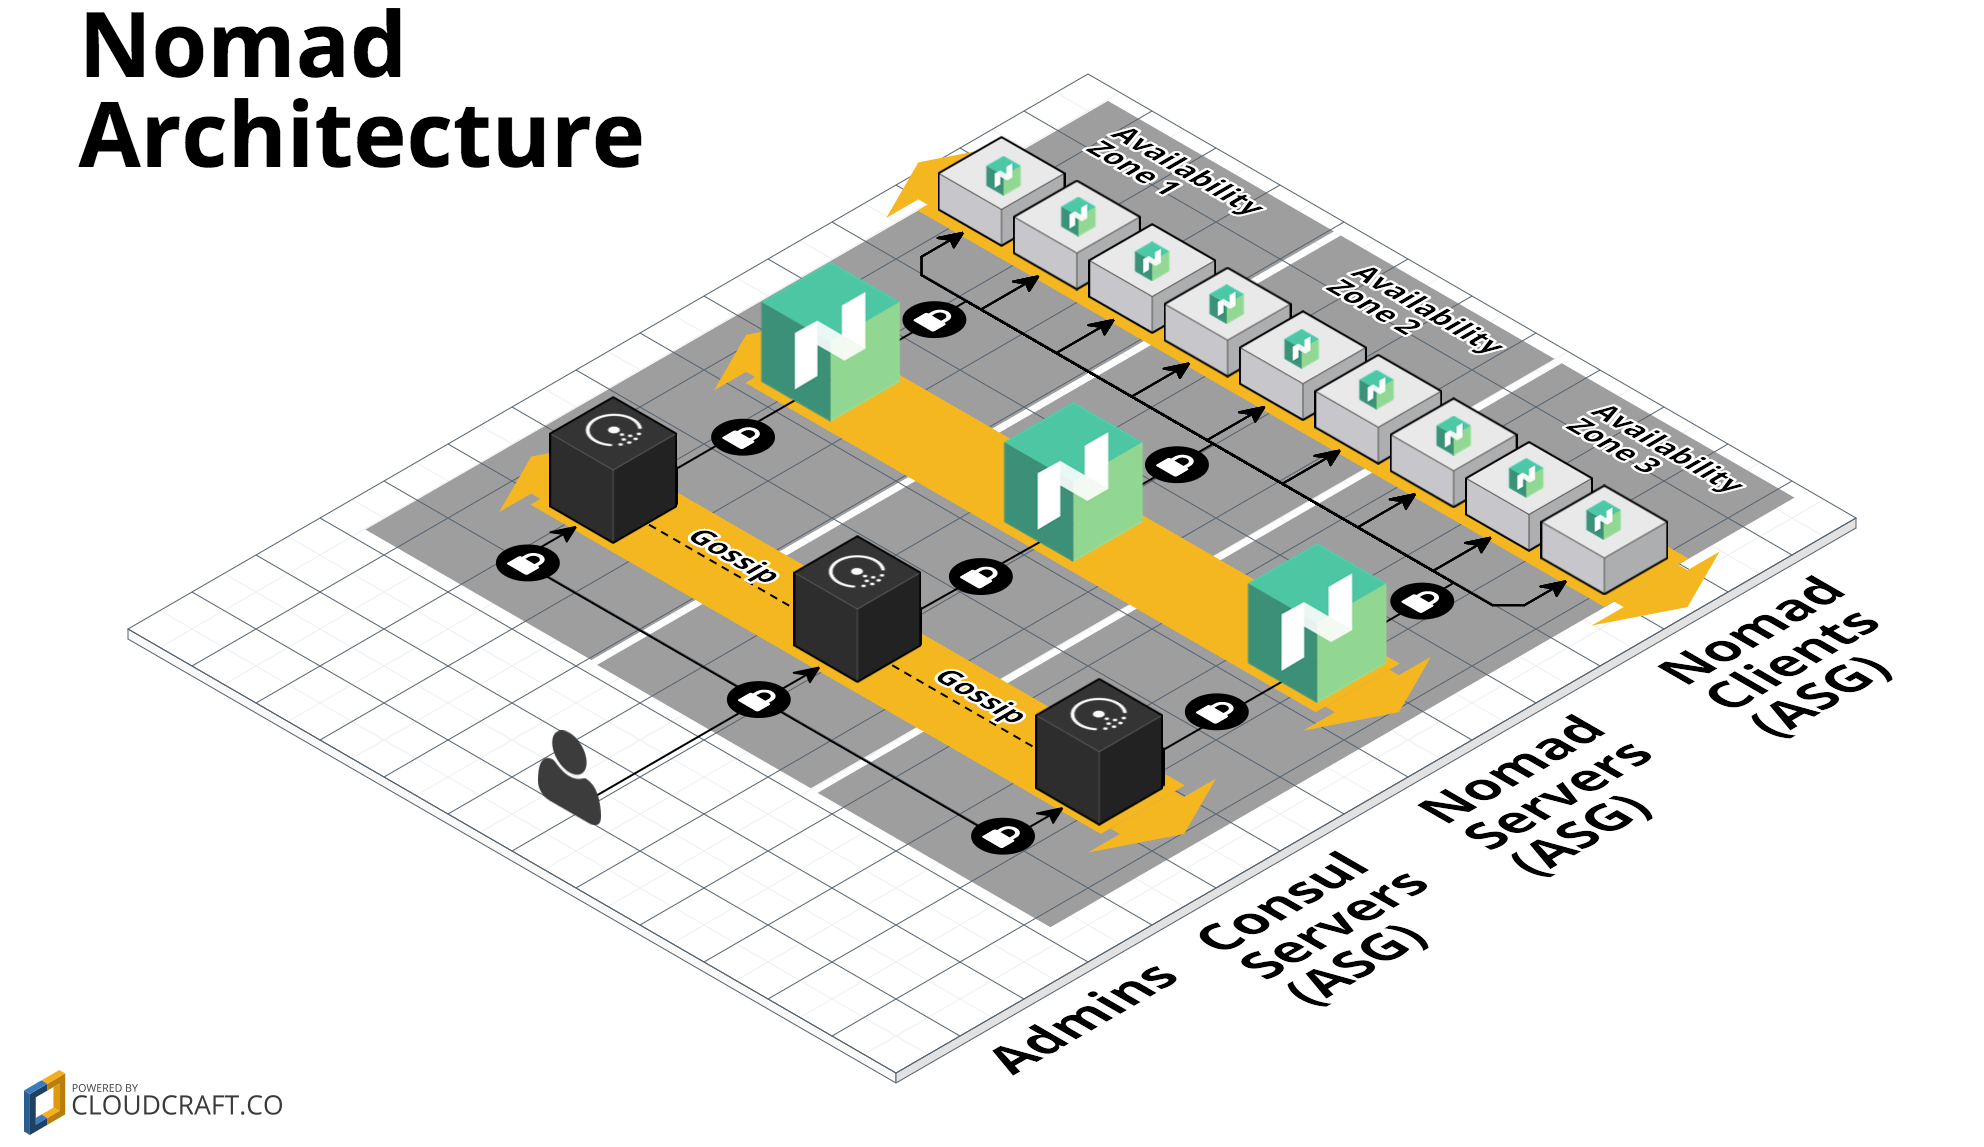
Basic example for the module. Per default the module will be deployed in us-east-1 (virginia).
# terraform init &&\
# terraform plan -out cos.plan -var deploy_profile=<your-profile> -var ami_id=<ami_with_nomad_consul_docker> &&\
# terraform apply "cos.plan"

# on playground
terraform init &&\
terraform plan -out cos.plan -var deploy_profile=playground -var ami_id=ami-004a32b425845383a &&\
terraform apply "cos.plan"
Now you can either configure your shell using the bootstrap.sh script by calling:
source ./bootstrap.shOr you follow the preceding instructions.
script_dir=$(pwd)/../helper && export PATH=$PATH:$script_dir &&\
export AWS_PROFILE=playground# Set the NOMAD_ADDR env variable
nomad_dns=$(terraform output nomad_ui_alb_dns) &&\
export NOMAD_ADDR=http://$nomad_dns &&\
echo ${NOMAD_ADDR}# wait for servers and clients
wait_for_servers.sh &&\
wait_for_clients.shnomad-examples-helper.sh# Set the CONSUL_HTTP_ADDR env variable
consul_dns=$(terraform output consul_ui_alb_dns) &&\
export CONSUL_HTTP_ADDR=http://$consul_dns &&\
echo ${CONSUL_HTTP_ADDR}# wait for servers and clients
## TBD# watch ping-service
watch -x consul watch -service=ping-service -type=service
# watch fabio
watch -x consul watch -service=fabio -type=servicejob_dir=$(pwd)/../jobs
# 1. Deploy fabio
nomad run $job_dir/fabio.nomad
# 2. Deploy ping_service
nomad run $job_dir/ping_service.nomadxdg-open $(get_ui_albs.sh | awk '/consul/ {print $3}') &&\
xdg-open $(get_ui_albs.sh | awk '/nomad/ {print $3}') &&\
xdg-open $(get_ui_albs.sh | awk '/fabio/ {print $3}')# call the service over loadbalancer
ingress_alb_dns=$(terraform output ingress_alb_dns) &&\
watch -x curl -s http://$ingress_alb_dns/ping# terraform destroy -var deploy_profile=<your-profile>
# on playground
terraform destroy -var deploy_profile=playgroundConnect to the bastion using sshuttle
# call
sshuttle_login.sh- TODO: Describe to configuration of the different nomad datacenters.
If you see the following error, then you don't have the AMI which is referenced available in your account.
module.nomad-infra.module.dc-backoffice.module.data_center.aws_launch_configuration.launch_configuration: 1 error occurred:
aws_launch_configuration.launch_configuration: No images found for AMI ami-02d24827dece83bef
To solve this issue you have to build it and to reference the newly built AMI in the example.
How to do this see paragraph Build the AMI using Packer in modules/ami2/README.md.
Open the file vars.tf and there replace the value of the field default for variables nomad_ami_id_clients and nomad_ami_id_servers with the id of the ami that was just created with packer.
If the used certificate is not valid any more you will receive the following (or similar) error.
aws_iam_server_certificate.certificate_alb: 1 error occurred:
aws_iam_server_certificate.certificate_alb: Error uploading server certificate, error: MalformedCertificate: Certificate is no longer valid. The 'Not After' date restriction on the certificate has passed.
To solve this issue a new certificate has to be created.
openssl req -x509 -newkey rsa:4096 -keyout key.pem -out cert.pem -days 365 -nodesThen copy the content of cert.pem into the field certificate_body of the file alb_cert.tf.
And copy the content of key.pem into the field private_key of the file alb_cert.tf.
This example uses the same AMI for the nomad servers, clients and the consul servers.


