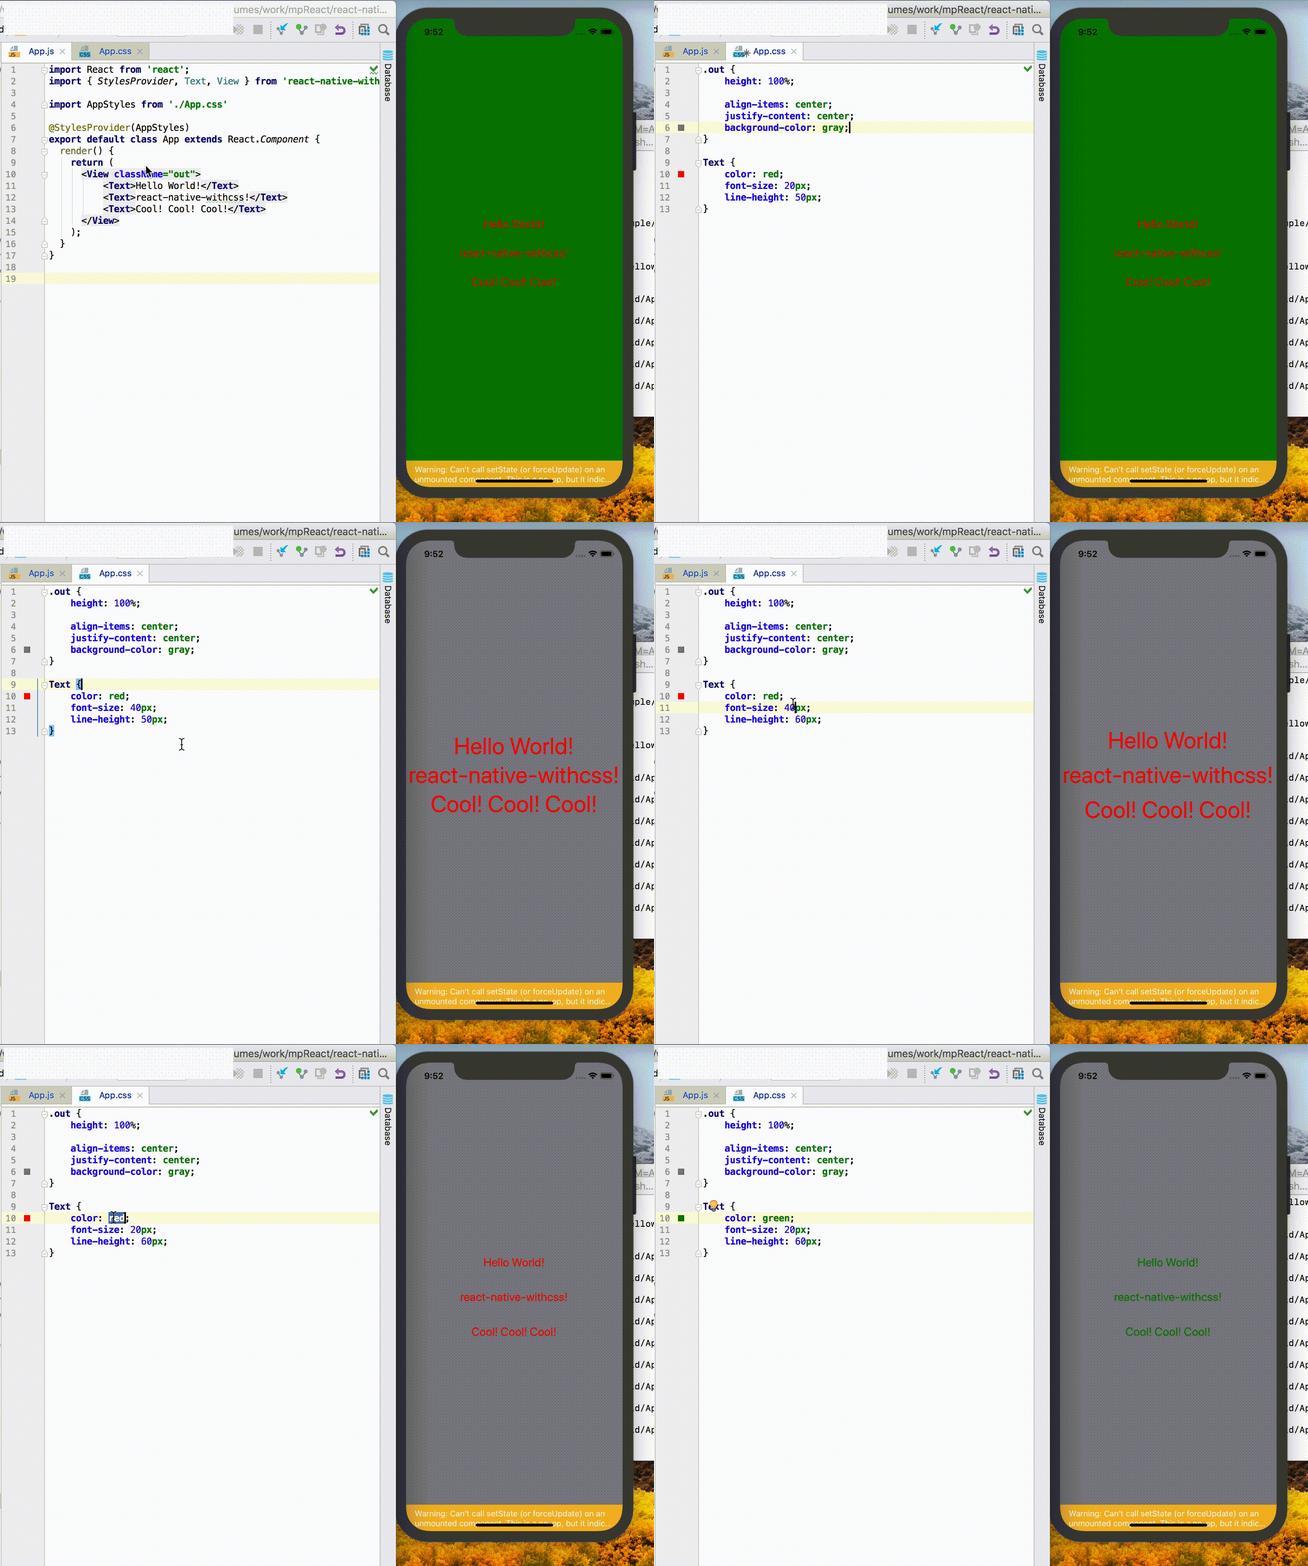
react-native + css, cool!
- 支持css文件
- 支持css文件的HMR
- css文件支持@import
- 支持css部分选择器: 类选择器,标签选择器,后代选择器。
- 支持属性继承
- 支持属性简写
需要提醒的是 react-native-withcss并没有实现css的任何属性 如果RN对css的某个属性没有支持,比如(display: block), 那么react-native-withcss也不会支持
由于React Native无法加载css, 先要使用一个babel plugin
npm install @areslabs/babel-plugin-import-css --save-dev
添加这个到 .babelrc 文件
{
  "plugins": ["@areslabs/babel-plugin-import-css"],
  ...
}
npm install @areslabs/react-native-withcss --save
在package.json的 scripts里添加命令 cssWatch(为了Live Reload / Hot Reload)
"scripts": {
    "start": "react-native-scripts start",
    "eject": "react-native-scripts eject",
    "android": "react-native-scripts android",
    "ios": "react-native-scripts ios",
    "test": "jest",
    "cssWatch": "cssWatch"
  },
以一个简单的HelloWorld为例:
App.js
import React from 'react'
import { StylesProvider, Text, View } from '@areslabs/react-native-withcss'

import AppStyles from './App.css'

@StylesProvider(AppStyles)
export default class App extends React.Component {
  render() {
    return (
      <View>
        <Text>Hello World</Text>
      </View>
    );
  }
}
App.css
View {
    border-width: 1px;
    height: 100%;
    align-items: center;
    justify-content: center;
}

Text {
    color: black;
    font-size: 15px;
    line-height: 50px;
}
需要注意的是 现在使用RN的组件需要import { Text, View } from '@areslabs/react-native-withcss'
React Native 自己提供了Live Reload / Hot Reload的功能。 如果想让.css文件具备Live Reload / Hot Reload,请务必在执行
npm run cssWatch
TodoList 是一个包含了所有特性的事例, 如果你有任何问题, 都可以参考TodoList的代码
使用方式
import homeCss from './home.css'
@StylesProvider(homeCss)
class Home extends React.Component {
}

/// 或者
StylesProvider(homeCss)(Home)
StylesProvider 给组件提供一个样式文件, 其子组件都将根据这个样式文件去计算自己的样式。 推荐在每一个页面的容器组件上使用StylesProvider,一个页面一个样式文件。
实际上,可以在任何组件上使用StylesProvider。
推荐使用注解的方式,但是如果是Functional Components, 那么只能用StylesProvider(homeCss)(Home) 这种方式了。
使用方式
@ClassEnable
class XXX extends React.Component {
    static displayName = "XXX"
    ...
}

/// 或者
ClassEnable(XXX)
每一个ClassEnable的组件都会根据祖先元素指点的css文件去计算自身的样式,计算好的样式会赋值到 this.props.style 这个属性。
比如:
@ClassEnable
class XXX extends React.Component {
    static displayName = "XXX"
    render() {
        return (
            <View style={this.props.rncStyle}>
                <Text>this is XXX</Text>
            </View>
        )
    }
}

@StylesProvider(appCss)
class App extends React.Component {
    render() {
        return (
            <View>
                <XXX className="xx"/>
            </View>
        )
    }
}
样式文件
.xx {
    border-width: 2px
}
同时 react-native-withcss也是支持标签选择器的。 所以上面的css文件也可以写成下面这样的:
XXX {
    border-width: 2px
}
注意 由于在打包之后js代码会被压缩,所以当你的组件需要使用 标签选择器的时候, 请务必给组件加上 displayName
另外, react-native-withcss 提供了一套与React Native官方对应的基本组件,默认开启ClassEnable, 所以在使用基本组件的时候推荐:
import {View, Text ...} from '@areslabs/react-native-withcss'或者当都需要使用的时候
import {View, Text} from 'react-native'
import {View as CSSView , Text as CSSText...} from '@areslabs/react-native-withcss'比如
View {
    margin: 20px
    padding: 20px
}对于文本类型的属性fontSize, color等,可以在最外层组件声明, 类似于web。
.clz {
    font-size: 12px;
    color: red;
}
class A extends Component {
render() {
return (
<View className="clz">
<Text>H</Text>
<Text>E</Text>
<Text>L</Text>
<Text>L</Text>
<Text>O</Text>
</View>
)
}
}现阶段,我们只支持标签选择器, 类选择器, 后代选择器
对于基本组件,react-native-withcss 提供了一套与React Native官方对应的基本组件。 所以可以直接
View {
    margin: 20
}
class A extends Component {
render() {
return (
<View/>
)
}
}对于自定义组件, 正如之前所说 需要开启 ClassEnable, 另外不要忘记了指定displayName
标签选择器影响范围很大的, 比如View, 那么所有View的样式都将会受到影响, 所以还是慎用标签选择器吧
类选择器是使用的最多的一类选择器了。 比如
.label {
   font-size: 12px
   color: red
}@StylesProvider(css)
class A extends Component {
render() {
return (
<View className="label"><Text>Hello World</Text></View>
)
}
}react-native-withcss 支持后代选择器, 比如我们有一个按钮, 在不同的情况下, 需要按钮背景色不同。 通常,我们可以通过父组件把背景色作为参数向下传递的方式。 而如果使用react-native-withcss, 那我们就可以
@ClassEnable
class MyBtn extends Component {
    static displayName = "MyBtn"
    render() {
        ...
    }
}
然后在使用的时候
.best MyBtn {
    background: #00ff00
}

.good MyBtn {
    background: #00aa00
}

.bad MyBtn {
    background: #aa0000
}

.worse MyBtn {
    background: #ff0000
}@StylesProvider(infoCss)
class Info extends Component {
render() {
return (
<View>
<View className="best">
<MyBtn/>
</View>
<View className="good">
<MyBtn/>
</View>
<View className="bad">
<MyBtn/>
</View>
<View className="worse">
<MyBtn/>
</View>
</View>
)
}
}很多情况下, 我们会有一个公共的css文件, 这个文件里面包含了我们App的基本共用样式, 我们当然不会希望在每个css文件之前都重复的写一下这下样式, 这不仅麻烦, 修改起来也很不方便, 这个时候就可以用到 @import
我们可以把共用样式写在 一个公共的css文件里面, 然后通过@import 引用


