BullSequana Edge Zabbix Templates allows Data Center and IT administrators to use zabbix to monitor BullSequana Edge devices.
BullSequana Edge
From zabbix directly :
- Zabbix >= 4.2
- Python >= 2.7.5
Optionally, 3 ready-to-go zabbix images are available on Dockerhub
- Dockerhub Zabbix images
- Docker CE
- Docker compose
- BullSequana Edge Zabbix Templates
- What to do first
- How to install BullSequana Edge template
- How to install BullSequana Edge Host template
- How to install BullSequana Edge Map template
- How to install BullSequana Edge Rsyslog template
- How to create your first Edge dashboard
- How to change your Proxy
- How to change Local Date / Time Zone
- How to add Security
- How to send Email
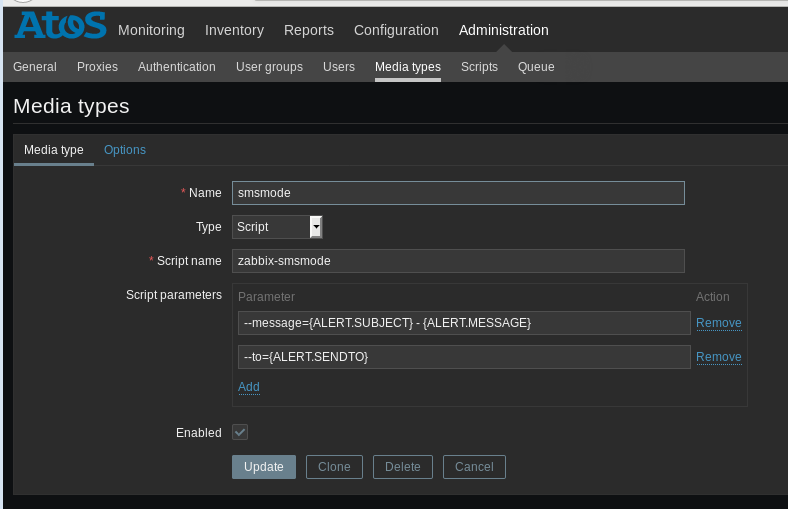
- How to send SMS
- How to add a Media for a User
- How to configure a Triggered Action for Users / User Group
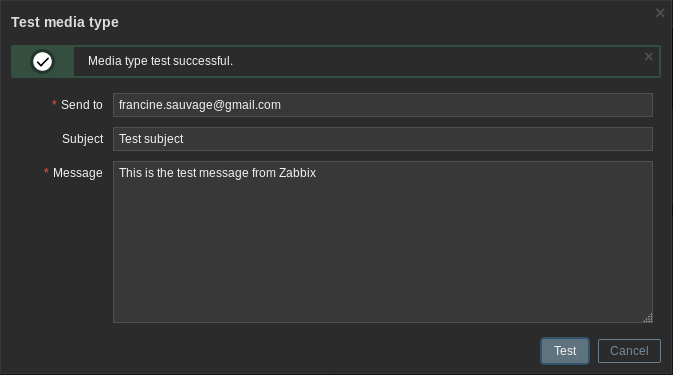
- How to test
- How to log on a docker container
- How to build your own docker container
- Warning for updates
- Support
- LICENSE
- Version
You can get it from
- Bull SOL (Support on line): full installation
- get zip from this repository
- clone this repository
from zip file, just unzip the file:
unzip <your_zip>
from this repository, just clone:
git clone https://github.com/atosorigin/bullsequana-edge-system-management.git
The following XXX_PROXY environment variables are automatically copied in zabbix context:
- HTTP_PROXY
- HTTPS_PROXY
- NO_PROXY
For more details, read the How to change your Proxy section
Bull Sequana Edge Zabbix Extensions has 3 Zabbix installers and an option to try it
Just choose your favorite installation for your environment
on existing zabbix: import Atos templates: you can import Atos templates in your Zabbix environment if you have an existing Zabbix installation
full install: <install_dir>/install.sh Full install - All in Once - it will load all docker containers and optionnaly install Ansible playbooks and plugins => use stop.sh and start.sh after
partial: <install_dir>/install_zabbix.sh it will build and install only Zabbix docker containers from your local Dockerfiles that you can adapt as needed => use stop_zabbix.sh and start_zabbix.sh after
try it: <install_dir>/install_zabbix_from_dockerhub.sh mainly dedicated to try bullsequana edge system management tool, it will install dockerhub atosorigin images, you cannot adapt the local Dockerfiles => use stop_zabbix.sh* and start_zabbix.sh after
For more information about dockerhub installation Visit https://hub.docker.com/repository/docker/atosorigin/bull-sequana-edge-zabbix-server
👍 Best Practice: remove useless install, stop and start scripts
🌎 Info: if tar files are not present, images are loaded from internet
- default url:
https://<ip_address_of_your_host>:4443 - default user/password is default zabbix user/password:
Admin / zabbix!! Care the uppercase 'A' !!
- Go to Administration / General / Others
- Check 'Automatic' for inventory
⛔ !!! VERY IMPORTANT !!! ⛔ You should first rename your Zabbix Server => It is highly recommanded to have a hostname without space (by default Zabbix Server hostname has a blank space)
- Go to Configuration / Hosts
- Select you Zabbix server host
- Cut/Paste the "Zabbix server" name to "Visible name": Visible name : Zabbix Server
- Enter name with a minus '-' Host Name : zabbix-server
⛔ Be careful: The "Visible name" is used by Zabbix Dashboards, so let "Zabbix server" persist as a Visible name.
⛔ => stop and start zabbix docker containers
- Change the agent to zabbix-agent:
- Remove IP = 127.0.0.1
- Add DNS = zabbix-agent on the NEXT CASE
- Click on DNS instead of IP
- Port should be 10050
Available Atos templates:
- template-atos_openbmc-lld-zbxv4.xml: should be applied on all Atos mipockets - How to install BullSequana Edge template
- template-atos_openbmc-rsyslog-zbxv4.xml: should be applied only on the zabbix-server - How to install BullSequana Edge Rsyslog template
- template-atos_openbmc-host-zbxv4.xml: should be imported in Host Configuration - How to install BullSequana Edge Host template
- template-atos_openbmc-sysmap-zbxv4.xml: should be imported in Map Monitoring - How to install BullSequana Edge Map template
When you import the host template, you will have a host "BullSequana Edge" automatically configured as your first example
- Zabbix agent is configured to zabbix-agen:10050
- Automatic Inventory is configured
- Macros are prepared
- Atos Bull Sequana Edge LLD Template is linked
🖊️ Info: All you need is to complete empty Macros : go to" Fill Atos template macros" below
- Go to Configuration / Hosts
- Click on the right button "Create Host"
- Add a Name
- Change the agent to zabbix-agent:
- Remove IP = 127.0.0.1 IP case should be empty
- Add DNS = zabbix-agent on the DNS case
- Click on DNS button instead of IP
- Port should be 10050
Optionaly, you can use the Zabbix discovery service to add your hosts.
- First you should add a Zabbix Discovery rule
- Go to Configuration / Discovery
- Create a new Discovery Rule

- Fill the IP range and "Check https" protocol. Care the Update interval (1h by default) and choose DNS Name only if you have a DNS (instead you can choose IP Address)

- Second you should add a Zabbix Discovery action:
- Go to Configuration / Actions
- Select Event Source = Discovery
- Create a new action
- In New condition select ""Discovery rule"" and choose your previously created rule

- Add your Condition

- Click Operations tab
- Fill the Operations you want: here the rule add the discovered host, add the host to "discovered hosts" group, link the template, enable the host and set the inventory to automatic

- Go to section Fill Atos template macros to complete your host with {$OPENBMC},{$USER}, {$PASSWORD}
- Go to Configuration/Hosts
- Select your host
- Click on "Template" tab
- Filter Atos template and retrieve Atos LLD template
- Click on Add Link => The template should apear in "Linked Templates" part above
- Click on Update button
This part does not apply if you use Atos Host Template
- Go to Configuration/Hosts
- Select your host
- Click on "Macros" tab You must add 3 macros on each mipocket host:
- {$OPENBMC} the reachable address of Mipocket
- {$USER} with the username to be used
- {$PASSWORD} with the password for Mipocket (could be encrypted with PSK => See Security below)
This part does not apply if you use Atos Host Template
This template should be the first imported template.
-
applications: All items are categorized inside applications with the following rules :

-
items belong to Applications
-
discovered items belong to Applications named "...Discovery..."
Fans, Temperature and Voltage are discovered - values are float => it could be added in 'Graph'
- triggers
Firmware update failures are triggered
- 4 discovered triggers per sensor
- Critical high & low triggers corresponding to Critical Alarms Threshold fo BullSequana Edge device are Enabled by default
- Warning high & low triggers to Warning Alarms Threshold fo BullSequana Edge device are Disabled by default
Go to Templates
Select Atos LLD
Select Items
Filter on "Collect Information"
Select your item
Version: BMC - Obsolete
Remove the history

- automatic inventory mapping
Model, Asset, Serial number, Software Version, OOB IP Address and Manufacturer are automatically fulfilled
-
discovered graphs (prototypes) for each fans, temperatures and voltages discoverd item with Critical High and Low values
-
1 screen with the 3 graphs : All Fans, Temperatures and Voltages
- collect items belong to Applications named "...Collect..." : background scripts => NO DATA, do NOT use Collect applications/items in dashboard, except if you are interested in collect background information itself
screens are available in host inventory details:
- Go to Monitoring / Inventory / Hosts
- Select your BullSequana Edge device
Screens appear in contextual menu when Host column is available:
- Copy the templates from <install_dir>\zabbix\server\externalscripts\ to a local path on you client computer running the browser
- Open a browser and go to Configuration / Templates
- Click on Import button at the right

- Locate your Atos templates

- Click on Import button
- Go to Monitoring / Dashboard
- Click on the right button "Create Dashboard"
- Add a Name
- Add a Widget
-
Select whatever items you want or write an item regular expression like
Fan: *
Temp: *
Volt: *
- Optionally add another Dataset with different colors by clicking Add a new Data Set button below
- Optionally if you need to start from 0, adjust the min Y axe :
- Select "Data Overview"
- Select whatever Application you want
- Adapt the refresh interval
- Select "Plain text"
- Select whatever items you want:
💼 Tips: items are prefixed with application names like "Control:" "Network:" "State:" ...
- Adapt the refresh interval
- Adapt the "show lines" number
This template should be the second imported template.
- 1 host as an example
- Copy the templates from <install_dir>\zabbix\server\externalscripts\ to a local path on you client computer running the browser
- Open a browser and go to Configuration / Hosts
- Click on Import button at the right

- Check Hosts checkboxes

- Import template-atos_openbmc-host-zbxv4.xml
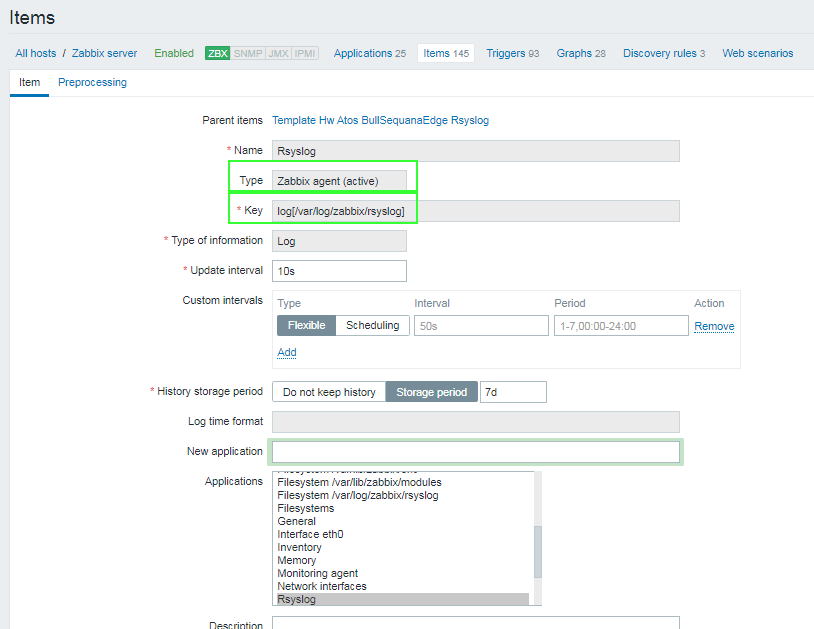
- application rsyslog is available for textual widget and history analysis
- 1 item
A unique item is detecting rsyslog file change - 1 trigger
A unique trigger is triggering on BullSequana Edge device error events
🛑 The rsyslog should be activated BEFORE loading rsyslog template
- Copy the templates from <install_dir>\zabbix\server\externalscripts\ to a local path on you client computer running the browser
- Open a browser and go to Configuration / Templates
- Click on Import button at the right

- Locate your Atos templates

- Click on Import button
In /etc/rsyslog.conf file, uncomment or copy the following lines:
### provides UDP syslog reception
$ModLoad imudp
$UDPServerRun 514

### provides TCP syslog reception
$ModLoad imtcp
$InputTCPServerRun 514
In docker-compose-zabbix.yml file, zabbix-server service section, uncomment :
    volumes:
       # - /var/log/rsyslog:/var/log/zabbix/rsyslog:rw
where /var/log/rsyslog is a physical (or shared) file on host of the zabbix docker container containing the rsyslog server file
check the path of the file, the zabbix agent should have the rights to read it and your system should have the right to write in the file, all along the path:
example:
- chmod ugo+rw /var
- chmod ugo+rw /var/log
- chmod ugo+rw /var/log/rsyslog
🛑 Be careful: The rsyslog should have read / write rights all along the path
The rsyslog file is monitored after the import of the template, so the collect will be triggered by the next line written in the rsyslog file.
log rotation is mandatory for the rsyslog template
install with your usual package manager like yum
yum update && yum install logrotate
rsyslog file should be the only file name of the current rsyslog file for the zabbix template to work => you must adapt the template if you have another rotation rule
Create your rsyslog template directly in /etc/rsyslog.conf
or
if this line exists in rsyslog.conf
### Include all config files in /etc/rsyslog.d/
$IncludeConfig /etc/rsyslog.d/*.conf
you can now create a .conf (like /etc/rsyslog.d/rsyslog_template.conf) file in /etc/rsyslog.d/ and place your template format :
$template rsyslog_format,"%timegenerated% %hostname% %FROMHOST-IP% %syslogfacility-text%:%syslogpriority-text% %syslogtag%%msg:::drop-last-lf%\n"
and add the following lines in your /etc/rsyslog.conf
$template RemoteLogs,"/var/log/rsyslog"
#*.* ?RemoteLogs;rsyslog_format
:hostname, contains, "your_naming_convention"	?RemoteLogs;rsyslog_format
& ~
where your_naming_convention is a substring contained in all BMC hostnames
Change user permission on rsyslog
chmod uo+rw /var/log/rsyslog
systemctl daemon-reload
systemctl stop rsyslog
systemctl start rsyslog
log on to your bmc : ssh user@<your_bmc>
with journalctl:
journalctl -r
with telnet to check port opening:
telnet <your_rsyslog_server_ip> <your_rsyslog_port>
with logger command:
logger 'here is a test log message from <your_rsyslog_server_ip>'
More information: Visit https://www.tecmint.com/install-rsyslog-centralized-logging-in-centos-ubuntu/
If ever you start docker containers after loading the rsyslog template :
=> remove the rsyslog directory created in /var/log/rsyslog because the docker container did not successfully map to /var/log/rsyslog and created a directory (instead of a file) by default:
rm -rf /var/log/rsyslog
and check that the file exists BEFORE loading rsyslog template
ls /var/log|grep rsyslog
If telnet is not working but the ping is working : firewall daemon could be the issue
You should add 2 firewall rules
[root@server ~]# firewall-cmd --permanent --zone=public --add-port=514/tcp
[root@server ~]# firewall-cmd --permanent --zone=public --add-port=514/udp
[root@server ~]# firewall-cmd --reload
🛑 Be careful to reload it after changes
:earth_america: More information: Visit https://www.itzgeek.com/how-tos/linux/centos-how-tos/setup-syslog-server-on-centos-7-rhel-7.html
If telnet is not working but the ping is working: iptables rules could be the issue
You can flush the iptables rules
🛑 Be careful to be able to recreate iptables rules after this command iptables -F
This template should be the third imported template.
- 1 Map template
⚠️ Warning: The BullSequanaEdgeIconMapping should be created BEFORE importing BullSequanaEdgeMap template Create BullSequanaEdge icons and Create BullSequanaEdge icon mapping
⛔ Info: You should install Host Bull Sequana Edge before: See How to install Host BullSequana Edge template
- Copy the templates from <install_dir>\zabbix\server\externalscripts\ to a local path on you client computer running the browser
- Open a browser and go to Monitoring / Map
- Click on Import button at the right

- Locate your Atos templates

- Check the maps and images checkboxes
- Click on Import button
- From your browser, you should be able to access <instal_dir>/zabbix/icons directory
- Go to Administration / General / Image / Icon
- Create as many icons as images in <instal_dir>/zabbix/icons directory

- Check your icons

- Go to Administration / General / Image / IconMapping
- Create one "Icon Mapping" as below:
a- Name should be BullSequanaEdgeIconMapping
b- Select Inventory field = Model
c- Write Expression = BullSequana Edge
d- Select your prefered Icon Size and Default Icon Size
- Copy the templates from <install_dir>\zabbix\server\externalscripts\ to a local path on you client computer running the browser
- Open a browser and go to Configuration / Templates
- Click on Import button at the right
- Check Maps and Images checkboxes only for Create New
- Import template-atos_openbmc-sysmaps-zbxv4.xml
💻 Your icons will be automatically detected for BullSequana Edge while creating your maps
- Go to Monitoring / Maps
- Create a new Map
- Add a new Map item
a- Select 'Host' type
b- Select your Host
c- Select Automatic icon mapping
Your server should behave like any other servers:
By default, when you start the installer, the proxy environment variables are added in containers thanks to the following section in docker-compose-awx.yml file:
    env-file:
        - Dockerfiles/zabbix.env
      ...
You can check your PROXY environment while starting up your AWX:
🛑 Be careful: If your bullsequana edge IP address is not declared in proxy: You may need to add your bullsequana edge IP address in your NO_PROXY configuration to bypass the proxy
export NO_PROXY="<your bullsequana edge IP address>,$NO_PROXY"
If you don't want to use the host configuration for XX_PROXY environment variables:
- Remove the following line in install and start shells
. ./proxy.sh
- Add your proxy environement as desired in docker-compose-zabbix.yml file with explicit IP addresses and host names:
    env-file:
      zabbix.env
    environment:
      HTTP_PROXY: http://<your proxy>:<your port>
      HTTPS_PROXY: https://<your proxy>:<your port>
      NO_PROXY: <your bullsequana edge IP address>,127.0.0.1,localhost,zabbix-web,zabbix-server,zabbix-agent,awx_web,awx_task,rabbitmq,postgres,memcached
      ...
⛔ Be Careful: If you change a XXX_PROXY env variable, you should restart the containers
./stop.sh or ./stop_zabbix.sh
./start.sh or ./start_zabbix.sh
By default, containers and host have the same /etc/localtime.
To change your local time, edit docker-compose-zabbix.yml file
    volumes:
      - /etc/localtime:/etc/localtime:ro
By default, when you start the installer, the host timezone (in /etc/timezone or /usr/share/zoneinfo) are copied inside containers as PHP_TZ.
To override your time zone, edit docker-compose-zabbix.yml file
    environment:
      ...
      PHP_TZ: ${timezone}
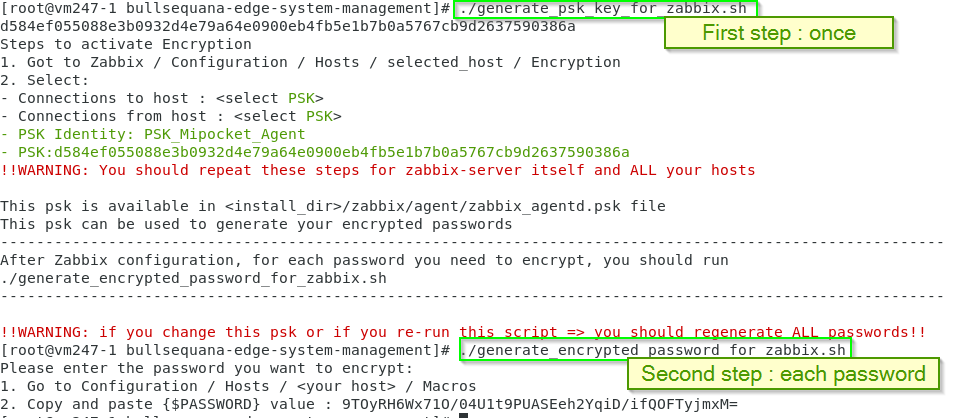
- generate a key in /etc/zabbix/zabbix_agentd.psk and follow the instructions
<install_dir>/generate_psk_key_for_zabbix.sh
-
edit zabbix/agent/zabbix_agentd.conf
-
locate the section and uncomment the 4 following items:
####### TLS-RELATED PARAMETERS #######
TLSConnect=psk
TLSAccept=psk
TLSPSKIdentity=PSK_Mipocket_Agent
TLSPSKFile=/etc/zabbix/zabbix_agentd.psk
- activate the PSK security in zabbix / Configuration / Hosts / your host / Encryption
Connections to host : <select PSK>
Connections from host : <select PSK>
PSK Identity: PSK_Mipocket_Agent"
echo PSK: <your psk>
🛑 you should restart docker containers
more info on https://www.zabbix.com/documentation/4.0/fr/manual/encryption/using_pre_shared_keys

chmod uo+w zabbix_agentd.conf
chmod uo+w zabbix_agentd.psk
-
generate an encrypted password for each different password
<install_dir>/generate_encrypted_password_for_zabbix.sh -
copy/paste encrypted result it in zabbix / Configuration / Hosts / you host / Macros / {$PASSWORD} Value
- Go to your SMS provider smsmode See https://ui.smsmode.com
- Create a token (API key)
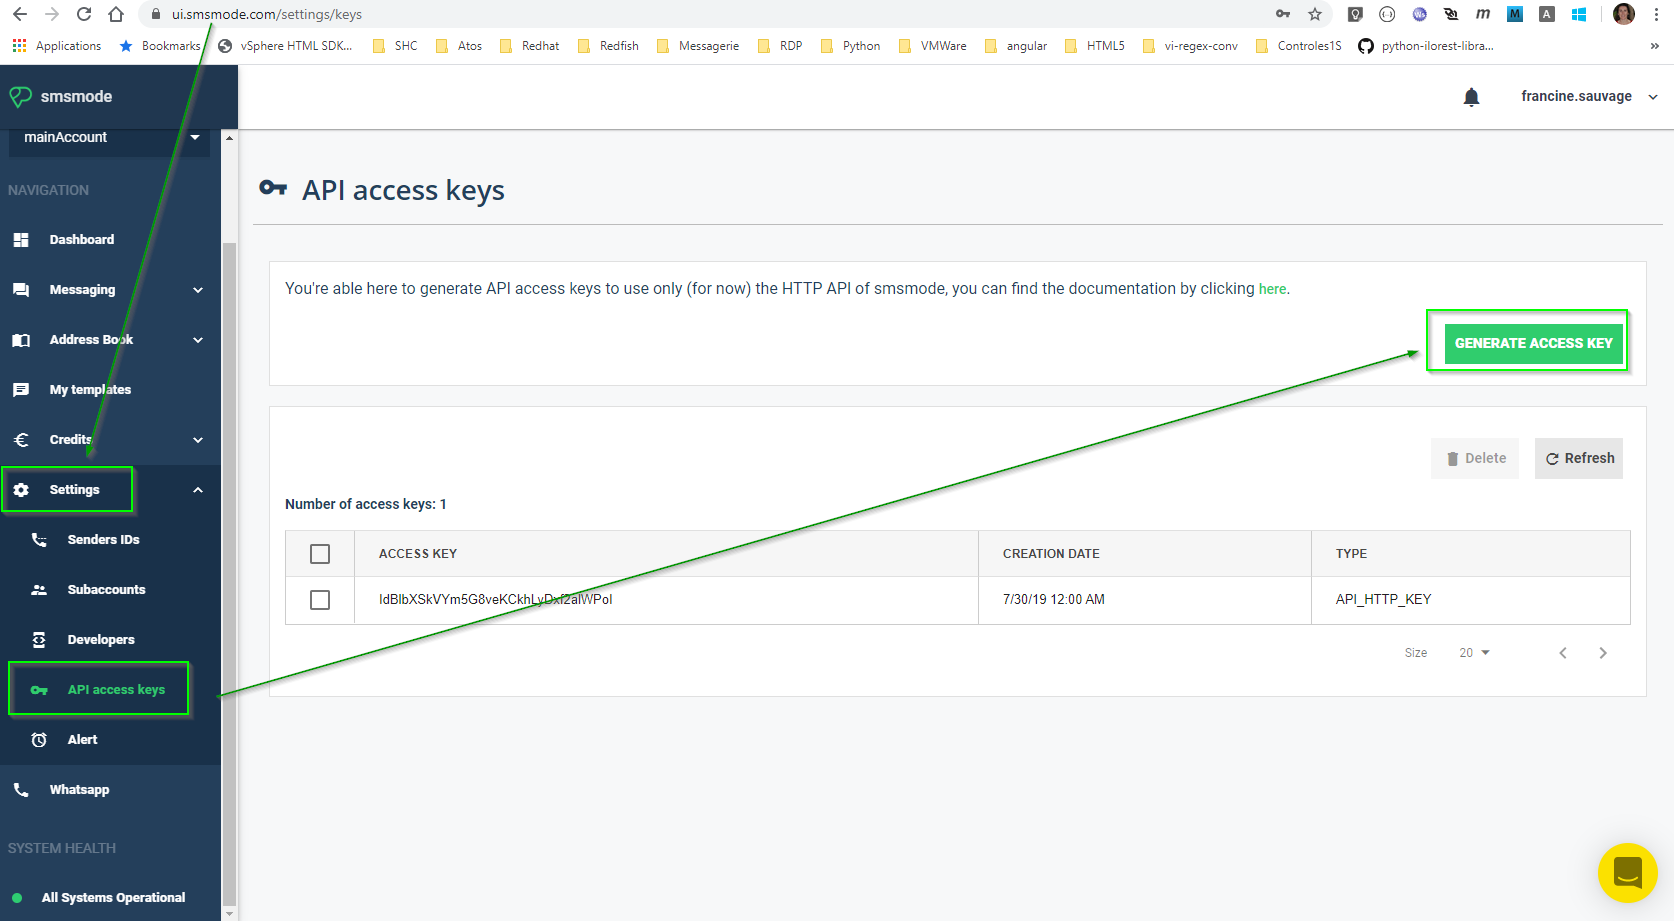
- Copy it for further usage
- You can consult your SMS list to check SMS traffic
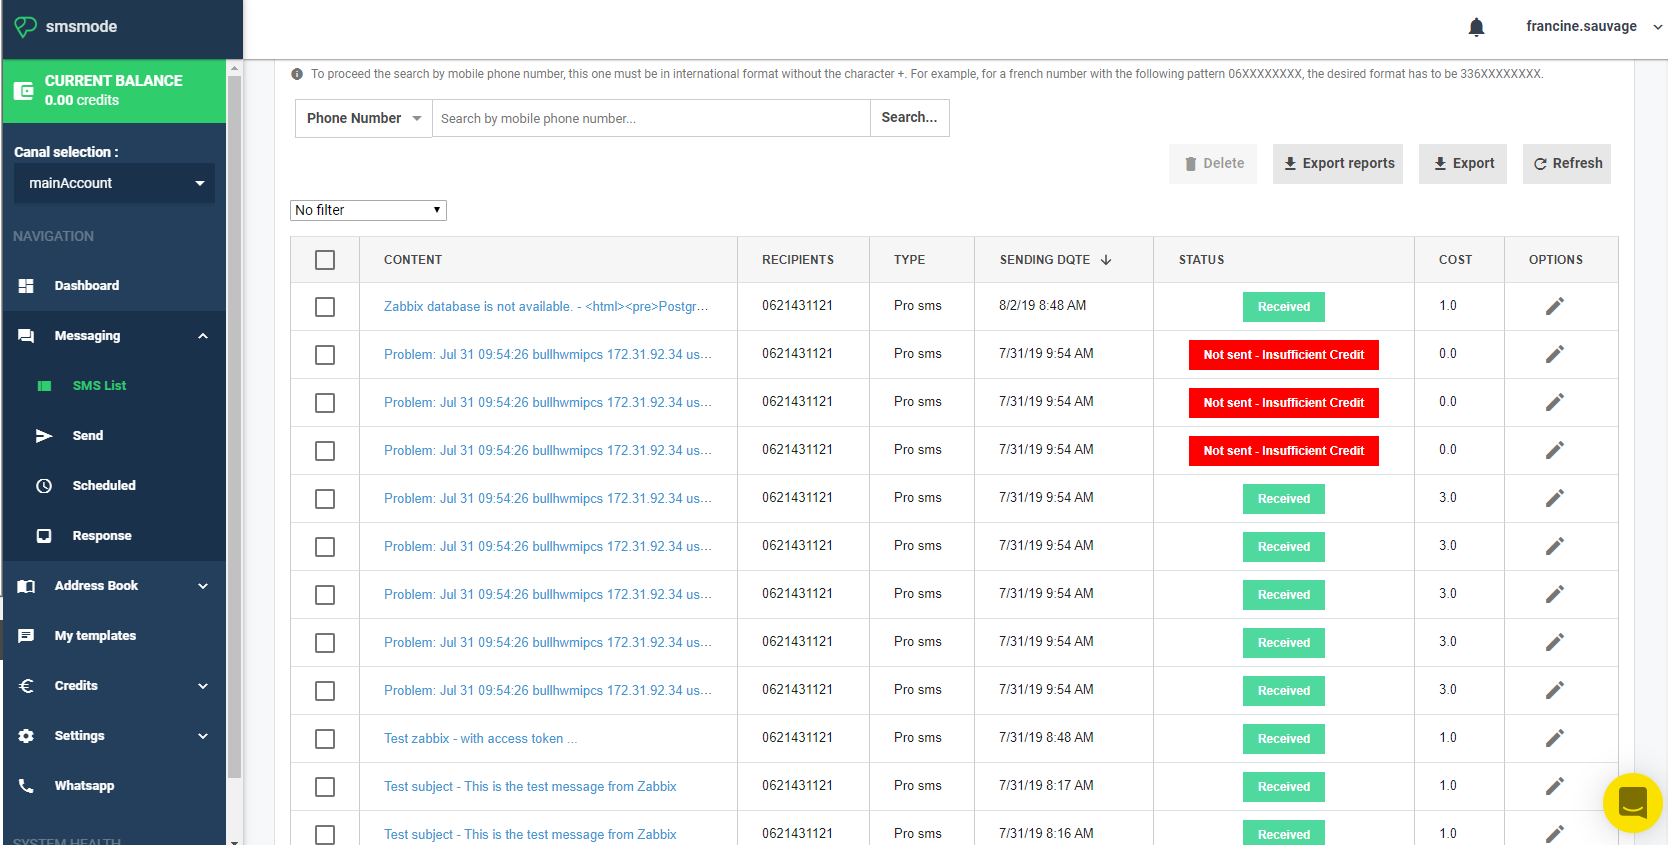
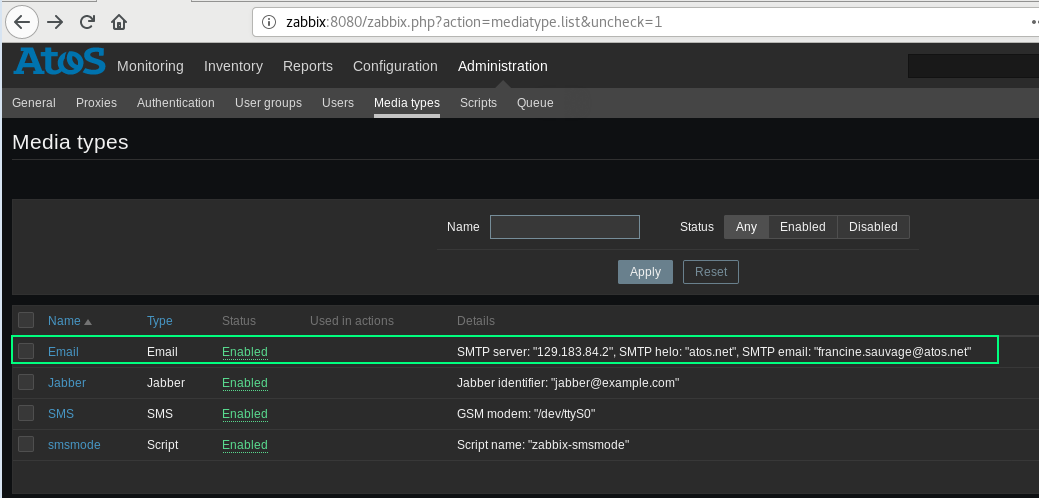
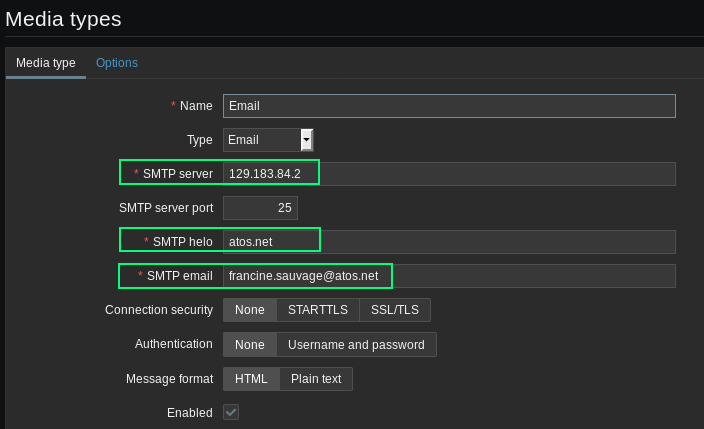
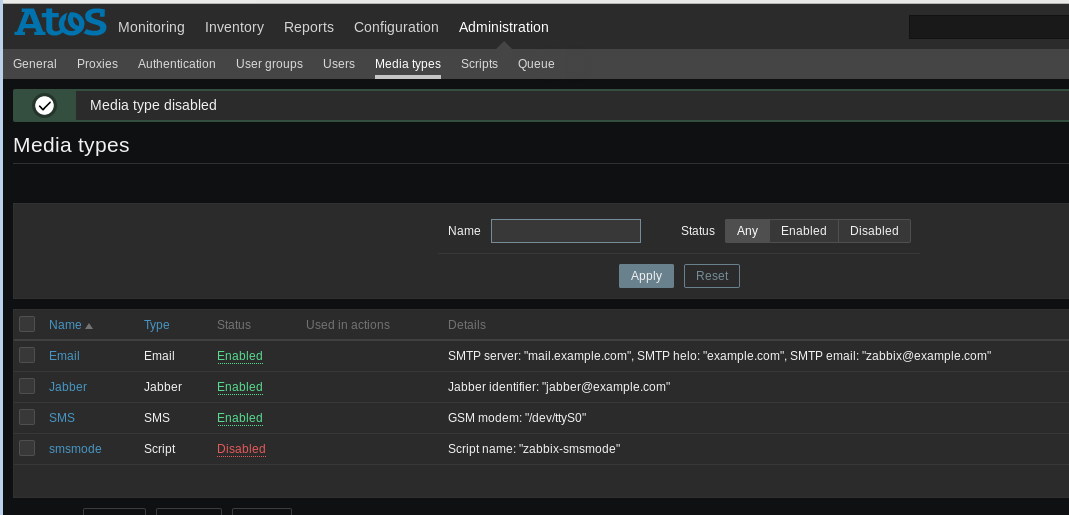
- Go to Administration / Media types
- Click on right button "Create Mediatype"

- Fill the form with following parameters
--message={ALERT.SUBJECT} - {ALERT.MESSAGE}
--to={ALERT.SENDTO}
--accessToken=
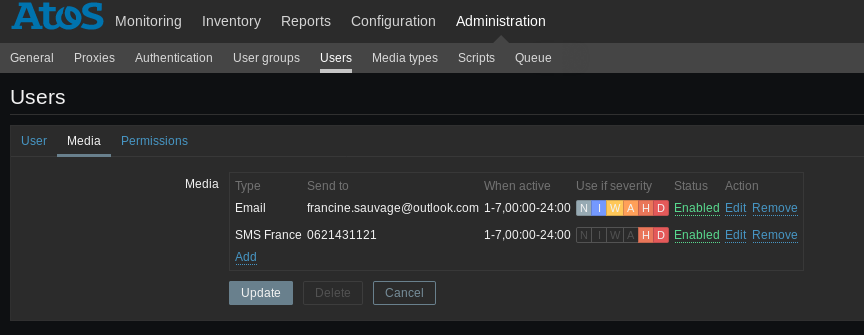
- Go to Administration / User / / Media
- Click "Add" to add a Media
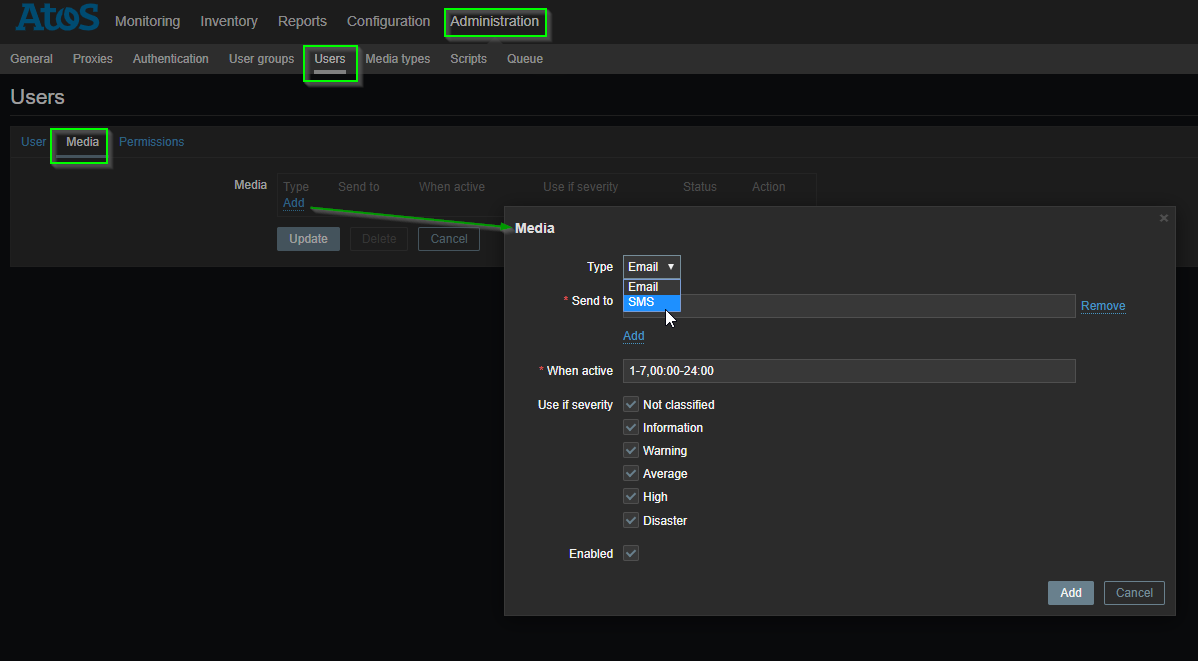
- Select Email or SMS
- Enter respectively a correct email or phone number
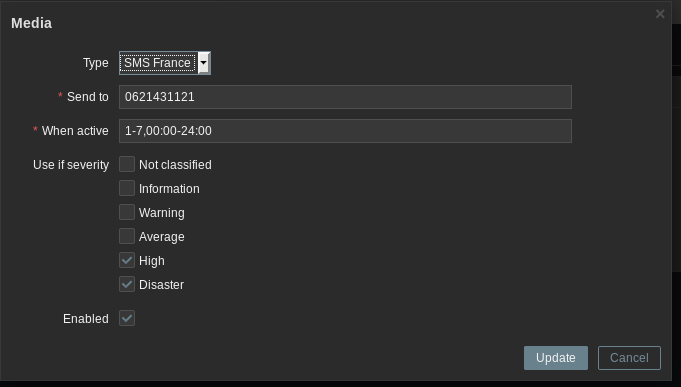
- Fill the active hours and the minimum severity level
- Check your newly created Media in the media list
You can add a User to a Group to send Email or SMS to all users of a named group
- Go to Administration / UserGroups
- Add User to your desired group
- Go to ConfigurationActions
- Check if "Trigger" Action is selected
- Click on right button "Create Action"

- Name the Action
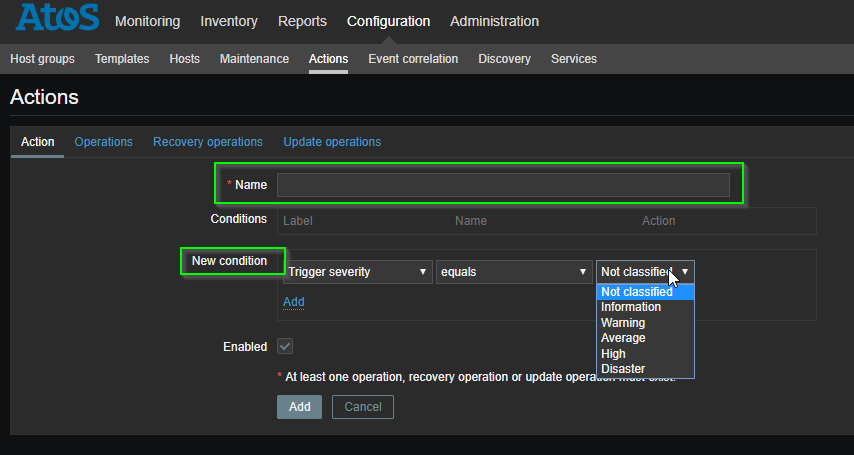
- Optionaly add a new condition. Your can let it empty to have NO condition
- Add an Operation
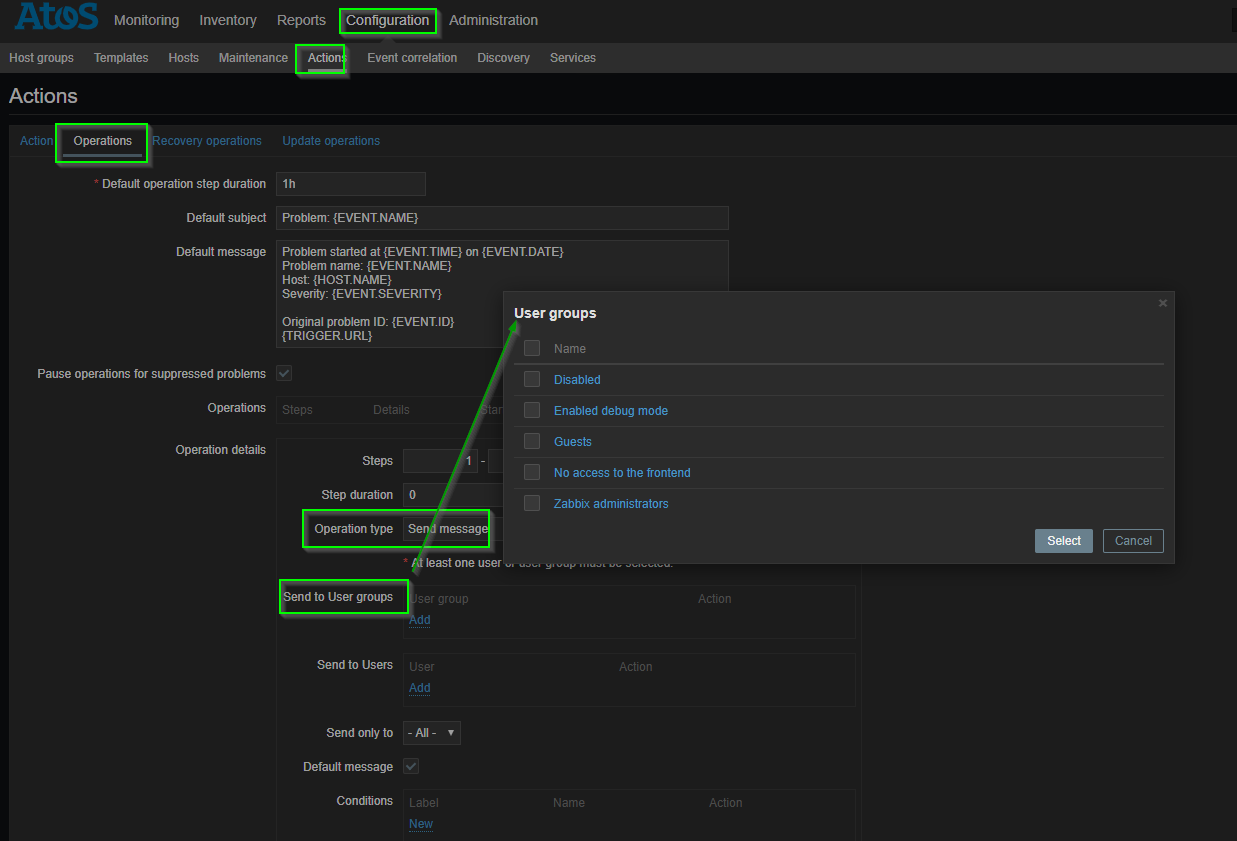
- Add your desired users or user groups

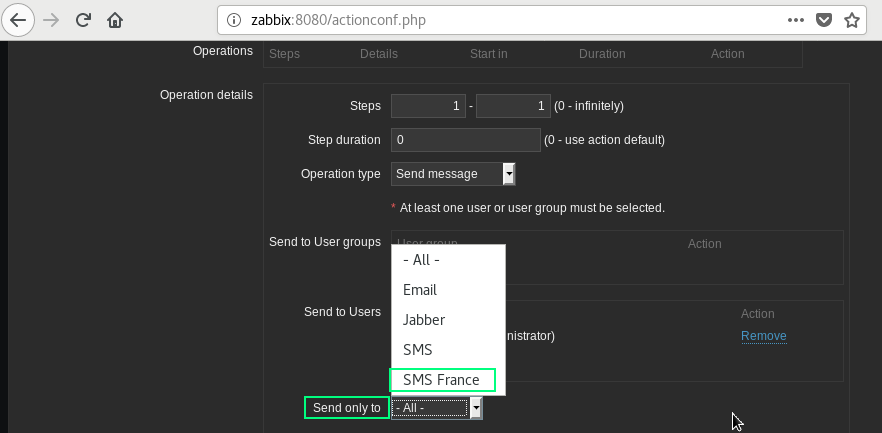
- Care the "Send only to" field and select needed target : Email or SMS or all
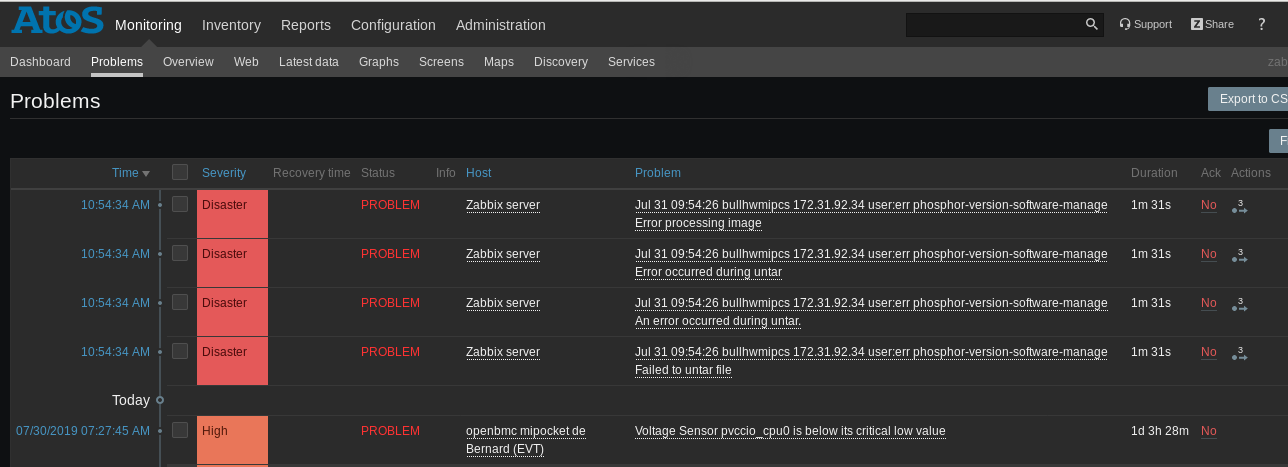
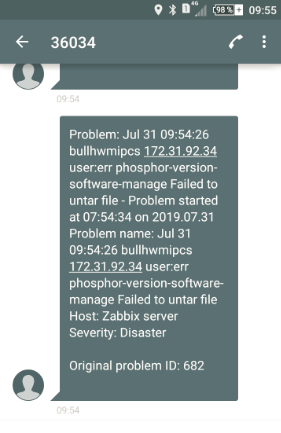
- For each problem - having the minimum severity level in Problems - you should receive an SMS:
- Make sure your MiPocket is reachable from the zabbix server/proxy, test with:
telnet <IP OPENBMC> - Make sure your MiPocket is reachable through a browser:
https://<IP OPENBMC>
See https://www.zabbix.com/documentation/4.4/manpages/zabbix_sender
See https://www.zabbix.com/documentation/4.4/manpages/zabbix_get
To log on a container with an interactive terminal:
docker exec -it <container name> <executable command or shell>
where:
-i = interactive
-t = terminal
<container name> is awx_web or awx_task : both can be use to use ansible CLI
<executable command or shell>
  shell : could be bash or sh
  command : any ansible command
container names are :
zabbix-server
zabbix-agent
zabbix-web
zabbix-postgres
examples :
docker exec -it zabbix-server bash
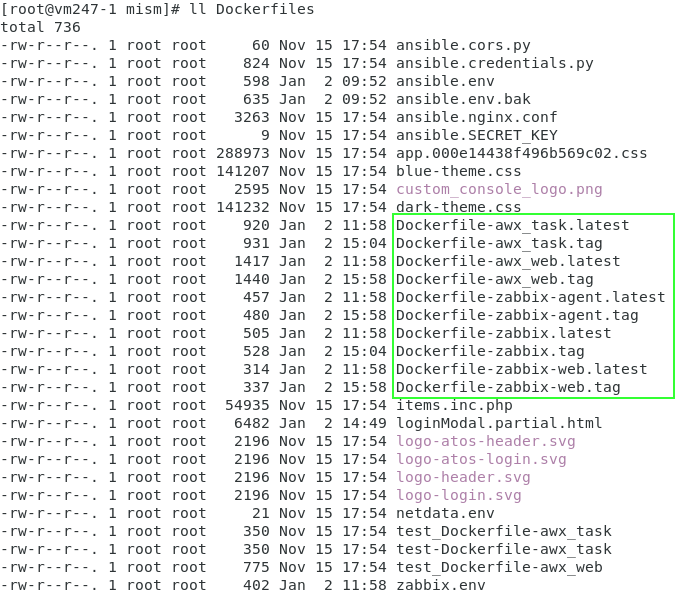
If you need to adapt a Dockerfile in Dockerfiles directory:
- edit the desired Dockerfile-xxx.tag and adapt it
- run the corresponding build-xxx
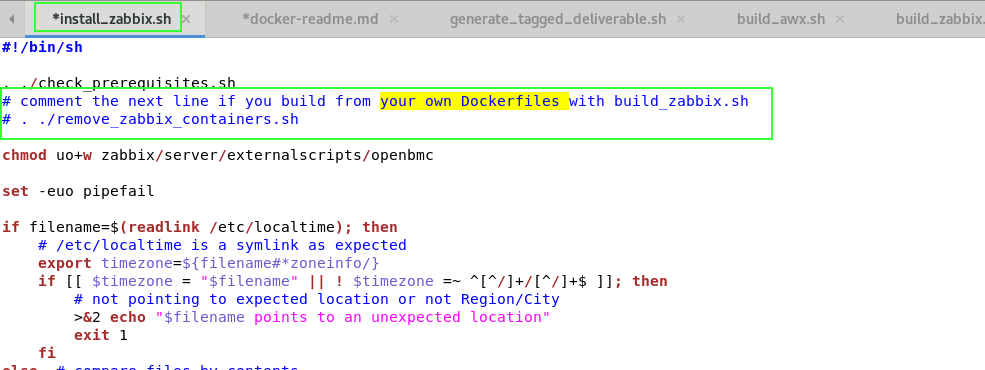
- edit the corresponding install-xxx script
- comment the remove-xxx-containers.sh line
- run your newly modified install script
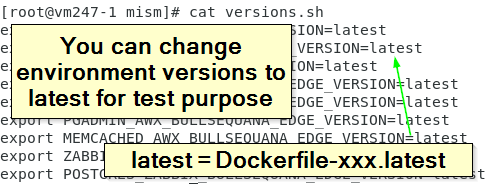
if you need to adapt the versions:
- edit versions.sh and adapt it
- run the corresponding build-xxx
- edit the corresponding install-xxx script
- comment the remove-xxx-containers.sh line
- run your newly modified install script
After a build and install process, the result should be:

⛔ Never change original templates => duplicate or create your own template
- This branch corresponds to the release actively under development.
- If you want to report any issue, then please report it by creating a new issue here
- If you have any requirements that is not currently addressed, then please let us know by creating a new issue here
This project is licensed under GPL-3.0 License. Please see the COPYING for more information
BullSequana Edge System Management Template version 2.1.10 MISM_BULLSEQUANA_EDGE_TEMPLATE_VERSION=2.1.10


