Basic shell script to take an existing Nutanix cluster running the Acropolis Hypervisor (AHV) and configure the Image Service, untagged VLAN and 3x virtual machines.
Intended to be used as part of a demo system. VMs are Windows 2012 R2, CentOS Linux 7 and Prism Central but could be anything you choose.
Chris Rasmussen, Systems Engineer, Nutanix (Melbourne, AU)
This script is something I threw together to automate a task that I carry out multiple times per week, i.e. taking an existing Nutanix cluster and automating Image Service configuration + VM creation. The idea is to take a bunch of already easy-to-complete tasks (the Prism UI is about as easy as it gets) and get the process very close to one "click".
There isn't any error checking in this script, purely because it's something I use internally at Nutanix. It should serve to get you started with scripting the Acropolis CLI (acli), though.
- An NFS share somewhere (can be anywhere, as long as the Nutanix CVMs have permission to read from it)
- A Nutanix cluster & appropriate credentials for a CVM SSH session
- Windows ISO (any bootable version - I'm using Windows 2012 R2)
- CentOS Linux ISO (any bootable version - I'm using CentOS 7)
- Prism Central Boot & Data disk images (KVM .qcow2 format)
- VirtIO driver ISO for Windows - currently this can be downloaded from https://fedoraproject.org/wiki/Windows_Virtio_Drivers#Direct_download
Note: The script powers on the created VMs but does not go through an unattended installation of the operating systems.
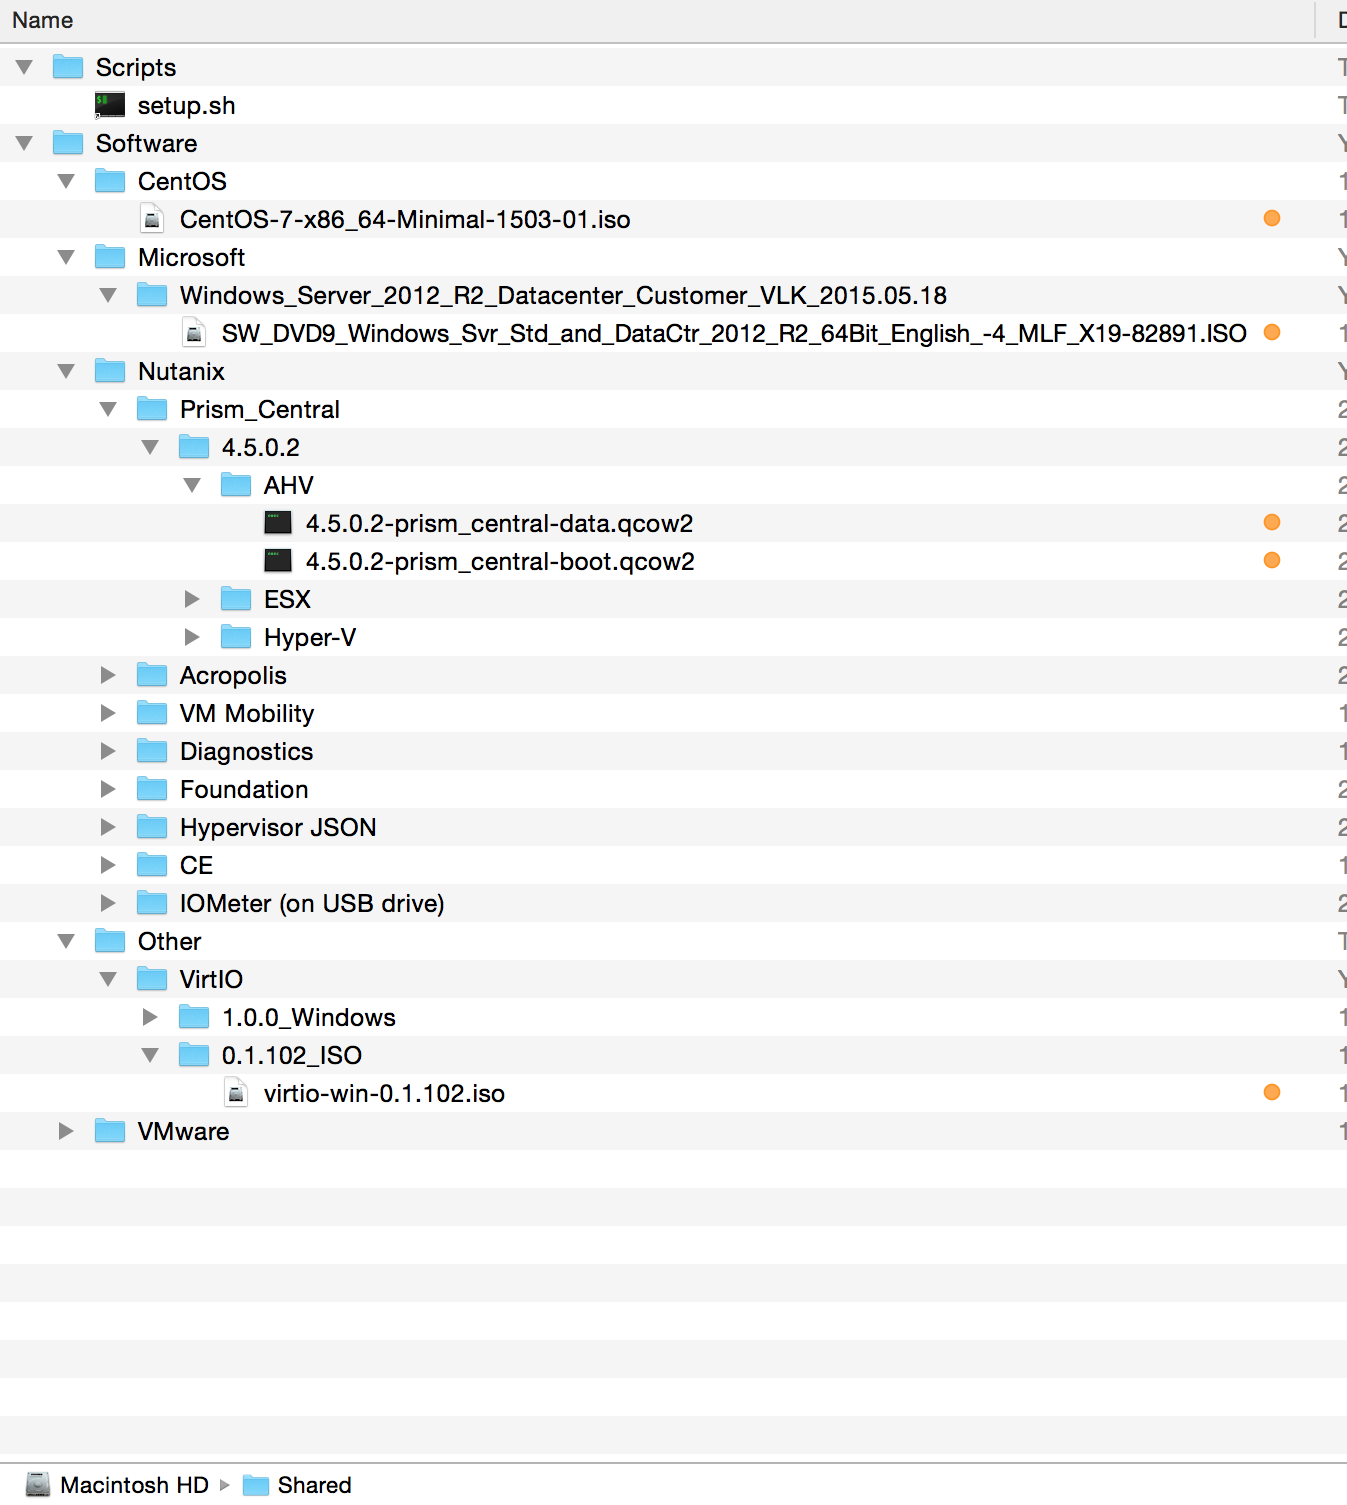
Here is the directory structure on my system (for reference only). Note the "orange" labelled files - these are the ISOs used by the script.
- Create the file "/etc/exports". Creating this file will automatically start the 'nfsd' daemon.
- Edit the /etc/exports file - example configuration is shown below. The example will export the /Shared directory + all sub-directories. The 10.10.10.0/24 network will be allowed access.
/Shared -maproot=root:wheel -alldirs -network 10.10.10.0 -mask 255.255.255.0
- Restart the nfsd daemon to reload configuration:
sudo nfsd stop
sudo nfsd start
The steps above will be different for NFS configuration on a non OS X system .
The setup.sh script should be accessible via the network using SCP.
For example, mine is in /Shared/Scripts
- Edit setup.sh and modify the variables to suit your needs. The most common settings that will need to be changed are near the top of the script. You may also wish to modify things like the VM and Image names further down the script.
- Edit the one-line command below and replace the IP address, username and script path with settings that makes sense for your environment.
[ -f "/tmp/setup.sh" ] && sudo rm "/tmp/setup.sh"; sudo scp [email protected]:/Shared/Scripts/setup.sh /tmp/setup.sh; sudo chmod 755 /tmp/setup.sh; /tmp/setup.sh
Those commands will:
- Check for an existing copy of setup.sh and remove it, if one is found in /tmp
- Connect to 10.10.10.243 and grab setup.sh from the /Shared/Scripts directory (it is copied to /tmp)
- Modify setup.sh permissions so that the current user can execute it
- Run setup.sh
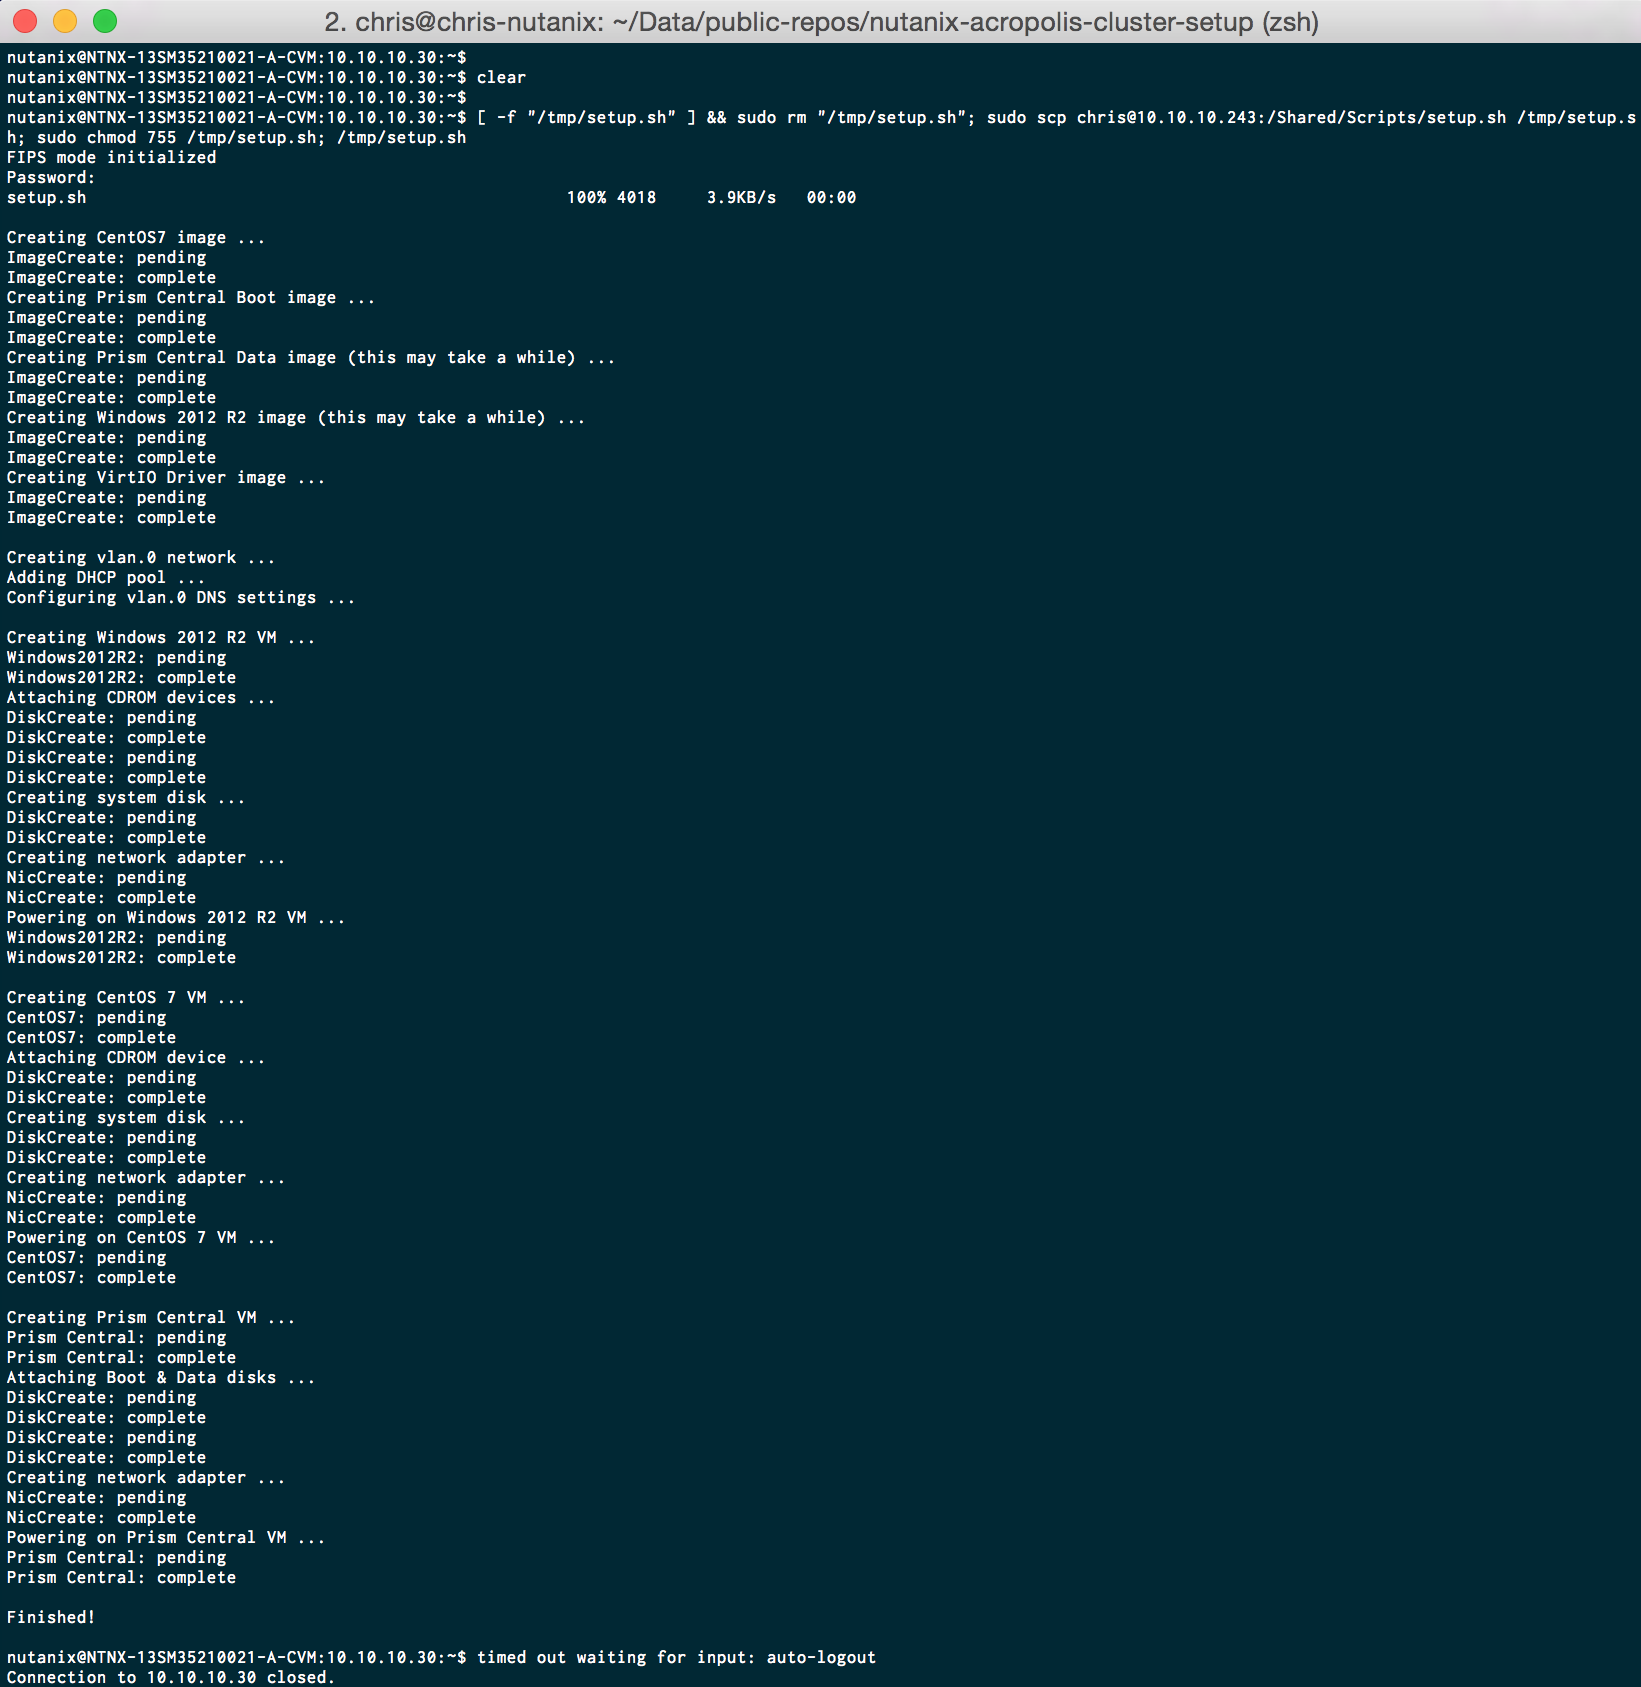
Here is an example of what the output generated by the script.
- Make sure the NFS directory export can be read remotely
- It is assumed that you don't already have VMs or Images that match the default names used by this script

