New Image BirdNET-Pi_v14.2.img.xz #353
Replies: 10 comments 22 replies
-
|
Woah! Good stuff Patrick! I should be able to test this soon |
Beta Was this translation helpful? Give feedback.
-
|
Will take this with me to the outdoors next week! Thanks Patrick! |
Beta Was this translation helpful? Give feedback.
-
|
Hi Patrick, Just did the install as you described above and got it working immediately! So it is safe to say it is monkey proof. 😂. I installed it and hooked it up to a powerbank and ran a test with recorded birdsounds from Merlin Bird ID. A great succes!! Tried both English and Dutch and both work. See screenshots below. I hope I have time this weekend to test it in the field. Thanks for making this project accessible for people without much knowledge about programming. Keep up the good work! |
Beta Was this translation helpful? Give feedback.
-
|
Patrick, thats really awesome! Installed it without any problems.
Perfect! Thanks a lot for this fantastic functionality ! |
Beta Was this translation helpful? Give feedback.
-
|
Installed the image to a fresh SD card today. Works perfectly! All the fixes seem to be working well now 💪 |
Beta Was this translation helpful? Give feedback.
-
|
Just wanted to say thank you @mcguirepr89 for your work. I've just installed this test version without a hitch. Sounded like a better idea to minimise SD card read/writes! |
Beta Was this translation helpful? Give feedback.
-
|
Hi, Thanks |
Beta Was this translation helpful? Give feedback.
-
|
Wondering about using rclone to backup birds.db and BirdSongs directory to my GoogleDrive using cronjob. |
Beta Was this translation helpful? Give feedback.
-
|
Bit of an old discussion here, but this image is amazing. I use it on my mobile rig. Installed over Christmas, plugged in to update, and it's just bullet proof in the field. Only caveat is you need to set the time every time you start it up. Not sure if this is just a quirk of a non-internet connected raspberry pi, or my particular pi. I was wondering why there were no detection events for the first part of my walk this morning, only to realize I'd missed the '-' sign in my latitude. Just a constant gotcha in the southern hemisphere :) |
Beta Was this translation helpful? Give feedback.


-
THIS IMAGE IS OBSOLETE. INSTALLATION INSTRUCTIONS ON THE MAIN REPO SHOULD BE FOLLOWED INSTEAD.
Obsolete instructions
Hello! I hope this announcement finds you all doing well.
I've put together a new BirdNET-Pi pre-installed image that is ready for testing.
The main features of the pre-installed image:
/dev/shm(virtual memory) to minimize SD card read/writesdhcpcdandopenresolvhave been replaced with a pureNetworkManagernetworking environmentnmtuiandnmclito manage the system's network connections from the "Web Terminal", SSH, or console.Fully Headless Installation Instructions:
Step 1: Download the Image
Step 1.5 (Highly Recommended): Verify the sha256 checksum
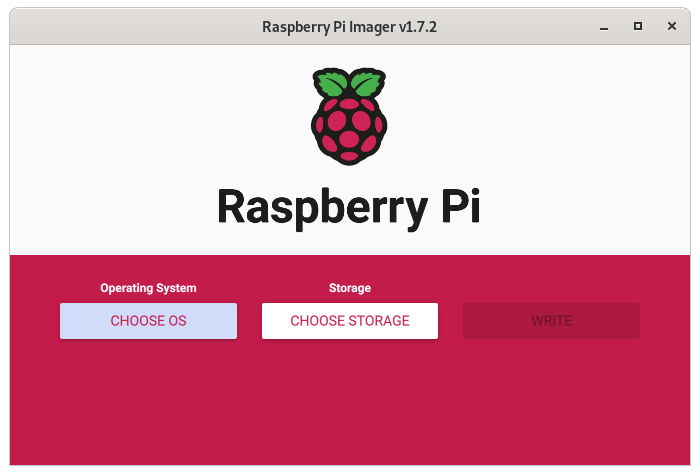
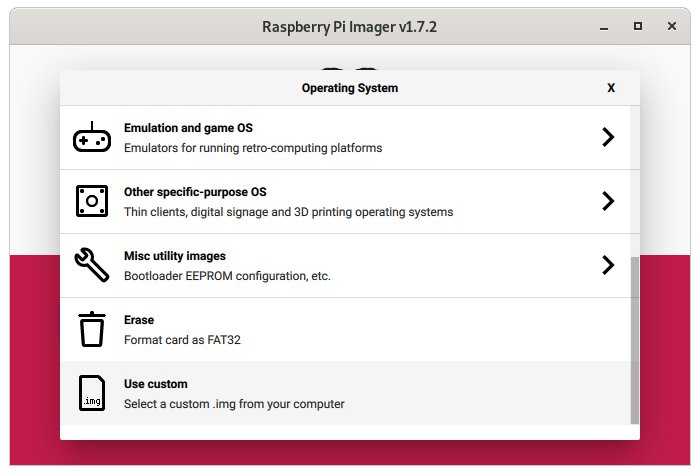
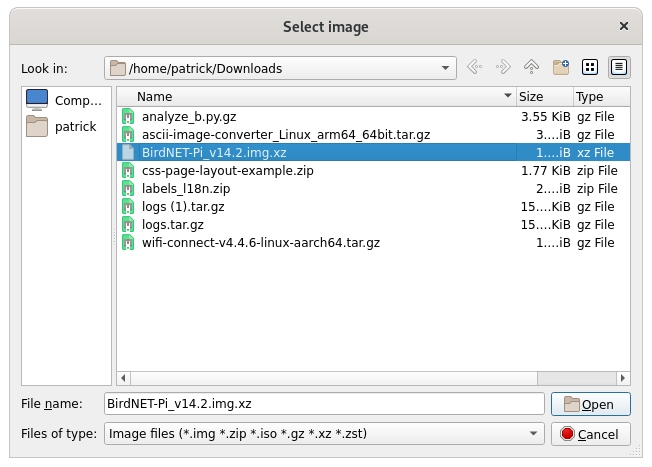
Step 2: Flash the Image Using the Raspberry Pi Imager
Open the Raspberry Pi Imager and locate the image downloaded in the step above using the "Choose OS" option as seen in the screenshot below:
IMPORTANT!!
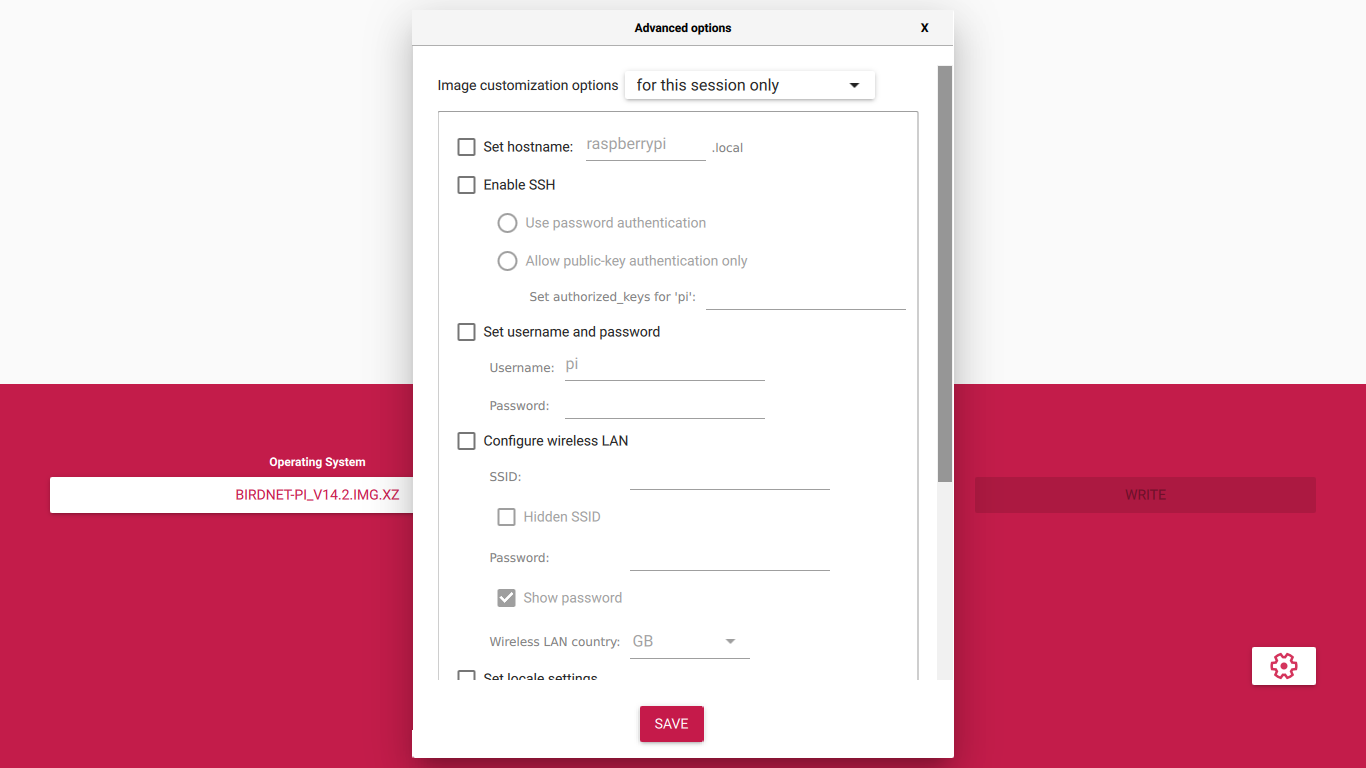
Remove any and all customized Advanced Settings in Raspberry Pi Imager
Choose the SD card onto which you wish to write the new BirdNET-Pi image
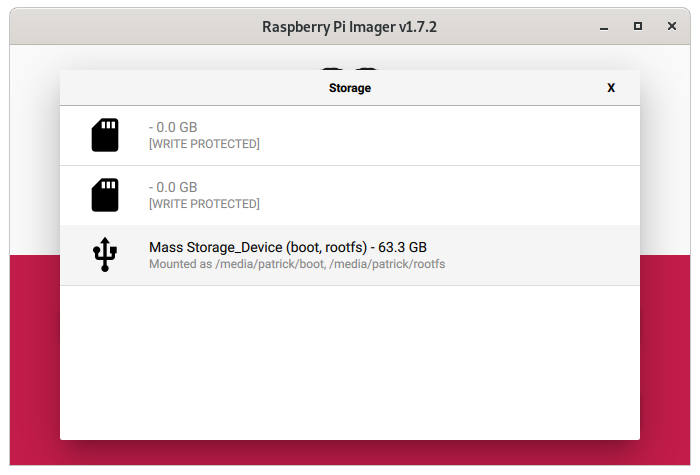
Write the image to the SD card
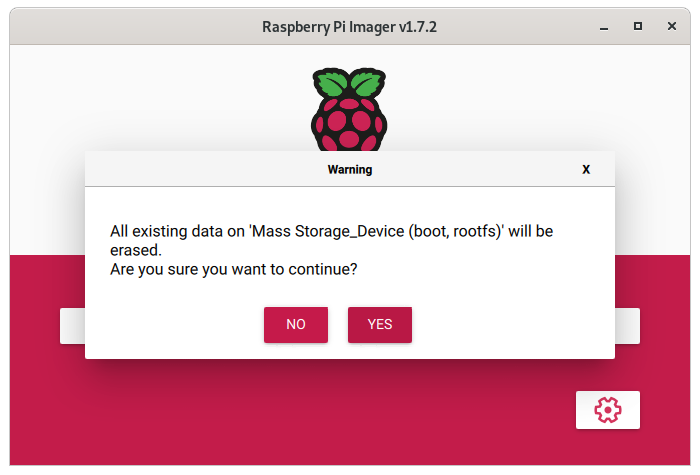
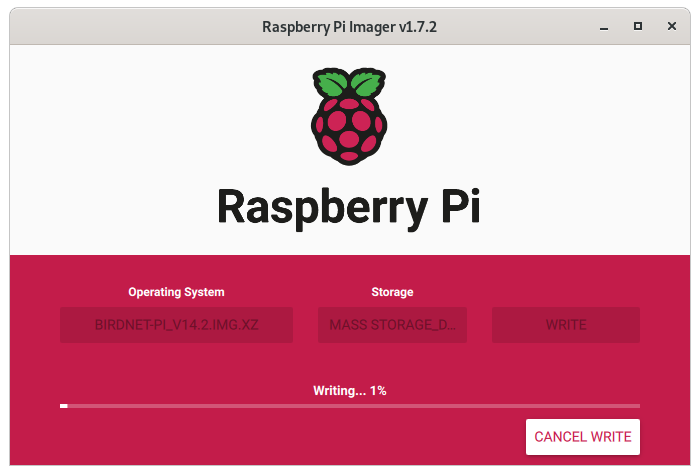
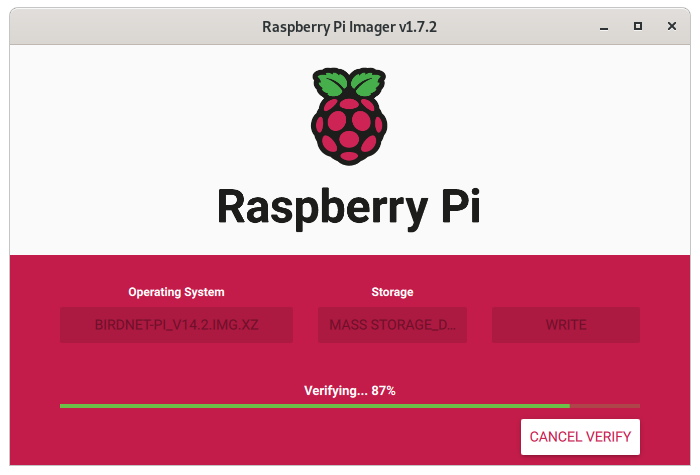
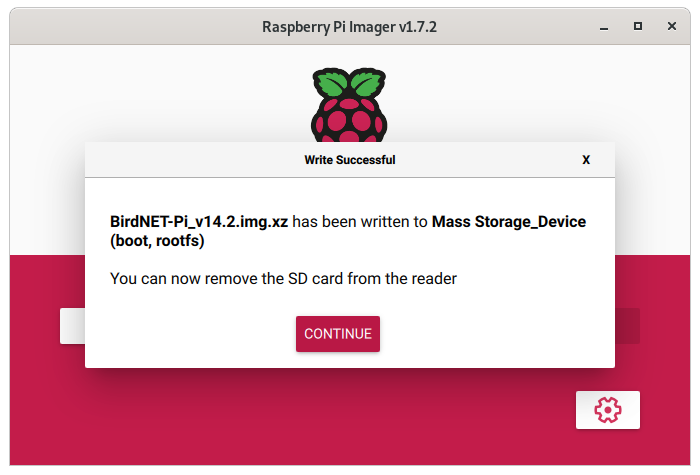
When you see the dialog below indicating the flashing is complete, you can close the Raspberry Pi Imager and remove the SD.
Step 2: Connect To the BirdNET-Pi HotSpot
Step 3: Choosing the Network You Want BirdNET-Pi To Join OR Work Fully Offline
- Note: If you are not automatically taken to the captive portal when you connect to the hotspot, you can navigate there manually by going to http://192.168.42.1.
- Note: Some devices will recognize that the BirdNET-Pi hotspot has no internet access -- be sure your device does not automatically disconnect from the hotspot in an effort to obtain an internet connection. You may need to explicitly instruct your device to stay connected to that hotspot in spite of there being no internet connectivity. On the Apple iPhone, for instance, I must always select to use the network without internet access to stay connected to the hotspot. I only need to do this once.
(a) Connect BirdNET-Pi To a Nearby Network
After you enter the WiFi credentials on the captive portal, the BirdNET-Pi will attempt to connect to the network you selected. If it is successful, the "BirdNET-Pi" hotspot will be disconnected and the BirdNET-Pi device will be reachable on your network.
At that point, join the WiFi network to which you just connected the BirdNET-Pi using any device (laptop, smart phone, PC) and go to http://birdnetpi.local to finish configuring the system.
(b) Configure the Installation To Work Fully Offline
Step 4: Configure Settings
Note: For the steps below, if you are working offline, the URL in the web browser address bar will actually be "http://birdnetpi.local:9999", otherwise the steps are the same.
By default, the username is birdnet and the password is empty.
- Note: If you are not prompted to input the username and password after clicking the "Tools" button and are instead told you cannot edit the settings for the installation, exit the "Captive Portal" and open a regular web browser and go to http://birdnetpi.local:9999 to try again.
Set your latitude and longitude to four decimal places
If you are working offline, BE SURE TO SET THE SYSTEM TIME
Step 5: Change system password
Finally, a very important step is changing the default password for the system. To do this, go to "Tools" > "Web Terminal" or via SSH
The username is:
birdieThe password is:
birdnetpiAs soon as you are logged in to the shell, type
passwdYou will be asked for you current password (
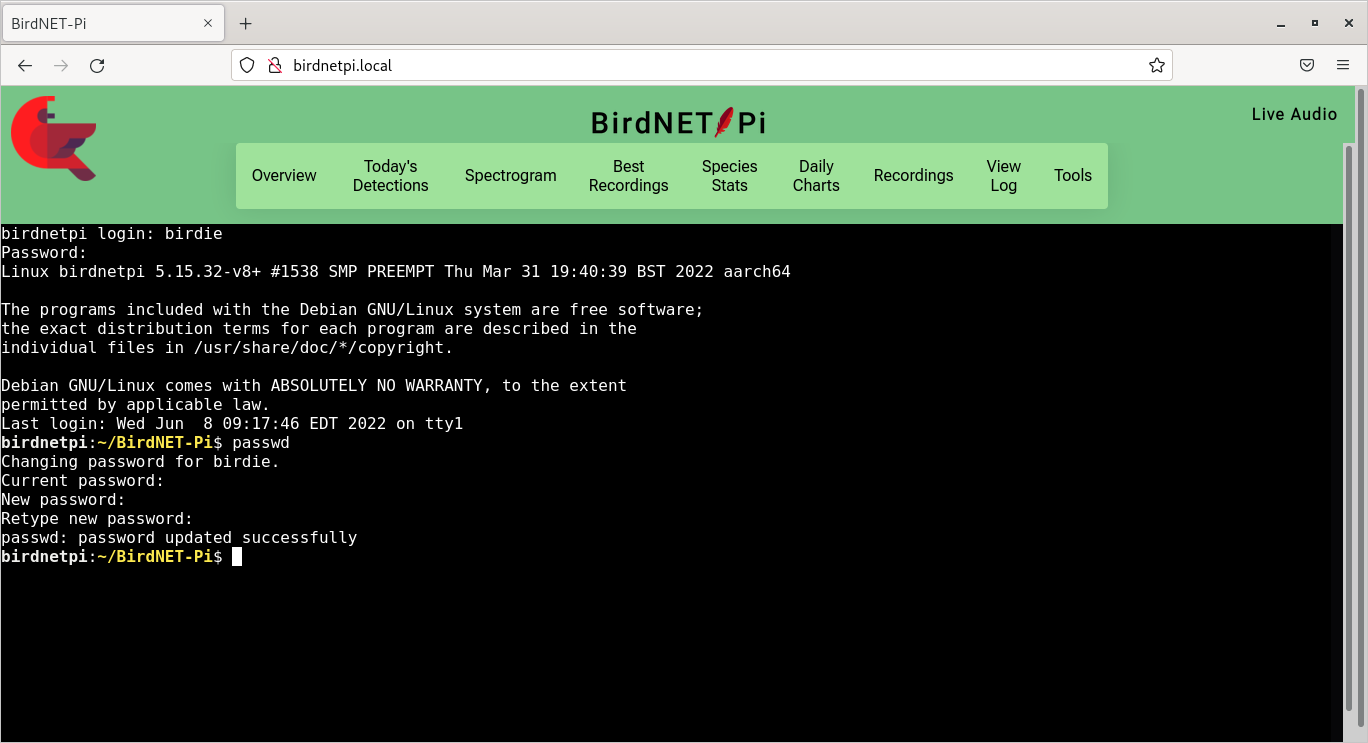
birdnetpi) -- note that you will not see any characters typed as you change the password.You will then be asked to enter the new password twice.
That's all!
Happy Birding!
Beta Was this translation helpful? Give feedback.
All reactions