Home
- Add Trackier SDK to your app
- Implement and initialize the SDK
- SDK Signing
- Track Events
- Track Uninstall for Android
- Proguard Settings
We have created a example app for the flutter sdk integration.
Please check the Example directory for know to how the Trackier SDK can be integrated.
Flutter SDK integration is very easy to integrate in your app. Just need to follow some steps
You can add the flutter sdk in two ways:-
- By adding the below code in the package
pubspec.yaml
dependencies:
  trackier_sdk_flutter: ^1.6.22
- By using cli command. you need to run the below command in
terminal/cmd.
$ flutter pub add trackier_sdk_flutter
This command will directly add the trackier sdk to your package's `pubspec.yaml`.
After that run the below command to update the packages.
$ flutter packages get
Add the Android Install Referrer as a dependency in your app build.gradle . You can find the latest version here
dependencies {
  // make sure to use the latest SDK version:
  implementation 'com.android.installreferrer:installreferrer:2.2'
}Trackier SDK need the following below permission in the AndroidManifest.xml
Please add the below permission in your app project AndroidManifest.xml. if they are not added.
  <uses-permission android:name="android.permission.INTERNET" />
  <uses-permission android:name="android.permission.ACCESS_NETWORK_STATE" />
  <uses-permission android:name="android.permission.ACCESS_WIFI_STATE" />

  <!-- Optional : -->
<uses-permission android:name="android.permission.READ_PHONE_STATE" />Trackier SDK need the advertising id from the application.
For achieving this, you need to add some line of code in the build.gradle and also in AndroidManifest.xml for read the Advertising id from the application which is mentioned below:-
- Add the google advertising id dependency in your android/app/build.gradle
dependencies {
  // This can be added where the SDK dependency has been added
  implementation 'com.google.android.gms:play-services-ads-identifier:18.0.1'
}- Update your Android Manifest file by adding the following permission. This is required if your app is targeting devices with android version 12+
<uses-permission android:name="com.google.android.gms.permission.AD_ID"/>- Add meta data inside the application tag (If not already added)
<meta-data
            android:name="com.google.android.gms.version"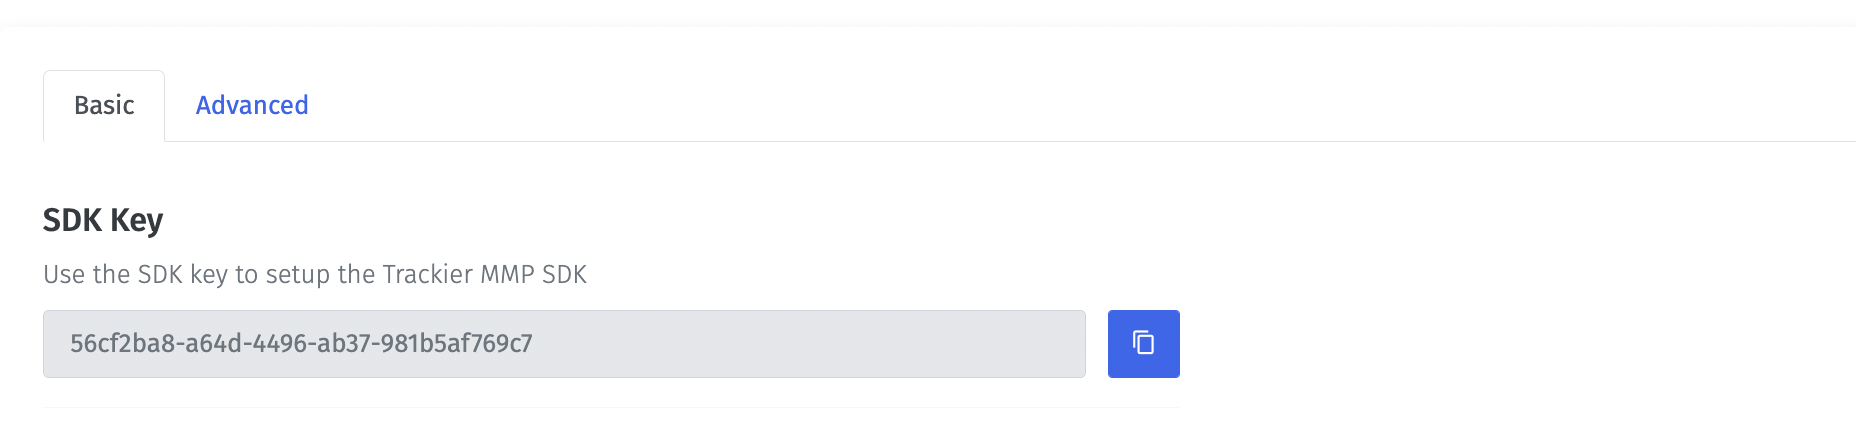
android:value="@integer/google_play_services_version" /> //Add this meta-data in the manifest.xml under Application tag.For initialising the Trackier SDk. First, We need to generate the Sdk key from the Trackier MMP panel.
Following below are the steps to retrieve the development key:-
- Login your Trackier Panel
- Select your application and click on Action button and login as
- In the Dashboard, Click on the
SDK Integrationoption on the left side of panel. - under on the SDK Integration, You will be get the SDK Key.
After follow all steps, Your SDK key look like the below screenshot
Screenshot[1]
Flutter sdk should be initialized in the initState() method under main.dart class.
Below are the example of initializing and calling the method of the sdk.
class _MyHomePageState extends State<MyHomePage> {

  @override
  void initState() {
    super.initState();
    initilalizeSdk();
  }

  Future<void> initilalizeSdk() async {

    String key ="xxxx-xx-4505-bc8b-xx"; //Please pass your Development key here.

    /*While Initializing the Sdk, You need to pass the two arguments in the TrackierSDKConfig.
         * In First argument, you need to pass the Trackier SDK api key
         * In second argument, you need to pass the environment which can be either "development", "production" or "testing". */

    TrackerSDKConfig trackerSDKConfig = TrackerSDKConfig(key,"production");
    Trackierfluttersdk.initializeSDK(trackerSDKConfig);

  }
}
You can also check the screenshot of the following examples
ScreenShot [2]
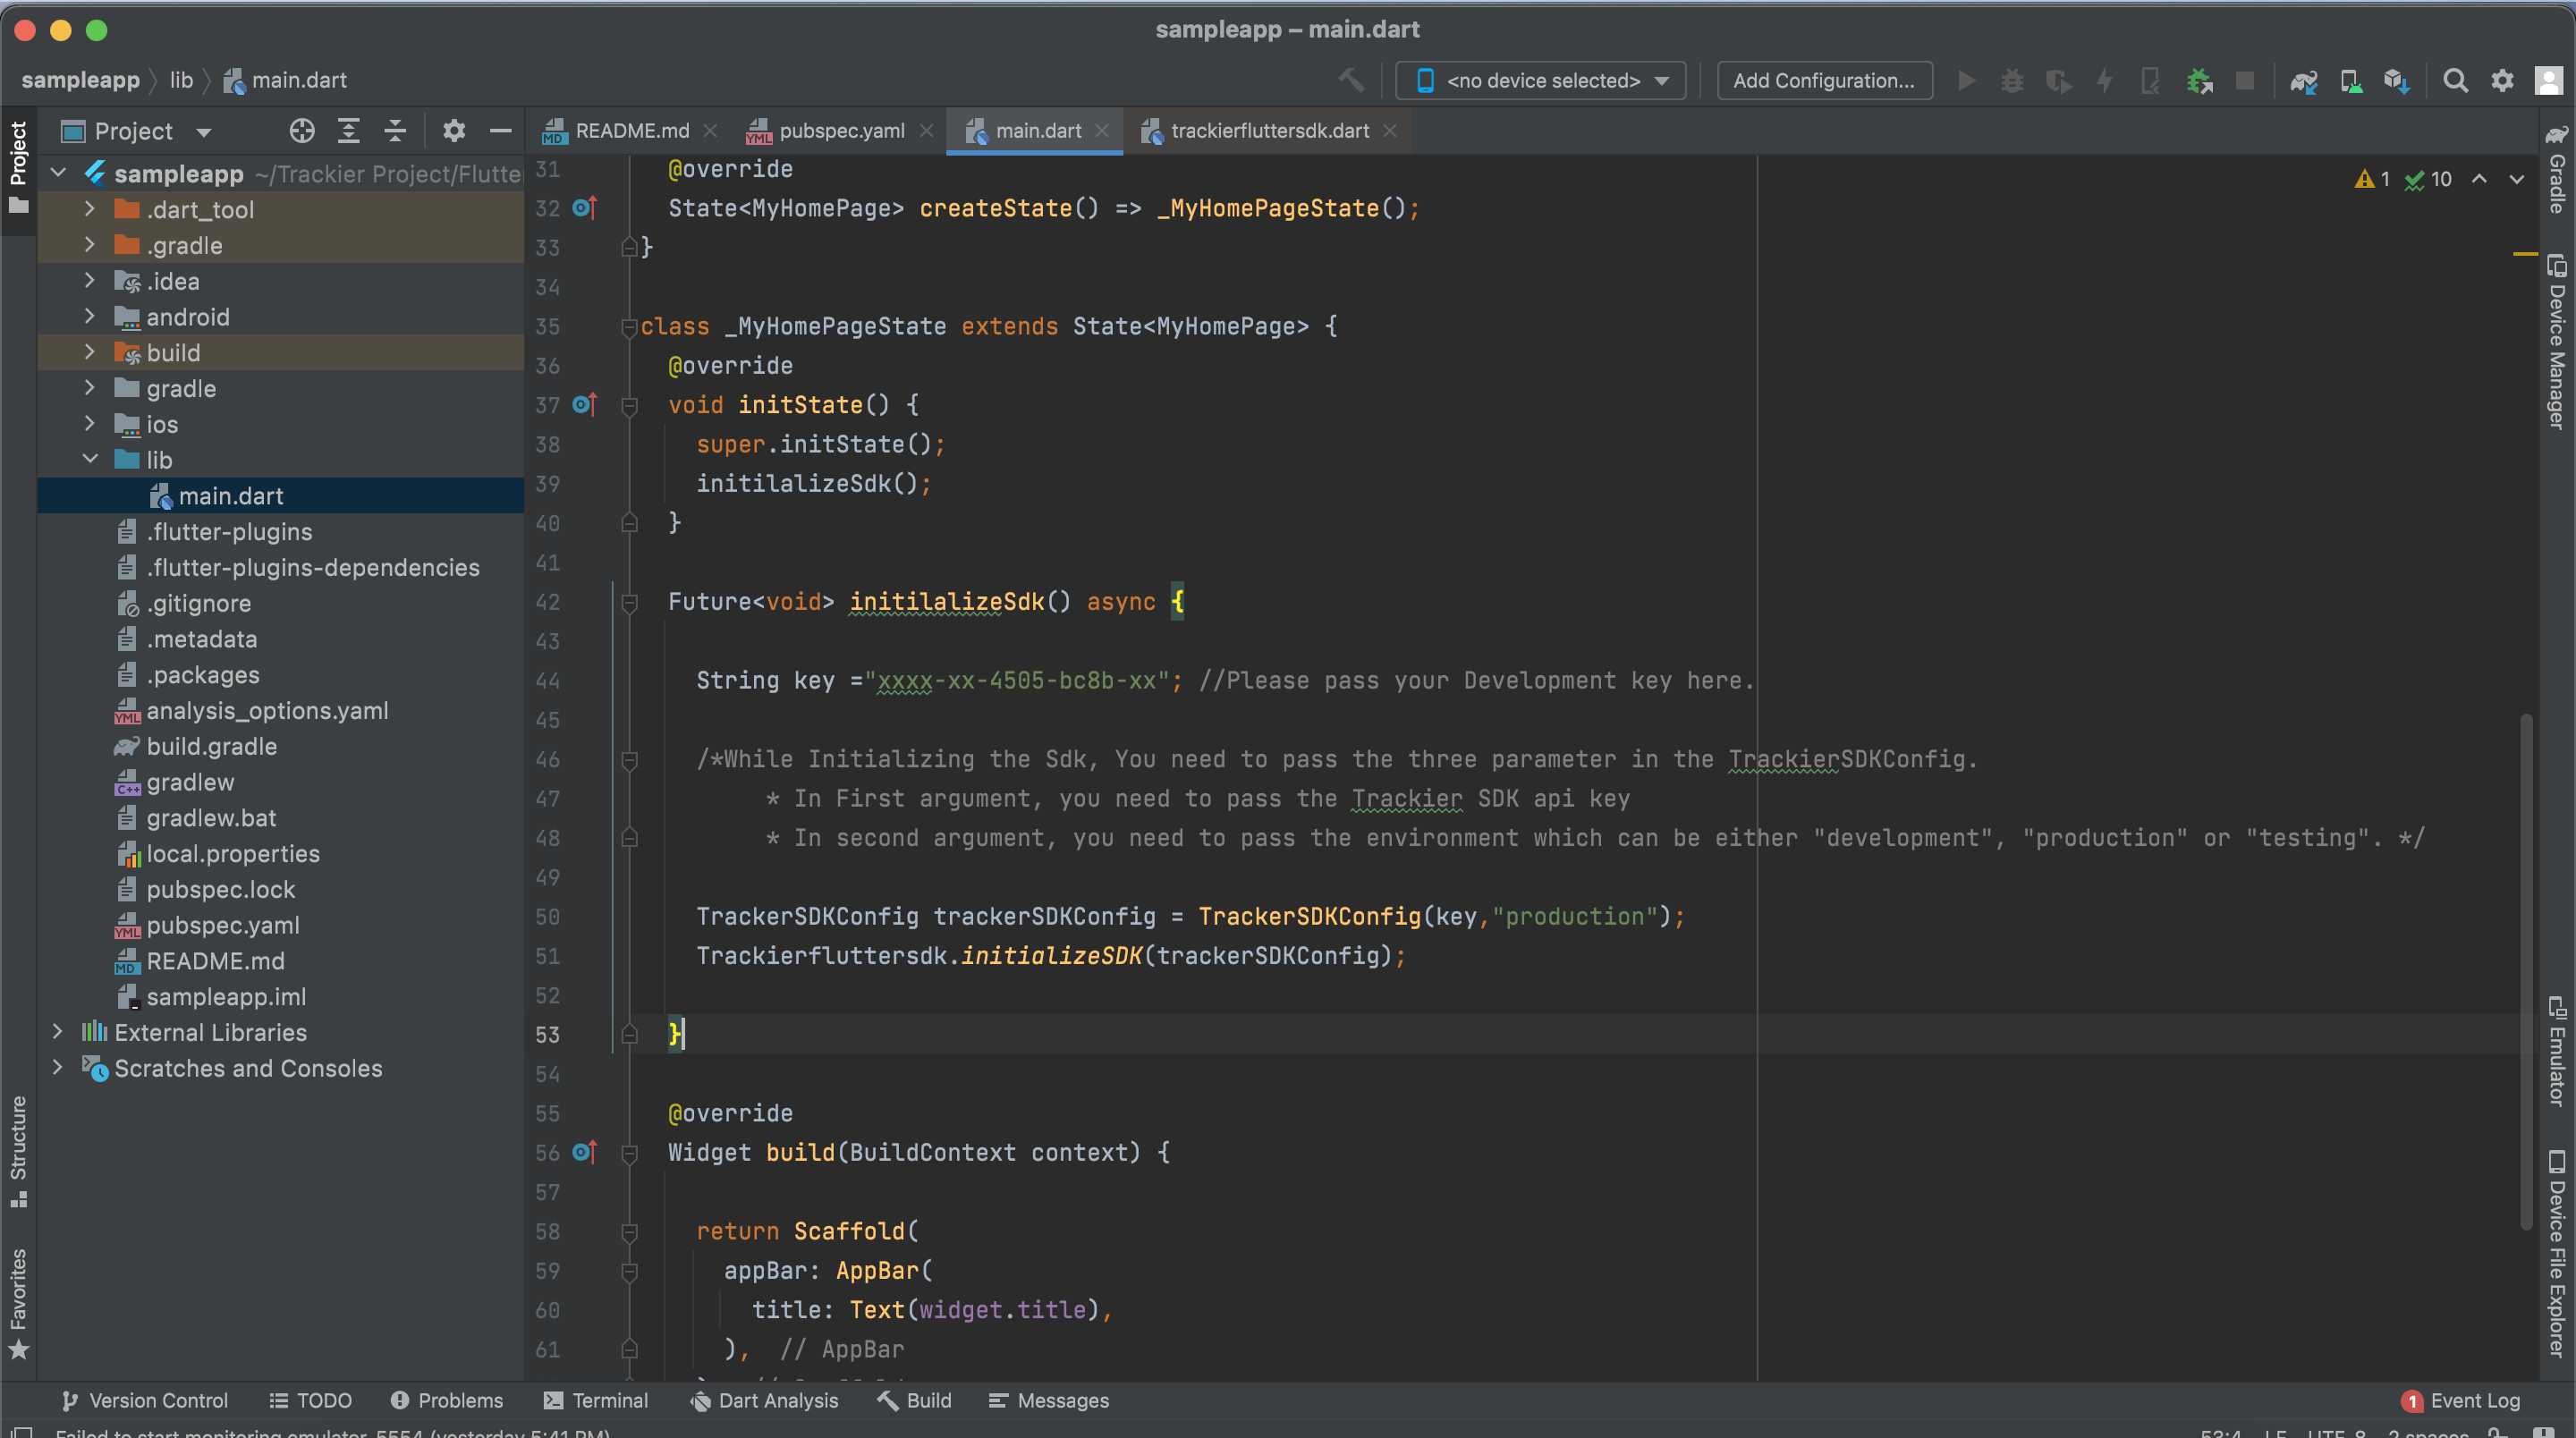
Important: it is crucial to use the correct dev key when initializing the SDK. Using the wrong dev key or an incorrect dev key impact all traffic sent from the SDK and cause attribution and reporting issues.
Trackier events trackings enable to provides the insights into how to user interacts with your app. Trackier sdk easily get that insights data from the app. Just follow with the simple events integration process
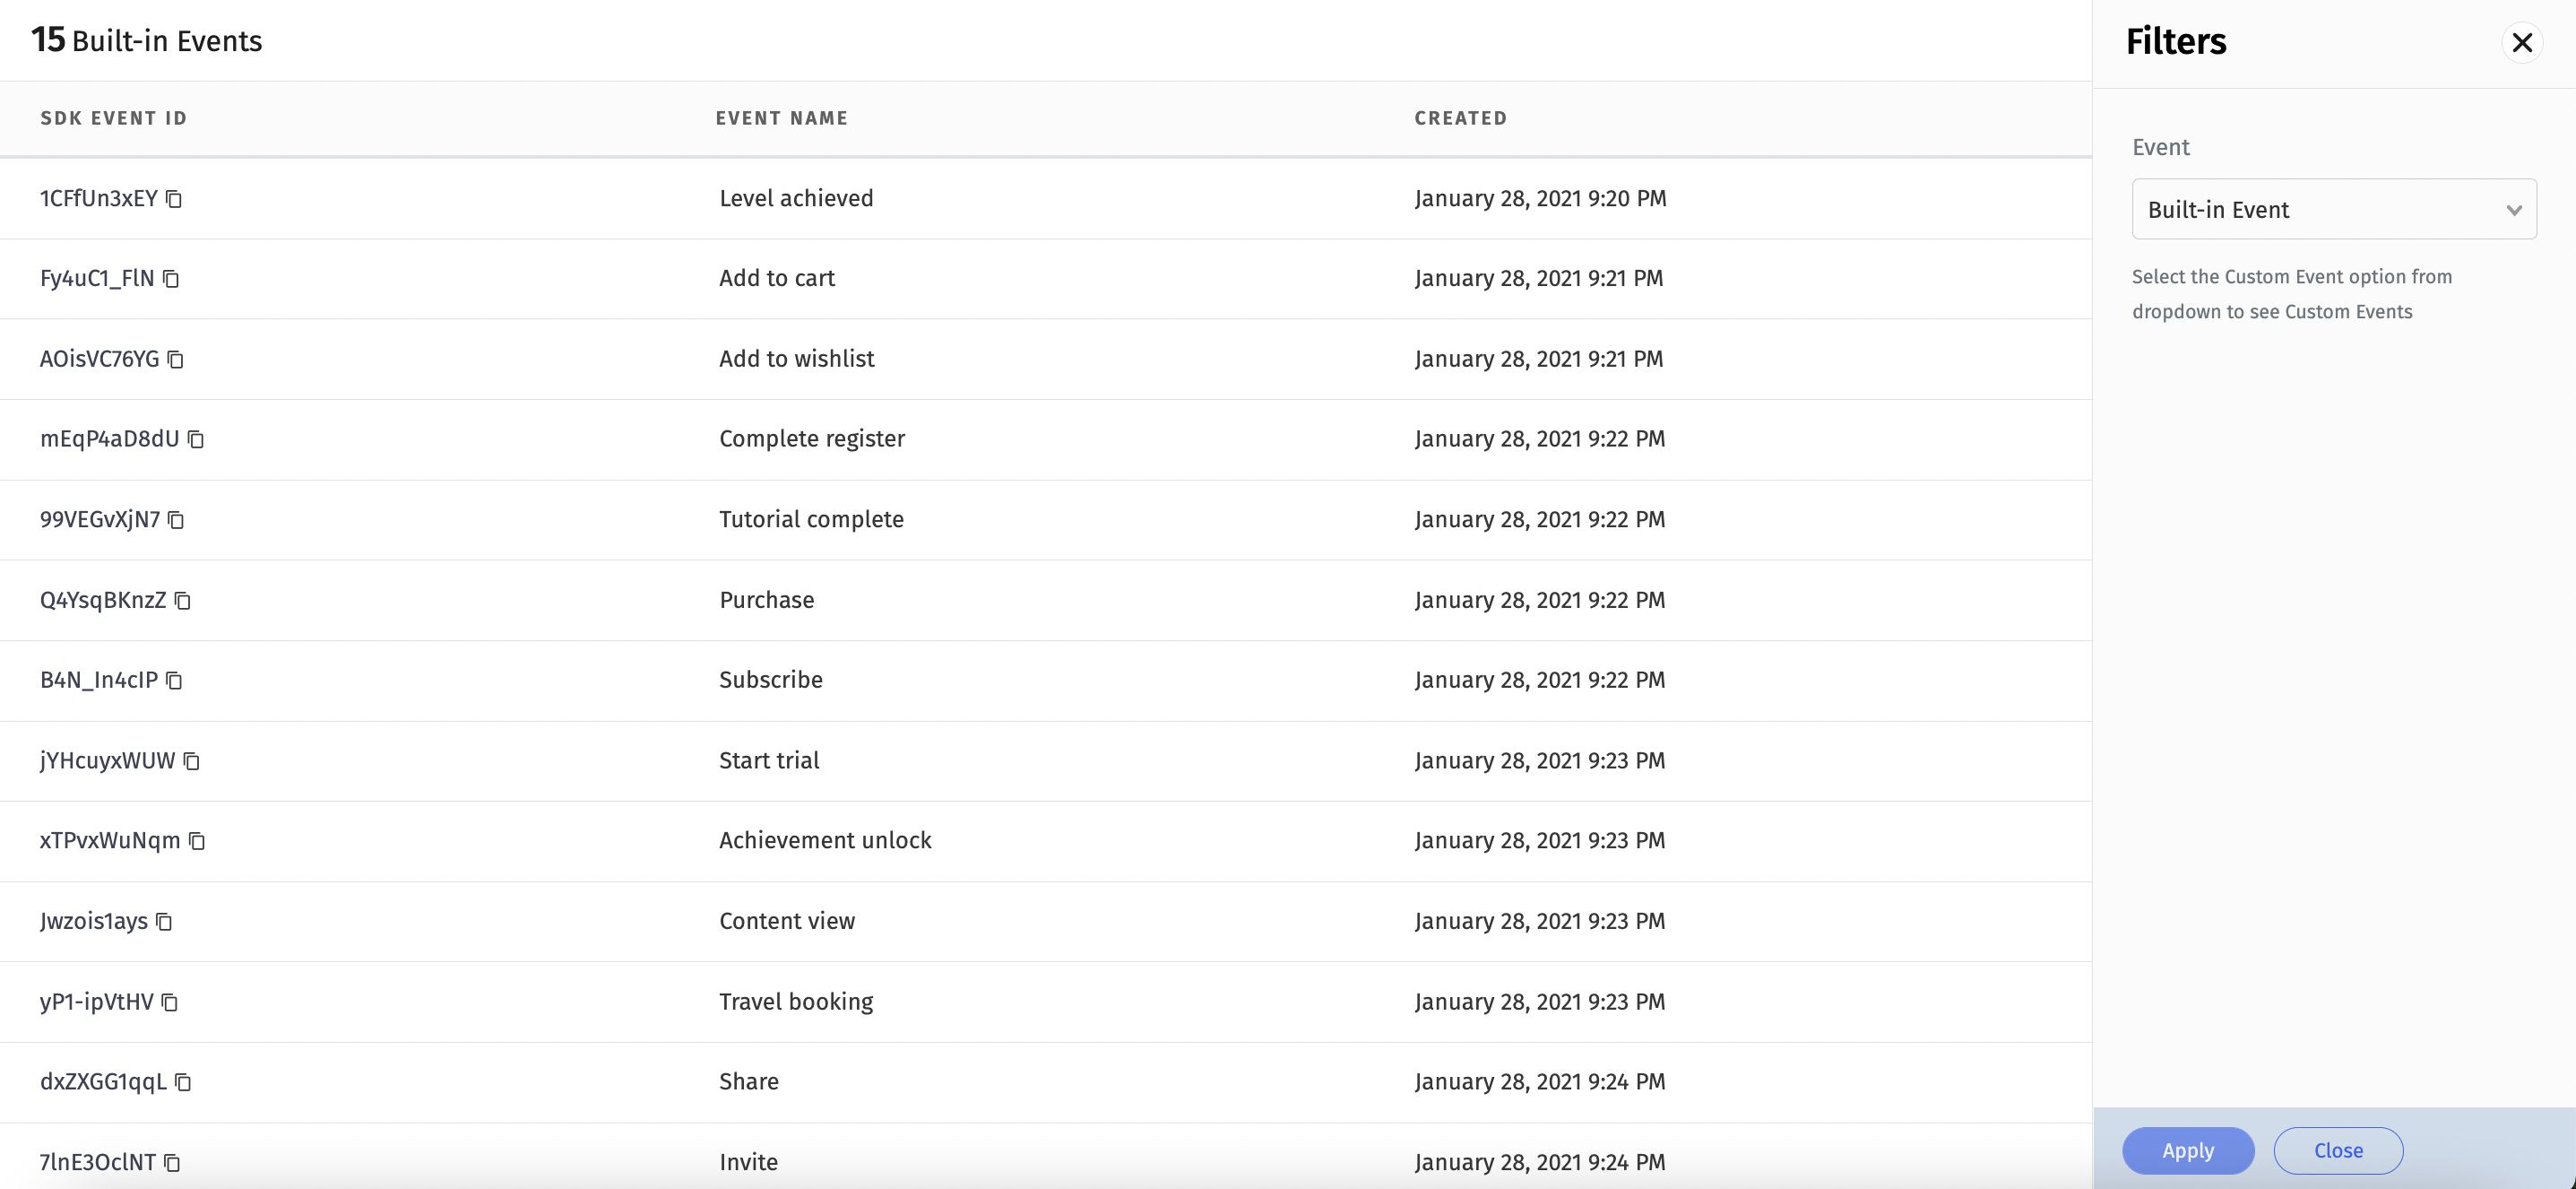
Trackier provides the Built-in events and Customs events on the Trackier panel.
Built-in Events - Predefined events are the list of constants events which already been created on the dashboard. You can use directly to track those events. Just need to implements events in the app projects.
Screenshot[9]
    TrackierEvent trackierEvent = new TrackierEvent("eventID");
    trackierEvent.orderId = "orderID";
    trackierEvent.param1 = "param1";
    trackierEvent.param2 = "param2";
    trackierEvent.setEventValue("ev1", "eventValue1");
    trackierEvent.setEventValue("ev2", 1);
Trackierfluttersdk.trackerEvent(trackierEvent);- Argument in Trackier event class is event Id which you want to call event for.
- You can associate inbuilt params with the event , in-built param list are below:- orderId, currency, currency, param1, param2, param3 ,param4, param5, param6, param7, param8, param9, param10
    TrackierEvent trackierEvent = new TrackierEvent("eventID");
    trackierEvent.revenue = 10.0;
    trackierEvent.currency = "INR";
    trackierEvent.orderId = "orderID";
    trackierEvent.param1 = "param1";
    trackierEvent.param2 = "param2";
    trackierEvent.setEventValue("ev1", "eventValue1");
    trackierEvent.setEventValue("ev2", 1);
Trackierfluttersdk.trackerEvent(trackierEvent); var eventCustomParams = Map<String, Object>();
eventCustomParams.put("customParam1",XXXXX)
eventCustomParams.put("customParam2",XXXXX)
event.ev = eventCustomParams
TrackierSDK.trackEvent(event)- First create a map
- Pass its reference to event.ev param of event
- Pass event reference to trackEvent method of TrackerSDK
-
Install
firebase_coreand add the initialization code to your app if you haven't already. - Add your app to your Firebase project in the Firebase console.
-
From the root of your Flutter project, run the following command to install the plugin:
flutter pub add firebase_analytics
-
Once complete, rebuild your Flutter application:
flutter run
-
Once installed, you can access the
firebase_analyticsplugin by importing it in your Dart code:import 'package:firebase_analytics/firebase_analytics.dart'; -
Create a new Firebase Analytics instance by calling the
instancegetter onFirebaseAnalytics:FirebaseAnalytics analytics = FirebaseAnalytics.instance;
-
Use the
analyticsinstance obtained above to set the following user property:var trackierId = await Trackierfluttersdk.getTrackierId(); analytics.setUserProperty(name: "ct_objectId", value: trackierId);
-
Adding the above code to your app sets up a common identifier.
-
Set the
app_removeevent as a conversion event in Firebase. -
Use the Firebase cloud function to send uninstall information to Trackier MMP.
-
You can find the support article here.
If your app is using proguard then add these lines to the proguard config file
  -keep class com.trackier.sdk.** { *; }
  -keep class com.google.android.gms.common.ConnectionResult {
      int SUCCESS;
  }
  -keep class com.google.android.gms.ads.identifier.AdvertisingIdClient {
      com.google.android.gms.ads.identifier.AdvertisingIdClient$Info getAdvertisingIdInfo(android.content.Context);
  }
  -keep class com.google.android.gms.ads.identifier.AdvertisingIdClient$Info {
      java.lang.String getId();
      boolean isLimitAdTrackingEnabled();
  }
  -keep public class com.android.installreferrer.** { *; }