Configuring the board
There are a number of jumpers that can be set on the back of Pepper which will configure the specific behaviour of the board.
To keep Pepper flexible, we have designed it so it can run off many different power supplies:
-
For best results Pepper should be connected to a Eurorack 12V power rail via a ribbon cable. This will allow for the full-scale range from the pots and requires the 5V regulator to be installed.
-
Pepper can also be powered directly off a 5V Eurorack PSU, assuming there are 400mA available on the 5V rail.
-
Just like the original Bela board, Pepper can also be powered via USB power, or 5V barrel jack into the Bela board.
Note that the PSU in use does not affect the I/O voltage ranges at the jack sockets, only the full-scale range you will get from the pots when nothing is plugged into the input. If you want to just work with the potentiometer when running off the 5V supply then you will need to multiply the reading you get from the analog inputs by 3.
Note that when the board is powered from the Eurorack rail it is still completely possible to be connected via USB for programming the board.
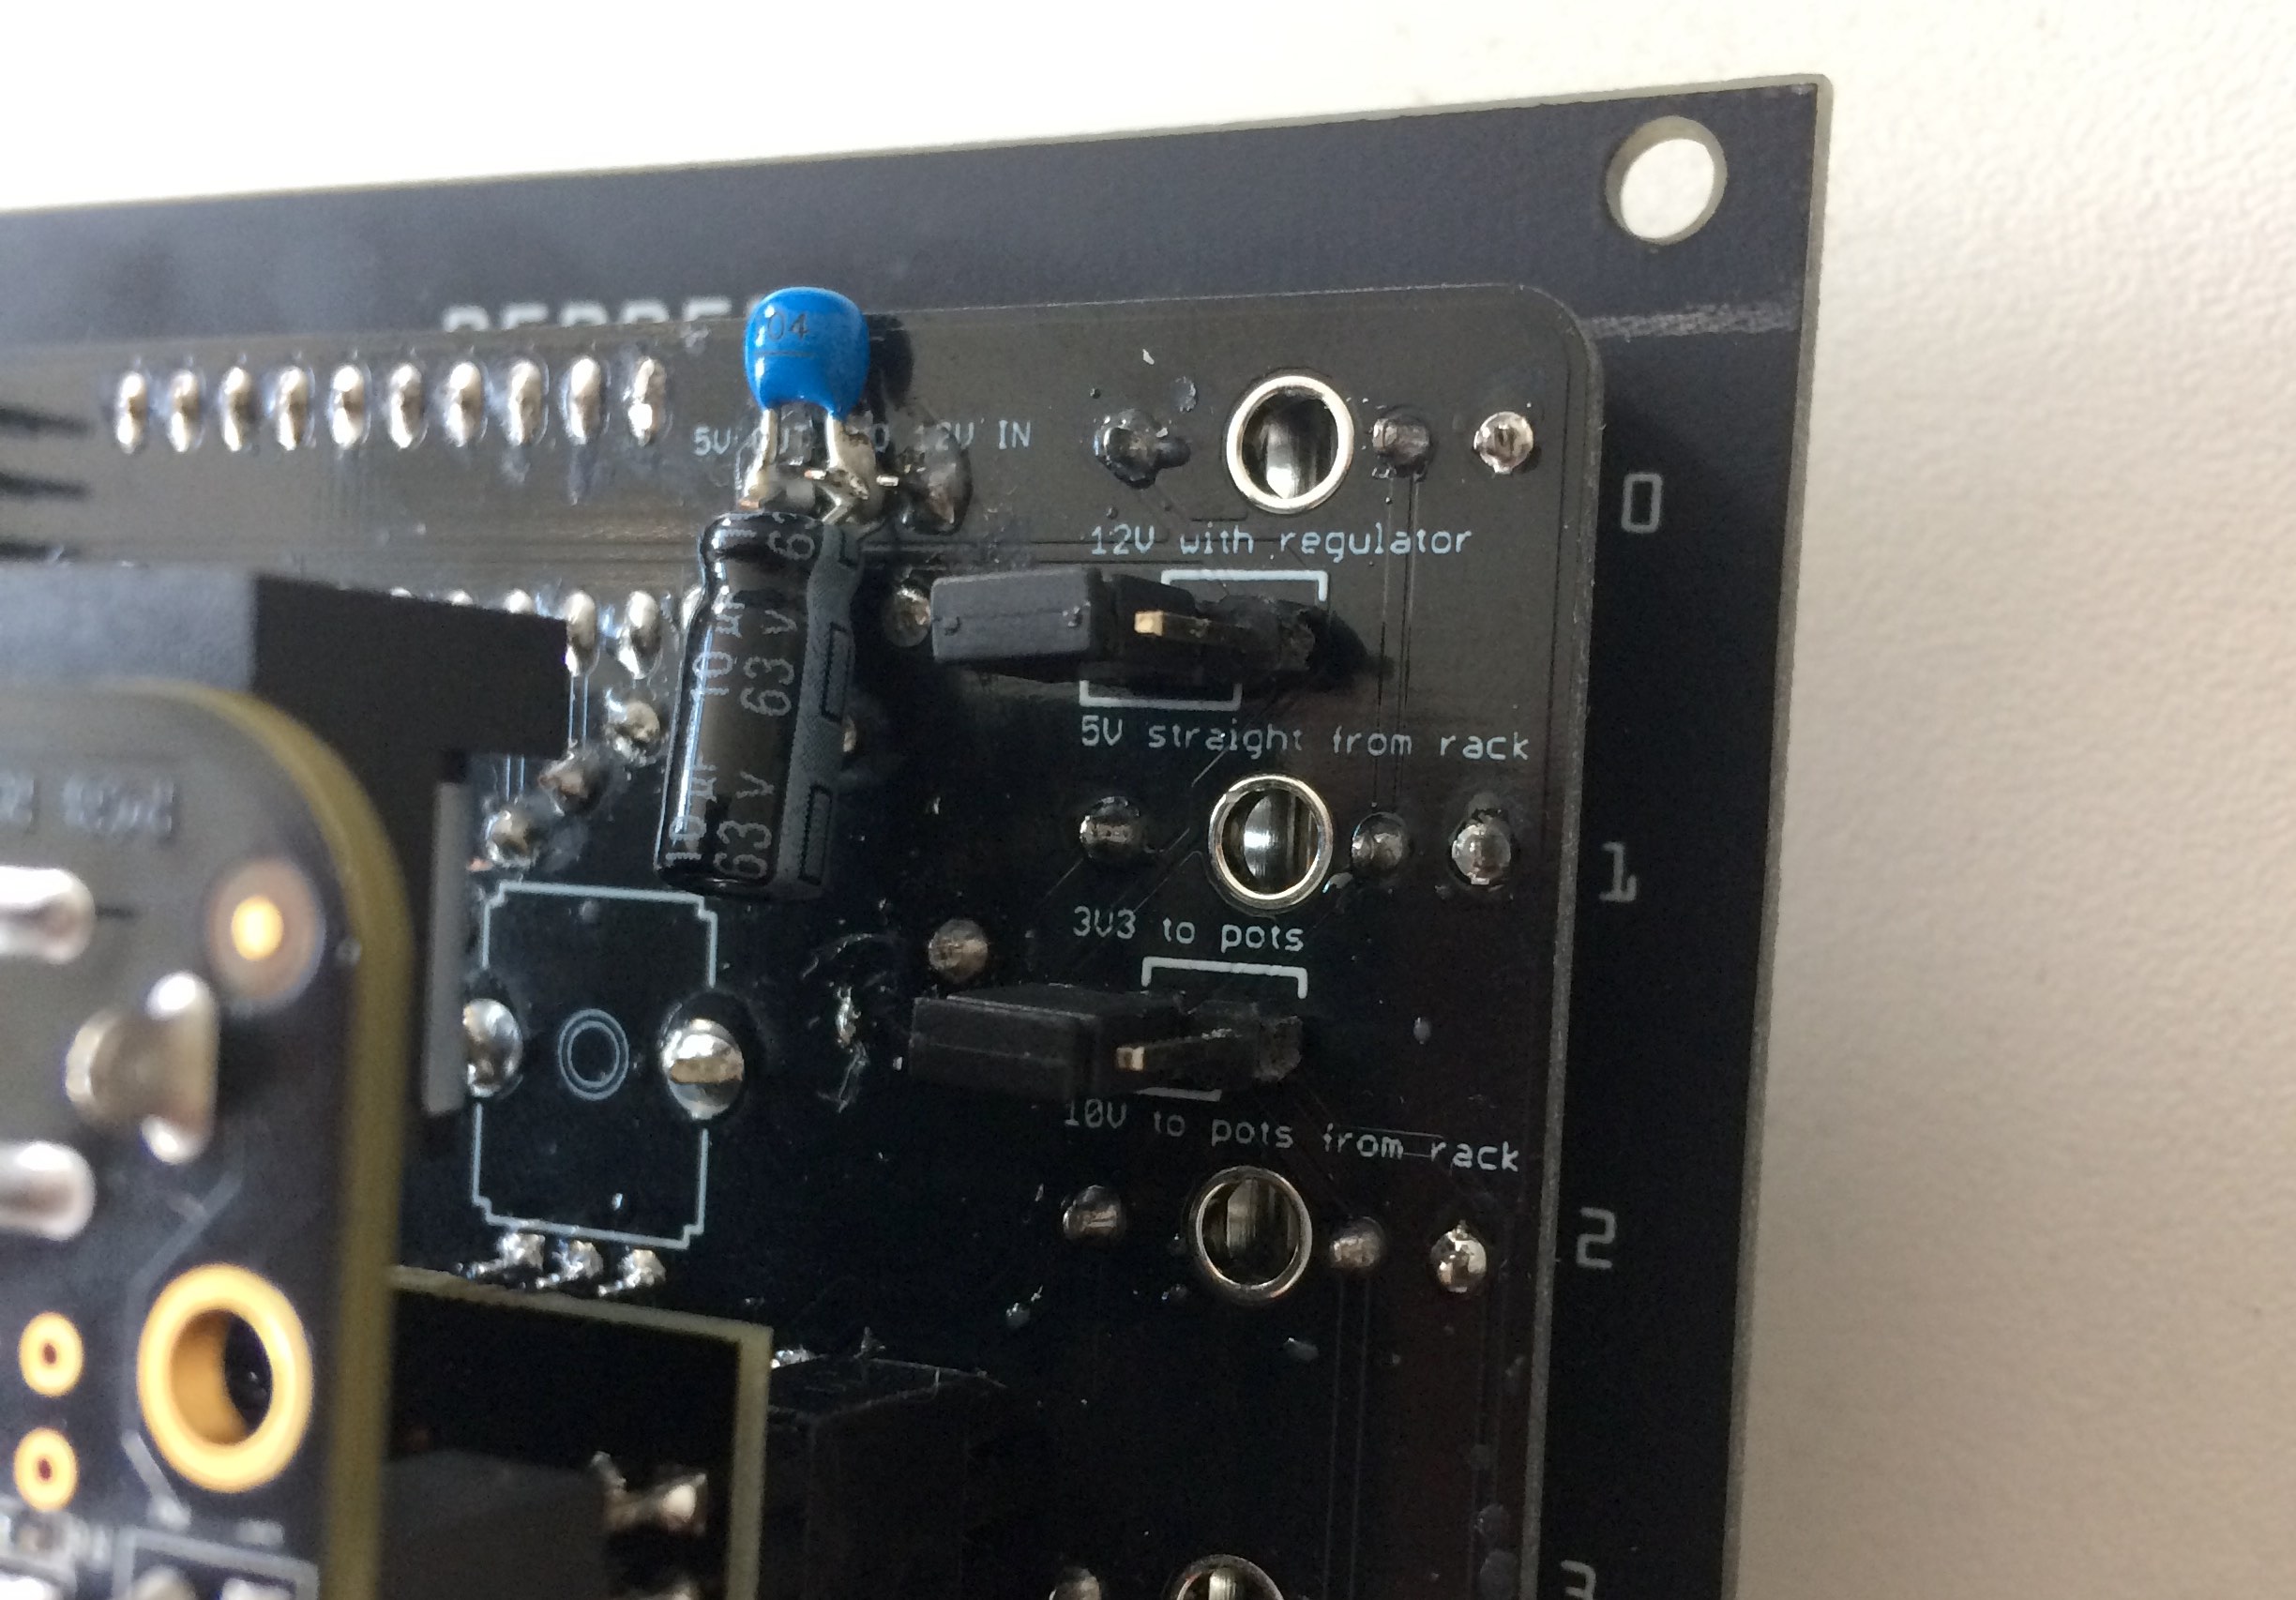
The first jumpers from the top set whether the board is powered from 12v from the Eurorack supply or 5V from the Eurorack supply. If you intend to power the board off USB alone then the position of the jumper is not important.
The second jumpers from the top decide which voltage source goes to the potentiometers when nothing is plugged into them i.e. the normalised voltage for the pots. When powering off the Eurorack 12V supply (recommended) this should be set to "10V to pots from rack" which will give you the full range at the analog input of Bela. If running from USB power alone then this should be set to "3V3 to pots". In this case you will need to multiply the reading by 3 in software to receive the full range from the pots.
On rev2 boards there is an additional set of jumpers which allow you to decide whether the audio output is direct from the Bela or amplified to a range of -5V to 5V. In order to use the amplified output you must be powering Pepper from your Eurorack supply. To use the amplified output you need to set two jumpers in the positions marked on the silkscreen.
In the default configuration the 8 pots act as attenuators for the 8 CV-in sockets before they are connected to Bela's analog inputs. These can optionally be re-configured so that up to 4 of the CV-in sockets are repurposed as trigger inputs, connected to Bela's digital inputs, while the corresponding pots are still controlling Bela's analog inputs.
This is selected through jumpers on the back of the PCB where each input can set to either "digital" for trigger inputs or "analog" for CV input.

Below this set of 4 pairs of jumpers there is also the I2C connections of Bela broken out to make it easy to connect additional hardware to the board.
Pepper's default configuration uses a 10-segment LED bar connected to Bela's digital outputs. This is great to visualise sequencer steps, levels and much more. Optionally this can be replaced by an array of 10 DIP switches. As the digital outputs can be repurposed as inputs in software, this would then act as 10 discrete digital controls into Bela. It is even possible to use as half and half, with 5 LEDs and 5 DIP switches.
In order to use the DIP switch it is necessary to enable the built-in pullup resistors on the Beaglebone.
To do this you just need to open up the IDE in a browser and in the console at the very bottom of the screen (you will see there is a small area where you can click and write commands next to where is says root@bela ~/Bela#) copy and paste the following and click enter.
sed -i "s/0x27\(.*INPUT_\)\(PULLDOWN\)/0x37\1PULLUP/" /opt/bb.org-overlays/src/arm/BB-BELA-00A1.dts;
rm -rf /opt/bb.org-overlays/src/arm/BB-BELA-00A1.dtbo;
make -C /opt/bb.org-overlays/ all install;
You will see a bunch of text printed to the console. Reboot the board via the Shutdown button in the IDE. When you reboot the board you will be good to go. Note that this means your digital inputs will now be default HIGH instead of default LOW.