-
-
Notifications
You must be signed in to change notification settings - Fork 53
Build Instructions
Flávio Freitas edited this page Sep 17, 2021
·
4 revisions
The building process is not trivial, so I'll guide you through the process and prevent the major caveats.
- Download Visual Studio Community 2019.
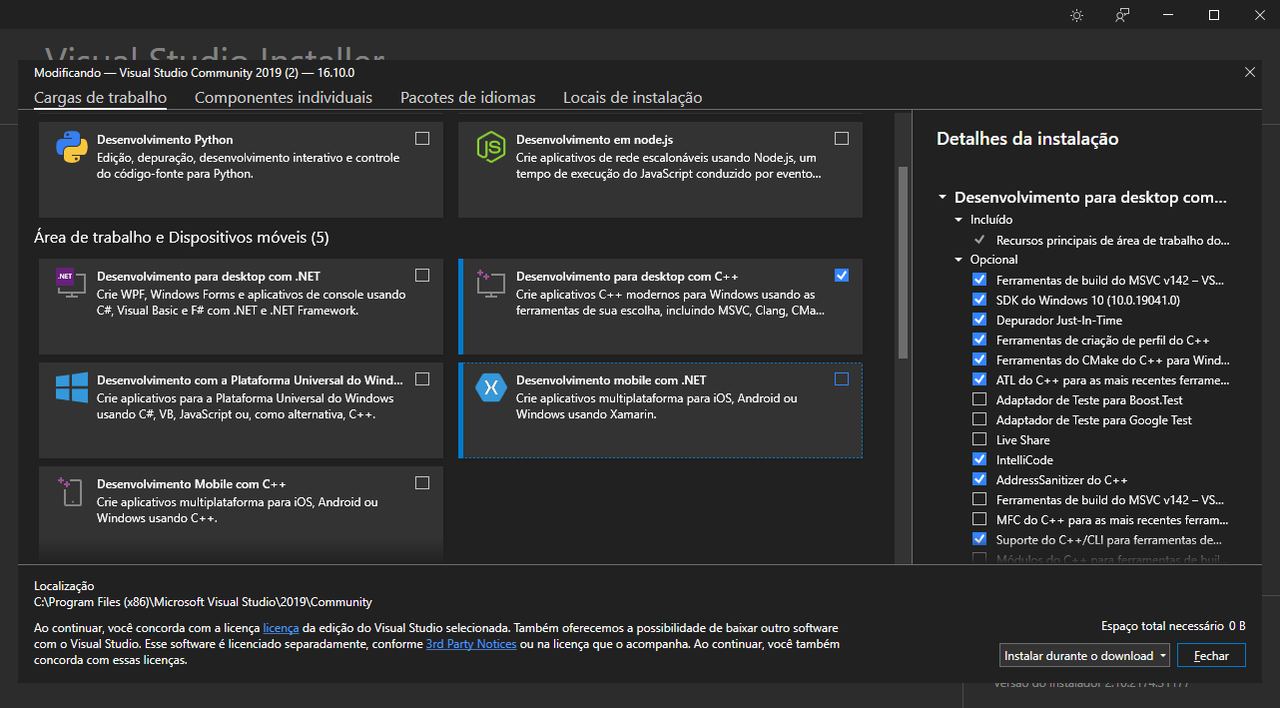
- Install the C++ development packages.
- Pay attention to the checkboxes at the right, you don't need all of them and you can save a lot of disk space by unchecking some of them. I can't tell for sure which ones are expressly required, but most of them are unimportant.
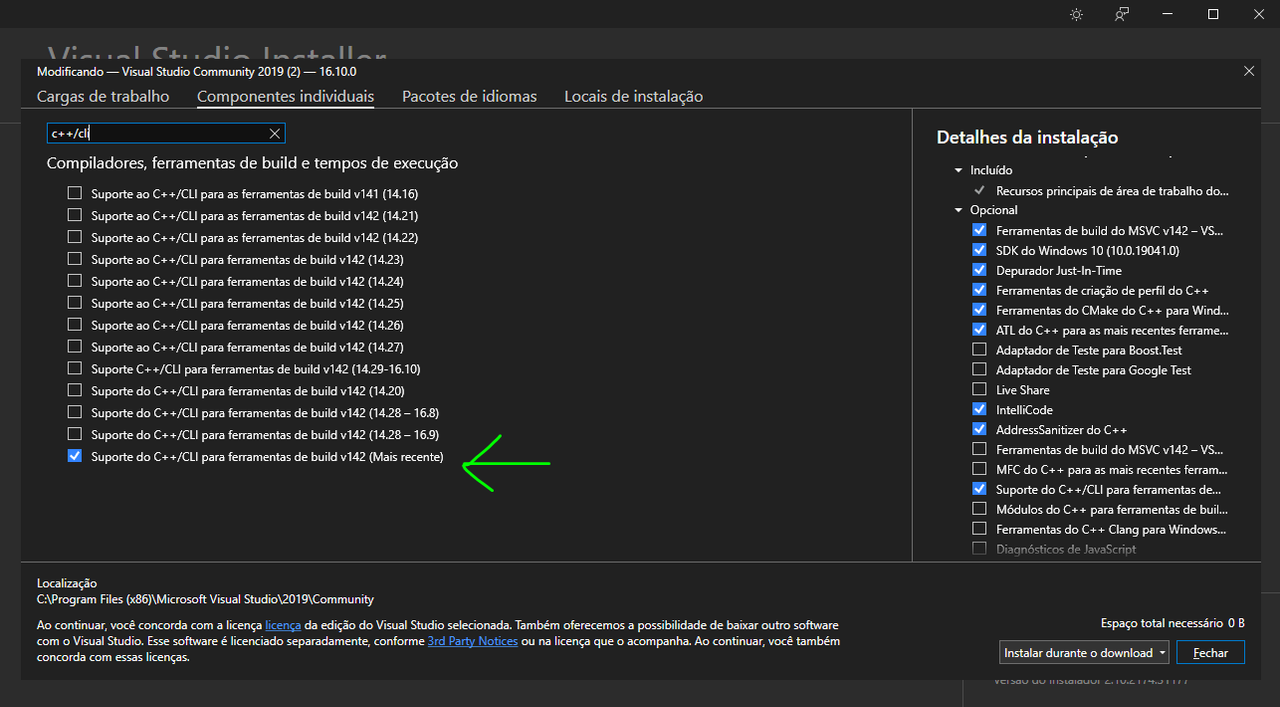
- You may need to install the C++/CLI build tools support package from the individual components tab.
- When applying the installation, I recommend that you pick the option to download all at once, and then install all at once. It seems faster that way.
- Clone this repository to some folder of your preference. Visual Studio generally uses the path {user folder}/source/. You can clone it by download and unzipping from GitHub or by using some version control app (I particularly use Fork).
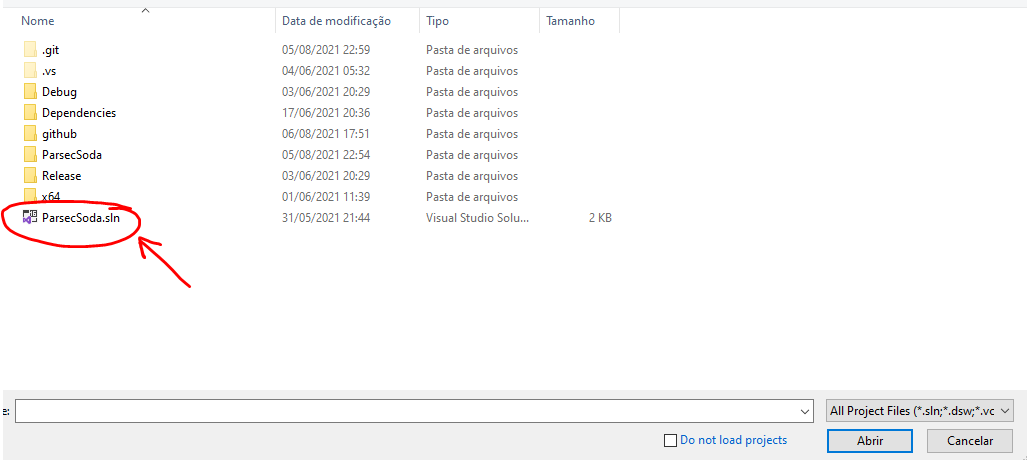
- Start Visual Studio 2019 and open the Project Solution.
- Now you must choose one of many paths, depending on the goals of your build. Your options are:
- Debug: intended for developers, creates a larger executable but that allows developers to inspect code flow.
- Release: intended for final use, creates a lightweight executable stripped from all unnecessary attachments.
- x64: For 64-bit Windows users.
- x86: For 32-bit Windows users.
Below, I list all possible executable directories:
| Build Goal | Folder |
|---|---|
| x64 Debug | /x64/Debug |
| x64 Release | /x64/Release |
| x32 Debug | /Debug |
| x32 Release | /Release |
- Choose your build options and hit "Build >> Build Solution" (or Ctrl + Shift + B), the folder of your choice will be created and the build MAY FAIL at first, but the directory will be created. Even if the build does not fail, when you try to run ParsecSoda.exe it will crash. And that is because you need to copy some dependencies to the executable folder.
Please note the first build may take a minute to complete.
- Below I list all of the dependencies you need to copy to the build folder to get the app working properly. Copy all of them to the root of your build folder:
| Dependency | File | Source | What is it for? |
|---|---|---|---|
| Parsec SDK dll | parsec.dll or parsec32.dll | /Dependencies/parsecsdk/windows/ | Prevents application from crashing, since everything related to Parsec SDK is built upon that dll. Copy parsec.dll if your system is x64. For 32 bits, copy parsec32.dll. |
| icons | The icons folder | /ParsecSoda/icons | Without this, ParsecSoda displays no icons, every button and image becomes blank. |
| fonts | The fonts folder | /ParsecSoda/fonts | Without this, all fonts and font sizes will be wrong, degrading user experience. |
| sfx | The sound effects folder | /ParsecSoda/sfx | These are standard sound effects. Without this, the app may crash when a sfx is played (e.g.: when blocking or kicking an user). |
-
This is how your final build folder should look like:
-
Now, build the project one more time just to be sure (Ctrl + Shift + B) and your executable should be good to go. Enjoy ParsecSoda.
- Home
- Build Instructions
-
FAQ
- My virtual gamepads won't connect!!
- How do I edit user preferences manually?
- How do I create custom sound effects?
- The volume of sound effects is too loud!!
- I have audio glitches.
- My window disappeared! I start ParsecSoda and nothing shows up anymore!
- Streaming copyright content
- Master of Puppets is getting blocked by the game I'm running.


