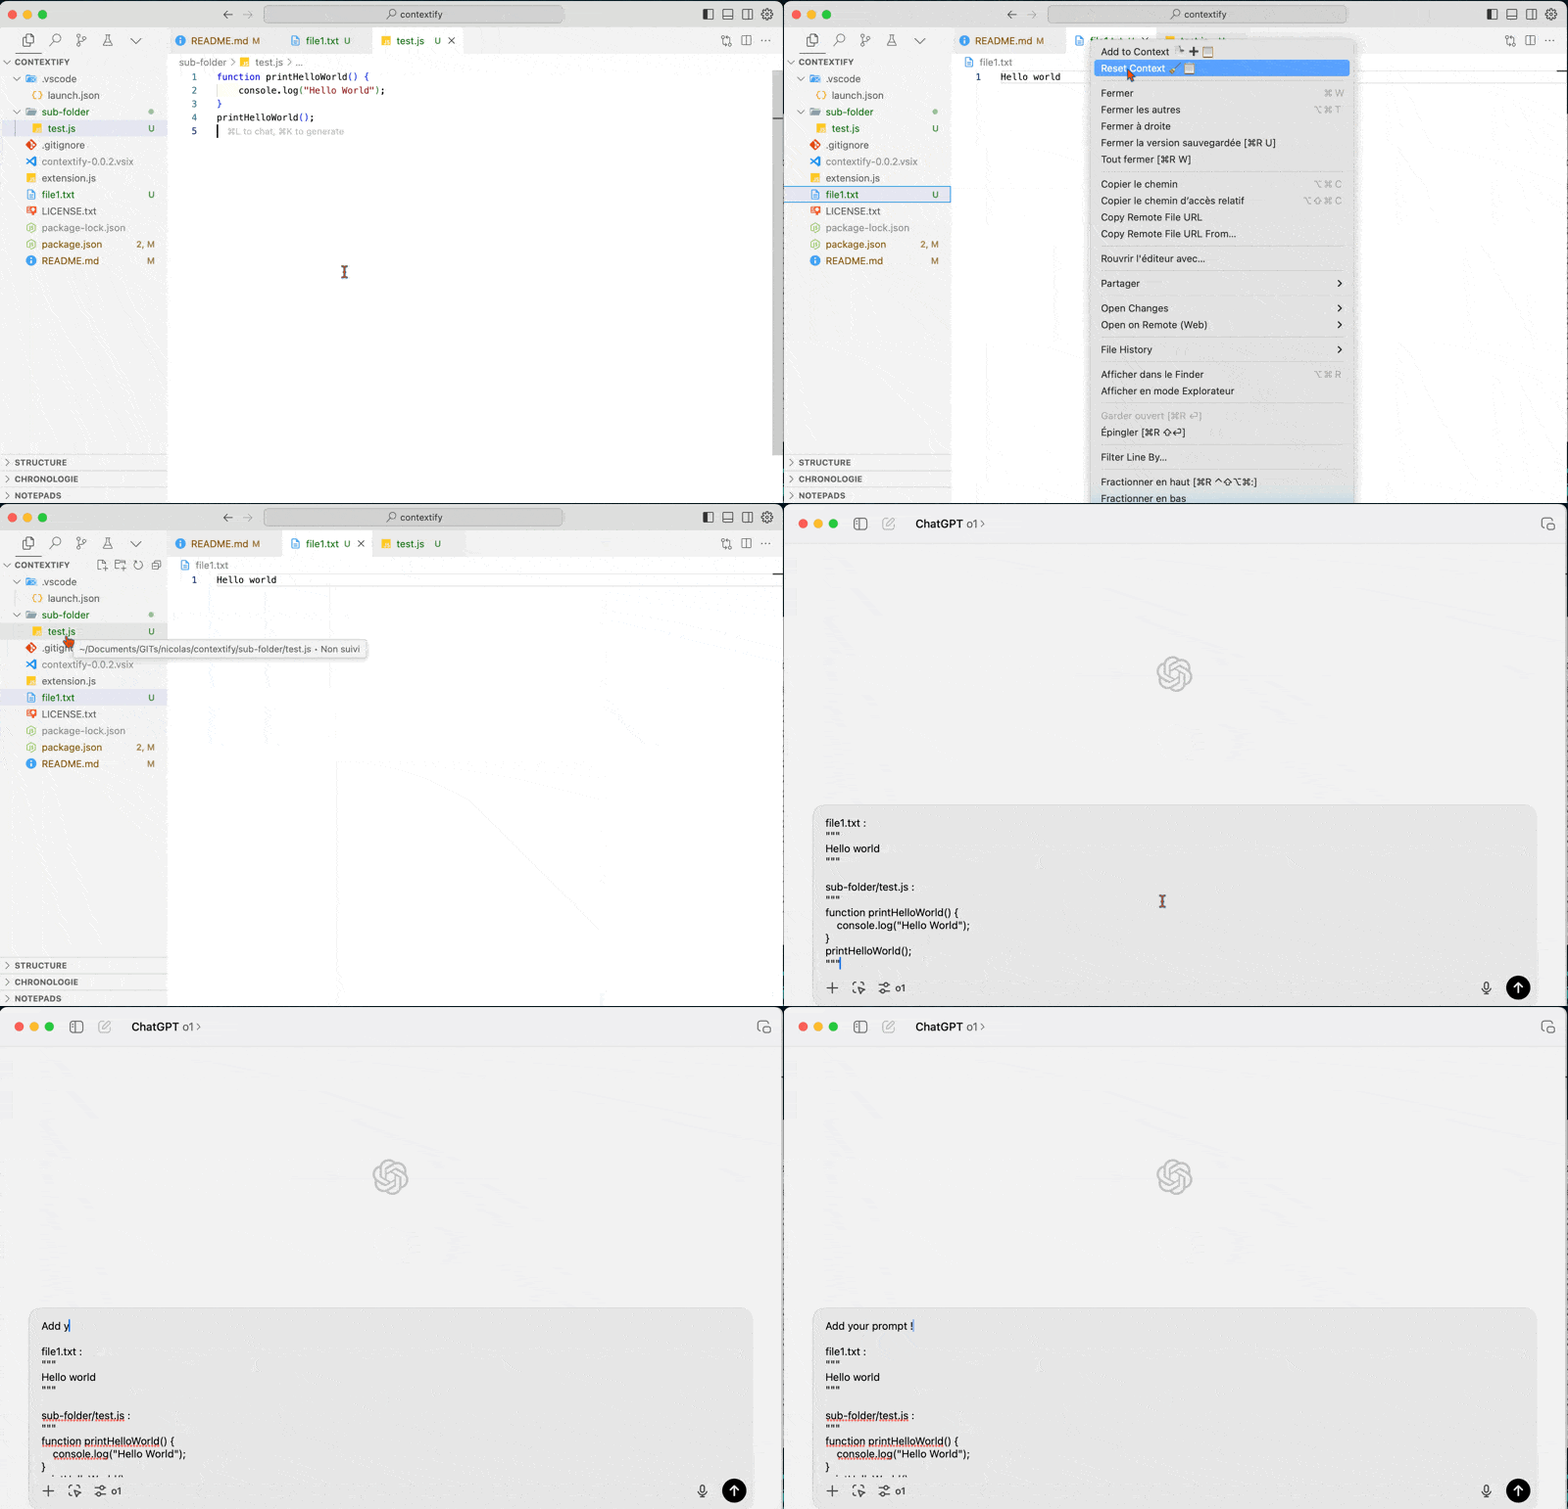
This extension adds a context menu item in the VS Code explorer and in the open file tab.
Select one or more files, right-click, then "Add to Context".
The extension will create a temporary text file containing the relative path of each file and its content between triple quotes.
The content is also automatically placed in the clipboard, ready to be used as context for an LLM.
-
Select Files:
- In the VS Code file explorer, select one or more files that you want to add to the context.
-
Add to Context:
- Right-click on the selection.
- Choose the option "Add to Context".
-
Result:
- A temporary text file is created containing the relative paths and the content of the selected files.
- The content is also automatically copied to your clipboard.
- Clone this repository.
- Open in VS Code.
- Launch the extension with F5.
If you want to share your extension without going through the VS Code Marketplace, you can create a .vsix file that other users can install manually.
- Node.js and npm installed.
- Install the
vscetool to package the extension:npm install -g vsce
-
Check the Information in
package.json:- Ensure that all necessary fields are filled (name, version, description, etc.).
- For example, add a
repositoryfield if it is not already present:"repository": { "type": "git", "url": "https://github.com/Nicolas-nwb/contextify.git" }
-
Generate the
.vsixFile:- In the terminal, navigate to your extension's folder.
- Run the following command to package the extension:
vsce package
- This will generate a file
contextify-0.0.1.vsix(the name includes the version defined inpackage.json).
-
Distribute the
.vsixFile:- Share the
.vsixfile with users via your GitHub repository, a website, or any other means of distribution.
- Share the
To install an extension from a .vsix file:
-
Download the
.vsixFile:- Make sure you have downloaded the
.vsixfile of the extension.
- Make sure you have downloaded the
-
Install via VS Code:
- Open VS Code.
- Go to the Extensions menu (
Ctrl + Shift + X). - Click on the three dots at the top right of the extensions view.
- Select "Install from VSIX...".
- Navigate to the downloaded
.vsixfile and select it. - The extension will be installed and available immediately.
