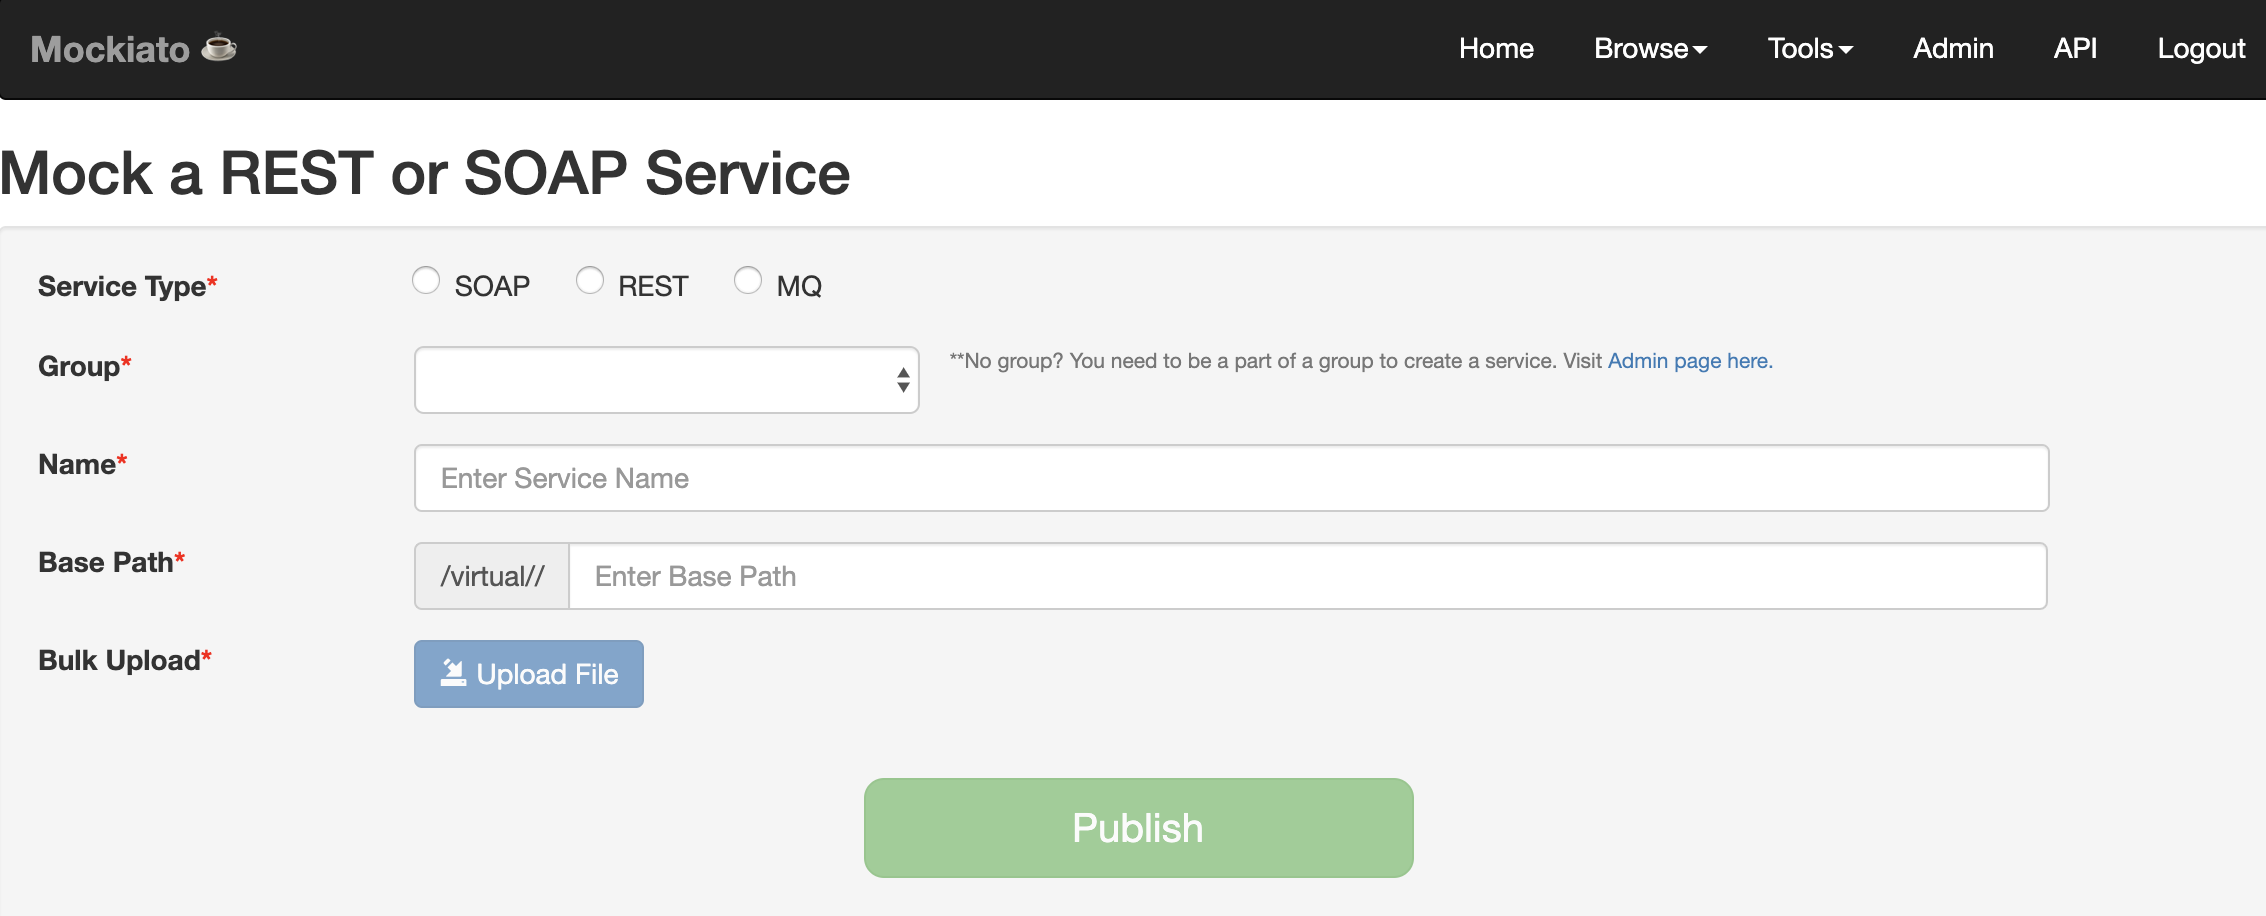
Bulk upload
- Using Firefox or Chrome browser navigate to https://mockiatoUrl/
- Enter credentials to log in to the application.
- Select the Bulk Upload button on the home page.
- Select the radio button that matches the service type you are going to upload.
- Select the group you wish to upload your file to from the Group dropdown menu.
- Enter the name you would like to use for this service in the Name field. Actual name of the service being virtualized and version number are recommended.
- If you are creating a SOAP or REST service, enter the base path in the base path field.
- Click the Upload File button and select the appropriate file from your computer.
-
File must be a zip file containing a request and a response file for each test case.
-
Request and response files can end in .txt, .json, or .xml file extensions but they must match.
-
Request files MUST end using –req preceding the file extension or Mockiato will ignore them.
-
Response files MUST end using –rsp preceding the file extension or Mockiato will ignore them.
-
Request and response pairs MUST have the same name prior to the –req or –rsp designation to be associated with one another.
-
If you are adding several test cases for a service you can use the same name and increment them numerically.
Ex. soapServiceV3-01-req.xml<br> soapServiceV3-01-rsp.xml<br> soapServiceV3-02-req.xml<br> soapServiceV3-02-rsp.xml<br> -
Select the Publish button.
-
You can locate your service by going to Browse->Services in the toolbar.
-