-
Notifications
You must be signed in to change notification settings - Fork 1
Building and using the dev container
The following instructions are best suited for Ubuntu.
You should already have Docker and VSCode with the remote containers plugin installed on your system.
If VSCode complains that docker cannot be run without sudo, run the following in terminal (from the Docker postinstall instructions).
sudo groupadd dockersudo usermod -aG docker $USERnewgrp docker
Now that you've cloned your repo onto your computer, you can open it in VSCode (File->Open Folder).
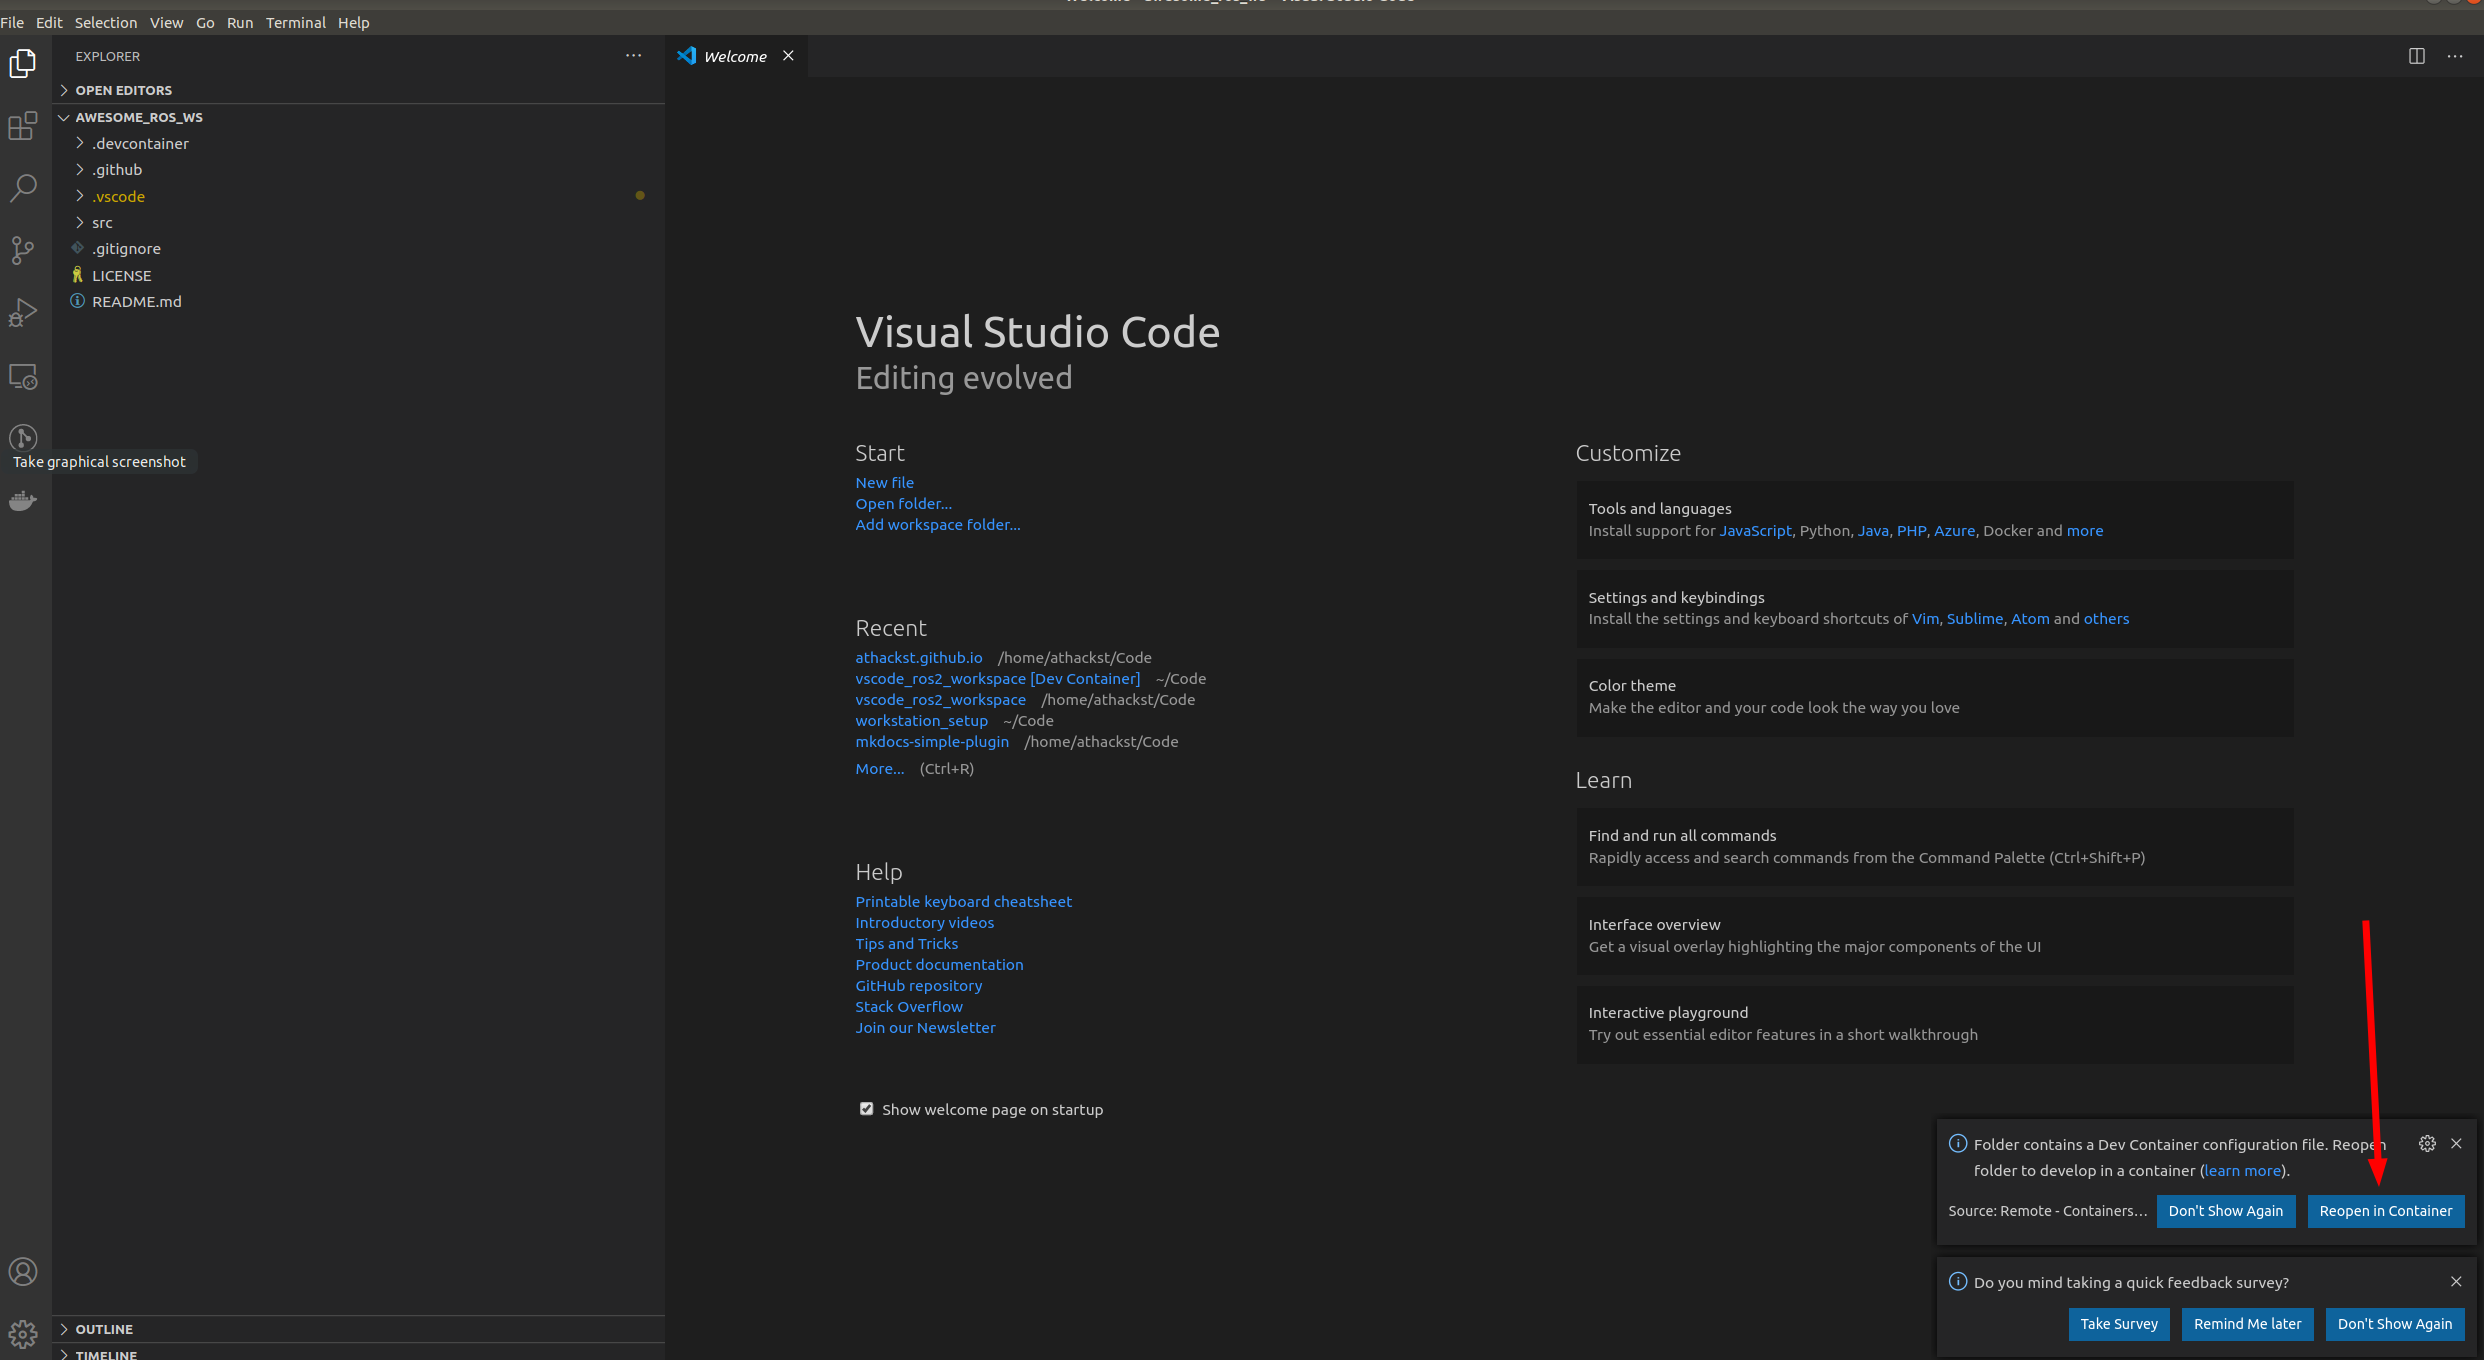
When you open it for the first time, you should see a little popup that asks you if you would like to open it in a container. Say yes!
- You may be prompted to install the dev container extension; if so, install it

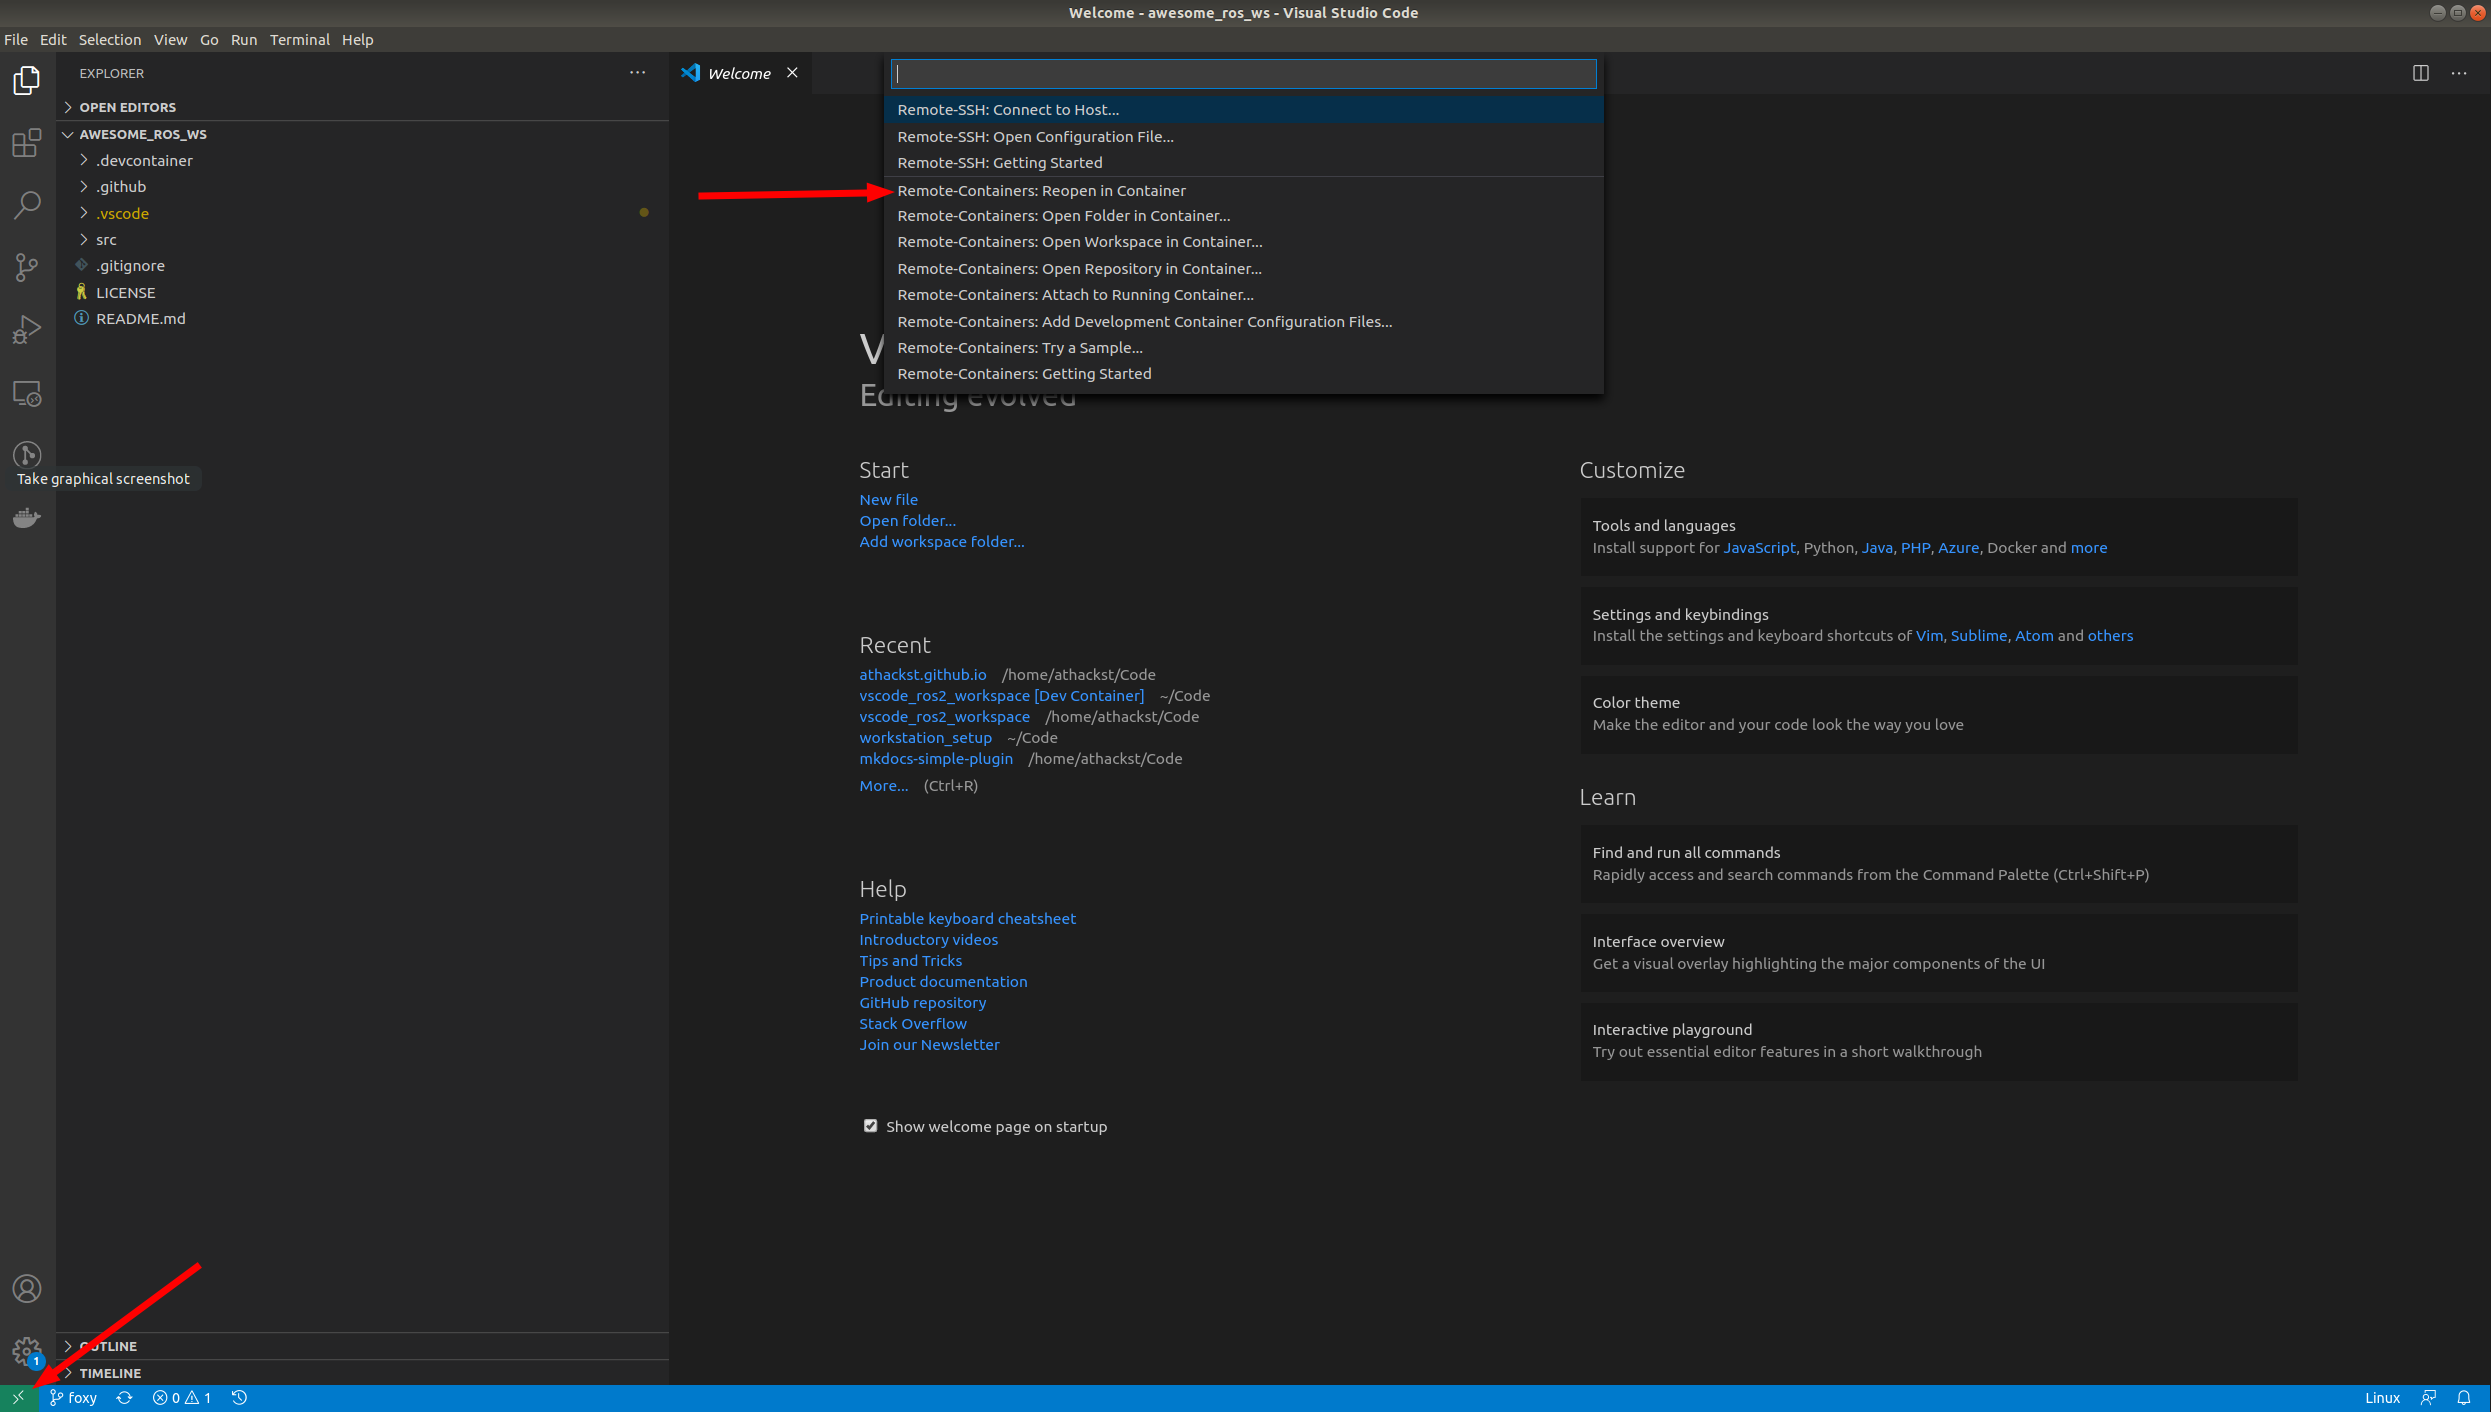
If you don't see the pop-up, click on the little green square in the bottom left corner, which should bring up the container dialog

In the dialog, select "Remote Containers: Reopen in container"
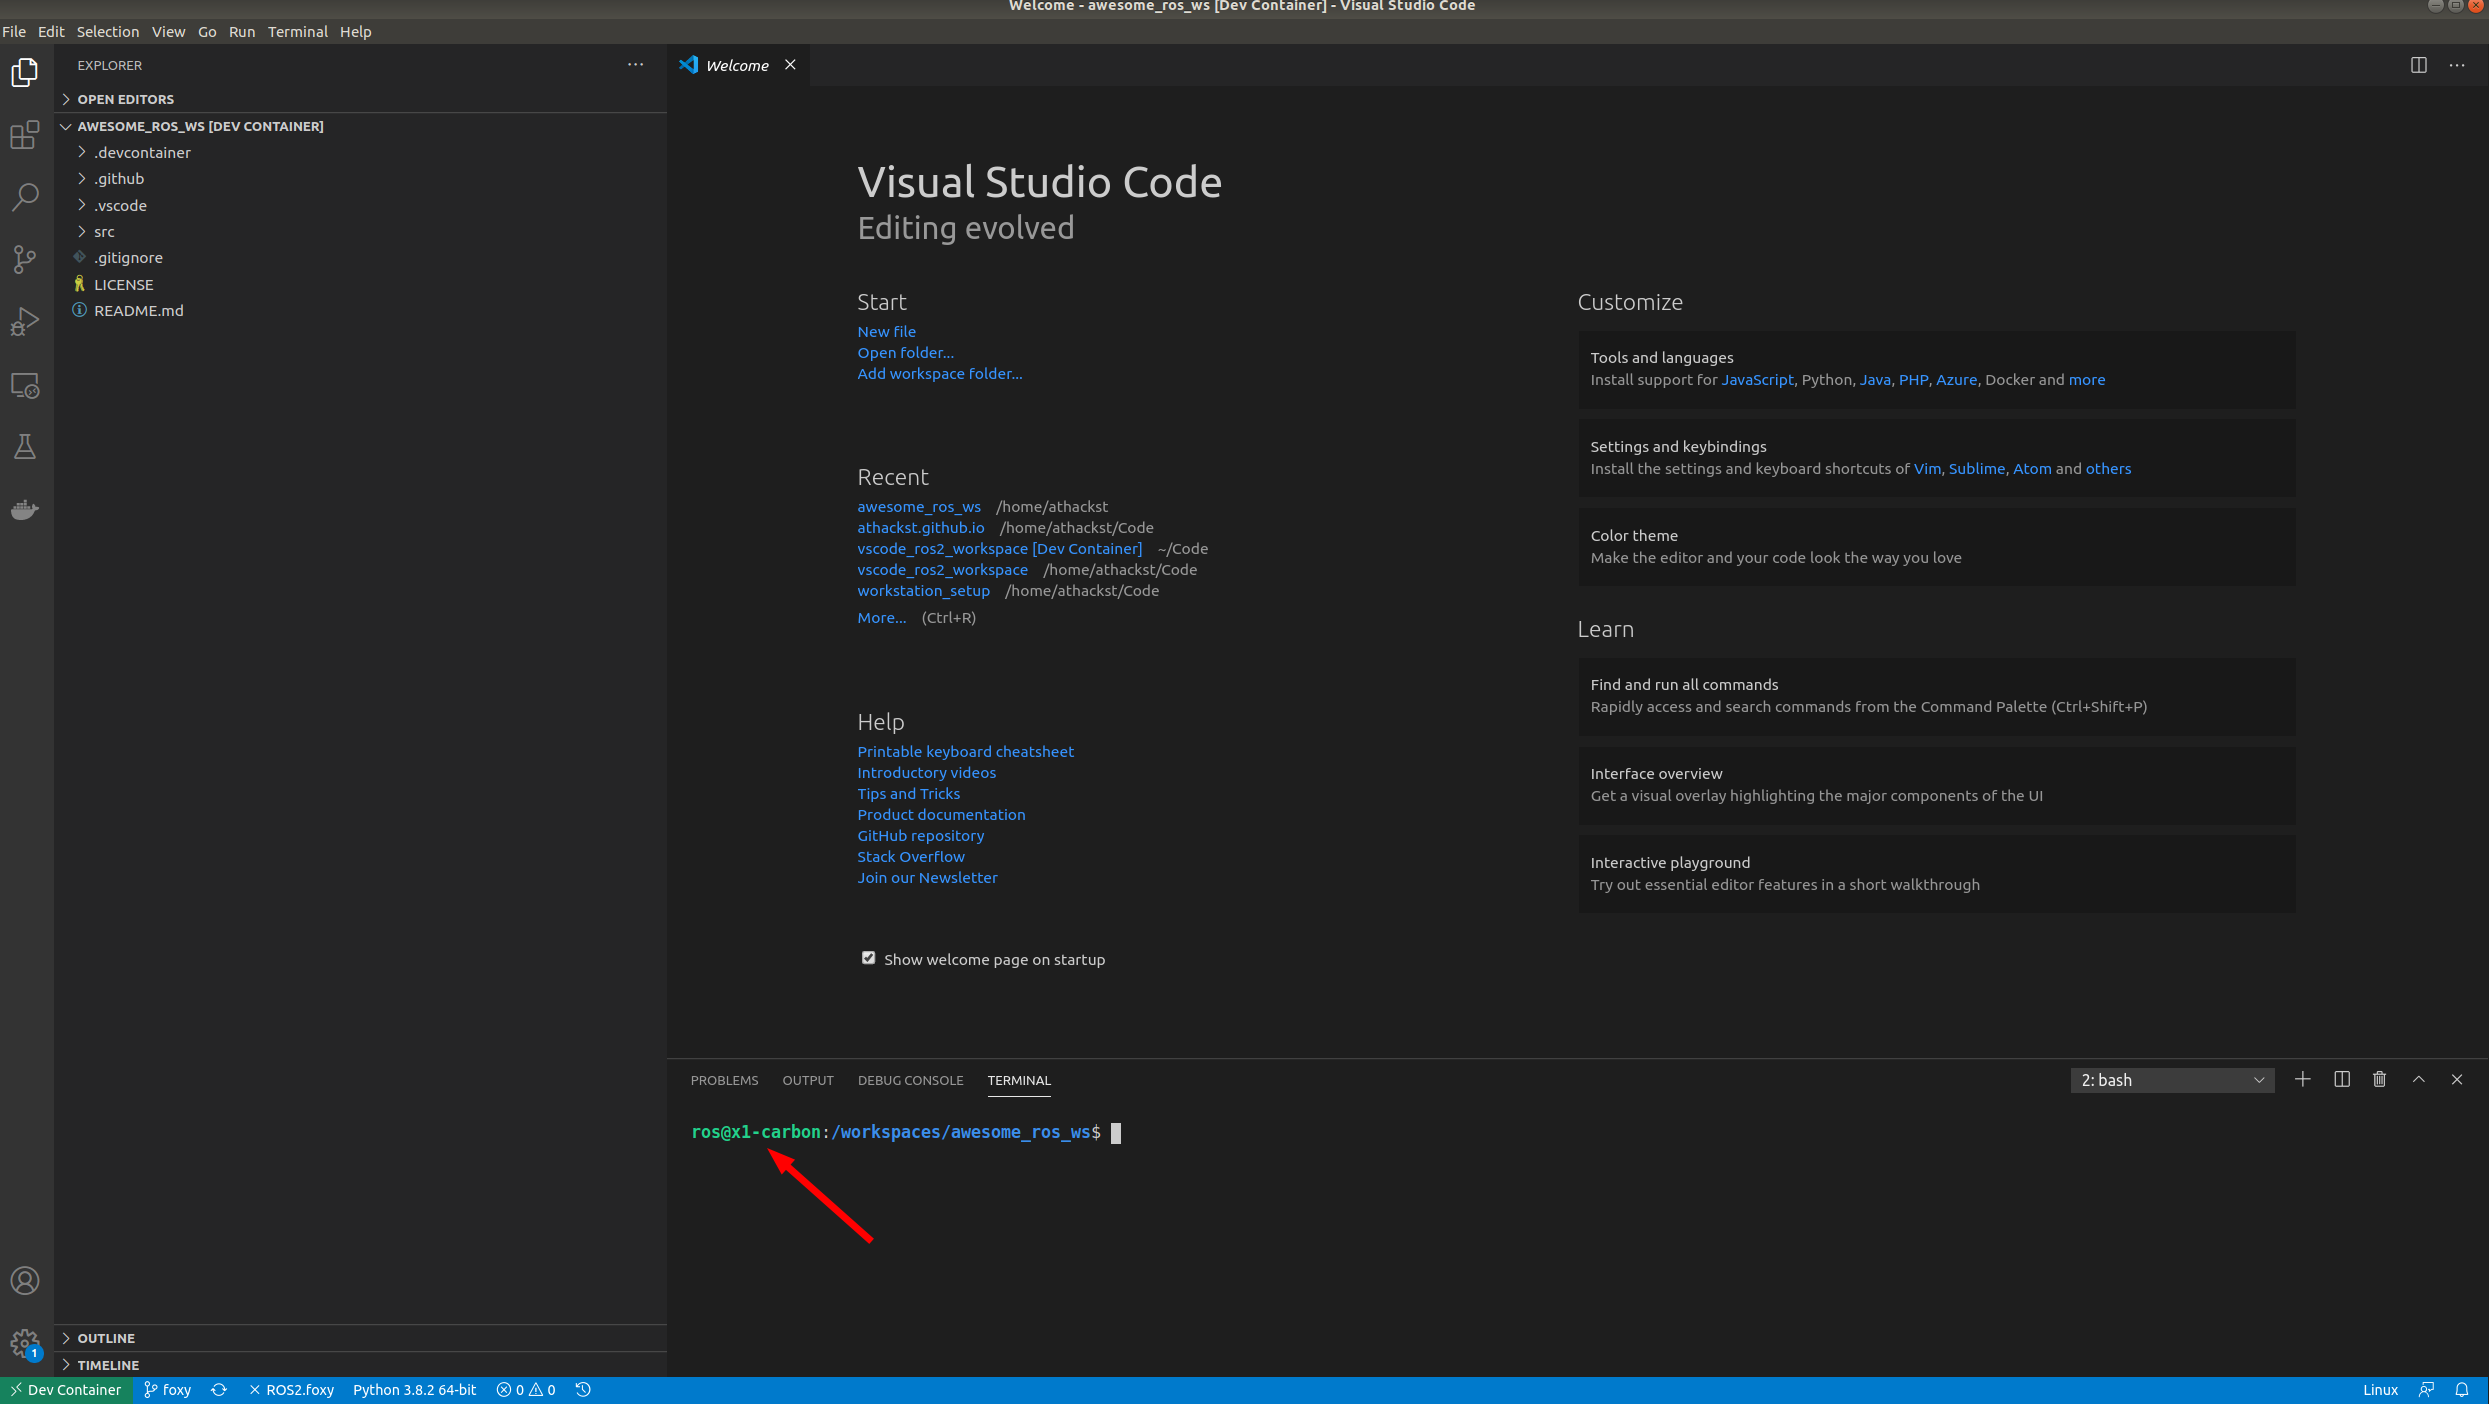
VSCode will build the dockerfile inside of .devcontainer for you. If you open a terminal inside VSCode (Terminal->New Terminal), you should see that your username has been changed to ros, and the bottom left green corner should say "Dev Container"

This is useful for avoiding broadcasting any messages to the network
Run sudo ip link set lo multicast on in terminal
- In
~/.bashrc, change the lineexport CYCLONEDDS_URI=/workspaces/ros2_tutorial/cyclonedds.xmltoexport CYCLONEDDS_URI=/workspaces/ros2_tutorial/cyclonedds_lo.xml - Run
ros2 daemon stop && ros2 daemon startin terminal