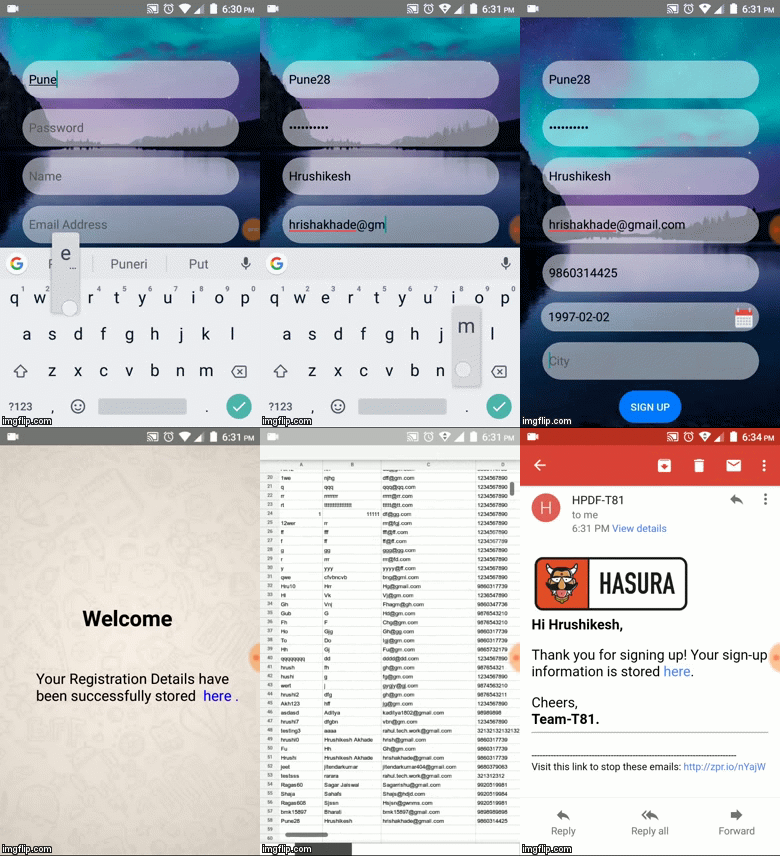
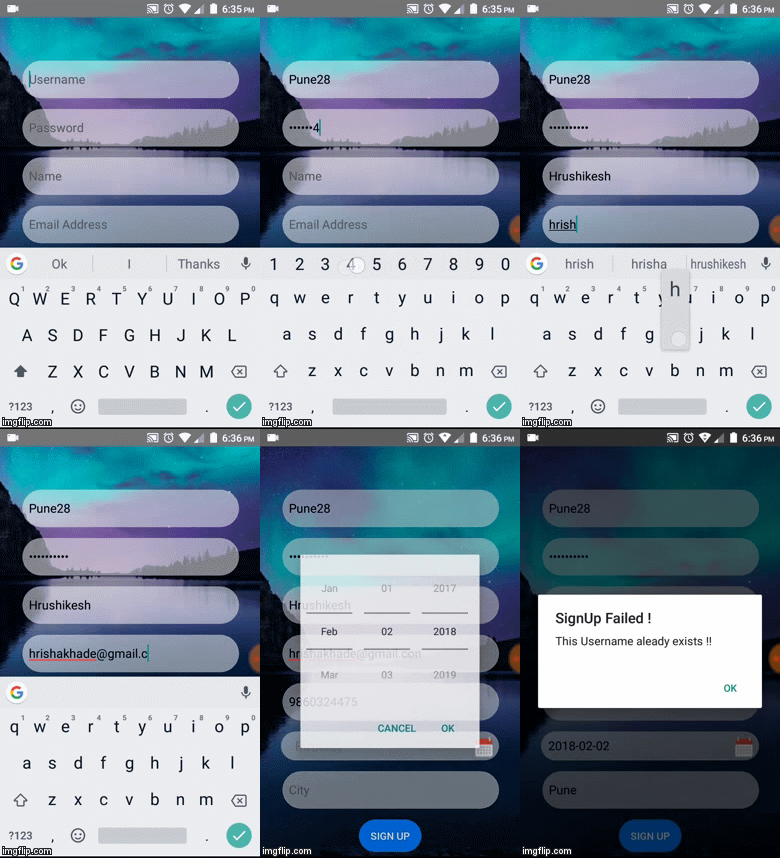
This app consists of a simple sign up form, which registers a user using the Hasura auth api. User data on sign up is stored on the hasura cluster database and also in a google sheet, if the sign up process fails appropriate message is displayed to the user.
The storage of the user data into google sheets is done using a Zapier-Zap webhook URL. The Zap also sends out a welcome-email to the signed up users.
The UI for the webapp is built using React JS and the backend is done using Python-Flask. This deployment also comes with a React-Native app which emulates the webapp and sends the requests to the same Flask server.
For the app to function we need a server that will receive the form data sent by the users, process this data and respond back to the user with state of the signup process.
-
Press the Clone & Deploy button above and follow the instructions.
-
The hasura quickstart command clones the project repository to your local system and also creates a free Hasura cluster where the project will be hosted for free.
-
A git remote (called hasura) is created and initialized with your project directory.
-
git push hasura masterbuilds and deploys the project to the created Hasura cluster. But before doing so, make the required changes mentioned in the later sections. -
The python-flask app is deployed as a microservice called app, and the react ui is deployed as a microservice called ui
-
Run the below command to open your app:
$ hasura microservice open app -
Run the below command to open your app:
$ hasura microservice open ui
-
Python Flask
- To make changes to the project, browse to
/microservices/app/srcand edit the respective files according to your requirements. - Commit the changes, and run
git push hasura masterto deploy the changes.
- To make changes to the project, browse to
-
React
- To make changes to the project, browse to
/microservices/ui/app/srcand edit the respective files according to your requirements. - Commit the changes, and run
git push hasura masterto deploy the changes.
- To make changes to the project, browse to
-
React-Native
- Go through this link to know how to work with the react-native app inside
/ReactNative.
- Go through this link to know how to work with the react-native app inside
-
Install python-3 and pip. (for local development)
-
Run
$ pip install -r requirements.txtto install all the dependencies.
-
Head to zapier.com
-
Sign up.
-
Click on
MAKE A ZAP!to make your own Zap :)-
The trigger will be
WebHooks Catch Hook -
Set this payload (replace the values with some inputs):
-
    {
        "name" :name,
        "birthdate" :birthdate ,
        "username" :username ,
        "email" :email ,
        "mobile" :mobile ,
        "city" :city
}-
The trigger is now complete. A webhook URL will be generated, which will be required in Step 2. Now an action will be triggered whenever a POST/GET request is made at the generated webhook.
-
Now for the action, choose Google sheets. Since we want to add user details as rows in a Sheet, click on
Create Spreadsheet Row. Create a Google sheet in your Drive and give its link to the zap. Set up the sheet row by providing which column takes which value, obtained from the step-1 payload. -
To send email to signed up users, add another action: Email. Choose
send outbound mailand choose the email field from step-1 as theTofield. Write a custom email as a welcome message to the users :) -
Turn on the Zap.
The server code is written in /microservices/app/src/server.py
Run hasura ms list to generate the list of microservices and their URLs for your cluster.
Replace the following URLs used in the server code with your own cluster's URLs and webhook URL.
- AUTH URL
def signup():
url = "https://auth.asthmatic70.hasura-app.io/v1/signup"- Data URL
url = "https://data.asthmatic70.hasura-app.io/v1/query"- Webhook URL- to be replaced by the webhook url obtained in step-1
zapPostURL = 'https://hooks.zapier.com/hooks/catch/2907826/8vw21h/' Commit the changes and push the commit to deploy your project to your cluster.
git commit -am "First commit"
git push hasura master
Folder structure
my-app


├── README.md


├── node_modules


├── package.json


├── .gitignore


├── public


│   └── favicon.ico


│   └── index.html


│   └── manifest.json


└── src


    └── App.css


    └── App.js


    └── App.test.js


    └── index.css


    └── index.js


    └── logo.svg


    └── registerServiceWorker.js


    └── assets


    │   └── css


    │   │   └── normalize.css


    │   └── img


    │       └── logo.svg


    │       └── bg.png


    └── components


        └── Layout.js


        └── Layout.css


        └── section


            └── Article.js


            └── Article.css


            └── form


            │   └── Signup.js


            │   └── Signup.css


            └── home


                └── Home.js


                └── Hoem.css
-
assetscontains the required files like css reset, images used in the project etc. -
componentdirectory contains the layout and other components of the app -
Layout.jsdefine the structure of the web page -
Article.jsis serving as a container for the other components -
Signup.jsis the signup form
Follow along for a step by step guide on developing this app
Head over to microservices\ui\app directory and execute the following command.
$ npm start
The above command will download all the required node modules for running the project. The modules used in this project are as follows :
-
Axios (For handling requests)
-
AntD (For User Interface)
-
React Modules
In order to change the POST request URL, go to the following directory and open the "Signup.js" file.
microservices\ui\app\src\components\sections\form\Signup.js
Inside this file, look at the 20th line which calls the axios post function. The POST url must be placed inside this function. You may change this according to your endpoint link.
$ npm install antd --save
This command will install ant design and save it to the package.json file.
To use some advance features provided by the ant design we need to configure it a bit, follow the official guide https://ant.design/docs/react/use-with-create-react-app
Reference APK Link: https://drive.google.com/folderview?id=1gZMLtFAaC0FSZbEw0matEdg8ku9nIC
- Node 4.x or better
- React Native for development
- Android SDK for Android development (optional)
- Android Lollipop or better for Android device testing (optional)
- Hasura cli
  >> npm install -g [email protected]

  >> npm install -g [email protected]

  >> npm install -g [email protected]
   >> git clone https://github.com/hrishiakhade/Zap_app.git

   >> cd Zap_app

   >> cd Zapier

   >> npm install

   >> npm install native-base --save

   >> npm install react-native-datepicker --save

   >> react-native link
     >> open ReactNative/Zapier/Zap.js
     >> Replace CLUSTER_NAME with your own hasura cluster from
        const DBUrl ="https://app.CLUSTER_NAME.hasura-app.io/signup"
'react-native run-android'
- Navigate to
https:\\ui.<your-cluster-name>.hasura-app.io\#loginin your browser


