Setup Guideline PyCharm
Firstly open the Github repository of the [at]-Python-template project.
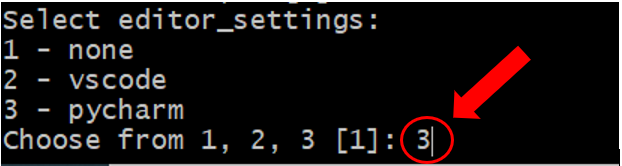
Now follow the instructions written in the README. Make sure to choose PyCharm as your code editor. If you accidentally chose the wrong setting, you have to repeat the whole process again.
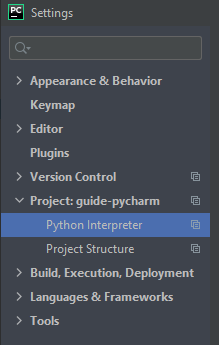
Open the directory of your project in PyCharm, go to the settings of your project and therein the "Python Interpreter" tab .
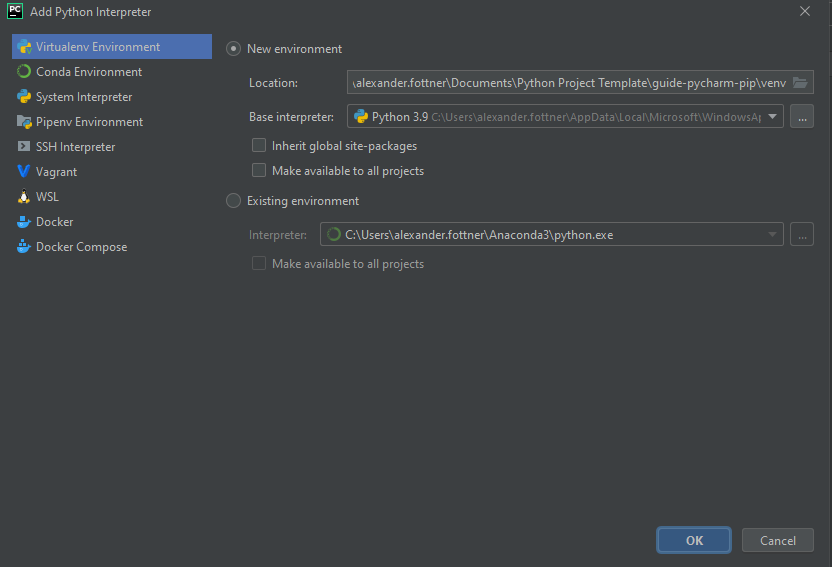
Click on the gear symbol on the top right and choose "Add...". Select the "New environment" option in the "Virtualenv Environment" tab, click on "OK" then "Apply" and "OK" again.
Now Pycharm automatically uses the created Virtualenv for your project. Since this environment is basically empty you have to lastly install all required packages. Therefore open a new terminal in PyCharm or just use the one from before and run:

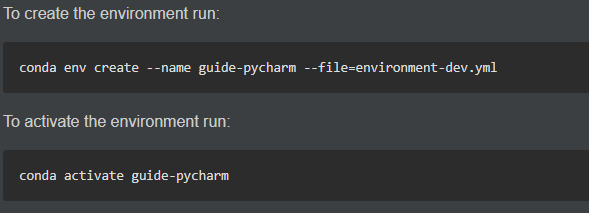
If you chose conda, you have to follow a different path. Therefore just open the folder structure without creating any new virtual environment. Open a new terminal inside PyCharm or use the one from before. Then open the README and follow the steps described therein.
As next step you have to ensure that PyCharm uses the proper Python interpreter and environment (the one you just created). To accomplish this you have to go to the settings of your project and therein the "Python Interpreter" tab (same as for pip).
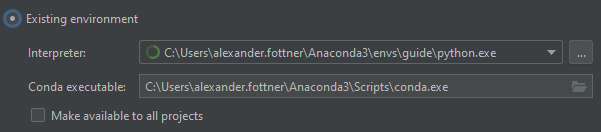
Then click on the gear symbol on the top right and click on "Add..". Then go to the Conda Environment tab and choose the "Existing environment option" and browse to the directory where the Python executable of your conda environment is stored. Afterwards click on "OK". Now PyCharm should use the proper interpreter for your project.
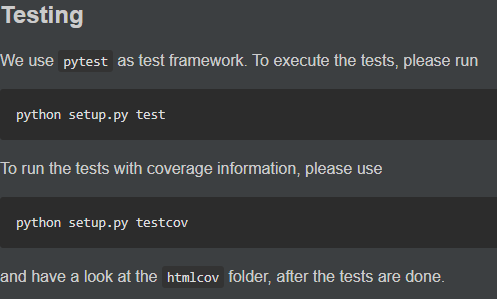
As next step you should run the tests to ensure everything went right. To do that you have two options. The first one is to run the tests in a terminal as described in the README:
The second option is to run the tests inside of PyCharm by clicking on the green play buttons besides each test.

Now run the pre-built tests to check if everything went right. If so, you can move on to the last part of this guideline, enabling the use of Jupyter.
If you want to use Jupyter Notebooks within your project, you have to firstly install the required Jupyter packages and add them to the specific requirements files.
Then run "pip install -e ." from your projects directory (same level as your setup.py) in your terminal. This makes sure that you don't run into any import errors within your notebook.
To actually use a notebook you have two options.
First option: Open the Notebook within your project environment by running "jupyter notebook" in your internal terminal and browsing to your file. This ensures that your kernel uses the correct Python interpreter.
If you prefer to run all your Notebooks from a separate environment, you have to follow a different path.
Second option: Make your project specific virtual/conda environment available as a separate kernel by running (replace pip with conda if you use a virtual environment):

Please substitute your environment name for “guide_pycharm”.
This enables you to use your virtual/conda environment in a notebook which has been opened from a different environment.
Congrats you’ve worked through the guideline of the Python project template by [at]!
We wish you happy developing! 😊