-
Notifications
You must be signed in to change notification settings - Fork 1
User Guide
When using GazeMonitor it is advisable to follow the steps in the order as listed below. After starting the tool, main window will be shown. Click "Start" to start the tracking. If everything works, LED lights on the tracker will be turned on.
Main window will show calculated deviation angles, but these values are unreliable before tracker is properly calibrated.
For best results, it is advisable to place the subject's head in the middle of the "trackbox". This can be done by clicking Tools -> Trackbox Viewer.
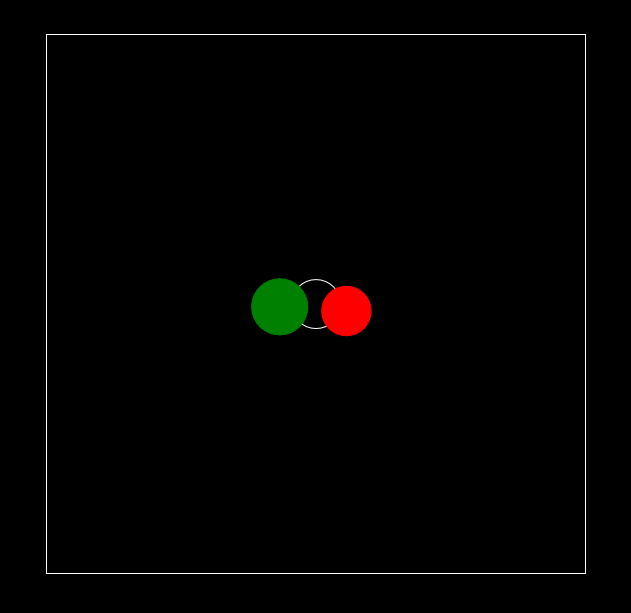
The following (or similar) image will be displayed:

Red circle represents right eye position, and green circle represents left eye position relative to the tracker. Size of the circle represents distance from the tracker (z axis). Non-filled circle in the middle represents position in the center of the trackbox. To position the head in the center, locate red and green circle near the center so their size closely matches the size of the center circle (like displayed on the image).
Note: Red = Right eye and Green = Left eye is used as a general convention in GazeMonitor.
Here is also a good opportunity to test if eye tracker can track eyes individually. By covering one eye with the hand (or other non-transparent object), the circle representing that eye should disappear from the screen while the other is still shown. If both circles disappear, it means eye tracker can't track one eye only. This issue was found with Tobii REX.
After the head is positioned, calibration process can be started with "Calibration -> New...".