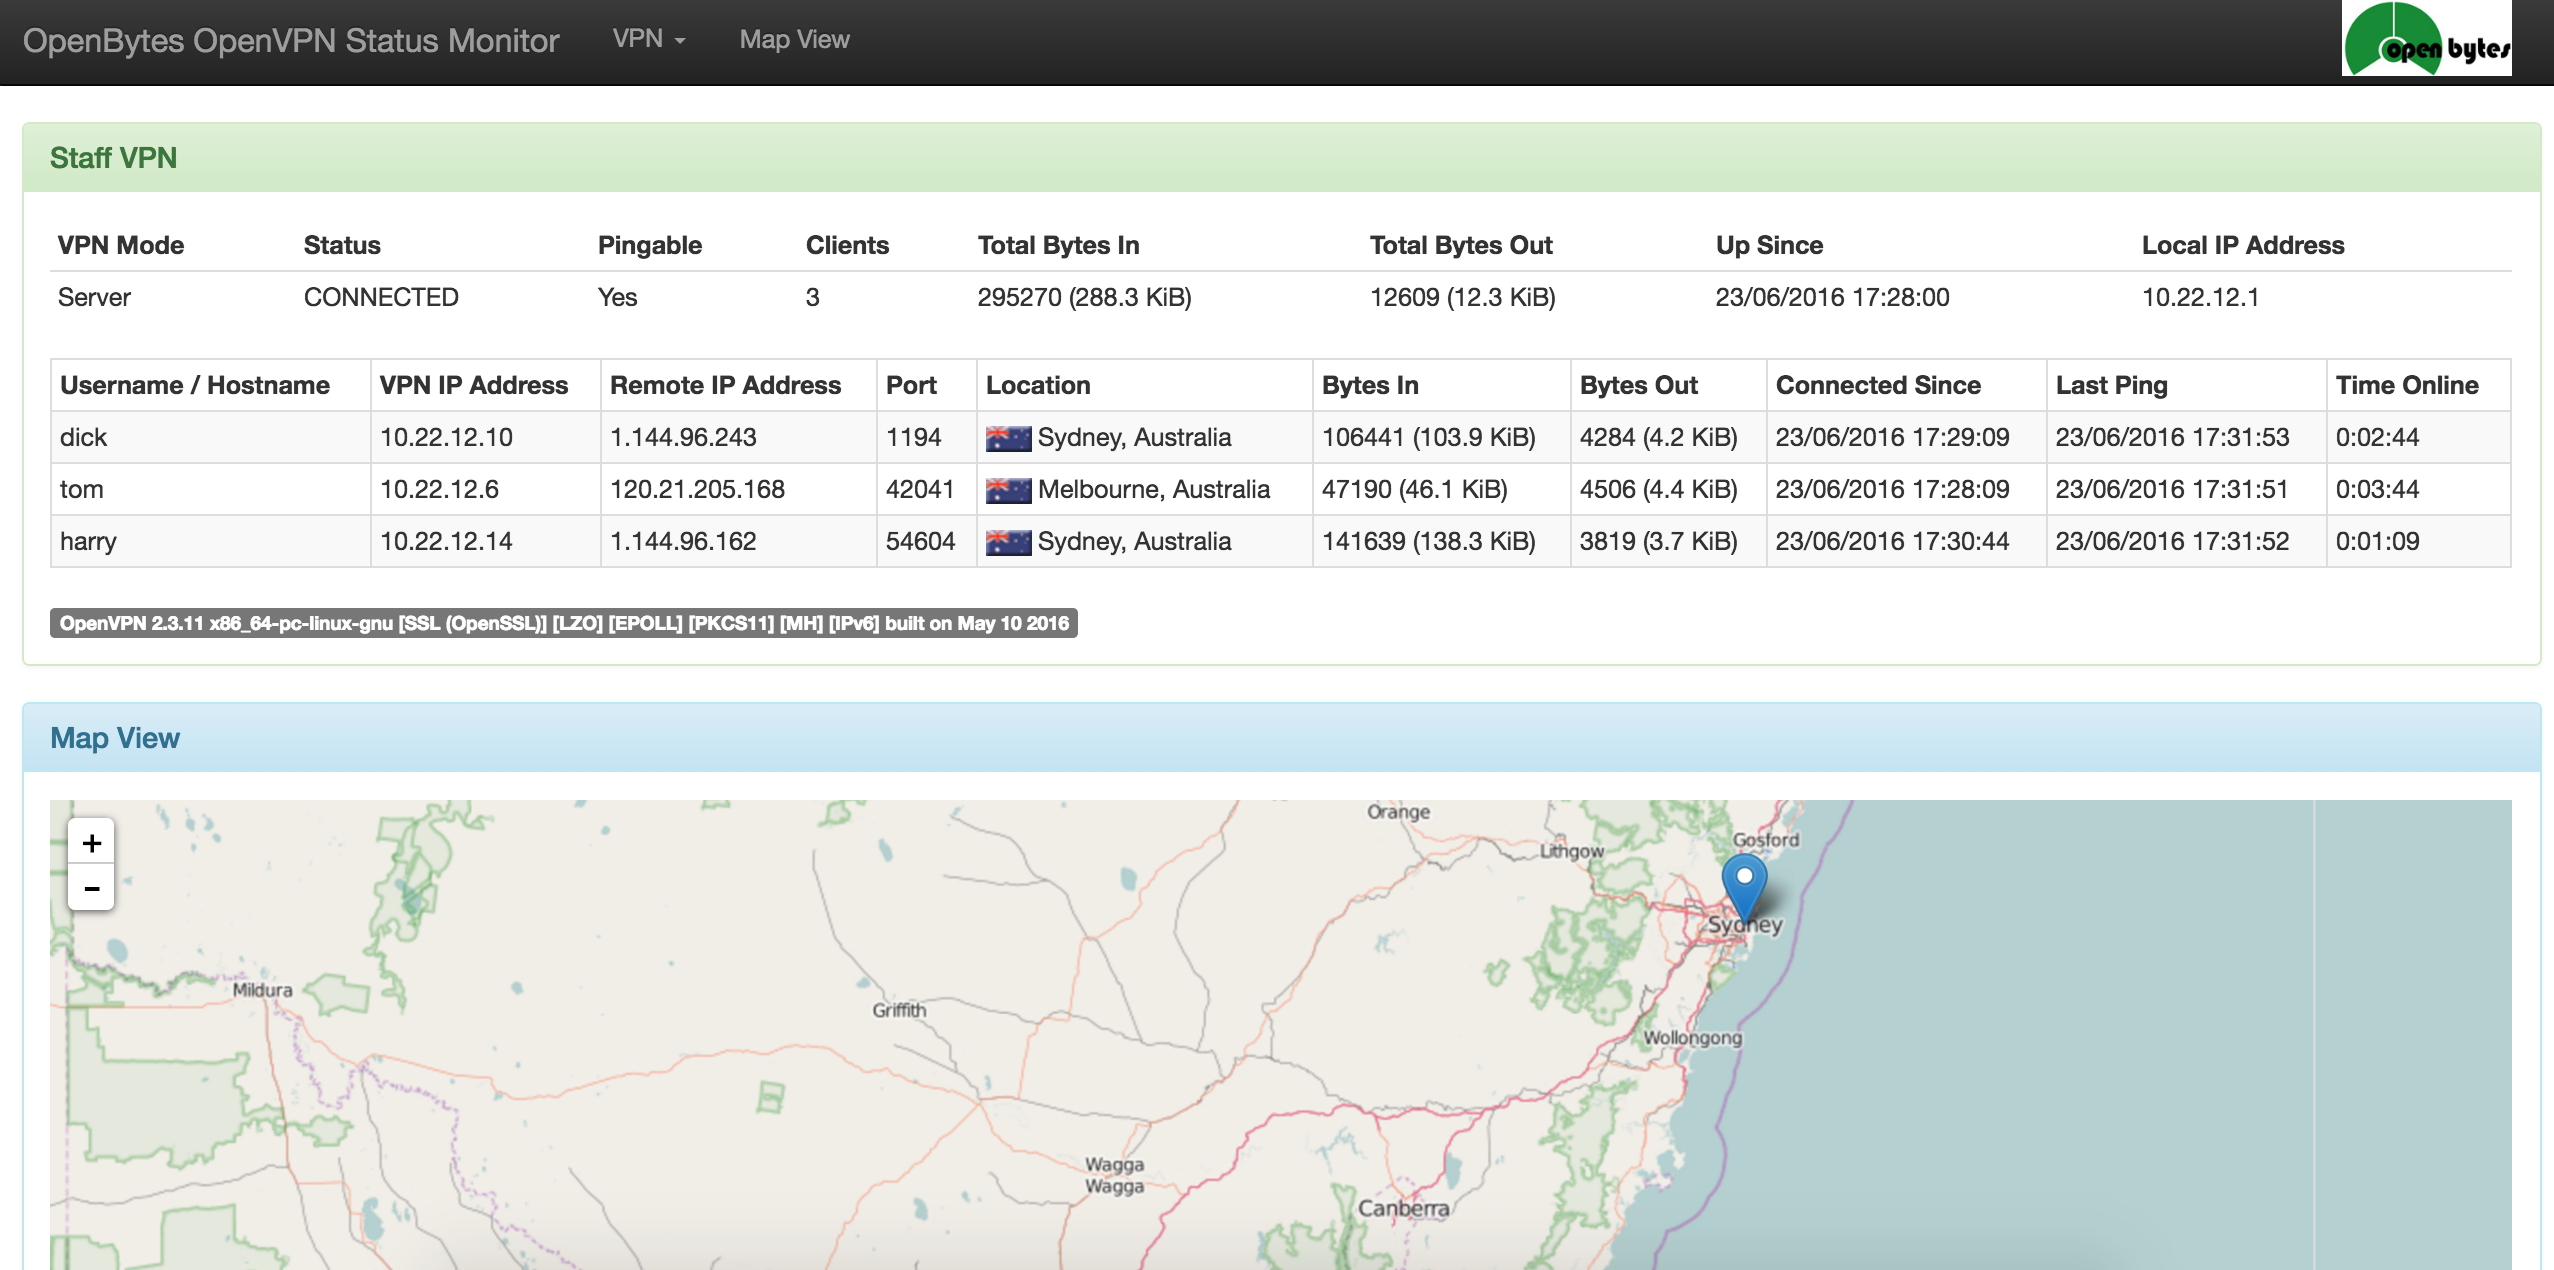
openvpn-monitor is a flask app that displays the status of OpenVPN servers, including all current connections. It uses the OpenVPN management console. It typically runs on the same host as the OpenVPN server, but it can also manage remote servers.
- Ubuntu 24.04 LTS (noble)
- Debian 11 (bullseye)
- CentOS / Rocky / Alma / RHEL 9
N.B. all CentOS / Rocky / Alma / RHEL instructions assume the EPEL repository has been installed:
dnf -y install epel-release
dnf makecache
If selinux is enabled the following changes are required for host/port to work:
dnf -y install policycoreutils-python-utils
semanage port -a -t openvpn_port_t -p tcp 5555
setsebool -P httpd_can_network_connect 1
Checkout the code:
cd /var/www/html
git clone https://github.com/furlongm/openvpn-monitor
cd openvpn-monitor
yarnpkg --prod --modules-folder openvpn_monitor/static/dist install
python3 -m venv .venv
. venv/bin/activate
pip install -r requirements.txt
Run the development server in debug mode:
flask --app openvpn_monitor/app run --debugcurl -sS https://repo.openbytes.ie/openbytes.gpg > /usr/share/keyrings/openbytes.gpg
echo "deb [signed-by=/usr/share/keyrings/openbytes.gpg] https://repo.openbytes.ie/openvpn-monitor/ubuntu noble main" > /etc/apt/sources.list.d/openvpn-monitor.list
apt update
apt -y install python3-openvpn-monitorcurl -sS https://repo.openbytes.ie/openbytes.gpg > /usr/share/keyrings/openbytes.gpg
echo "deb [signed-by=/usr/share/keyrings/openbytes.gpg] https://repo.openbytes.ie/openvpn-monitor/debian bookworm main" > /etc/apt/sources.list.d/openvpn-monitor.list
apt update
apt -y install python3-openvpn-monitorcurl -sS https://repo.openbytes.ie/openbytes.gpg > /etc/pki/rpm-gpg/RPM-GPG-KEY-openbytes
cat <<EOF >> /etc/yum.repos.d/openvpn-monitor.repo
[openbytes]
name=openbytes
baseurl=https://repo.openbytes.ie/openvpn-monitor/el9
enabled=1
gpgcheck=1
gpgkey=file:///etc/pki/rpm-gpg/RPM-GPG-KEY-openbytes
EOF
update-crypto-policies --set DEFAULT:SHA1
dnf -y install epel-release
dnf makecache
dnf -y install python3-openvpn-monitorSee configuration for details on configuring openvpn-monitor.
These instructions assume a source checkout to /var/www/html/openvpn-monitor
apt -y install git apache2 libapache2-mod-wsgi-py3 python3-geoip2 python3-humanize python3-flask python3-flaskext.wtf python3-semver yarnpkg
cp /var/www/html/openvpn-monitor/etc/openvpn-monitor/apache.conf.example /etc/apache2/conf-available/openvpn-monitor.conf
sed -i -e "s#^\(Define openvpn_monitor_pythonpath\).*#\1 /var/www/html/openvpn-monitor#" /etc/apache2/conf-available/openvpn-monitor.conf
a2enconf openvpn-monitor

systemctl restart apache2dnf -y install git httpd mod_wsgi python3-geoip2 python3-humanize python3-flask python3-flask-wtf python3-semver geolite2-city yarnpkg
cp /var/www/html/openvpn-monitor/etc/openvpn-monitor/apache.conf.example /etc/httpd/conf.d/openvpn-monitor.conf
sed -i -e "s#^\(Define openvpn_monitor_pythonpath\).*#\1 /var/www/html/openvpn-monitor#" /etc/httpd/conf.d/openvpn-monitor.conf
systemctl restart httpdSee configuration for details on configuring openvpn-monitor.
docker run -p 80:80 ruimarinho/openvpn-monitorRead the docker installation instructions for details on how to generate a dynamic configuration using only environment variables.
apt -y install python3-venv           # (debian/ubuntu)
dnf -y install python3 geolite2-city  # (rocky/alma/rhel)
mkdir /srv/openvpn-monitor
cd /srv/openvpn-monitor
python3 -m venv .venv
. venv/bin/activate
pip install openvpn-monitor gunicorn
gunicorn openvpn_monitor.app -b 0.0.0.0:80
See configuration for details on configuring openvpn-monitor.
apt -y install git gcc nginx uwsgi uwsgi-plugin-python3 python3-dev python3-venv libgeoip-dev yarnpkg  # (debian/ubuntu)
dnf -y install git gcc nginx uwsgi uwsgi-plugin-python3 python3-devel geolite2-city yarnpkg            # (centos/rhel)
cd /srv
git clone https://github.com/furlongm/openvpn-monitor
cd openvpn-monitor
python3 -m venv .venv
. .venv/bin/activate
pip install -r requirements.txt
yarnpkg --prod --modules-folder openvpn_monitor/static/dist installCreate a uWSGI config: /etc/uwsgi/apps-available/openvpn-monitor.ini
[uwsgi]
base = /srv
project = openvpn-monitor
logto = /var/log/uwsgi/app/%(project).log
plugins = python3
chdir = %(base)/%(project)
virtualenv = %(chdir)/.venv
module = openvpn-monitor:application
manage-script-name = true
mount=/openvpn-monitor=openvpn_monitor/app.py
Create an Nginx config: /etc/nginx/sites-available/openvpn-monitor
server {
    listen 80;
    location /openvpn-monitor/ {
        uwsgi_pass unix:///run/uwsgi/app/openvpn-monitor/socket;
        include uwsgi_params;
    }
}
ln -s /etc/uwsgi/apps-available/openvpn-monitor.ini /etc/uwsgi/apps-enabled/
systemctl restart uwsgi
ln -s /etc/nginx/sites-available/openvpn-monitor /etc/nginx/sites-enabled/
rm /etc/nginx/sites-enabled/default
systemctl restart nginx
See configuration for details on configuring openvpn-monitor.
Add the following line to your OpenVPN server configuration to run the management console on 127.0.0.1 port 5555, with the management password in /etc/openvpn/pw-file:
management 127.0.0.1 5555 pw-file
To run the management console on a socket, with the management password in /etc/openvpn/pw-file:
management socket-name unix pw-file
Refer to the OpenVPN documentation for further information on how to secure access to the management interface.
Copy the example configuration file openvpn-monitor.conf.example to the same
directory as app.py or to /etc/openvpn-monitor/openvpn-monitor.conf
cp openvpn-monitor.conf.example openvpn_monitor/openvpn-monitor.confor
mkdir -p /etc/openvpn-monitor
cp openvpn-monitor.conf.example /etc/openvpn_monitor/openvpn-monitor.conf
In this file you can set site name, add a logo, set the default map location (latitude and longitude). If not set, the default location is New York, USA.
Once configured, navigate to http://myipaddress/openvpn-monitor/
openvpn-monitor is licensed under the GPLv3, a copy of which can be found in the COPYING file.
Flags are created by Matthias Slovig ([email protected]) and are licensed under Creative Commons License Deed Attribution-ShareAlike 3.0 Unported (CC BY-SA 3.0). See http://flags.blogpotato.de/ for more details.
