-
Notifications
You must be signed in to change notification settings - Fork 80
How to Install the hex firmware with the Mission Planner
Jean-Louis NAUDIN edited this page Nov 28, 2013
·
14 revisions
- You need first to Download the required firmware Arduplane v2.73-xp1
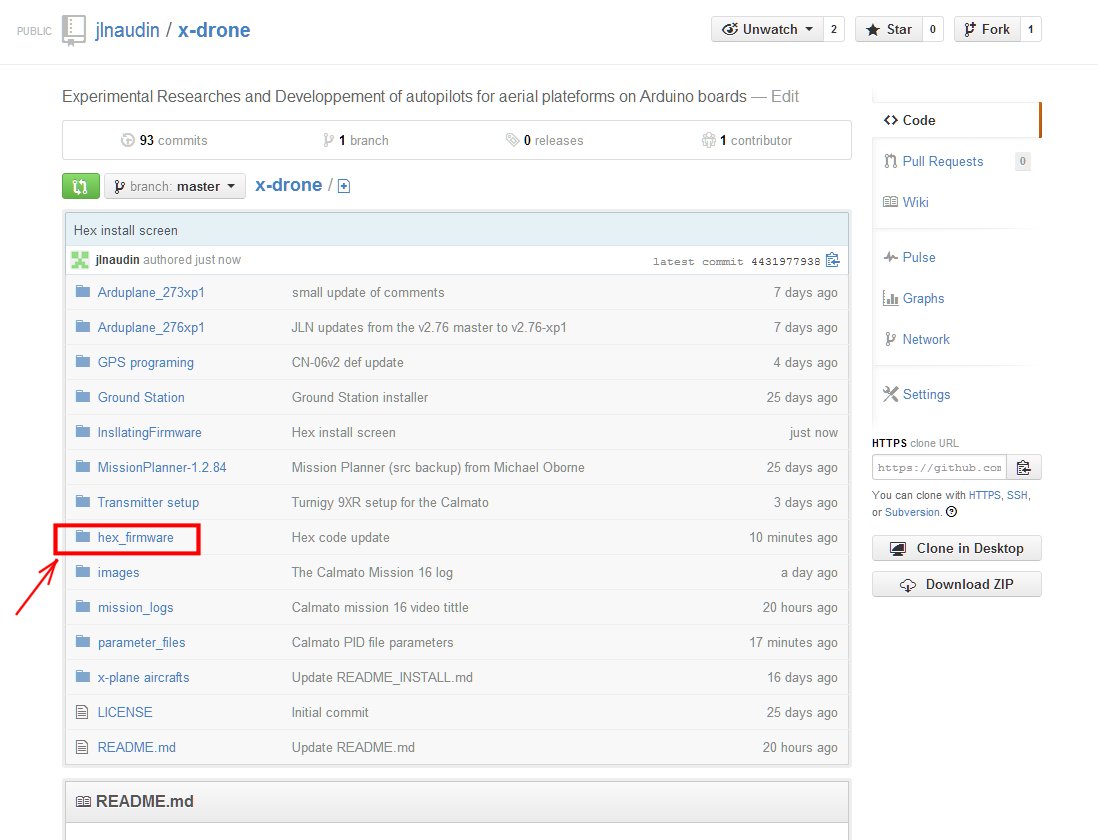
Click on the folder hex_firmware on the x-drone main index
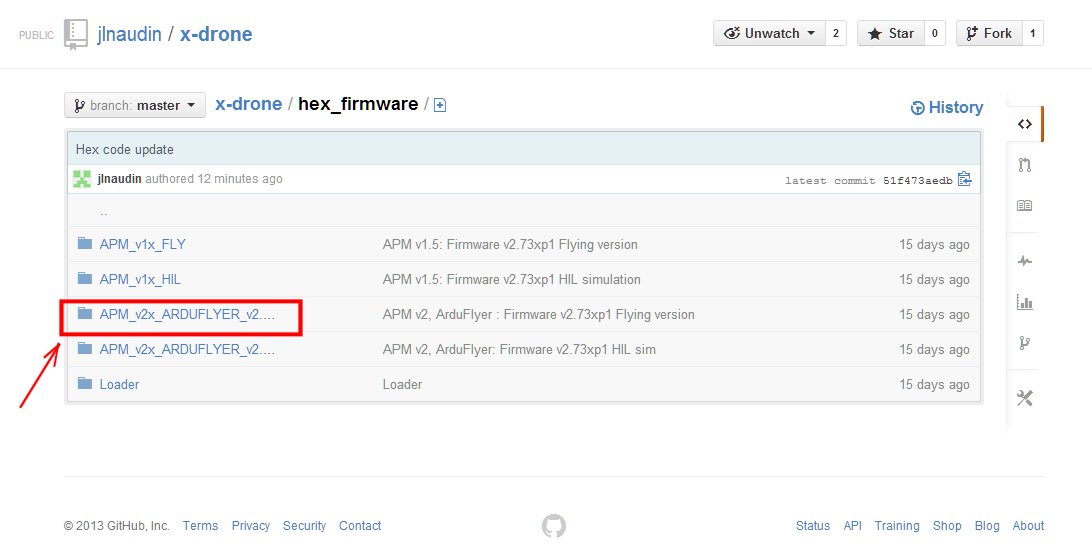
- then choose your required firmware
- for HIL simulation on X-Plane: if you have an APM v2.x or an ArduFlyer v2.5.x: chose the hex file in the folder:
APM v2, ArduFlyer: Firmware v2.73xp1 HIL sim
- for a real flight version: if you have an APM v2.x or an ArduFlyer v2.5.x: chose the hex file in the folder:
APM v2, ArduFlyer : Firmware v2.73xp1 Flying version
-
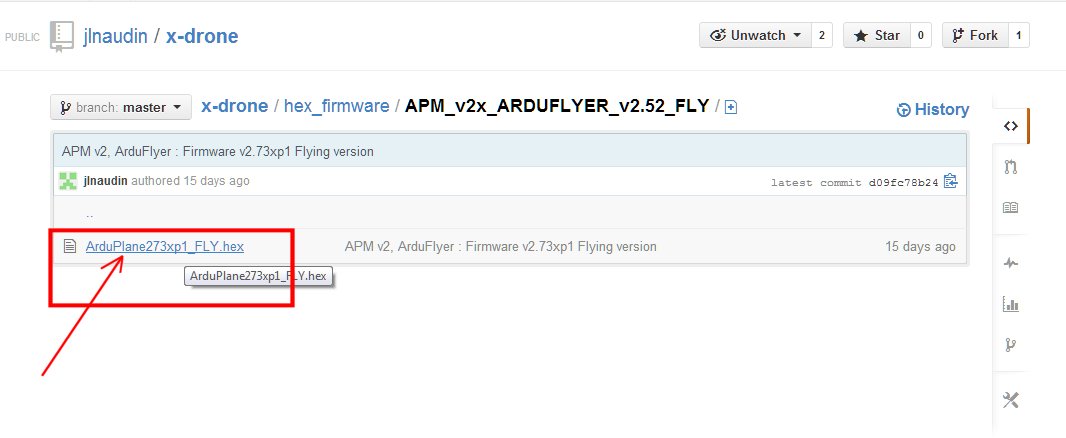
Click on the choosen hex_firmware
-
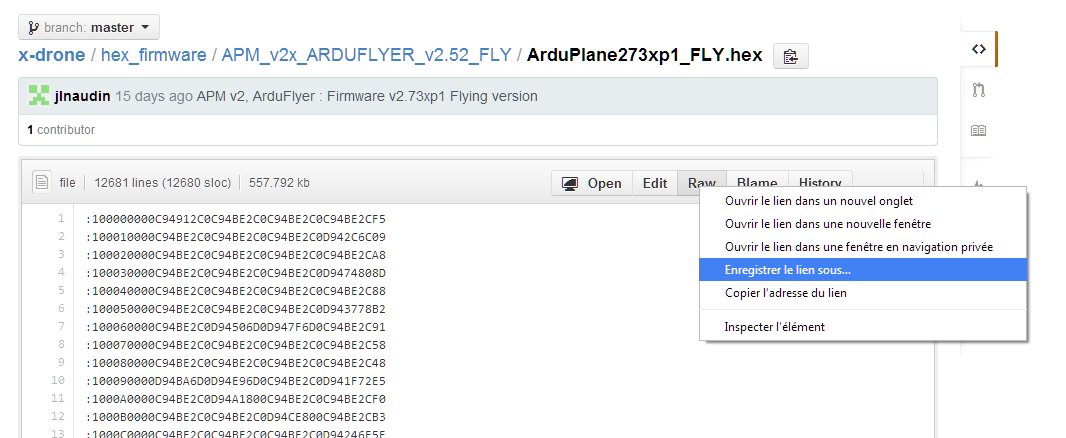
Click with the mouse right boutton on RAW so as to save the hex file on your desktop
-
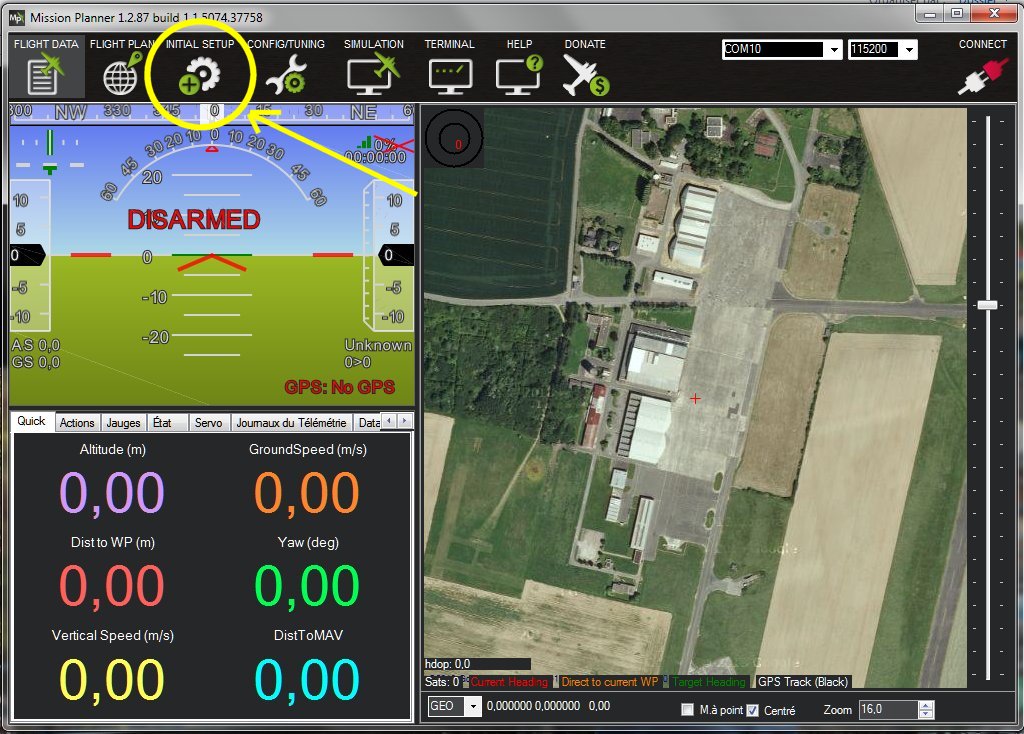
Connect the APM or ArduFlyer board to the USB com port,launch the Mission Planner application, select the good comm port and then click on INITIAL SETUP:
-
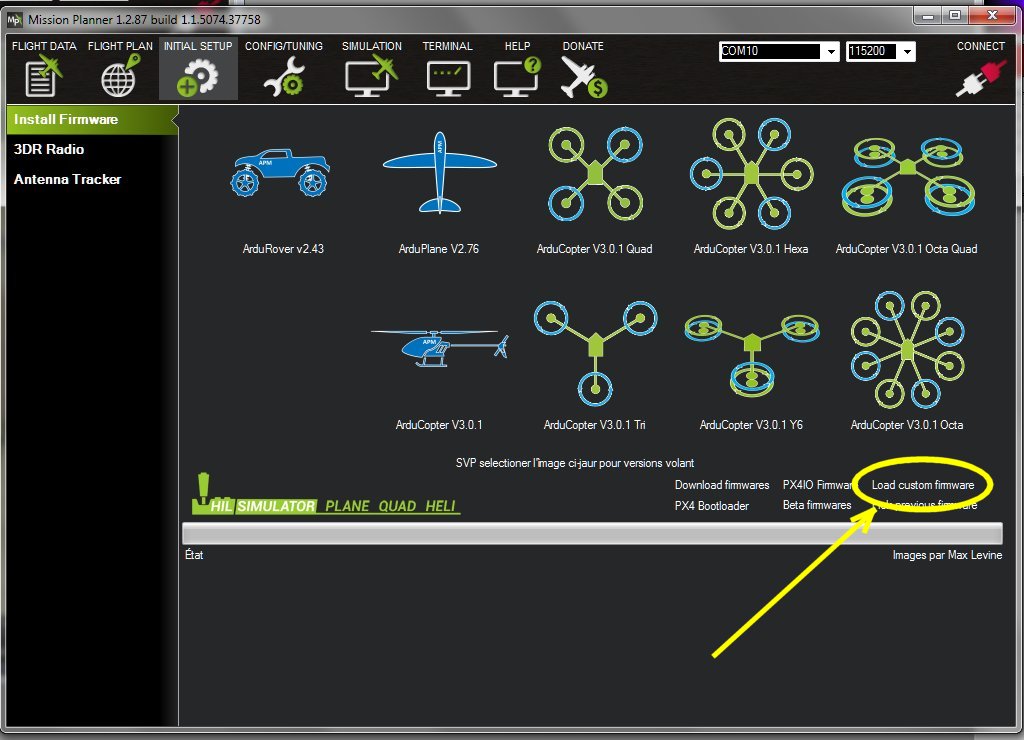
Click on Load custom firmware (don't click on CONNECT):
-
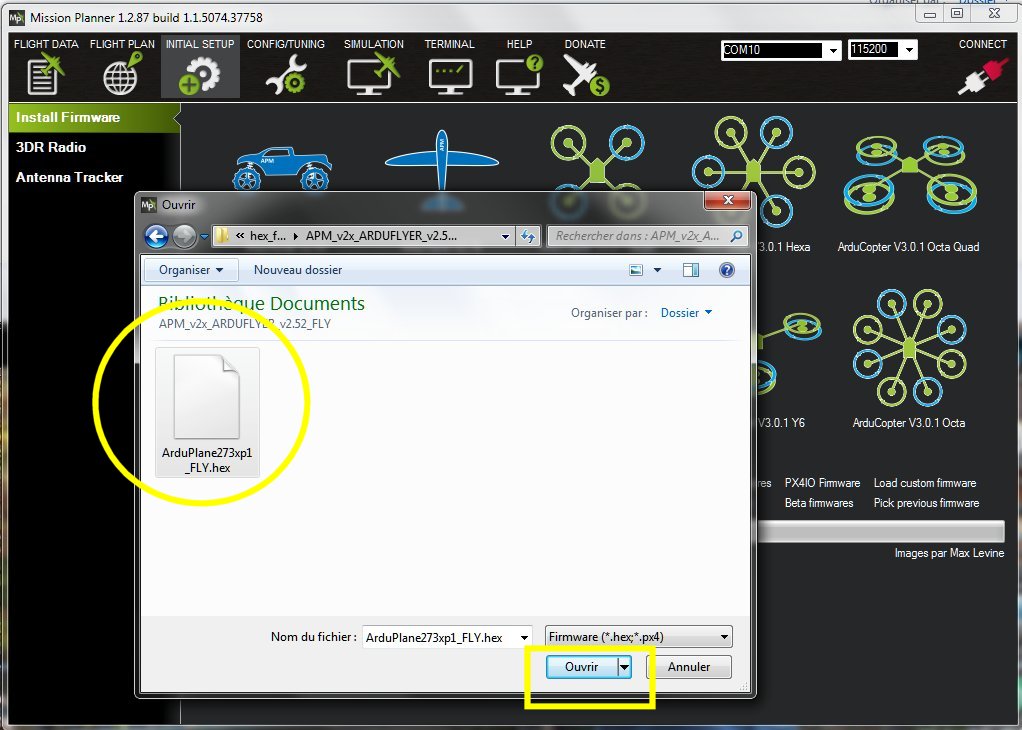
Select your previously downloaded hex file ArduPlane273xp1_FLY.hex, then click on OPEN:
-
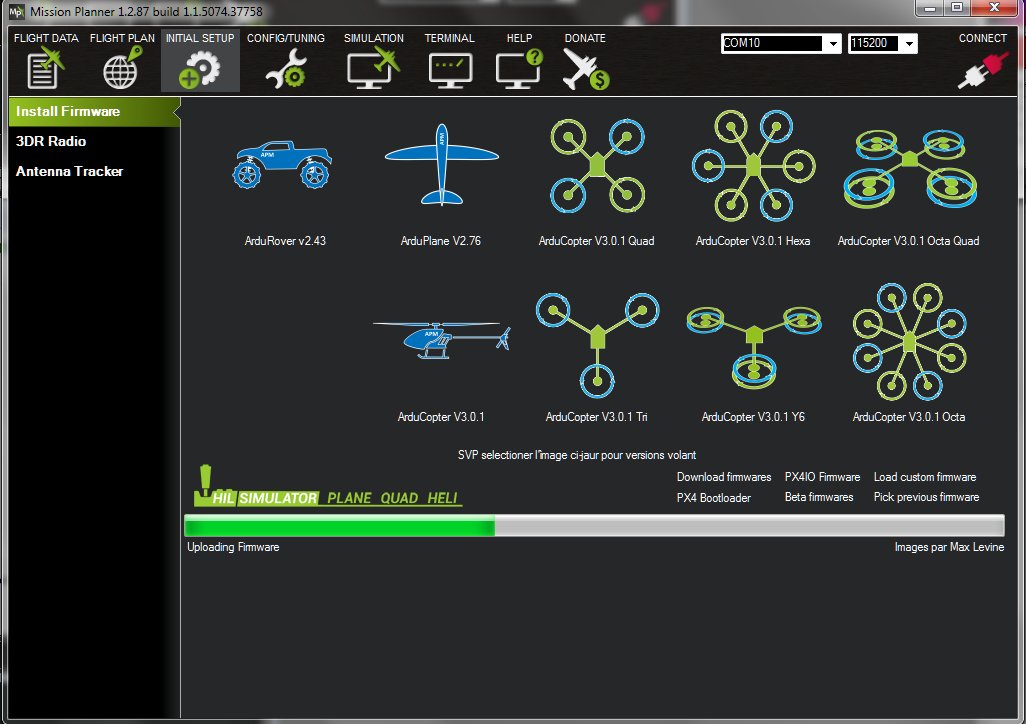
Wait a few minutes while the firmware is installing on the APM board:
-
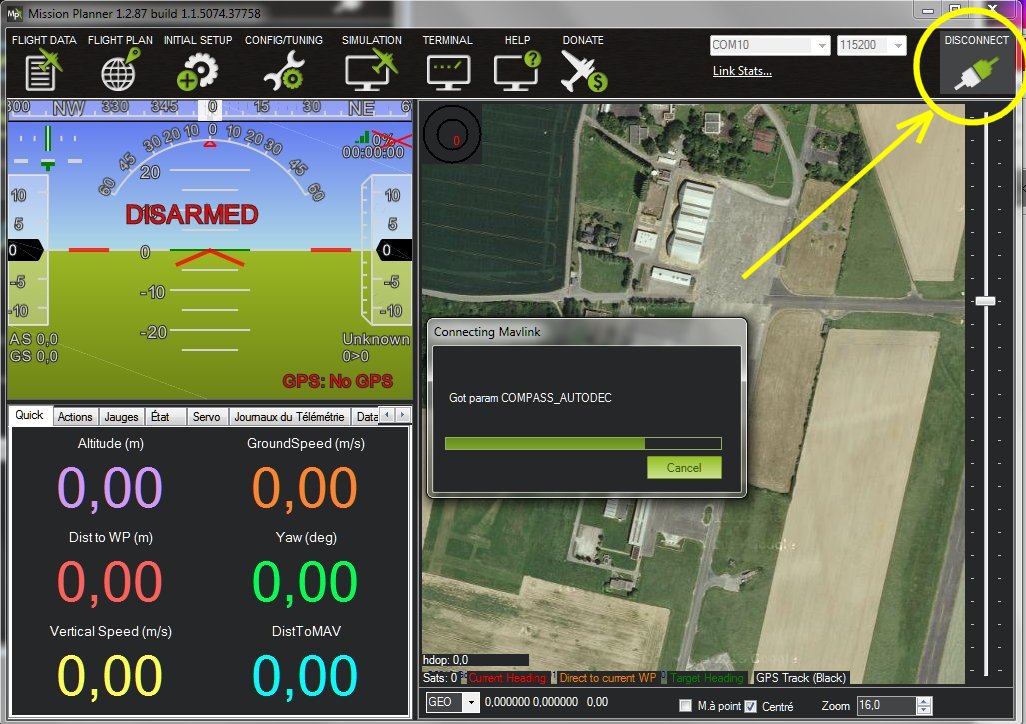
When the installation is finished and successful, you may click on CONNECT to use the installed firmware:
