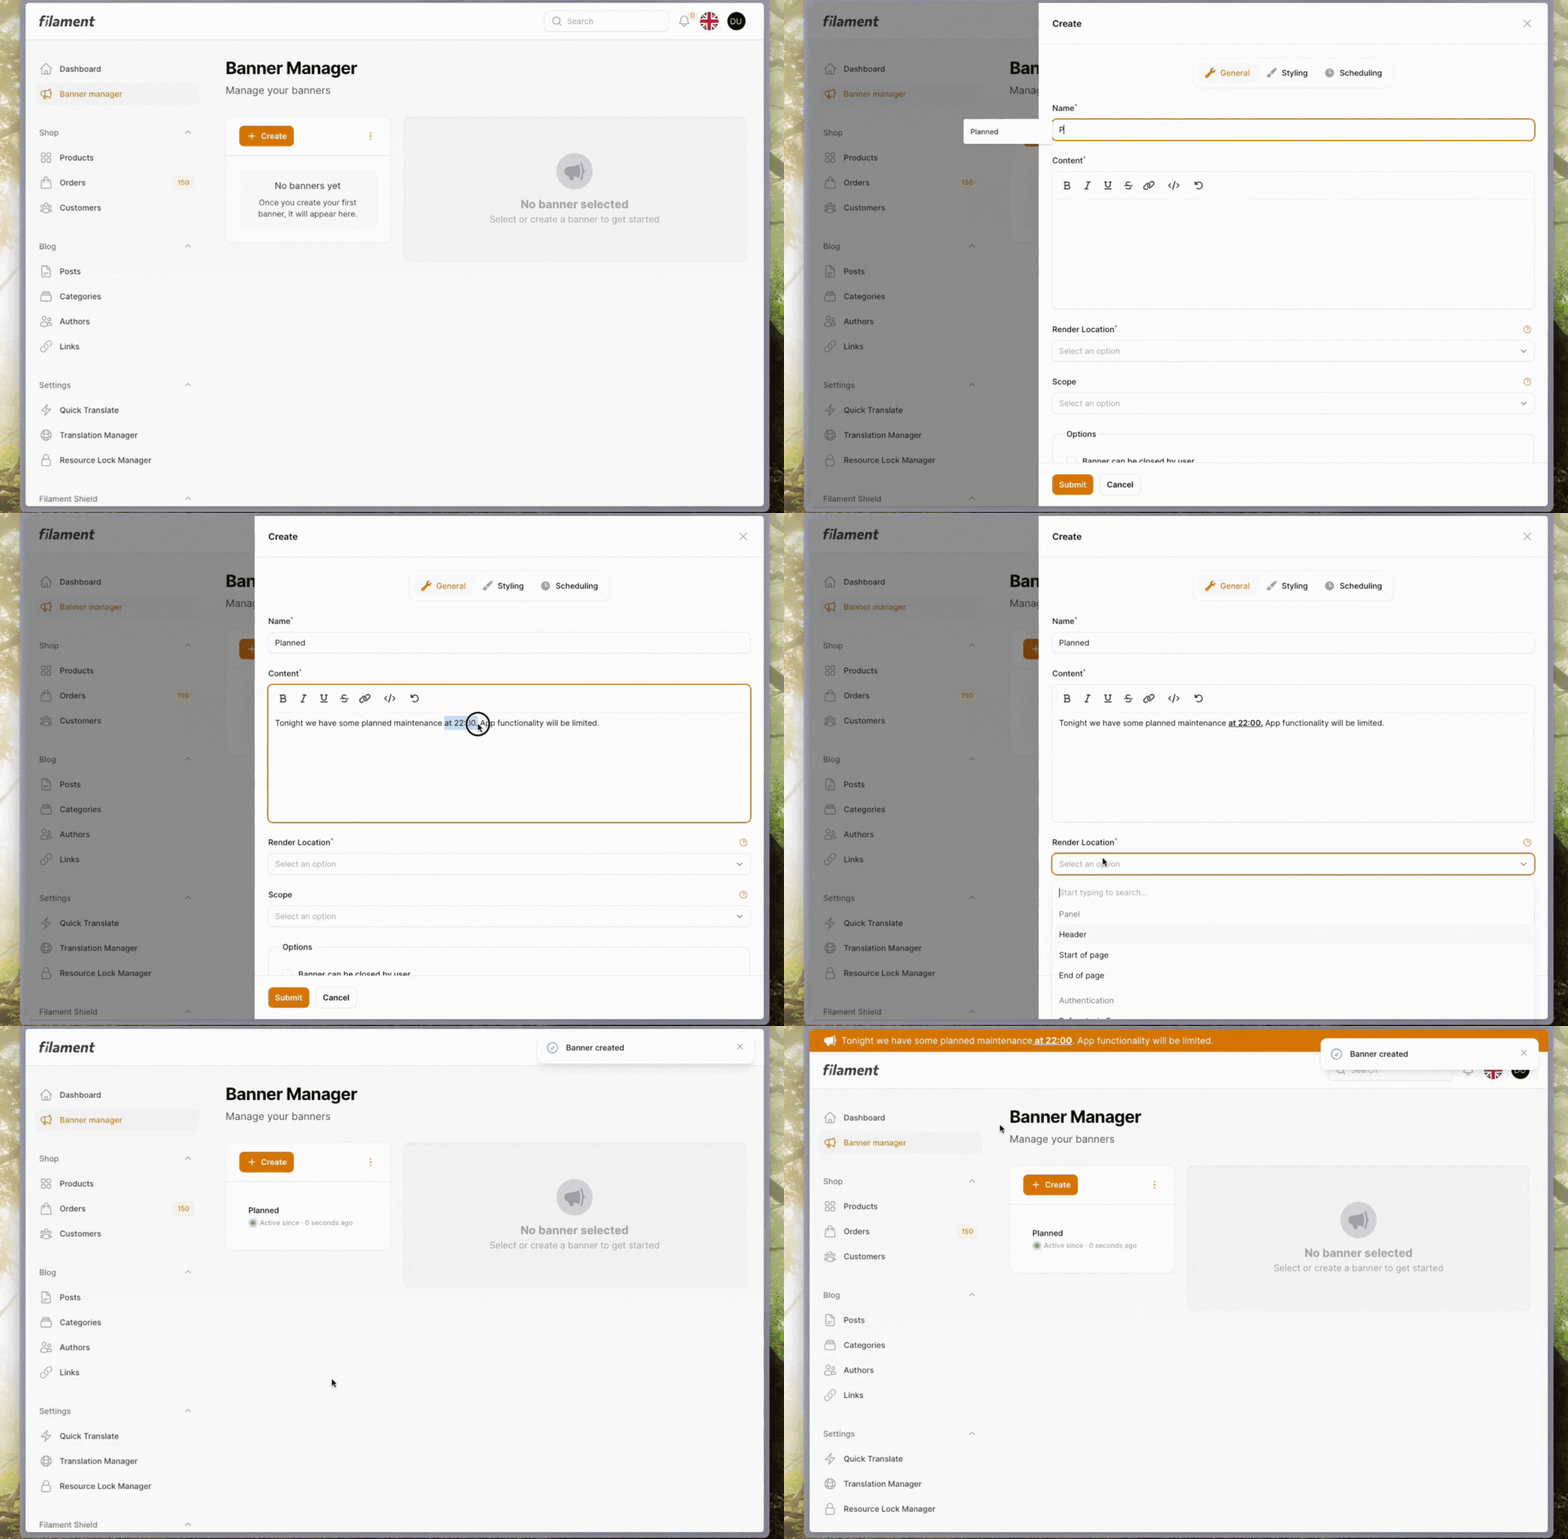
Filament Banner is a powerful Filament plugin that allows you to seamlessly integrate dynamic banners into your Filament-based application. With this plugin, you can easily create, manage, and display engaging banners that can be customized to your specific needs.
Demo:
A scoped banner is only visible on the selected resource pages.

- Create Multiple Banners: Easily create and manage multiple banners within your Filament application.
- Customize Banner Look: Tailor the appearance of your banners to match your brand and design.
- Optional User Closing: Allow users to close banners if desired.
- Banner Scheduling: Schedule your banners to be displayed at specific times.
- Scoped Visibility: Control the visibility of your banners by targeting specific pages or resources within your Filament application.
- Render Location Control: Select the desired locations where your banners will be displayed within your application.
- Programmatic Banner Creation: Utilize the BannerManager Facade to create banners programmatically.
Before we get started, it's important to know that banners can be stored in 2 ways: cache and database.
By default, the plugin stores the banner in the cache. If you want to persist the banners in the database, you'll need to follow the additional instructions.
The cache option provides a quick and easy way to get started. It's suitable for displaying occasional or temporary banners, as it's faster to get started because doesn't require additional setup. However, banners stored in the cache will be lost if the cache is cleared.
The database option is for users who need to use banners more extensively or require persistent storage. Storing banners in the database ensures they don't get lost, allows for better management, and offers more scalability as your application grows. By providing both options, the plugin gives you the flexibility to choose the storage method that best fits your application's requirements.
-
Install the package via composer:
composer require kenepa/banner
-
Setup custom theme
Filament v3 recommends that you create a custom theme to better support a plugin's additional Tailwind classes. After creating your custom theme, you should add the views of the banner plugin the to your new theme's tailwind.config.js file, which is typically located at
resources/css/filament/admin/tailwind.config.js:content: [ ... './vendor/kenepa/banner/resources/**/*.php', ]
Import Banner's custom stylesheet into your theme's CSS file located at
resources/css/filament/admin/theme.css. (Be aware this may differ in your project):@import '../../../../vendor/kenepa/banner/resources/css/index.css';
Compile your theme:
npm run build
Run the filament upgrade command:
php artisan filament:upgrade -
Add plugin to your panel
use Kenepa\Banner\BannerPlugin;
use Filament\Panel;

public function panel(Panel $panel): Panel
{
return $panel
       // ...
     ->plugins([
        BannerPlugin::make()
     ]);
}
If you want to use the database storage option, you can follow these steps:
Note: Your database must support JSON column type
-
Publish & run migrations You can publish and run the migrations with:
php artisan vendor:publish --tag="banner-migrations" php artisan migrate -
Configure the plugin
Add the
persistsBannersInDatabase()the banner plugin.use Kenepa\Banner\BannerPlugin; use Filament\Panel; public function panel(Panel $panel): Panel { return $panel // ... ->plugins([ BannerPlugin::make() ->persistsBannersInDatabase() ]); }
This package provides a comprehensive banner management system, allowing you to create, view, update, and delete banners to be displayed throughout your application.
If you want to programmatically create banners, you can use the BannerManager facade. The BannerManager uses a Banner Value Object. Because this package allows you to choose how you want to store the banner, I wanted a single way to represent a banner when interacting with the BannerManager.
Looking for more information about what Value Objects are and why they could be useful, I recommend this article.
Note: Functionality for the BannerManager is limited at the time because this is all that I needed for the project. But feel free to make PRs to extend its functionality.
You'll need to create a Value Object first to represent the banner.
$bannerData = new BannerData(
    id: 'banner_123',
    name: 'Promotional Banner',
    content: 'Check out our latest sale!',
    is_active: true,
    active_since: '2024-06-01',
    icon: 'heroicon-m-wrench',
    background_type: 'gradient',
    start_color: '#FF6B6B',
    end_color: '#FFD97D',
    start_time: '09:00',
    end_time: '18:00',
    can_be_closed_by_user: true,
    text_color: '#333333',
    icon_color: '#FFFFFF',
    render_location: 'header',
    scope: []
);
You'll need generate the id of the banner your self. Tip use
uniqid()
Create
Now you can create the Banner using the bannerData object.
use Kenepa\Banner\Facades\BannerManager;

BannerManager::store($bannerData);
Get All
use Kenepa\Banner\Facades\BannerManager;

$banners = BannerManager::getAll();
Delete
use Kenepa\Banner\Facades\BannerManager;

BannerManager::delete('banner_id_123');
Update
use Kenepa\Banner\Facades\BannerManager;

$updatedBannerData = \Kenepa\Banner\ValueObjects\BannerData::fromArray([
    // ID must be the same
    'id' => 'banner_id',
    'name' => 'updated title'
    // ... all other properties of the banner
]);

BannerManager::update($updatedBannerData);The BannerPlugin class provided by the package allows you to customize various aspects of the banner management system. This includes the plugin's title, subheading, navigation settings, and more.
To customize the plugin, you can use the static BannerPlugin::make() method and chain the various configuration methods together.
Title and Subheading
You can set the title and subheading of the banner manager page using the title() and subheading() methods, respectively.
BannerPlugin::make()
    ->title('My Banner Manager')
    ->subheading('Manage your website banners');
Navigation Settings
The plugin also allows you to customize the navigation settings, such as the icon, label, group, and sort order.
BannerPlugin::make()
    ->navigationIcon('heroicon-o-megaphone')
    ->navigationLabel('Banners')
    ->navigationGroup('Marketing')
->navigationSort(1);navigationIcon(): Sets the icon to be used in the navigation menu.navigationLabel(): Sets the label to be used in the navigation menu.navigationGroup(): Sets the group in which the plugin should be placed in the navigation menu.navigationSort(): Sets the sort order of the plugin in the navigation menu.
Disable Banner manager You can disable the banner manager altogether. For example, if you want to disable the banner manager for a different panel without having to set permissions for that page.
BannerPlugin::make()
->disableBannerManager()By default, the banner manager is available for everyone. To restrict access, you'll need to add the ability (also known as "permission" within the context of the Spatie Permission package) as shown below:
BannerPlugin::make()
->bannerManagerAccessPermission('banner-manager')Example using Laravel gates
Inside the boot() method of your service provider define a gate with the same name you have configured for the plugin.
// app/Providers/AppServiceProvider.php

   public function boot()
    {
        Gate::define('banner-manager', function (User $user) {
           return $user->email === '[email protected]';
        });
    }
Example using spatie permission package This example shows how to create a permission and assign it a users
$permission = Permission::create(['name' => 'banner-manager'])
auth()->user()->givePermissionTo($permission)
After the correct ability/permissions have been created and assigned, the banner manager will only be available to a select group of users.
php artisan vendor:publish --tag="banner-views"composer testPlease see CHANGELOG for more information on what has changed recently.
Please see CONTRIBUTING for details.
Please review our security policy on how to report security vulnerabilities.
The MIT License (MIT). Please see License File for more information.


