title: Adding Airplay to an external usb audio interface post_date: 2013-01-08 10:03:52 post_name: adding-airplay-to-an-external-usb-audio-interface
update: In the months following my original write-up many improvements have been made in the 1.0-dev branch of Shairport. The following text now refers to this soon-to-be stable version.
The Raspberry Pi is a fairly powerful $25 single-board computer targeted toward the educational market, though just because it's for kids doesn't mean it's not fun for adults. I've been wanting to buy a Pi for a while now, but couldn't justify purchasing hardware I have no use for - that is, until I saw this post detailing how to use the Pi as an Apple Airplay receiver. This is perfect. Let's get started turning our little computer into a single-purpose appliance!
The actual board itself is very small. So small, in fact, that I wondered whether I needed to buy a project box to stuff it in. While looking around online at different expensive plastic boxes to put this in, I realized that I have the perfect enclosure for the Pi already in my audio stack.
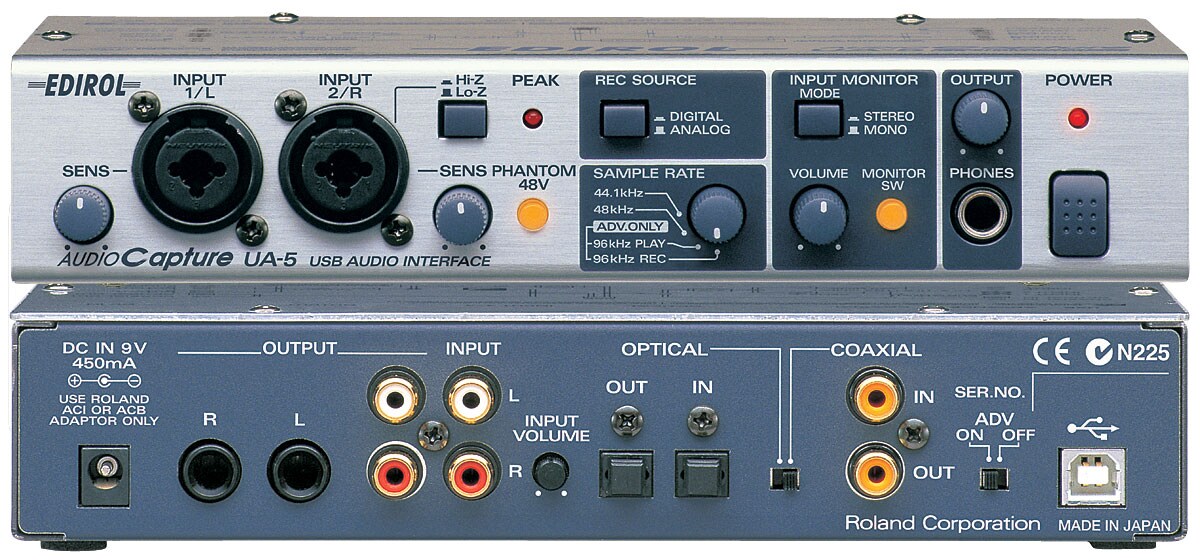
This USB audio interface is made of thick steel and aluminum, and will be plugged in to the Pi anyway (since the Pi uses onboard pulse-width modulation to approximate an audio signal at low quality). Why not put the Pi inside the UA-5? Let's see if there is room for a Pi.
After removing the thick aluminum cover with a few screws, I see that there looks to be room directly over the digital signal processing side of the board. This is good, because I don't want to stick a little computer spewing RF noise all over any analogue circuits. Let's remove the main board.
The board comes right out, and now we're left with a thick steel case. Let's cut a hole in it! We need a hole to pass the USB ports, power, and WiFi radio through. I have a feeling this case efficiently blocks and RF signals emanating from inside. At this point I should say that I rushed in to cutting the case without proper tools (I used a drill and some snips). I should have had at least a file to smooth out the rough edges, but I can go back and fix this later.
After cutting a hole in the side of the case, let's figure out how to fit the Pi in. I'll screw the main board back in and then cut a piece of the packaging cardboard to make a stand-off that will insulate the two boards from each other.
And secure the Pi to it's new home. I've added an 8GB SD card with Raspbian along with an Edimax USB wireless dongle and a microUSB cable for power. This is all secured to the cardboard standoff with zip ties.
Before I screw the lid back on I need to power up the Pi and log in via SSH using the onboard ethernet. After editing my /etc/network/interfaces:
auto lo
iface lo inet loopback

allow-hotplug eth0
iface eth0 inet dhcp

allow-hotplug wlan0
iface wlan0 inet manual
wpa-roam /etc/wpa_supplicant/wpa_supplicant.conf

iface default inet dhcp
wireless-power off
And wpa_supplicant.conf:
ctrl_interface=DIR=/var/run/wpa_supplicant GROUP=netdev
update_config=1

network={
    ssid="Shirley"
    proto=RSN
    key_mgmt=WPA-PSK
    pairwise=CCMP TKIP
    group=CCMP TKIP
    psk="super_secret_key"
    priority=5
}
grab the wlan0 MAC address, add a static DHCP reservation for the Pi on my router, and reboot. Now let's put the lid on.
It looks pretty good! Let's log in to our Pi and install Shairport. It's pretty straightforward.
Change to our home directory, install all the packages we need.
cd ~
apt-get install build-essential libssl-dev libao-dev libasound2-dev avahi-utils pkg-config git
Clone Shairport from the GitHub repo
git clone https://github.com/abrasive/shairport.git
cd shairport
git branch 1.0-dev
./configure
make
make install
Demote the onboard soundcard and allow USB soundcards to become default in /etc/modprobe.d/alsa-base.conf
options snd_bcm2835=-1
#options snd-usb-audio index=-2
Copy the example init script
cp scripts/debian/init.d/shairport /etc/init.d/shairport
cp scripts/debian/default/shairport /etc/default/shairport
update-rc.d shairport defaults
Set up downsampling to 44.1 khz in ~/.asoundrc
pcm.!default
{
  type plug
  slave sl1
}

ctl.!default
{
  type hw
  card 0
}

pcm_slave.sl1
{
  pcm "hw:0,0"
  format S16_LE
  channels 2
  rate 44100
}
That's it! Let's hook it back in to our amplifier. I've connected the UA-5 to the remaining USB port on the Pi.
With everything connected and powered on, we can now select "Shairport" from our iOS or Mac OS devices and stream music to the nicest speakers in the house.
The UA-5 is capable of 96KHz 24-bit playback, but because the Pi is not too powerful, and Airplay only transmits 16-bit resolution, I have it set up for 44.1KHz 16-bit playback. For most Airplay material this should be bit-perfect.


