AIGovTool Proof-Of-Concept is an AI privacy solution, allowing AI model providers to 'lend' their AI models for on-premise hosting without exposing their model weights and while retaining full control over usage.
Table of Contents
AIGovTool POC is an Open-Source solution enabling AI providers to 'lend' their models for on-premise deployment while guaranteeing privacy for both their model weights and end user's data. It includes a custodian Server and client to monitor inference consumption of a particular model and grant or block access.
In order to understand AIGovTool, let’s first define the three key actors in our secure AI consumption process:
- The custodian: Their role is to provide the AI model, track and potentially block AI consumption
- The AI borrower: The borrower deploys the custodian's AI model on their infrastructure. This actor may or may not also be the final end user.
- The AI consumer: The AI consumer is the end user who queries the model hosted by the AI borrower.
AIGovTool is made up of three main components:
This is the server used by the custodian to:
- Securely share the model to the enclave used by the AI consumer
- Block or unlock model consumption for end users
- Follow the consumption of AI models
This server is used by AI consumers to locally host the AI model. This model weights are never directly accessible and remain encrypted in memory thanks to the use of secure enclaves.
The client server for AI consumers to query the model inside the Enclave AI server.
In order to run the enclave server, the AI borrower will need to set-up a compatible VM and install the required dependencies.
There are different VMs available on Azure for running confidential computing applications.
As we are working on intel SGX, we are going to choose the DCs v3 family which supports Intel SGX (and more precisely SGX 2). To have enough memory to run our models, we choose the 64gb memory with 8-vcpus.

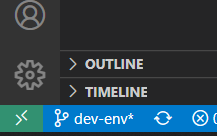
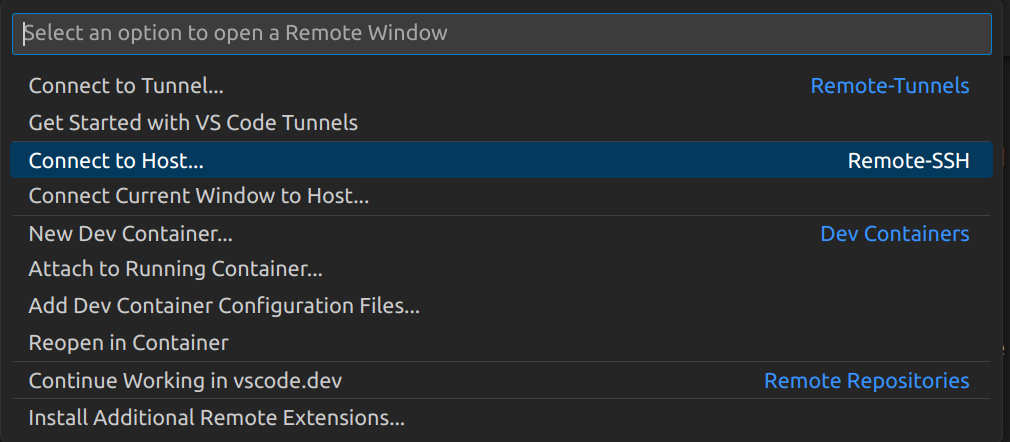
After the creation of the instance, we can connect to it via SSH. You can do this in Visual Studio Code with the remote container VSCode extension.
Once you have installed this extension, you can click on the green menu in the bottom-left of VSCode and select connect to host before supplying your host address, azureuser@VM_IP_ADDRESS.
After connecting to the instance via SSH you can run the following scripts to install SGX, rust, and all the configuration needed to run our BlindAI secure enclave.
We begin by cloning the AIGovTool repo via github :
$ git clone https://github.com/mithril-security/aigovtool.git
$ cd aigovtool/- The first script installs all the dependencies needed for SGX and remote attestation to work perfectly, this one should be ran as root :
$ sudo ./install_packages.sh- Then, run the following script in normal user to finish the installation configuration.
$ ./install_config.shAfter this point, a reboot is necessary so that SGX works. You can directly reboot the instance from the Azure portal.
At this point, everything related to Intel SGX has been installed.
For more examples on the BlindAI project, you can refer to the Documentation
Recently Azure has upgraded the default kernel on Ubuntu 20.04 to 5.15.0-1045-azure. This breaks the ability to use AVX on SGX enclaves. The last known kernel that worked correctly was 5.15.0-1043-azure and therefore we'll downgrade to that kernel before we install the AIGovTool server.
Run the downgrade_kernel_azure.sh script to downgrade the kernel.
./downgrade_kernel_azure.shThis will present a warning asking if you want to abort removing the kernel you're currently using. Select No to continue removing the kernel.

Once this is done, reboot the VM.
sudo rebootAll parties: the custodian, AI borrower and end user can use our poetry environment to install the required BlindAI client.
To do this, you can run the following from the root of the AIGovTool repo:
$ cd client/ && poetry shell
$ poetry installIn this demo, we are going to show a quick example of controlled AI consumption using AIGovTool with the COVIDNet model, which takes images of patient chest x-rays and returns a probability of this patient having Covid.
You can download the COVIDnet model by running the following command :
pip install gdown
gdown 1Rzl_XpV_kBw-lzu_5xYpc8briFd7fjvc
The model downloaded will be named as COVID-Net-CXR-2.onnx.
For the purposes of this demo, we do this on one machine using different terminal windows to show the view of each key party involved. In order to follow along on one machine, please open three terminals on your VM.

In the custodian window, you can launch the custodian server and upload your model with the following commands: [in red]
$ cd drm-blindai && python3 main.py --address=127.0.0.1 --upload=COVID-Net-CXR-2.onnxWe pass the path to the COVIDNet model with the upload parameter.
The custodian server will now wait for a connection attempt from the enclave server and verify it through a process called attestation before uploading the model.
Once the enclave server has been launched and verification is completed, we will see a connection is established and the model is successfully uploaded.

In the Enclave window : [in green]
You can launch the enclave server and BlindAI using our justfile with the following command from the root of the aigovtool repo:
$ BLINDAI_AZURE_DCS3_PATCH=1 just release You may need to wait a few minutes for the server to start running and connect to the DRM custodian server.
On the customer : [in blue]
Before running the client, we will need to supply an image that will be ran by the CovidNet model.
Let's fetch the CXR image to send to the model:

wget --quiet https://raw.githubusercontent.com/lindawangg/COVID-Net/master/assets/ex-covid.jpeg$ cd drm-client && python3 main.py --address=127.0.0.1 --input=ex-covid.jpegPass the path to the ex-covid.jpeg image to the 'input' parameter.
The end user can see the result of this request and how many more requests they can make (before they would need to request access to more queries from the custodian) in their console log.

Note that if you wanted to send the end user query from a different machine, you would need to copy the enclave server's
manifest.prod.tomlfile generated in the root at the repo on on build into theclient/blindaifolder with the namemanifest.toml. This is so that the end user can verify they are sending their data to an authentic BlindAI enclave server.
The custodian can see the AI consumer's usage in their console log output:
![]()
They can cut all end user access to the model at any time by shutting down their custodian server. All new queries by end users to the model will now fail:

If there is no inferences left the client will wait for the custodian to free more inferences. This is done through the endpoint supply_inferences. A example of a query done by the custodian can be the following:
curl -k -X POST -d "number_inferences=10" https://127.0.0.1:6000/supply_inferences- Go to our Discord #support channel
- Report bugs by opening an issue on our BlindAI GitHub
- Book a meeting with us
Distributed under the Apache License, version 2.0. See LICENSE.md for more information.
Mithril Security - @MithrilSecurity - contact@mithrilsecurity.io
Project Link: https://github.com/mithril-security/BlindAI