-
Notifications
You must be signed in to change notification settings - Fork 100
Tutorial Part 2: Coordinate system
- Tutorial Part 1: To build the first cube
- Tutorial Part 2: Coordinate system
- Tutorial Part 3: Primitives
- Tutorial Part 4: Color
- Tutorial Part 5: Dimension
In this part, we will learn how the coordinate system is working in obelisk.js.
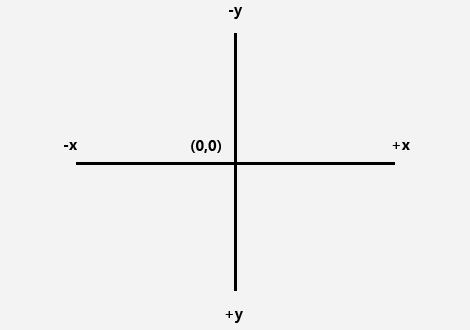
Coordinate system in traditional 2D stage is defined as below:
Considering the code in part one, we defined the traditional 2D point like this, but just remember this object has nothing to do with our pixel object and coordinate, the point (200, 200) is where we put the whole pixel view thing:
var point = new obelisk.Point(200, 200);
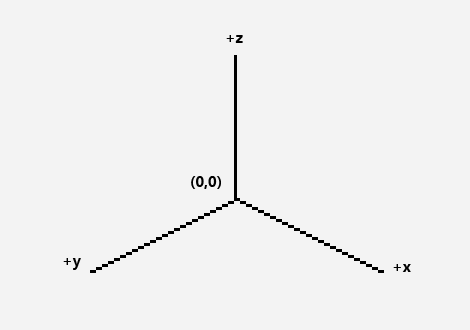
In obelisk.js, the isometric 3D coordinate system is defined like this:
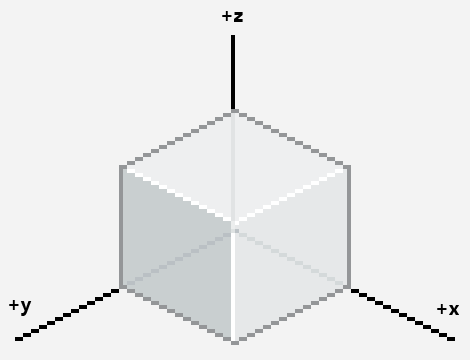
Since we didn't really assign any 3D coordinate object to render the view, so it was located in (0, 0, 0) by default like this:
To render the object in a certain 3D point, you will need to create an 3D position instance:
var p3d = new obelisk.Point3D(40, 40, 40);
And pass it to render any object like this:
pixelView.renderObject(cube, p3d);
Play with code: http://jsfiddle.net/nosir/7efkF/


