Video delivery platform for StageCast, created based on Puffer.
Media server is the program that serves the video contents to the client over a WebSocket. It's written in C++.
- Make sure you have all the following dependencies installed:
python3
cmake
gcc >= 8.0
g++ >= 8.0
libcrypto++-dev
libssl-dev
libyaml-cpp-dev
- Clone this repo, and then run the following command to fetch the submodules:
git submodule update --init
- The rest should be straightforward:
mkdir build
cd build
cmake ..
make -j$(nproc)
- Download this package and extract it somewhere outside of the project root.
https://stagecast-us-west-1.s3-us-west-1.amazonaws.com/puffer-test-channel.tar.gz
- Create a YAML file
settings.ymlundersrc/, with the following content:
media_dir: [path-to-the-puffer-test-channel]
experiments:
  - num_servers: 1
    fingerprint:
      abr: linear_bba
      abr_config:
        upper_reservoir: 0.9
      cc: cubic
channels:
  - test
channel_configs:
  test:
    live: true
    video:
      1280x720: [20]
    audio: [64k]
    present_delay_chunk: 300
ws_base_port: 50000
enable_logging: false
Remember to replace
[path-to-the-puffer-test-channel]with the path to the directory that you extracted in step (1).
- Go to
build/directory, and make sure that you can start the media server:
./ws-media-server ../src/settings.yml 1
- Leave the server running for the next step.
- Install pip3 (
python3-pippackage on Ubuntu), and use it to installvirtualenvpackage:
pip3 install virtualenv
- Go to
src/portal, and create a virtual environment for the server:
virtualenv venv
- Activate the environment:
source venv/bin/activate
- Install the required dependencies:
pip3 install -r requirements.txt
- Append the following to
src/settings.ymlfile you created in the previous section.
portal_settings:
  allowed_hosts:
    - '*'
  debug: true
  secret_key: ')wjz$3&asr7sm3+cp@*)na__j7fu4smpo^eh8@)-p&o__l@57r'
- Create the database:
./manage.py migrate
- Start the development server by running
./manage.py runserver 0:9999
-
Open
localhost:9999in your browser, and verify that you can sign up and log in. -
Click on "Watch" and enjoy the show! (Make sure that the media server is running).
If you don't have access to a Linux box, you can use Docker to develop and test on Mac.
-
Download and install Docker for Mac from here.
-
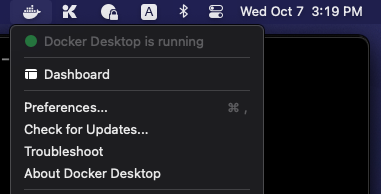
Start Docker. It should appear in your macOS menubar, and after a few seconds its status will change to "running":
-
Open a terminal window, and do the following:
- Create a directory for StageCast-related files:
mkdir ~/stagecast - Switch to the directory you just created:
cd ~/stagecast - Clone the repo:
git clone --recurse-submodules https://github.com/stanford-stagecast/audience - Download the test video pack:
curl -OJ https://stagecast-us-west-1.s3-us-west-1.amazonaws.com/puffer-test-channel.tar.gz - Unpack the videos :
tar xvf puffer-test-channel.tar.gz - Fetch the development Docker image:
docker pull stanfordsnr/stagecast -a
- Create a directory for StageCast-related files:
-
Great! The source code is in
stagecast/audienceand you can use your favorite editor, e.g. VS Code, for development.
- Create a file named
settings.ymlinaudience/src/with the following contents:
media_dir: /stagecast/puffer-test-channel
experiments:
  - num_servers: 1
    fingerprint:
      abr: linear_bba
      abr_config:
        upper_reservoir: 0.9
      cc: cubic
channels:
  - test
channel_configs:
  test:
    live: true
    video:
      1280x720: [20]
    audio: [64k]
    present_delay_chunk: 300
ws_base_port: 50000
enable_logging: false
portal_settings:
  allowed_hosts:
    - '*'
  debug: true
  secret_key: ')wjz$3&asr7sm3+cp@*)na__j7fu4smpo^eh8@)-p&o__l@57r'
- On your Mac, run
docker image lsand make a note of IMAGE ID:
- Run the following command (replace
[IMAGE-ID]with the ID from the previous step):
docker run --name stagecast -p 9999:9999 -p 50001:50001 -v ~/stagecast:/stagecast -td [IMAGE-ID]
This will start a Docker container, which is based on Ubuntu 20.04, has all of the necessary packages installed, and can be used to compile and run the project.
-
Get shell access to the Linux container by running
docker exec -it stagecast /bin/bash. -
Go to
/stagecast/audience/src/portal. -
Run the following commands:
virtualenv venv
source venv/bin/activate
pip3 install -r requirements.txt
./manage.py migrate
-
Inside the Linux container, navigate to
/stagecastdirectory:cd /stagecast. This is the same directory as the one that you created in the previous section. It's shared between your macOS and your Linux container. -
cd audience. -
Now, prepare the build by running the following commands:
mkdir build
cd build
cmake ..
- In the
builddirectory you just created, runmake -j$(nproc)to compile the project.
- On your macOS, open a new Terminal window, and run the following command:
docker exec -it stagecast /stagecast/audience/build/ws-media-server /stagecast/audience/src/settings.yml 1
This command starts the media server, the one that serves the video over WebSocket to the client. Congratulations! Keep it running.
Note: every time that you make changes to the WebSocket server and recompile the code, you need to restart the server, by killing it and running it again.
- Open a new terminal window, and run the following command to start the web server:
docker exec -it stagecast /stagecast/audience/src/portal/runserver.sh
- Open your browser, and navigate to
http://localhost:9999. You should be able to create an account, login and then watch the demo video.

