To proceed into the application you'll have to use a valid corpus. What counts as a valid corpus is explained in the documentation on the page Interfaces/Corpus.
To import a corpus, you can click the Insert corpus as file button and proceed to select your corpus JSON, or you can enter the corpus as a pasted text by clicking on the Insert corpus as JSON text.
If you just wish to explore the tool, an example corpus is provided upon clicking the Use the example corpus.
To navigate the map you can simply click and drag the map around and scroll up to zoom in or scroll down to zoom out.
If you wish to move the map around without a mouse, you can do so using arrow keys and the '+' and '-' keys to zoom in and out respectively.
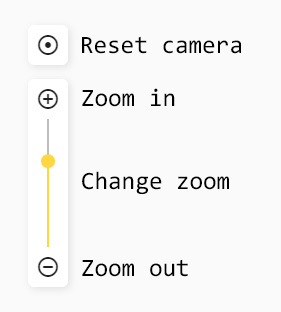
You can also use the on screen user interface to center or zoom the camera.
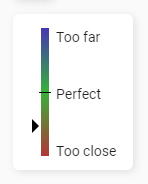
To select a node you can simply click on it. This will by default colour in all the other nodes depending on their deviation from the calculated cosine distance. You can refer to the deviation legend that appears.
This legend displays an indicator whenever you hover over a node as portrayed in the image above.
If you desire to highlight multiple nodes, you can do so by holding the CTRL key
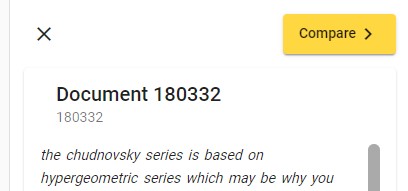
When selecting a document, you can view its contents on the right side of the screen. If you wish to view multiple documents' contents at once, you can do so by selecting multiple nodes and then exploring them on the right side as well.
To compare documents, you need to select exactly two documents and then click the Compare button in the top right.
This then opens the comparison screen, where you can compare the documents in further detail
If you click on a checkbox next to one of the matched words, you will select that word for highlighting in the documents displayed above.
If you select the words from the exact matches column, the highlights will be coloured in yellow, and if you select a match from the soft match column, the first word will be coloured in with yellow as well but the second will be coloured red.
You can further single out highlights by hovering over the word in the word selections columns.
You can change the settings of the tool by pressing the settings button in the top left.
Upon cloning or forking the project, you can execute several commands to aid you with the manipulation of the project.
To install all the needed dependencies for the application you will require Node.js to be installed.
If you have Node.js installed, then you can proceed to execute the following Node.js command in the root folder of the project:
npm install
This will install all the needed dependencies, required for the project to run and will create an environment for you to work with.
In order to test and develop the application, without the need to build the project every time a change is made, you can use the development server, which automatically quickly builds the project for you. This will improve your workflow substantially.
You can run the development server, by running the following command in the root folder of the project:
npm run start
You can then navigate to the http://localhost:4200/ URL in your
browser of choice, where the development server is running the
application.
To build and deploy the final project you can execute the following command:
npm run build-prod
This will build and compile the project into the final HTML, CSS and
JavaScript files and place them into the dist folder in the
project’s root folder. You can then copy the contents of the dist folder
onto an HTTP server.
Beware, if you are planning to run the deployed program in a non-root
path of the server URL, you are required to change the final
index.html file.
Open the compiled index.html file, located in the dist folder, with a
text editor and find the following line:
<base href="/">
You then have to replace the contents of the href parameter to match
the deployed application’s path.
For example, if the application was deployed on a web page with the URL
http://example.com/foo/bar/document-maps/, then the base tag would
look like the following:
<base href="/foo/bar/document-maps/">
The project comes with the compodoc tool, which can quickly create an interactive web page, compiled from the TSDoc documentation contained in the code.
To generate this documentation, you can run the npm run compodoc which
will create the documentation web page and place it into the
documentation folder, contained in the project’s root folder.
MIT License
Copyright (c) 2021 Michal Petr
Permission is hereby granted, free of charge, to any person obtaining a copy of this software and associated documentation files (the "Software"), to deal in the Software without restriction, including without limitation the rights to use, copy, modify, merge, publish, distribute, sublicense, and/or sell copies of the Software, and to permit persons to whom the Software is furnished to do so, subject to the following conditions:
The above copyright notice and this permission notice shall be included in all copies or substantial portions of the Software.
THE SOFTWARE IS PROVIDED "AS IS", WITHOUT WARRANTY OF ANY KIND, EXPRESS OR IMPLIED, INCLUDING BUT NOT LIMITED TO THE WARRANTIES OF MERCHANTABILITY, FITNESS FOR A PARTICULAR PURPOSE AND NONINFRINGEMENT. IN NO EVENT SHALL THE AUTHORS OR COPYRIGHT HOLDERS BE LIABLE FOR ANY CLAIM, DAMAGES OR OTHER LIABILITY, WHETHER IN AN ACTION OF CONTRACT, TORT OR OTHERWISE, ARISING FROM, OUT OF OR IN CONNECTION WITH THE SOFTWARE OR THE USE OR OTHER DEALINGS IN THE SOFTWARE.


