Feature
- static dispatch (can be compared with dyn dispatch using benchmark)
- remove arc and change it to reference
- static bvh
- add cargo bench (use criterion)
- transformer pdf
- support obj
(due to the limited time ,maybe I can add more object and elevate sampl_per_pixel) only 20 sample_per_pixel but it take 4 hours
this is more clear
70 per_pixel
if you can't see it ,you can click
https://github.com/yichuan520030910320/raytracer/blob/master/pic/test20.png
simple scence made up of sphere
if you can't see it ,you can click
https://github.com/yichuan520030910320/raytracer/blob/master/pic/manyball.png
book1 scence
book 2
classic cornell box with pdf
classic cornell box with obj
manual in Chinese
-
你可以先把压缩包下载到本地(或者是git clone)
-
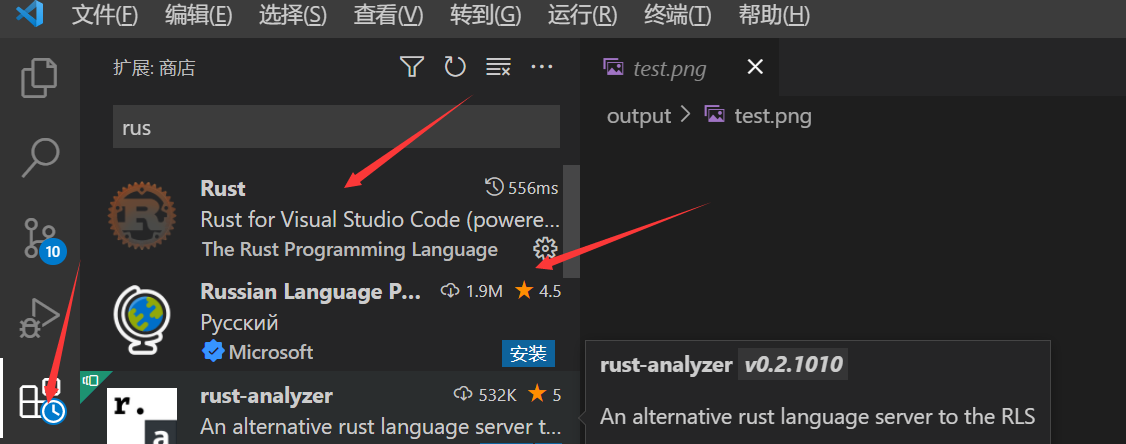
在本地你需要安装vscode或者clion的RUST插件来运行本项目
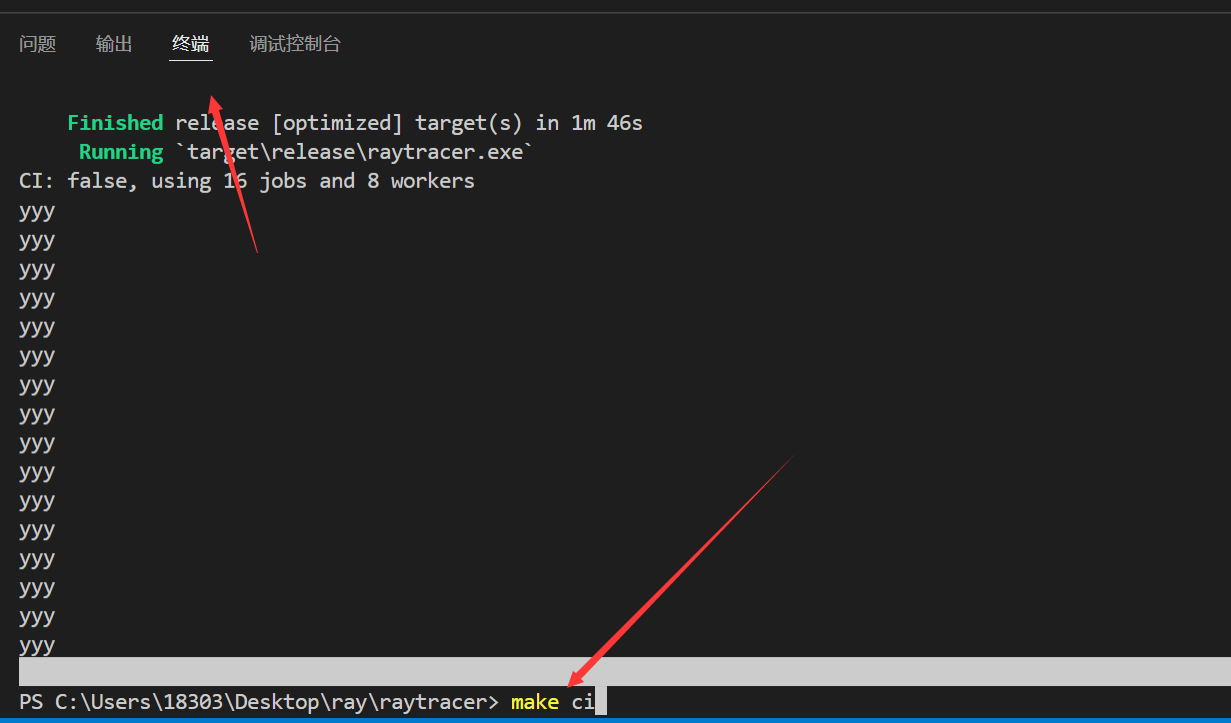
- 以vscode为例,在安装好这个插件之后,你可以ctrl + ` 打开终端(随便你怎么开终端)
make ci
即可
回车运行 接下来就能跑了
注意第一次make ci可能需要比较长的时间
另外注意路径要正确 要在makefile同一个目录下
-
你可以改变run.rs的
的number来改变你想要的图片!(in the file raytracer/src/run.rs) take whatever you want!
-
最终的结果在output/test.png
manual in English
- You can first download the compressed package to the local (or git clone)
- You need to install the RUST plugin of vscode or clion locally to run this project
- Take vscode as an example, after installing this plugin, you can ctrl + ` to open the terminal (however you want to open the terminal)
make ci
Enter and run, and then you can run
Note that the first make ci may take a long time
Also note that the path must be correct and must be in the same directory as the makefile
- You can change run.rs's
number to change the picture you want!(in the file raytracer/src/run.rs) take whatever you want!
- After make ci you can see the progress meter if you think it is too slow you can change
This value reduces the resolution and increases the speed
- The final result is in output/test.png
必做部分:
- book 1
- 3 BVH
- 7 Rectangles and Lights
选做部分:
- 2 Motion Blur
- 4 Solid Textures
- 5 Perlin Noise
- 6 Image Texture Mapping
- 8 Instances
- 9 Volumes
- 10 book 2 final scene
Bonus tracks:
- Track 1
- Track 2
- Track 3
- Track 4
- Track 5
- Track 6
- Track 7
- 手写obj_loader
具体内容参考tutorial
感谢 闵乐钧 林春茹 仇天元 王崑运 何夏麟 罗皓天 对本项目的大力支持,让我跪着(边跪边爬?)走完这条路
make ci要退到
/mnt/c/Users/18303/CLionProjects/raytracer1
目录再执行,需要包括makefile
运算符重载时要注意顺序
有两种漫反射的公式可以后续切换使用
image 9
朗伯反射
8.6另一种漫反射
100次
修掉返回值的BUG数组,并且写掉两个柏林球......
11
13
16
笔记:
[1]线程
将程序中的计算拆成多个线程可以改善性能,因为程序可以同时进行多规格任务,不过这也会增加复杂性,因为线程是同时进行的,所以无法保证不同线程的代码的执行顺序:
竞争状态(Race conditions),多个线程以不一致的顺序访问数据或资源
死锁(Deadlocks),两个线程相互等待对方停止使用其所拥有的资源,这会阻止它们继续运行
只会发生在特定情况且难以稳定重现和修复的 bug
RUST 在尝试减少线程的负面影响,不过多线程编程过程仍然需要格外小心,所需要的代码结构也不同于单线程的程序结构。
(1)使用spawn创建新的进程
use std::thread;
use std::time::Duration;

fn main() {
    thread::spawn(|| {
        for i in 1..10 {
            println!("hi number {} from the spawned thread!", i);
            thread::sleep(Duration::from_millis(1));
        }
    });

    for i in 1..5 {
        println!("hi number {} from the main thread!", i);
        thread::sleep(Duration::from_millis(1));
    }
    }
示例 : 创建一个打印某些内容的新线程,但是主线程打印其它内容
thread::sleep 调用强制线程停止执行一小段时间,这会允许其他不同的线程运行。这些线程可能会轮流运行,不过并不保证如此:这依赖操作系统如何调度线程。
hi number 1 from the main thread!
hi number 1 from the spawned thread!
hi number 2 from the main thread!
hi number 2 from the spawned thread!
hi number 3 from the main thread!
hi number 3 from the spawned thread!
hi number 4 from the main thread!
hi number 4 from the spawned thread!
当主线程结束的时候,新线程也会结束,而不管他是不是执行结束
如果运行代码只看到了主线程的输出,或没有出现重叠打印的现象,尝试增大区间 (变量 i 的范围) 来增加操作系统切换线程的机会。
(2)使用join等待所有线程结束
use std::thread;
use std::time::Duration;

fn main() {
    let handle = thread::spawn(|| {
        for i in 1..10 {
            println!("hi number {} from the spawned thread!", i);
            thread::sleep(Duration::from_millis(1));
        }
    });

    for i in 1..5 {
        println!("hi number {} from the main thread!", i);
        thread::sleep(Duration::from_millis(1));
    }

    handle.join().unwrap();
}
output:
hi number 1 from the main thread!
hi number 2 from the main thread!
hi number 1 from the spawned thread!
hi number 3 from the main thread!
hi number 2 from the spawned thread!
hi number 4 from the main thread!
hi number 3 from the spawned thread!
hi number 4 from the spawned thread!
hi number 5 from the spawned thread!
hi number 6 from the spawned thread!
hi number 7 from the spawned thread!
hi number 8 from the spawned thread!
hi number 9 from the spawned thread!
[2]各个线程的通信
这里使用 mpsc::channel 函数创建一个新的通道;mpsc 是 多个生产者,单个消费者(multiple producer, single consumer)的缩写。简而言之,Rust 标准库实现通道的方式意味着一个通道可以有多个产生值的 发送(sending)端,但只能有一个消费这些值的 接收(receiving)端。想象一下多条小河小溪最终汇聚成大河:所有通过这些小河发出的东西最后都会来到下游的大河。目前我们以单个生产者开始,但是当示例可以工作后会增加多个生产者。
use std::thread;
use std::sync::mpsc;

fn main() {
    let (tx, rx) = mpsc::channel();

    thread::spawn(move || {
        let val = String::from("hi");
        tx.send(val).unwrap();
    });

    let received = rx.recv().unwrap();
    println!("Got: {}", received);
}
两种接受方式:
通道的接收端有两个有用的方法:recv 和 try_recv。这里,我们使用了 recv,它是 receive 的缩写。这个方法会阻塞主线程执行直到从通道中接收一个值。一旦发送了一个值,recv 会在一个 Result<T, E> 中返回它。当通道发送端关闭,recv 会返回一个错误表明不会再有新的值到来了。
try_recv 不会阻塞,相反它立刻返回一个 Result<T, E>:Ok 值包含可用的信息,而 Err 值代表此时没有任何消息。如果线程在等待消息过程中还有其他工作时使用 try_recv 很有用:可以编写一个循环来频繁调用 try_recv,在有可用消息时进行处理,其余时候则处理一会其他工作直到再次检查。
接受多个消息:
use std::thread;
use std::sync::mpsc;
use std::time::Duration;

fn main() {
    let (tx, rx) = mpsc::channel();

    thread::spawn(move || {
        let vals = vec![
            String::from("hi"),
            String::from("from"),
            String::from("the"),
            String::from("thread"),
        ];

        for val in vals {
            tx.send(val).unwrap();
            thread::sleep(Duration::from_secs(1));
        }
    });

    for received in rx {
        println!("Got: {}", received);
    }
}
RUST生命周期的优势就在于他在编译阶段可以避免一些可能的并发的错误,比如下面的代码在编译阶段就会报错:
use std::thread;
use std::sync::mpsc;

fn main() {
    let (tx, rx) = mpsc::channel();

    thread::spawn(move || {
        let val = String::from("hi");
        tx.send(val).unwrap();
        println!("val is {}", val);
    });

    let received = rx.recv().unwrap();
    println!("Got: {}", received);
}
创建多个生产者(采用克隆的方法)
use std::thread;
use std::sync::mpsc;
use std::time::Duration;

fn main() {
// --snip--

let (tx, rx) = mpsc::channel();

let tx1 = tx.clone();
thread::spawn(move || {
    let vals = vec![
        String::from("hi"),
        String::from("from"),
        String::from("the"),
        String::from("thread"),
    ];

    for val in vals {
        tx1.send(val).unwrap();
        thread::sleep(Duration::from_secs(1));
    }
});

thread::spawn(move || {
    let vals = vec![
        String::from("more"),
        String::from("messages"),
        String::from("for"),
        String::from("you"),
    ];

    for val in vals {
        tx.send(val).unwrap();
        thread::sleep(Duration::from_secs(1));
    }
});

for received in rx {
    println!("Got: {}", received);
}

// --snip--
}
虽然你可能会看到这些值以不同的顺序出现;这依赖于你的系统。这也就是并发既有趣又困难的原因。如果通过 thread::sleep 做实验,在不同的线程中提供不同的值,就会发现他们的运行更加不确定,且每次都会产生不同的输出。
[3]共享状态的并发
管理互斥器:正常的管理互斥器异常复杂,所以许多人热衷于通道,然而在RUST中,得益于类型系统和所有权,我们不会在锁和解锁上出现错误。(1)Mutex < T > 的API
单线程的互斥器
use std::sync::Mutex;

fn main() {
    let m = Mutex::new(5);

    {
        let mut num = m.lock().unwrap();
        *num = 6;
    }

    println!("m = {:?}", m);
}
[4]用Sync和Send trait的可拓展并发
[5]总结:强大的RUST
pdf的作用,让法向的光更多,从而达到降噪的作用,在相同的采样数下达到噪点更少的效果
cosinepdf是为了更多的光线靠近法向来达到相同光线数量情况下光线密度最大
hittabkepdf从光源做出光线来保证达到物体(也就是更快的打到光源来结束函数调用,来降噪(也是在保证一定samole_per_pixel的情况下))
pdf_value的含义是计算概率密度,即投影面占据整个圆的面积,因此来得出整体情况下正常光的漫反射现象
100
3
5
8
目前任务:完成自由创作!原理进一步理解,前几张图用PDF做出,emmm;BONUS完成!(学并完成)
GO学习,RUST原理可以理解一下emmm CF码力!
py继续安装环境,CMU的课程学习
github学习使用
[1]基本数据
顶点坐标
v 几何体的顶点 (Geometric vertices)
vt 贴图坐标点 (Texture vertices)
格式:vt u v w
意义:绘制模型的三角面片时,每个顶点取像素点时对应的纹理图片上的坐标。纹理图片的坐标指的是,纹理图片如果被放在屏幕上显示时,以屏幕左下角为原点的坐标。
注意:w一般用于形容三维纹理,大部分是用不到的,基本都为0。
vn 顶点法线 (Vertex normals)
格式:vn x y z
意义:绘制模型三角面片时,需要确定三角面片的朝向,整个面的朝向,是由构成每个面的顶点对应的顶点法向量的做矢量和决定的(xyz的坐标分别相加再除以3得到的)。
元素(element)
f 面(face)
意义:绘制三角面片的依据,每个三角面片由三个f构成,由f可以确定顶点、顶点的对应的纹理坐标(提取纹理图片对应该坐标的像素点)、通过三个顶点对应的顶点法向量可以确定三角面的方向。
https://www.jianshu.com/p/1aac118197ff
tip:
最终每个三角面的颜色,是由构成这个三角面的三个顶点进行插值计算(有例如:一个三角面其中两个顶点对应的纹理坐标是黑色的,另外一个是白色,那整个面呈现的颜色是由黑变白渐变,而不是三个颜色值的平均值。这就是插值的作用)来确定。所以面的颜色有可能不与每个点的颜色一致。
//todo
顶点的个数不一定与纹理坐标的个数一样多,因为有可能很多顶点公用一个纹理坐标的像素。//?
//为什么要法向量这个玩意
//了解tobj的用法
[2]调外置库
OBJ文件不包含面的颜色定义信息,不过可以引用材质库,材质库信息储存在一个后缀是".mtl"的独立文件中。关键字"mtllib"即材质库的意思。
材质库中包含材质的漫射(diffuse),环境(ambient),光泽(specular)的RGB(红绿蓝)的定义值,以及反射(specularity),折射(refraction),透明度(transparency)等其它特征。
"usemtl"指定了材质之后,以后的面都是使用这一材质,直到遇到下一个"usemtl"来指定新的材质。
[3]数学过程
https://blog.csdn.net/wuwangrun/article/details/8188665
[4]一个例子
use tobj;

let cornell_box = tobj::load_obj(
    "obj/cornell_box.obj",
    &tobj::LoadOptions {
        single_index: true,
        triangulate: true,
        ..Default::default()
    },
);
assert!(cornell_box.is_ok());

let (models, materials) = cornell_box.expect("Failed to load OBJ file");

// Materials might report a separate loading error if the MTL file wasn't found.
// If you don't need the materials, you can generate a default here and use that
// instead.
let materials = materials.expect("Failed to load MTL file");

println!("# of models: {}", models.len());
println!("# of materials: {}", materials.len());

for (i, m) in models.iter().enumerate() {
    let mesh = &m.mesh;

    println!("model[{}].name = \'{}\'", i, m.name);
    println!("model[{}].mesh.material_id = {:?}", i, mesh.material_id);

    println!(
        "Size of model[{}].face_arities: {}",
        i,
        mesh.face_arities.len()
    );

    let mut next_face = 0;
    for f in 0..mesh.face_arities.len() {
        let end = next_face + mesh.face_arities[f] as usize;
        let face_indices: Vec<_> = mesh.indices[next_face..end].iter().collect();
        println!("    face[{}] = {:?}", f, face_indices);
        next_face = end;
    }

    // Normals and texture coordinates are also loaded, but not printed in this example
    println!("model[{}].vertices: {}", i, mesh.positions.len() / 3);

    assert!(mesh.positions.len() % 3 == 0);
    for v in 0..mesh.positions.len() / 3 {
        println!(
            "    v[{}] = ({}, {}, {})",
            v,
            mesh.positions[3 * v],
            mesh.positions[3 * v + 1],
            mesh.positions[3 * v + 2]
        );
    }
}

for (i, m) in materials.iter().enumerate() {
    println!("material[{}].name = \'{}\'", i, m.name);
    println!(
        "    material.Ka = ({}, {}, {})",
        m.ambient[0], m.ambient[1], m.ambient[2]
    );
    println!(
        "    material.Kd = ({}, {}, {})",
        m.diffuse[0], m.diffuse[1], m.diffuse[2]
    );
    println!(
        "    material.Ks = ({}, {}, {})",
        m.specular[0], m.specular[1], m.specular[2]
    );
    println!("    material.Ns = {}", m.shininess);
    println!("    material.d = {}", m.dissolve);
    println!("    material.map_Ka = {}", m.ambient_texture);
    println!("    material.map_Kd = {}", m.diffuse_texture);
    println!("    material.map_Ks = {}", m.specular_texture);
    println!("    material.map_Ns = {}", m.shininess_texture);
    println!("    material.map_Bump = {}", m.normal_texture);
    println!("    material.map_d = {}", m.dissolve_texture);

    for (k, v) in &m.unknown_param {
        println!("    material.{} = {}", k, v);
    }
}
https://alschwalm.com/blog/static/2017/03/07/exploring-dynamic-dispatch-in-rust/
https://zhuanlan.zhihu.com/p/163650432
静态分发和动态分发
Q1:
The dyn keyword is used to highlight that calls to methods on the associated Trait are dynamically dispatched.
这个前两个为什么不能不用dyn
Q2:引用加泛型的作用
采用生命周期+&的方法可以不必声明泛型的类型(在泛型的类型没有确定的时候)进去了可以再解释成具体的类型——在编译阶段推断出具体类型
关于检验去除部分智能指针后时间性能的优化测验
(原因:智能指针会涉及原子化操作与计时器操作)
| 图像与sample_per_pixel | static 耗时 | 正常耗时 |
|---|---|---|
| berlin ball 50 | 7:66 | 8:31 |
| radomscence 30 | 1:48:80 | 2:03:35 |
就是让随机的光线加上偏移量(角度或者位移)(probability dense function)
就好了
- close VSCode or other tools that might run
rust-analyzerbefore you start. - move original source code into
raytracerfolder - create
raytracer_codegencrate - add
raytracer_codegento dependencies ofraytracer, copy all codes from tutorial - use procedural macro in
raytracer - create a root
Cargo.tomlwith workspace definition - before commit, MAKE SURE you didn't accidentally add
target/folder or other binaries into git (you may add them into.gitignore)
[1]RUST 的过程宏
(1)宏是什么
Hello world程序中就会用到println!宏
宏即编译时将执行的一系列指令
不同于C/C++中的宏,Rust的宏并非简单的文本替换,而是在词法层面甚至语法树层面作替换,其功能更加强大,也更加安全
 macro_rules! sqr {
    ($x:expr) => {x * x}
}

fn main() {
    println!("{}", sqr!(1 + 1));
}
将得到正确的答案4。这是因为Rust的宏展开发生在语法分析阶段,此时编译器知道sqr!宏中的$x变量是一个表达式(用$x:expr标记),所以在展开后它知道如何正确处理,会将其展开为((1 + 1) * (1 + 1))
vec!
let v: Vec<u32> = vec![1, 2, 3];

#[macro_export]
macro_rules! vec {
    ( $( $x:expr ),* ) => {
        {
            let mut temp_vec = Vec::new();
            $(
                temp_vec.push($x);
            )*
            temp_vec
        }
    };
}
注意:标准库中实际定义的 vec! 包括预分配适当量的内存的代码。这部分为代码优化,为了让示例简化,此处并没有包含在内。
上述描述的是普通宏(规则宏)macro_rules!
(声明式宏)->匹配对应模式然后以一部分代码替代当前代码
(2)过程宏
AST:语法树
接受rust代码作为输入,然后在这些代码上进行操作,产生另外一些代码作为输出
过程宏分为三种:
- 派生宏(Derive macro):用于结构体(struct)、枚举(enum)、联合(union)类型,可为其实现函数或特征(Trait)。
- #[derive(CustomDerive)]
派生宏的定义方法如下:
#[proc_macro_derive(Builder)]
fn derive_builder(input: TokenStream) -> TokenStream {
    let _ = input;

    unimplemented!()
}
其使用方法如下:
#[derive(Builder)]
struct Command {
    // ...
}- 属性宏(Attribute macro):用在结构体、字段、函数等地方,为其指定属性等功能。如标准库中的#[inline]、#[derive(...)]等都是属性宏。
属性宏的定义方法如下:
#[CustomAttribute]
#[proc_macro_attribute]
fn sorted(args: TokenStream, input: TokenStream) -> TokenStream {
    let _ = args;
    let _ = input;

    unimplemented!()
}
使用方法如下:
#[sorted]
enum Letter {
    A,
    B,
    C,
    // ...
}- 函数式宏(Function-like macro):用法与普通的规则宏类似,但功能更加强大,可实现任意语法树层面的转换功能。
- custom!(...)
函数式宏的定义方法如下:
#[proc_macro]
pub fn seq(input: TokenStream) -> TokenStream {
    let _ = input;

    unimplemented!()
}
使用方法如下:
seq! { n in 0..10 {
    /* ... */
}}
它的定义方式与普通函数无异,只不过其函数调用发生在编译阶段而已。
[2]Crate [quote]
把一个返回值变成tokenstream
把rust 语法树数据转化成源码的令牌(把运行时的状态信息转化成rust的代码
在quote!宏中,通过#value插入值,对于任何实现了quote::ToTokenstrait的类型都可以被插入。 这包括大多Rust原生类型以及语法树类型。
quote!也支持重复数据,用法类似macro_rules!,如 #(...)*,#(...),*。它支持实现了IntoIterator的变量,Vec就是其中之一。
函数式宏类似于声明式宏,因为他们都通过宏调用操作符!来执行,并且看起来都像是函数调用。它们都作用于圆括号里的代码。
下面是如何在 Rust 中写一个函数式宏:
#[proc_macro]
pub fn a_proc_macro(_input: TokenStream) -> TokenStream {
    TokenStream::from(quote!(
            fn anwser()->i32{
                5
            }
))
}
函数式宏在编译期而非在运行时执行。它们可以在 Rust 代码的任何地方被使用。函数式宏同样也接收一个TokenStream并返回一个TokenStream。
tip:一个小插曲
神秘BUG解决了!!——》 这包括大多Rust原生类型以及语法树类型。
这句话值得重视,在quote内部最好用RUST的原生类型
这样写的话,卡了一个晚上的BUG
但如果提前对上述要用到的值进行赋值,可以解决问题:原因就是在生成新的代码的时候,采用center.x/y/z不能很好的找到原来的center信息,如果用原生数据类型则能够快速将数据写入二进制文件
[1]
一般完成一个项目的流程是:自己想想该怎么写->然后看看有没有人写过->有,拉别的项目到本地开始跑看,然后理解代码的意思->然后对大致流程清楚了->最后自己开始写
[2]
拆解成任务明确的子任务
Pseudo Photograph Company of ACM
ACM伪摄影公司,简称PPCA,于2021年成立😉
这个项目的主要工作是使用Rust语言实现一个光线追踪渲染器。以这个形式,你能通过学习一门新的(而且漂亮的)语言来加深对编程语言设计、编译原理的理解,同时又能趣味性地了解Computer Graphics的基础工作。
今年我们增设了作品互评环节。使用自己手写的渲染器,发挥艺术才能,创造出惊艳全场的超现实大作吧!
主要参考资料如下:
更多的参考资料信息在下方的Reference版块中。
你可以直接点击右上角的“Use this template”将这个项目复制到自己的 GitHub Profile 中。接下来,你需要做一些准备工作。
- 在
raytracer/Cargo.toml中,修改作者信息。 - 在
LICENSE中,将作者修改为自己。你也可以换成其他许可证。 - 使用 rustup 安装 Rust。如果下载速度很慢,可以考虑使用 SJTUG Mirror 的 rust-static 和 crates.io 镜像。
- 之后,你需要安装一些工具。首先,你需要定位到项目目录。而后,运行
rustup component add clippy rustfmt - 接着,运行
make ci。如果程序可以正常运行,那么环境就已经配置成功了。 - 将这些更改 push 到 GitHub 上。在 GitHub Action 中,“Lint and Test”和“Build and Upload”都应当通过。
- 程序生成的结果会出现在 GitHub Action 的 artifacts 中。output 文件夹下的内容应当是程序运行时生成的。
对 output 文件夹的修改不应该被同步到 GitHub 上(这个文件夹在
.gitignore中有设置,会被 git 忽略)。 - 最后,你可以把 README.md 的教程部分删除,换成自己程序的描述、运行方法等信息。
我们希望在前一周的时间让大家熟悉Rust的语法。请阅读Rust书(或者你认为合适的教程)学习。
- 通常来说,你只需要用到前 6 章和第 10.2 节的内容。
- 如果碰到了 lifetime 相关的问题,请仔细阅读第 4 章,特别是 4.2 的例子。
- 当然,你也可以通过第 15 章中的智能指针解决一部分 lifetime 导致的问题。
- Rust 的面向对象特性(trait,对应 C++ 的类)可以在 10.2 中找到。
- (Advanced)涉及到多线程渲染时,你可以阅读第 15、16 章的内容。
- Ray Tracing book 1,轻巧的一个周末。
初定code review:第二周周一。
- book 1相关细节
- Rust特性掌握(简易,不超出要求章节外)
- Ray Tracing book 2 (Motion Blur / Fog可二选一)
- 多线程渲染
初定code review:第二周周五
- book 2相关细节
- 工科同学结课🎉 作品互评🤯
- Ray Tracing book 3
- Advanced features
初定code review:第四周周五
- book 3相关细节
- advanced features相关细节
- ACM班同学结课🎉 作品互评🤯
这个部分尚未确定,可以暂时不看。目前移用去年的任务。
- Track 1: New Features 完成 Rest of Your Life 的剩余部分,重构代码并渲染带玻璃球的 Cornell Box。
- Track 2: More Features 完成 Next Week 中除 Motion Blur 外的部分,渲染噪点较少的最终场景。
- Track 3: Reduce Contention 此项工作的前提条件是完成多线程渲染。在多线程环境中,clone / drop Arc 可能会导致性能下降。因此,我们要尽量减少 Arc 的使用。这项任务的目标是,仅在线程创建的时候 clone Arc;其他地方不出现 Arc,将 Arc 改为引用。
- Track 4: Static Dispatch 调用
Box<dyn trait>/Arc<dyn trait>/&dyn trait中的函数时会产生额外的开销。我们可以通过泛型来解决这个问题。- 这个任务的目标是,通过定义新的泛型材质、变换和物体,比如
LambertianStatic<T>,并在场景中使用他们,从而减少动态调用的开销。你也可以另开一个模块定义和之前的材质同名的 struct。 - 你可以在
Material.rs里找到泛型的相关用法。 - 仅在
HitRecord,ScatterRecord(这个在 Rest of Your Life 的剩余部分中出现),HittableList和BVHNode中使用dyn。 - 如果感兴趣,可以探索如何使用
macro_rules来减少几乎相同的代码写两遍的冗余。
- 这个任务的目标是,通过定义新的泛型材质、变换和物体,比如
- Track 5: Code Generation 此项工作的前提条件是完成 BVH。
- 目前,
BVHNode是在运行时构造的。这个过程其实可以在编译期完成。我们可以通过过程宏生成所有的物体,并构造静态的BVHNode,从而提升渲染效率。 - 为了使用过程宏,在这个工程中,我们已经重新组织了目录结构。请参考这个 PR进行修改。
- 你可以使用
cargo expand来查看过程宏处理过后的代码。你也可以在编译过程中直接输出过程宏生成的代码。 codegen部分不需要通过 clippy。- 如果感兴趣,你也可以探索给过程宏传参的方法。e.g. 通过
make_spheres_impl! { 100 }生成可以产生 100 个球的函数。
- 目前,
- Track 6: PDF Static Dispatch 此项工作的前提条件是完成 Rest of your Life 的剩余部分。PDF 中需要处理的物体使用泛型完成,去除代码路径中的
&dyn。 - Track 7: More Code Generation 在过程宏中,读取文件,直接从 yaml 或 JSON 文件(选择一种即可)生成场景对应的程序。
- 在
data文件夹中给出了一些例子。 - 例子中
BVHNode里的bounding_box是冗余数据。你可以不使用这个数据。 - 读 JSON / yaml 可以调包。
- 在
- Track 8: Advanced Features 增加对 Transform 的 PDF 支持。
- 如果你有多余的时间,你可以通过 benchmark 来测试实现功能前后的区别。
- 完成 Track 3 前请备份代码 (比如记录 git 的 commit id)。完成 Track 4, 5, 6 时请保留原先的场景和程序,在此基础上添加新的内容。
- 你可以使用
criterioncrate 做 benchmark。benchmark 的内容可以是往构造好的场景中随机打光线,记录打一条光线所需的时间。
Makefile 中包含了运行 raytracer 的常用指令。如果没有安装 make,你也可以直接运行 cargo balahbalah。
make fmt会自动格式化所有的 Rust 代码。make clippy会对代码风格做进一步约束。make test会运行程序中的单元测试。你编写的Vec3需要通过所有测试。make run_release会运行优化后的程序。通常来说,你需要用这个选项运行 raytracer。否则,渲染会非常慢。make run以 debug 模式运行程序。make ci=fmt + clippy + test + run_release。建议在把代码 push 到远程仓库之前运行一下make ci。
这个仓库已经配置好了 GitHub Action。只要把代码 push 到远程仓库,GitHub 就会进行下面两个检查。
- Lint and Test 会运行所有单元测试,并检查代码风格。
- Build and Upload 会运行优化后的程序,并将 output 目录下生成的文件传到 build artifacts 中。
- The Rust Programming Language
- rustlings 包含许多 Rust 小练习。如果你希望通过练习来学习 Rust 语言,可以尝试一下这个参考资料。
- Ray Tracing in One Weekend — The Book Series
- (Advanced)过程宏相关
- Procedural Macros (关注 Function-like procedural macros 即可)
- quote crate
- (Advanced)JSON / yaml 读取
- serde-json,只需要关注其中的 untyped 部分。
- yaml-rust
- 通常来说,你并不需要使用到下面这个序列化/反序列化的包。
- serde


