-
Notifications
You must be signed in to change notification settings - Fork 11
Configure Permissions for an Azure AD App Registration
After an Azure AD App registration has been created, it must be given appropriate permissions to access Azure resources. Some inputs will require granting permissions to specific APIs. Other inputs will require adding the Azure AD App registration to specific Identity and Access Management (IAM) roles.
Execute the following steps for the inputs in the add-on that require specific API permissions.
Refer to the Azure/O365 Splunk Add-on Required Permissions matrix for complete details on required API and role permissions.
-
Login to the Azure Portal
-
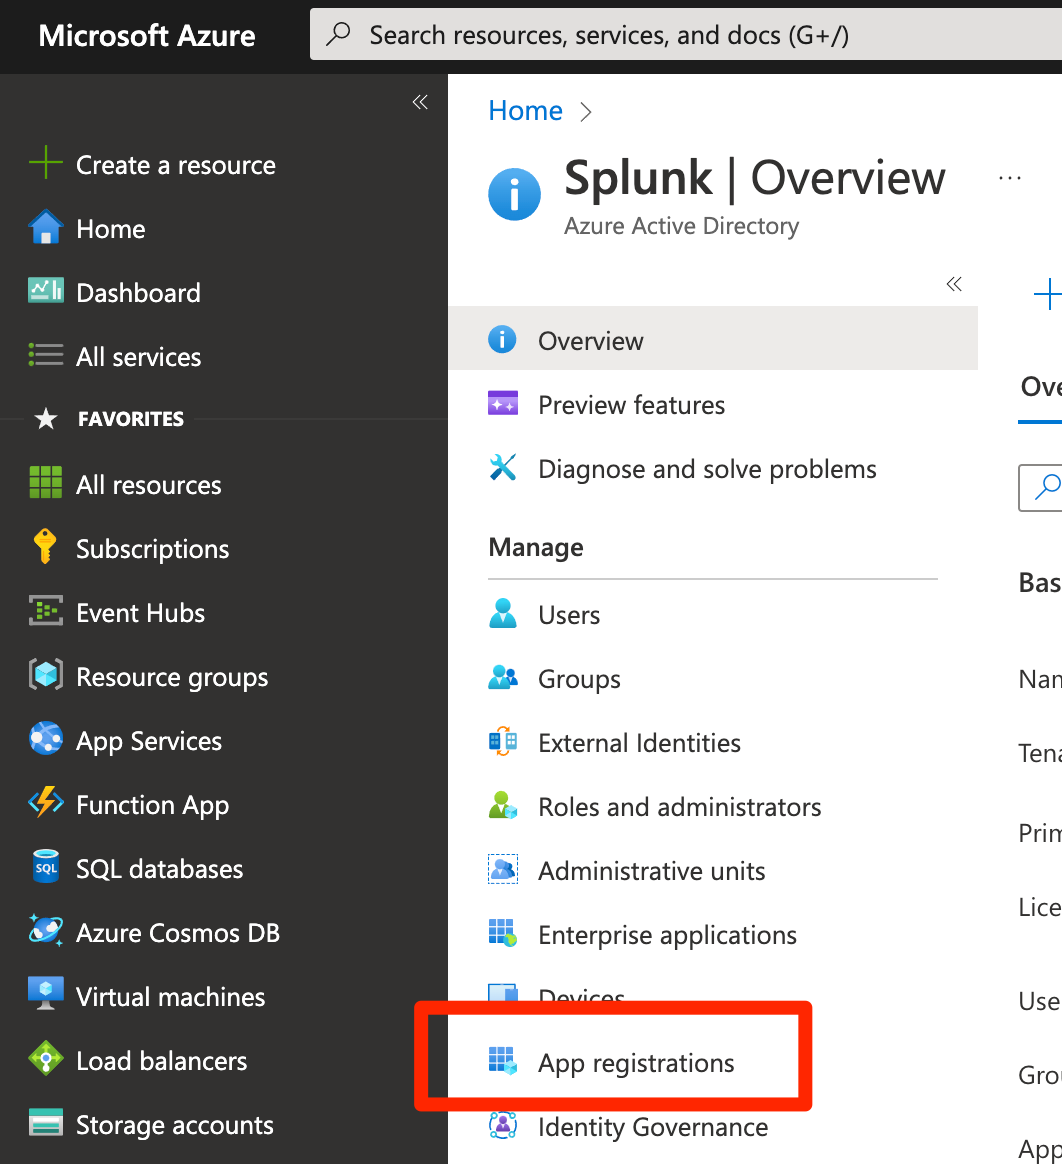
Type azure active directory in the search bar and click the Azure Active Directory service.

- Select App registrations.
-
Select your App registration
-
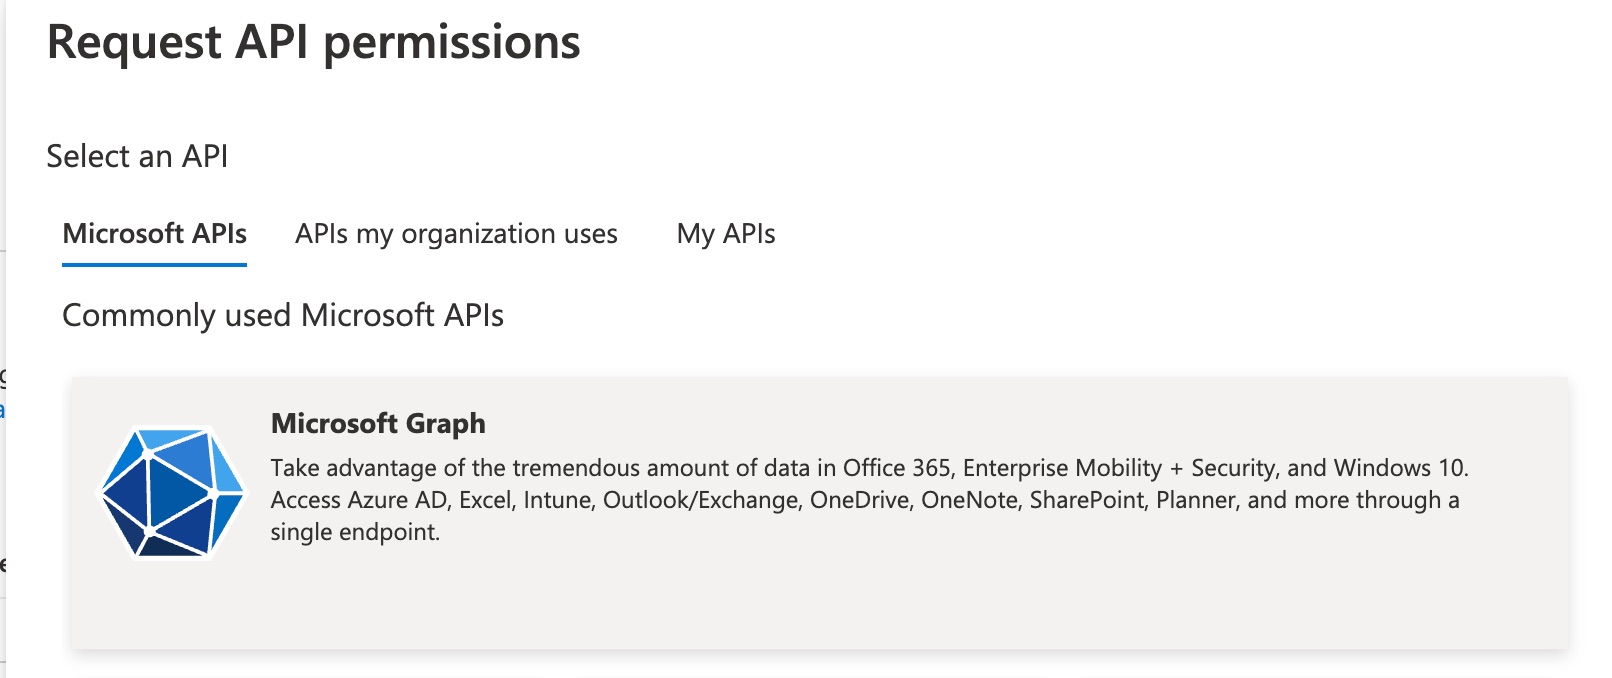
Select API permissions > Add a permission

- Select the appropriate API.
For example, choose
Microsoft Graphto gather Azure Active Directory Users data.
Refer to the Azure/O365 Splunk Add-on Required Permissions matrix to determine which API is needed for each input you want to use in the add-on.
- Choose Application or Deletegated permissions. Most inputs will require
Applicationpermissions.
We will choose
Applicationfor our Azure Active Directory Users data example.
- Select the necessary permission(s).
We will choose
User.Read.Allfor our Azure Active Directory Users data example.

-
Repeat the above steps for each necessary API permission.
-
Select the Add permissions button.
Some API permissions require an Azure administrator to consent to the requested permissions.
- From the API permissions section of your Azure AD App registration, click the button labeled Grant admin consent for .
Note: if this button is disabled, you may not have the necessary permissions to grant API consent. Contact your Azure admin to grant the API permissions.

- After granting permissions, the Status column should say "Granted for <your tenant".

Execute the following steps for the inputs in the add-on that require specific IAM roles.
Refer to the Azure/O365 Splunk Add-on Required Permissions matrix for complete details on required API and role permissions.
-
Login to the Azure Portal
-
Type subscriptions in the search bar and click the Subscriptions service.

-
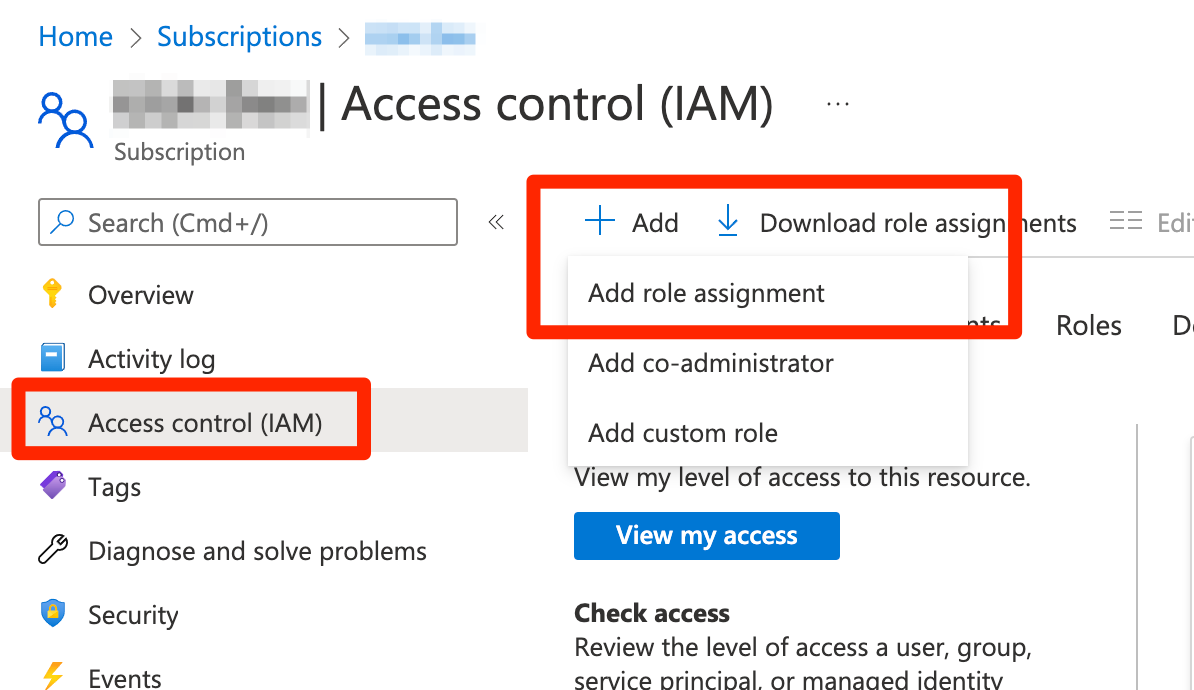
Select your subscription, and then click Access control (IAM).
-
Click the Add button, and then select the Add role assignment option.
- In the search box, type the name of the required role. Select the role in the table, and then click the Next button.
For example, choose
Readerto gather Compute data.

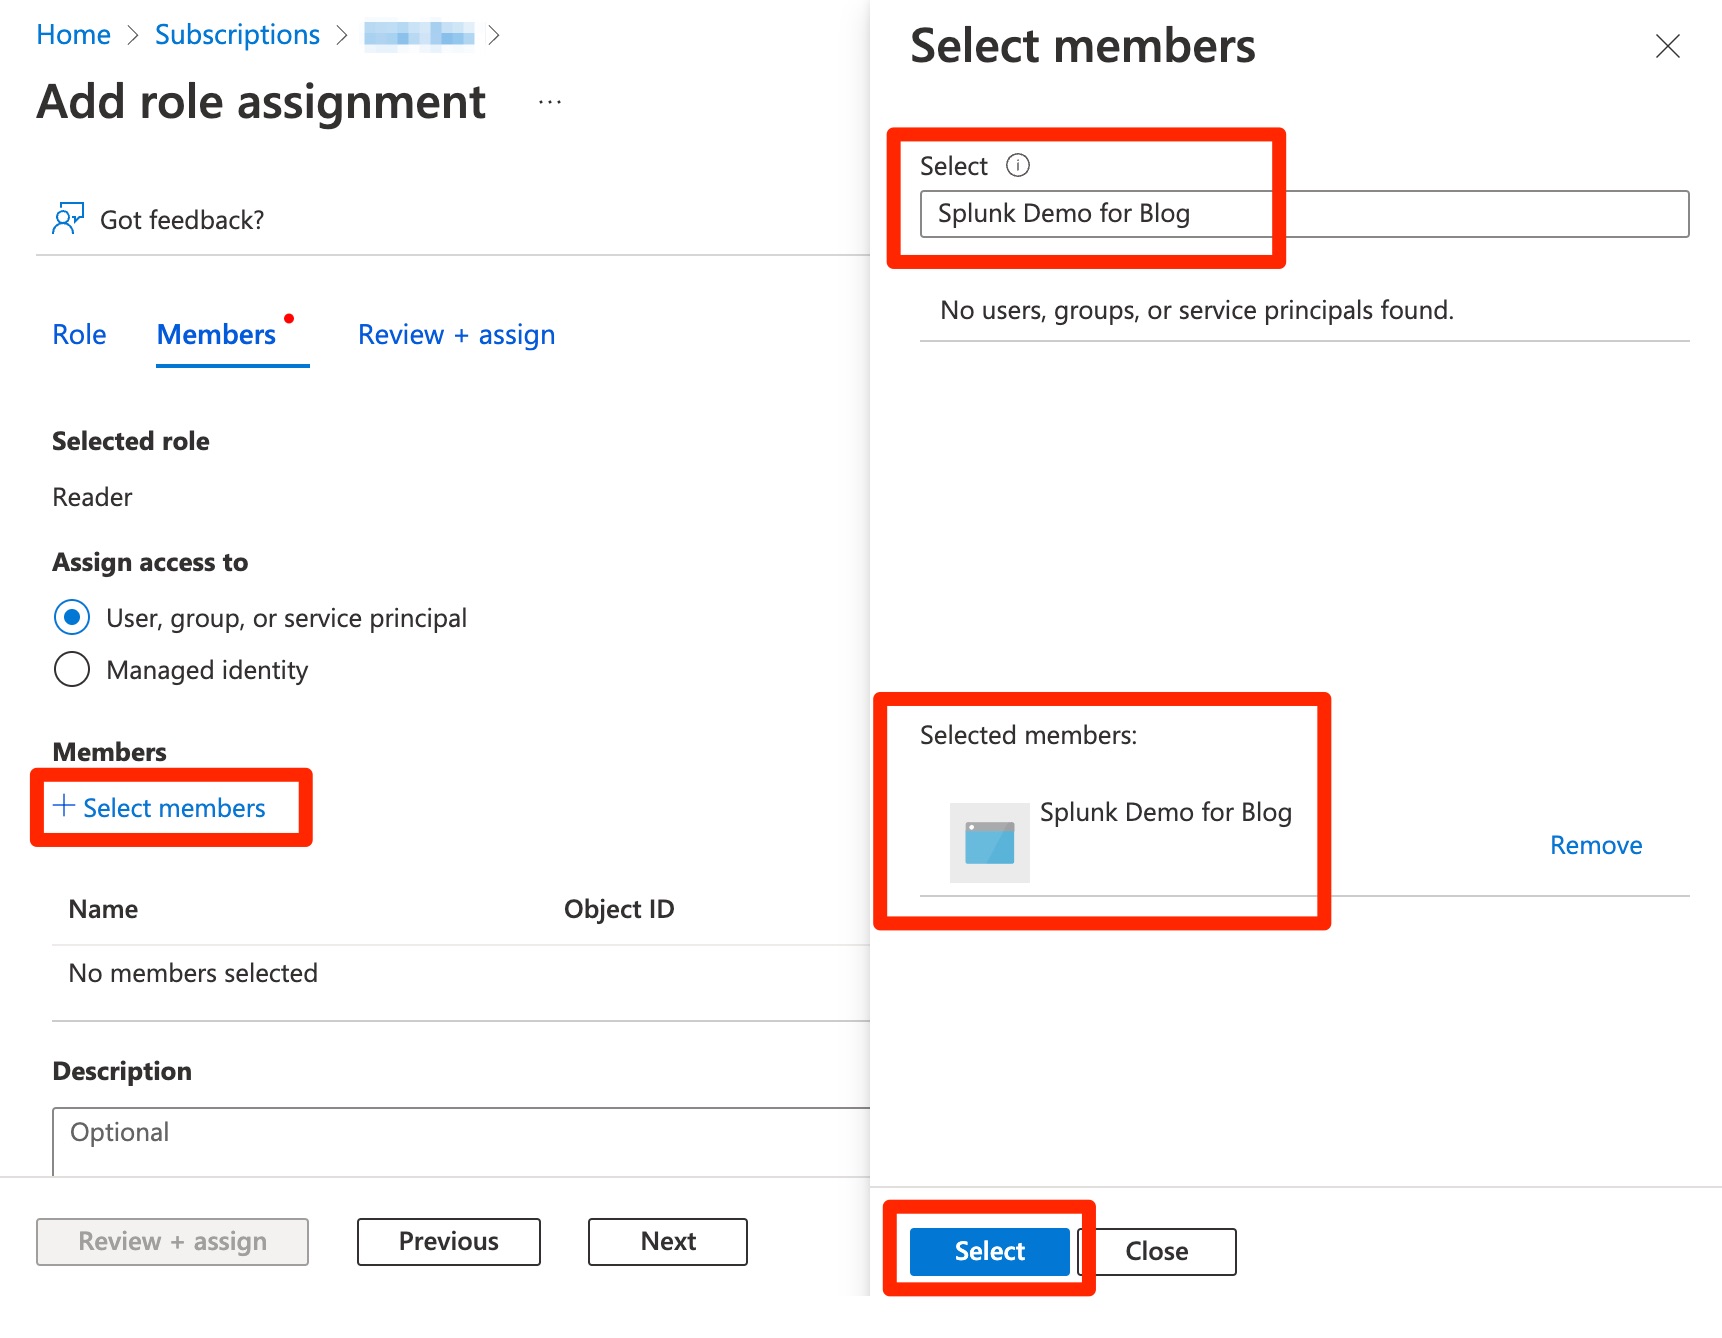
- Click the Select members button. Type the name of the Azure AD Application registration. Click the name of the application so that it shows up in the Selected members section. Then, click the Select button.
-
Click the Review + assign button.
-
Once the process finishes, click Role assignments and check that the application is in the role.
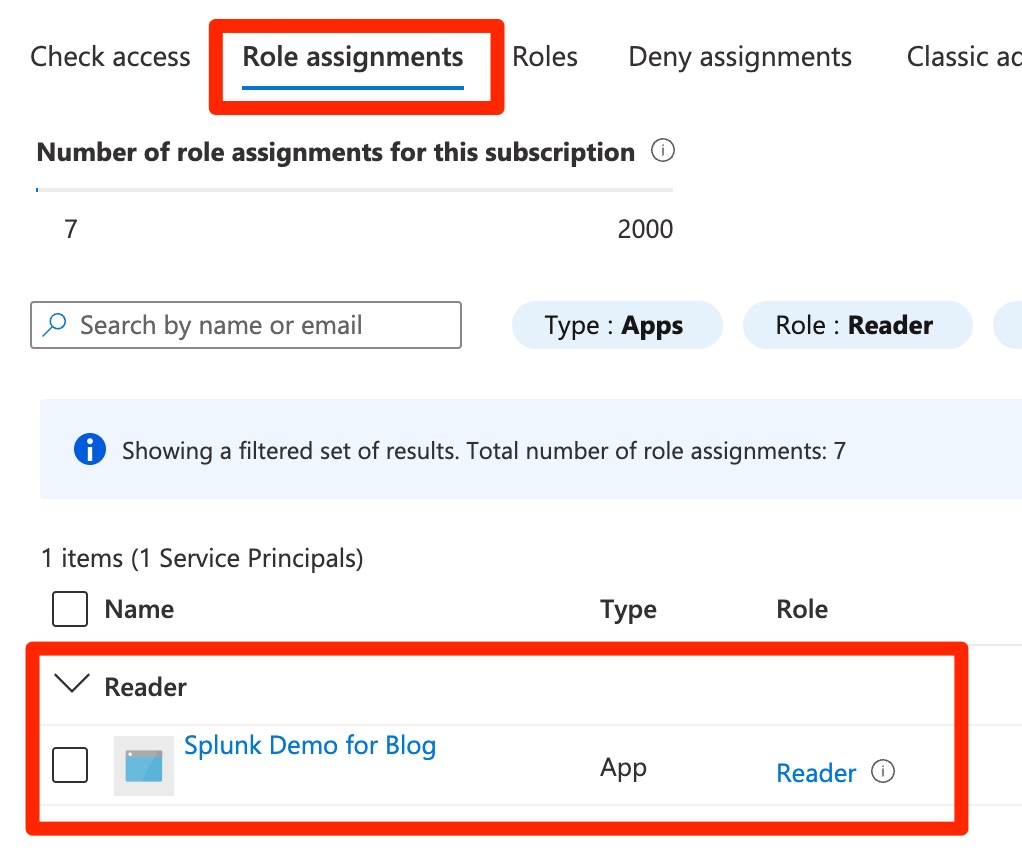
- Repeat the above steps for each necessary role.
Connect to your Azure Account with Splunk Add-on for Microsoft Azure
![]()
- Create an Azure AD App Registration
- Configure Permissions for an Azure AD App Registration
- Connect to your Azure Account with Splunk Add-on for Microsoft Azure
- Configure Azure Active Directory inputs
- Configure Azure Metrics inputs
- Configure Security Center Alerts & Tasks inputs
- Configure Azure Subscriptions inputs
- Configure Azure Resource Groups inputs
- Configure Azure Virtual Network inputs
- Configure Azure Compute inputs
- Configure Azure KQL Log Analytics inputs
- Configure Azure Billing and Consumption inputs
- Configure Azure Reservation Recommendation inputs
- Configure Azure Resource Graph inputs
- Configure Azure Topology inputs