-
Notifications
You must be signed in to change notification settings - Fork 142
Mcu Reference
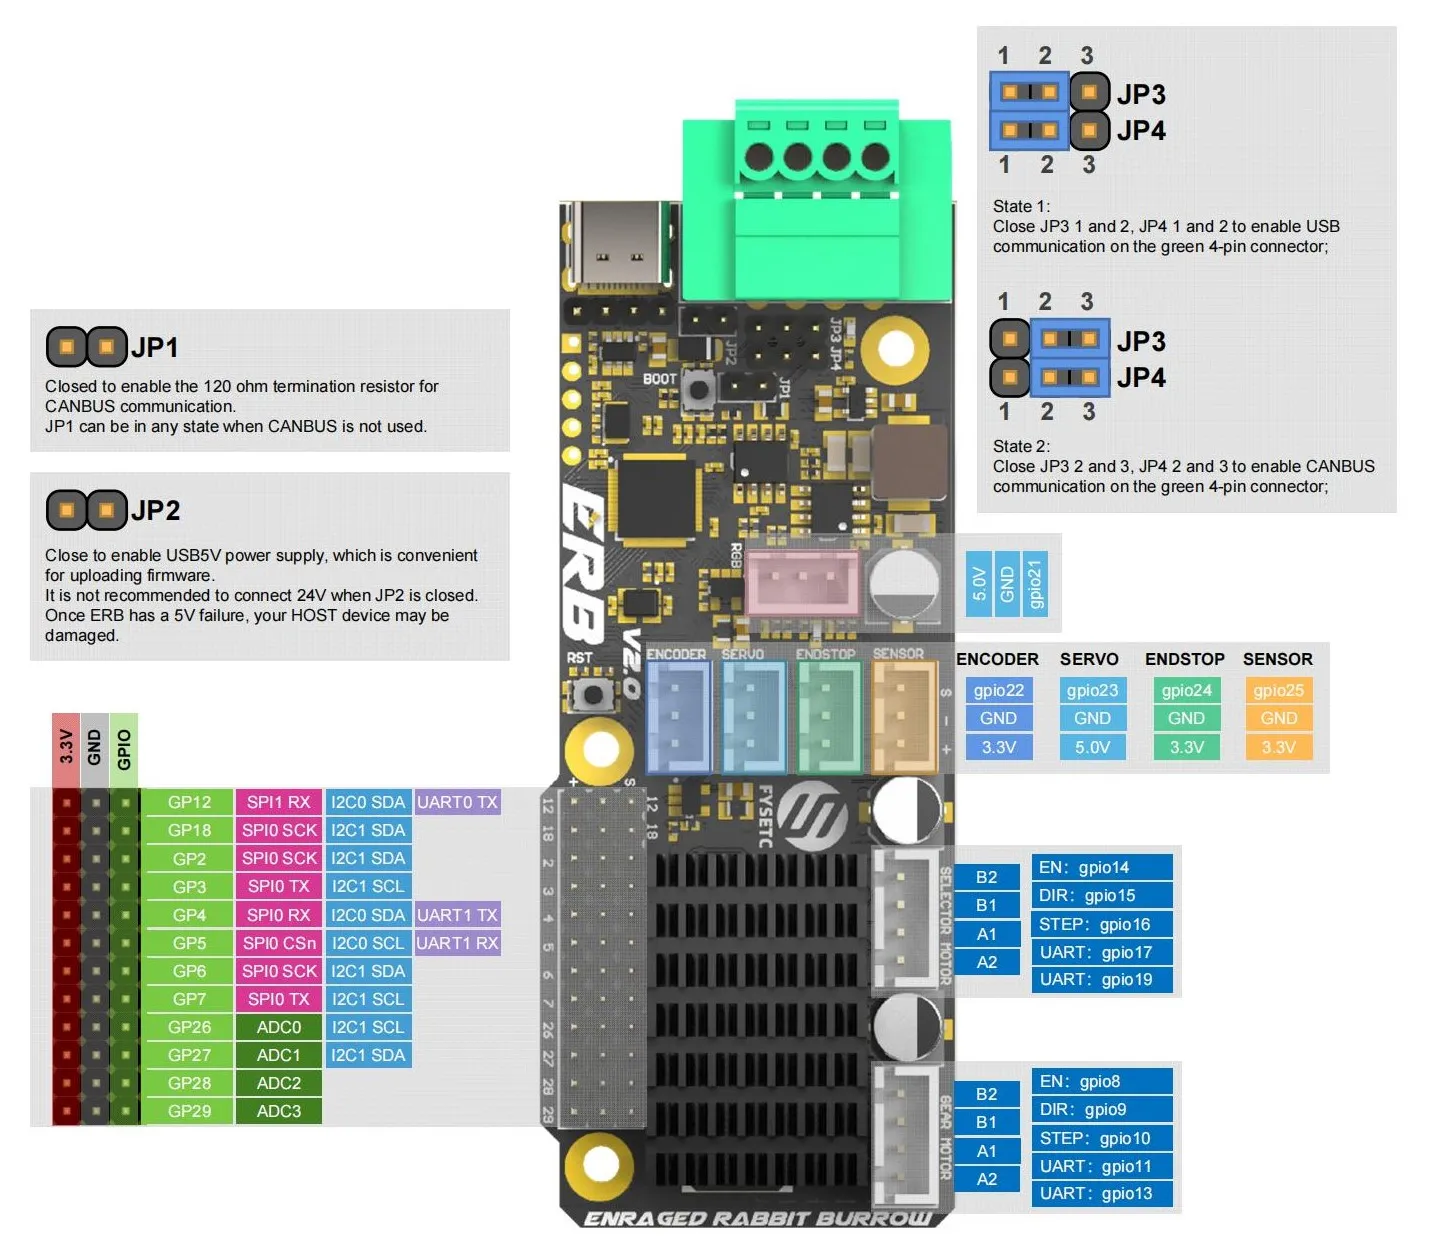
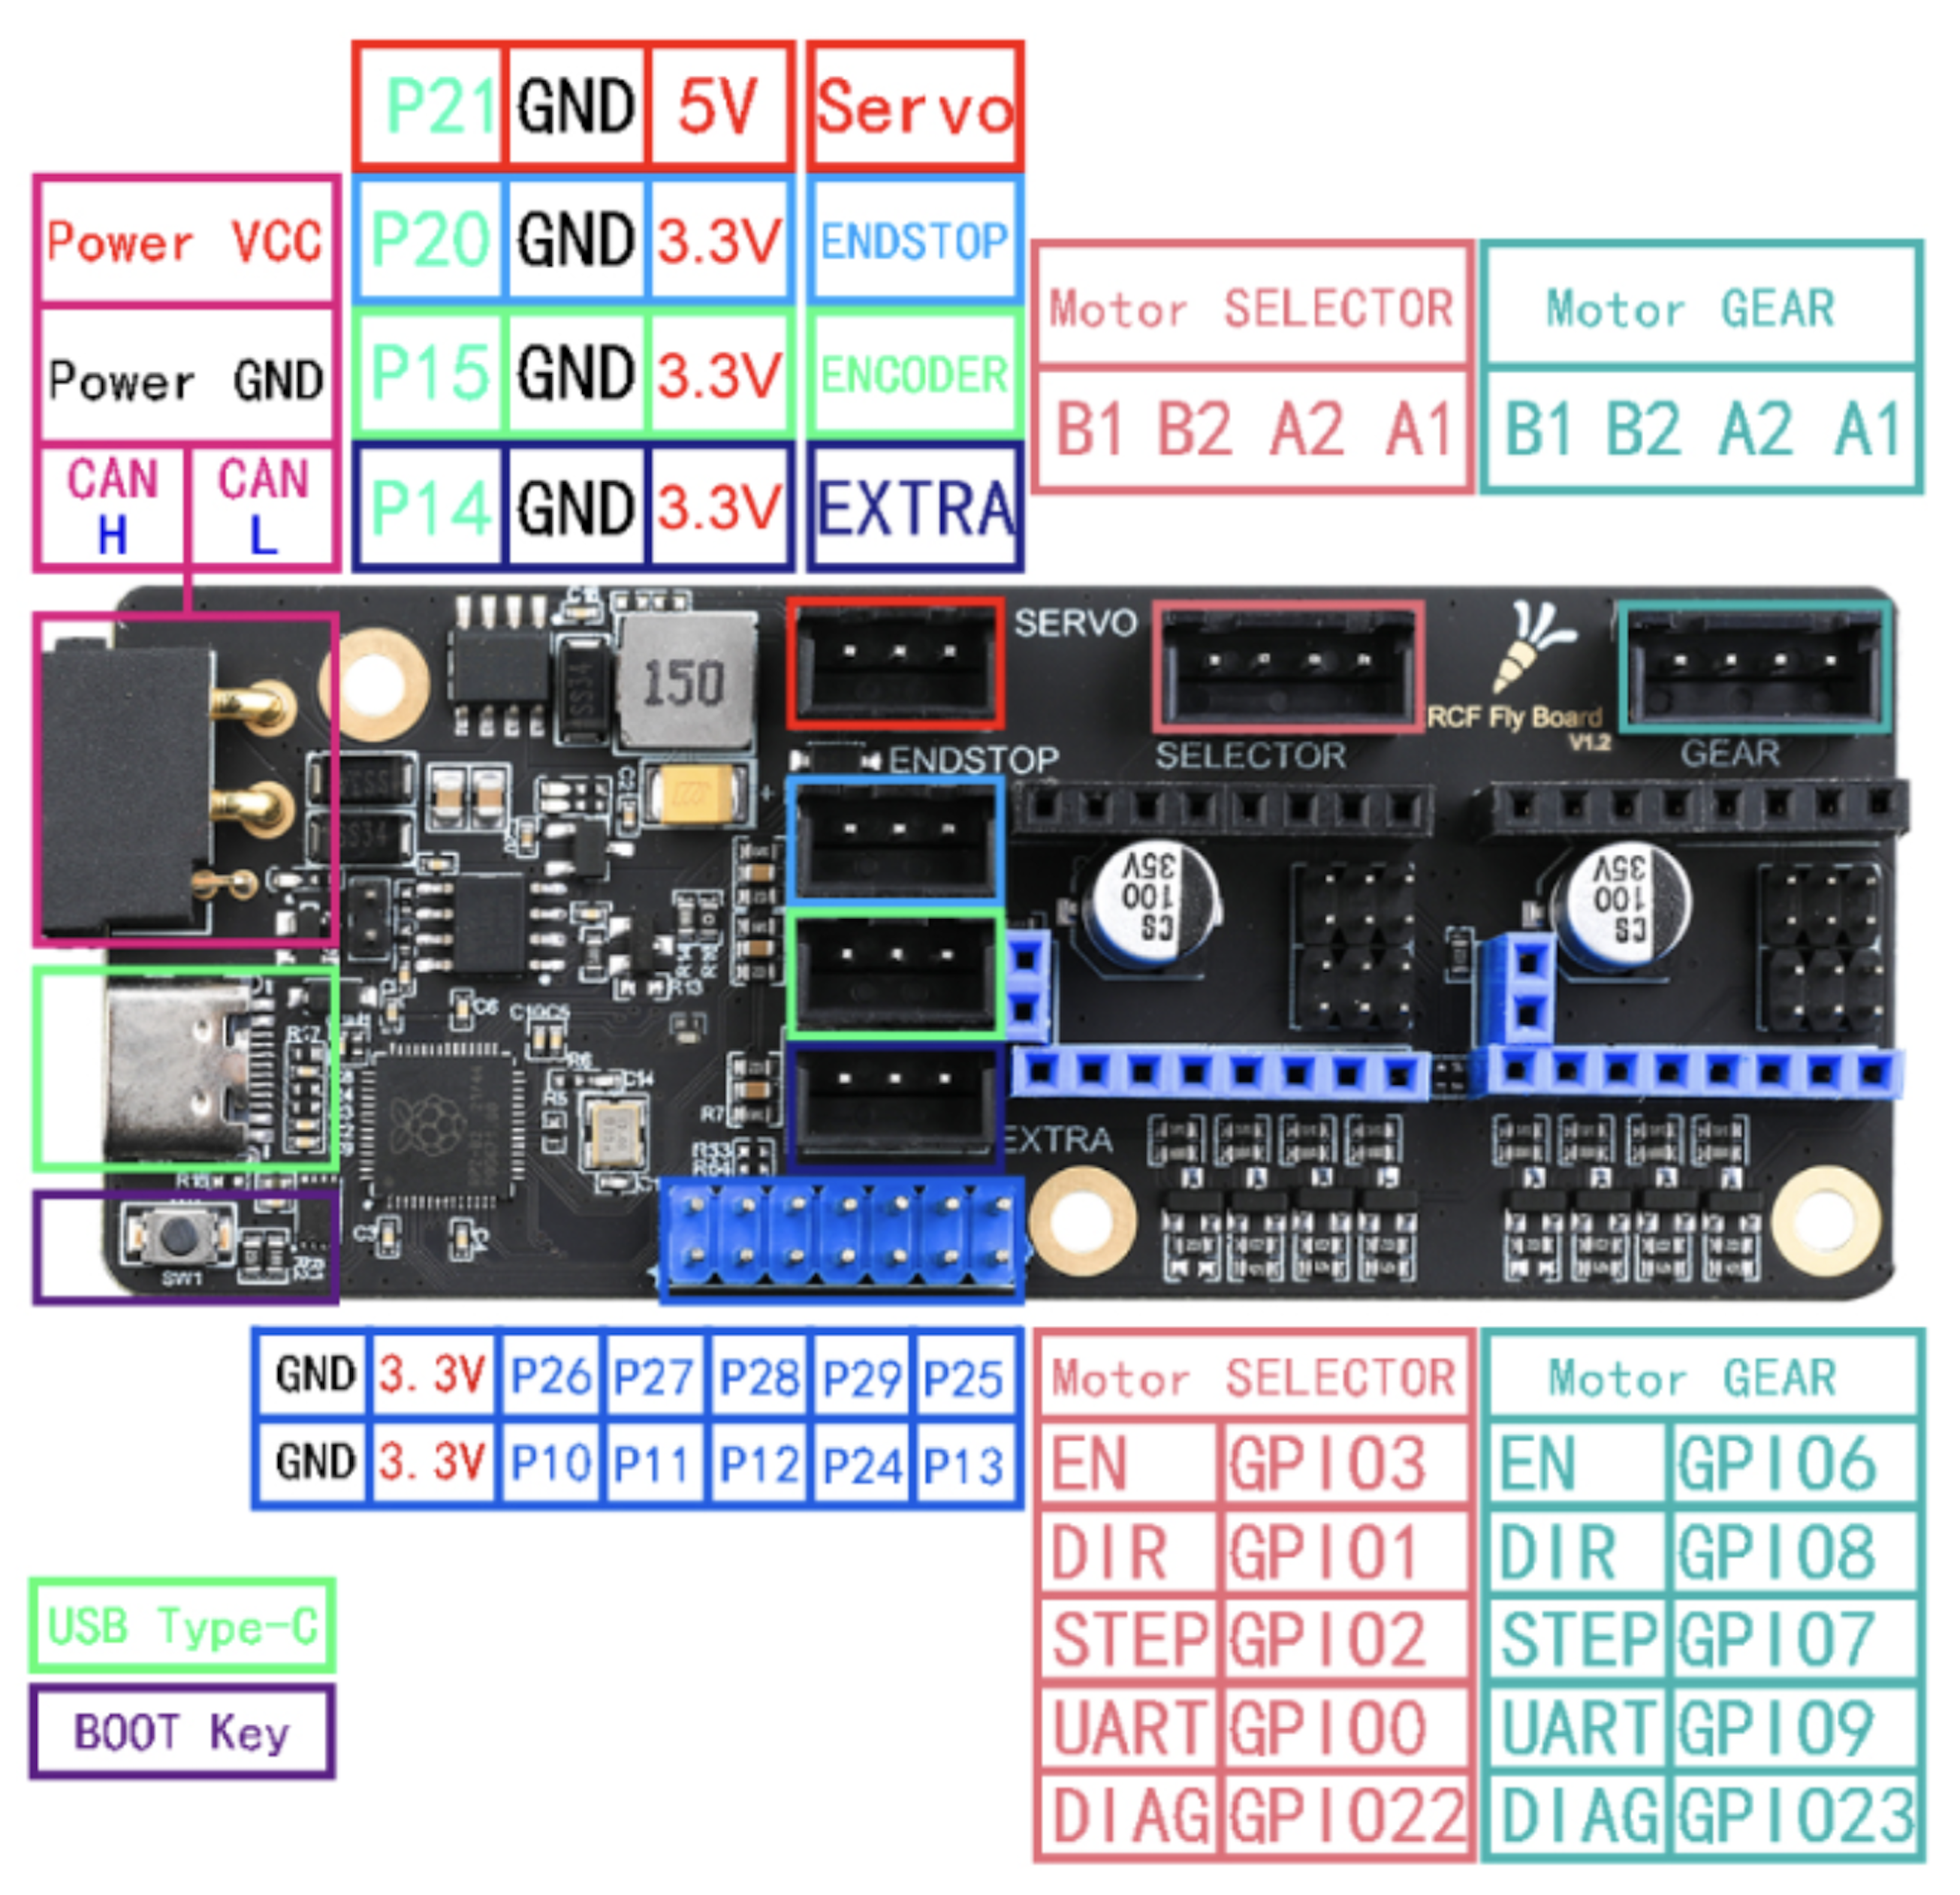
The folling a collection of reference material showing pinouts, pin numbering and firmware programming notes for the most popular MCU's used for MMU Designs
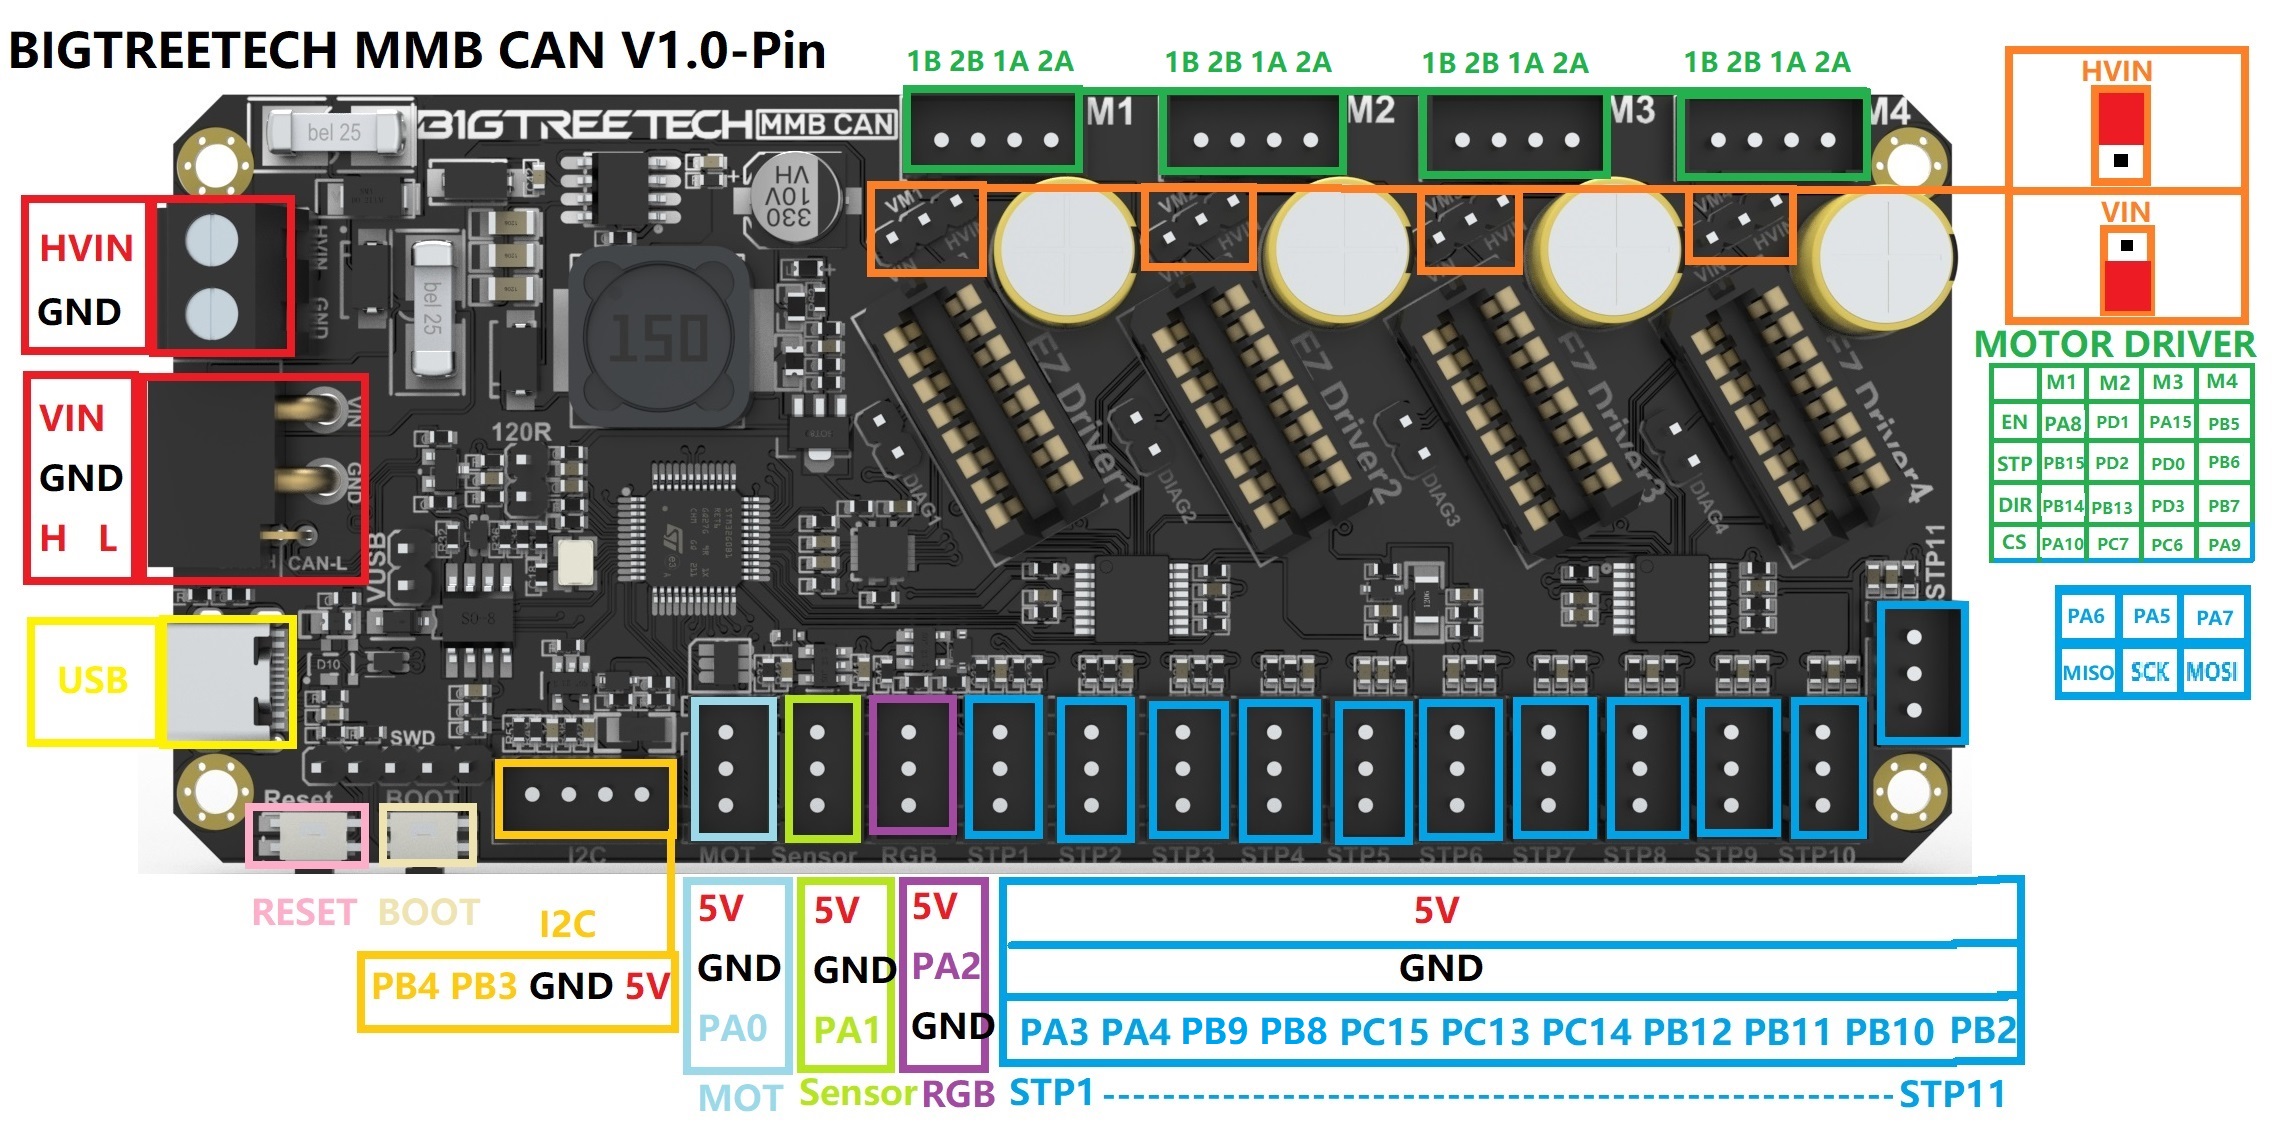
Click for details on Firmware flashing
Probably the best guide available is Esoterical's site: Firmware Guide
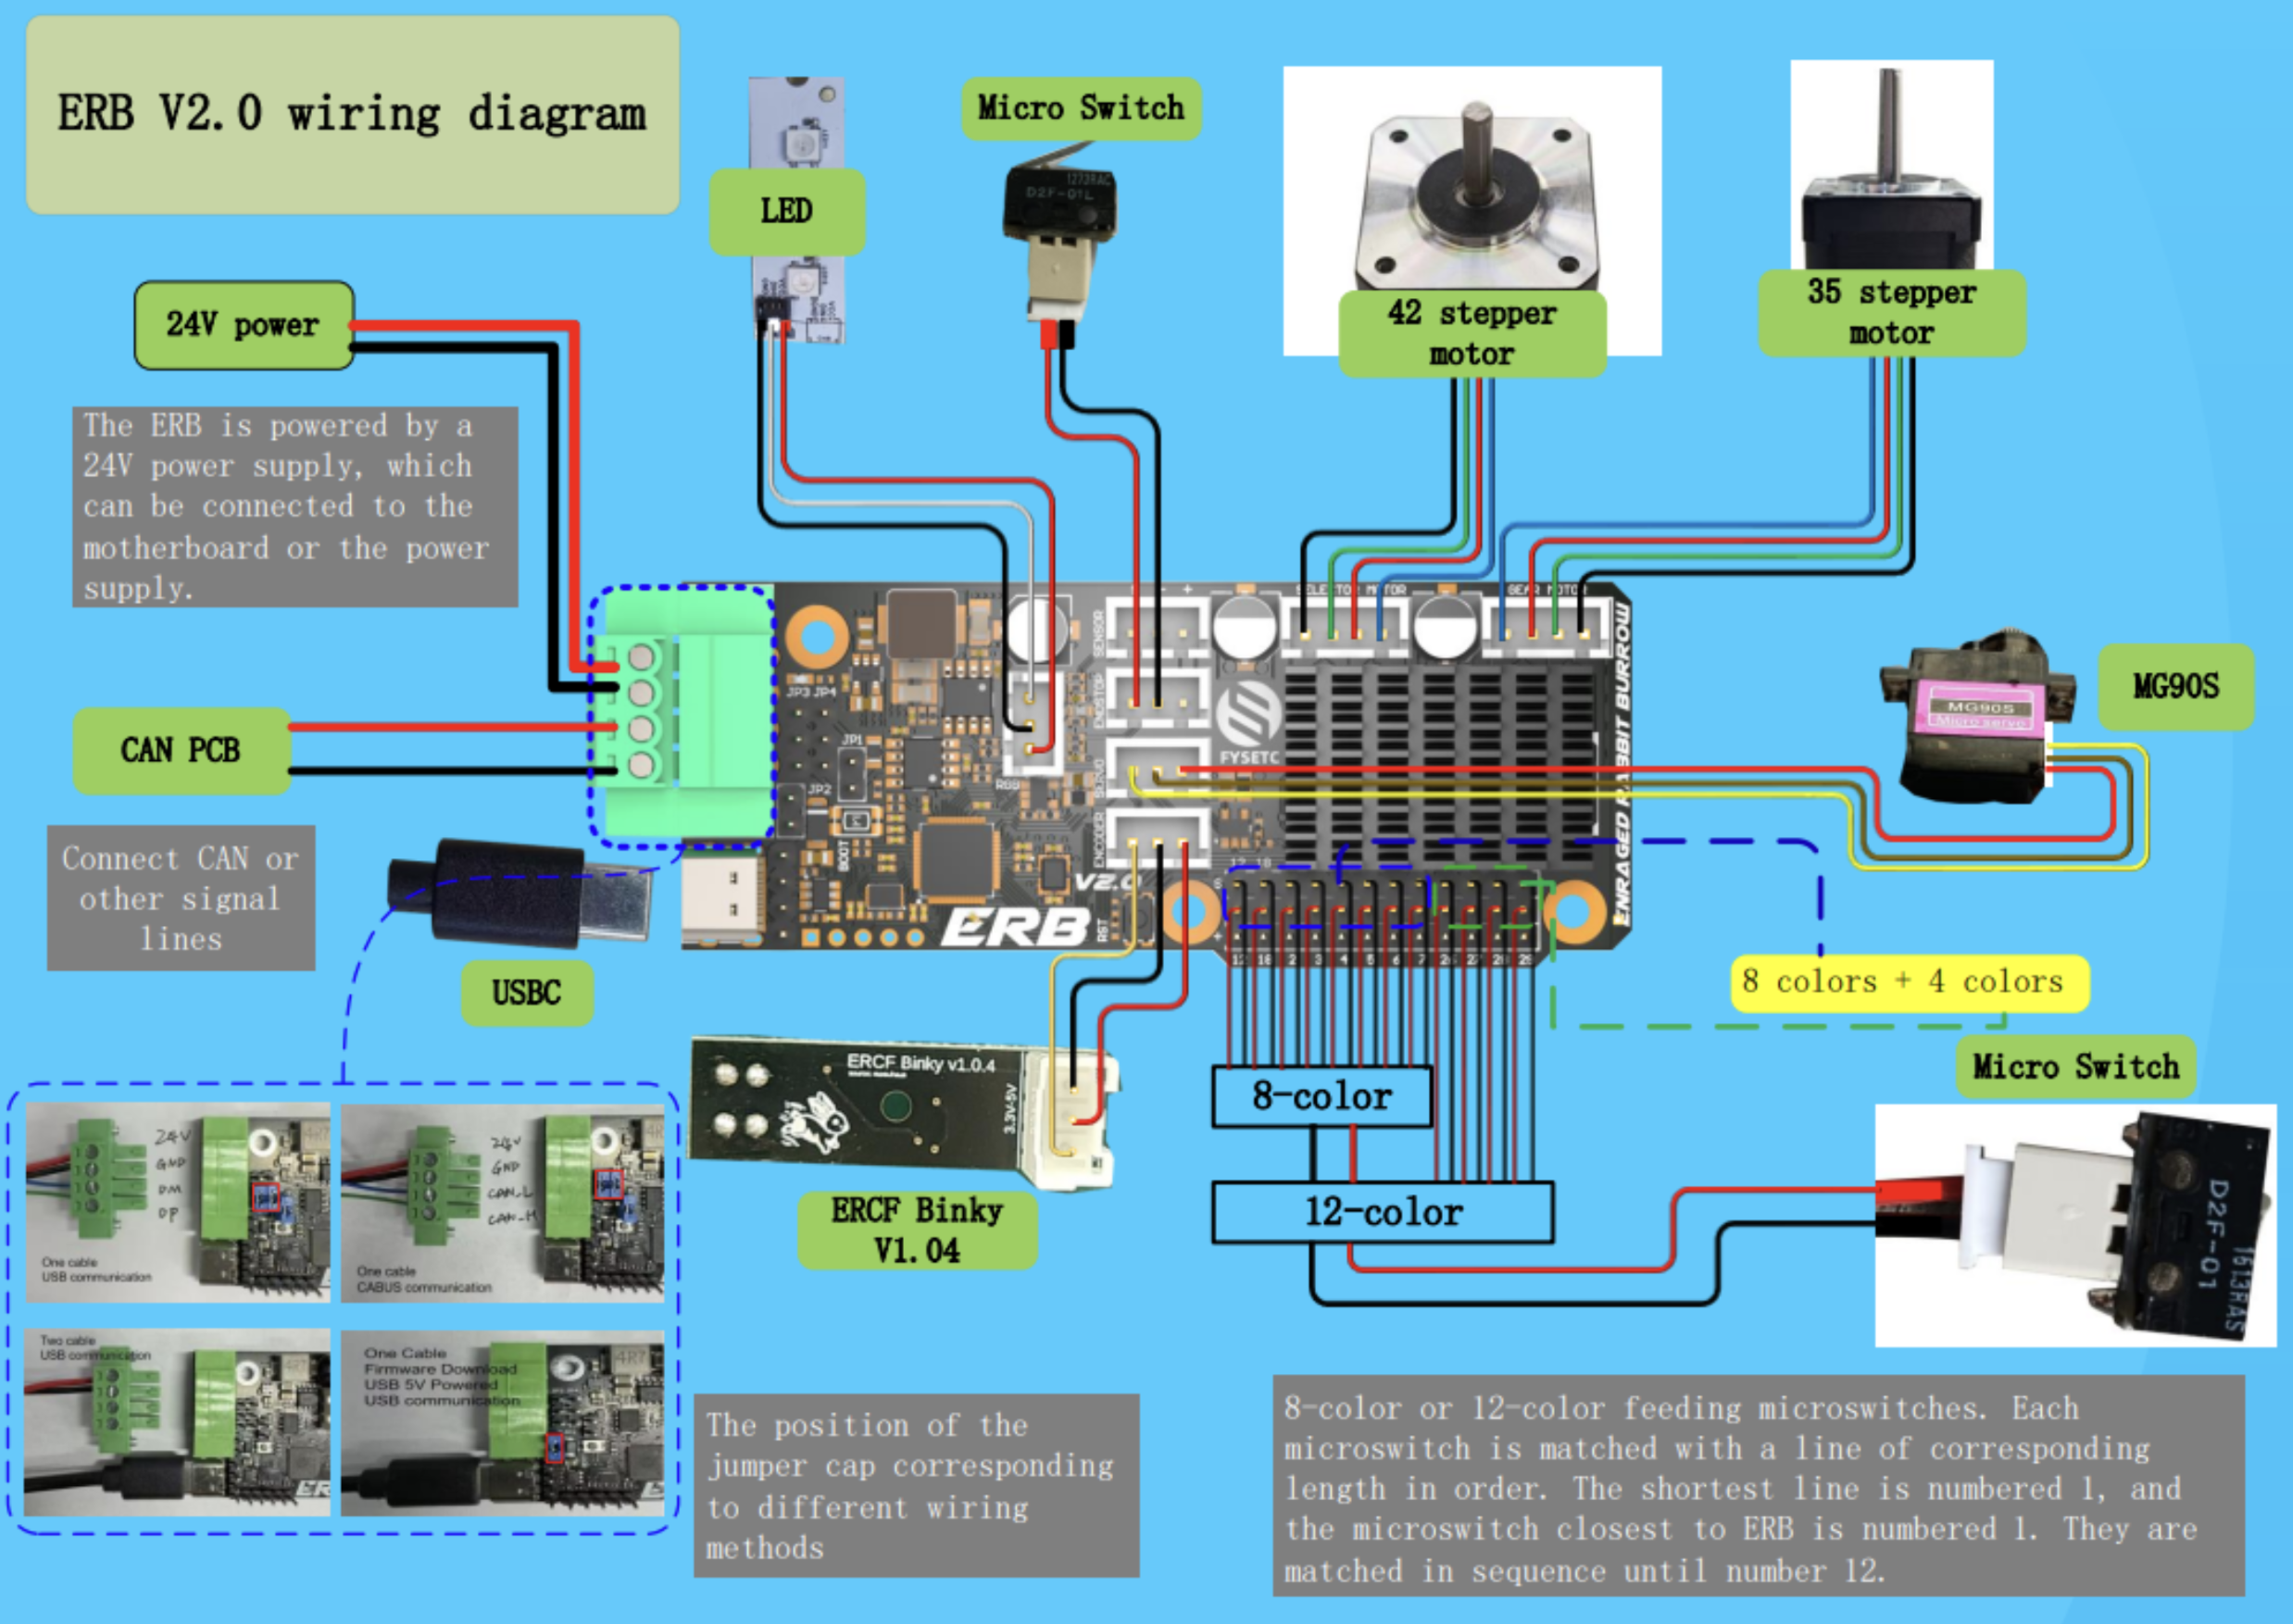
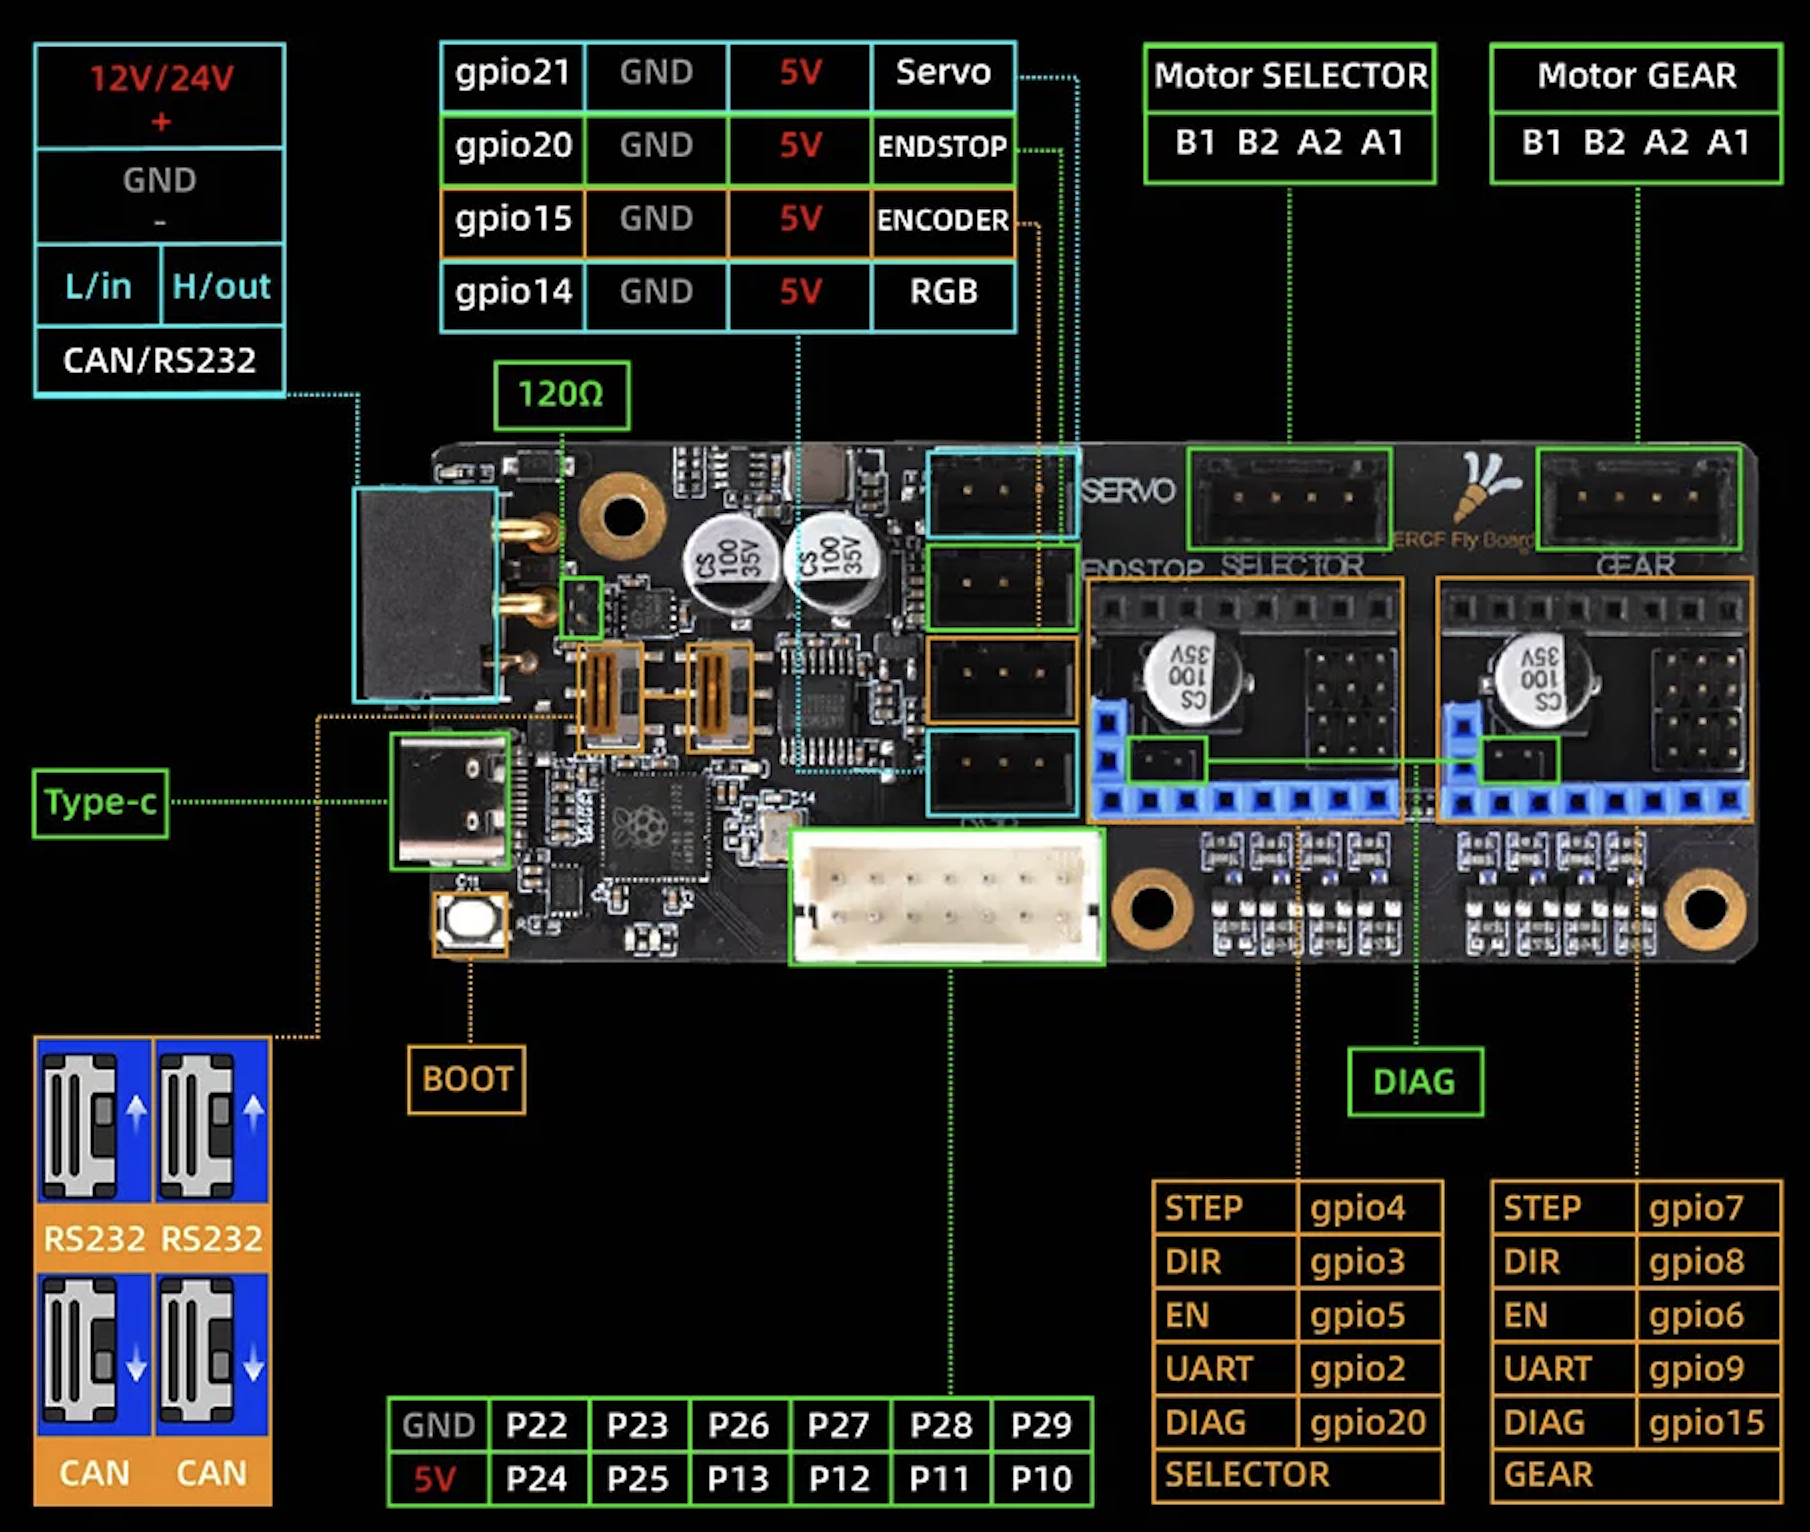
ERCF v2 Connection Diagram:
Click for details on Firmware flashing
Probably the best guide available is Esoterical's site: Firmware Settings
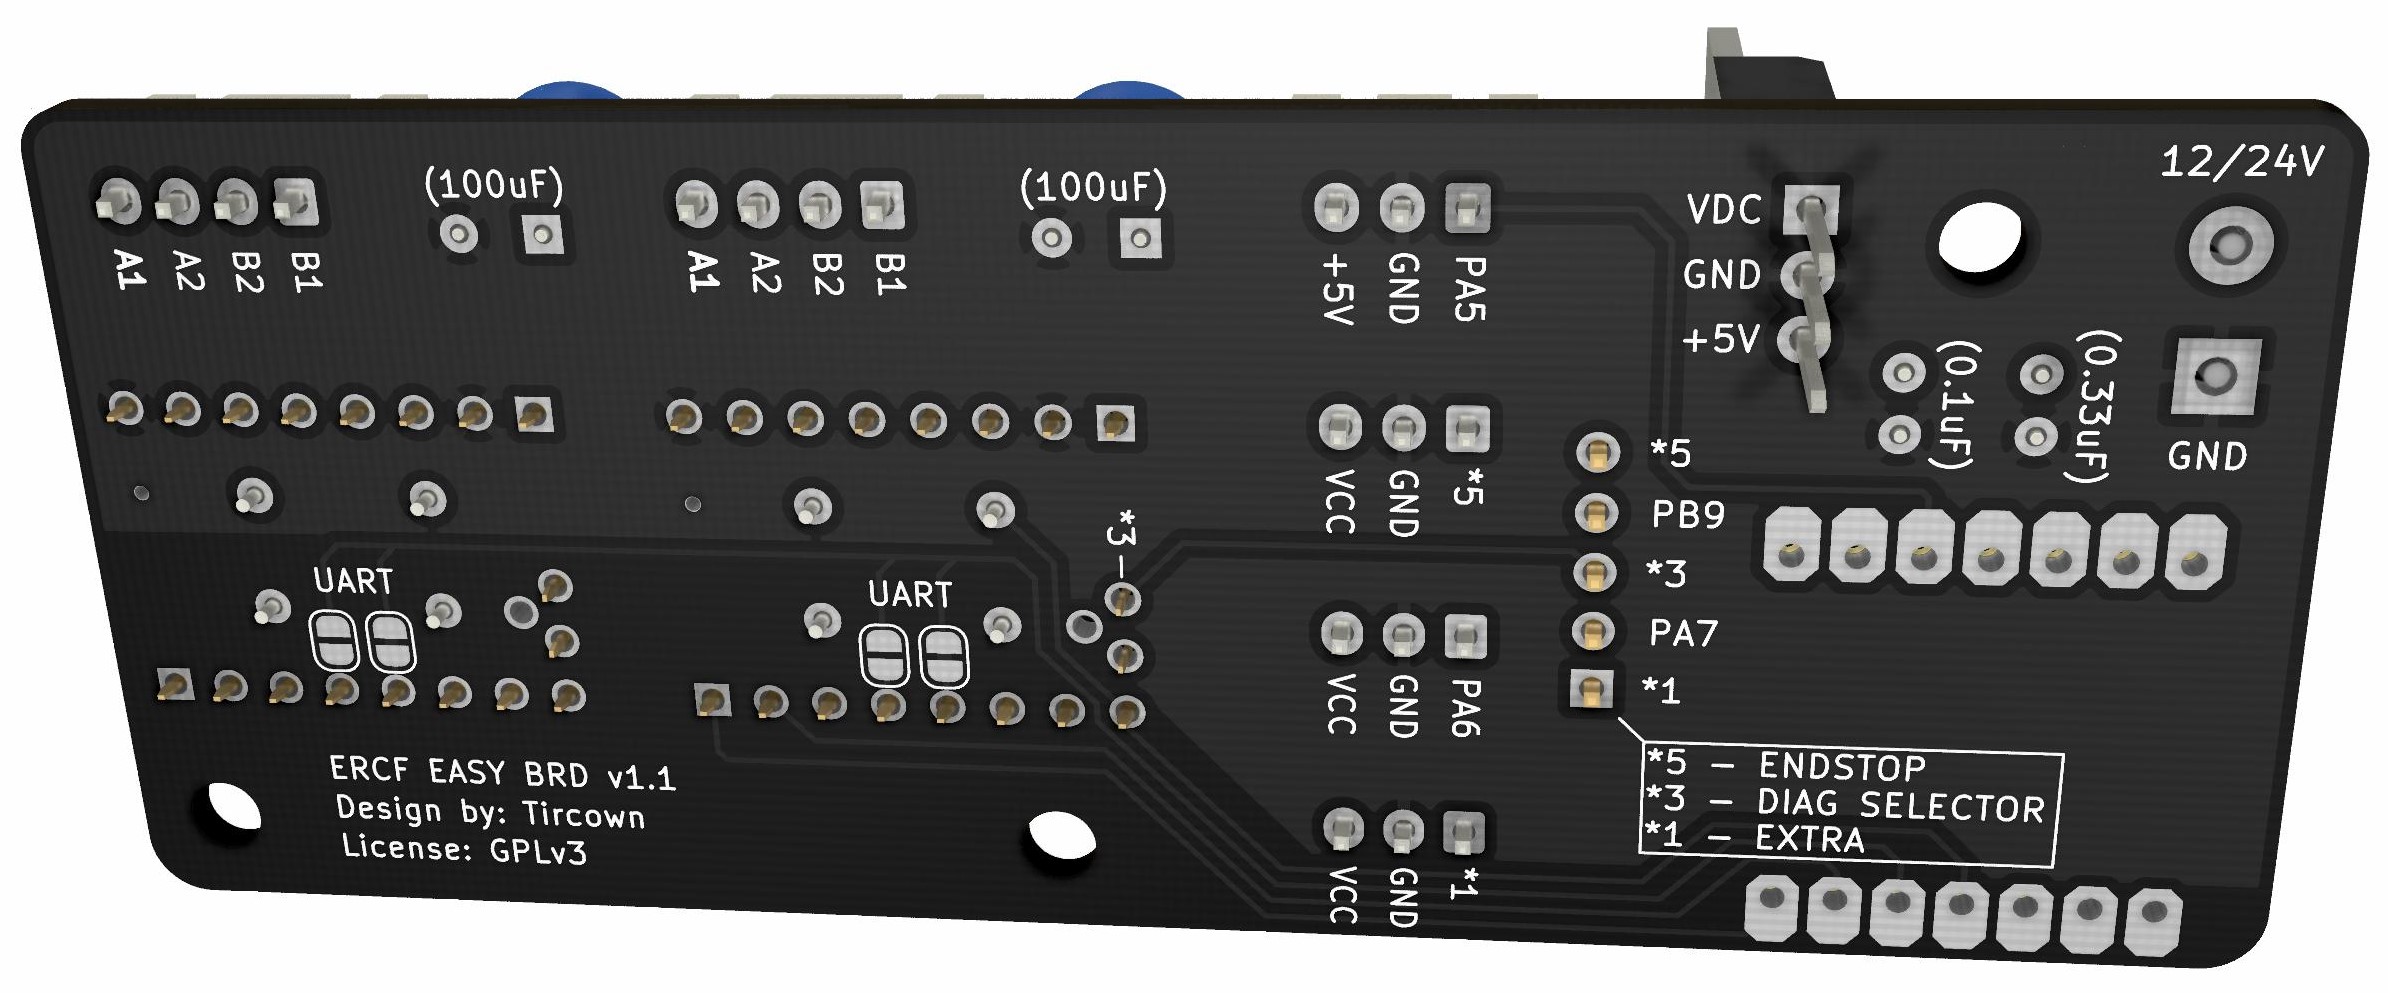
Click for details on Firmware flashing
Probably the best guide available is Esoterical's site: Firmware Settings
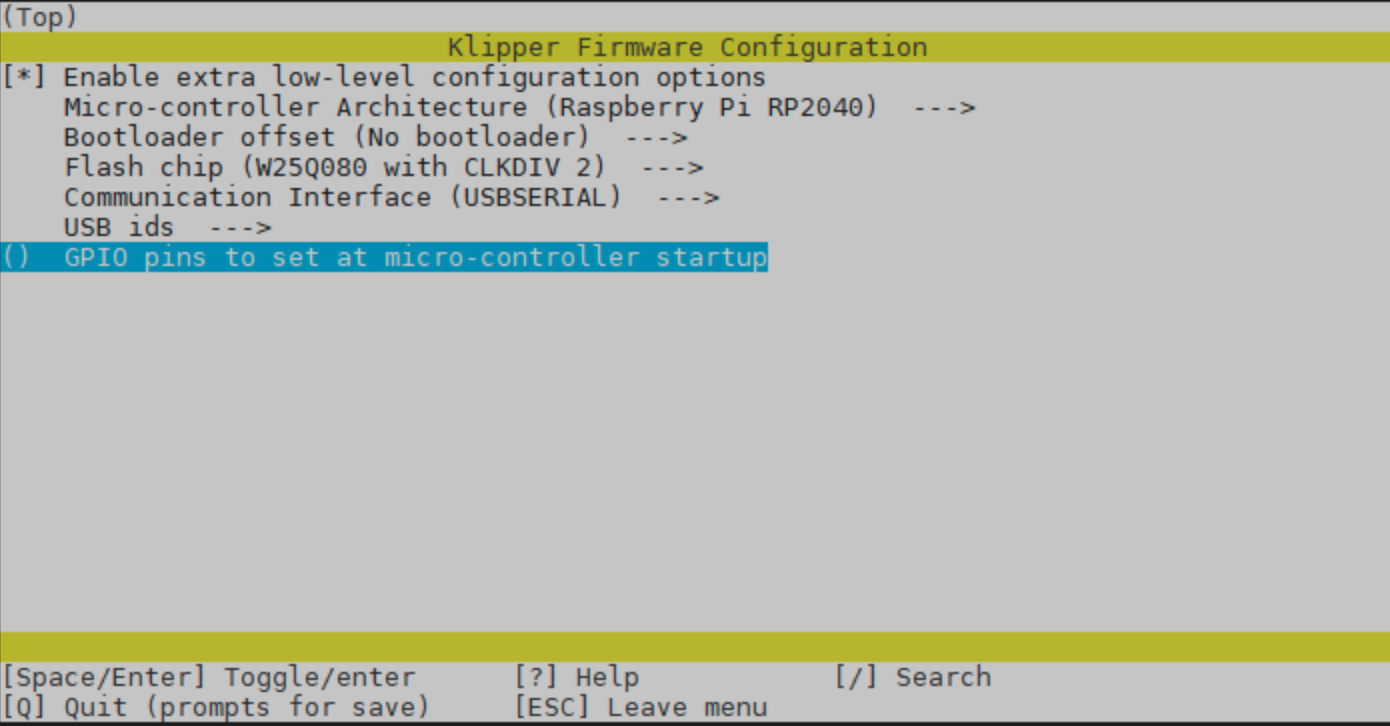
When using any MCU with Klipper, it is important to first flash Klipper firmware. Follow these steps to flash your MCU with Klipper firmware:
Important
For MCU's using CANbus, follow this guide.
-
SSH (PuTTy) into your Raspberry Pi
-
Run the following commands:
cd ~/klipper make menuconfig -
Enter your MCU board's firmware settings, as explained later in this page.
-
Save (Q)
-
Run the following command:
make flash FLASH_DEVICE=/dev/serial/by-id/<your-mcu-id>
Tip
To find your serial port, open a new SSH window, unplug your controller board, and run:
ls /dev/serial/by-id
Next, plug in your controller board, and re-run the command. The newly added line is your controller's serial address.
  (\_/)
  ( *,*)
  (")_(") Happy Hare Ready
Copyright (C) 2022-2025 Paul Morgan
1. Introduction
2. Installation
3. Essential Configuration
4. Calibration
5. Operation
-- YOUR MMU IS READY TO PLAY WITH --
6. Slicer-MMU Setup
-- NOW YOU ARE READY TO PRINT! --
7. Tuning
8. Optional Feature Setup
9. Advanced Configuration
10. Advanced Concepts
- State Persistence
- Statistics and Counters
- Tool and Gate Maps
- Filament Bypass
- Runout/Clog Detection
- Consumption Counters
- Synchronized Gear/Extruder
11. Quick References
12. Troubleshooting
13. FAQ
14. MCU Board Reference 🆕
15. Change Log
Happy Hare Discord


 Popular MCUs
 )
)