-
Notifications
You must be signed in to change notification settings - Fork 0
Multiplayer
![]()
VNet is VTube Studio's built-in online collaboration functionality, available as paid DLC for Windows and macOS.
You can buy it here: https://store.steampowered.com/app/2384550
- It works for up to 4 people per collab session.
- You HAVE to start VTube Studio through Steam to use VNet.
- Any models and items (including Live2D Items) you load are automatically synced to other participants. There are currently no restrictions as to how many you can load.
- With this, your collab participants will show up directly in your VTS, so you no longer have to deal with bad collab video quality.
- You can even pin other participants' models to yourself.
- Movement data is sent between participants via the Steam P2P network, so you have to be logged into Steam to use this and the person hosting the collab has to be Steam-friends with all participants.


Note: This page describes what VNet is and how to use it. If you want to learn about security aspects, please check out the page "VNet-Security".

There are two new buttons in the main menu:
-
[LEFT]: Collab Setup
- Use this for setting up or joining the collab. Will show private details such as Steam names, Steam IDs and Steam profile pictures.
-
[RIGHT]: Collab Control
- Use this during the collab. Will show who's in the collab but only shows nicknames and no personal info.
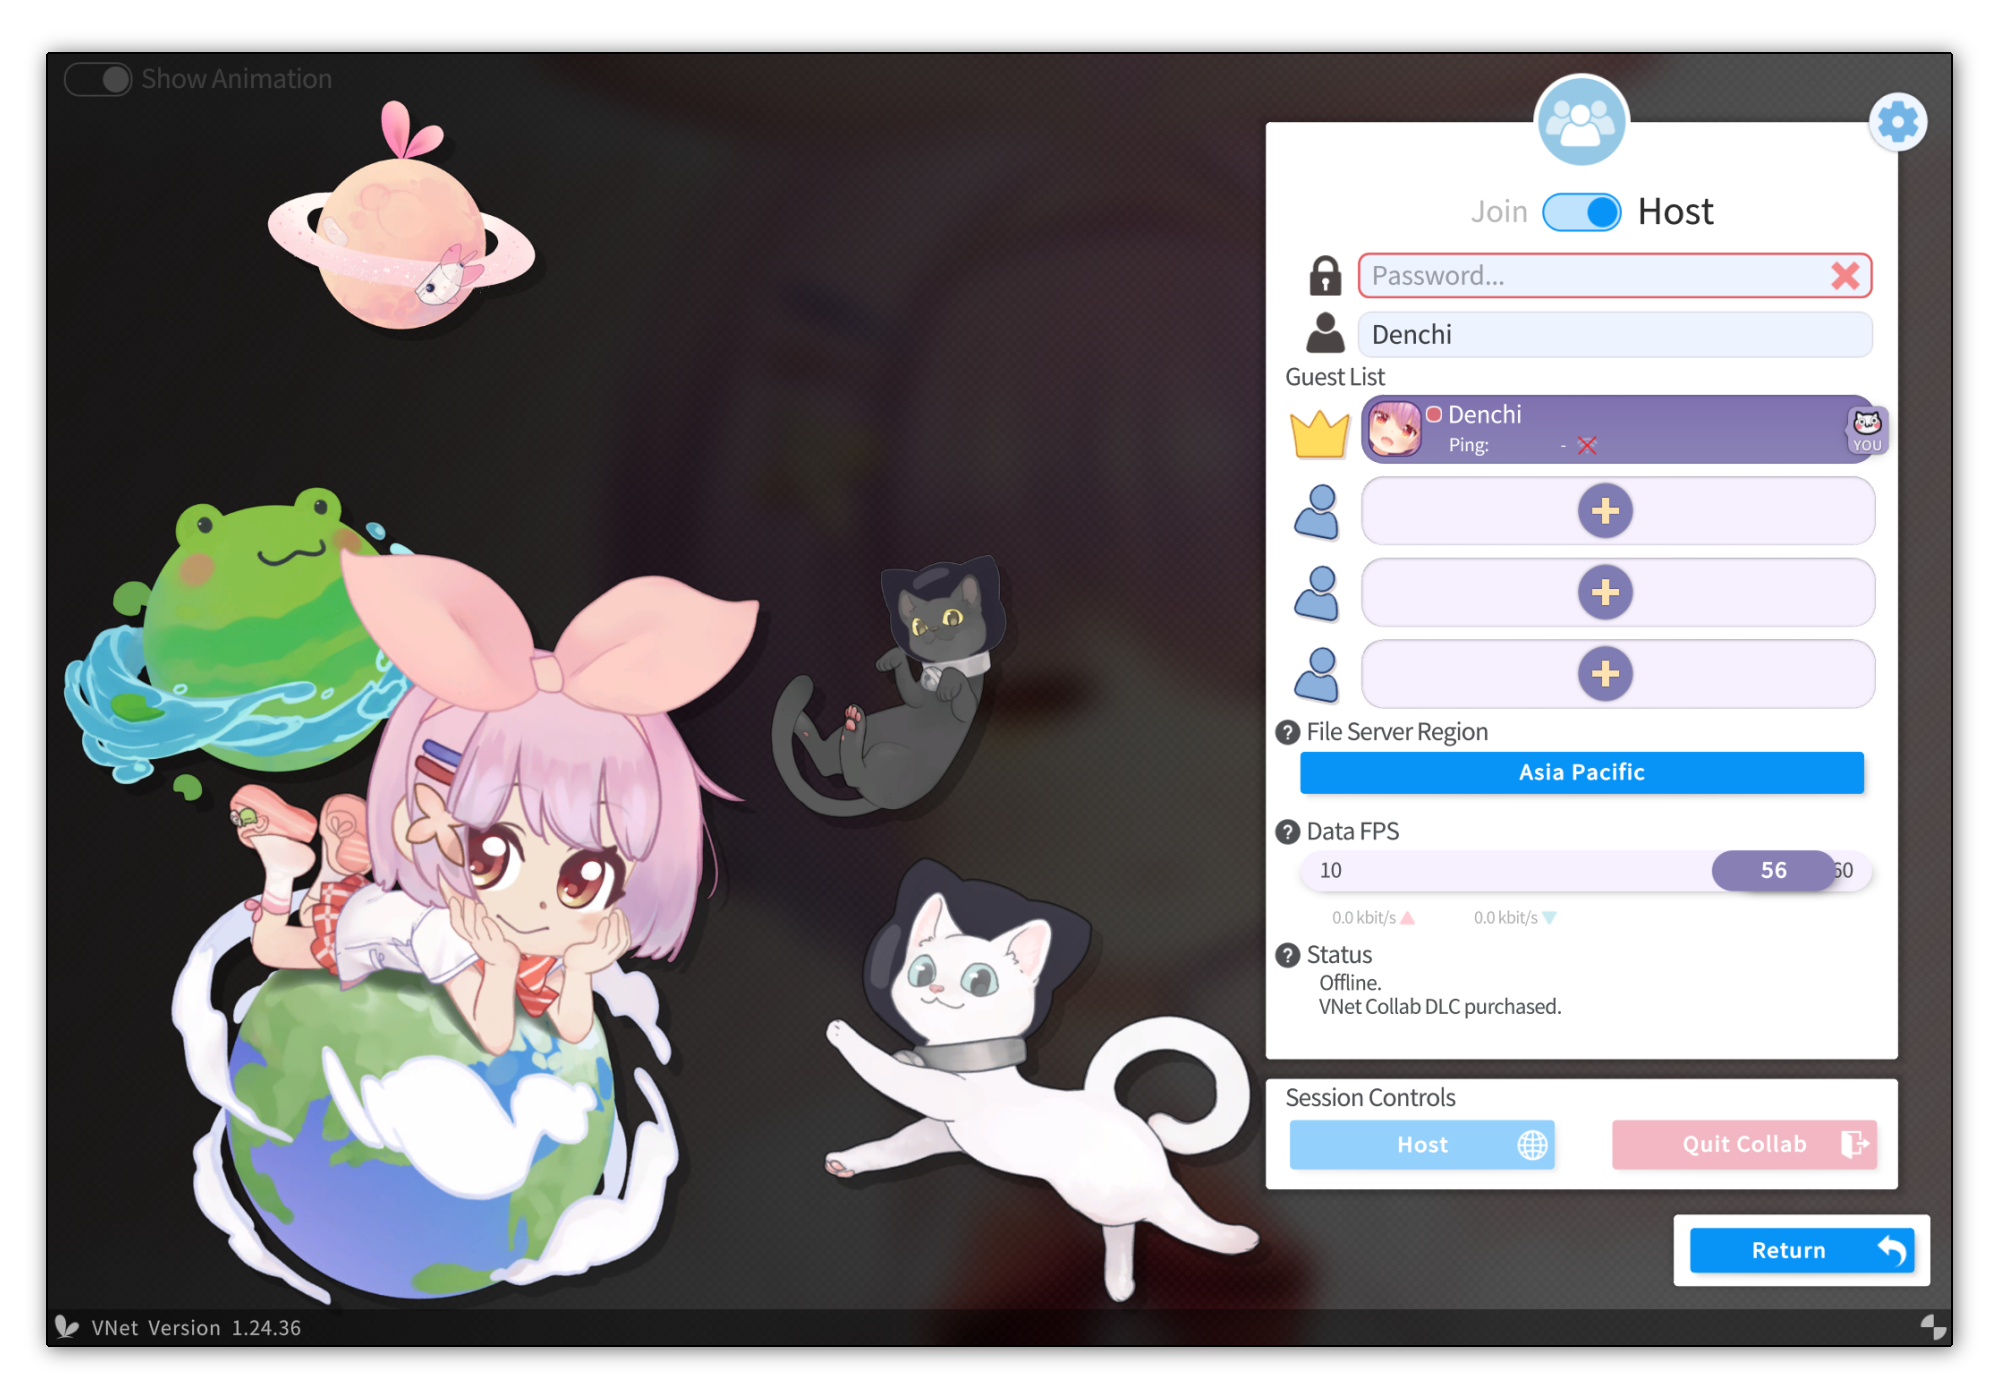
In the collab setup screen, you can choose if you want to host or join a session. Then, choose a nickname. This will be used to identify you during the session and will be shown instead of your Steam name or Steam ID since many people may want to keep those private.
Make sure you put in the correct password and all people on the collab use the same version of VTube Studio. Then, to host/join:
- If you are HOSTING a collab, you can select up to 3 Steam friends to add to the collab. ---> Then press
Hostbutton. - If you are JOINING a collab, you have to select the Steam friend who is hosting the collab you want to join. ---> Then press
Joinbutton.
You can also select a File Server Region. This determines which VNet server your files will be uploaded to. Choose the nearest region to you so your models/items upload as fast as possible.
The host can also set the Data FPS. This determines how fast movement data is sent between collab participants.


The person with the best internet connection (upload/download speed) should host the session!

In the top right, you can access the general collab settings. This lets you disallow sharing dragged-in items, for example (as a security measure).
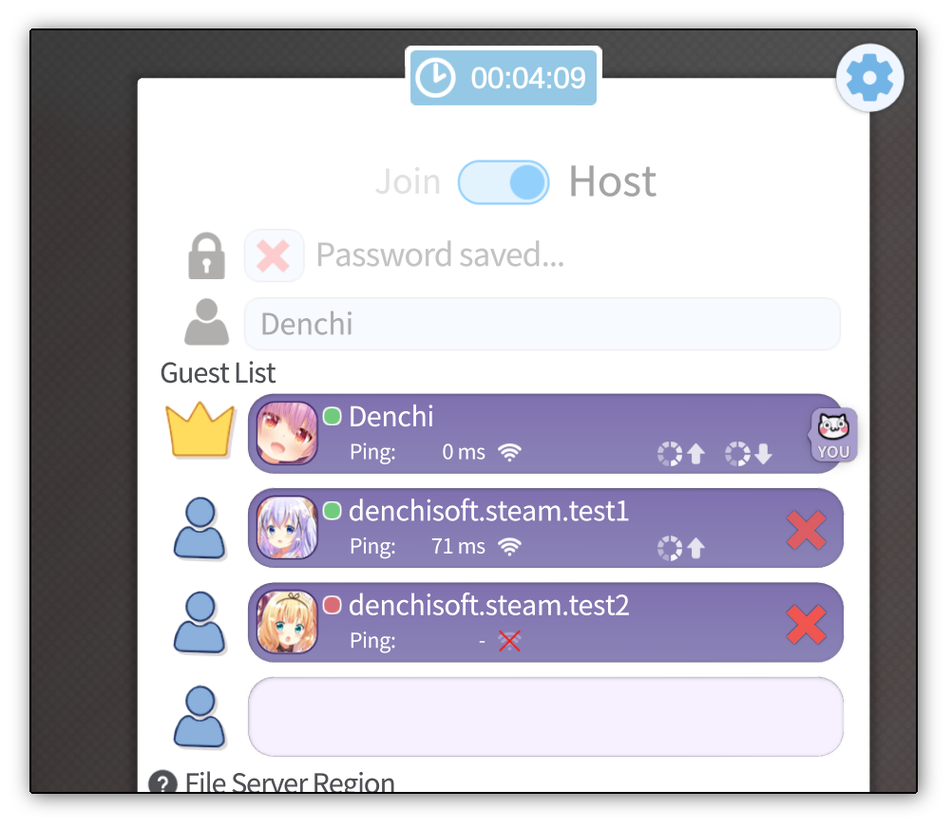
You will then be shown a list of all other clients in the collab and can decide whether or not you want to join.
If you decide to join, you are now in the collab session. Any models/items you load will automatically synced to all other participants.
This screen will show the ping for all joined clients and whether or not they're currently uploading/downloading any items/models in the background. A red dot next to their profile picture means they haven't currently joined the collab.
When people join, their models/items will spawn in automatically and vanish when they leave.
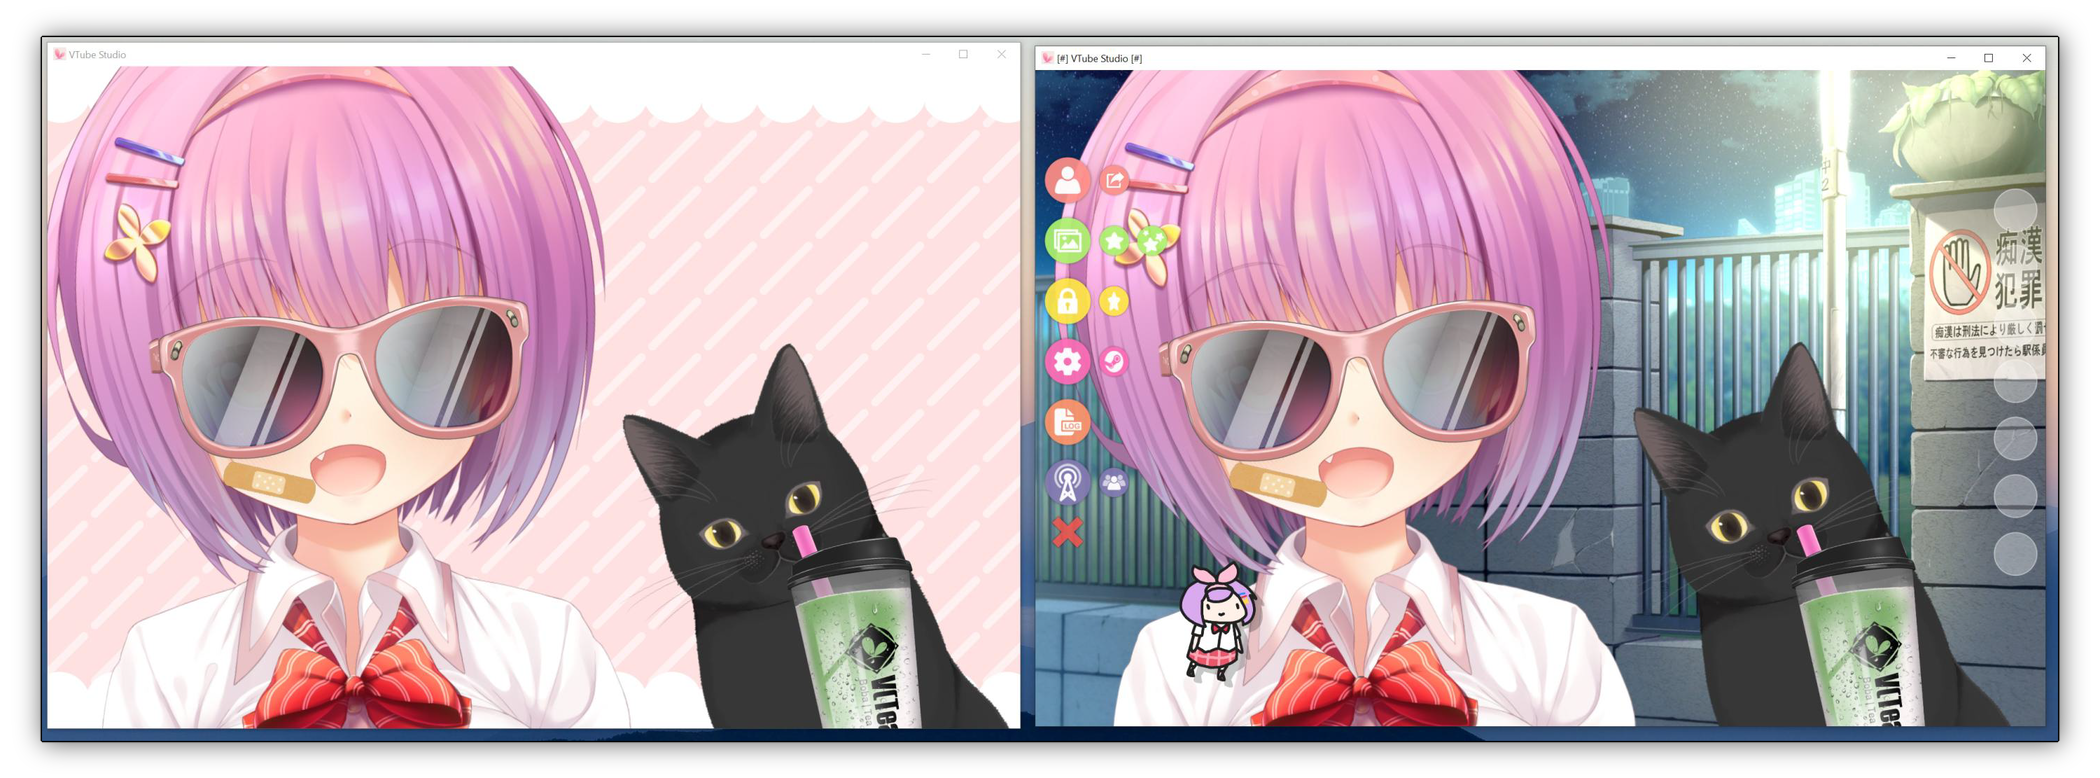
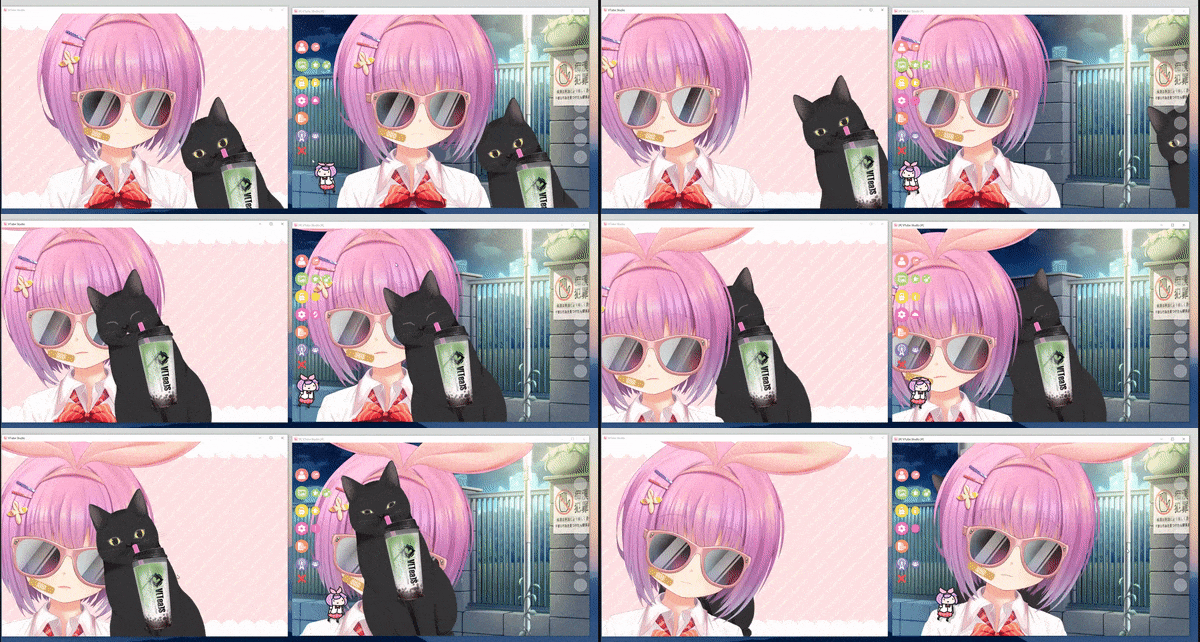
You can drag/scale/resize your own model. You can drag using the left or right mouse button.
- [LEFT]: When you start a left-click drag, your model will be set to the top, above all other participant models. This will happen on your side and for all other participants. They can do the same to set themselves on top.
- [RIGHT]: You can right-click drag to drag your model without changing the model order.
Open the "Session Control Screen". It's the right button.
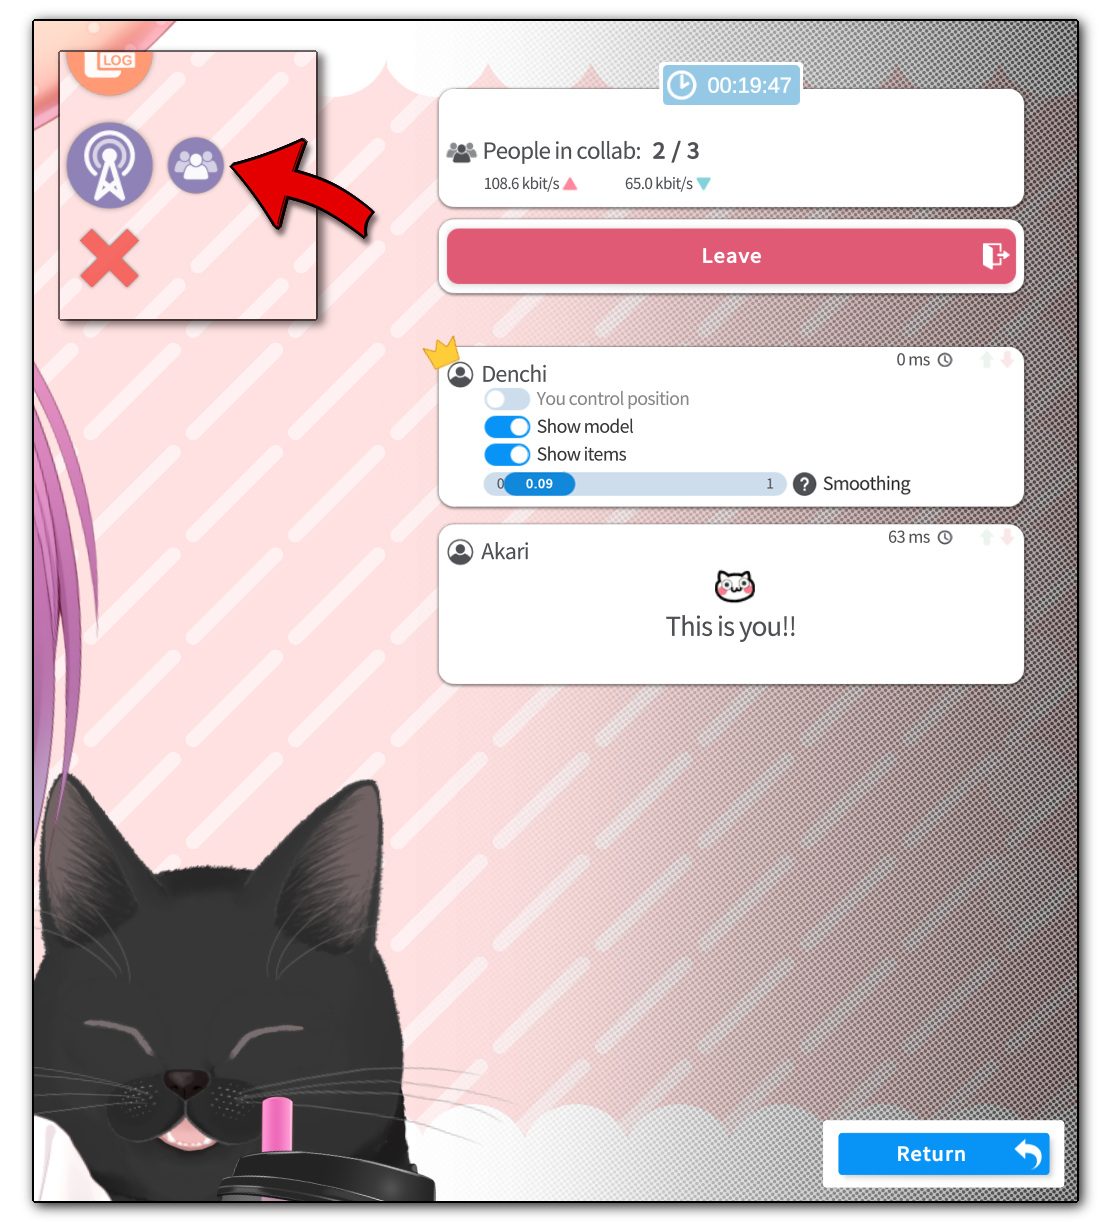
This screen can safely opened during the session, since it shows no details like Steam ID, etc. It only shows the nicknames the participants have chosen. The host will be marked with a little crown there.
You can also leave the collab session from here. When the host leaves, the session ends and everyone disconnects.
About the ping: The ping is the time (in milliseconds) it takes for your movement data to be received by the host and for the host to respond to you. So by definition, the host will always have a 0 ms ping. Your ping will mostly depend on how far away you are from the host and also on whether or not you have a good internet connection. Typically it should be somewhere between 100 and 300 ms.
On this screen, you can do 4 things:
- [1]: Switch the model position control mode per participant (make other participants into Live2D items, explained below).
- [2]: Show/Hide models per participant. This is good for when only one person is streaming since your VTS won't have to render/animate the models from the other participants.
- [3]: Show/Hide items per participant.
- [4]: Set "smoothing" for that participant (might rename this to "movement buffer" since it's not really smoothing). This lets you set a buffer (between 0 and 1 seconds) for movement data. A bigger buffer allows VTS to remove stuttering caused by network lag but will also introduce a delay. Keep this at 0.05 (default) to 0.10 seconds if you don't experience any stuttering, otherwise increase it until the jittering is gone.
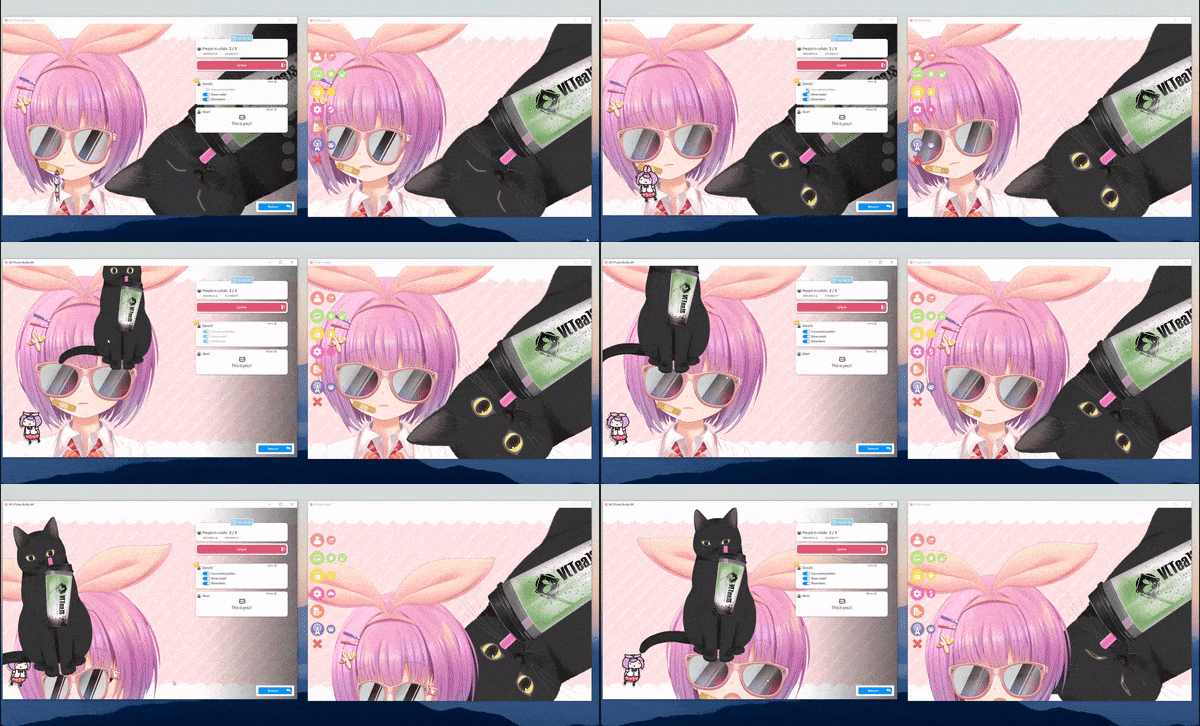
You can do that by switching on "You control position" for a participant. That essentially turns their model into a Live2D item that you can drag around, resize, rotate and even pin to yourself.
I have frame-by-frame parameters in my Live2D model and they look broken for the other participants. How to fix that?
Try turning off VNet parameter smoothing for your frame-by-frame Live2D parameters. You can do that here:
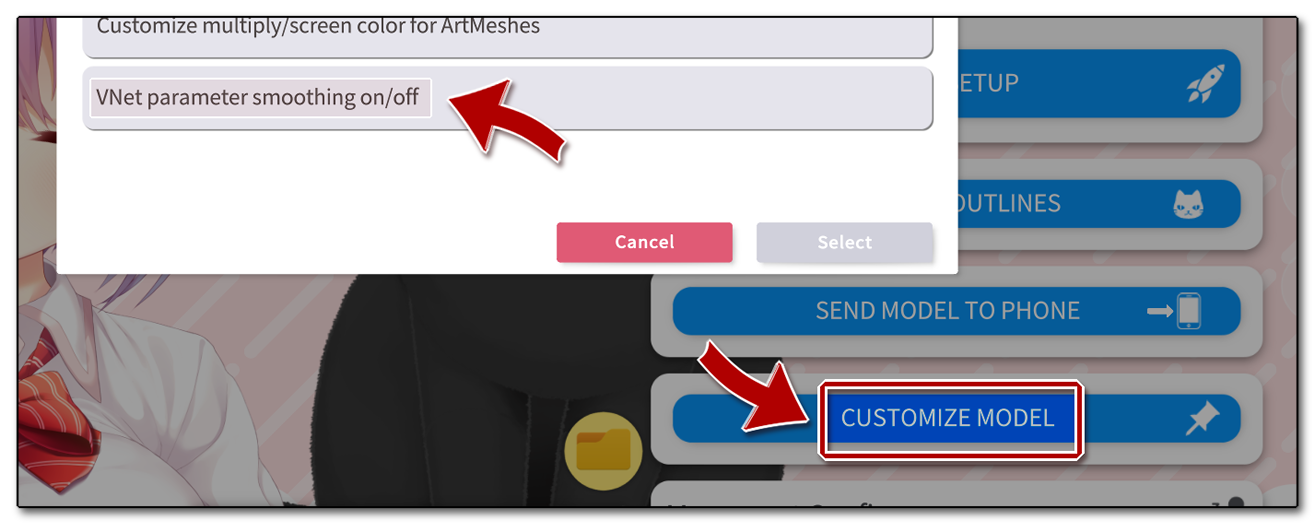
Currently, there are a few limitations in place, but you are unlikely to run into them if you use VNet normally.
- [1]: You can load any number of items, Live2D items or models.
- [2]: Any item/model you load can have at most 120 files.
- [3]: Any item/model you load can be at most 190 MB in total size (after VNet compression).
- [4]: Items/Models that have at least one file that is larger than 90 MB (compressed) will not work.
- [5]: You can load any number of Live2D items, but if the total number of Live2D parameters in your Live2D items is greater than 100, the Live2D item models that pushed the parameter count over 100 will not have their parameter values synced. They will still be loaded for the other participants though and react to physics on their side.
- [6]: Live2D parameter values can't be bigger than 9000 or smaller than -9000.
- [7]: All models/items are kept in memory, so if you load many very big items/models during the session, the VTube Studio RAM usage will grow, so be careful. There is currently no limit in place, so this can potentially crash VTube Studio.
https://help.steampowered.com/en/faqs/view/1F39-DCB4-FF28-5748
![]() 如果你遇到了任何该手册中没有回答的问题,请到 VTube Studio Discord
如果你遇到了任何该手册中没有回答的问题,请到 VTube Studio Discord![]() !!
!!
- 使用单个网络摄像头或iPhone Android设备控制多个模型
- 在模型间复制配置
- 载入自定义背景
- 重新着色模型和挂件
- 录制动画
- 使用OBS录制/串流
- 将数据传输至VSeeFace
- 以管理员身份启动
- 不通过Steam启动应用
- 向Mac/PC推流
- 多人联机
- Steam创意工坊
- 截图与分享
- Live2D Cubism Editor 通信
- VTube Studio设置
- VTS模型设置
- VTS模型文件
- 视觉特效
- Twitch互动
- Twitch热键触发器
- Spout2背景
- 按键表情
- 动画
- 动画、表情、面部追踪、物理等之间的交互
- Google Mediapipe面部捕捉
- NVIDIA Broadcast面部捕捉
- Tobii 眼球捕捉
- 手部捕捉
- 音频口型同步
- 挂件系统
- Live2D挂件
- 层间挂件固定
- 挂件场景和挂件热键
- 添加特殊的ArtMesh功能
- 屏幕光源着色
- VNet网络安全
- 插件 (YouTube, Twitch等平台)
- Web挂件
- Web挂件插件

