-
Notifications
You must be signed in to change notification settings - Fork 0
Record Animations
You can record animations in VTube Studio (.motion3.json files). These animations can then be used directly in your model or even re-imported into Live2D Cubism to be used in the Live2D Cubism Animator or the Live2D Cubism Physics Editor.
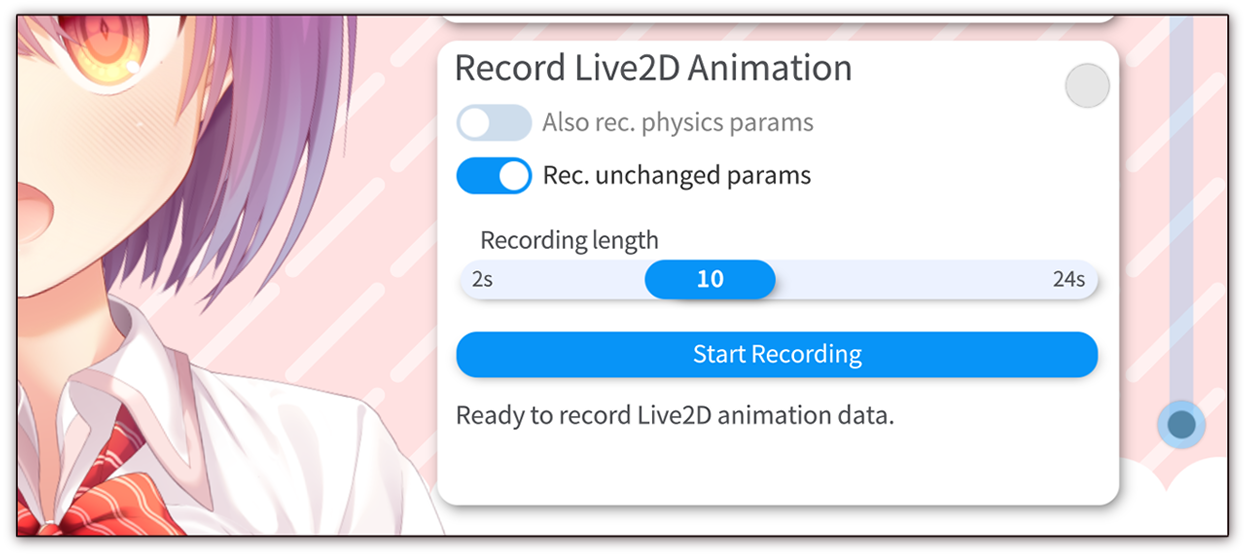
Scroll down in the camera settings tab to "Record Live2D Animation". This is available on all platforms, including mobile. You can choose to record or exclude the physics output parameters as well. Keep in mind that if you save and play the recorded animation later in VTube Studio, physics parameters that are set by an animation will be ignored because they will be overwritten by the physics system.
If you deactivate "Rec. unchanged params", VTube Studio will check for any parameters that did not change at all during recording and exclude them from the animation per default (you can turn them back on manually). This would for example exclude any parameters used as expression toggles that were not toggled during animation recording.
After the recording is finished, you will be presented with the animation config screen. You can toggle individual parameters on and off to include/exclude them from the final animation. The slider lets you choose how much the animation for the selected parameter should be smoothed. The curve preview window will show the final animation curve for that parameter in red and the raw data in gray. The red dots mark the curve segment end points. If you plan to use the animation in the Live2D Cubism Animator, making sure that the curves look good and have a reasonable amount of points is important.
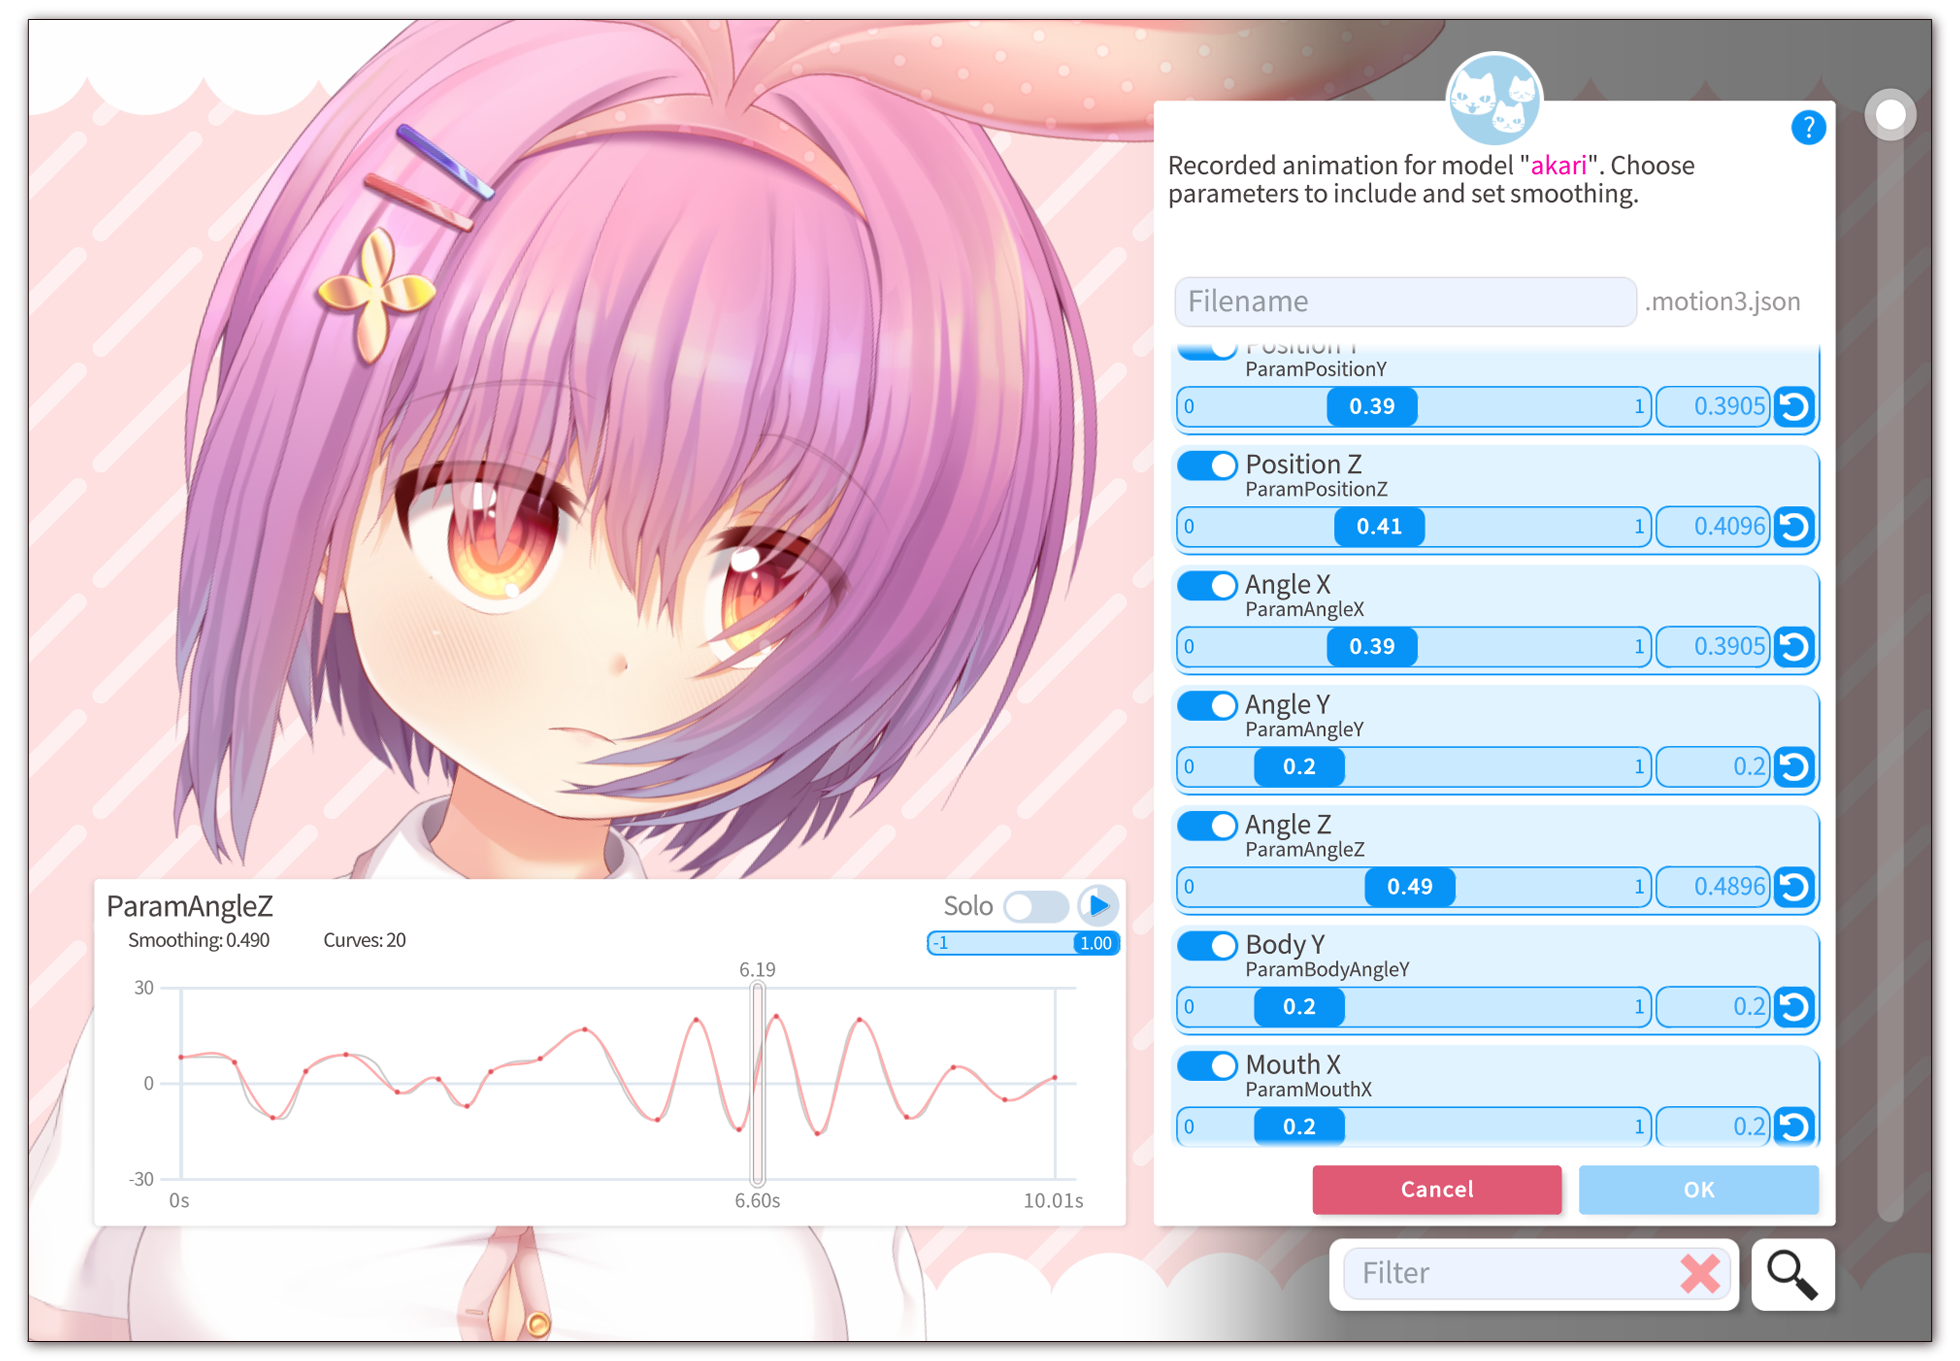
After choosing a filename and saving, the animation will be saved as <name>.motion3.json in the same folder you've used for your other animations or next to the model file if you have no other animations.
You can re-import animations (.motion3.json files created with VTube Studio) back into the Live2D Cubism Animator. To do that, start the Animator for your model like you normally would (as in open the .can3 file of your model or create one).
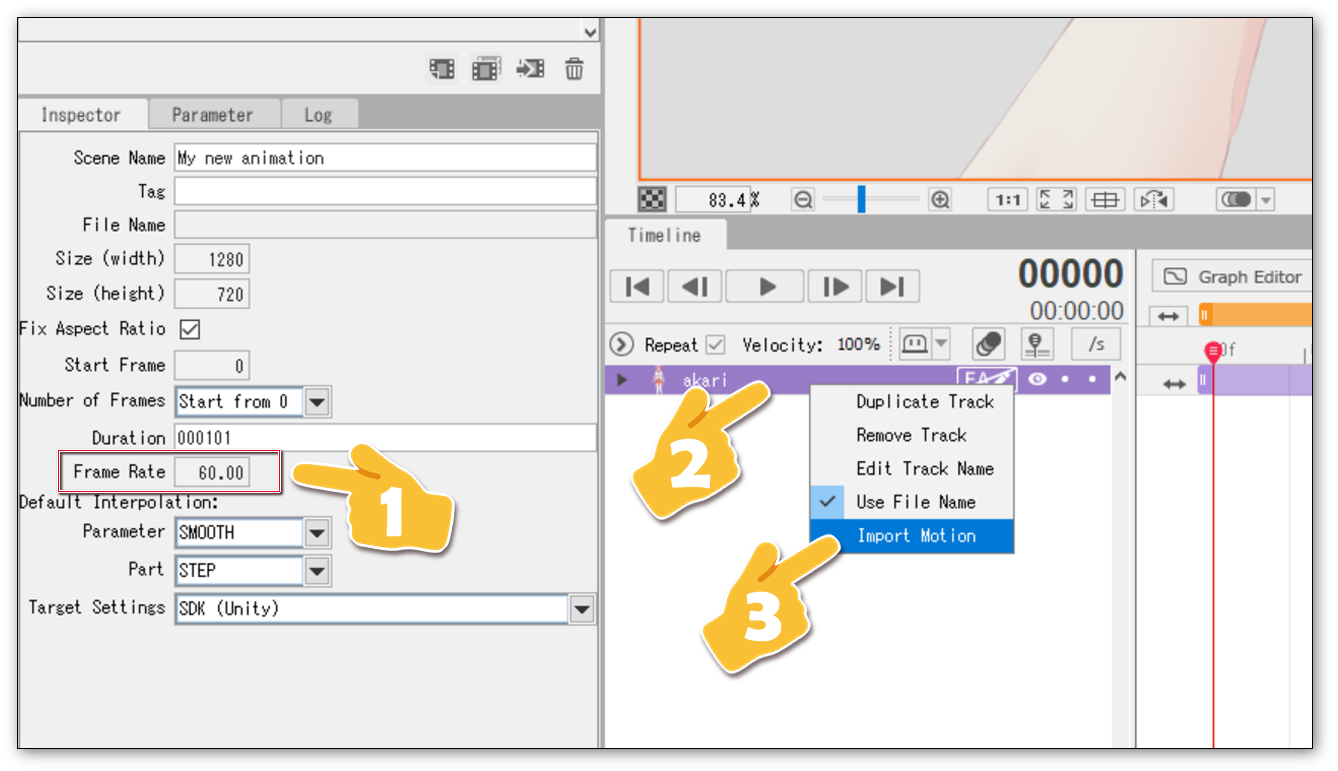
Important: Make sure the FPS ("Frame Rate") is set to 60 before importing the animation. VTube Studio animations are always exported as 60-FPS-based curves.
Then, create a new empty Scene for the animation. You can now import your .motion3.json file into that Scene by right-clicking the purple animation track for the model and selecting "Import Motion".
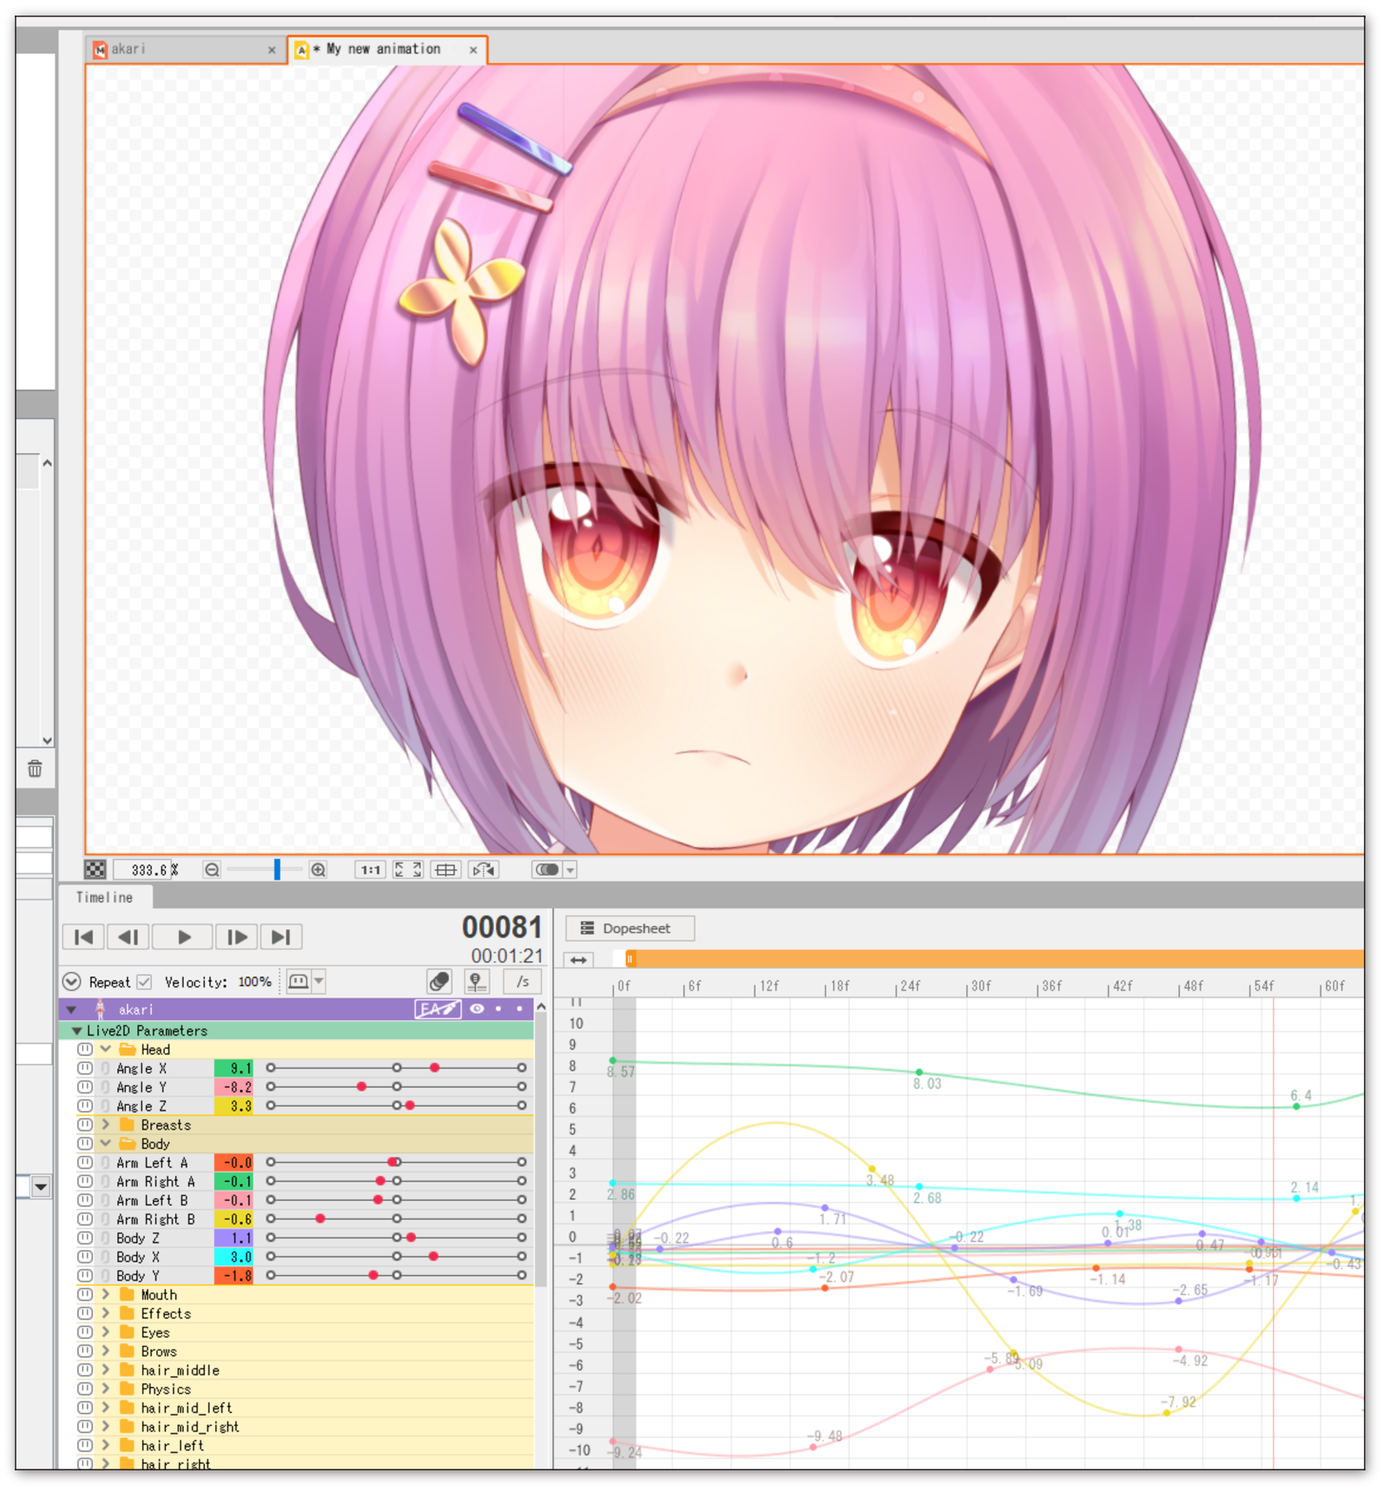
You will now have all animation curves from the .motion3.json file imported into the animator. From there, you can modify the animation in any way you want.
You can play animations in the _Live2D Cubism Physics Editor. This can be useful for comparing how physics calculations behave in VTube Studio vs. Live2D Cubism.
To do that, make sure you have both the model file (.cmo3) and the animation file (.can3) open in the same Live2D Cubism Editor, then open the physics window.
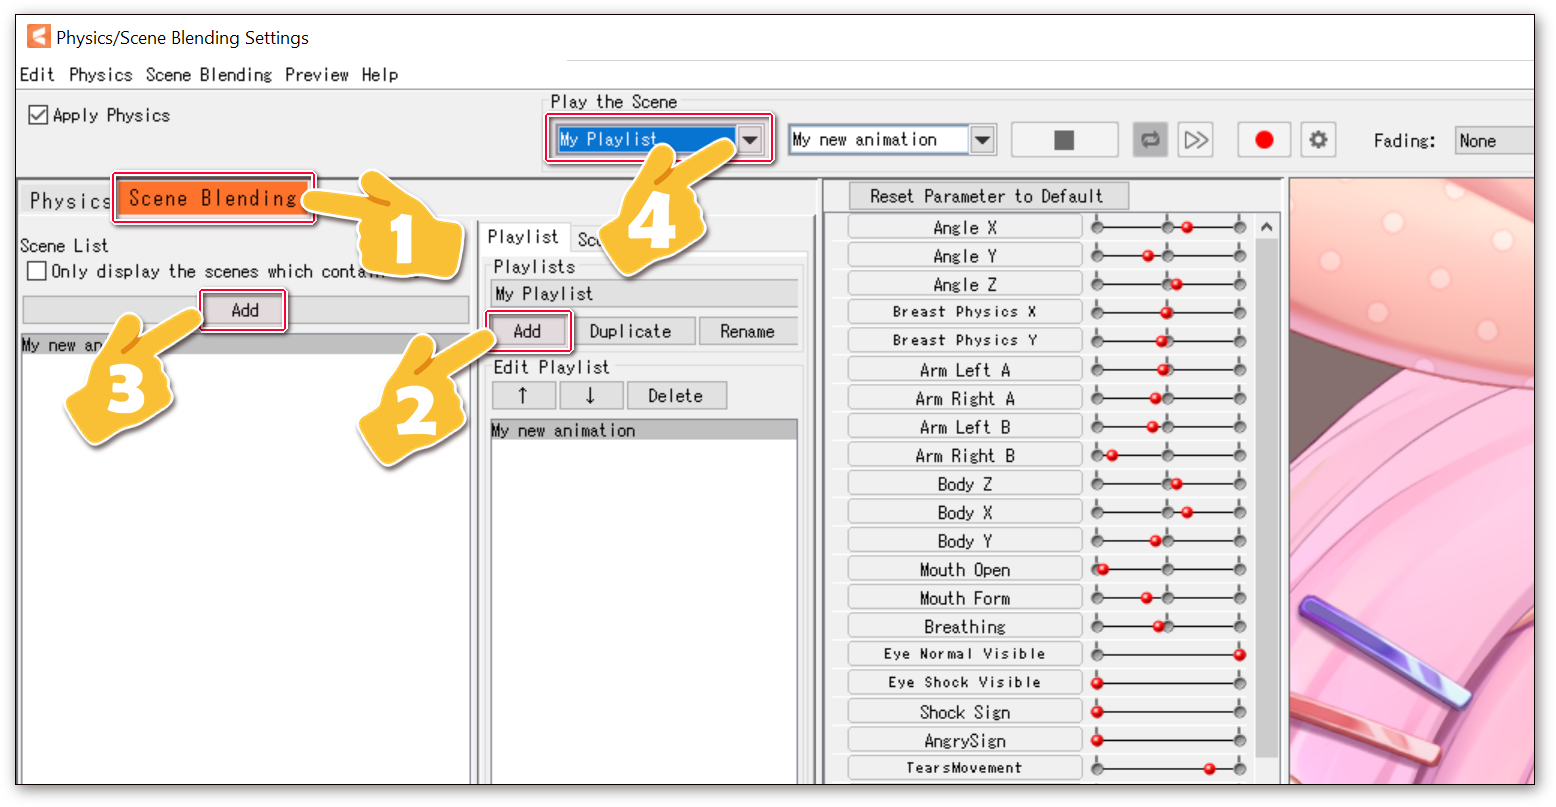
In the physics window, choose the "Scene Blending" tab. Create a new "Playlist" by clicking the "Add" button, then add your animation scene to the playlist. Finally, select the playlist under "Play the Scene". The animation will now play and loop in the physics preview window.
![]() 如果你遇到了任何该手册中没有回答的问题,请到 VTube Studio Discord
如果你遇到了任何该手册中没有回答的问题,请到 VTube Studio Discord![]() !!
!!
- 使用单个网络摄像头或iPhone Android设备控制多个模型
- 在模型间复制配置
- 载入自定义背景
- 重新着色模型和挂件
- 录制动画
- 使用OBS录制/串流
- 将数据传输至VSeeFace
- 以管理员身份启动
- 不通过Steam启动应用
- 向Mac/PC推流
- 多人联机
- Steam创意工坊
- 截图与分享
- Live2D Cubism Editor 通信
- VTube Studio设置
- VTS模型设置
- VTS模型文件
- 视觉特效
- Twitch互动
- Twitch热键触发器
- Spout2背景
- 按键表情
- 动画
- 动画、表情、面部追踪、物理等之间的交互
- Google Mediapipe面部捕捉
- NVIDIA Broadcast面部捕捉
- Tobii 眼球捕捉
- 手部捕捉
- 音频口型同步
- 挂件系统
- Live2D挂件
- 层间挂件固定
- 挂件场景和挂件热键
- 添加特殊的ArtMesh功能
- 屏幕光源着色
- VNet网络安全
- 插件 (YouTube, Twitch等平台)
- Web挂件
- Web挂件插件

