-
Notifications
You must be signed in to change notification settings - Fork 102
Azure DevOps Build Configuration
Mötz Jensen edited this page Nov 2, 2018
·
7 revisions
You will need a Personal Access Token configured in your github account. Read this guide to obtain that.
- Navigate to your Azure DevOps project
- Click on the "Project settings" icon in the bottom left corner of the page

- Select the "Service connections" menu option, under the "Pipelines" section in the new navigation tile on the left
- Select "Github" from the "New service connection" dropdown list

- Select the "Personal access token" option in the "Choose authorization" configuration
- Fill in a desired name for this connection that you are creating in the "Connection Name" configuration
- Fill in your token that you have created on Github in the "Token" configuration
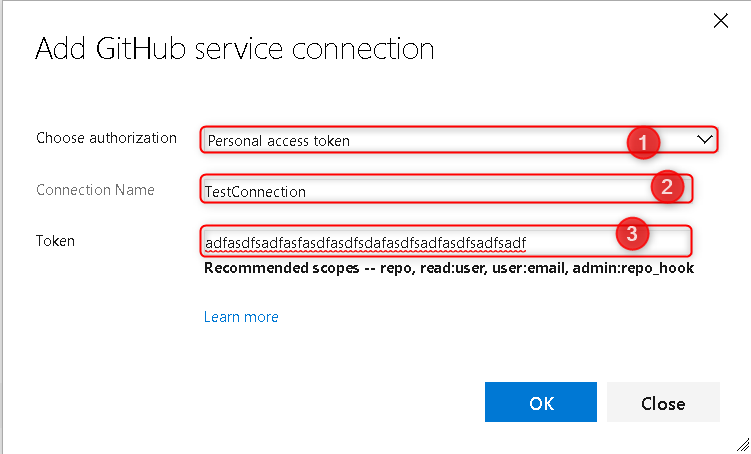
- Validate that the "Service Connection" is created as desired and go back to your Azure DevOps project start page
- Select the "Pipelines" menu option in the navigation on the left
- Select the "Builds" menu option that is revealed under the "Pipelines" section in the navigation on the left
- Click the "+ New" iceon and select the "New build pipeline" from the dropdown
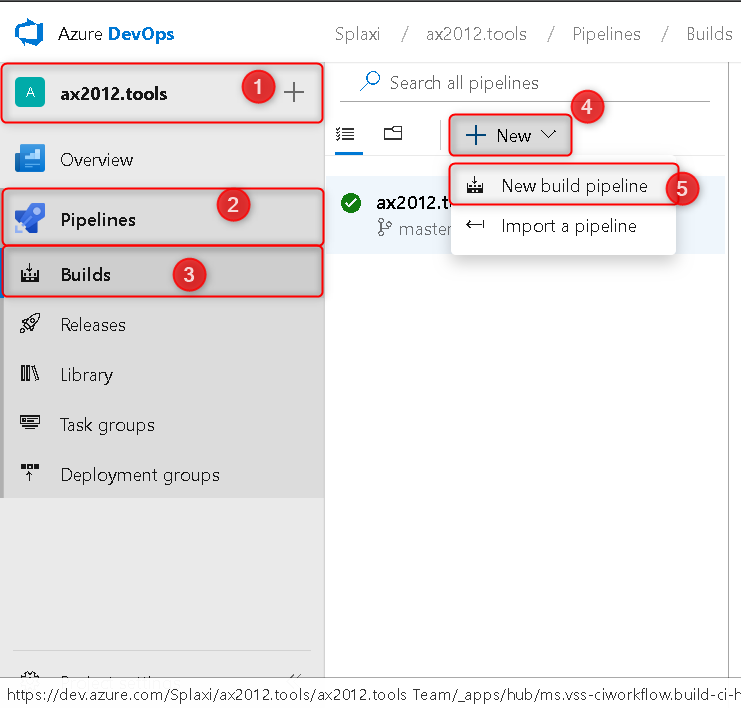
Or if you never did create a build pipeline it will just show you a empty page with just one button to click

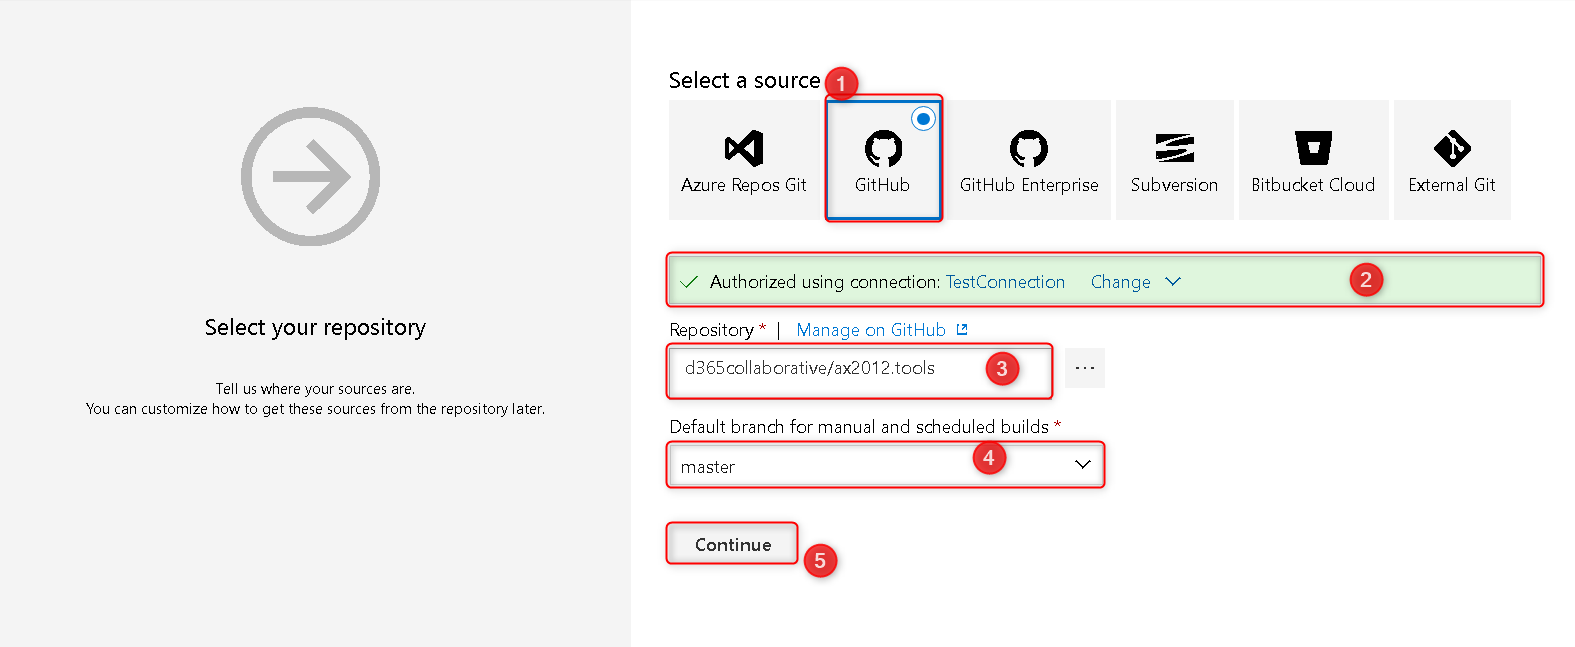
- You have to select the "Github" option and validate that it selects the current "Service Connection" created earlier
- Select the github repository you want to build
- Select the default branch that the build pipeline should build when you initiate a manuel build
- "master" is the normal default
- Click continue when ready
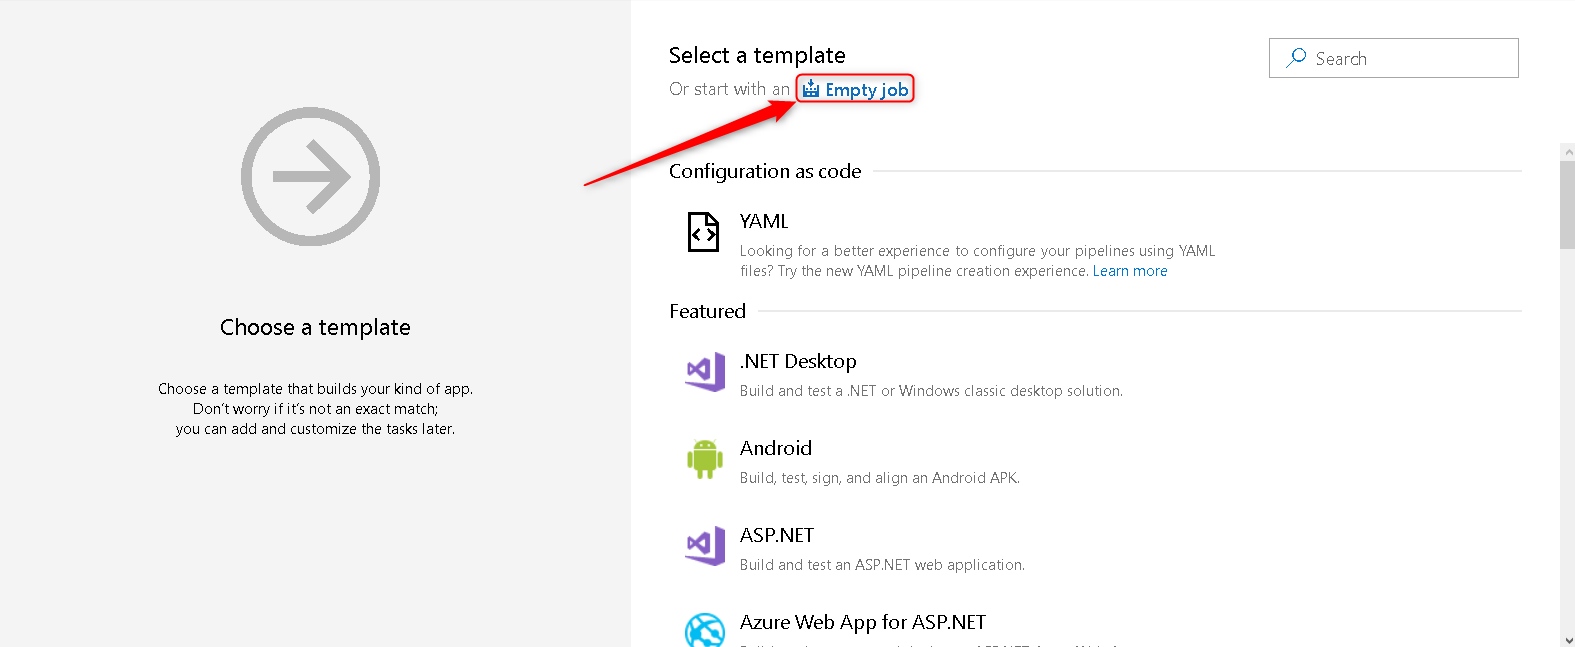
- Select the "Empty job" option in the very top of the page
- Select the new Agent job 1 and click on the + sign
- Search for PowerShell and add 2 x PowerShell tasks

- Search for Publish Test Results and add only 1

- Validate that you have 2 PowerShell tasks and 1 Publish Test Results

- Select the first PowerShell task, name it "Prerequisites"
- Fill in "build/vsts-prerequisites.ps1" into the "Script Path"

- Select the second PowerShell task, name it "Validate"
- Fill in "build/vsts-validate.ps1" into the "Script Path"
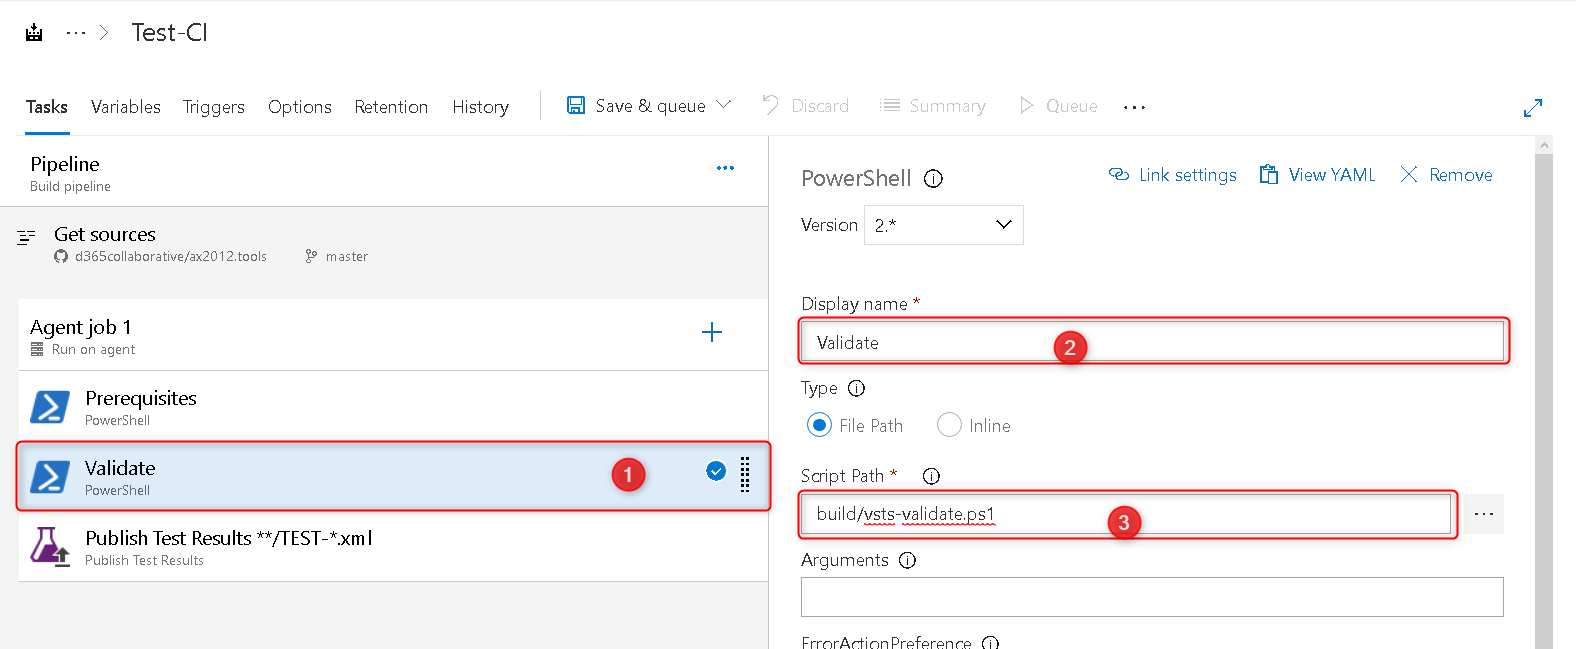
- Select the Publish Test Results and change the "Test result format" from "JUnit" to "NUnit"
- Expand the "Control Options" section and change the "Run this task" value from "Only when all previous tasks have succeeded" to "Even if a previous task has failed, even if the build was canceled"

- When ready click on the "Save & queue" button in the top menu and select the "Save" option from the dropdown menu

- Go back to the build pipeline overview and "Queue" a new build
- Accept the default values from the popup

- Once the build is done and error free, you can continue the configuration of your github repository and branch protection
- Install as a non-Administrator
- Install as a Administrator
- Import d365fo.tools module
- List available commands from d365fo.tools module
- Get help content for a command
- Start, Stop and List services
- Import users into the D365FO environment
- Import external users into the D365FO environment
- Enable users in the D365FO environment
- Update users in the D365FO environment
- Provision D365FO environment to new Azure AD tenant
- Import a bacpac file into a Tier1 environment
- List modules / models
- Compile module
- Install AzCopy
- Install SqlPackage
- Install Nuget
- Speed up LCS download via AzCopy
- Download latest bacpac from LCS via AzCopy
- Register NuGet source
- Configure Azure Logic App
- Fix AzureStorageConfig
- Run a runnable class
- Update users in environment
- Work with Azure Storage Account
- Work with packages, resource label files, language and lables
- Working with the different D365 services