-
Notifications
You must be signed in to change notification settings - Fork 126
Getting Started with MDK
First of all, obviously, you need to make sure you have installed Visual Studio 2022. This will work with all editions, but the Community edition is completely free. You can find instructions on how to install that here.
https://visualstudio.microsoft.com/vs/community/
Note: Visual Studio 2017 and 2019 are no longer supported. Visual Studio 2022 is required.
For Space Engineers development you need at least:
From the main installer tab:
- .NET desktop development workload.
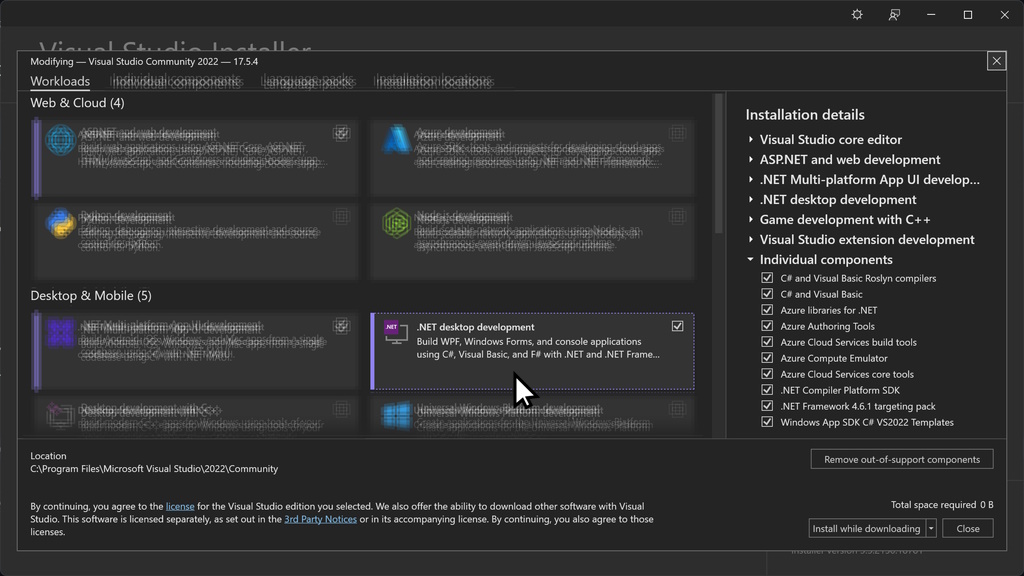
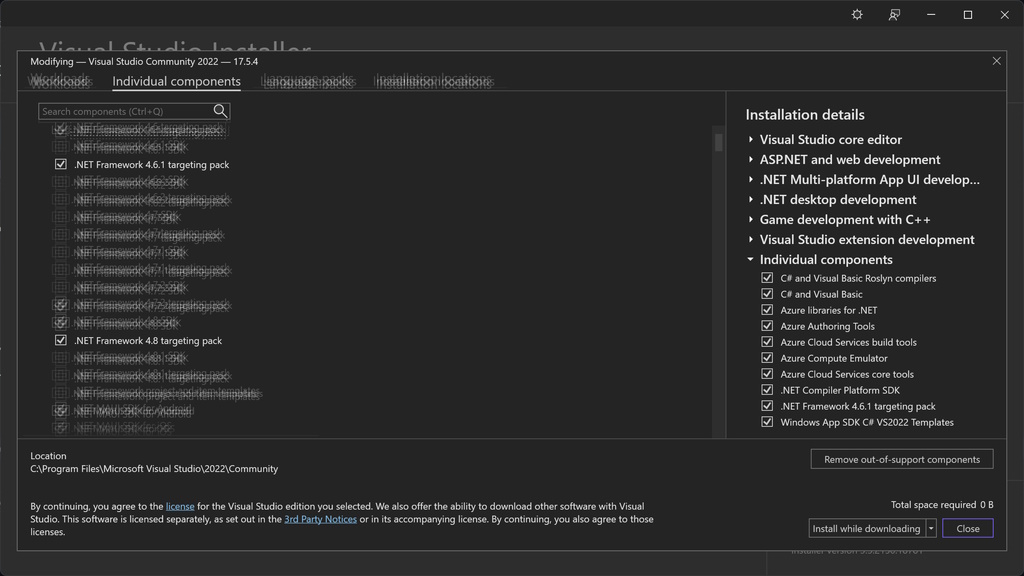
From the "Individual Components" installer tab
- .NET Framework 4.6.1 Targeting Pack
- .NET Framework 4.8 Targeting Pack
Download the extension from here: https://github.com/malware-dev/MDK-SE/releases
In most circumstances you will be interested in downloading the file named MDK.vsix. This is a installer package format used by Visual Studio to install extensions. Double-click it to install it - after installing Visual Studio.
You should stay away from any pre-release builds unless you know what you're doing, or if you are kind enough to want to help me test. Just be aware that pre-release builds are bound to be particularly buggy, and might even break script projects, so you certainly shouldn't use them for your more complicated scripts.
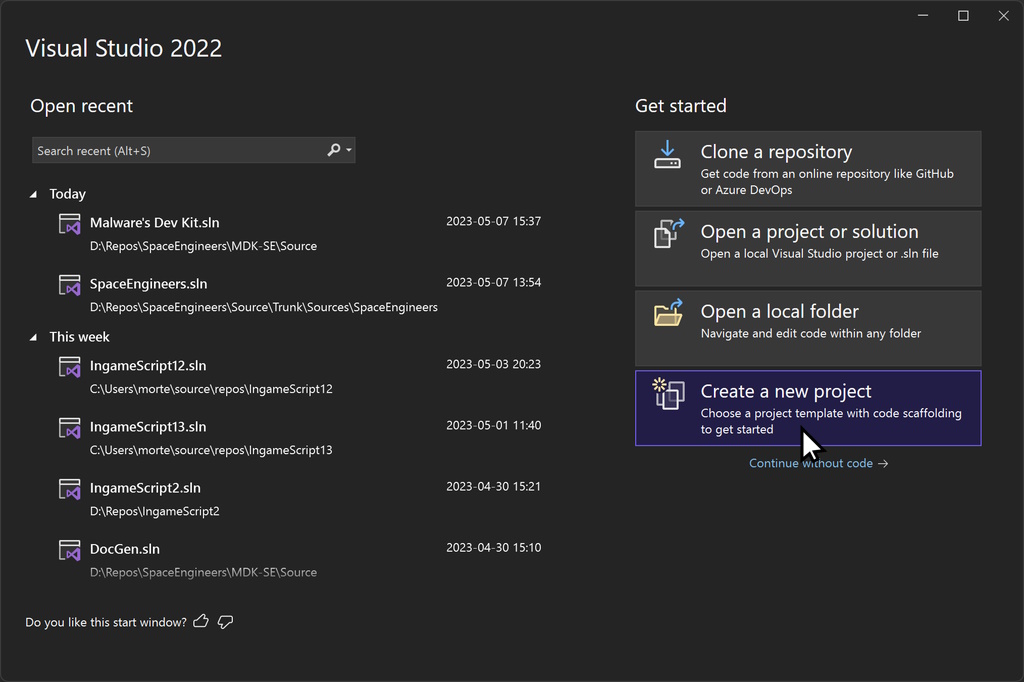
After installing the extension, you can now start Visual Studio and create your script project. You will be presented with the Visual Studio splash screen. To begin, click the Create a new project button.
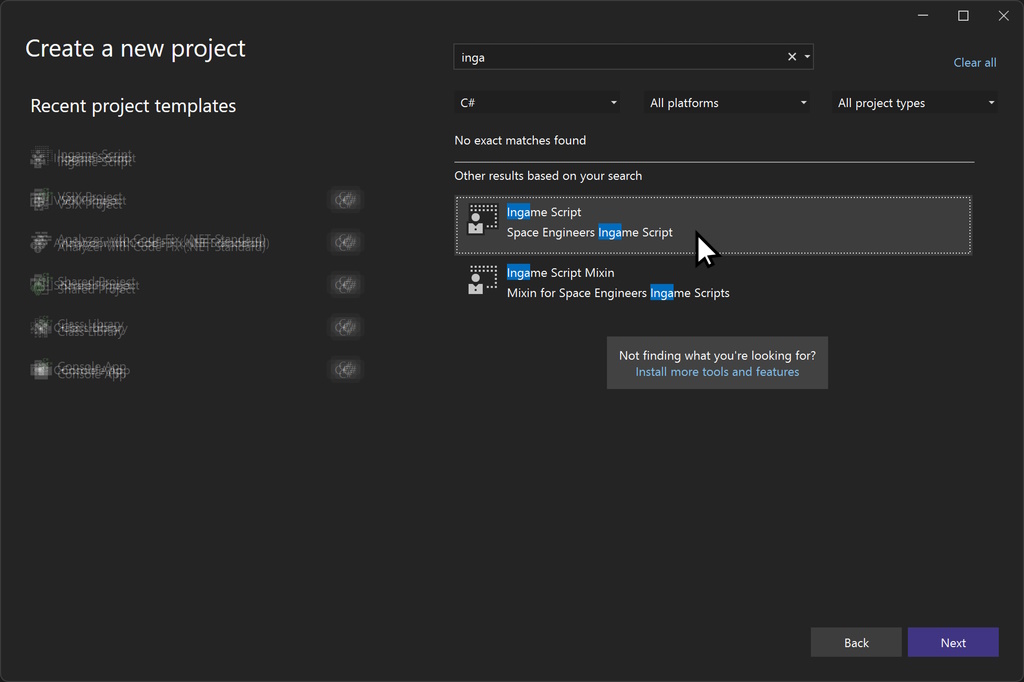
After this you can search for ingame script in the search box, and select the Ingame Script template.
Now you can select your project's location and names in the boxes below.
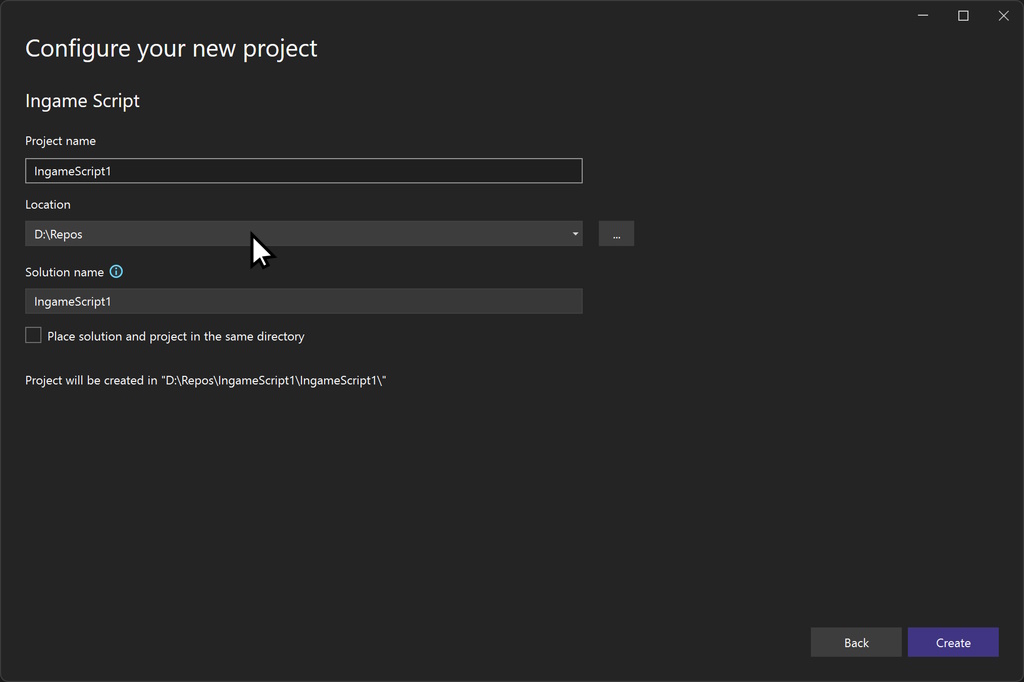
Note the Location box. That is where your solution and project will be stored on disk: Visual Studio will add a subfolder there with the name of your solution, and below there it will create a .sln file. Make note of this file, because this is the file you need to open when you're going back to your project later, not the individual .cs files.
Press OK to create your project.
You may now write your script directly in this class if you wish. If your scripts are not too large, this is quite fine. However this extension has another couple of tricks up its sleeve for the slightly more advanced users.
If you need to, you can find an introduction to ingame scripting and an autogenerated API listing on this site as well.
Happy Scripting!
Do you have questions, comments, suggestions for improvements? Is there something I can do better? Did I make a mistake? Please add an issue here, and prefix your issue title with Wiki. Thank you, your help will be very appreciated!